I've run into a problem never encountered before and hope others might shed some light on this
My V8 swap was first built in 1999 and then rebuilt beginning in 2015...so it's not my first rodeo, and I've done all the work myself.
The car has the above mentioned Champion radiator and I drove it throughout the spring of this year and summer, around 1500 miles with no radiator issues. During my EFI to carb conversion last month, I drained the coolant to change intake manifolds. All that went fine including the normal routine of refilling the system by raising the rear, filling to the outer most lip of the radiator neck, capping it off, and then filling the intake manifold. So far so good. I drove it around 50 miles with no issues.
Last week I was changing the fan control sensor and incurred a few leaks around the gooseneck. After the refilling of coolant and restarting the car to check out the fan control sensor, any leaks, etc., I ran into hot coolant filling the overflow and running all over the floor. When I tried to refill with gooseneck off via the usual method, I found that all the added coolant was directly overflowing the overflow tank. In short, a pint into the system went directly on the floor from the overflow tank.
Fast Forward.....after cleaning up all traces of ethylene glycol in my shop, I started over again by filling with water and using a new Murray cap for 88 Fiero.
I found that both the barely used Champion cap as well as the Murray cap did not compress their own rubber seal against the inner shoulder inside the Champion filler neck. After taking Vernier measurements from the filler outer surface to inner shoulder, I found that both caps were either line on line or had less that .010" calculated seal compression on the inner neck shoulder.
I temporarily solved it by removing the inner rubber washer from the Murray and adding it to the inner face of the Champion cap, knowing that preloading the spring will also raise the relief pressure. Anyway, it all worked, fan control went on, etc.
So:
1) Why did Champion cap, practically new, work all summer and 1500 miles, but now fail to seal and allow all pumped coolant to enter the overflow tank. BTW, all sealing surfaces are good
2) Murray cap actually had clearance at inner seal and neck shoulder so that it could never stop pumped coolant from going directly into the overflow tank.
It seems that both of these caps are too short for the Champion radiator. I will be phoning Champion tomorrow.
Has anyone encountered the need for longer reach or depth radiator caps?
I have the Champion radiator and it will not seal using the Fiero radiator cap or a number of Stant caps that I have tried. Perhaps there is a Stant cap that will fit but no one has a part number.. The Champion low quality Chinese Quality caps work but as they age the spring tension gets less and some do leak. With the shambles that the economy is in right now who knows when we will see new caps again? According to the info that I can find, a Stant 10231. Gates 31523, or CSF4515 is the cross reference, ------------------ " THE BLACK PARALYZER" -87GT 3800SC Series III engine, custom ZZP /Frozen Boost Intercooler setup, 3.4" Pulley, Northstar TB, LS1 MAF, 3" Spintech/Hedman Exhaust, P-log Manifold, Autolite 104's, MSD wires, Custom CAI, 4T65eHD w. custom axles, Champion Radiator, S10 Brake Booster, HP Tuners VCM Suite. "THE COLUSSUS" 87GT - ALL OUT 3.4L Turbocharged engine, Garrett Hybrid Turbo, MSD ign., modified TH125H " ON THE LOOSE WITHOUT THE JUICE "
[This message has been edited by Dennis LaGrua (edited 11-01-2021).]
I spoke with tech support at Champion yesterday and they tell me that standard caps are not likely to work on aluminum radiators and that I need a cap that's made for aluminum radiators. He said I could buy one from one of their competitors or from Champion. They have the caps in stock so I bought one for $14.95 including freight from Los Angeles to Massachusetts.
Meanwhile, here are some pictures of how I fixed it:
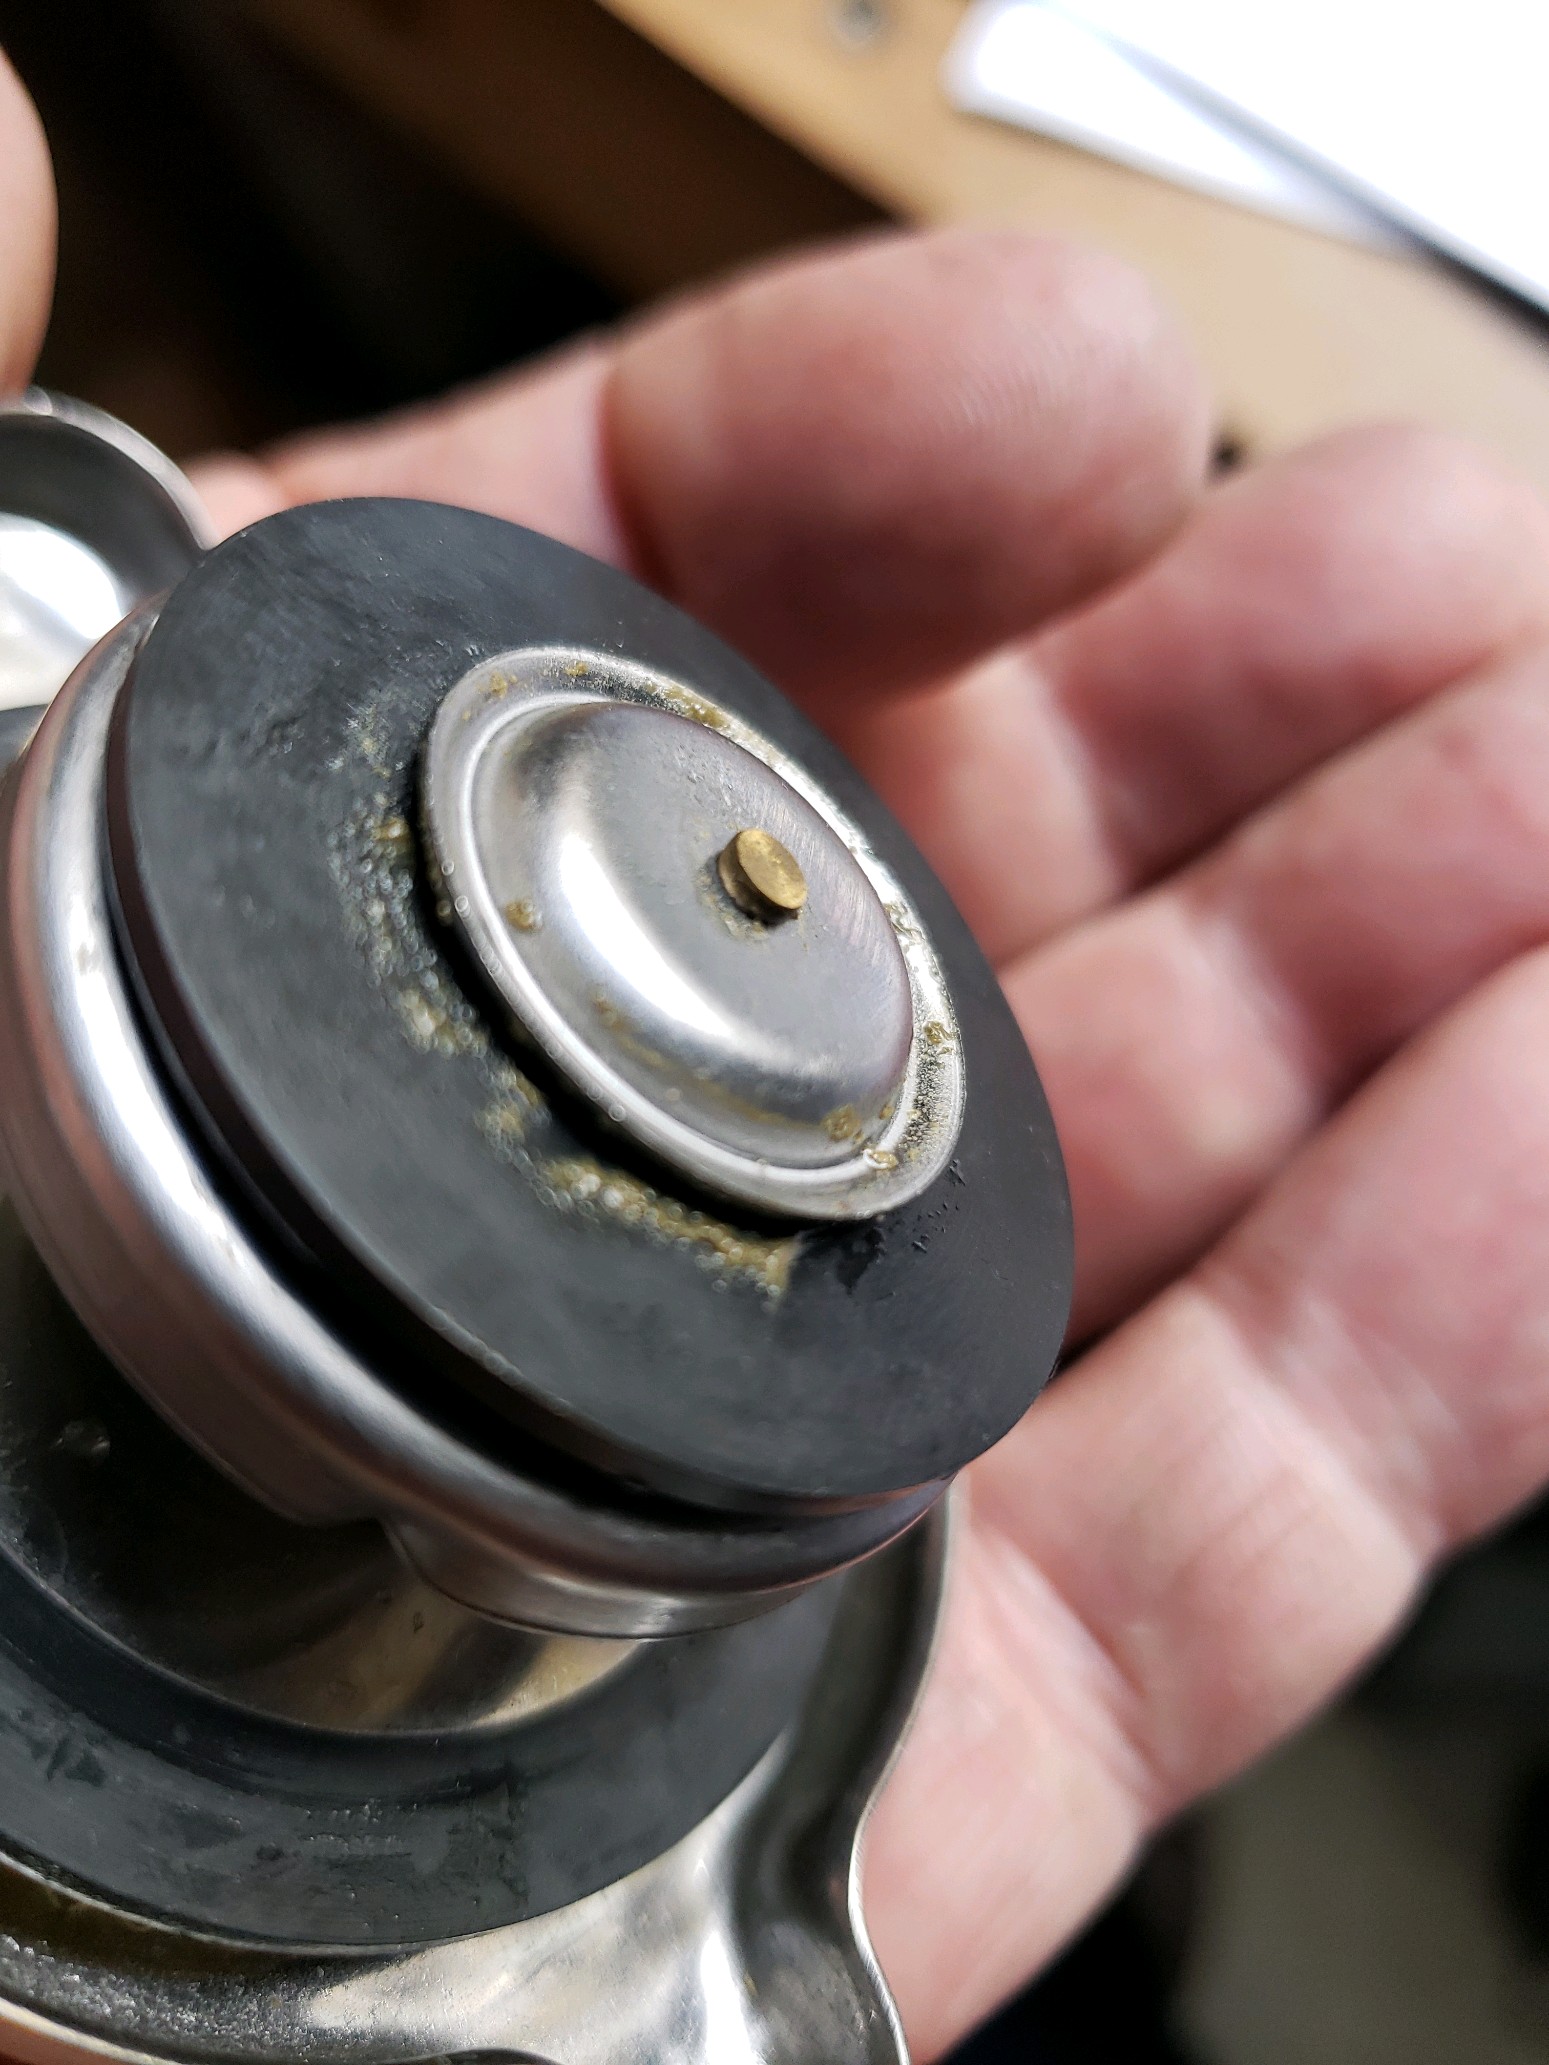
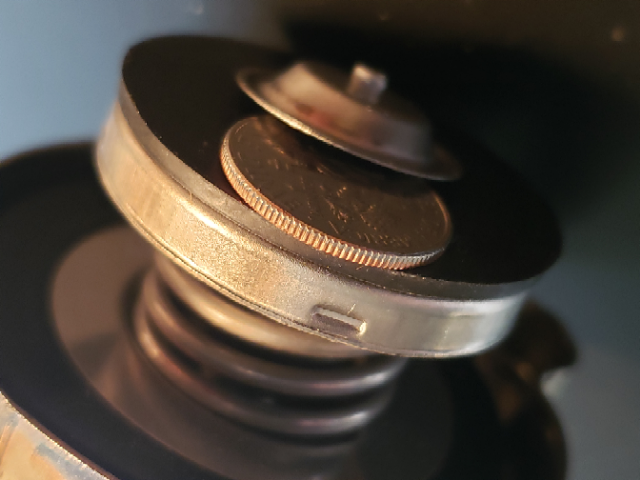
Original Champion cap had clearance between the rubber gasket and retaining disc:
Remove end of retention pin from MurrayPN 7616 and here's what's left:
Now take the Murray rubber seal and add it to the Champion. It's like stretching a tire over a rim. I used a small screwdriver to stretch and guide it over the Champion retaining disc. You end up with a second seal on the end. Since the Champion had lost all ability to compress and seal, the Murray donor made up the difference:
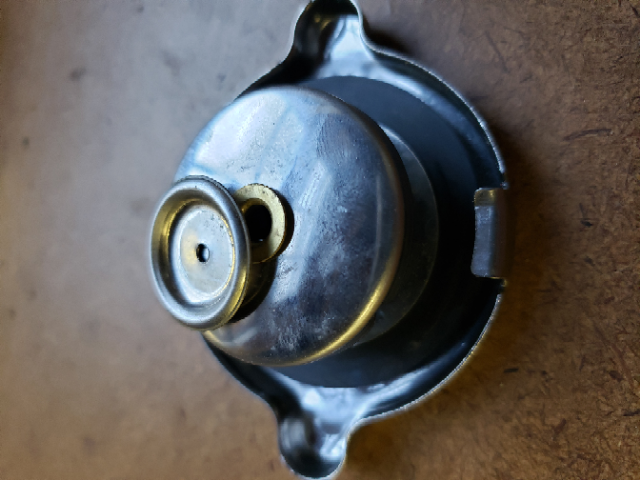
Here are pictures of the new one. Note it's self venting where the retention button on the inner end has some float to allow any system vacuum to draw coolant back from the overflow tank.
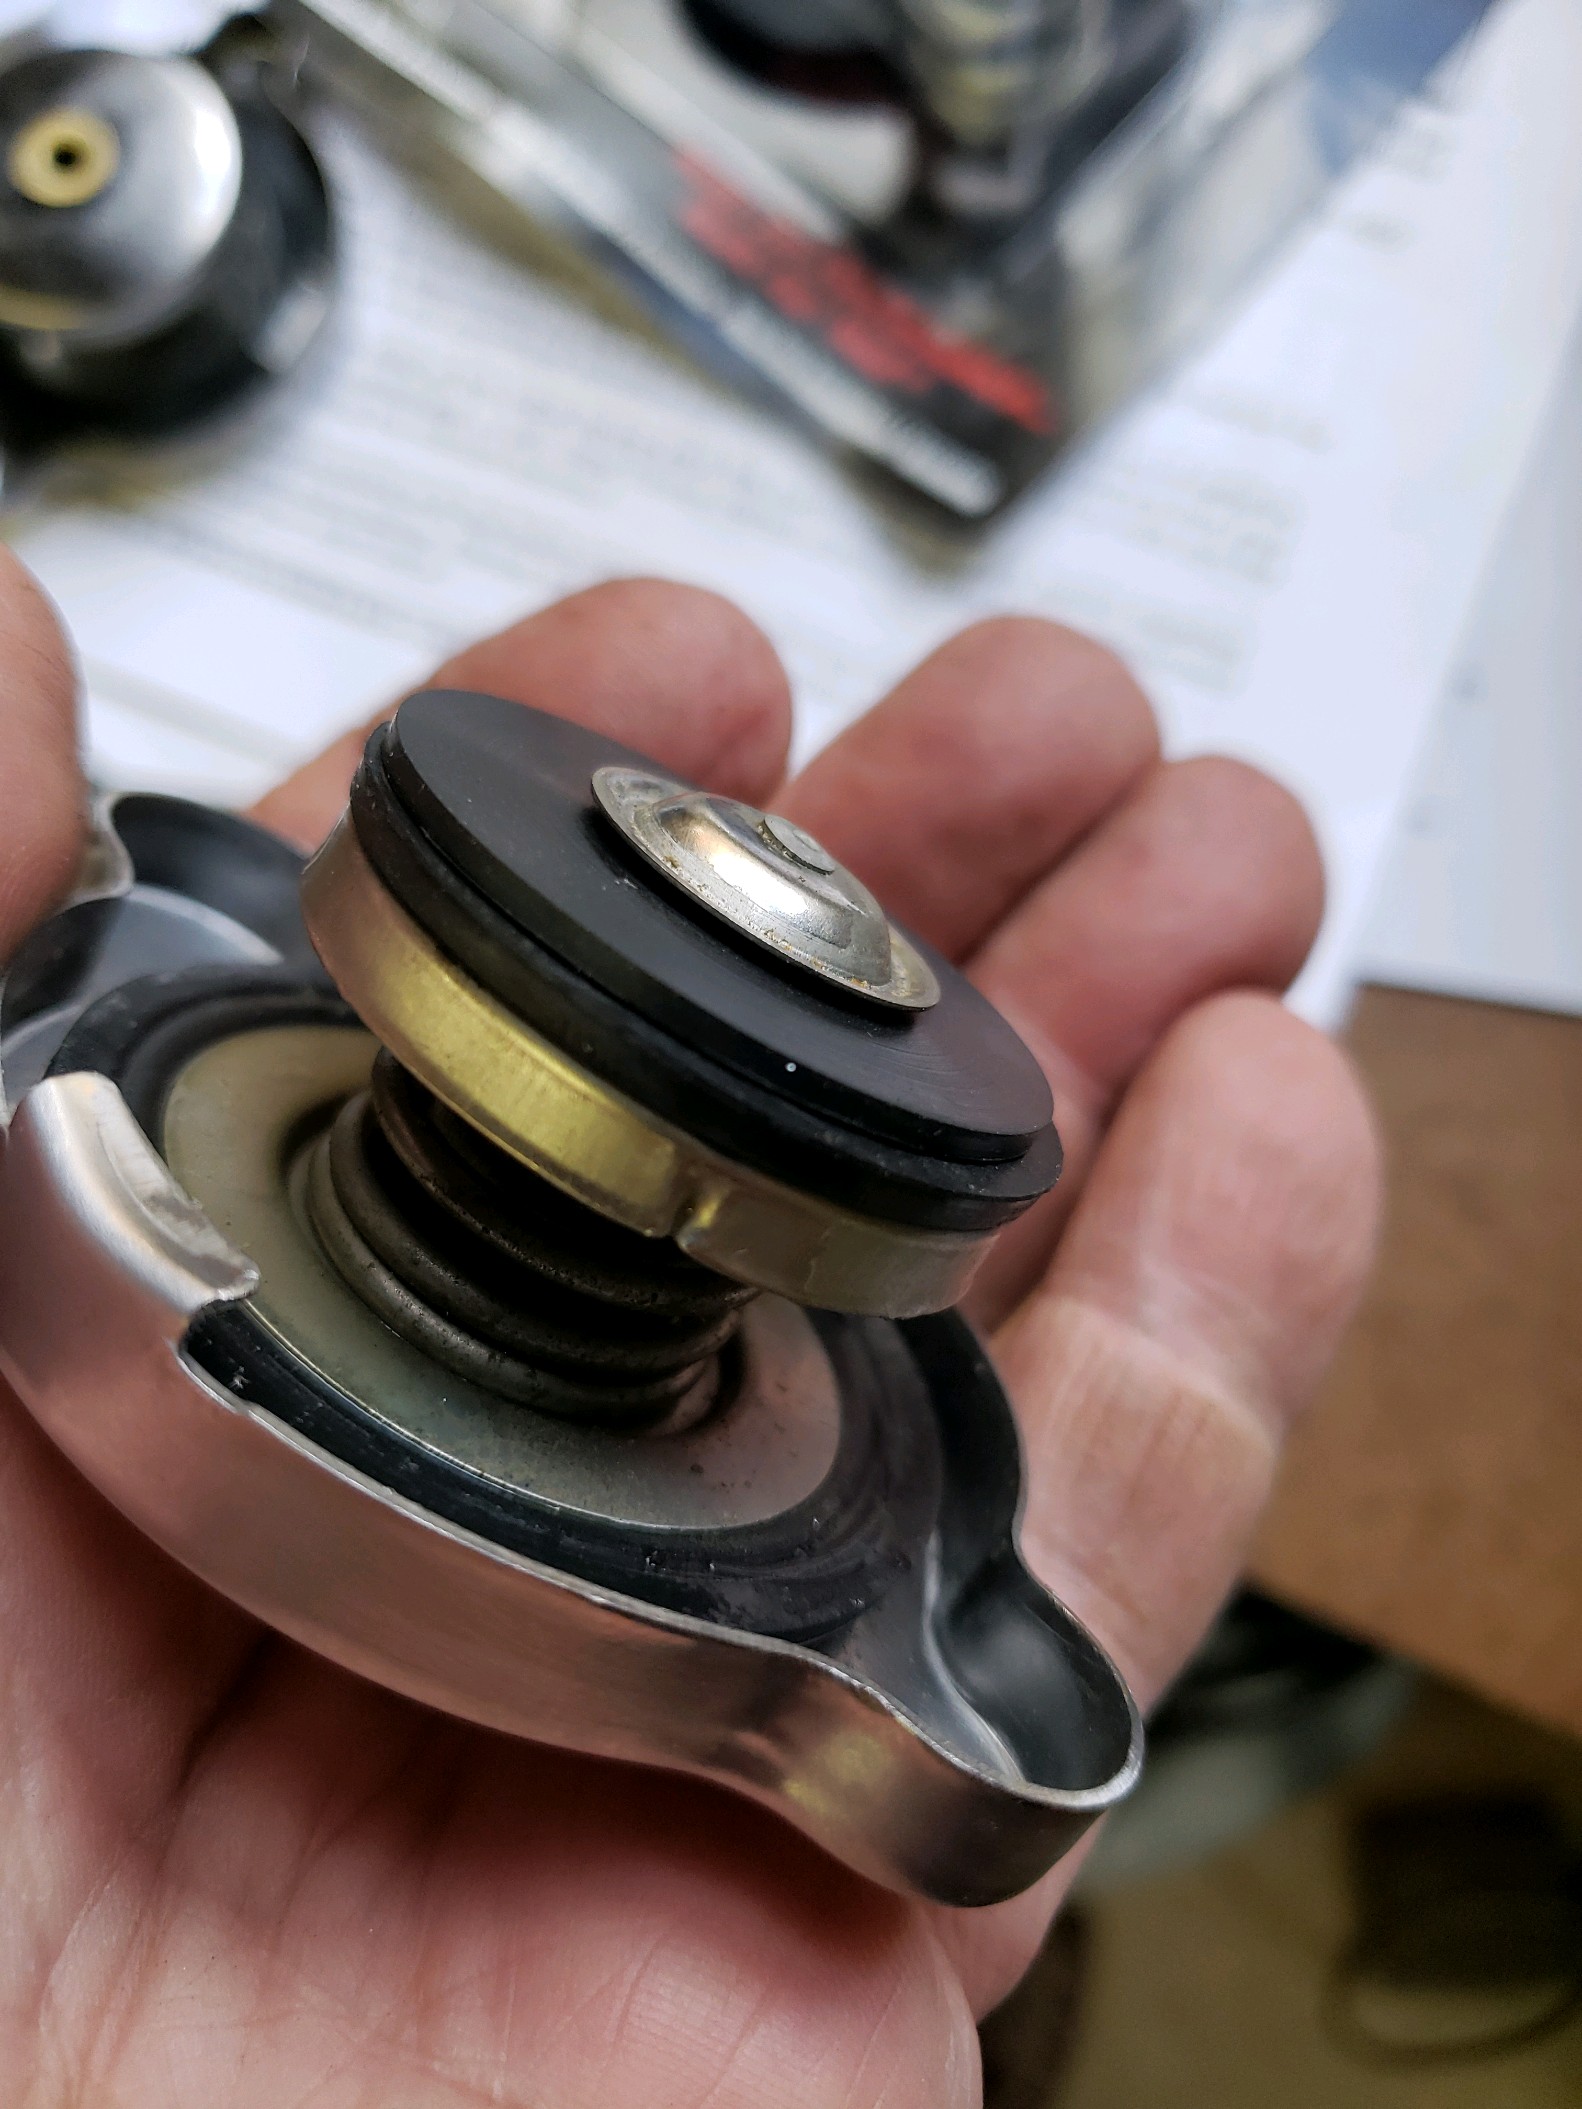
My added seal above negated the venting capability. In the next few days, I plan to measure the dimension from the face of the neck to the inner shoulder and then compare to the same dimension on this replacement cap. If the dimensions are correct there will be compression on the inner seal and it will work as it should.
EDIT: I noticed on my photo of the home made double seal there might still be space under that venting button, so maybe it still has venting capability. I'll know more when I take it out.
The new Champion cap is in and working correctly. When the coolant warms up and expands, the hose to the reservoir is warming up and venting.
The depth dimension from the face of the neck to the inner shoulder was .810/.818. The corresponding dimension on the new cap measured .836/.842 showing that the spring would be preloaded upon assembly.
For me, this problem is solved and I think the older cap, although used for only 1500 miles & 8 months, had taken a set and would no longer seal correctly. The lesson learned on this and supported by a telcon with Champion is that off the shelf caps like the one from Murray, and presumably others, may not necessarily seal. The reason is that they are too short.
Not everyone has the measuring tool to check this out but if you have an aluminum radiator from Champion, buy the cap from them. Otherwise, measure to the inner shoulder and bring a Vernier to the parts store. I'm going to buy a spare from Champion.
I think you've encountered the problem with today's aftermarket parts manufacturing. They just aren't to spec. I've had a similar issue with my radiator - the cap would leak because it wouldn't seal properly, had to get an extra gasket. So my solution is to hack it so it's fixed. It's just not plug and play, gotta dig deeper into it.
Here are pictures of the new one. Note it's self venting where the retention button on the inner end has some float to allow any system vacuum to draw coolant back from the overflow tank.
My added seal above negated the venting capability. In the next few days, I plan to measure the dimension from the face of the neck to the inner shoulder and then compare to the same dimension on this replacement cap. If the dimensions are correct there will be compression on the inner seal and it will work as it should.
EDIT: I noticed on my photo of the home made double seal there might still be space under that venting button, so maybe it still has venting capability. I'll know more when I take it out.
Did Champion give you a part number or application spec for that cap? I have the same problem.
The Entire metal valve/seal part can be carefully pried off the spring/cap parts.
Can likely put a shim between them to tighten the seal.
Stant likely makes a cap to work Champion rads w/ deeper necks. Likely a Trunk cap not standard xx230. If you have PN can likely just cross ref that to Stant or Motorad part. (Motorad makes most "Store brand" caps.)
Why said? Stant rad testers covered here uses a "washer" to use the tester w/ some vehicles. Is not same rubber part in 12450 adapter.
I'll dig thru notes etc. later for more info.
------------------ Dr. Ian Malcolm: Yeah, but your scientists were so preoccupied with whether or not they could, they didn't stop to think if they should. (Jurassic Park)
Originally posted by V8Steve: It's the standard cap that comes with the radiator.
Is no help to most buyers. Besides Low pressure cap can boil over at lower temps... Also allows more Cavitation in the Water Pump making that to "wear out" faster.