Originally posted by fishsticks: I am just razzing you.
I don't bother with flat tappet anything anymore, since roller ramp designs are so much better. The triple spring thing was for the old guys jumping coke cans in the back.
And I figured it was some sort of plenum on your car.
Where I come from, if we talk smack to you it means we like you.
Your coments didn't bother me at all mate. Looking forward to see your car running soon!
Still waiting on the shortblock to ship out. But parts are starting to arrive.
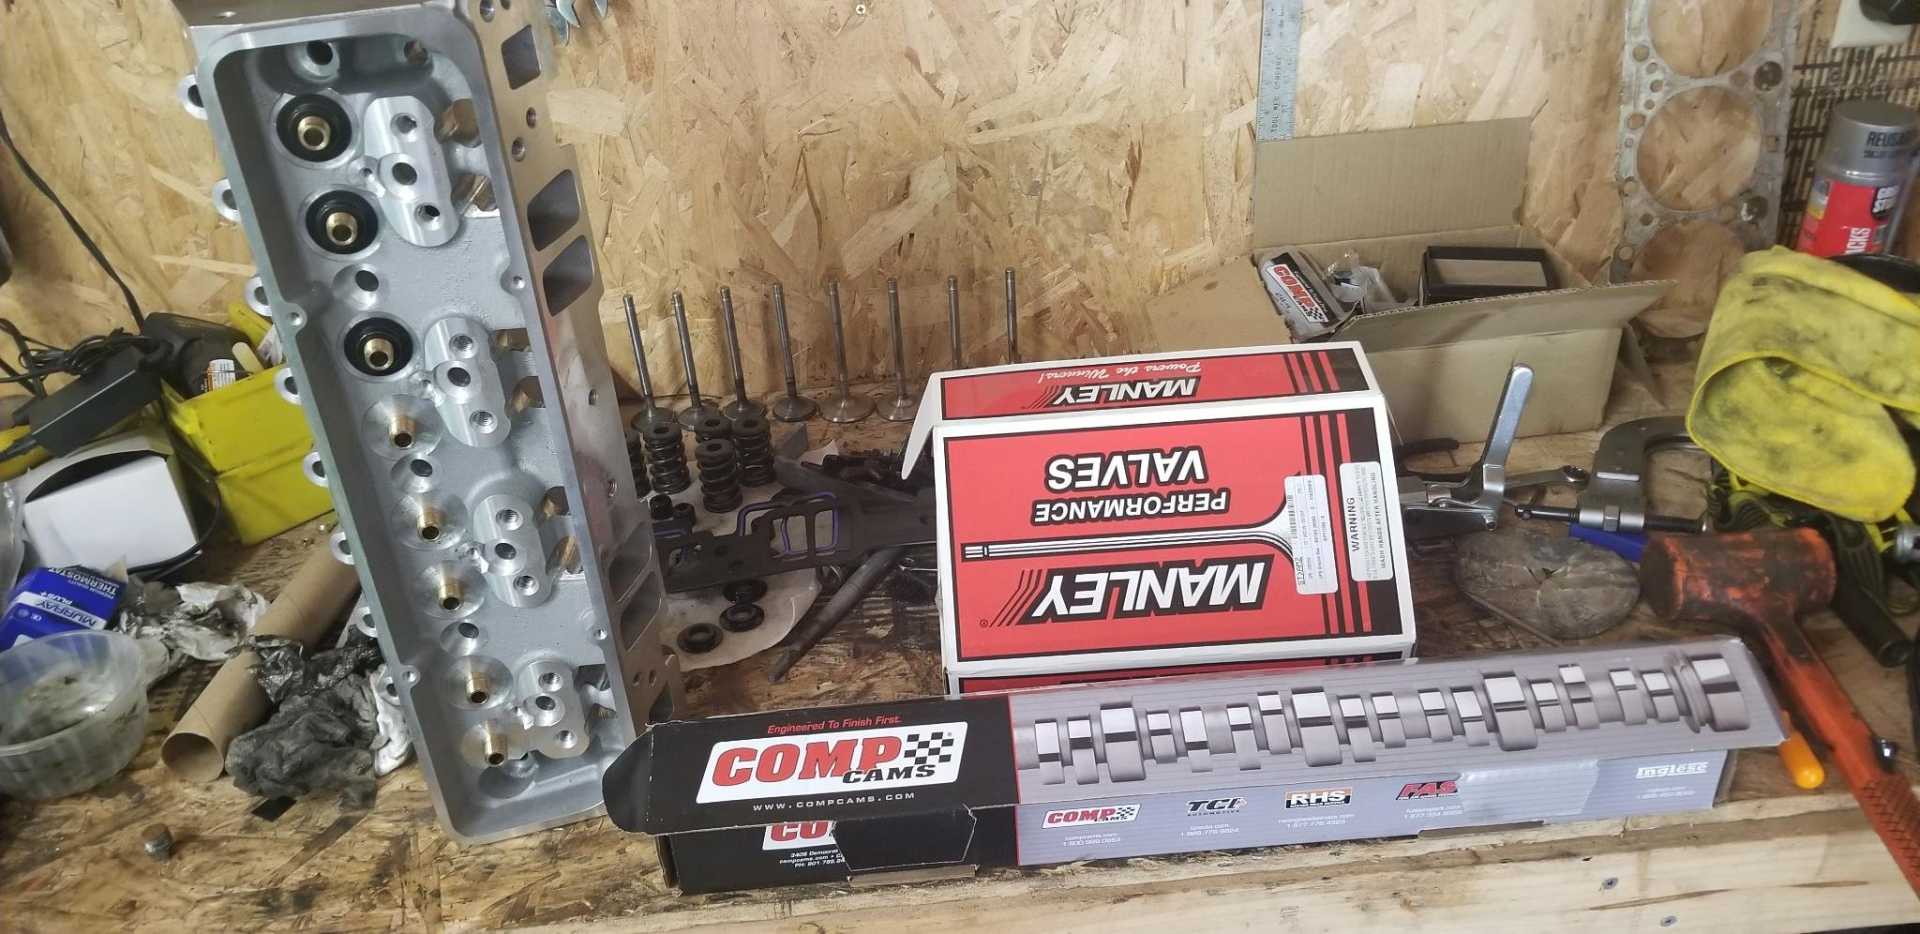
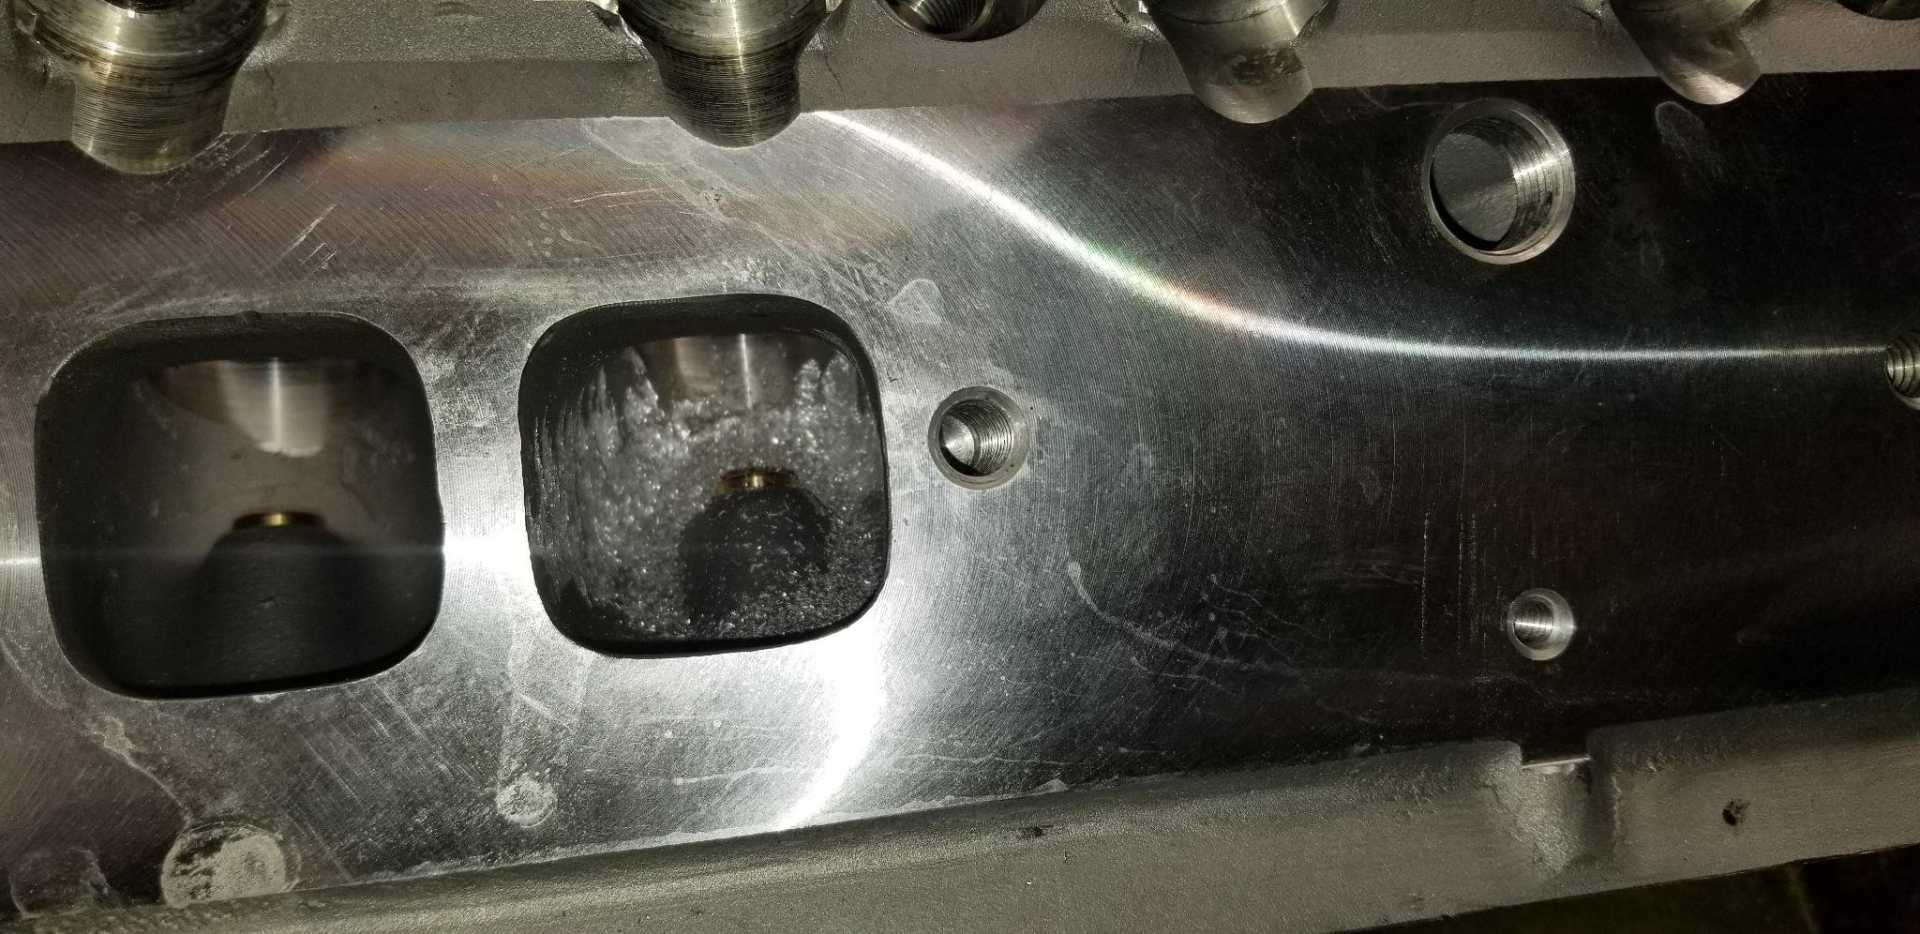
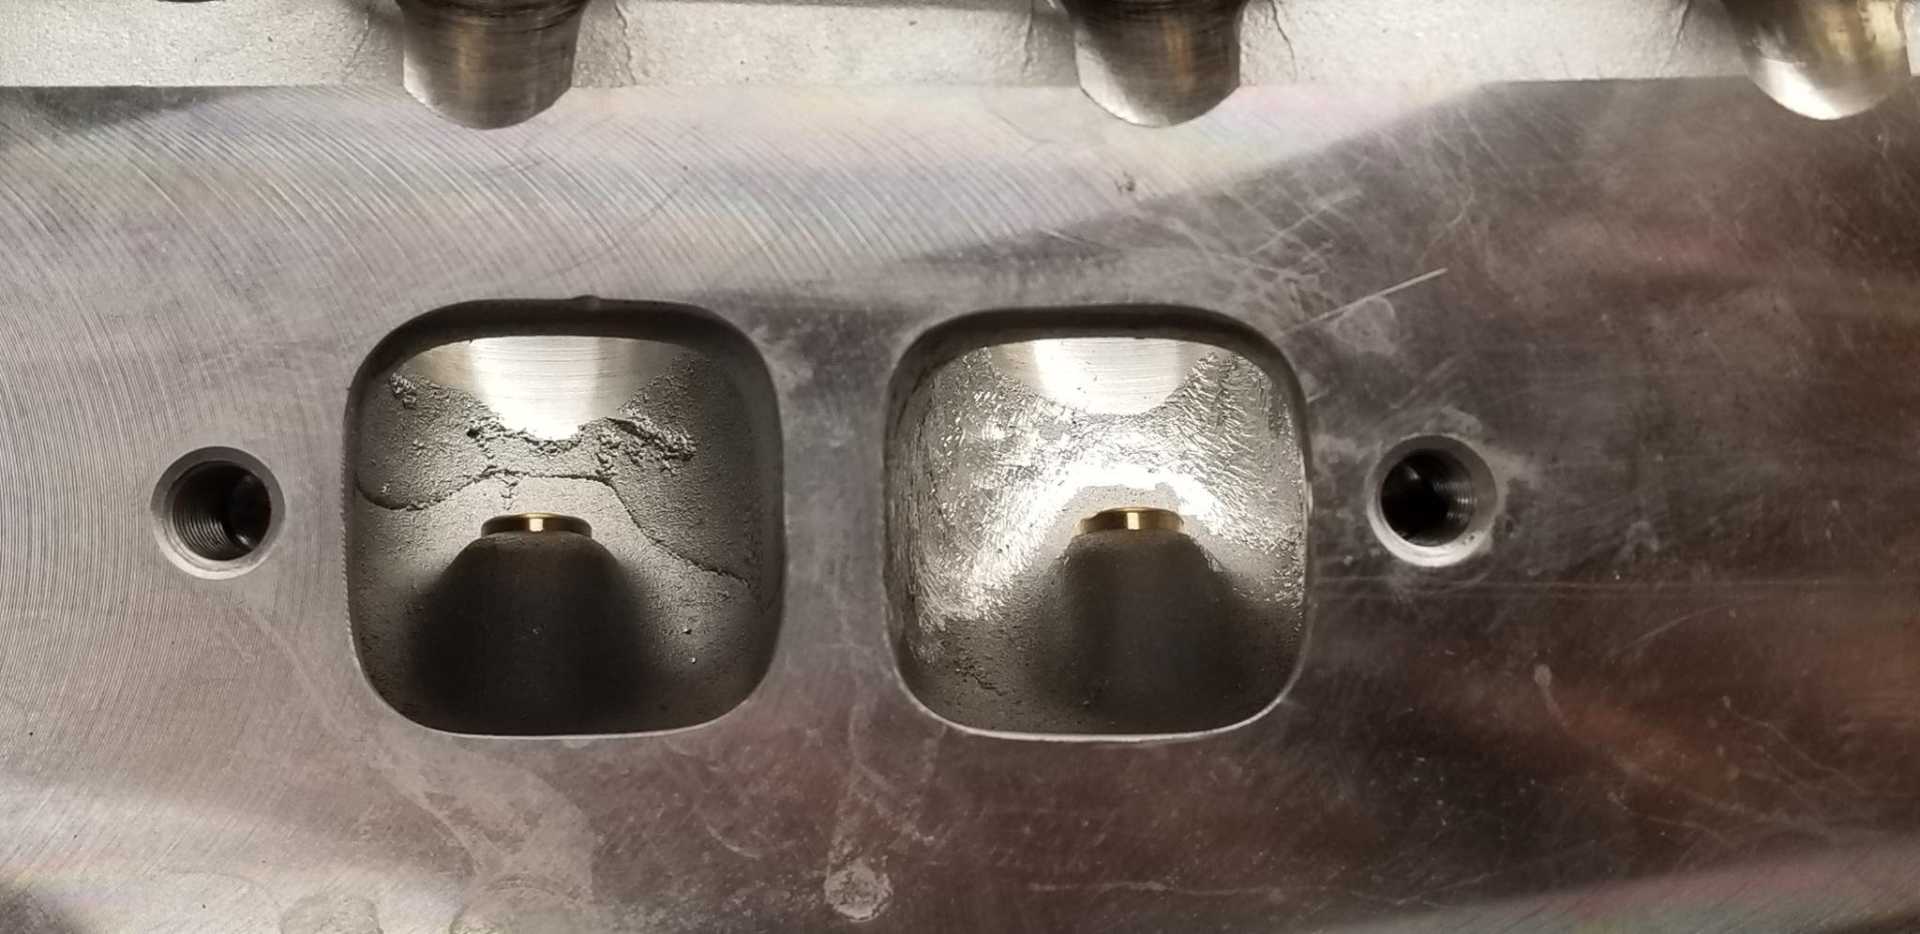
Because the previous owner ran self aligning rocker with guide plates, the valves were put into a bit of a bind situation. This resulted in the guides being worn a bit funny on each intake valve. I noticed this when I first put the motor back together and just crossed my fingers it wouldn't use oil... buuuut it did. Rather than send these off to machine, I bought new castings. $225 each on Amazon. I'll port the new ones very lightly (mostly just casting flash cleanup). Also bought some light, undercut valves.
I really weighed overcamming the car to soften low speed torque but ultimately decided against it. Since I have a 2D timing table available I'm going to attempt to use that to manage torque in the same vein as traction control on newer vehicles. I also have launch control available on the Sniper and may see what I can make happen with that. This guy should put power peak in the 6000 range. I will run it with the 1.6 aluminum roller rockers I currently have.
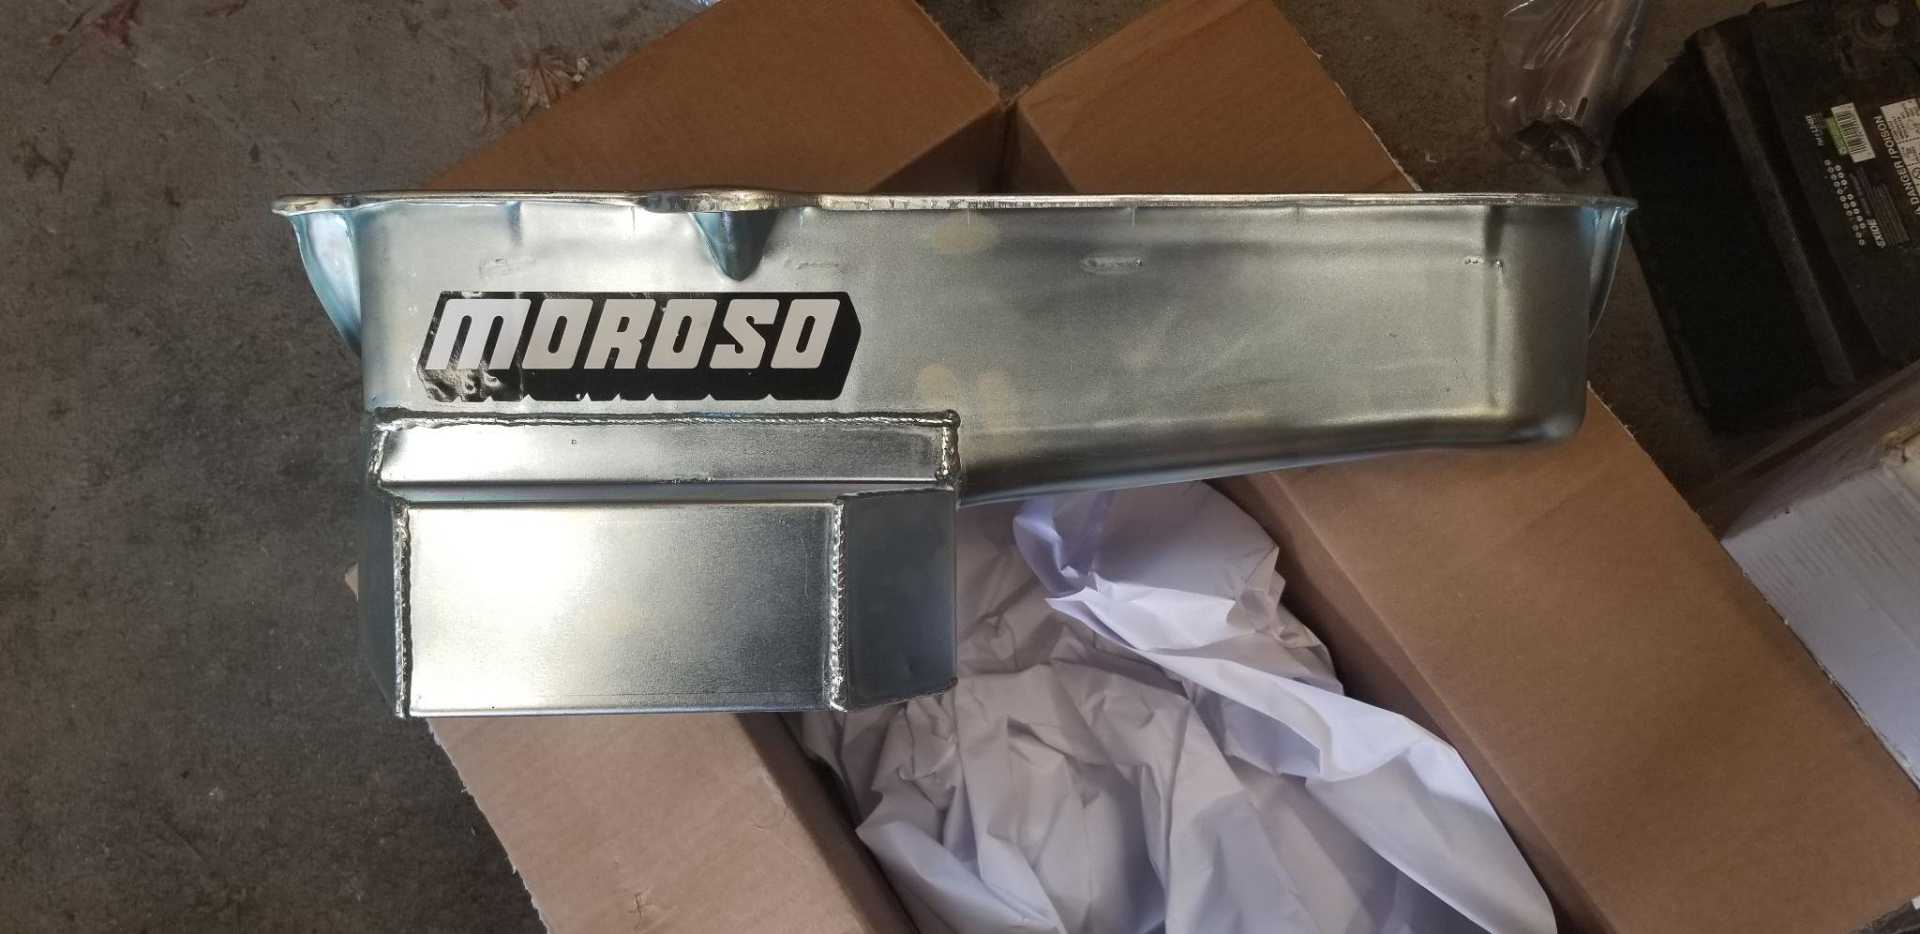
Having this in my hands now, I got the measurements I really wanted off of it, and it will clear the passenger side axle. Awesome! 7qts (+ .5-1 for the remote oil filter) will work nicely with the high volume oil pump I got.
I guess I should go put the new heads together or something. Maybe drop the old motor out of the car...
Still waiting on the shortblock to ship out. But parts are starting to arrive.
Because the previous owner ran self aligning rocker with guide plates, the valves were put into a bit of a bind situation. This resulted in the guides being worn a bit funny on each intake valve. I noticed this when I first put the motor back together and just crossed my fingers it wouldn't use oil... buuuut it did. Rather than send these off to machine, I bought new castings. $225 each on Amazon. I'll port the new ones very lightly (mostly just casting flash cleanup). Also bought some light, undercut valves.
I really weighed overcamming the car to soften low speed torque but ultimately decided against it. Since I have a 2D timing table available I'm going to attempt to use that to manage torque in the same vein as traction control on newer vehicles. I also have launch control available on the Sniper and may see what I can make happen with that. This guy should put power peak in the 6000 range. I will run it with the 1.6 aluminum roller rockers I currently have.
Hey Fish, what is the part number of the black spring seats on the heads?
Thanks
Rei
Having this in my hands now, I got the measurements I really wanted off of it, and it will clear the passenger side axle. Awesome! 7qts (+ .5-1 for the remote oil filter) will work nicely with the high volume oil pump I got.
I guess I should go put the new heads together or something. Maybe drop the old motor out of the car...
Originally posted by La fiera: Hey Fish, what is the part number of the black spring seats on the heads?
Thanks
Rei
Lunati 86705-16
Comp 4705-16 will also work.
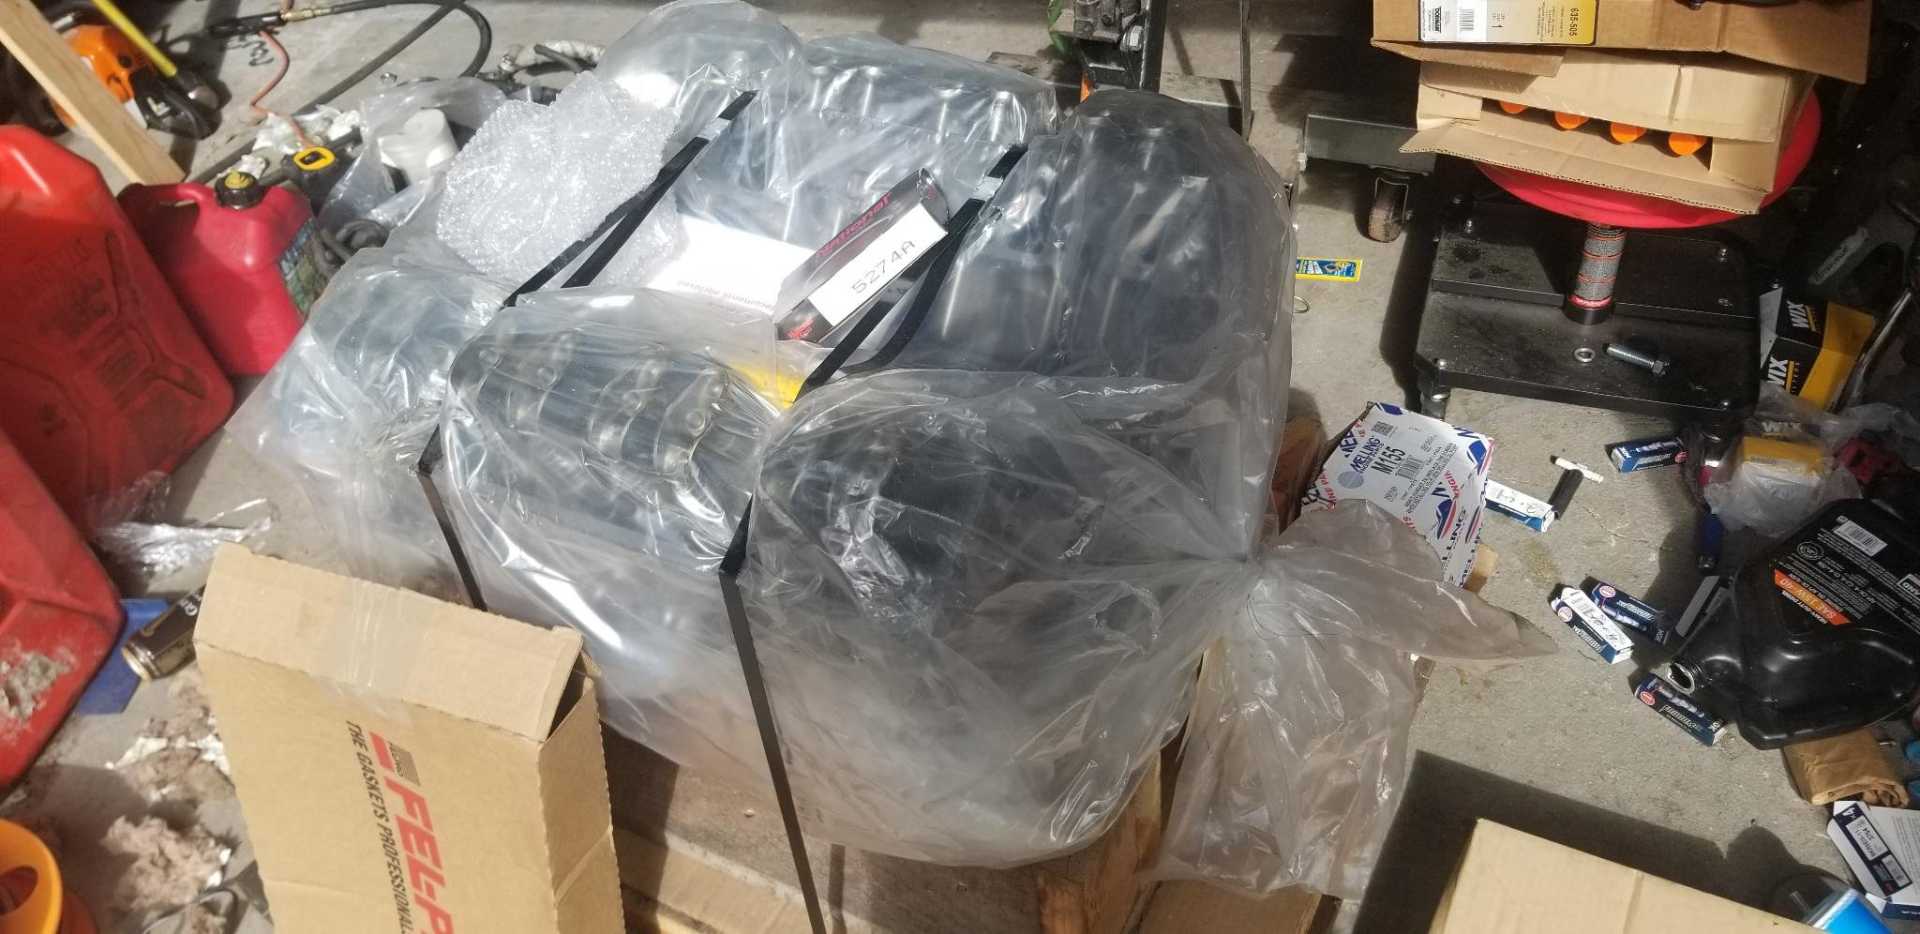
OD 1.300 ID .570 Spring ID .875 .060 thickness Jeg's emailed today to let me know the short block (that was supposed to ship on 5/17) is backordered until July 15th.
I'll admit I started looking at Dart blocks right after... but trying not to let mission creep set in.
Waiting until Mid July to get a short block here wasn't working for me. So I cancelled the order.
Traded some turbo parts to a buddy and for this instead:
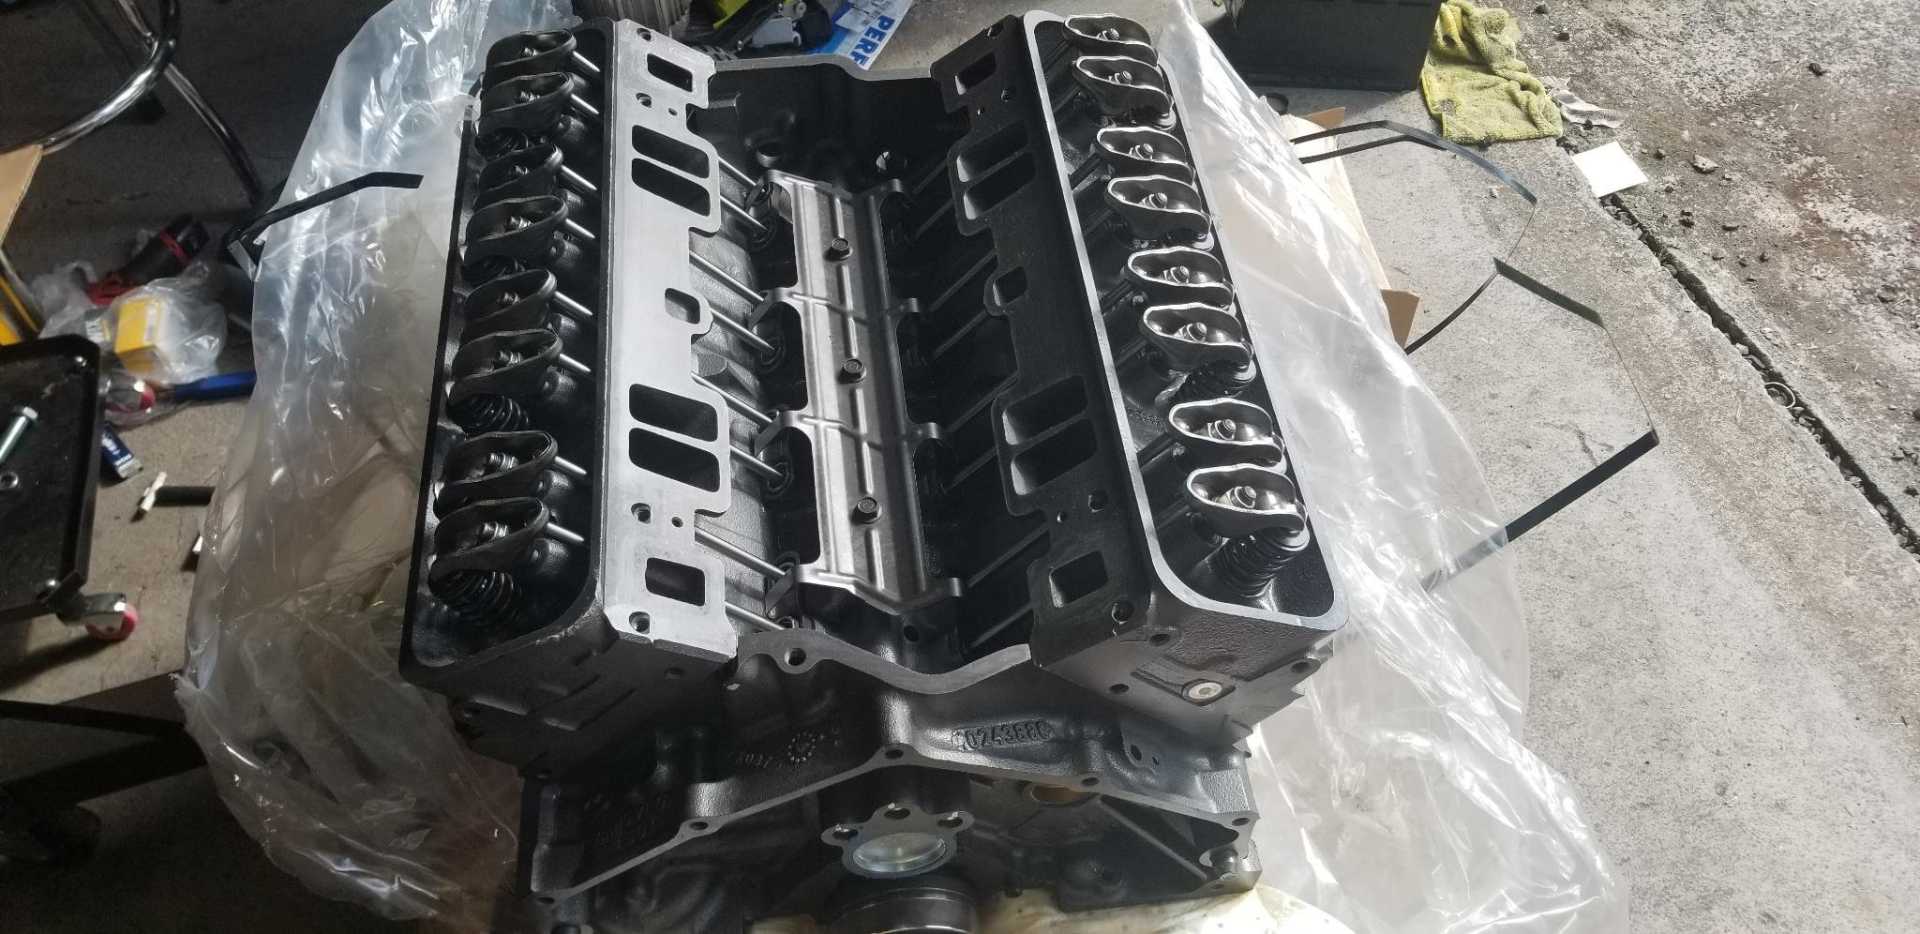
This is a .030 over rebuilt L31 block for over 8500 GVRW trucks.
The good:
Spheroidal graphite iron block
Forged crank
Powdered metal rods
4 bolt mains
The bad:
Rebuilder pistons
Normal compression height for SBC pistons is 1.560". Most rebuilders use 1.540 pistons in stock rebuilds, so that there is room to deck the block if needed.
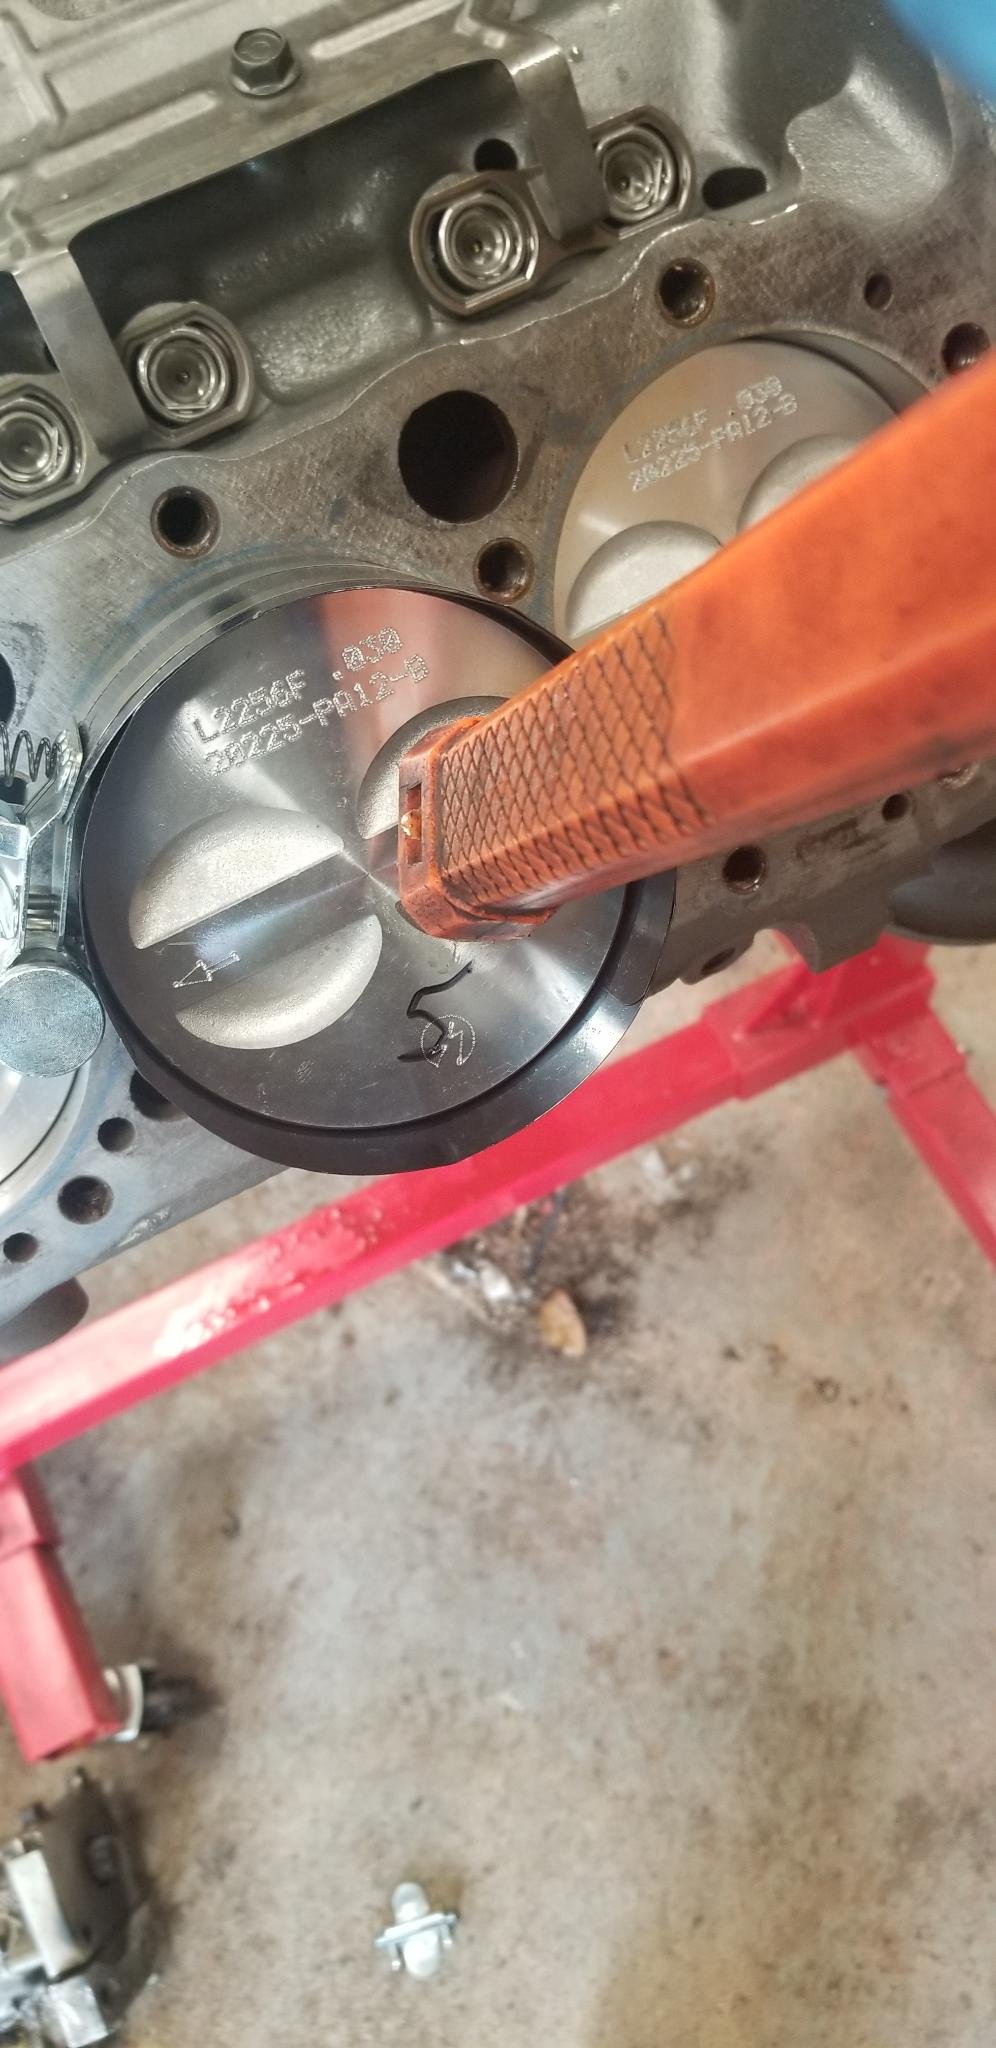
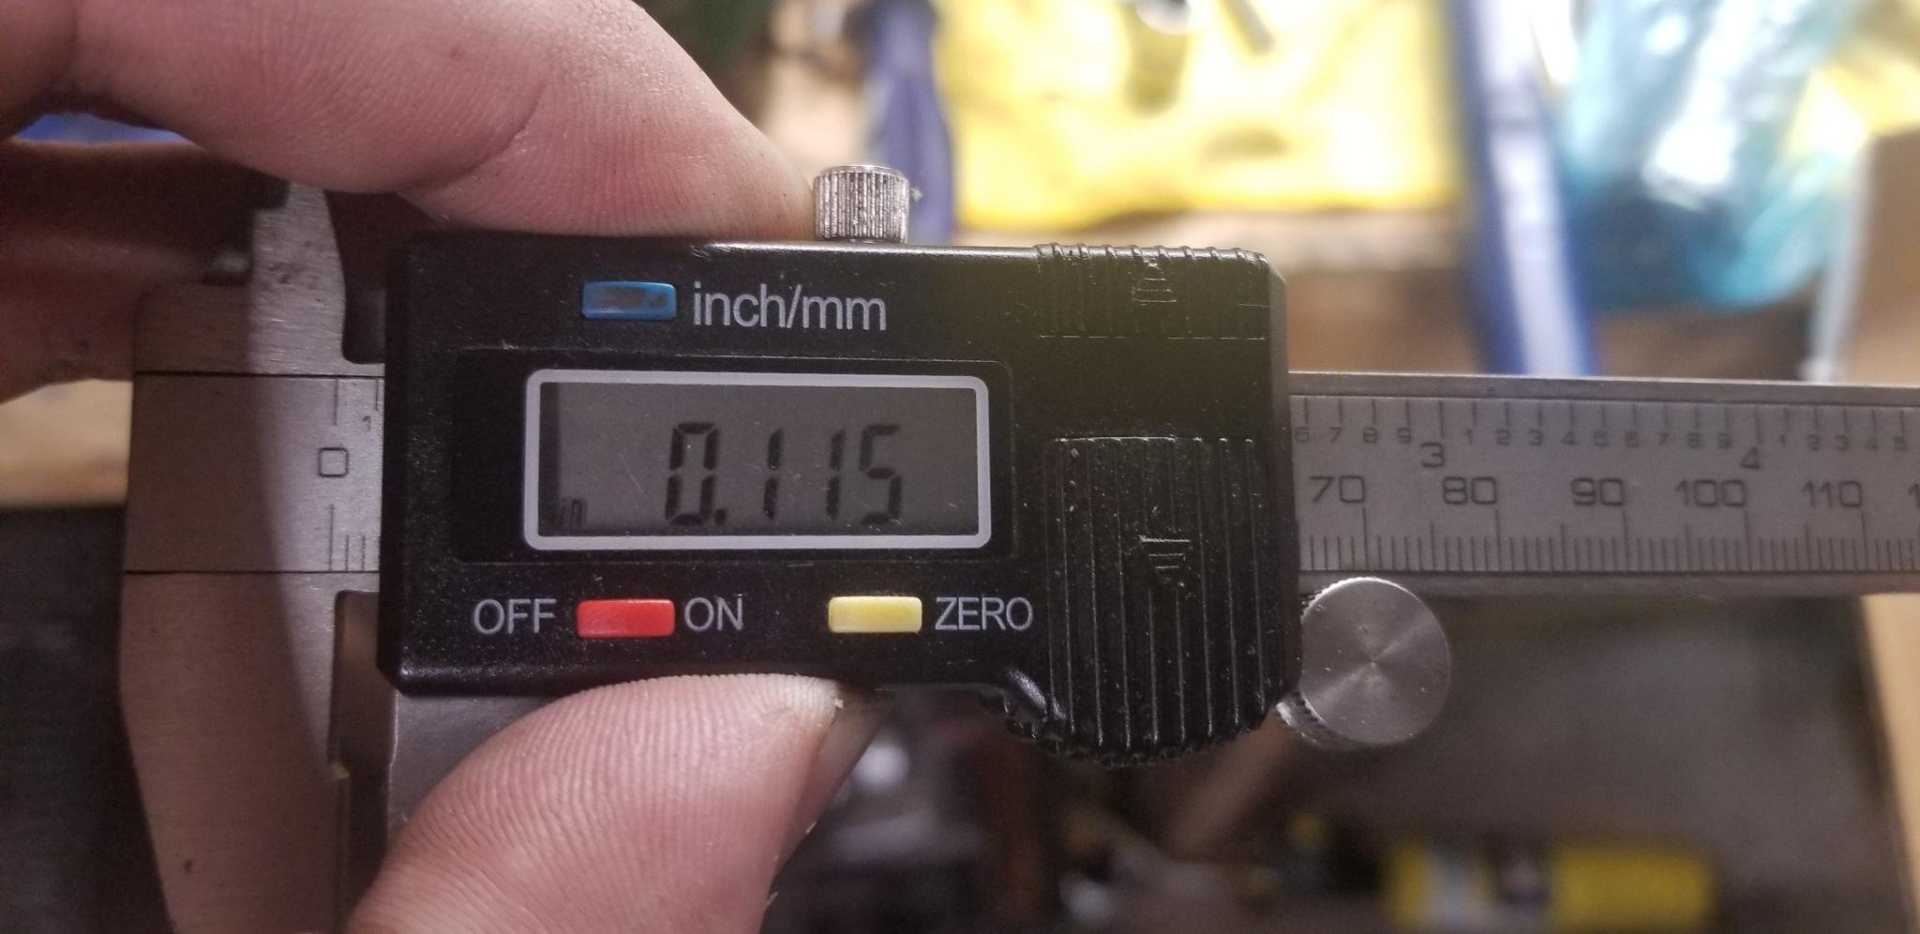
This block was not decked, which puts those pistons .045 in the hole (confirmed by measuring). I could eek out 9:1 compression with a 64cc head and a .015 gasket. Not great for NA.
There's no evidence the shop rebalanced the crank, and of course they just tossed these pistons in without matching anything. So a 1.560 compression height flat tops should work fine with the crank bob weight. Those will be here Monday with a 6cc relief and moly rings. Should make 10.2:1 compression with my heads. Easy peasy on pump gas.
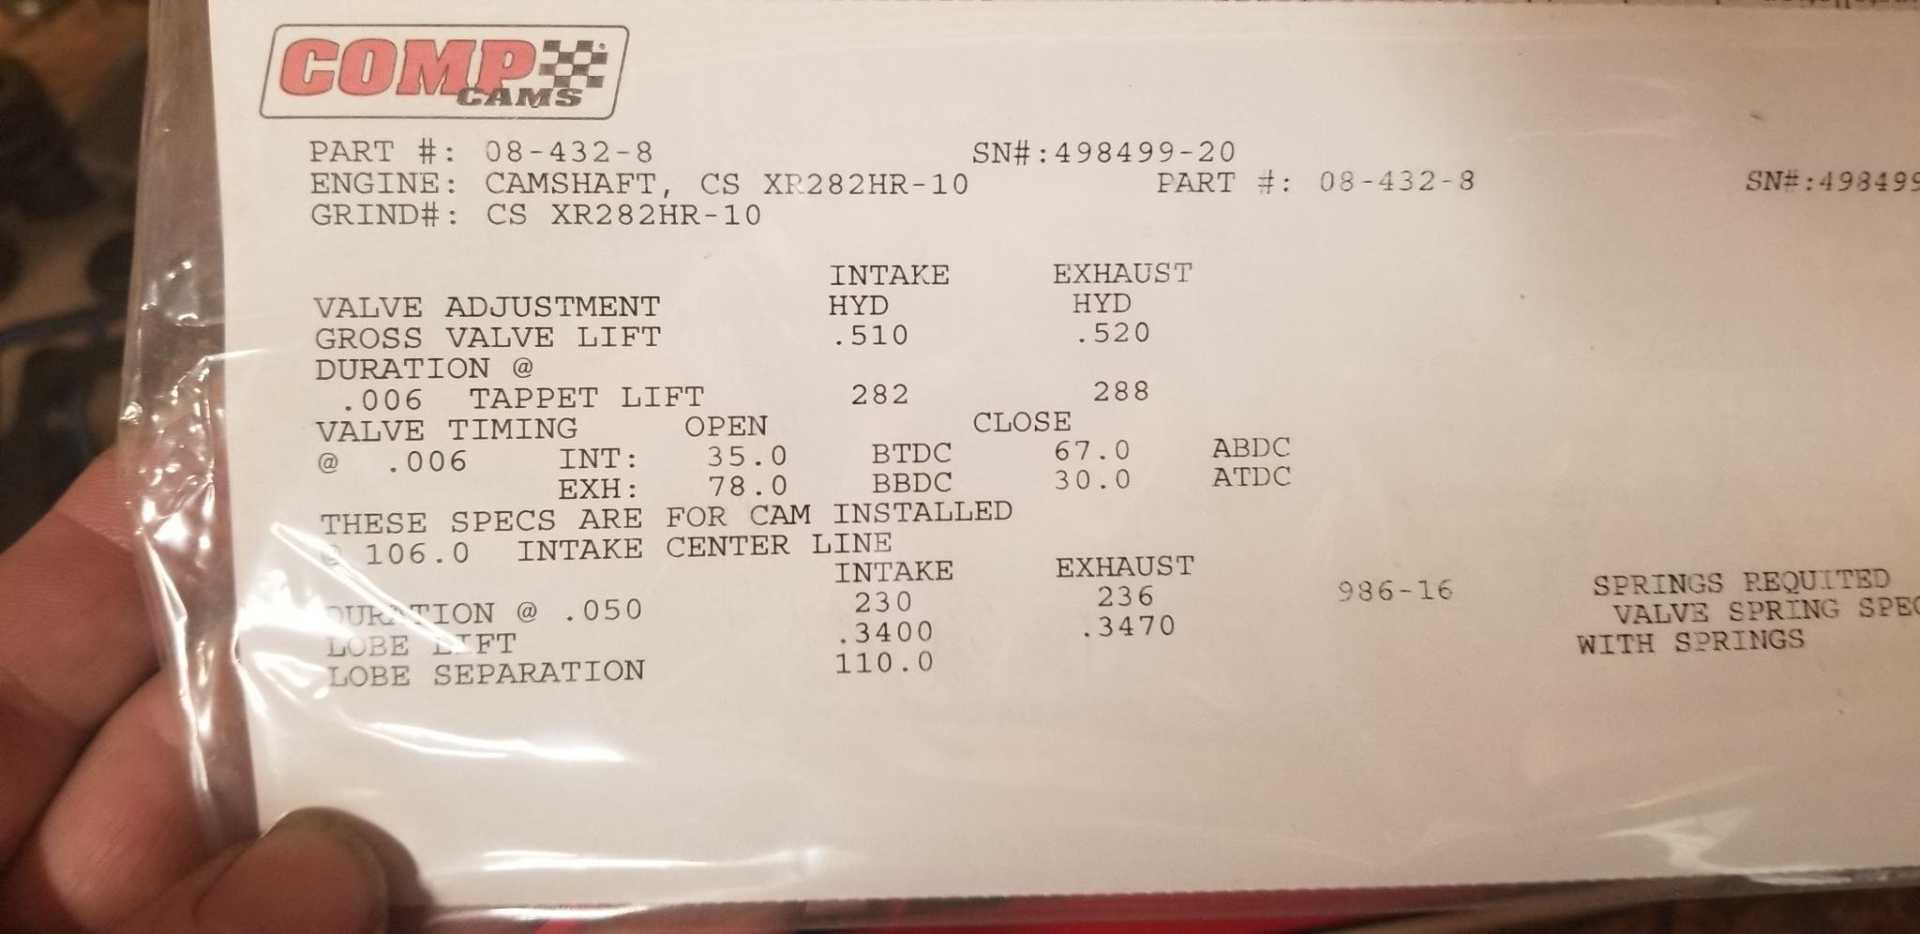
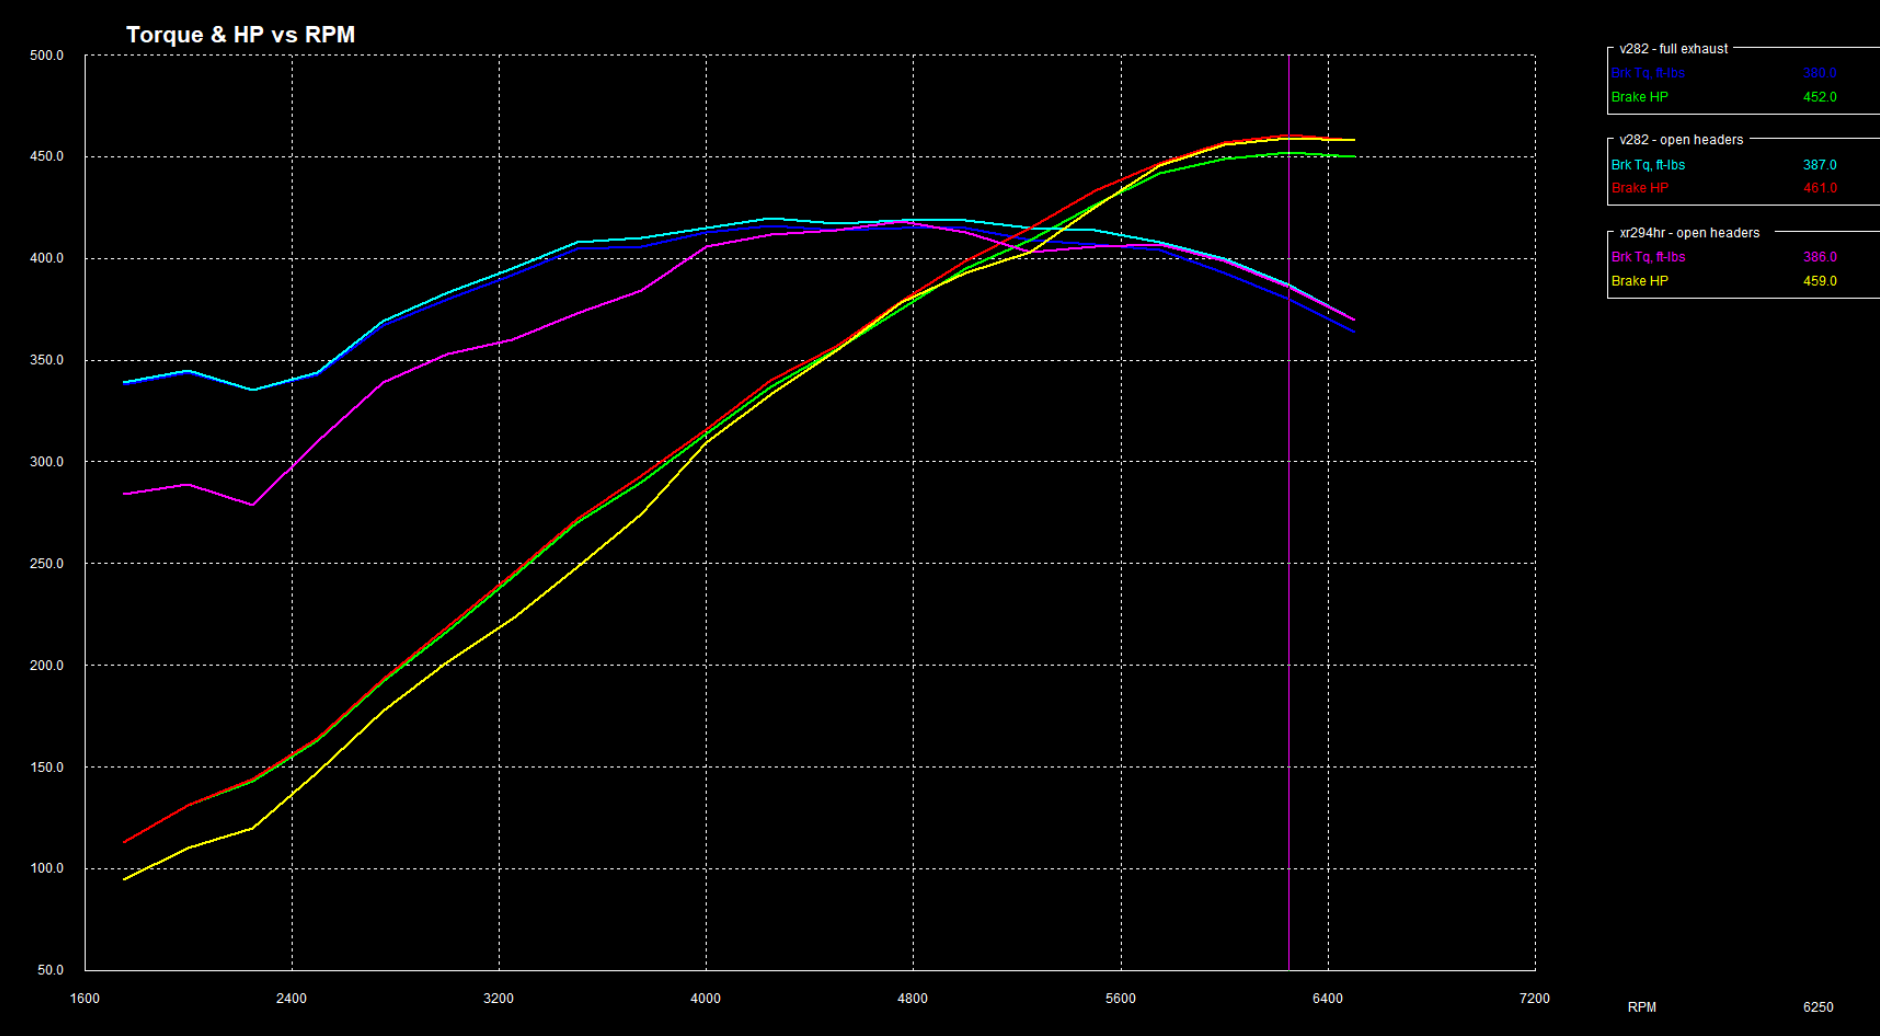
Settled on the Lunati Voodoo 282 cam. 231/239 @ .050, .571/.587 lift on a 1.6 rocker.
I have a good set of head flow data and a pretty simple exhaust. So we should be in the ballpark on these numbers.
Anyway, this train is moving again finally! Also finished installing a Maxjax because I'm in my 40s and tired of working on my back. Hoping to build some momentum on this project quickly.
[This message has been edited by fishsticks (edited 06-14-2021).]
I really enjoy the build process. I turn some music on, close up the shop and just do the thing. It's a pretty relaxing thing actually, unlike working on stuff in the pits or at camp.
I'm bad at remembering to take pictures, but here's some of the ones I got.
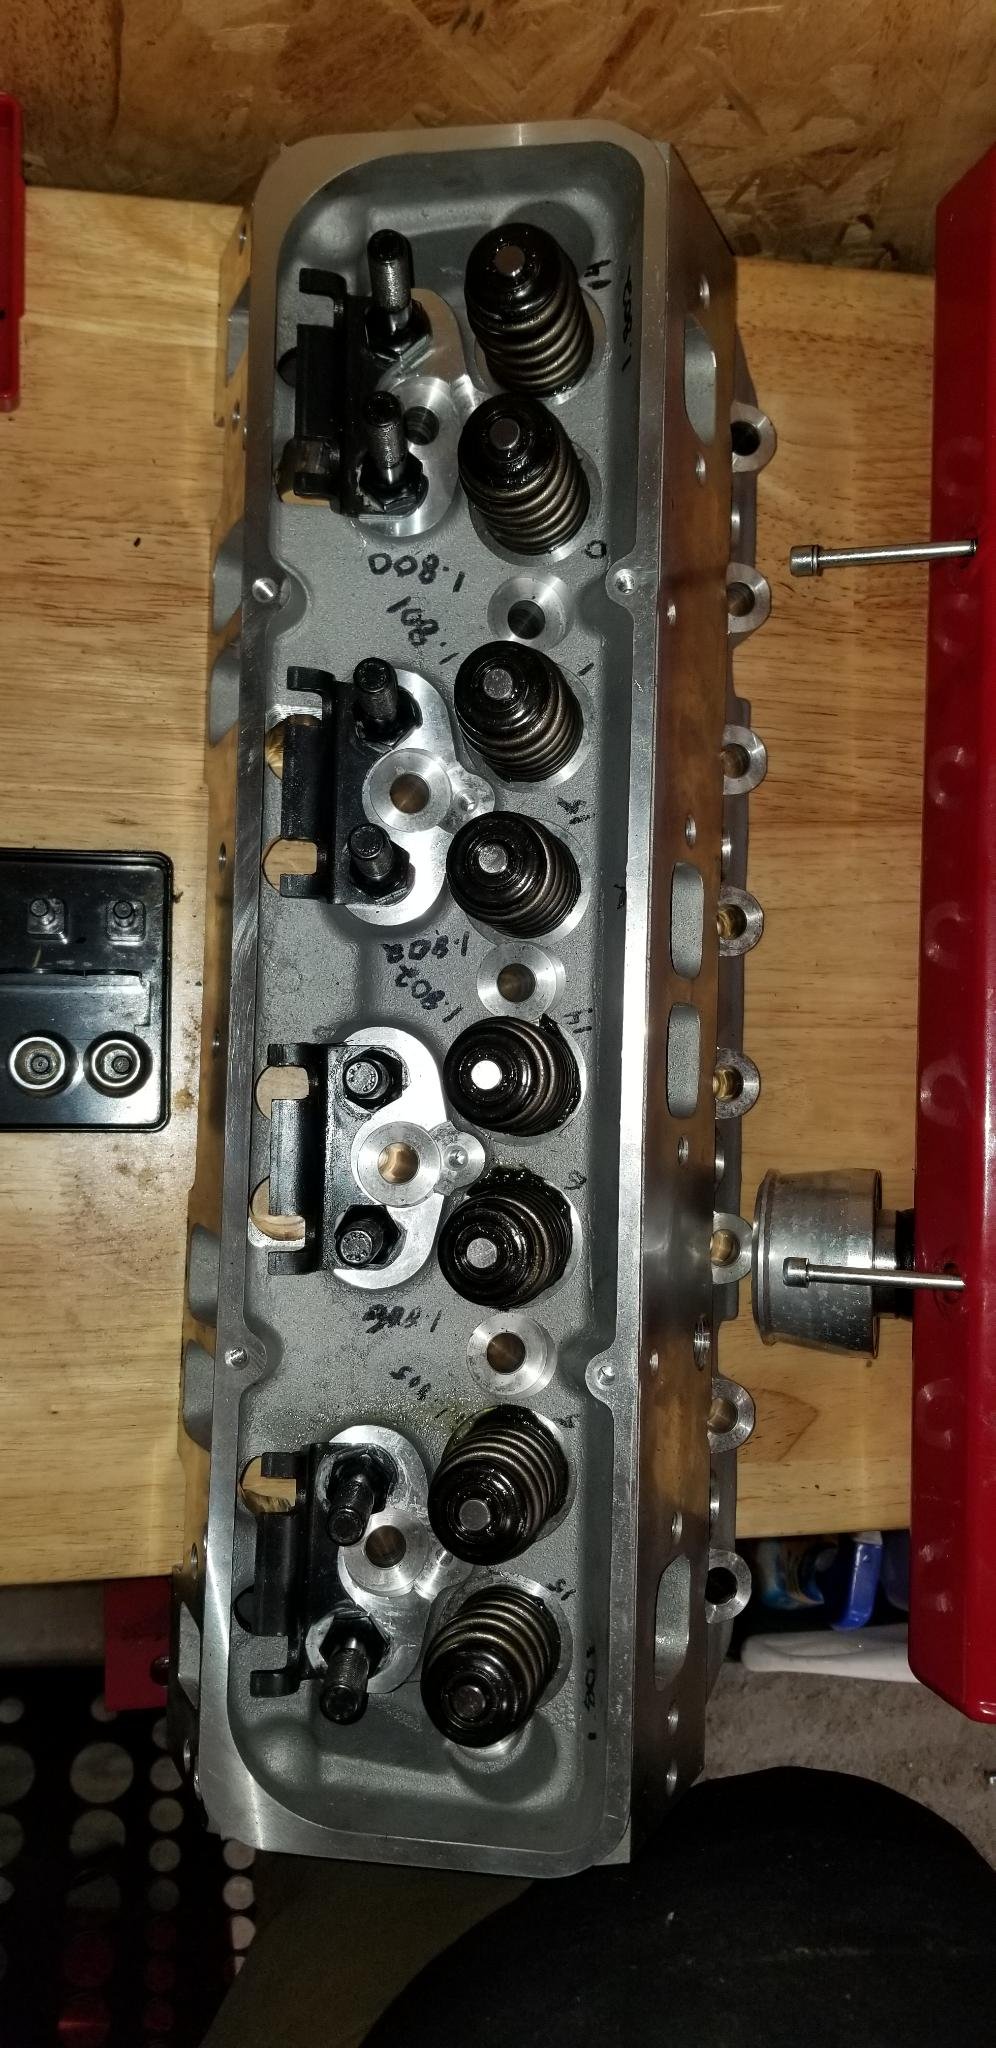
A couple head porting shots. I'm not trying to reshape these ports, just clean up casting flash. I'm no porting savant and these ports aren't terrible as they come. I use a carbide burr set I bought on Amazon and a cordless drill. Wrap a rag around the shaft of the burr so you can guide it with your non-drill hand. Finish with an 80 grit sanding roll.
Vacuum out the shavings, hit it with compressed air and start assembly. Run a small bottle brush through the valve guides just in case.
Already posted a shot of the other head assembled. You get the idea.
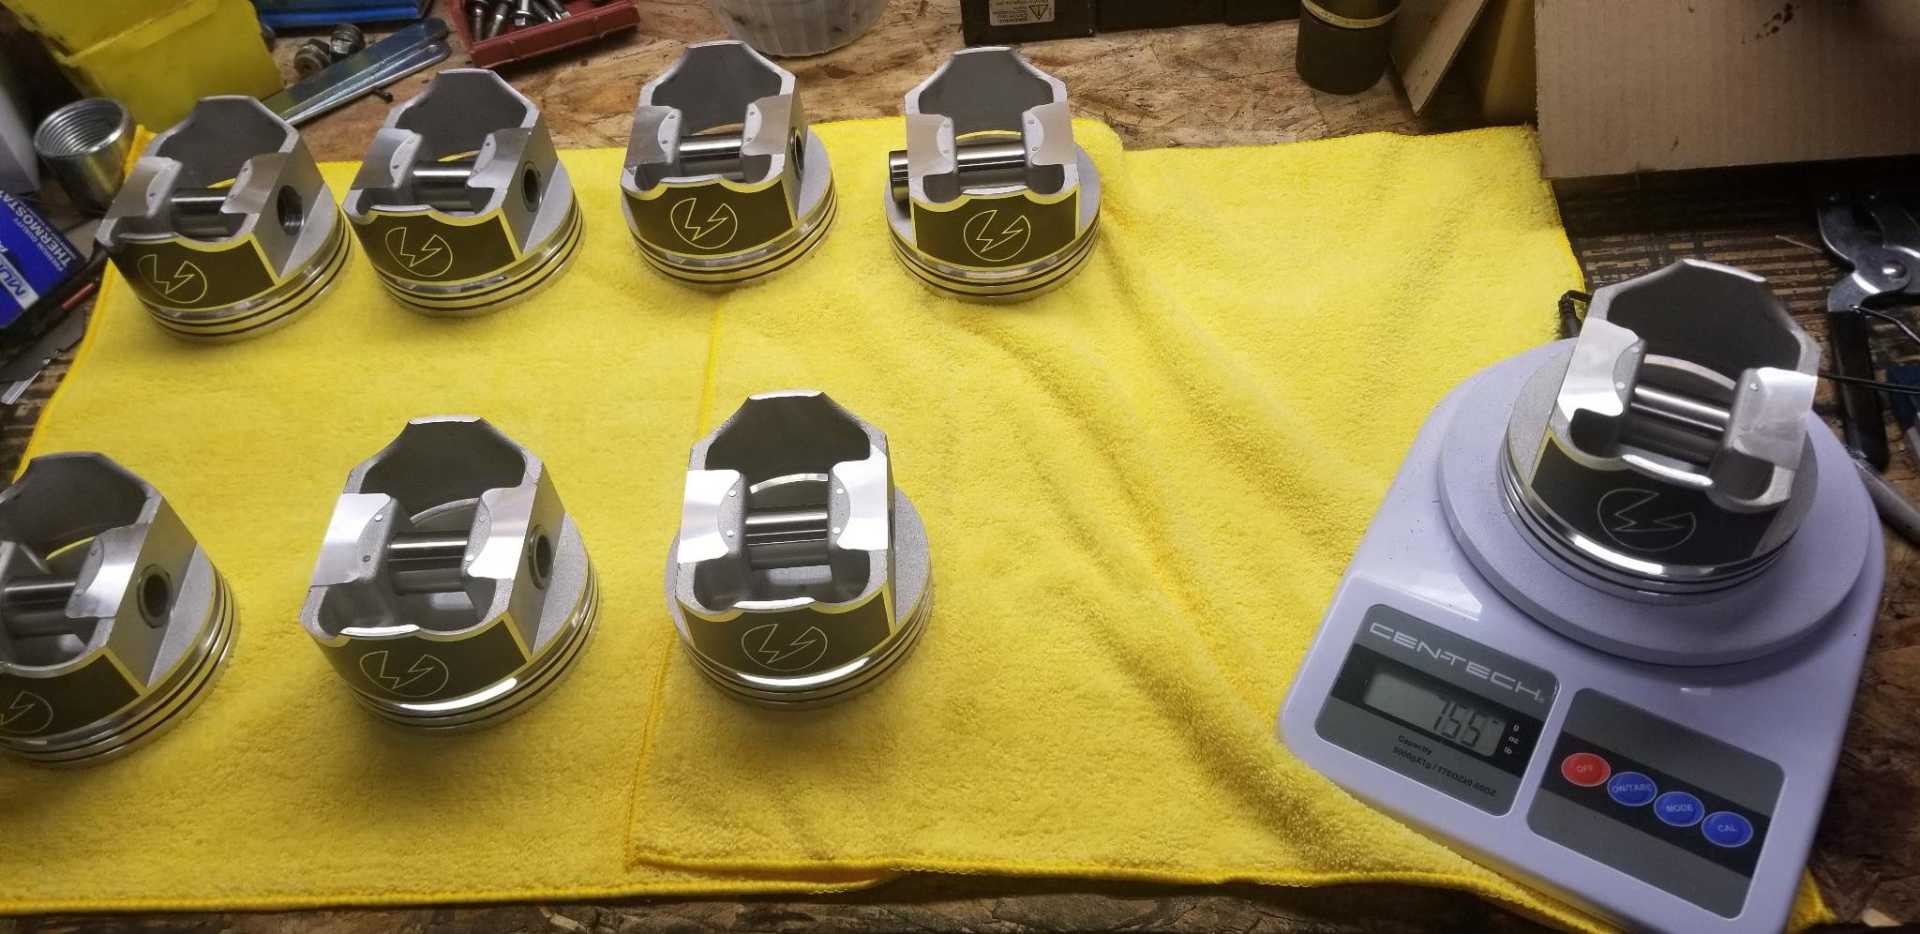
Forged pistons. We're fancy now.
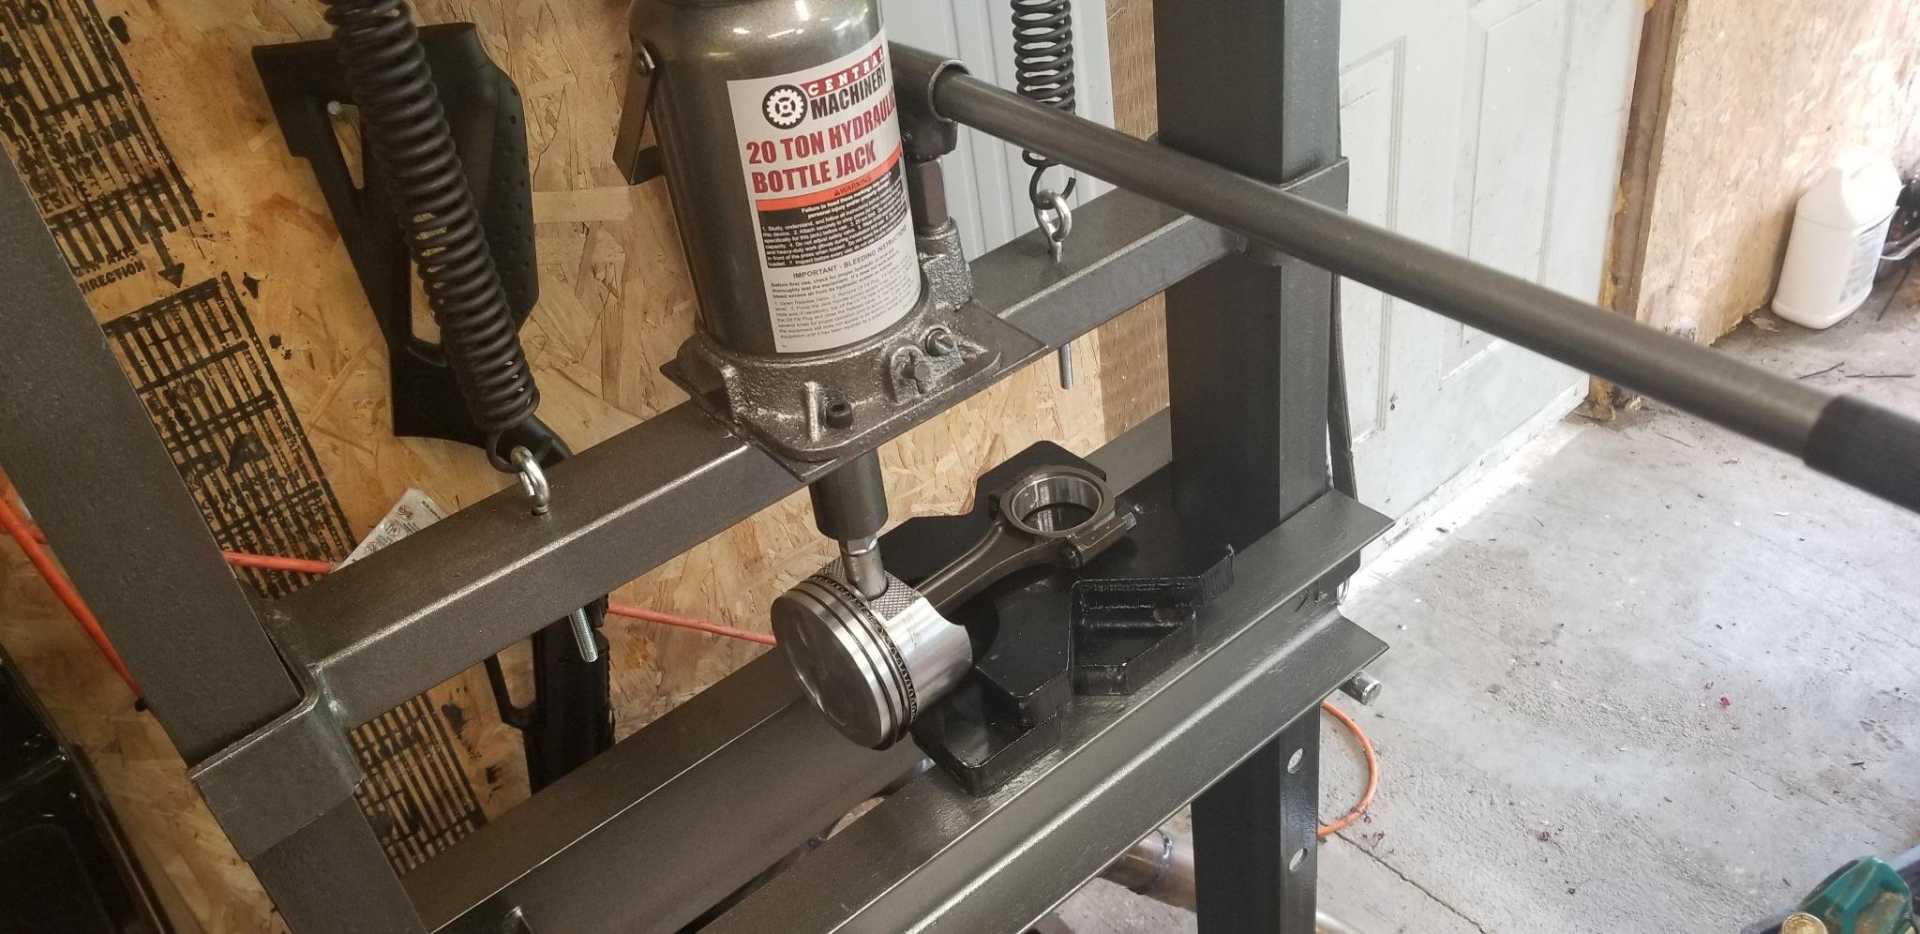
Gotta press the old pins out. Fortunately SBC pistons have flat side skirts, so you don't really need a round jig. (Yes, that's a spark plug socket)
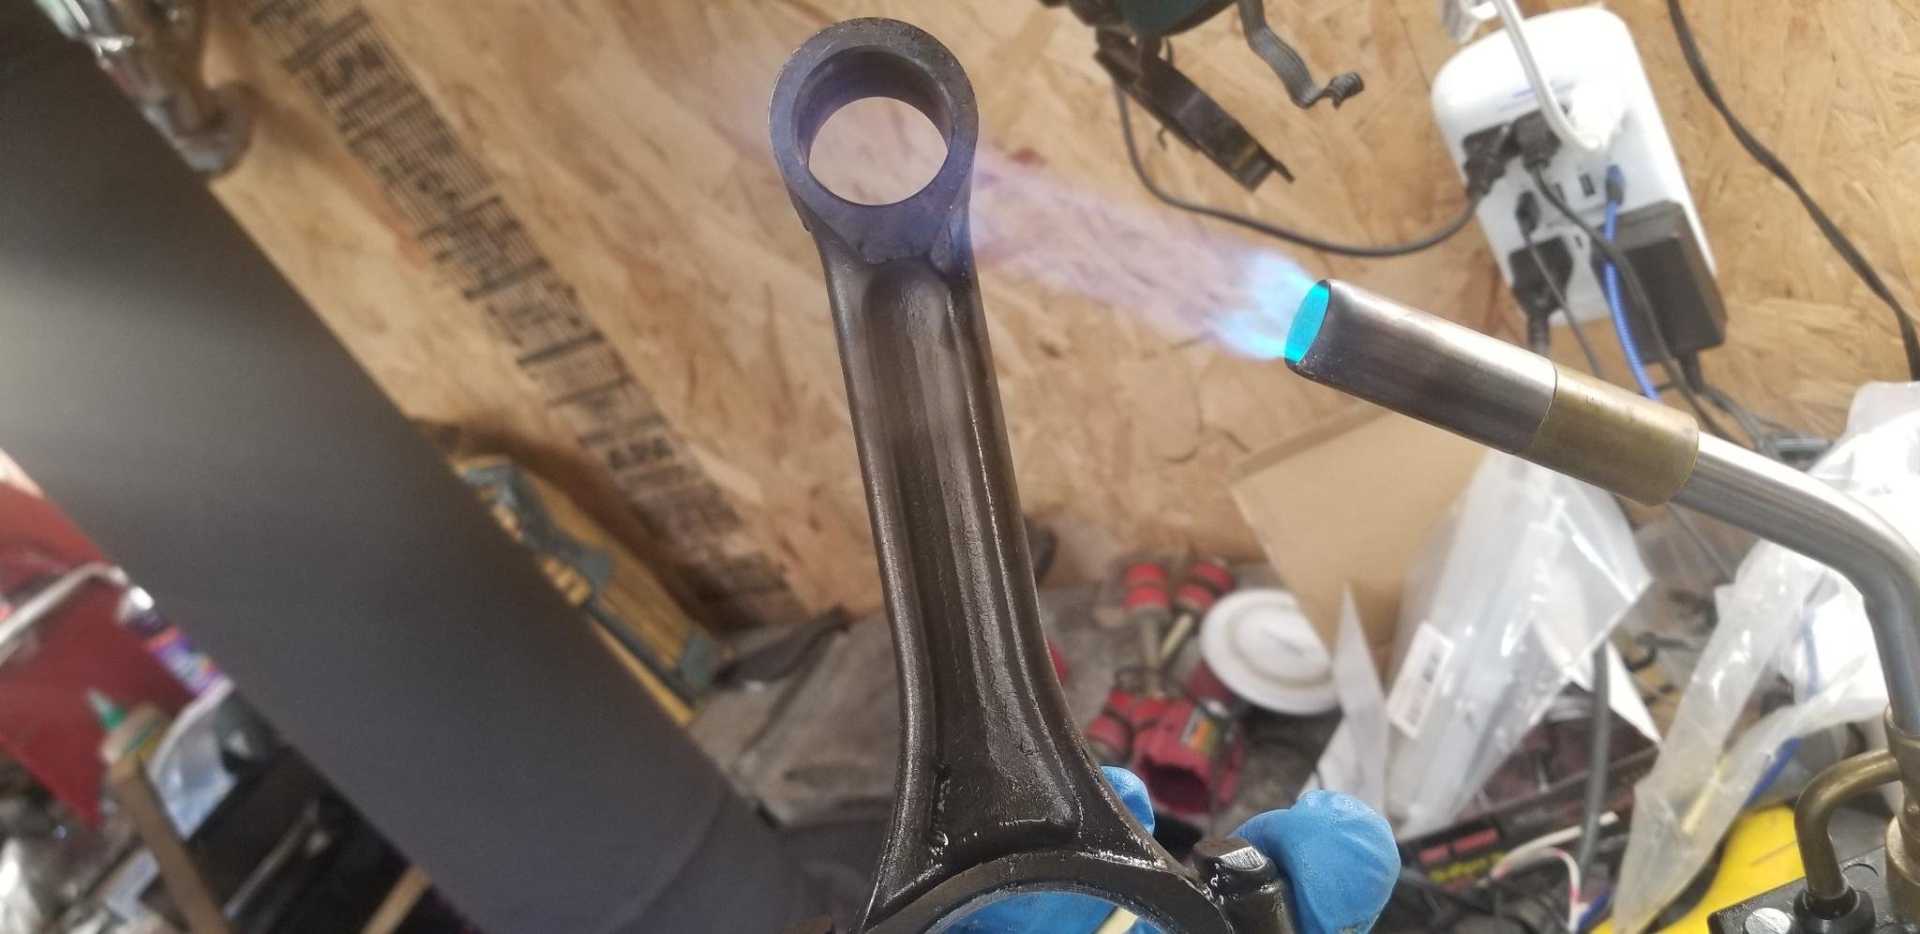
The best way to install press fit pistons it by heating the small end of the rod to expand the hole. Prelube the pin holes in the piston with assembly lube and start the pin on one side.
Make sure you have your rod/piston oriented correctly. I like to write on the caps with a sharpie while they are still installed.
Heat the metal until it turns a light tan color. If it turns blue you have too much heat in it. I find another easy way to tell on used rods is to watch the "dry" area where the oil cooks out of the metal. When it's about halfway down the skinny part of the rod you're ready to go. You can see it in this picture.
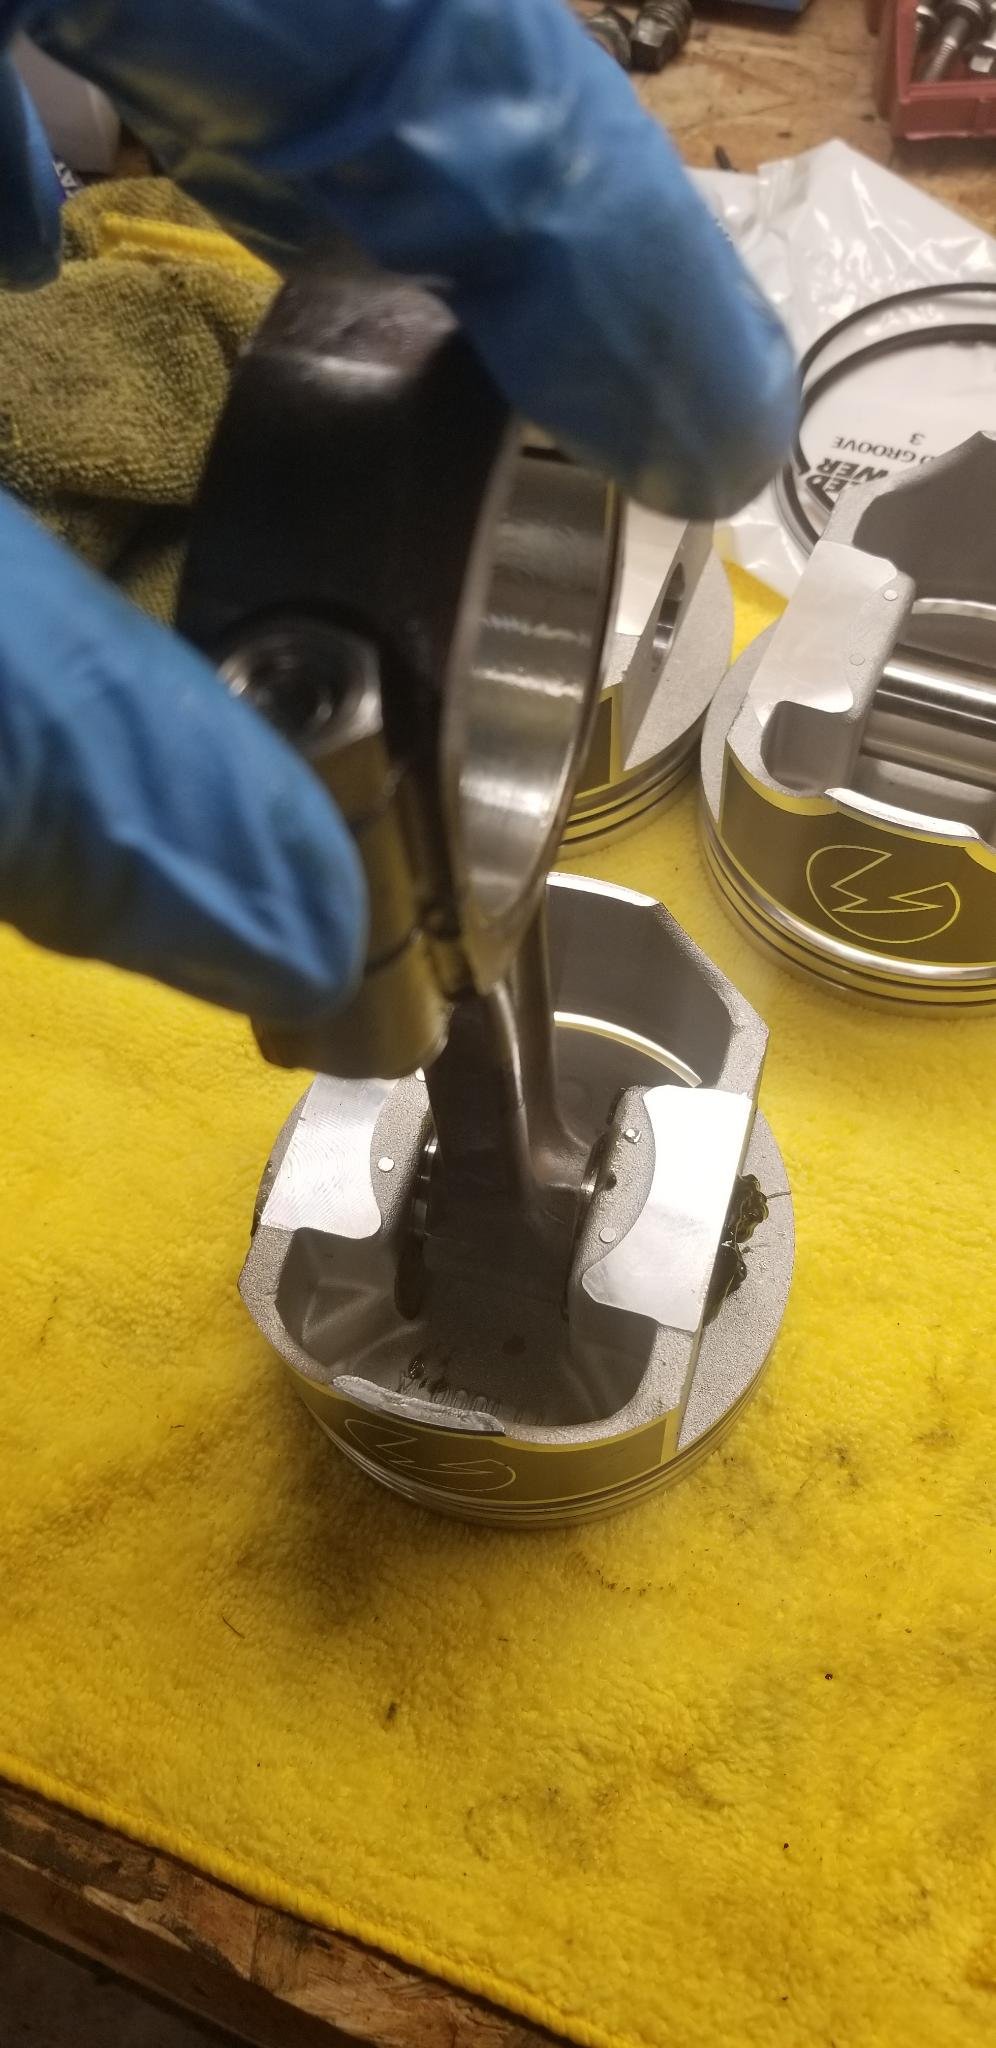
Double check your cap mark, stick the small end into the piston and press the pin through with your finger. You have about 2-3 seconds to do this before the pin locks into place. Some guys make a jig to do this so they don't go to far, but I've got a pretty good feel for it. If you mess up and have a press, you can make a adjustment once the rod cools. They don't have to be exact down to the thousands, you just want full engagement when the rod is centered.
I recommend installing your oil control rings onto the pistons before installing the pins this way. All that heat is going to transfer into the piston and the rest of the rod. You generally put oil rings on by hand, and use an expander for compression rings. Putting oil rings onto a hot piston isn't much fun. The compression rings are easy.
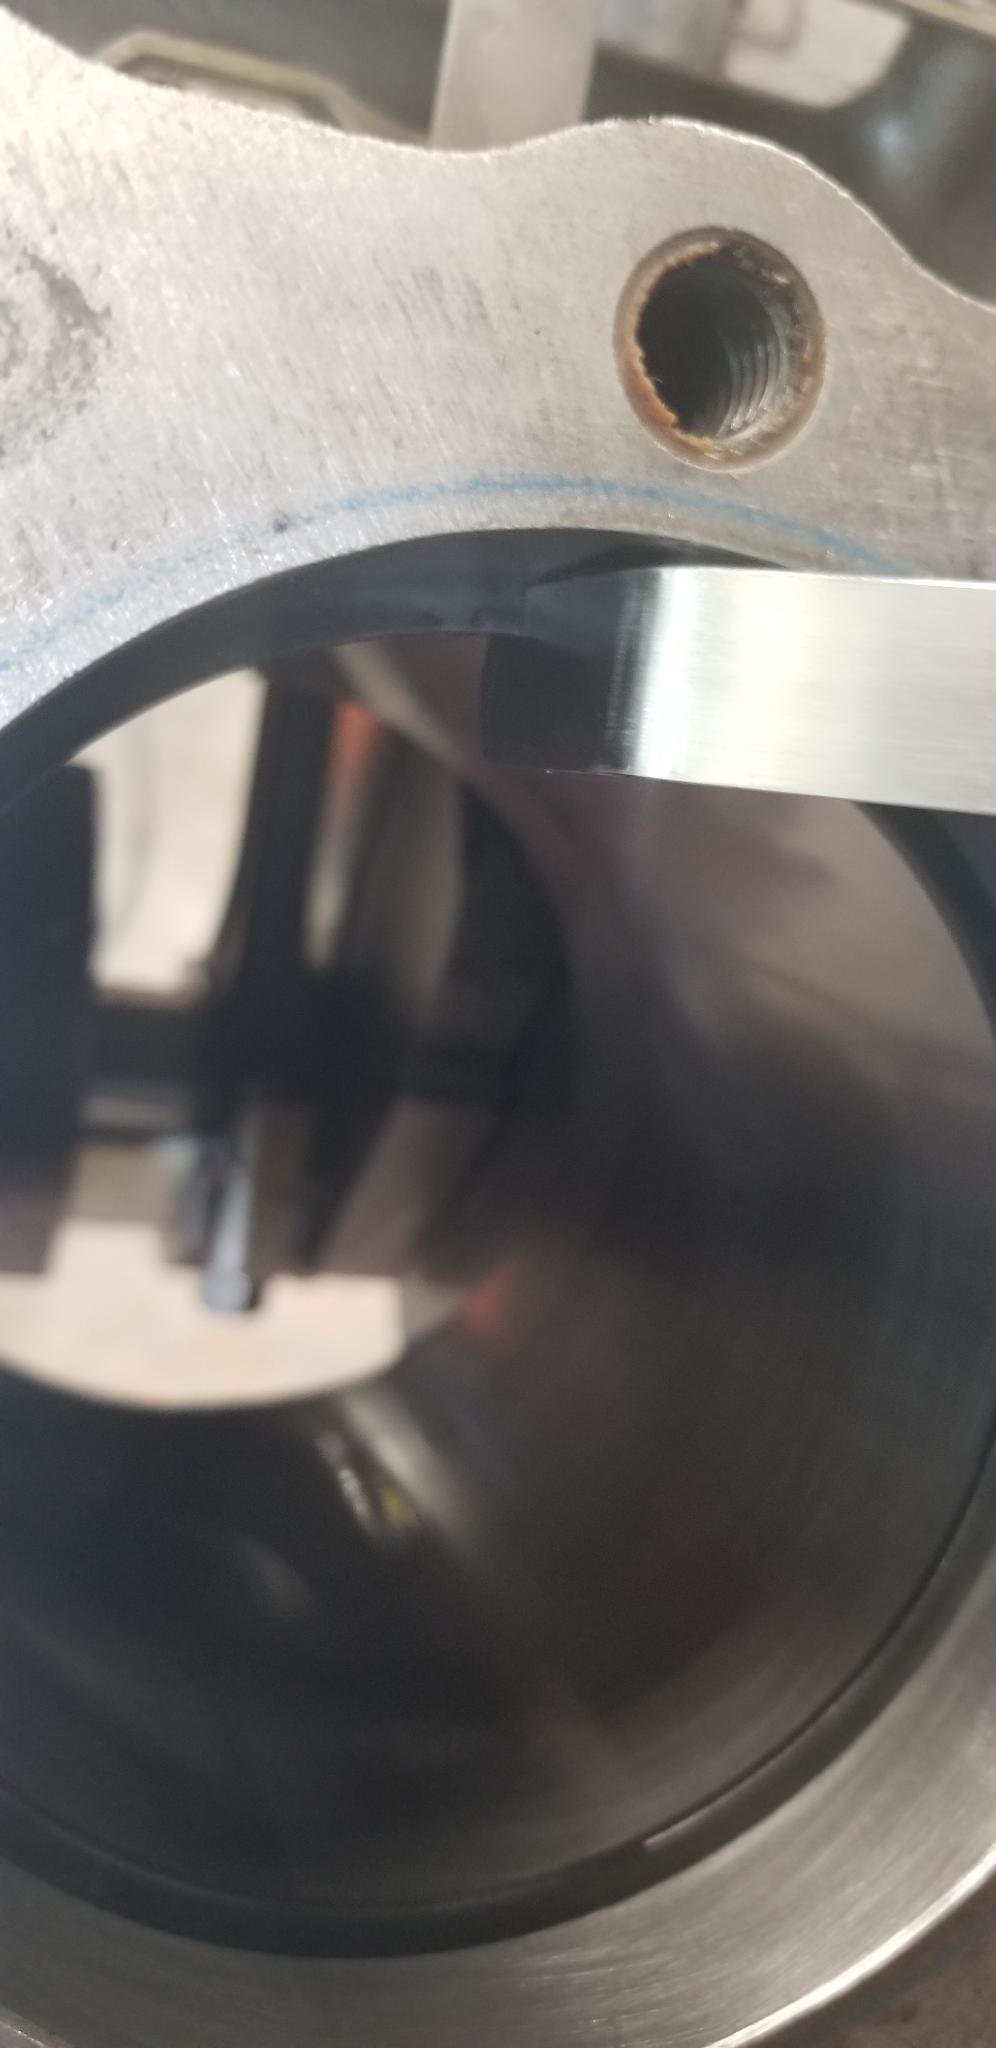
While you wait for your piston to cool, check ring gap. Insert the ring into the bore.
Use an old piston with just the oil rings on as a squaring tool. Push the ring down into the bore with the piston until it stops.
Now check your ring gap. I set mine a little loose (.022-.025) in case I decide to do silly boost things to this engine later. The ring set I bought was already close. I think I needed to file 2 of them.
Install compression rings, put the piston into your install tool and tap it in.
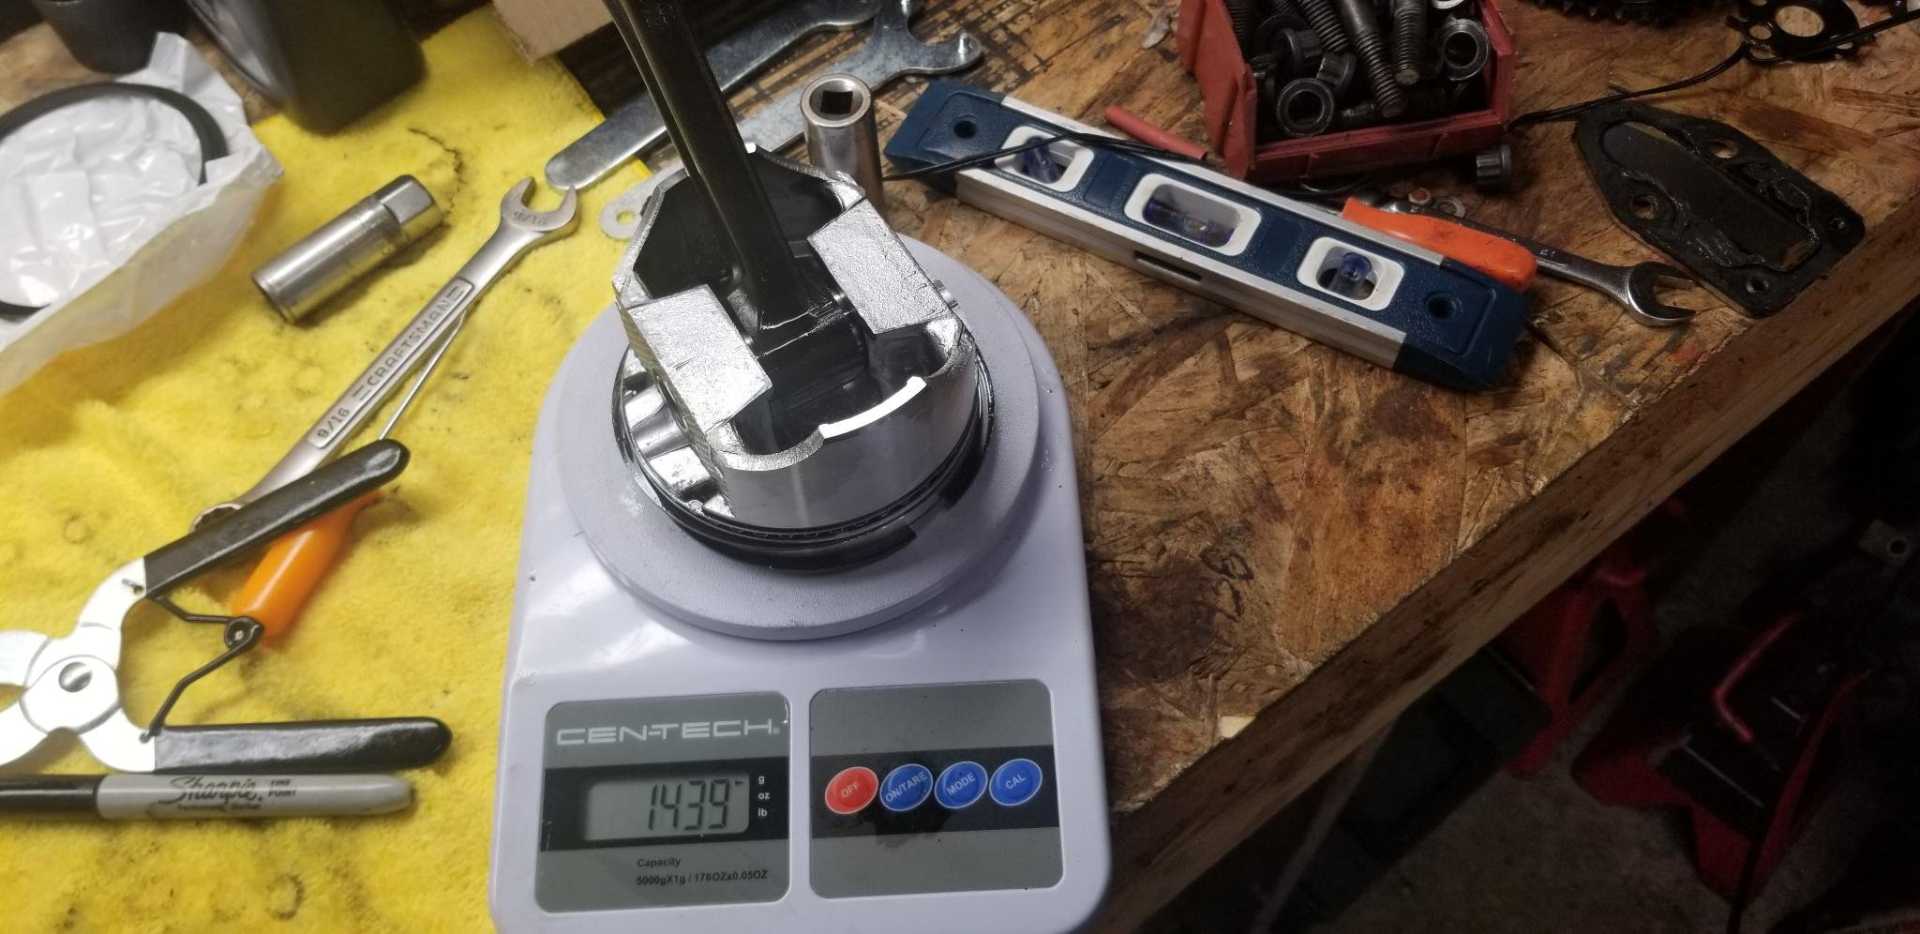
In case anyone was wondering, this is the weight of a piston/rod assembly as the engine came to me, including bearings and rings. With the forged pistons and rings each ended up at 1462 +- 0.5gram. About a 23g gain per cylinder. SHOULD I have had the crank rebalanced? Probably. But this is a street engine that isn't going to see 6000RPM much. We should be ok.
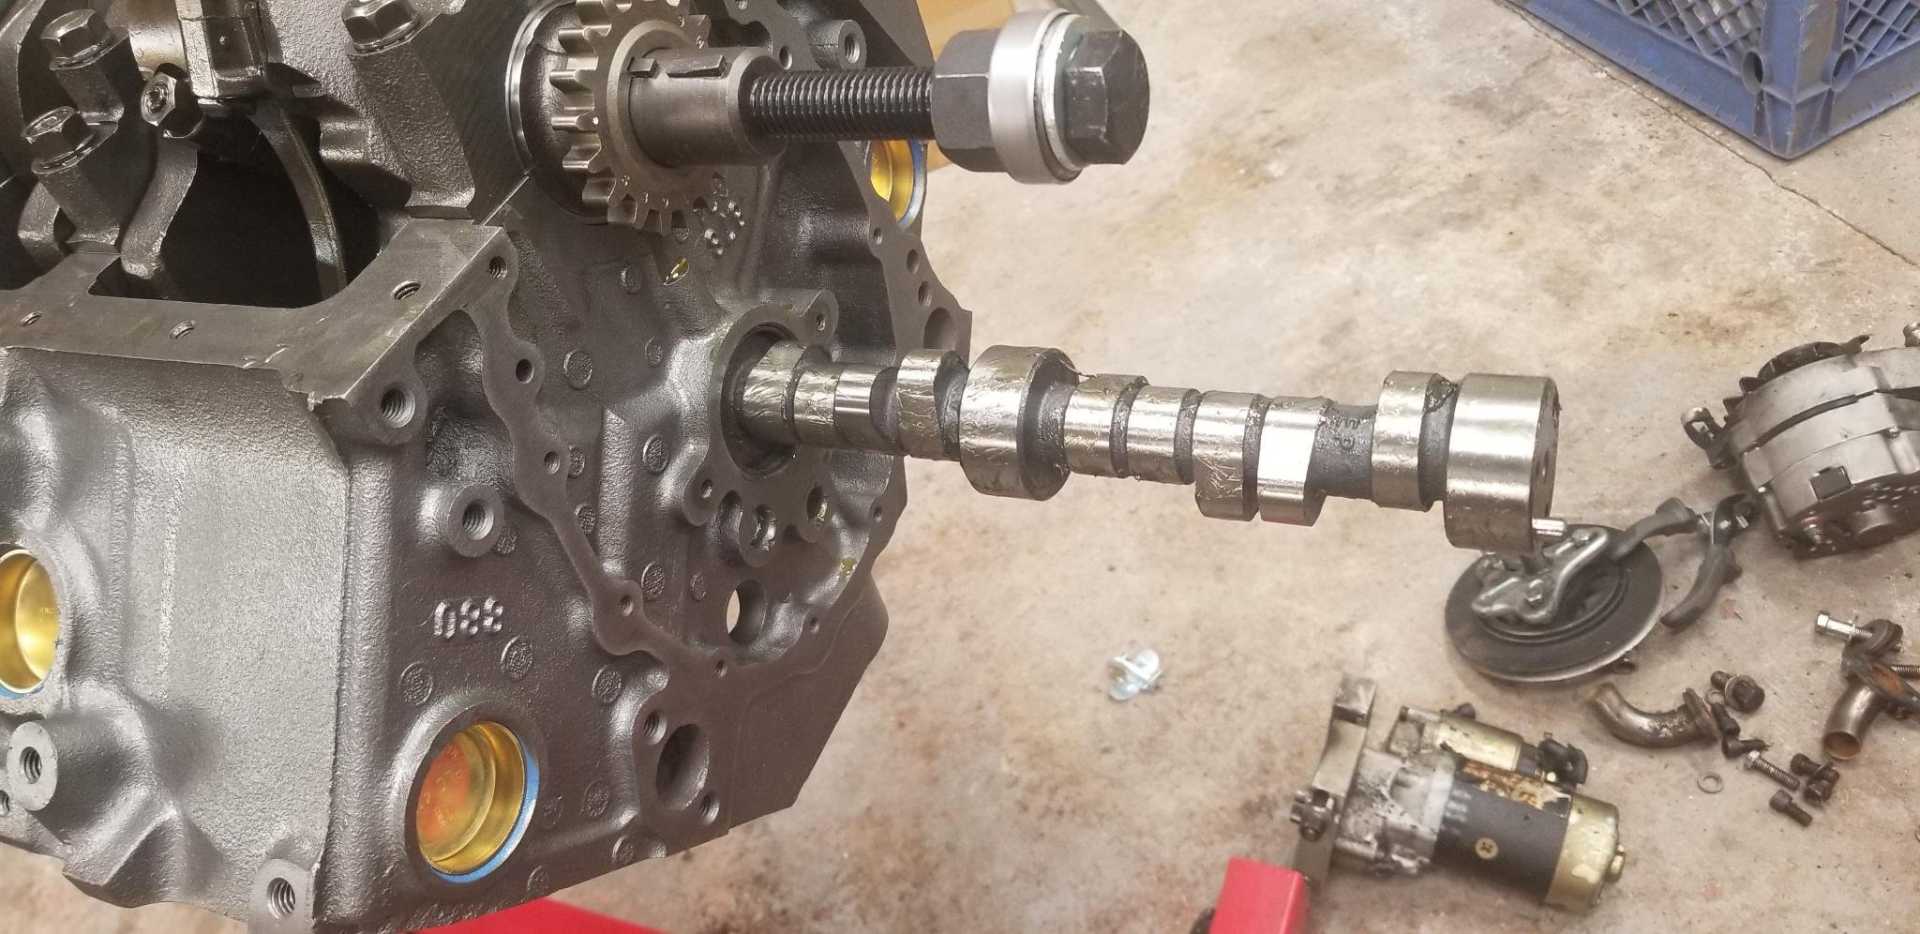
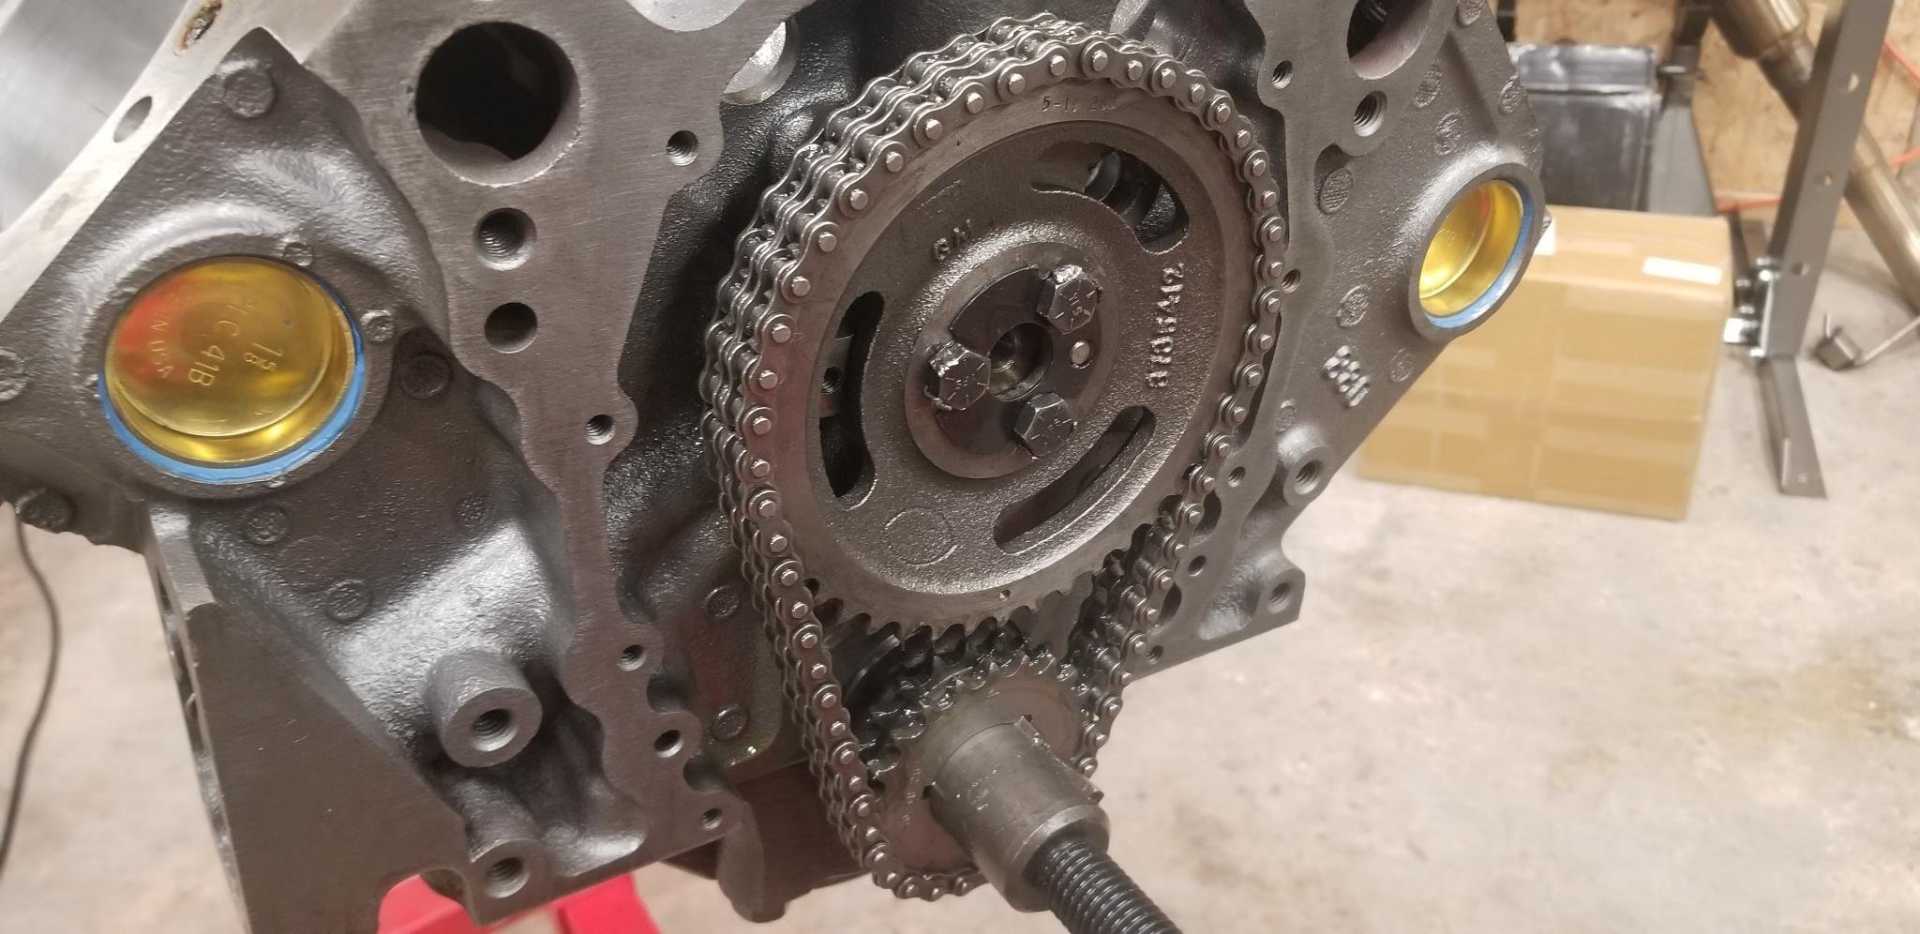
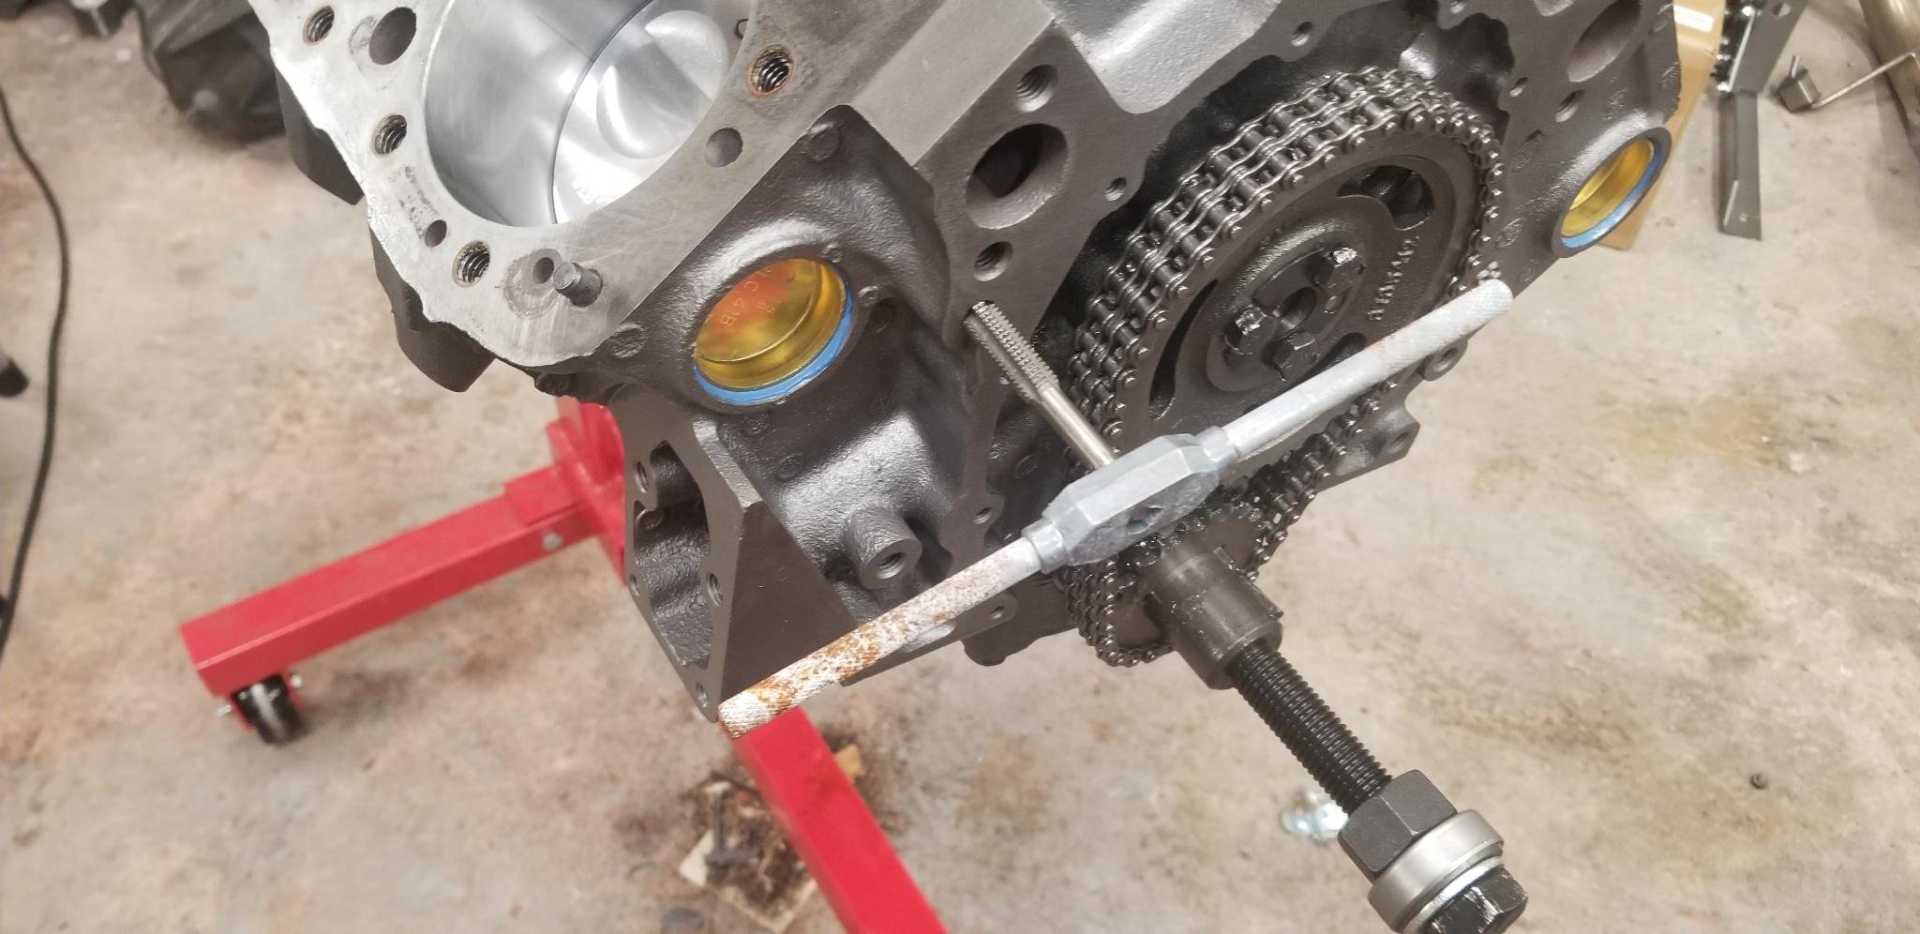
Let's yank out the stock cam and install our lumpy one.
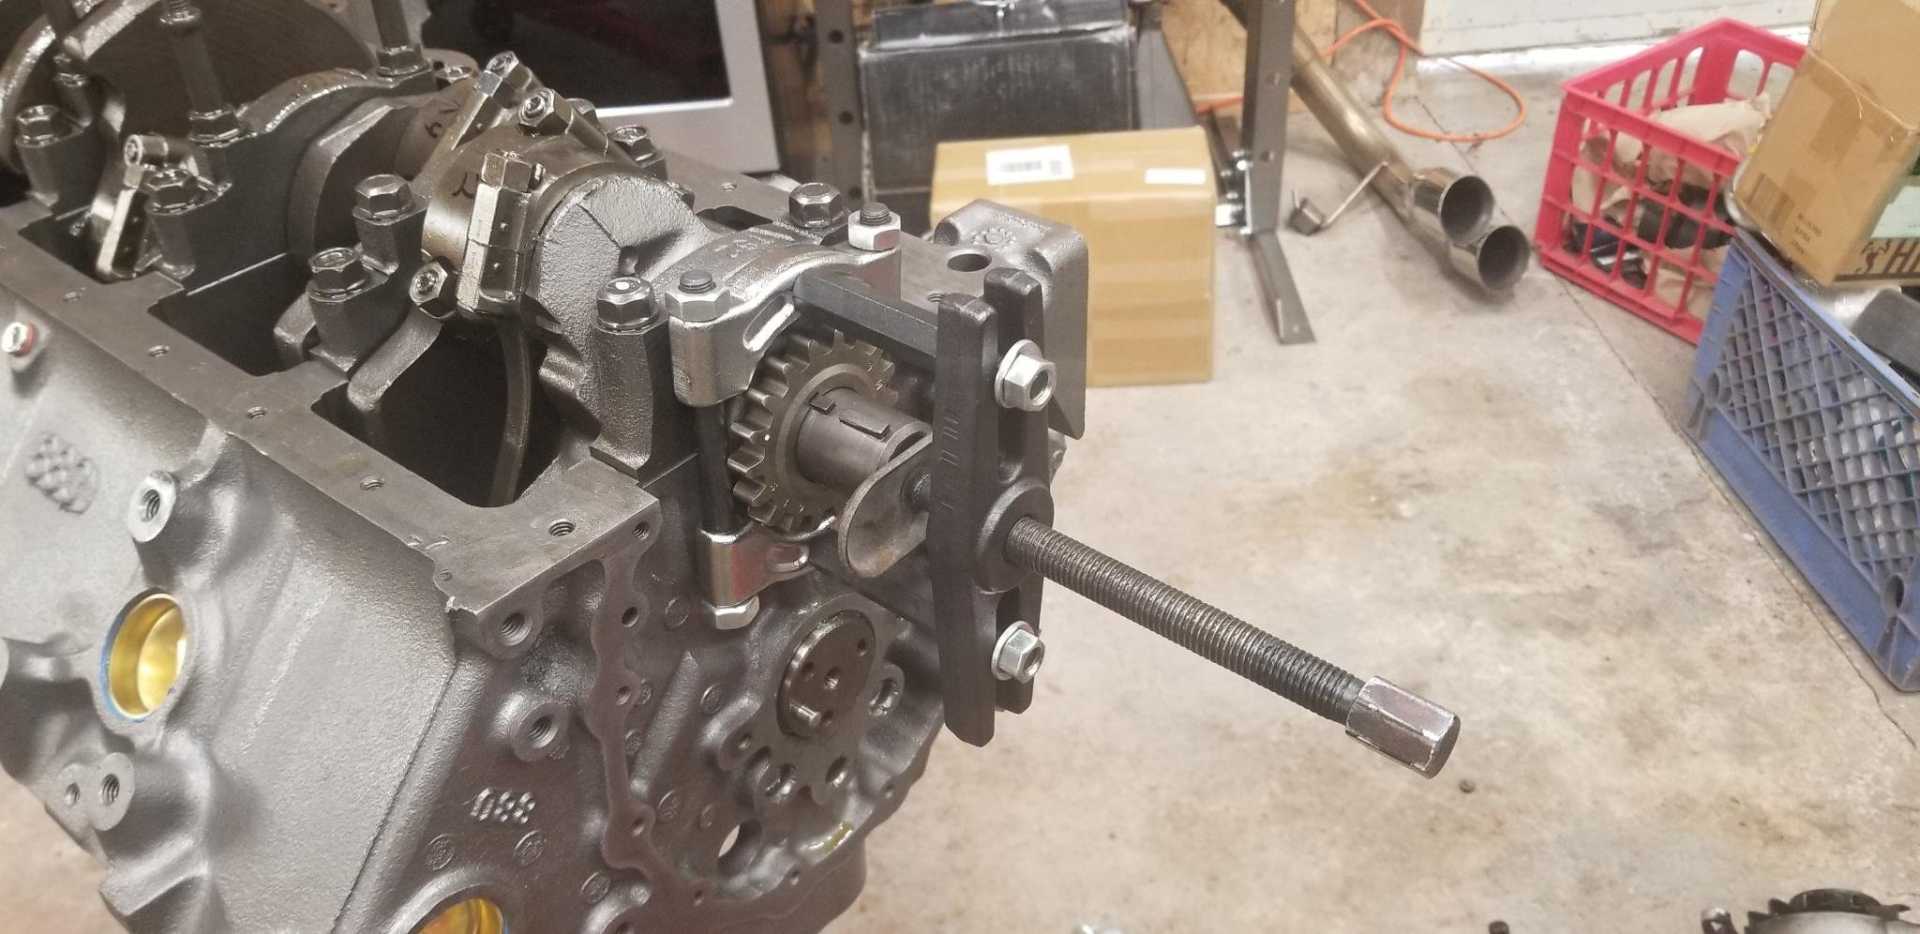
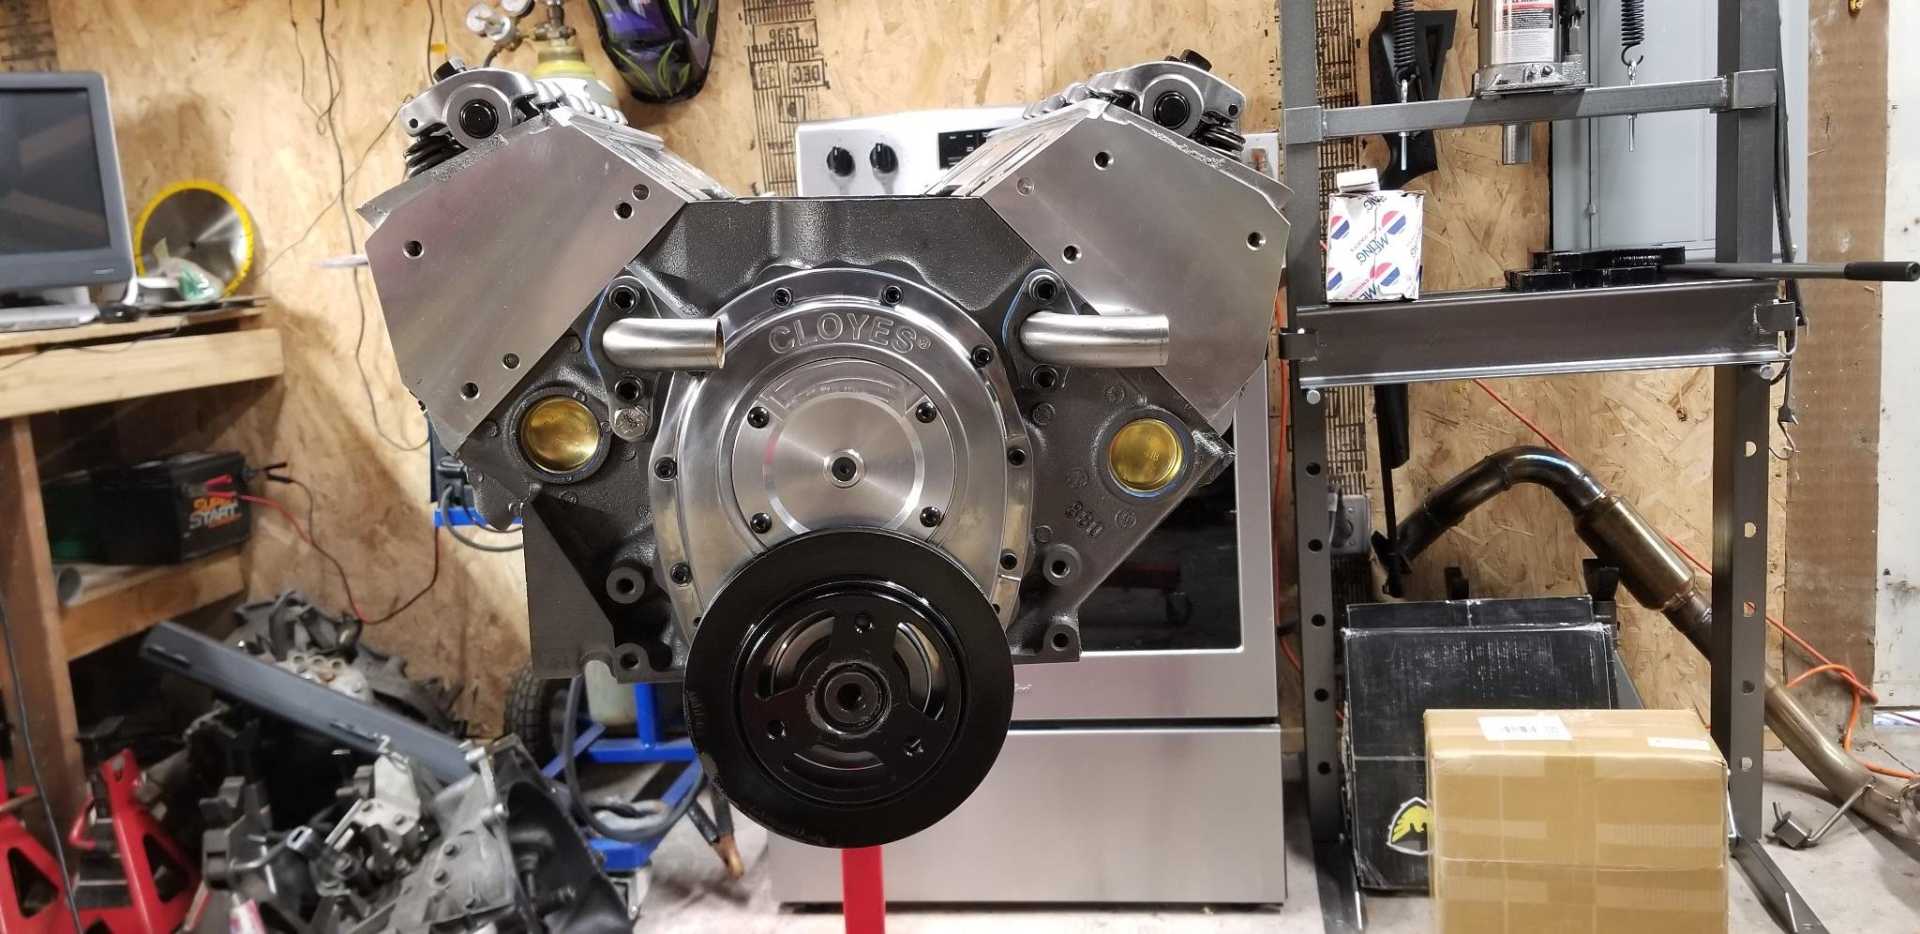
Converting to an older style double roller timing set. My 3 jaw pulled is apparently a 2 jaw puller now, but a split bearing puller fits.
The new crank sprocket can be heated to install, or you can grease the crank snout with assembly lube and tap it on with a large socket and a deadblow hammer. It should go on most of the way by hand.
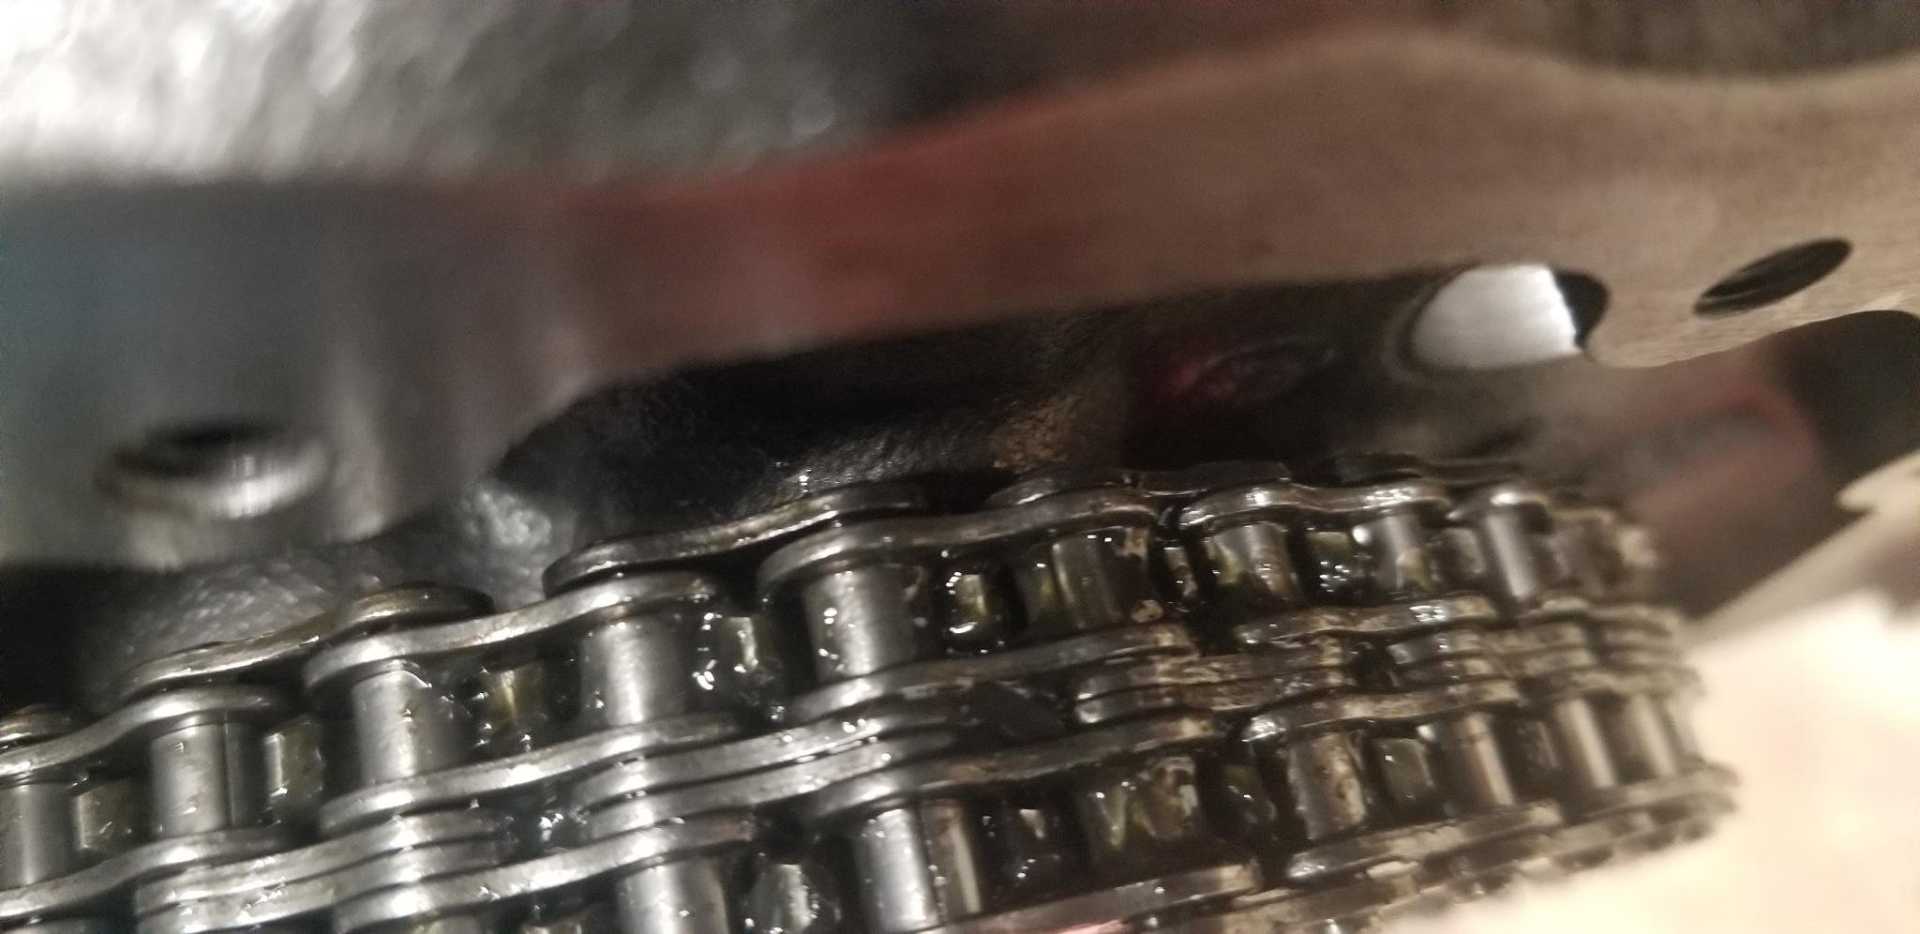
Since I'm converting the timing set, I have to check clearance to the top oil galley boss. Sometimes you have to grind a bit off here. Can't really get a feeler gauge in there, so I put some grease on it, then installed the came sprocket and gave it a few turns while pushing inwards on it. Afterwards I still had grease on the boss, so there's no contact.
I'm running a remote electric water pump, so this hole needs to be tapped and plugged, or we'll have a coolant fountain. 7/16-14 threaded bolt does the trick. You could also drill and tap to 3/8 NPT for a plug, but I didn't have a tap for that and no one local had one.
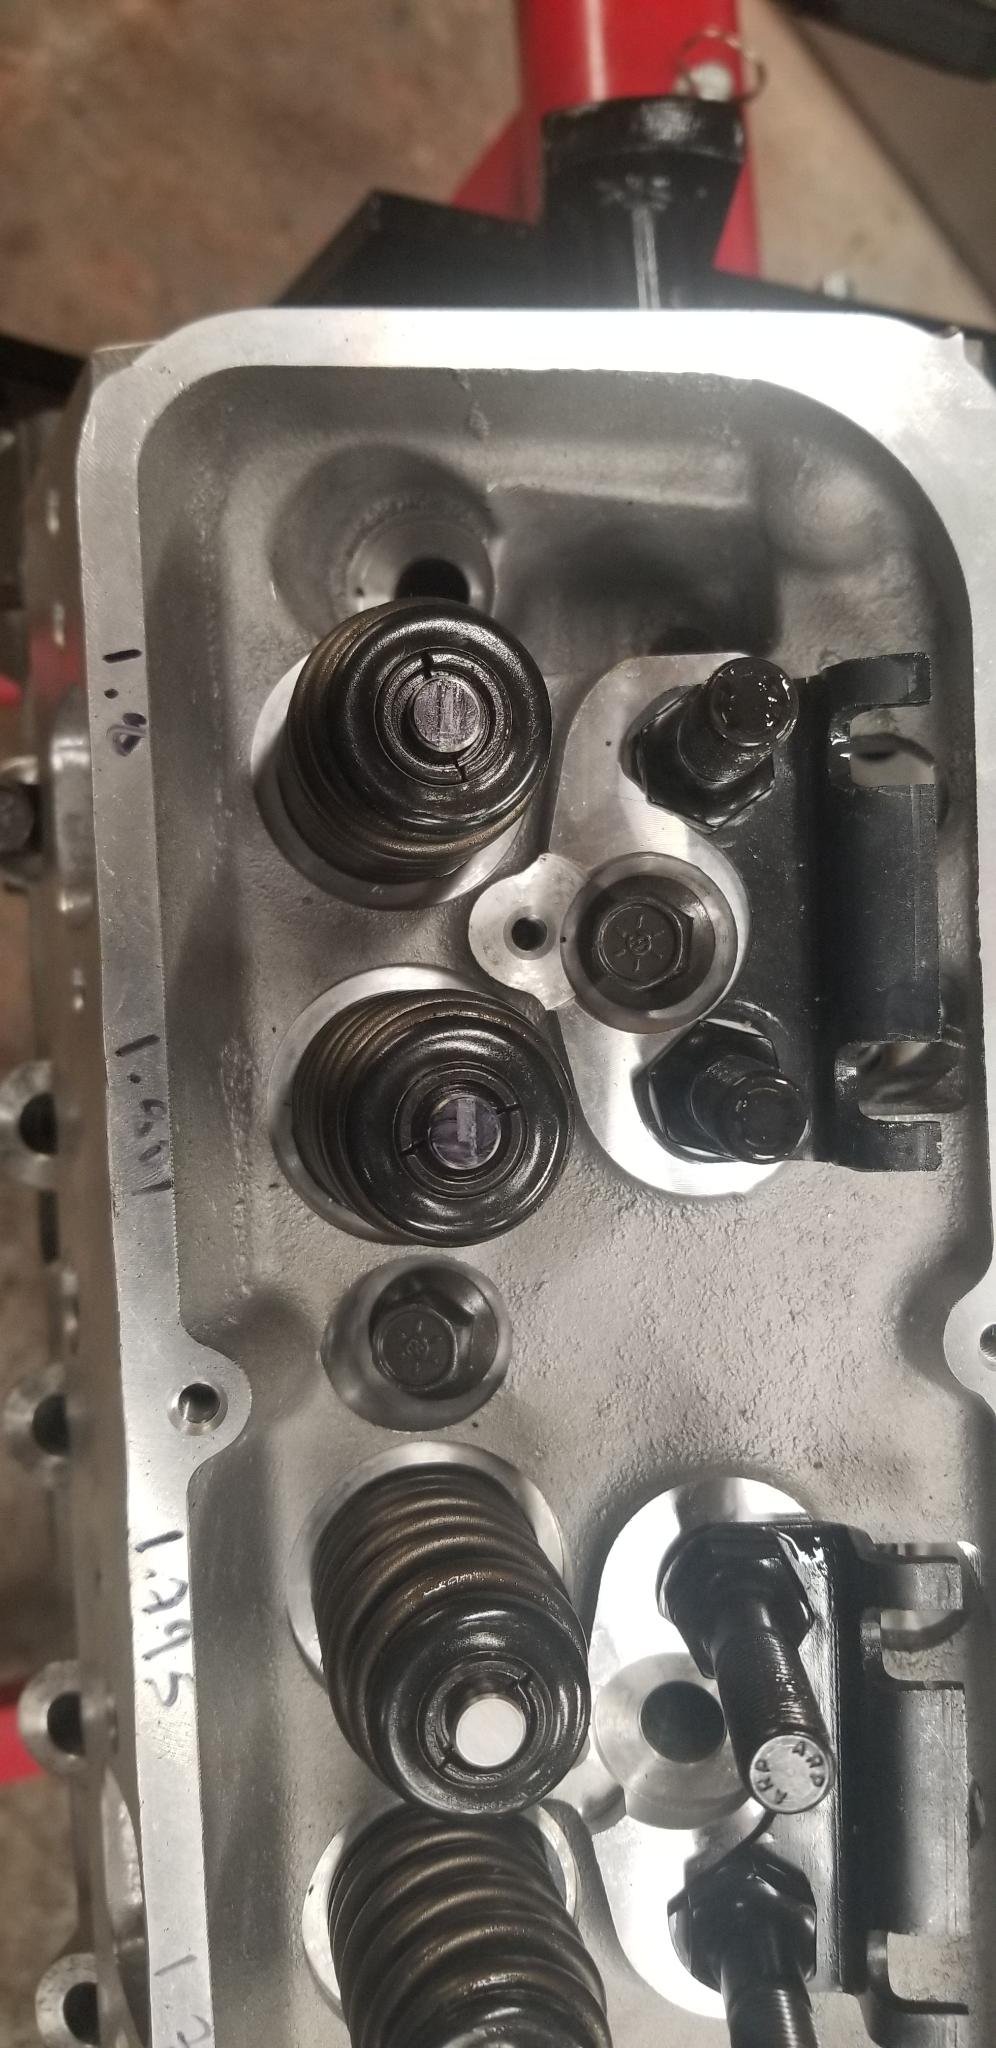
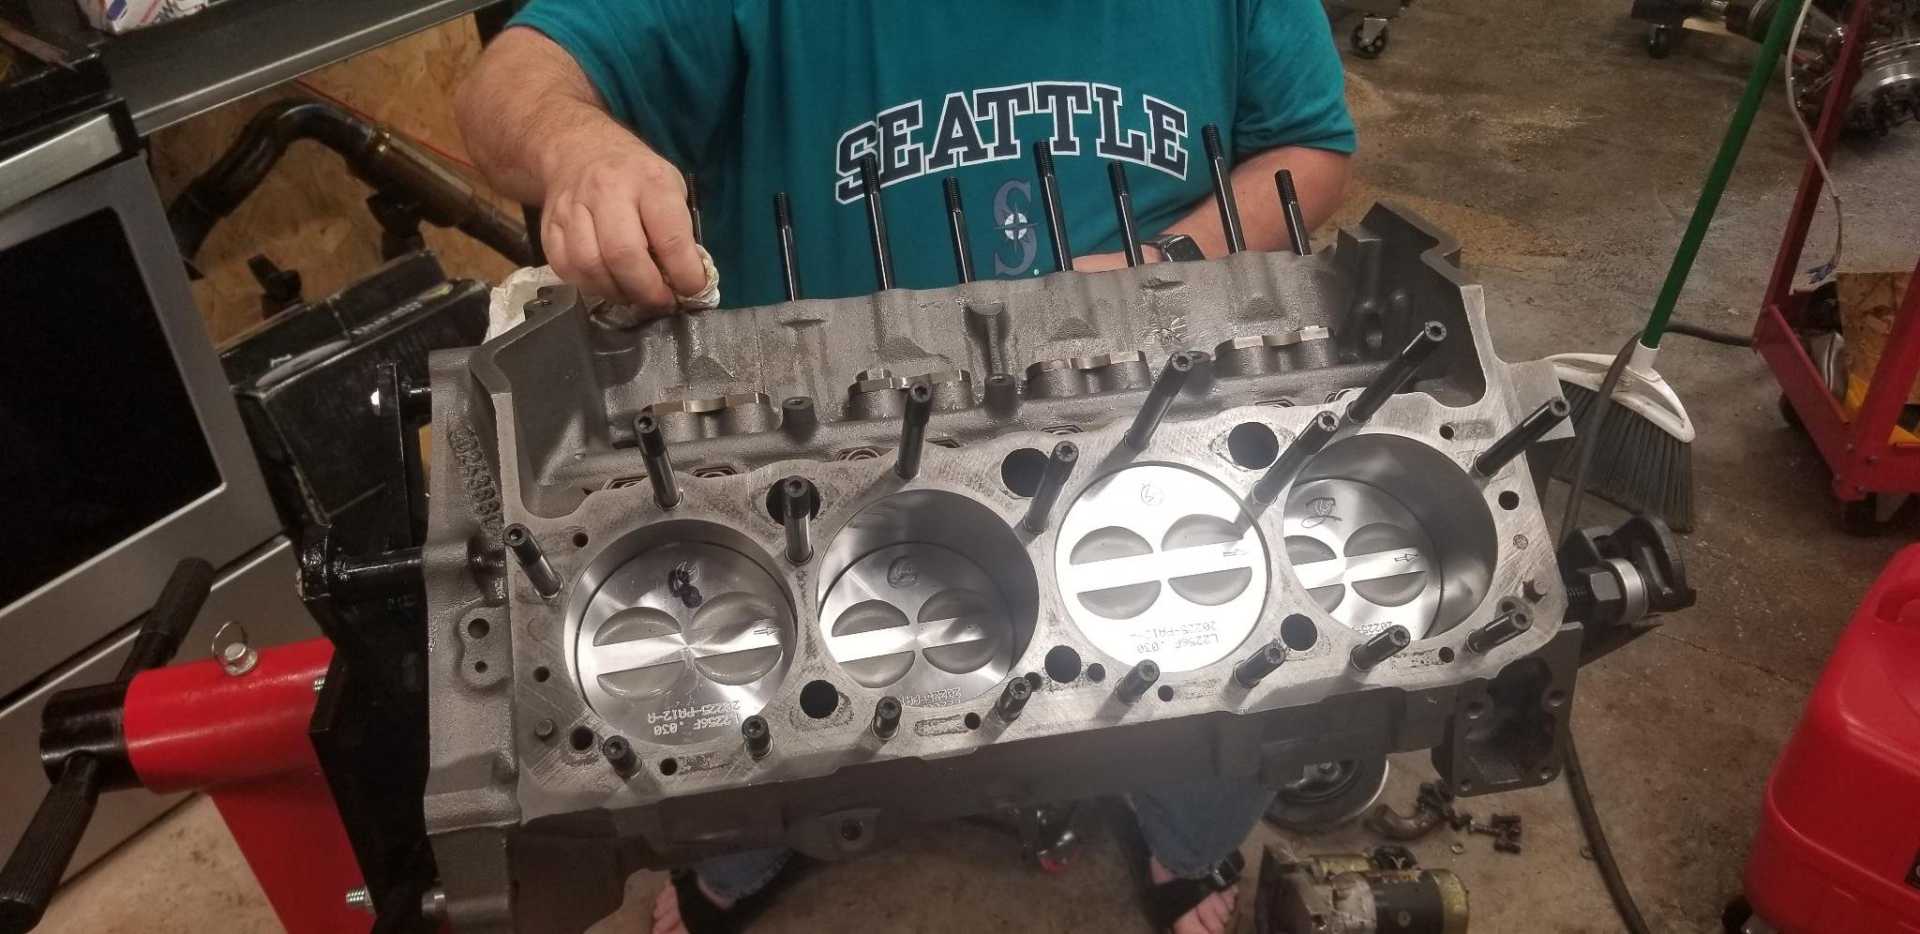
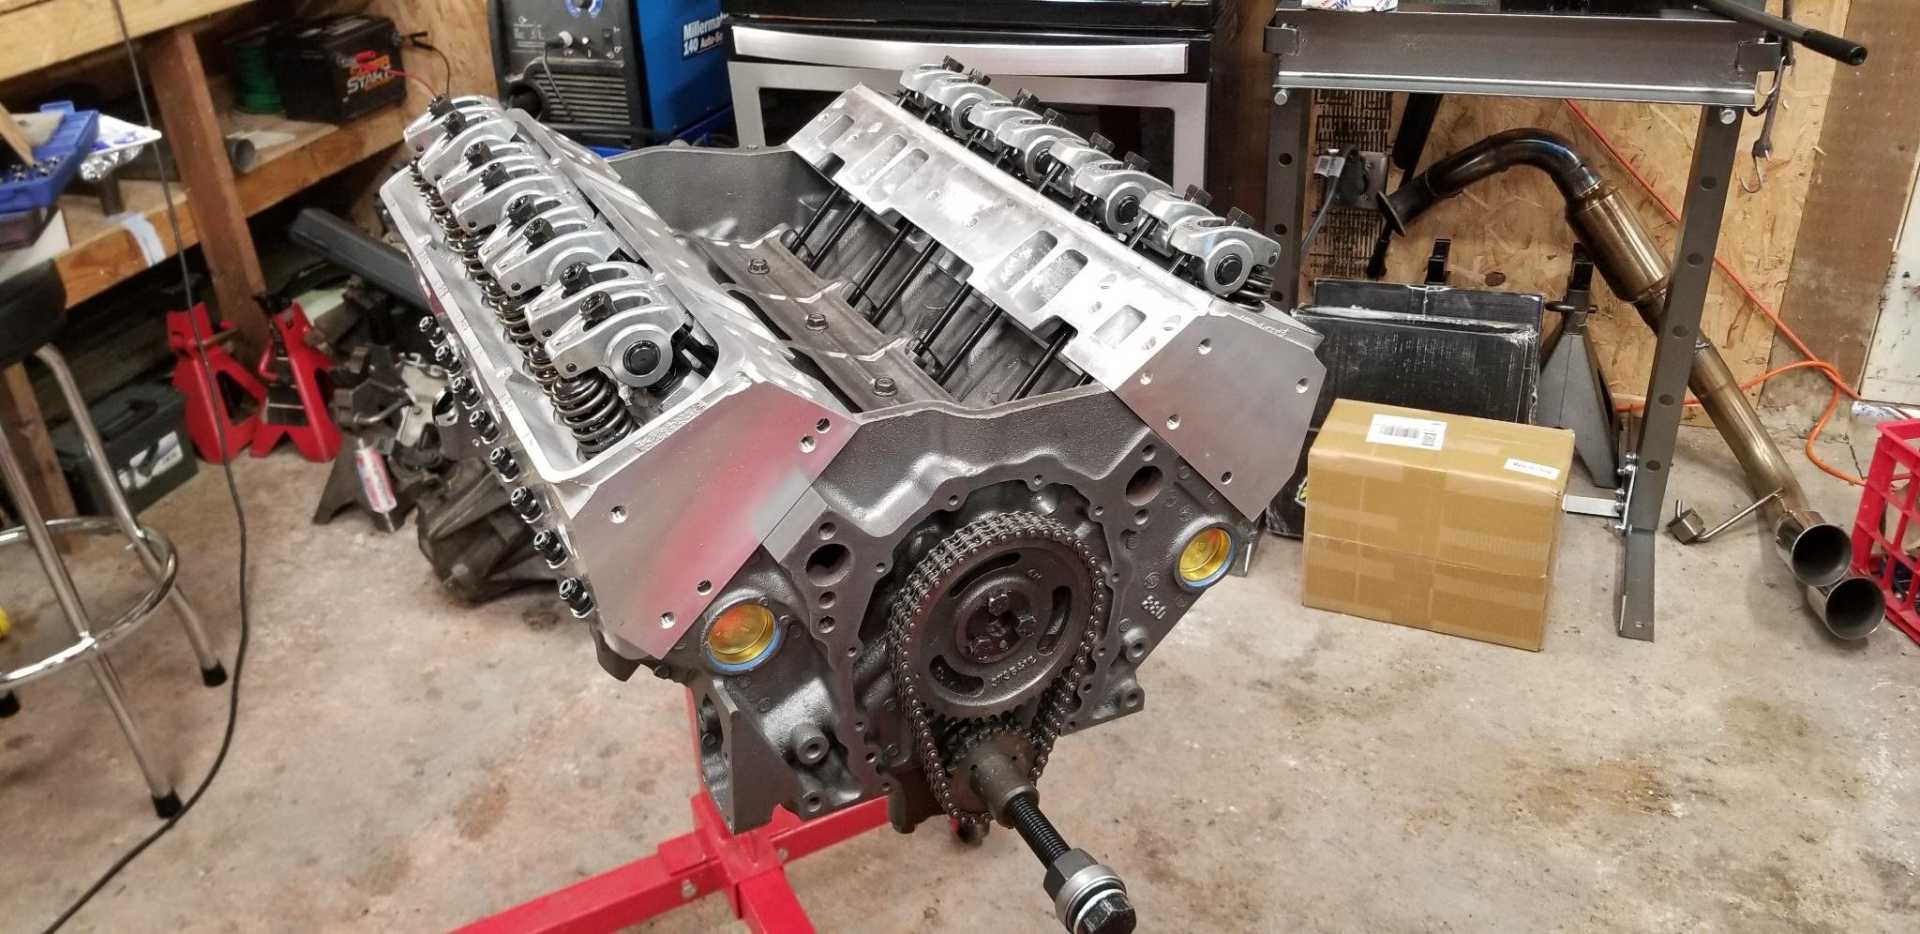
Dropped a head on with a gasket and a couple bolts snugged down. Checked valvetrain geometry and piston to valve clearance. Didn't get pics of the process because my hands were covered in home-made playdough and oil. Lots of internet reading on how to do this though. Note the centered wear marks on the valve tips (good geometry!). The second pic is my PTV clearance.
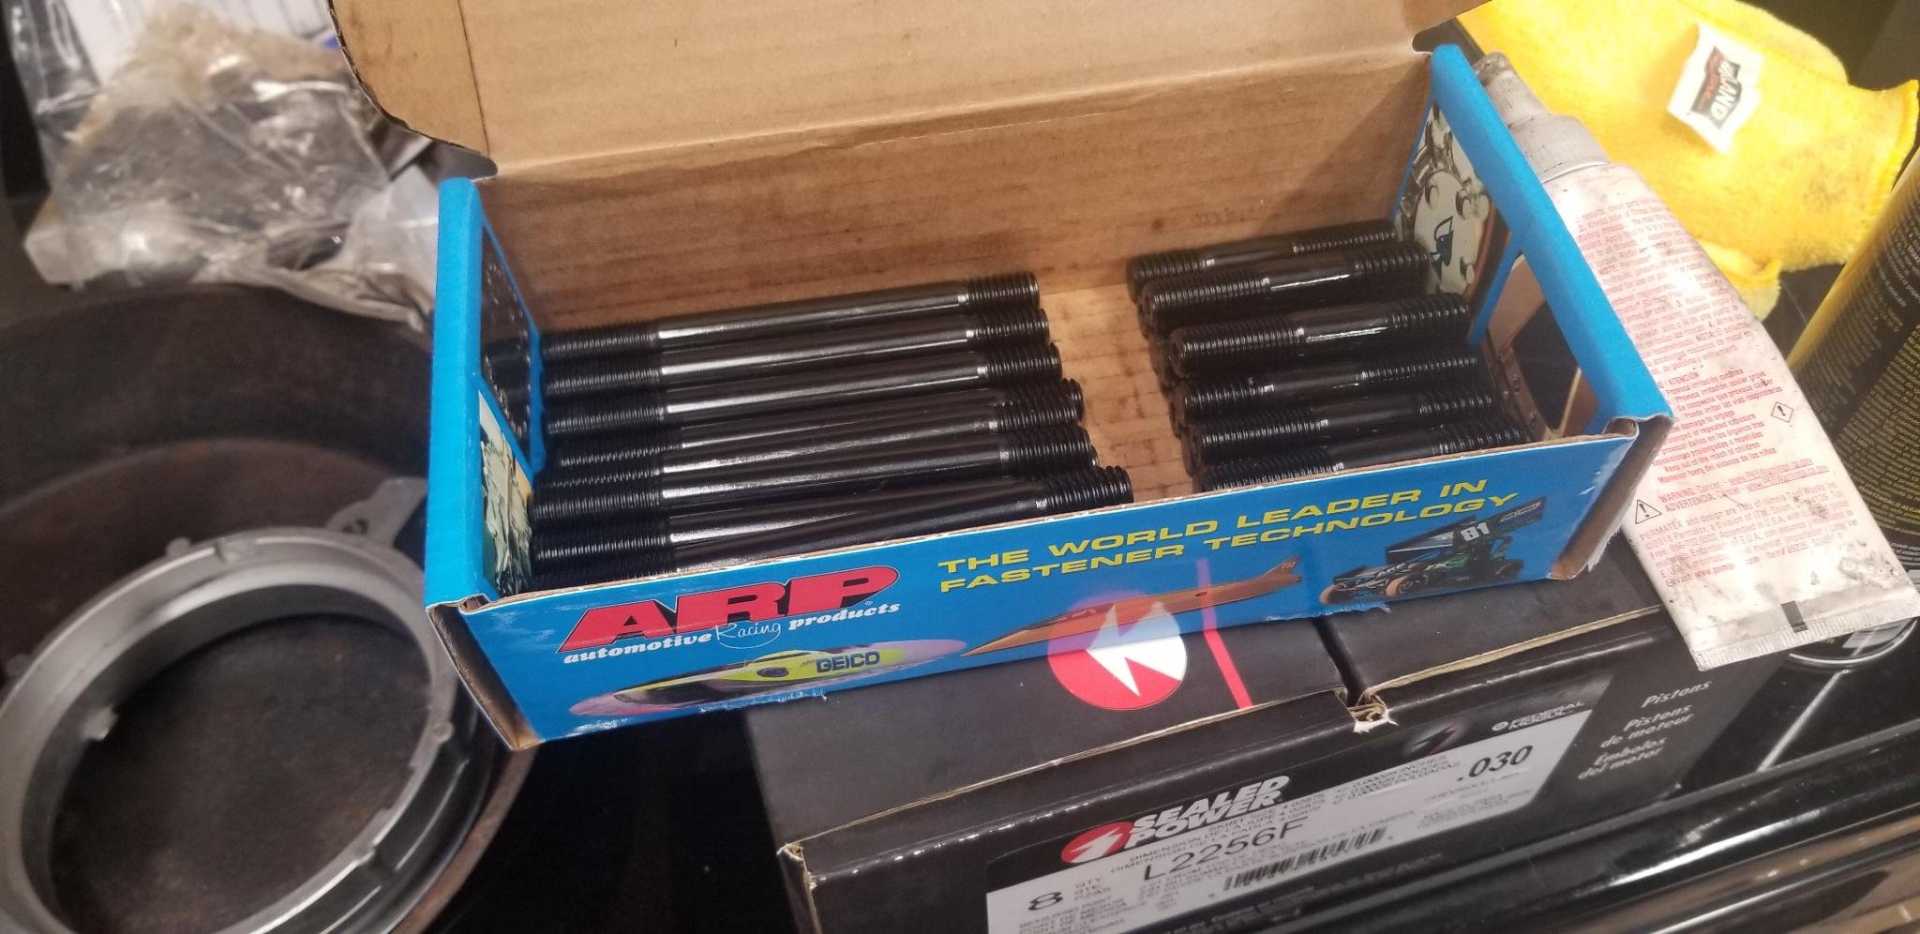
Real ARP studs this time...
Buddy came by yesterday. An extra set of hands is always welcome.
All torqued down.
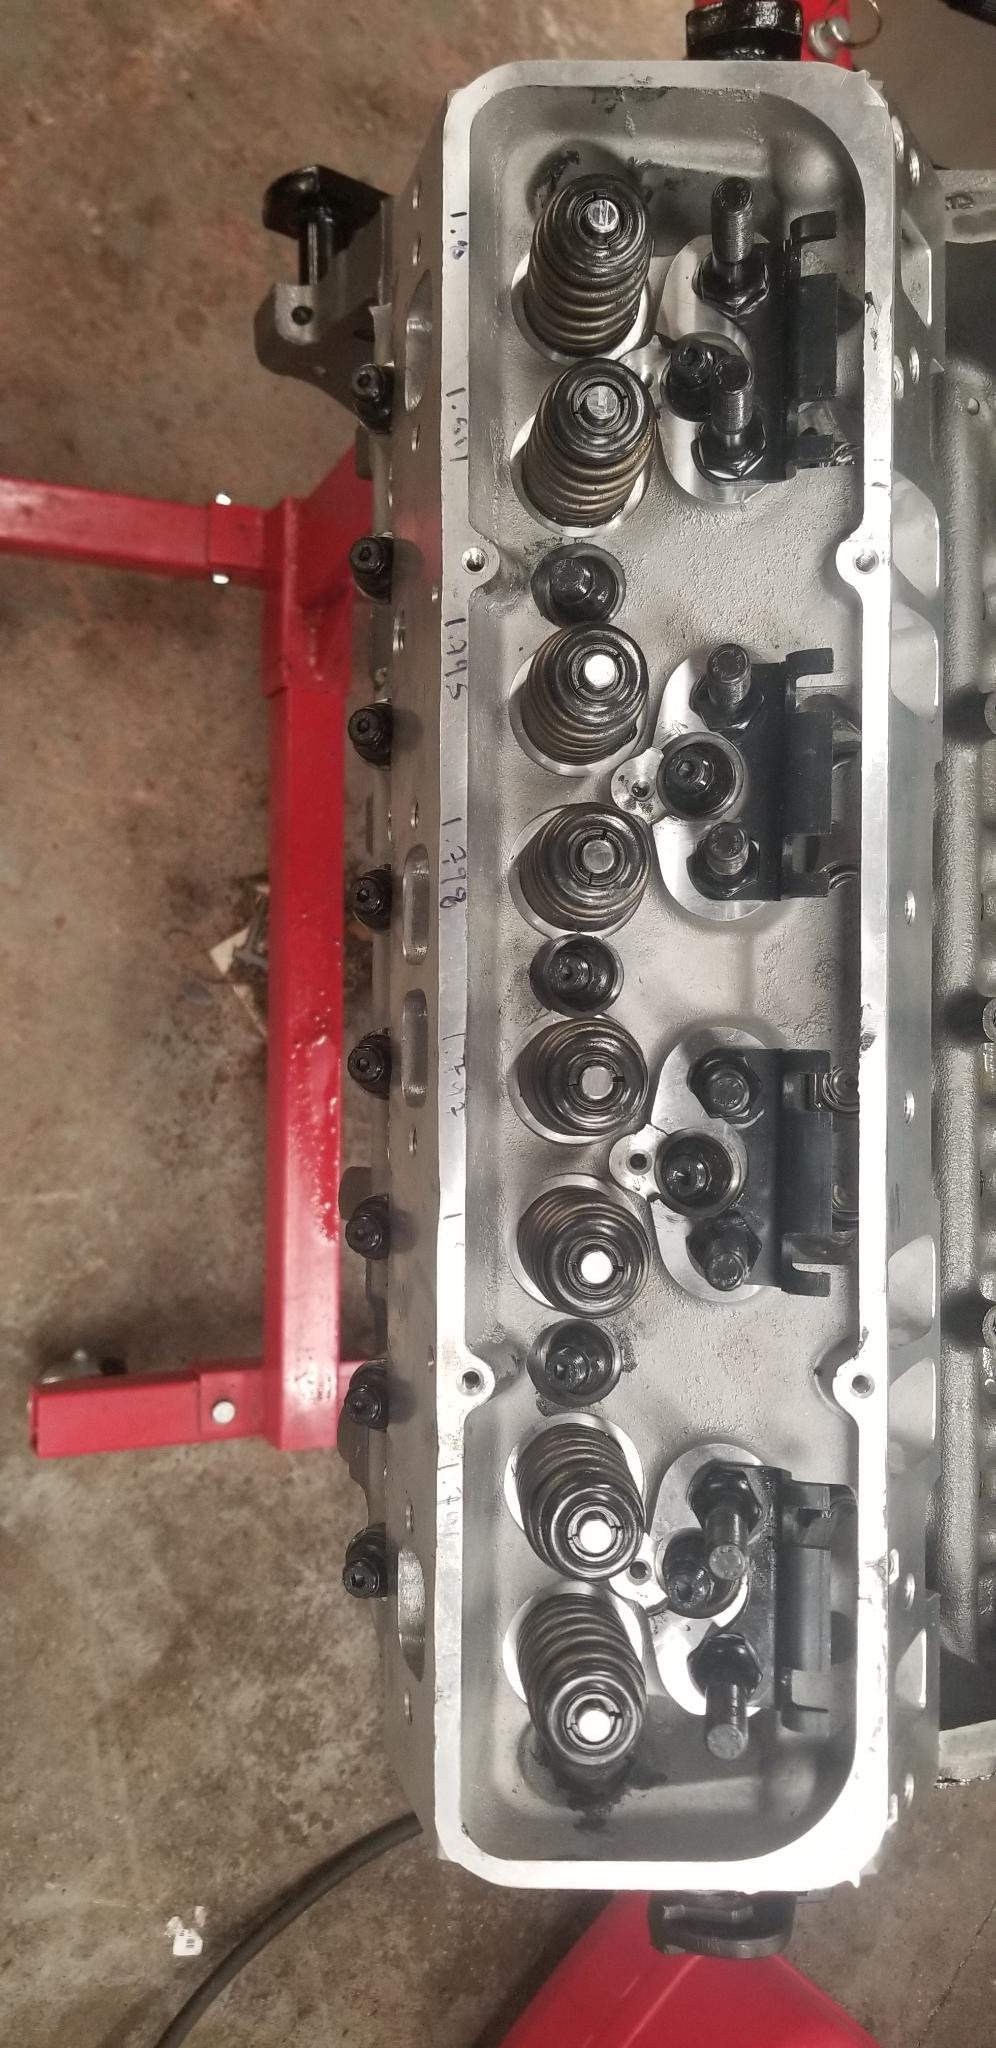
Put the rockers on and set lifter preload. That's where we left it yesterday. Need a couple parts to show up to finish it off.
[This message has been edited by fishsticks (edited 06-14-2021).]
I'm running a remote electric water pump, so this hole needs to be tapped and plugged, or we'll have a coolant fountain. 7/16-14 threaded bolt does the trick. You could also drill and tap to 3/8 NPT for a plug, but I didn't have a tap for that and no one local had one.
Pretty sure you can R&R the timing cover without removing the water header. It looks like it would make the packaging relative to the frame rail for the right bank water connection easier.
Pretty sure you can R&R the timing cover without removing the water header. It looks like it would make the packaging relative to the frame rail for the right bank water connection easier.
OK I understand what you mean now. (I had to google what it was in the first place)
Could definitely work but getting a timing light down in there might be tricky.
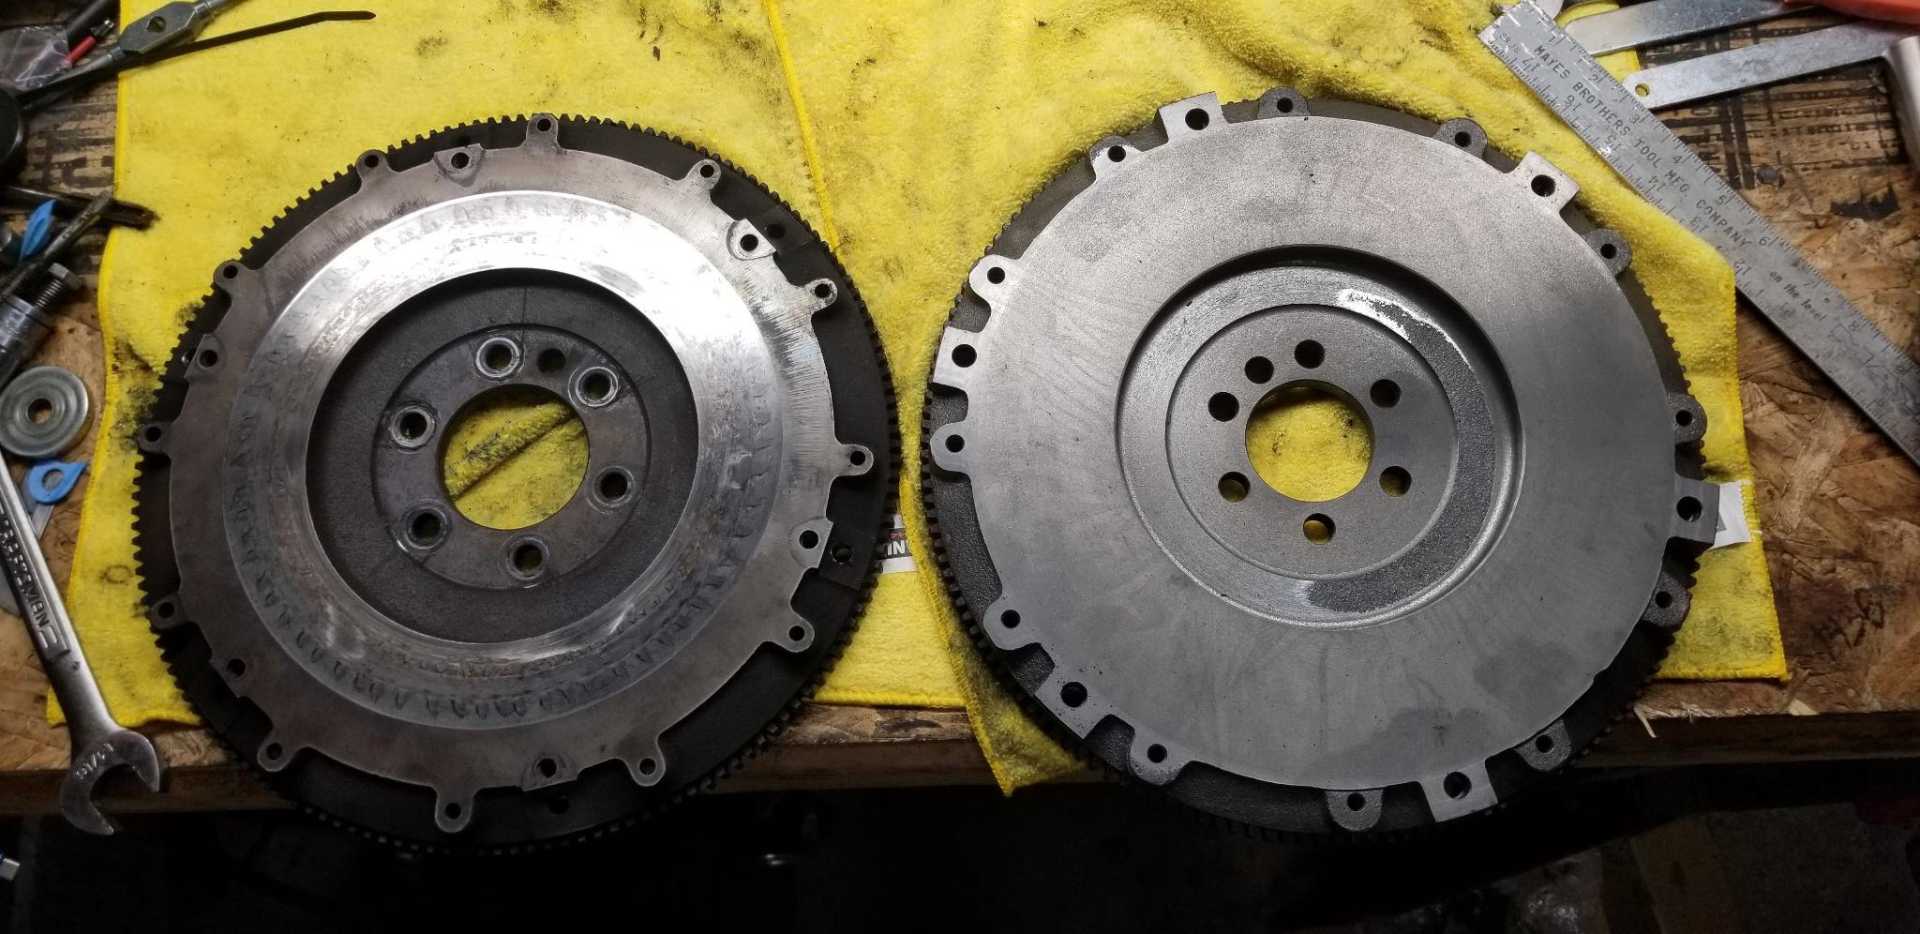
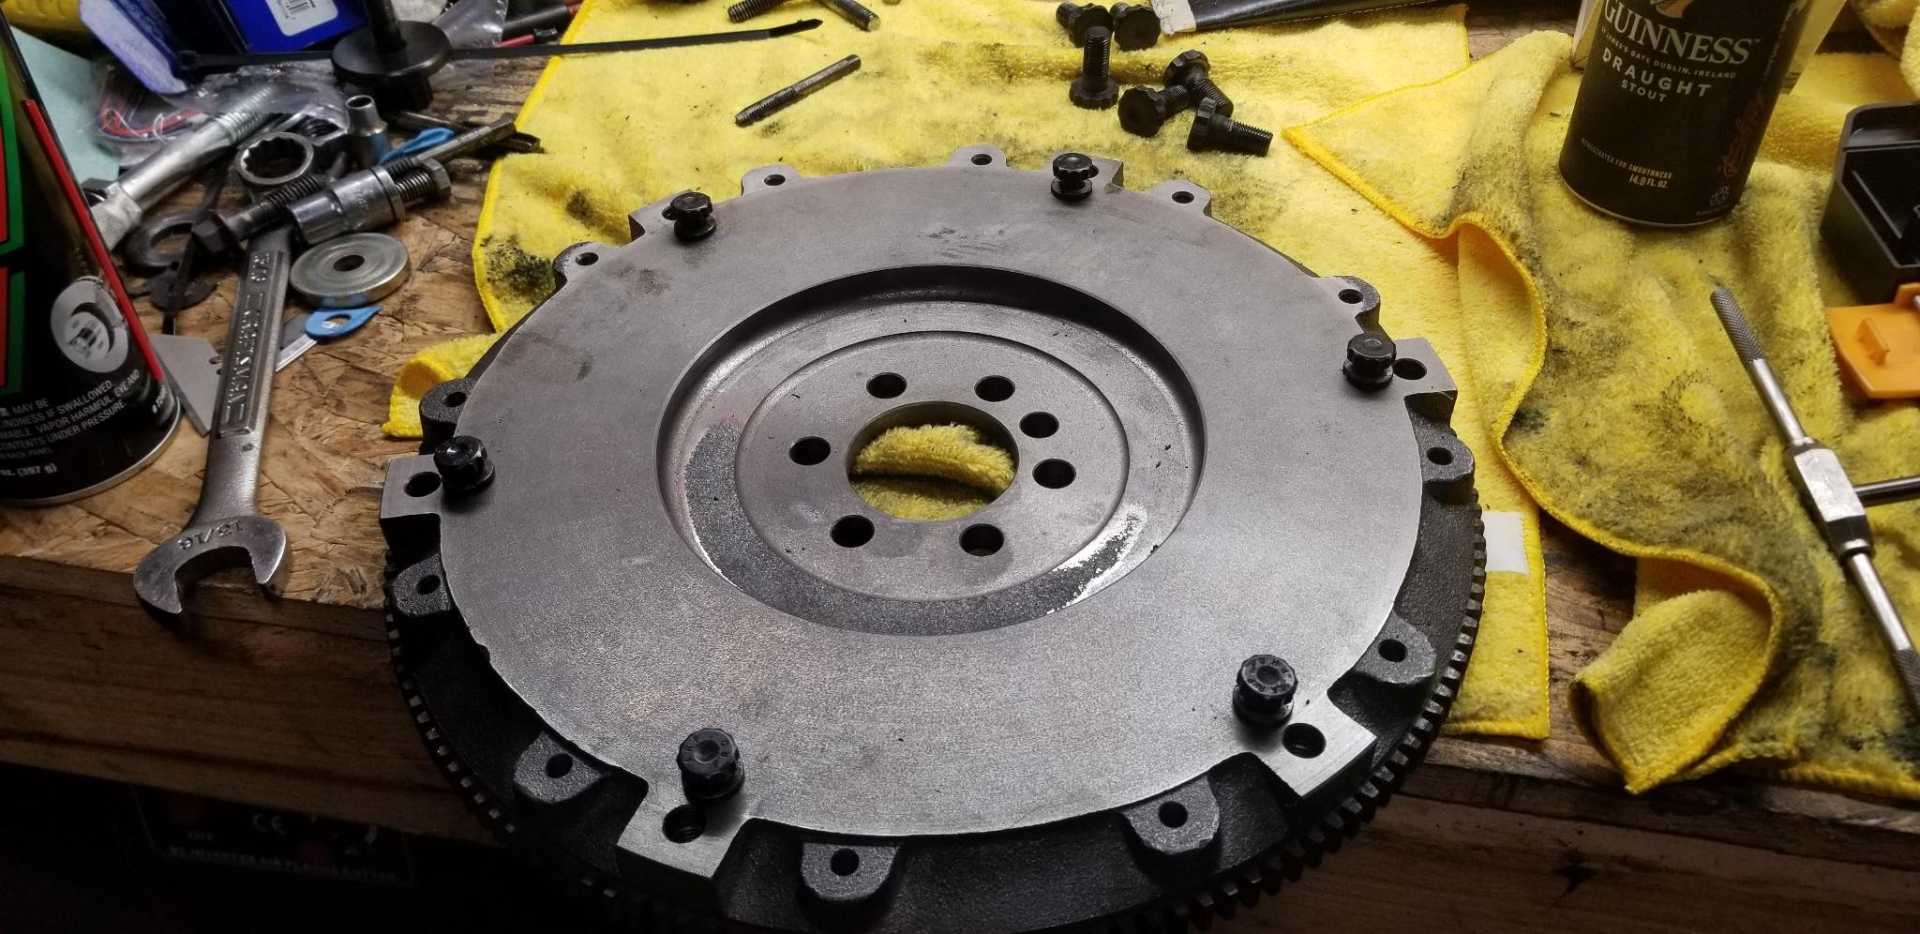
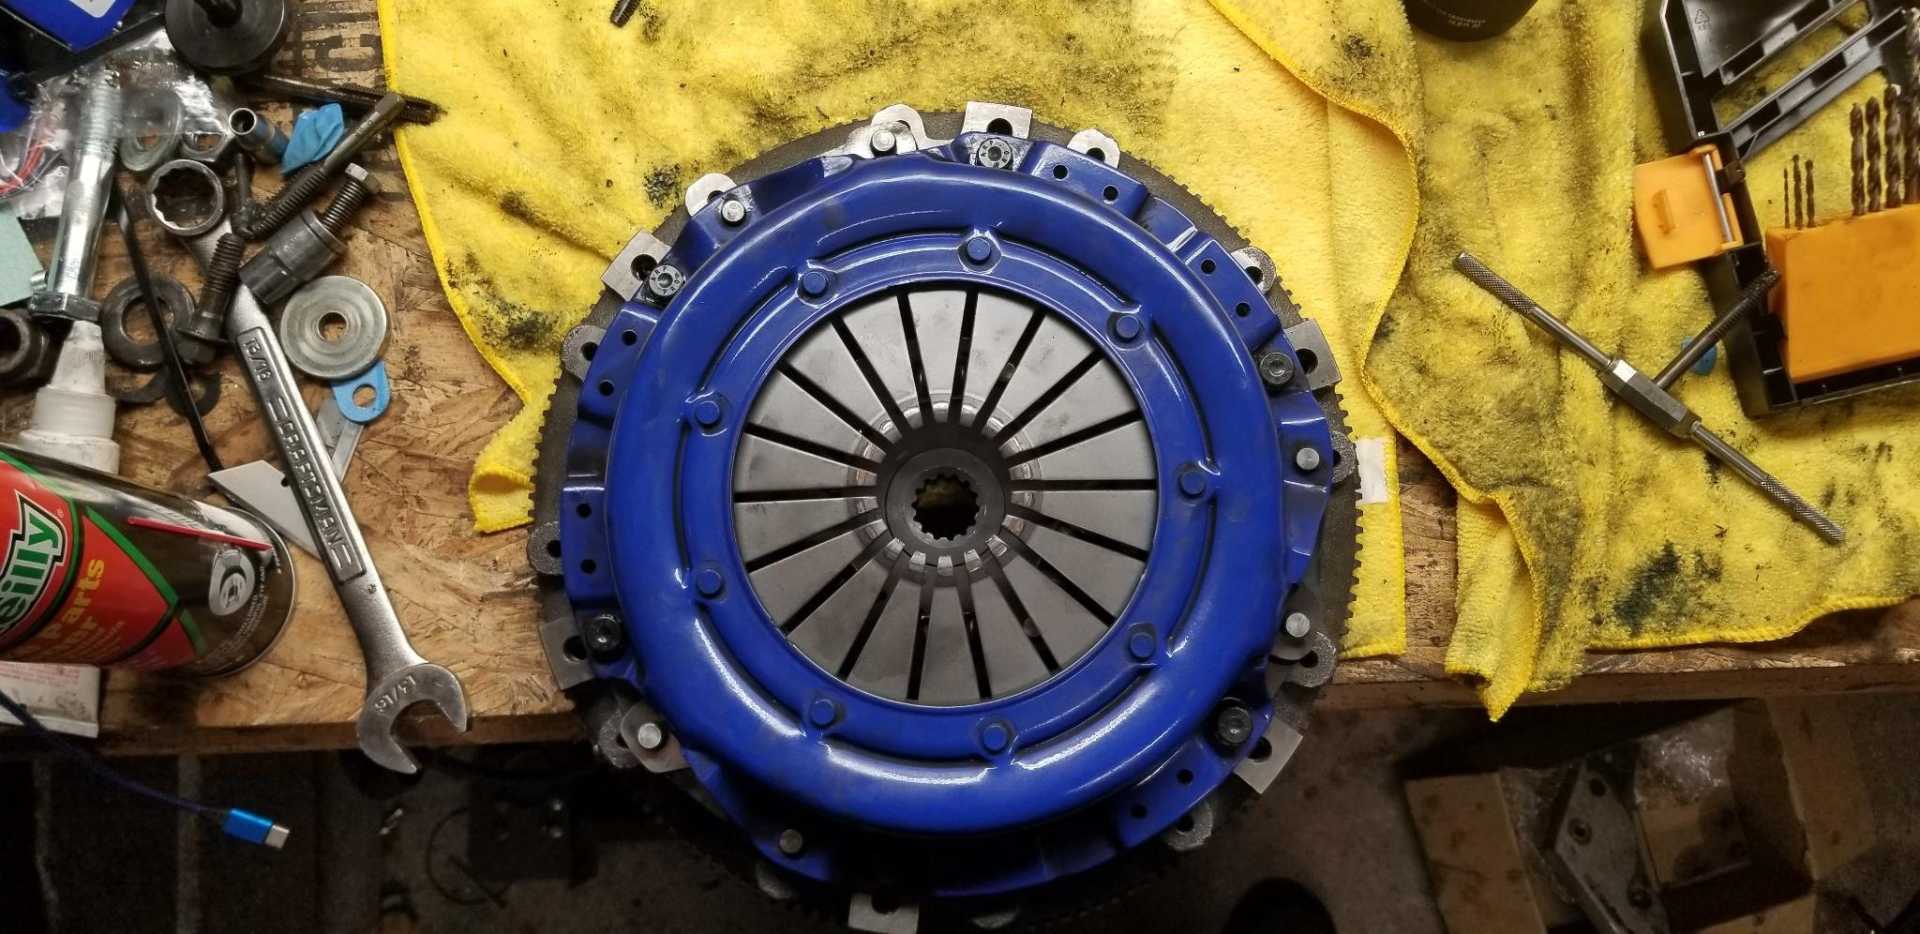
Waiting on parts to arrive again. Need to do a flywheel....
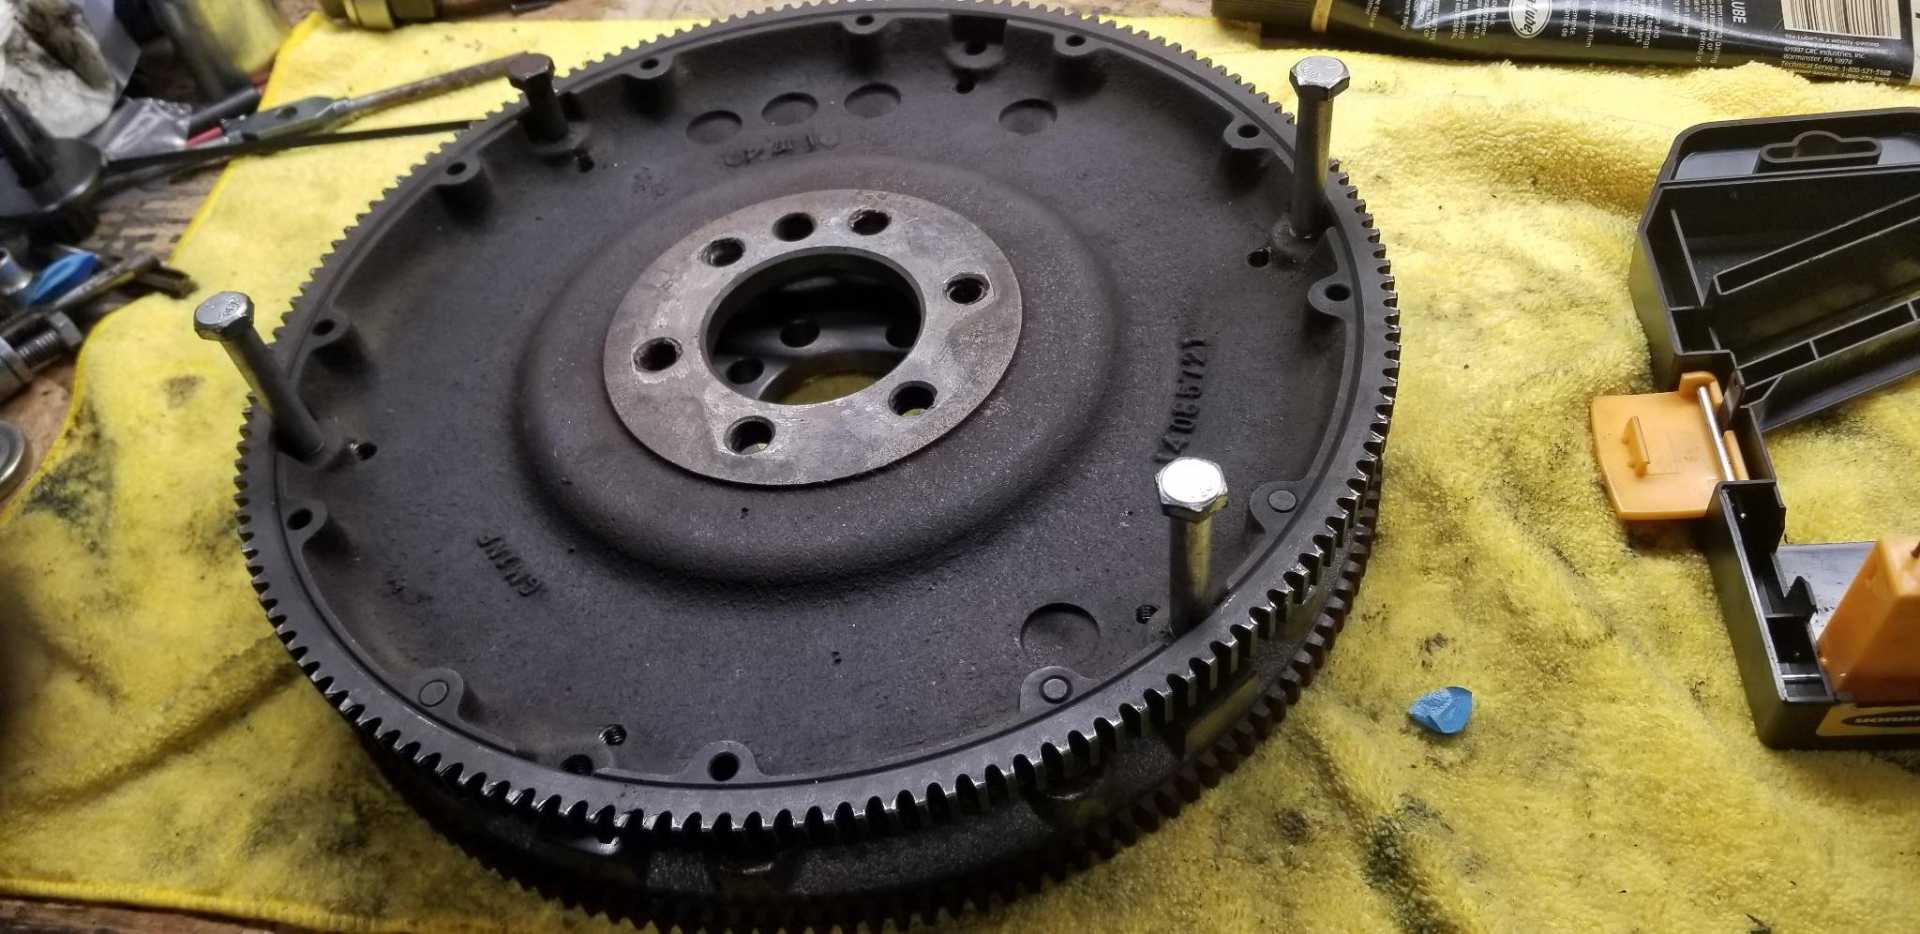
These are Corvette flywheels. They weigh around 16lbs. Pretty good for a light car that's going to make gobs of torque. They are from an 85 and back and an 86+ Corvette respectively.
Only thing is, two modifications need to be done to use them: Holes for the Fiero clutch need to be drilled, and the edges need to be shaved down to fit the Muncie bellhousing.
The one on the left is already done, but is for a 2 piece rear main SBC. I now have a 1 piece rear main engine which needs a counterweight. Hence, the flywheel on the right.
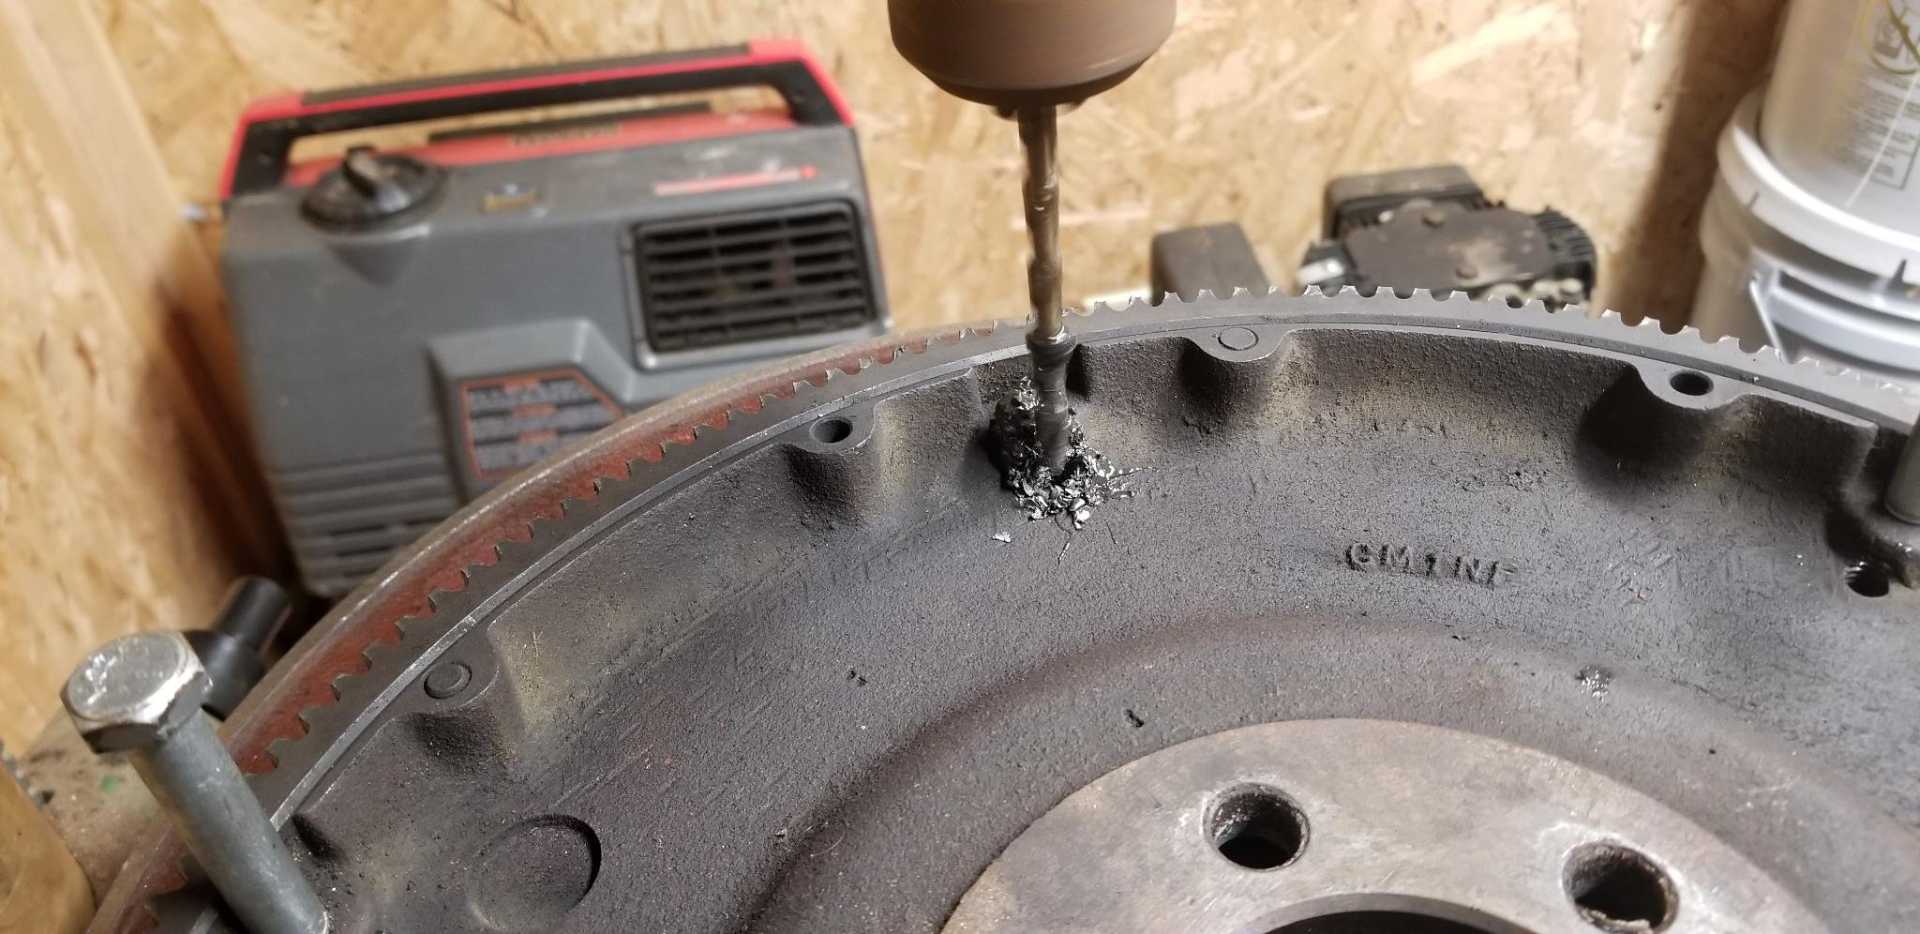
So, how to line these up to drill the holes?
Well, that was easy.
Tapping for 5/16 coarse thread...
Bolts installed.
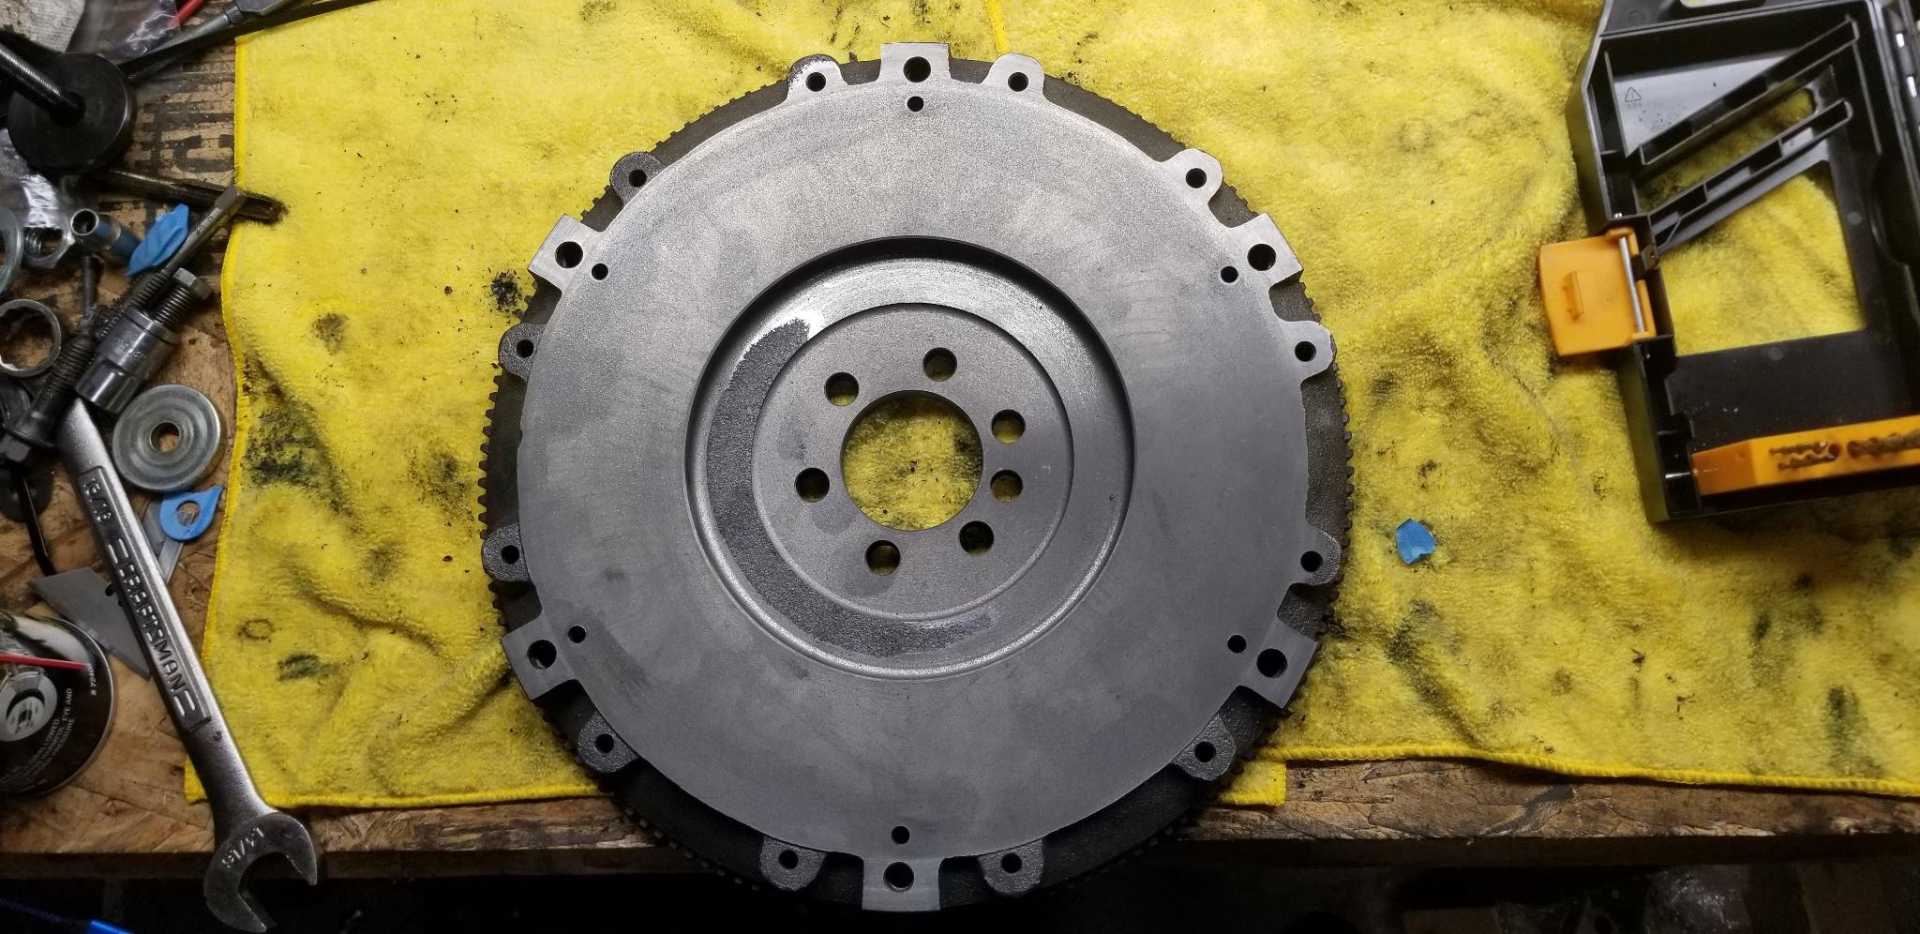
These didn't come out exactly perpendicular to the face even though I used the drill press. I'm annoyed with that but they do fit and torque down properly.
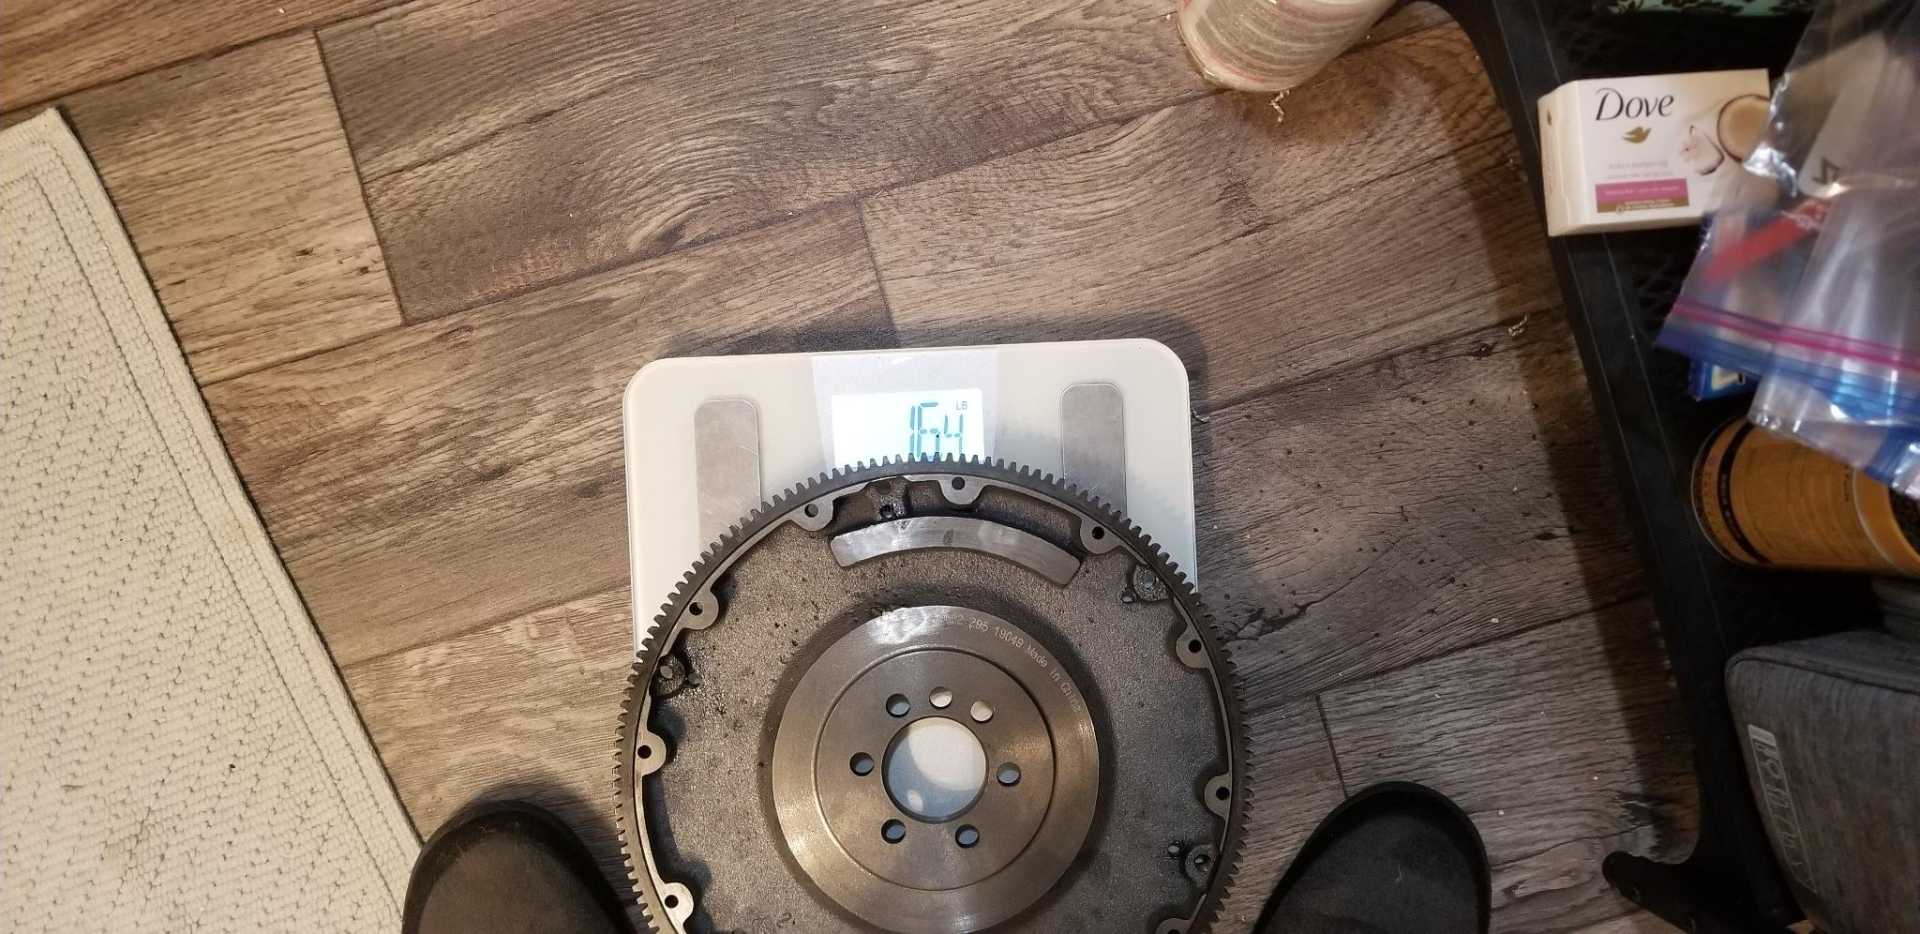
Be sure the lady of the house is away before dragging car parts in to put on the bathroom scale.
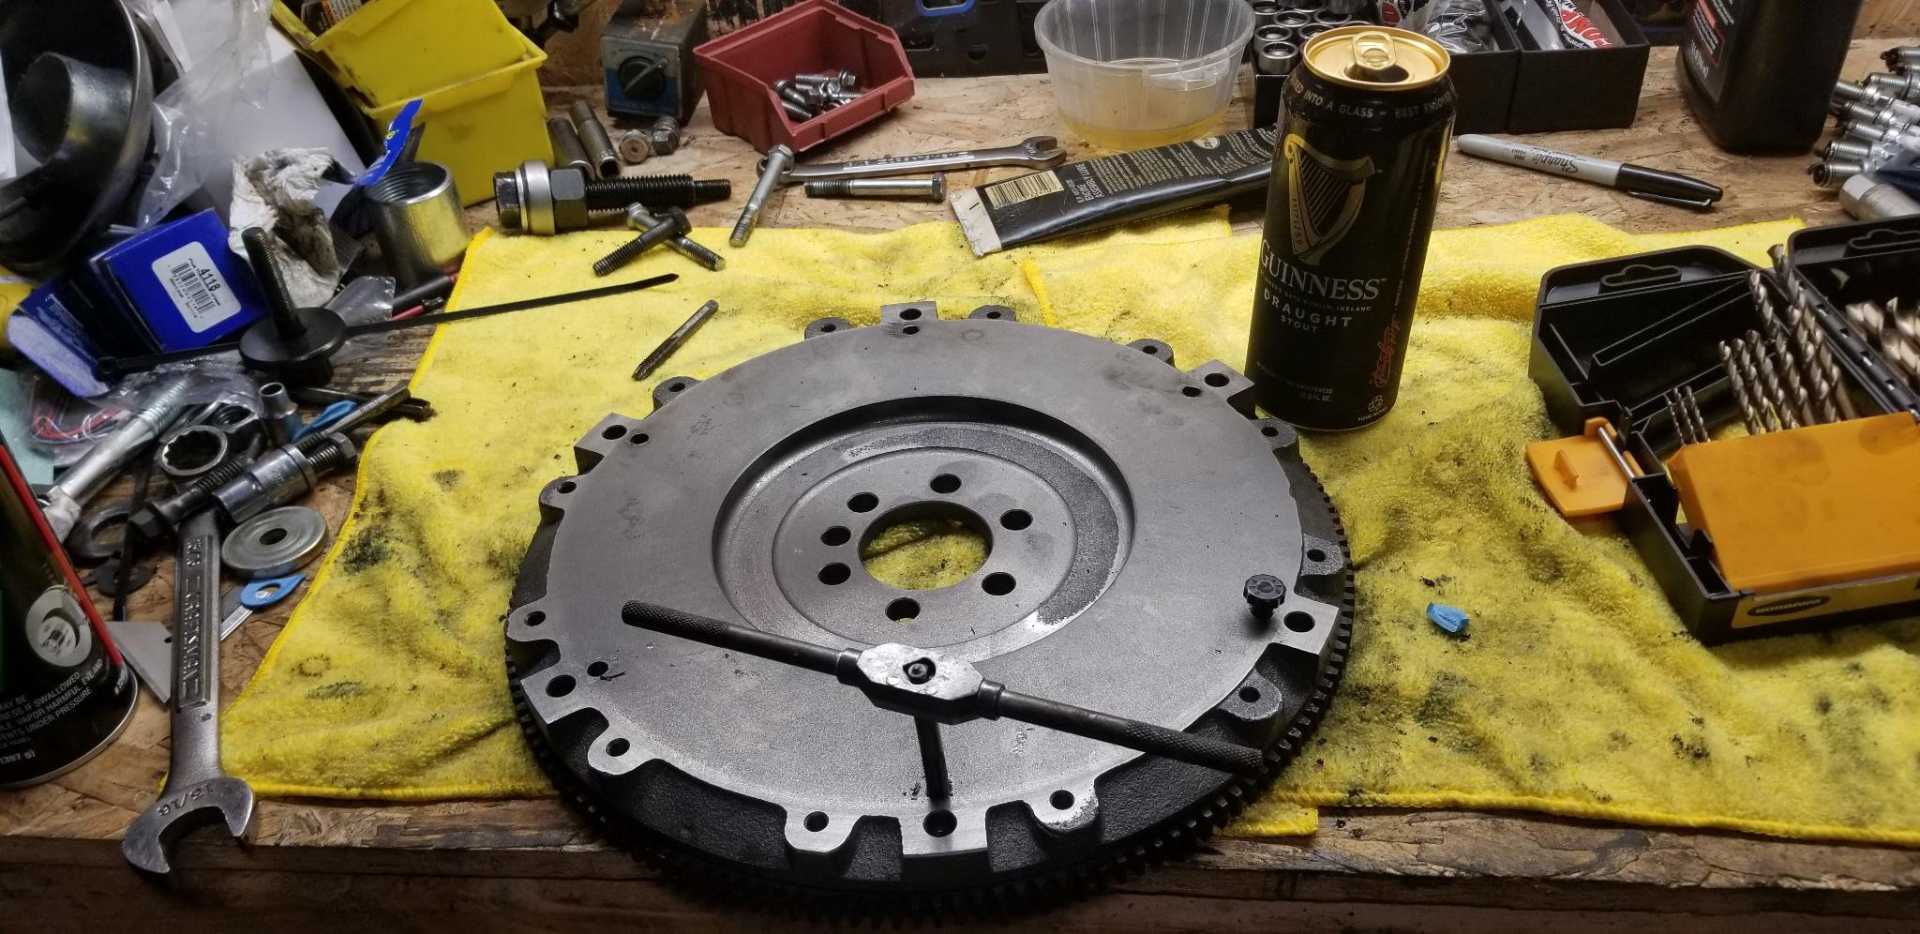
So, now I need to trim down those edges. I don't have access to a lathe. I could try to shave the corners off with an angle grinder, but not sure if my grinder-fu is up to this task. I HAVE turned down Toyota hubs with a grinder and a running truck turning them... but I don't see an immediate way to chuck this flywheel into anything I have. Running the engine and grinding on it is outside of even MY comfort zone I think...
I guess I could drop it off at a machine shop, but I'm soliciting ideas from anyone out there on a good home remedy.
[This message has been edited by fishsticks (edited 06-16-2021).]
I didn't realize you needed an external counterweight on your flywheel. I would had suggested getting your flywheel and crank balanced together. Since you're taking material off the flywheel, you'll need to get it rebalanced afterward, so you might as well just take it to an engine machine shop for both operations.
I didn't realize you needed an external counterweight on your flywheel. I would had suggested getting your flywheel and crank balanced together. Since you're taking material off the flywheel, you'll need to get it rebalanced afterward, so you might as well just take it to an engine machine shop for both operations.
That's where I'm at. While if I was able to remove exactly the same amount of material all around, the balance should stay true, I don't have that equipment here.
Going to drop it off today while I'm out. Hopefully they can work me in in the next couple days.
The density of cast iron is variable enough that you can throw the balance off even by turning it in a lathe.
I was talking to the machinist about that yesterday. He expressed the same concern but said I might get away with it since the amount of material removed was so little. Unfortunately they can't spin balance the flywheel there, and a static balance won't do much good on a weighted flywheel. The automotive machine shop I stopped at first didn't have a big enough lathe to do what was needed so he sent me over to the industrial machinists.
Small town problems. They said they could get it back to me today or tomorrow at least.
Nice little video! Just read through your thread. Very cool project. Good luck and I'll be watching for updates.
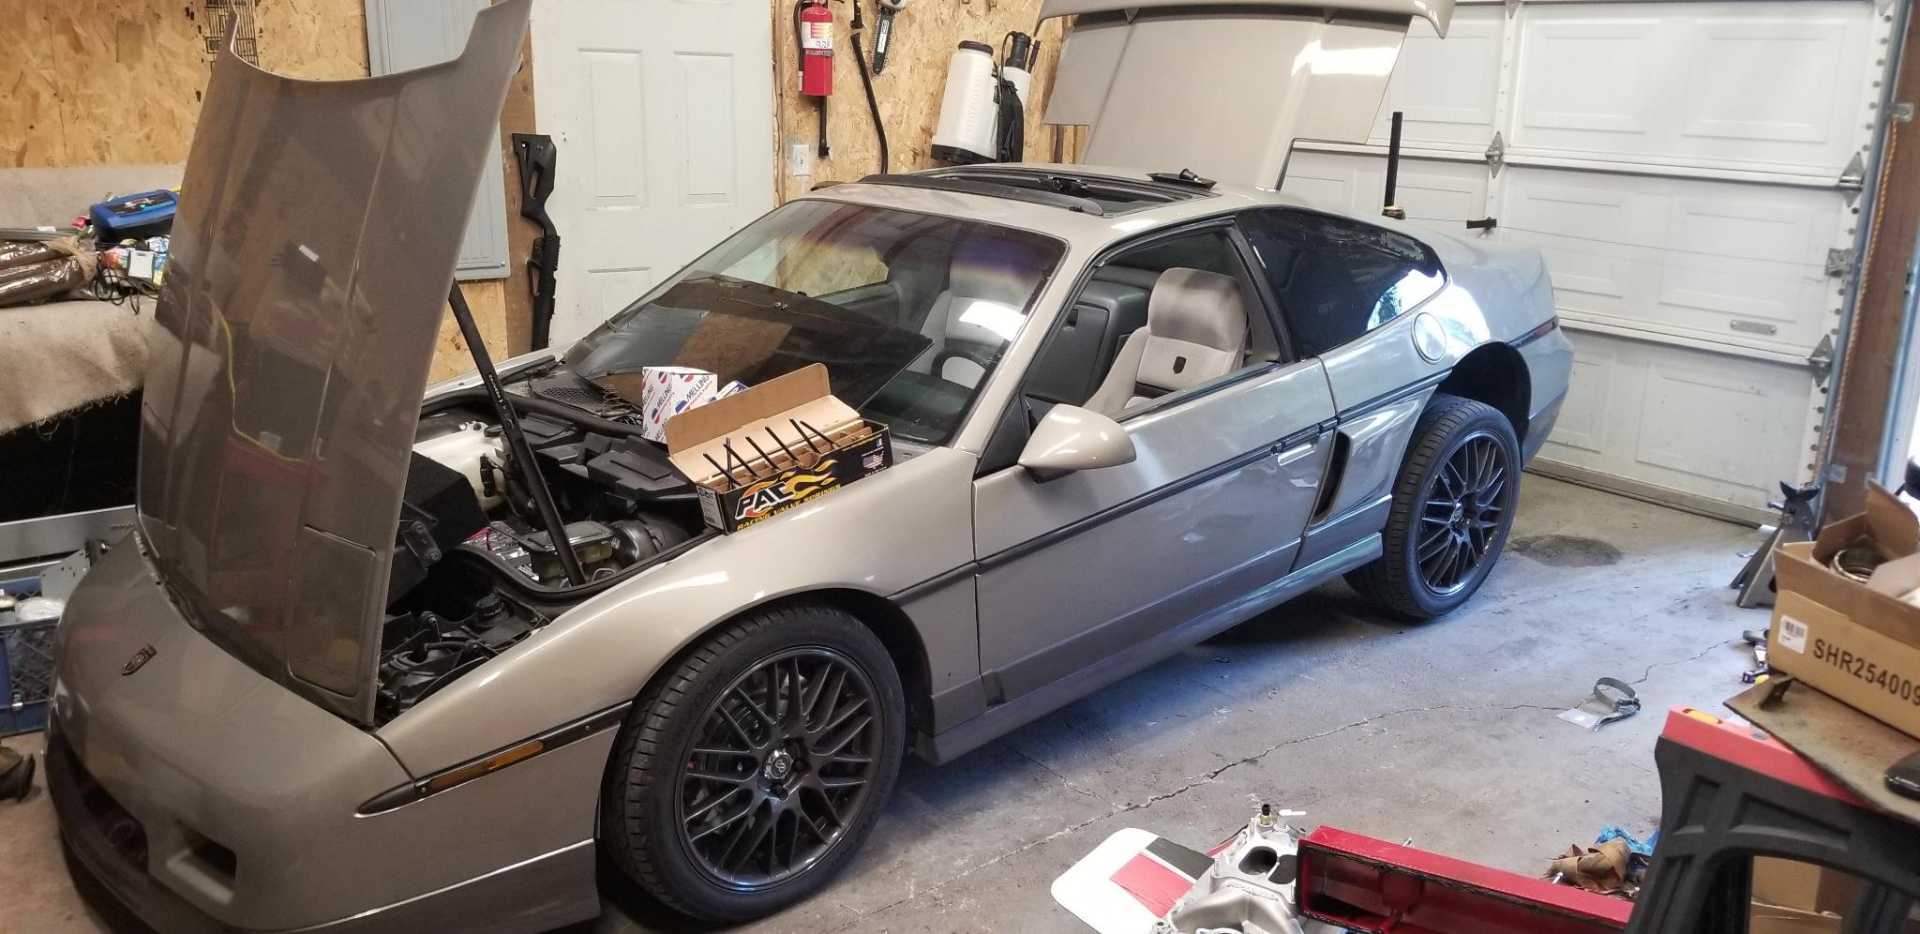
Thanks. Been a bit busy the last few weeks but did get the tune dialed in a bit. I need to get some more air moving up front as it heats up on long freeway trips. Runs just fine around town though.
Is it done Fish?! 330WHP and 345WTQ is my prediction. Good luck mate!
It is, in fact... -mostly- done.
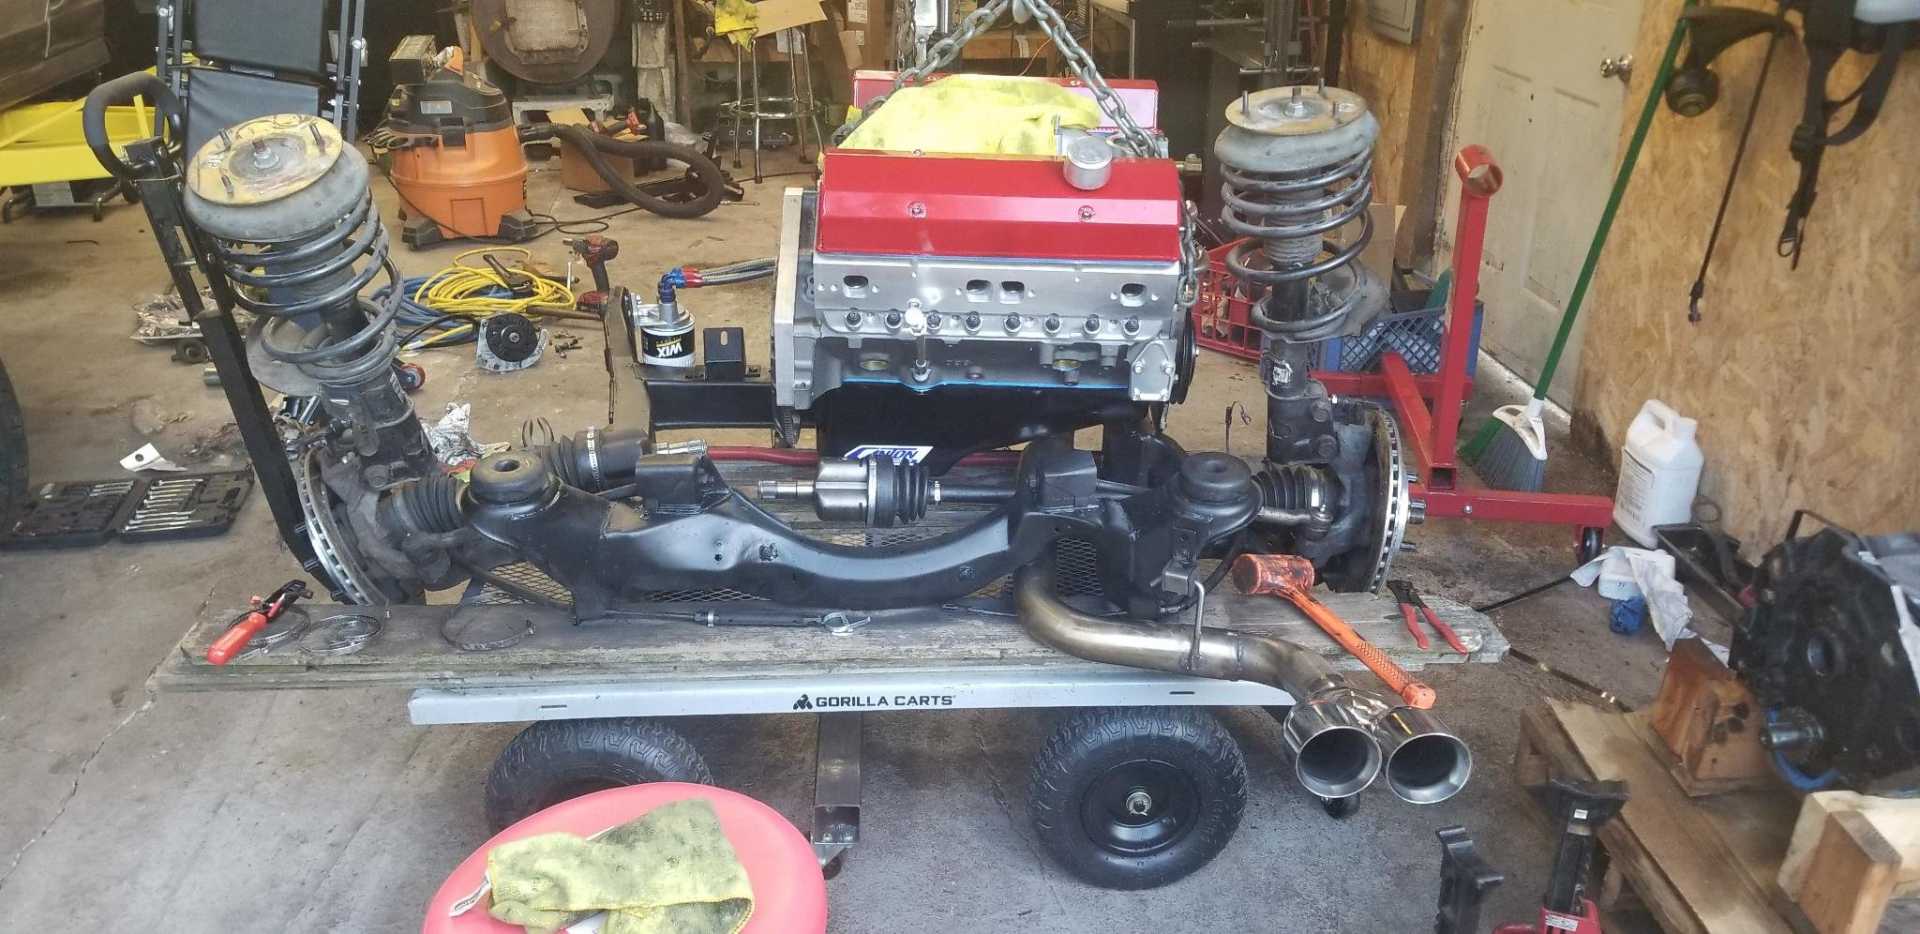
I've put a couple thousand miles on it. Getting ready to put it away for the year once the weather changes.
Work has been an absolute killer the last couple months. There are a few things I want to do, but haven't had time. Getting it on a dyno is one of those.
I need to retorque the heads as well I think. I have a (very) small amount of coolant pooling on the back of the block which is either coming from the intake manifold passage or the rear head. No smoke and compression is good on all cylinders so don't think anything major is afoot. I do have a tiny bit of moisture on the breather cap.
The car loves RPM. Lighter valvetrain/bigger cam/improved exhaust so it rips to 6500 in no time.
This winter I need to rethink suspension/aero. The car is kinda scary above 100mph while under throttle because it has so much torque along with the annoying lift Fieros seem to generate.
I have a new Tacoma on order (we had a truck go down and with 335K miles it was time to retire it) so trying not to split my attention too much. I'm also getting married next month. Great time in my life but horrible for working on project toys.
Your latest video popped up for me on YT, which is what actually reminded me to check in here, lol. Is it done yet?
Glad yours is doing great! Yes, mine is done. Last time I test drove the car tt was acting very erratic,it would cut ignition at 4000rpm. it was a bad ICM. Now I can fine tune the fueling map. Imworking on getting the tip in throttle crispy clean, it idles beautifully now. Be careful getting to 6500rpm, I can recall a previous post where your forged piston/rod combo was several grams heavier and you decided not to balance the assembly.
Fun post to read. It feels a little like deja vu all over again. My Fiero SBC V8 project sat neglected for 11 years. Now I'm back working on it again. I'll be watching your progress with interest since we are in parallel universes. You made the exhaust look easy. I might need to talk with you about how to fabricate a decent exhaust system. I thought that I was the only one dumb enough to consider building a HP engine to keep the torque down. I'm using a single plane intake for that very reason. Carry on.
Hey Patrick, there's still a few old-timers around I see. So much for me trying to keep a low profile.
quote
This winter I need to rethink suspension/aero. The car is kinda scary above 100mph while under throttle because it has so much torque along with the annoying lift Fieros seem to generate.
Been there and done that. I always suspected the floatiness was due to: (1) a sbc with cast iron heads and intake adds about 150 lbs. or more to the rear of the car. (2) Air flows through the radiator, heats up, then becomes turbulent flow under the hood until it's pushed out under the car. (3) A combination of worn suspension parts and sloppy bushings makes things worse.
Me and my car are going on a diet. The new engine will have aluminum heads and intake, along with tube headers, which should reduce weight by over 60 lbs. I moved the battery to the front for better weight distribution. To improve air flow, I installed a chin spoiler which not only funnels air into the radiator, but also generates a downward force. I have vents in the hood which allows some of the hot air an escape route above the car in addition to going under. I have spent a lot of time and money to rebuild and beef up the suspension. I have changed out pretty much all of the rubber bushings for poly ones. After doing most of these mods, my Fiero drove great and was no longer floaty at speed. Too bad the engine was toast.