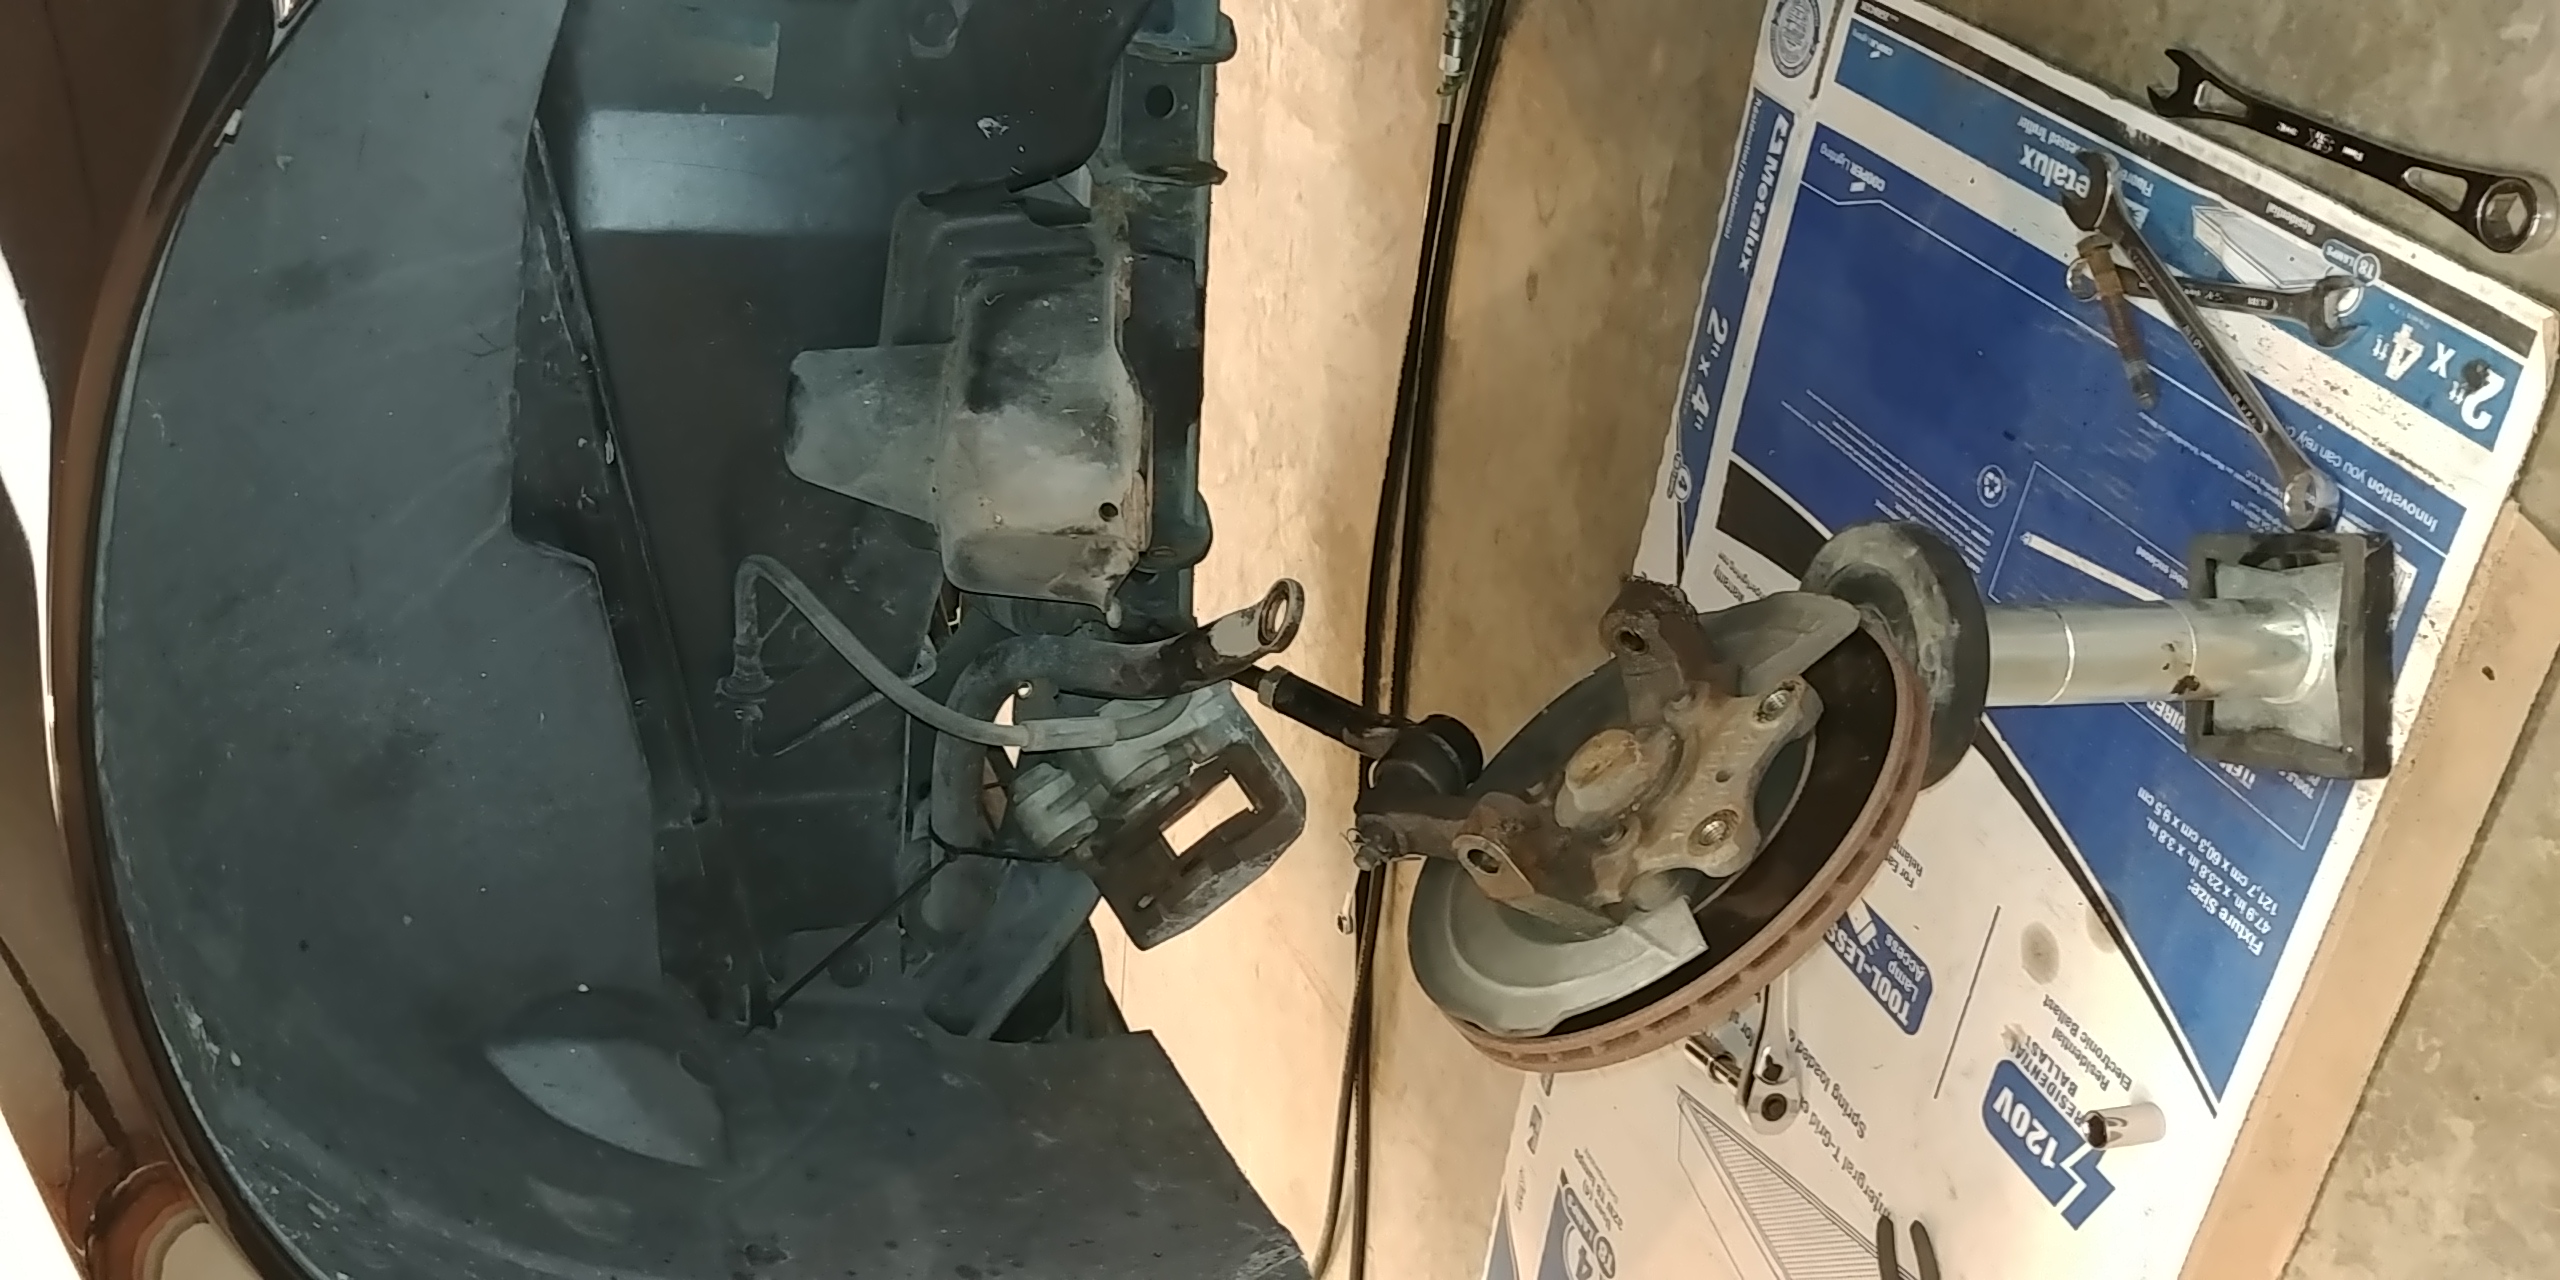
I got one of the two sets of ADDCO bars that The Fiero Store had in stock. I got the front bar in place, then realized that there was no way that the brackets were going to fit in the space between the subframe and the frame rail. They're bigger than the stock brackets, but even the stock brackets already are flattened on the forward/upper part to fit in that "Y". It looks like poor packaging design, but this car was designed before the days of 3D CAD.
Furthermore, the bolt spacing of the ADDCO brackets doesn't even line up with the existing holes. Not that I would drill new holes anyway, but there's no room to relocate the bracket down/rearward, as the subframe curves inward immediately below/rearward of the bracket.
Has anyone successfully installed a set of ADDCO swaybars in an '88 GT? Can you share your experience?
It seems like the easiest thing would be to get a set of stock bushings (or poly bushings for a stock bracket) and mill out the inside to increase the inner diameter to match the 1.25" ADDCO bar.
In the meantime, I'm awaiting a response from The Fiero Store (who didn't commission the design and haven't installed any, themselves), and ADDCO.
This is the stock bar in place, but you can at least see the mounting position.
You may be able to use the old bracket and either A) Grind out the rubber to make room for the bigger bar, or B) Get a different bushing that will fit the new bar with the old bracket.....and it seems they would have done that right....(What may have happened is they originally had the kit properly set up, but as fewer people bought that kit, they decided to use a "Common" bracket/bushing without actually testing the fit...)
You may even want to call Addco and let them know....and they may be able to send you a better fitting bracket/bushing......
I'm waiting for replies from TFS and ADDCO.
Does anyone have a source for new stock rubber bushings, or urethane bushings for stock bushing clamps?
Short answer is it is a known issue. I modified the rear addco bracket which was smaller and made my own bushing for the front. In the rear, I kept the stock 88 rear bracket and made another set of custom bushings.
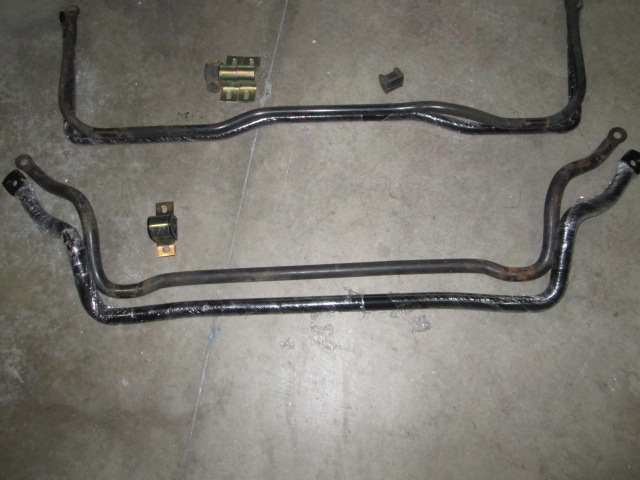
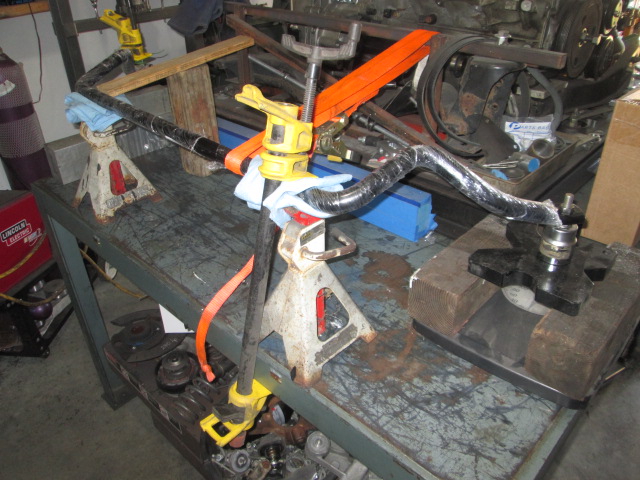
First order of business was to measure the torsional resistance of the two stock bars and then the addco ones to verify the gain. I made this crude test stand to lock the bars to the work table, used a pipe clamp to load one end while the other end pressed on the scale.
Here is what I came up with: Stock Front: 169 lb/in (Addco spec'd @ 157 lb/in) Addco Front: 243 lb/in (Addco spec'd @ 240 lb/in)
My measurements have the Addco bars 44%/81% stiffer than stock vs. their estimate of 53%/72%. Overall I think the torsional specs for the Addco bars are spot on (I was within +/- 3 lb/in with my measurements).
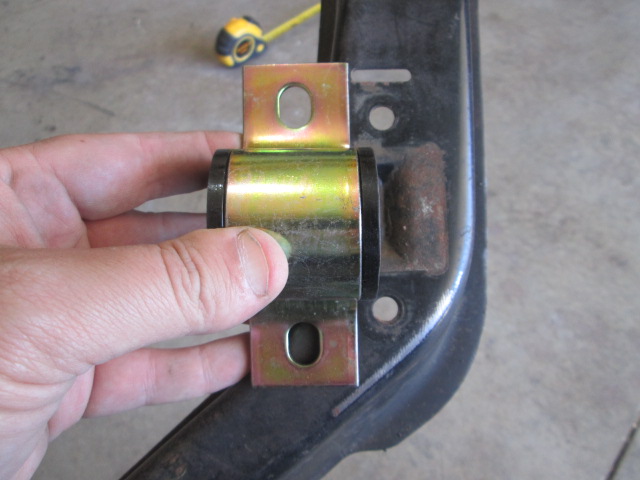
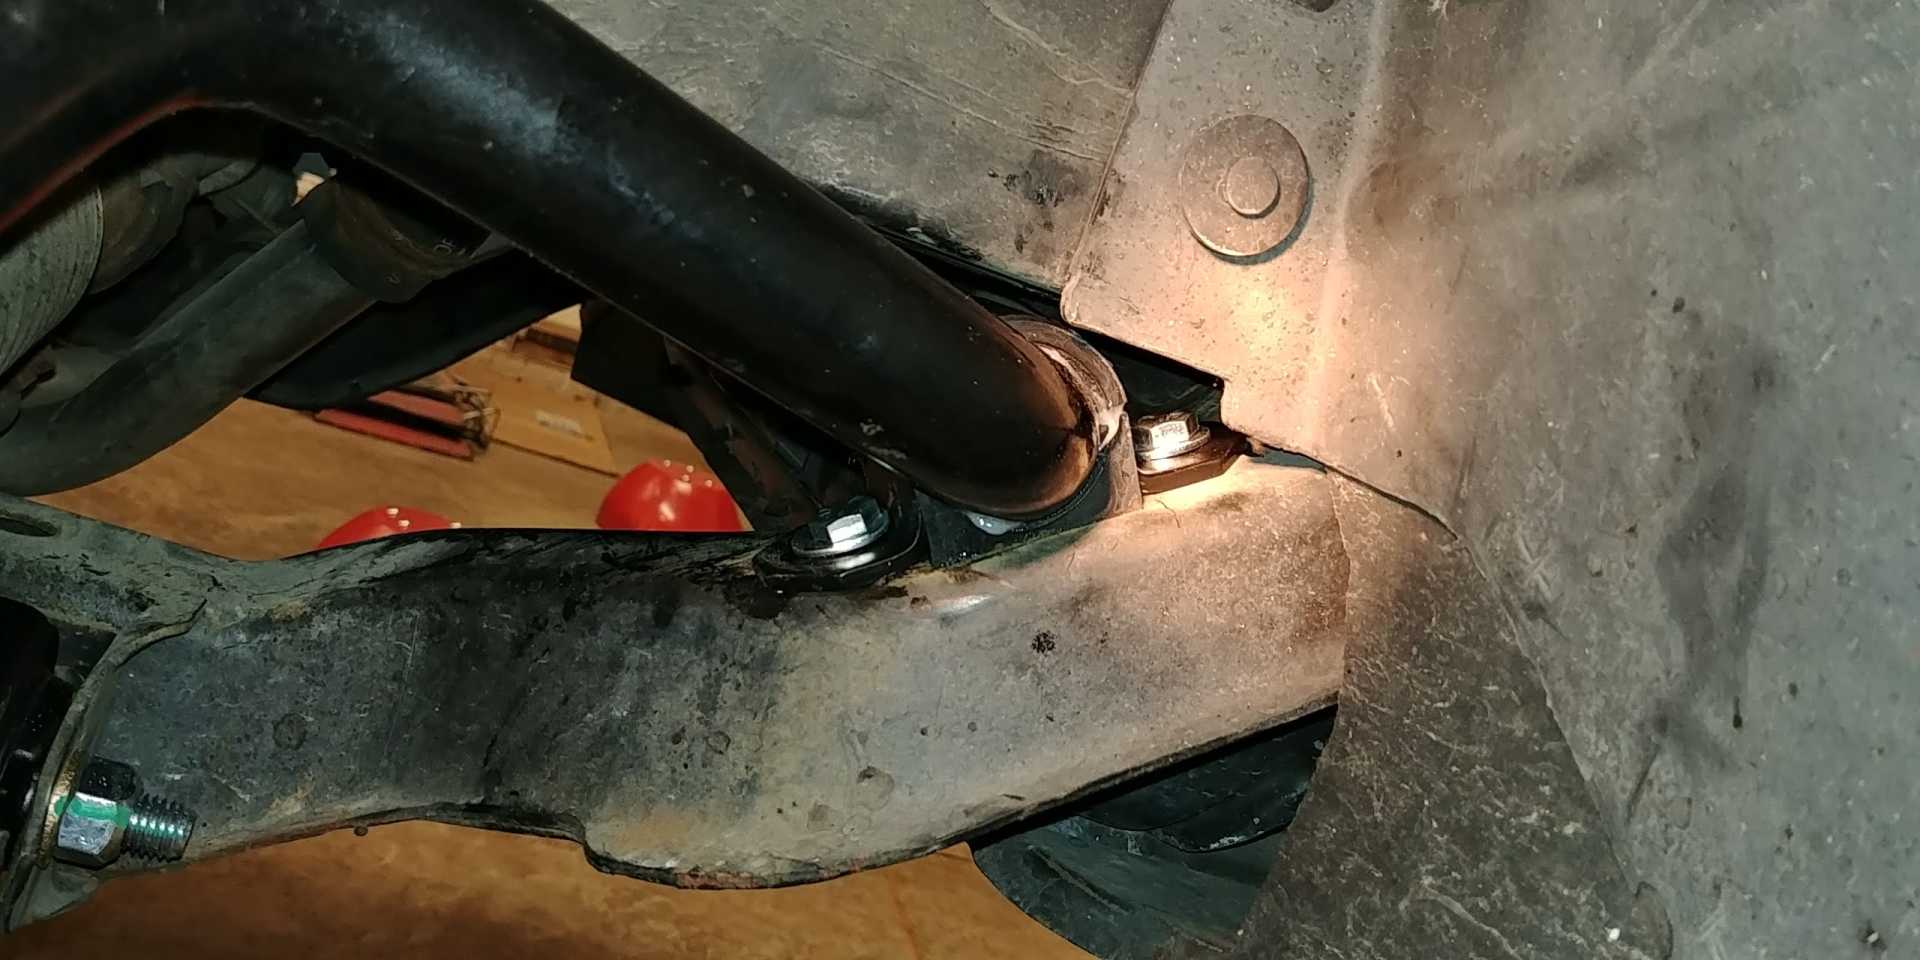
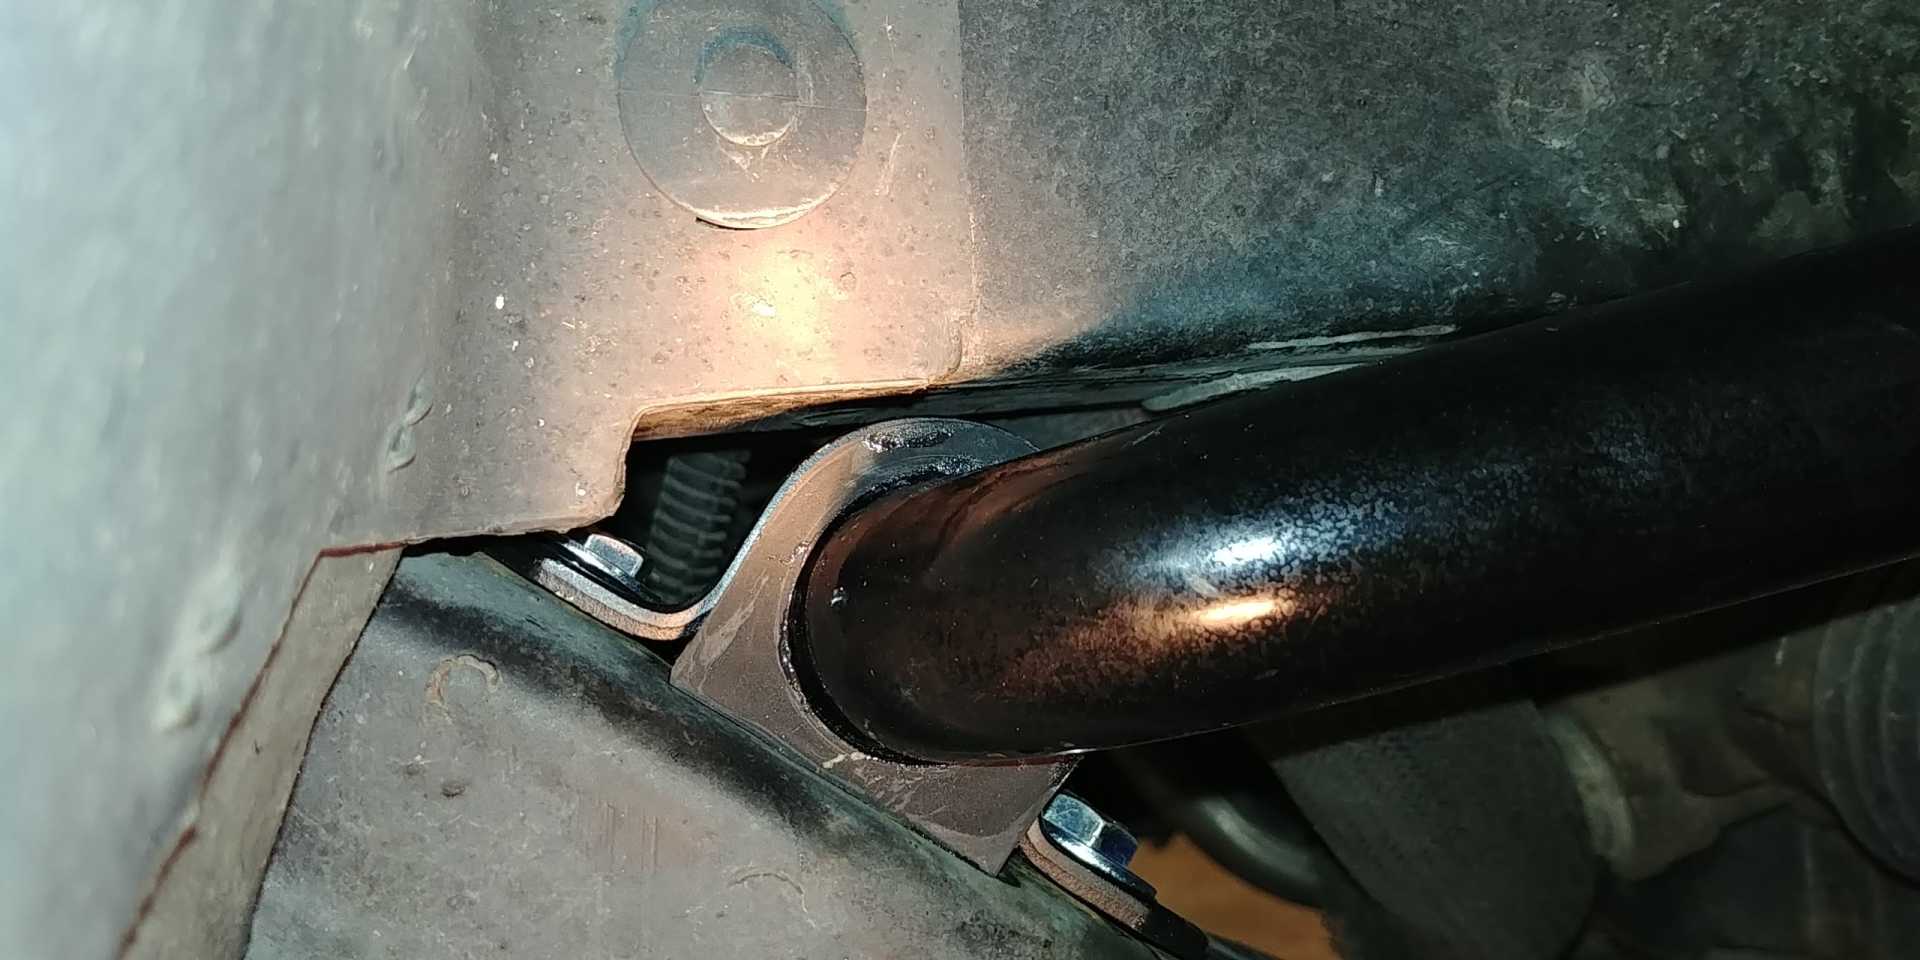
I started with mocking up the front. The supplied bushing and bracket will need to be slotted further to line up with the stock holes in the cradle:
My front wheels barely clear the stock sway bar, let alone a thicker one. So I wanted to shift the sway bar as far to the rear as I could. So I ended up using the rear addco brackets (smaller), made some bushings, and then modified the bracket to accept the stock 8 mm bolts. Starting on the left in this picture: Modified Addco rear bracket, Addco rear bracket with 1 slot extended, addco front bracket, stock 88 bracket:
Installed with new bushings:
I did round the inside edge of the sway bar and ground the corner off the bump stop pad on the crossmember - there are two areas that get tight as the sway bar is shifted to the rear:
Front Installed:
The car rolls much less with just the front bar. I am hoping to get the rear bar installed on Monday.
I don't visit the forums often, but TFS reached out to me, as I was the one who was able to get the bars back into production. I mentioned to Dean and Justin (TFS) that the Addco kit (well before my efforts of reproduction) come with universal brackets that essentially do not work on the Fiero.
As Fiero Guru mentioned, and you came to the conclusion of, you will have to modify the components to get them to work. I elongated the mounting holes on the rear sway bar mount to work on my car. And for the front, I used the stock bracket, and removed material from the poly bushings to get them to work inside the OE Fiero bracket. this was shadetree efforts, Fiero Guru has the proper tools to make a better bracket/bushing fitment.
I had taken pictures of my install and modifications and literally deleted them about a week ago as no-one had reached out for install assistance.
You can contact me via email, foxspeeddivision@gmail.com if you'd like.
in my opinion, "if" fiero Guru is willing to develop some brackets/bushings for you, that'd be the direction i would take
That's crazy that you just deleted the pictures of your install! Any chance they're still in your "recycling bin"?
If only Prothane made 1.25" ID bushings for their "Bracket Style 'A'", we'd be good. But I'm sure they don't because of how little material is left.
quote
Originally posted by fieroguru:
Short answer is it is a known issue. I modified the rear addco bracket which was smaller and made my own bushing for the front. In the rear, I kept the stock 88 rear bracket and made another set of custom bushings.
fiero Guru, I appreciate you actually measuring the stiffness of the bars!! Would you consider re-making a set of bushings?
Did either of you have any problems with the rear bar?
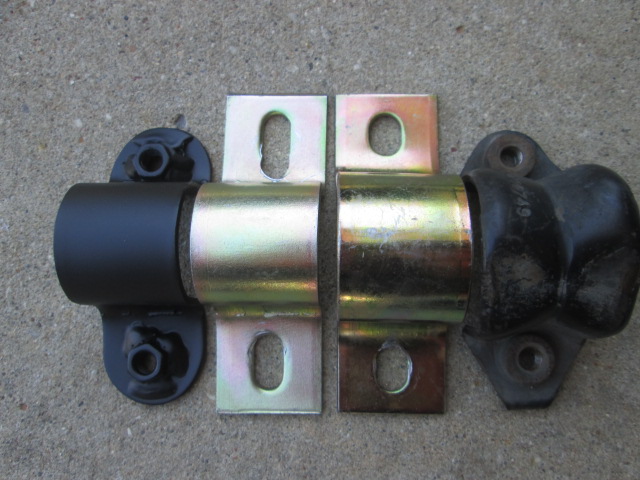
Hey folks, I think I have a solution that doesn't involve customization. Basically, the brackets specified originally for this application were a size too large, both front and rear (Prothane bushing/bracket sizing, for reference.) The solution requires simply getting new swaybar bushings and brackets.
The fronts requires a Bracket Style B and 1-1/4" ID bushing, model 19-1137. Front
The rear requires a Bracket Style A and 1" ID bushing, model 19-1110. Rear
Basically, the Addco bars were delivered with a Style C bracket for the front and Style B bracket for the rear, which is why the rear happens to work on the front (after boring the bushing out to 1-1/4"). If anyone in the future is referencing this, make your life easier and just buy the brackets with the correct sized bushings. The bushings are grooved in their ID to hold grease, so this will be retained.
Downsides of this solution, compared to stock or the original bushings supplied by Addco: 1) Less bushing material around the bar to absorb NVH. - This will actually stiffen things up, but that wasn't my goal and I am concerned with the life span of the bushings. 2) The front bushing supplied by Addco was felt-lined on the inside to prevent squeaking. That will be lost. - I'll be using a marine-grade Amsoil grease, which I've used before with good results, and hope for the best.
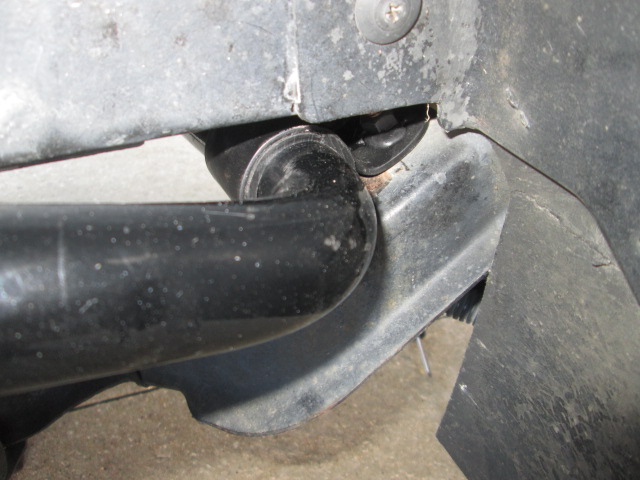
I have physically confirmed fitments and have both bars in place in the car, just without the bushings and brackets on. The rear will be attached this weekend and the front next week (after they arrive), so I'll be able to confirm that these work as intended.
Thanks to those who have offered information and assistance.
CONFIRMED. The bushings and brackets I listed above DO fit.
Only problems that I see are that the bushing slit didn't close down when the bracket was tightened. I hope that it will do so after some cycling of the bar. It would be nice if the bar was 1/2" longer between the bends. The bends start right at the bushing and may be contributing to the slot being opened slightly (not really possible to see in these photos).
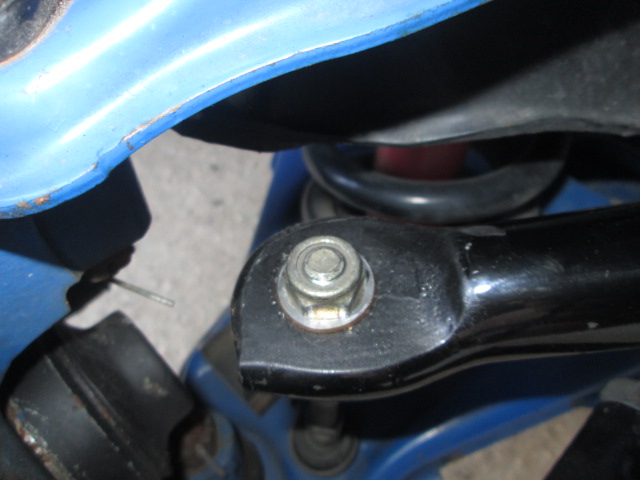
Second problem is that the washers supplied with the Addco bars are for M10 bolts, rather than the M8 bolts supplied. Actually, I think they're some english size that's close. 5/16", I think. I'd recommend replacing all the hardware with correct M8 hardware. I think the bolt length is about 40mm, but I'll need to confirm that when I change it out. If the bolts are too long, you won't be able to get them in. If too short, you won't be able to get them through the hole enough to get the washer and nut on the bottom. So, the length is actually relatively critical.
I thought I'd provide initial feedback on this setup. I did a string alignment in the garage and know that I need a bit more toe-in in front (I'm basically 0 right now), and possibly a bit more caster. I'm in the 5-6 degree range right now.
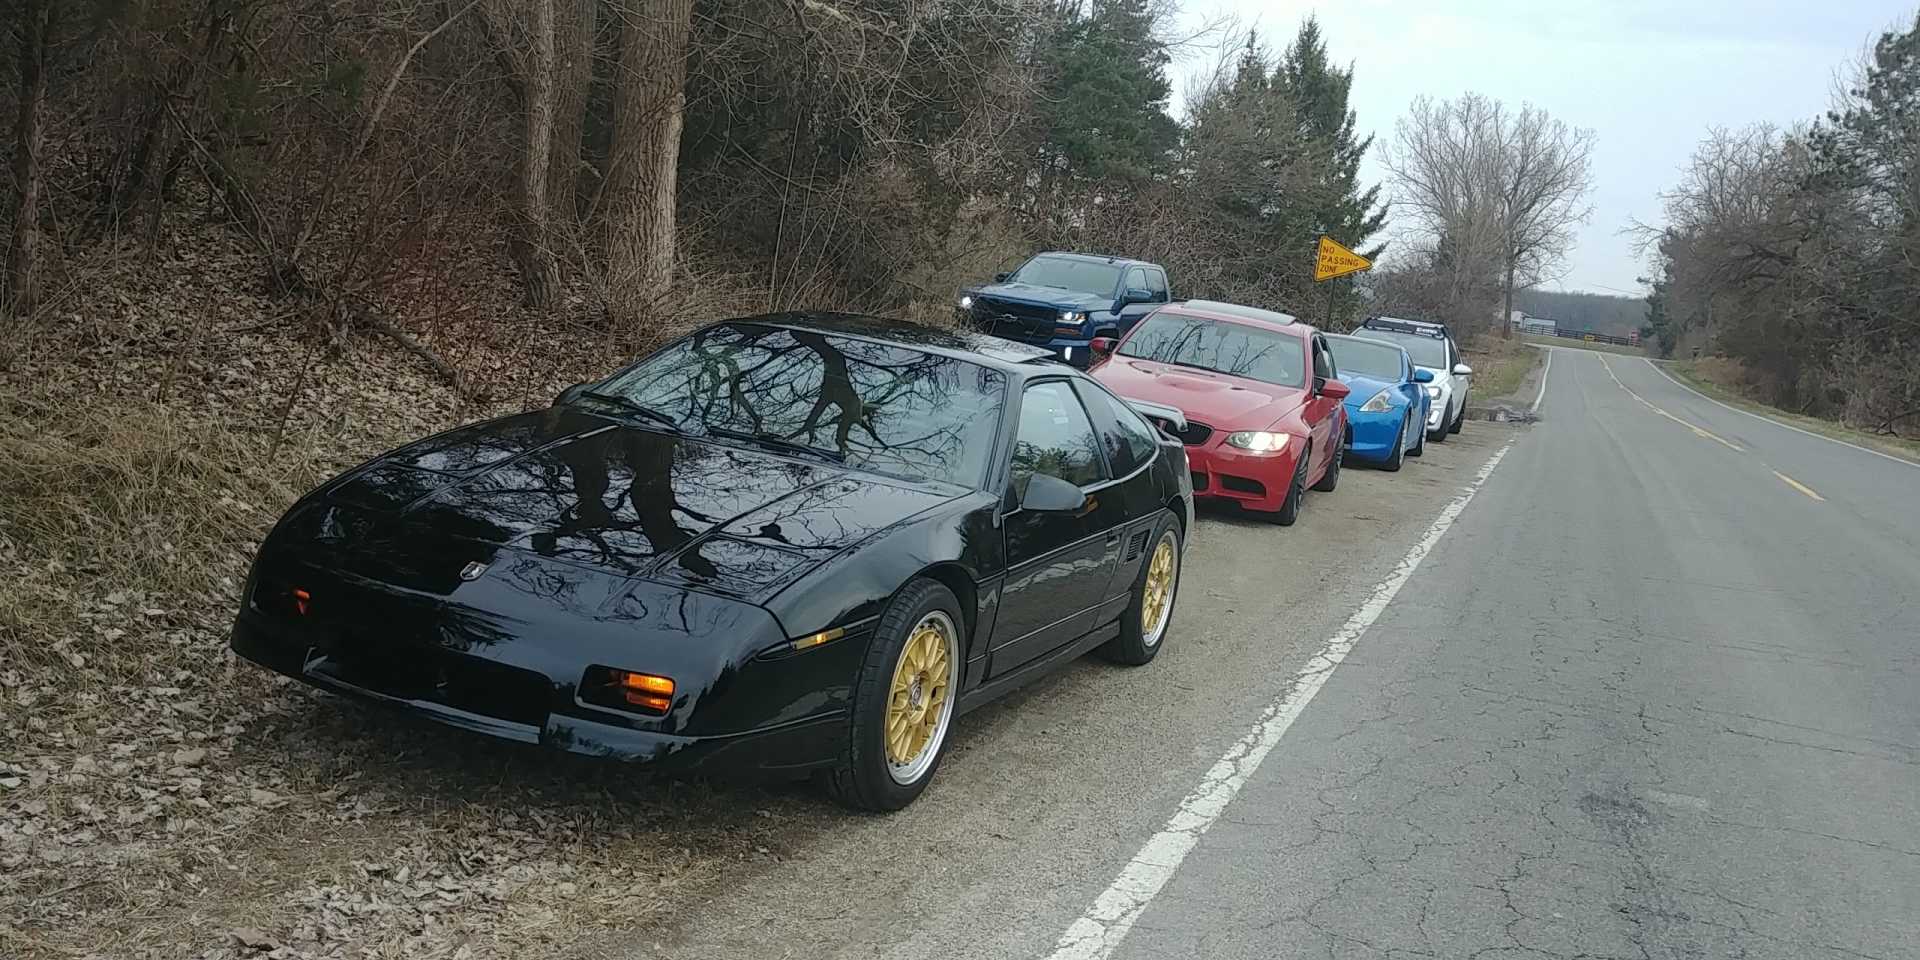
I took the car out on the route known as the "10-Best Route", as this is the loop in Michigan where Car and Driver evaluates their 10 Best cars every year. I've used the loop for OEM development work and know it very well. Its less than 10 min from my house.
So, here we go: Steering is lighter than before and the front is a bit darty (hence the need for some toe-in in front). Part of this is that the front end picked up some response with the new bushings and bigger front bar. Understeer is reduced a bit (less than I expected), with a mild reduction in body roll. If I wish to reduce understeer further, I may go back to the stock front bar. But I'll see once the alignment is fixed. Its still understeer-biased unless I trail-brake heavily into a turn.
I had set the Koni front dampers at their middle setting before installing. The rears had been set a little softer than preferred because I had KYB Gas-A-Justs in the front and I had to basically try to get close to those. Now, with the Konis at both ends, the rear had a bit of float relative to the front, especially in rebound, but also seemed like it was getting into the jounce bumpers on hard compression. Not bump impacts, but a dip that the whole car goes through. So, its more in the low speed range that it needed it. In any case, an additional turn on the knob in the rear brought it in line to balance out with the front.
On modern tires, the car certainly has a good amount of grip. It lacks the refinement and compliance of a modern car, but its almost decent to drive on a real handling road now. I led the group I met out on the route for a lap through it. I had to back it down to 50% to not lose them. Kinda weird because I've always just had the car as a cruiser and had a variety of BMWs, RX-8, and FR-S as sporty cars over the years.
Give Rodney Dickman's zero-lash swaybar links a try...I noticed an improvement right away over the poly bushings that I had. And the poly was an improvement over the stock rubber bushings.