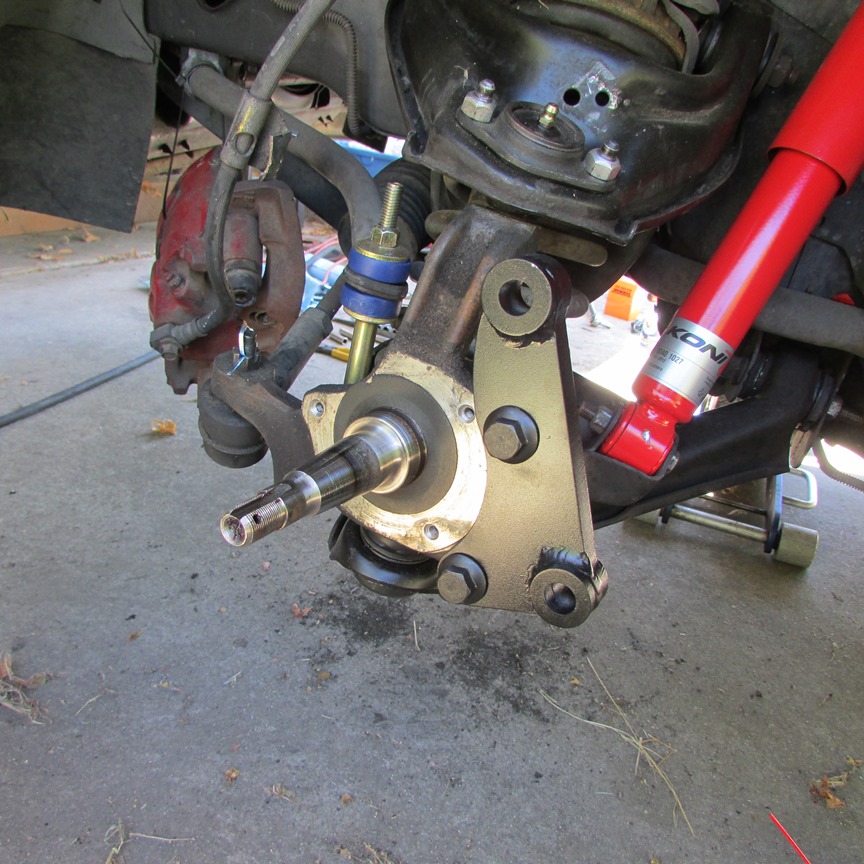
The process starts easily enough - remove the wheel and caliper. If you have not done it before, you will *probably* want to drill out the rivet that holds the brake hose to the upper a-arm. It's not explicitly necessary, but it's helpful for a number of reasons. Once that's done, remove the old caliper and hang it out of the way. That way your hydraulic system stays sealed until the operation is completed. A couple zip ties will secure the caliper to the swaybar beautifully.
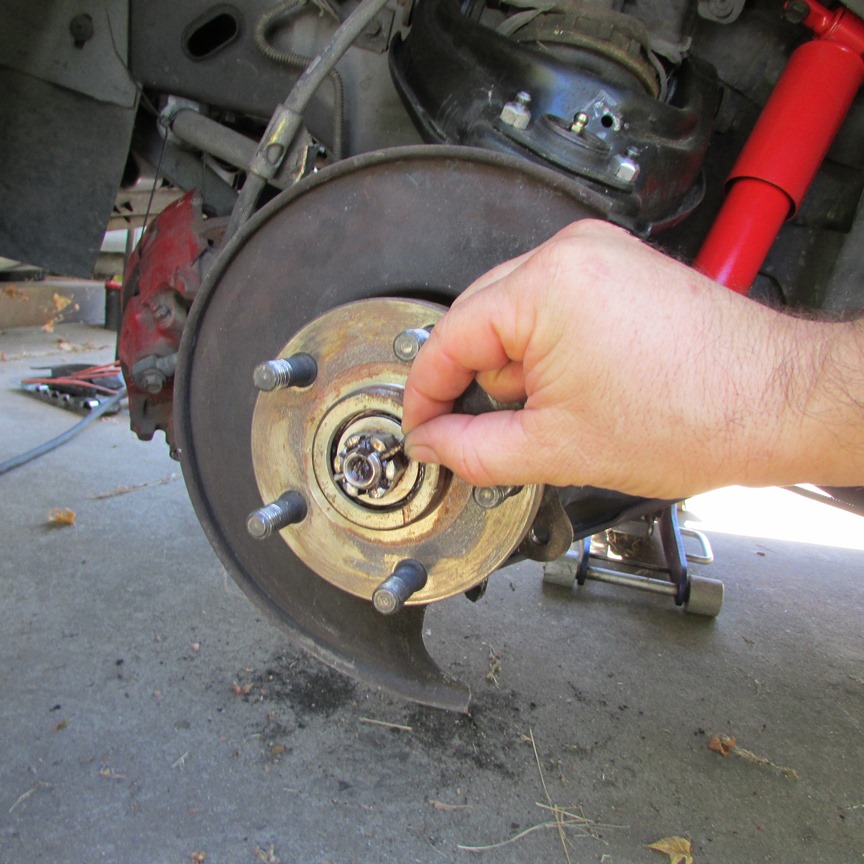
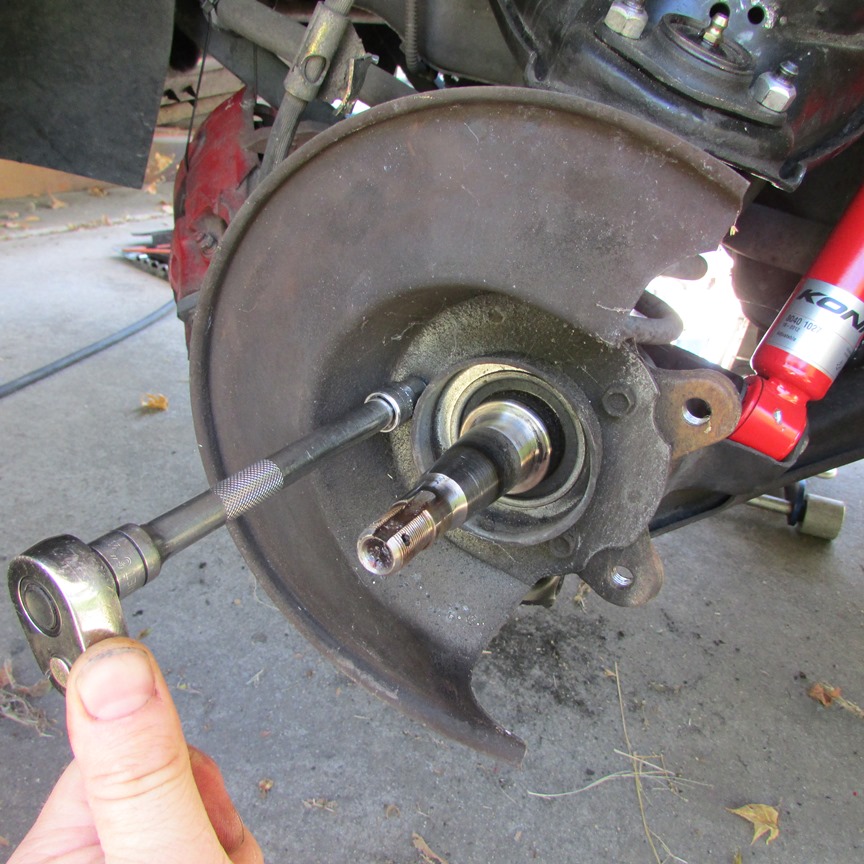
Then remove the rotor and then the hub. Out with the cotter pin and hub nut!
Three bolts to remove the factory brake rotor shield. It won't fit even remotely properly with the Corvette brakes, and by the time it's appropriately massacred to fit, it's a waste of space and weight.
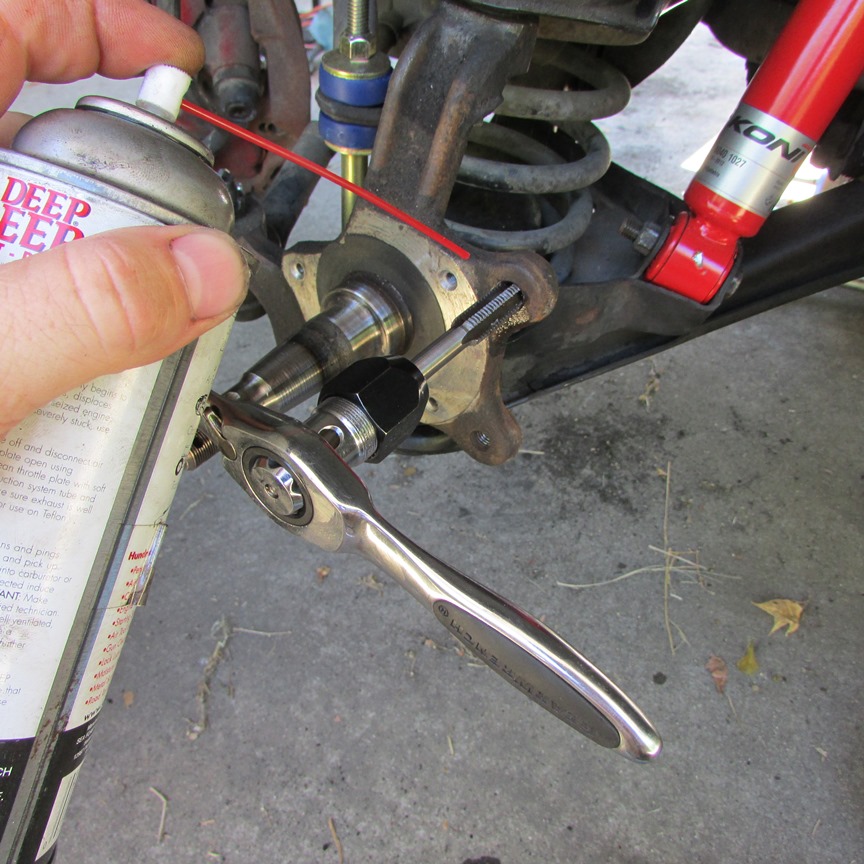
The bolts holding the previous calipers on were a bit rusty, so I cleaned the threads with a tap (because I don't have a thread chaser

)
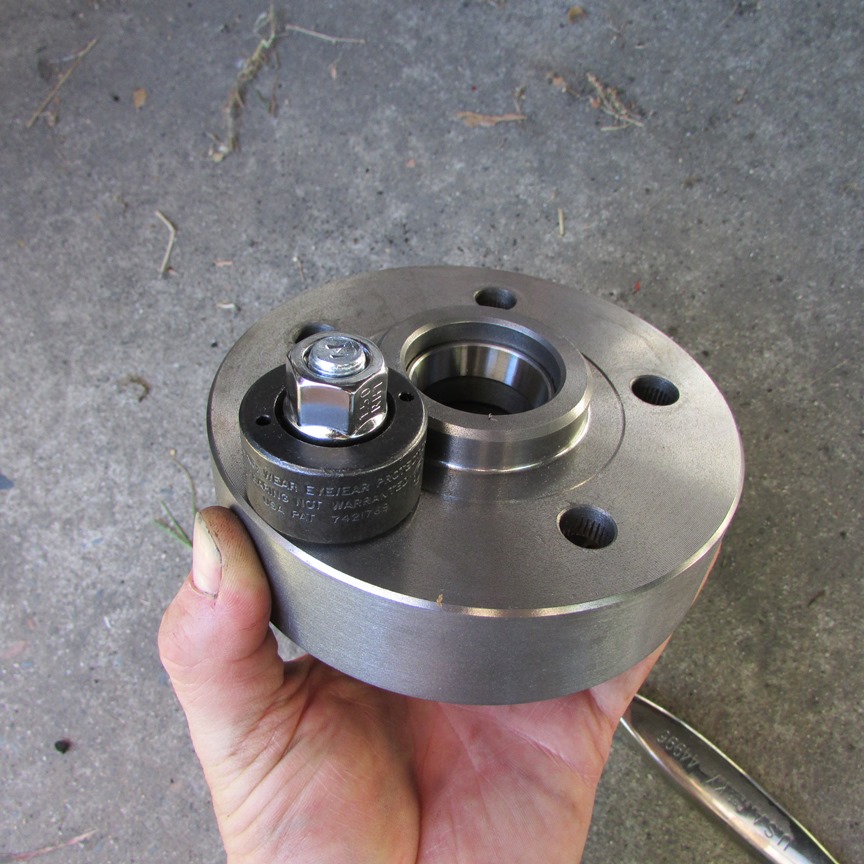
DoubleC4's aluminum caliper bracket. Painted black for stealthiness! Bolts are McMaster-Carr #98093A751 (Class 10.9 Flange Head Cap Screw, M12x1.75mm, 30mm length). I used Loctite Blue threadlock on the threads as, in theory, these bolts are probably not coming out. I believe the Fiero spec on these bolts is 34 or 38 lb ft, which seemed very low for an M12 bolt holding brakes on. I torqued mine to 60 lb ft.
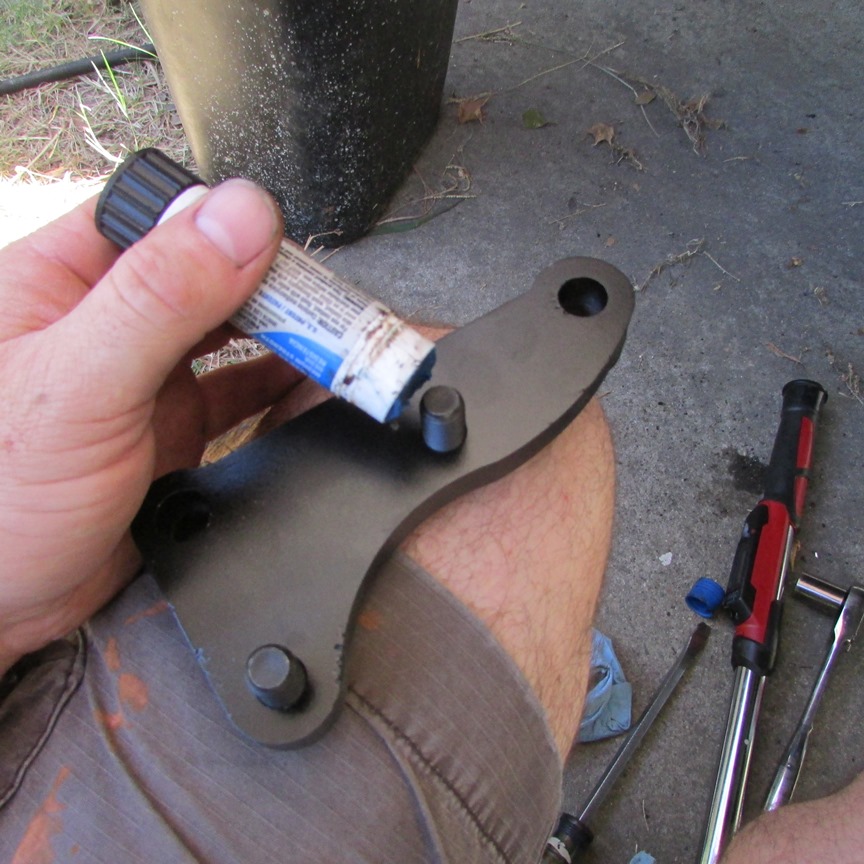
The caliper adapter installed and torqued.
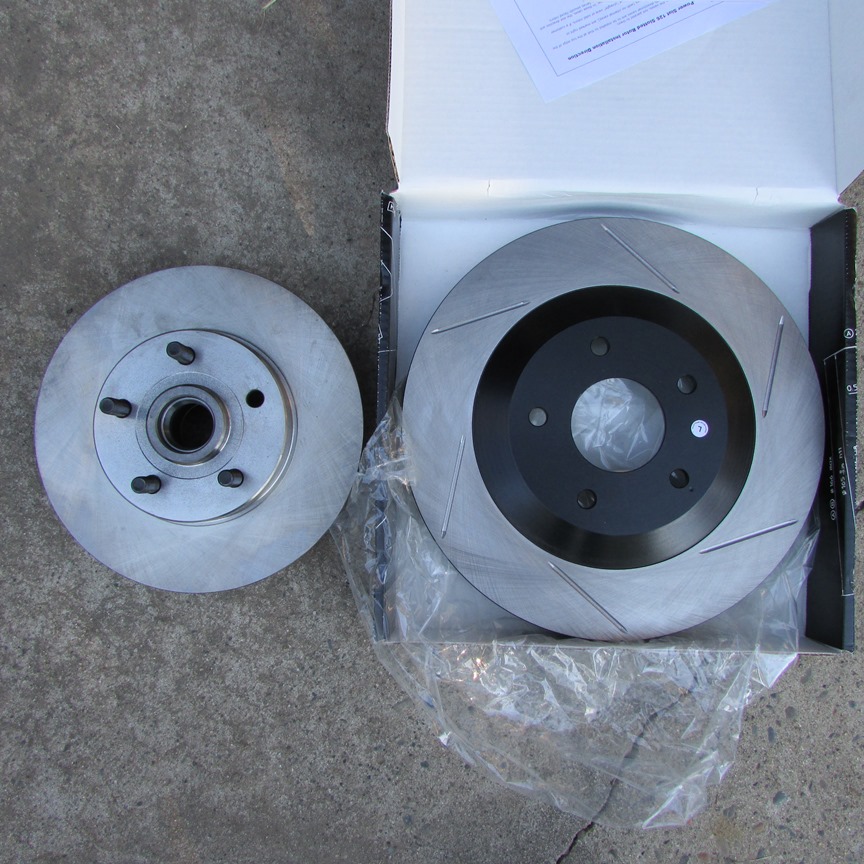
A comparison of the stock Raybestos Fiero rotor and the incoming C5 rotor. I went with Stoptech Sport Slotted Rotors from TireRack. They are high quality rotors without being over the top - about $100ea.
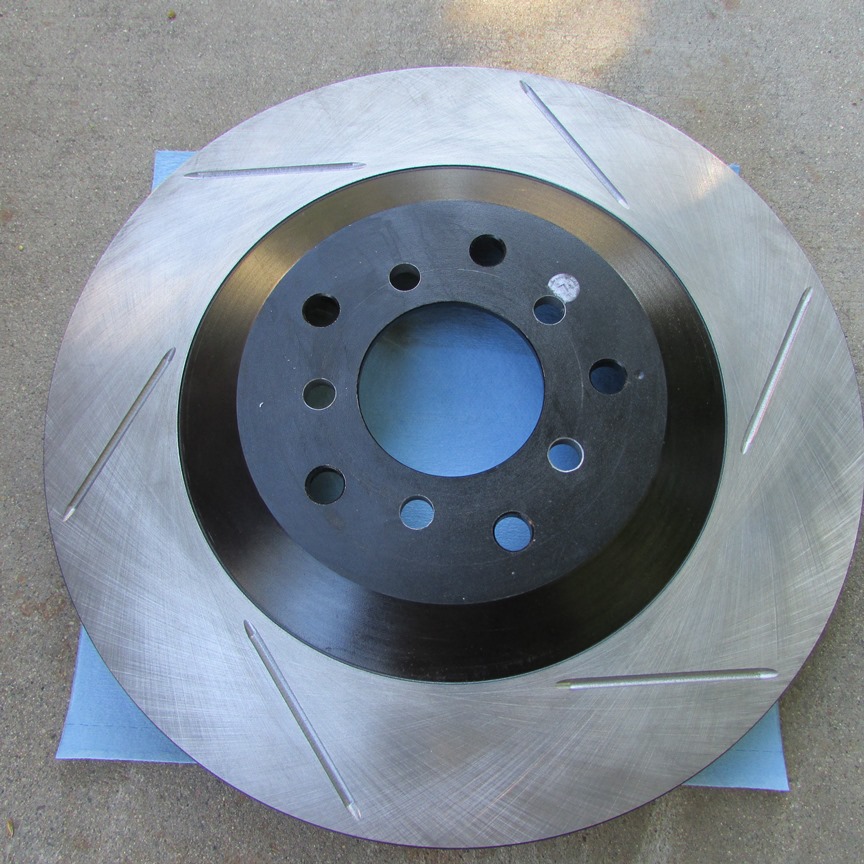
5x100 pattern drilled into the new C5 rotor by a local machine shop.
My car came to me with Grand Am brakes, and upon disassembling I found three of the stud holes on one of the turned down hubs had cracked. I bought new Raybestos rotors and had the machine shop modify them, leaving the entire hub area intact. The extra diameter would be a problem with the Grand Am rotors, but these fit easily inside the Corvette rotors. Yes, it's a bit extra unspring weight, but I sleep easier at night knowing the structural integrity of my hubs is secured.
FWIW, the total machine shop cost of the redrilled rotors and turned down hubs was $100.
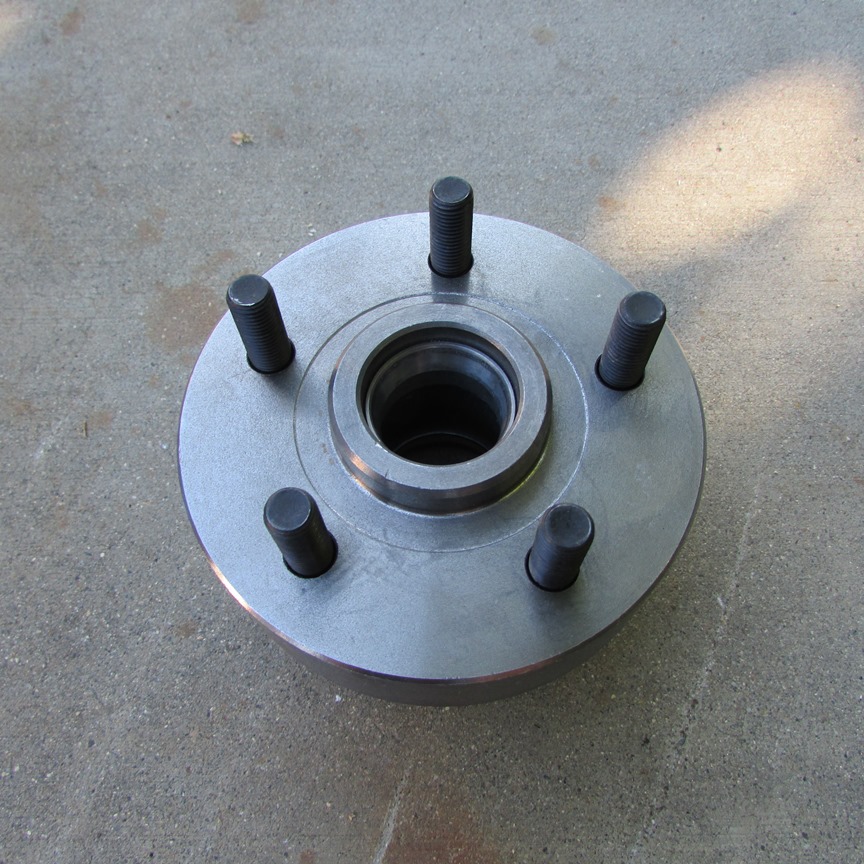
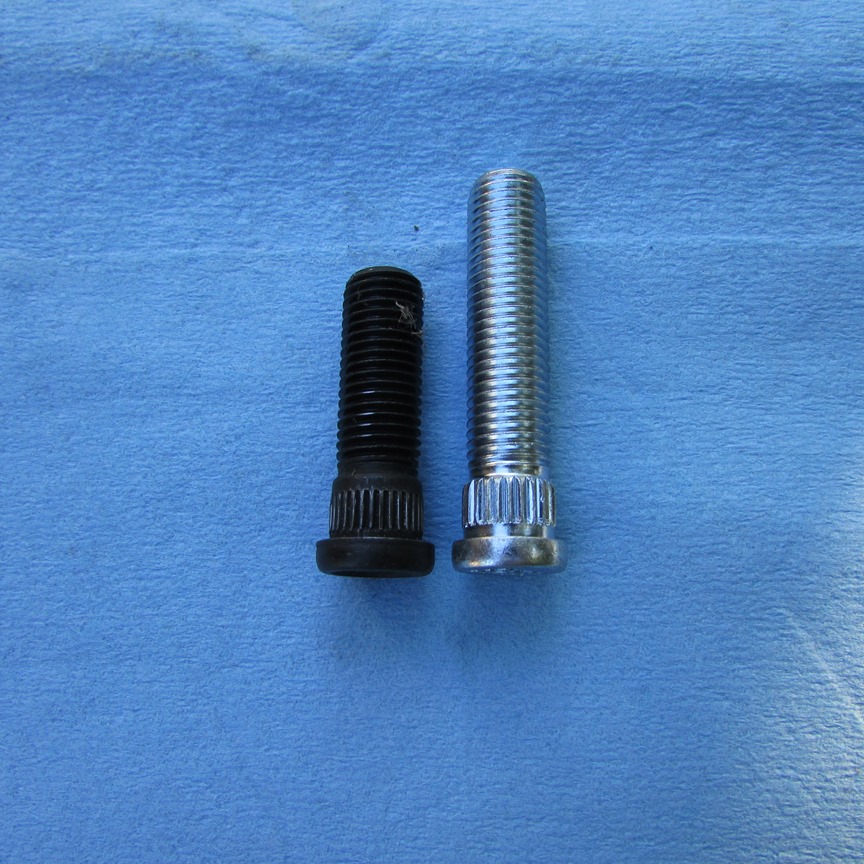
Stock studs from the Raybestos rotors next to the Dorman studs I went with. I found out the hard way but not all Fiero rotors have the same size studs installed in them. It's important to pull a stud from whatever you're running and measure the knurl so you know what you're shopping for! I went with longer studs to make up the difference of the additional thickness of the Corvette rotor, aftermarket wheel, and a planned 3mm spacer. The OE studs would not have provided enough thread engagement. These are studs from a Hummer H3, suggested by another forum member. You can also check Dorman or ARP's website for studs, listed by thread size/pitch, knurl diameter, and overall length to find what you need.
I used a shop press to remove the studs from the Raybestos rotors, then the trick (and cheap!) little Lisle 22800 wheel stud installer to install the new ones.
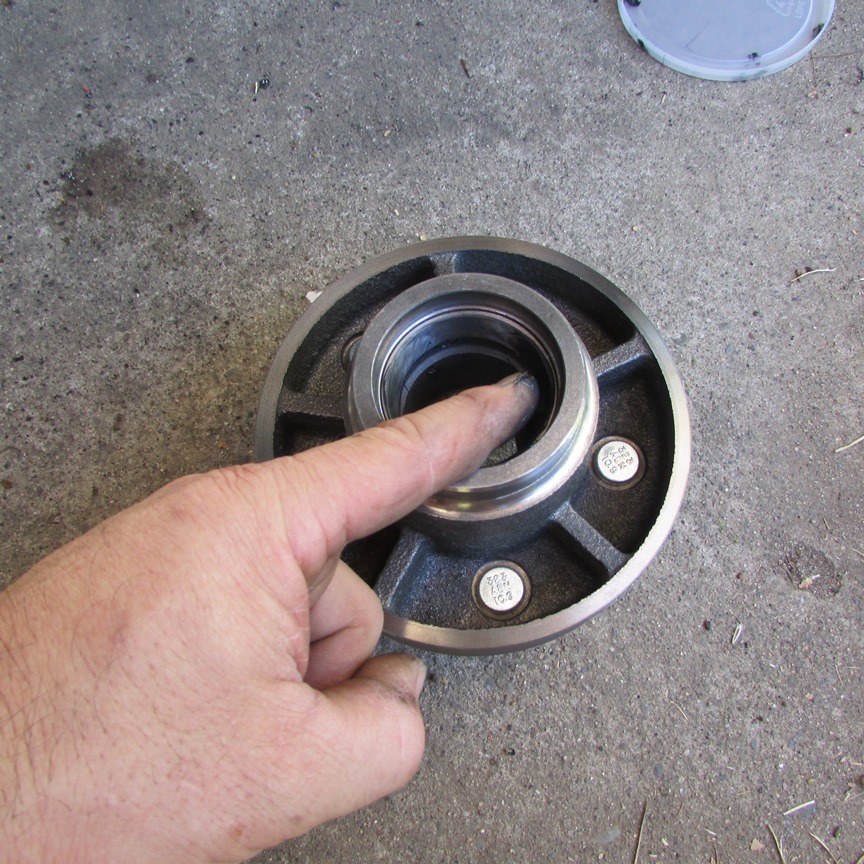
Completed hub, almost ready for install.

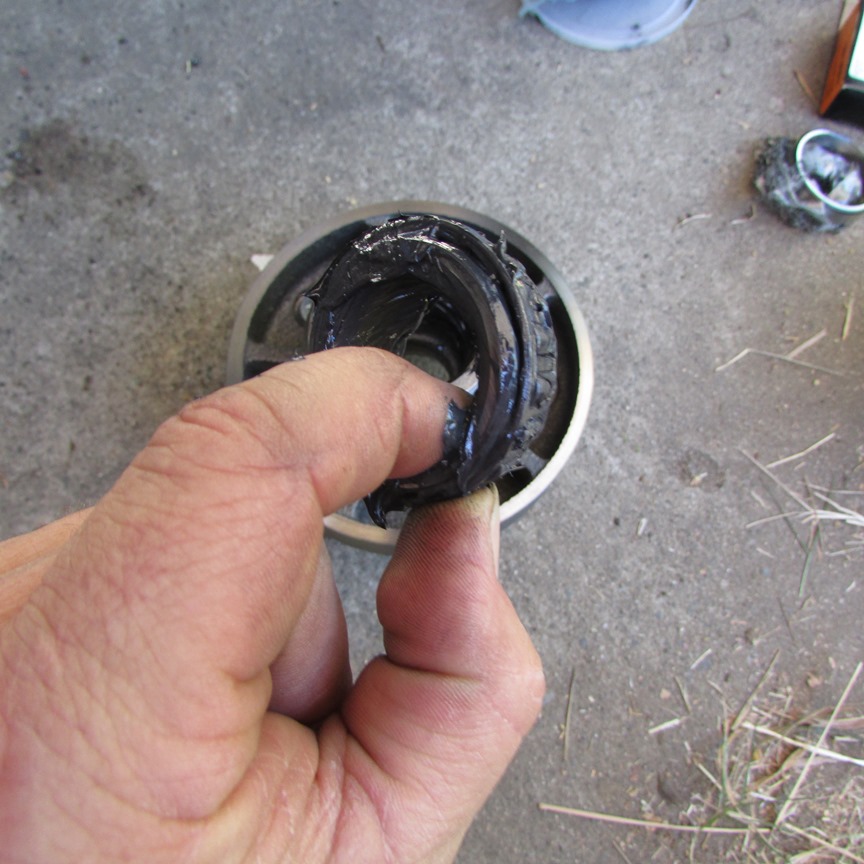
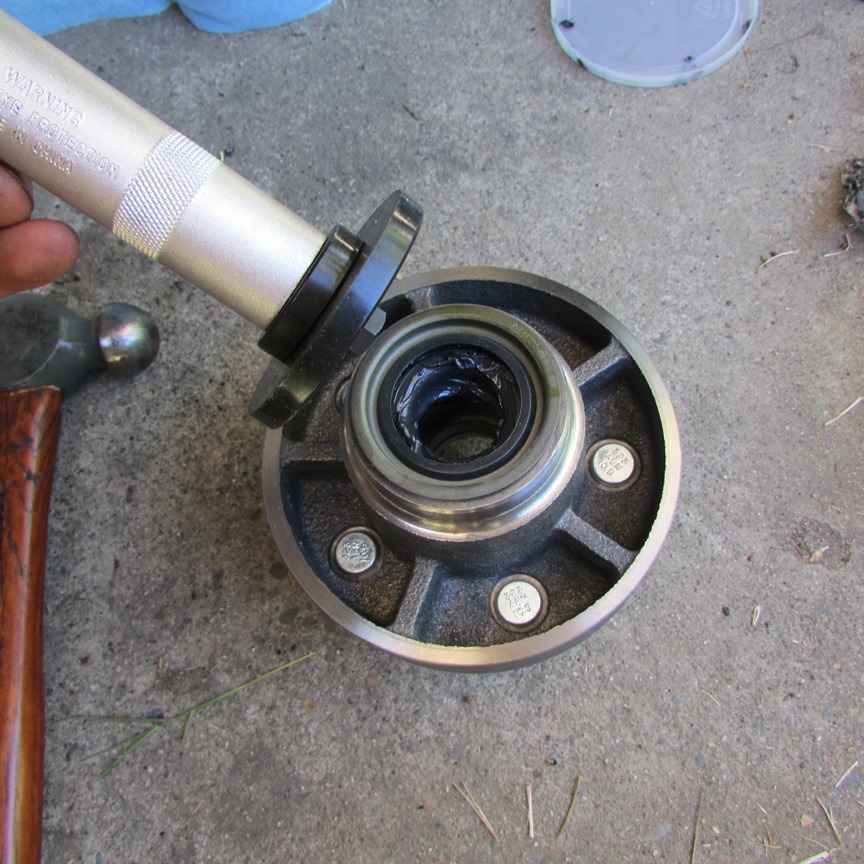
The races must be greased, and the inside of the hub packed with more!

Packing the new wheel bearing with Valvoline synthetic grease. It's important to get grease everywhere!
The bearing seal being installed with a cheapo Harbor Freight seal driver.
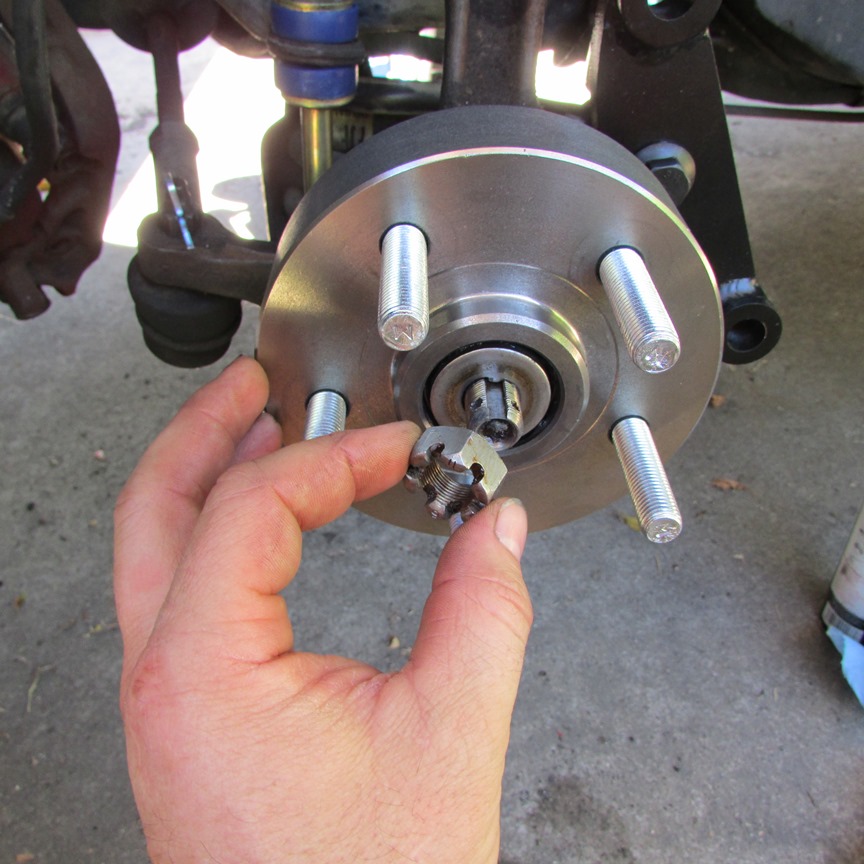
I reused the stock hub hardware. Proper torque is important on the Fiero! The correct procedure is to spin the wheel in the direction of tightening the nut, tighten the nut to 12 lb ft, back off the nut until "just loose," snug the nut back up by hand, then adjust the nut until the cotter pin slips in. There should be .03-.13mm of end play when it's done. Too much or too little and you'll wreck your bearings in no time!
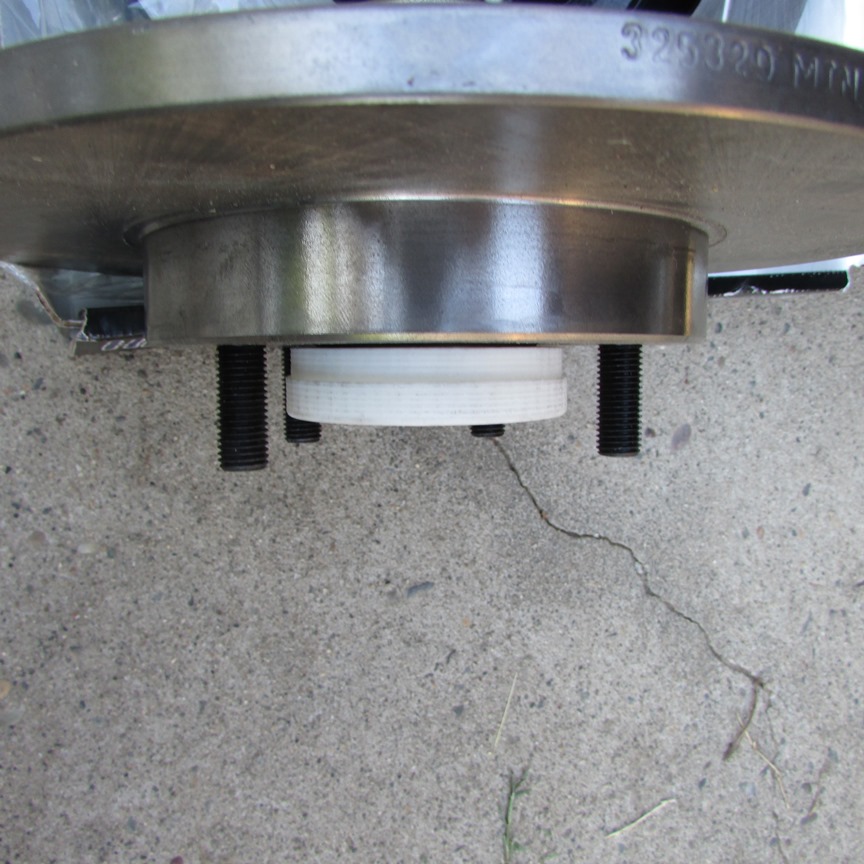
DoubleC4 supplied this dope little plastic ring that centers both the Corvette rotor and my aftermarket wheel. Very cool. Normally a wheel centering ring is installed into the wheel, but that doesn't work out in this arrangement. I beveled the edges of the ring to make slipping the wheel over easier. It works great!
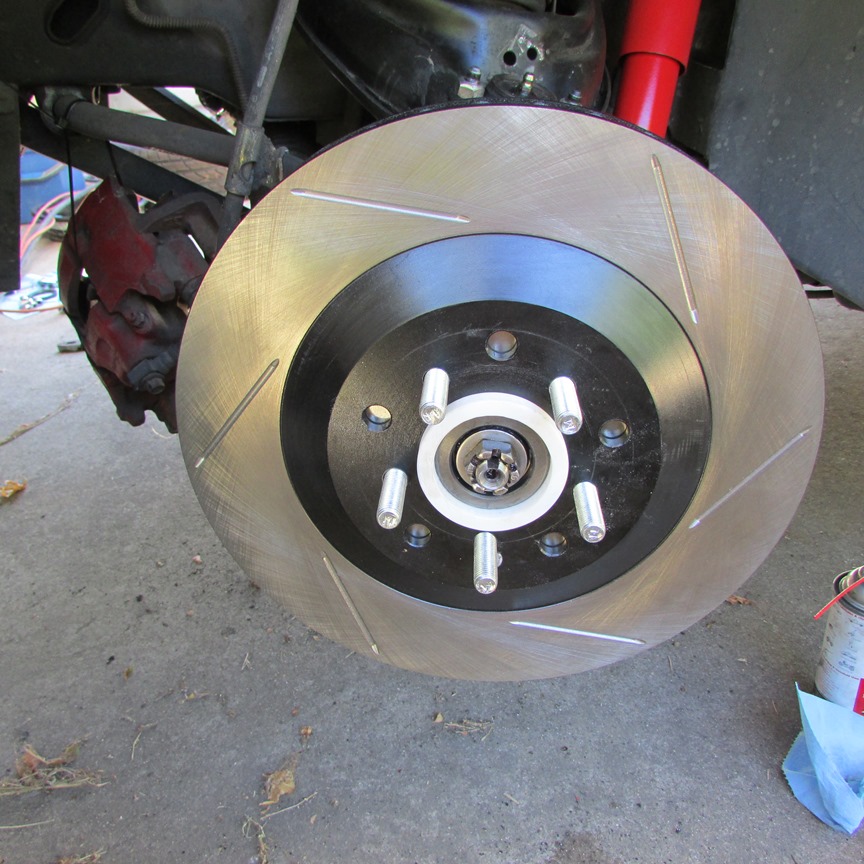
The hub and rotor installed, using the centering ring. You need to be careful with Corvette brake rotors, as they may be directionally vented - a Right that's different from the Left. Don't assume the slots or crossdrilling goes a particular way, as it's the internal vents that matter. Check the documentation or part numbers that come with your rotors to ensure you've got them on the correct sides of the vehicle. If you don't, you'll be giving up performance!
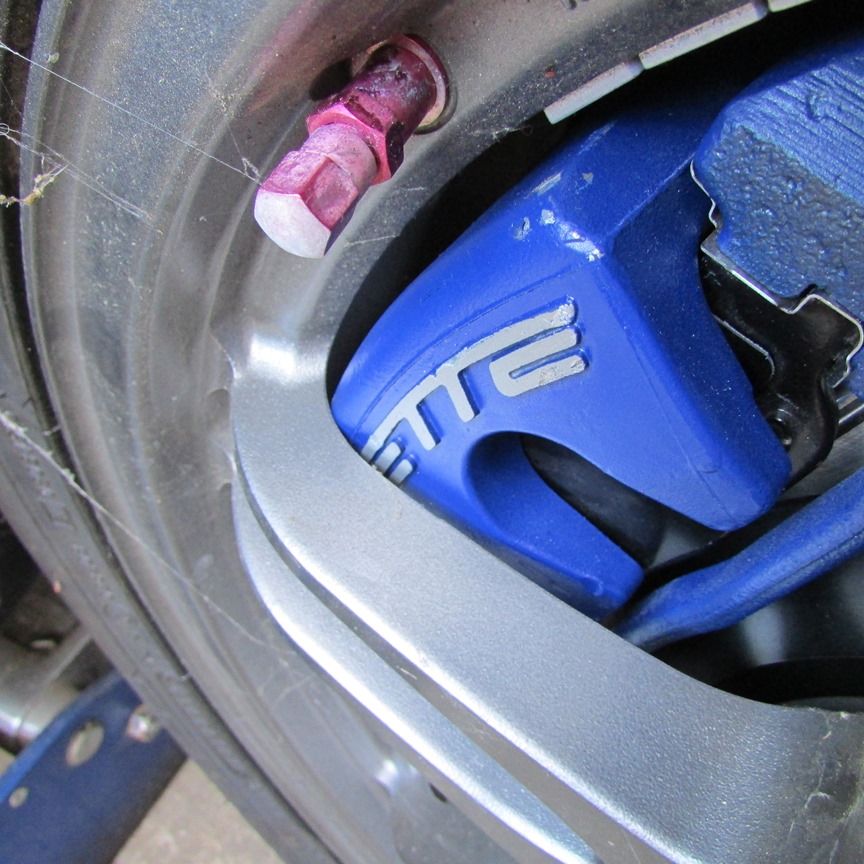
I went with C6 calipers instead of C5 calipers based on some advice from a friend. C5 calipers are apparently prone to spreading with heavy braking, and often times these make it through the reman process. The C6 caliper has a reinforced bridge and isn't susceptible to such damage. Otherwise, it's dimensionally identical to the C5 part. I bought Retech remans from Rockauto, about $150ea including the core charge. I got the "loaded" variety as it was the most effective way to get the mounting brackets. Figured I'd use the pads until there was a reason not to.
I went with blue paint, because I thought it would look good behind the anthracite wheels on the silver car. This is the caliper masked off for painting, with three coats of VHT blue.
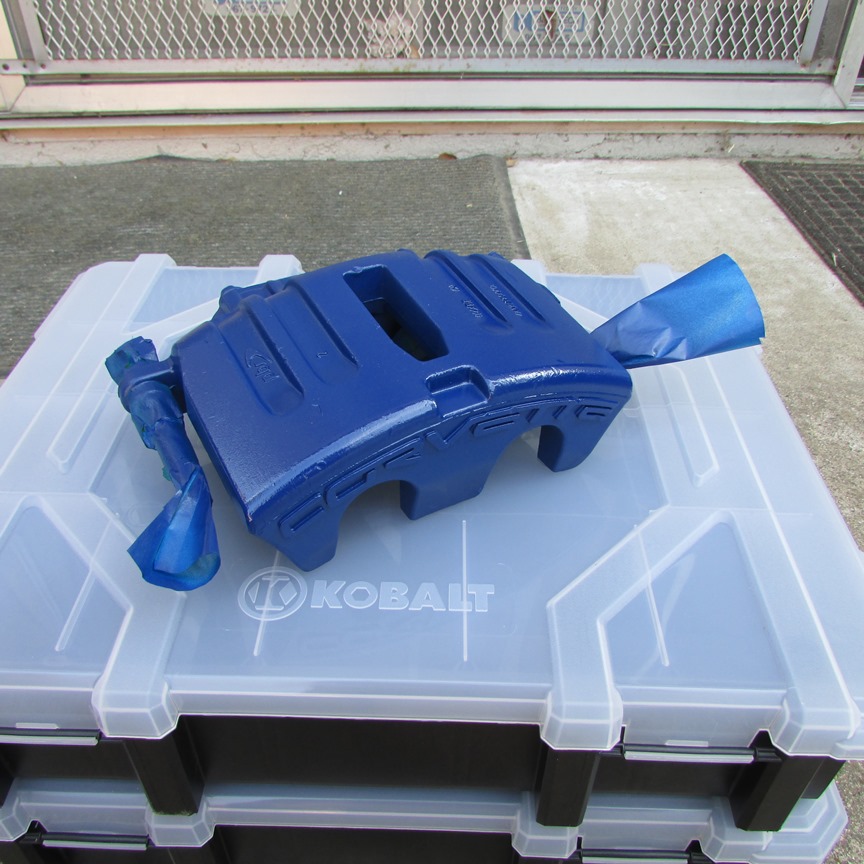
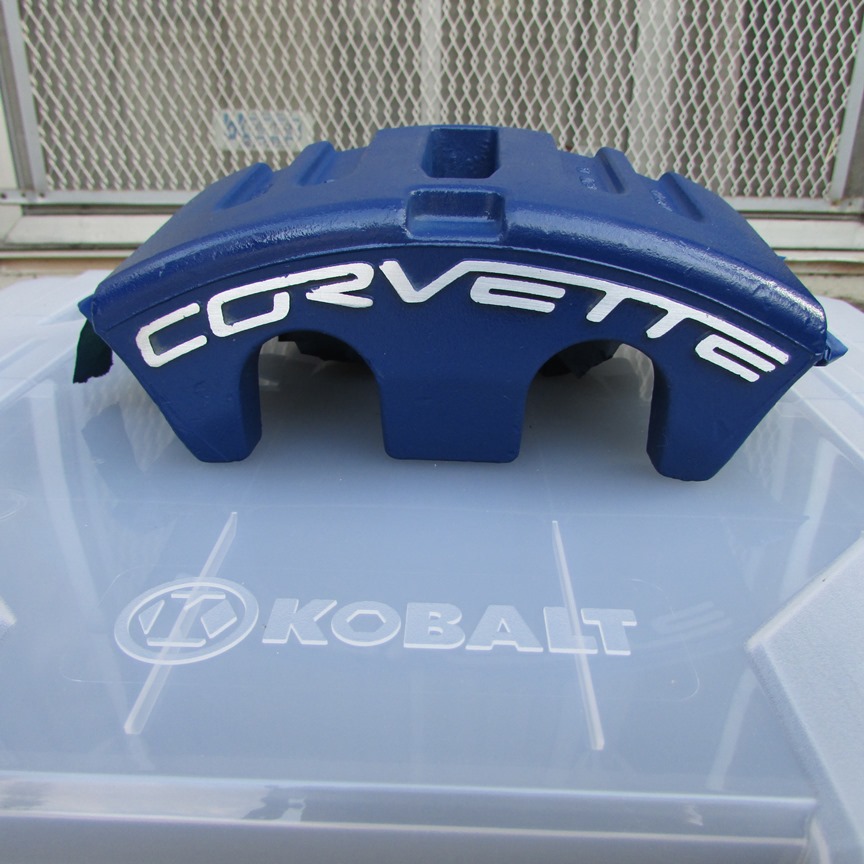
The finished C6 caliper. I used 400 grit sandpaper on a Durablock to shine up the Corvette script, and then three coats of clear over the whole thing with VHT brake caliper clear to keep the script pretty.
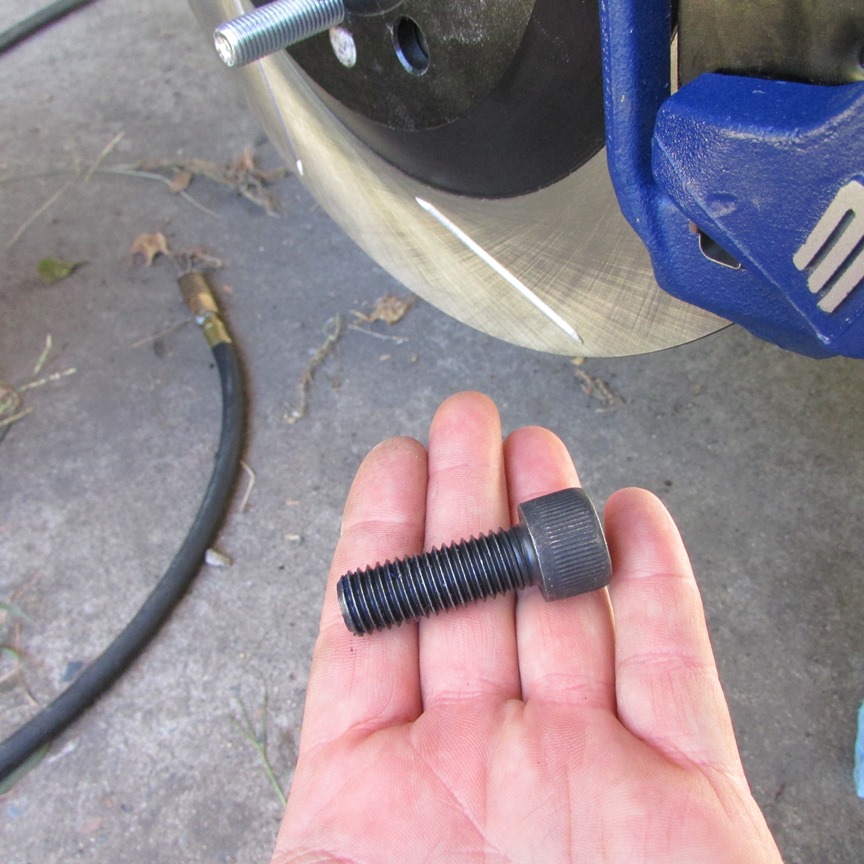
I purchased these bolts from McMaster-Carr. #91290A725 (Class 12.9 Socket Head Cap Screw, Alloy Steel, M14x2mm Thread, 40mm Length). Install the Corvette caliper using these bolts. GM specs 125lb ft for the calipers on the Corvette, so that's what I went with.
At this point, you are ready to swap the brake hydraulic hose from the old caliper to the new caliper. Make sure your banjo bolt matches the threads on the new caliper. At some point, GM switched from the 1.5 pitch banjo (on the Fiero) to a 1.00 pitch banjo. Not sure when this switch happened, but I needed 1.00 for the C6 calipers. I initially sourced banjos from NAPA, but in the end went with Russell R40506 from Summit - see the bit below about clearances.
GM specs the C6 caliper's banjo to be torqued to 30lb ft, but that's a LOT of torque for a fine-thread M10. After a little searching, I found most places recommend 10-12 lb ft for the banjo, so that's what I did. Be sure to use new sealing washers!
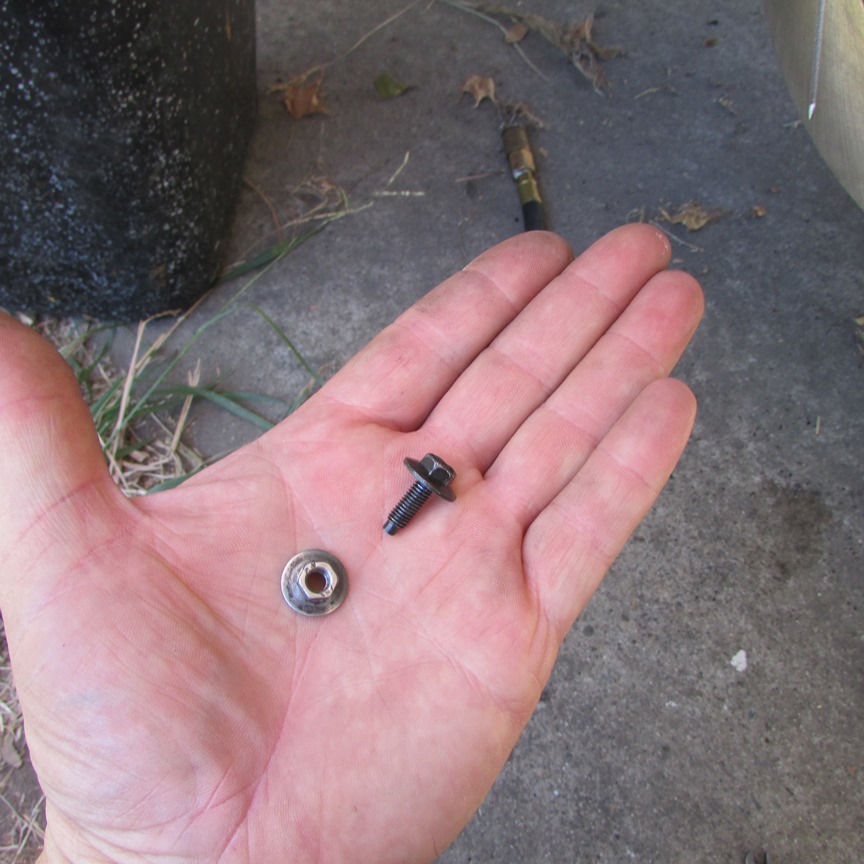
Once installed at the caliper, the brake hose bracket was re-secured to the upper a-arm with an M4 bolt and serrated flange nut, to facilitate future maintenance. Be sure to use some sort of fastener that will resist vibrating loose!
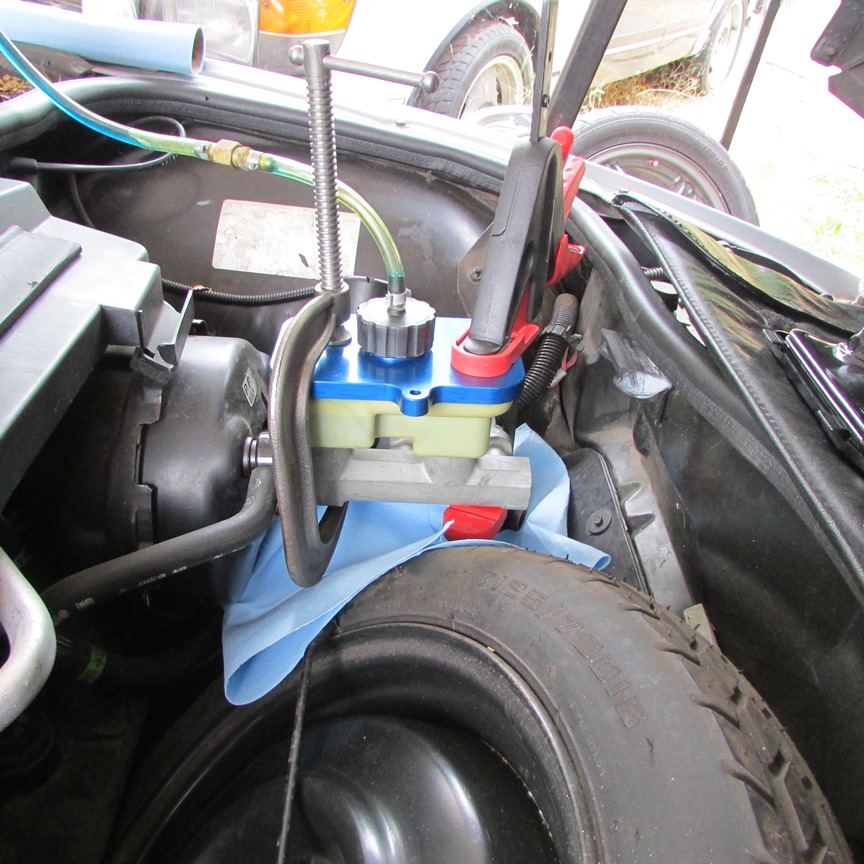
At this point, you are ready to bleed the brakes. I use a Motive Pressure Bleeder because it's 100% reliable in getting fully bled brakes. My car has a Blazer master cylinder, so unfortunately the generic GM rectangular adapter that comes with the Motive bleeders is too small. Instead, I use a specialty adapter sourced from a Corvette shop that works great. Looks crazy, though!
Once that's done, it's wheels on, jack down... unless...
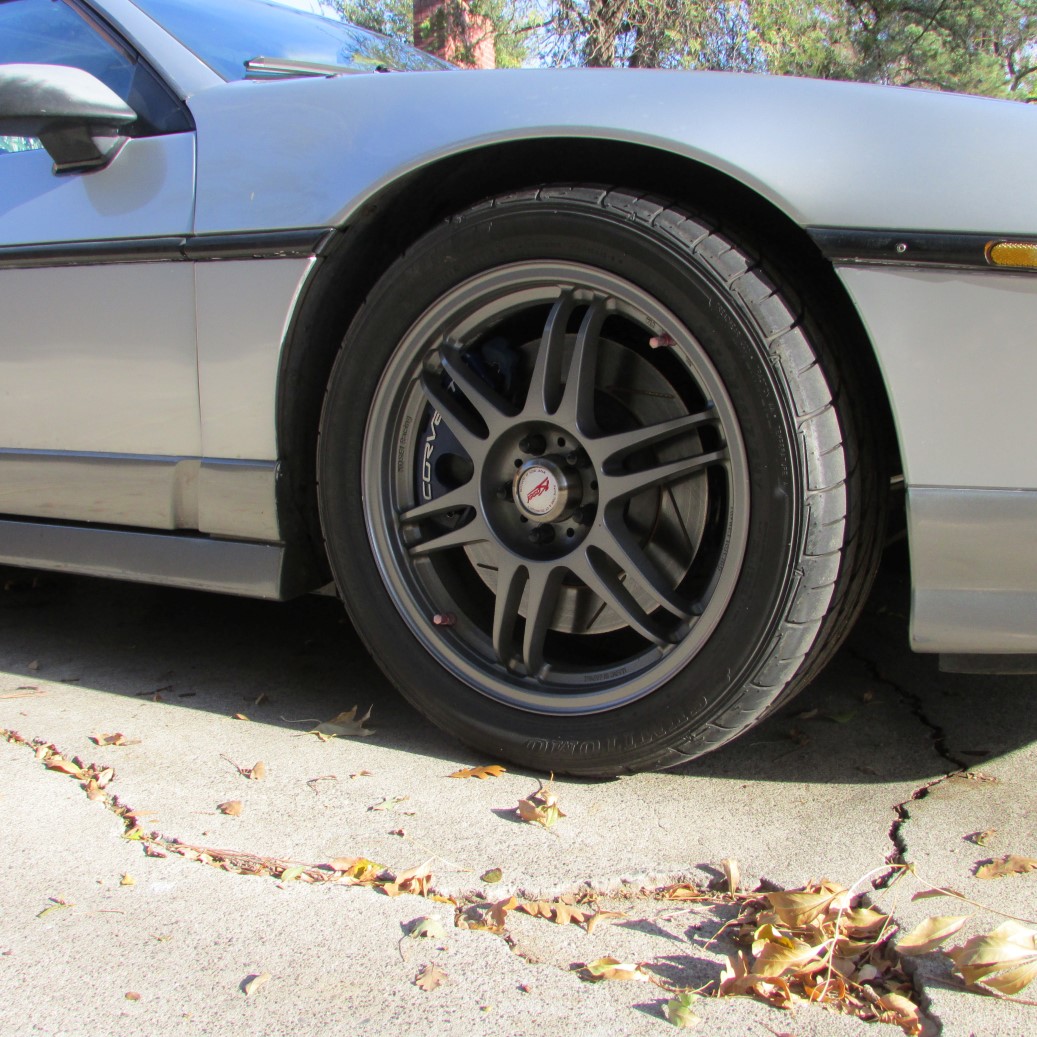
One thing I had not originally anticipated was interference between the caliper and wheel spoke. These are ET50 17x7 Koseis, but interference is going to be a function of wheel design more than anything, so you may want to measure before buying your wheels! You should have a good 3-5mm of space between the caliper and wheel - here I've got 2mm or so. I had been planning on using a 3mm spacer to add a little width to the front, so this tight fit was just one more reason to do it.
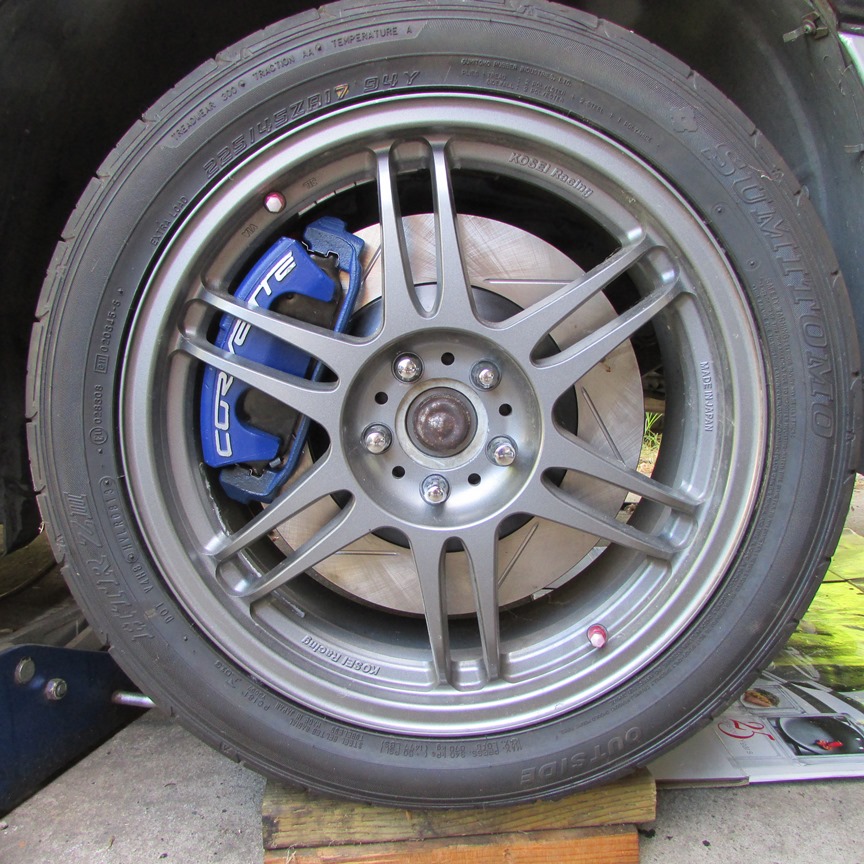
The final result does look good!
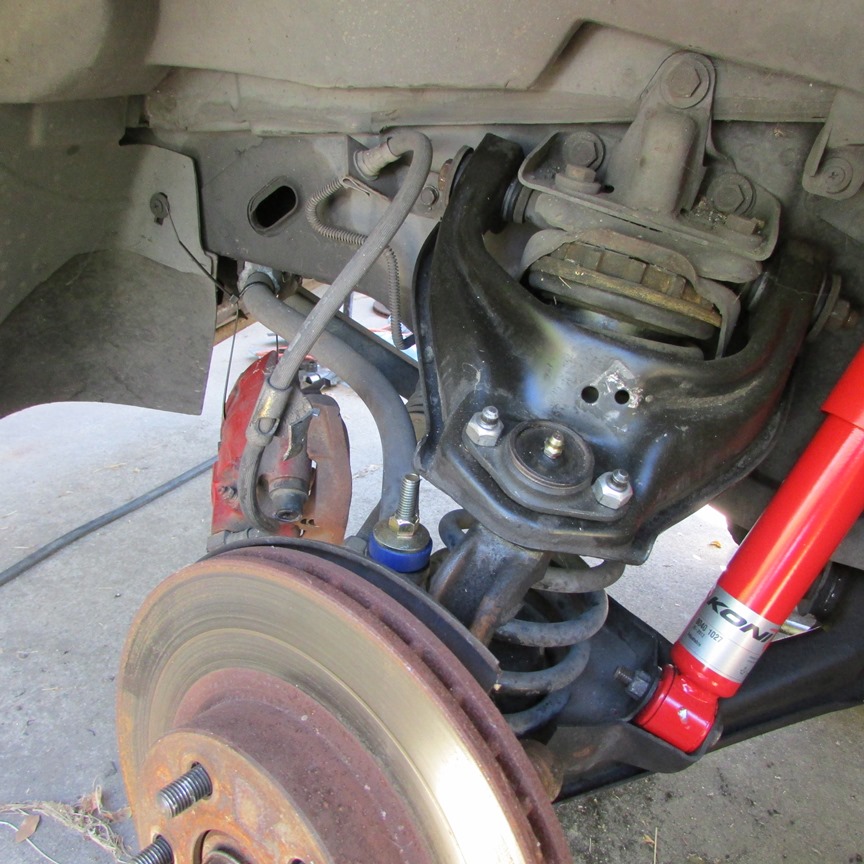
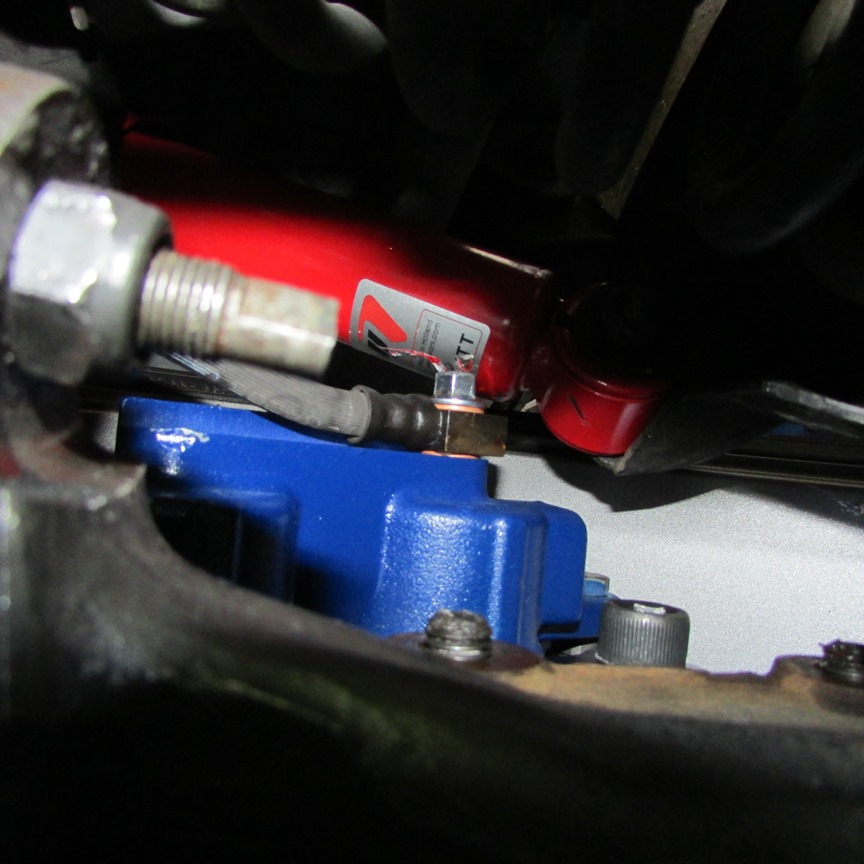
Something to be aware of with this conversion is, apparently, the possible interference between the brake caliper and shock. Not sure if this is unique to my car - the only variable would be the Koni shock (maybe a little thick?). The entire front end of this car - bushings, balljoints, tie rods, etc. - was new, done at the same time as the brakes. The photo was taken at stock ride height, with stock Corvette banjo bolts, with a stock neutral (0" toe) alignment, at full lock. After lowering the car about 1.5", getting banjos with slimmer heads, and adjusting for a quarter inch of toe the interference was virtually (but not quite) eliminated, but just an FYI for a totally stock car.
With everything wrapped up, the big question of course comes down to the drive... I was very patient - I double-checked my work, properly bedded in the pads, and put 100 gentle miles on the car before getting aggressive with the brakes. It's taken me two months to write this, because I wanted to have a real sense of the performance.
My car is an '87 GT V6 with an '88 cradle swap and a 3.4pr from an f-body. That work was done by a previous owner. Prior to the brake swap, I rebuilt the entire front end (bushings, ball joints, tie rods, steering damper - everything). I've got Koni Specials ("Reds") at all four corners (also new), all set on "++." 300 lb in springs on the Held/AMS coilovers in back. Front springs have had 1 full coil cut, but are stock. Wheels are Kosei K1-TS (~15lbs ea), 17x7 F and 17x8 R. Front offset is +50, but of course that's modified by the ~9mm thickness of the Corvette rotor and a 3mm spacer, so the net change on wheel centerline vs stock wheels is actually -3mm (ie, they are inboard 3mm). Rear offset is +45 - with the extra 1" of wheel width, the net change in wheel centerline is -2.5mm. The rolling stock is a great fit. Tires are 225/45-17 F and 245/45-17 R, brand new Sumitomo HTRZ-III. Obviously front brakes are C6, rear brakes are stock '88 Fiero. Front pads are whatever came in the calipers, which is ostensibly "OE material." Rear pads are (not joking) Duralast Gold that are about 50% worn. I'm running a stock booster with a Blazer master cylinder. I reused the stock rubber brake lines as I wasn't sure what the bite of the brakes was going to be, and I didn't want the fronts too touchy. I may yet go to stainless.
Immediately after putting it all back together, I took the car in for an alignment. I'm running -1 degree camber in the front (slotted upper ball joints), .25" toe in. Caster is -5 degrees. I'm running 32psi front and rear.
I've got just shy of 300 miles of mixed commuting, freeway, and street hooliganism on this setup now, and here are my observations:
Zero problems with brake balance. I haven't tried any stupid braking like stabbing them in the middle of a turn, but for straight line stopping and mild trail braking I have not managed to upset the car once. Quick stops are perfectly controlled, and there is never a sense the back end is doing anything I don't want it to.
Brake modulation is great. It's very easy to move between light braking and heavy braking - there is no sudden engagement or unexpected bite at either end. In fact, I feel more confident trail braking now than in the past - I have a concise and distinct knowledge of what the brakes are doing at all times. This because especially evident when trying a little left foot braking on some of Sacramento's wackier roads.
Pedal travel increased ever so slightly versus the Grand Am brakes, but the upside of this is that heel-toe (or, side-to-side in this car) is incredibly easy to accomplish - even comfortable. Rev matches on downshifts feels positively elegant now. The engagement point of the brake pedal is perfectly inline with the engagement point of the accelerator. I could not be happier with this!
There is a slight sponginess to the pedal, but I am certain it's the brake pad "choice." I've experienced the same feel in other cars with cheap pads, and I'm certain it will go away when this car gets the Hawk HPSs I ordered but did not install. I wanted to start out with a very mild street pad before moving to anything aggressive. This car already has way more brakes than it needs, so I'll probably save the Hawks for a track day, keep these "OE material" pads for the street.
As expected, these brakes are unfadable - at least not with 160hp on tap.
The car doesn't weigh enough or change velocity quickly enough to push the brakes in the slightest. I'm hoping I can make them work a bit more on track, but on the street it's just not possible.
I'd like to work in a track day for the car to really put the whole setup to the test, but that will have to wait until spring. For the street, I couldn't be happier. The brakes do exactly what I intended them to do, and do it well. Truly, worth every penny and a great finishing touch to all the suspension work. As a buddy of mine put it, it's like driving a go-kart. 3.4pr burbling through a Flowmater right behind your head, grippy tires, and reliable brakes. It's super neat.
The
final piece of this puzzle occurred to me randomly a couple weeks ago, and that was flat recovery. Obviously the teeny tiny Fiero spare was not going to fit over the Corvette brakes. In my head, I just figured if it ever came up I'd swap a rear wheel onto the front, and put the spare in back. The moment when it hit me staggered wheels/tires side to side probably wasn't a good idea was a bit of a facepalm moment... Duh... After considering a few options, including a space saver spare from a recent VW, I decided to go with a page from the GM playback and use one of the compressor/sealant "packs" from a recent Chevy as my Plan B. $25 off ebay? Sold. After checking various mounting options, I ended up just stashing it behind the passenger seat. It fits great, does not impact fore-aft travel in any meaningful way, and stays out of the elements.
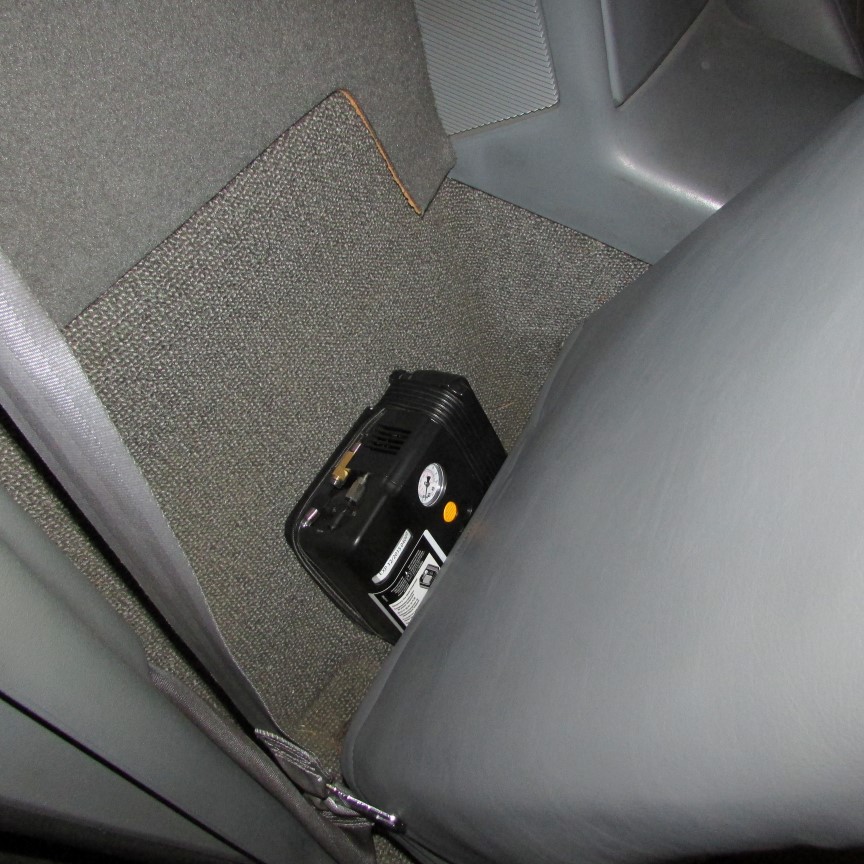
I yanked the spare and tire iron/lug nut wrench out of the front but left the jack. You never know when a jack will come in handy! Saved me about 15lbs over the front axle, and relocated three pounds to be between the axles.
[This message has been edited by thesameguy (edited 11-06-2013).]