came across this recently... have read through page 16...
http://board.moparts.org/ub...&page=0&fpart=1&vc=1intend on trying it on my "new" 1973 dune buggy...
chasgas
in a nutshell: Awesome.
Im gonna go get to work.
This is the step by step process i made, using 69chargers words only I added one sentence in ()'s
I just copied, and pasted.
here it is. If i left out anything. LET ME KNOW!
So, im gonna go rip off that sign, and get some 150grit, and sand till its smooth, and thenpaint.
this is exciting
Body prep
next prep your car as if was any other paint job, fix all the rust, ect....
no need to prime the car since the tremclad allready contains elements which allow
it to be painted over bare metal.
mixing paint
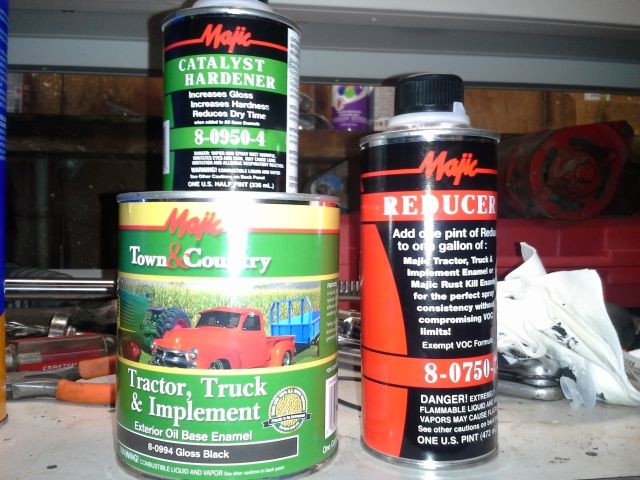
next u thin the paint with mineral spirits so it just about as thin as water, a little thicker.
theres no ratio that i could come up with because once you open the can and pour some out the next day the paint will be a bit thicker.
if i had to guess i would say about 20% thinner or so? just thin enough that it does'nt run,
but not too thick. keep in mind that you can allways add more paint to the mix if you go too thin.
and the coats go on really really thin, that is the key, like i said before you don't really have a true non transparent base until the 3rd or 4th coat.
Painting
I also load the roller up quite heavily, then work it until the roller does'nt have so much paint in it
and do the detail work after. once you spread the paint wait a minute or so and then just really gently
run the roller using only the weight of the roller, on the sides just use very very light pressure as if
it were the weight of it. How you thin the paint is critical, i have not had one paint run on any of the cars
i've painted. To give you an idea, you really only start to have full coverage to where u can't see any body work
or underlying color thru the paint until the 3rd coat
after u do 2 coats, wet sand the whole car, then repeat, 2 coats, wetsand, 2 coats wetsand
The trick is in how you thin the paint, get it as thin as possible without running,
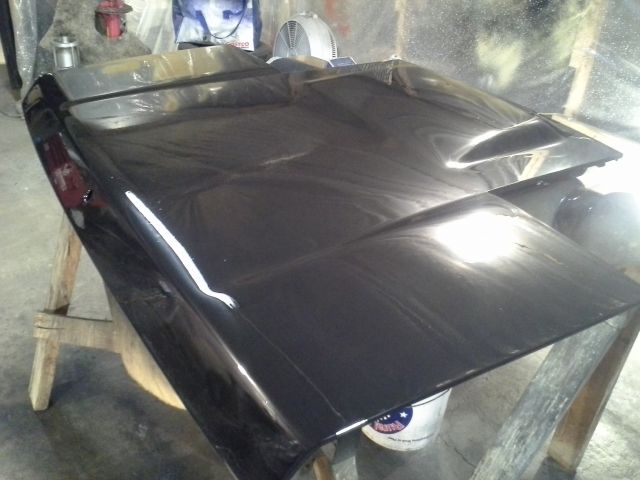
and the paint "self levels" it comes out like glass,
wet sanding just makes it better,'
when the paint is thinned your barley putting on any paint with each coat, so you really need to do about
6 coats to get enough of a base so you can wet sand and polish
You only cover up the bodywork, underlying color until after the 4th coat, keep in mind that there is wet sanding in between each 2 coats.
if you get bubbles when your painting your pushing down on the roller too hard, lighten it up a bit,
let the paint sit for 1 minute after you've spread it out nice, then just run the roller over the area VERY gently using only the weight of the roller,
then turn around, have a smoke after you've done the pannel, and when your done your smoke, turn around and you'll see it has "self leveled"
before your eyes
Painting Hard to get areas
do the hood, doors, front fenders, and the trunk, that's easy.
then i do the whole roof and sail pannels in one shot working fast, there's enough time to do it before the paint tacks up if u rush it,
not the time to have a coffee or smoke. i stopped at the rear quarter just below the sail pannels and top quarter pannel where there is a edge to stop at.
then continue from there on each side meeting in the back rear valance. the trick there is to not leave and raised paint lines,
and smooth it out gradually as u approach the point where u stop, then run to the other side and do the other half of the roof and overlap the strokes.
wetsanding does the rest, but u try to make it as smooth as possible, the paint is very thin on each coat. it's really hard to describe,
that's where all the expirementing comes in to play.
Sanding
do one panel at a time, and don't stop once you start. once your done the final coat,
wetsand with about 1000 grit to a totally smooth finish, and then using a high speed polisher
i use a buffing bonnet and turtle wax polishing compound. do the whole car with this, and i'm telling u,
depending on the amount of time and paitence you have, the results are amazing
use a spray bottle and keep the paper really wet, finish with a 1000 grit or so and then buff with a random
orbit polisher using turtle wax POLISHING compound, NOT the rubbing compound, its' to harsh.
it is critical to use the proper roller, it's about 4" wide and about 1 1/2" thick,
and really high density white foam. it really works and is much tougher paint than todays single stage or base clear,
very hard to scratch
did not block sand the car just wetsand progressivly finer paper by HAND, no machine, no block nothing.
using any "block" to sand i found the paper got dirty fast and got all plugged up,
so do it by hand and keep it really wet, using a spray bottle in one hand and a clean bucket of water and a shammy
(dollar store!!!)to clean it off to see how it looks. i prepped the car with 80, then 100, then 200,
finished with a 400, did all my body work, and painted. after 2 coats (about 4hrs work for the whole car)
i wetsanded with a 600, then did 2 more coats, wetsand with 800, 2 more coats and sand with a 1000-1500 and polish,
followed by wax, done......
one more pointer, when u wet sand the final coat, the paint looks flat, like velvet,
if you take a rag soaked with mineral spirits and whipe a spot down that you just sanded,
that's what it will look like buffed. if you buff and decide to paint again clean the area with
mineral spirts so that and residue from the polishing compound is removed or the paint won't stick.
do another coat, try to put it on really light, i hope u prepped the fender a little before you started painting.
when u wet sand try using a 600-800 grit, and lightly wet sand the fender with light pressure and ALOT of water.
Spraying it on should maybe work better but its messy, stinky, and a pain. when u first start to wet sand you'll notice
the paper just kinda glides over the paint and it does'nt really feel like your sanding anything, keep going, soon the water will stop
beeding off the paint and it will start to turn yellow. after wetsanding it looks like crap, this is where the polishing come in, brings it to glass.
i haven't tried soap and water, i see no real advantage, i just use straight water and keep the area really wet, using a spray bottle and spray it down alot,
after wetsanding for a bit i have a bucket of water and a shammy i whipe down the surface with while it's still wet, that way it's much eaiser
to clean before it dries. and as for the mineral spirits on a wet rag and just whiping it down, yes, that's what it looks like polished, even better,
just gives you an idea of what it will look like when finished, that's about the first time you really see the results.
buffing
polishing compound, not rubbing compound
the rubbing compound could be used if you really want to, i just found it much better to wetsand with 1000 grit and then go straight to polishing,
that's what worked for me. the rubbing compound seemed to ball up under the polisher and make a mess and make some scratches when it balled up,
i used the polishing compound on a regular bonnet on a 10" elecrtic random orbit polisher, it's only after polishing that it looks like glass,
and i kept it wet with water from a spray bottle on the bonnet, forgot to mention that, but keeping it quite wet worked great.
like i mentioned before after wetsanding use a random orbit polisher and the cheapest
POLISHING COMPOUND made by turtle wax, it comes in a paste in a small round flat container and it's white,
allmost looks like hand cream and smells good too!!!
Random tips
as a hint if you try it first you paint the surface, and then really lightly "skim" the surface with the weight of the roller
only to remove any lines bubbles ect, then just leave it for a minute or two and you'll see it just "self levels"
totally flat to glass. then wetsand it really fine
Oh and i strip the car of all chrome, bumpers, rubber, door handles, trim, ect...nothing looks cheaper than a car that's just taped!!!
have a shelf full of polishing compounds, mothers, mequires, ect....know what works the best?
the cheapest one!!! turtle wax polishing compound in the white paste, $3,
polish ANY enamel with a electric random orbit polisher and you'll be impressed......... and just a tip if you try it keep the buffing bonnet WET,
have a spray bottle full of water and spray it on the bonnet each time u load up the polish paste, be very generous with both.
there's still bubbles in the paint when u mixed it really well then get some paper towel and "skim" the surface to get rid of the bubbles.
if you get bubbles when your painting your pushing down on the roller too hard, lighten it up a bit, let the paint sit for 1 minute,
after you've spread it out nice, then just run the roller over the area VERY gently using only the weight of the roller,
then turn around, have a smoke after you've done the pannel, and when your done your smoke, turn around and you'll see it has "self leveled"
before your eyes. if your doing a vertical section just apply a tiny amount of pressure as if it were the weight alone of the roller.
it's really tricky to do, i could lay it down perfectly level but i have done it alot, you have to "read" the paint, listen carefully,
it will tell you what to to . hope this helps.
DON'T use water!!! (to clean the roller, or paper towels)
[This message has been edited by chasgas (edited 08-15-2013).]


