Pennock's Fiero Forum
  Technical Discussion & Questions
  DA6 and HR6 Compressor Teardown and Comparison

Post New Topic  Post A Reply
Email This Page to Someone! | Printable Version


next newest topic | next oldest topic
DA6 and HR6 Compressor Teardown and Comparison by RWDPLZ
Started on: 08-25-2012 03:56 PM
Replies: 16 (4318 views)
Last post by: RWDPLZ on 05-24-2022 10:45 PM
RWDPLZ
Member
Posts: 15013
From: Michigan
Registered: May 2002


Feedback score:    (11)
Leave feedback


Total ratings: 304
Rate this member

Report this Post08-25-2012 03:56 PM Click Here to See the Profile for RWDPLZClick Here to visit RWDPLZ's HomePageSend a Private Message to RWDPLZEdit/Delete MessageReply w/QuoteDirect Link to This Post
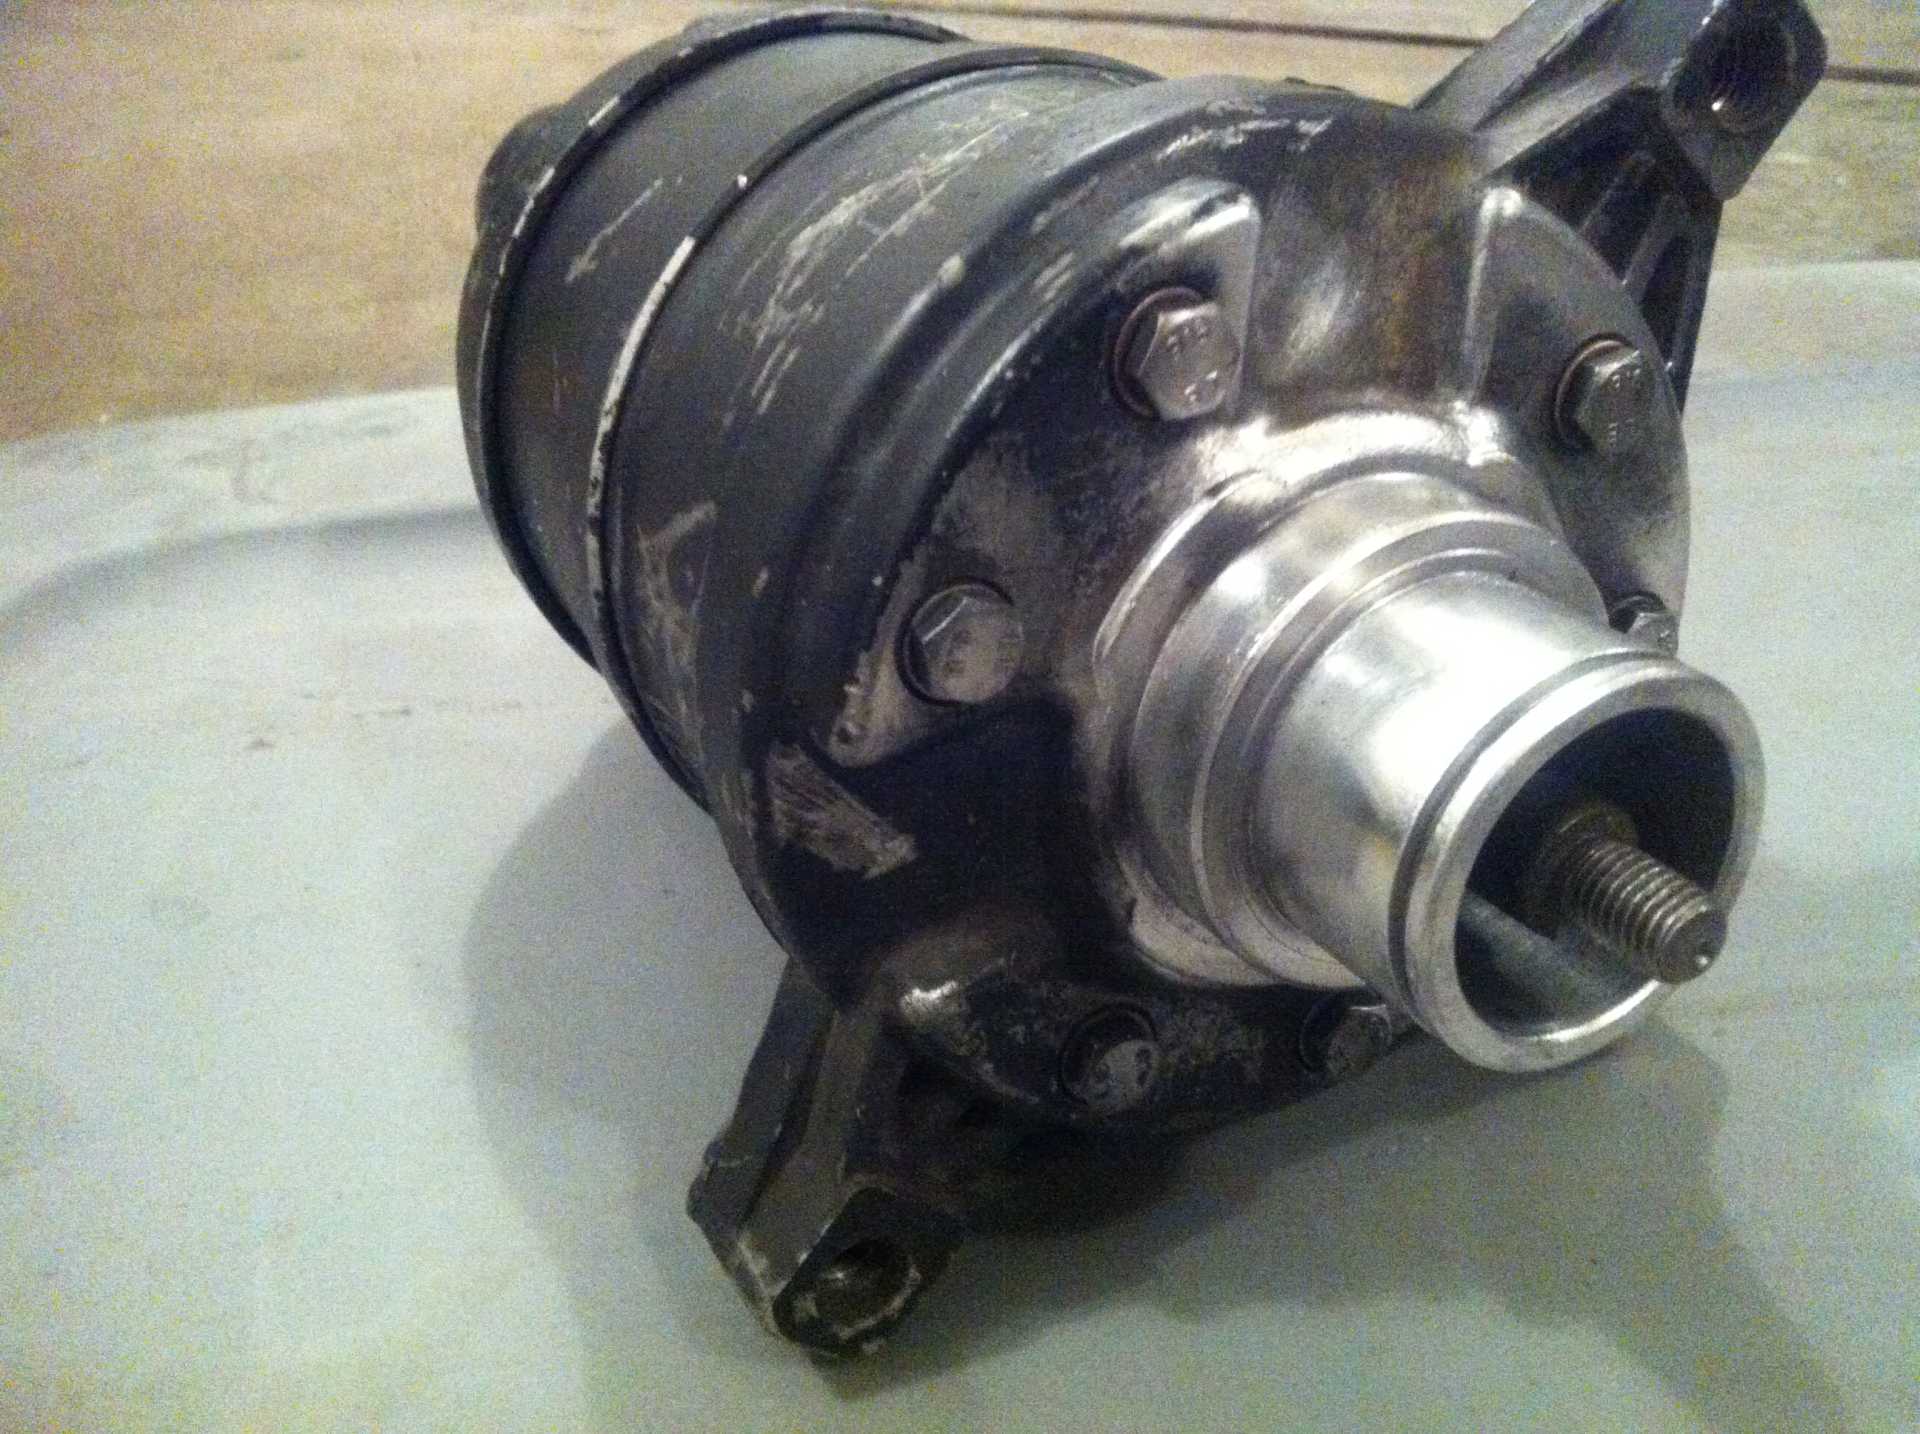
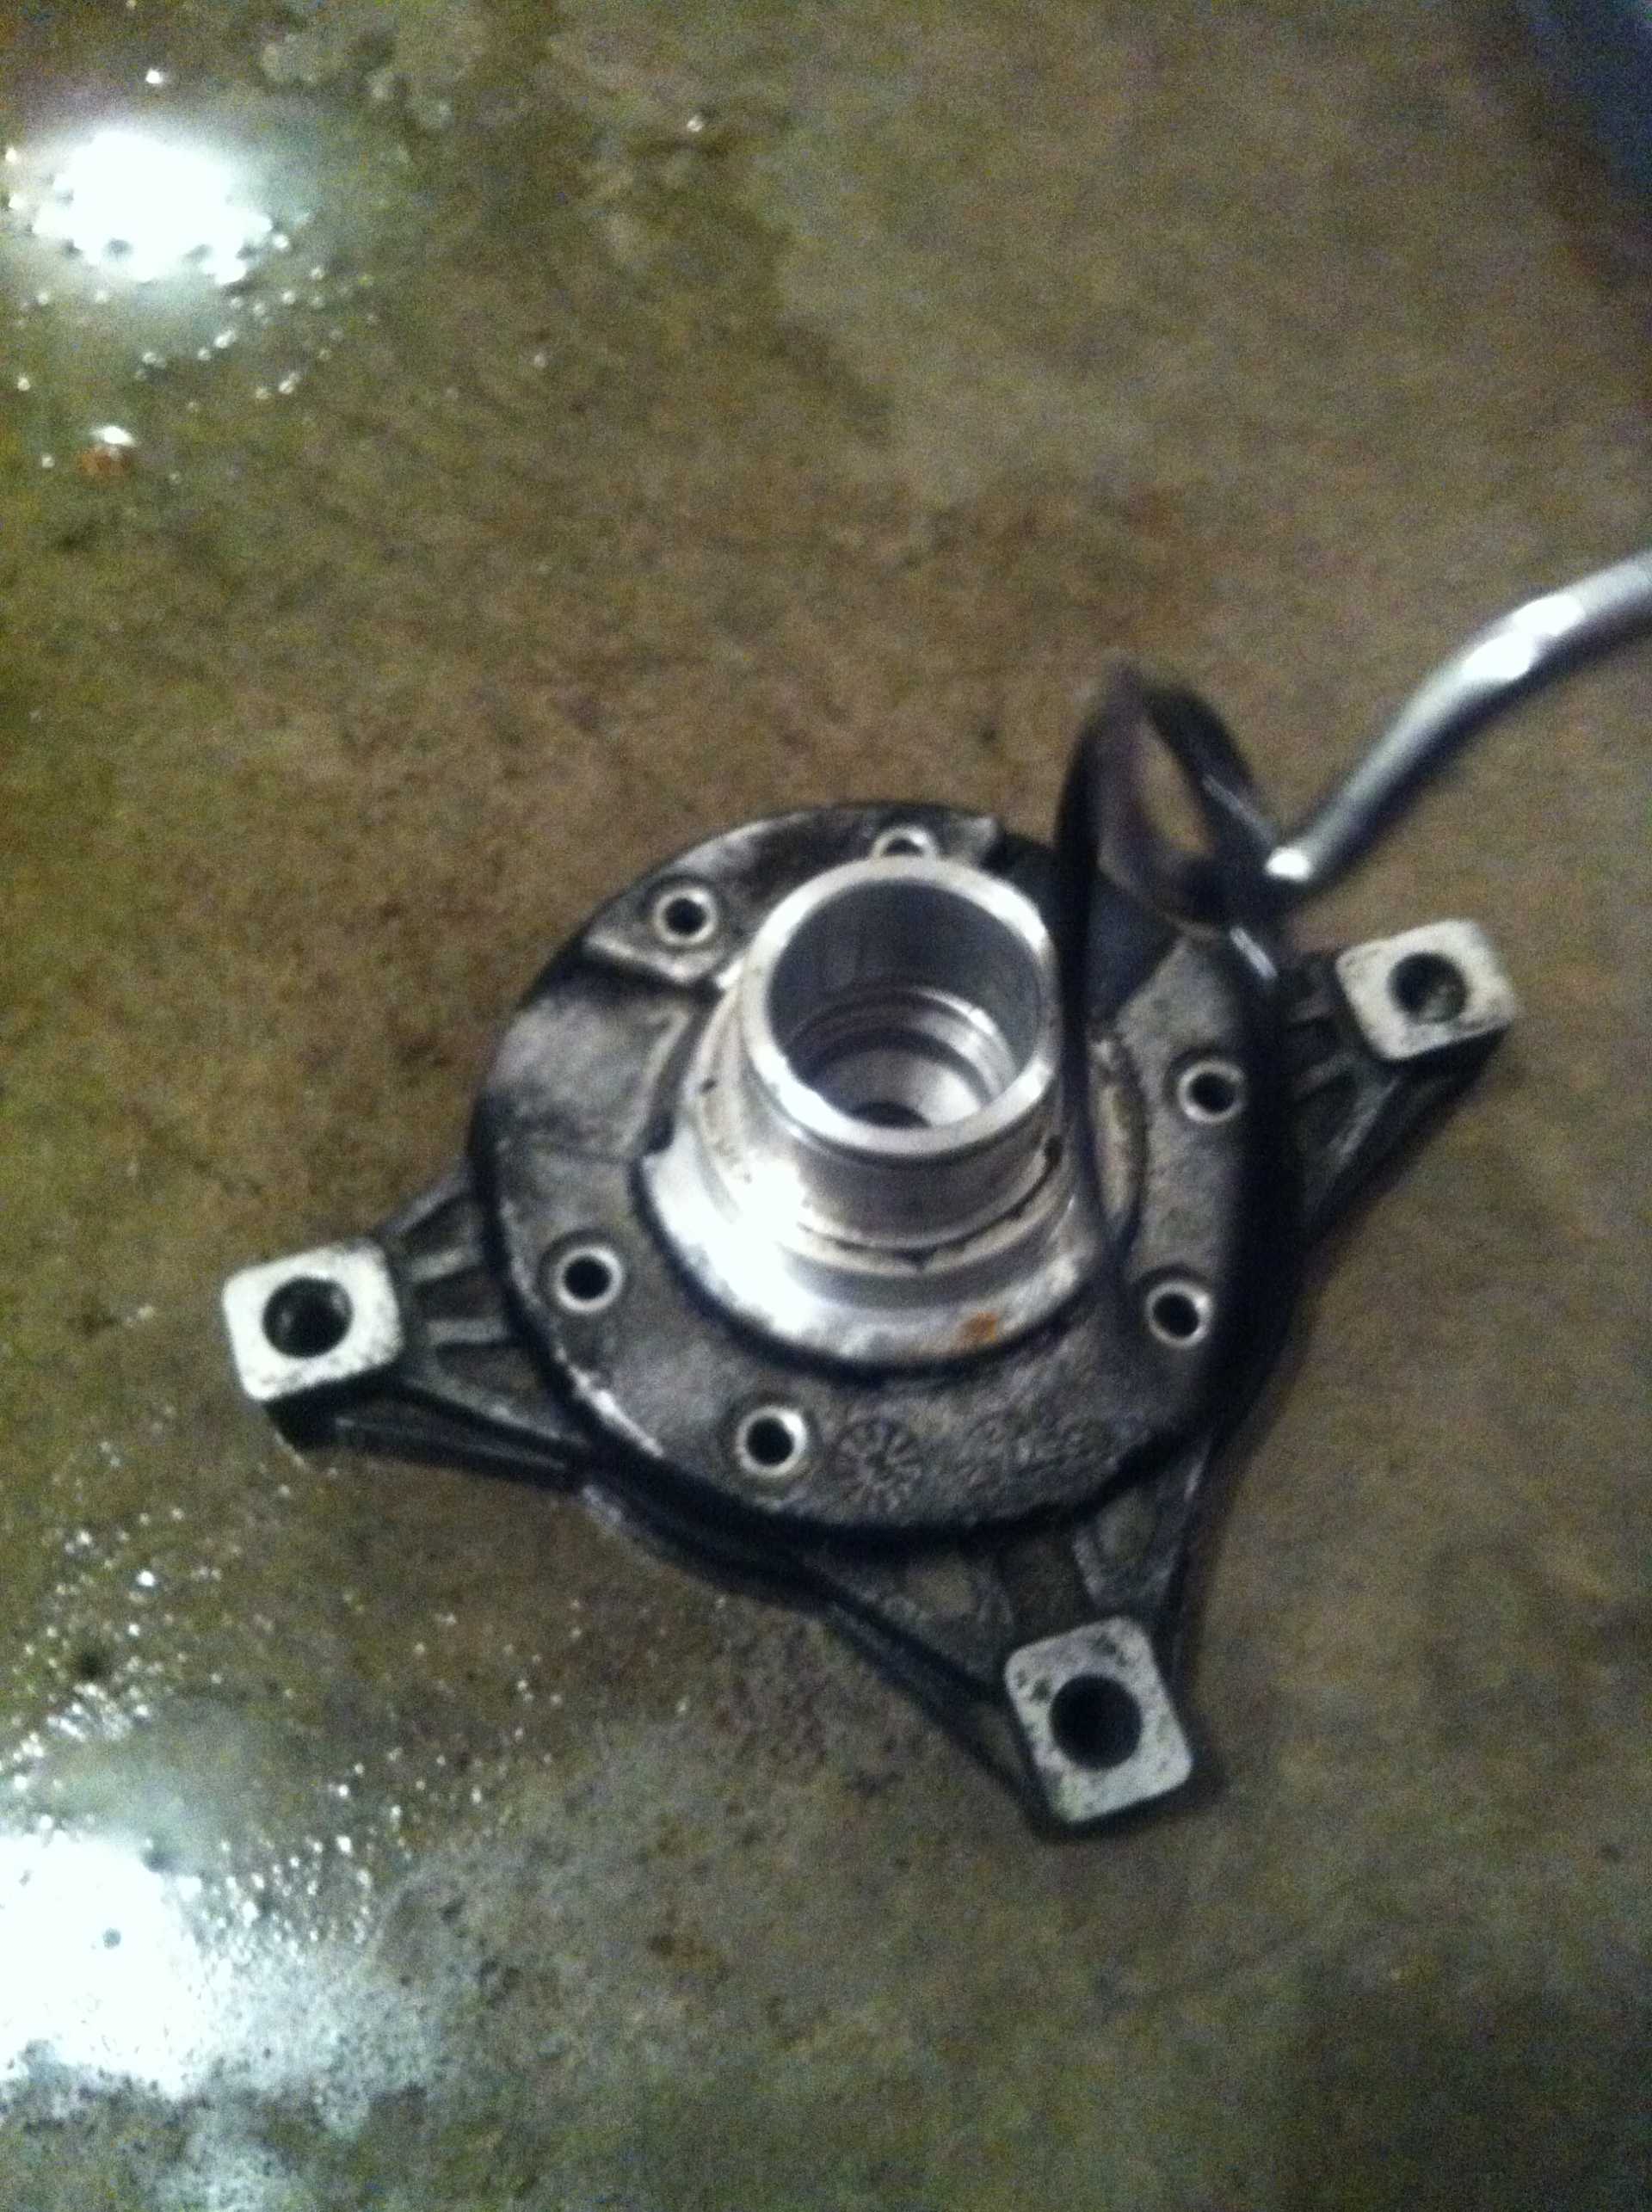
Teardown and comparison of the DA6 and HR6 compressors. The compressors are externally almost identical, so telling them apart is nearly impossible, unless the original sticker is still on it and readable. First, the original DA6 from my 84 Fiero SE. I removed the clutch hub, pulley, and clutch coil, and cleaned the end off with a wire wheel. Sometimes these can get REALLY dirty, and the best way I've found to clean them, is to plug the ports on the back, spray the compressor down with engine degreaser, and hose it off. You want it to be as clean as possible before opening it.


Remove the 6 bolts with washers, and remove the front head. This reveals the head gasket and front valve plate


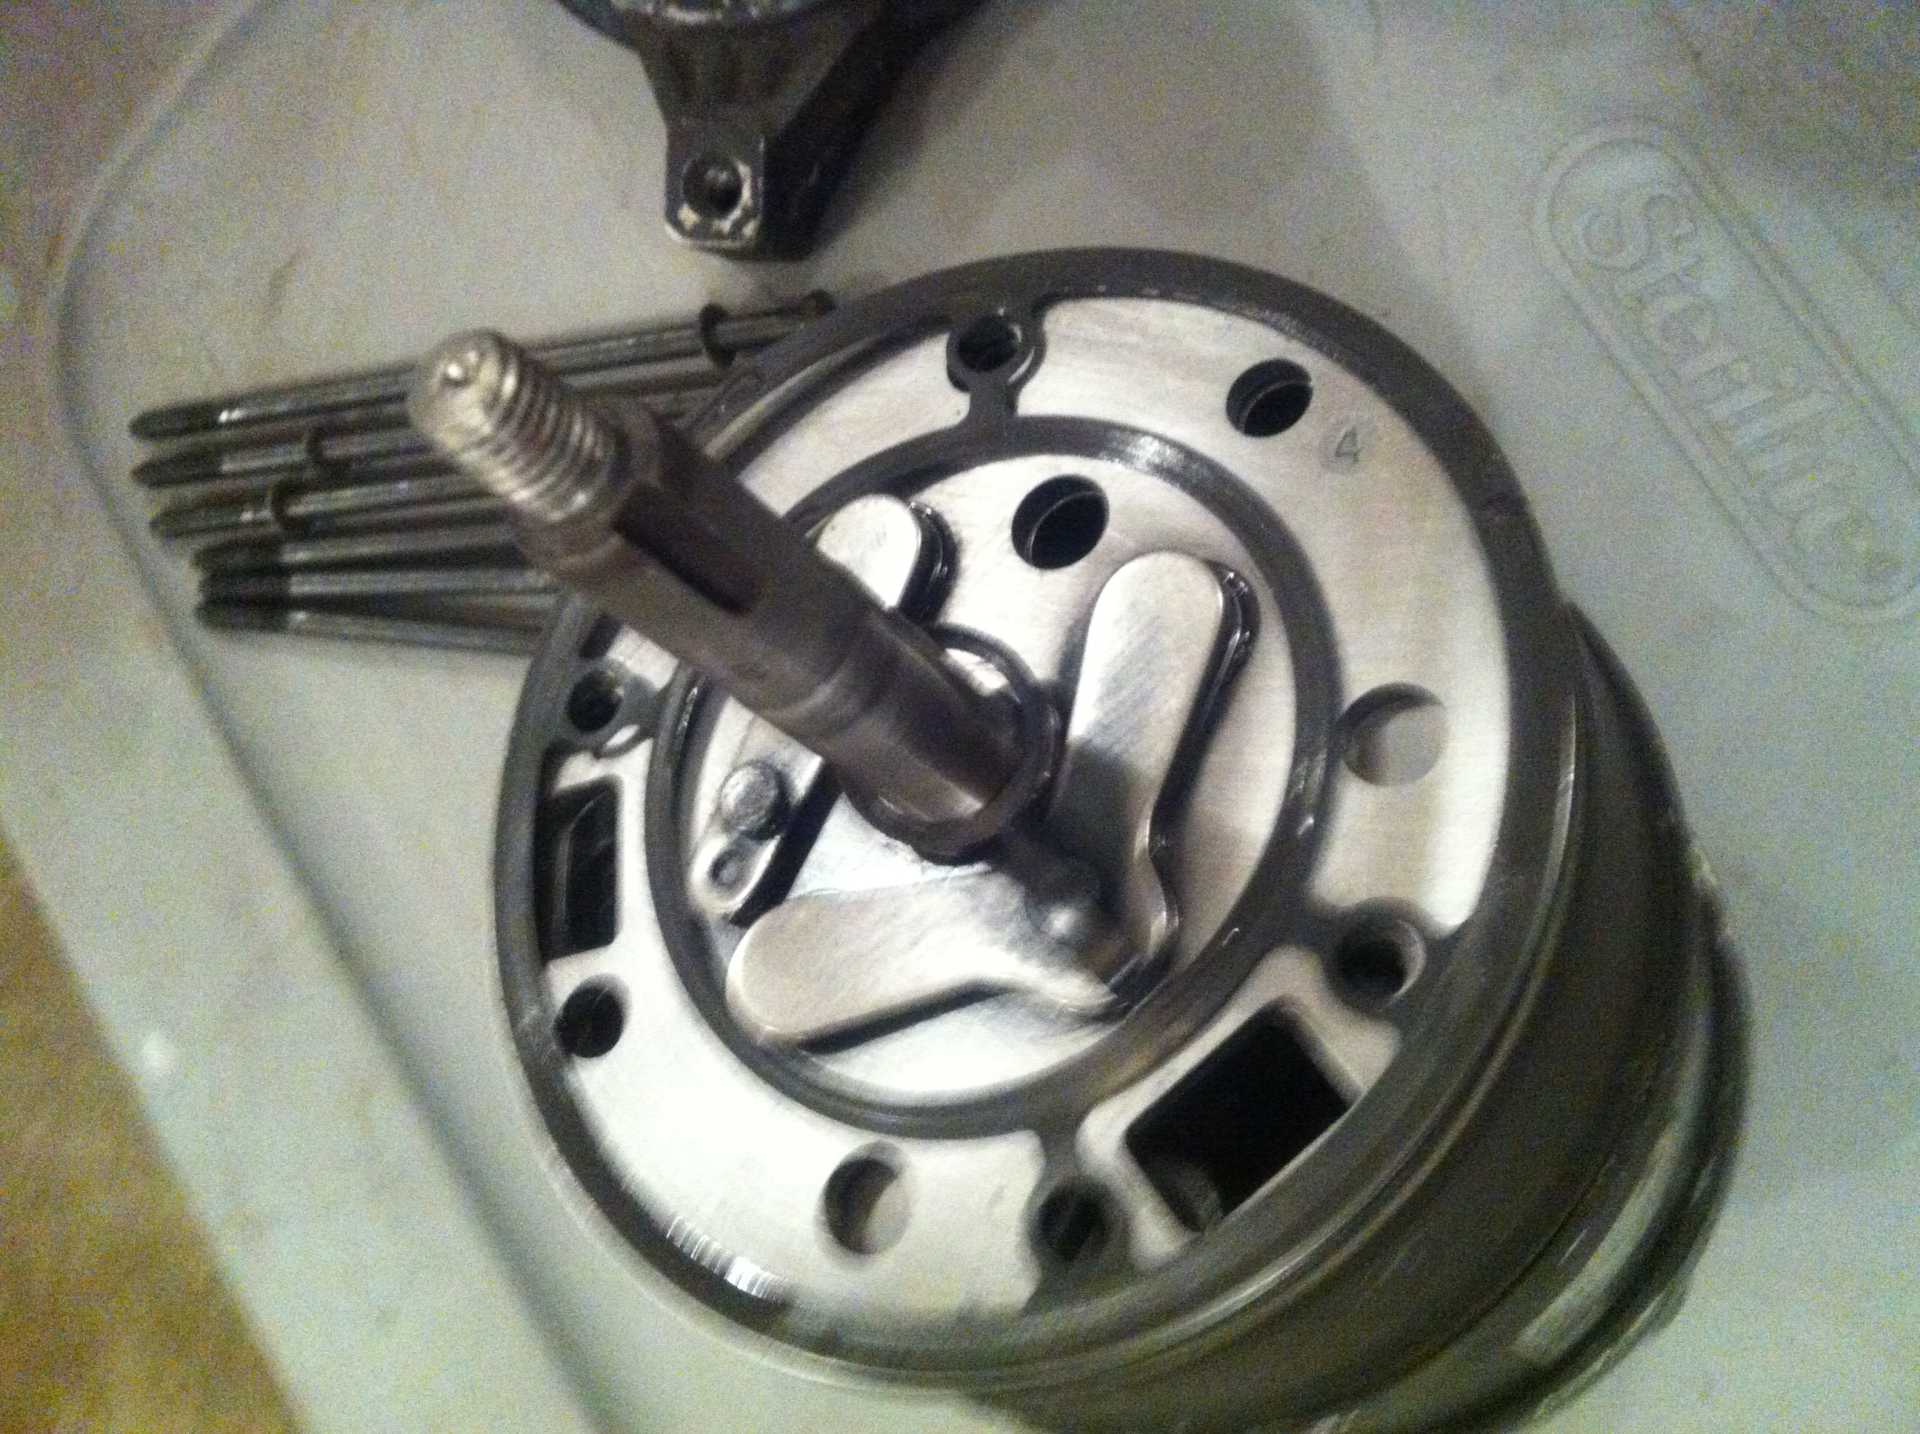
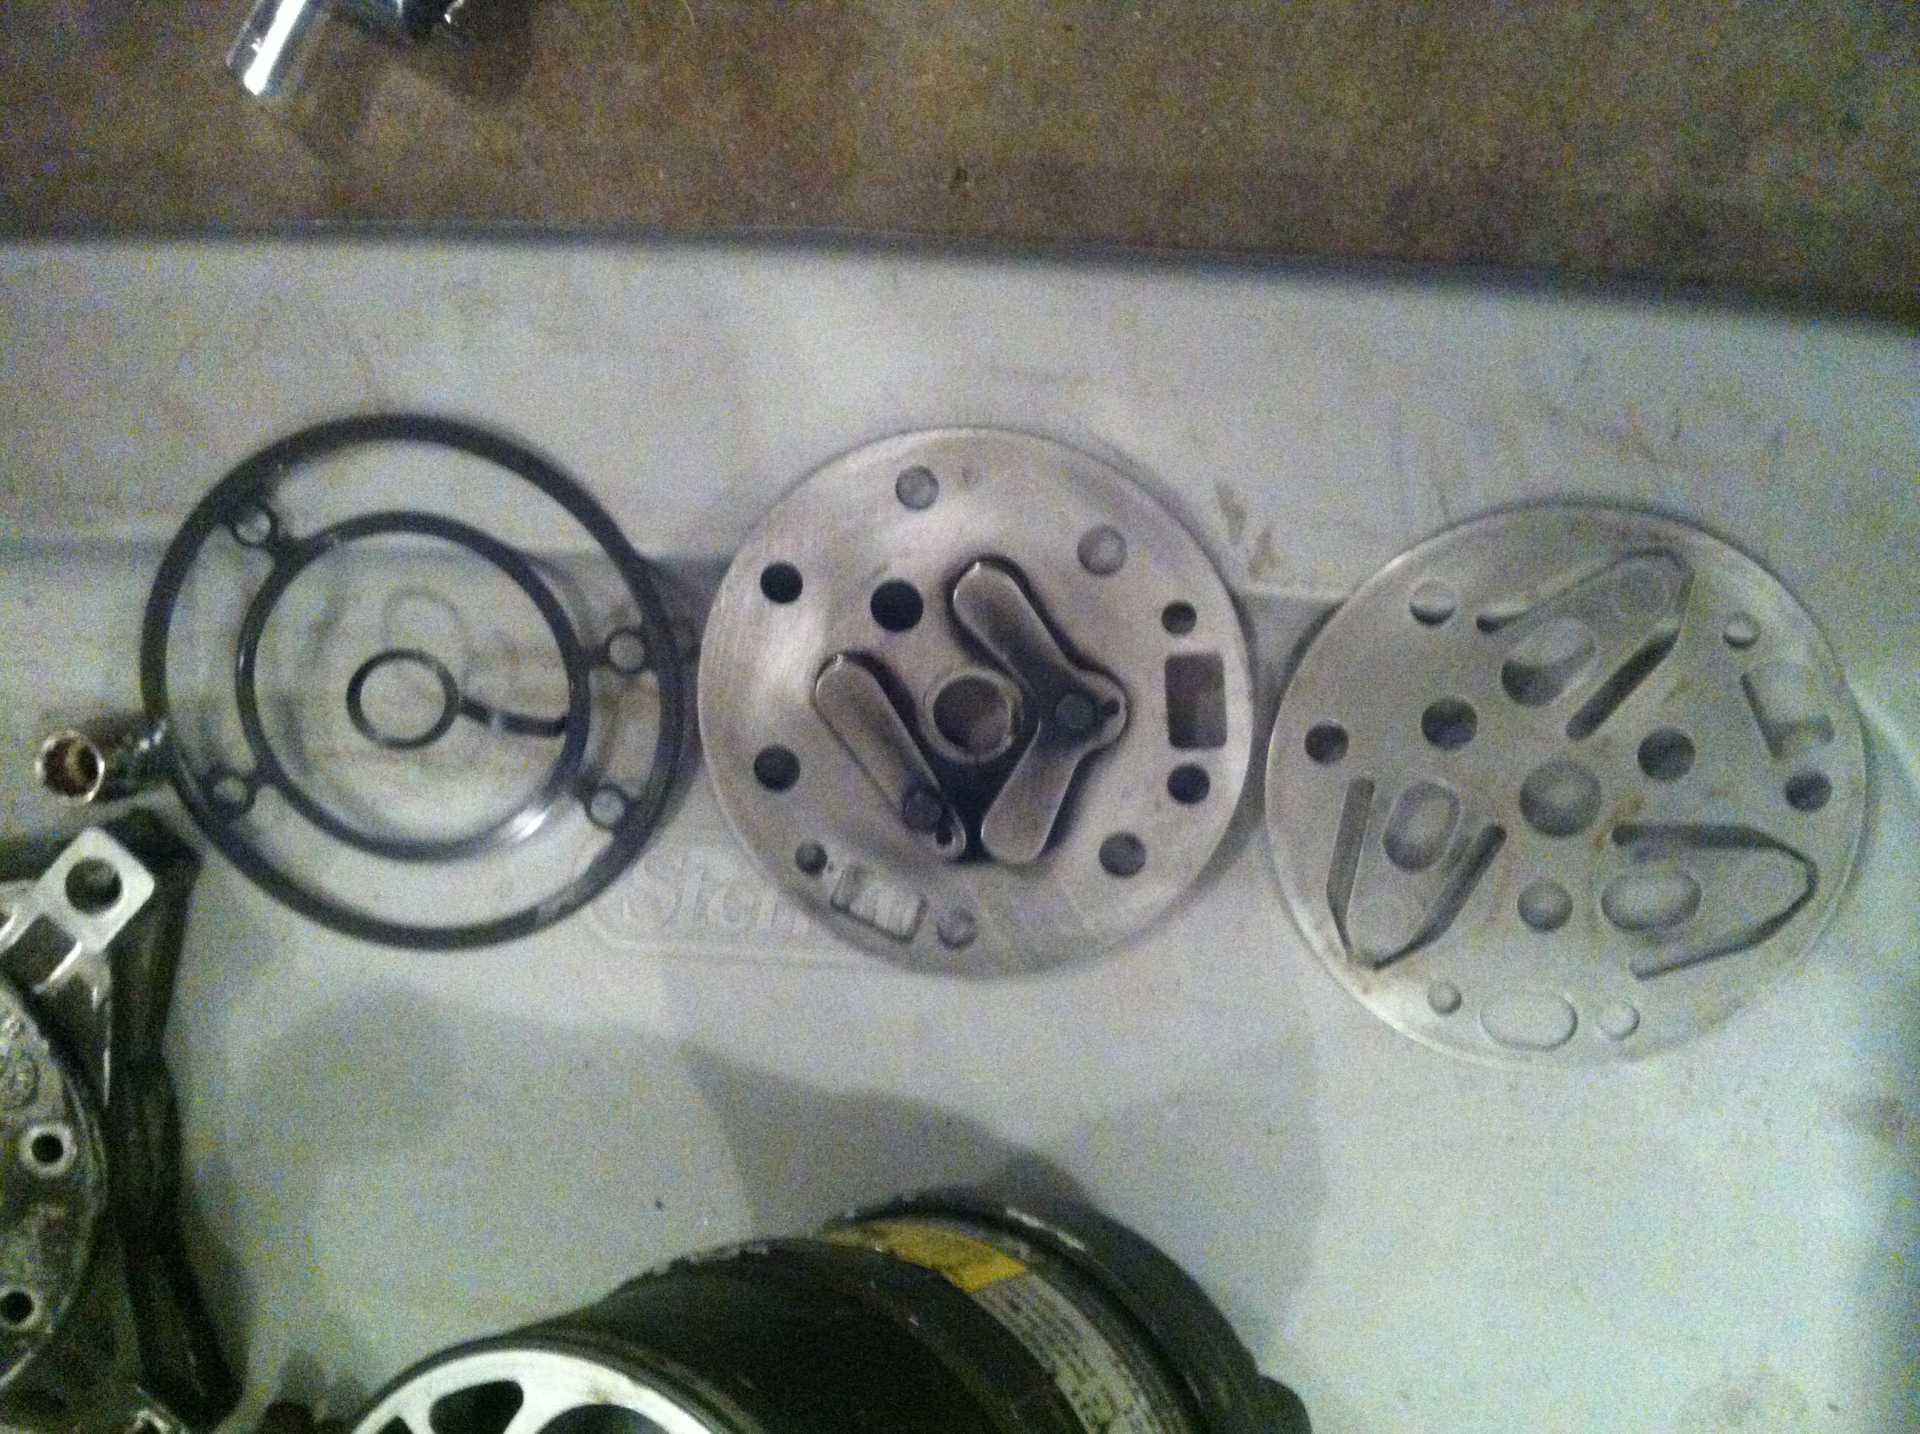
From left to right: head gasket, valve plate, and suction reed


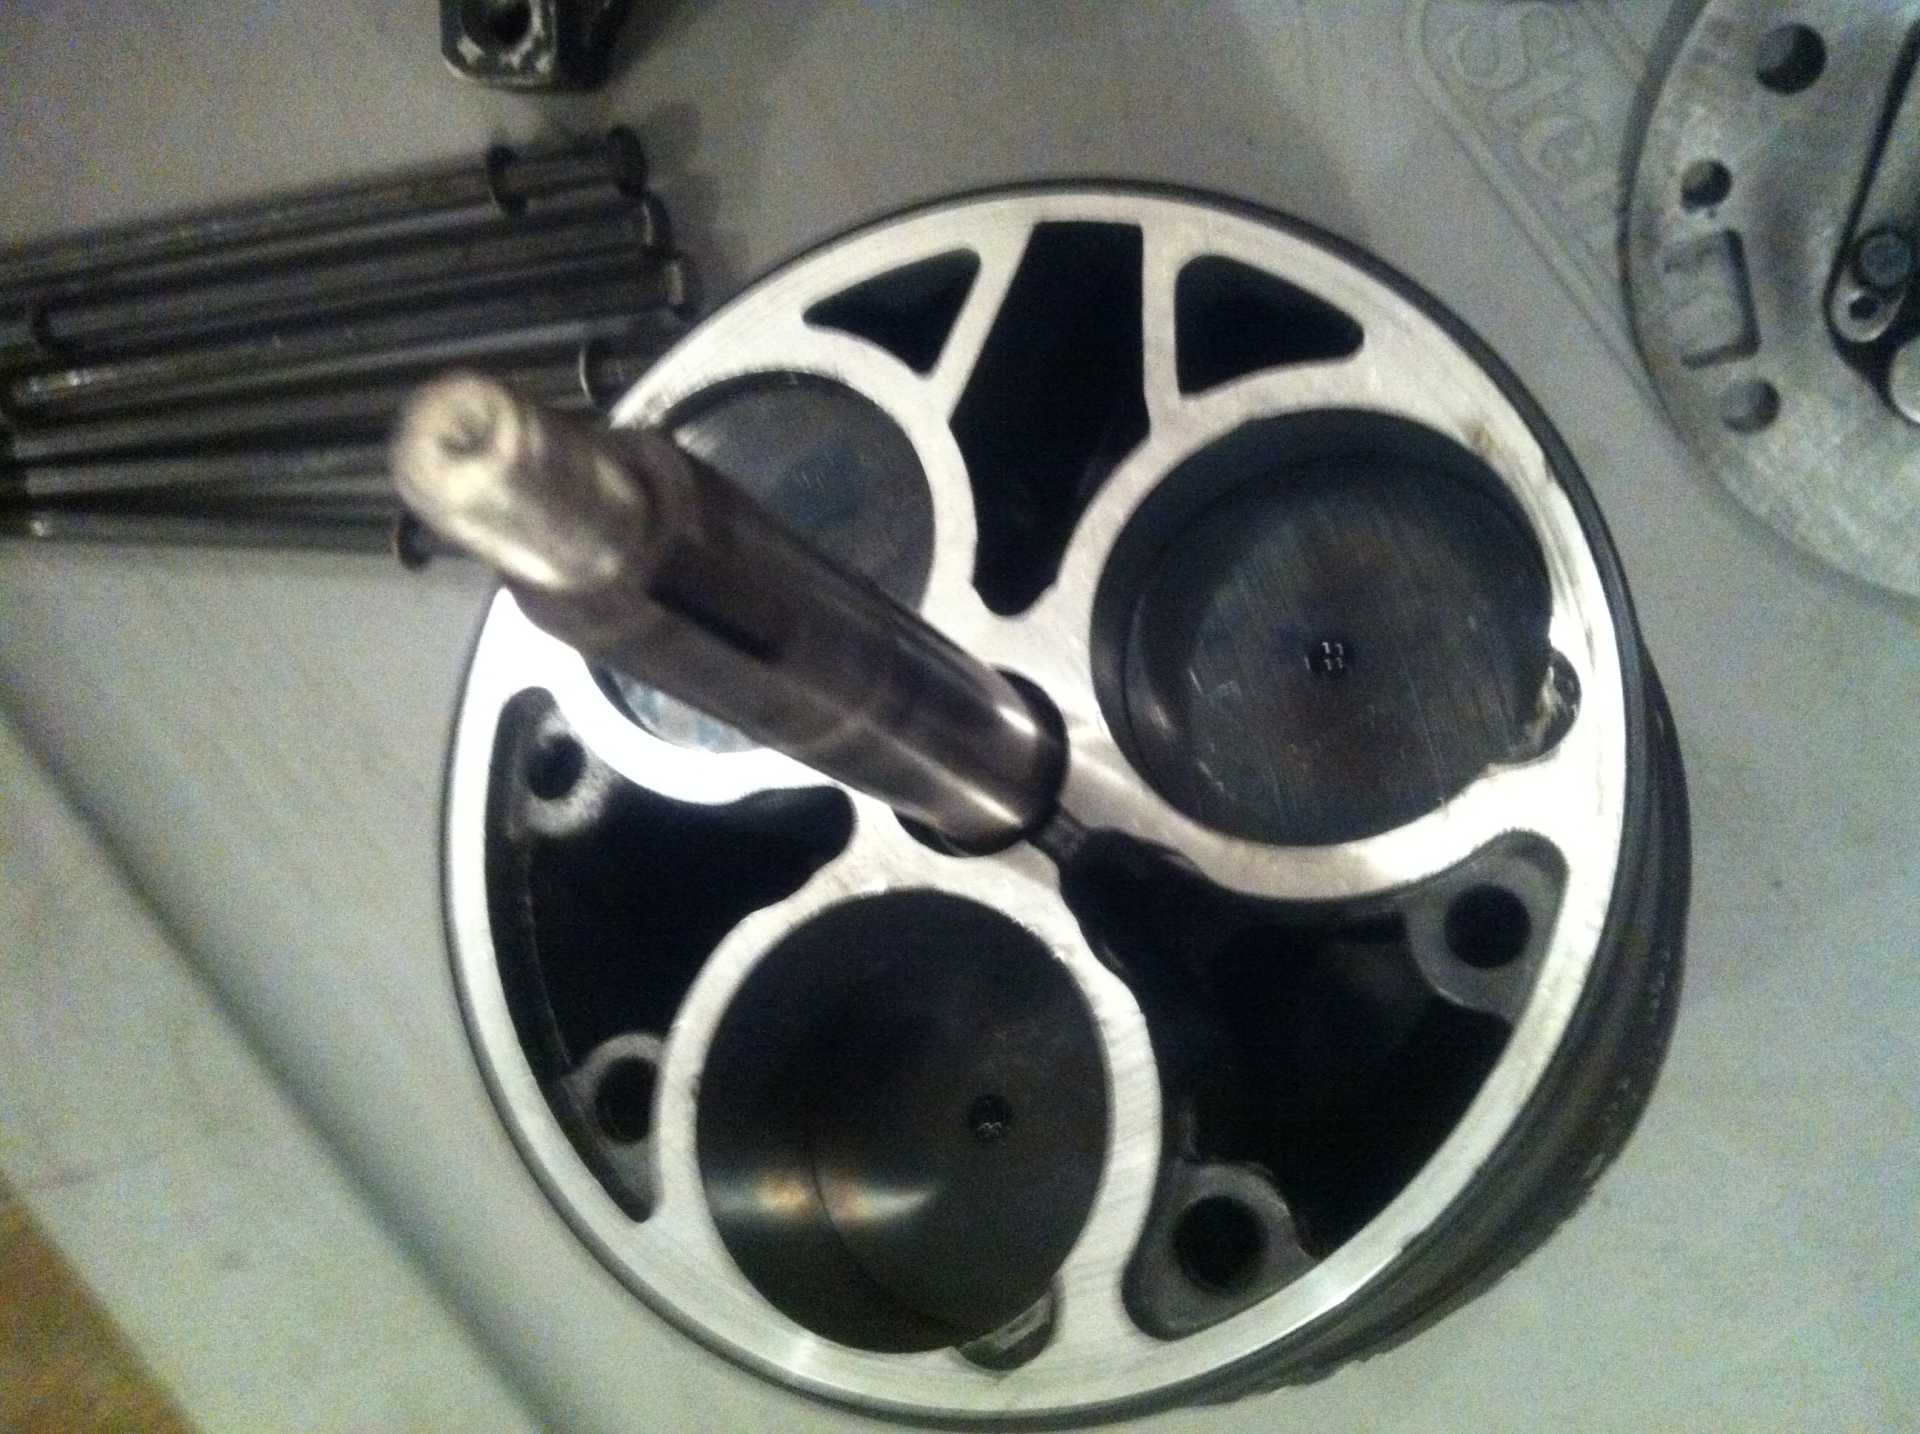
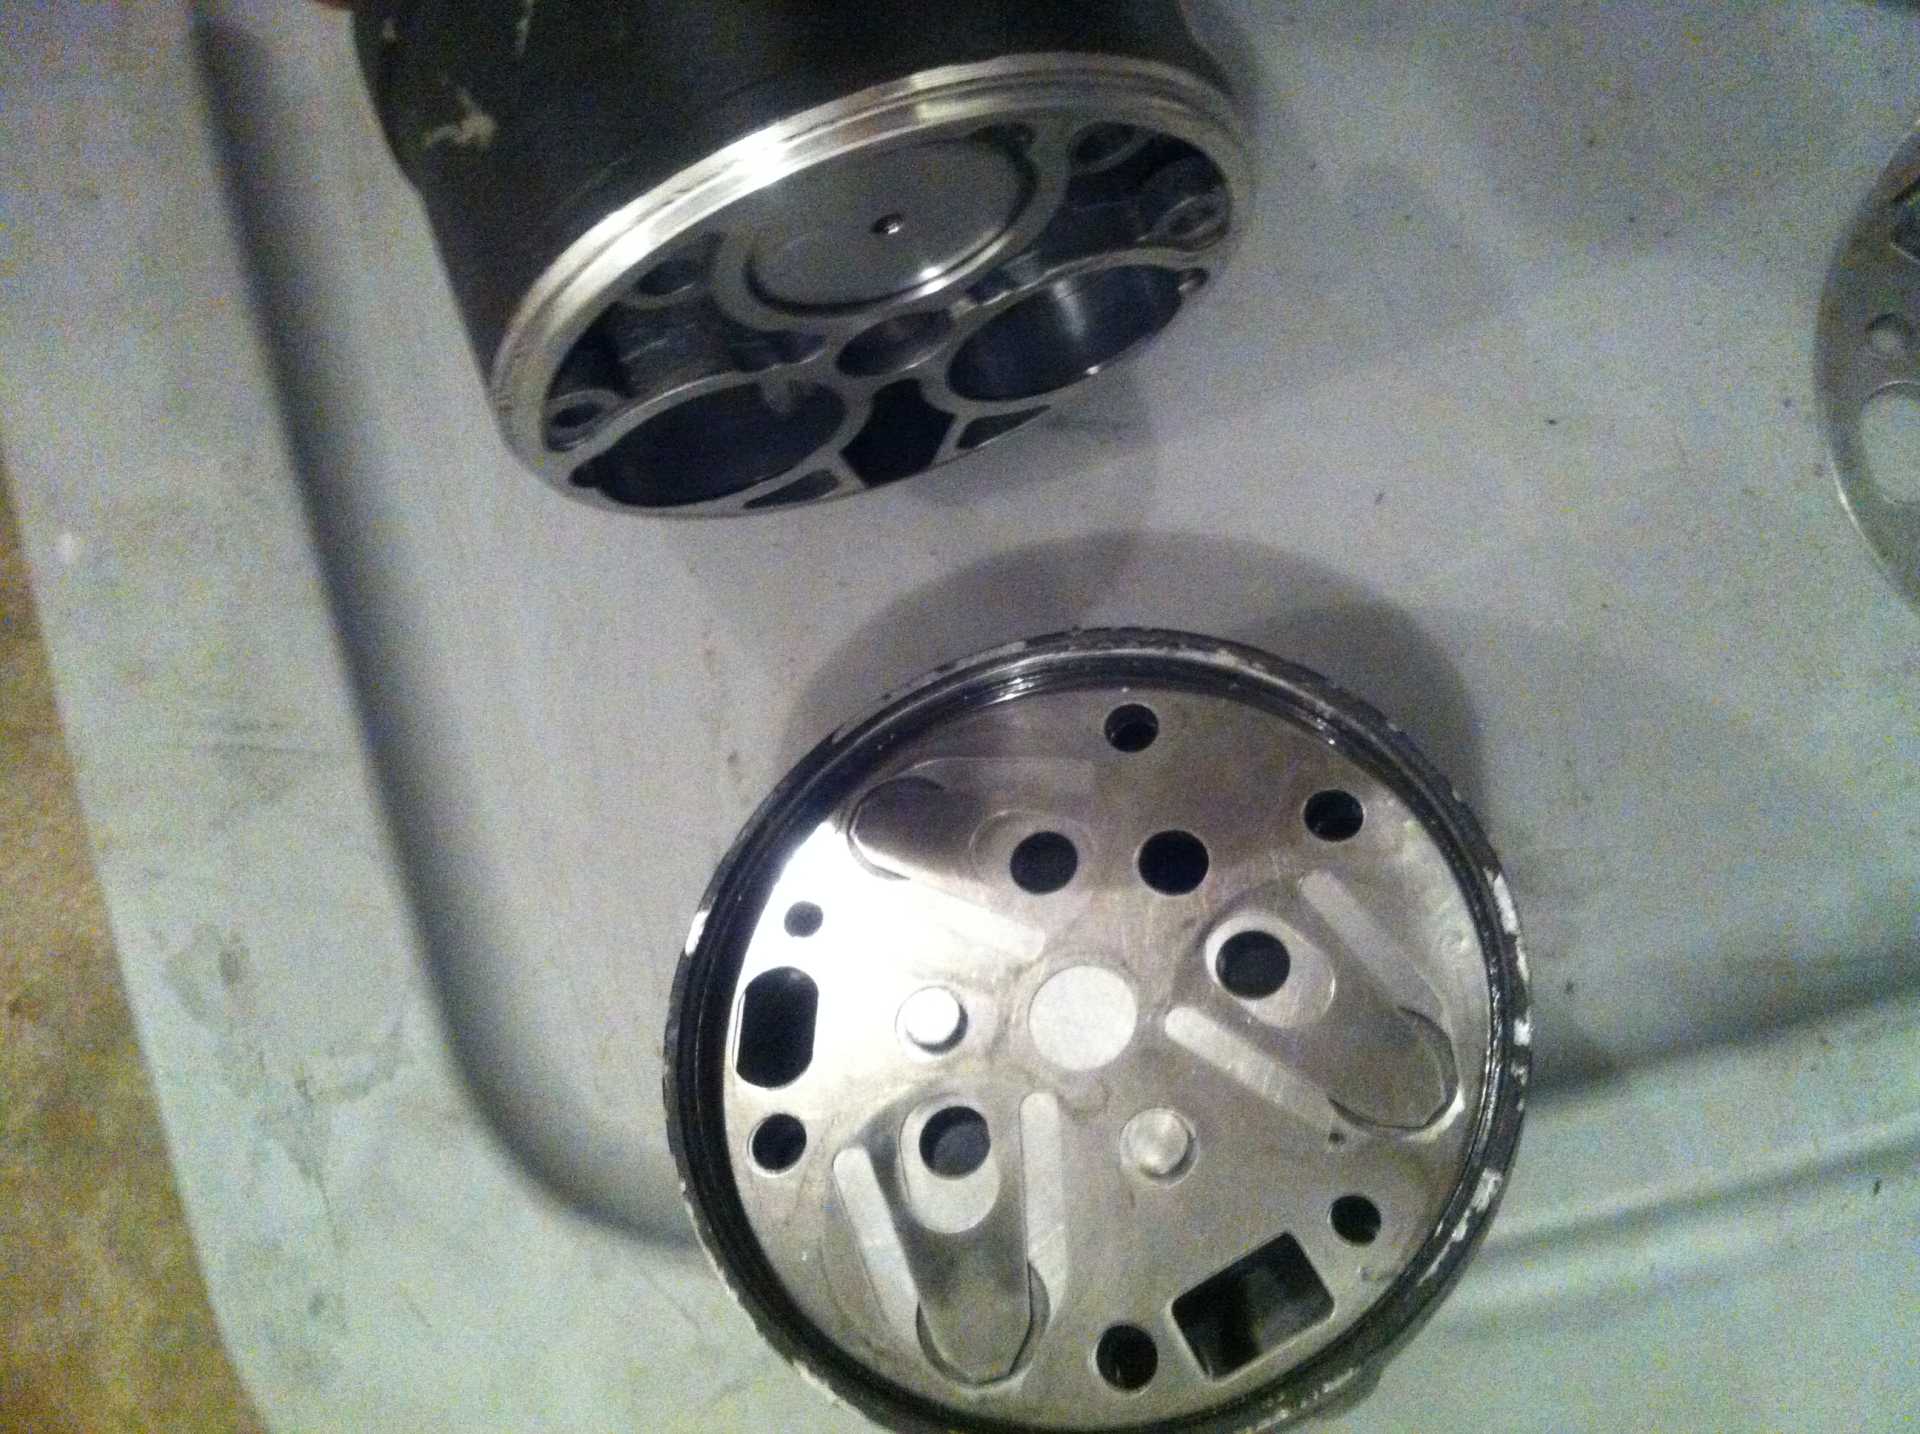
Top of the compressor with the above parts removed, showing the cylinders and pistons


Rear head removed, as it came off, showing the rear suction reed.


Rear head with the head gasket, valve plate, and suction reed removed.


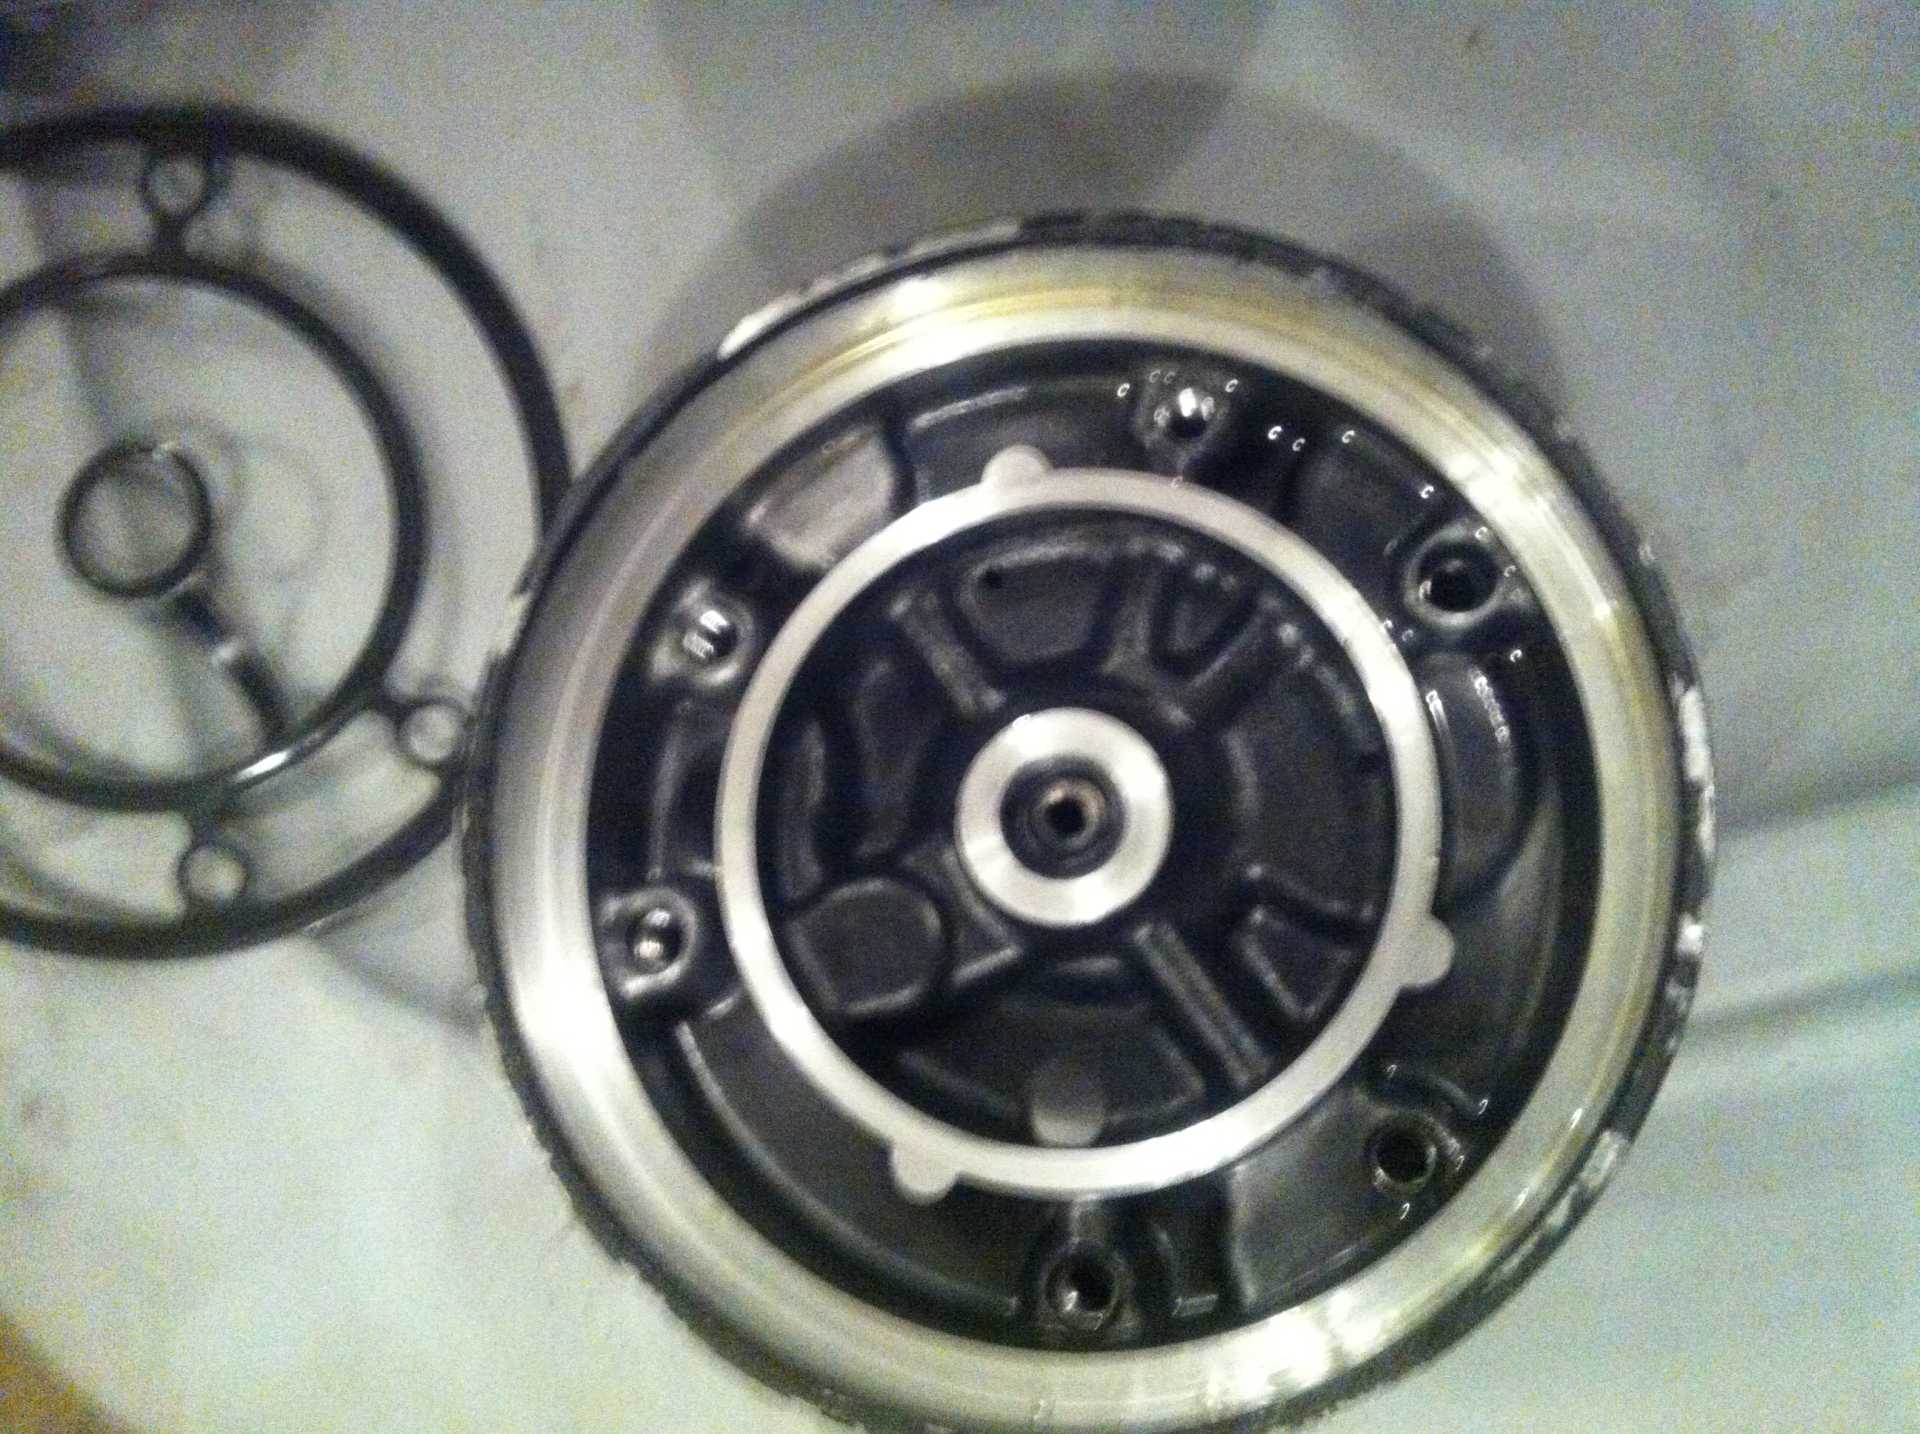
If you look closely at the inner ring here, you can see two holes drilled into the casting. These go to the other side, where the pressure switches are.


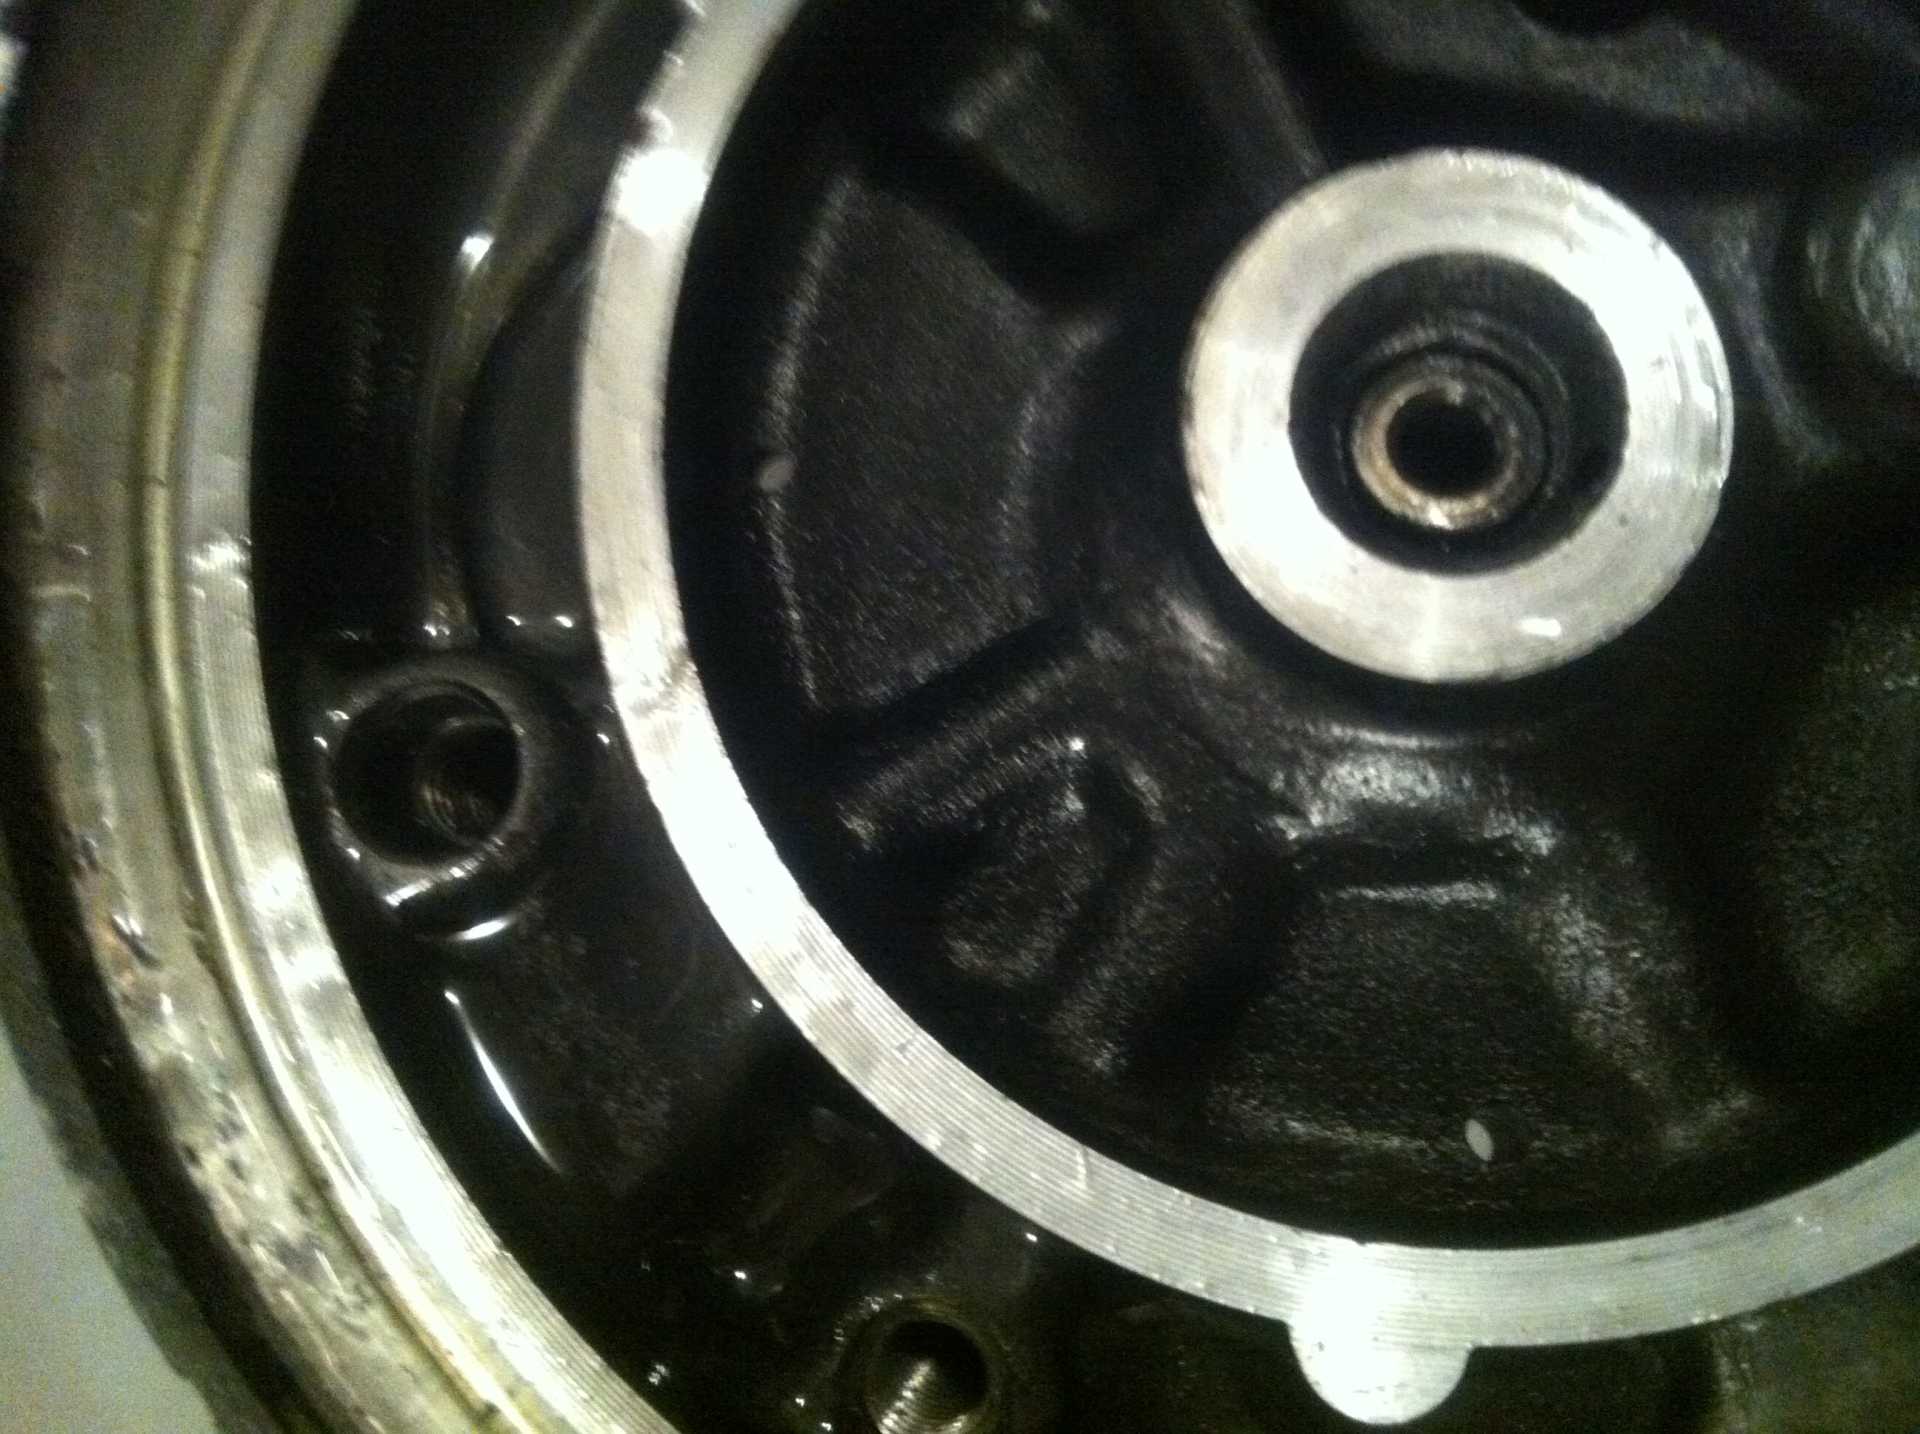
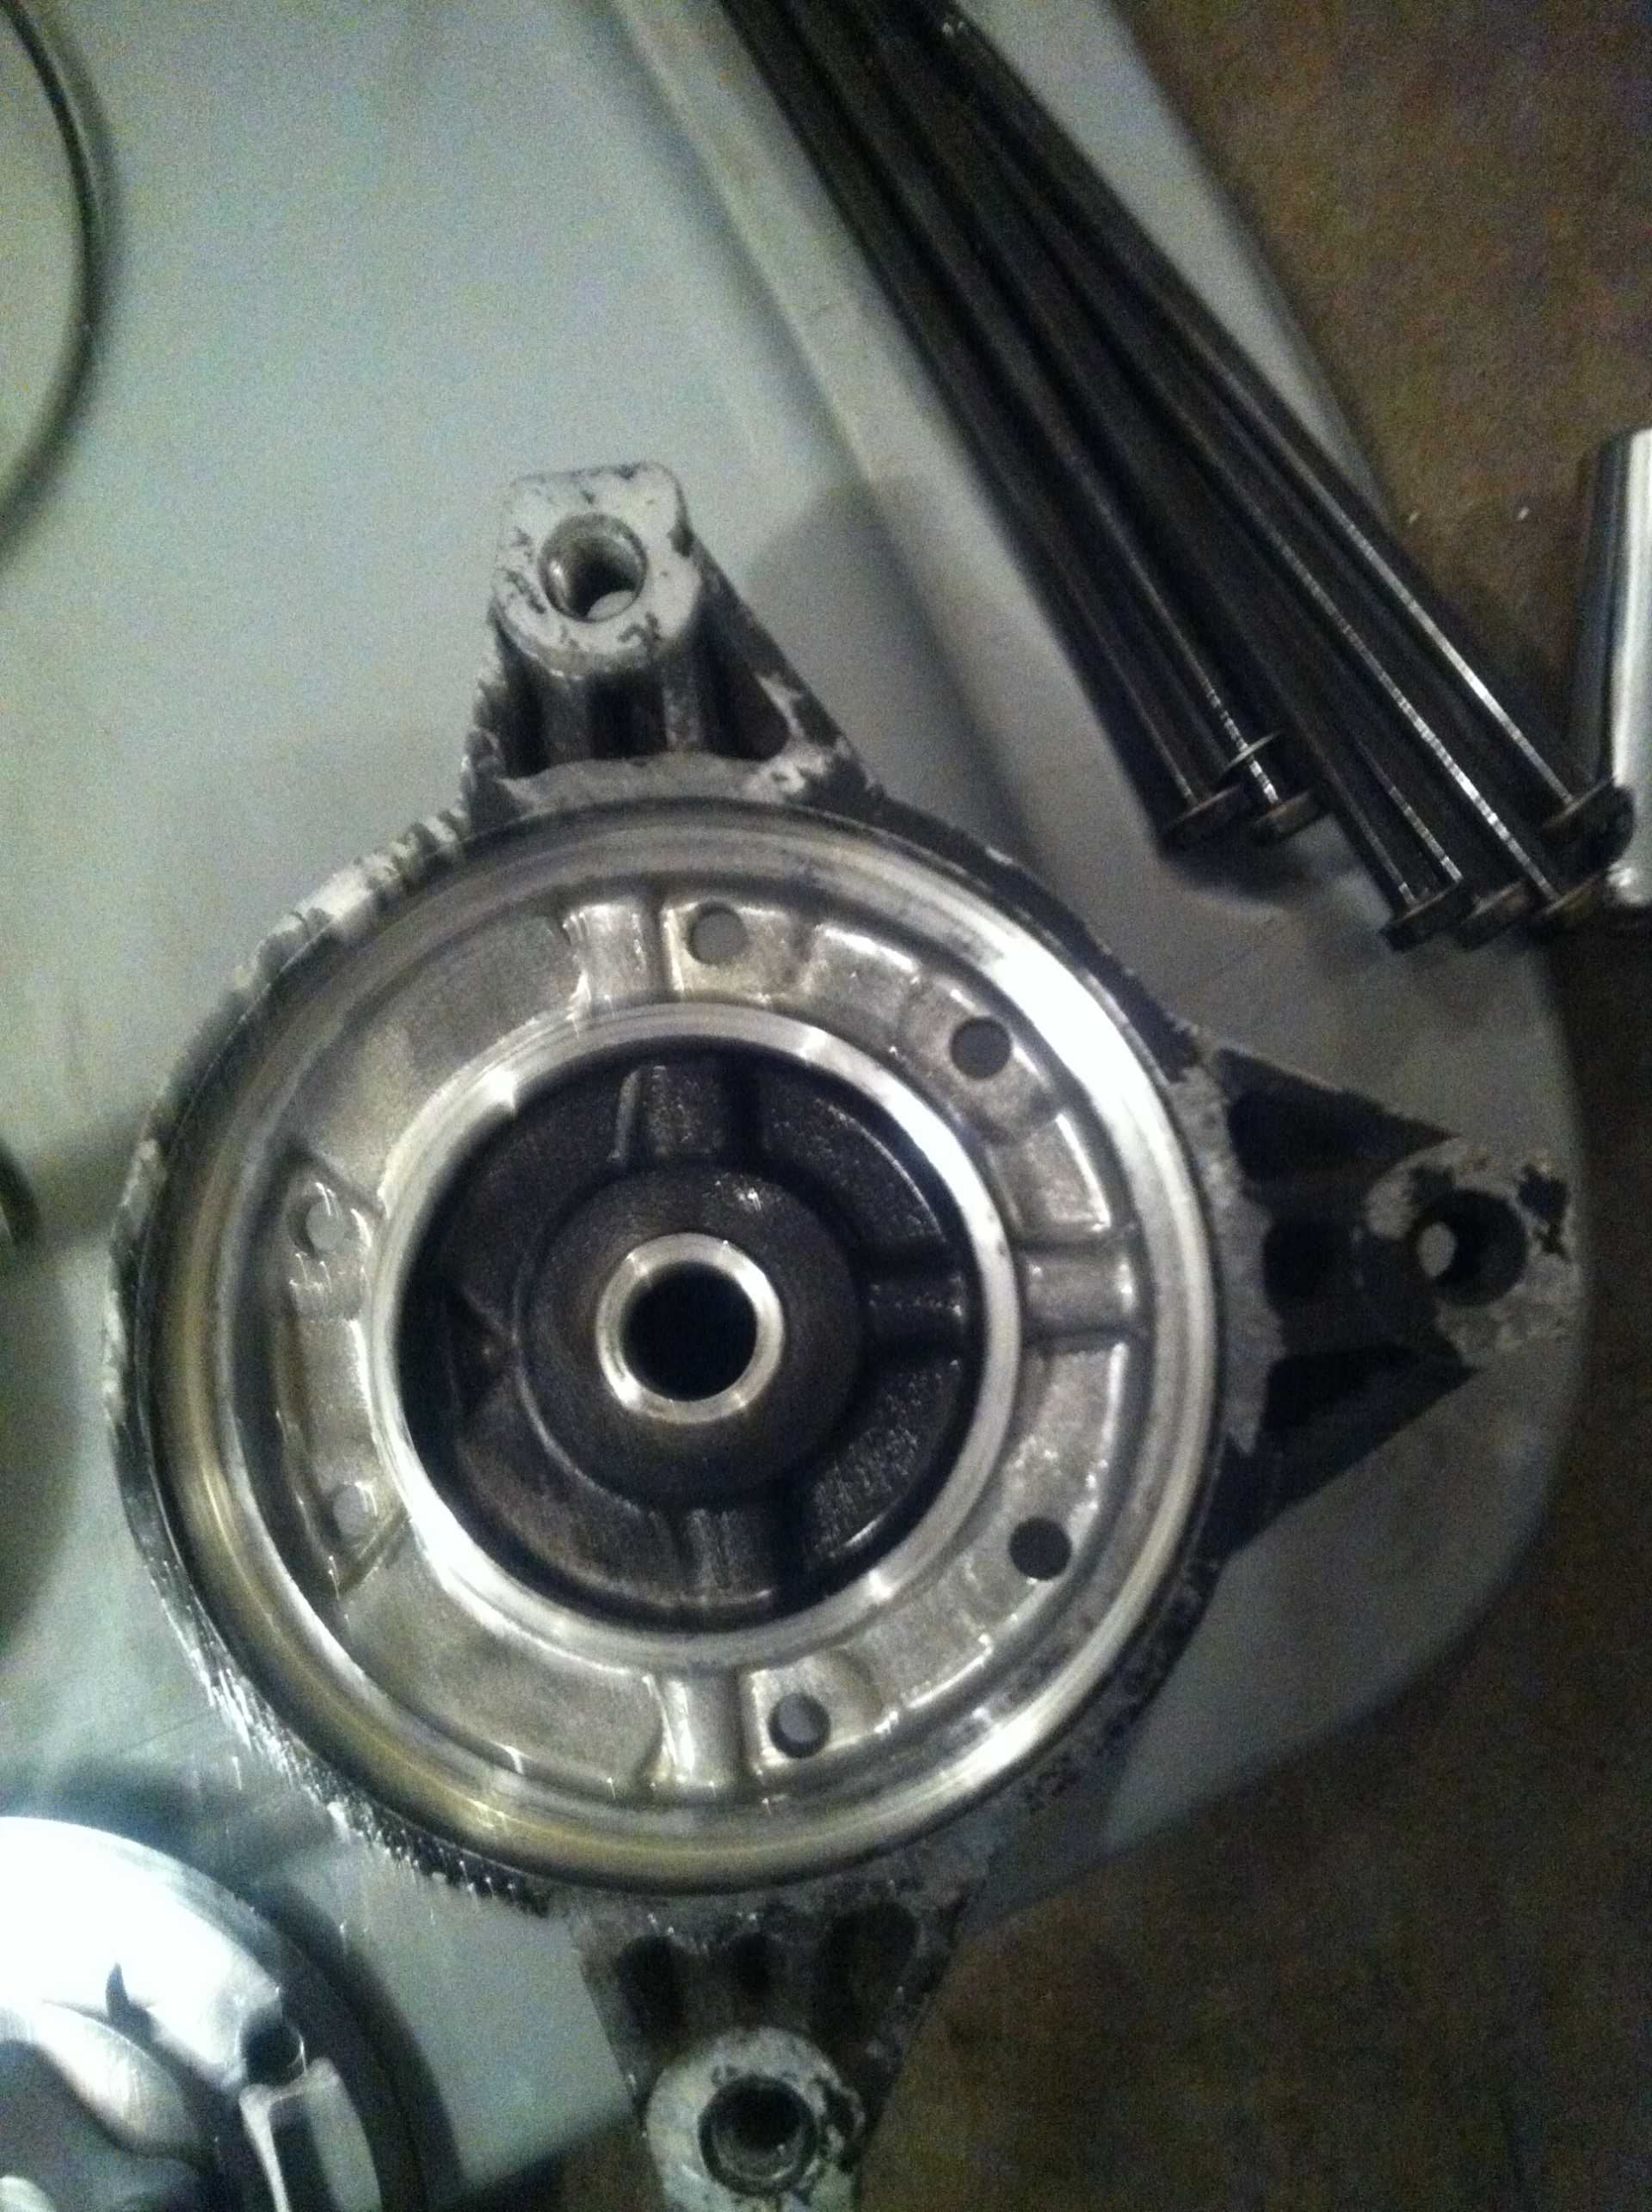
Top of the rear head


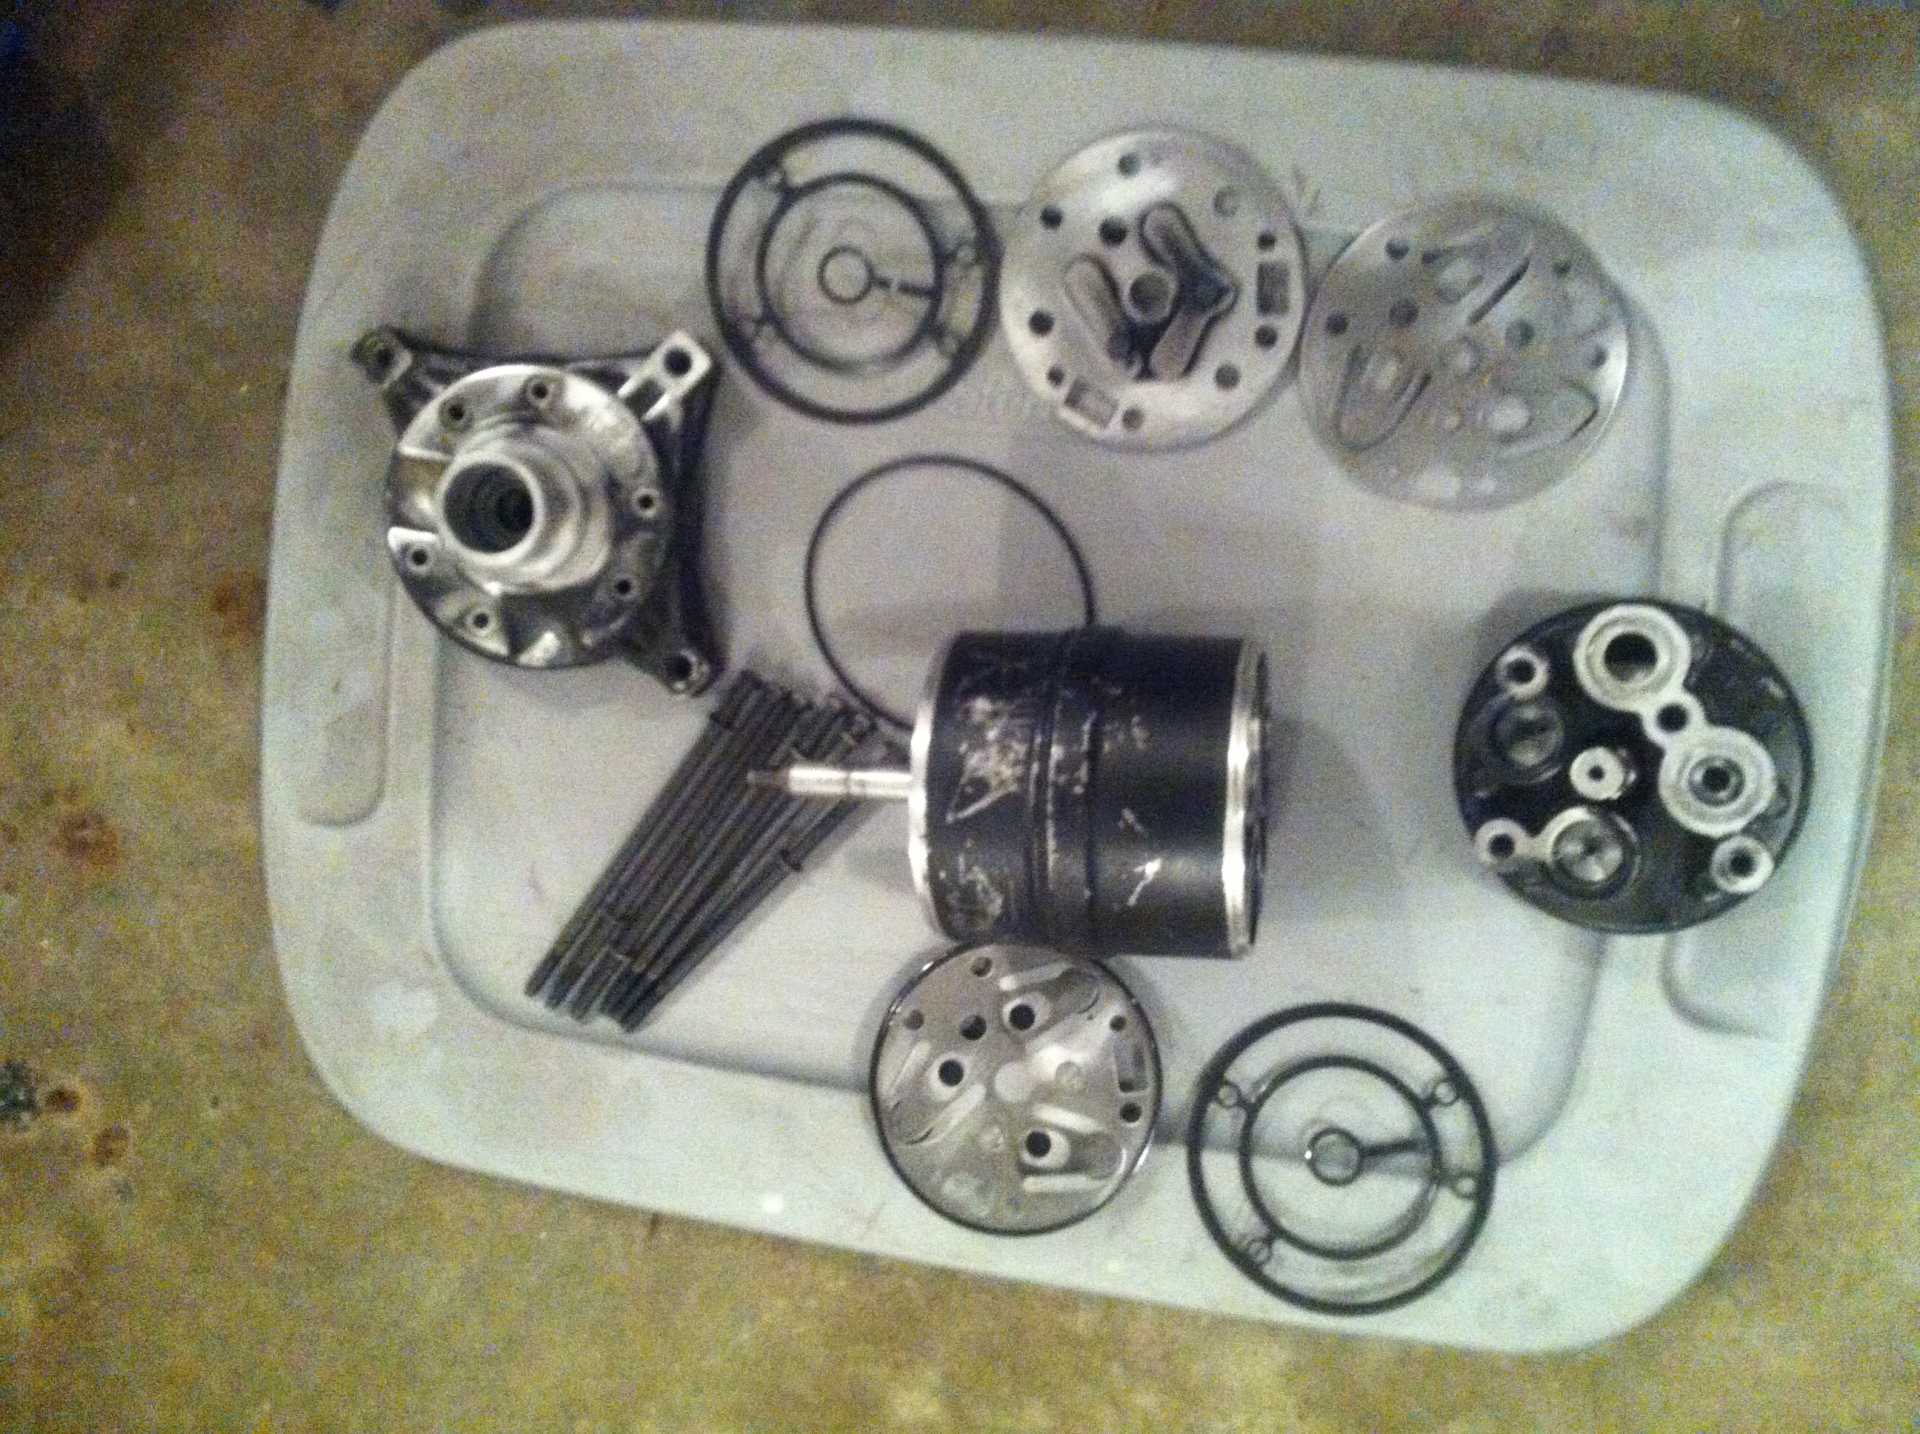
Exploded view of the compressor


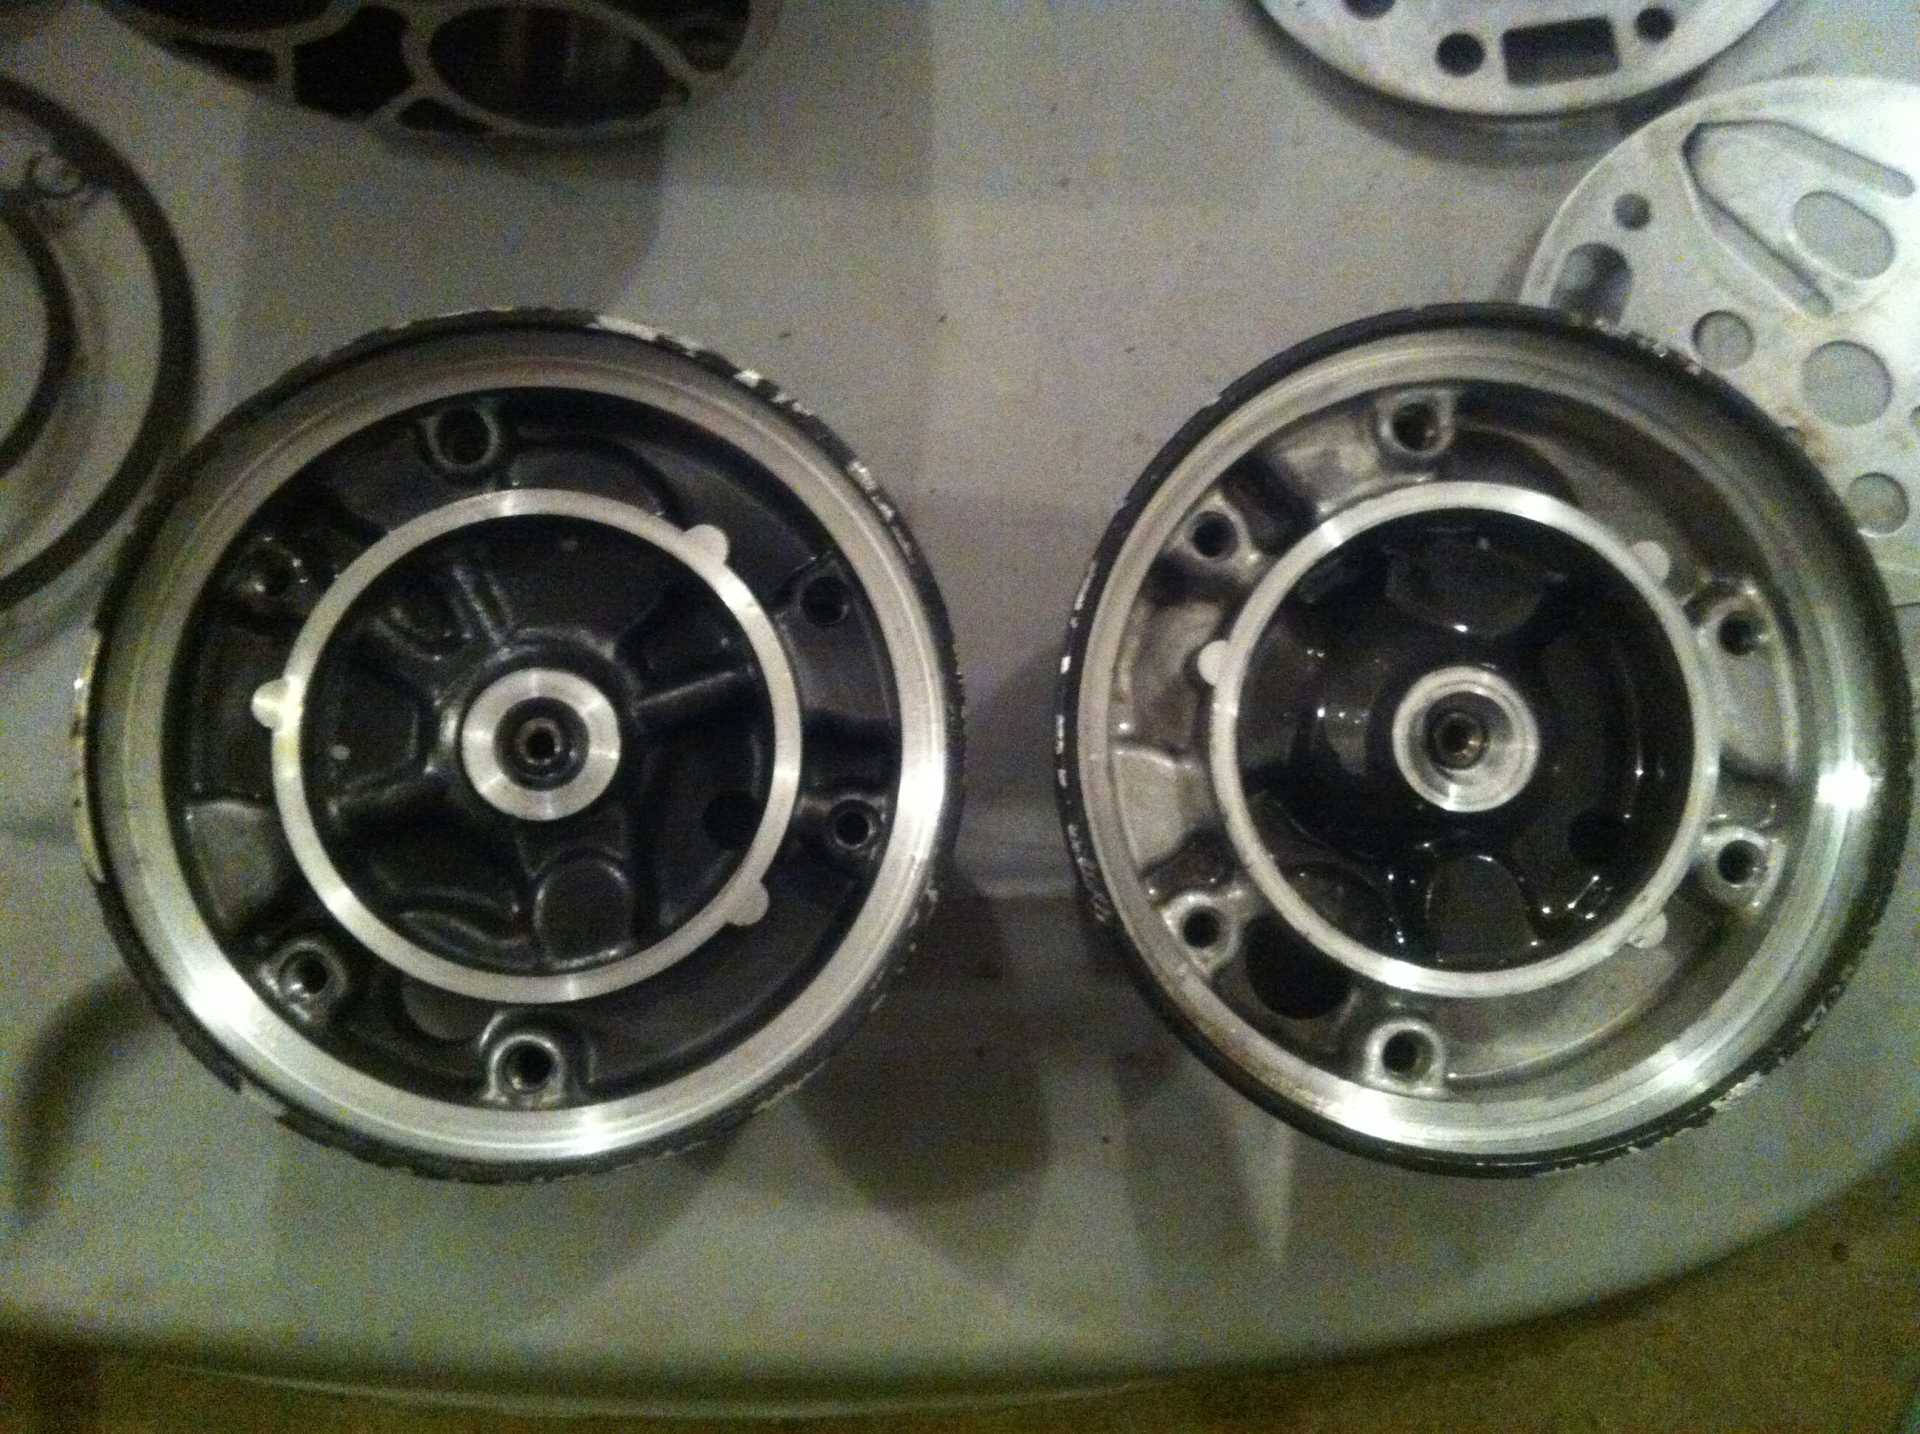
Front of the HR6 compressor. Completely identical.


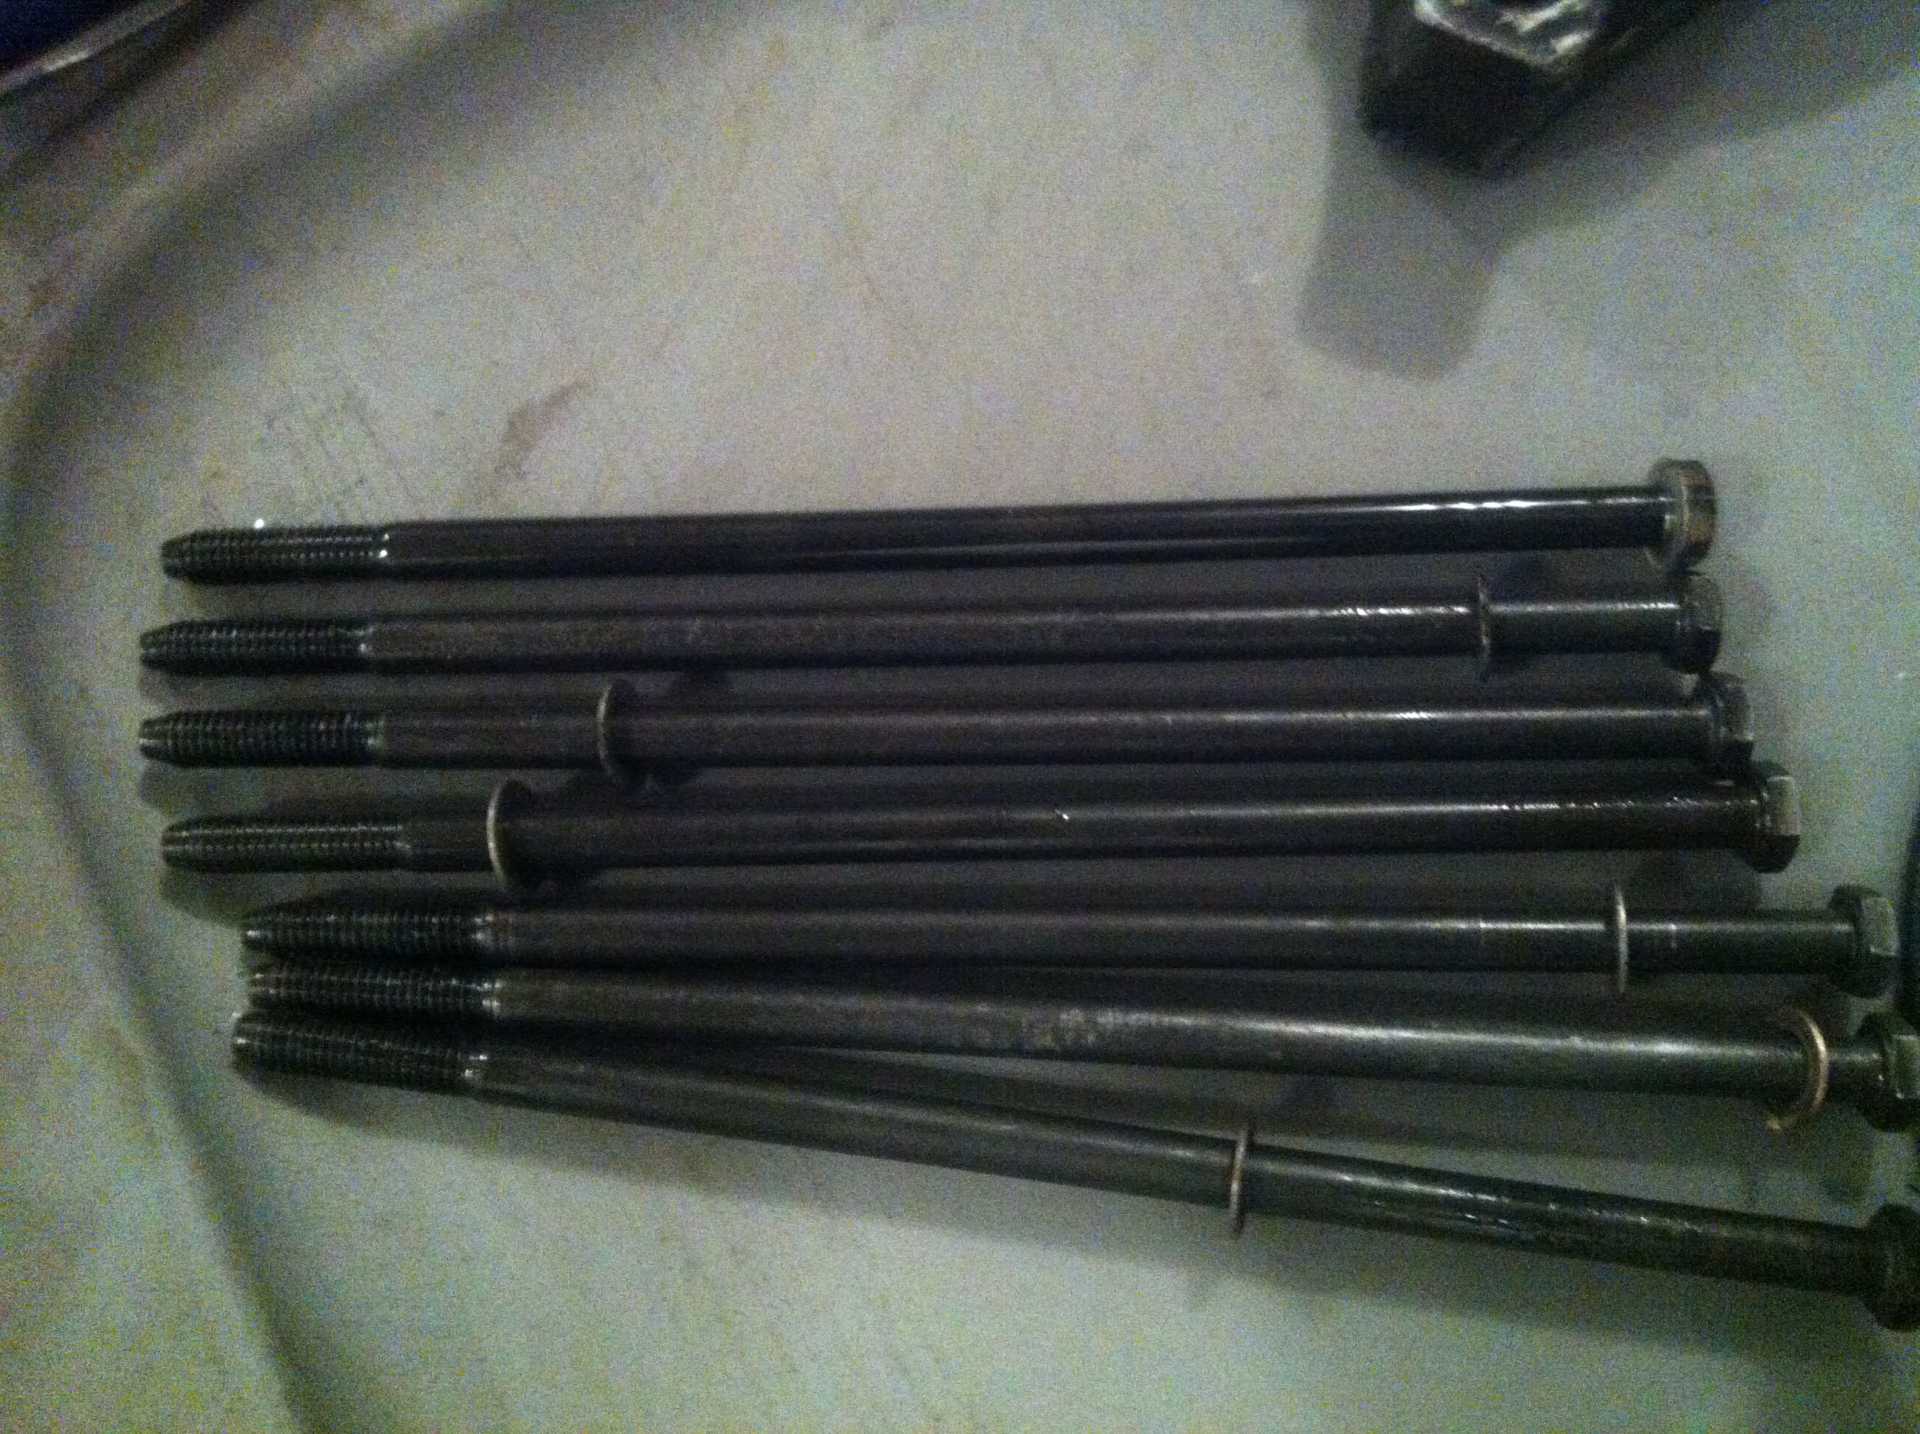
The through bolts, completely identical as well.
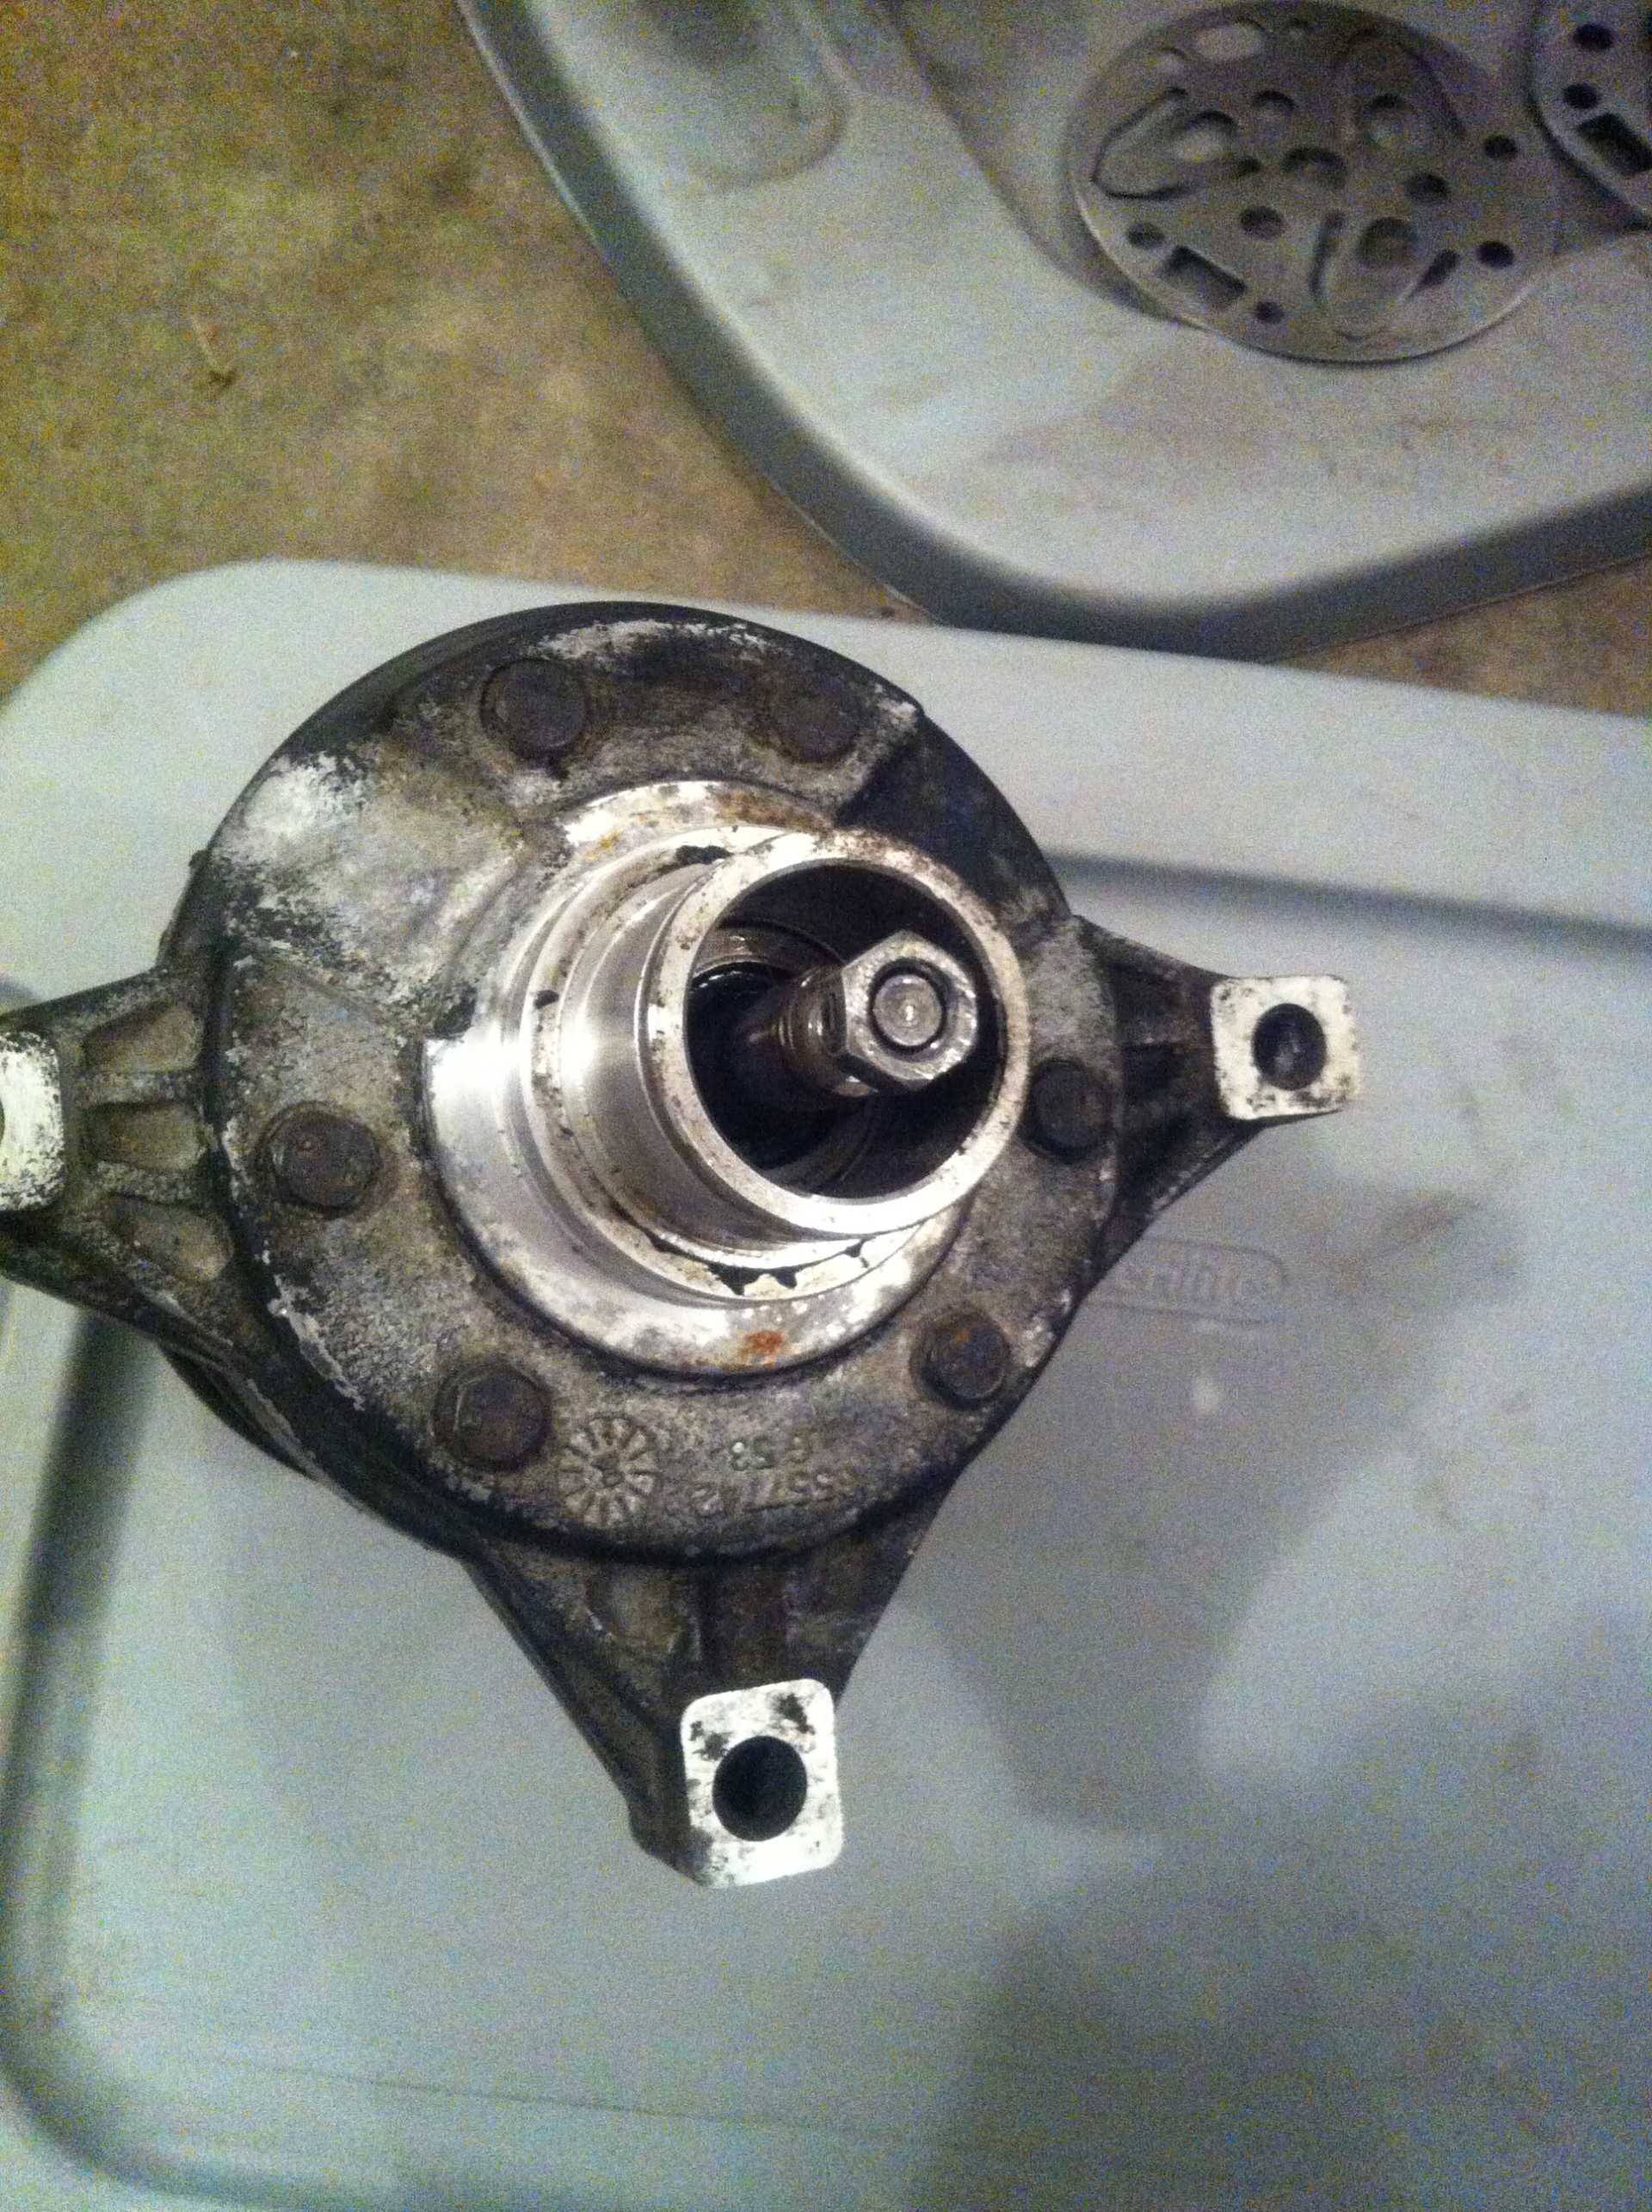


Front head removed


Back of the HR6


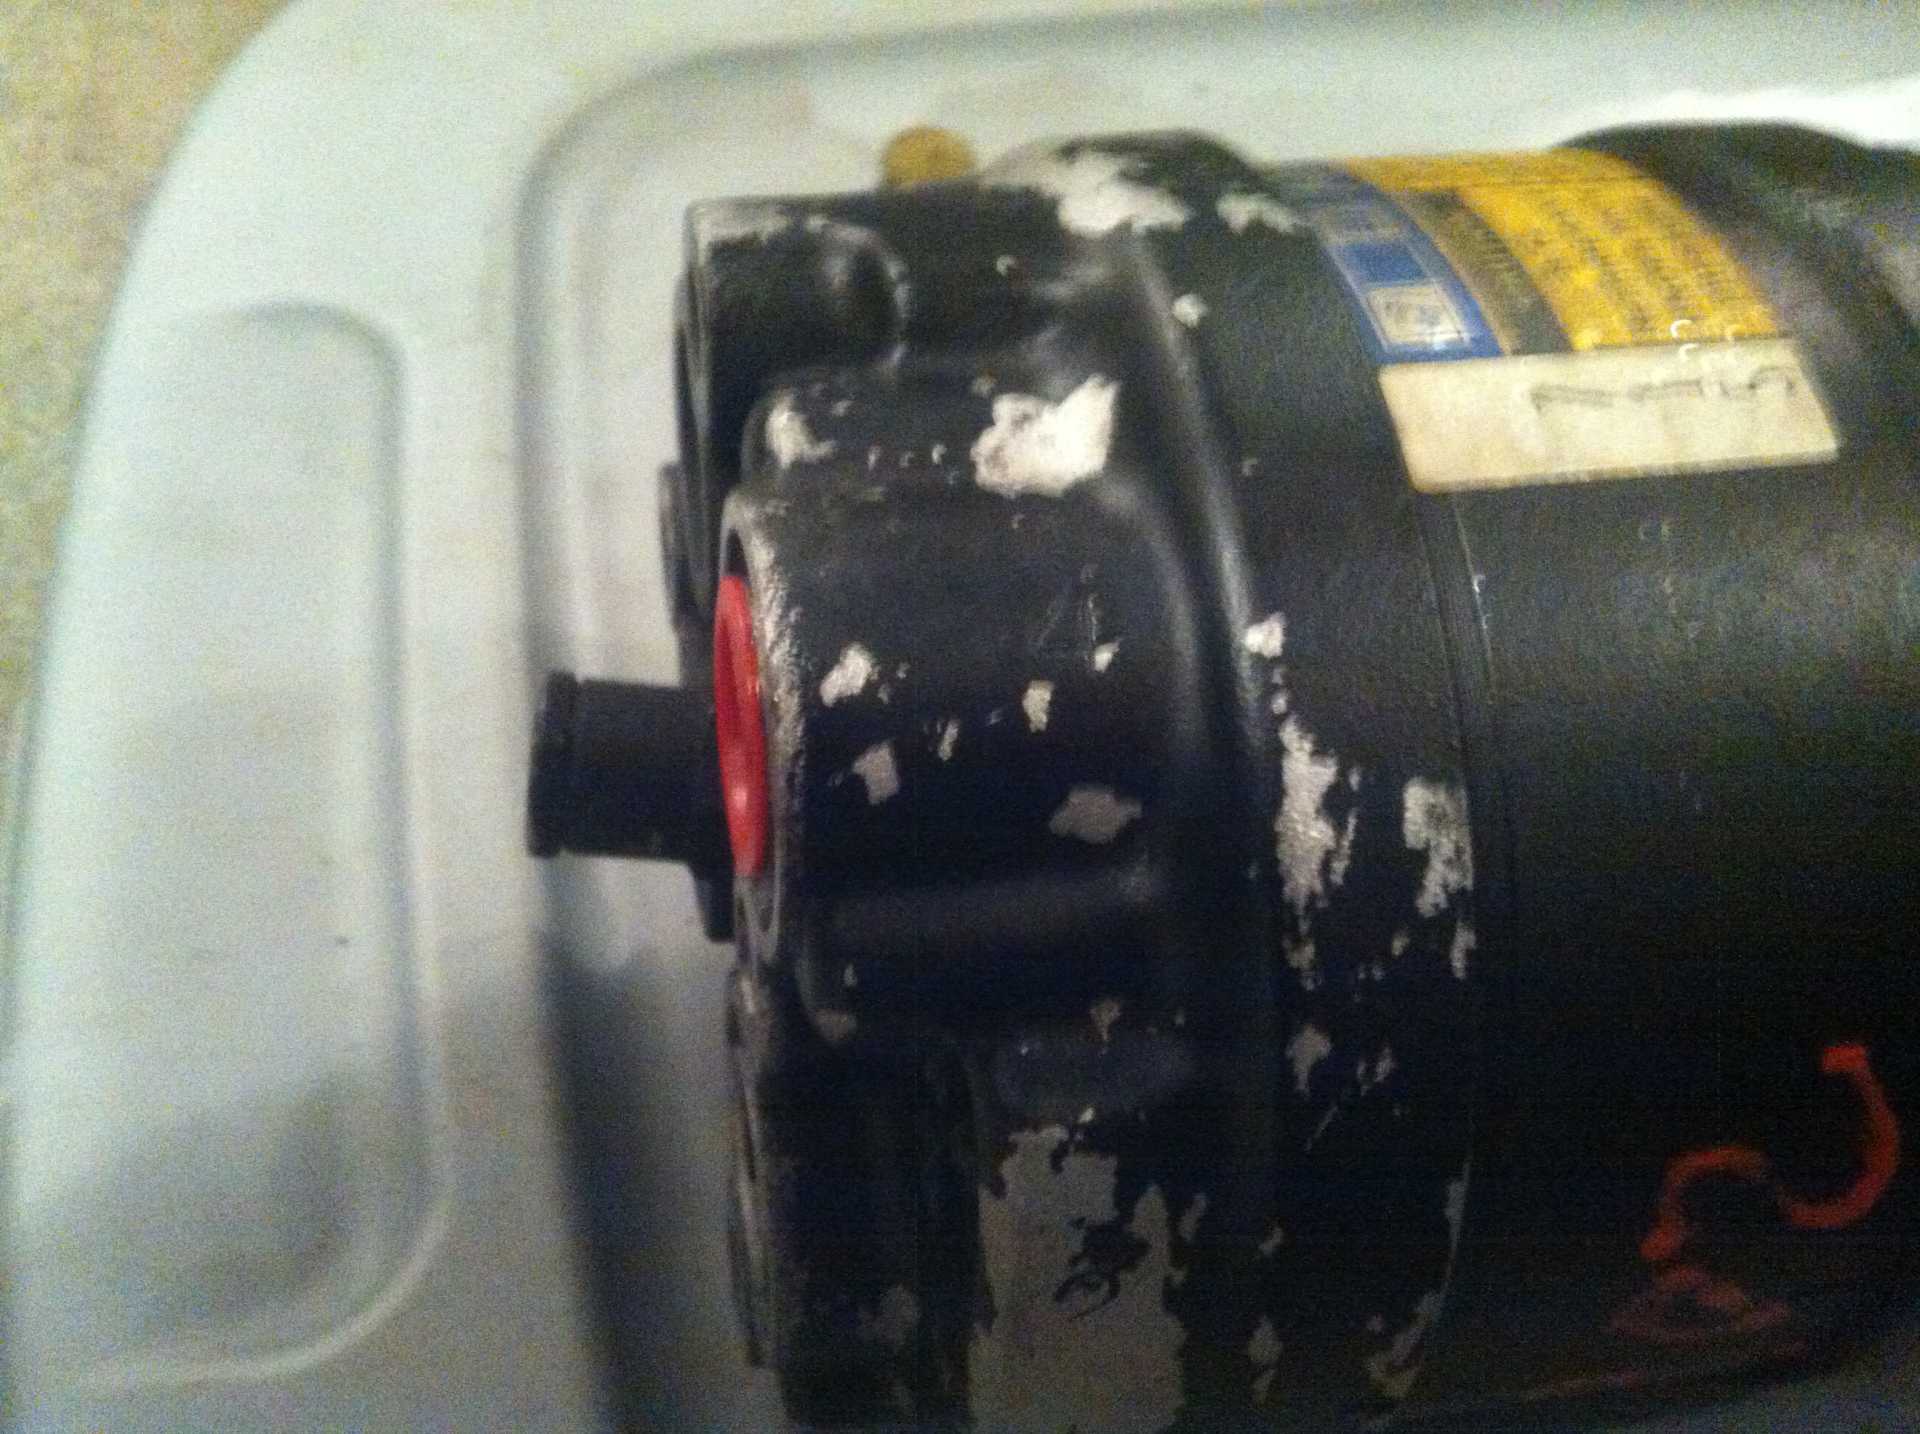
Front shaft cleaned with a red scotchbrite pad, so the new front seal will actually seal.


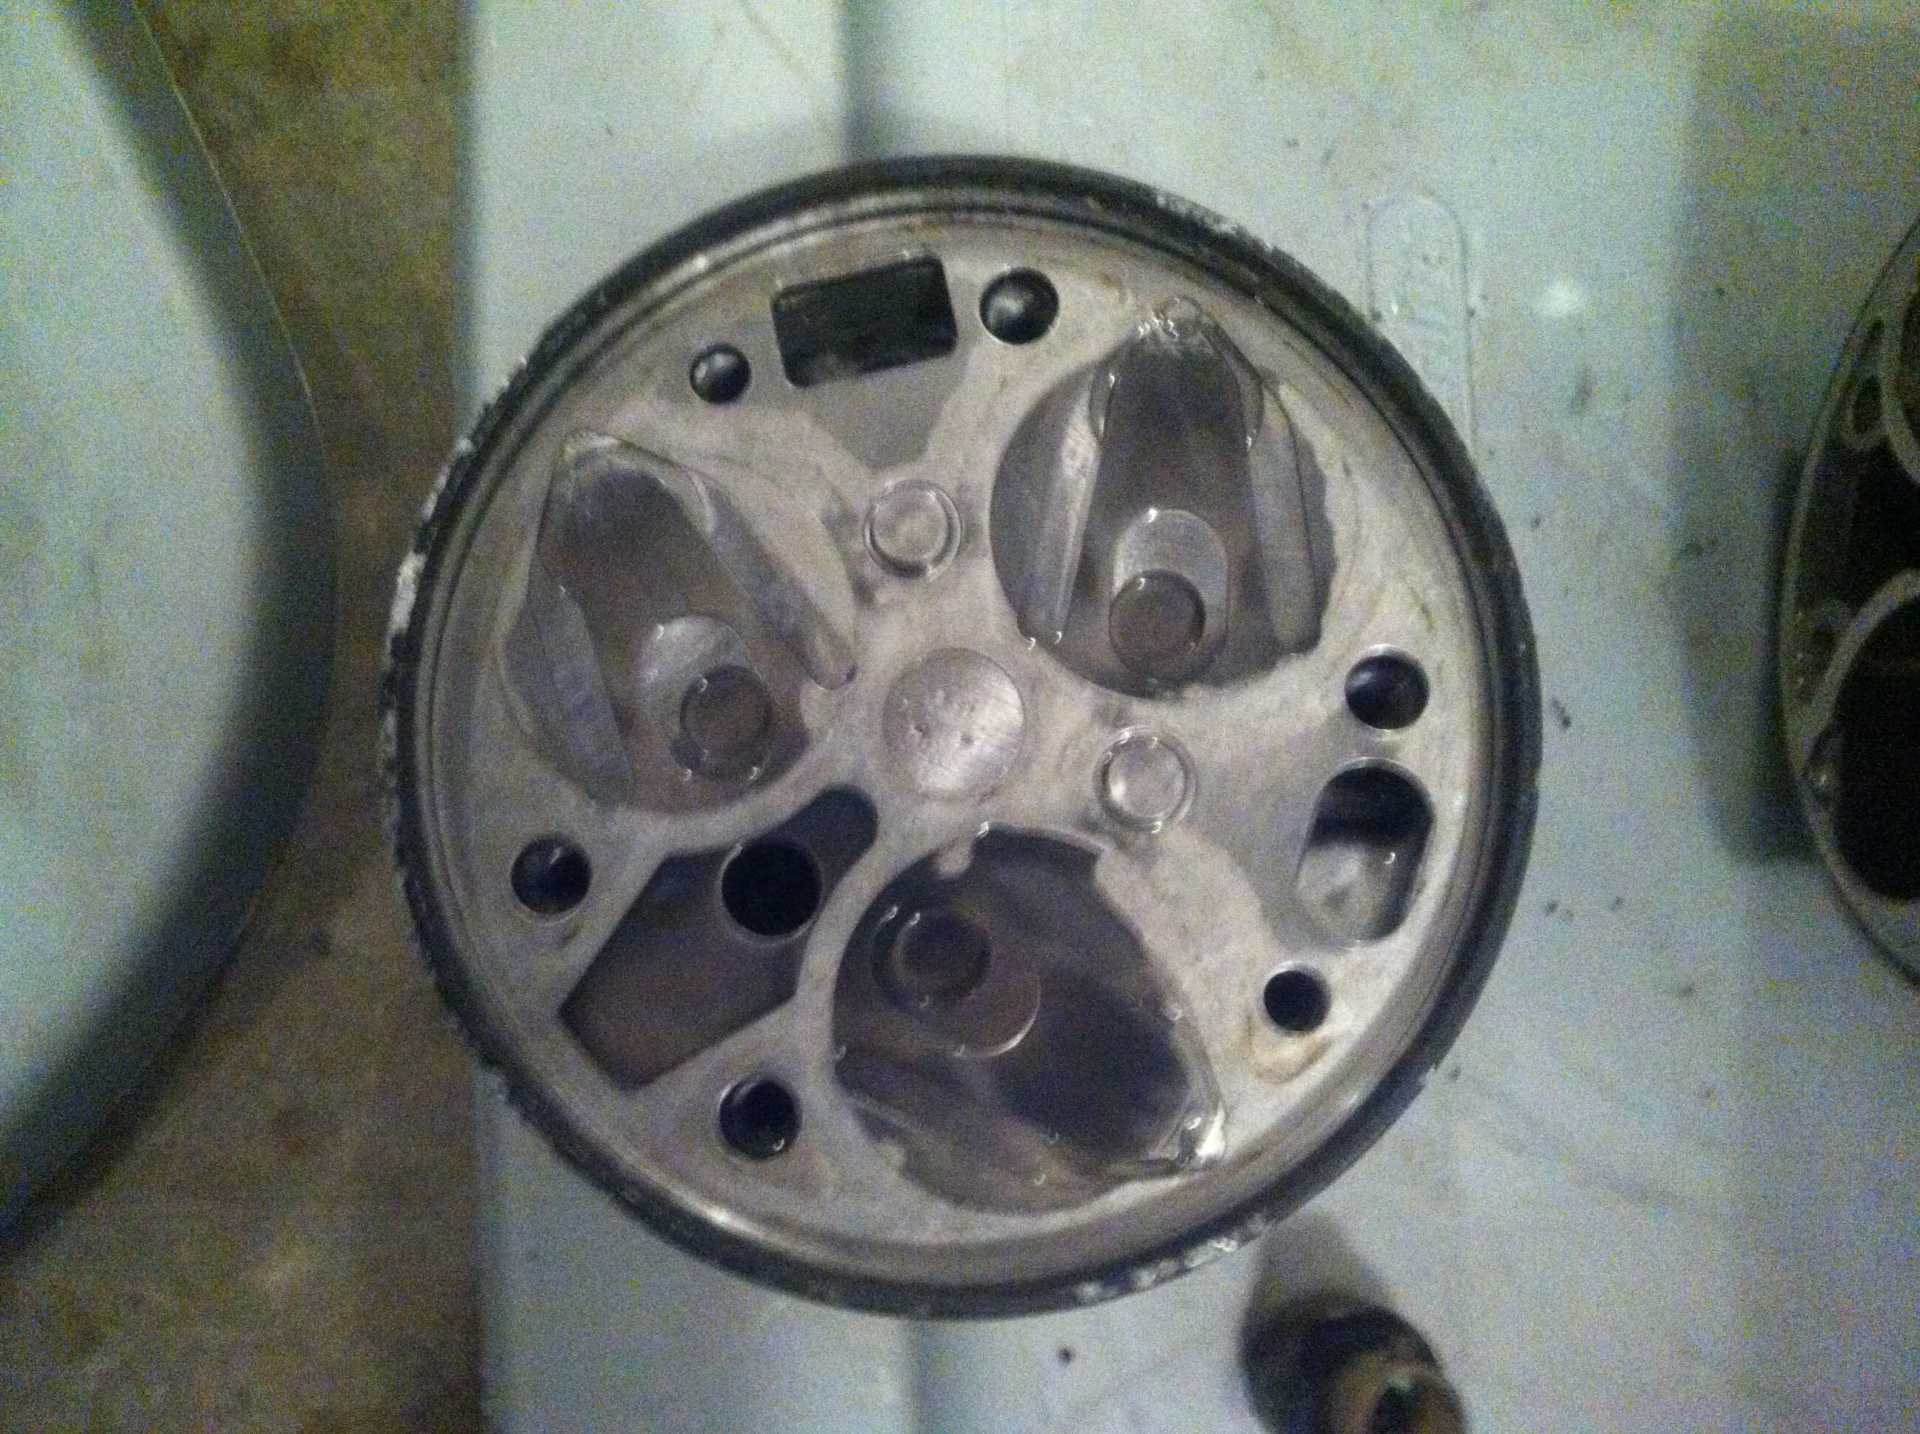
Front head viewed from the back, showing the back of the suction reed. Notice the diamond-shaped portion.


Another head gasket and valve plate


Front head casting, identical to the DA6, just cleaner


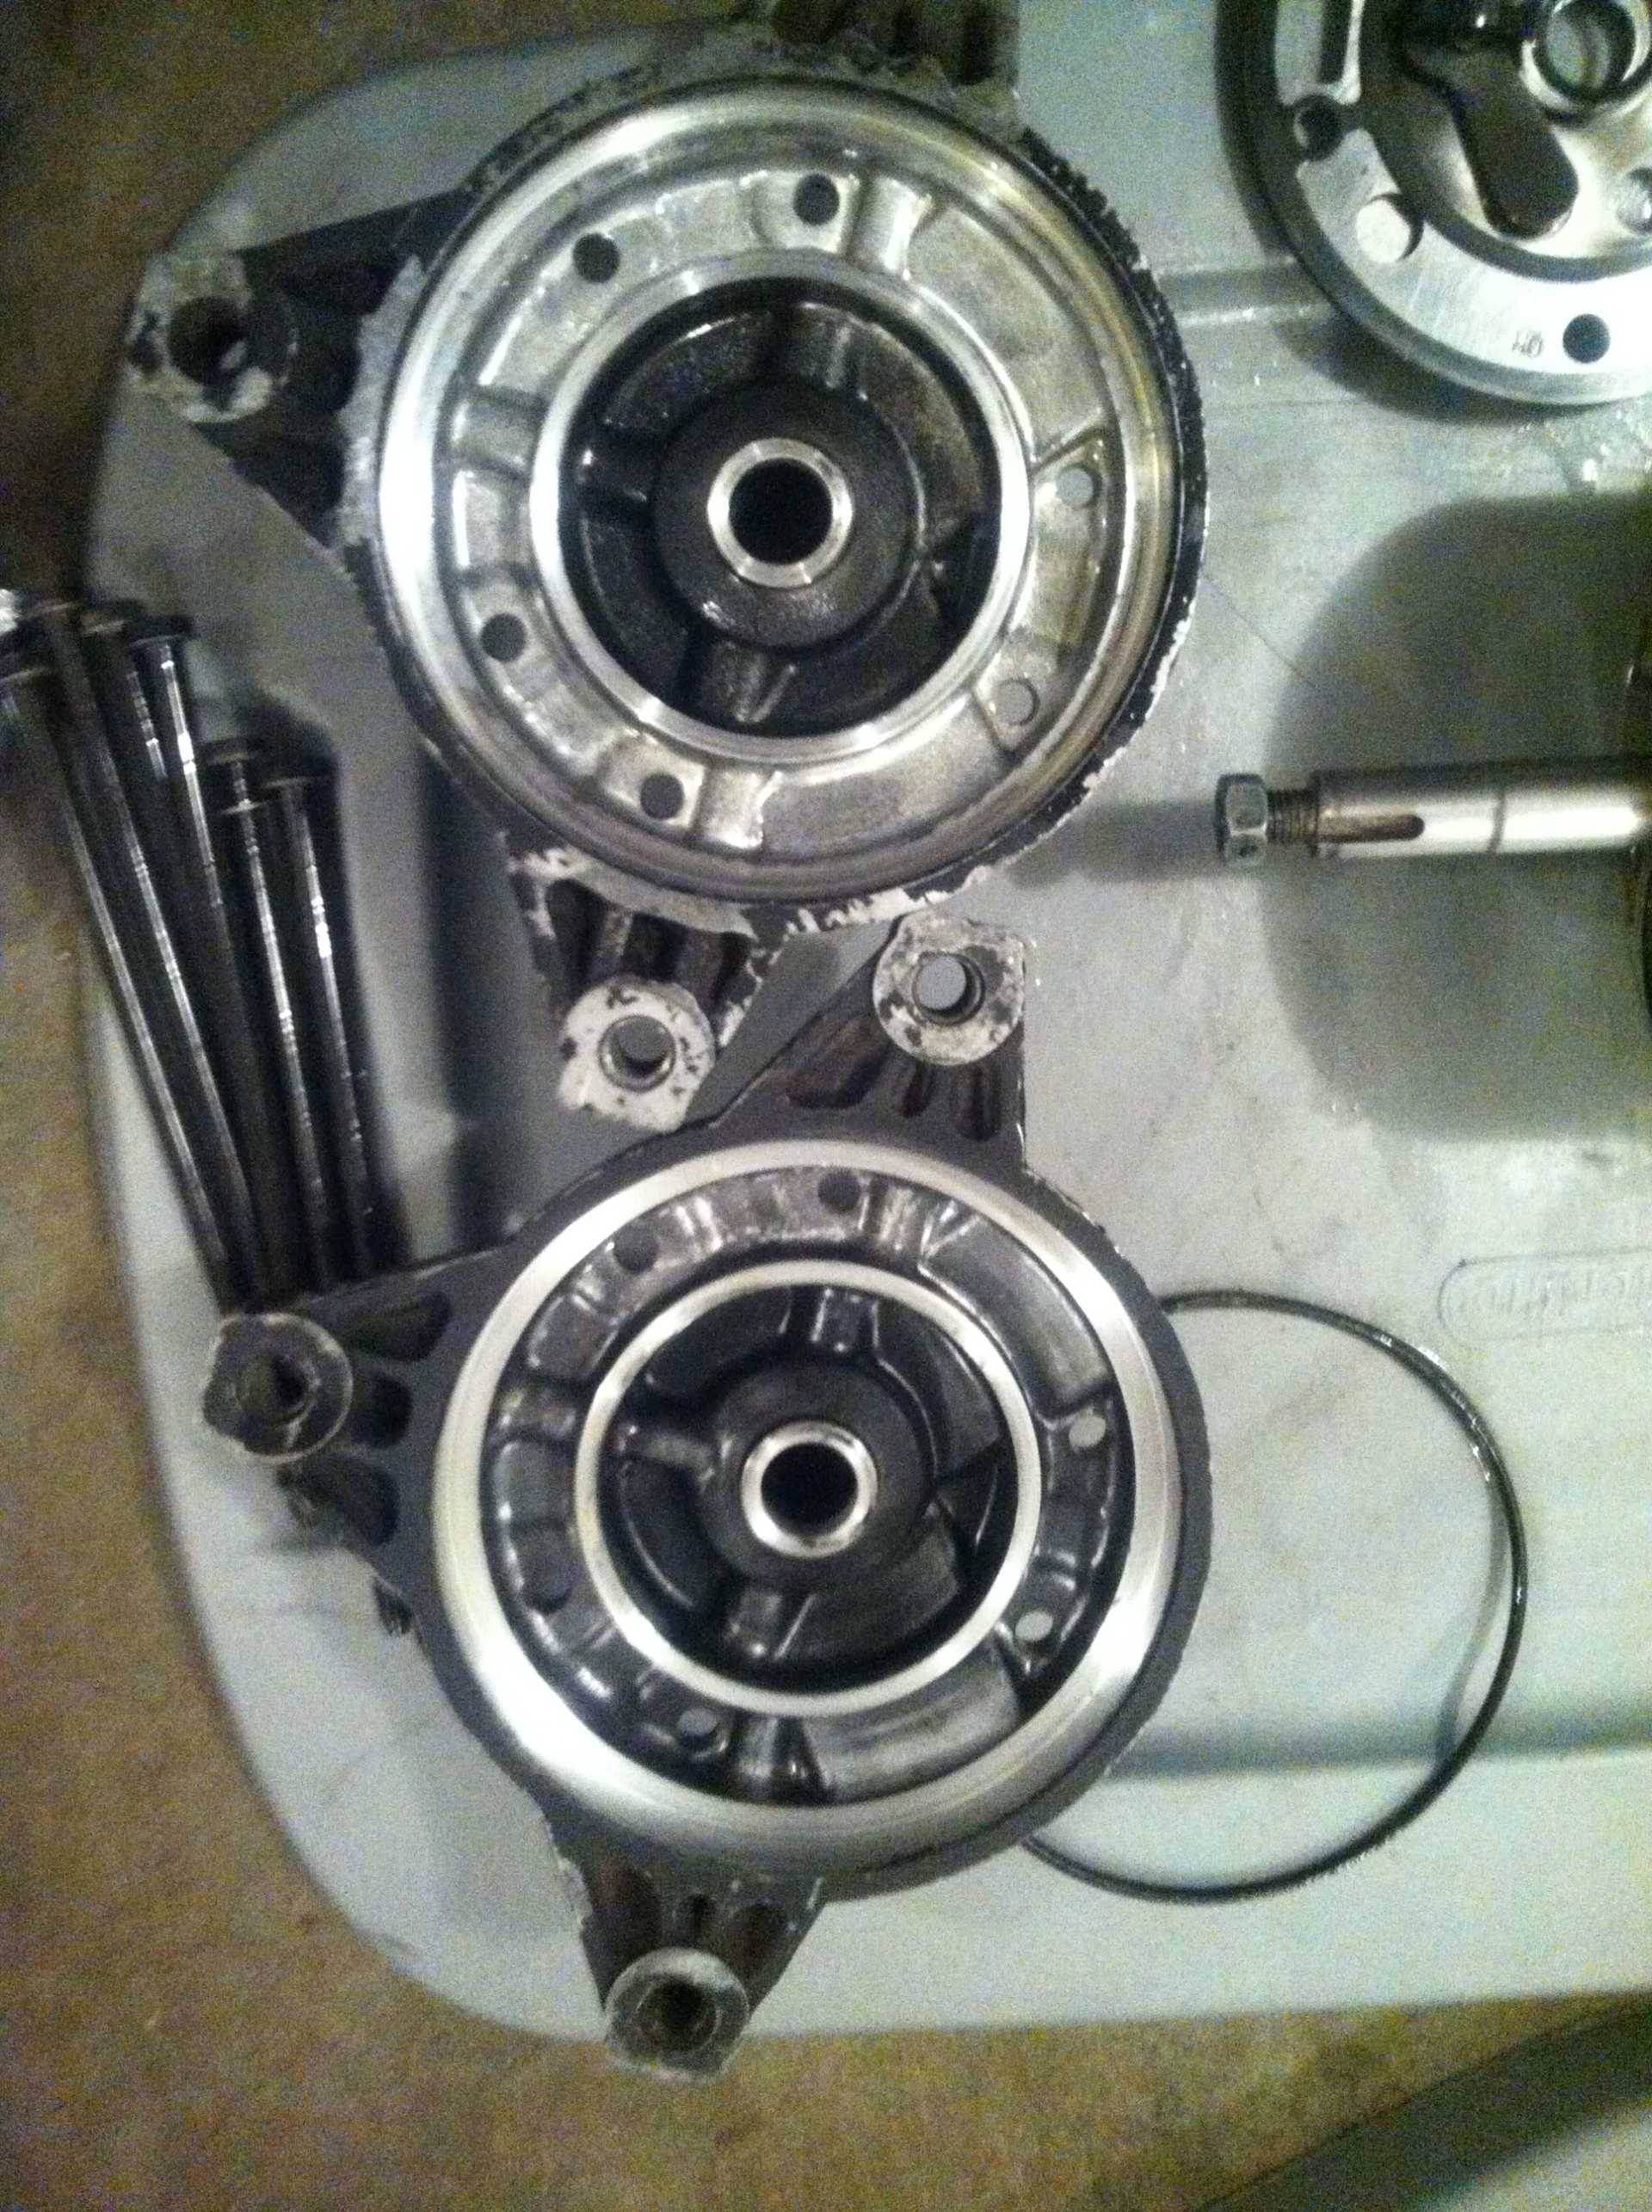
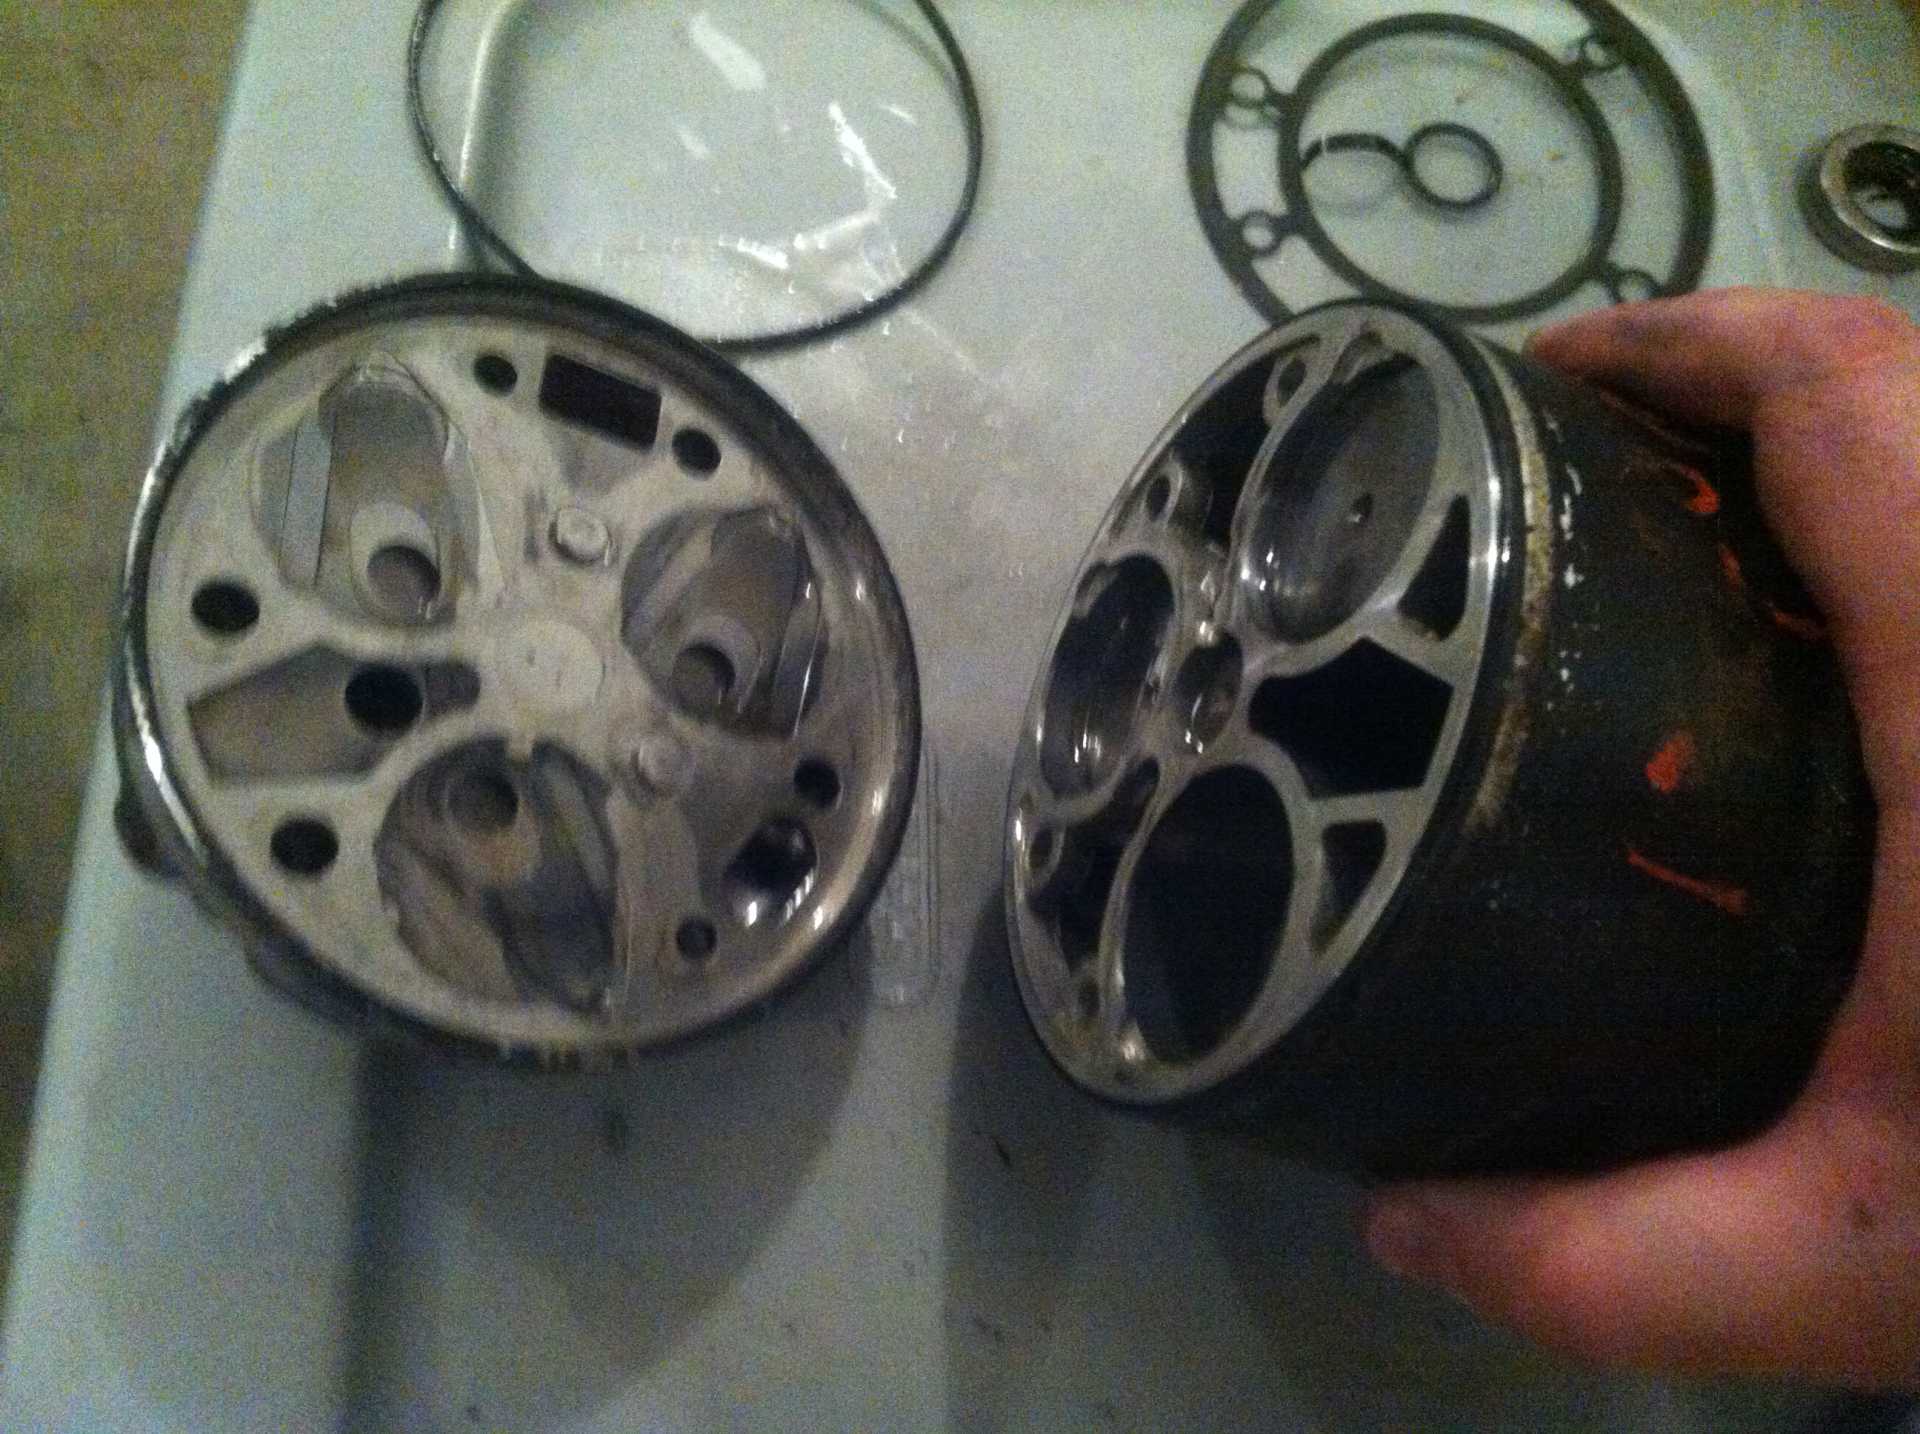
Comparison of the two front heads, DA6 bottom, HR6 top


Front seal removed. With the compressor assembled, this requires a special tool. With the compressor apart, you can just punch it out from the rear with a screwdriver and hammer.


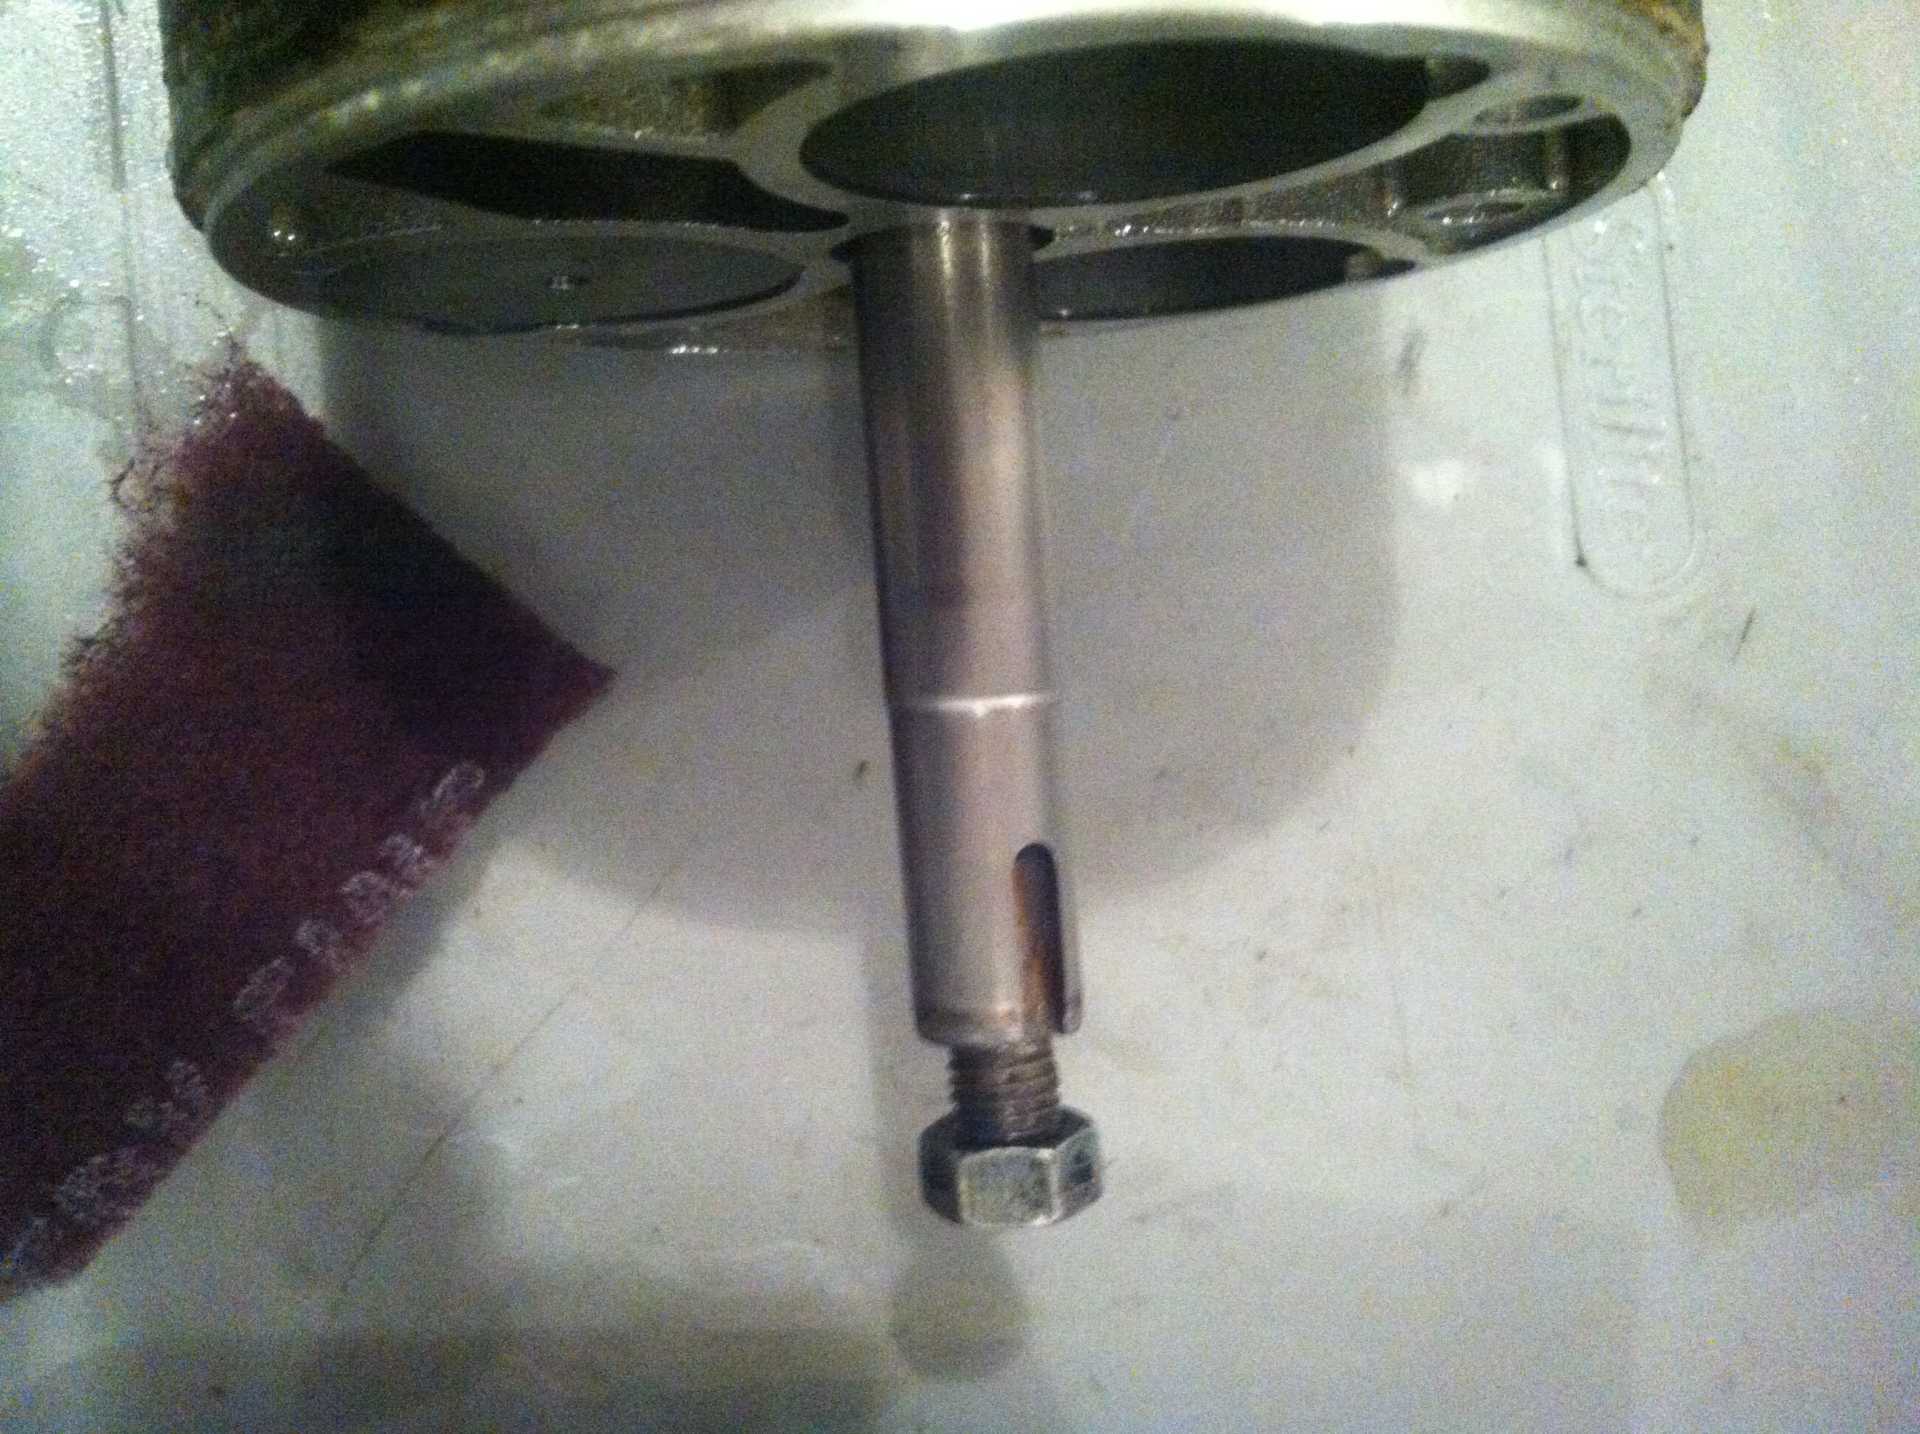
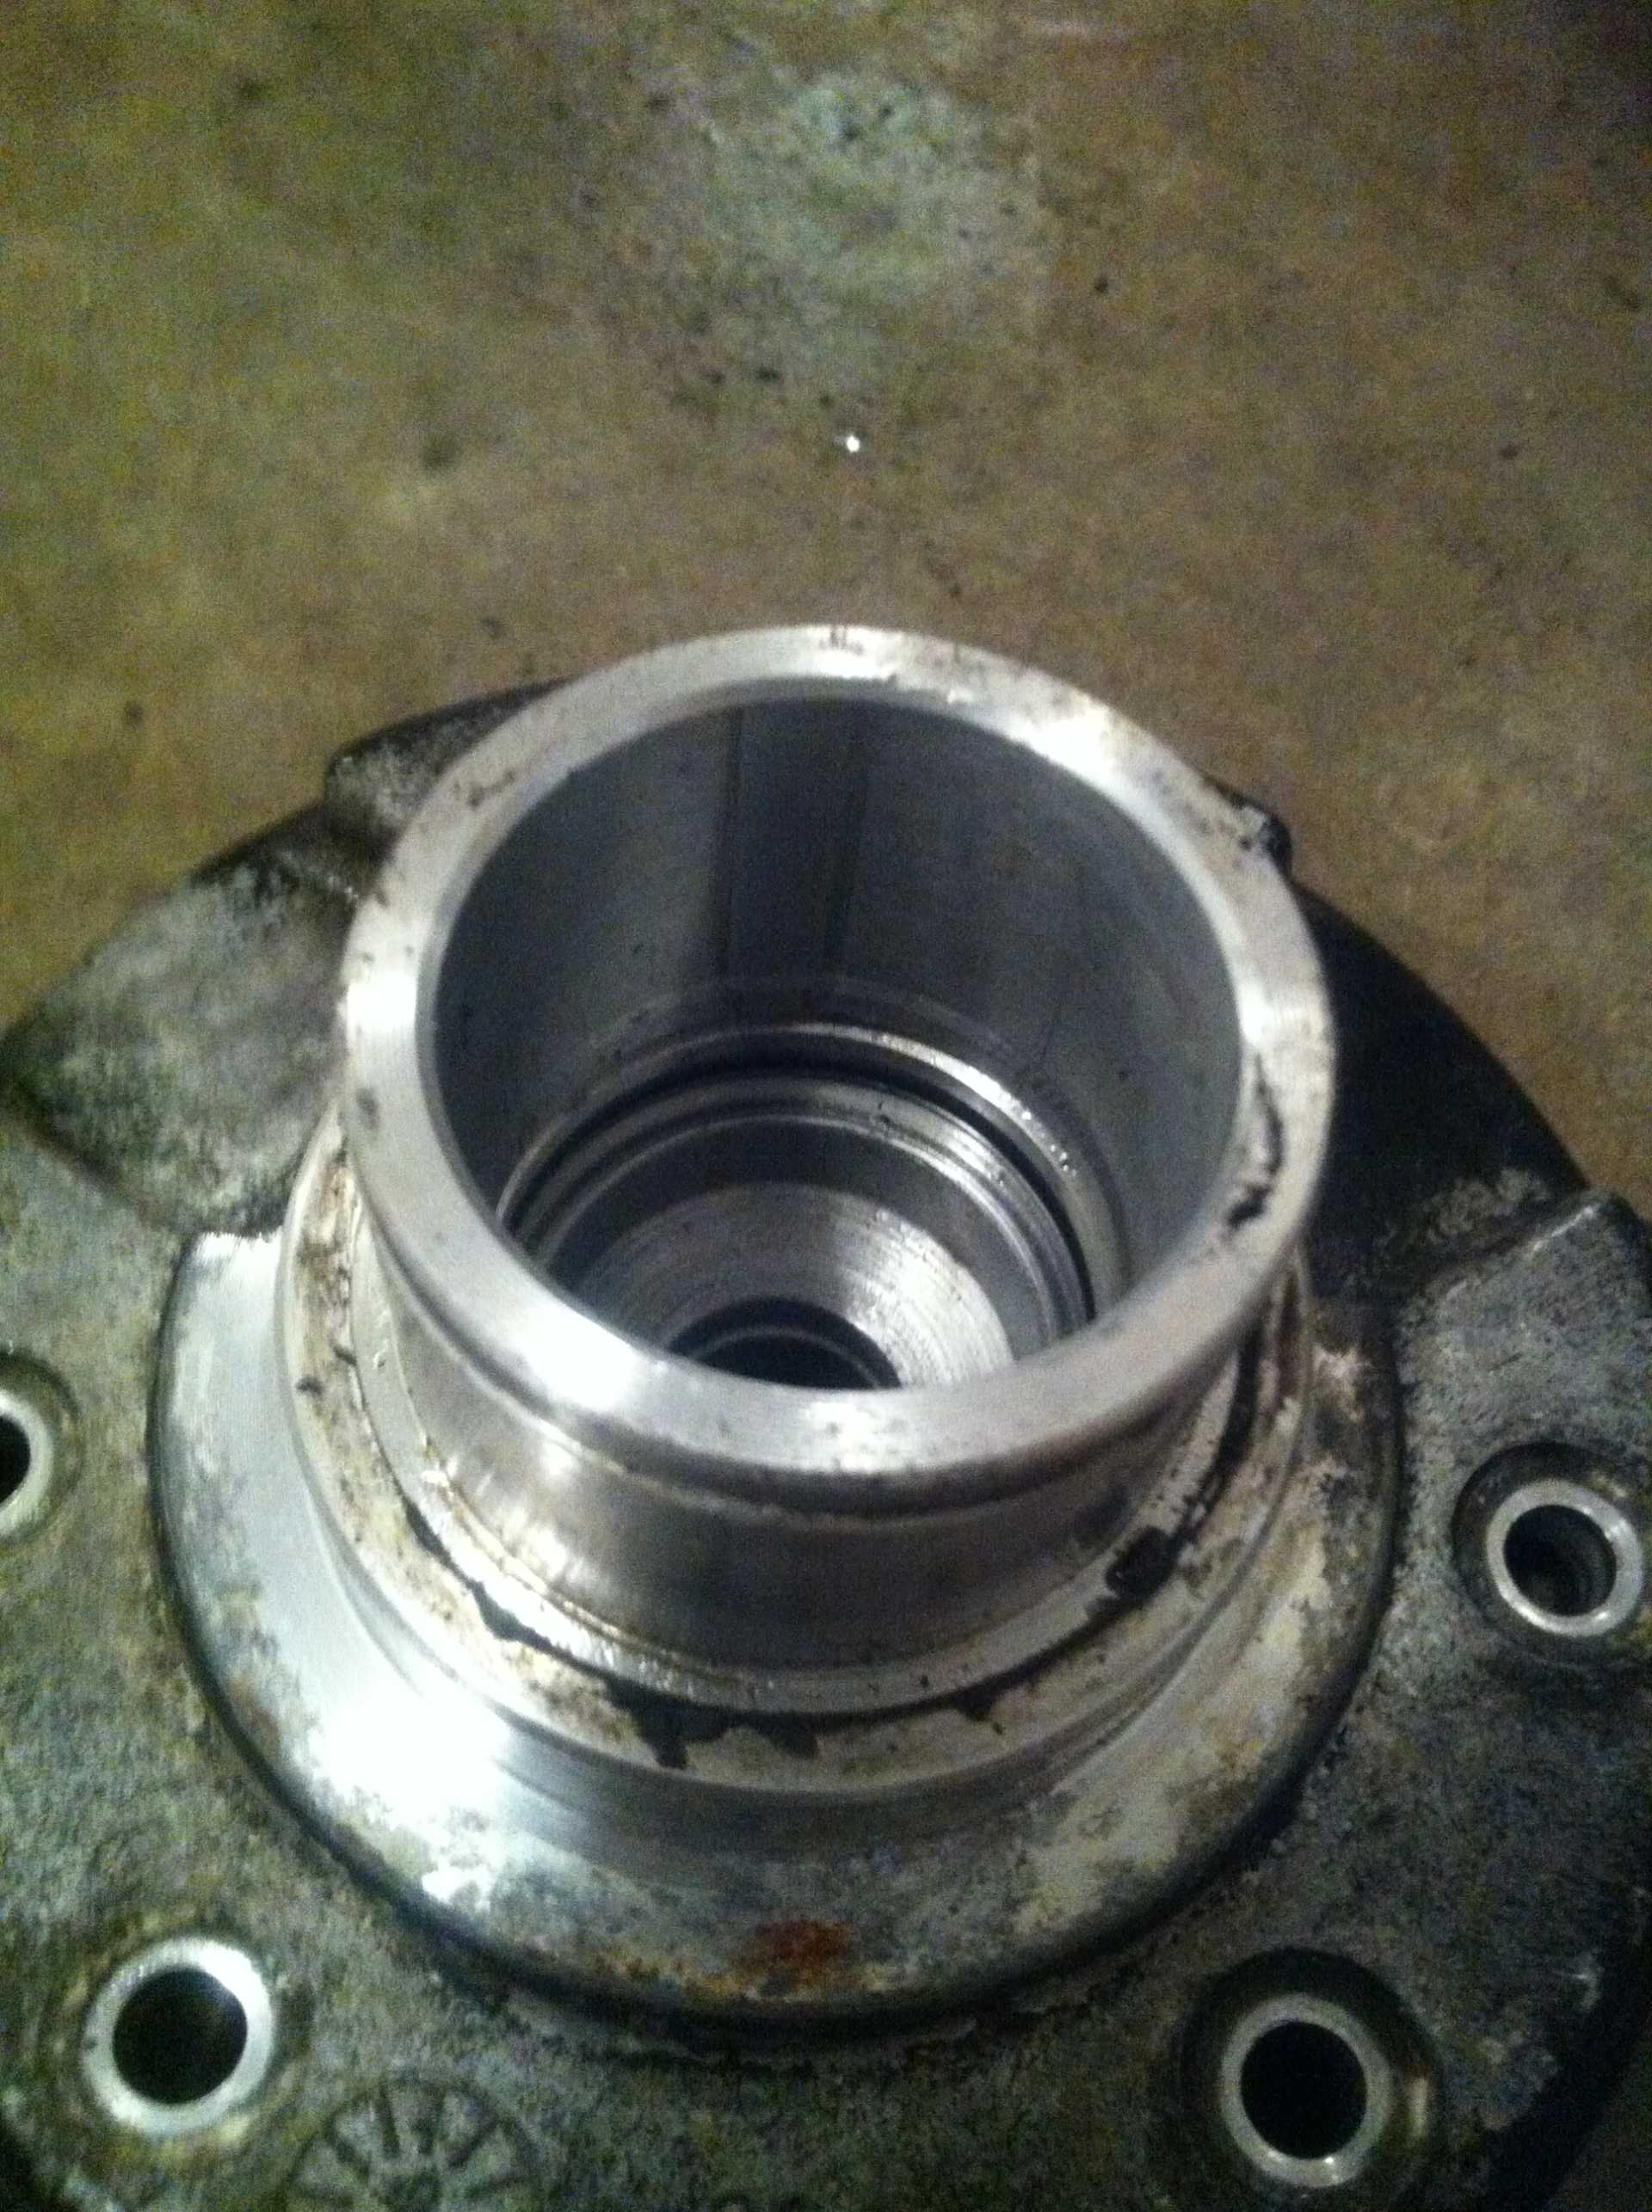
With the seal removed, there is still an o-ring down in the bore. a curved hook makes removing it a breeze.


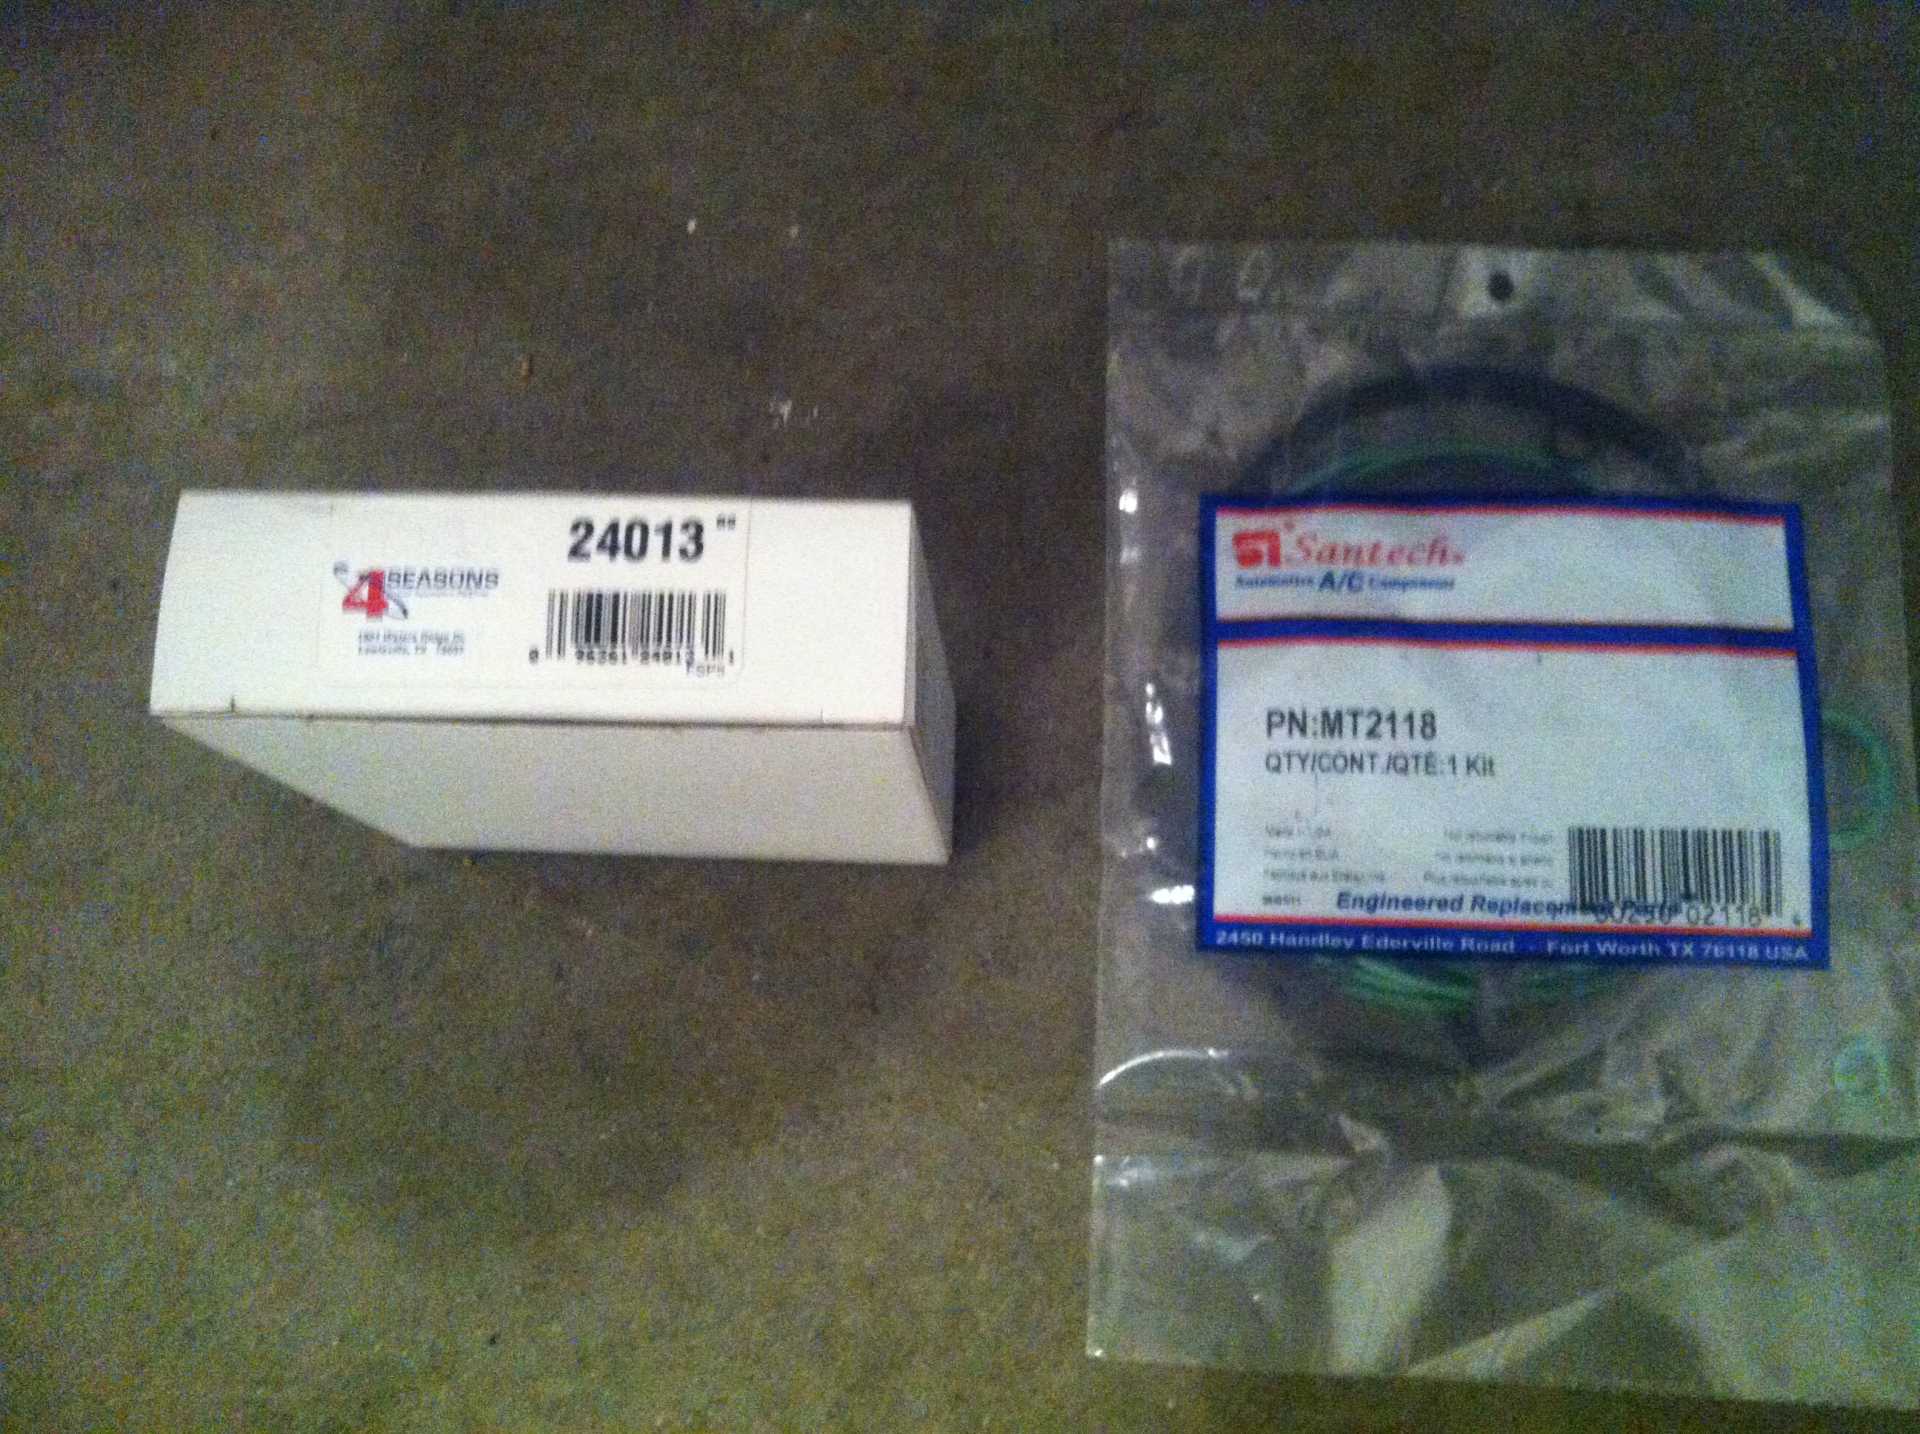
New seal kits to rebuild the compressor. On the left, the new front seal, o-ring, and installation tool. On the right, the new seals for the compressor, including the large body seals and head gaskets.
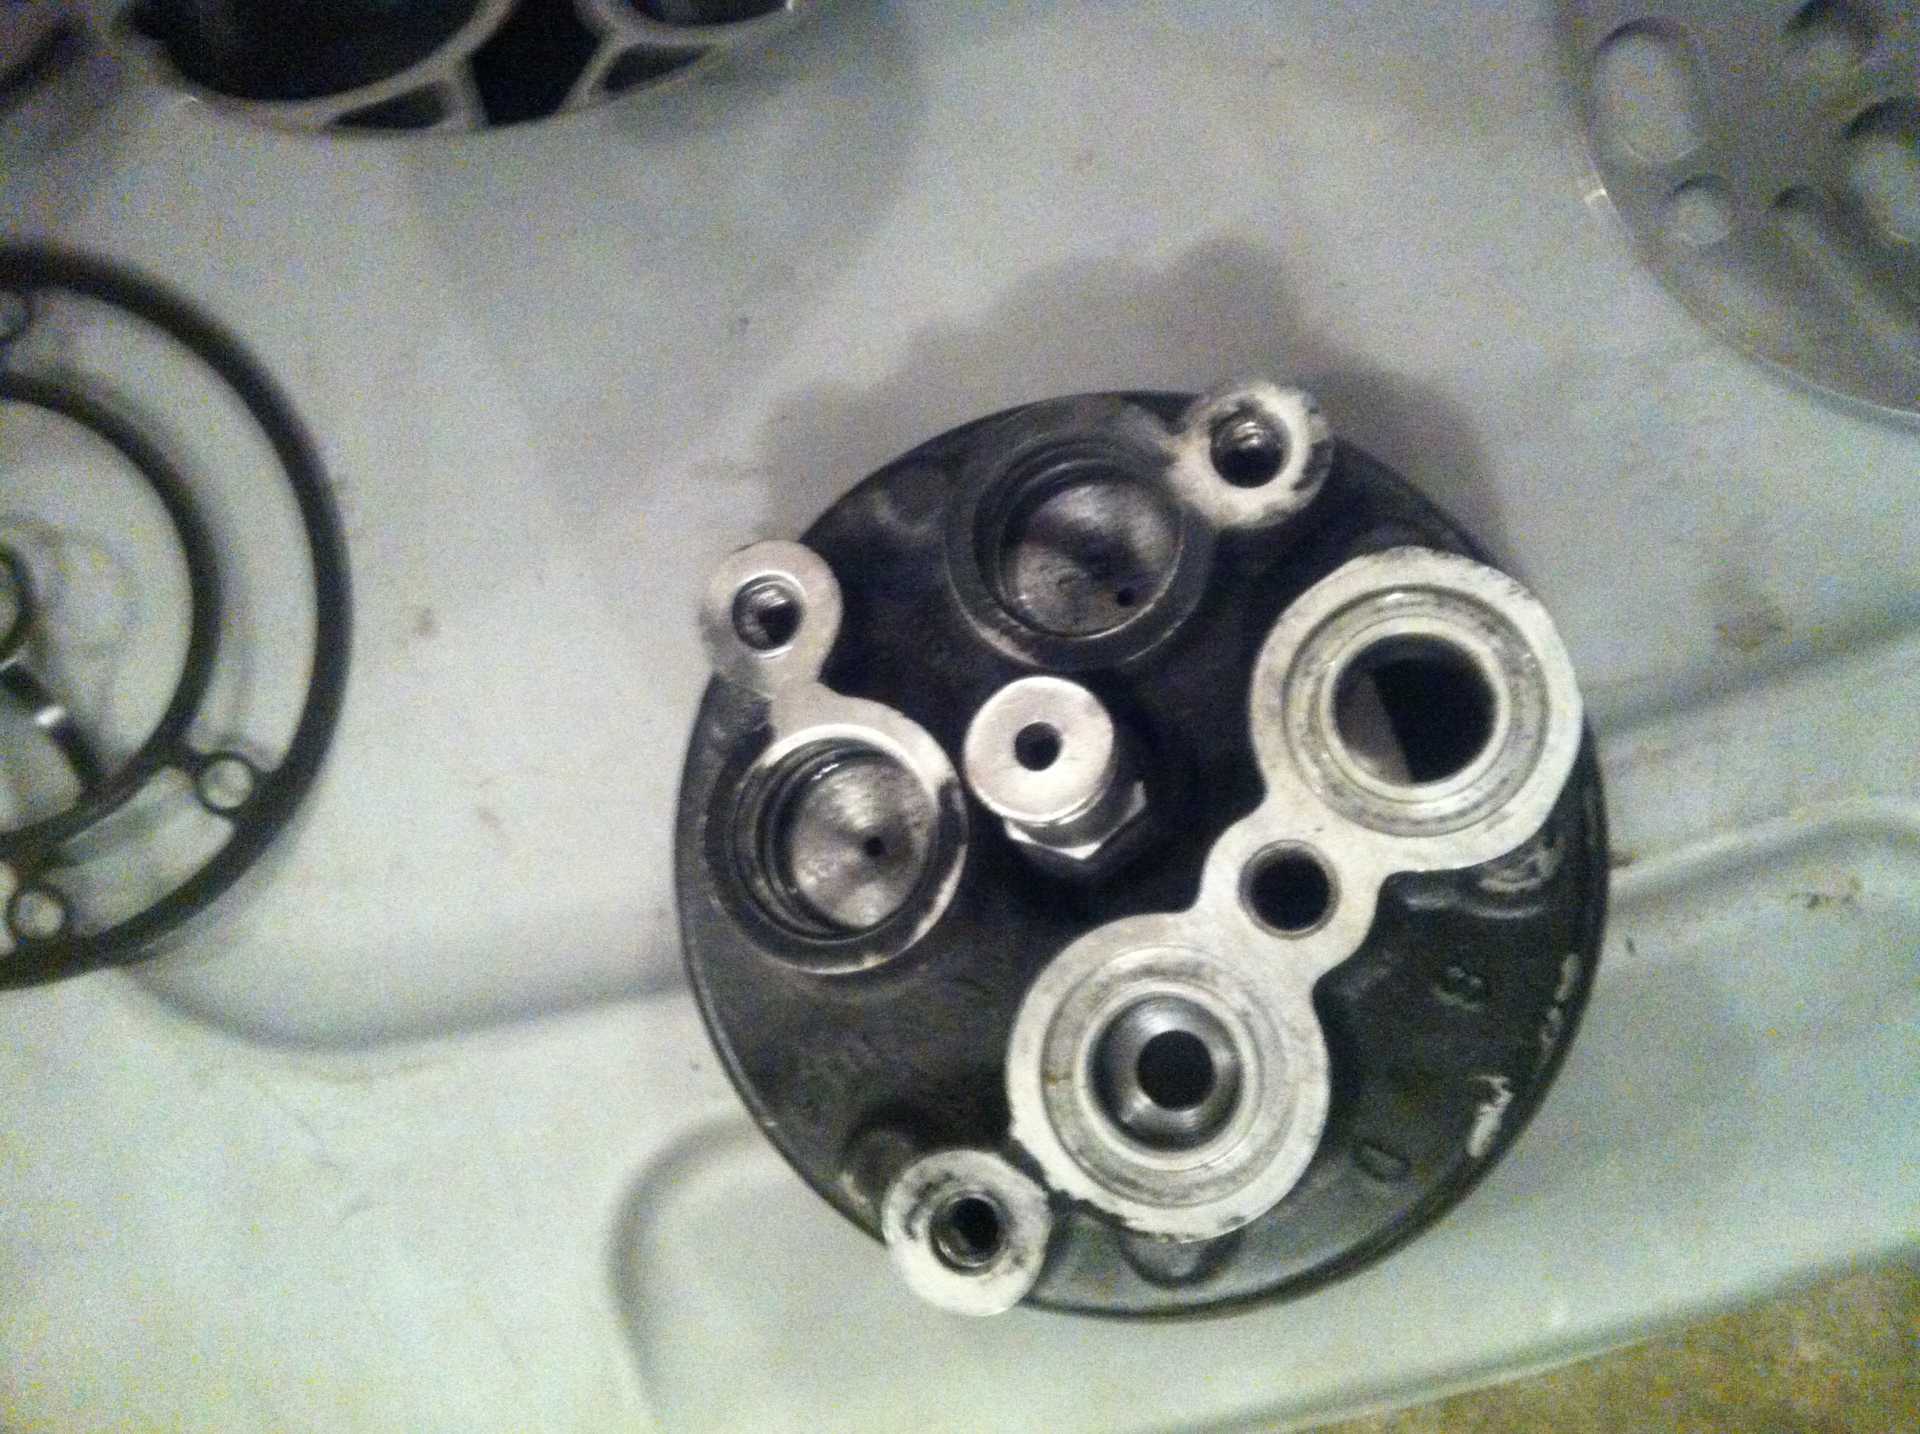
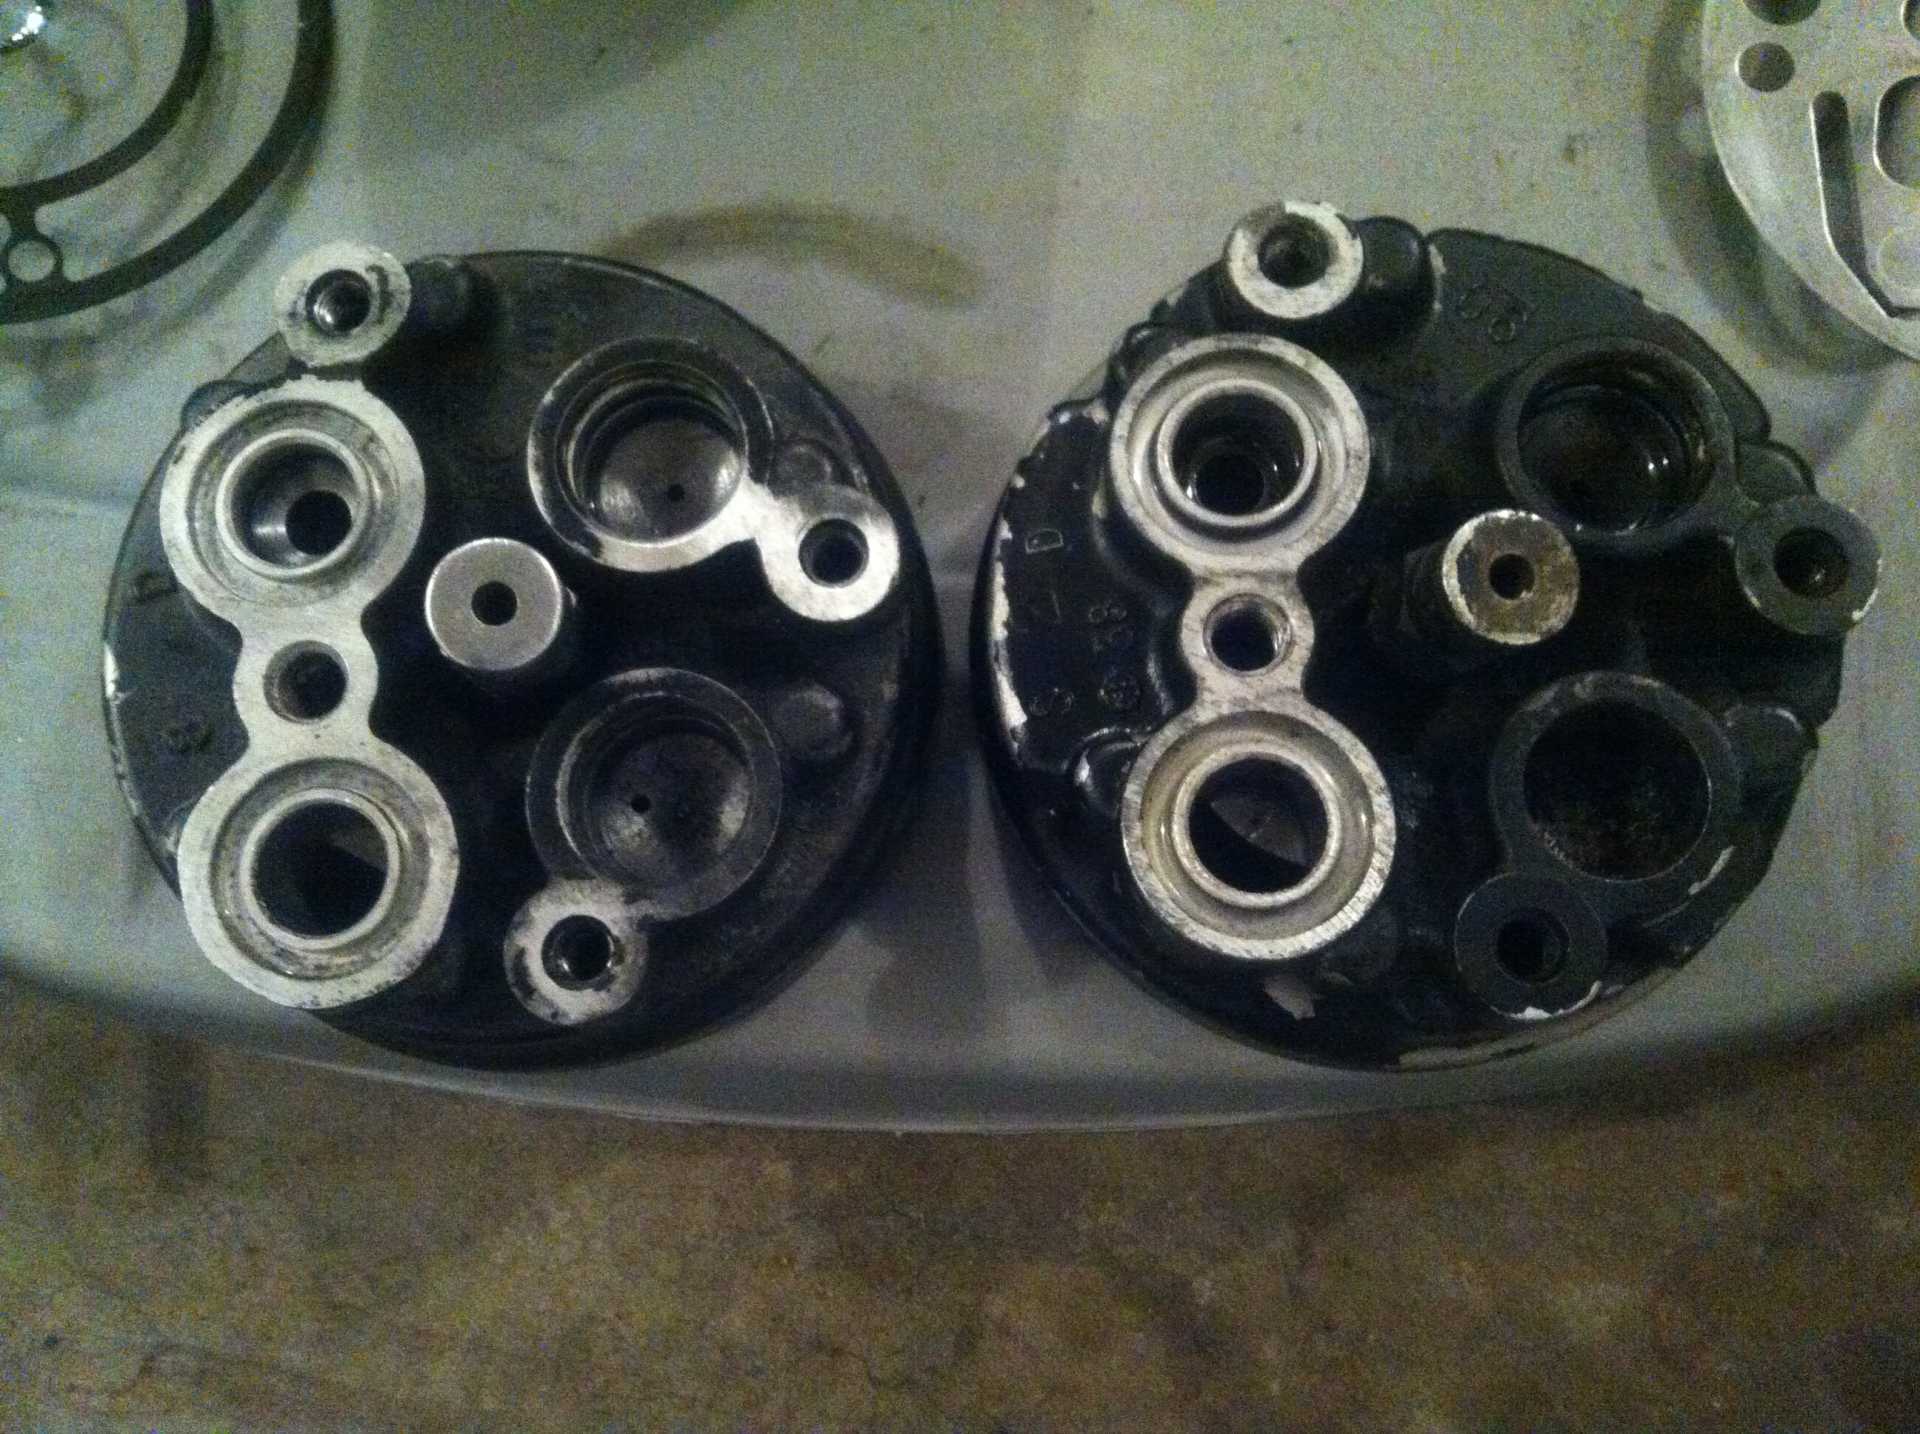


Rear head removed


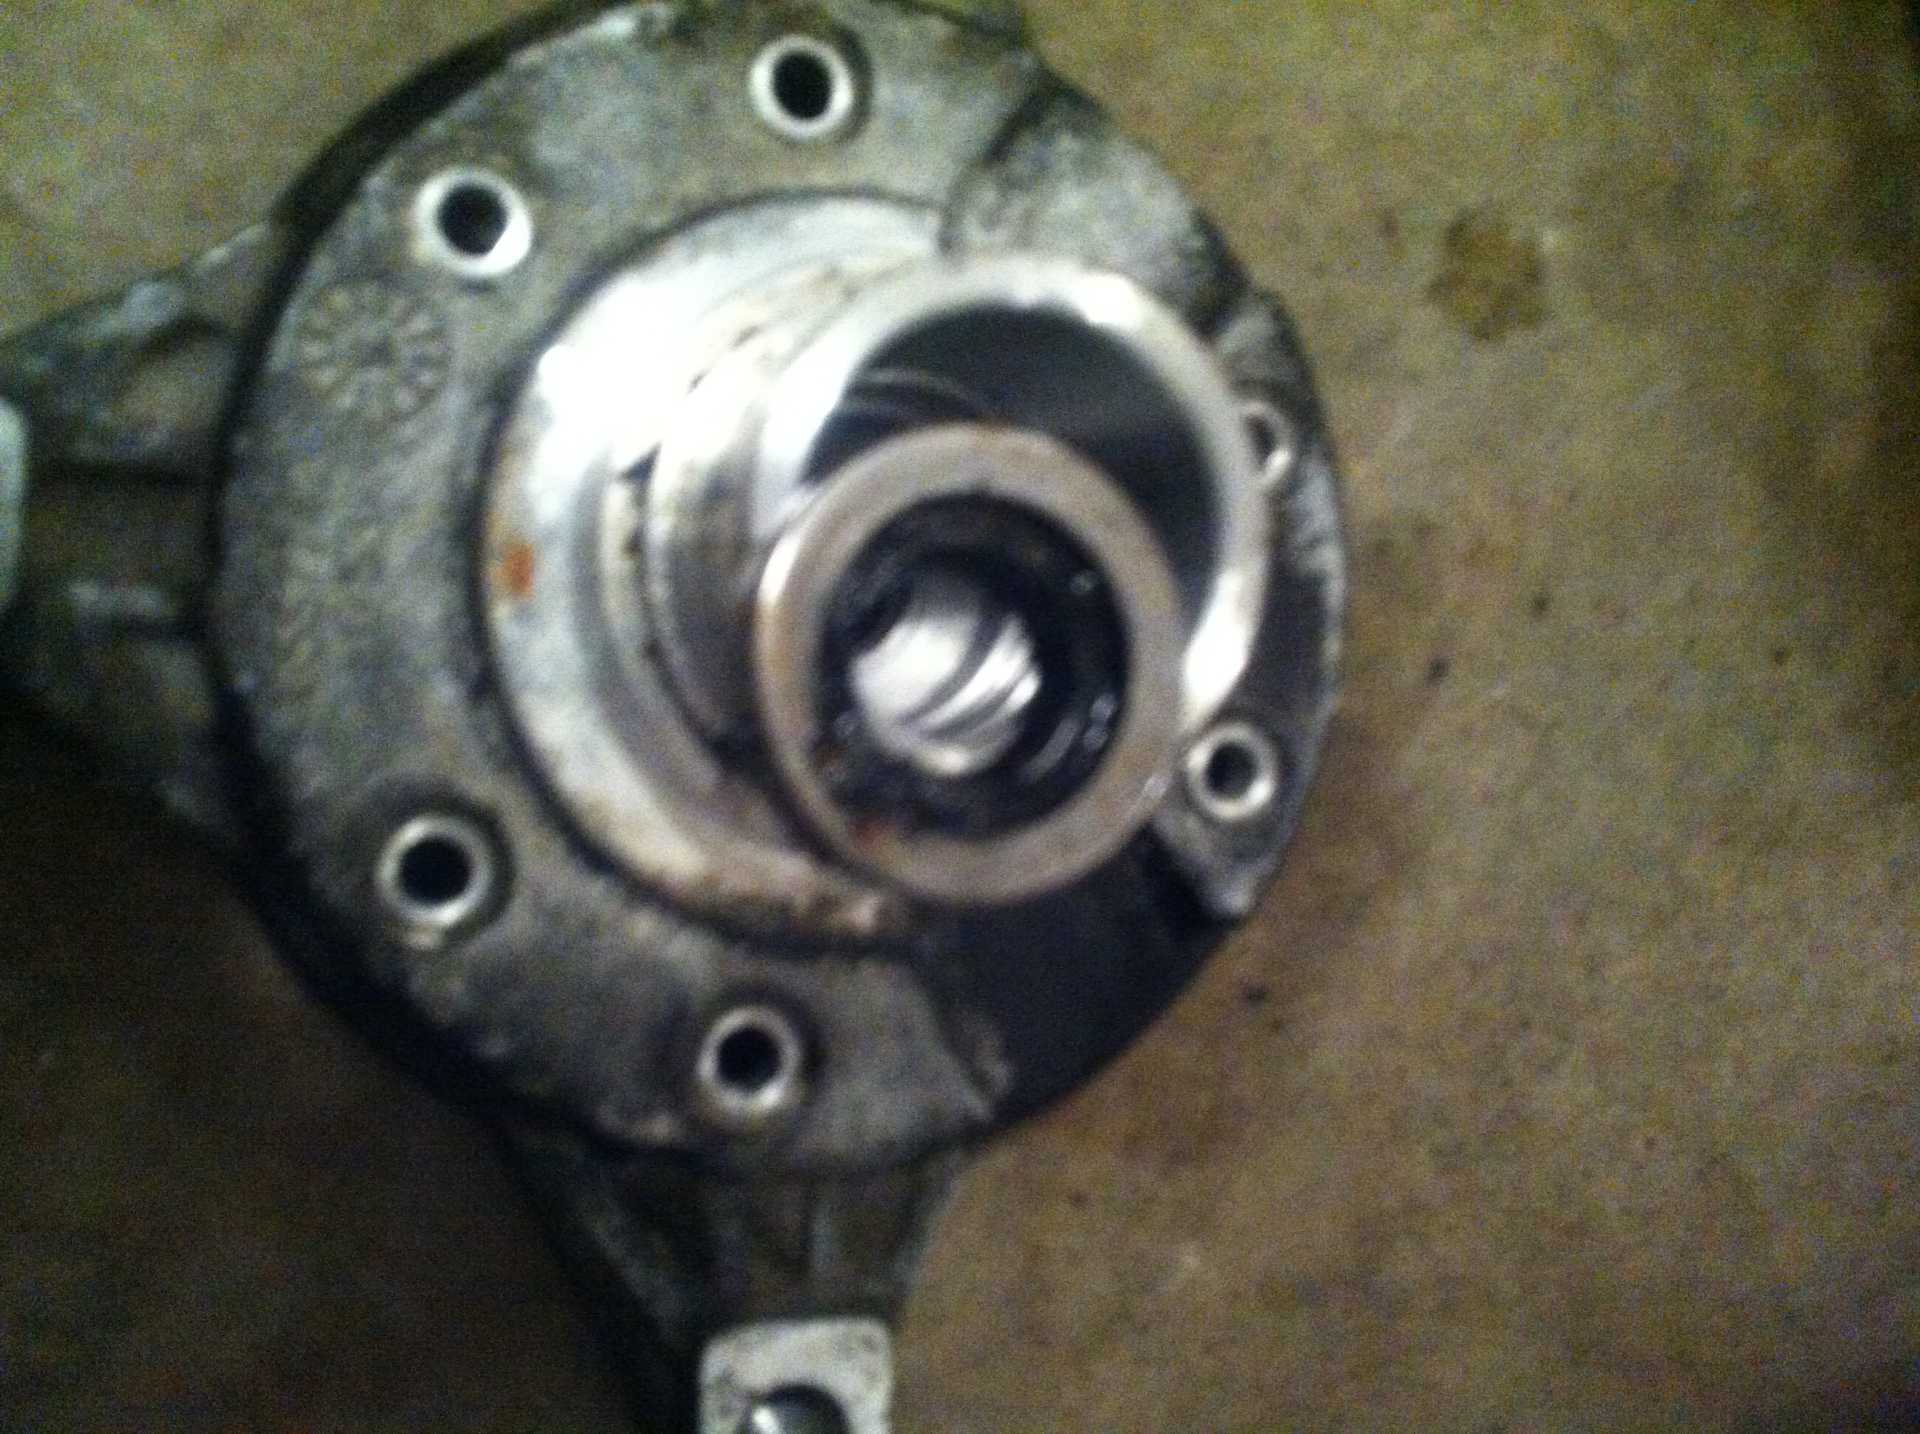
Rear head, note again the diamond shaped part


Rear heads comparison, the casting is identical, the only difference is the machining. The rear head on this HR6 does not have a second switch. The indentation is there, but they didn't drill the hole, or machine the recess for the snap ring.


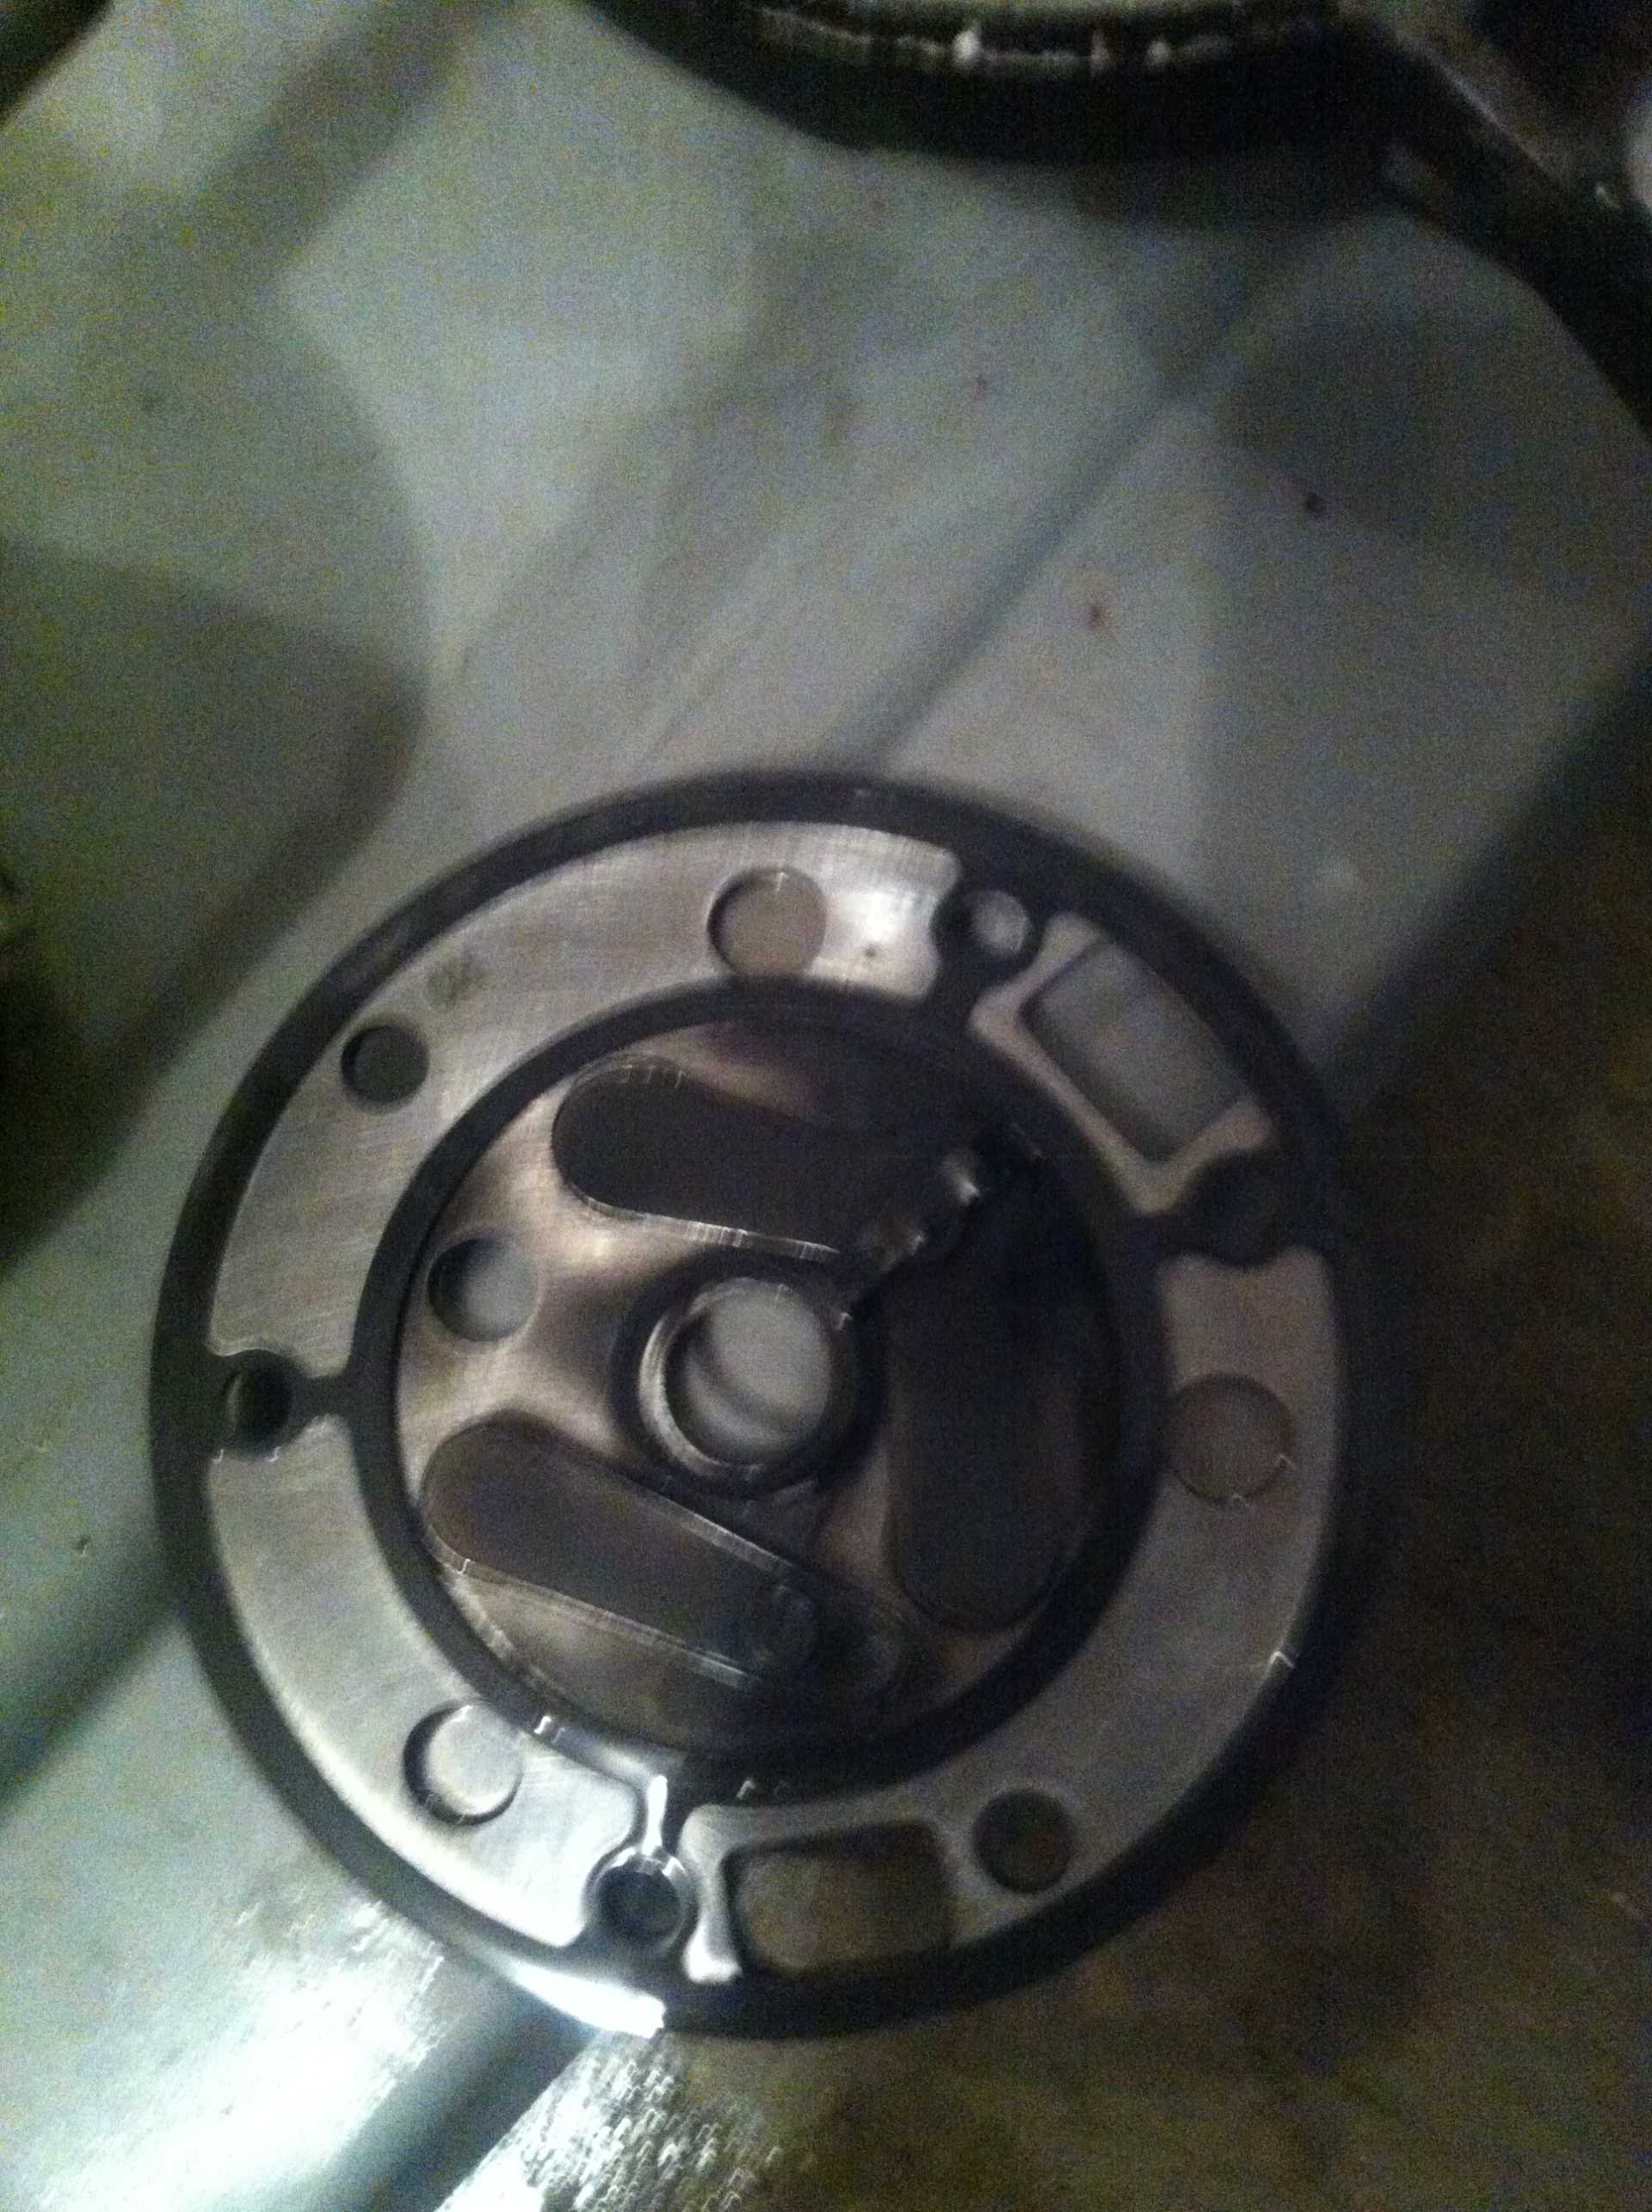
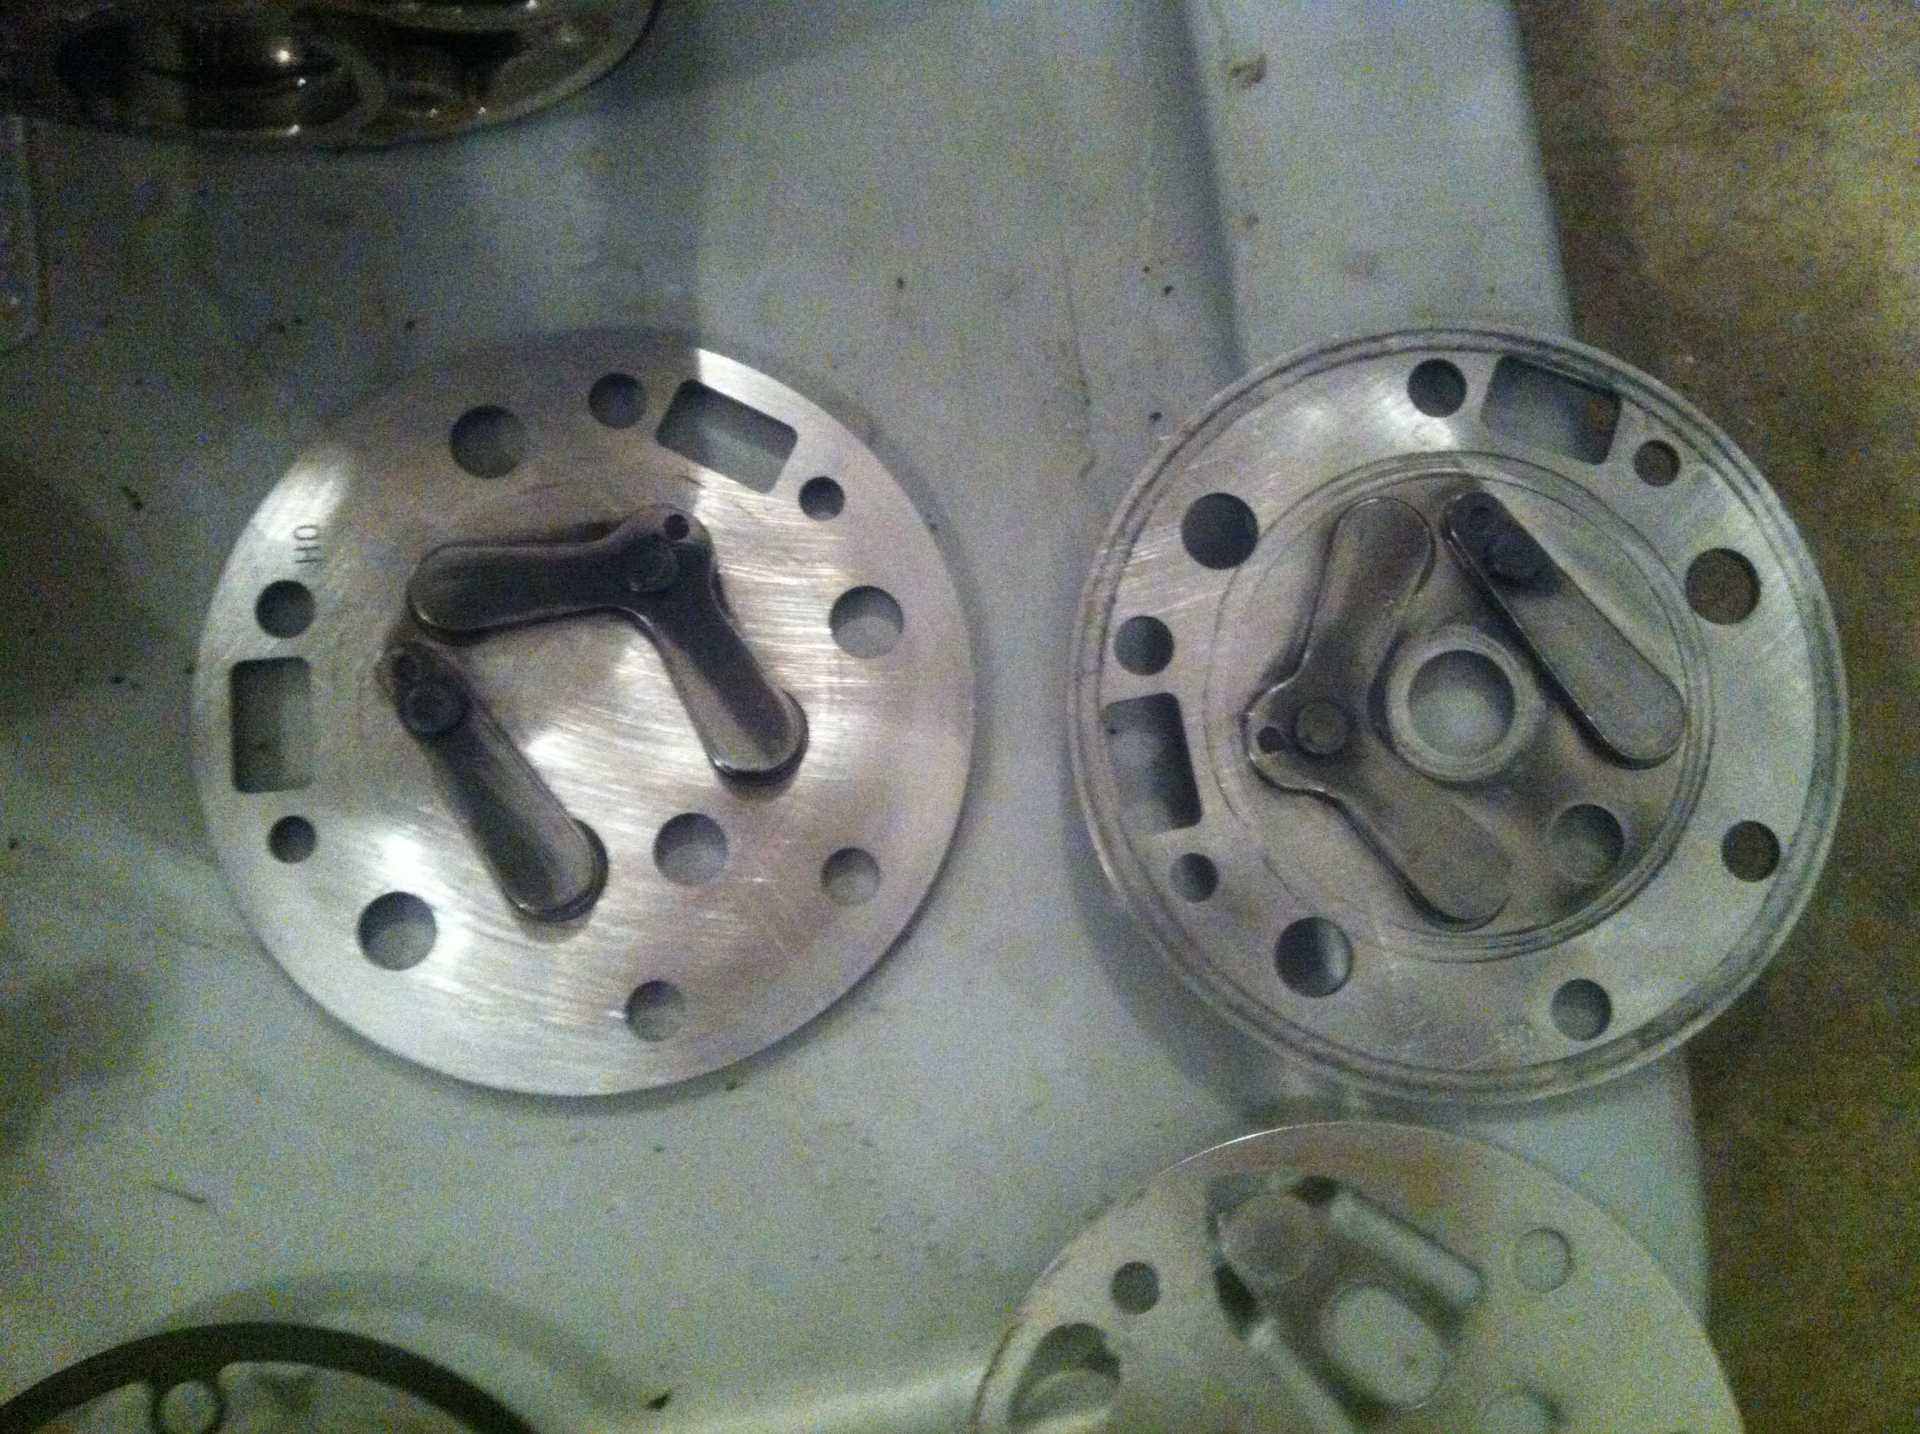
Comparison of the front and rear valve plates, they are different


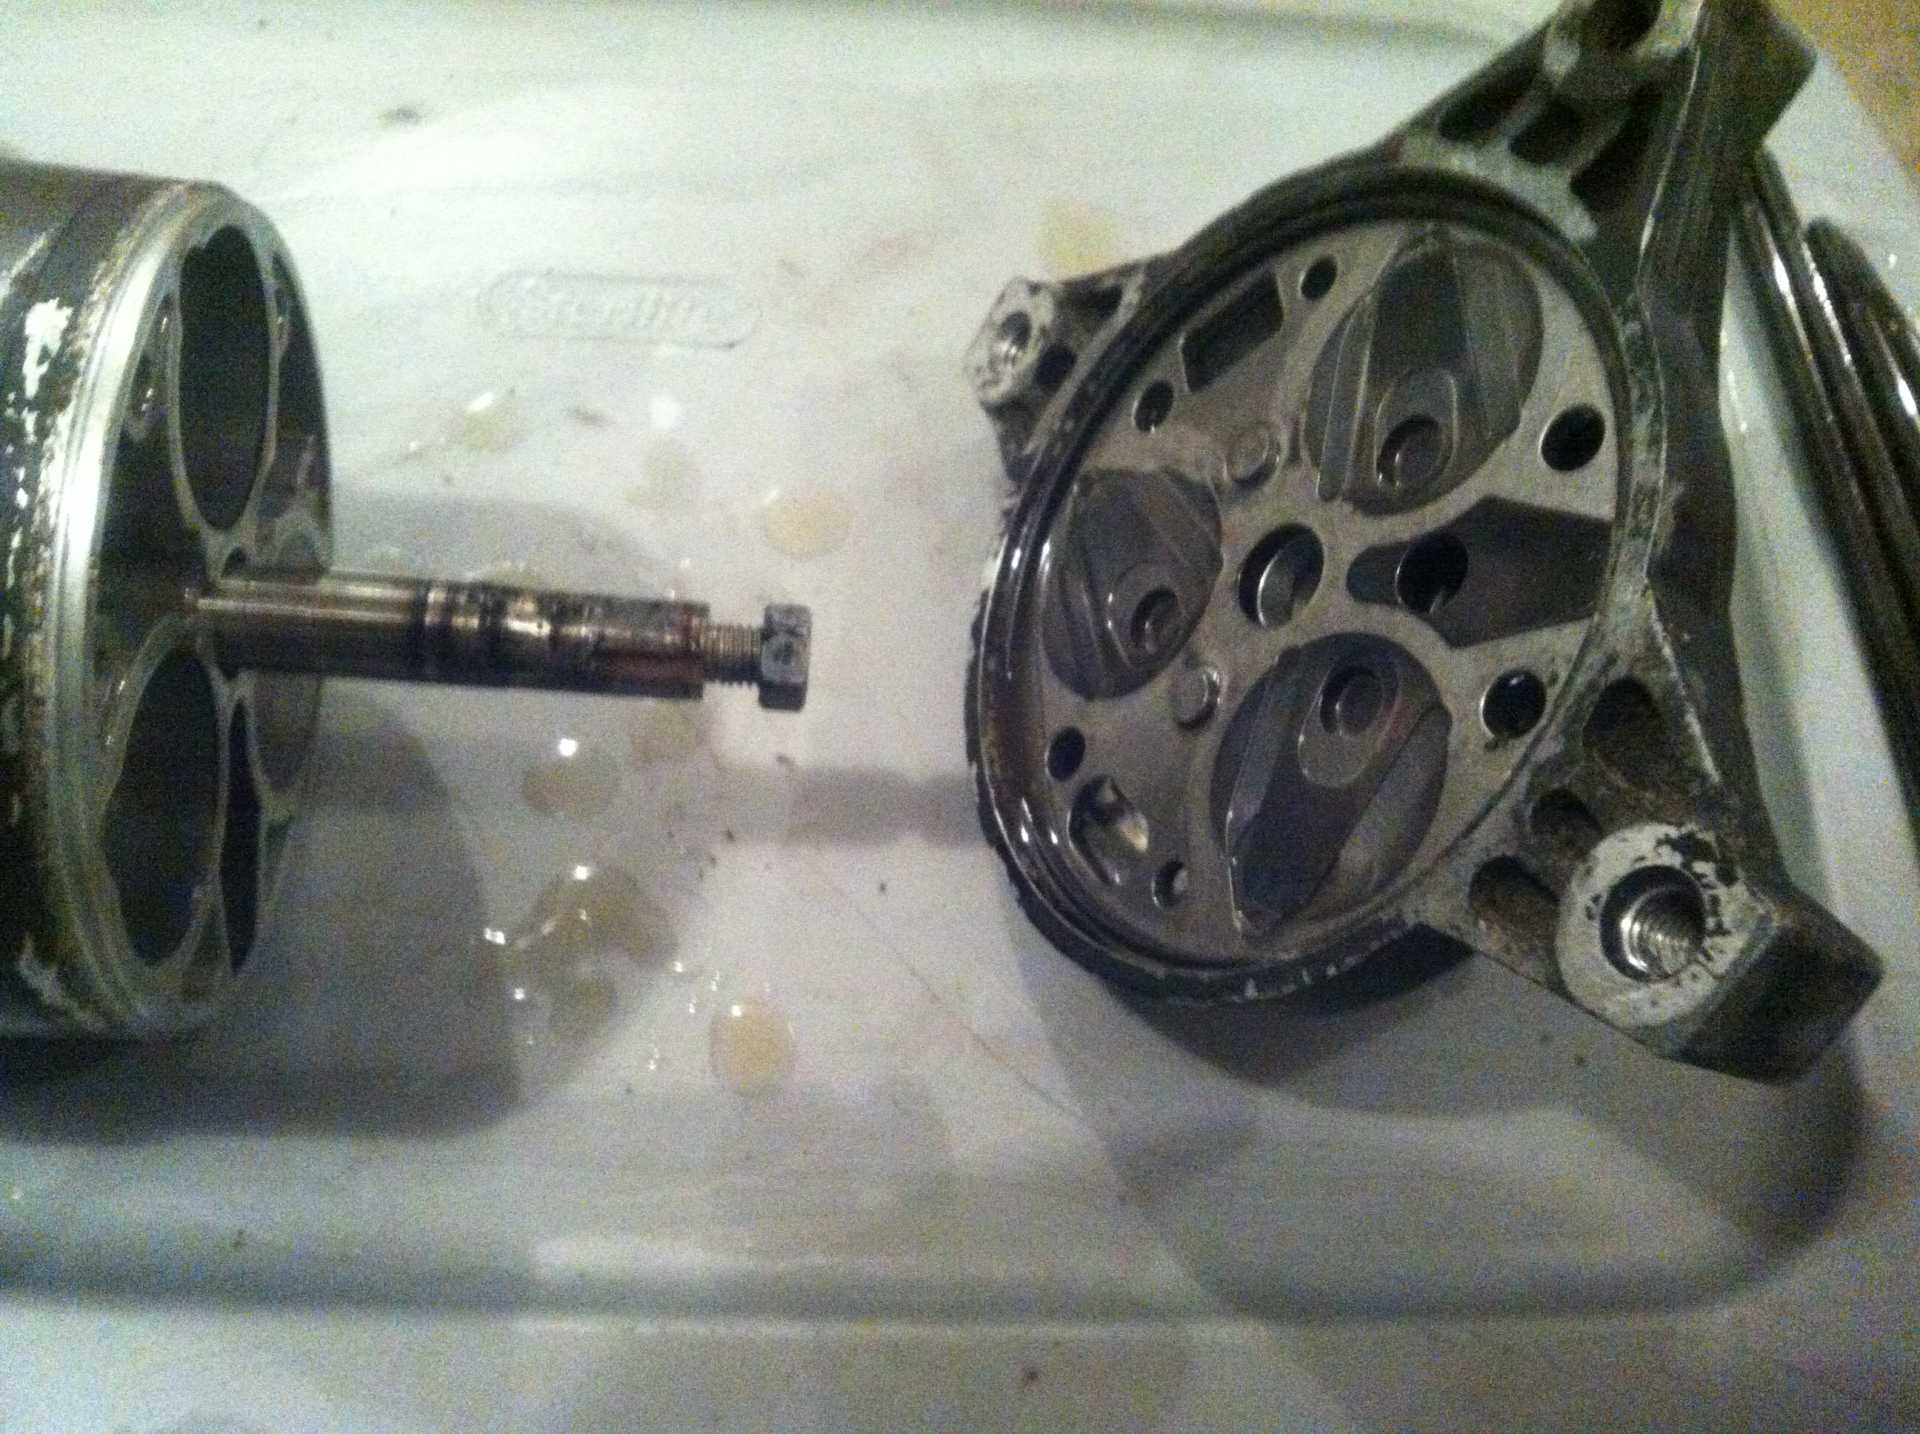
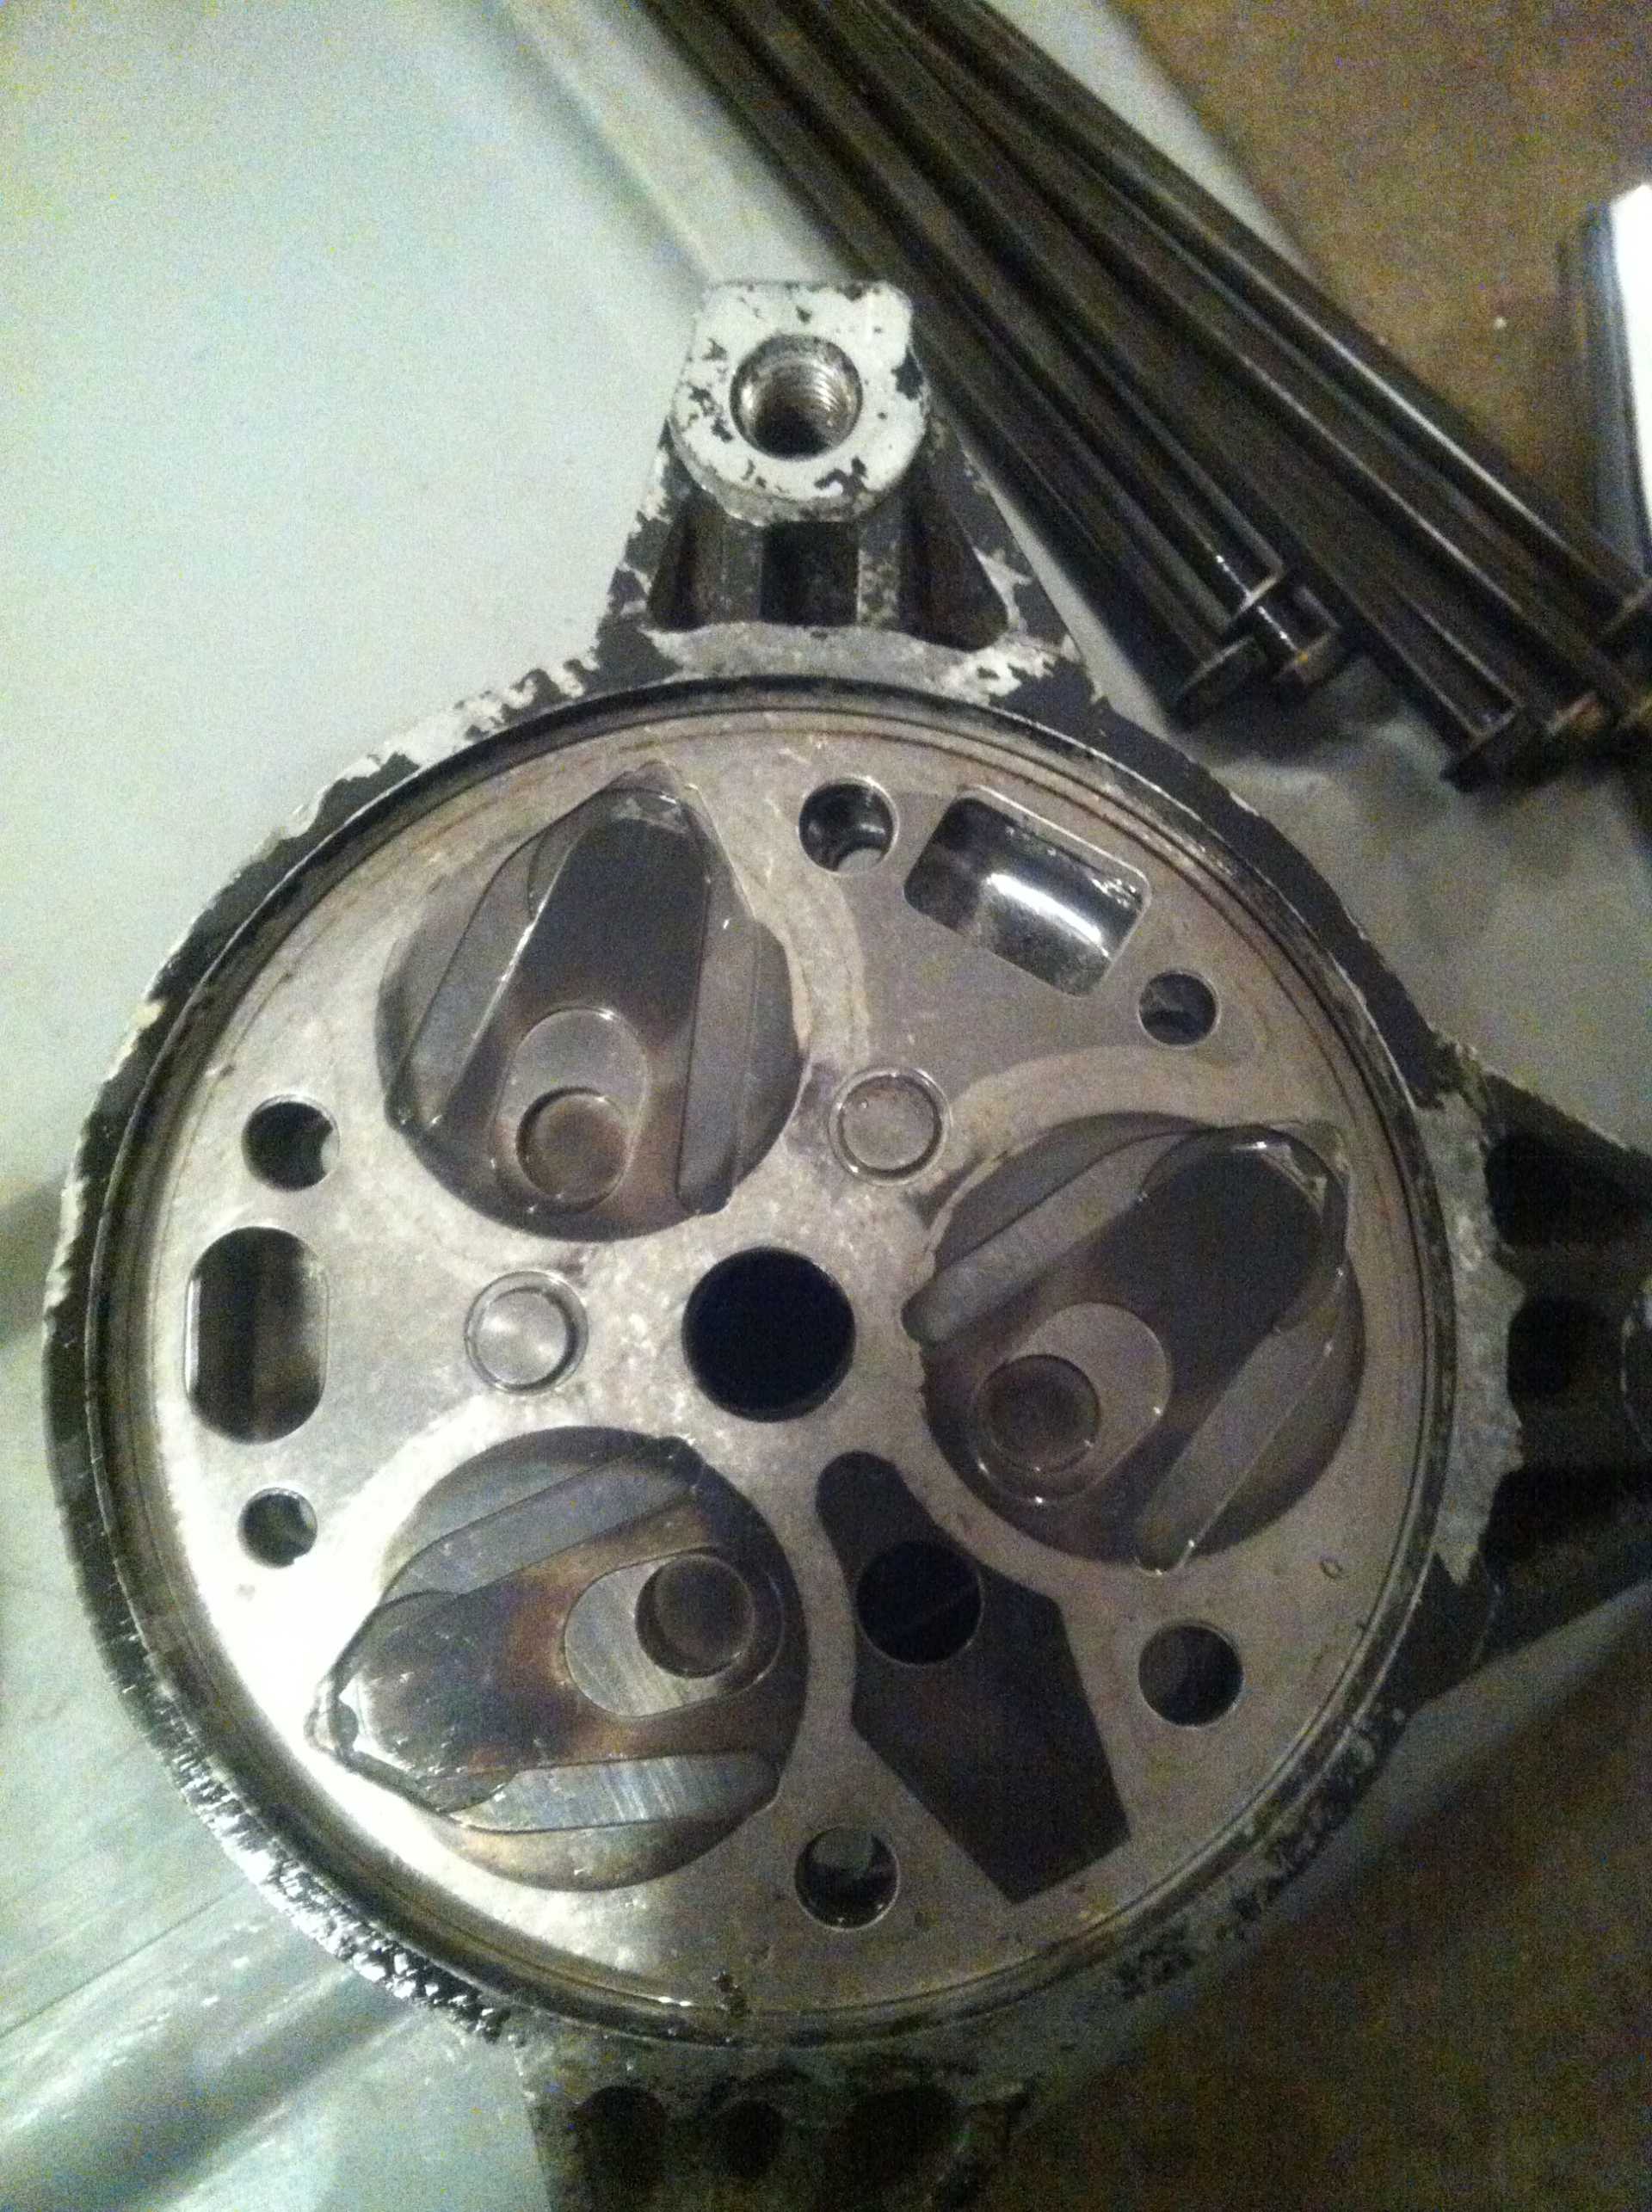
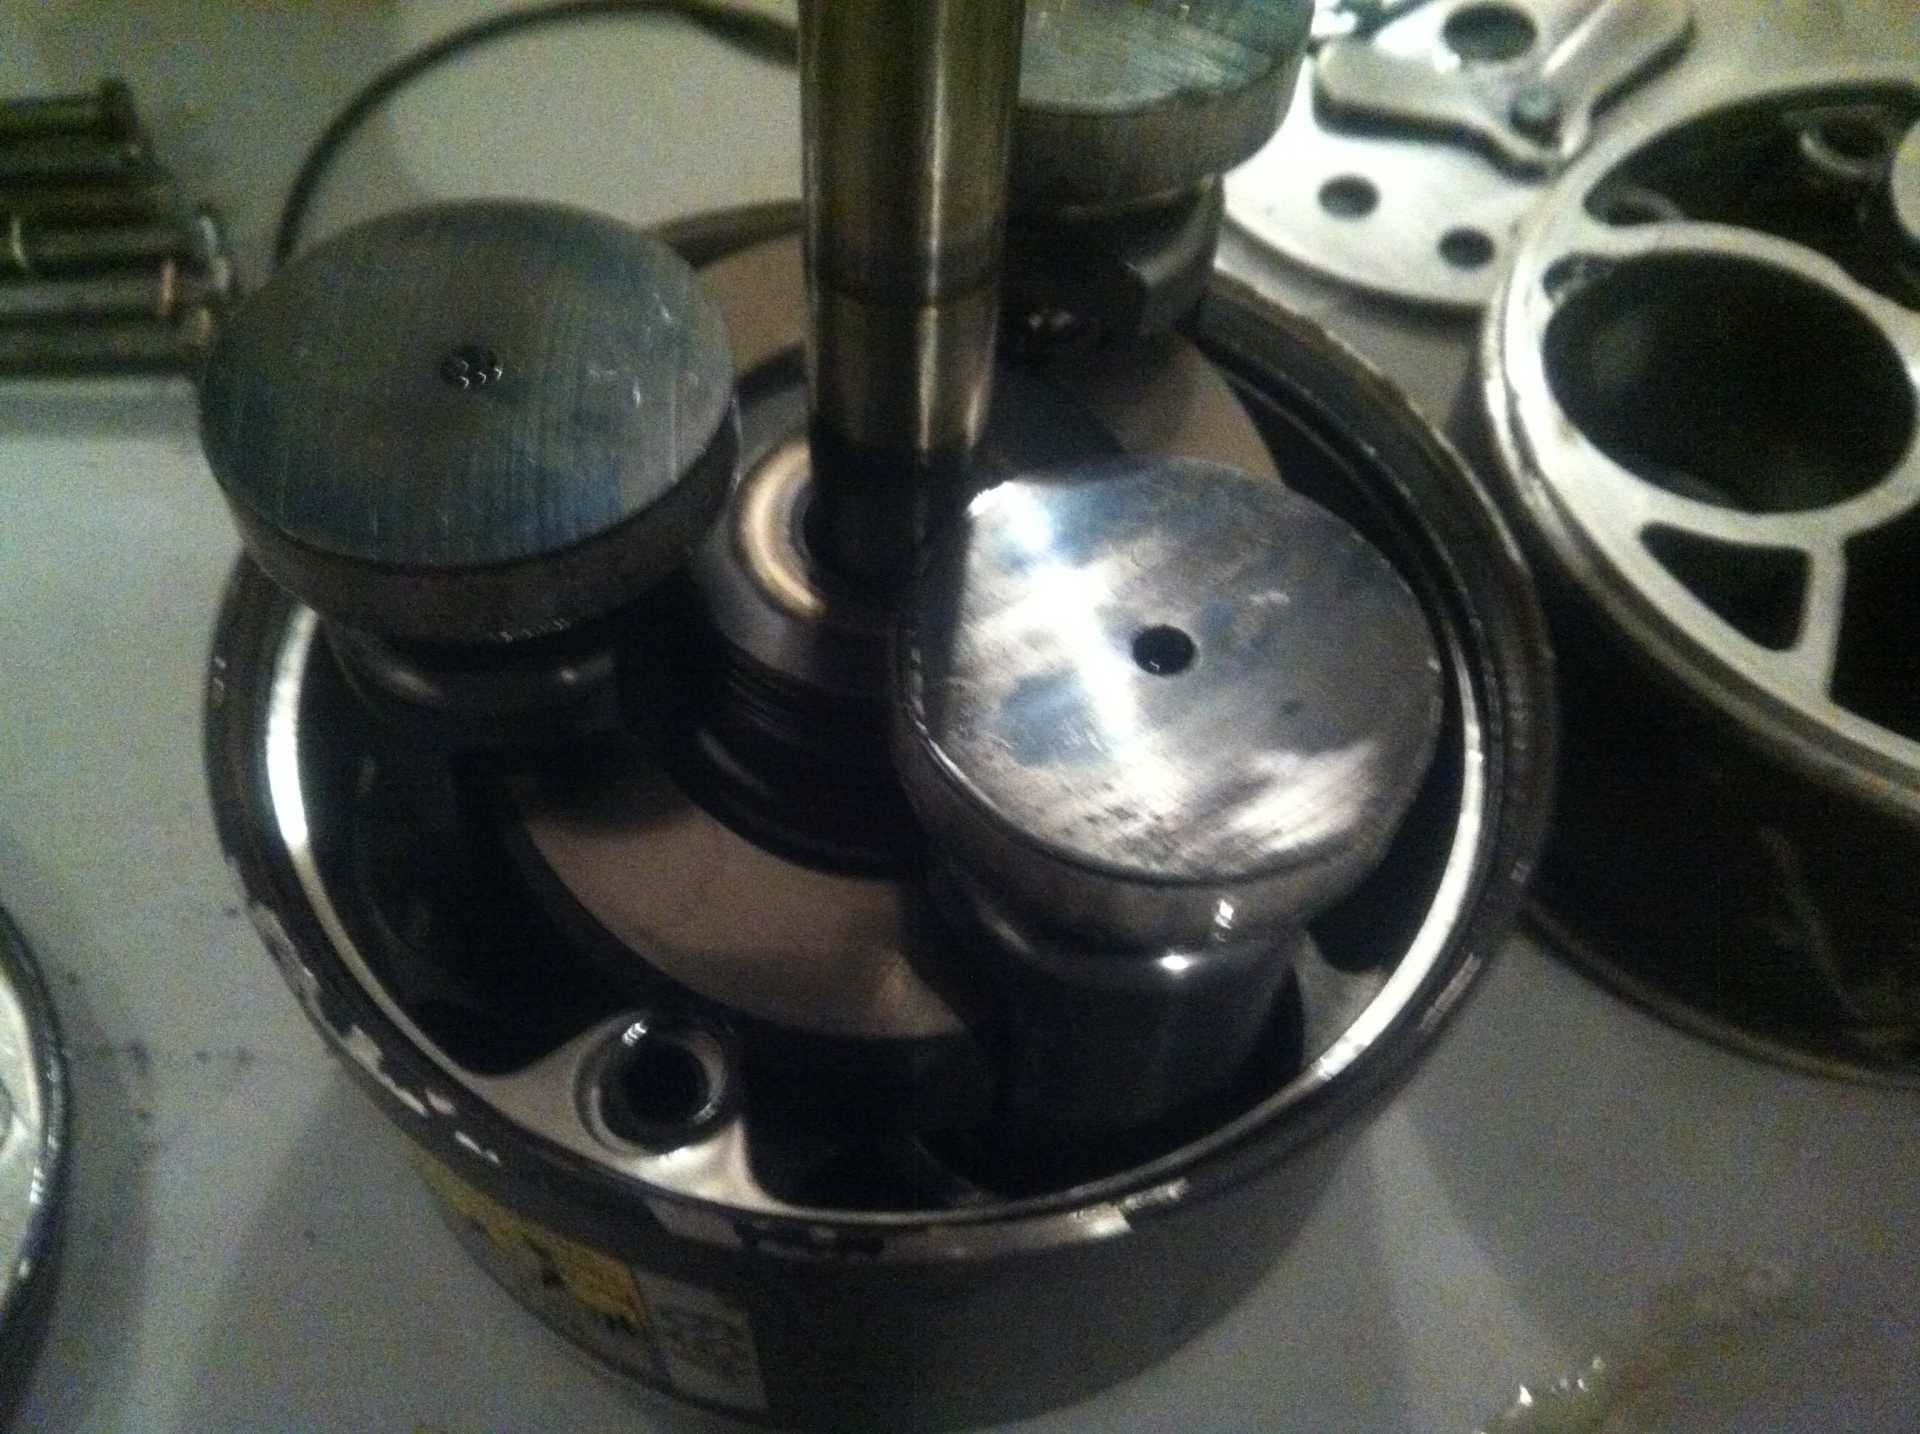
The center section separated, showing the pistons. Notice the small o-ring at the bottom. This is also included in the above kit.


Reassembly is the reverse, with new seals coated in mineral oil, even if you're doing an R-134A conversion. In the case of this HR6, I had to reclock it to use it in the Fiero. This is what the correct compressor clocking looks like:


EDIT: I found an old iPhone backup with all but one of the missing images, restored to the thread in the original full sizes.

[This message has been edited by RWDPLZ (edited 02-27-2024).]

IP: Logged
PFF
System Bot
ltlfrari
Member
Posts: 5356
From: Wake Forest,NC,USA
Registered: Jan 2002


Feedback score: (4)
Leave feedback


Total ratings: 127
Rate this member

Report this Post08-25-2012 06:24 PM Click Here to See the Profile for ltlfrariClick Here to visit ltlfrari's HomePageSend a Private Message to ltlfrariEdit/Delete MessageReply w/QuoteDirect Link to This Post
Cool. Do you have pics of the pulley/clutch removal and replacement process/tools?

------------------
Anything I might say is probably worth what you paid for it, so treat it accordingly!

Dave

www.ltlfrari.com

IP: Logged
RWDPLZ
Member
Posts: 15013
From: Michigan
Registered: May 2002


Feedback score:    (11)
Leave feedback


Total ratings: 304
Rate this member

Report this Post08-25-2012 06:29 PM Click Here to See the Profile for RWDPLZClick Here to visit RWDPLZ's HomePageSend a Private Message to RWDPLZEdit/Delete MessageReply w/QuoteDirect Link to This Post
 
quote
Originally posted by ltlfrari:

Cool. Do you have pics of the pulley/clutch removal and replacement process/tools?


Even better, here's a video:


It's an R4 compressor, but the procedure is identical.
IP: Logged
Marine1981
Member
Posts: 1364
From: Austin, Texas, USA
Registered: Jan 2011


Feedback score:    (6)
Leave feedback

Rate this member

Report this Post06-02-2014 11:36 PM Click Here to See the Profile for Marine1981Click Here to visit Marine1981's HomePageSend a Private Message to Marine1981Edit/Delete MessageReply w/QuoteDirect Link to This Post
Where can you buy the rebuild kits from? I have a ton of them laying around lol.
IP: Logged
Kevin87FieroGT
Member
Posts: 1202
From: Michigan
Registered: Nov 2010


Feedback score: (2)
Leave feedback

Rate this member

Report this Post06-03-2014 10:51 AM Click Here to See the Profile for Kevin87FieroGTSend a Private Message to Kevin87FieroGTEdit/Delete MessageReply w/QuoteDirect Link to This Post
Nice write up, always wondered about the internal differences. Appreciate the photos.
IP: Logged
Will
Member
Posts: 14219
From: Where you least expect me
Registered: Jun 2000


Feedback score: (1)
Leave feedback


Total ratings: 237
Rate this member

Report this Post10-29-2018 08:39 PM Click Here to See the Profile for WillSend a Private Message to WillEdit/Delete MessageReply w/QuoteDirect Link to This Post
So, I got this far...

I'm modifying a new Four Seasons Fiero compressor to work with my Northstar swap.

My dad put together the puller apparatus to remove the pulley & clutch, incorporating 9mm(!) metrix threads--thanks GM and we used a 3 jaw puller to remove the clutch coil.

We then pulled the six front plate to rear plate bolts, according to this thread, resulting in this:


However, in trying to break the front plate loose from the cylinder block, the cylinder block broke loose from the swash plate housing. We haven't yet been able to separate the front plate from the cylinder block. Anyone have ideas?

I guess we just need to come up with a way to clamp the cylinder block down, then tap on the front plate lugs with a hammer to break the stick of the gasket.
IP: Logged
RWDPLZ
Member
Posts: 15013
From: Michigan
Registered: May 2002


Feedback score:    (11)
Leave feedback


Total ratings: 304
Rate this member

Report this Post10-30-2018 06:55 AM Click Here to See the Profile for RWDPLZClick Here to visit RWDPLZ's HomePageSend a Private Message to RWDPLZEdit/Delete MessageReply w/QuoteDirect Link to This Post
Both of those came apart pretty easily. Try putting the nut back on the threaded part of the shaft, put it on a flat surface, and push by the mounting ears, maybe a rubber mallet if that doesn't work?
IP: Logged
Will
Member
Posts: 14219
From: Where you least expect me
Registered: Jun 2000


Feedback score: (1)
Leave feedback


Total ratings: 237
Rate this member

Report this Post10-30-2018 09:54 AM Click Here to See the Profile for WillSend a Private Message to WillEdit/Delete MessageReply w/QuoteDirect Link to This Post
 
quote
Originally posted by RWDPLZ:

Both of those came apart pretty easily. Try putting the nut back on the threaded part of the shaft, put it on a flat surface, and push by the mounting ears, maybe a rubber mallet if that doesn't work?


Ok, so I probably just need to get a better grip on the cylinder block. Thanks.
IP: Logged
Notorio
Member
Posts: 2964
From: Temecula, CA
Registered: Oct 2003


Feedback score: (3)
Leave feedback

Rate this member

Report this Post11-24-2018 01:10 PM Click Here to See the Profile for NotorioSend a Private Message to NotorioEdit/Delete MessageReply w/QuoteDirect Link to This Post
What an excellent write up! Any chance you have a close-up shot of the seals that get destroyed in Black Death?
IP: Logged
Dennis LaGrua
Member
Posts: 15143
From: Hillsborough, NJ U.S.A.
Registered: May 2000


Feedback score:    (13)
Leave feedback


Total ratings: 328
Rate this member

Report this Post11-29-2018 02:09 PM Click Here to See the Profile for Dennis LaGruaSend a Private Message to Dennis LaGruaEdit/Delete MessageReply w/QuoteDirect Link to This Post
 
quote
Originally posted by Notorio:

What an excellent write up! Any chance you have a close-up shot of the seals that get destroyed in Black Death?


I believe that black death has to do mainly with internal mechanical failure.

------------------
" THE BLACK PARALYZER" -87GT 3800SC Series III engine, custom ZZP /Frozen Boost Intercooler setup, 3.4" Pulley, Northstar TB, LS1 MAF, 3" Spintech/Hedman Exhaust, P-log Manifold, Autolite 104's, MSD wires, Custom CAI, 4T65eHD w. custom axles, Champion Radiator, S10 Brake Booster, HP Tuners VCM Suite.
"THE COLUSSUS"
87GT - ALL OUT 3.4L Turbocharged engine, Garrett Hybrid Turbo, MSD ign., modified TH125H
" ON THE LOOSE WITHOUT THE JUICE "

IP: Logged
Notorio
Member
Posts: 2964
From: Temecula, CA
Registered: Oct 2003


Feedback score: (3)
Leave feedback

Rate this member

Report this Post12-07-2018 12:01 AM Click Here to See the Profile for NotorioSend a Private Message to NotorioEdit/Delete MessageReply w/QuoteDirect Link to This Post
Seals was probably not the right word ... I meant whatever it is on the pistons that slowly disintegrate w/o sufficient oil, shedding black particles, and finally allow metal-on-metal grinding to commence and unleash the metal chips ...
IP: Logged
PFF
System Bot
xenocide
Junior Member
Posts: 3
From: WI
Registered: May 2022


Feedback score: N/A
Leave feedback

Rate this member

Report this Post05-24-2022 09:06 PM Click Here to See the Profile for xenocideSend a Private Message to xenocideEdit/Delete MessageReply w/QuoteDirect Link to This Post
 
quote
Originally posted by RWDPLZ:
Reassembly is the reverse, with new seals coated in mineral oil, even if you're doing an R-134A conversion. In the case of this HR6, I had to reclock it to use it in the Fiero. This is what the correct compressor clocking looks like:


I know I'm opening a very old post but I see RWDPLZ is still active here and I've been scouring the internet for this information and this forum post is all I've found; hoping @RWDPLZ is still subscribed to this post and would be willing to help.

I'm fitting an HR6 compressor to a vehicle that it wasn't meant for and am struggling to find one that's clocked just right; I bought a new one only to find the rear ports are in the wrong spot (after I fitted the correct pulley and clocked the magnet.) My question is simply; what are the steps to re-clock an HR6; can you just rotate the rear housing 33 degrees or do the front and rear housings need to be rotated together? I haven't cracked it open yet and can't tell for sure from the pictures how that would be done.

Thanks in advance!

[This message has been edited by xenocide (edited 05-24-2022).]

IP: Logged
RWDPLZ
Member
Posts: 15013
From: Michigan
Registered: May 2002


Feedback score:    (11)
Leave feedback


Total ratings: 304
Rate this member

Report this Post05-24-2022 09:30 PM Click Here to See the Profile for RWDPLZClick Here to visit RWDPLZ's HomePageSend a Private Message to RWDPLZEdit/Delete MessageReply w/QuoteDirect Link to This Post
The front and rear housings don't need to be in the same orientation together, the compressor was designed so that the front and rear castings can each be mounted in one of 3 positions: Notice how the bolts are not equally spaced around the perimeter of the body? They're basically in 3 pairs, meaning the front has 3 potential orientations, and the rear has 3 potential orientations. You have to remove the 6 through bolts and pop the rear casting off to re-clock it, same with the front.

In doing so you'll need to replace the body seals, and the shaft seal that's likely bad. Lube with LOTS of oil.
IP: Logged
xenocide
Junior Member
Posts: 3
From: WI
Registered: May 2022


Feedback score: N/A
Leave feedback

Rate this member

Report this Post05-24-2022 09:54 PM Click Here to See the Profile for xenocideSend a Private Message to xenocideEdit/Delete MessageReply w/QuoteDirect Link to This Post
Thank you sir! The front is fine; so it sounds like I'll just need to pop off the rear, clock it, then reinstall with a new body seal (I see that should be in the MT2118 kit) and lots of oil. It's a new unit so was hoping to re-use the seal but will order the gasket kit just to be safe.

IP: Logged
RWDPLZ
Member
Posts: 15013
From: Michigan
Registered: May 2002


Feedback score:    (11)
Leave feedback


Total ratings: 304
Rate this member

Report this Post05-24-2022 10:05 PM Click Here to See the Profile for RWDPLZClick Here to visit RWDPLZ's HomePageSend a Private Message to RWDPLZEdit/Delete MessageReply w/QuoteDirect Link to This Post
 
quote
Originally posted by xenocide:

Thank you sir! The front is fine; so it sounds like I'll just need to pop off the rear, clock it, then reinstall with a new body seal (I see that should be in the MT2118 kit) and lots of oil. It's a new unit so was hoping to re-use the seal but will order the gasket kit just to be safe.


If it's brand new it will probably re-seal fine, HOWEVER, the new compressors may be different internally, I've never taken one of those apart, supposedly they're significantly improved over the old ones.
IP: Logged
xenocide
Junior Member
Posts: 3
From: WI
Registered: May 2022


Feedback score: N/A
Leave feedback

Rate this member

Report this Post05-24-2022 10:17 PM Click Here to See the Profile for xenocideSend a Private Message to xenocideEdit/Delete MessageReply w/QuoteDirect Link to This Post
It's new old stock (guessing it's from the 90s) so it'll likely be the same.

I could see the rear cap had some differences (rectangle hole, oval hole etc.) so wasn't sure if there was something that required it to stay aligned as built by the factory. It makes sense that it would be modular so could just be rotated to work with the vehicle it was being installed on. Hope to give it a try this weekend. Thanks again!
IP: Logged
RWDPLZ
Member
Posts: 15013
From: Michigan
Registered: May 2002


Feedback score:    (11)
Leave feedback


Total ratings: 304
Rate this member

Report this Post05-24-2022 10:45 PM Click Here to See the Profile for RWDPLZClick Here to visit RWDPLZ's HomePageSend a Private Message to RWDPLZEdit/Delete MessageReply w/QuoteDirect Link to This Post
 
quote
Originally posted by xenocide:

It's new old stock (guessing it's from the 90s) so it'll likely be the same.

I could see the rear cap had some differences (rectangle hole, oval hole etc.) so wasn't sure if there was something that required it to stay aligned as built by the factory. It makes sense that it would be modular so could just be rotated to work with the vehicle it was being installed on. Hope to give it a try this weekend. Thanks again!


Ah ok, an NOS unit. I would replace all those rubber parts with the new HNBR green o-rings and the front seal, you can also see if it had any oil in it and drain it.

I used the DA6 rear head with the HR6 compressor and it worked fine, I re-used the DA6 rear because the HR6 I had came off a car that didn't have 2 switch ports like the Fiero does.
IP: Logged

next newest topic | next oldest topic

All times are ET (US)

Post New Topic  Post A Reply
Hop to:

Contact Us | Back To Main Page

Advertizing on PFF | Fiero Parts Vendors
PFF Merchandise | Fiero Gallery | Ogre's Cave
Real-Time Chat | Fiero Related Auctions on eBay


Copyright (c) 1999, C. Pennock