Ive been following this thread for some time now and am just about to install the HR6 compressor with the new switches as described above. Currently I have the MT0671 and the MT0678 switches in the compressor which were described.
Now since they have changed the switches from the single wire to the 2 wire I am a bit confused on which wire to use to properly connect it. So just to make sure that everything is done correctly I have a few questions:
1: For either of the 2 switches does it matter which wire is the ground or is it specific? *FOUND ANSWER* must have missed it
quote
Originally posted by randye:
To wire them into the OEM harness is fairly simple. You will just cut the original single switch wires on the car, (do one at a time so that you dont confuse the high pressure cutoff switch with the fan switch), and simply splice in one of the two wires from the new switch plug. The 2nd wire from each of the new plugs is a ground wire and you should run each of these wires to a good ground on the chassis or engine block.
NOTE: It doesnt matter which of the 2 wires you choose to splice into the harness or run to ground. Both switches simply complete or interrupt a circuit to ground. The reason for the 2 wires on the new switch connectors is that the old single wire switches grounded through the body of the A/C compressor and the new switches do not. Therefore the separate ground wire is required.
2: If the ground wire needs to be connected to something on the High Pressure switch where would be a good location to connect it?
HR6 Compressor related question:
Since the HR6 comes with oil I will imagine that it comes stock with the PAG150 oil. I have flushed the lines of the system but am concerned to the impact of the oil with the old mineral oil that was probably in the system during the old R12 days that may still be present in the evaporator core and possibly the condenser. Will this have any affect on anything in the system?
I may have other questions so I thank you in advance
[This message has been edited by RyuKyu567 (edited 04-10-2017).]
Since the HR6 comes with oil I will imagine that it comes stock with the PAG150 oil. I have flushed the lines of the system but am concerned to the impact of the oil with the old mineral oil that was probably in the system during the old R12 days that may still be present in the evaporator core and possibly the condenser. Will this have any affect on anything in the system?
I may have other questions so I thank you in advance
Never assume, always check the documentation, or email the manufacturer. Really doubt it comes with PAG150.
It's been my turn to go through this again this summer. When I bought a new 4 Seasons compressor it came prefilled with 3oz of oil and a sticker on the ports noting it. With the same concerns about existing mineral oil in the system, I called them and asked what kind of oil it was. PAG150 was the answer. Drained it and refilled with Ester.
Other notes:
- For the fan switch, R-134A retrofitted cars (which should be everyone in 2018) apparently need to use the gray/black switch, Murray #35969 instead of the purple one. I was unable to find one with a complete kit and had to buy the harness separately. I'm not completely sure what the correct part number for the harness is yet, will update this post when I know for sure.
- If you're going to change the compressor on a V6 car you will have to lower the cradle to do it - there's just not enough room to get a wrench with enough leverage in there for the upper bracket bolt. The basic pivot technique is adequate with just detaching the dogbone, not the full pivot with the struts detached. Remove the firewall heat shield and the lower exhaust heat shield too.
- If you're going to change the compressor on a V6 car you will have to lower the cradle to do it - there's just not enough room to get a wrench with enough leverage in there for the upper bracket bolt. The basic pivot technique is adequate with just detaching the dogbone, not the full pivot with the struts detached. Remove the firewall heat shield and the lower exhaust heat shield too.
It can be changed without touching the cradle. The trick to the top bolt is to come from behind through the rear bolt hole. Put a quarter extension through the hole, attach a socket, and twist away.
It can be changed without touching the cradle. The trick to the top bolt is to come from behind through the rear bolt hole. Put a quarter extension through the hole, attach a socket, and twist away.
YUP That is 100% correct and exactly the way I did it my first time several years ago.
[This message has been edited by randye (edited 10-14-2018).]
Cool trick... would take a pretty long quarter extension to work but yeah, I can see it. It isn't a big deal to pivot the cradle down though. Any time I'm working on the firewall side I just drop it down and make some room. And the more often you work those cradle bolts the less likely they are to seize up.
Can you use the high and low pressure switches from the old compressor in the new compressor or do I need to use the new switches that came with the new compressor and just replace the stock connectors?
You can reuse the old ones if they're in good shape, but at this point they're so old you might want to use new ones, especially if you have them already.
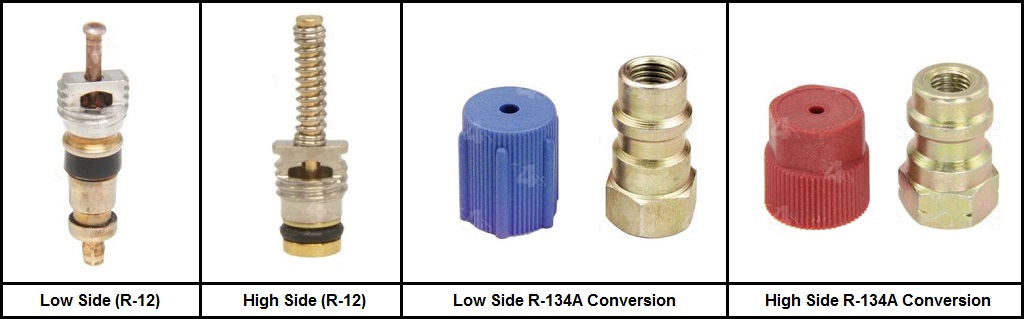
The compressor-mounted switches are the same pressure for R-12 or R-134A. The only one that is refrigerant specific is the cycling switch on the accumulator for DA6 and HR6 compressor vehicles (set to 25 psi for R-12 or 21 psi for R-134A)
Hey guys, I have been stalking both rwd’s posts about A/c. I recently am trying to fix mine, but I ran into a massive problem. I have tried both style switches/part numbers and they are all too big to fit in the new compressor. The compressor was ordered in a kit I got to fix it all, it’s an H6, that’s all it states. Any help is much appreciated! I can’t cross match a proper fix.
Hey guys, I have been stalking both rwd’s posts about A/c. I recently am trying to fix mine, but I ran into a massive problem. I have tried both style switches/part numbers and they are all too big to fit in the new compressor. The compressor was ordered in a kit I got to fix it all, it’s an H6, that’s all it states. Any help is much appreciated! I can’t cross match a proper fix.
I've only ever seen one size of switch, have any pics? Might be a snap ring in the port, or on a lot of compressors, the cavities are not machined to accept switches, for applications that didn't have them.
Hello I have been looking at all the A/C write ups and i am having ZERO luck getting the right switches. If I get one that's supposed to be on a GM its too small for my new compressor. I bought the kit from partsgeek.com I believe. It said it was for a Fiero and its about the same size compressor and accumulator was a flawless fit so i don't think I got the wrong one. Dose any one have a updated list? The compressor in my kit is a H6. Thanks any and all help is appreciated, car is just sitting on jack stands for the last week and I am getting frustrated!
I've only ever seen one size of switch, have any pics? Might be a snap ring in the port, or on a lot of compressors, the cavities are not machined to accept switches, for applications that didn't have them.
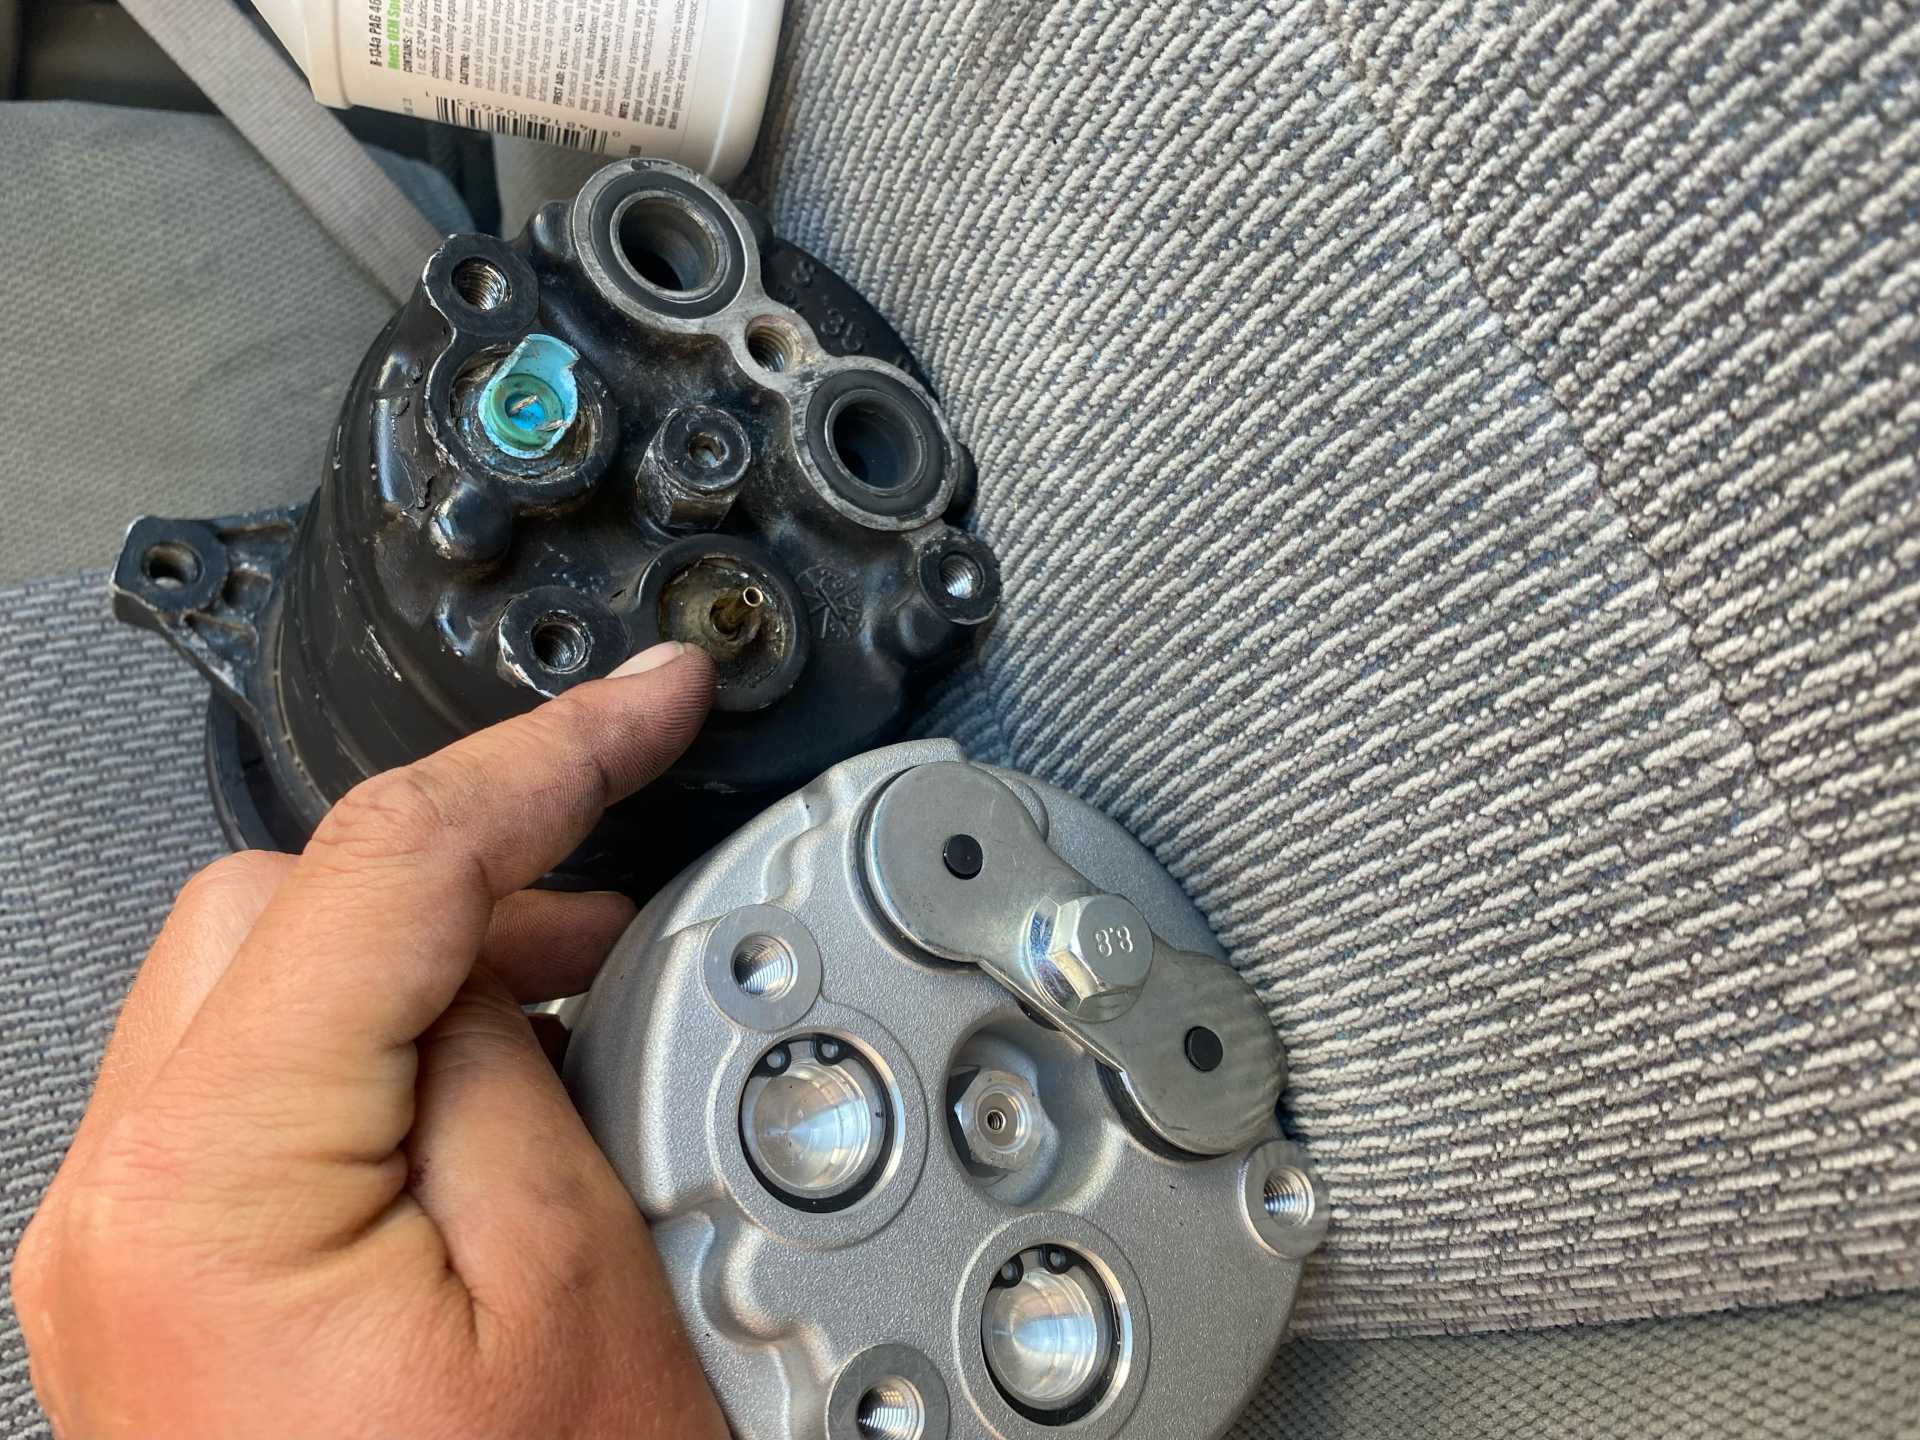
Here is some pictures, I know the snap ring is in there but when i take it out the switch diameter is only 14mm where the old was 22. I have used both your write ups for all my parts all have worked until i got here. Also sorry for double post and late responses I dont get notifications when there is a reply. Thanks for any help to get me in the right direction. Pictures
Here is some pictures, I know the snap ring is in there but when i take it out the switch diameter is only 14mm where the old was 22. I have used both your write ups for all my parts all have worked until i got here. Also sorry for double post and late responses I dont get notifications when there is a reply. Thanks for any help to get me in the right direction. Pictures
Here are the pics:
On the new compressor: Did you remove the snap ring, AND the metal plug? The plugs are there for applications that have 1 or 0 switches.
On the new compressor: Did you remove the snap ring, AND the metal plug? The plugs are there for applications that have 1 or 0 switches.
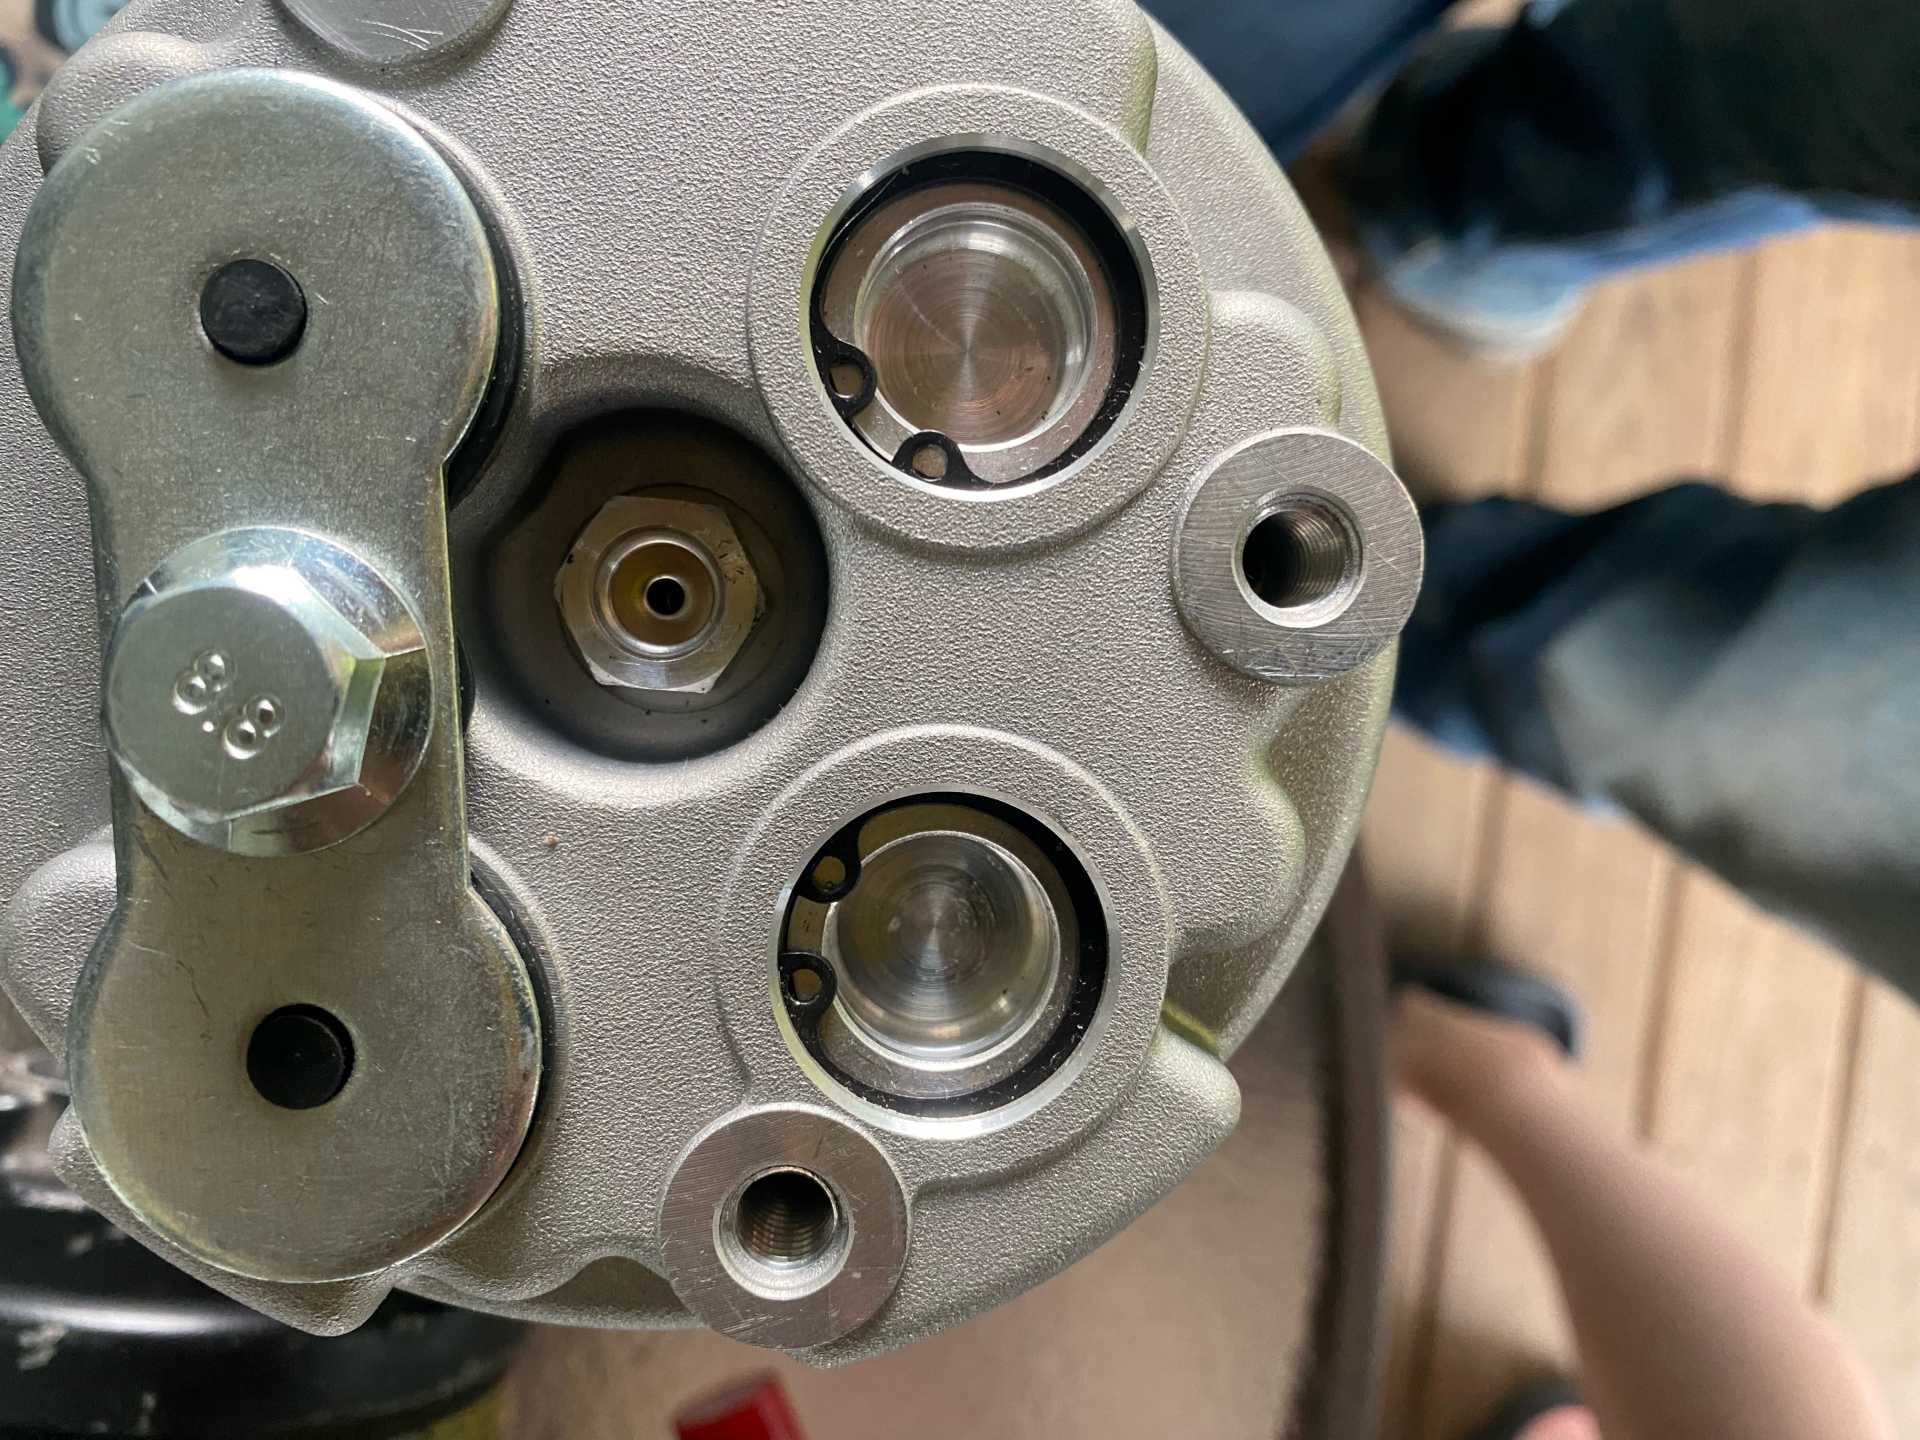
If you look closely you can see the o-ring groove. I have taken the snap rings off as i have tried to install the new switches based on both of your build threads. ALL of them are way to big. This seems so weird to me that everything has literally, bolted perfectly into place besides these pressure switches.
That metal machined surface behind the snap ring is a plug, it isn't part of the compressor body, you use a pair of pliers to remove it. Then the switch will slide right in.
That metal machined surface behind the snap ring is a plug, it isn't part of the compressor body, you use a pair of pliers to remove it. Then the switch will slide right in.
I will try this tomorrow, I dont have that plug looking thing as you can see in the picture, but I maybe wrong as this is my first attempt at tackling any sort of air conditioner project. I spent most of my day today putting on Mr.Mikes seats, and man he makes it look easy!
I will try this tomorrow, I dont have that plug looking thing as you can see in the picture, but I maybe wrong as this is my first attempt at tackling any sort of air conditioner project. I spent most of my day today putting on Mr.Mikes seats, and man he makes it look easy!
As you were right again RWD, those were pressure testing plugs! With a bit of effort they came right out. I feel like an ass as I am very inclined with mechanics, but I have never touched an A/C system before. The right switches I returned two times now are right lol! :-) now I feel really dumb! Thanks for all the help guys!
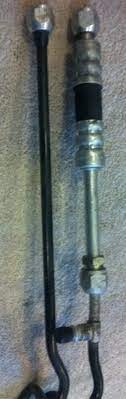
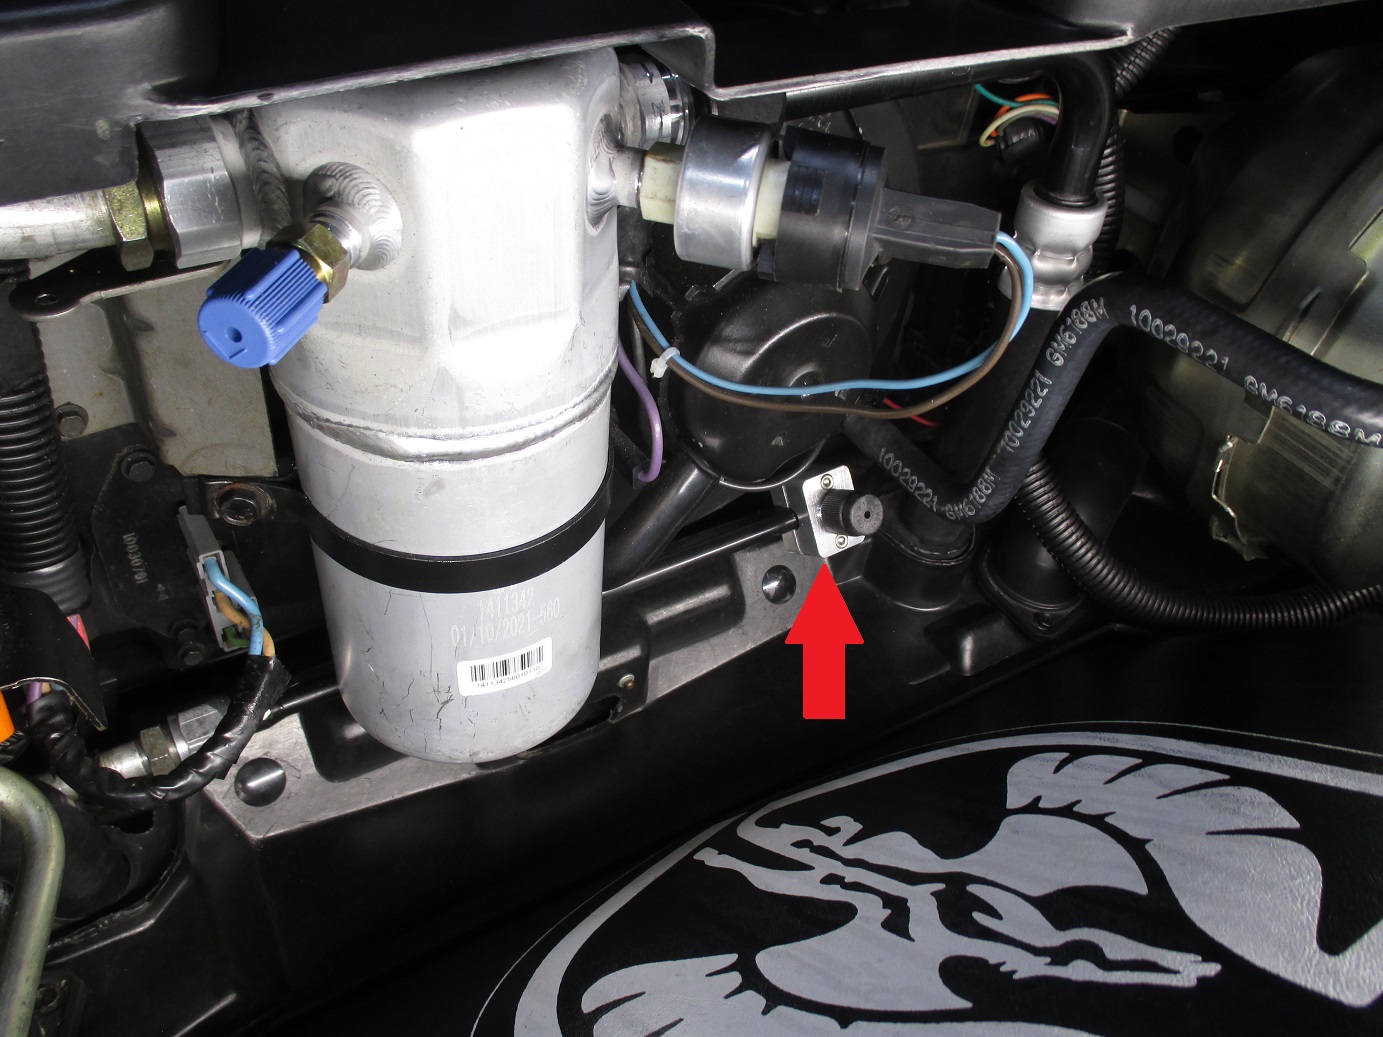
On the 84 Fiero Your "low" side connection was on the A/C drier up front. The "hi" side connector was on the A/C line from the compressor in the engine bay near driver's side decklid hinge. That's a real nuisance connecting lines to an A/C gauge set.
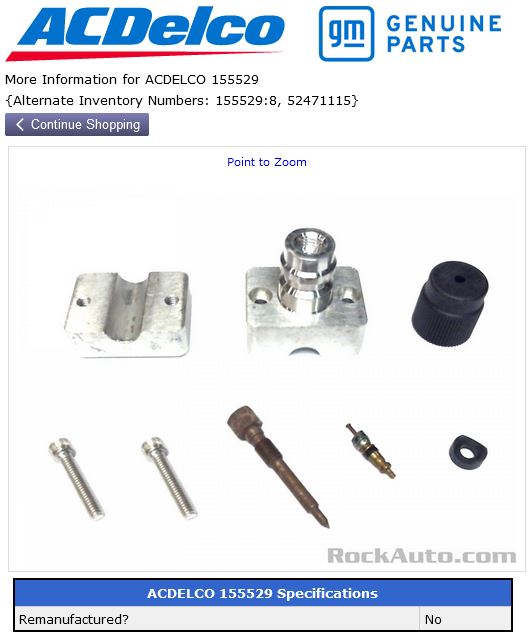
It appears AC Delco made a retrofit kit to provide a connection up front on the tube upstream of the orifice valve. You clamp it on and use a tool provided to pierce the aluminum tube, then install the Schrader valve. I saw this part on RockAuto listed under A/C parts for 84 Fiero...
This is the comparison the the 84 (left) and later year A/C lines from condenser to evaporator. The line from the condenser up front to the evaporator are interchangeable. https://www.fiero.nl/forum/...160323-2-123621.html
[This message has been edited by fierosound (edited 09-20-2023).]
So I have rebuilt my ac, I am having massive problems with crushing the schrader valve on the low pressure side. I have all 3 parts available for the quick connect. They all keep crushing when the manifold quick connect goes in. So could I take out the schrader in the accumulator and just use the valve in the quick connect? I have been through 4 and keep having the same problem.
So I have rebuilt my ac, I am having massive problems with crushing the schrader valve on the low pressure side. I have all 3 parts available for the quick connect. They all keep crushing when the manifold quick connect goes in. So could I take out the schrader in the accumulator and just use the valve in the quick connect? I have been through 4 and keep having the same problem.
When you install the new low side adapter fitting on the accumulator, you first remove the schrader valve from the accumulator. The adapter has its own schrader valve. The adapter is a one-time use and seals to the accumulator's threads. If you need to replace the accumulator in the future, you'll need to buy another low side adapter fitting.
Originally posted by RWDPLZ: The adapter is a one-time use and seals to the accumulator's threads. If you need to replace the accumulator in the future, you'll need to buy another low side adapter fitting.
I'm sure this is something most of us didn't know. (filed in memory for future use)
What about the switch on the accumulator? It appears to be plastic threads in it.
[This message has been edited by fierosound (edited 09-21-2023).]
What about the switch on the accumulator? It appears to be plastic threads in it.
No, the cycling switch comes off and on as needed, the accumulator port it's attached to has a schrader valve that is left in place, the switch has a little nub inside it that presses in on and opens the schrader valve so it can directly measure the pressure in the system, and is sealed by the recessed o-ring in the switch.
I'm sure this is something most of us didn't know. (filed in memory for future use)
What about the switch on the accumulator? It appears to be plastic threads in it.
Thank you for all your answers. I had no idea I was supposed to do that first. I just assumed that they work in unison together. As i said in my previous messages this is my first go through on any sort of air conditioning work. Thanks for all your help!
Originally posted by Raydar: The 4.9, as installed in a Fiero by TFF, does not utilize any pressure switches. At all. Mine worked fine (for probably 8 years) right up until it didn't. Coming back from Indy, I blew out a high pressure hose at 80 MPH. Was pretty spectacular. Thought I had blown an engine, based upon the noise and smoke. When I rebuilt the A/C system (complete flush, and new accumulator and compressor) I added a high pressure switch. I did not add the low side switch, as it seemed to be redundant to the pressure/cycling switch in the front. (Yes... I understand the difference, and am willing to put up with it.)
That is correct Ed Parks hooked up the A/C in his swaps without a pressure switch but on a full system some of his setups blew hoses. The 4.9L A/C system uses only one high pressure switch and that goes into the ECM to control the compressor clutch and cycle the system. You can add a 10mm switch port to the high side line and use a pressure switch to keep pressures within operating specs and restore PCM control.
------------------ " THE BLACK PARALYZER" -87GT 3800SC Series III engine, custom ZZP /Frozen Boost Intercooler setup, 3.4" Pulley, Northstar TB, LS1 MAF, 3" Spintech/Hedman Exhaust, P-log Manifold, Autolite 104's, MSD wires, Custom CAI, 4T65eHD w. custom axles, Champion Radiator, S10 Brake Booster, HP Tuners VCM Suite. "THE COLUSSUS" 87GT - ALL OUT 3.4L Turbocharged engine, Garrett Hybrid Turbo, MSD ign., modified TH125H " ON THE LOOSE WITHOUT THE JUICE "