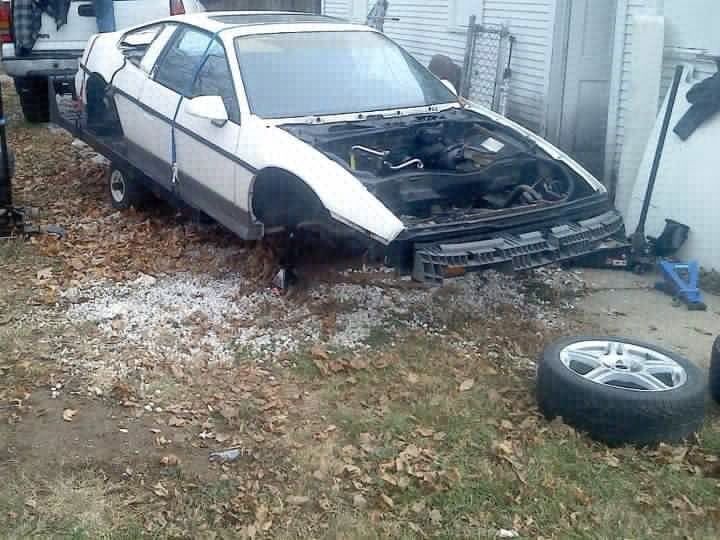
I just bought this car this past weekend, the car was already mostly taken apart when i bought it. It came with most of the parts i need to put it all back together and 2 engines. I am going to ditch both of them and step into the modern age with a 2005 3400. I will be mating this to the 5 speed transmission that came with the GT.
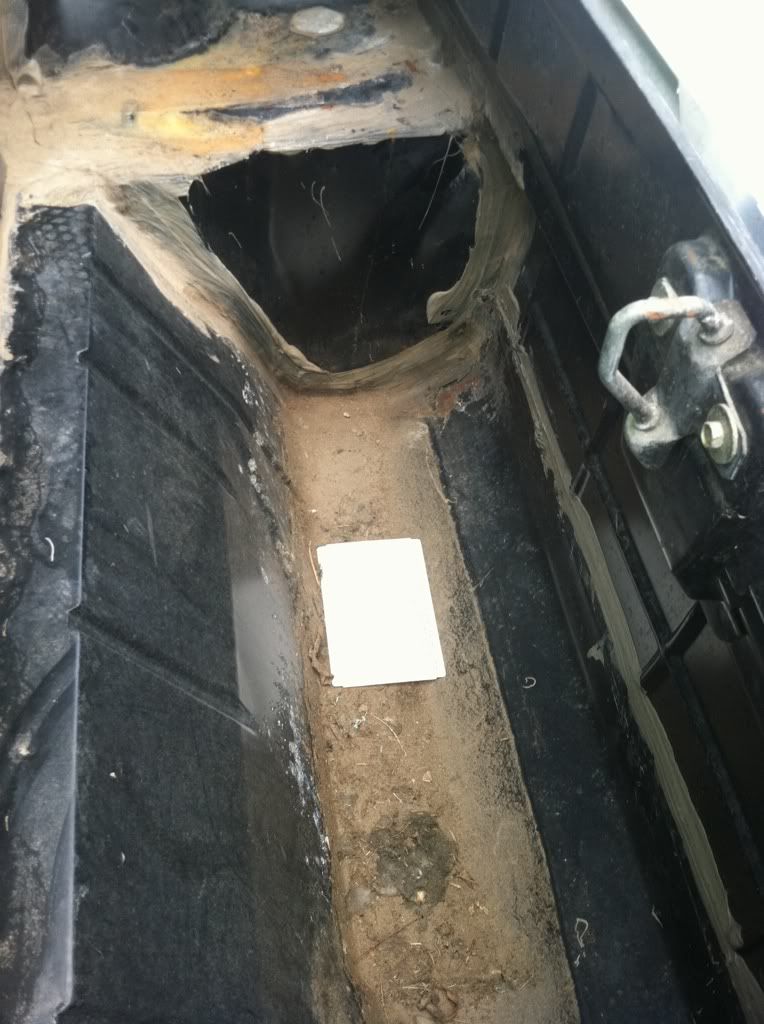
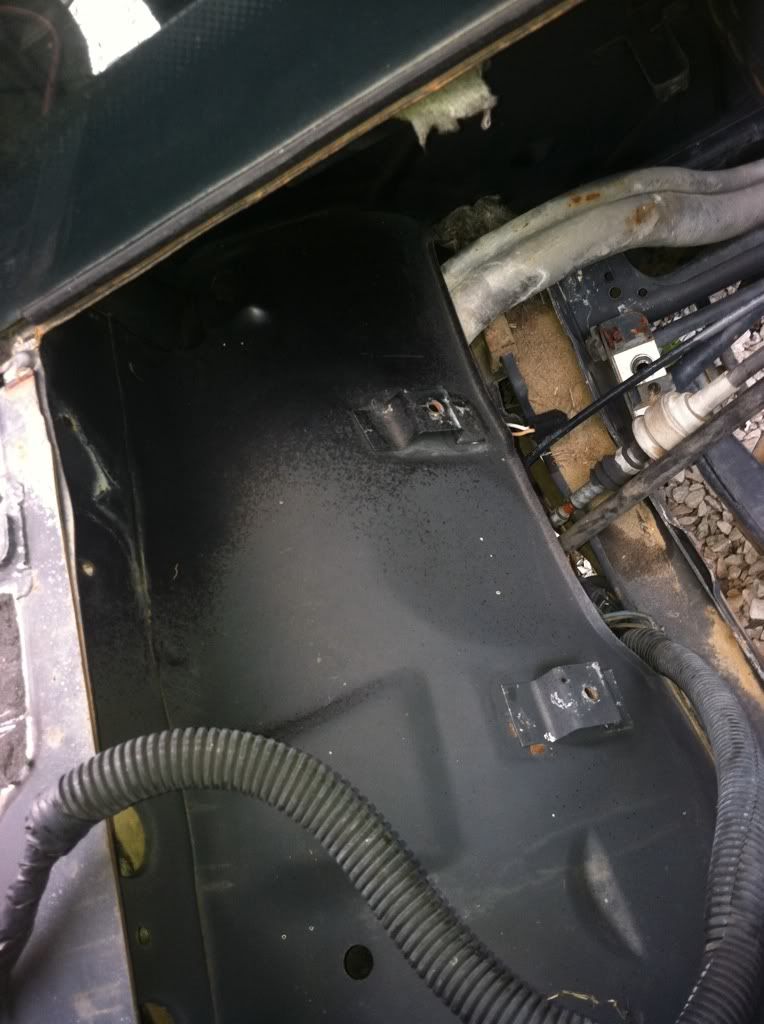
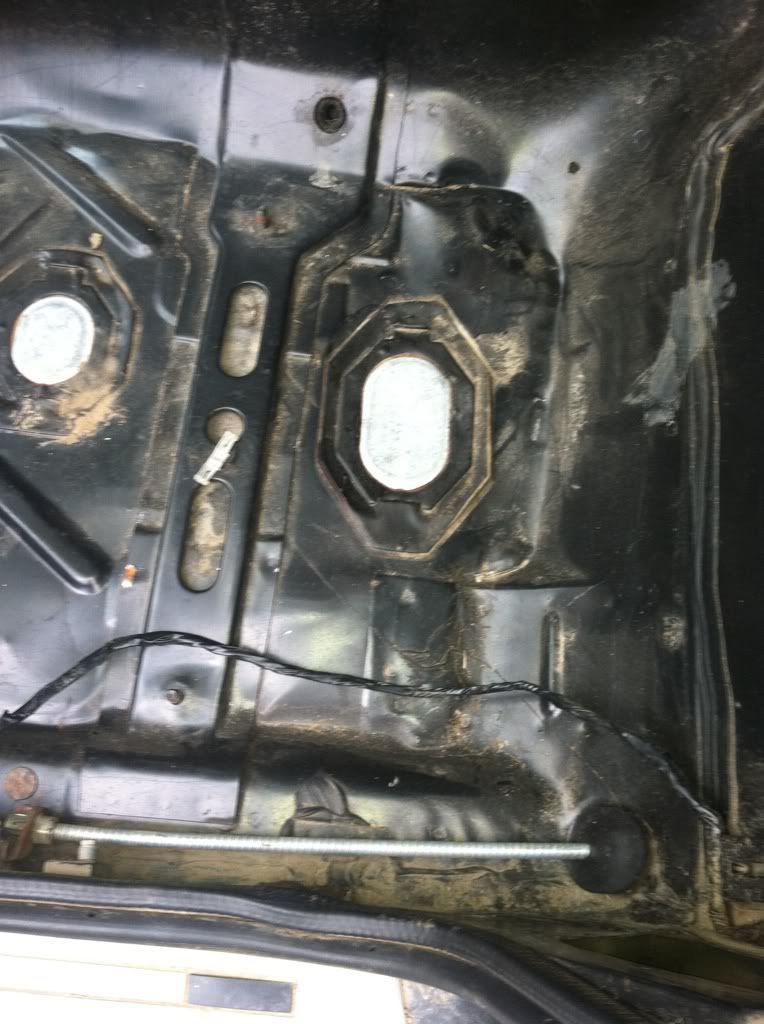
This car is very free from rust which is great, I plan on cleaning the engine bay up and spraying some new paint in it
if the panels all go on straight i wouldnt worry about it. hard to see the welds in that shot but if they look good and the panels are straight id leave it alone
Looks about like mine did when I started only mines an 86. Nice to see another one so close to me. Edit to say is the spoiler on the rear backwards in pic #2??
Looks about like mine did when I started only mines an 86. Nice to see another one so close to me. Edit to say is the spoiler on the rear backwards in pic #2??
The spoiler is not bolted on it was just sitting there for the picture
Well i have been doing a lot of reading on 3400 swaps. There are still a few things i need to figure out, but so far my plans for this car as are follows
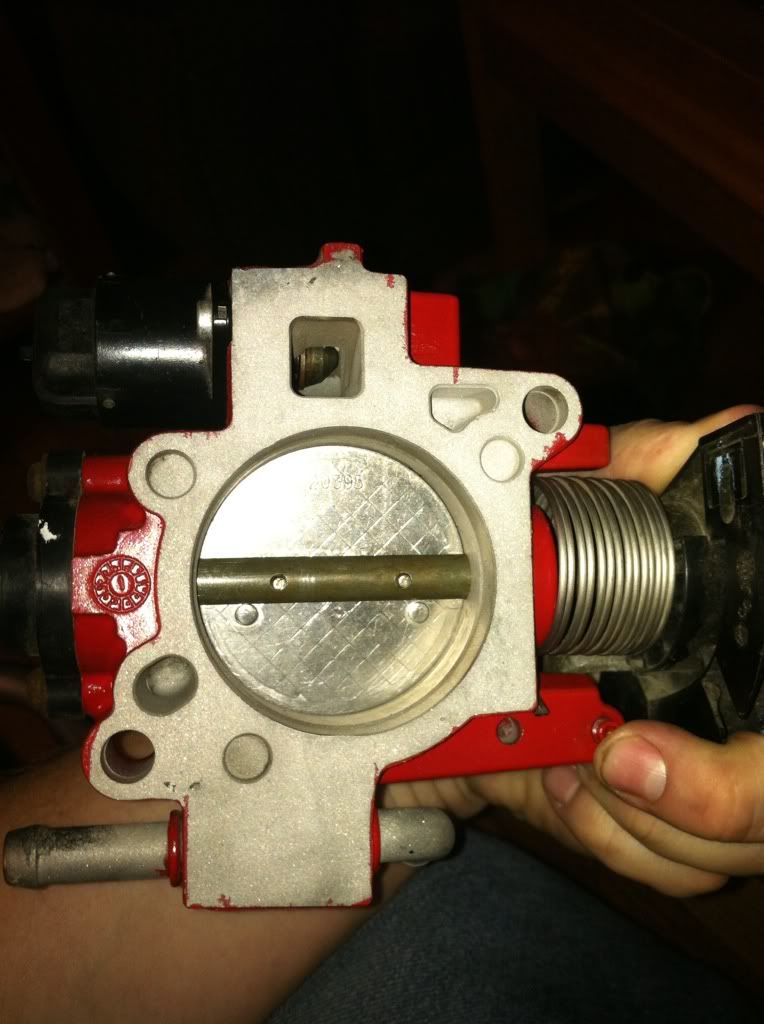
05 3400 mated to a 5 speed I am going to be running a PCM from a 2001 Alero I am going to attempt to use the stock exhaust for now, i would like to build headers in the future
As for the car its self Rear coil overs Front lowering ball joint Poly Bushing all around
So for any one that has done this swap have any of you mounted the alt down low rather than up top where i would have to notch the deck lid
Well i have been doing a lot of reading on 3400 swaps. There are still a few things i need to figure out, but so far my plans for this car as are follows
05 3400 mated to a 5 speed I am going to be running a PCM from a 2001 Alero I am going to attempt to use the stock exhaust for now, i would like to build headers in the future
As for the car its self Rear coil overs Front lowering ball joint Poly Bushing all around
So for any one that has done this swap have any of you mounted the alt down low rather than up top where i would have to notch the deck lid
whatcha need to figure out? i might have some answers for ya.
I am looking for a solution to mounting the Altnenator lower so i can keep the stock dog bone mount and not have to cut my deck lid
if i remember correctly, you gota use the old style alternator for that setup, and the backets from a 2nd gen 60degree (like a 3.1 beretta) id ask on 60degree to be certain tho.
Congrats on the purchace. I actually used the stock 3400 a/c mount for my low mount alternator. It took a bit of cutting and shaving but seems to be okay. Take a peek on my build and I can answer any questions that you have. I'm still finishing up the turbo set up before I fire it up but if you have other questions just shoot a pm.
I am also wanting to keep the AC so i would have to mount the alt below the stock dog bone location
quote
Originally posted by dutch13:
Hey,
Congrats on the purchace. I actually used the stock 3400 a/c mount for my low mount alternator. It took a bit of cutting and shaving but seems to be okay. Take a peek on my build and I can answer any questions that you have. I'm still finishing up the turbo set up before I fire it up but if you have other questions just shoot a pm.
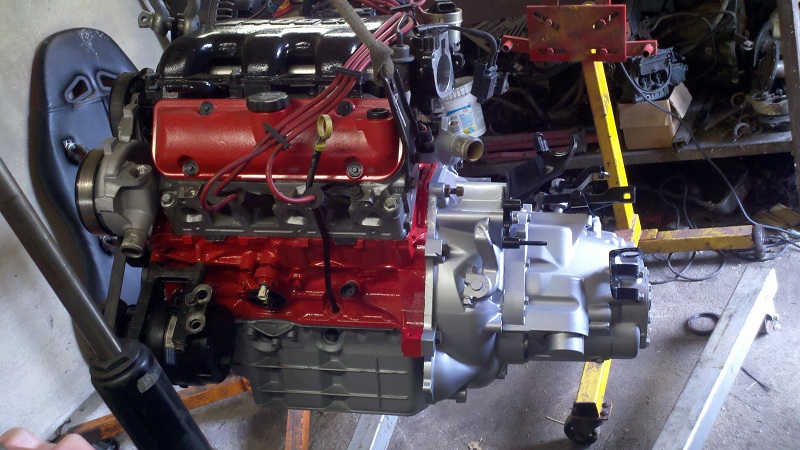
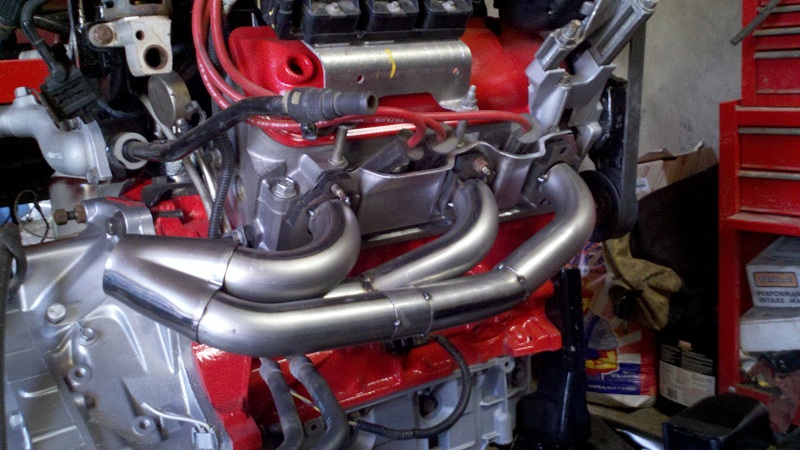
i had a mounting solution for the alt. below the stock location but i spent hours trying to figure out belt routing and couldnt come up with a way for an auto tensioner to work properly.. i have decided to keep my stock 2003 alternator and i am going to come up with a dog bone mount bracket that comes off the back side of the engine cradle and bolts to the side of the engine block.. when i start building something i will post pictures and my ideas.. subscribed to thread and good luck with the swap.. mounting the engine in the cradle is a piece of cake!! any questions just ask . a pic of my engine and trans before it was mounted in the cradle: and a pic of one of my mocked up headers..
hope this gives you some good motivation :-)
------------------ --Mark-- 87 GT soon to be 3400 SFI OBD2
[This message has been edited by 86 toy (edited 07-29-2011).]
Very nice! Are you making the headers yourself? And please post the details about your pcm/wiring when you get to that point. I'm probably going to be starting a 3500 swap soon, but I'm doing the homework now.
Yes I am bulling headers myself..I sent the pcm from the 2003 grand am to sinister performance www.gmtuners.com. to be modified to work in the Fiero with a 5speed trans. I highly recomend them for this type of work. as for wiring I plan to cut up the grand am engine harness to make it fit my car. I will be using the wiring instructions from sinisters website..hope this helps..sorry about hijacking the OP thread
Thats a nice and clean rust free car, should be the perfect starting point for your project. Good luck with it and be sure to post pictures as your build progresses!
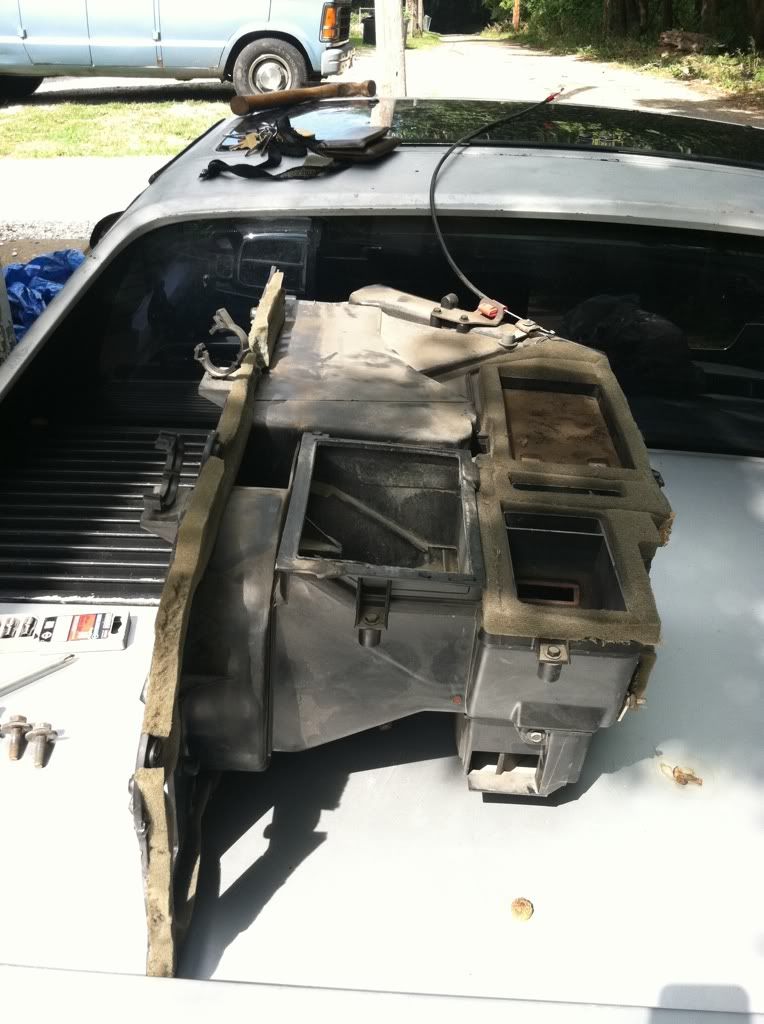
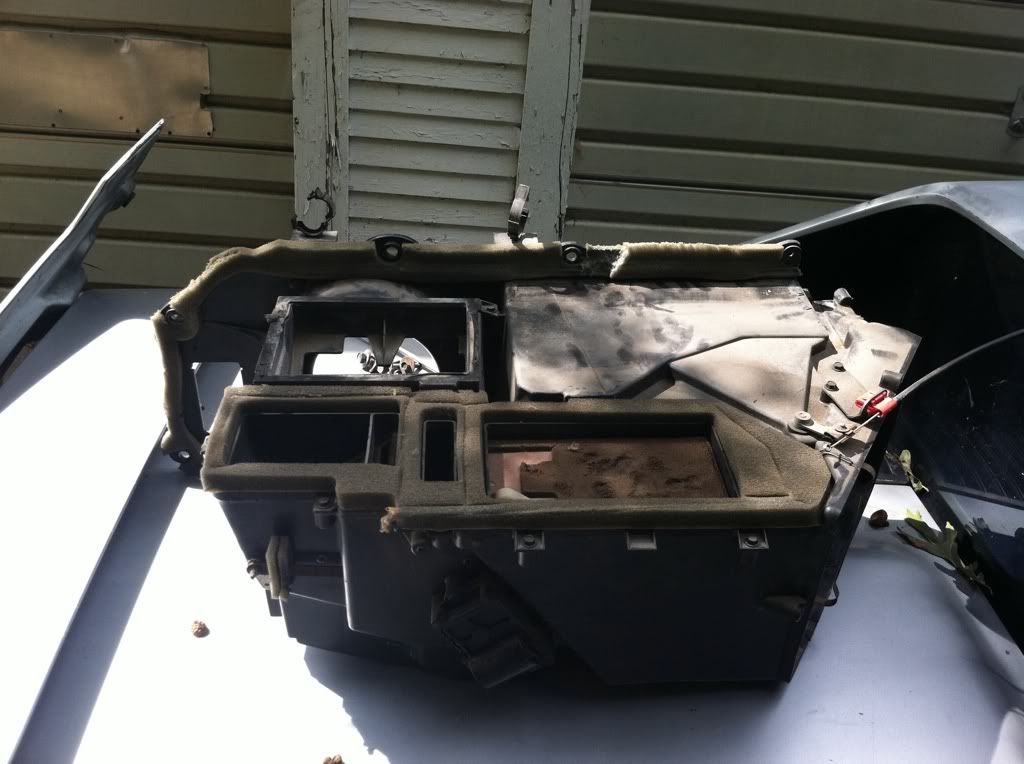
Well i got a good amount of work done this weekend, I picked up one of these so i have been cleaning up all the parts that i have taken off the car so far
I pulled the fuel tank out so i could swap to a different fuel pump and was surprised how clean it was, besides the huge dents on the bottom of the tank. I am thinking i will use my stud gun to pull the dents out of the bottom of the fuel tank
I pulled the struts out and was surprised at how good of shape they are in, I will be taking these apart and converting them into coil overs
Well i got a bunch of work done on the car today. Now the rear suspension is completely torn down and i am in the process of sandblasting it all. I started to tear down the front suspension and have one side torn down so far.
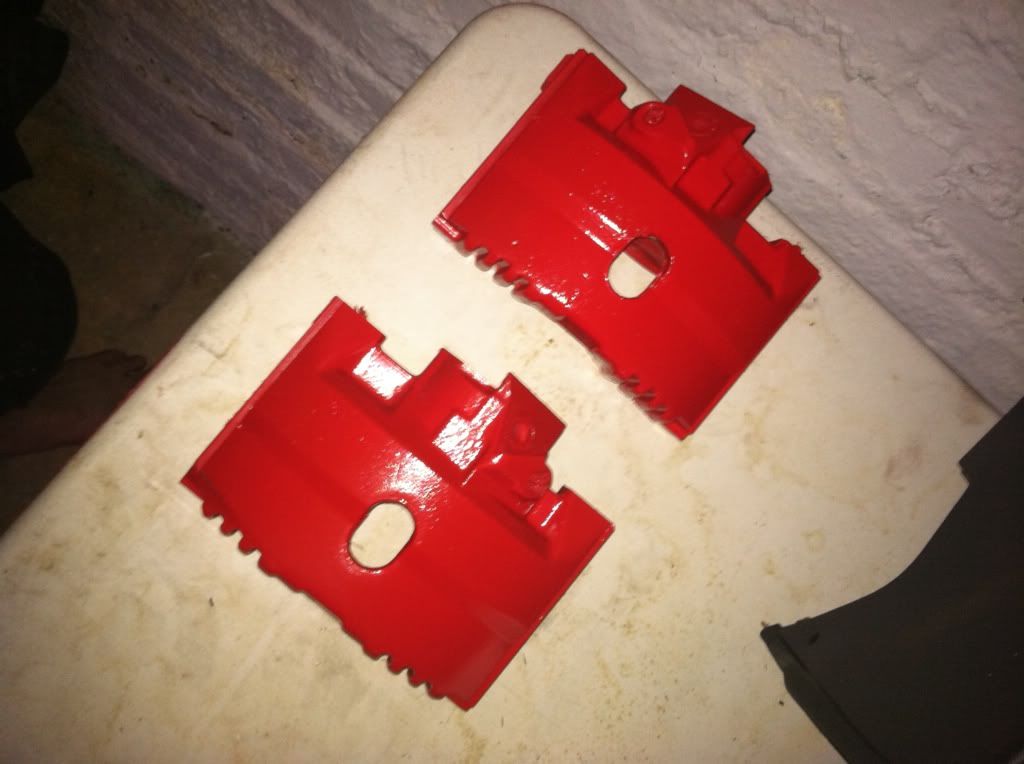
Here are the rear calipers all cleaned up and ready for paint
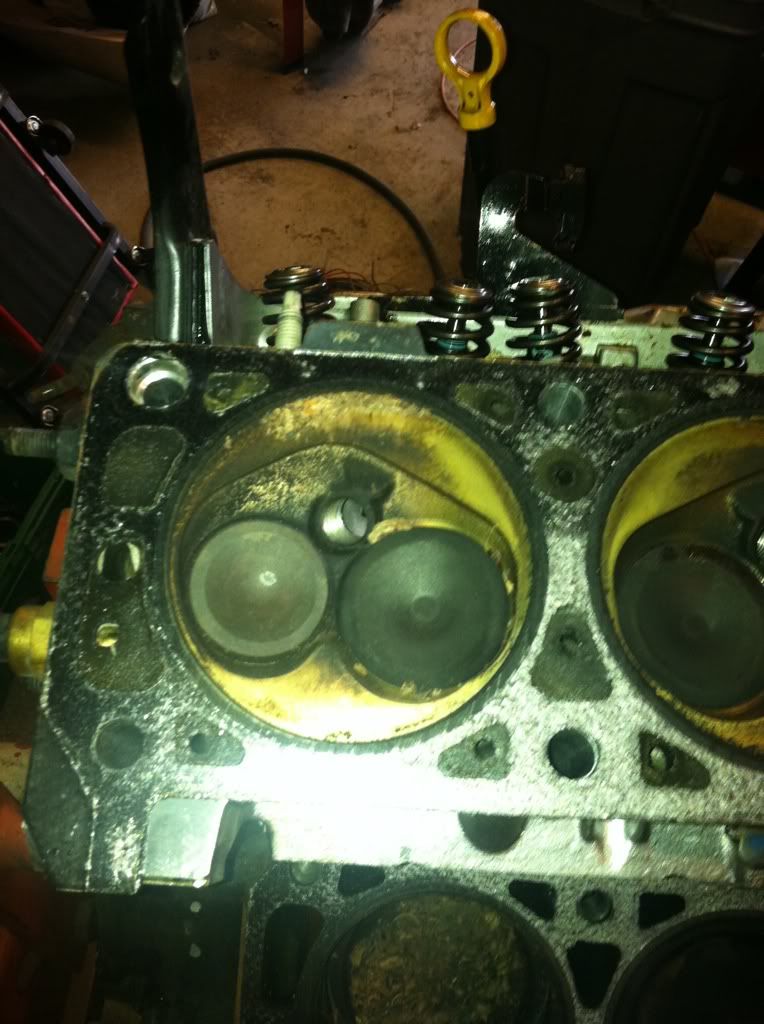
So i decided to start getting the engine squared away, I discovered that the almost new engine would not turn over. So after pulling the valve covers i discovered a large mouse nest in the valve covers and under the intake. The engine would still not turn completely over so i ended up pulling the heads off and found this
damn mice, so now i get to add head gaskets and head bolts to my list of parts needed for this build.
Well I have not made to much progress on the car latley, I have been distracted building a 1911 for my grandfather
I finally got the car moved in the garage so i can work on it in the winter and the city stops threatening to tow it away lol. It was not an easy task to move the car being that it has no suspension on it.
Now its in the garage, My next step is to get the front suspension together so i can get it off the tires, Im not to thrilled about having in resting on tires like it is. My front suspension is all been blasted and painted and I am just waiting to get my springs back from powder coating to assemble everthing
Well I got a bit more done today, I installed the intake manifold, valve covers, and the oil pan. Then I start to figure out what I am going to haveto do to mount the coil pack on the backside of the engine. Where it is mounted from the factory would put it right in the way of the dog bone mounting area. To do this the only thing needing to be done is create a spot for the upper coil pack mounts to attach.
The clearance for the hose is pretty tight, I will end up having to bend the plate a little bit to ensure there is enough clearence
I am going to grind off the original mounting points and smooth the area down
Your work looks great so far! I would like to replace the foam inside my dash also. Where did you get it? What do I ask for?
Thanks,
------------------ Jonathan 23K mile '85 notchie w/ 88 cradle, '87 2.8/Getrag, Air, PW, PDL, PM - Still under construction https://www.fiero.nl/forum/Forum2/HTML/121056.html I'm not a mechanic but I play one in my garage - me Power tends to corrupt, and absolute power corrupts absolutely - Lord Acton Those who hammer their guns into plows will plow for those who do not - Thomas Jefferson The tree of liberty must be refreshed from time to time, with the blood of patriots and tyrants - Thomas Jefferson
Your work looks great so far! I would like to replace the foam inside my dash also. Where did you get it? What do I ask for?
Thanks,
I got it at Ace hardware, it is open cell foam, it will come in strips with adhesive backing. I also used a weather stripping adhesive to glue the sides of the strips together. I only used 2 different sizes, the thinner stuff for the blend doors and the thicker stuff on the mating surfaces
I decided rather than wait until I can get a clutch, I bolted the trans to the engine so i could mock it up in the subframe and start figuring out my belt routing
Its looking really good. I am on hold with doing anything to mine at the moment since I am out of work. Hoping something comes up soon so I don't have to sell it.
I decided to start working some on the interior some and installed some heat sheilding/ sound deading material, I used duct insulation from lowes, For the price it will work great. IT was only $20 a rolll and 3 rolls will be plenty to do the interior
I decided to replace the old worn out plastic select shaft bushings with Rodneys to help tighten the shift linkage up some
I also started to get my front suspension put back together, I will post some pictures when I have it a little more together
Here are some updated pictures from the past few weeks of work I have done
I have the front suspension almost completely together now, I still need to touch the parts up a little more and final torque everything. I will also be replacing the old rubber brake lines with some braided stainless ones
I decided to replace the bushing in my rack and pinion while I had it out of the car
This is the housing with the rack and pinion removed
The pinion gear was in great shape with only some polishing on the active face of the gears
The assembly that provides preload to the rack
The racks gear teeth, I cleaned and then regreased
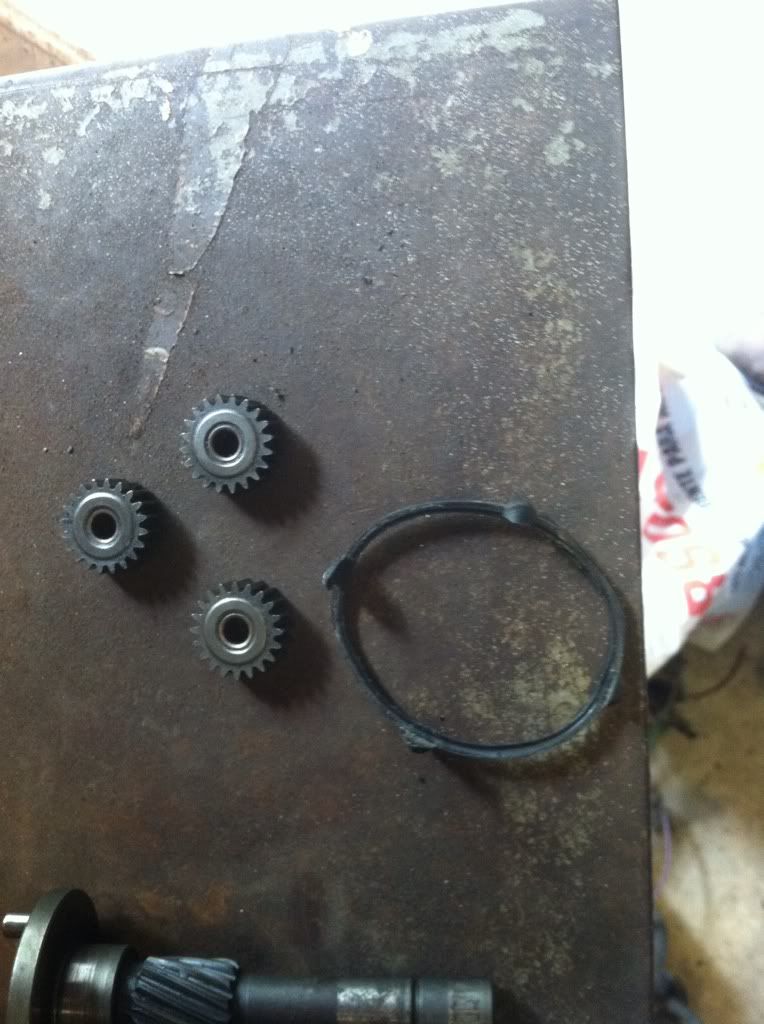
I got this starter motor for a core price to use for mock up, being curious I decided to open in up and see what was bad, all that was wrong was the bendix was stuck becasuse of rust on the shaft, I soaked it in PB blasted for a little bit and was able to get it working again.
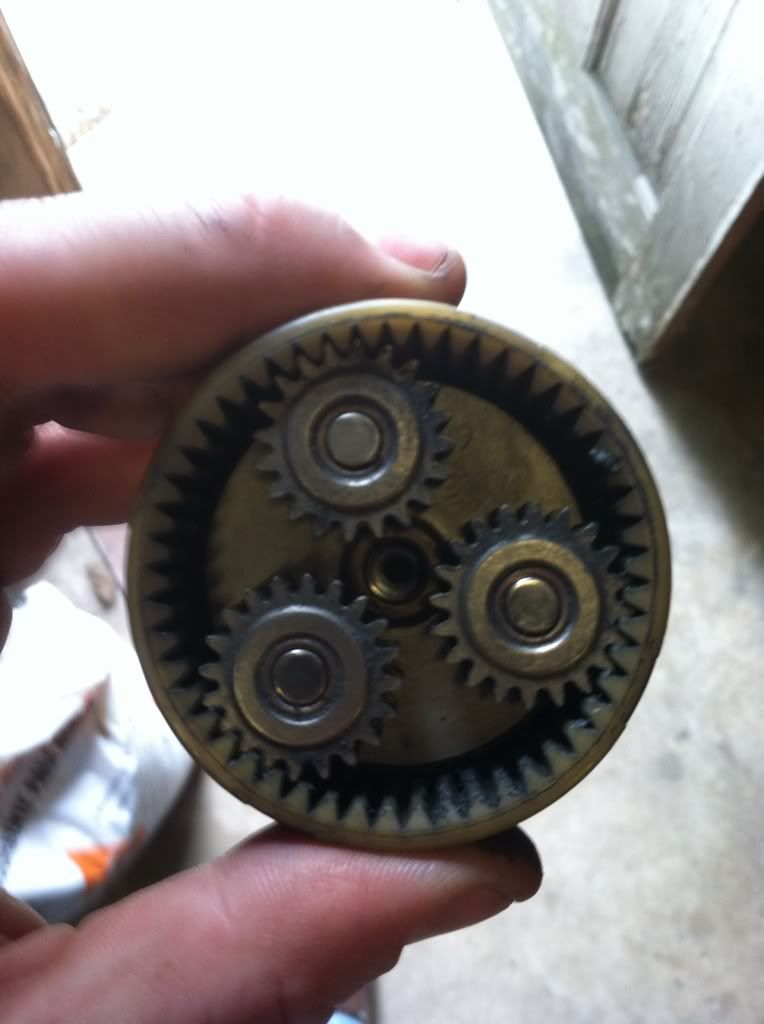
This is the planetary reduction unit for the starter
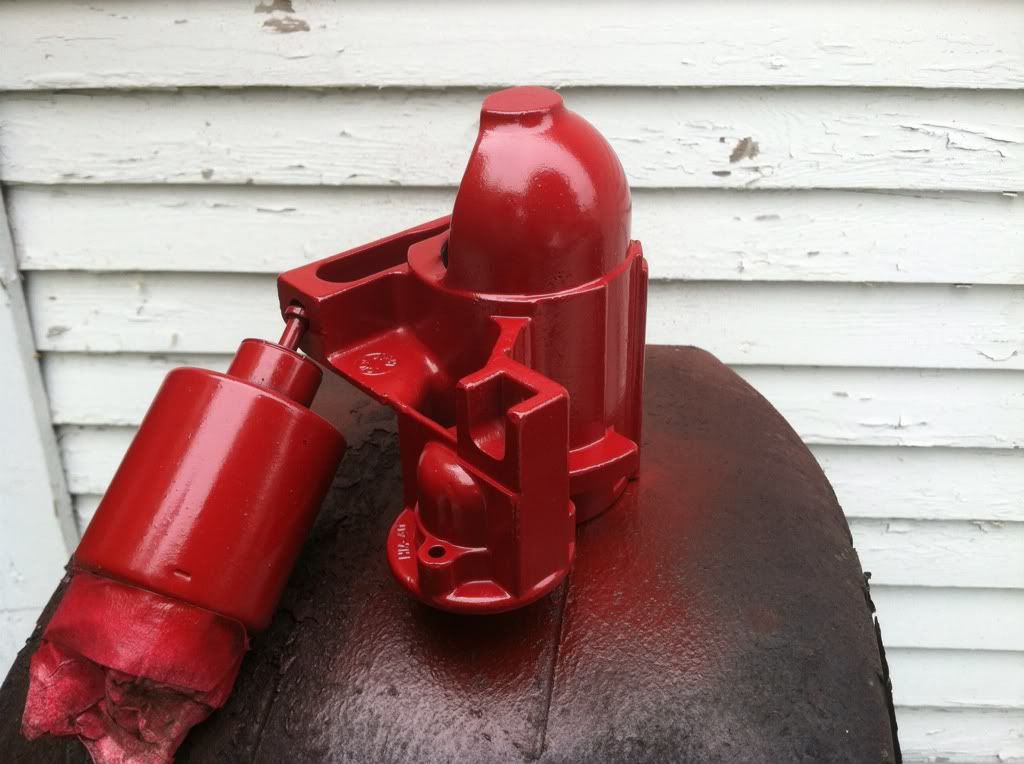
I cleaned up the starter parts and painted them
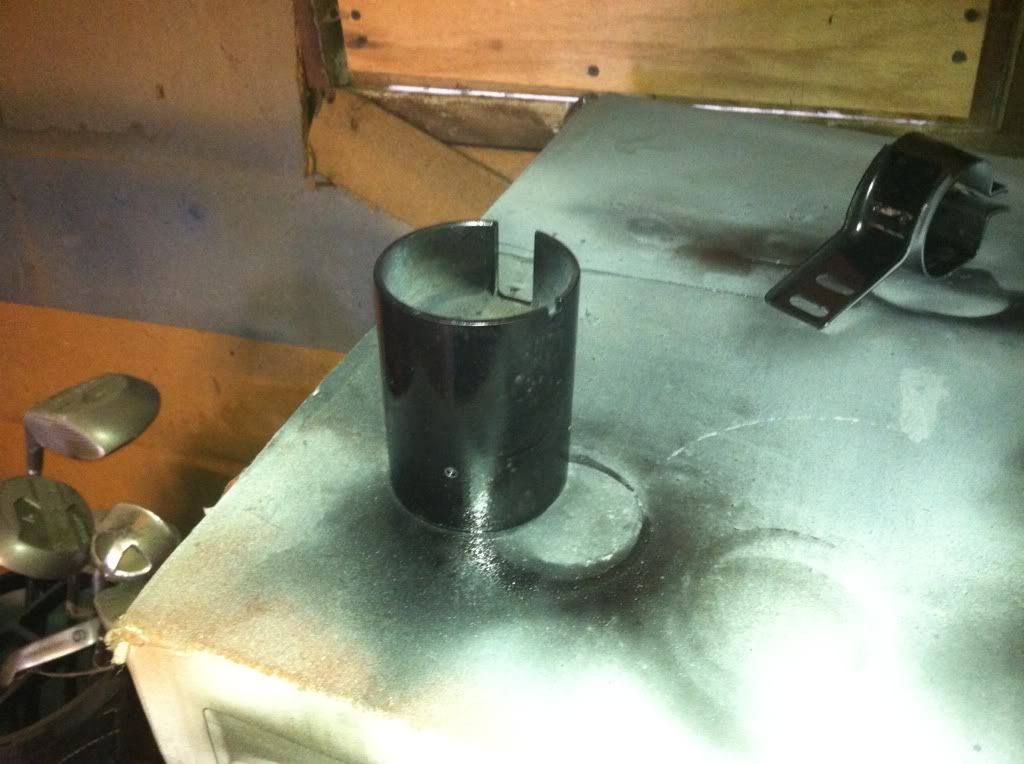
To get the starter back together I used a socket to retain the Brushes into there cavities
I then was able to easily slip the brushes onto the motor
I sand Blasted my front calipers and used the ceramic caliper paint on them
When I was cutting up a fiero I save the engine bay to use as a mock up, this will be really handy in the future....
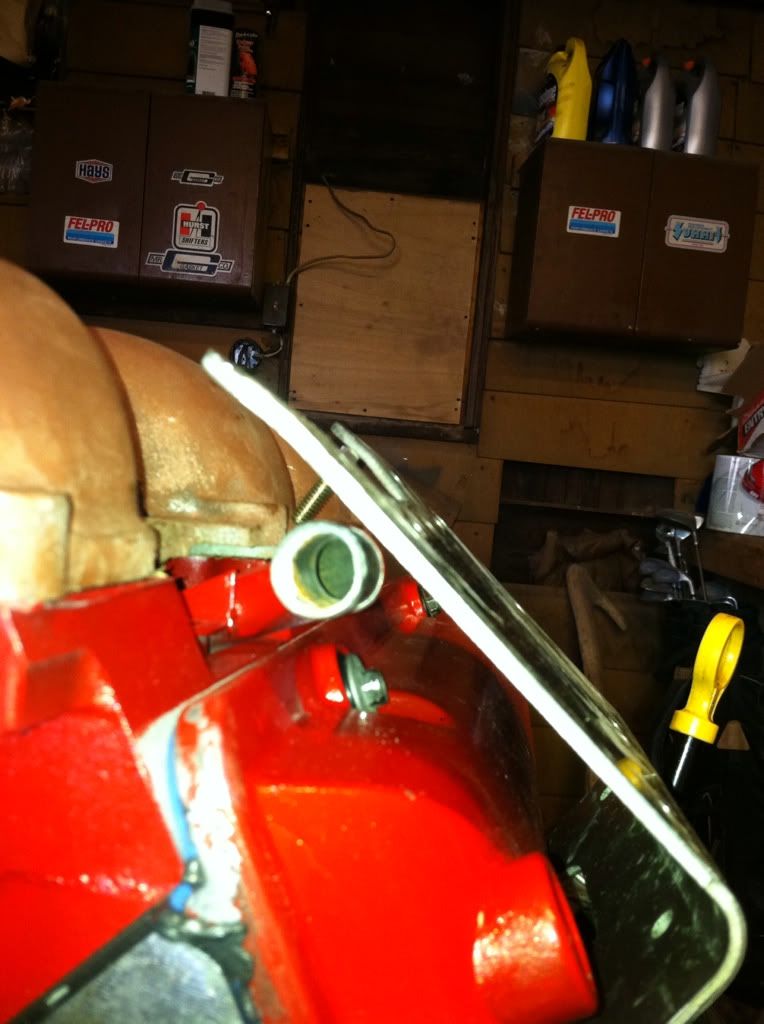
I am going to use the stock location for the Dog bone mount, I just need to make the engine side of the mount
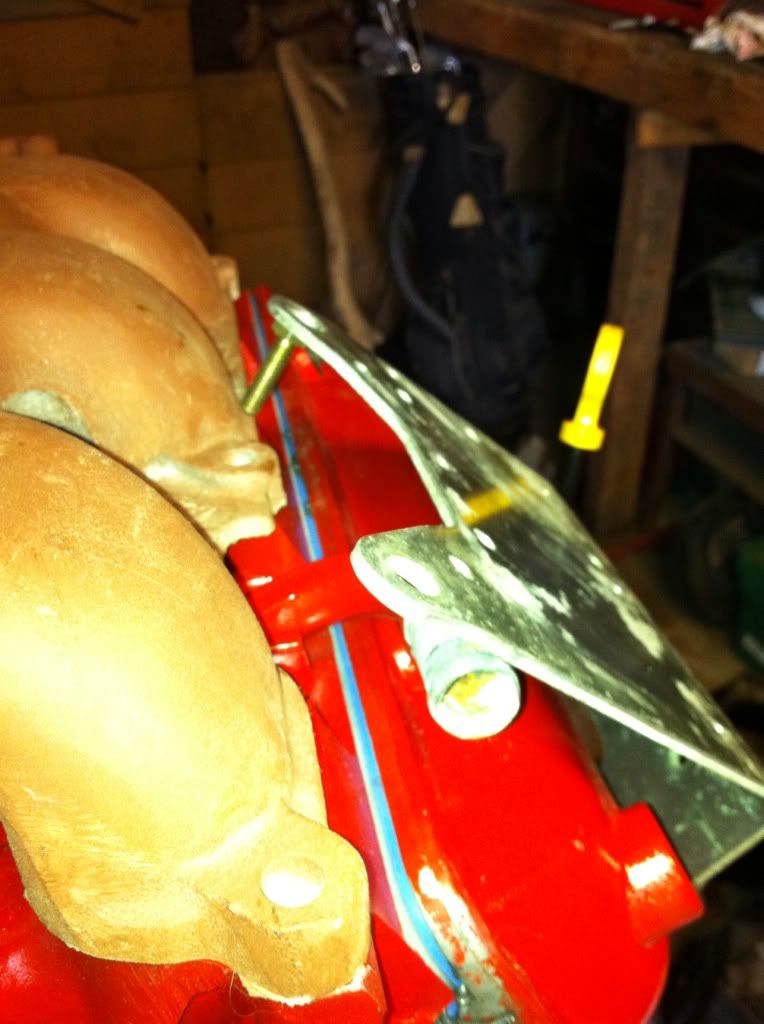
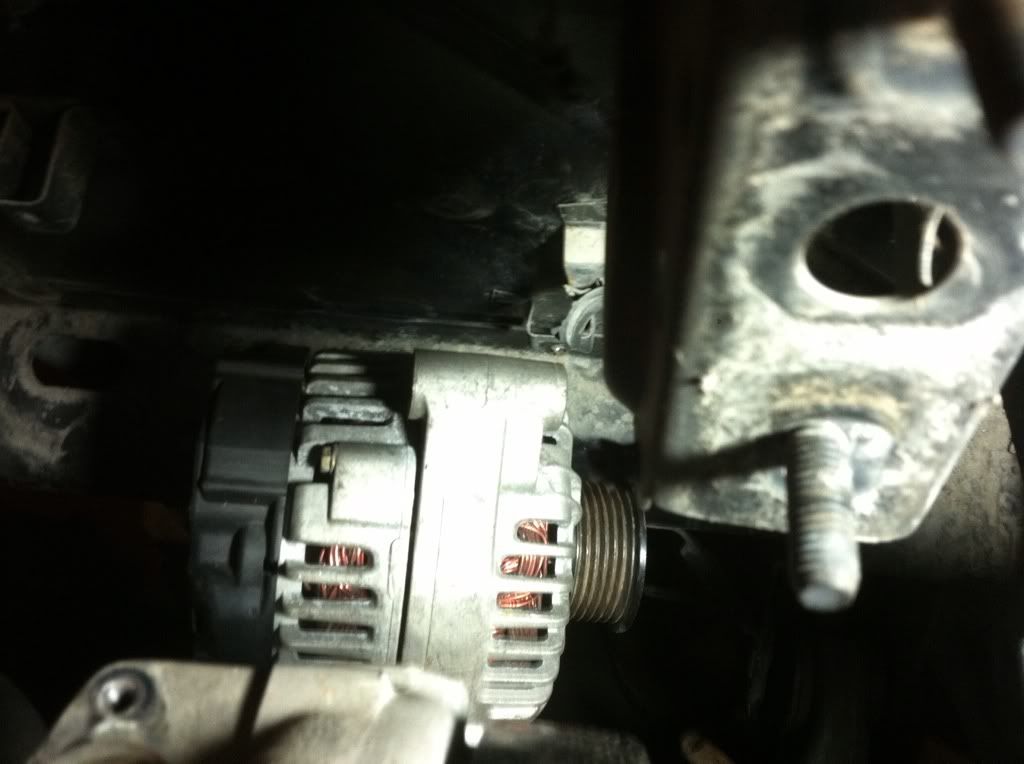
There looks to be enough room for me to mount my alternator next to the AC this will really help make the engine bay cleaner
Theses are front 3500 manifolds, they clear every thing really well
Looking good, do you have a logon on 60*? if you do, be sure to join the owner's group over there!
PS, Thanks for not putting fiero iron heads on it.
I do have a log in over there I will have to check it out thanks, and I would have never thought of putting iron heads on a 3400 I don't like going backwards in technology.