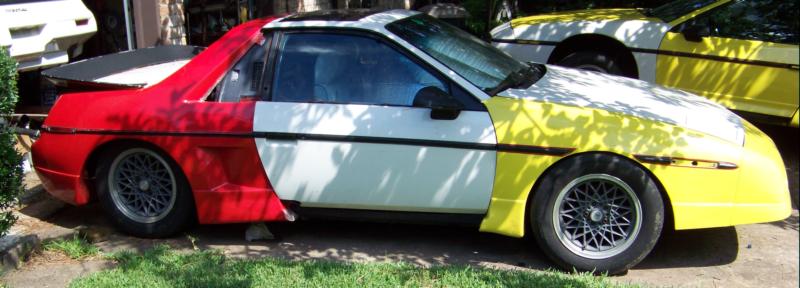
I've sold off the parts cars and started on getting them on the Ecotec car.
The front clip will be replace with a special Norm's one piece clip that I ordered several months ago. I talked to Norm last week and It should be done some time later this month.
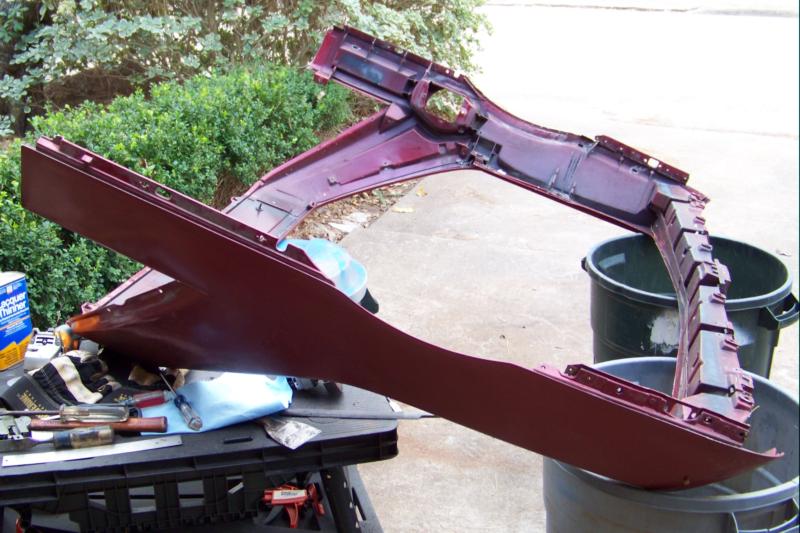
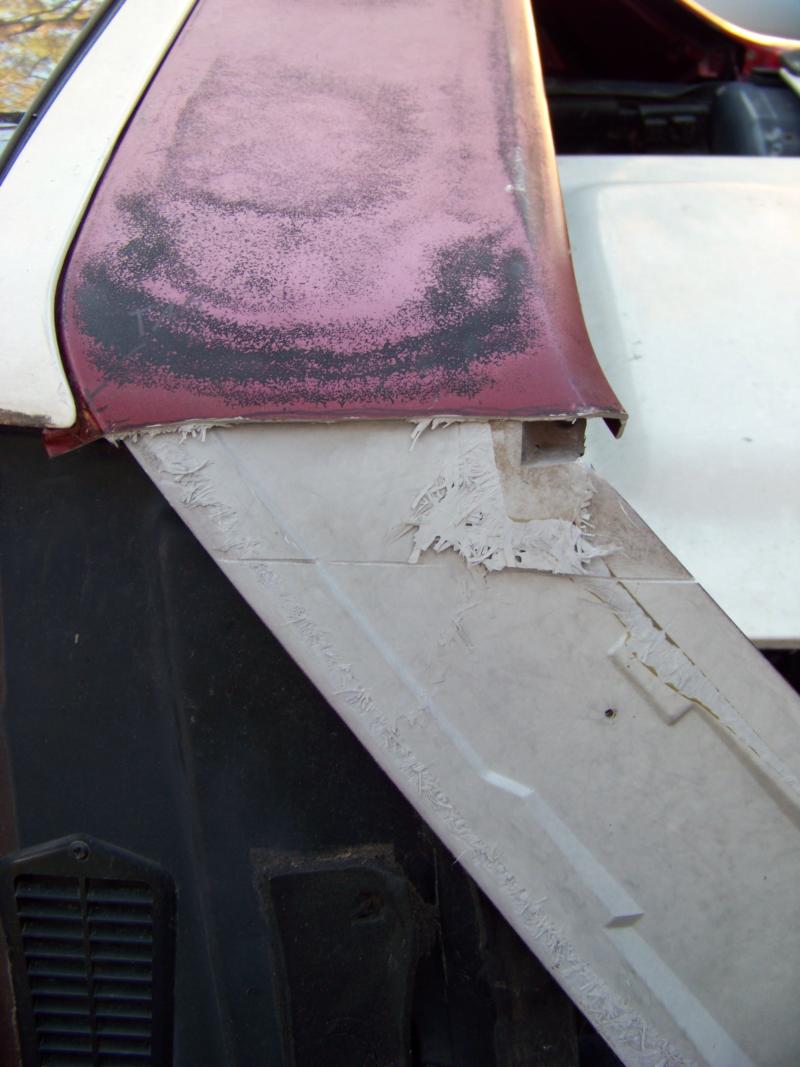
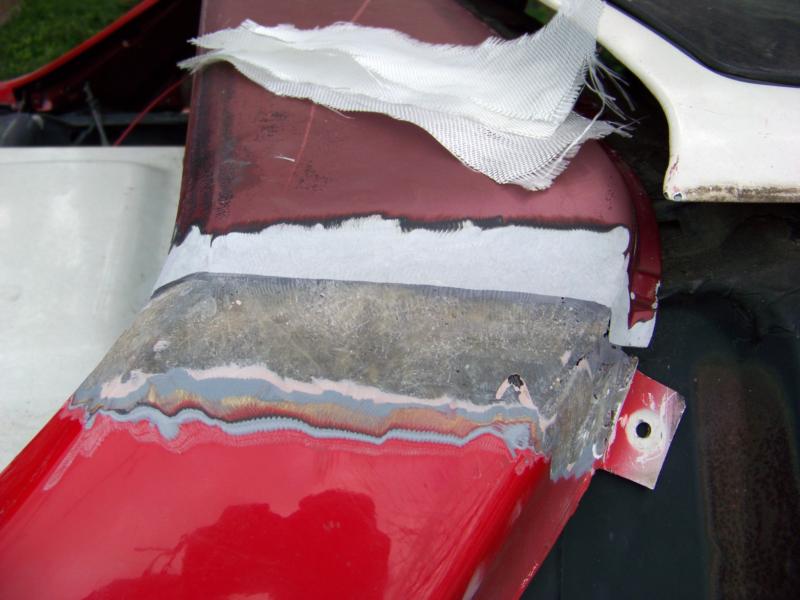
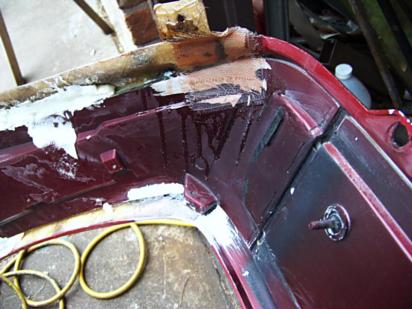
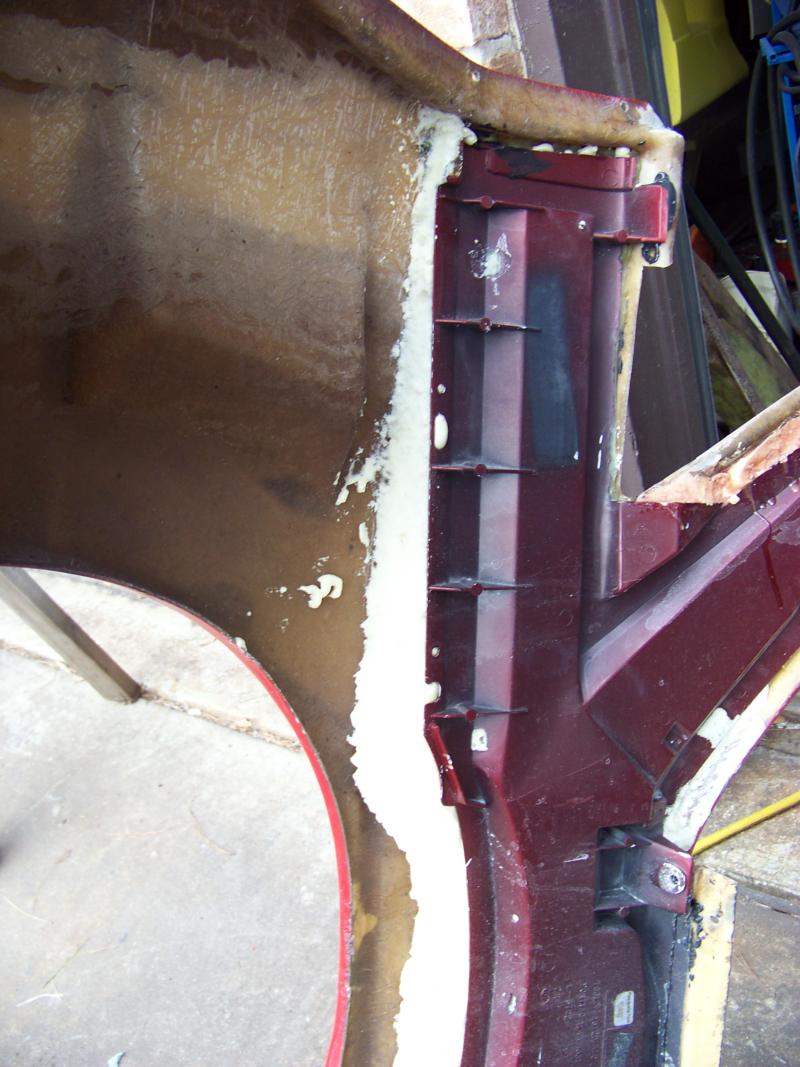
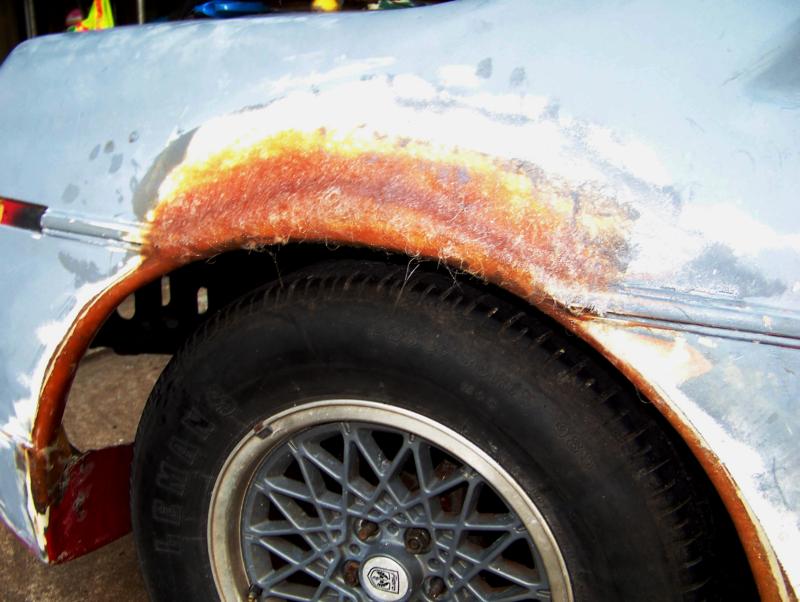
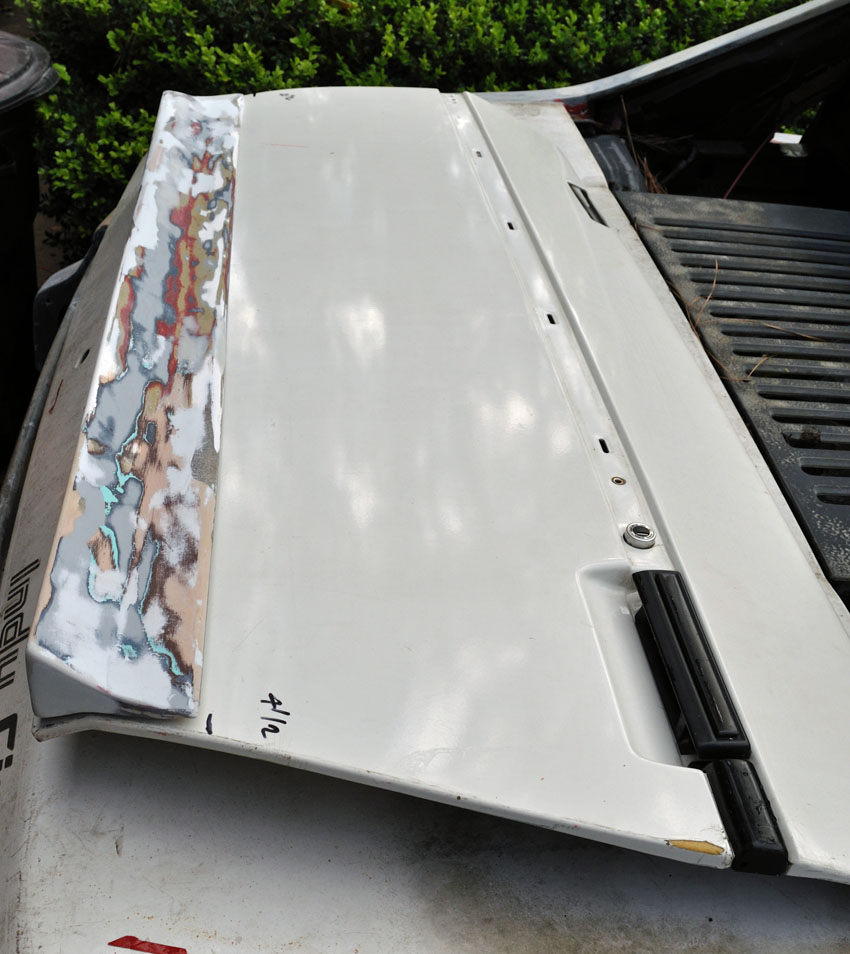
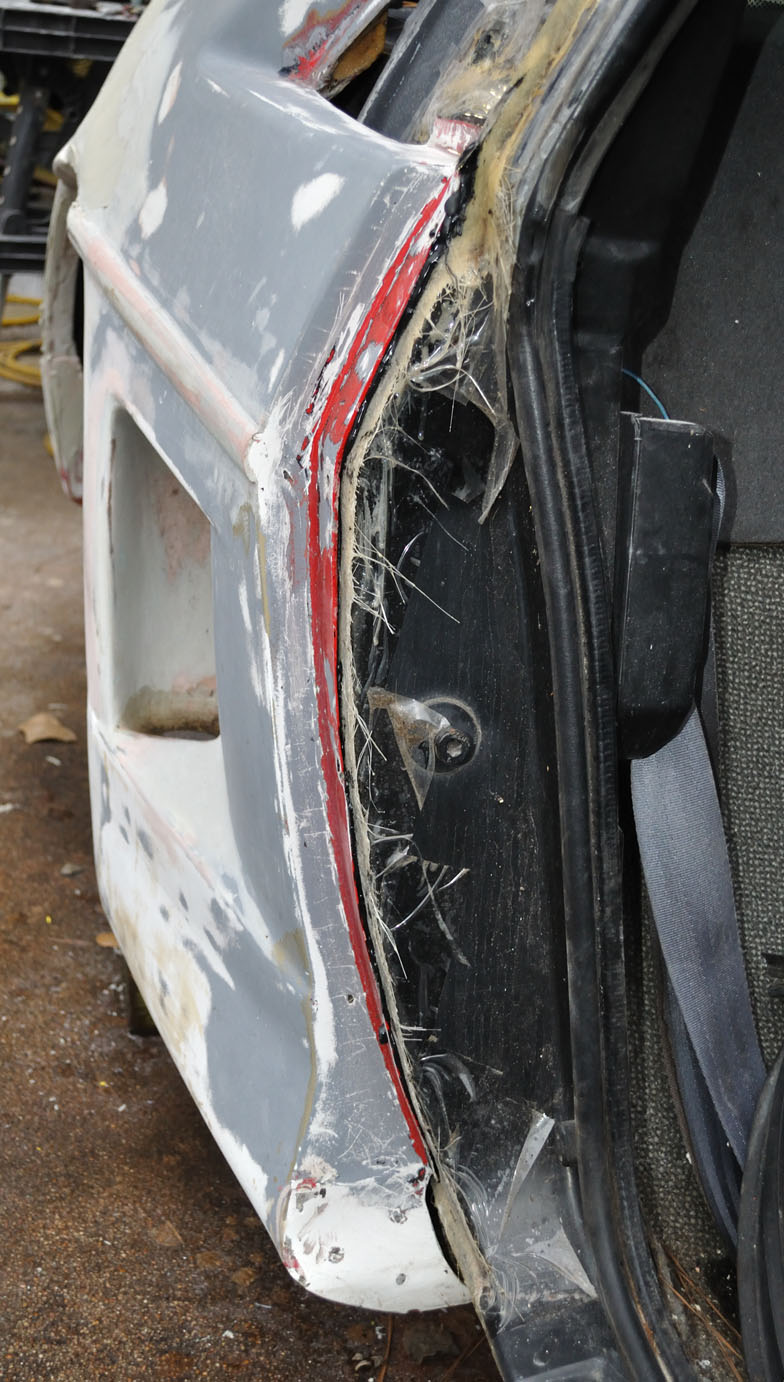
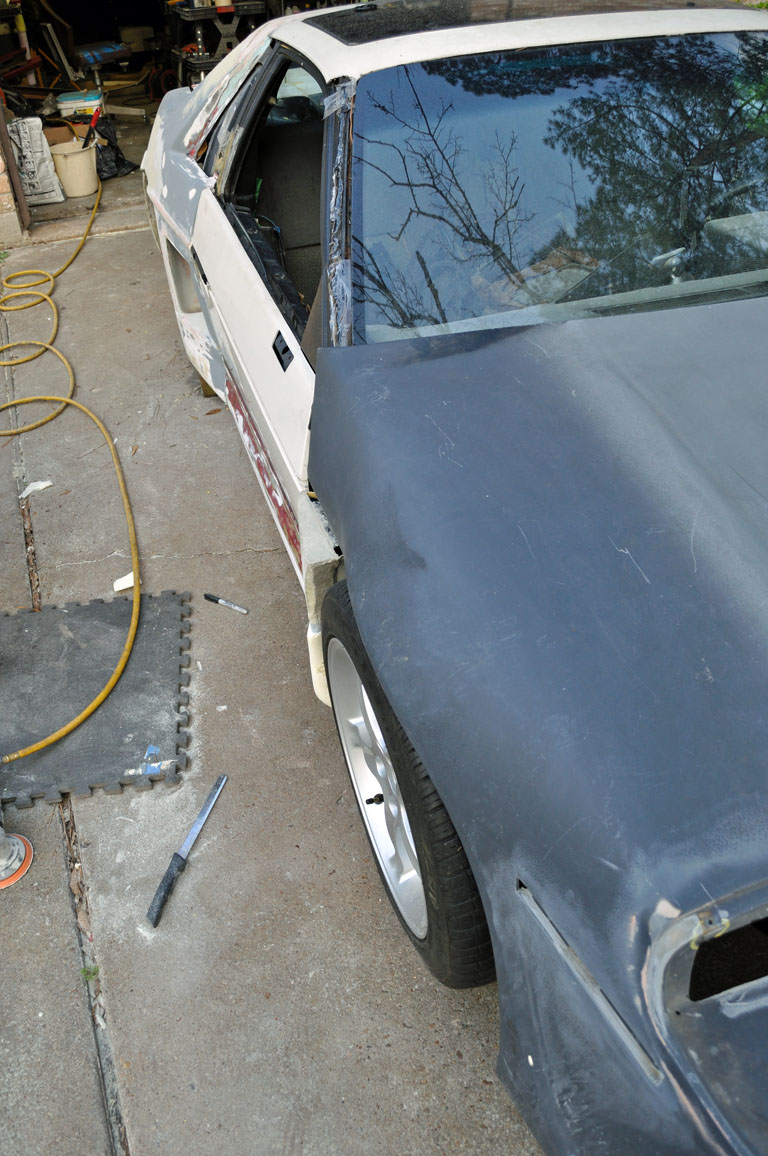
The rear clip needs some work. It has some pretty big cracks that need fixing. I'm going to lay the panels on the under structure like Russ did on his.
First I need to seperate the under structure from a doner re-clip.
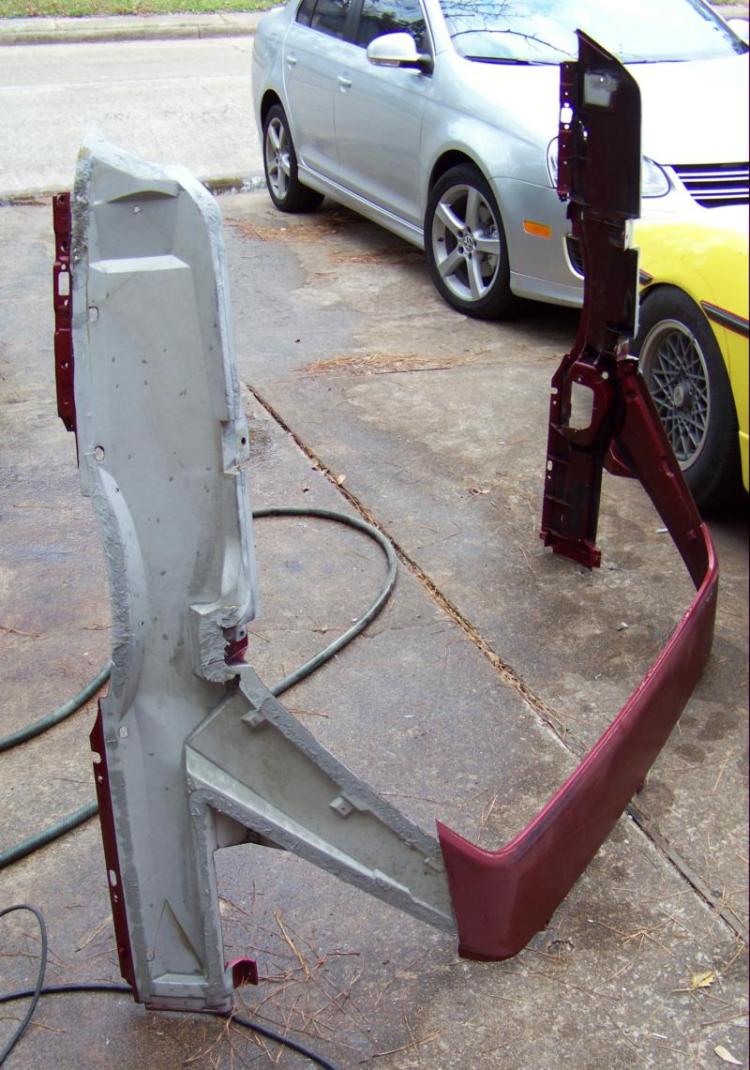
I intended to leave the taillight bucket piece intack but it was already broken apart on the drivers side from an previous fender bender. It is only held with 1 pop revit and a little glue on each side.
The sail panels are trimed about an inch below the curve of the roof panel. This area was cracked on both sides when I recieved the car. The drivers side snap off when we pulled the rear clip off.
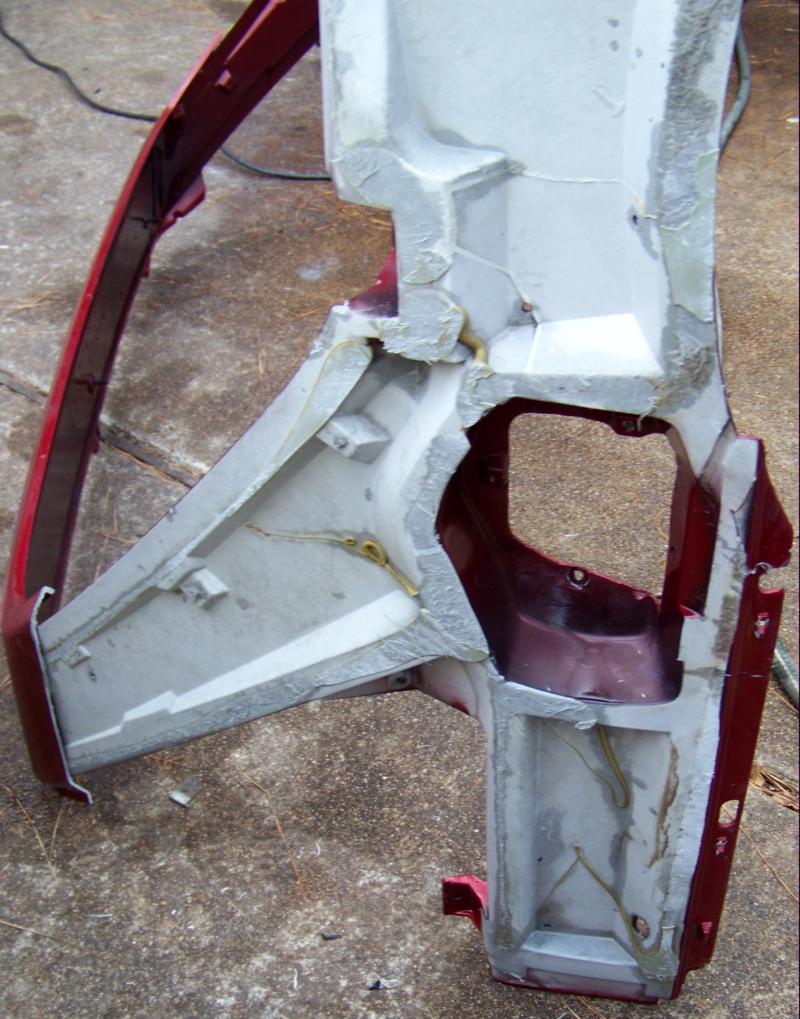
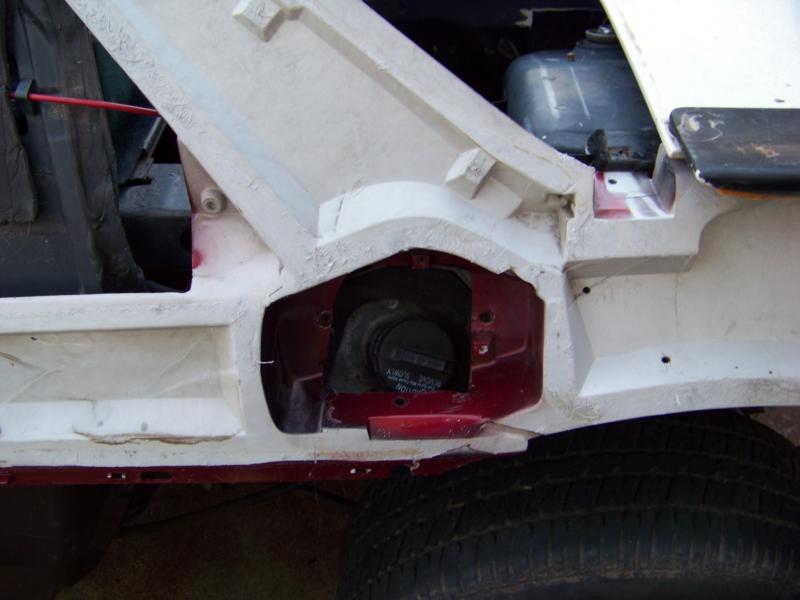
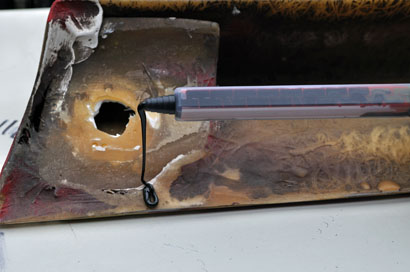
Another plus using the sub structure, you get all the mount holes for the filler neck. I plan to seal the sub structure to the fender to keep the road grim out of the filler neck recess.
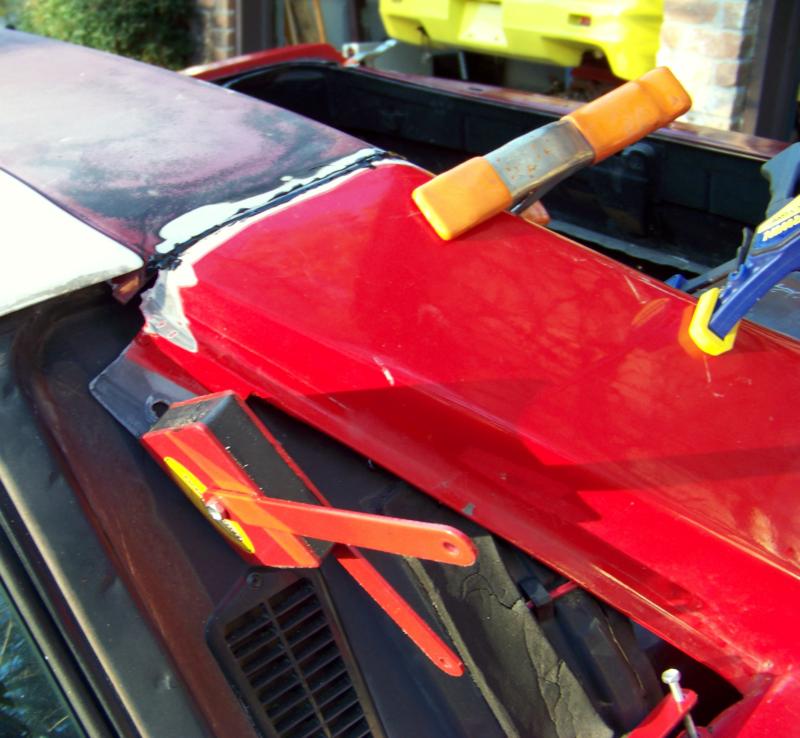
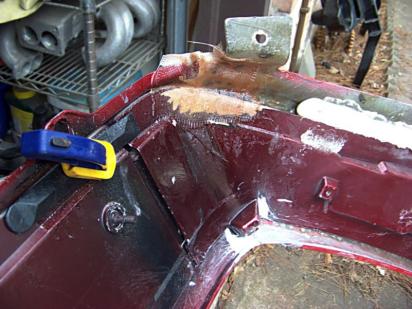
I used a SEM product #39747 Multi-purpose panel adhesive with a 90 min. working time. I followed Russ's advise and layed a thick patches of glue were the fender panels touched.
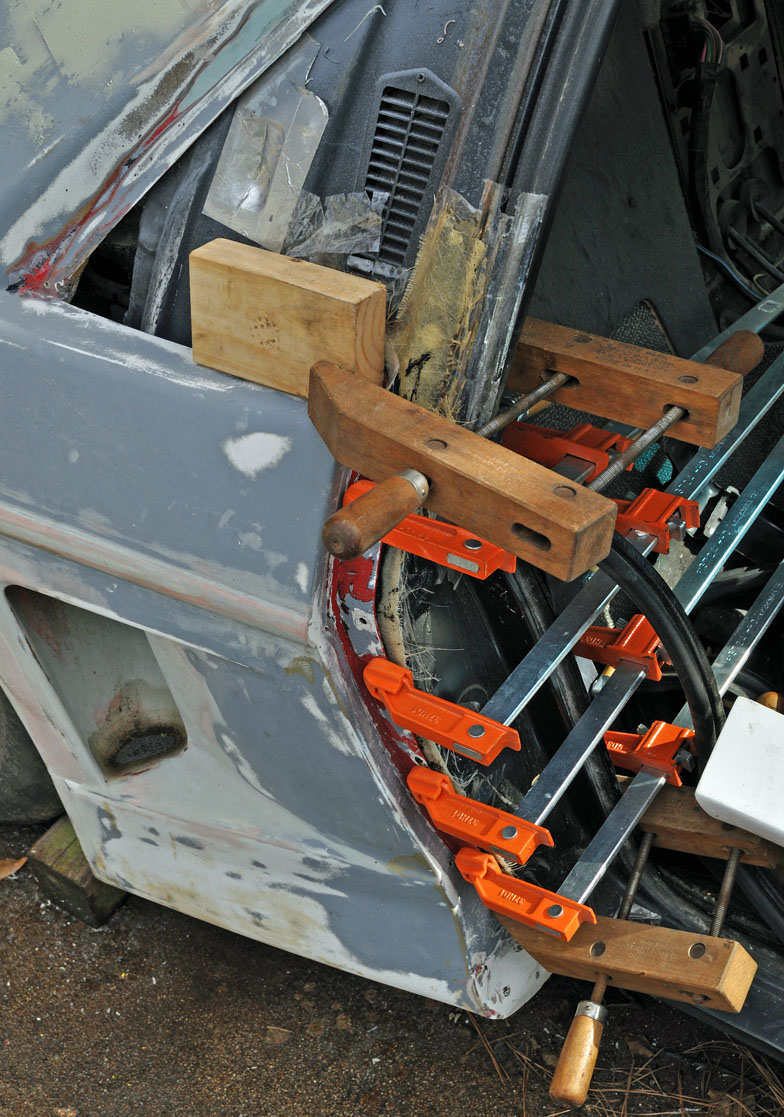
It does not take a lot of clamping pressure to get a good bond, but you do want to have your panels aligned before the 90 minute limit, adhesive sets in 4 hours.. Total cure in 24 hours
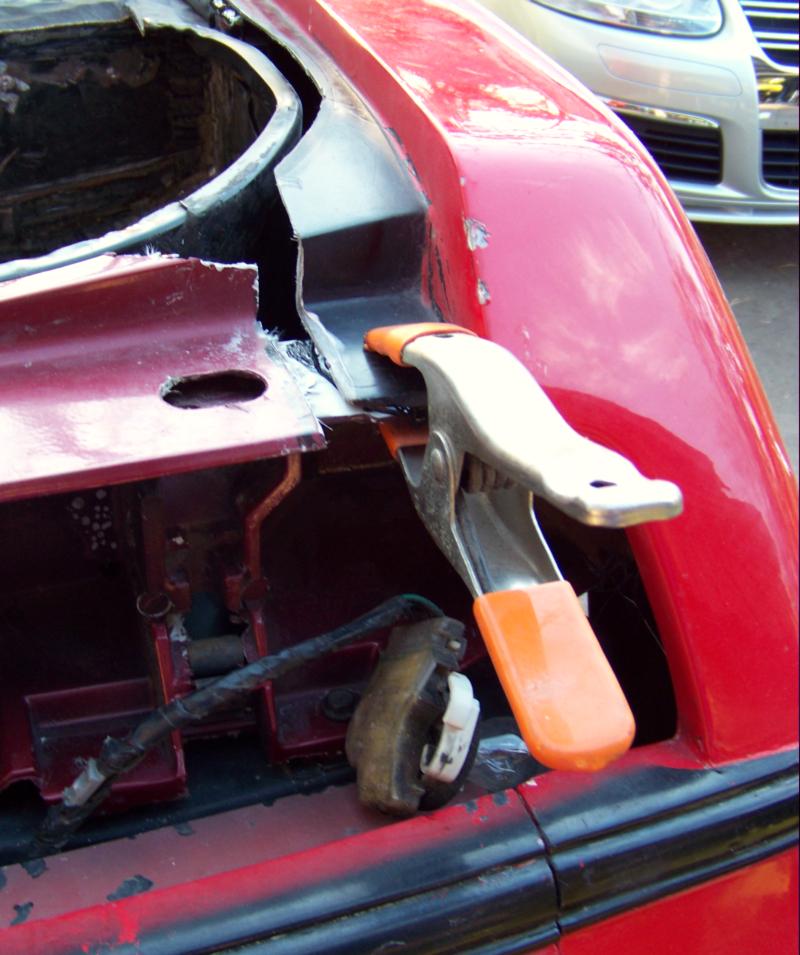
I ground out about a 1/4" of filler off the finder and will put a few layers of cloth. I will take the rear clip off and filp it upside down and fill in the gaps. Then flip it back and start getting everything straight and smooth again.
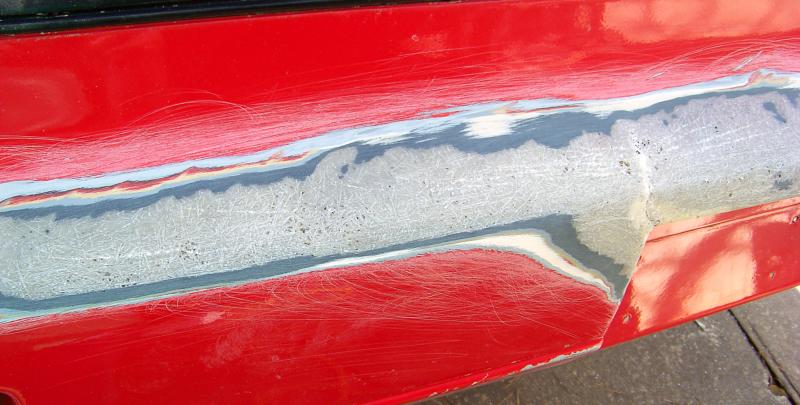
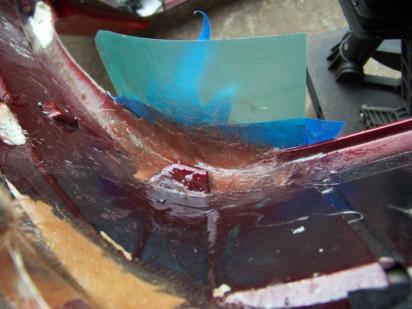
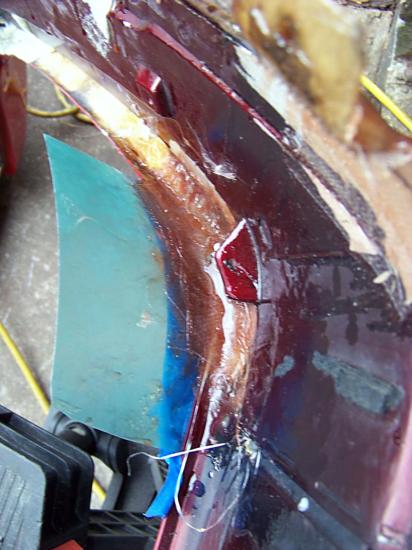
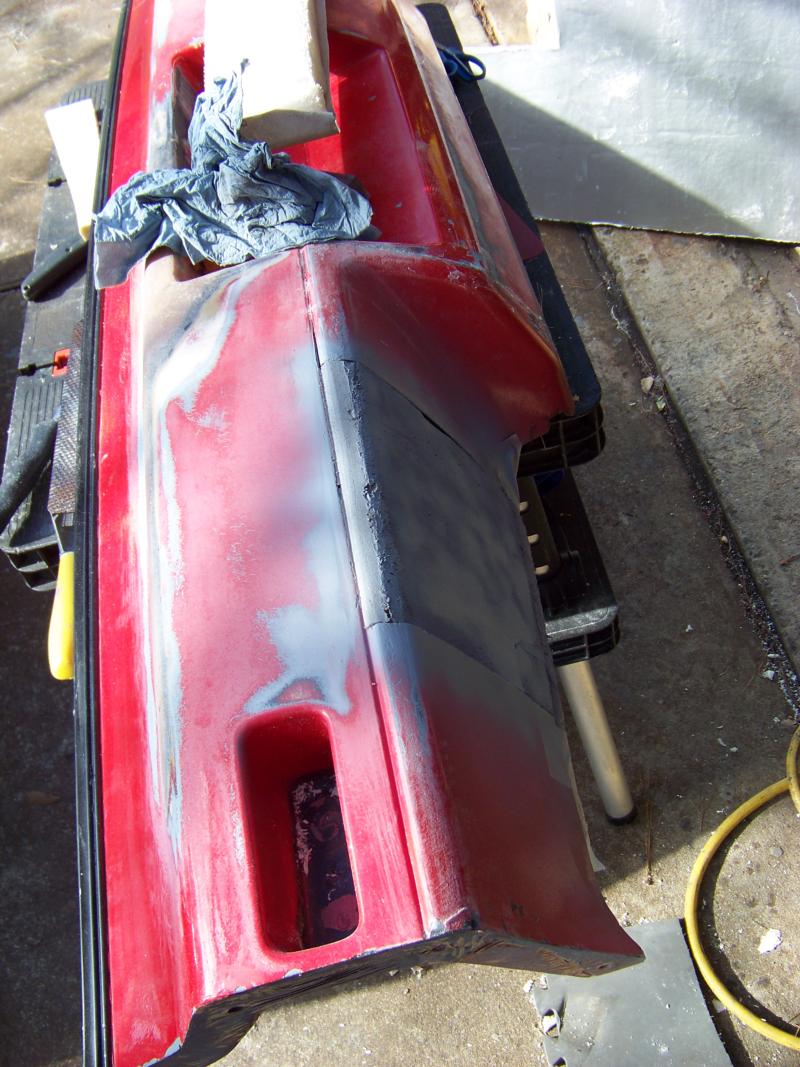
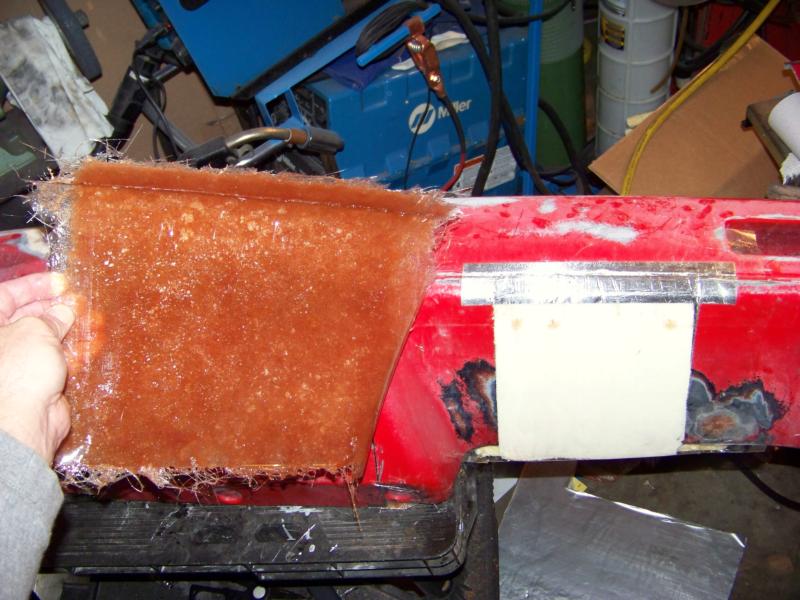
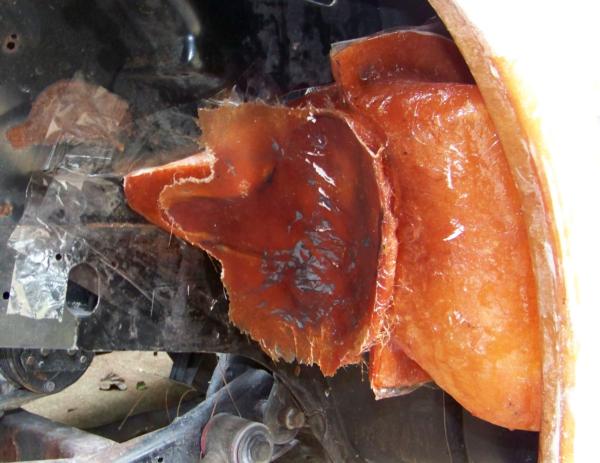
The bumber was rear-ended and created a pretty big crack with some long spiders. It was fixed previous by grinding the glass down and filling with bondo. The cracks in the glass transfered right back into the paint. After I sanded it down to the glass, the pinholes you see go all the way through the glass.
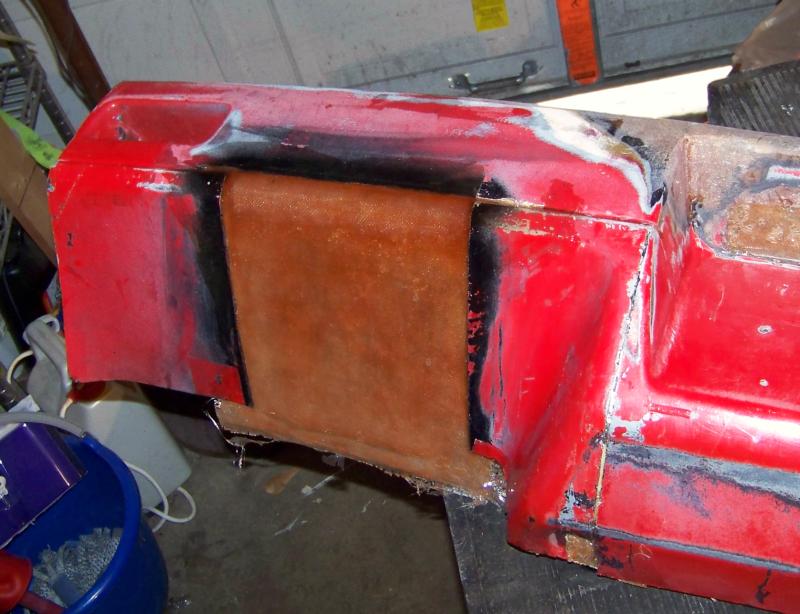
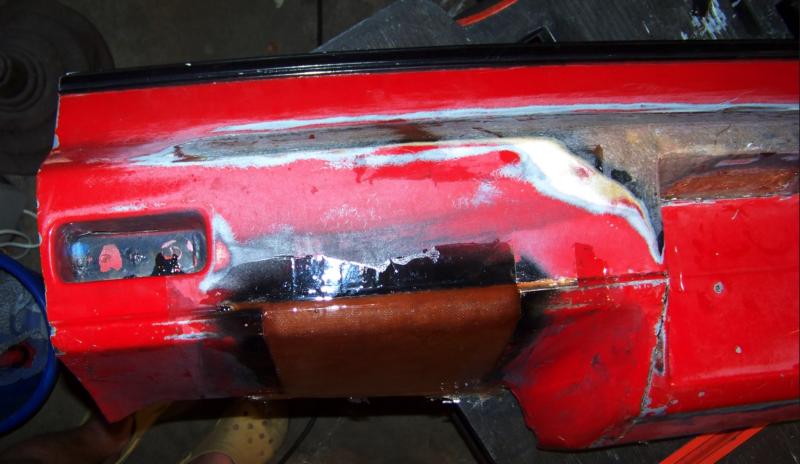
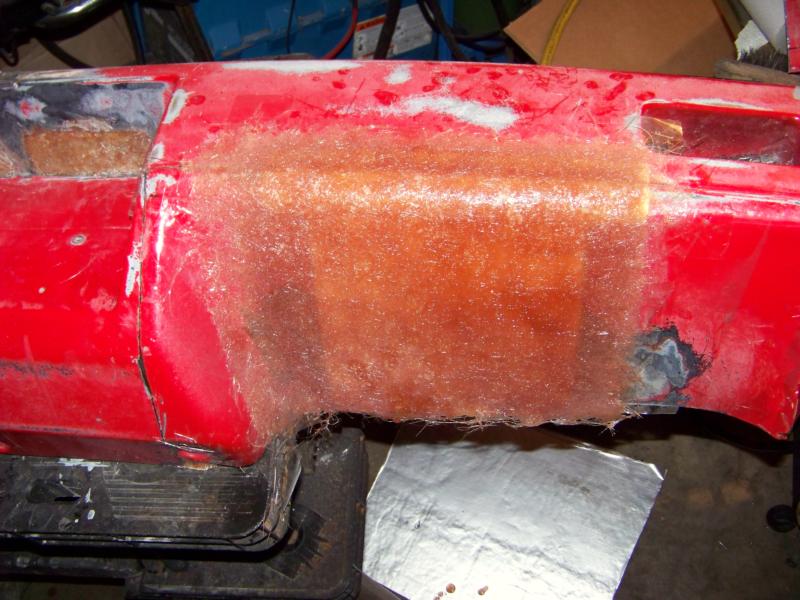
I dug out the fractured glass and filled it in with kitty hair and put a single layer of mat on the outside. I'll put another layer of mat on the inside when it's flipped.
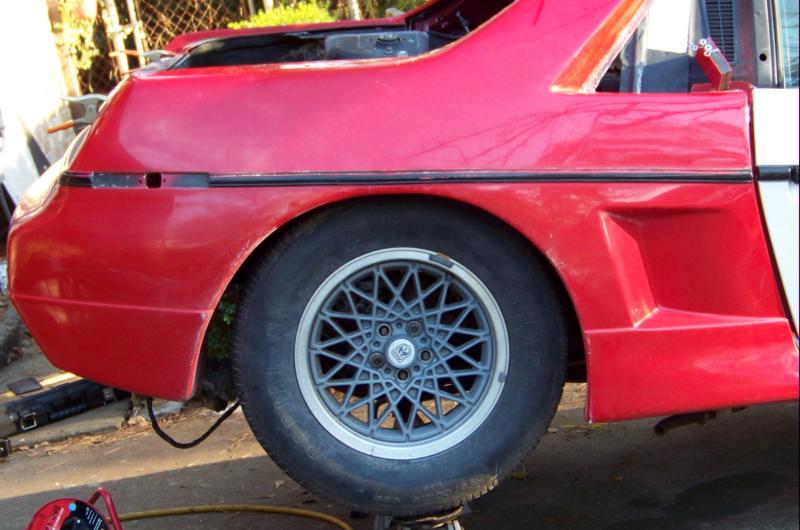
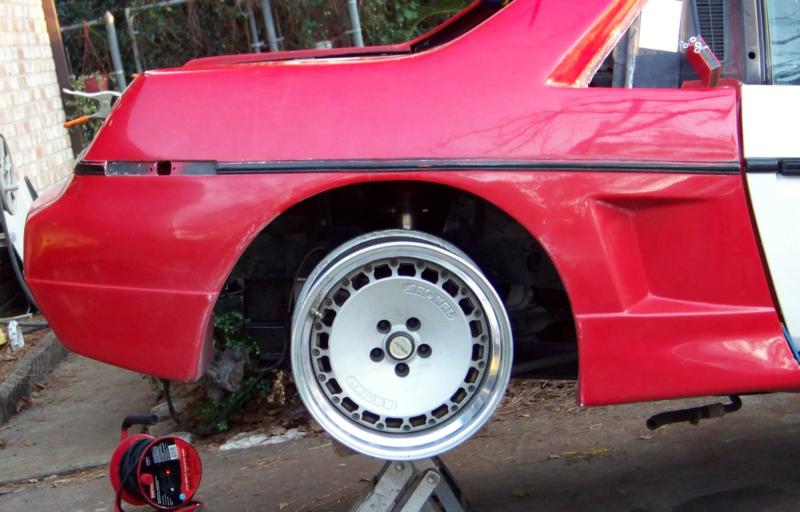
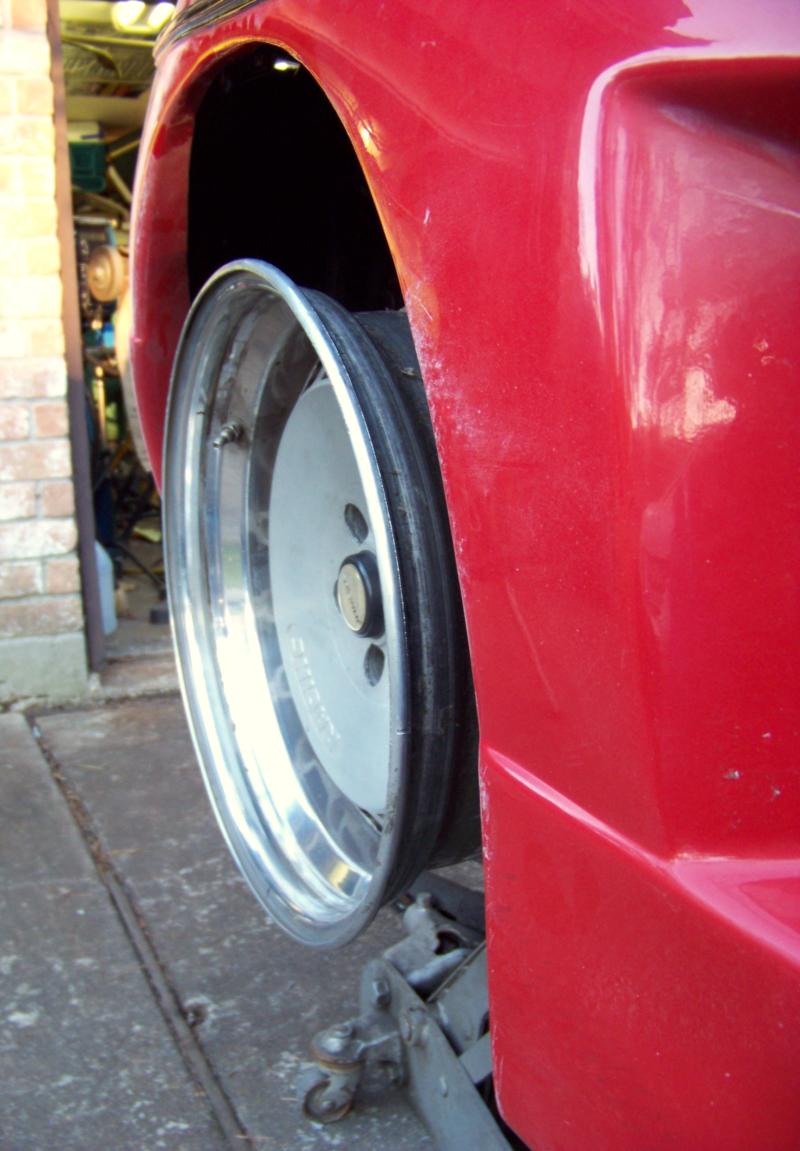
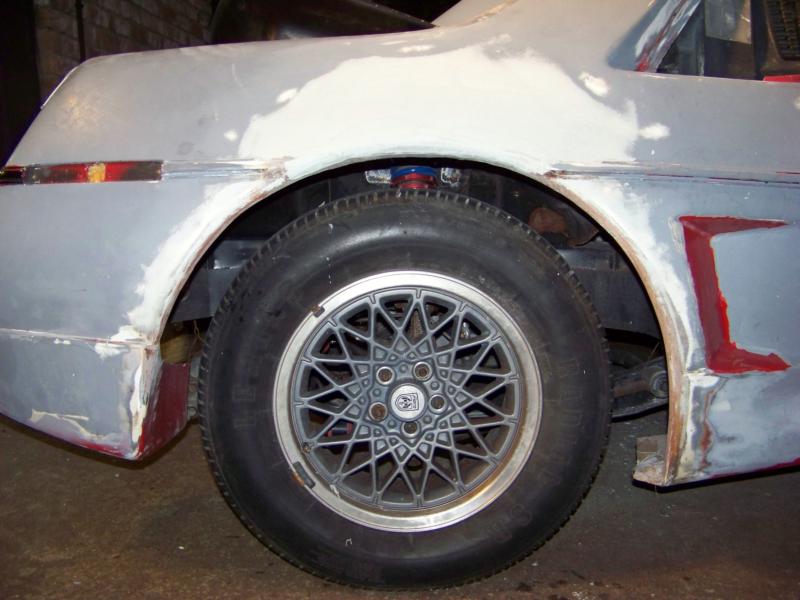
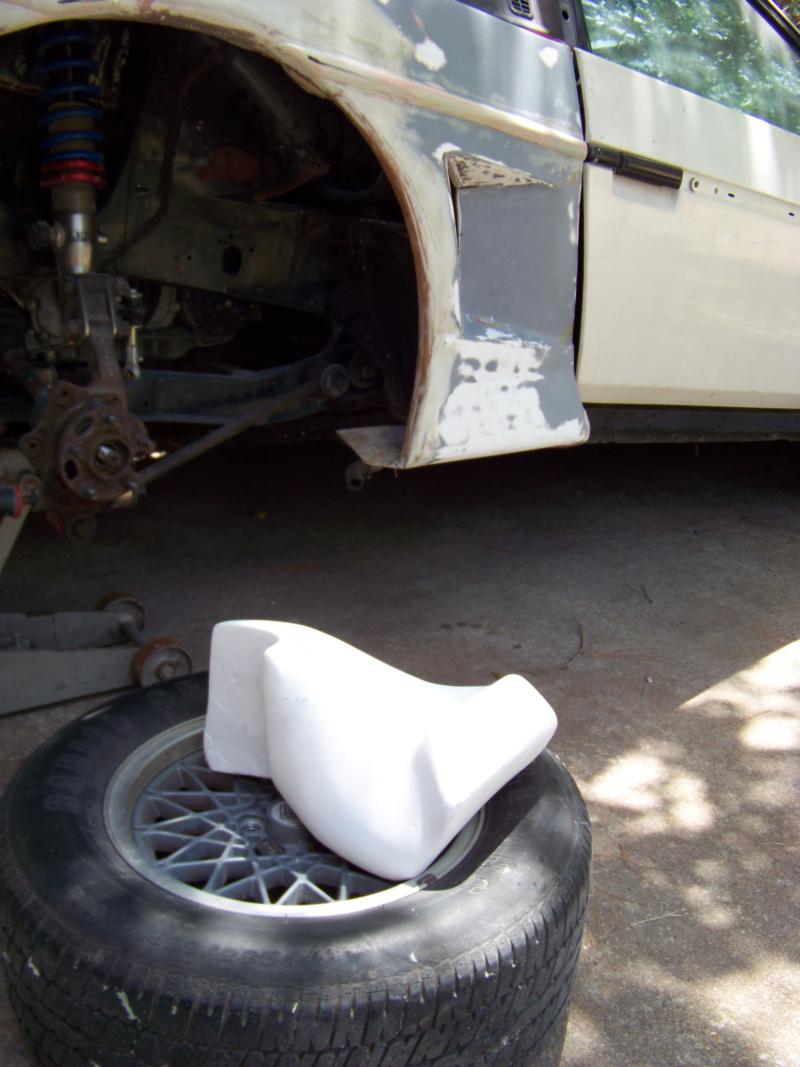
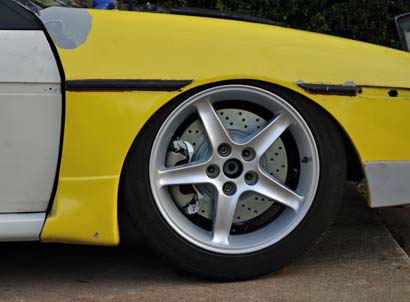
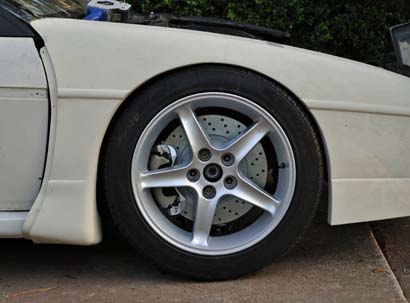
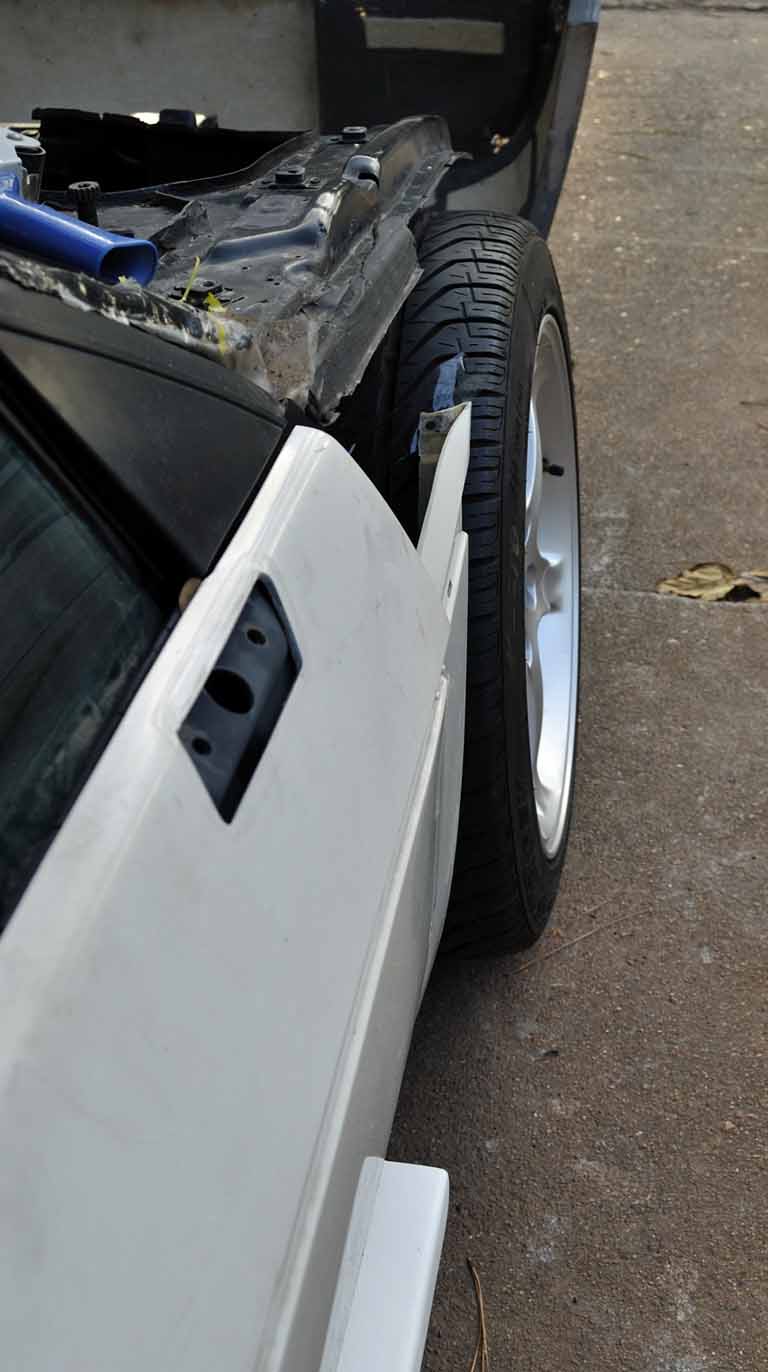
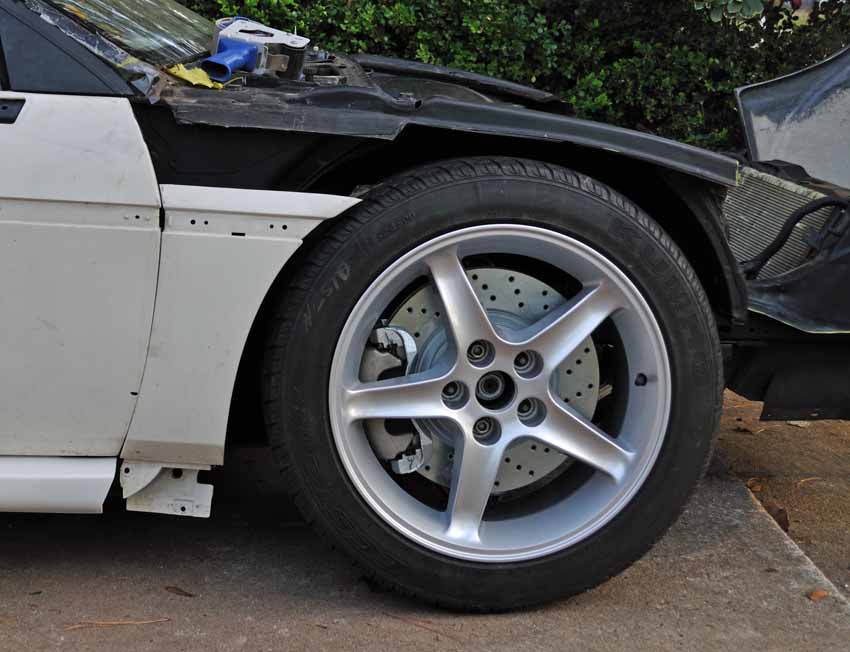
Wheel at ride height. Very cool magnesium Ronal wheel at ride height.
This guy will fill the well nicely.
------------------ yellow 88 GT, not stock white 88 notchie, 4 banger
You should not be using the woven cloth. You should be using the mat directly on the fiberglass peice (build it up with several layers): not putting kitty hair on it then mat. If you have any questions just ask & we'll try to guide you before you make these mistakes. Edit: Oh & you really *do* need more clamping strength than those clamps supply for the strongest bond. ~ Paul aka "Tha Driver"
[This message has been edited by Tha Driver (edited 02-02-2009).]
Your right about the kitty hair, it did not stick very well were I used it to fill up a gap. Picked it out and filled it will loose mat & epoxy. I have a butt load of cloth I picked up at a swap meet. The mat is a lot thicker but a little harder to get the air out of it. I have to put 4 or 5 layers of cloth down to match the thickness of 1 mat.
------------------ yellow 88 GT, not stock white 88 notchie, 4 banger
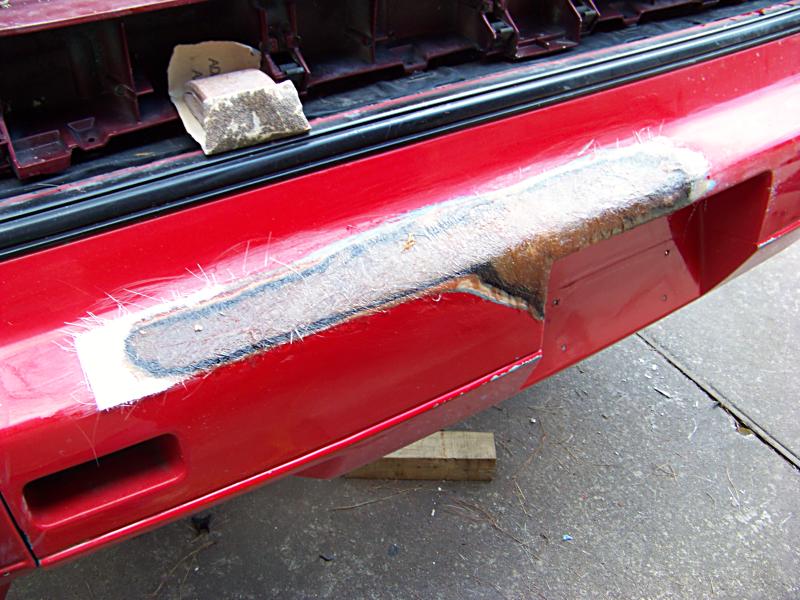
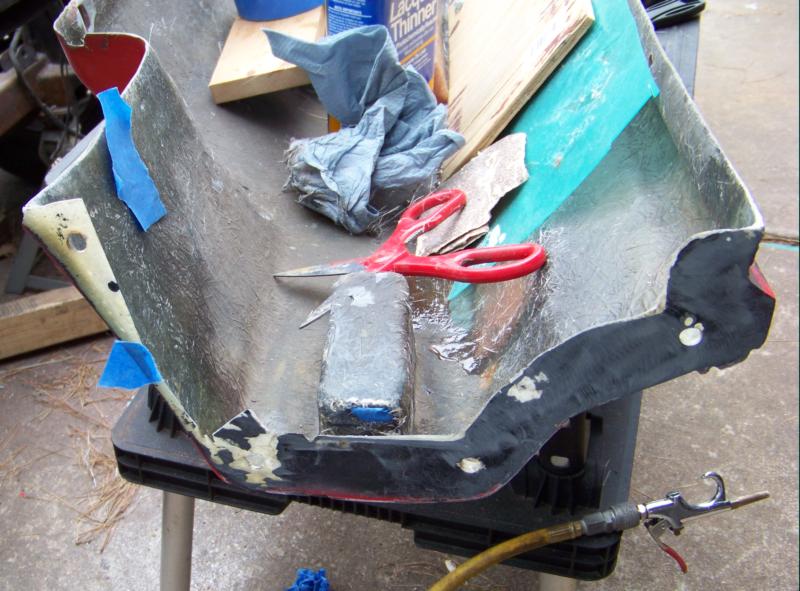
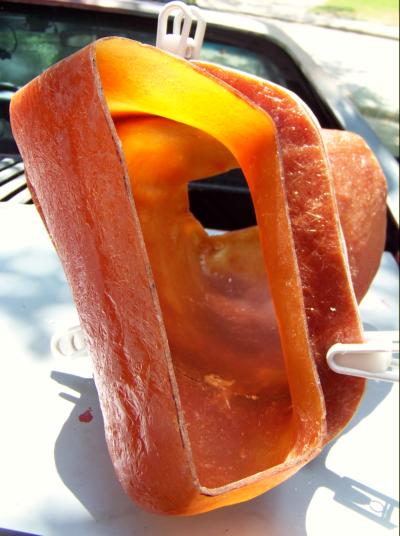
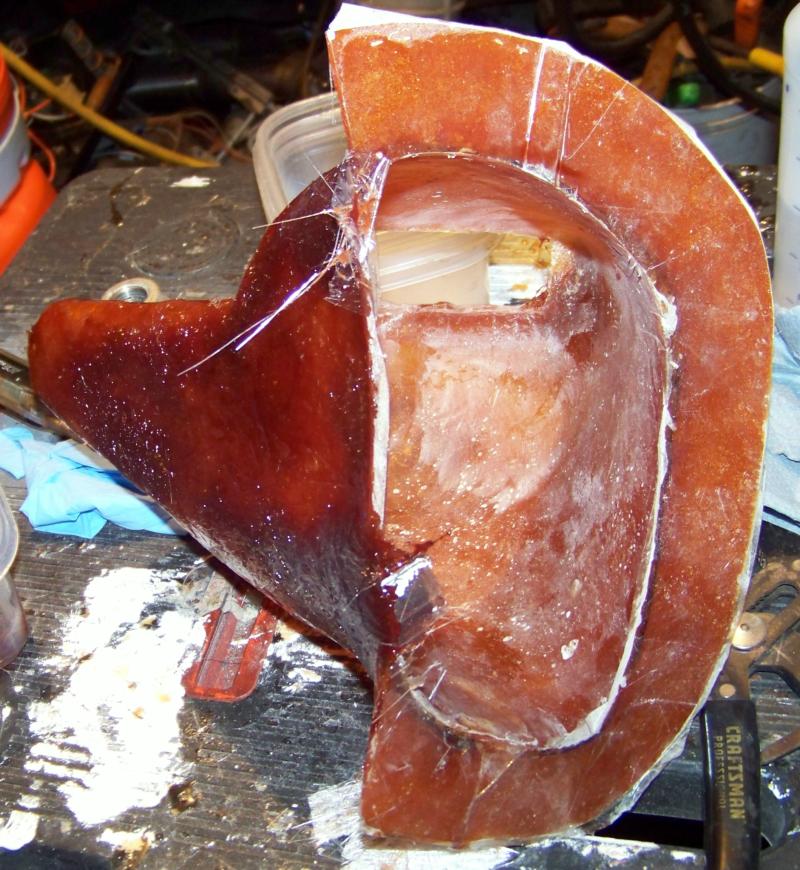
I've been working on the center bumper section getting it ready for some mods.
The Flanges were cut down on both sides to clear the frame horns and exhaust hangers.
I built the flange back up using a peice of formica covered plywood as a form.
The original car with these panels were cracked where the IMSA panels joined the roof piece, so I reinforced the inside face.
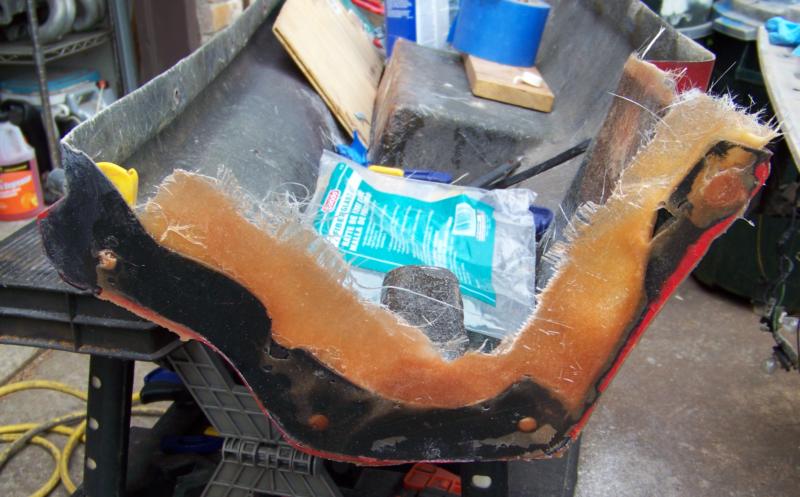
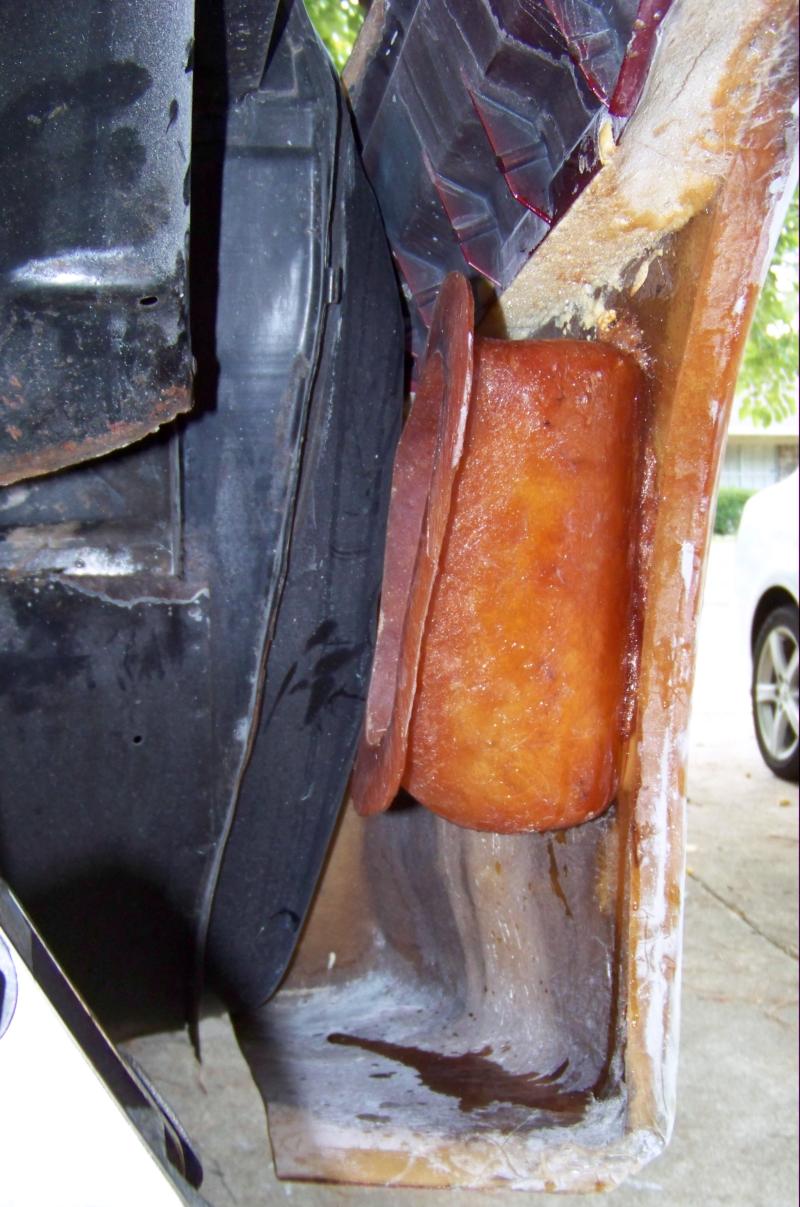
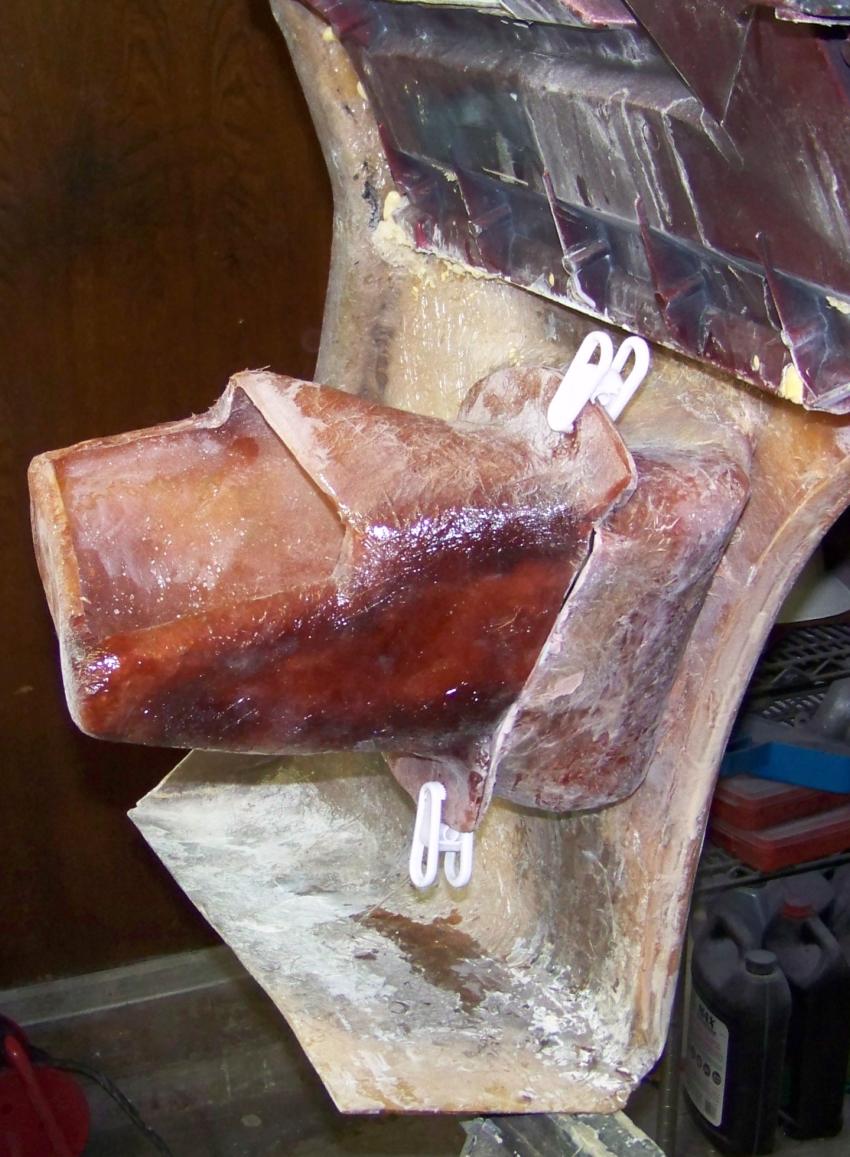
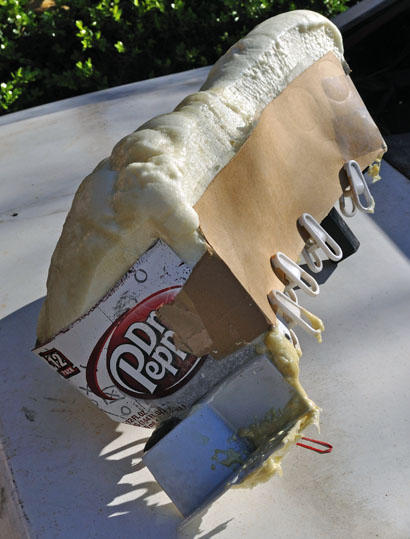
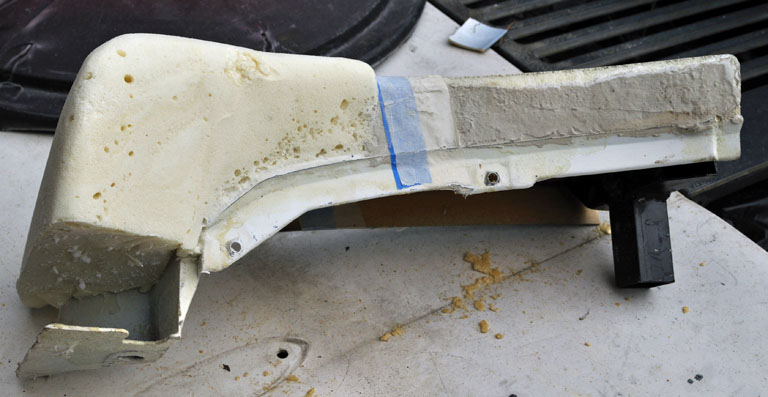
I tried something new in attemps to keep the rattles down and keep the fractures & cracks from forming. I foamed the big gaps between the inner fiero structure and the IMSA panels.
It did not work out very well. I filled the gaps with the rear clip upside down. So when the foam set the clip was flexed out wide. When I put it back on the car the quarter panels wanted to be about 4" away from the chassis. I ended up cutting big V notches out of the foam and it relaxed a bit. I would do this again, but put the clip back on the car before the foam cured completely.
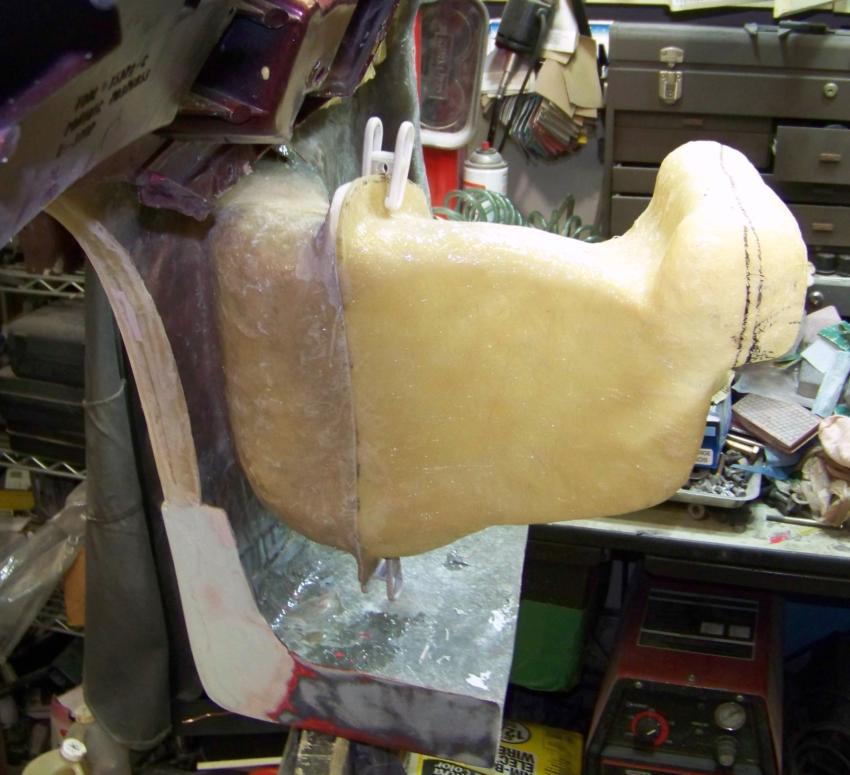
When I enlarge the wheel wells, I'll re-foam and later put a skin of fiborglass on the trimmed foam.
------------------ yellow 88 GT, not stock white 88 notchie, 4 banger
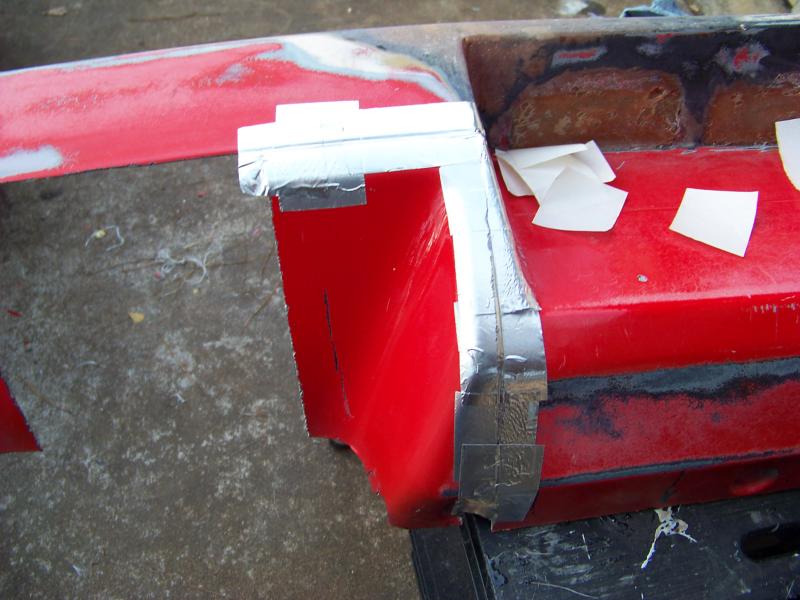
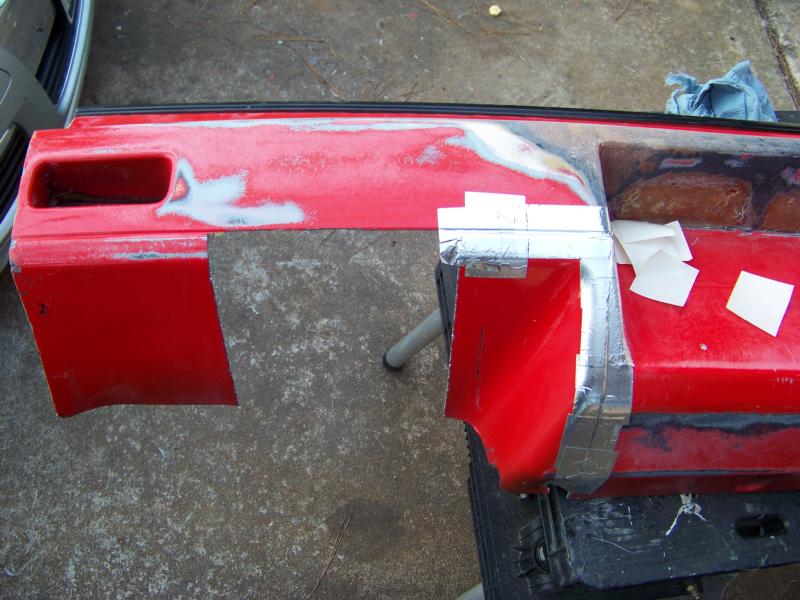
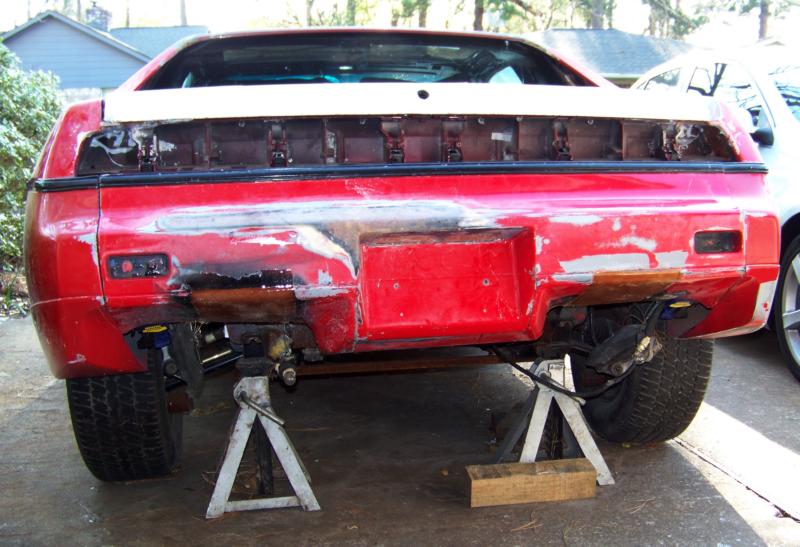
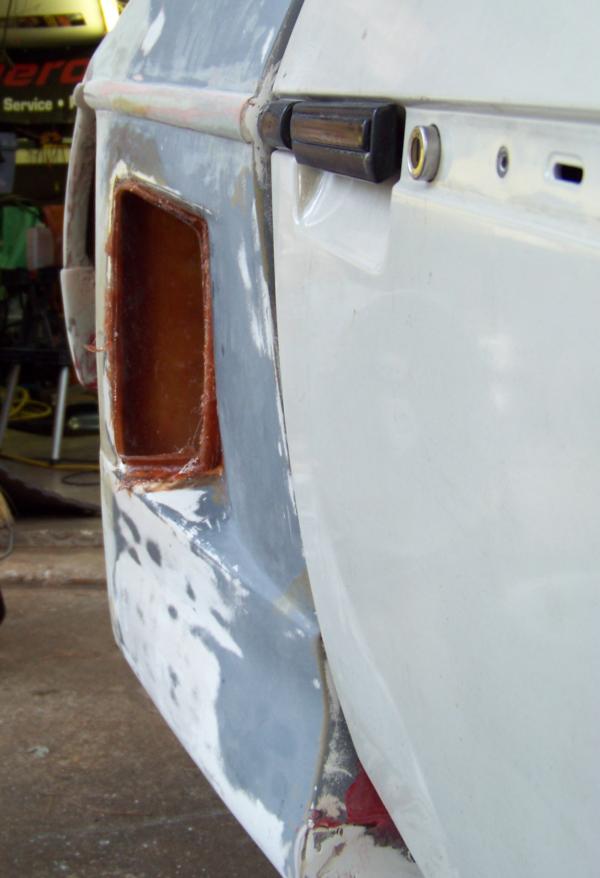
I wanted to modify my bumper like Blacktree's silver freak project. But to be able to fit my exhaust I need to first get the opening done first. Then I can re-fit my exhaust with hangers, then see how much rear pan I can put back in.
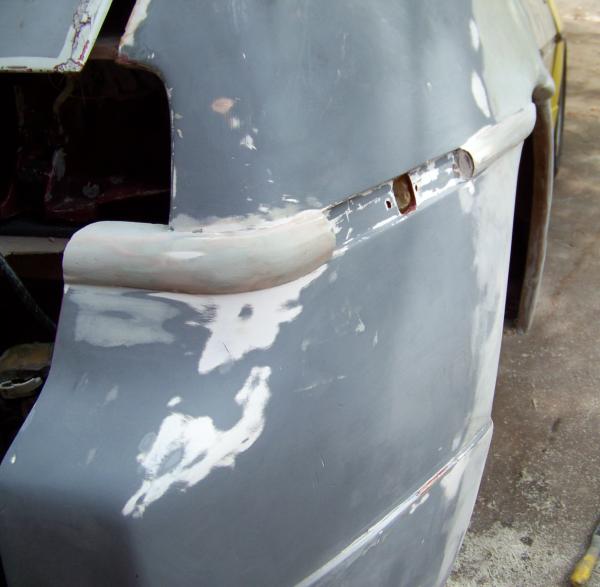
I sectioned up the stock exhaust relief area and moved it over to were I thought it looked good and taped it inplace. The mating profiles were pretty close that could be blended later.
The resulting gap needed filling.
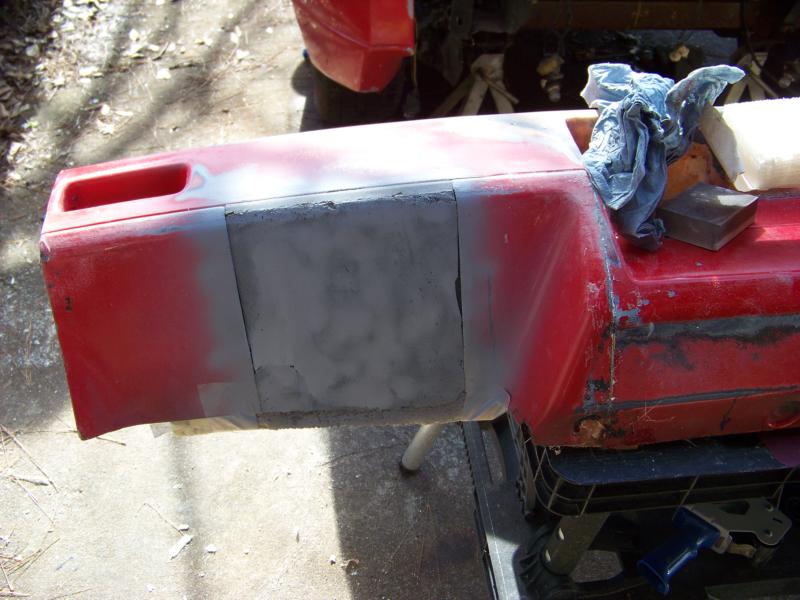
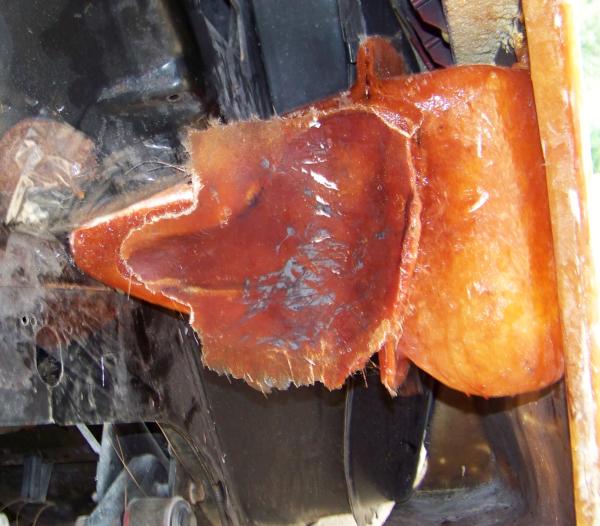
I glued together a few foam sheets and stuck into the back side of the bumper. I then sanded it down to blend the profile. I sprayed a little paint on it so seal the foam. I then covered up the foam with carefully layed down packing tape. I did'nt need a real smooth surface, just the basic shape. I made a splash mold off this, then taped the mold back on the bumper and laid some glass on the inside.
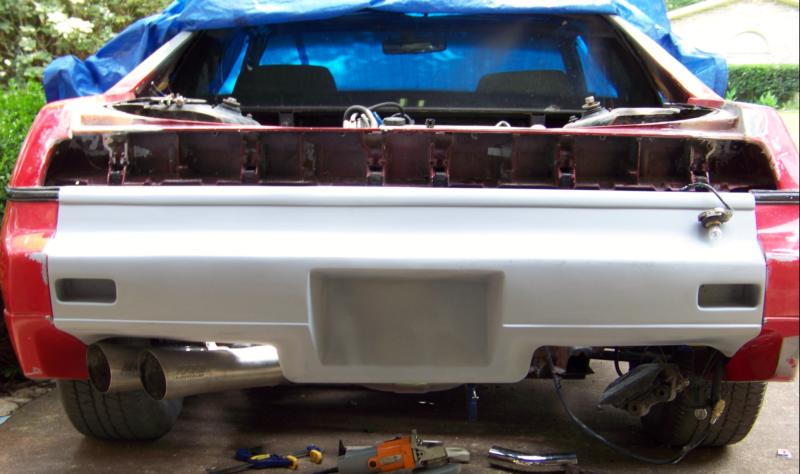
So this is the results this morning.
It came out pretty good. Now I need to do the other side.
------------------ yellow 88 GT, not stock white 88 notchie, 4 banger
I don't think my body work is up to snuff but I'm getting a little better at it each time I do it. I got the bumper smoth out a little and shot with a coat of primer. Will need to go back with a long board to get the angles and creases out.
------------------ yellow 88 GT, not stock white 88 notchie, 4 banger
I've been working on and off the IMSA ecotec's body work for a while and had a few updates to post.
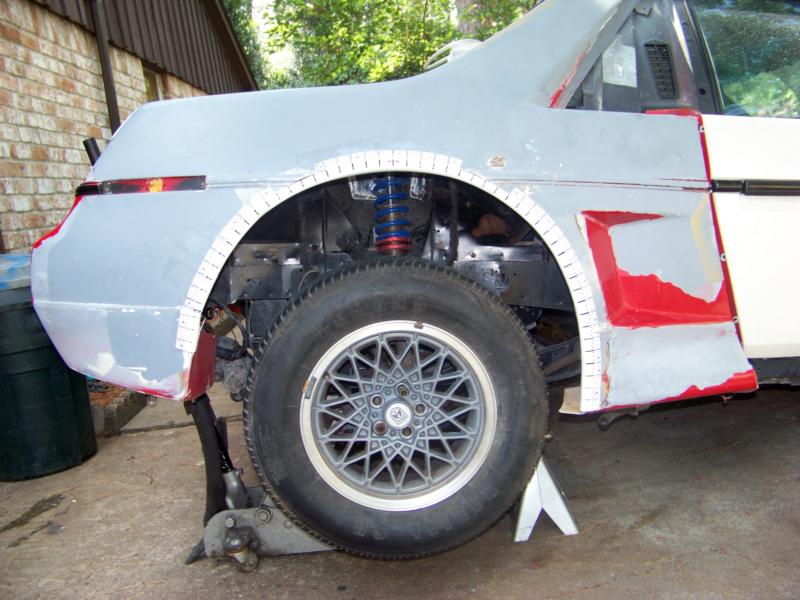
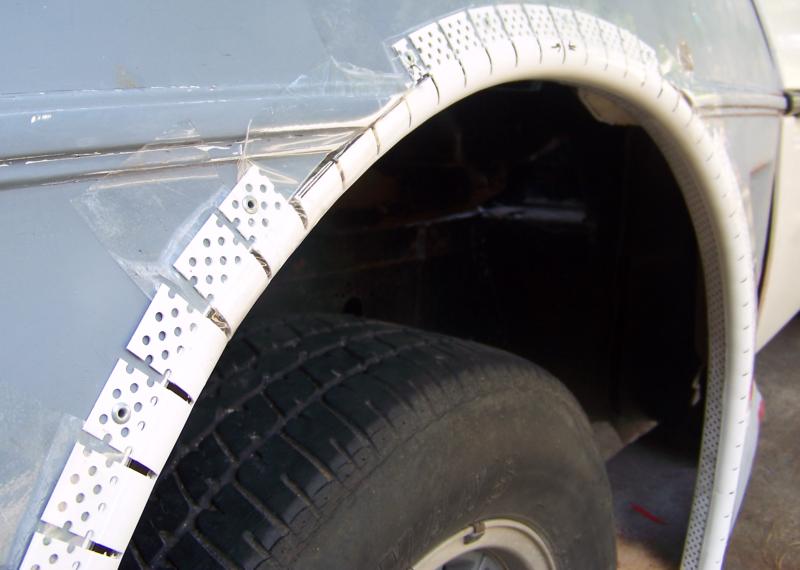
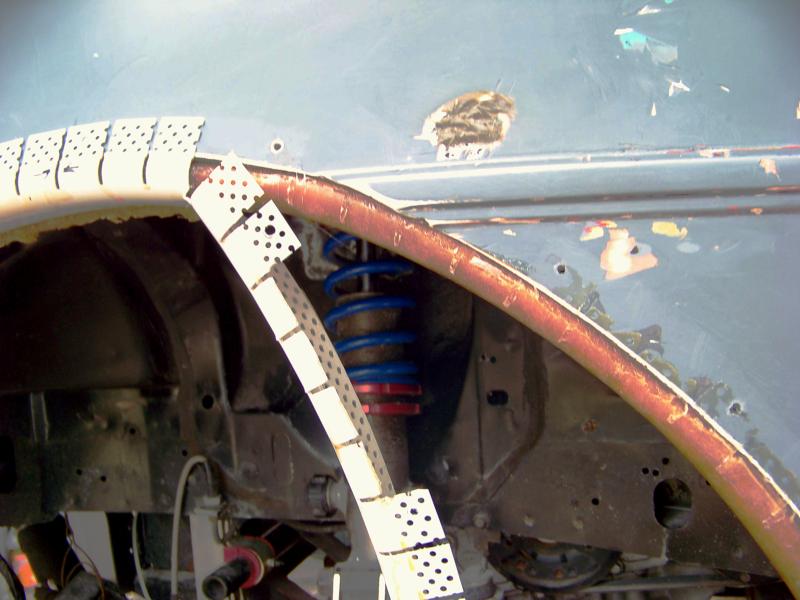
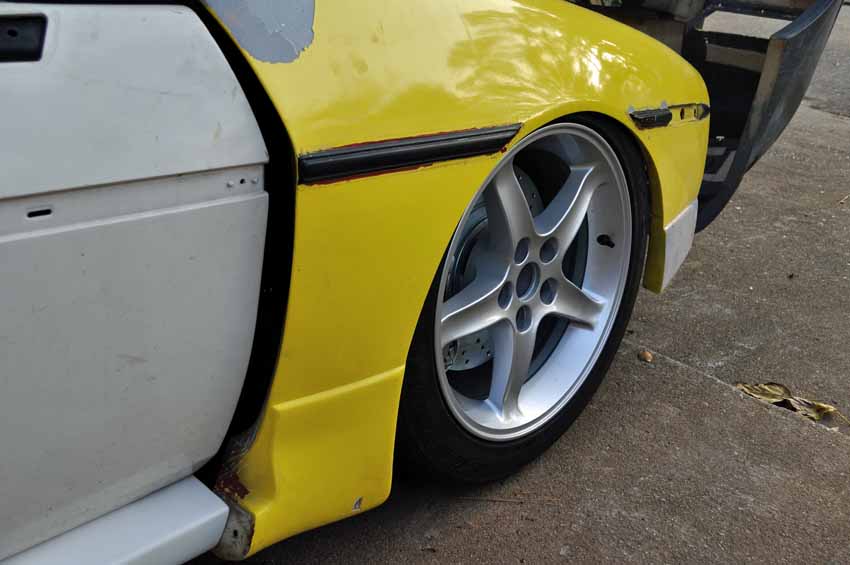
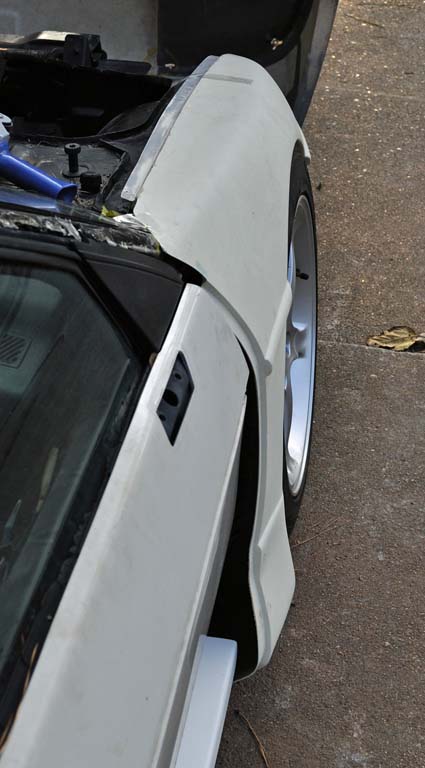
I widen the wheel wells to look more like the real IMSA cars. The wheel arc needed to go above the belt line to allow for some good size rubber for later.
To get a nice radius edge to follow the contours I used the rounded edge sheet rock molding from Home Depot and popped riveted onto the outside of the fender. I first feathered edged the inside surface with 40 grit and then put a strip of packing tape on the inside of the molding to help keep the epoxy in.
The arc of the wheel well was scribed on the fender using the wheel set at ride height, it did create a relief that would expose the top edge of the tire. I'll created a little flare to fill it back in.
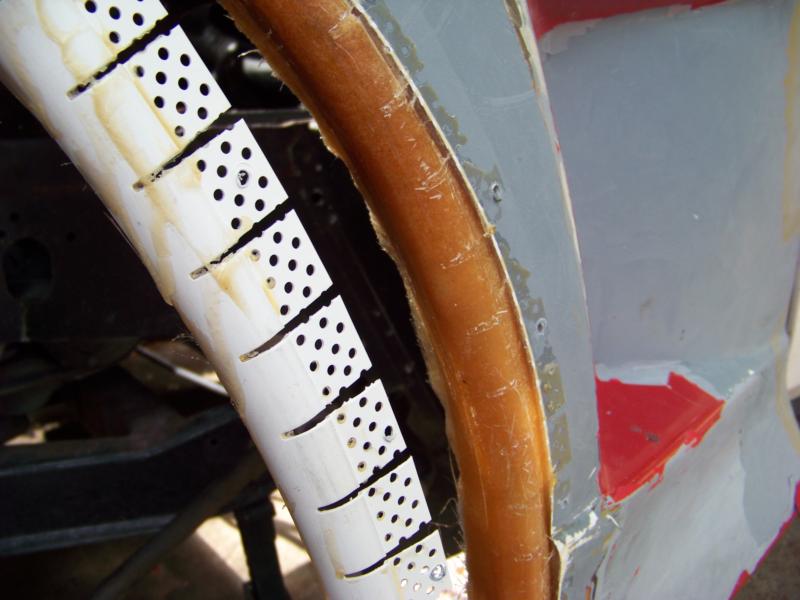
After filling the form with 5 or 6 layers of mat, I drilled out the pop rivets and pulled off the molding. The epoxy does not stick to the plastic.
The resulting edge is a near perfect 3/4" radius edge that just needs a little sanding and filling.
I built up the flare with several layers of mat.
Then sanded and filled in with some light weight filler.
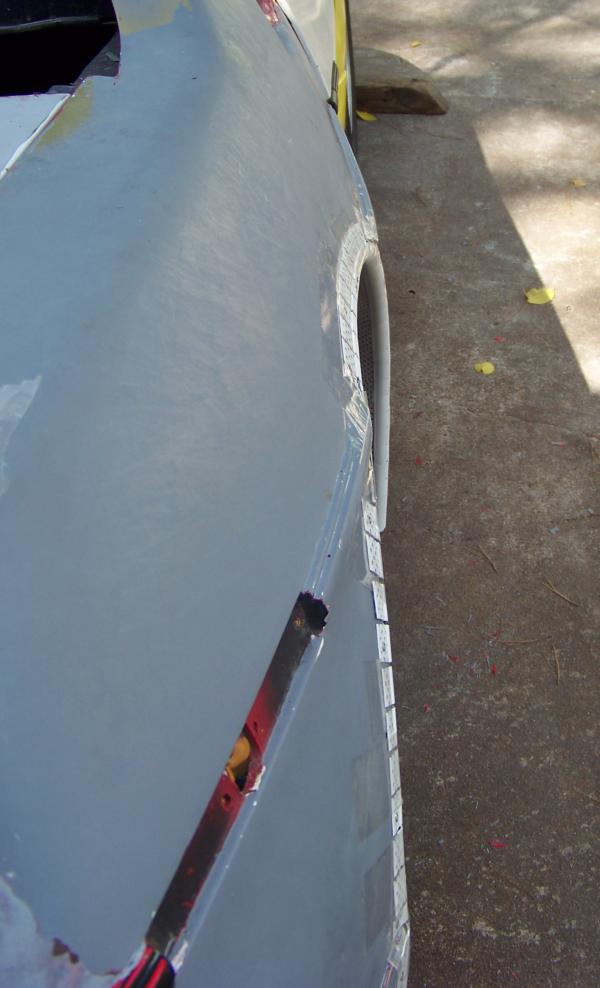
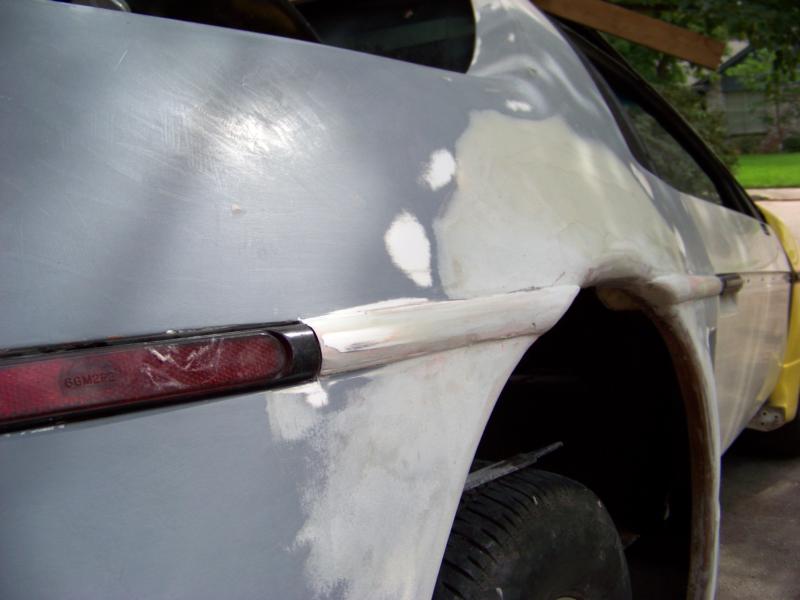
Since this is an 88 and all the IMSA race cars had round belt line molding, I filled in the molding to make it round.
Here is a mock up with the rear corner reflector after rough shaping.
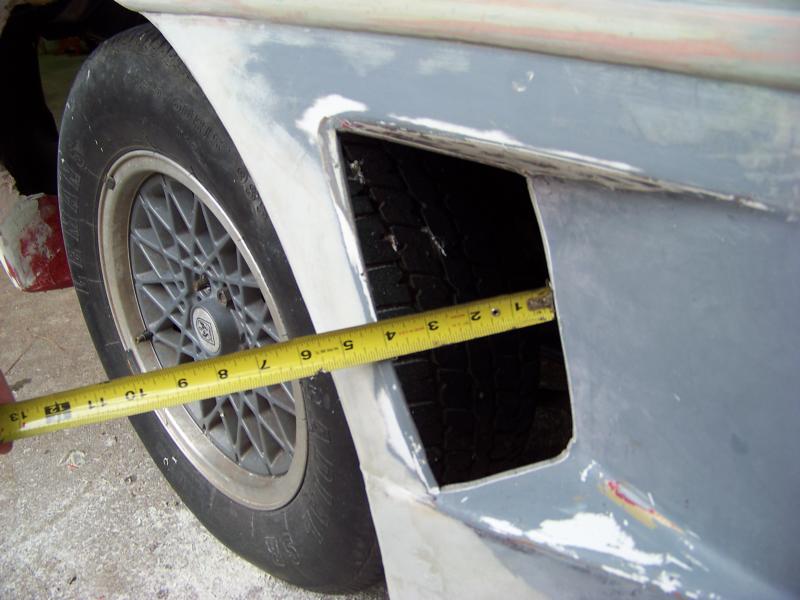
I opened up the scoops to the fullest possible size and follow the contours of the leading surfaces. I will make an inside plug to duct the air to were the battery tray used to be.
------------------ yellow 88 GT, not stock white 88 notchie, 4 banger
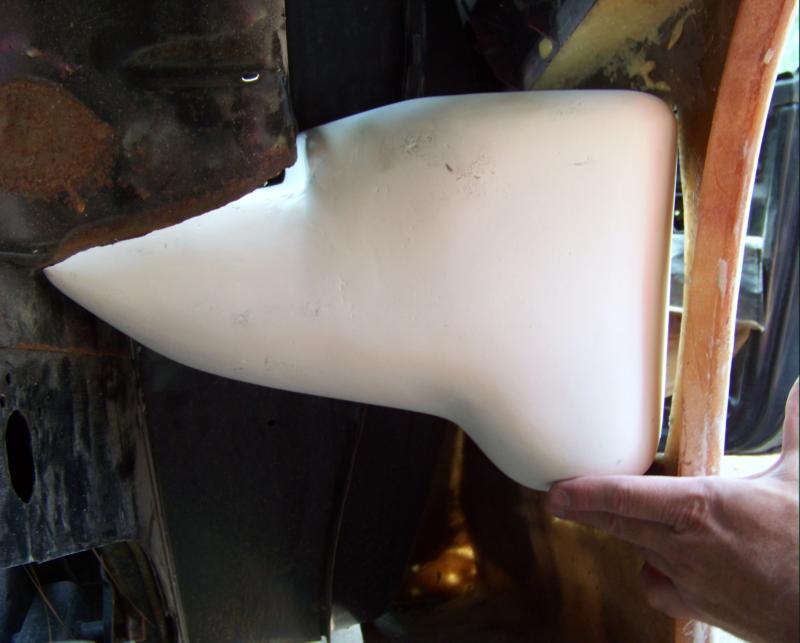
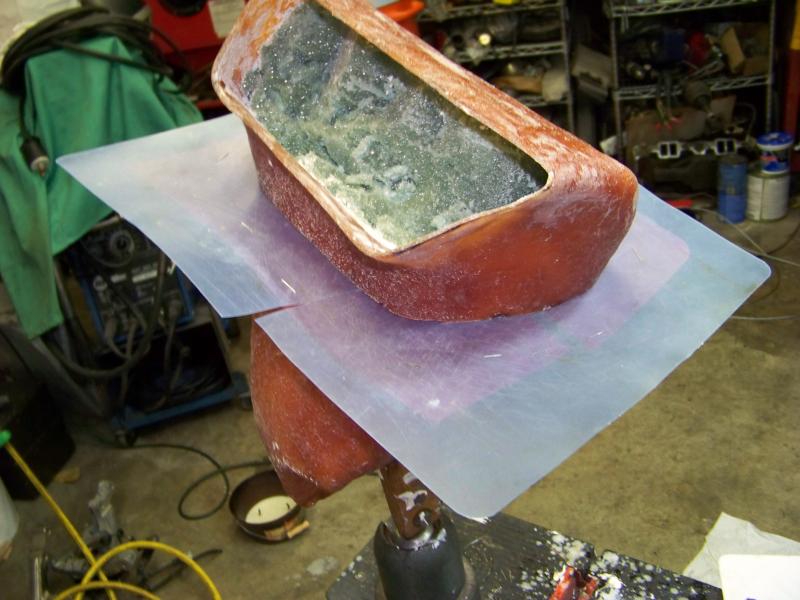
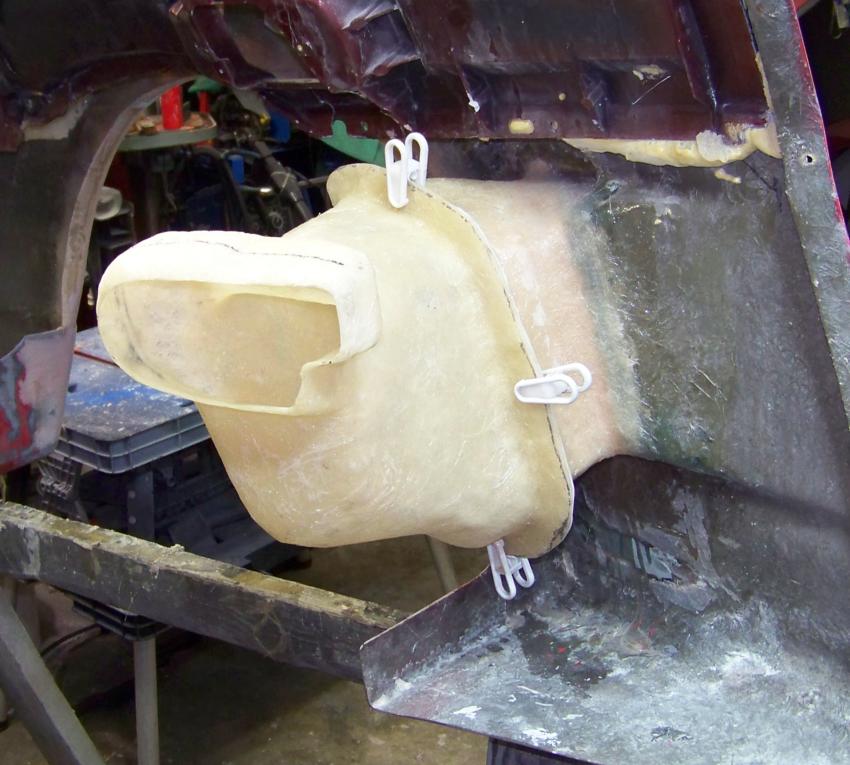
I made a buck from foam then covered it with dry wall joint compound and sanded it smooth.
The buck is supposed to be the inner surface of the air duct. I made it a little smaller so the fiberglass build up will fill the gaps.
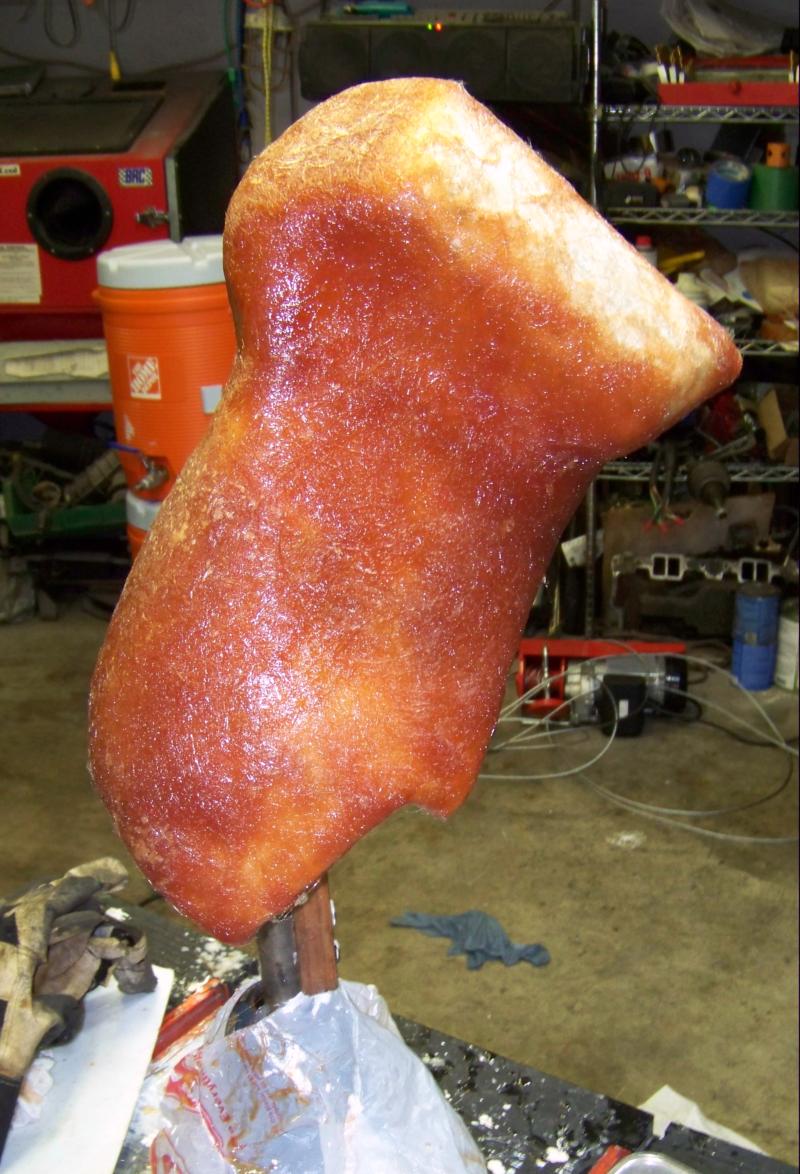
I waxed up the plaster then covered in glass.
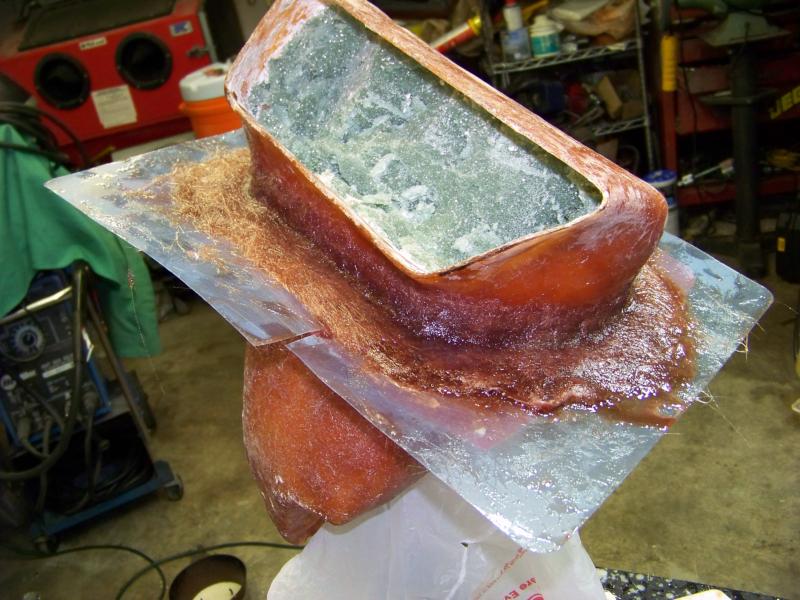
The rear clip would not be removable if the air duct is in place, so I need to be able to remove the duct from the rear clip. So I ran a saw around the thing as straight as I could, just cutting through the glass but leaving the foam core intact. I then shoved two thin poly cutting boards with c-notches into the gap making sure the over lapped good.
Then glassed in flanges on both sides of the poly.
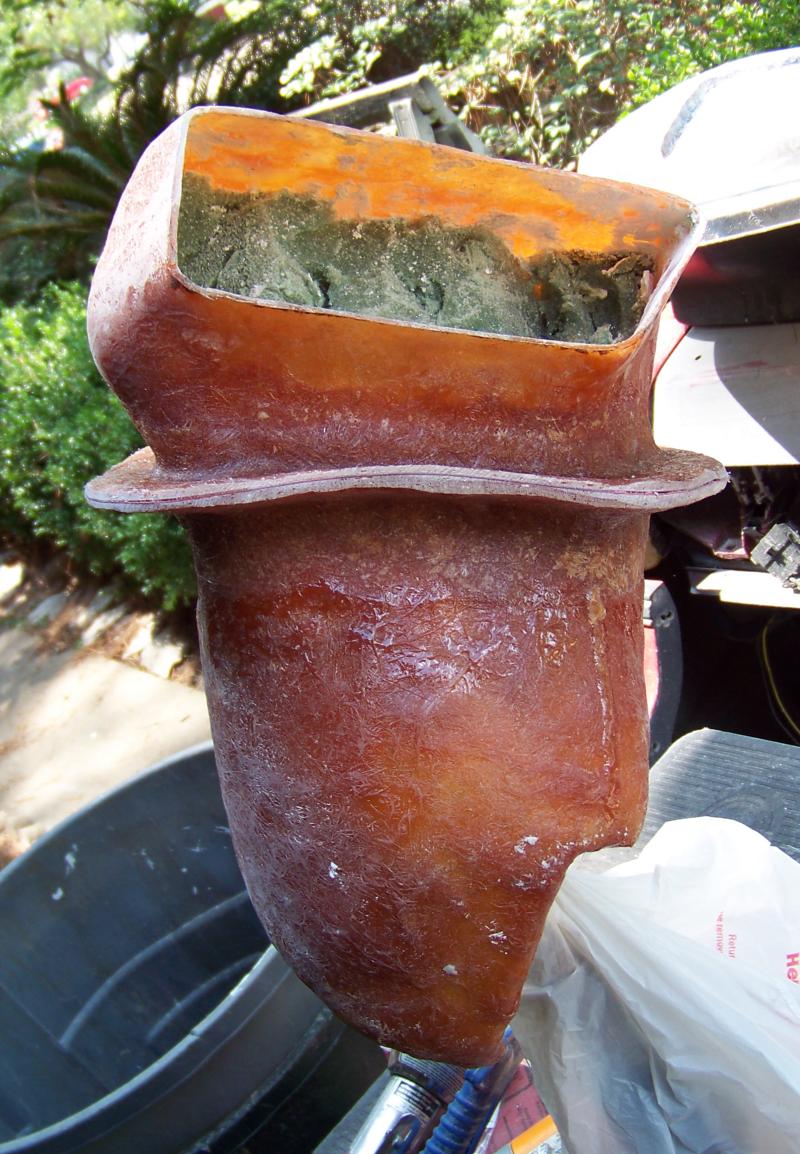
Pull out the poly and grind the flanges to a uniform distance from the duct body. Even though it's not straight, they match. Cool trick.
After digging out the foam and cleaning up, they look real good, nice smooth insides.
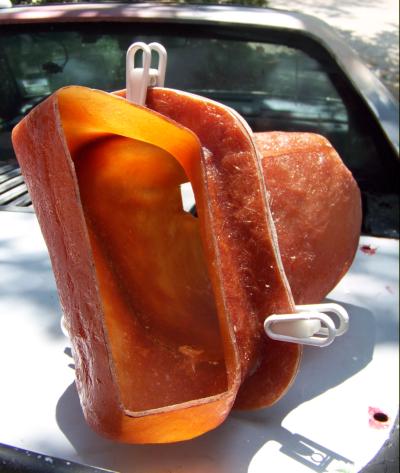
I glassed in the outside of the duct to the rear clip.
This is the ruff in of the duct in the scoop inlet. I have to remove the rear clip to finish glassing it in. Then I'll blend it in with the body work.
I made a bad mistake. I did not have have any wheel liners at the time I was fooling with the foam and estimated were it would be. I was a little off. I kept cutting at the duct until the wheel liner nested in.
I laid some glass right on the liner then put it in position and glassed inside the duct on to the liner. Filling in were I could. I pulled the liner a week later. I should have used a little release agent as it stuck pretty good to the liner. I re-cut the new glass in the duct at the same part line as the rest of the flange.
Cleaned up the inside part and glassed in the thin parts. When the car is put together, the flange will use double side tape to hold it together, the non-flange part will use racers tape to seal up. The inboard side of the duct will be fastened to the frame.
The passenger side has a bit more stuff in the way. More to come.
------------------ yellow 88 GT, not stock white 88 notchie, 4 banger
I finished the scoops and got them trimmed and smoothed on the inside.
The passenger side scoop comes up under were the battery used o be.
The Driver side has to snake under the gas fill tube before going the original hole for the air snorkel.
I'll make some more duct work for inside the engine bay.
The scoop openings smoothed out real nice. Both scoops will help cool the supercharger and reduce the drag caused by the large negative pressure area at the base of the notch back. The engine has a water cooled heat exchanger on it for the engine oil.
Still waiting on the frickin Norms tilt front end.
------------------ yellow 88 GT, not stock white 88 notchie, 4 banger
Have you ever heard of "bagging" a fiberglass repair? If not it is fairly simple. Material wise it will cost a little more, but greatly reduces air pockets. You need 1)scrim cloth, 2) batting) 3) some sort of easily removed tape to lay about 2-3 inches around the perimeter of the repair, and 4) a vacuum pump (cheap one from harbor freight works good), and 5) plastic sheeting. Way it works, lay down your repair, lay scrim cloth over the repair ( won't stick to the repair), lay your outline tape, put batting to just inside of the outline, lay vacuum hose over batting towards center, put a piece of the tape over the hose, lay the plastic down and start vacuum. Make sure ya have a good seal (you'll be able to tell).
We use this procedure to fix blades and structural fiberglass on Chinook helicopters. There can be no air pockets on a blade repair, that is the reason we bag it As long as your weave or mat has good saturation, it will draw the resin through it, plus compress it to make a strong bond. Also makes a smoother repair so that there is less sanding. It is a few more steps, but makes for a strong repair, especially in a structural piece.
Just a little hint that might help some of our modifiers/repairers out there.
By the way, It looks really good so far. Wish I could find a widebody I could afford. Maybe on day, until then I'll keep drooling over the lucky ones here
[This message has been edited by thumper_64735 (edited 12-15-2009).]
I've read about the bagging technique and would like to try it. I just need to get all the materials on hand before I start something and give it a go.
------------------ yellow 88 GT, not stock white 88 notchie, 4 banger
I've read about the bagging technique and would like to try it. I just need to get all the materials on hand before I start something and give it a go.
If you need some help with tecnique, etc, just let me know. I would LOVE to get my hands on a hot bonder, but I can't justify the price tag for one, and i have yet to see one on Ebay, lol. I would say that any autobody supply house, or fiberglass supply house should be able to get everything you need to bag. I have an unofficial sponsor for my stuff. BTY, alot of times you can reuse the plastic if you get the plastic sheeting made for bagging/hot bonding. It is a type of stiff i think cellophane. I usually grab what we are going to pitch from repairs done on the birds and reuse it. It doesn't matter if it has creases and old composite on it, as long as it seals.
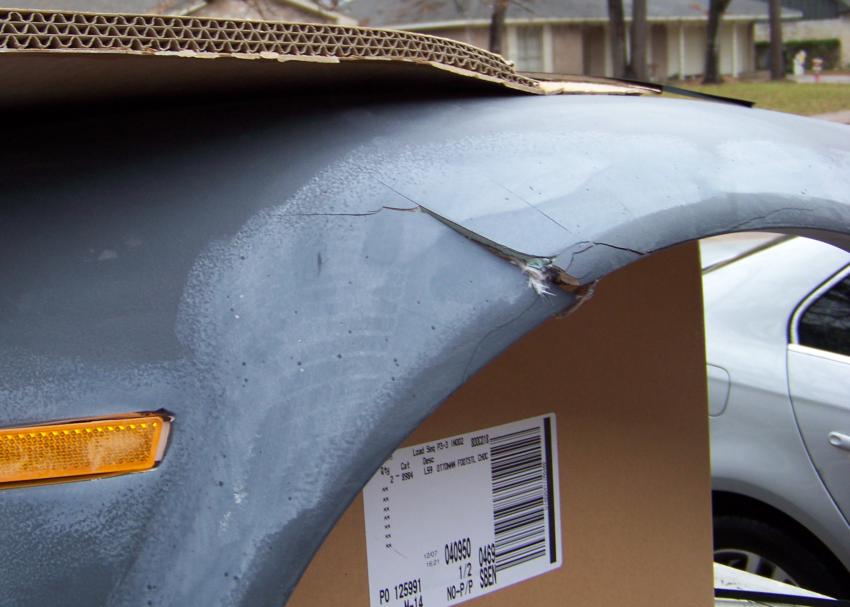
I finally got the front clip here, ( after 15 months), but not with out more hassles. It arrived damaged, it appears it was dropped and has about 8 cracks, some completely through the glass. I filed a claim for a replacement clip, so perhaps my business with Norm is not over.
If anybody is ordering fiberglass body parts, from any vendor, consider the insurance option, the vendor probably will not pack it well, and dock workers are only interested in loading and unloading as fast as they can. I can't tell you the number of times I received panels stacked on top of each other with just a piece of card board between them, lashed down to a scrap pallet. Beat to **** .
This is what I saw after taking off the 1st strapping band. A 6 inch tear through the fender lip.
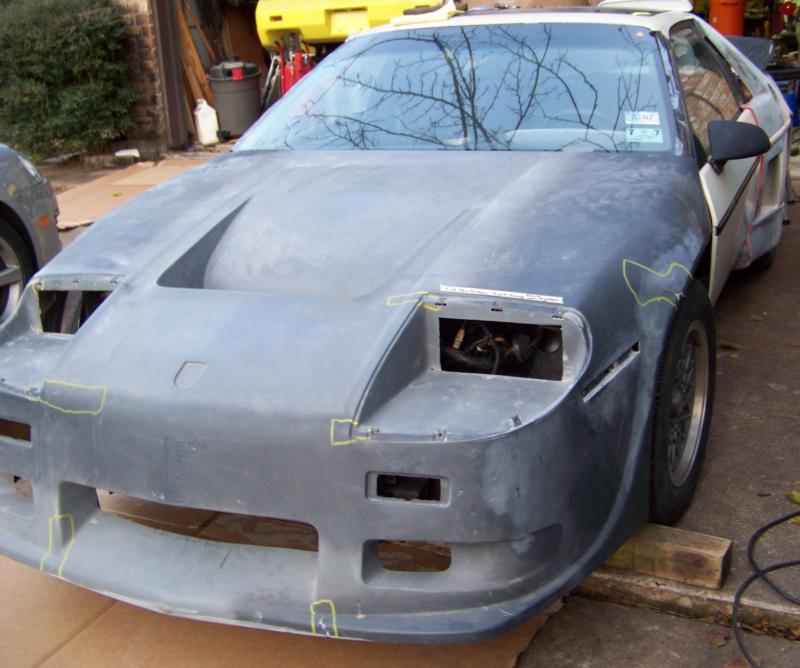
Anyway, I installed the clip on the car so I can have enough room to keep working on the car.
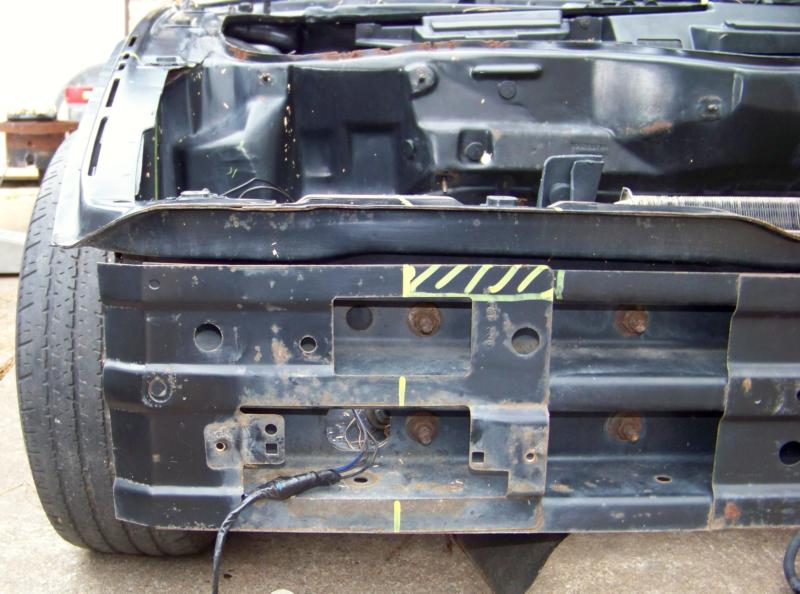
Norm sends a lot of pictures along to show you were to cut. Dimensions would be nice too, but the frame has enough features to judge by to make a confident cut.
The 1st cut is the deepest. You will need a few different length blades to make quick work of it. I had 10", 6" and 4" blades for my Sawsall.
I think I went through about 6 blades all total.
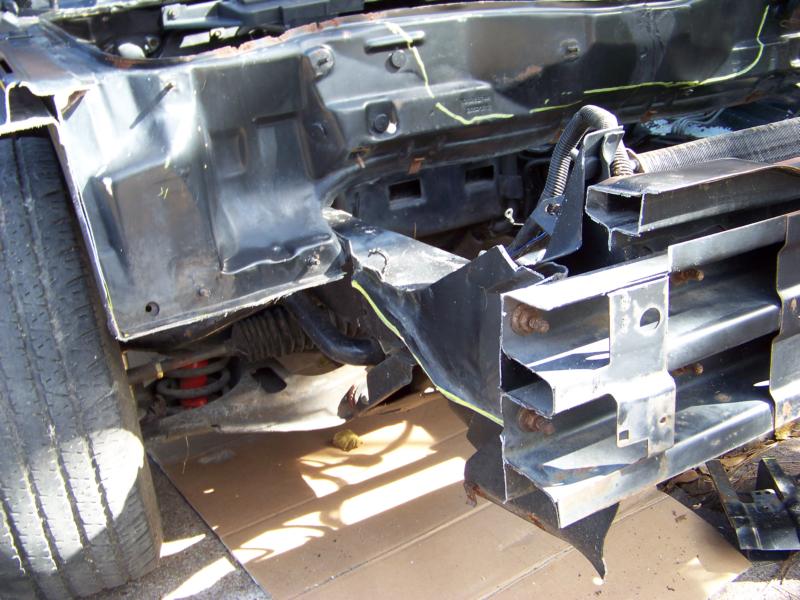
It took about 30 minutes to get to this point. I removed about 8-10 lbs. of metal, not including the lights and motors.
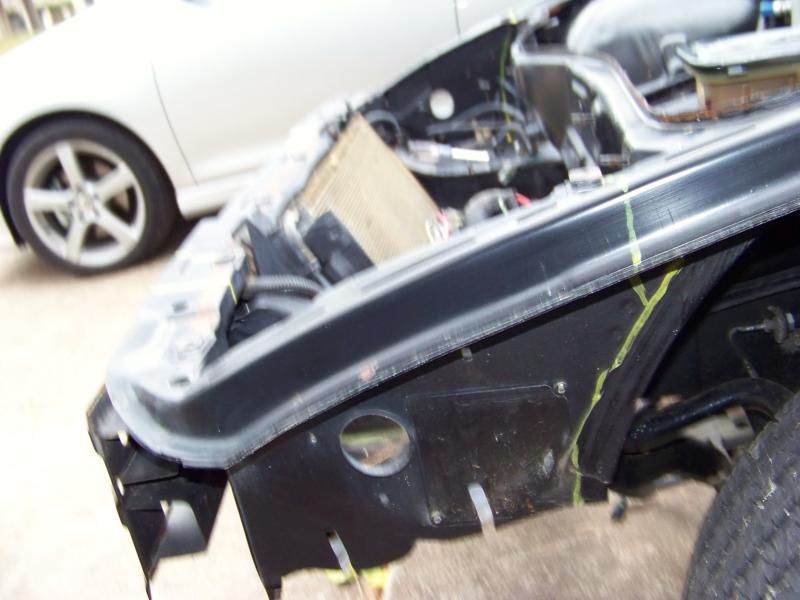
My neighbor came over after I tacked on the brackets that hold the nose in place, and we fastened it in place. Forgot to take some pictures of the brackets but will get some posted next time. All the cracks are outlined in yellow paint marker.
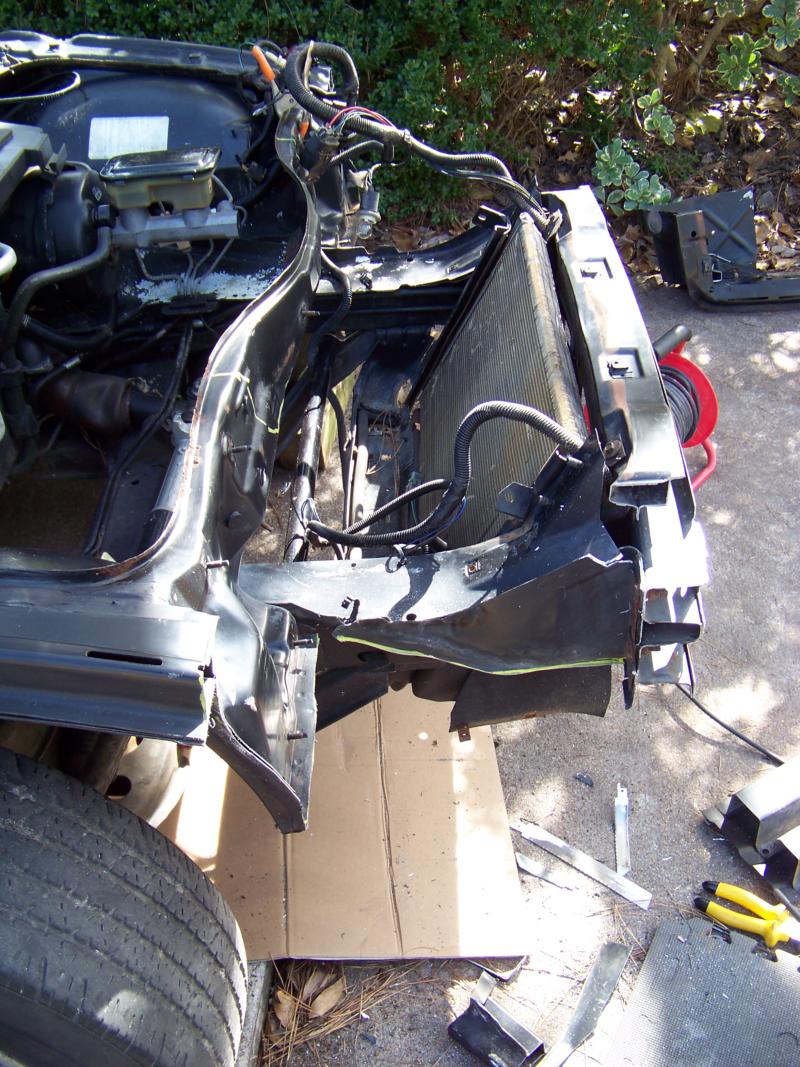
The clip was to have IMSA style fenders grafted on at Norms, but I'll will do it myself now after I get the reworked front suspension up underneath with the 8" wide wheel and tire combo.
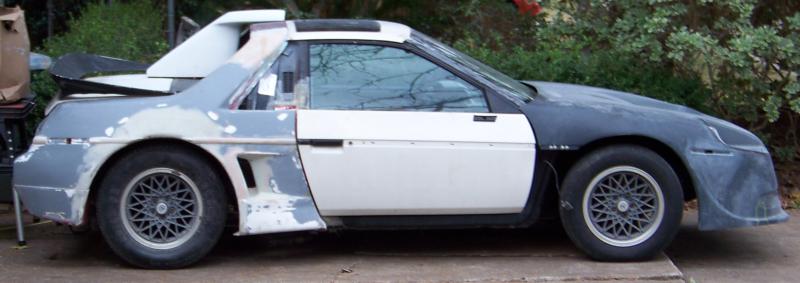
None of these body panels have been aligned but you can get an idea of what it's going to look like. I need to finish rebuilding the passenger door hinges before I get to the bigger clips.
------------------ yellow 88 GT, not stock white 88 notchie, 4 banger
Got a response from the insurance claim people. I can't do anything to the clip until the claim is settled. They said it should be done in 30 days, we'll see.
------------------ yellow 88 GT, not stock white 88 notchie, 4 banger
You going to leave your bumper that short? I want to replace mine with a tube bumper that sits under the head light buckets and covers the entire front end. Nice build thread!
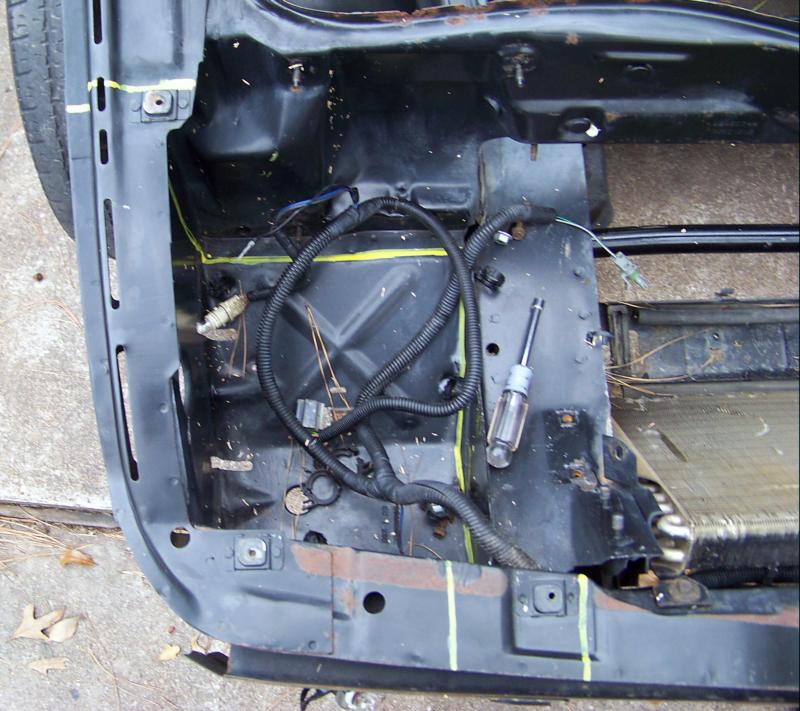
I really have not spent anytime under the car since putting the clip on. I want to put a battery box in front of the passenger front tire if it will fit. Also I plan on putting a pan under the front to help manage the air under the car.
------------------ yellow 88 GT, not stock white 88 notchie, 4 banger
I did do a little work on the body while literally some paint was drying.
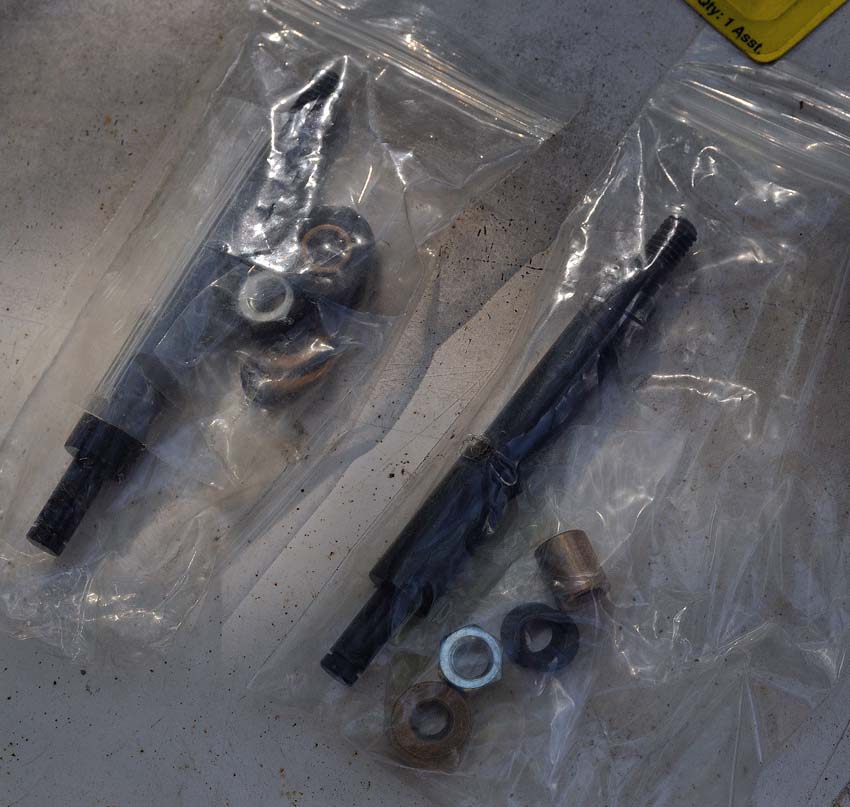
I installed the passenger side door hinge rebuild kit from Rodney Dickman. I had previously did the drivers door about a year and a half ago. I was in the mood to make a path forward in refurbishing the front clip but I needed the doors to hang right before I start working on panel gaps.
Rodney's kit comes complete with a new roller pin and both sets of bushings for each hinge.
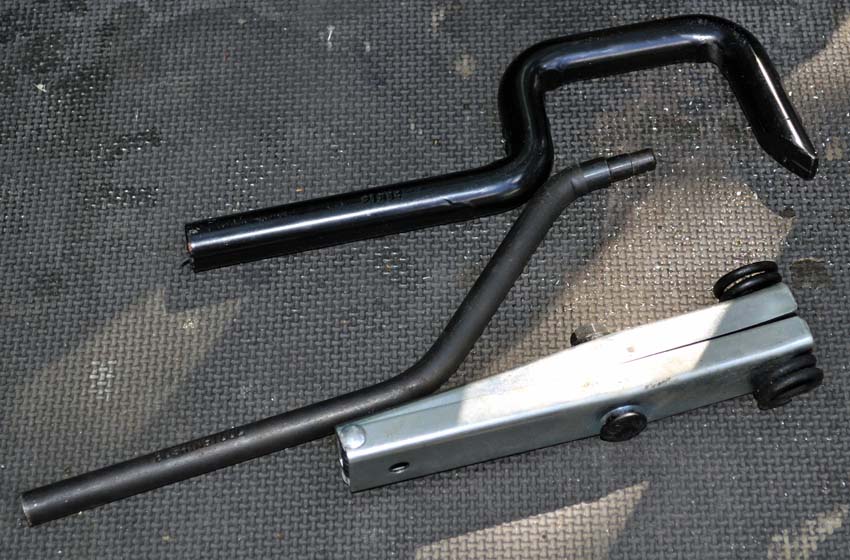
Using the special tools for doors makes quick work of it and can be done with out unbolting the hinges. From top to bottom:
Hinge pin knock out tool. Bushing knock out tool Door spring compression tool
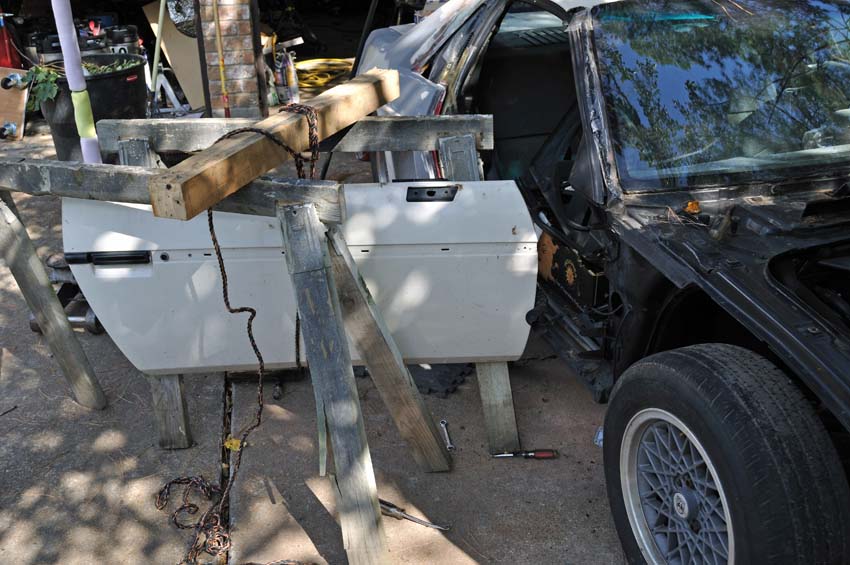
I used a couple of old saw horses and a rope to hold up the door will I worked on the hinges.
This door had a split lower bushing in the bottom hinge. The drivers side had about 2" of travel if you lifted the door up when it was open. Passenger side had about 1". Now they are both about 1/8"
Next thing I need to replace is the stricker pins.
------------------ yellow 88 GT, not stock white 88 notchie, 4 banger
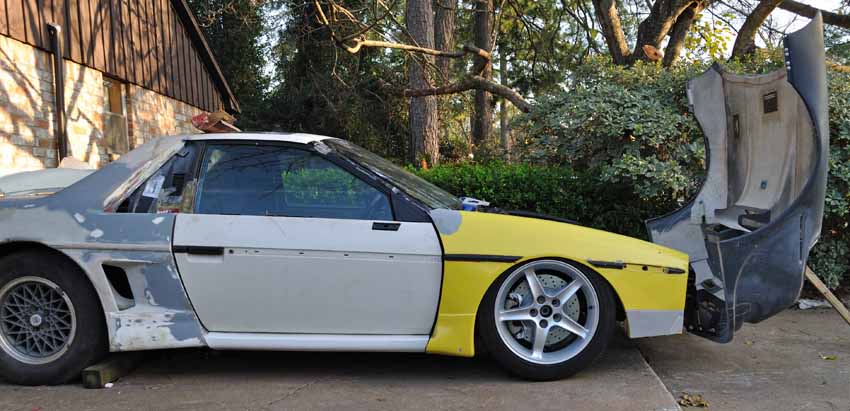
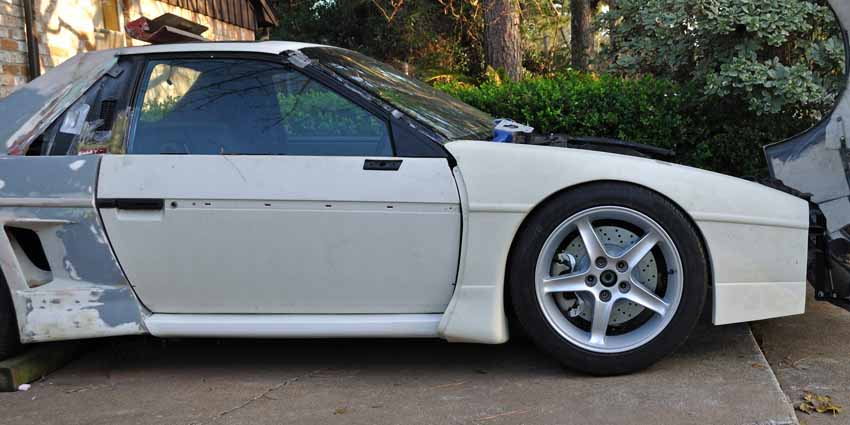
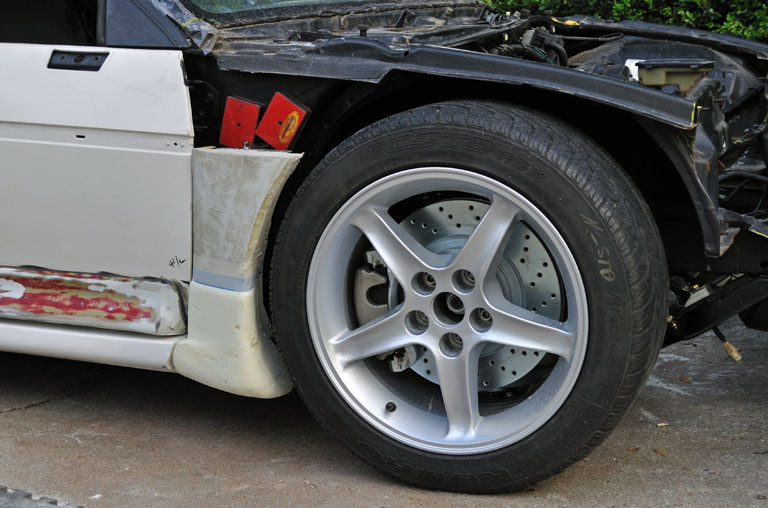
I finally finished the new front suspension and installed it with 17x9 cobra R wheels and 245x45 tires. The install is posted on my LSJ thread.
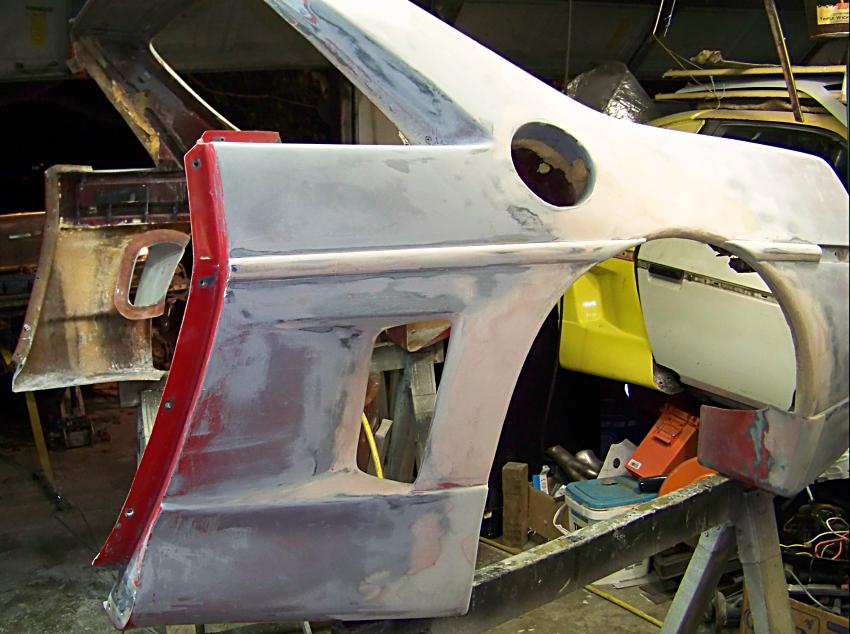
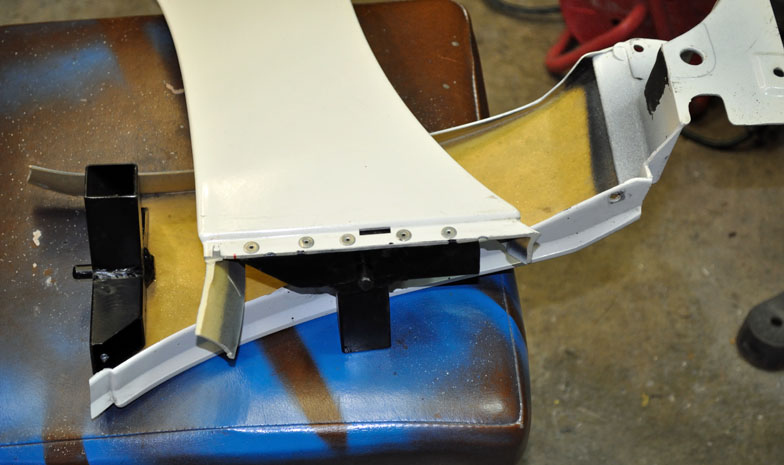
Originally IMSA style fenders were to be blended on the tilt front end, but it turn out to be a fricken disaster so now I'm beginning the process. Shown is a typical front fender you would receive from Doug at the Fiero Warehouse. What I need to do is build up the IMSA side burns and then modify the tilt front end fenders to make a good transition into the nose.
This is an actual IMSA race car fender, the wheel arches are much higher then the street IMSA version.
I will use the race piece as model for the side burns.
The street IMSA fenders are really not much wider then a stock fender, in fact the car that this fender came from had some rubbing issues with stock wheels and stock ride height.
Even the race fender needs another inch to clear the 17x9's.
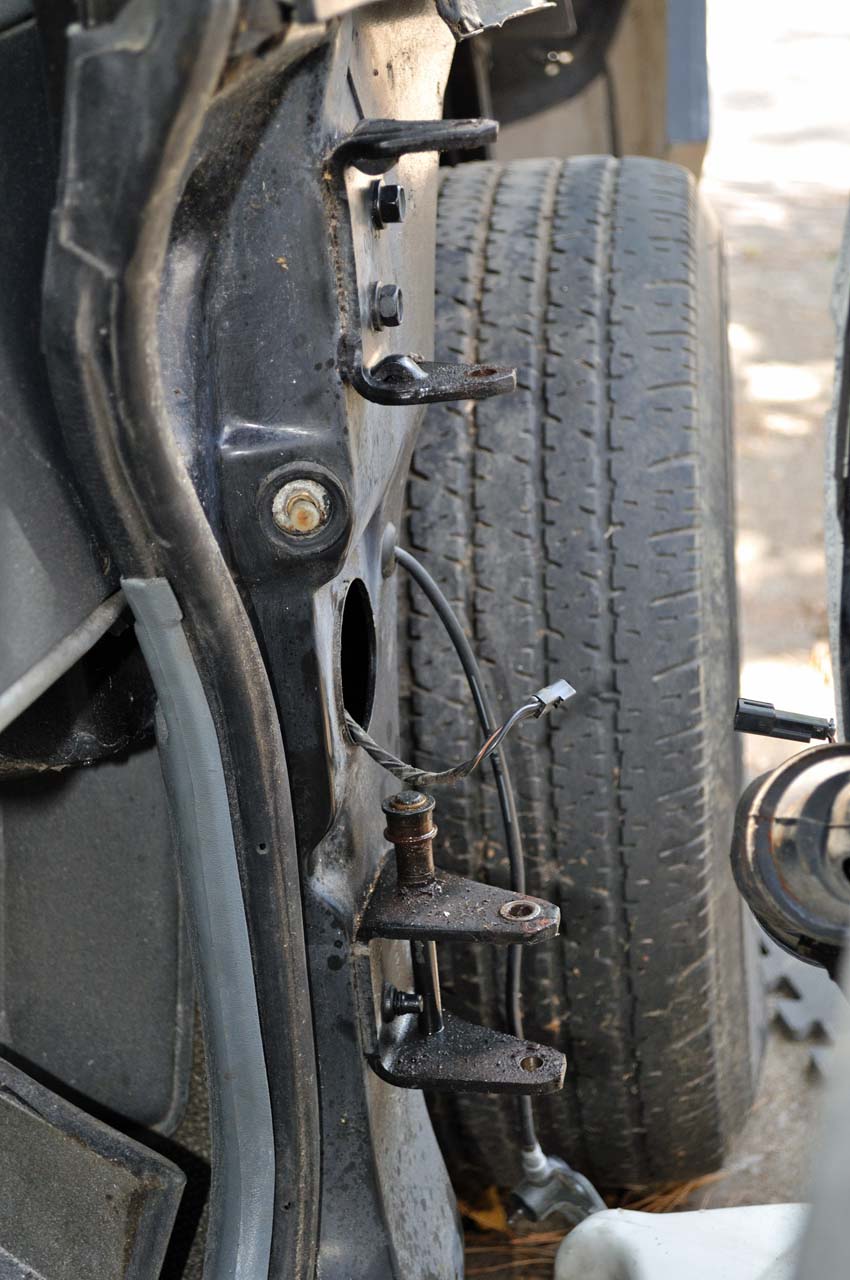
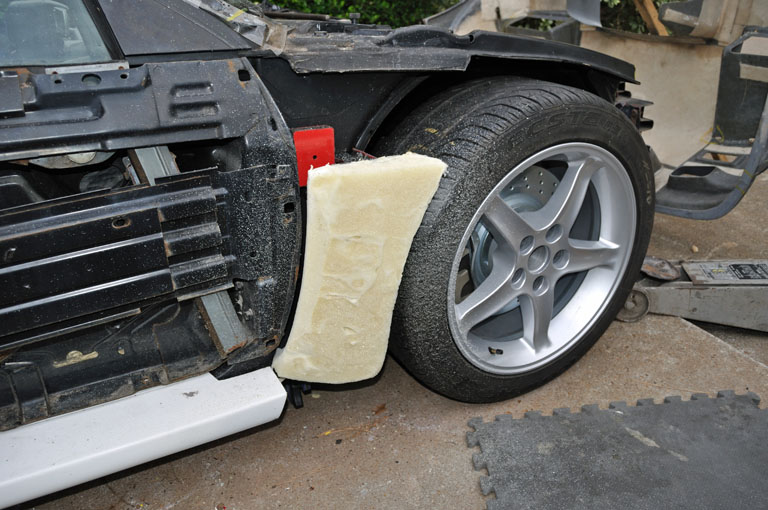
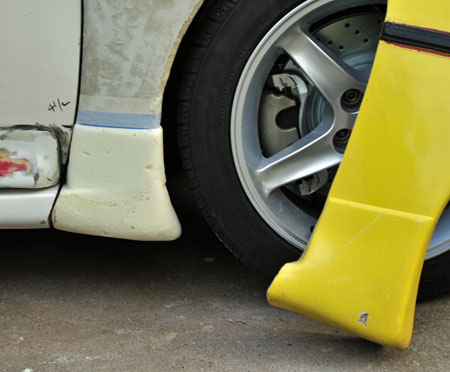
This is what needs covering. Ride height was set with 2" between the top of the tire and the chassis.
I'm going to start with the sideburns cut from a stock fender, and use AB foam to build up the IMSA shape, then fiberglass over top of the foam.
I've been debating with myself whether or not to retain the rocker arm exstentions or leave them off. They have a little rust that needs fixing but they also interfere some what with the IMSA rocker panel.
I'm waiting for some warm weather to come back to work the foam.
------------------ yellow 88 GT, not stock white 88 notchie, 4 banger
[This message has been edited by ccfiero350 (edited 01-22-2011).]
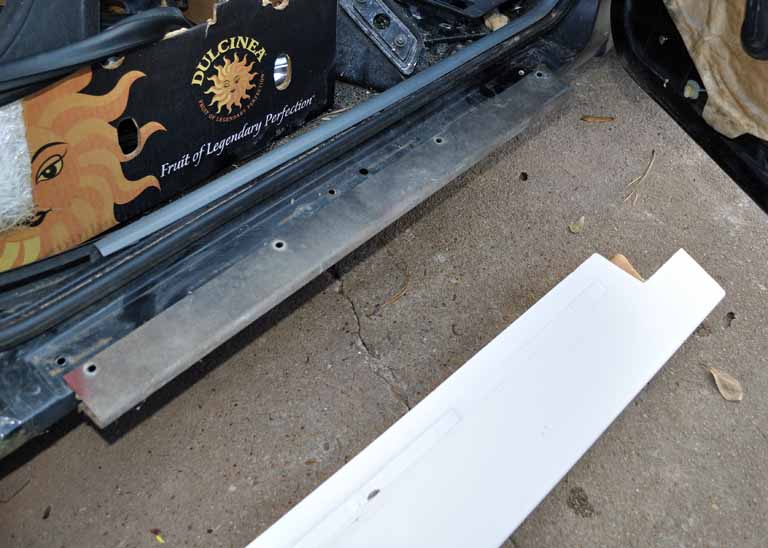
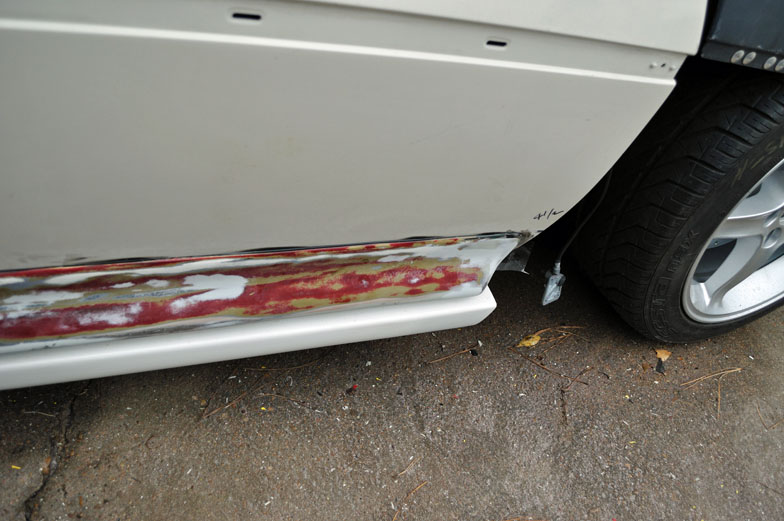
I started working on the door trim pieces, they had at least 6 layers of paint on them along with a lot of holes and cracks.
Some time back somebody trimmed a little off of the front third of the trim piece and did a real poor job of it.
I laid out the door panel flat and sanded the back of the trim piece to sit flat and flush as much as possible with the door skin.
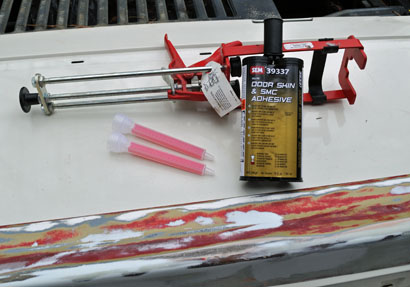
I have used SEM 39337 a few times and been super satisfied with it's performance, but this is the first time I used it in 50 degree weather. It has a work time of 25-35 mins, and sets up in an hour at 70. It took about 3 hours in the cold. I wish it were cheaper, the tube cost $47.00
I had taped over the chassis and applied a few layers of fiberglass were the rear clip would make contact so I could make a much better bonding area later.
When I take the rear clip off again I will trim up the outside and add a little more glass on the inside. Hopefully this and the better support underneath will keep the cracks at bay.
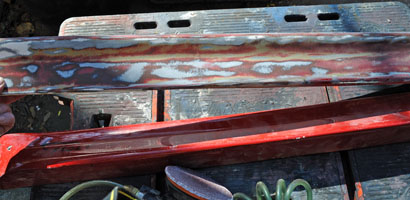
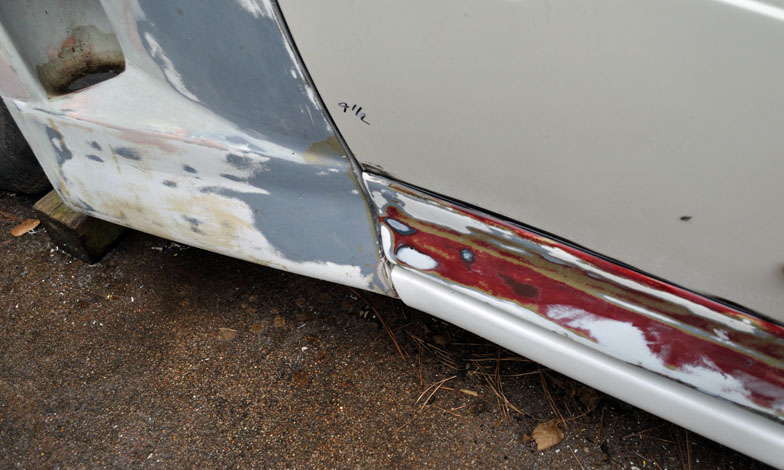
The lower rocker panel is new but the rest of the IMSA parts are more then twenty years old. The rear part looks pretty good.
The front shows the trimmed area a little bit. After paint it may look odd.
Now that I have the rocker trim in place I can start on the sideburns. Here they are prepped with the weldments waiting for the foam treatment.
------------------ yellow 88 GT, not stock white 88 notchie, 4 banger
There be a lot of work going on there, can't wait till mine gets to that stage. Must be nice living in a climate that allows body work outside almost all year long.
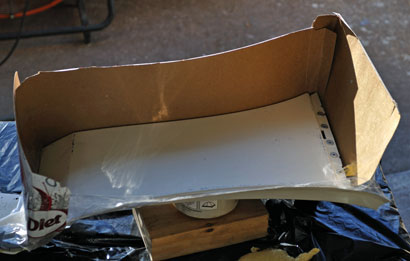
I started on the foam process by building up a dam around the part. I used 4 lbs AB foam from http://www.uscomposites.com/foam.html I mixed up 8 oz of each and poured, you have about 30 seconds to get it mixed then pour.
I did find it's very hard to get a real good blend when doing 8 oz. mix, you get different density foam through the part. I found it better to do 4 oz. mix and do it a few times to get the thickness I was looking for.
It took about 5 minutes to get the basic shape with an orbital sander with 36 grit paper.
I decided to get the basic blend first then add the rocker detail.
I put a skim coat of filler on the base shape and added a tape line before I added more foam and made the rocker detail. I used another IMSA fender as a model. Had to sand clearance for the door areo piece when it all the way open.
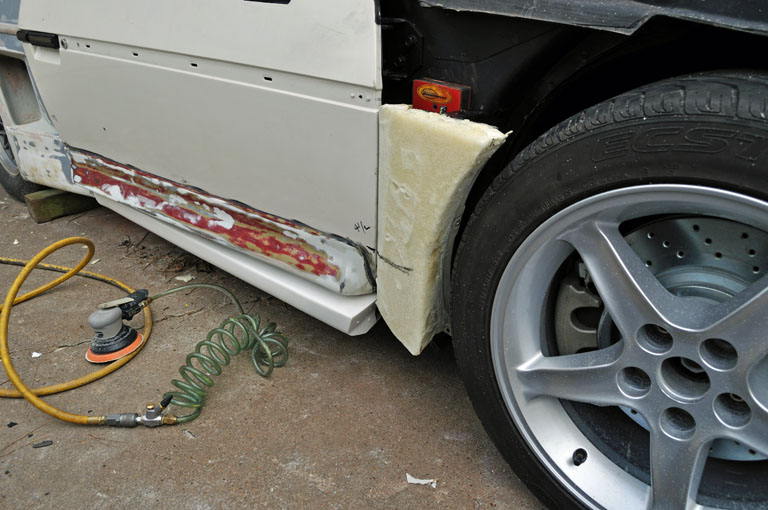
It was pretty easy to get the foam in the right basic shape to fit the other parts. The sideburns is held on by single panel fastener at the bottom and a pair of welding magnets. Real easy to take on and off.
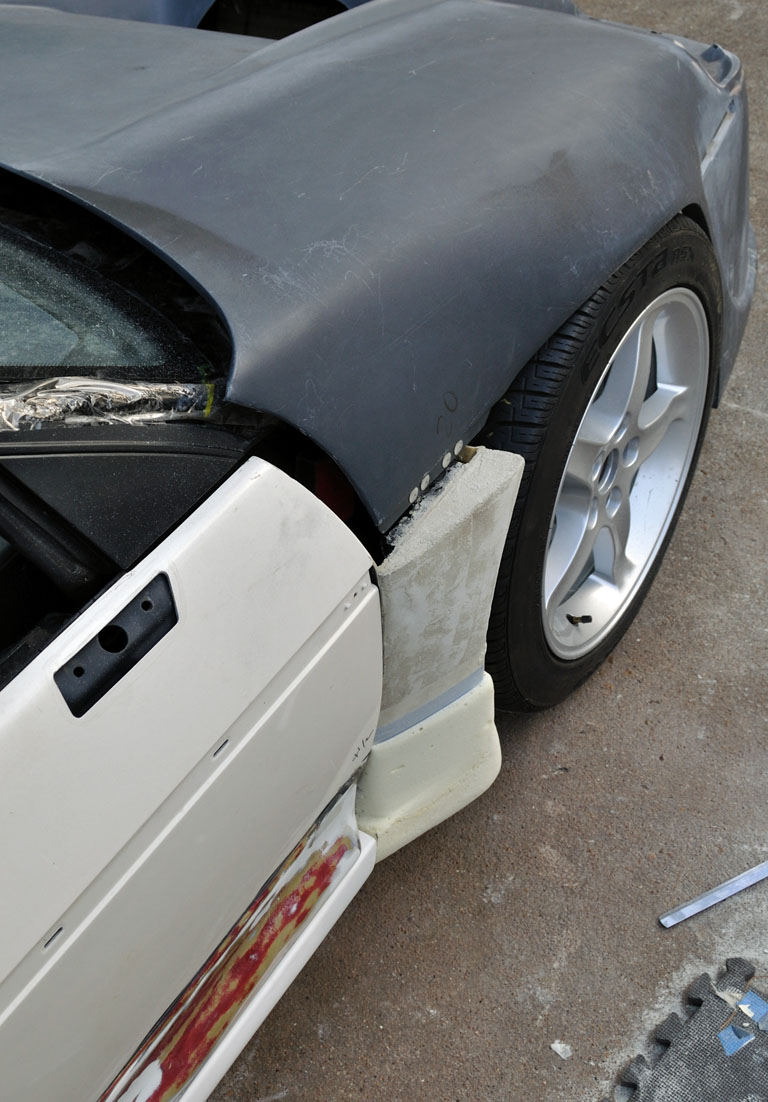
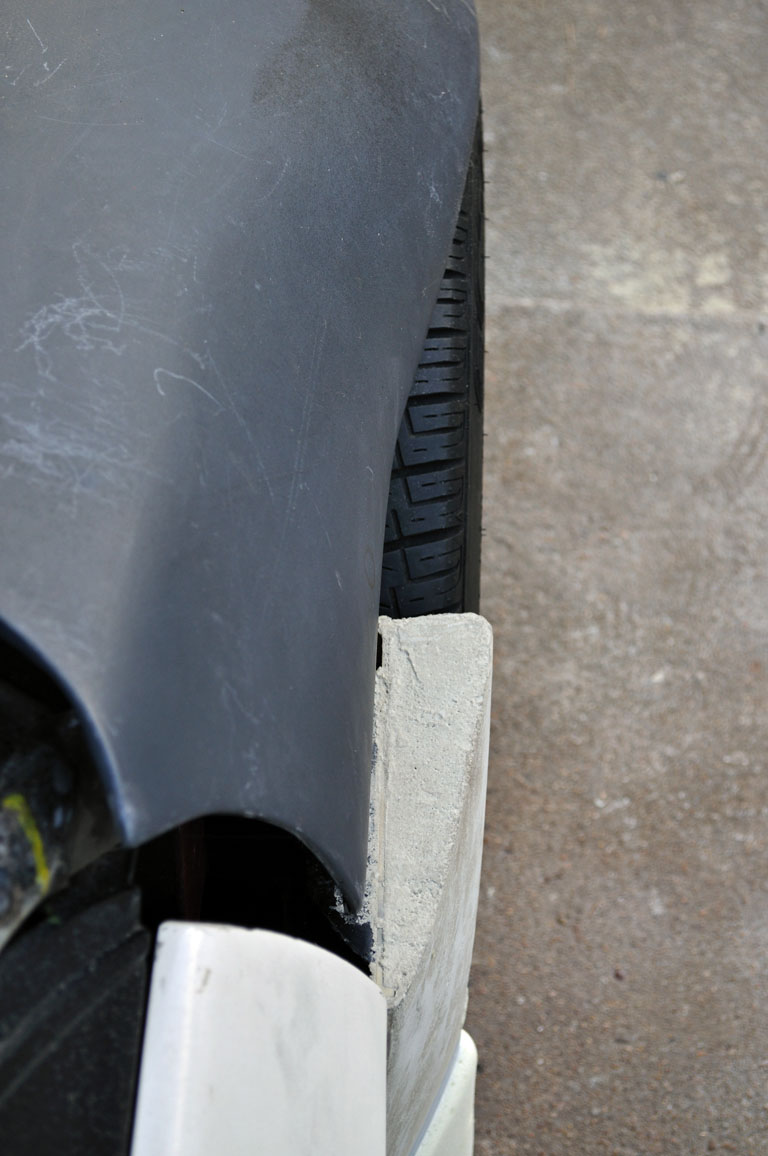
The race front end with 9" wide wheels does push the wheels outboard a bit.
There is almost 3" of additional fender required.
I will have to build up the tilt front end fenders to match the shape cues from the sideburns with a bunch of foam.
Here you can see the shaped foam and the filler skim coated foam. I will skim coat the rest of it to smooth it out some more before fiberglassing.
The real hard part is to make the drivers side the same as the passenger side. Its going to test my sculpting skills to the max.
------------------ yellow 88 GT, not stock white 88 notchie, 4 banger
Once I got my timing right and not try to mix too much at once I found I can get a pretty consistent density thats rigid and shapes easily each time. I re-did the driver side without the cardboard and was able to get better foam in 3 pours rather then one big one.
PS, do not get this stuff in your hair. I have a bald spot on my arm when I pulled off a cured blob.
------------------ yellow 88 GT, not stock white 88 notchie, 4 banger