Pennock's Fiero Forum
  General Fiero Chat
  Filling scratches & gouges in rubber

Post New Topic  Post A Reply
Email This Page to Someone! | Printable Version


next newest topic | next oldest topic
Filling scratches & gouges in rubber by Kitskaboodle
Started on: 07-02-2022 08:49 PM
Replies: 7 (322 views)
Last post by: theogre on 07-08-2022 07:53 PM
Kitskaboodle
Member
Posts: 3232
From: San Jose, Ca.
Registered: Nov 2004


Feedback score:    (8)
Leave feedback

Rate this member

Report this Post07-02-2022 08:49 PM Click Here to See the Profile for KitskaboodleSend a Private Message to KitskaboodleEdit/Delete MessageReply w/QuoteDirect Link to This Post
Hi all..,,,
I finally got a front rubber air dam for my Fiero. My 85 GT now has an 87 coupe fascia. The rubber spoiler is the last piece of the puzzle. I found one in good shape but it does have a few small scratches and one small gouge about 3 inches long or so.
I want to try and fill the scratches and gouge, then sand & paint the spoiler before mounting it on the front fascia. Being moderately flexible, I’m not certain what will work to fill in the scratches and gouge. After this, I plan to lightly sand the spoiler (maybe 400 or greater sandpaper) and then paint it semi/gloss black.

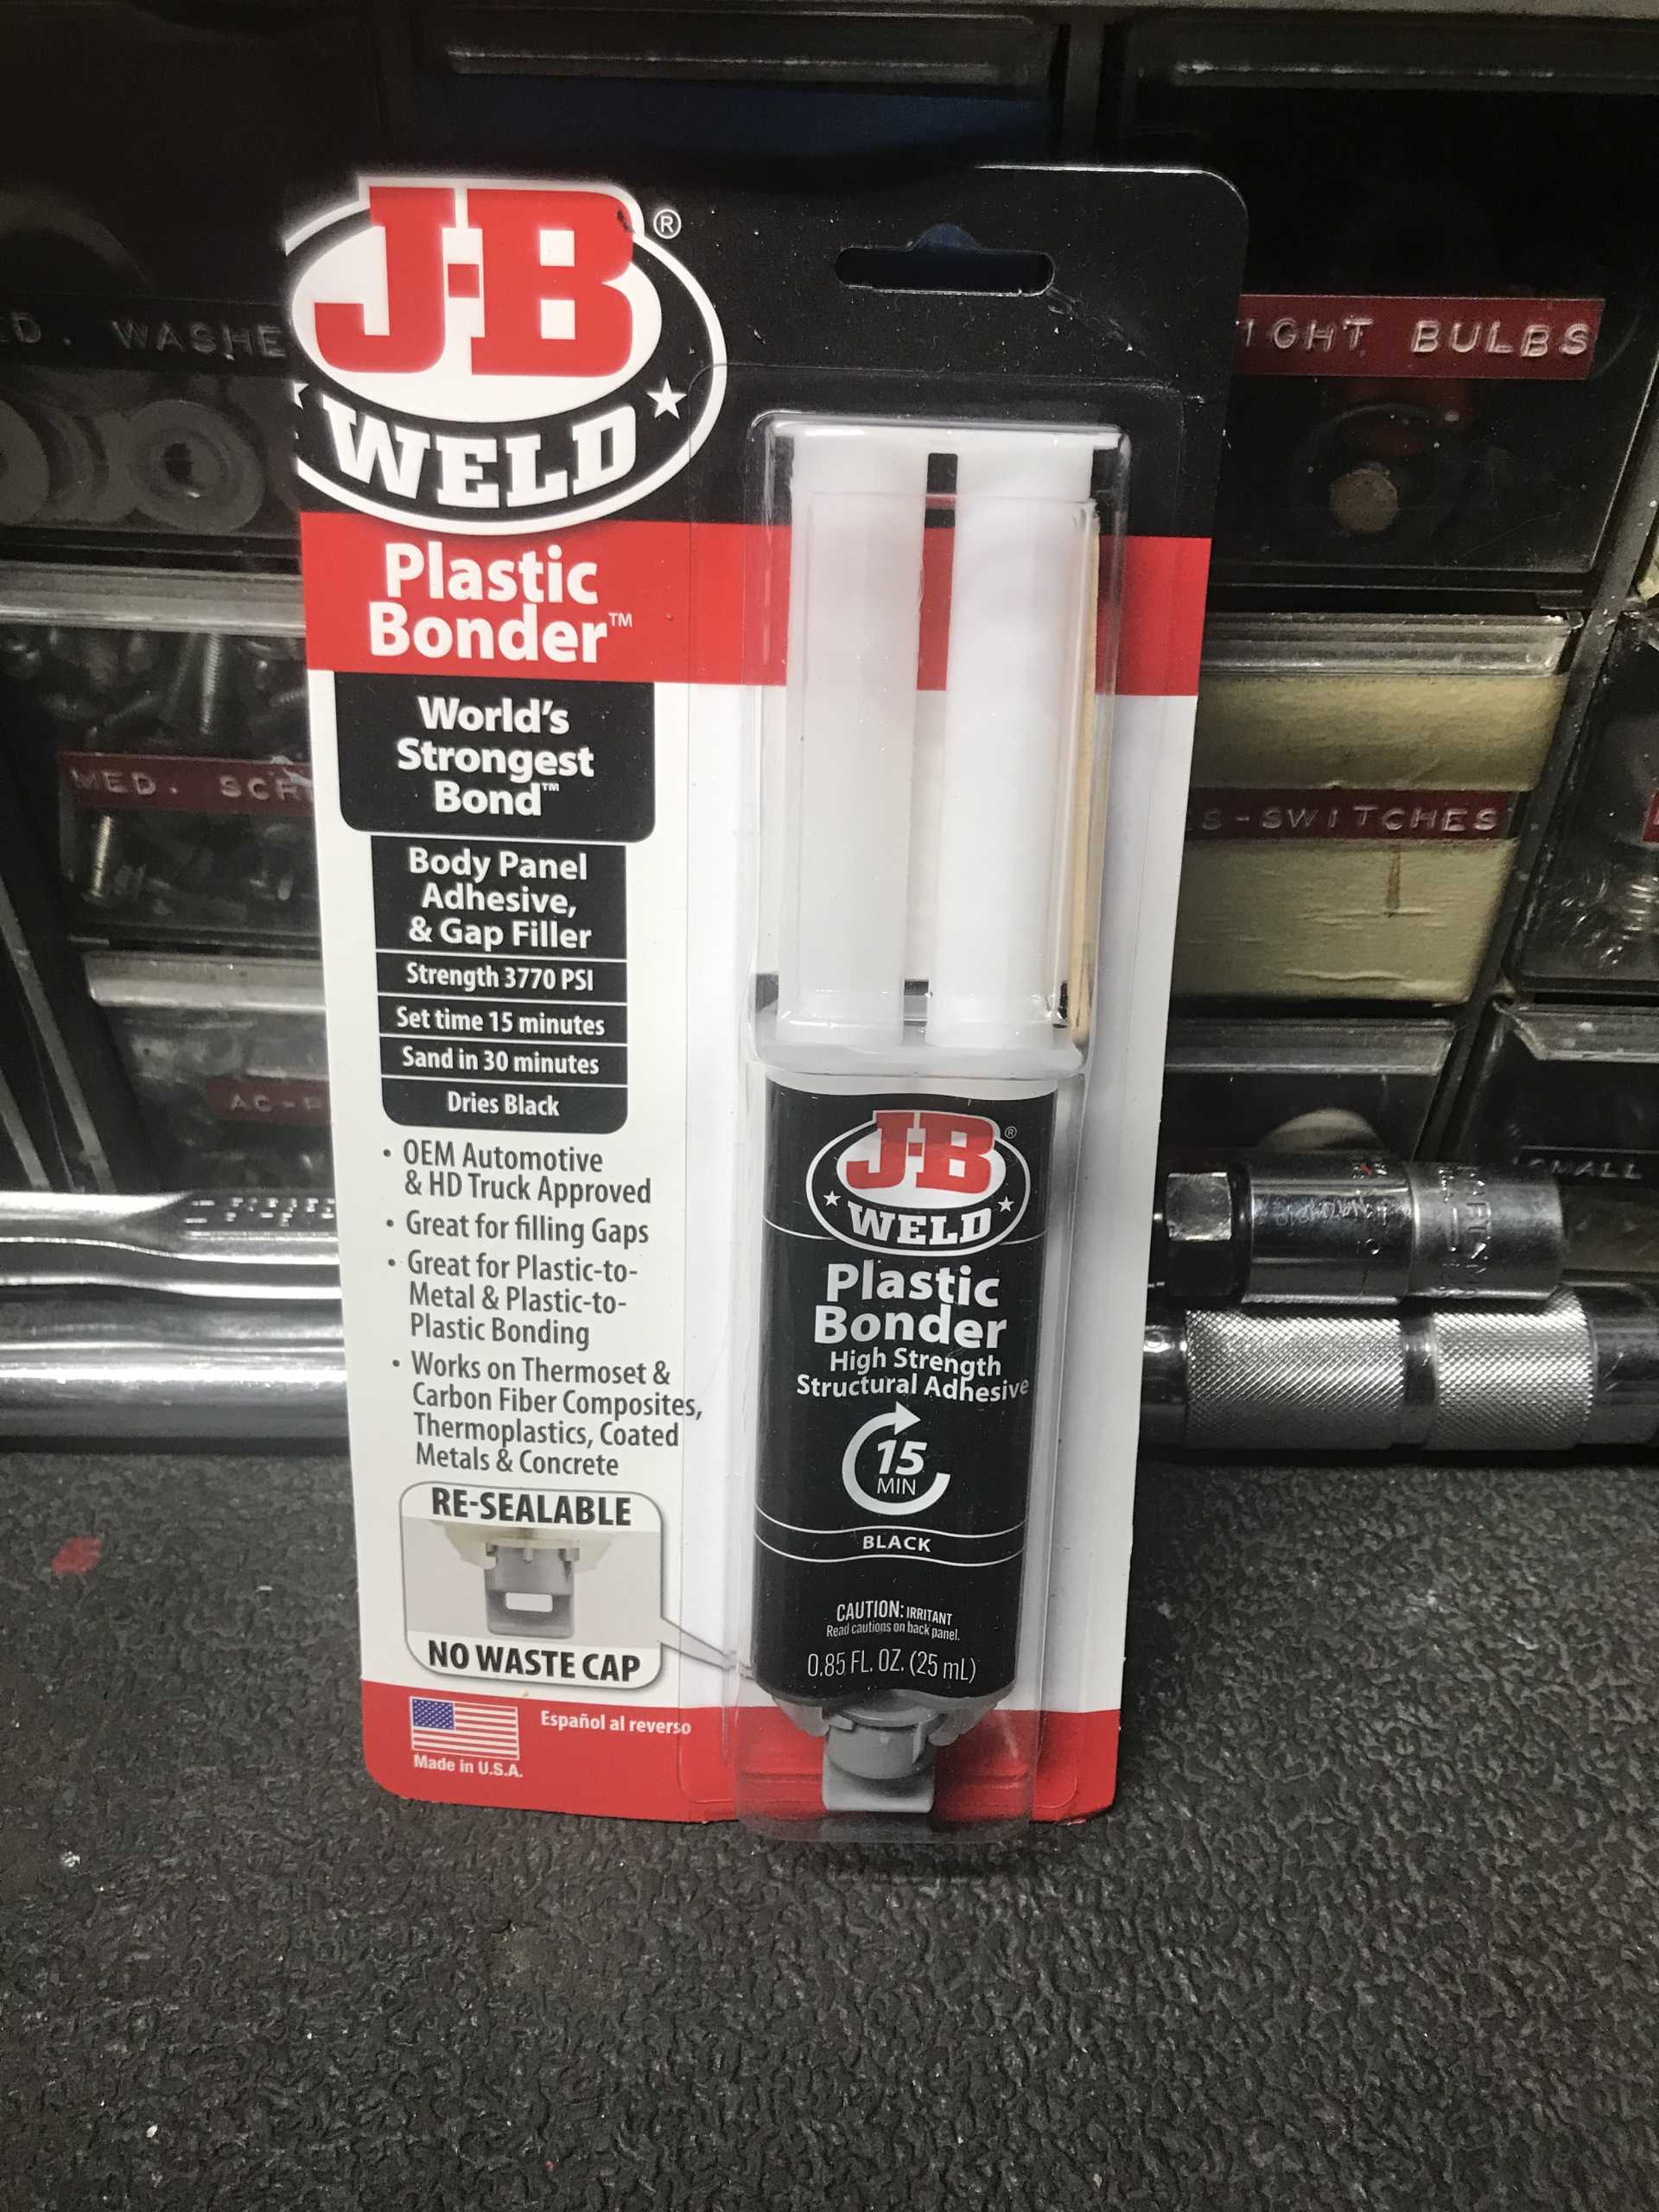
Here is what I bought to fill in the imperfections. Ok to use? Or, what would you use?
Thanks Kit
IP: Logged
PFF
System Bot
theogre
Member
Posts: 32520
From: USA
Registered: Mar 99


Feedback score: N/A
Leave feedback


Total ratings: 572
Rate this member

Report this Post07-03-2022 08:51 AM Click Here to See the Profile for theogreClick Here to visit theogre's HomePageSend a Private Message to theogreEdit/Delete MessageReply w/QuoteDirect Link to This Post
The "Air Damn" is Polypropylene, AKA ♻️ 2 PP, and most glues including epoxies won't stick. Nor do most paint types including many claim stick to plastic. Is near Teflon to them.

Leave it black. You will hit something, likely soon, and remove any paint and whatever to fix "defects."

------------------
Dr. Ian Malcolm: Yeah, but your scientists were so preoccupied with whether or not they could, they didn't stop to think if they should.
(Jurassic Park)


The Ogre's Fiero Cave

IP: Logged
skywurz
Member
Posts: 1031
From: CA Usa
Registered: Feb 2006


Feedback score: (2)
Leave feedback

Rate this member

Report this Post07-03-2022 11:40 AM Click Here to See the Profile for skywurzClick Here to visit skywurz's HomePageSend a Private Message to skywurzEdit/Delete MessageReply w/QuoteDirect Link to This Post
I wonder how well Plasti Dip would do
IP: Logged
IMSA GT
Member
Posts: 10716
From: California
Registered: Aug 2007


Feedback score:    (8)
Leave feedback


Total ratings: 250
Rate this member

Report this Post07-03-2022 01:44 PM Click Here to See the Profile for IMSA GTSend a Private Message to IMSA GTEdit/Delete MessageReply w/QuoteDirect Link to This Post
Dave said it best above when he says it is like Teflon. There is a way to paint this type of part but it is VERY risky if you don't know what you are doing. I'll explain this but I don't recommend you do this unless you are comfortable. I've been painting since the late 80's so I have to experiment with different types of plastics and composites.

You take the air dam off the car. Get a terry cloth towel and flood the towel with Acetone and I mean FLOOD it. Take the towel and wipe very hard in 1 direction only. Do not scrub the air dam back and forth, just go from one end to the other in one hard swipe. Give it a minute and see if you can leave a mark in the air dam with your finger nail. If you can, that means the outer layer is softened. You can then use a strong chemical spray paint ( not water based ), spray the part, and POSSIBLY the paint will fuse with the air dam once the fumes have evaporated from the Acetone and the paint. The theory is that you open the "pores" of the plastic with the Acetone and the chemicals from the spray paint go into the pores and grip on.

The worst case scenario is that you do this wrong and melt the air dam into a useless piece of plastic. That's why I don't recommend this unless you are comfortable.
IP: Logged
Kitskaboodle
Member
Posts: 3232
From: San Jose, Ca.
Registered: Nov 2004


Feedback score:    (8)
Leave feedback

Rate this member

Report this Post07-03-2022 06:49 PM Click Here to See the Profile for KitskaboodleSend a Private Message to KitskaboodleEdit/Delete MessageReply w/QuoteDirect Link to This Post
Thank You all for the great advice.
What I ended up doing is just hand sanding with 200 grit sandpaper and then followed up with 400 sandpaper. I sanded only minimally where the scratches and gouge was. I then treated it with black trim dressing and mounted it under the front fascia.
Thanks, Kit
IP: Logged
BHall71
Member
Posts: 364
From: Yukon, OK. U.S.A.
Registered: Jun 2007


Feedback score: (1)
Leave feedback

Rate this member

Report this Post07-08-2022 05:35 PM Click Here to See the Profile for BHall71Send a Private Message to BHall71Edit/Delete MessageReply w/QuoteDirect Link to This Post
The "rubber" one you have, is it aftermarket?

Like Ogre said, if it is OEM, its Polypropylene and just about nothing will stick to it. My OEM was torn and I was able to mend it with heated metal (zigzagged paper clips) and then smoothed it over with a large soldering iron. I then sanded it with 80grit on a palm sander. Gave it a velvet type finish. Came out pretty good IHO.


Brian

[This message has been edited by BHall71 (edited 07-08-2022).]

IP: Logged
Kitskaboodle
Member
Posts: 3232
From: San Jose, Ca.
Registered: Nov 2004


Feedback score:    (8)
Leave feedback

Rate this member

Report this Post07-08-2022 05:50 PM Click Here to See the Profile for KitskaboodleSend a Private Message to KitskaboodleEdit/Delete MessageReply w/QuoteDirect Link to This Post
Mine is OEM.
As I mentioned, I simply sanded it lightly with 200 grit and then followed that with 400 grit. Finally, I used Meguires tire dressing. Looks good overall.
Kit
IP: Logged
theogre
Member
Posts: 32520
From: USA
Registered: Mar 99


Feedback score: N/A
Leave feedback


Total ratings: 572
Rate this member

Report this Post07-08-2022 07:53 PM Click Here to See the Profile for theogreClick Here to visit theogre's HomePageSend a Private Message to theogreEdit/Delete MessageReply w/QuoteDirect Link to This Post
 
quote
Originally posted by BHall71:
My OEM was torn and I was able to mend it with heated metal (zigzagged paper clips) and then smoothed it over with a large soldering iron. I then sanded it with 80grit on a palm sander. Gave it a velvet type finish. Came out pretty good IHO.
PP can be welded w/ smallish heat gun etc better then using solder iron/gun because most of those are way too hot and even adjustable irons units can't adjust for "very low" temps.

Can make filler "rods" out of any old PP things even sections of many frozen food containers marked ♻️ 2 PP.

PP is flexible in most cases but can crack/break when hit in cold weather or something relatively sharp.
IP: Logged

next newest topic | next oldest topic

All times are ET (US)

Post New Topic  Post A Reply
Hop to:

Contact Us | Back To Main Page

Advertizing on PFF | Fiero Parts Vendors
PFF Merchandise | Fiero Gallery
Real-Time Chat | Fiero Related Auctions on eBay


Copyright (c) 1999, C. Pennock