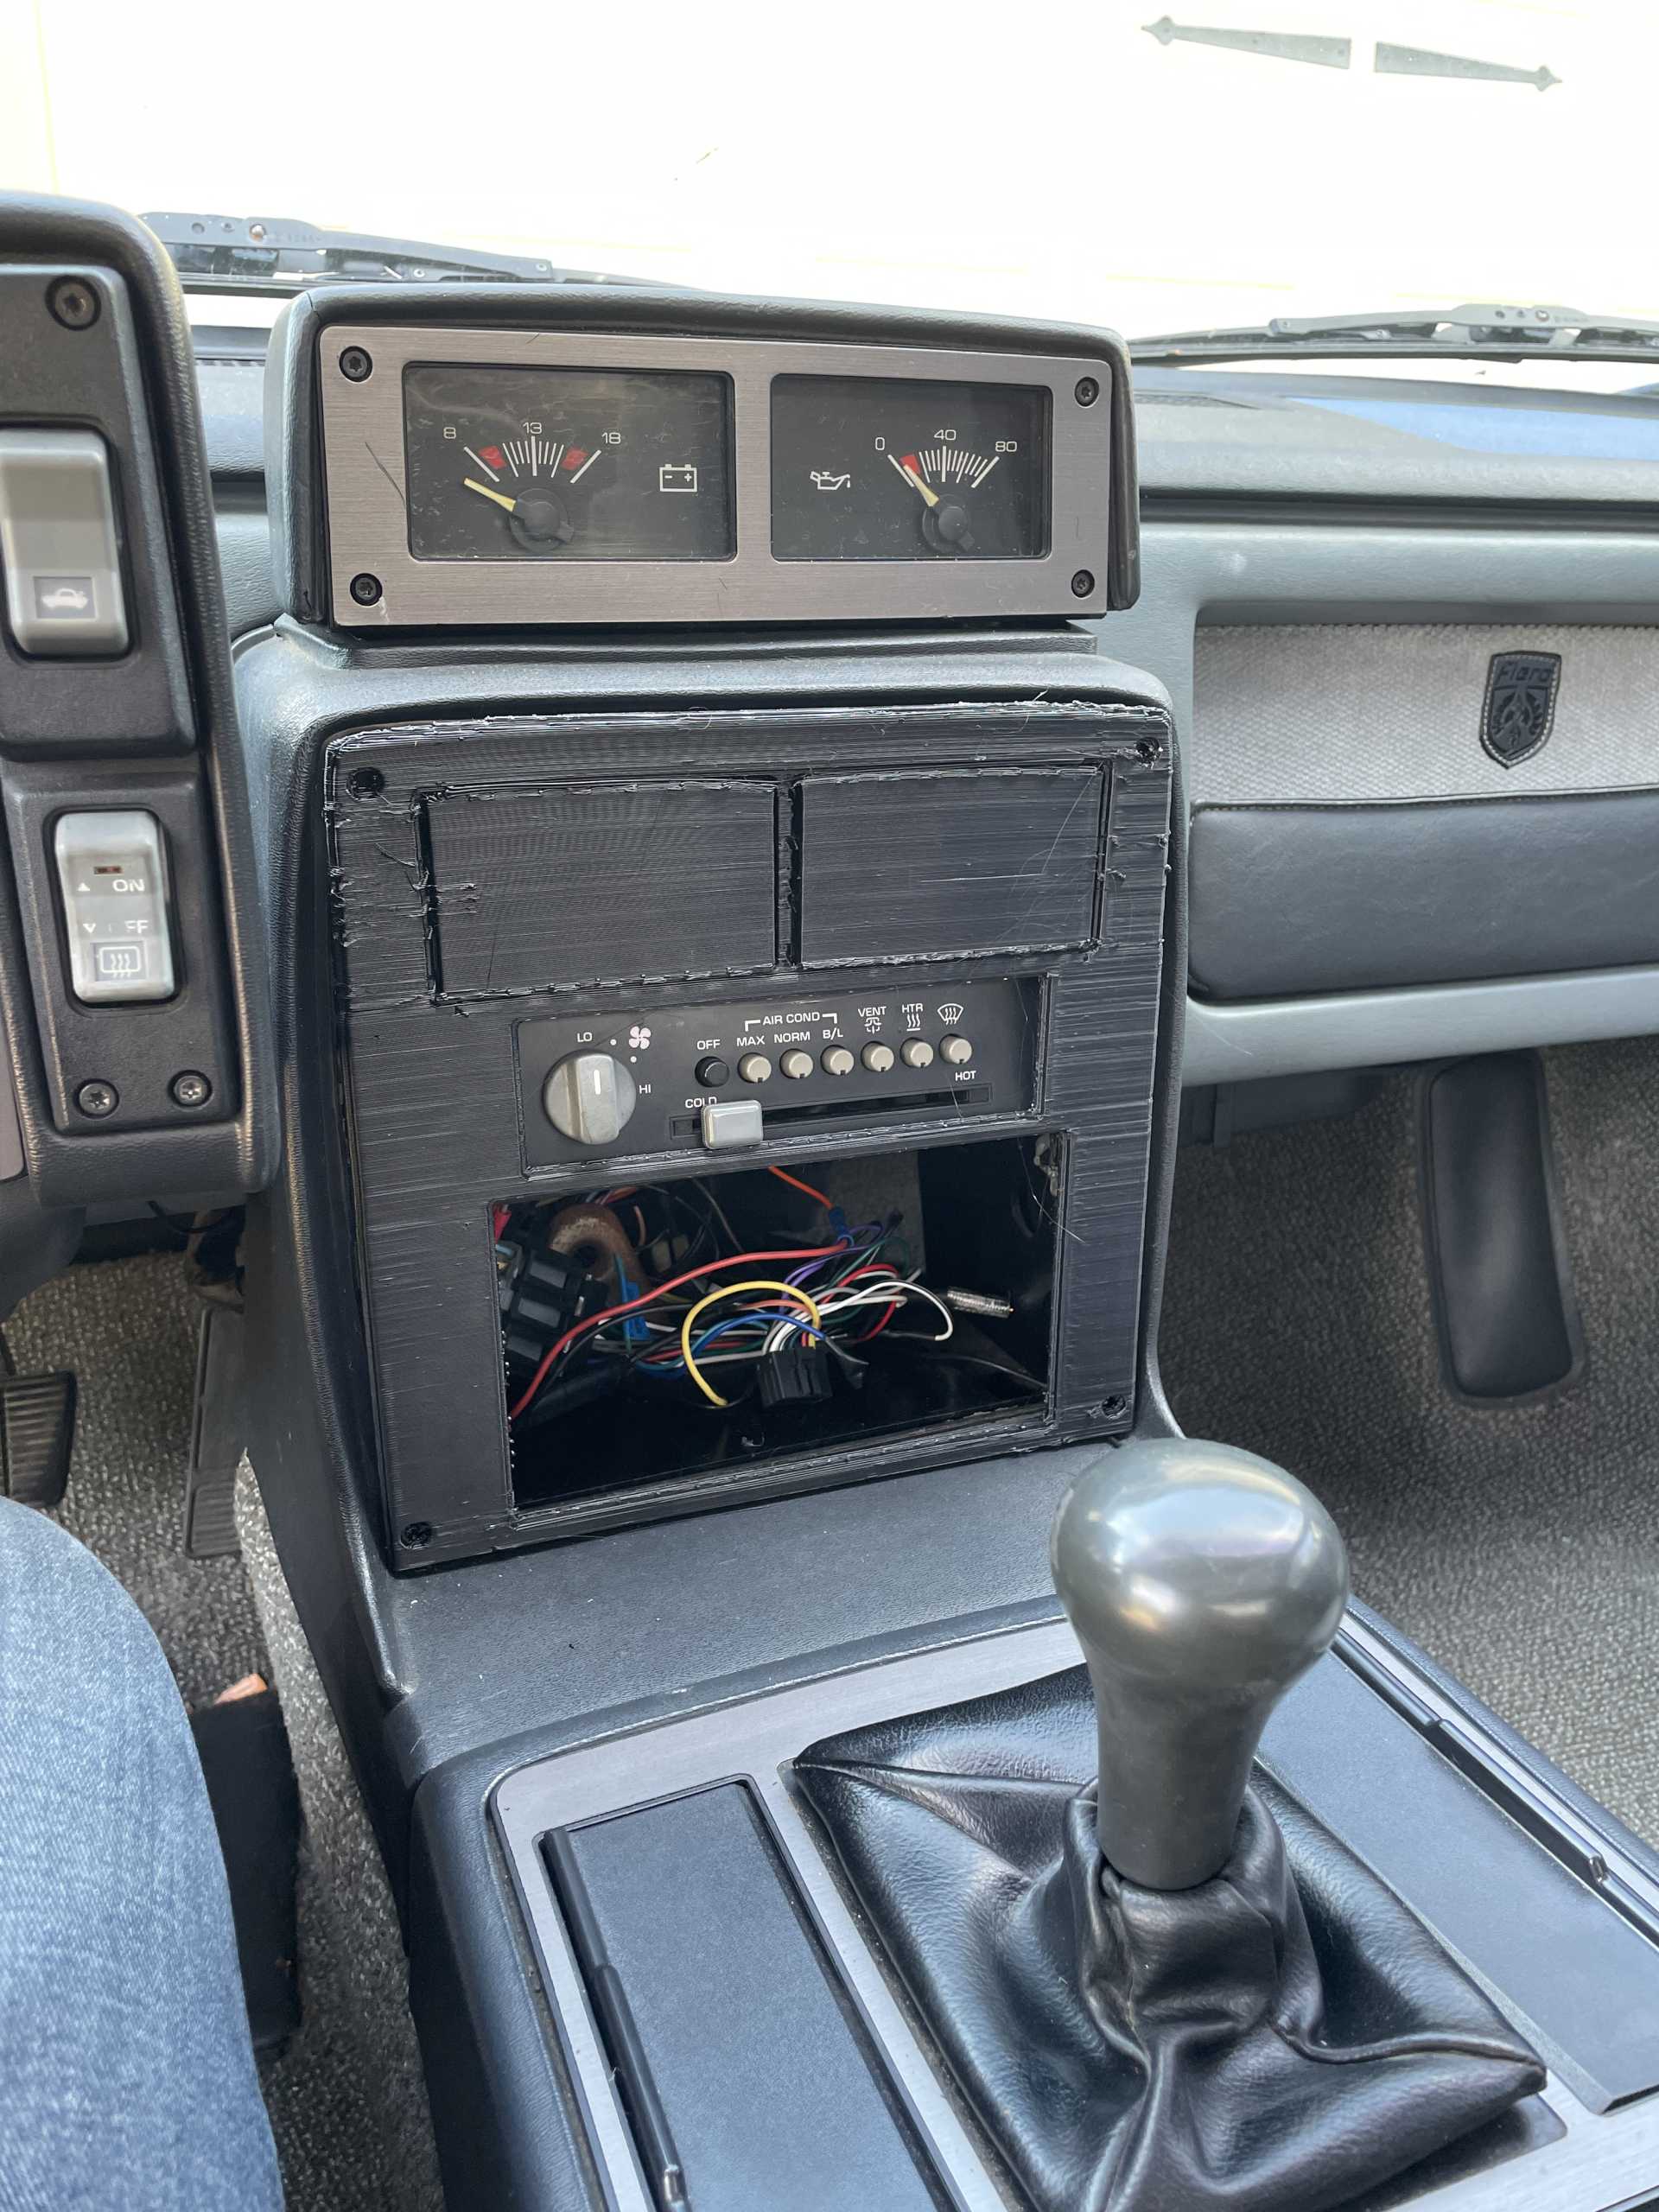
but I really didn't like how it looked. So I stole the model and put it in fusion 360. I have a model for the climate control being closed off at the bottom, and with the climate control on top.
Heres what it looks like:
The print just barely fit on my ender 3 3D printer. I printed it out of ABS so that I can vapor smooth it.
I will be uploading the file on thingiverse later today if anyone is also interested in this. If anyone sees any problems with my plan please let me know. Also of course I will give credit to the creator of the original file.
I imagine I will have to design some bracketry for the climate control and for the radio, so I will go and think up how I will do that later today.
[This message has been edited by Xenoblast (edited 12-04-2021).]
It looks like the climate control can use the stock mounting location, due to the hole for it being 3mm bigger btw. I am getting a double din radio on Wednesday so I will try and make bracketry then, or I will use the original files bracket but idk if that will work. Once I get everything fitted I will put a brushed aluminum look on it.
[This message has been edited by Xenoblast (edited 12-05-2021).]
Vapor smooth? I'm interested in your outcome with this, I'm itching to do basically what you're doing. That's pretty cool so far..
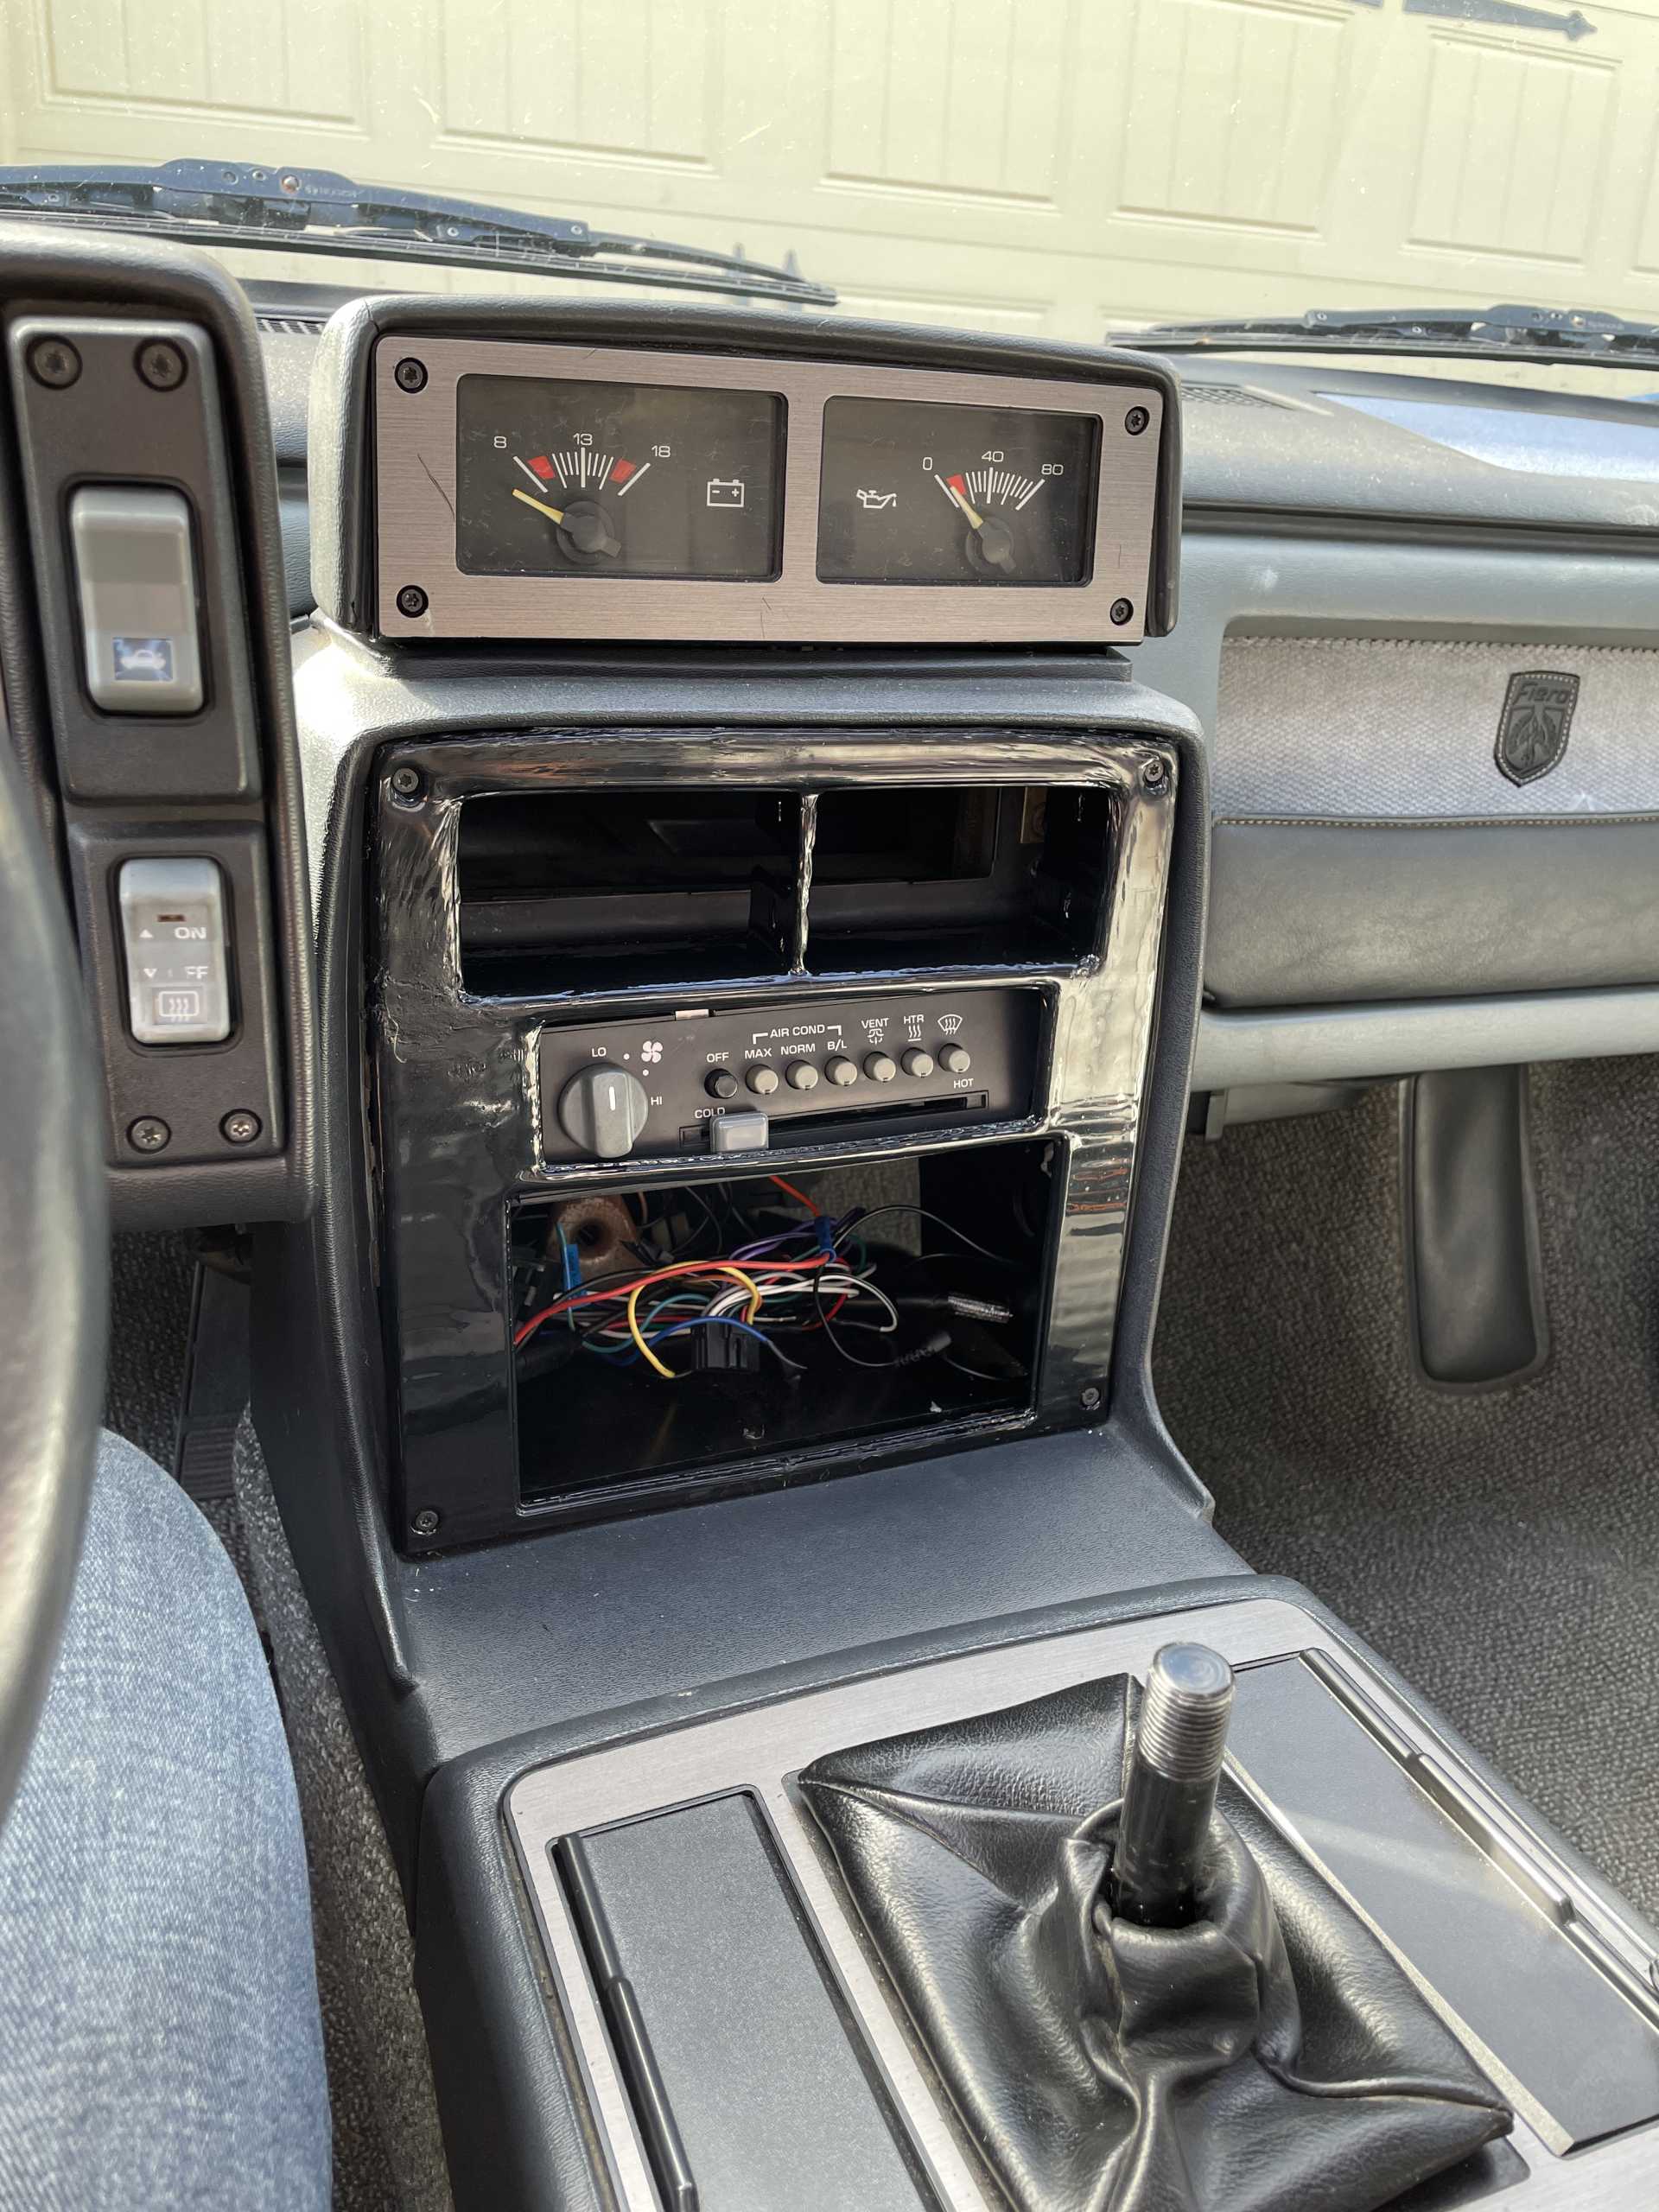
Vapor smoothing is the process of putting a 3D printed part in a chamber with acetone vapors inside of it. For small prints, putting it in a pot on a stove works best and can finish in 10 minutes. For big parts like this you just have to hang the part on the top side of a bucket and put acetone in and wait a couple hours. All plastics can be vapor smoothed, but require hard to get or expensive chemicals to do so. ABS and ASA can do it with cheap store bought acetone. I left mine in a little too long, and so the part became soft in some places, so I am going to reprint using ASA this time, which is basically ABS but easier to print.
This time I will sand the part first then vapor smooth it.
[This message has been edited by Xenoblast (edited 12-08-2021).]
I've been wanting to print the original one-when I get access to my buddy's printer. Beyond pulling the current face plate off and undoing the side bracketry for the climate and radio and locating them appropriately. What do I have to do to install a double DIN in my own Fiero?
What do I have to do to install a double DIN in my own Fiero?
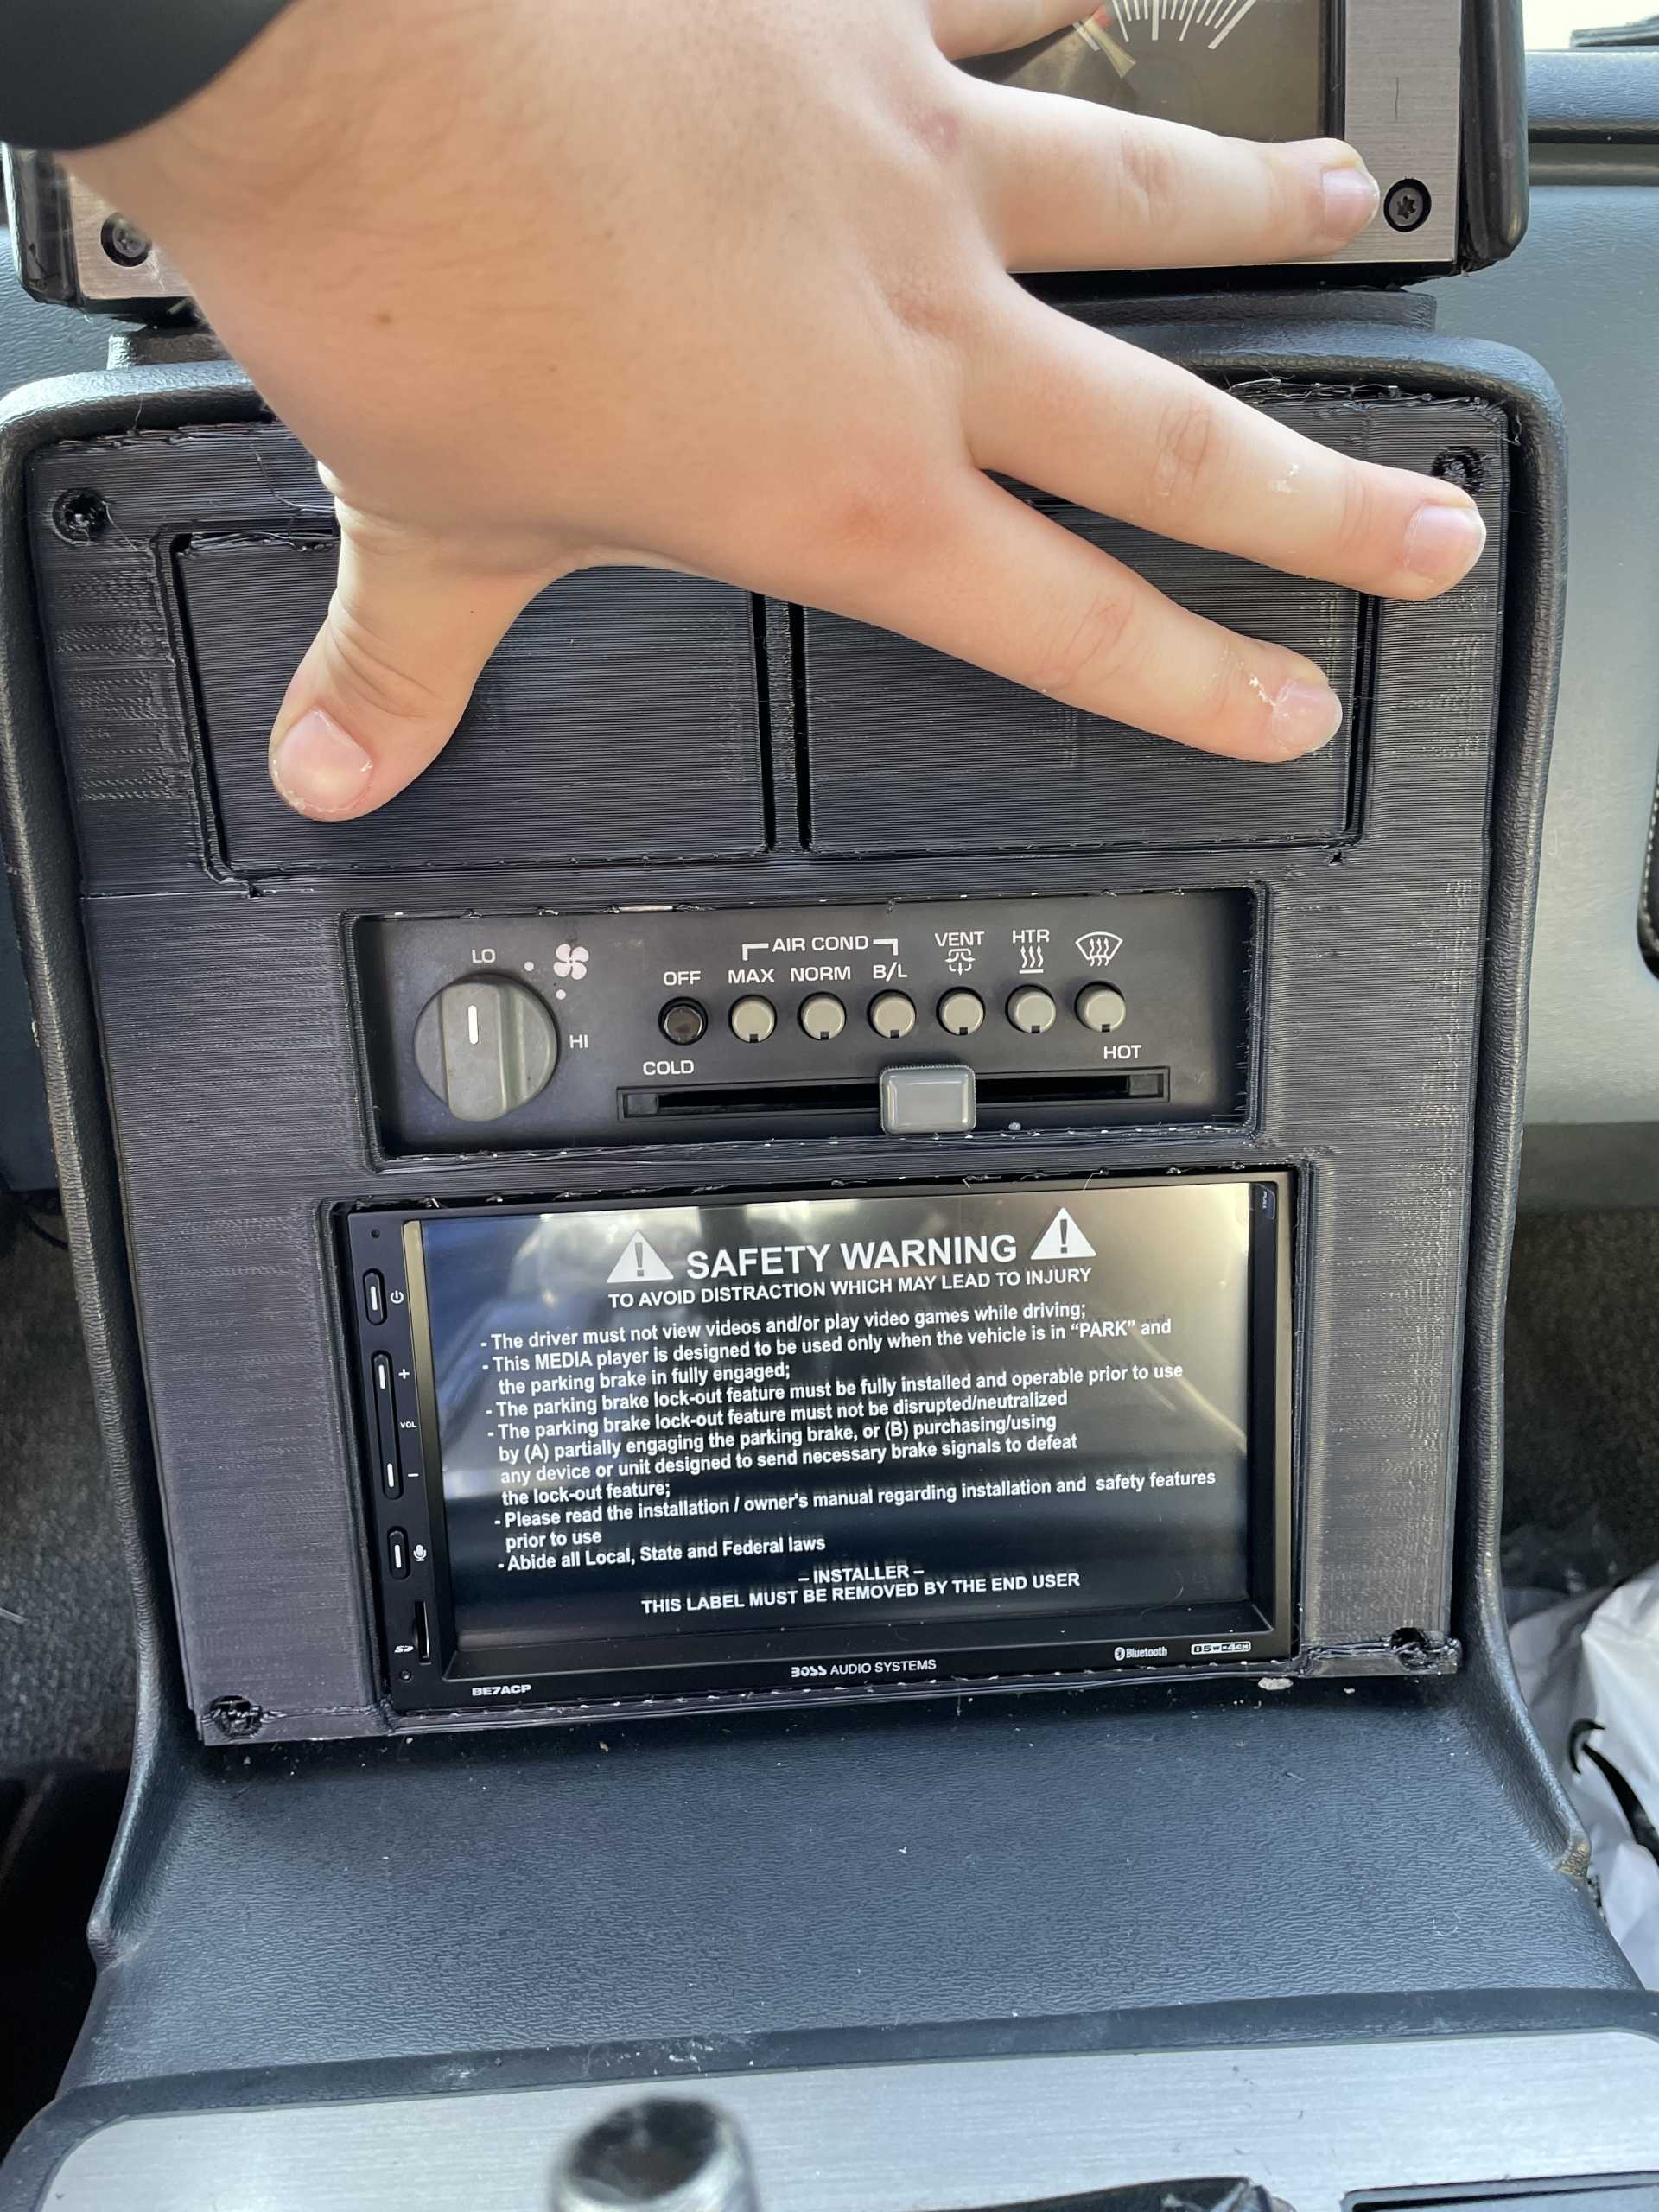
Unfortunately I havent gotten to installing everything yet, but I did a quick test fit with the radio without the faceplate and it seems the only major thing you would have to do is cut the plastic bar underneath where the climate control is. My radio also fits snuggly underneath the climate control supporting it, so I dont think the added stress of removing the bar will do much.
Probably fantastic, but youd need a big and expensive resin printer to do it... my printer costs $200 and does a pretty decent job at it, atleast good enough so that a little sandpaper and vapor smoothing can fix the blemishes.
but if you have a resin printer id say definitely go for it, i dont even think you would need to do any sanding at all if you did
Originally posted by MichiganReefer: What do I have to do to install a double DIN in my own Fiero?
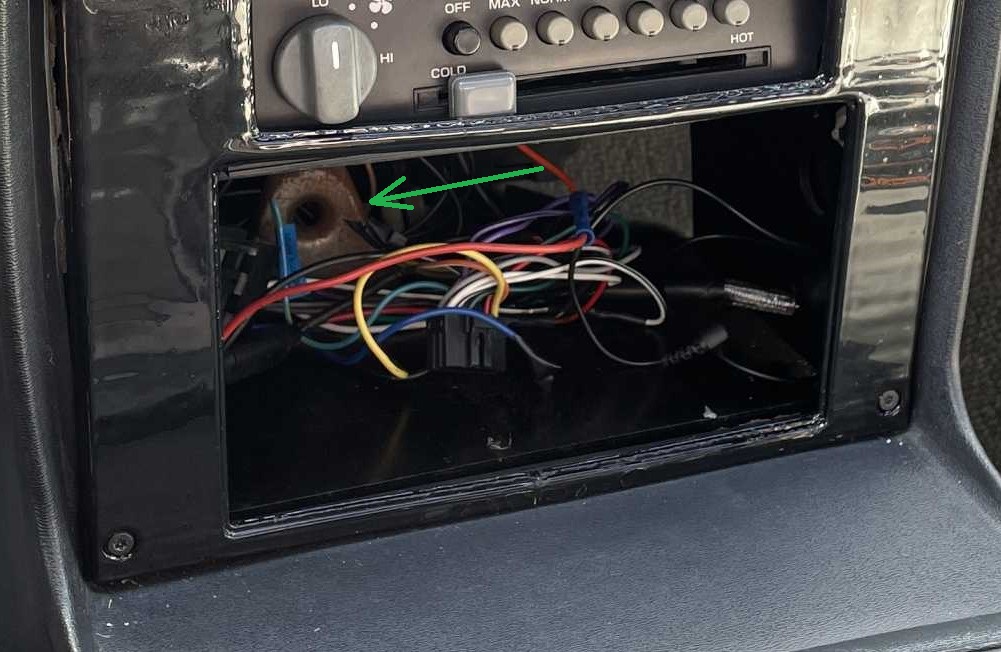
Depending on the depth of the radio, you may have to saw/bend the original bracket out of the way. Here is a blown up picture from the above post. You can see the factory radio bracket that may or may not need to be removed.
[This message has been edited by IMSA GT (edited 12-09-2021).]
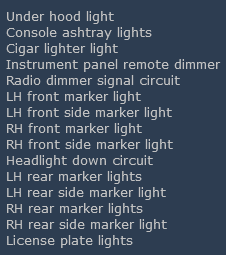
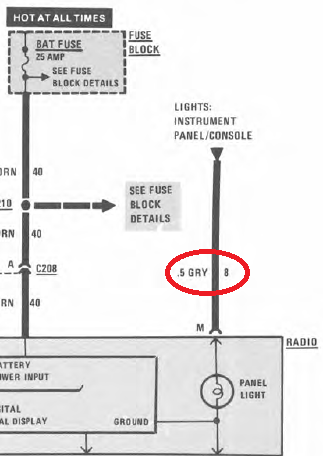
And for everyone on this thread, if you install the radio, press your headlight switch and the lights go up but won't go down when you turn them off, that means you've blown the fuse for all of this:
Disconnect the gray console lighting wire from the radio and that should fix it.
[This message has been edited by IMSA GT (edited 12-09-2021).]
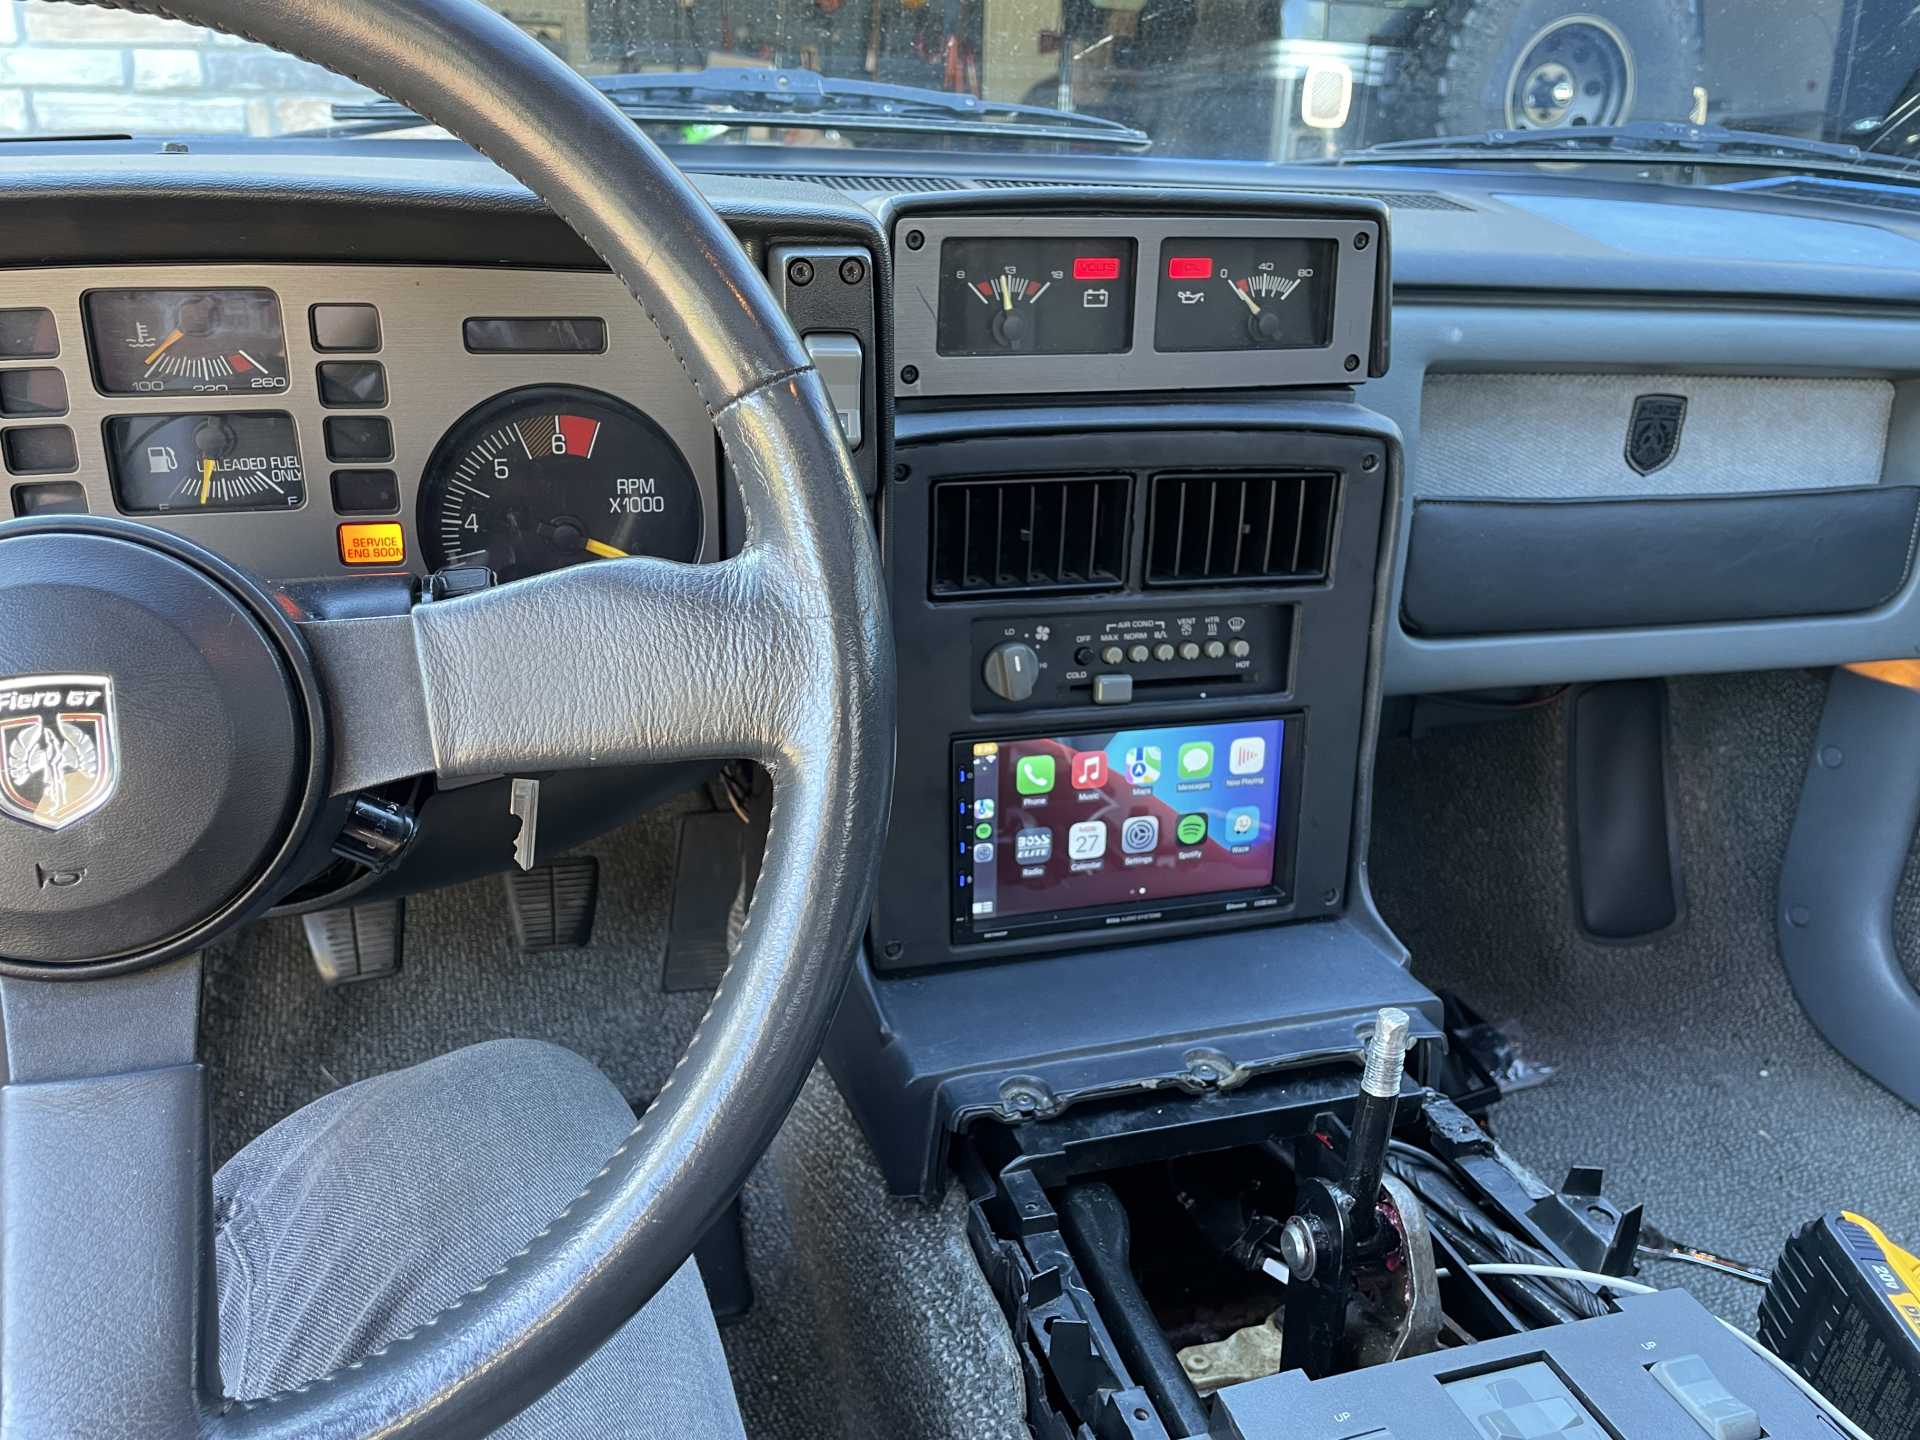
Finally done with the conversion it seems! It took so long because I figured i should install an sub and an amp while all the interior was apart, and I have to say it sounds really good now. The bluetooth is kinda crappy with the headunit i got but i bought it for apple car play anyway.
Also I somehow lost a few screws and they are weird sized screws so I have to wait on those before putting the shifter stuff back on.
[This message has been edited by Xenoblast (edited 12-27-2021).]
Thanks, however the majority of the credit goes to "dremu" on both this forum and on thingiverse. I basically just spliced around his model and measured to make so i made the holes big enough.
ngl that radio seems like a fire hazard lol, I also wanted a good driver for my sub and speakers that I installed, so a single din would be limited in quality. Not saying single dins are bad but double dins have more head room to be better.