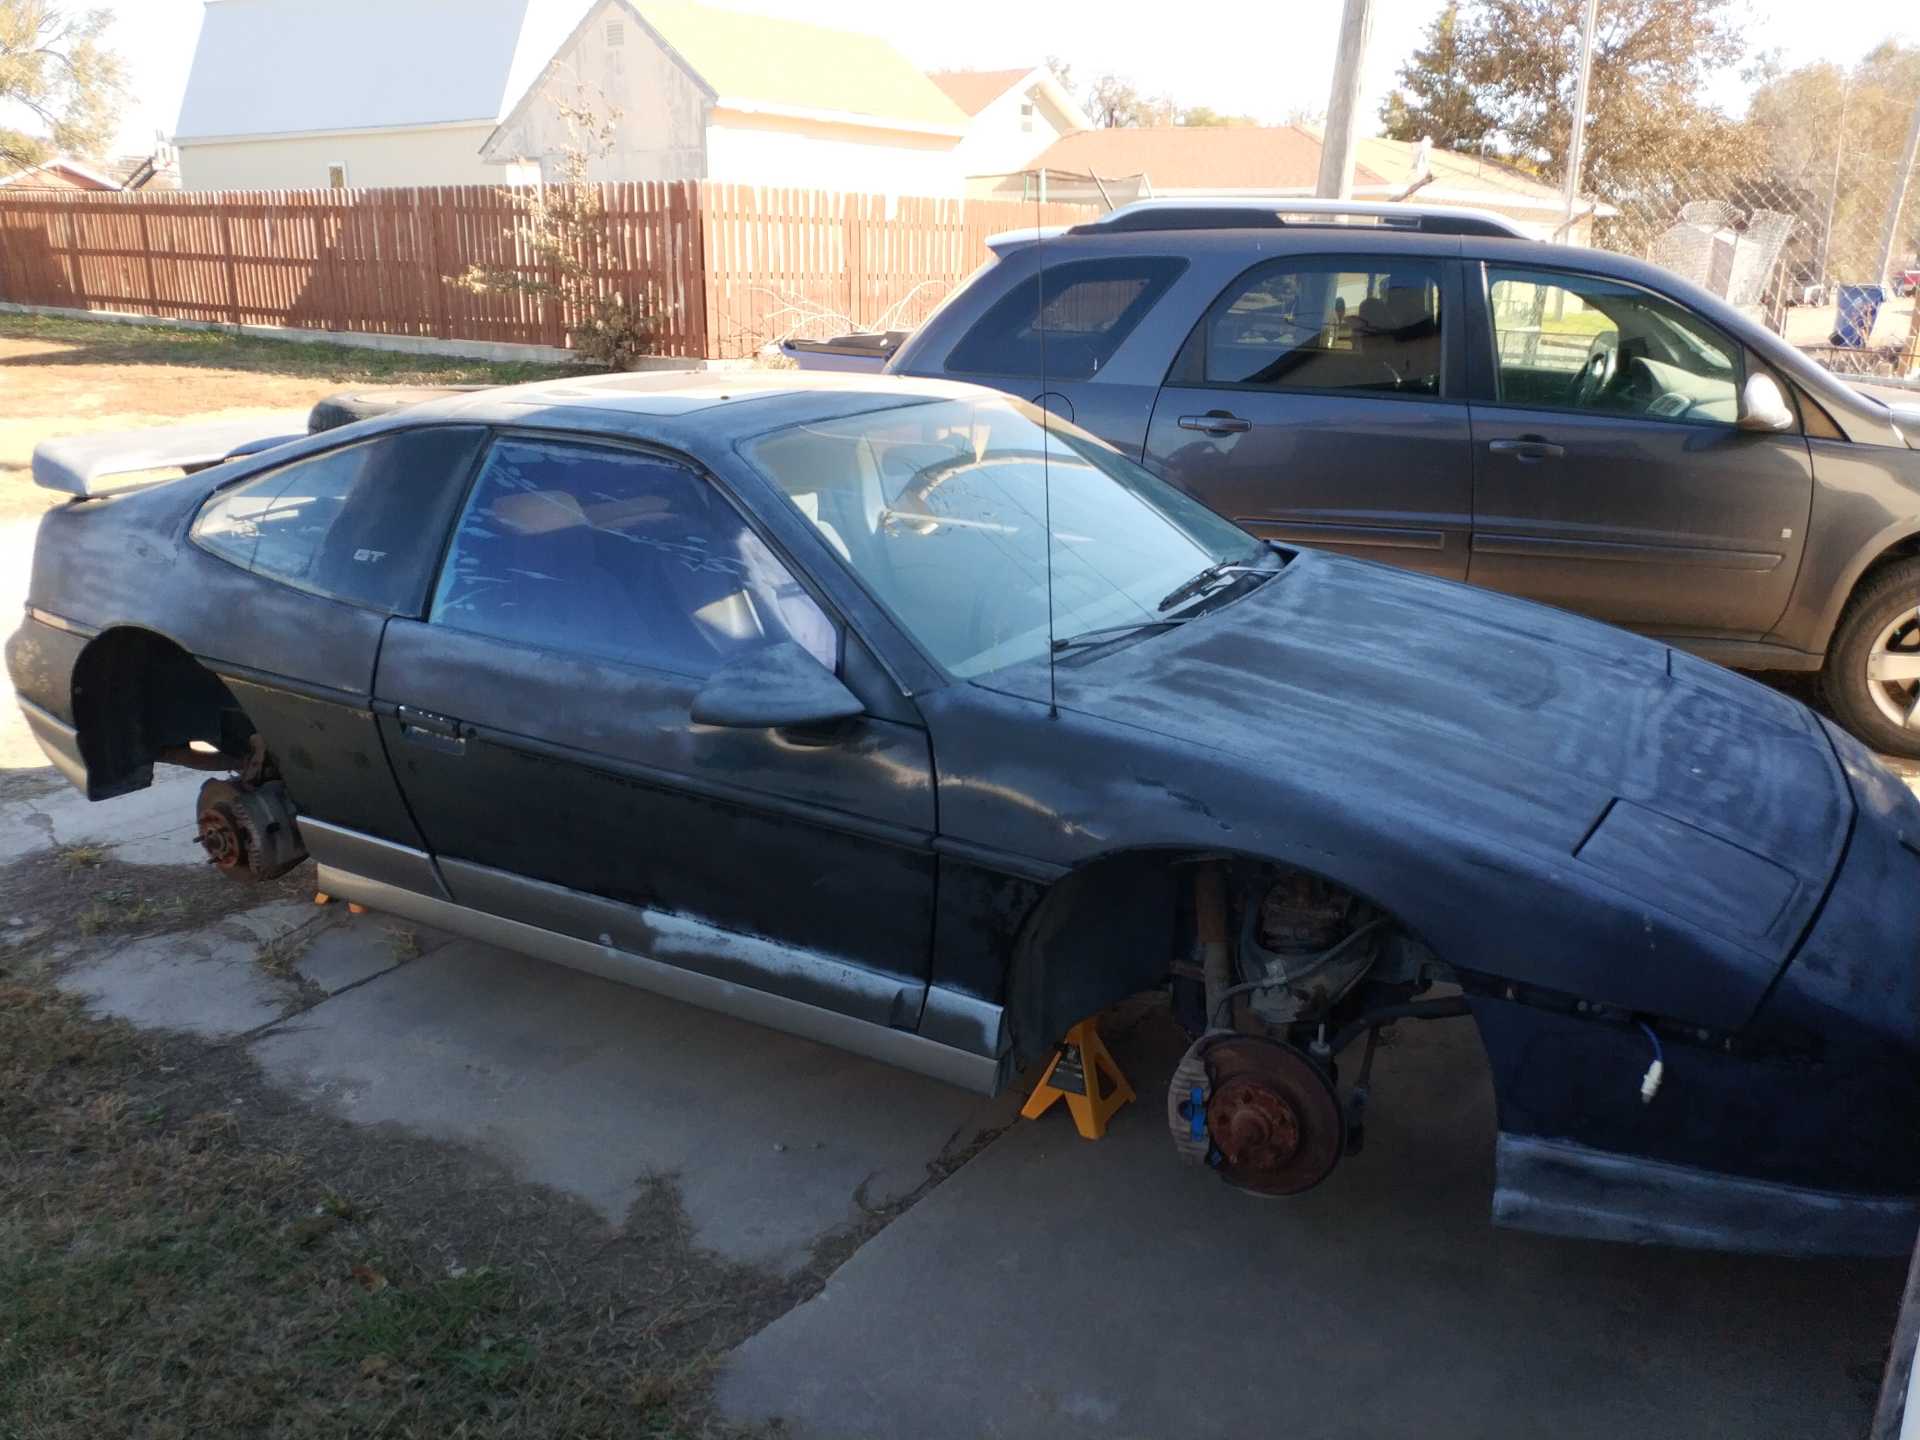
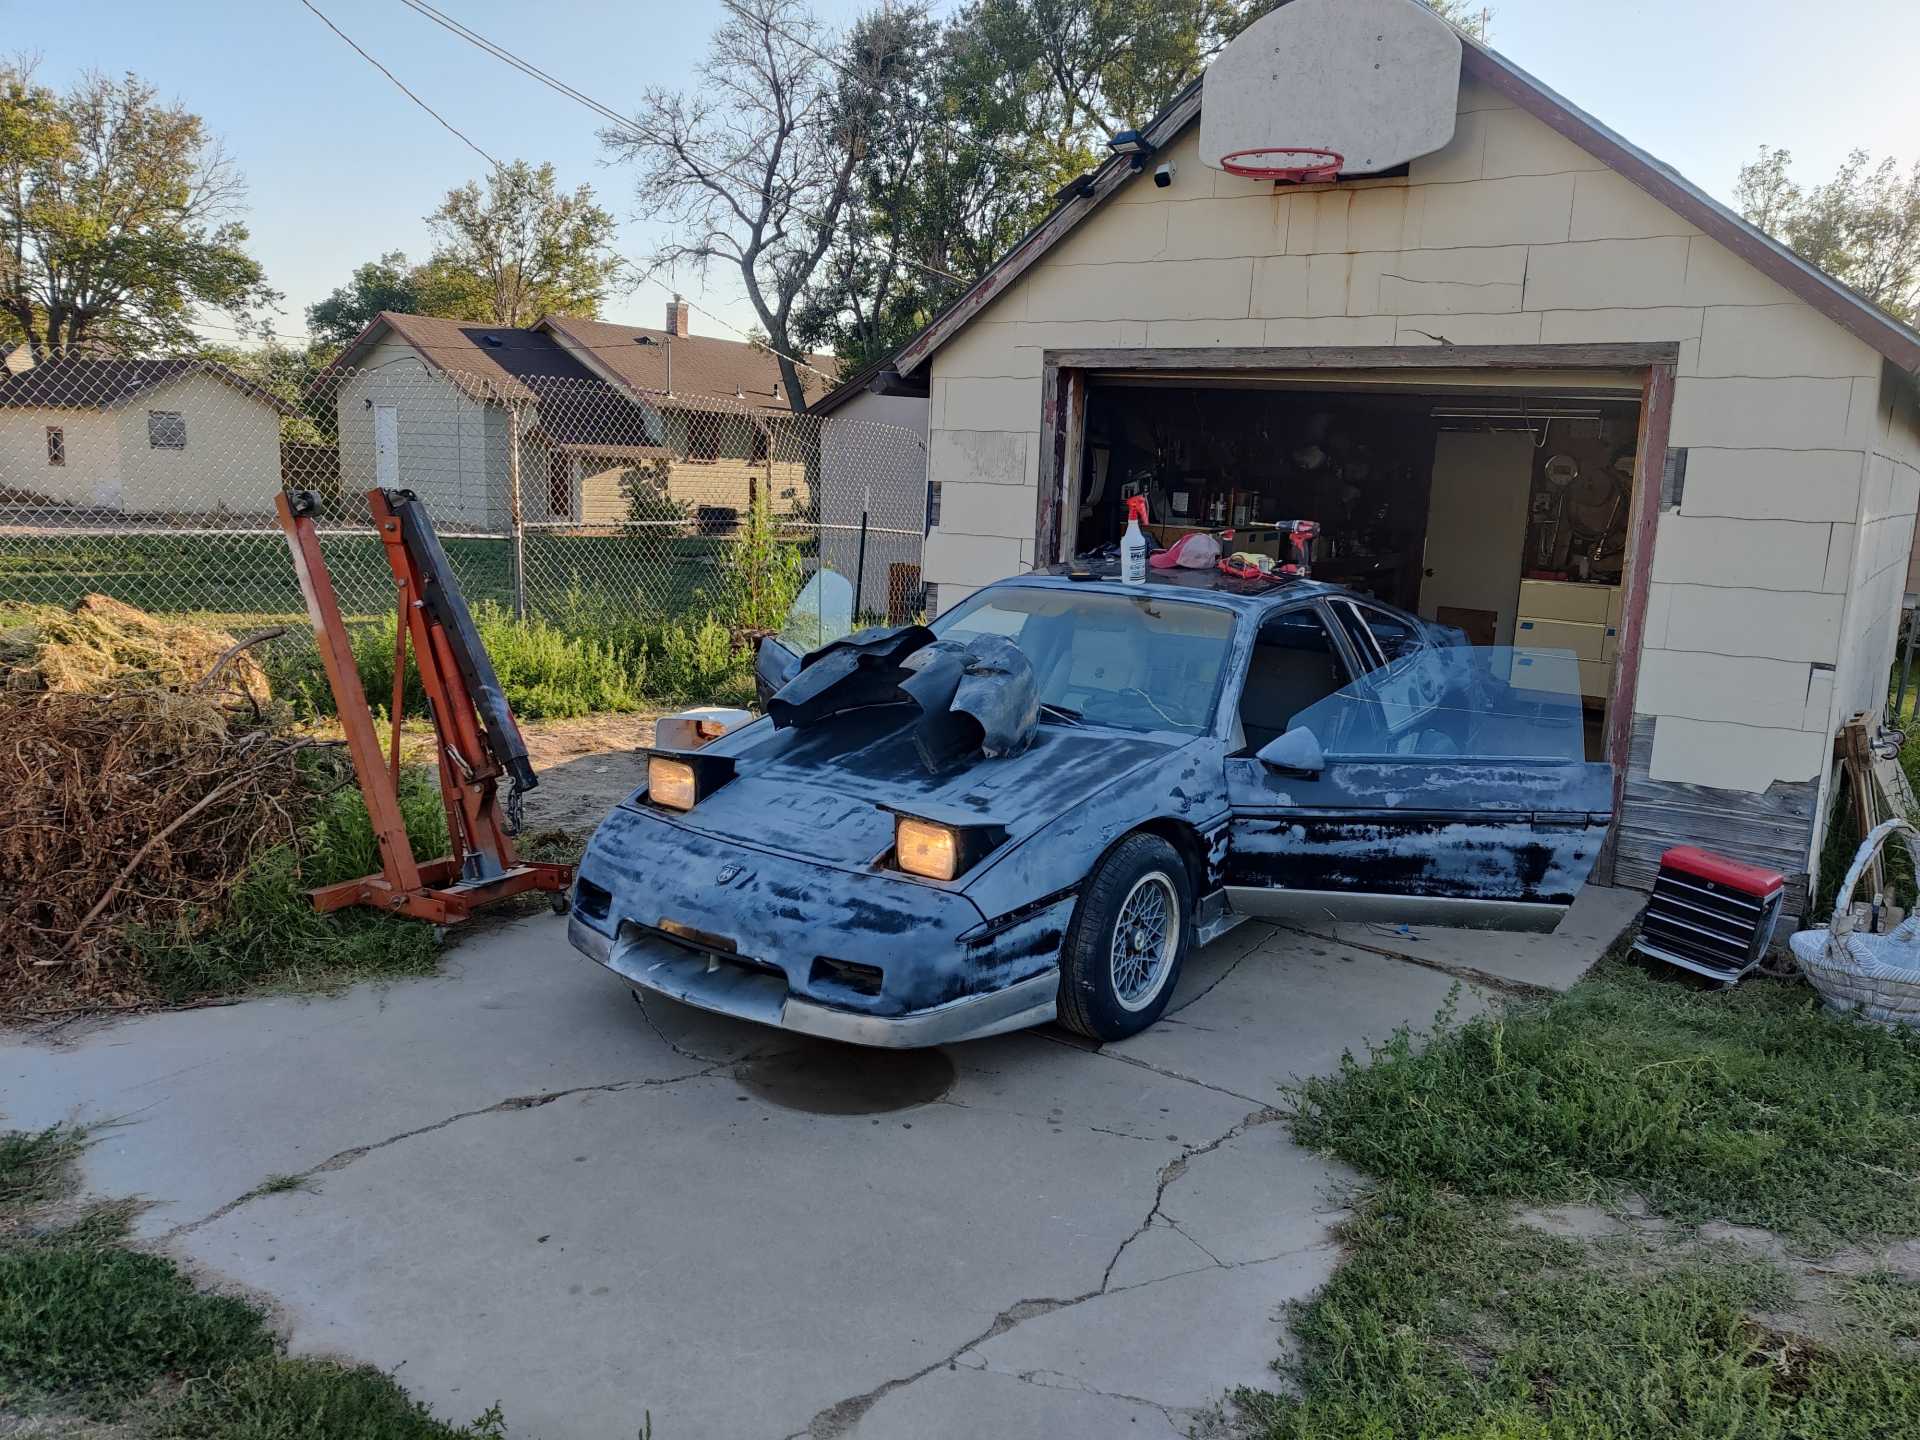
I first want to start off by saying thank you to everyone on this site. Pennock and everyone showing their builds. There is soo much good information here it's unreal. This 87 GT has been on my watchlist for a long time. I mean a loooong time. I first seen this car when i was about 12 (31 now) riding my bike around with my friends. It was a friend of mines uncle that owned it. I know for a fact it hadn't moved the entire time I've known of its existence. Well about 5 years ago I had the opportunity to buy it and I jumped on it. I probably should have talked him down a little bit but it was the one I've been wanting for a decade and a half so i had to get it. No title or keys. It took me 8 months to track down and speak to the original title holder (not the guy I bought it from) but he, thankfully, applied for a new title and signed it over to me. (I sent him $ for fees to re-apply and some gas money)
Yes it did come with wheels i just needed to use them at that point in time to move my parts car
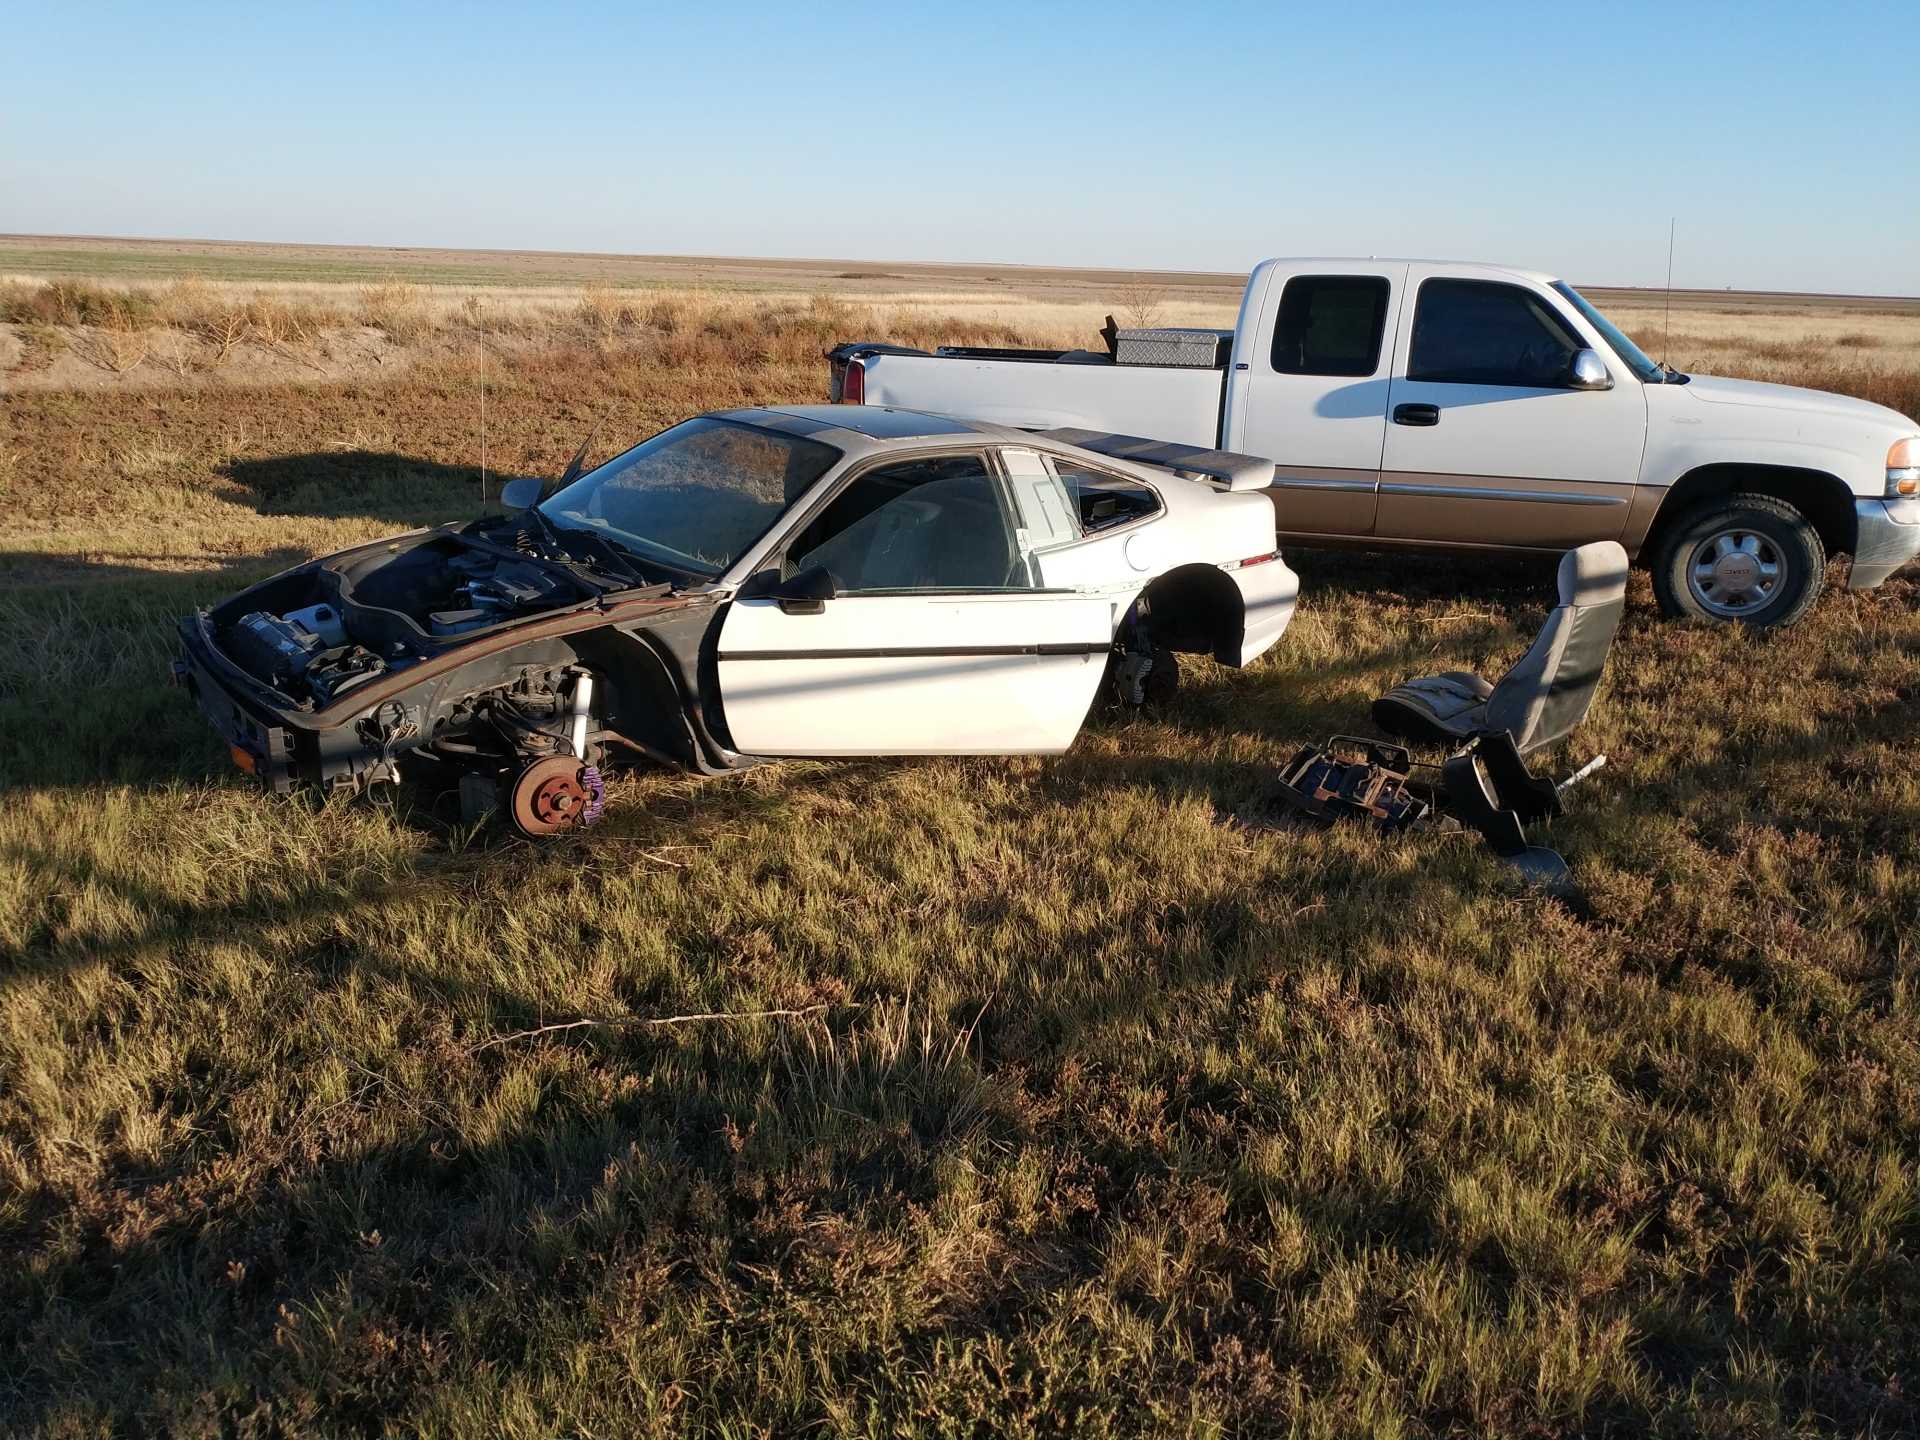
Parts car doesn't have a title either and its been hit in the drivers side (door had been replaced)
I had big hopes for the black one but when I dropped the oil, about 2 gallons of antifreeze came out with it so the car sat for about 4 years while I located a motor I wanted to put in it. I had a 3800SC lined up but the price wasn't right and couldn't talk them down. About a year ago, after not looking for a motor for months, I randomly got on Craigslist and looked again. There was a LS4 motor , tranny, & harness for the right price so again I had to have it haha.
Yeeeaaa let's get this party started!
From then til now has been an awesome ride and I want to share it with everyone I've found inspiration from on this site. Now It's not quite up and running yet but it's getting there.
Also I'm slow working on it mainly because I'm preoccupied with work and being a parent so be patient with me lol and I hope you all enjoy my upcoming posts and the build as much as I love searching through the builds on here.
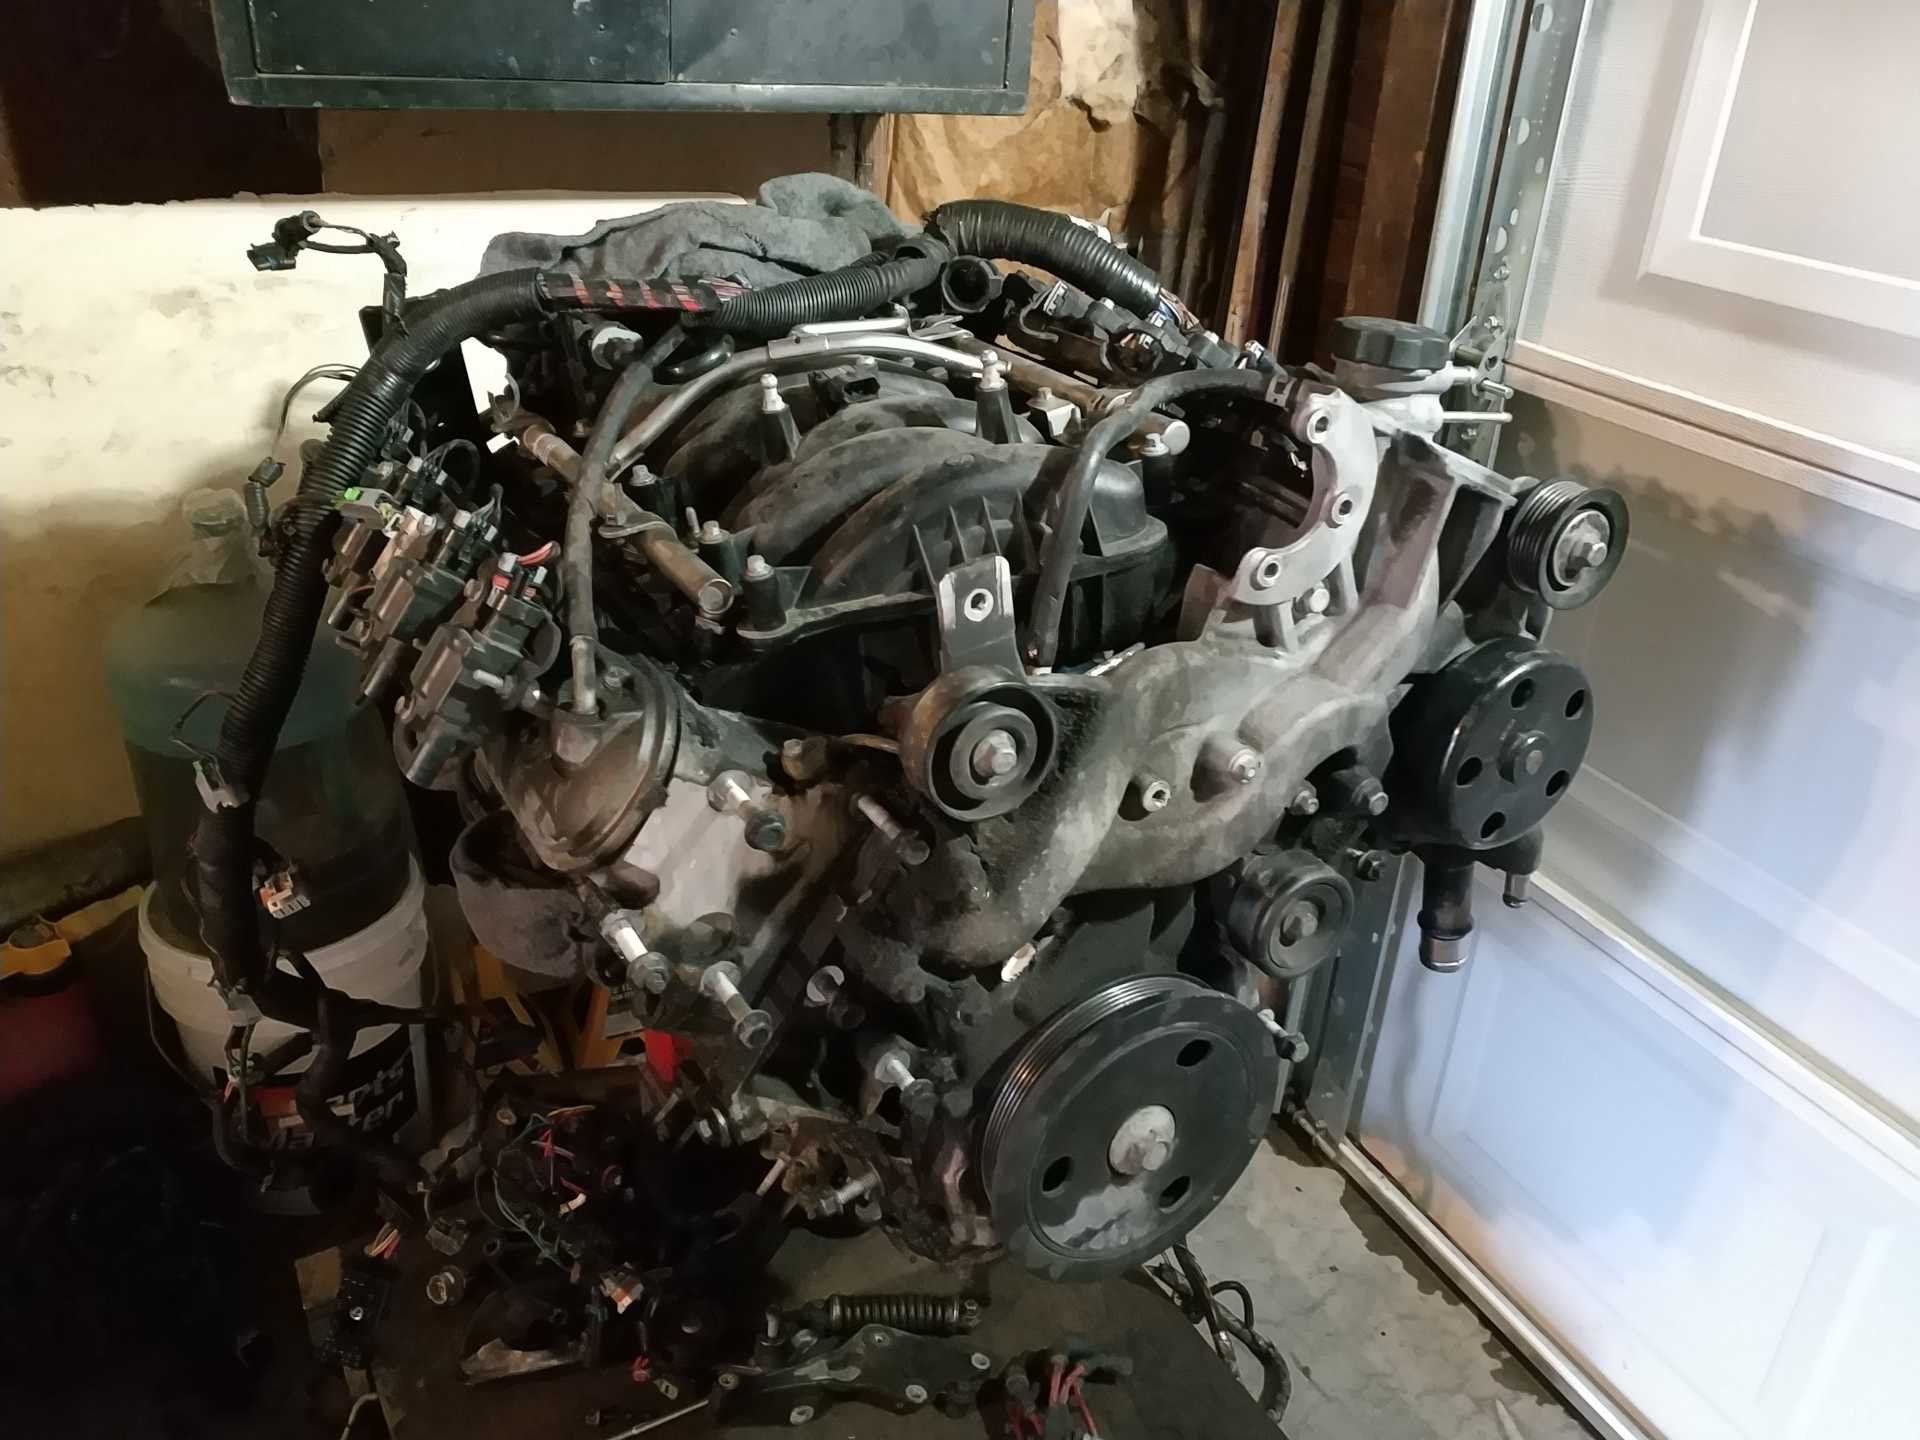
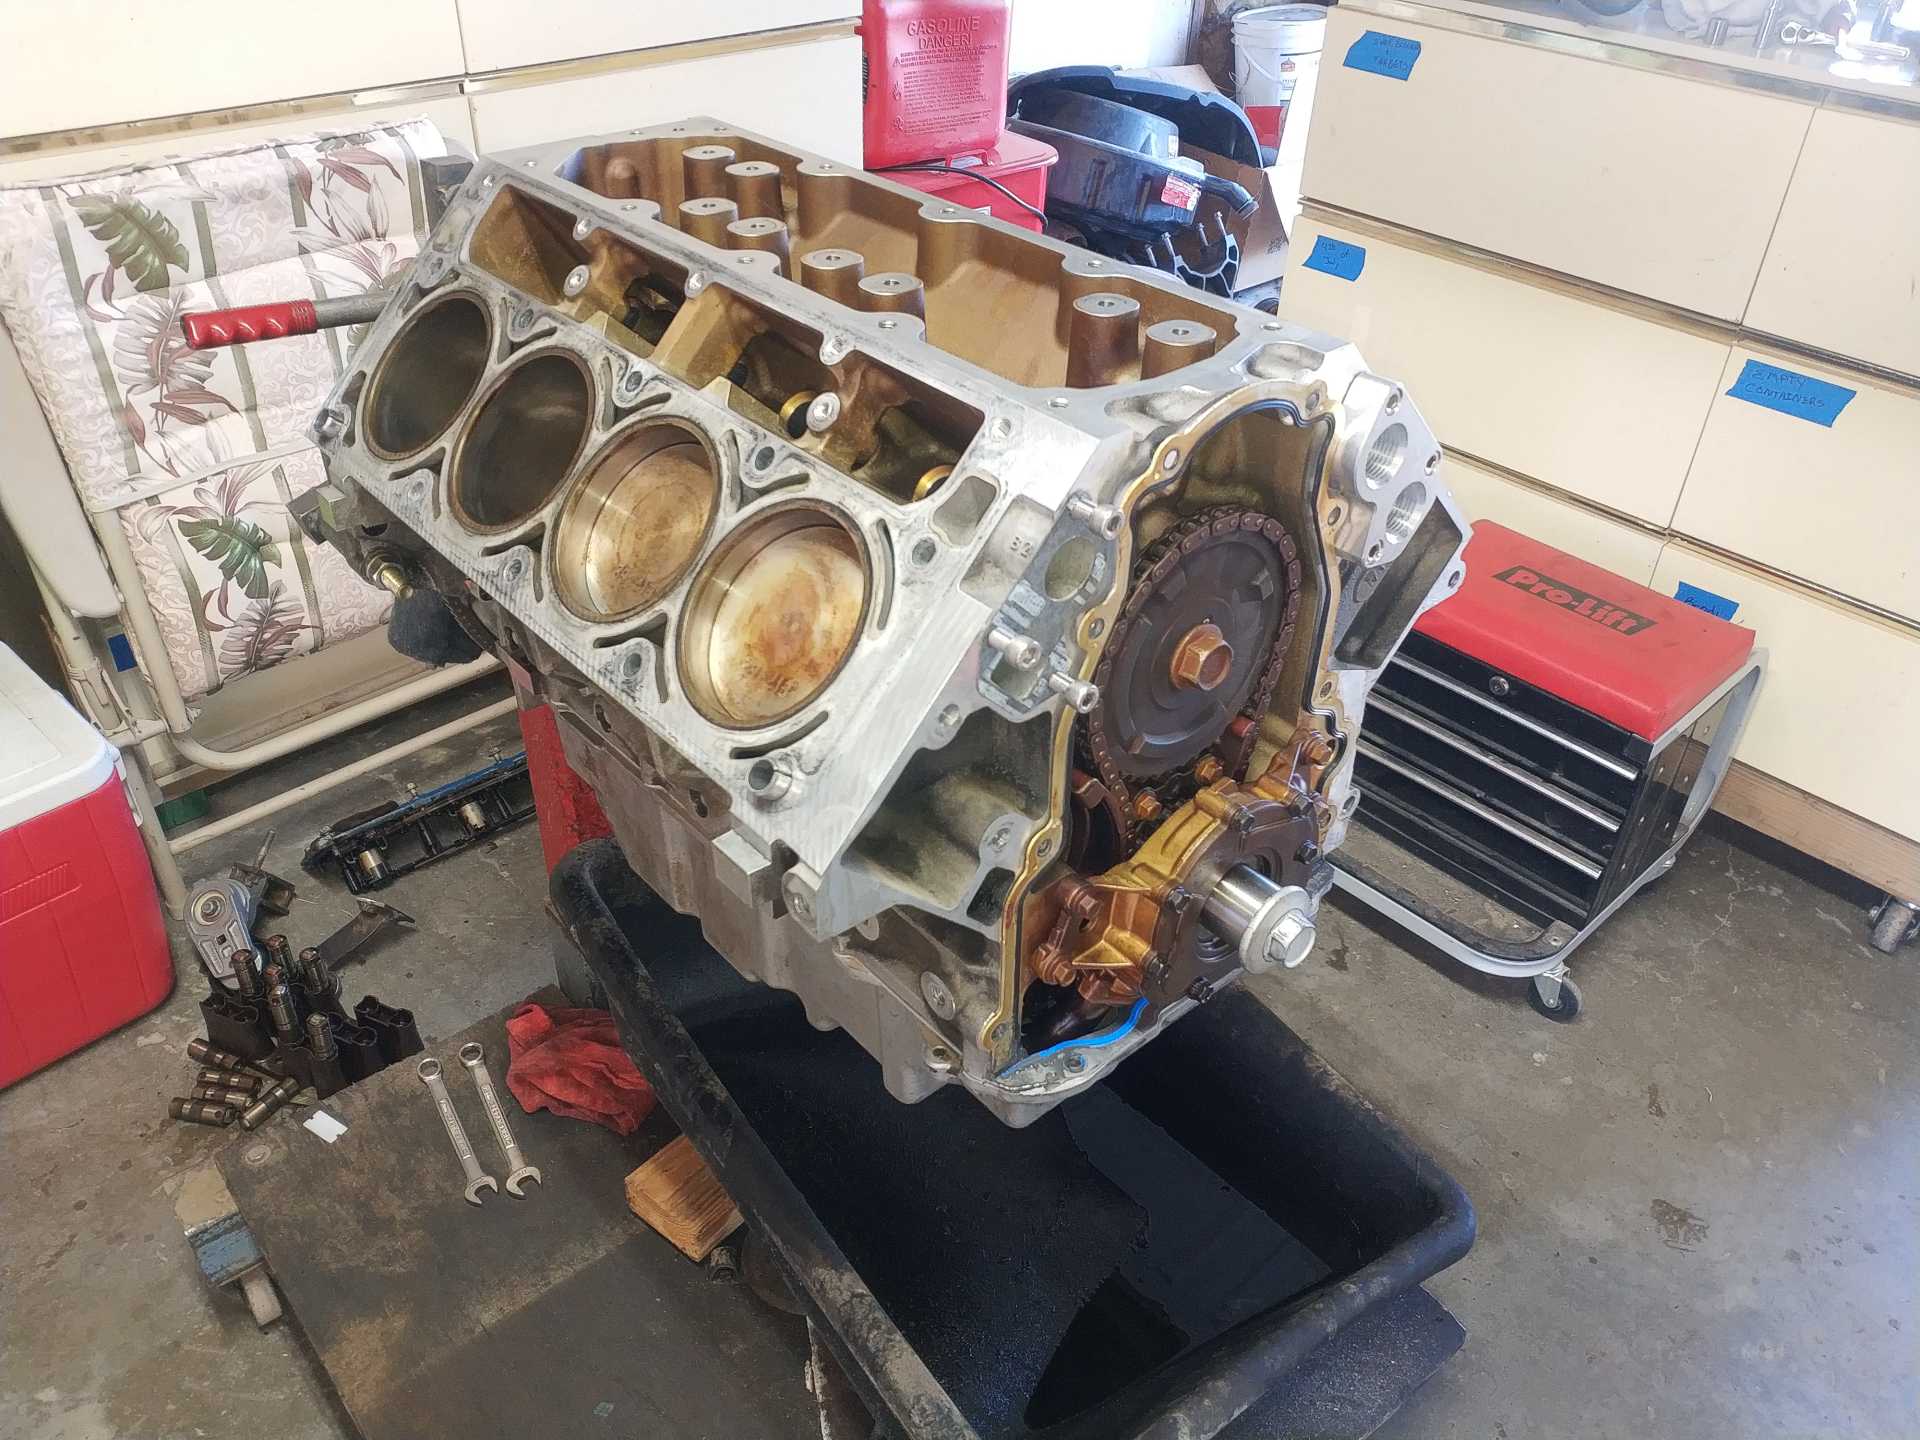
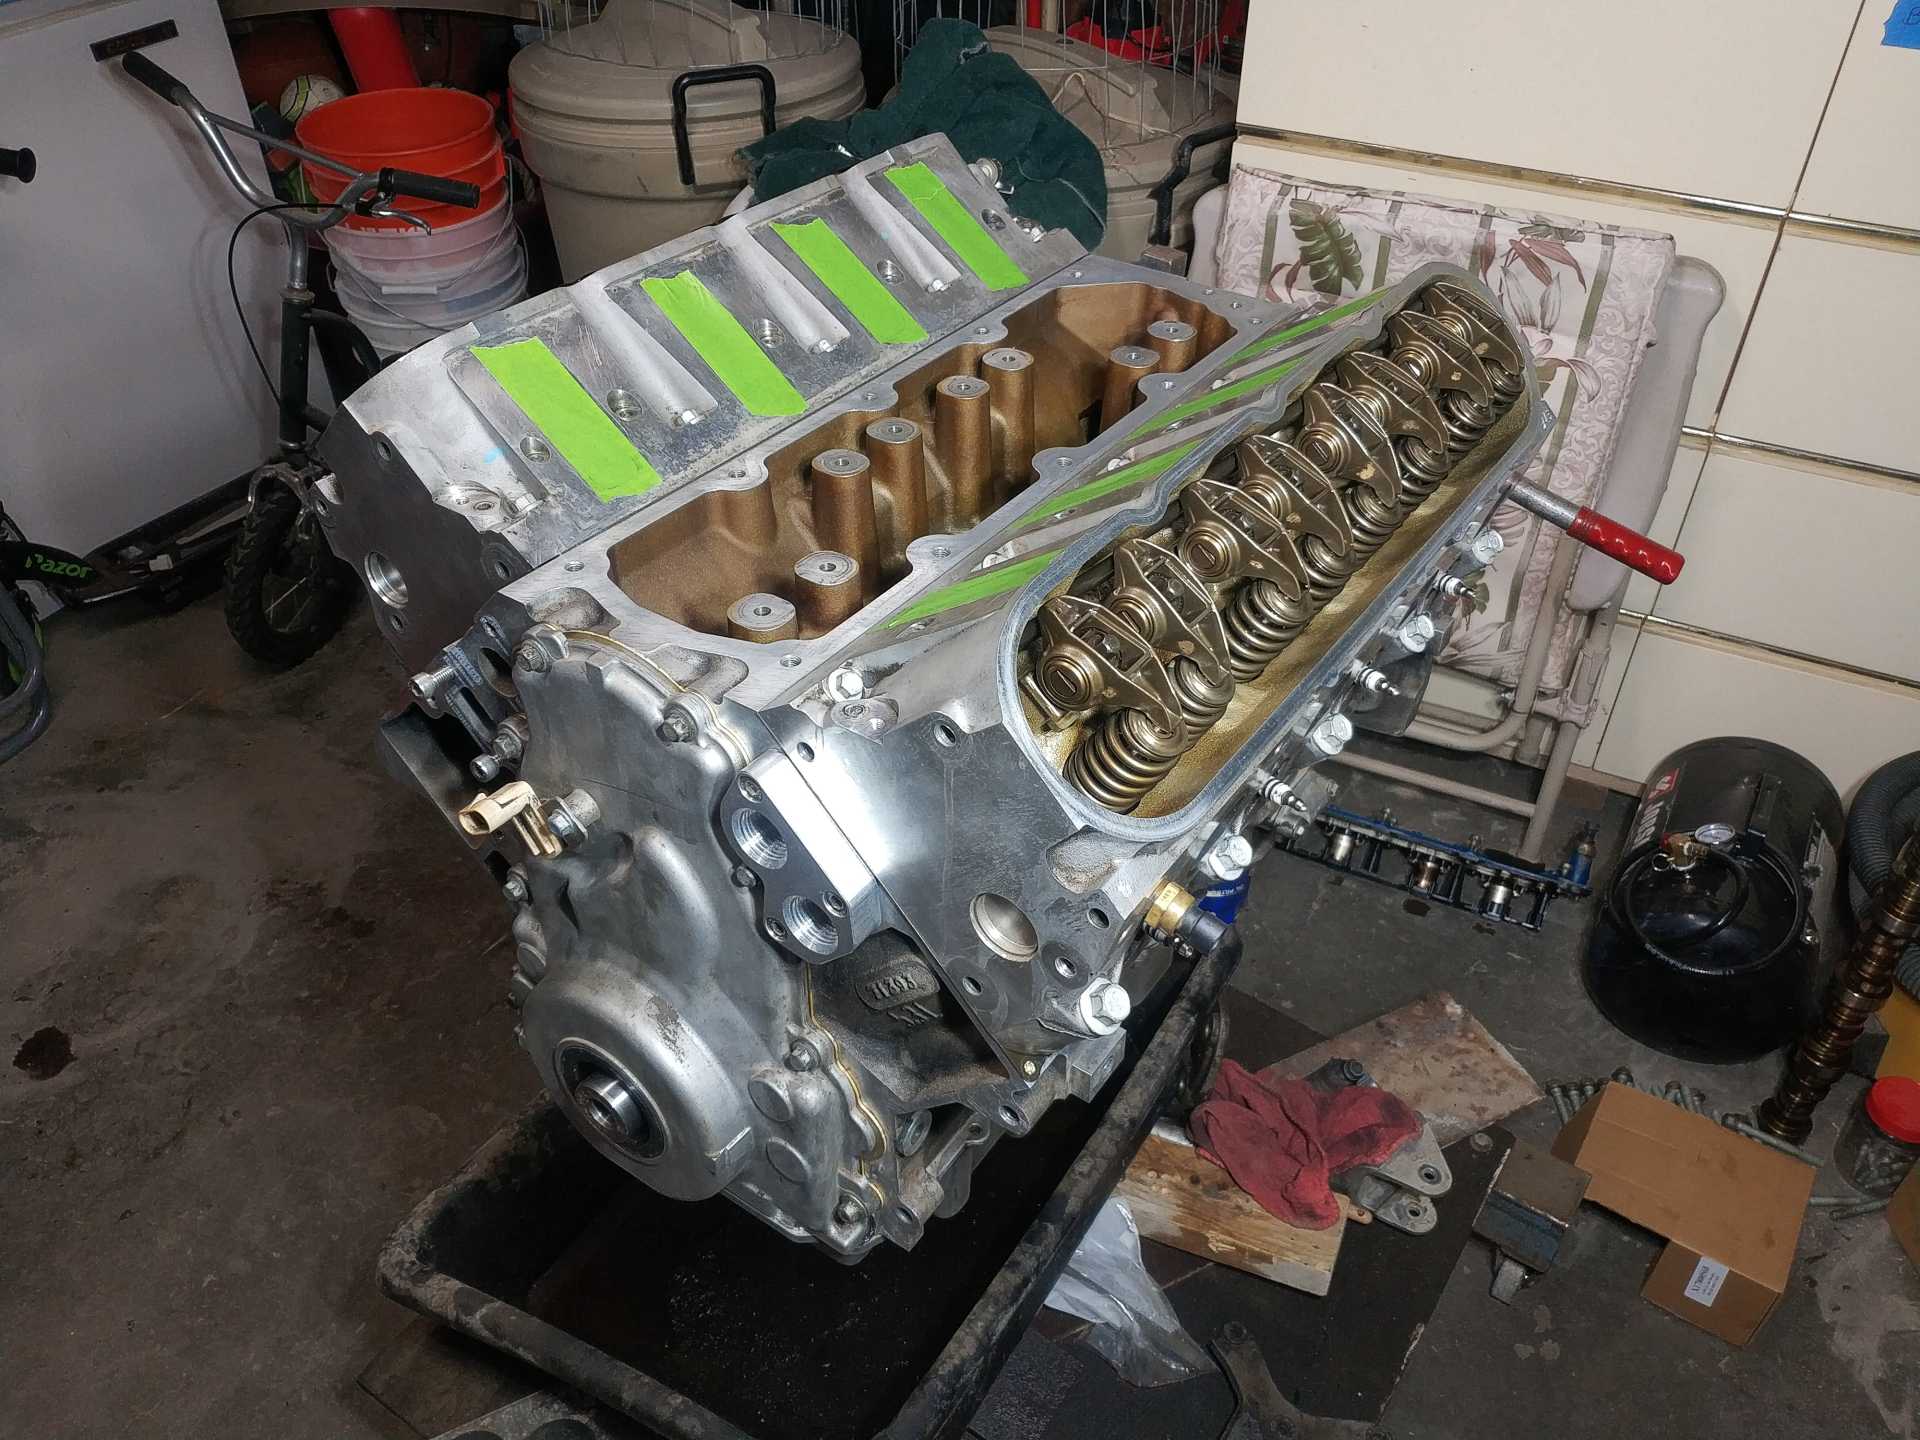
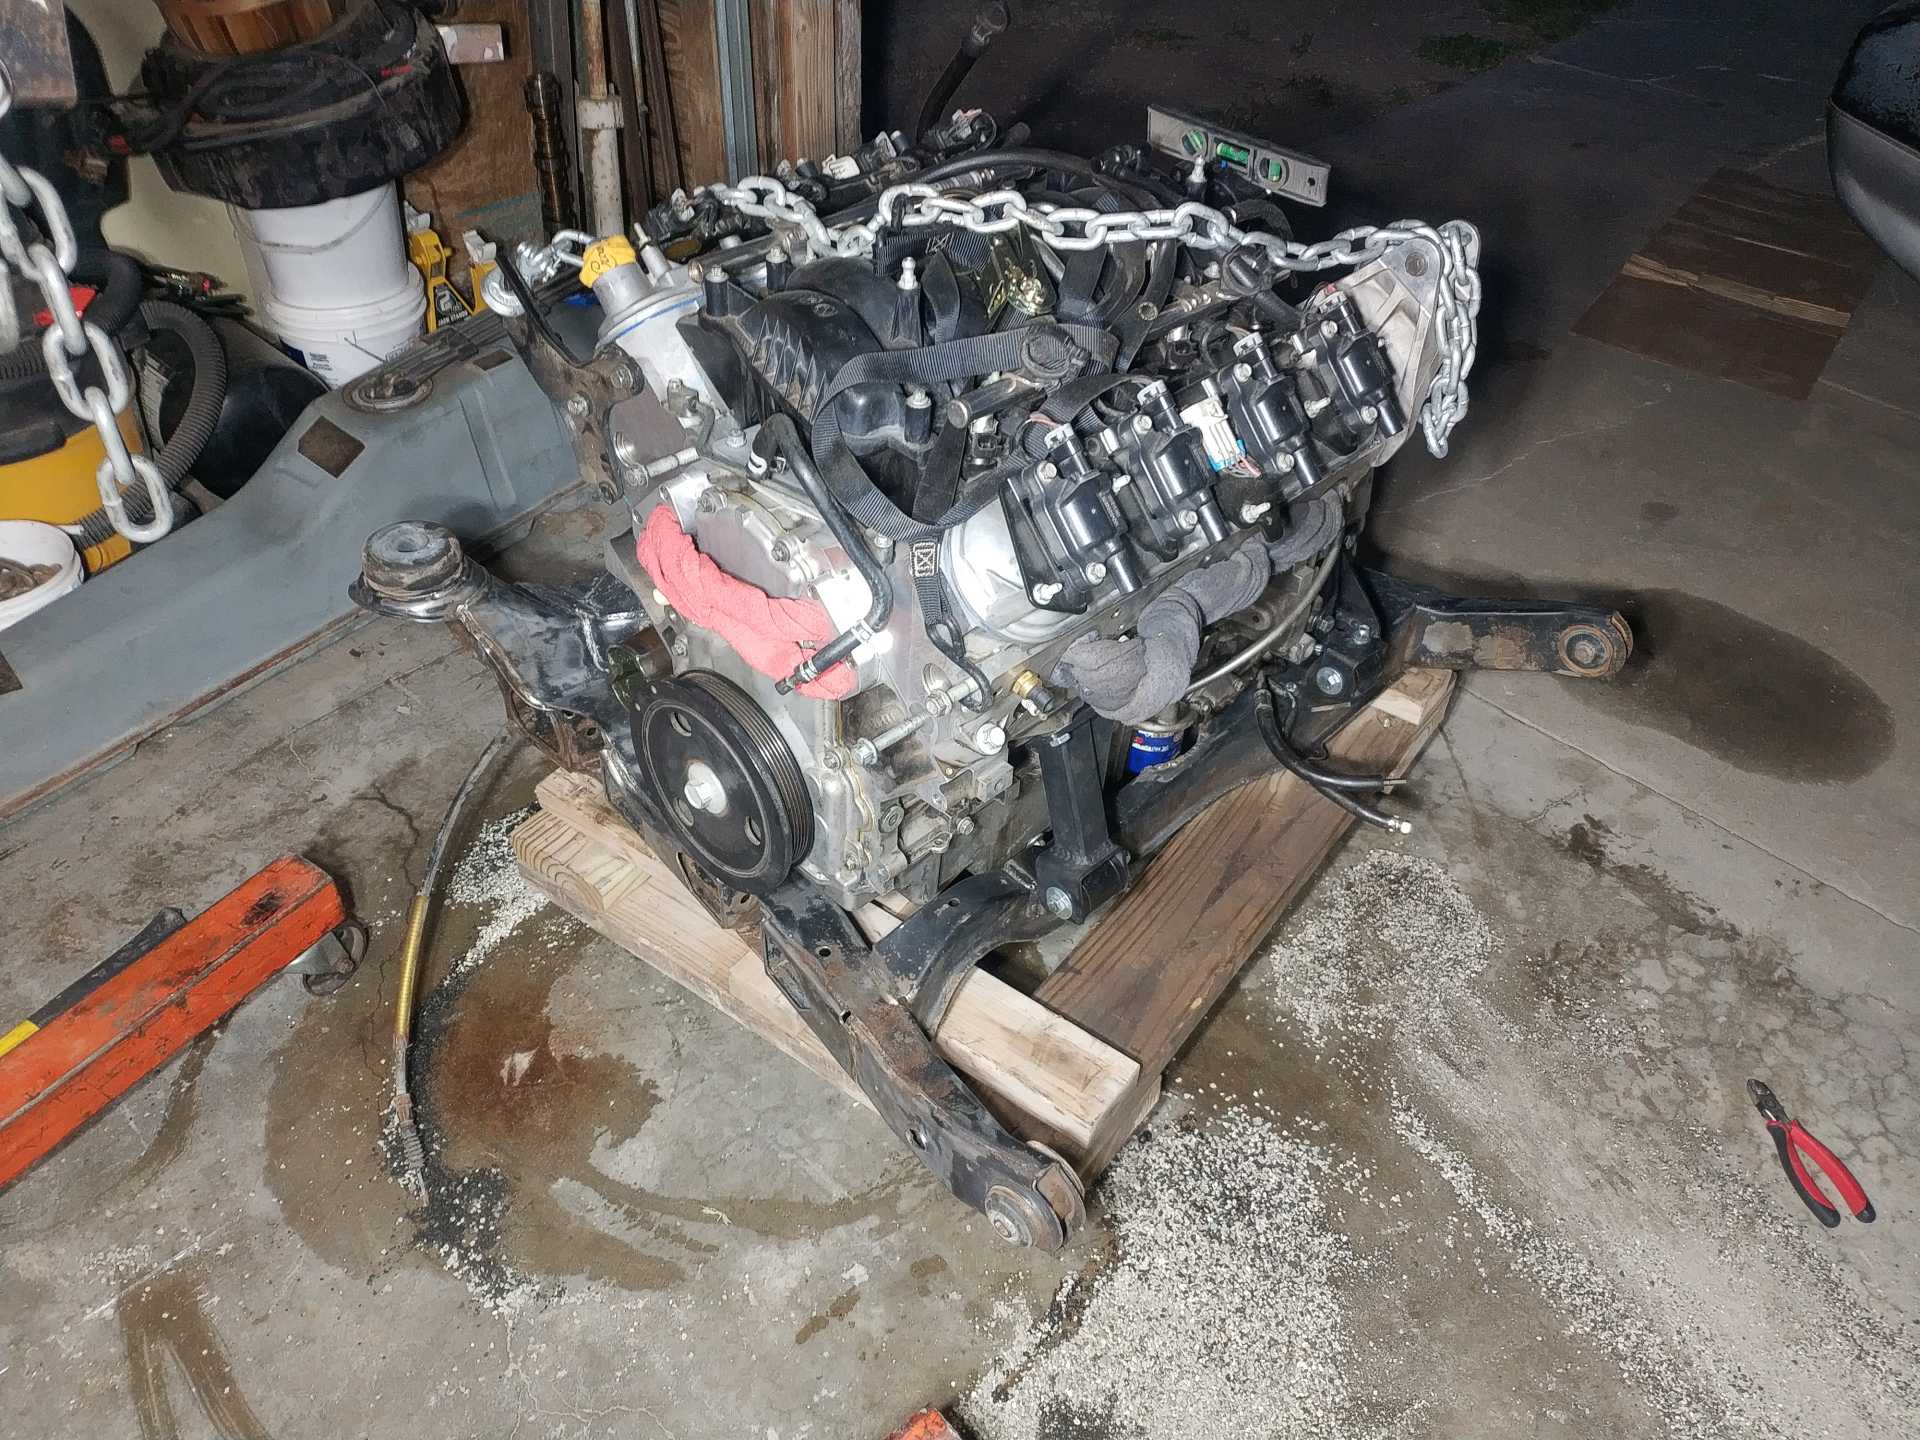
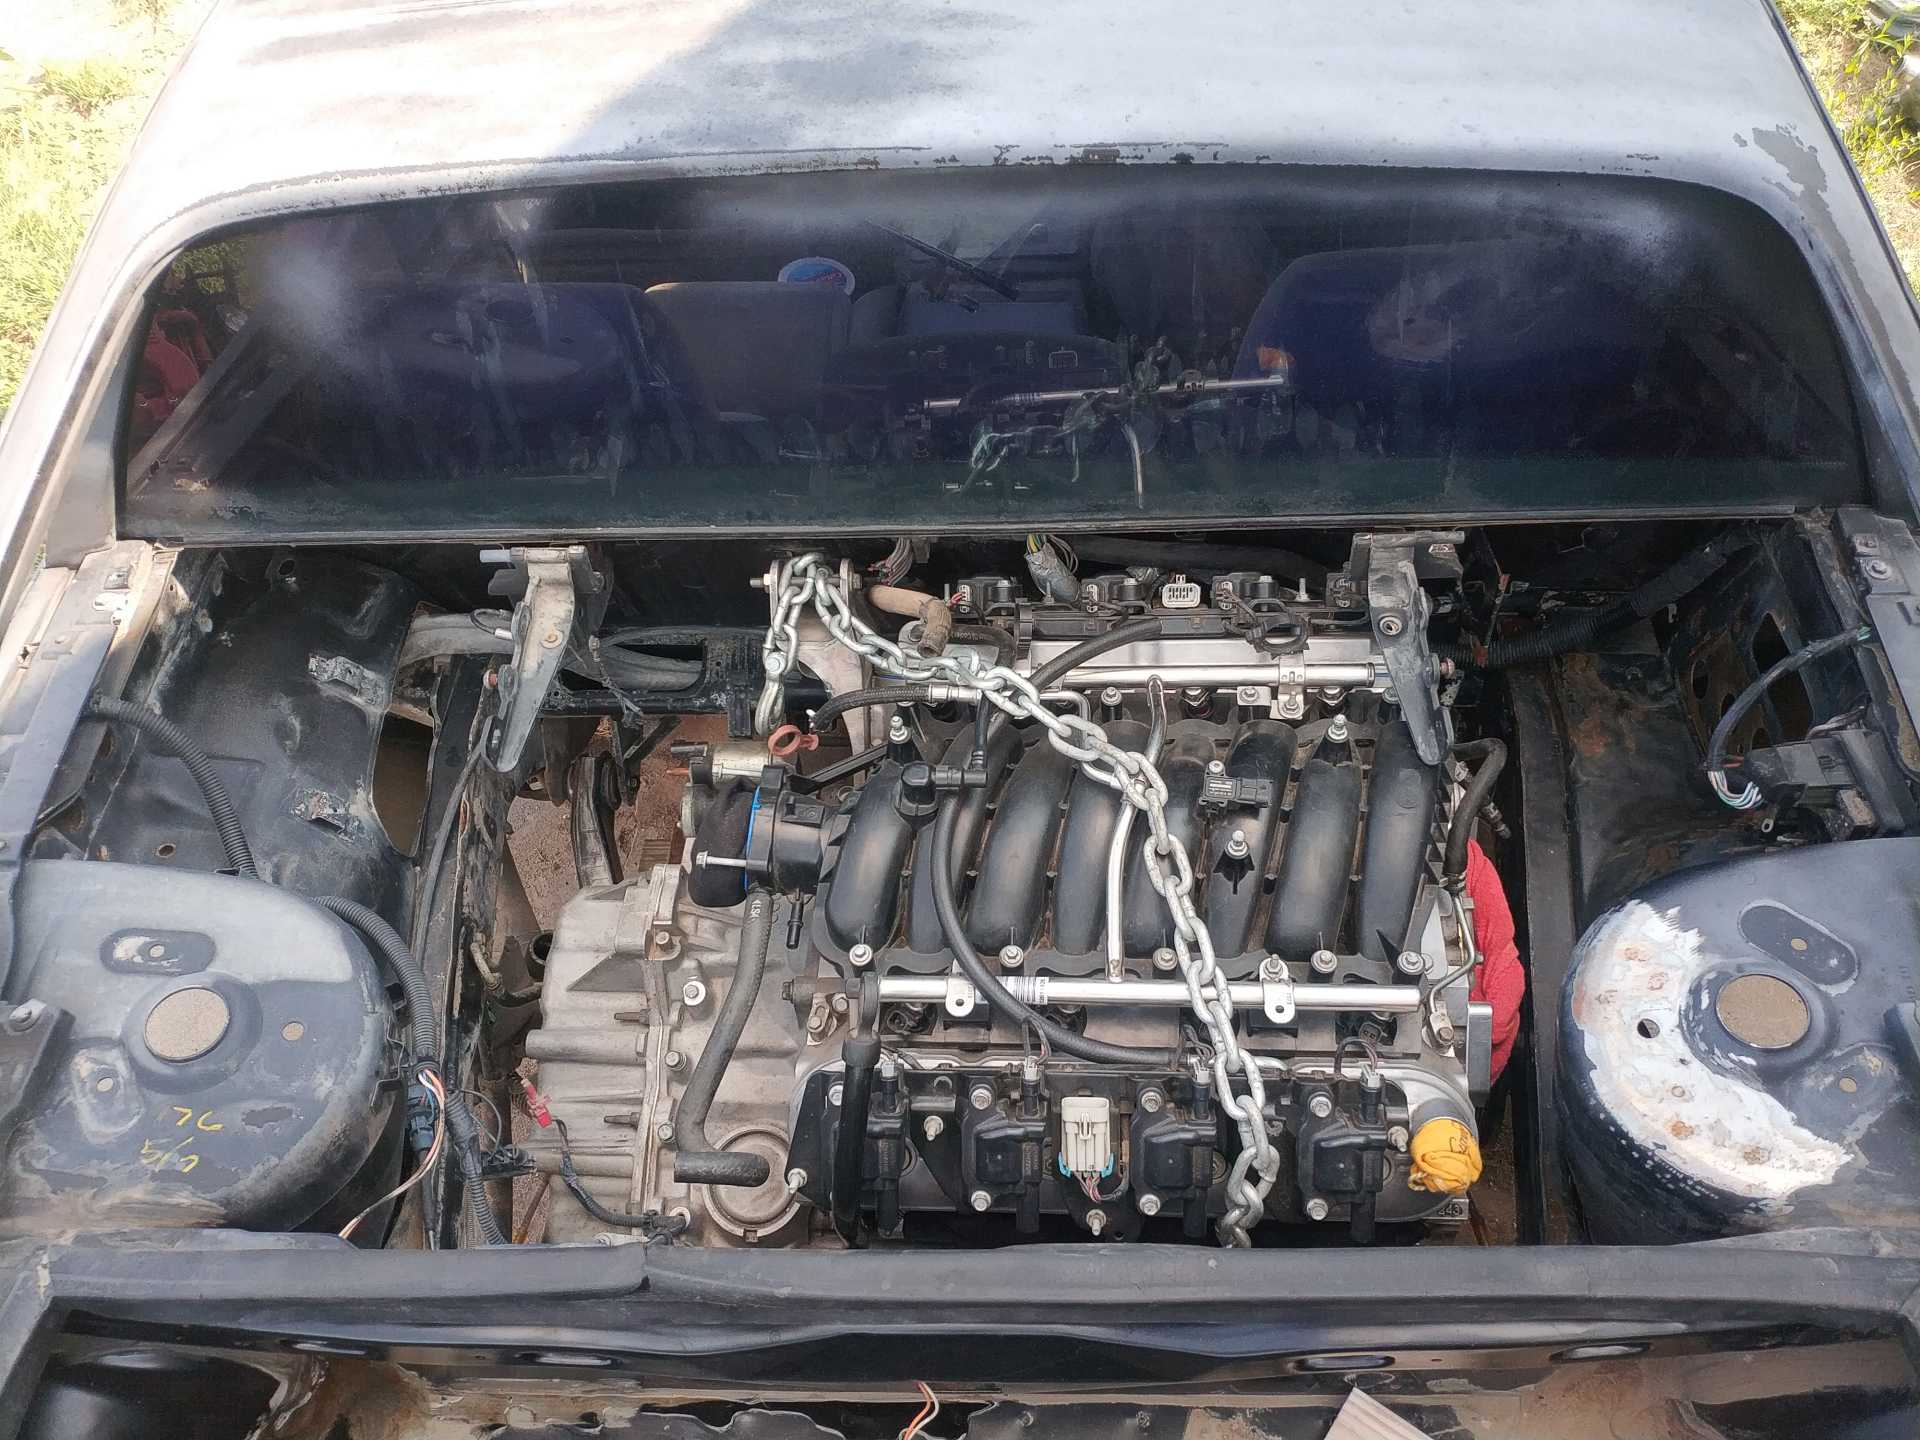
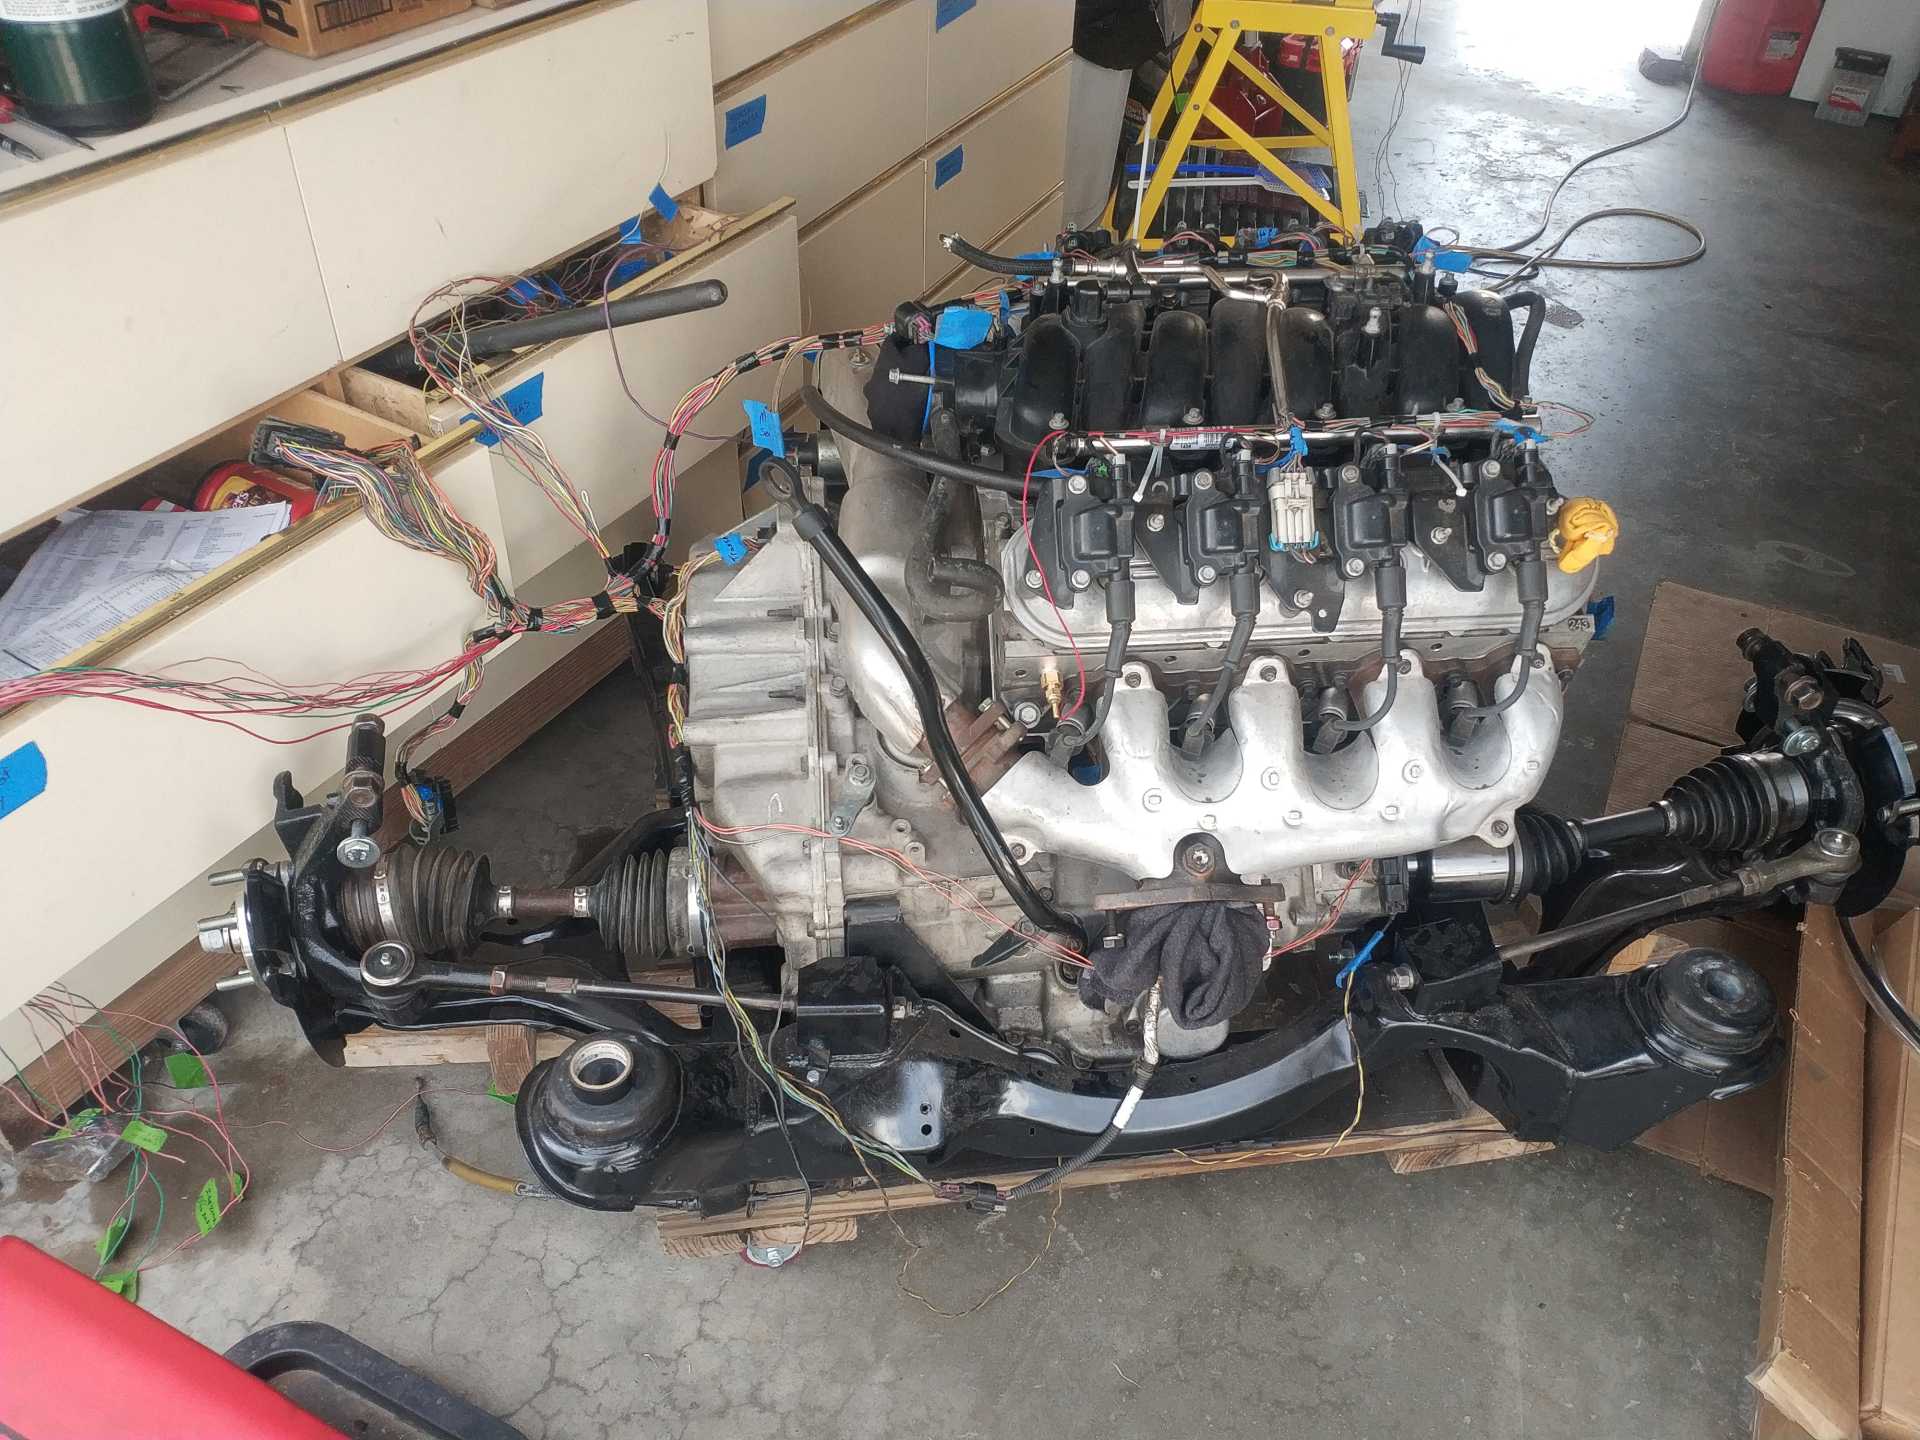
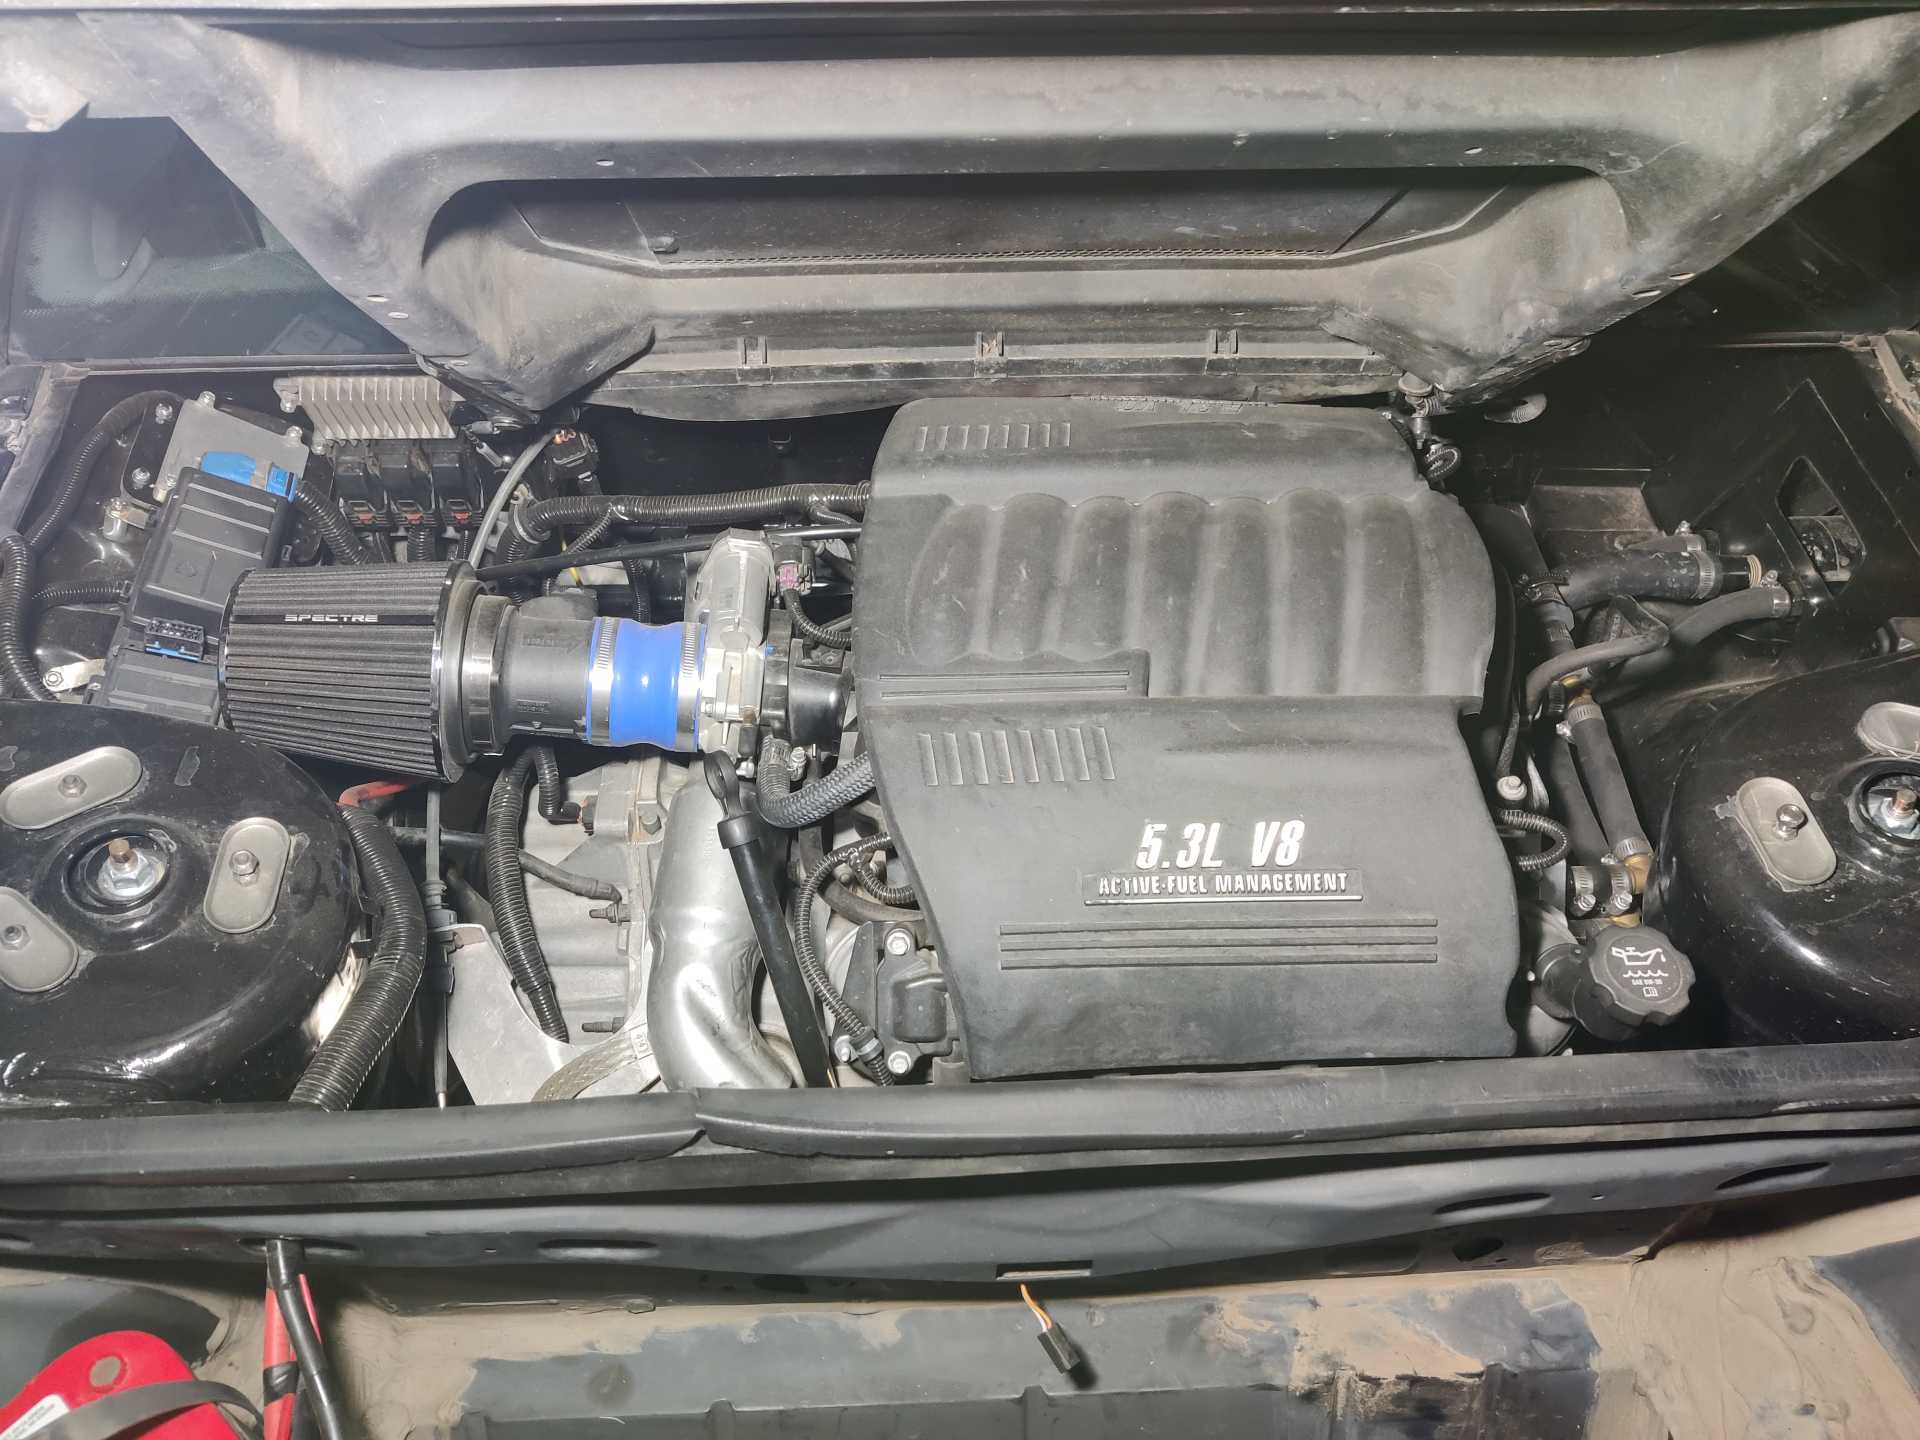
The drive train came out of a 2008 Chevy Impala and it was a MESS. I got it all cleaned up and started tearing into it to. It got all new gaskets from my work and a DOD delete kit from AMS Racing. I decided to go with a stock cam even though it would be nice to hear it lope a bit. I'll probably change that later on down the road when I can afford a less restrictive intake and maybe dual exhaust. First I want to make it a reliable 5.3l. It's not going to have A/C (for now) and I will be running an electric water pump.
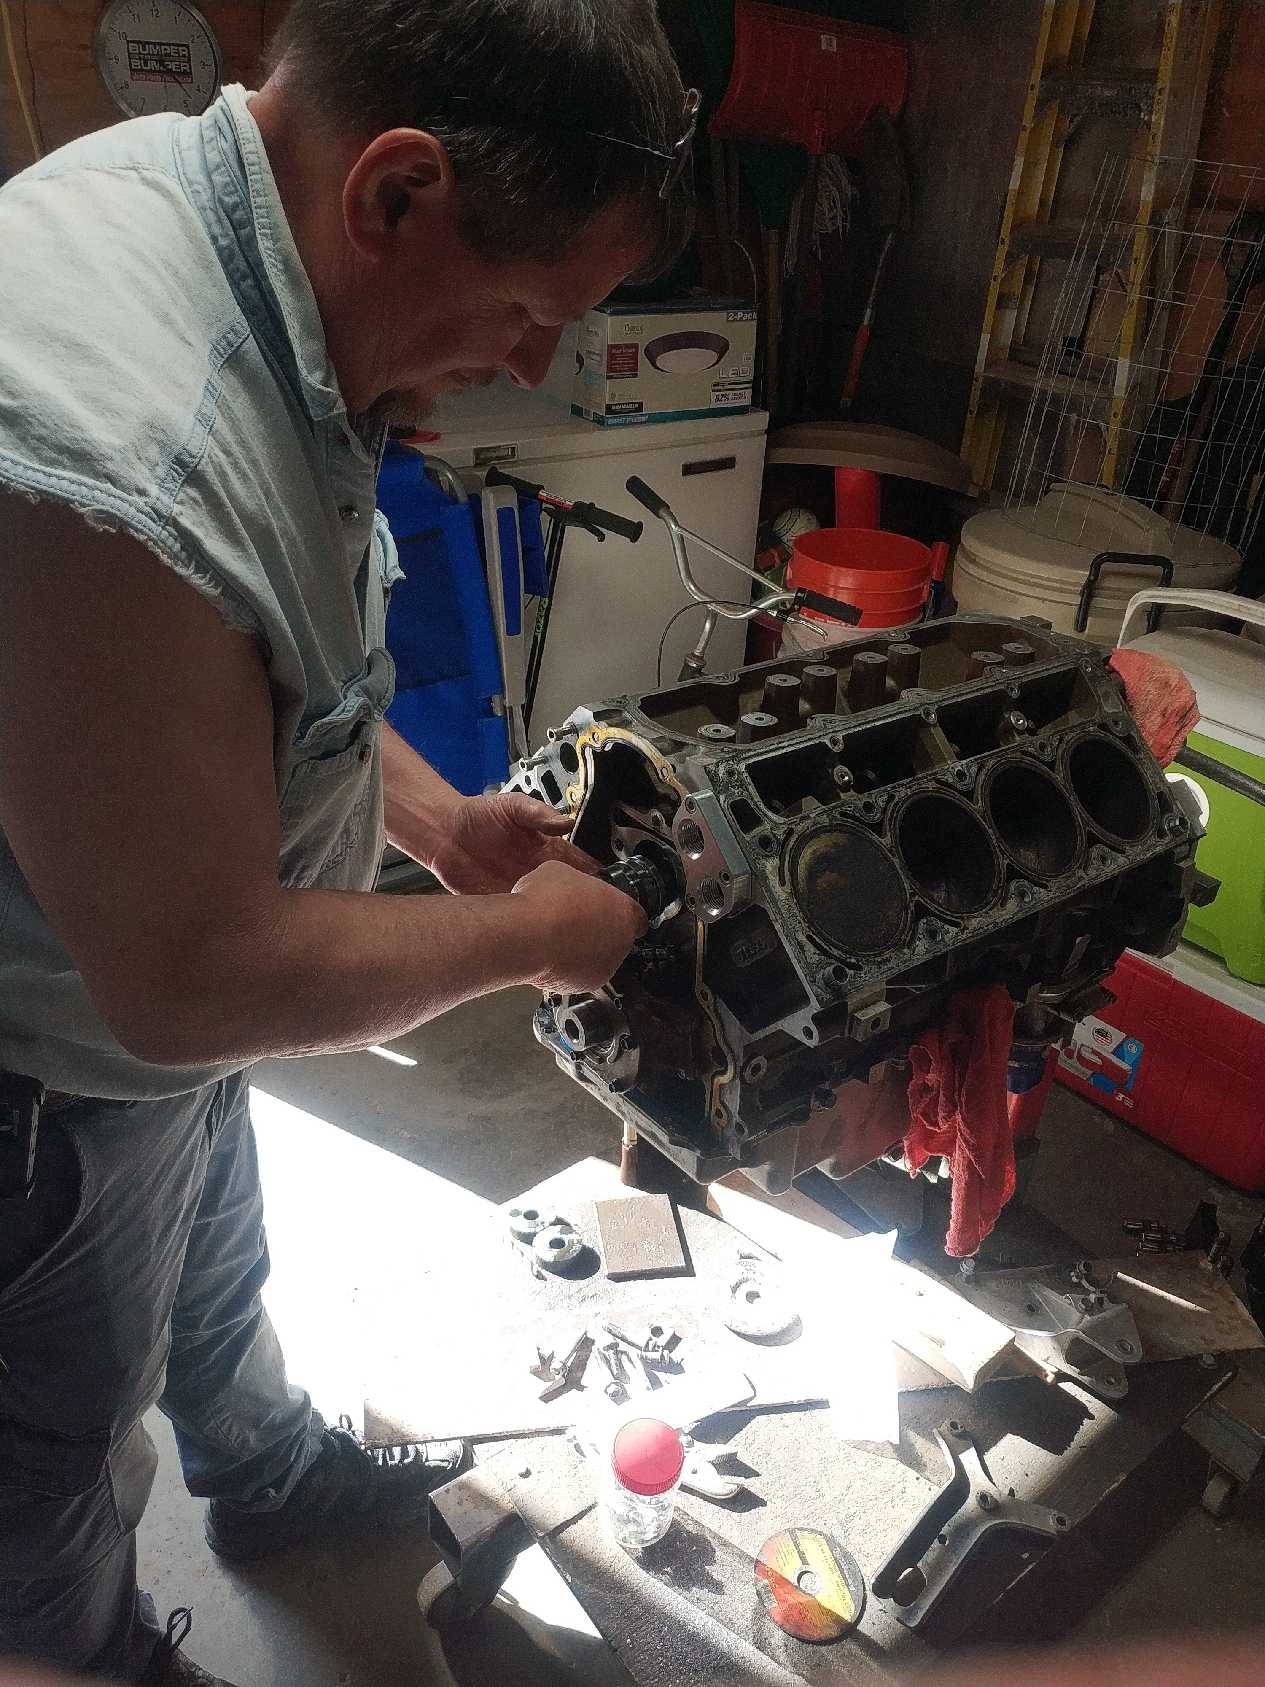
My dad was helping me this day
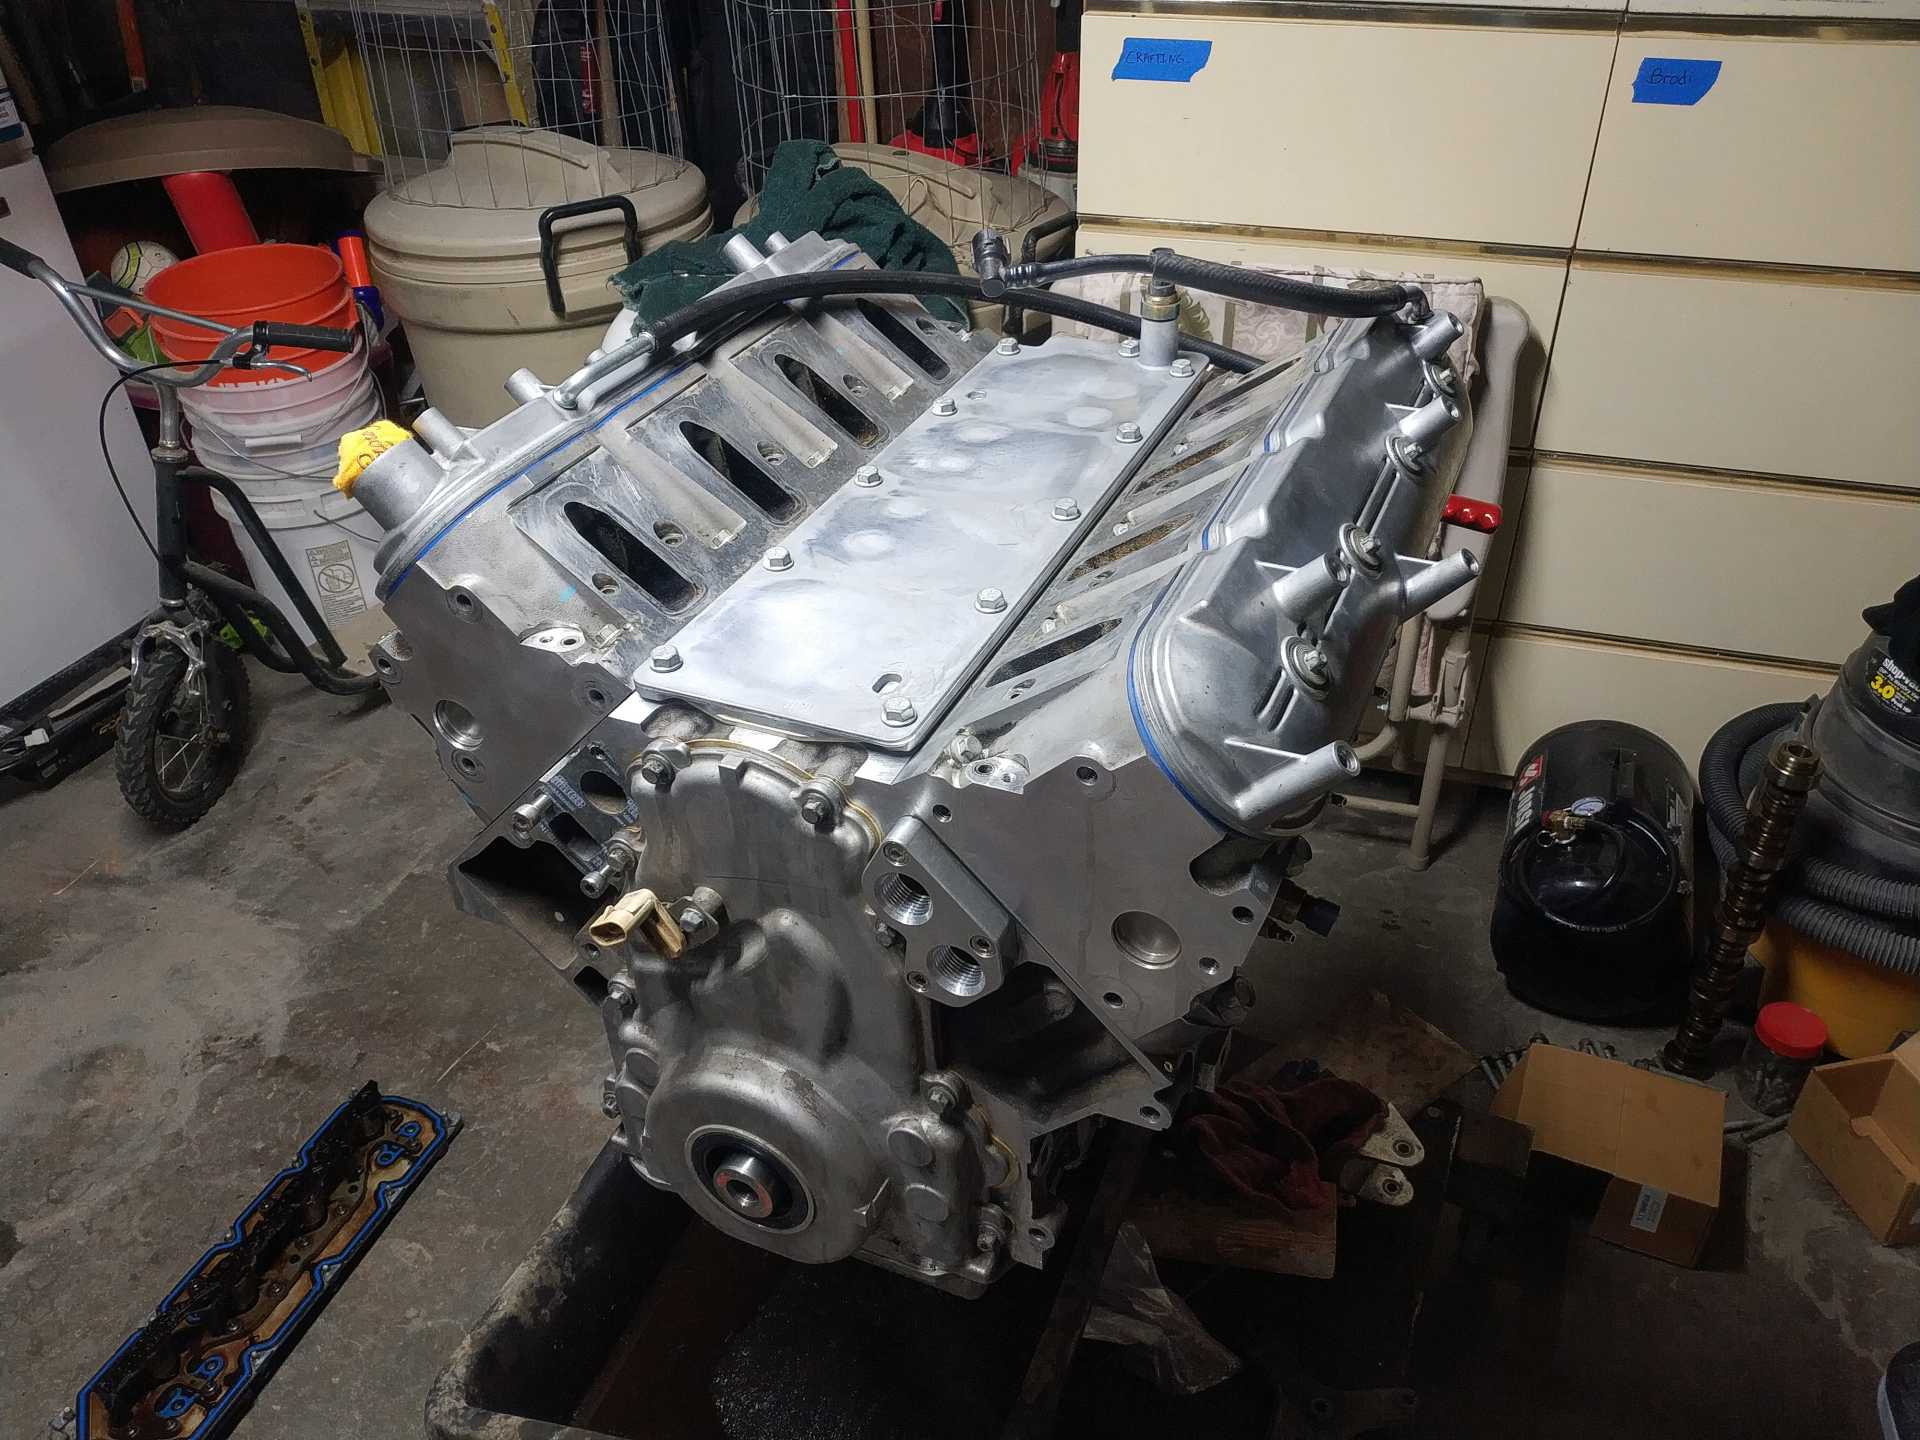
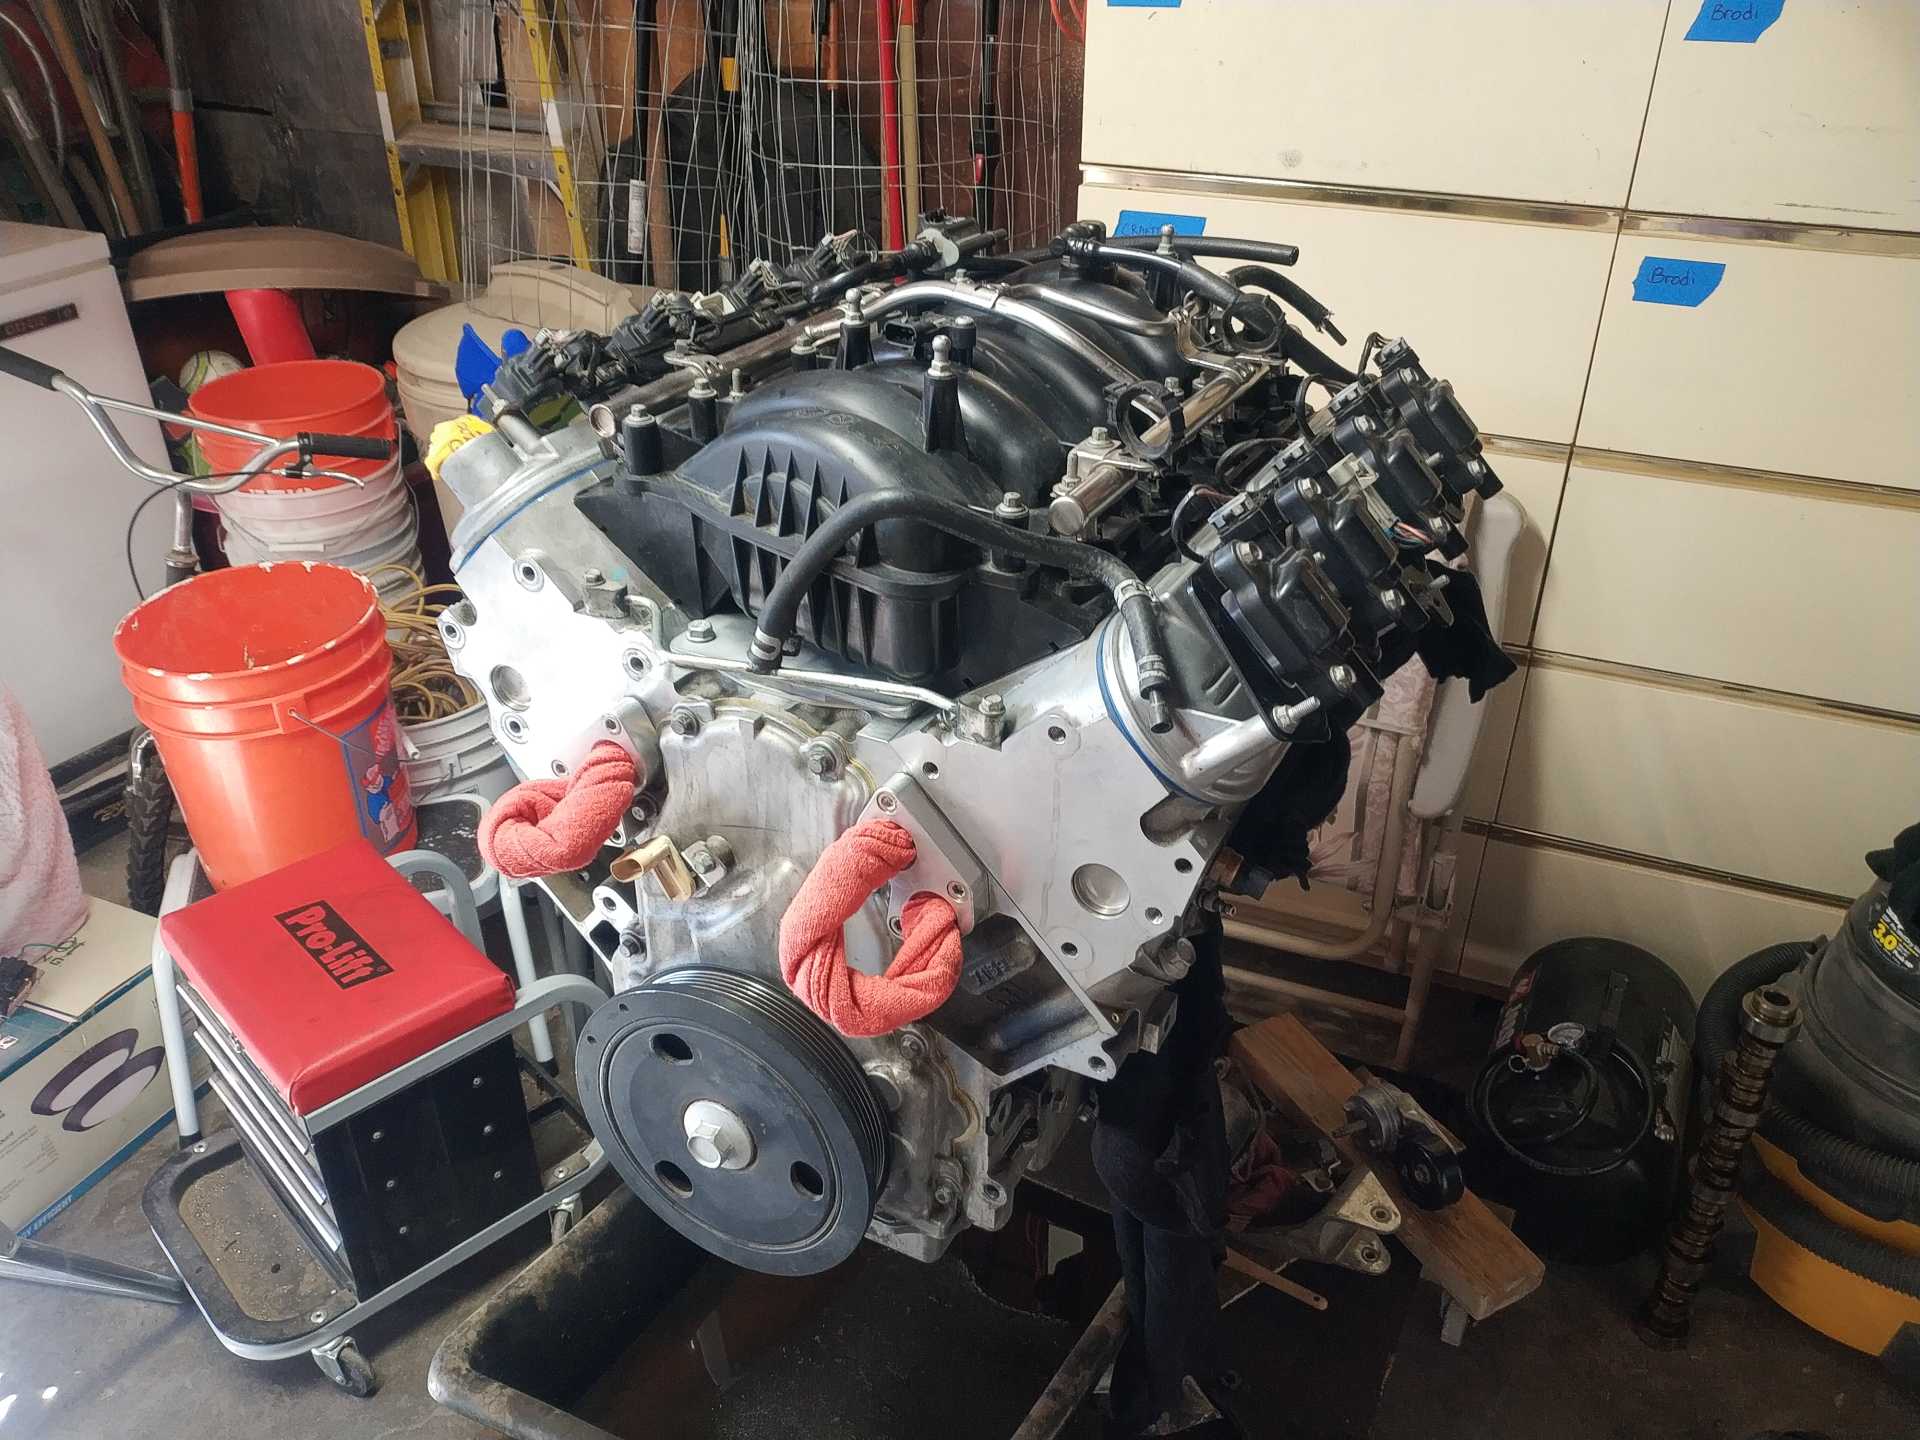
Despite it being a grease ball on the outside, it was pretty clean inside. Anyways I got it all put back together with the valve covers swapped and the hoses going to where they should
Please excuse my mess in the backgrounds lol small garage problems..
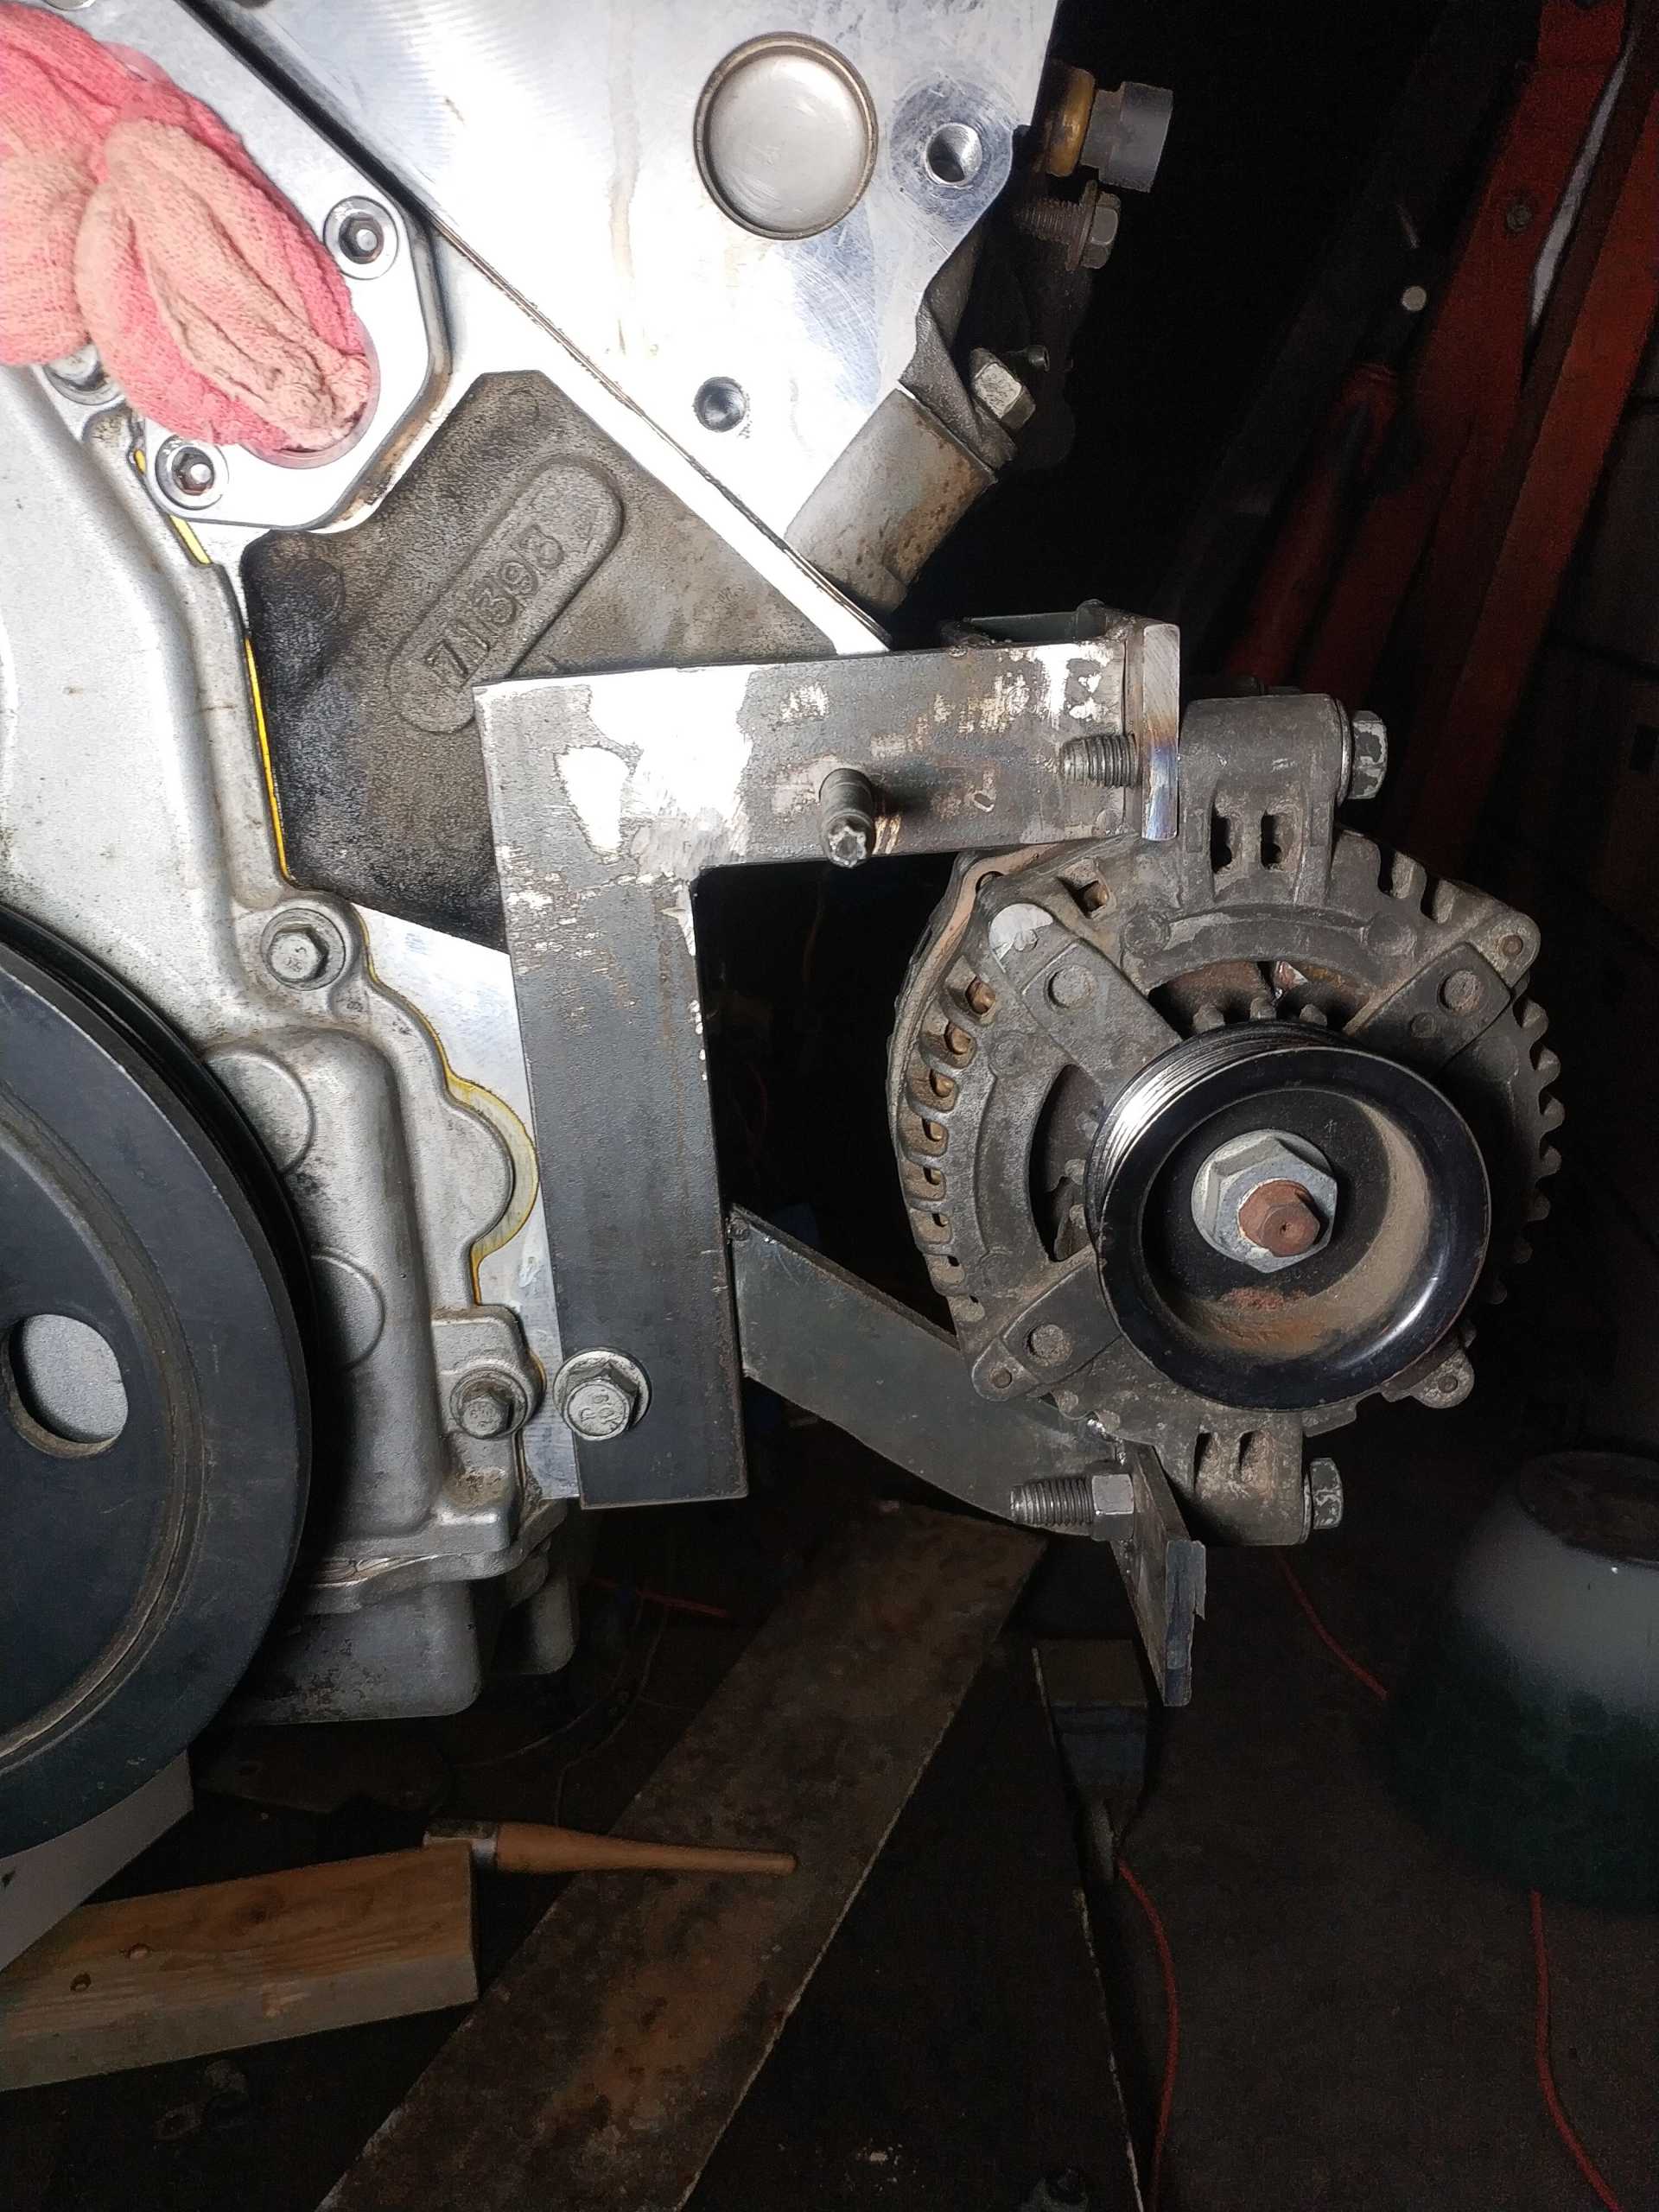
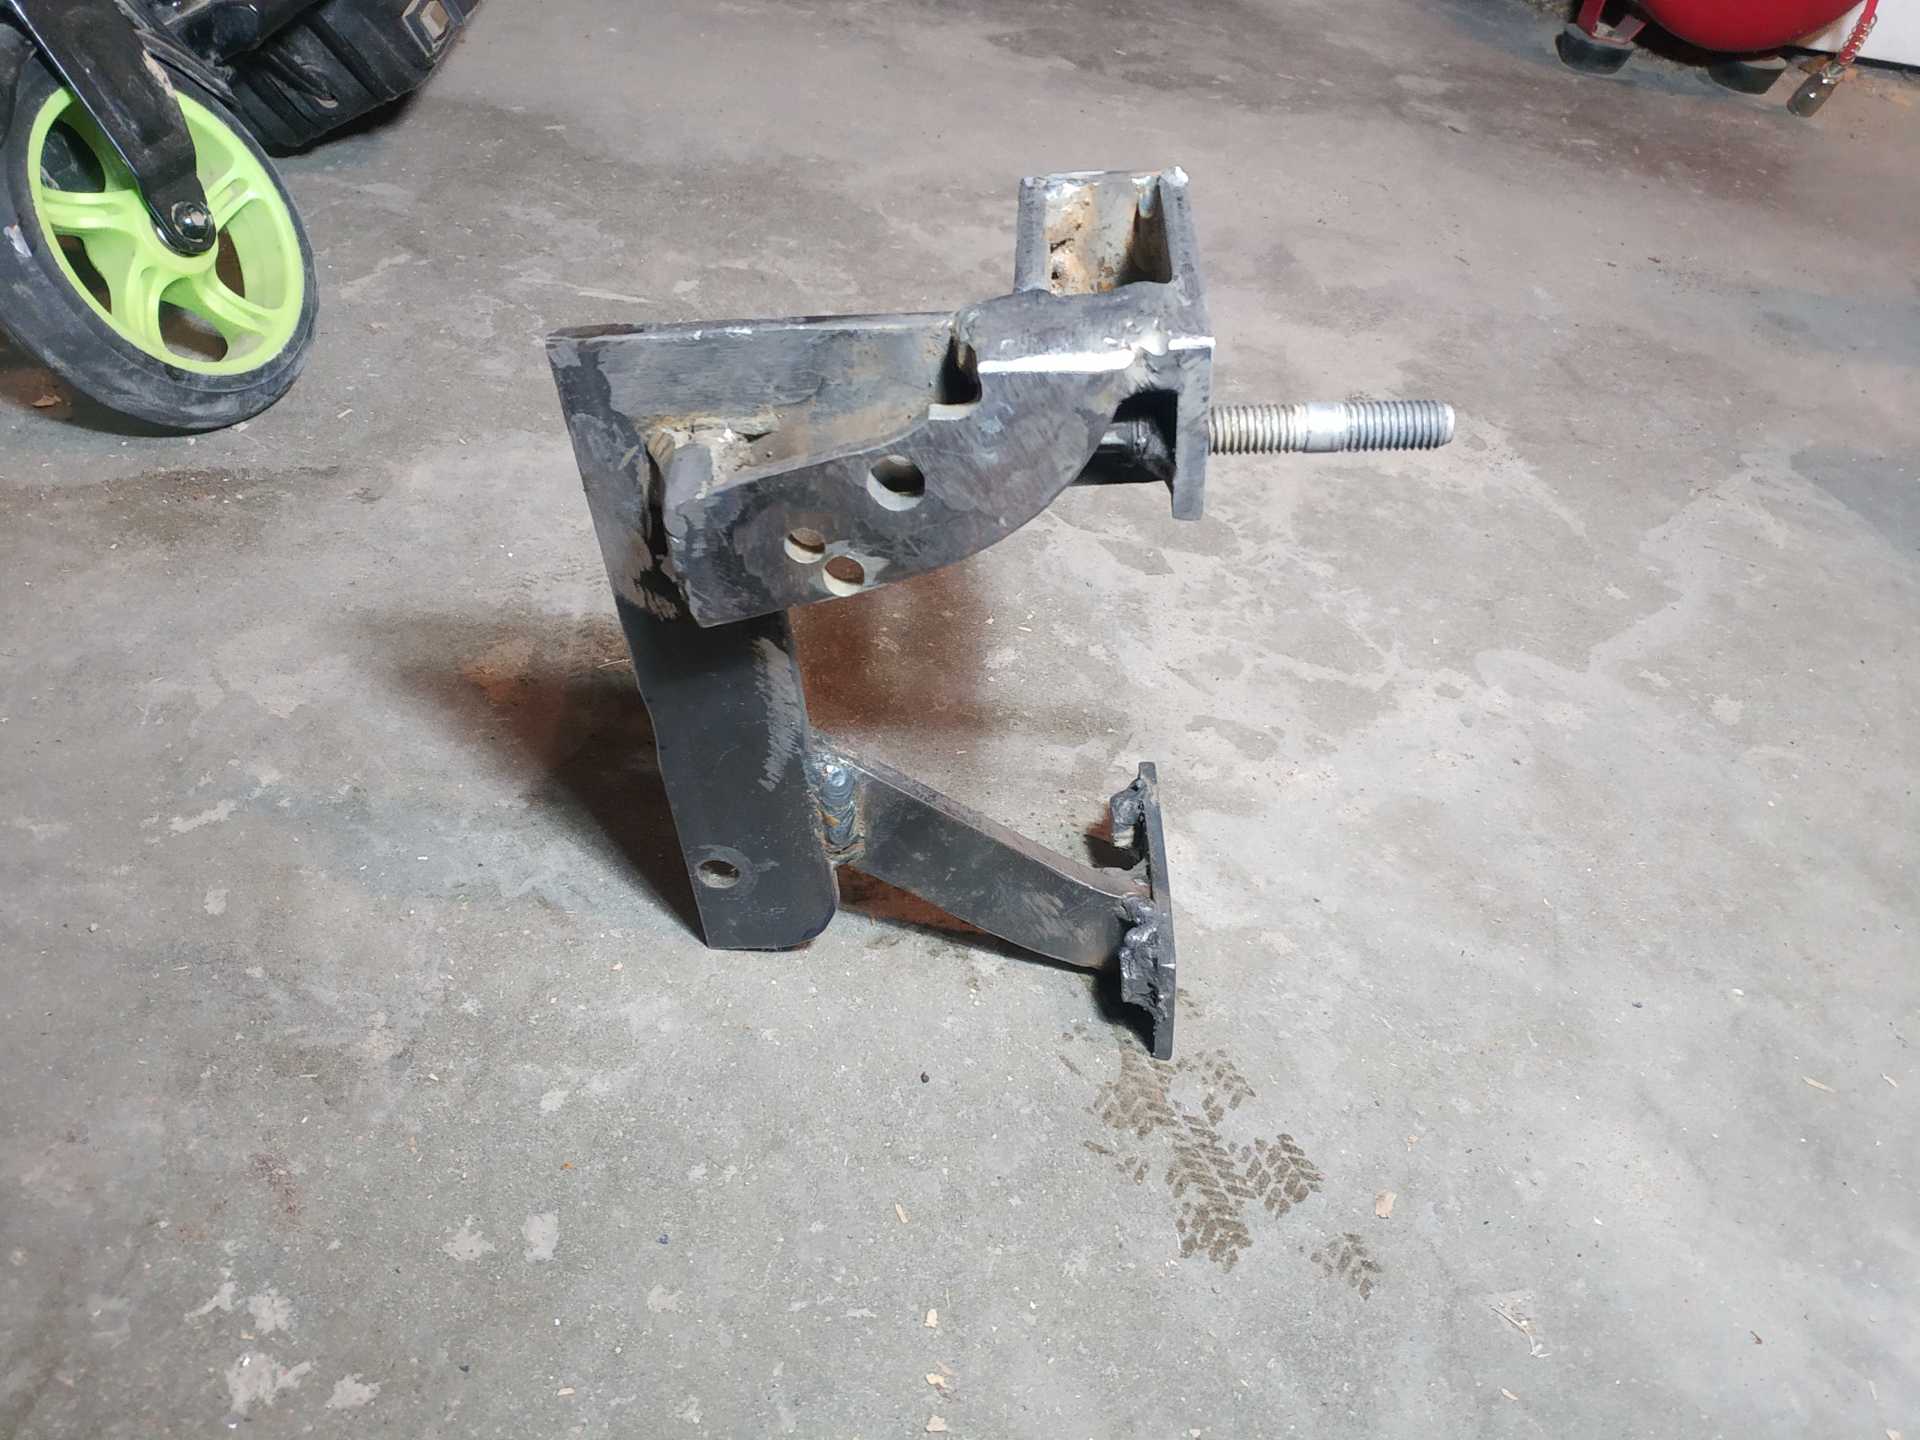
Next it was time to figure out the alternator. I'm on a pretty strict budget but I have some metal and a welder so I decided to make my own tensioner and alternator bracket. (Sorry Guru) I had to oval out one of the mounting holes on the alternator a little bit to make sure the pulley lined up well with the harmonic ballancer. One bolt mounting the alternator on is going to go through my bracket and into the block.
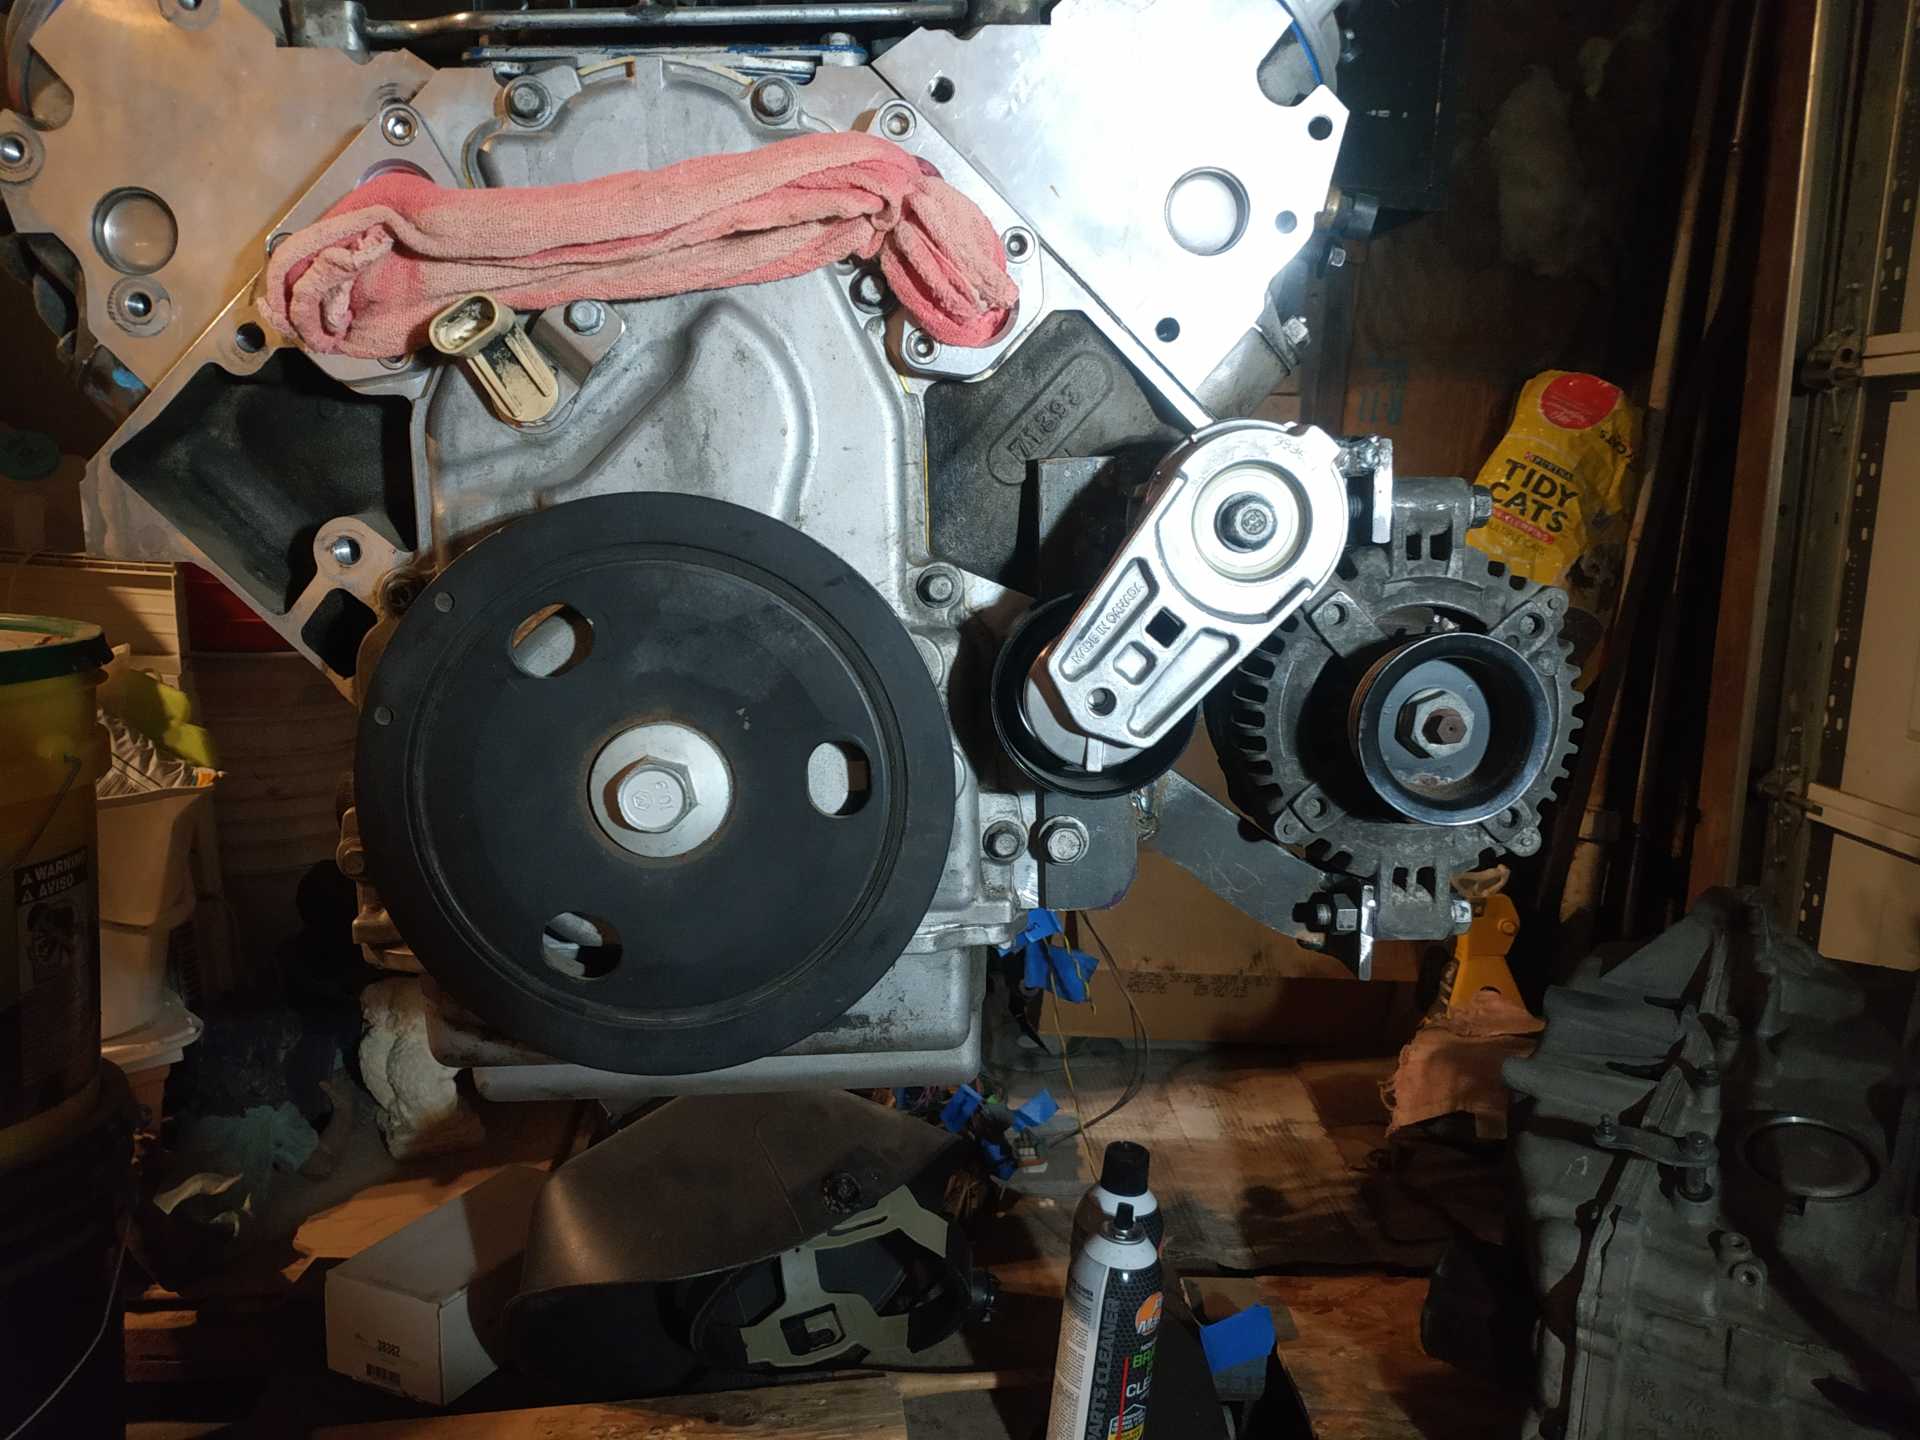
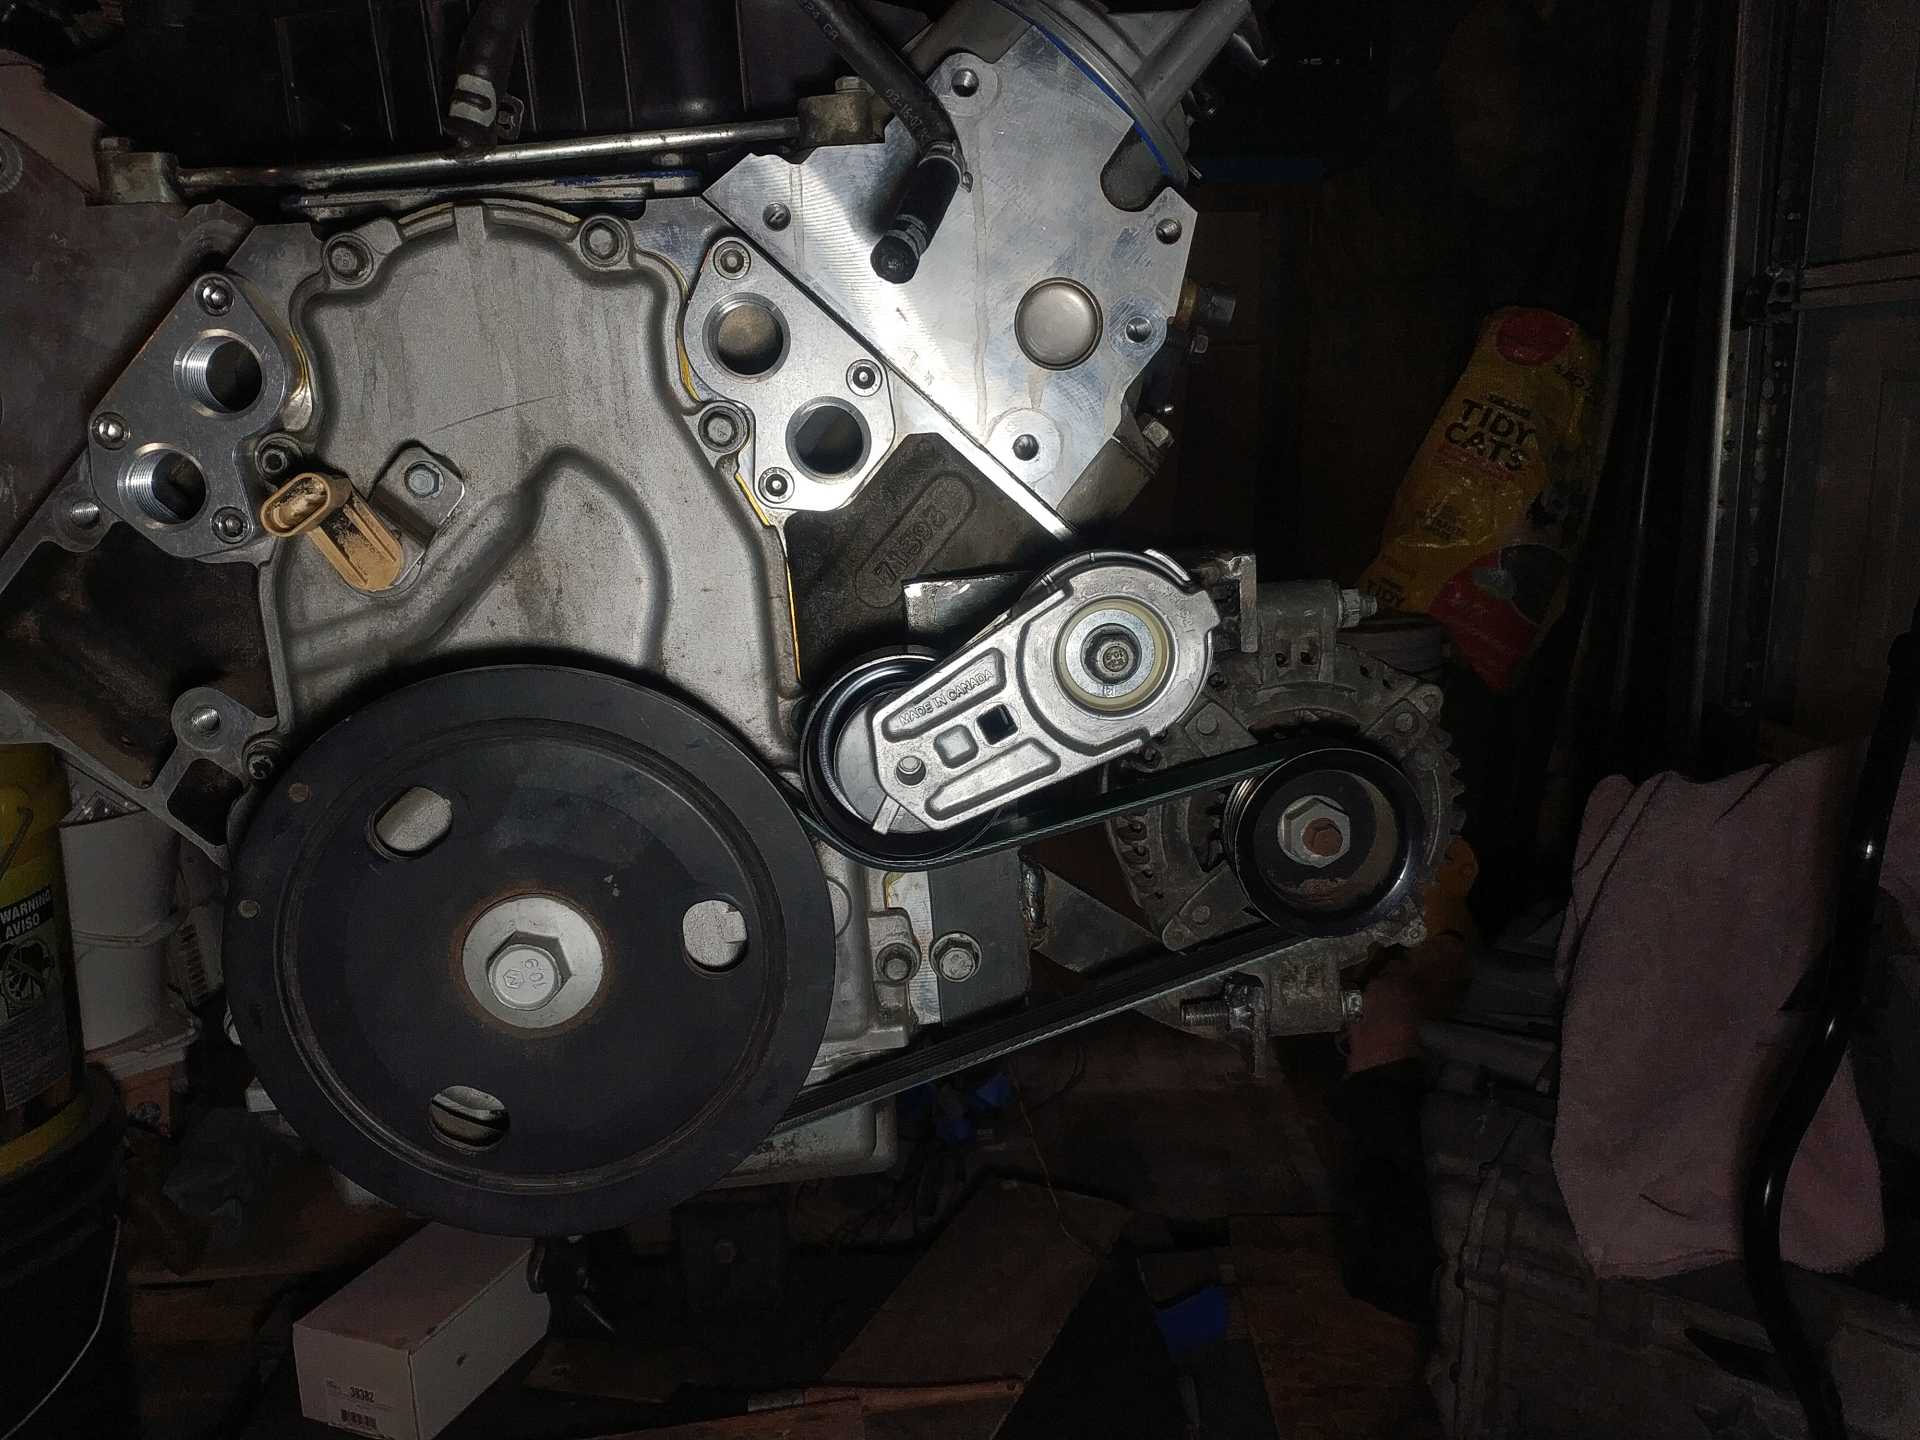
It was slightly off so i cut it apart and redid it lol I don't want to be constantly tearing up belts. The tensioner is a Gates 38382. It comes with a 7-rib grooved pulley so I used a Gates 38006 smooth pulley. I finally came up with this gem lol.
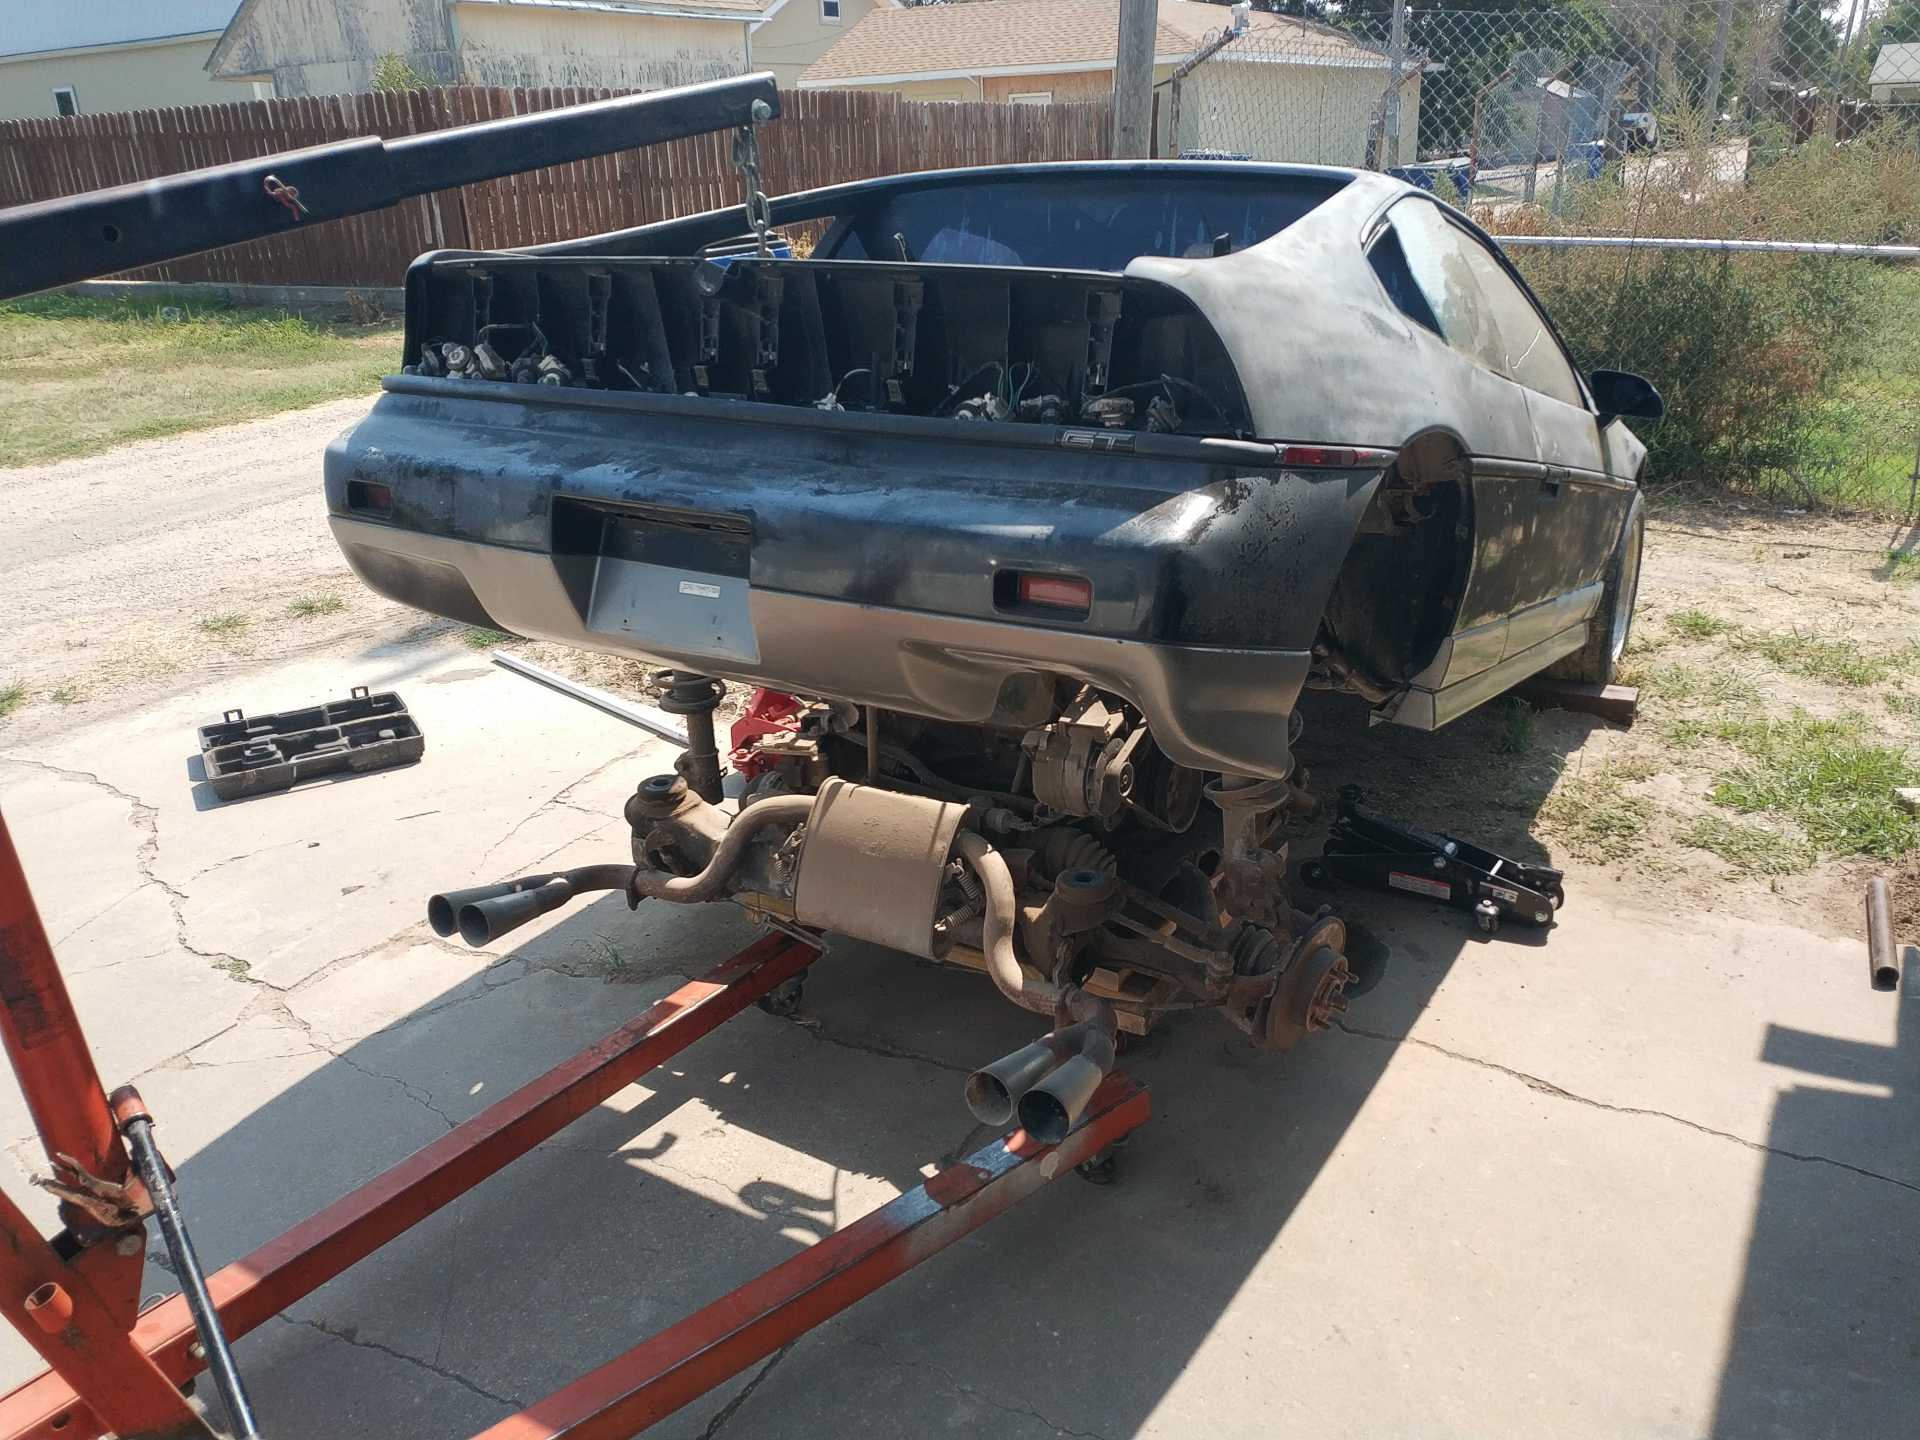
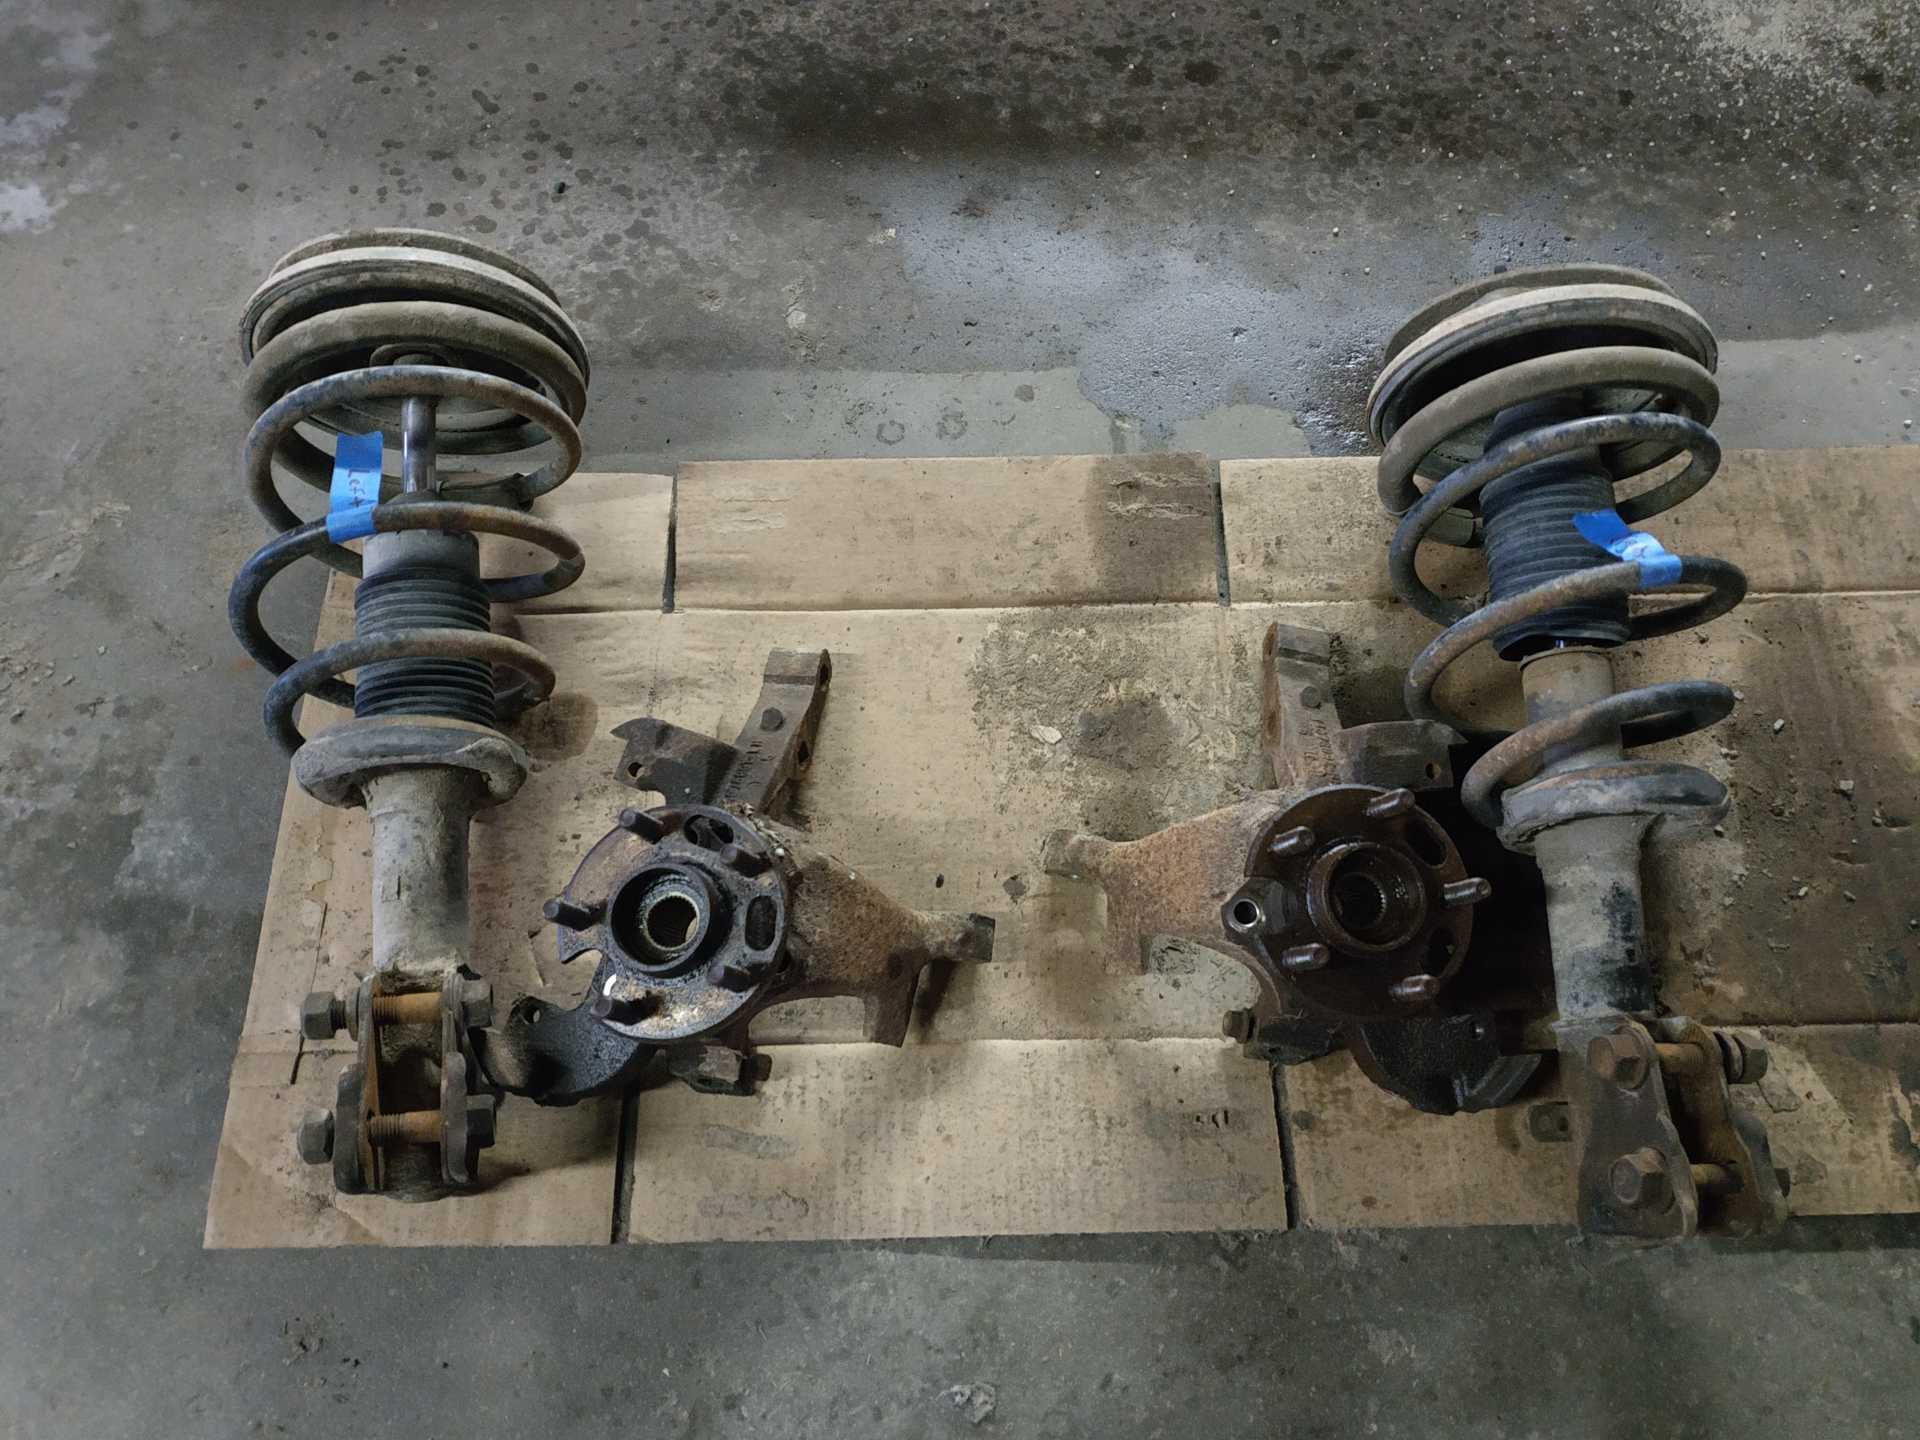
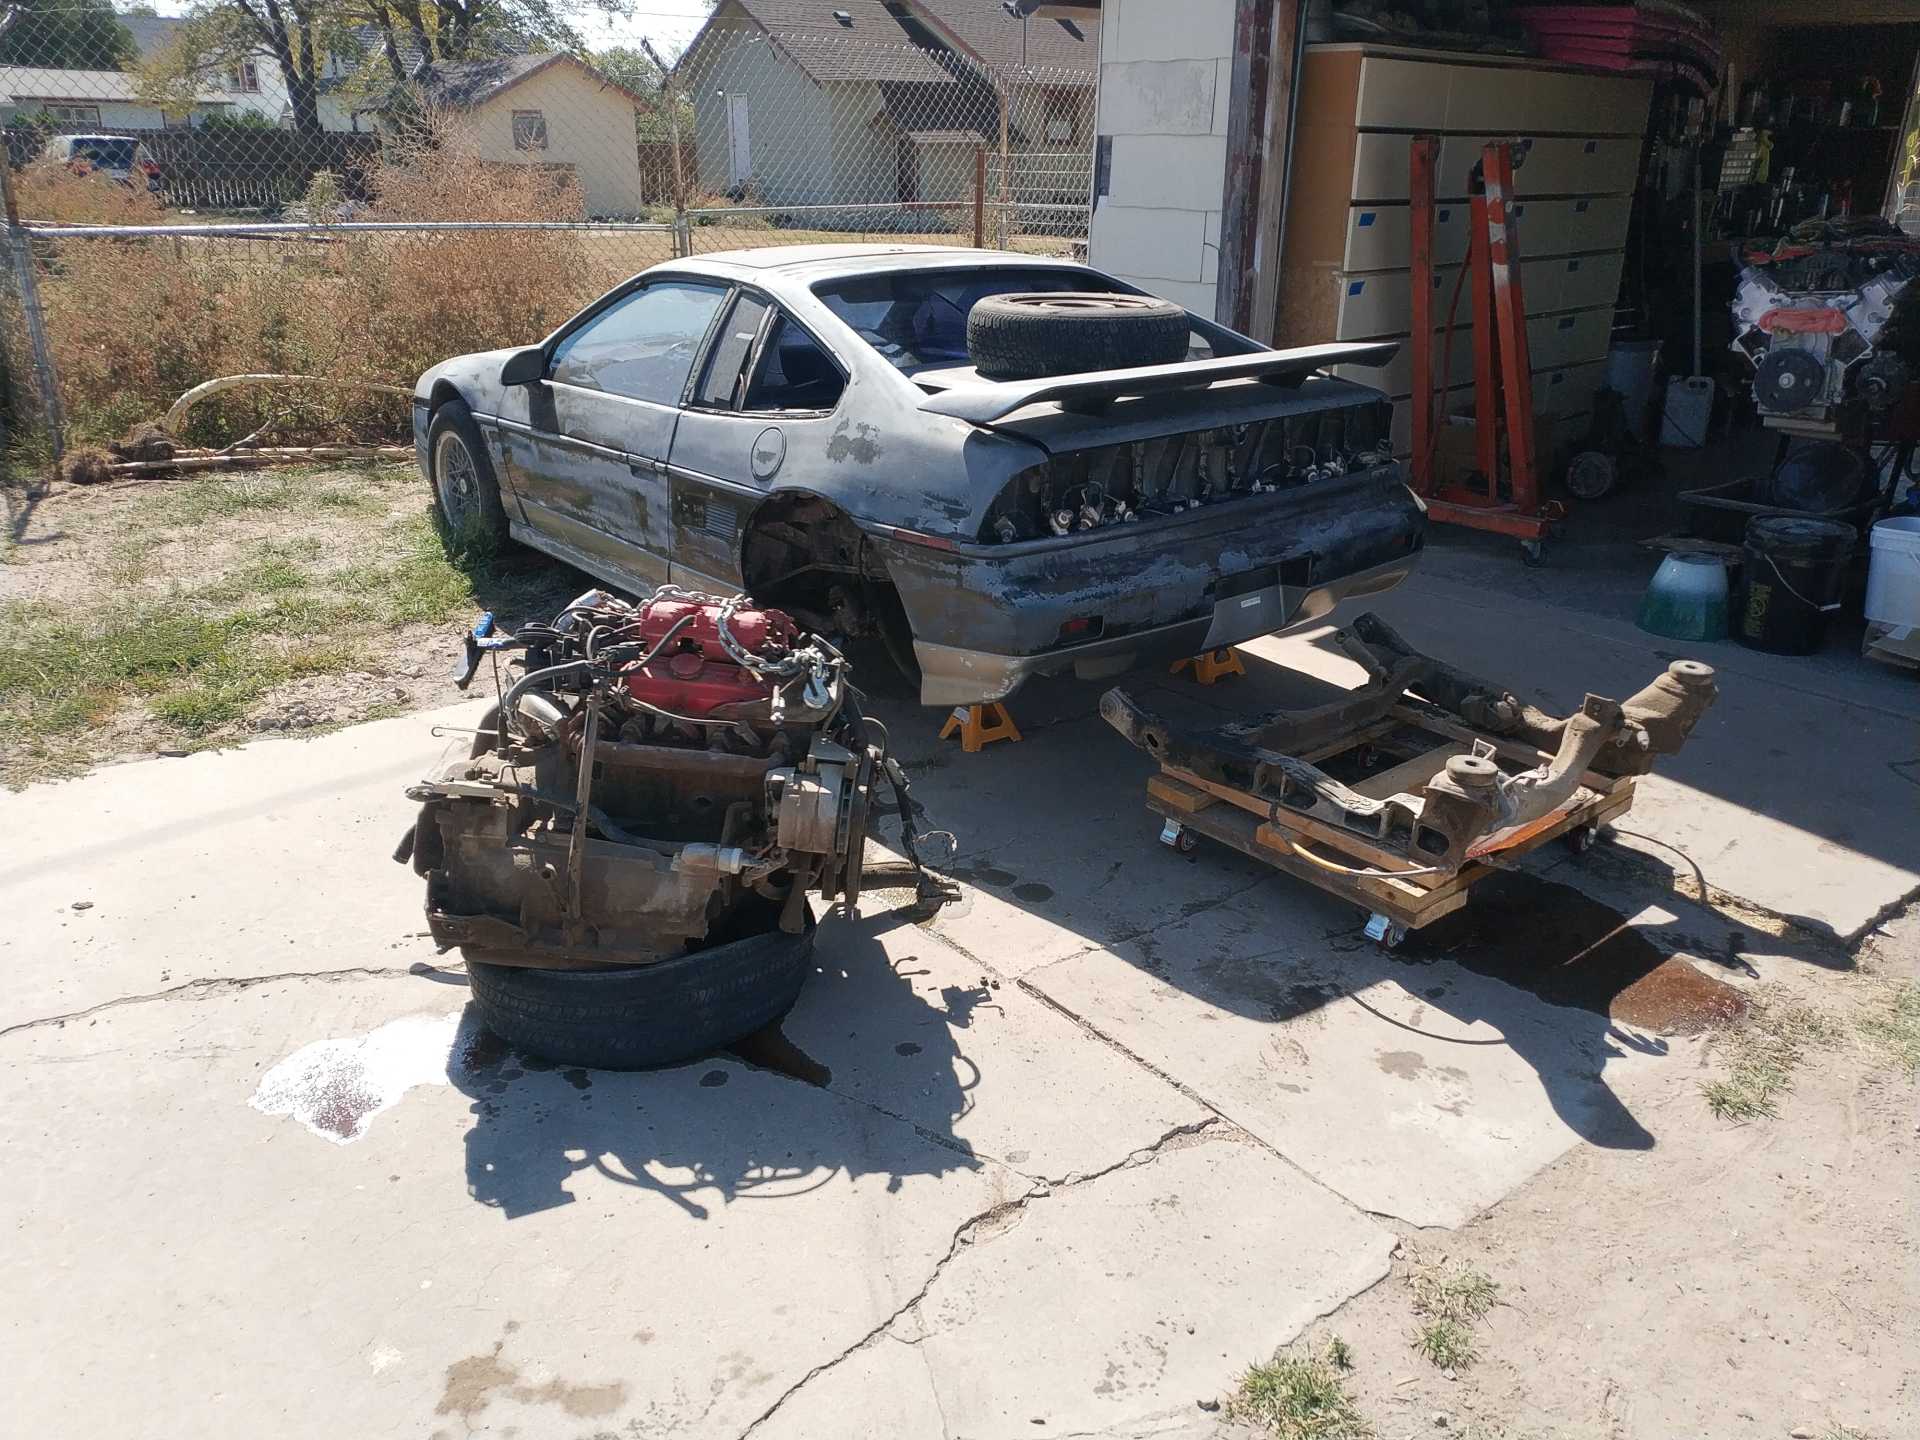
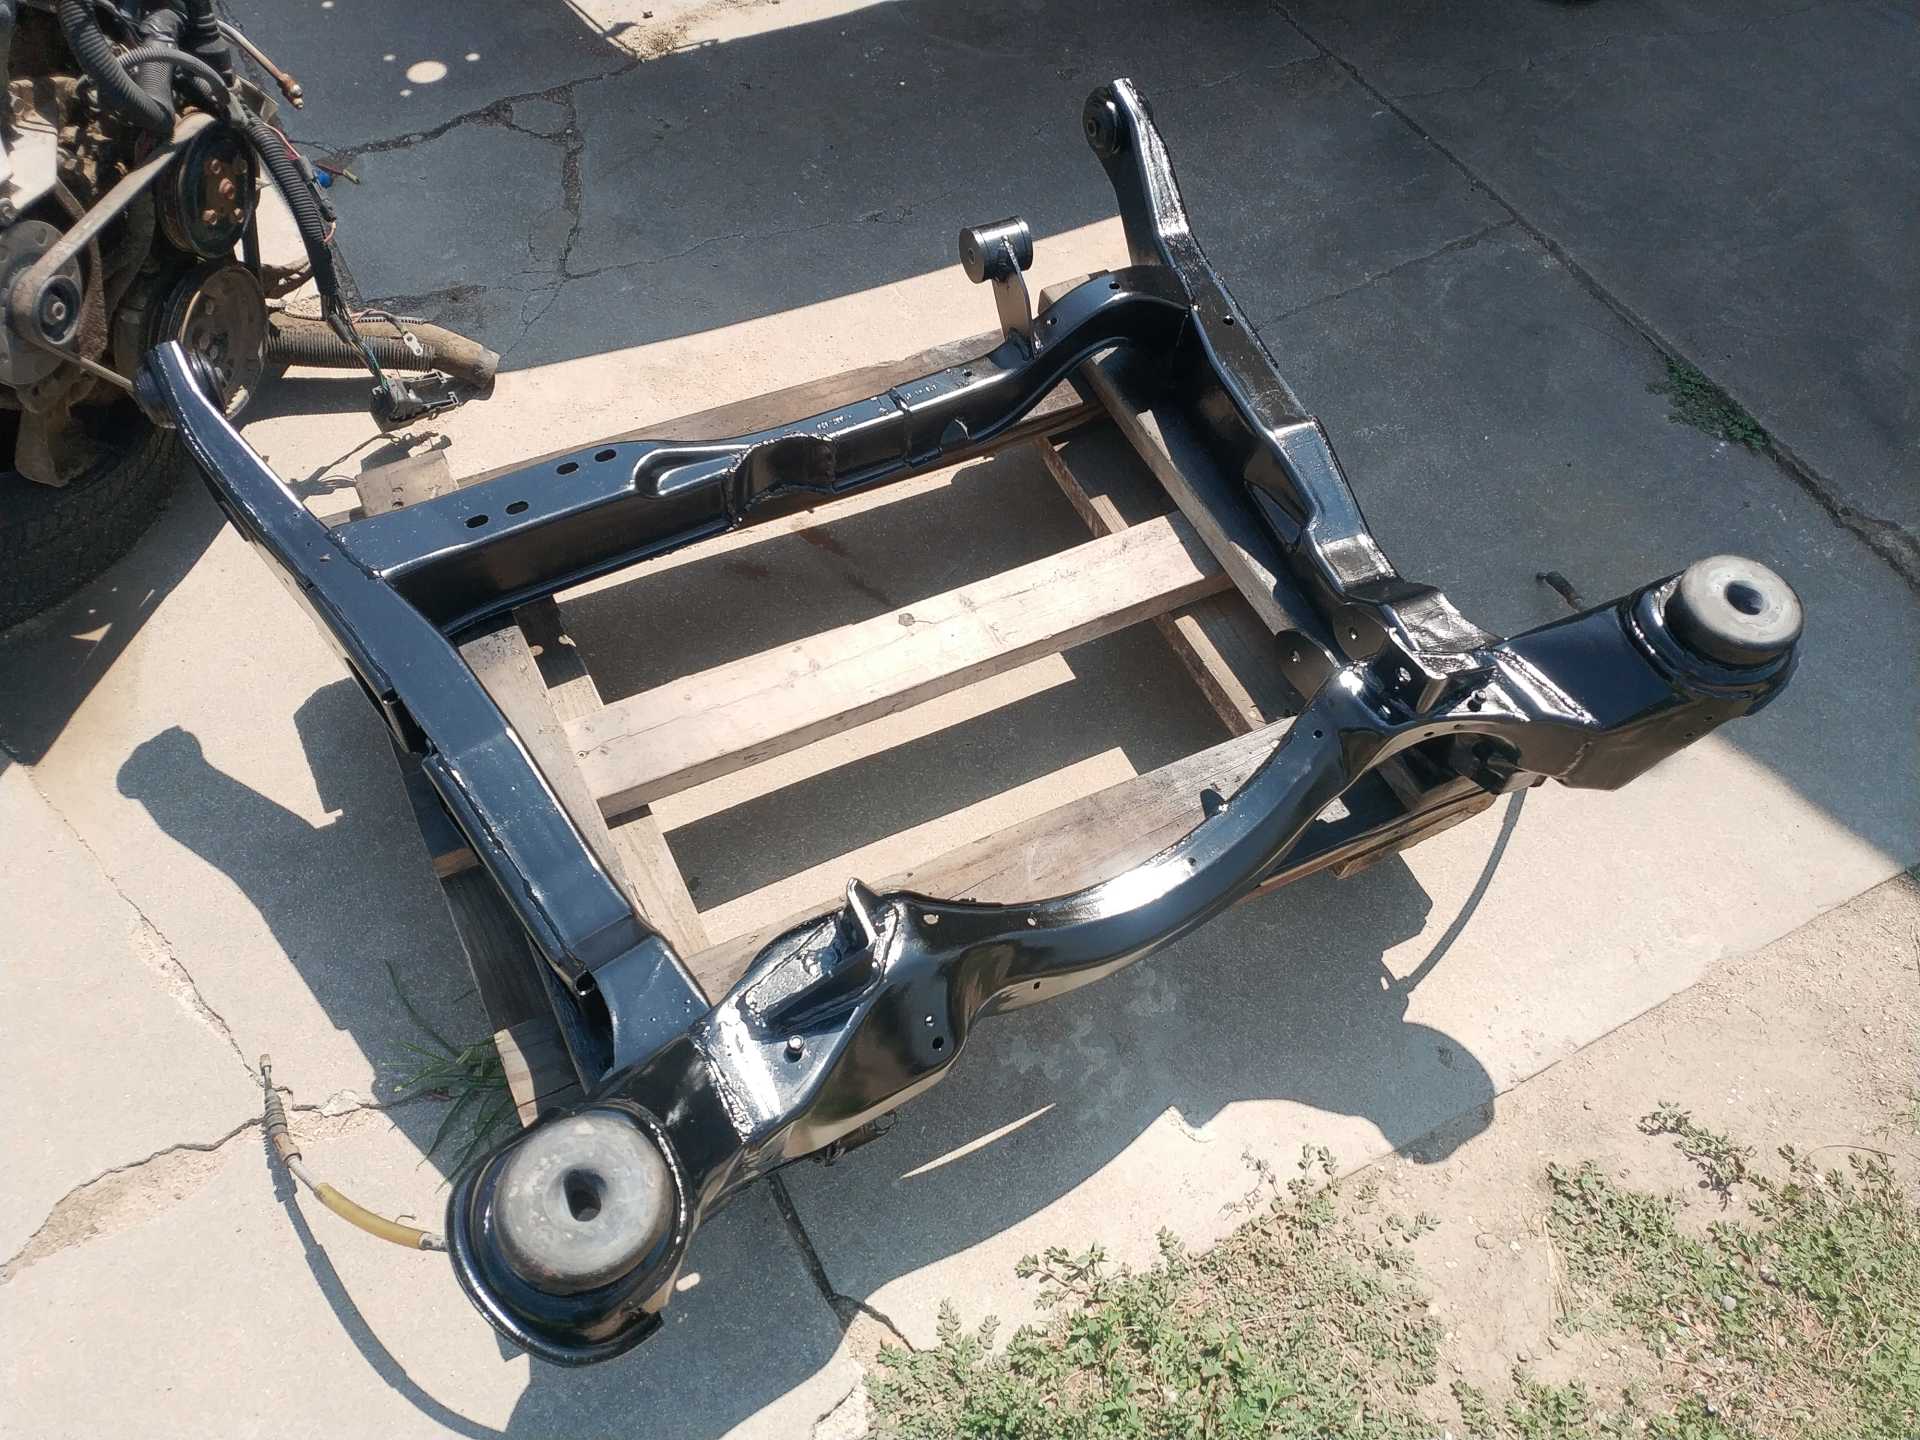
Over last winter the rear end of the car was taken apart and the pieces were restored/rebuilt. I took them with me to work and worked on them on my lunches and stayed after quite a few times to get this done.
I used the trunk latch to lift the car even though it is sketchy. The legs of the cherry picker stuck out to far to get any closer to the engine cart i built.
In my opinion, rebuilding the struts is more sketchy than lifting the car by the trunk latch. I had jacks to stop/slow the car from falling on me, if it would have, but there's no stopping a strut that wants to come apart if something fails. Thankfully nothing bad happened.
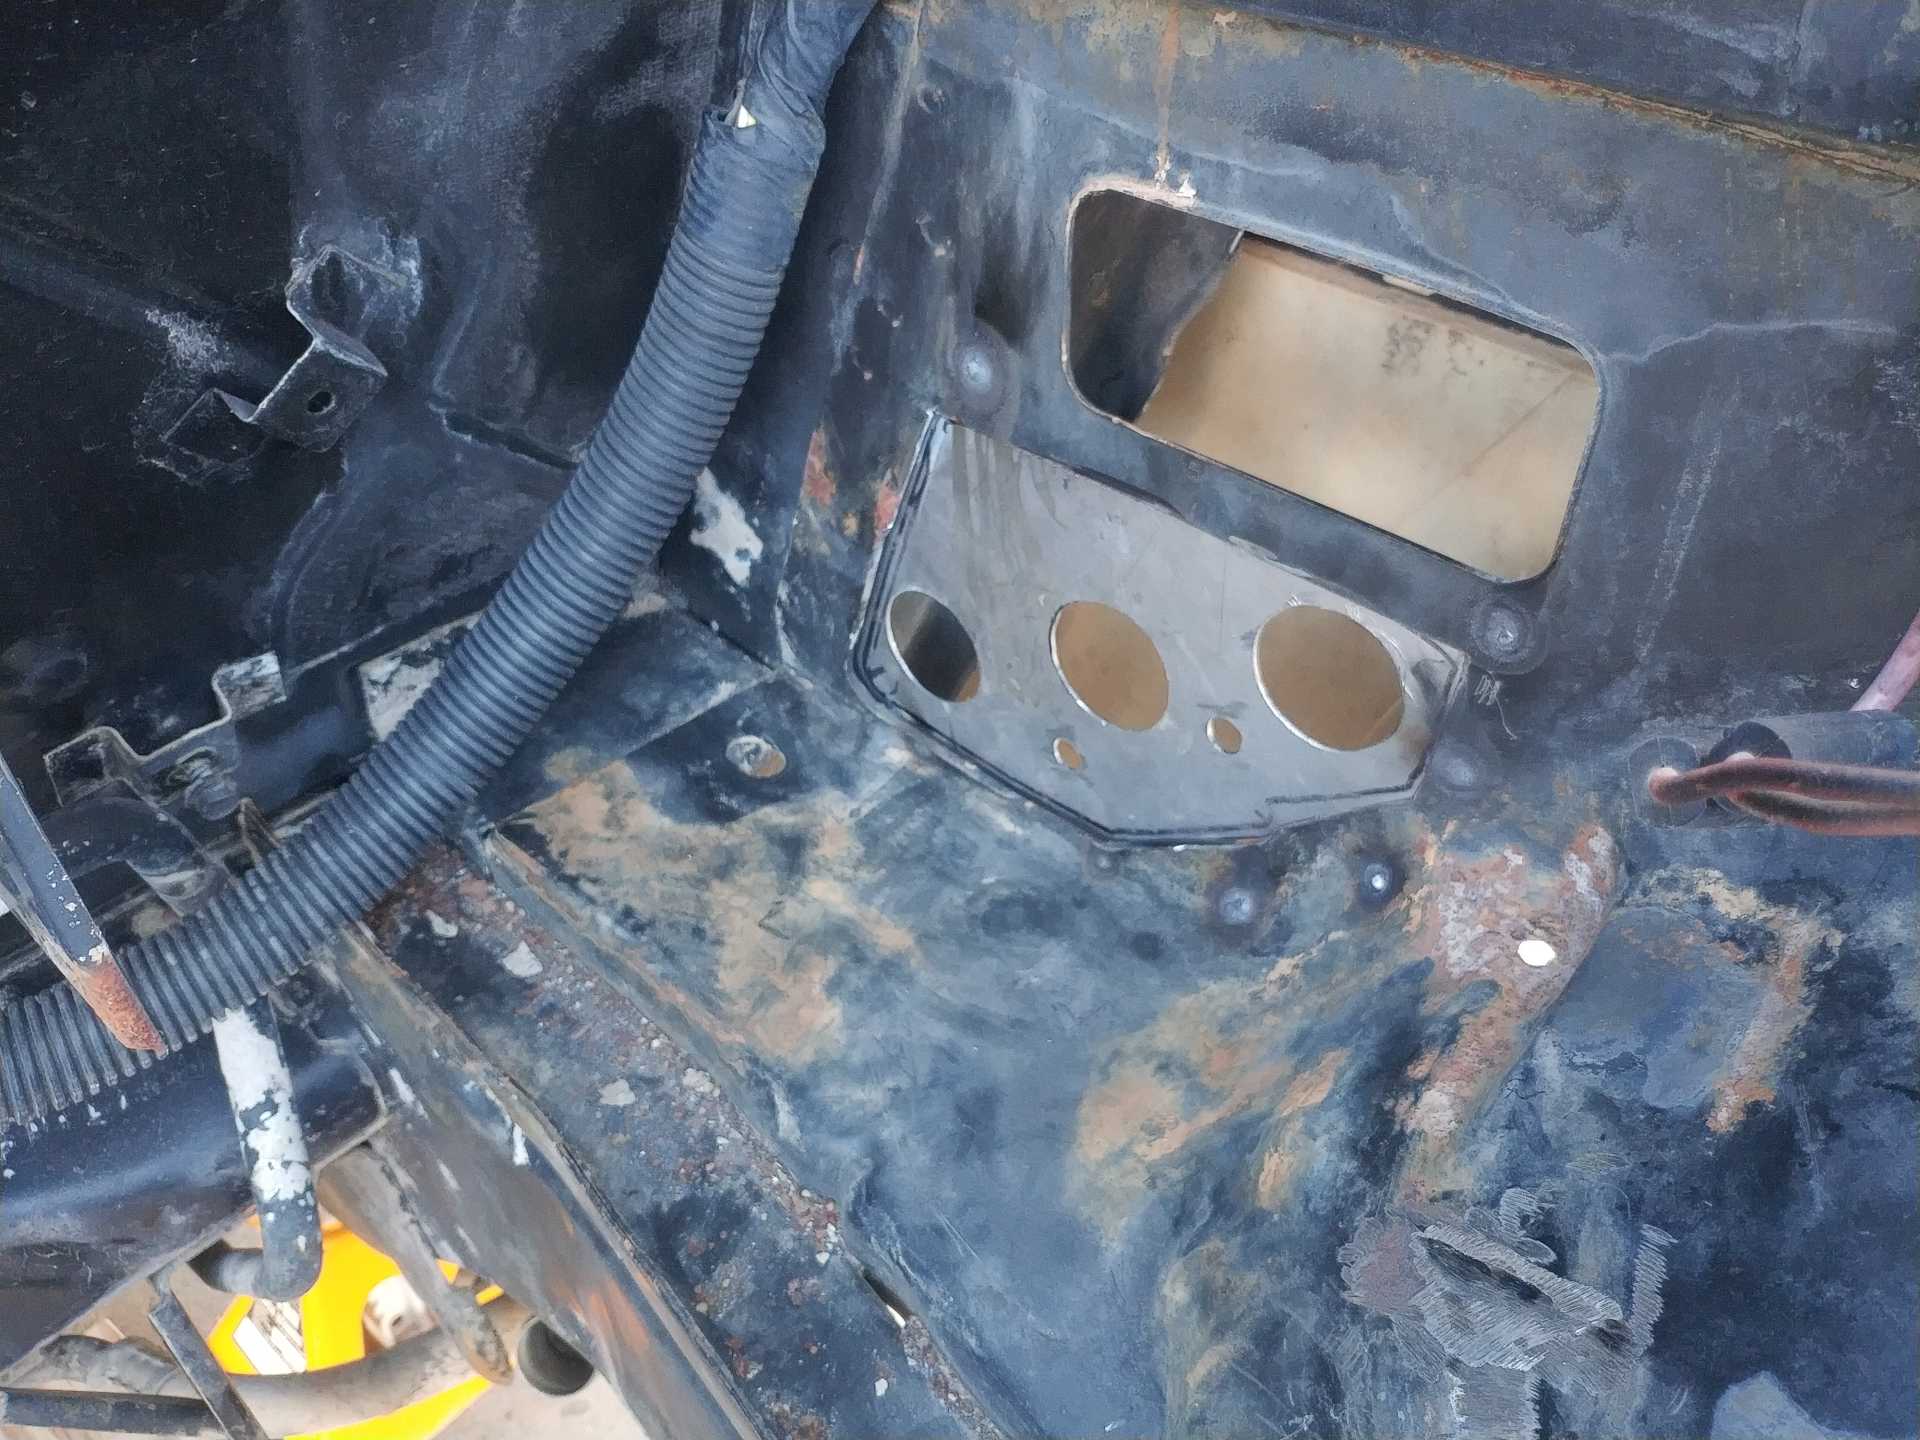
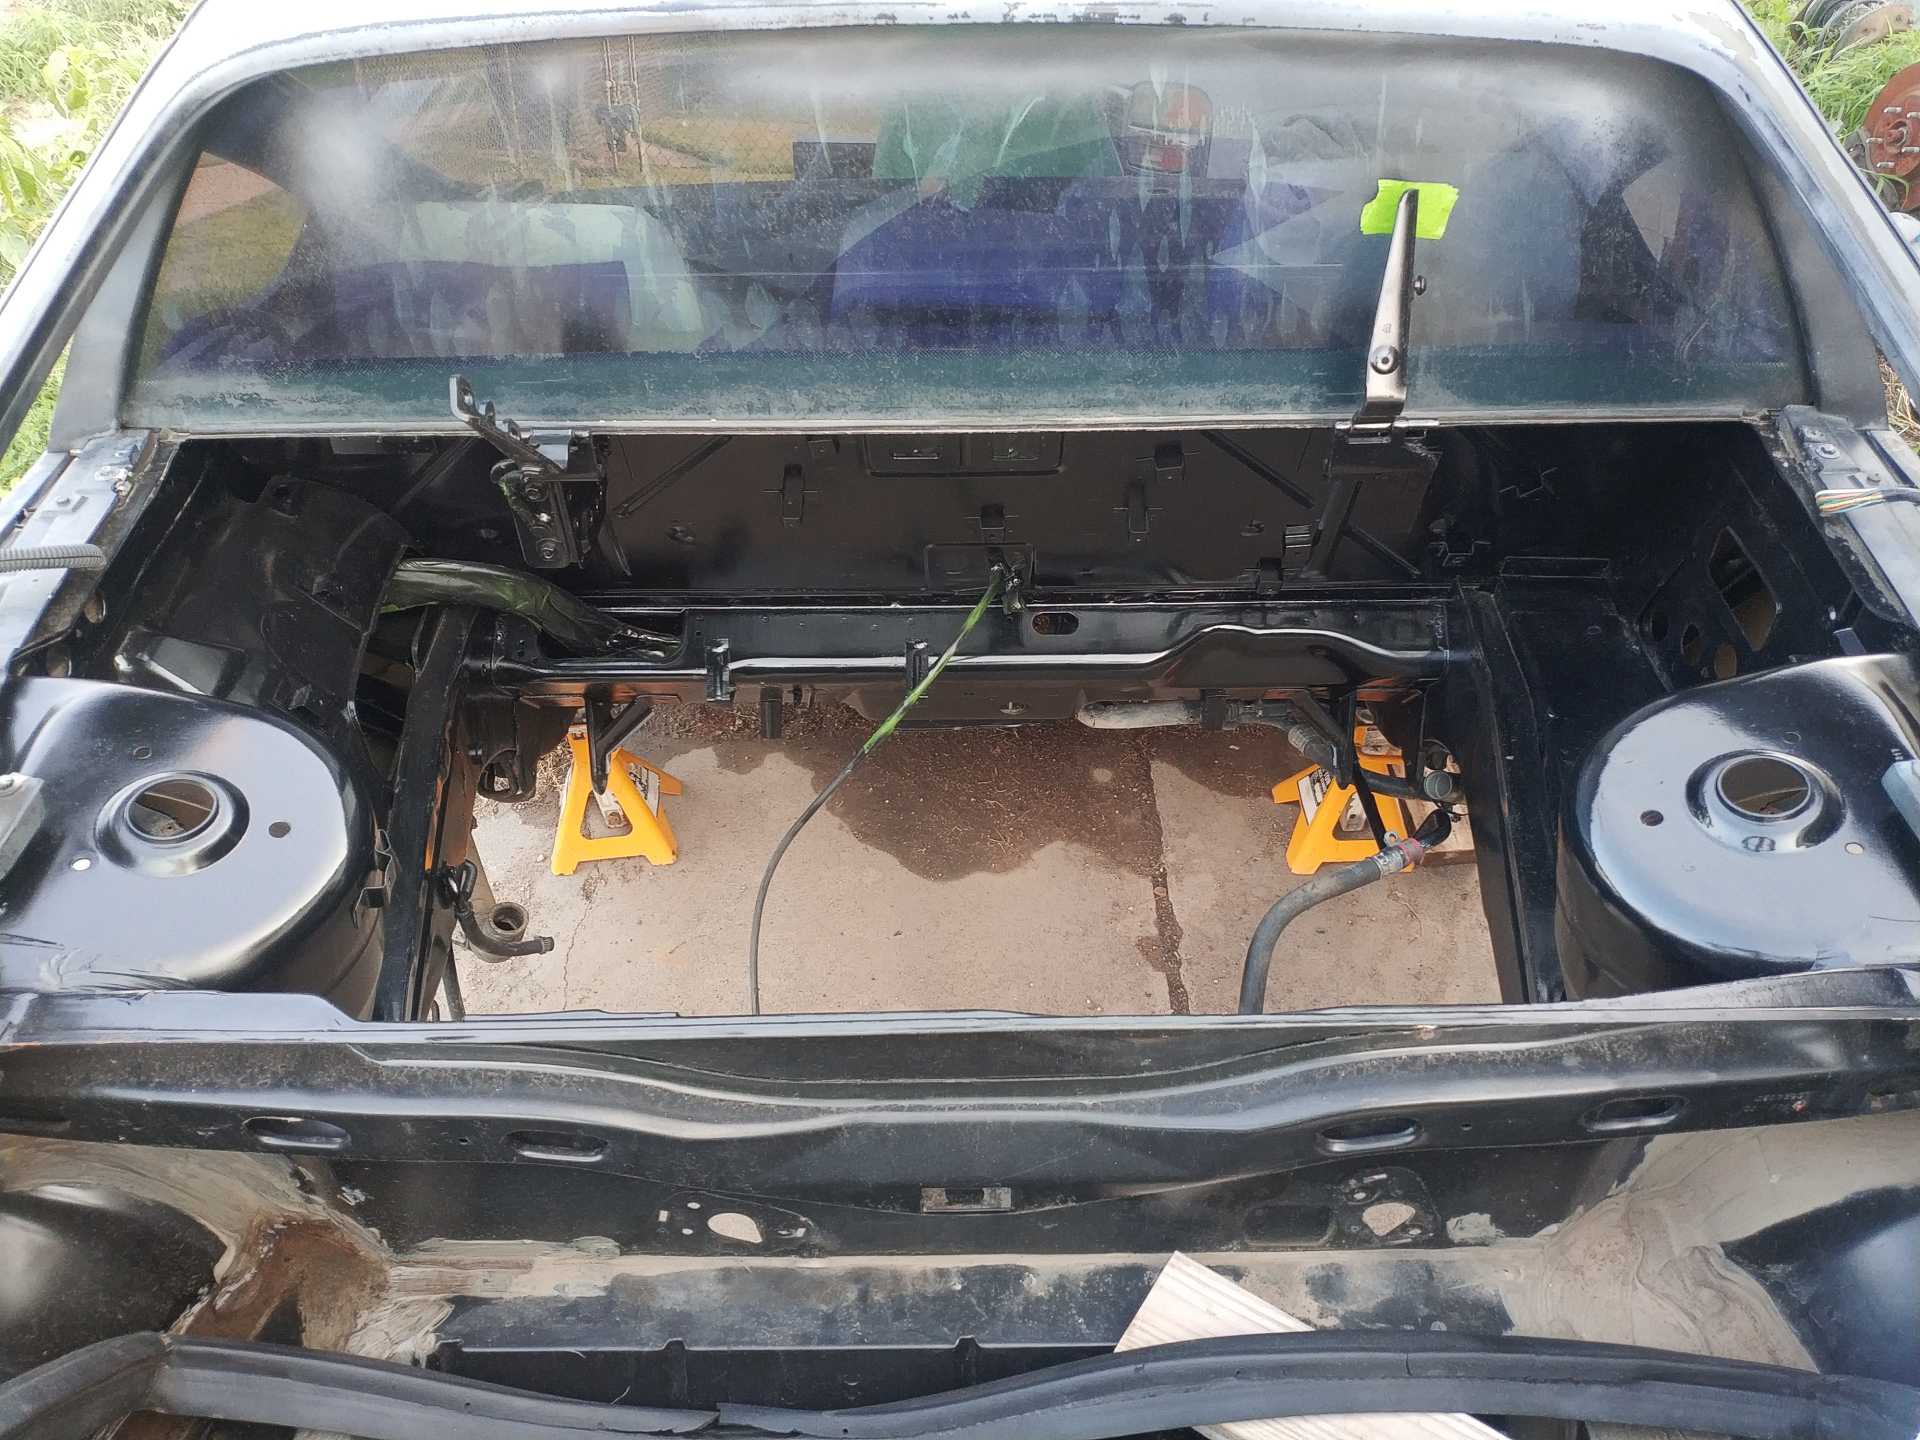
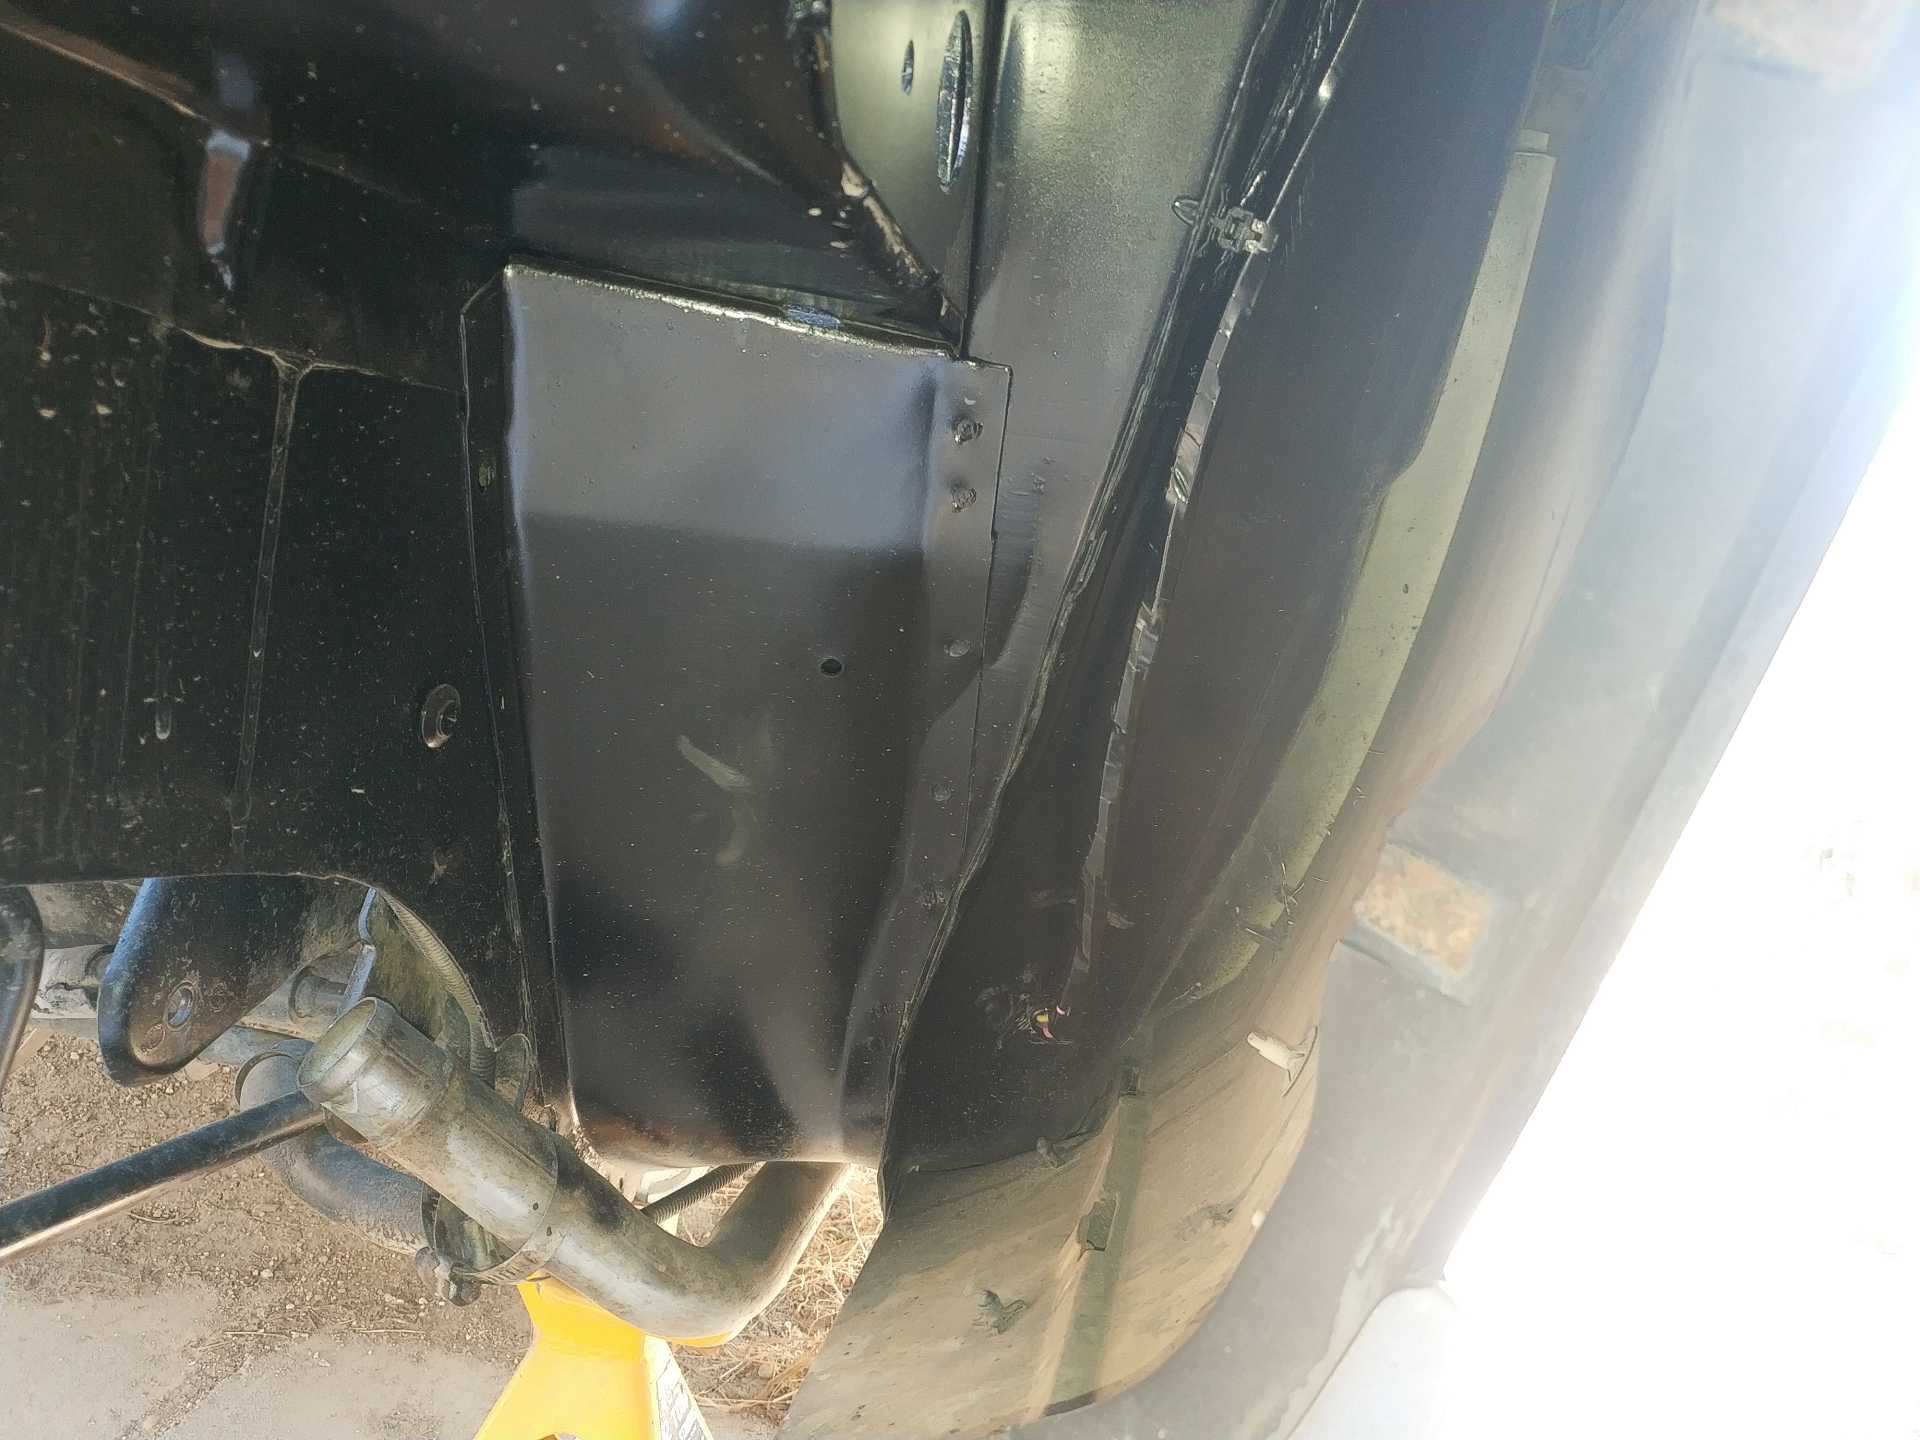
I wanted to make sure the new engine was going to sit on the cradle properly so I made the decision to buy a kit through West Coast Fiero. This made things soo much easier and sped the process up since I didn't have to build the mounts myself and worry about alignment. The battery tray and dogbone mount were removed. The passenger decklid mount was also modified. I welded the mount at the top and cut out a good sized square to make room for the coil pack. I made a water pump mount out of sheet metal and opened up enough of an area where the battery use to be. The water pump is a Meziere WP116S and will go behind the passenger quarter panel.
With the help of a friend we got the engine fitted to the cradle and the oil filter provision welded in and everything reinforced on the bottom. I had realized the oil drain plug needed to have a spot cut out on the cradle after fitting the engine on it. It was going to make a huge mess every time the oil was changed if this wasn't done. (not pictured) Next we test fit it in the car.
Looks pretty good to me. It was then removed and the cradle and engine bay prepped for paint.
Thank you sir. It doesn't look too pretty but it's going to work great I believe. I realized after I painted the engine bay that I'm going to have to do more work in it and have to respray again but for now it is clean and looking good.
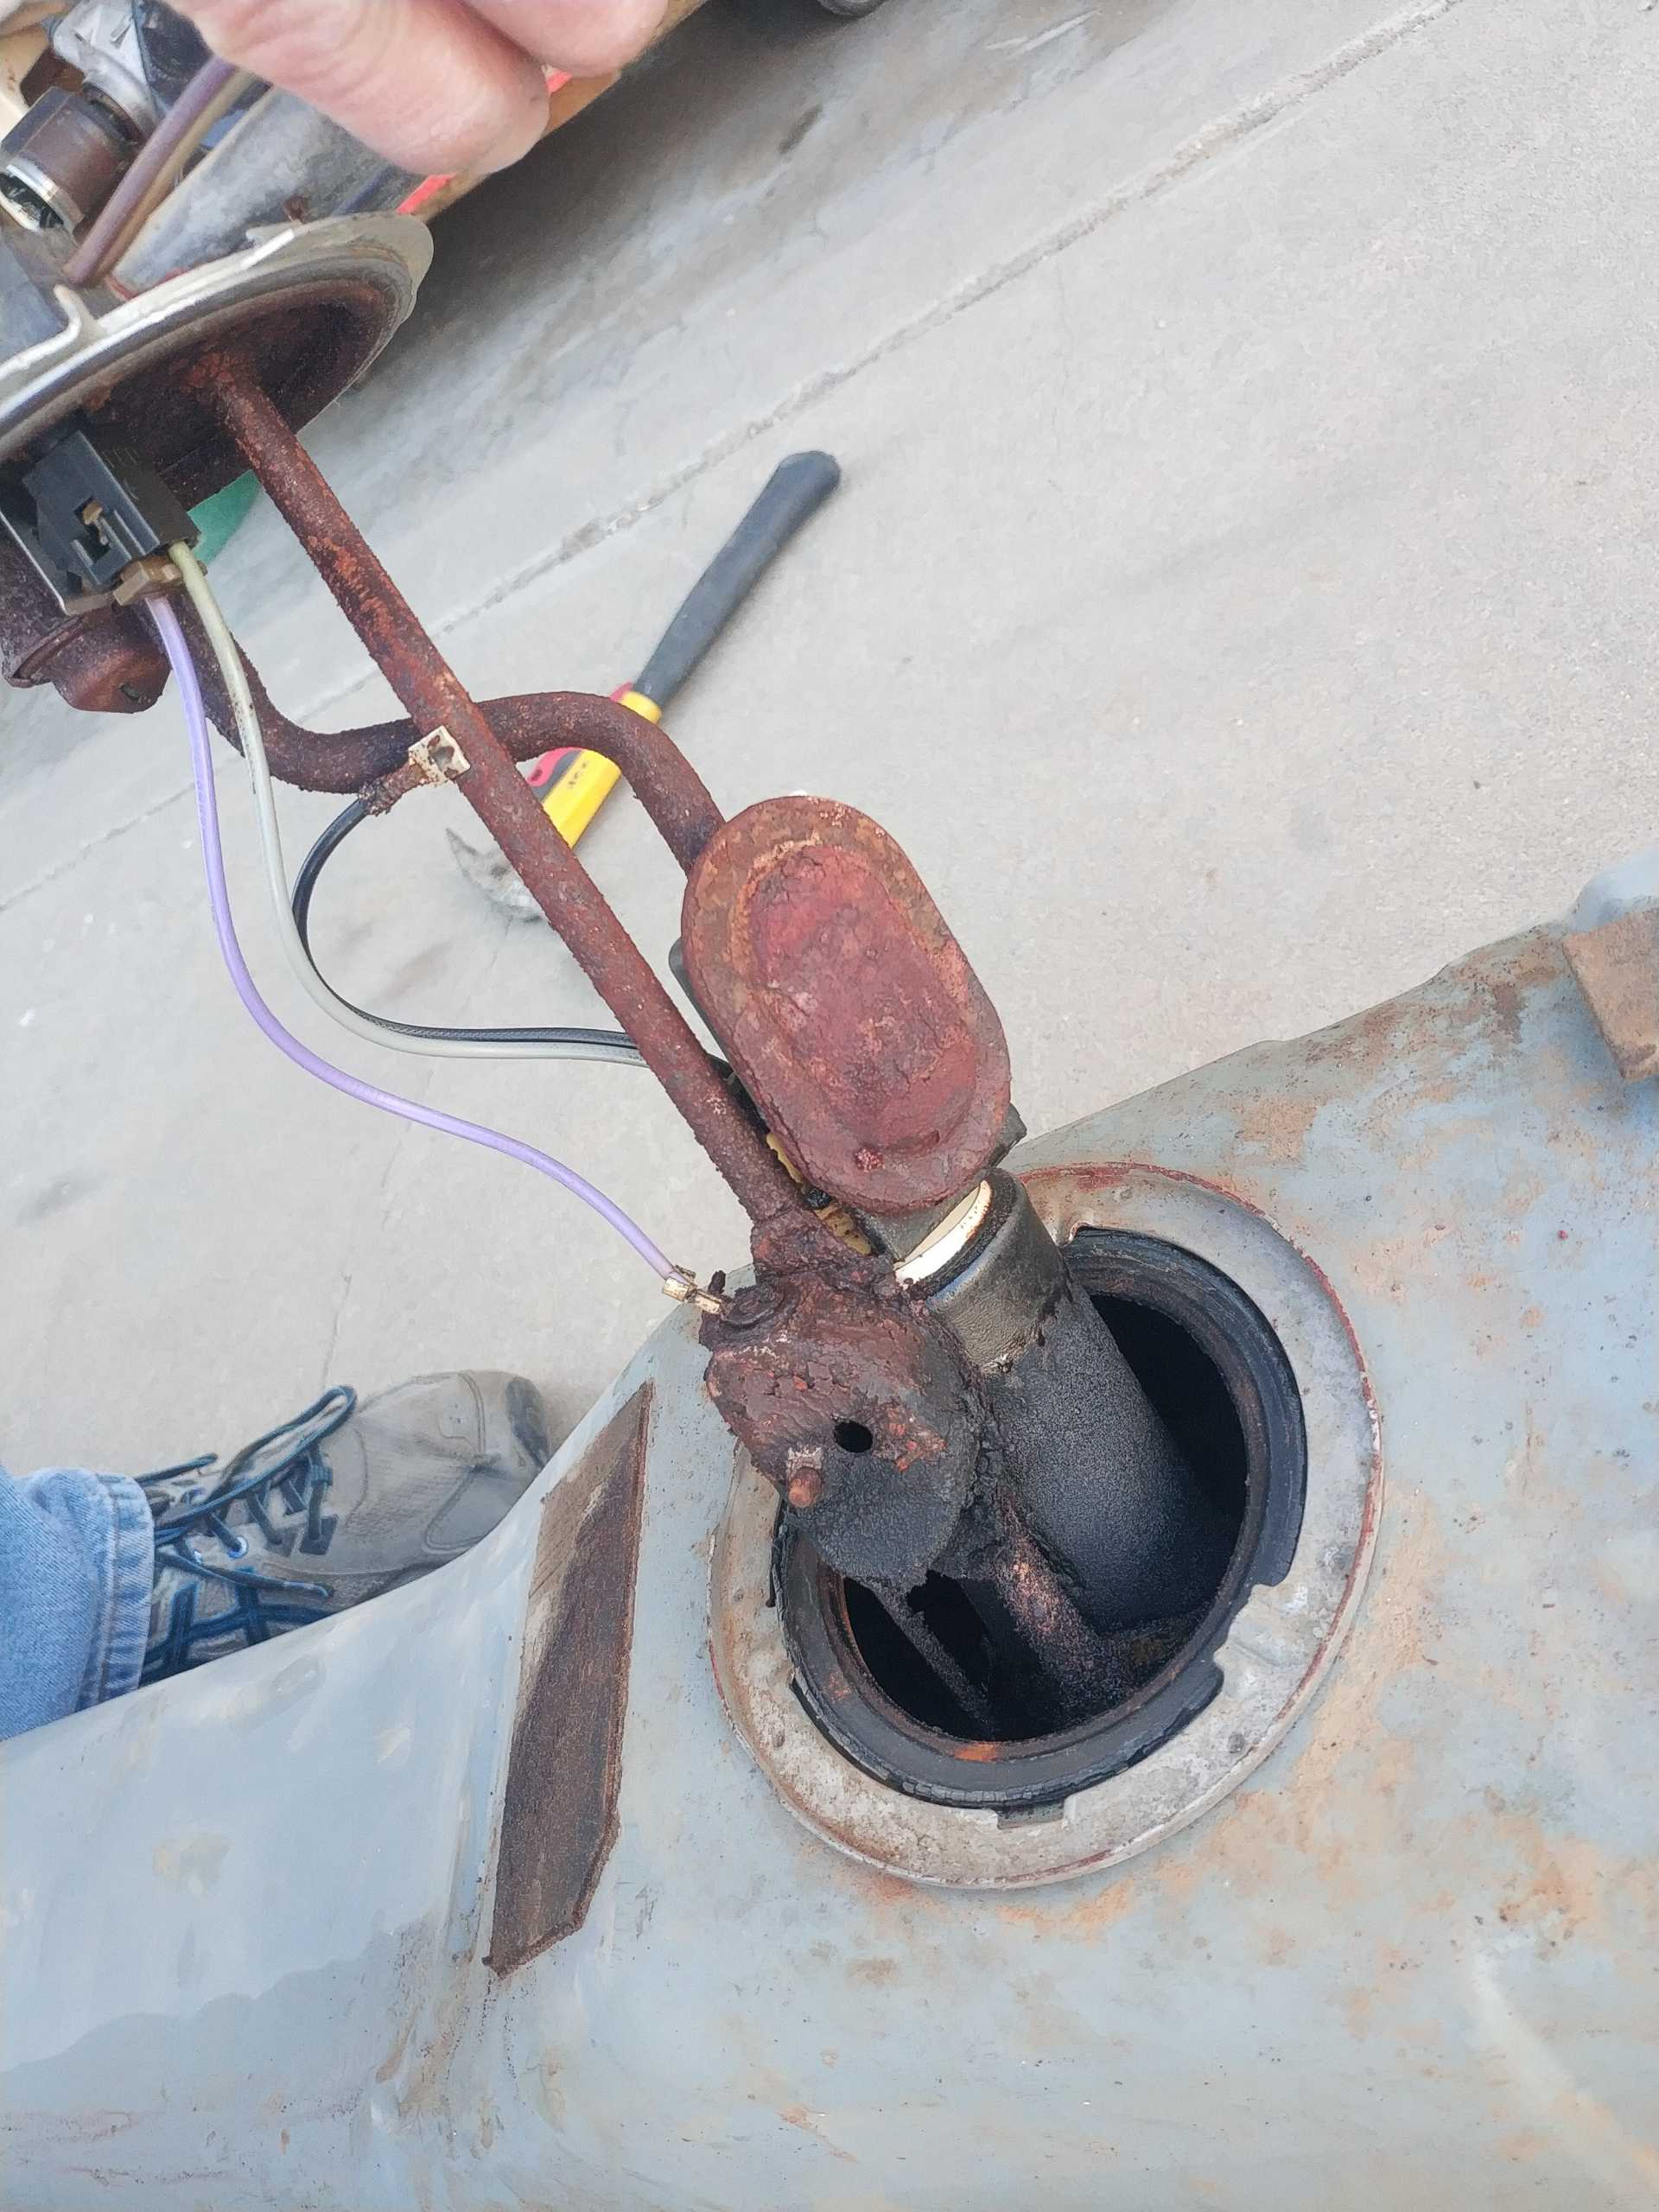
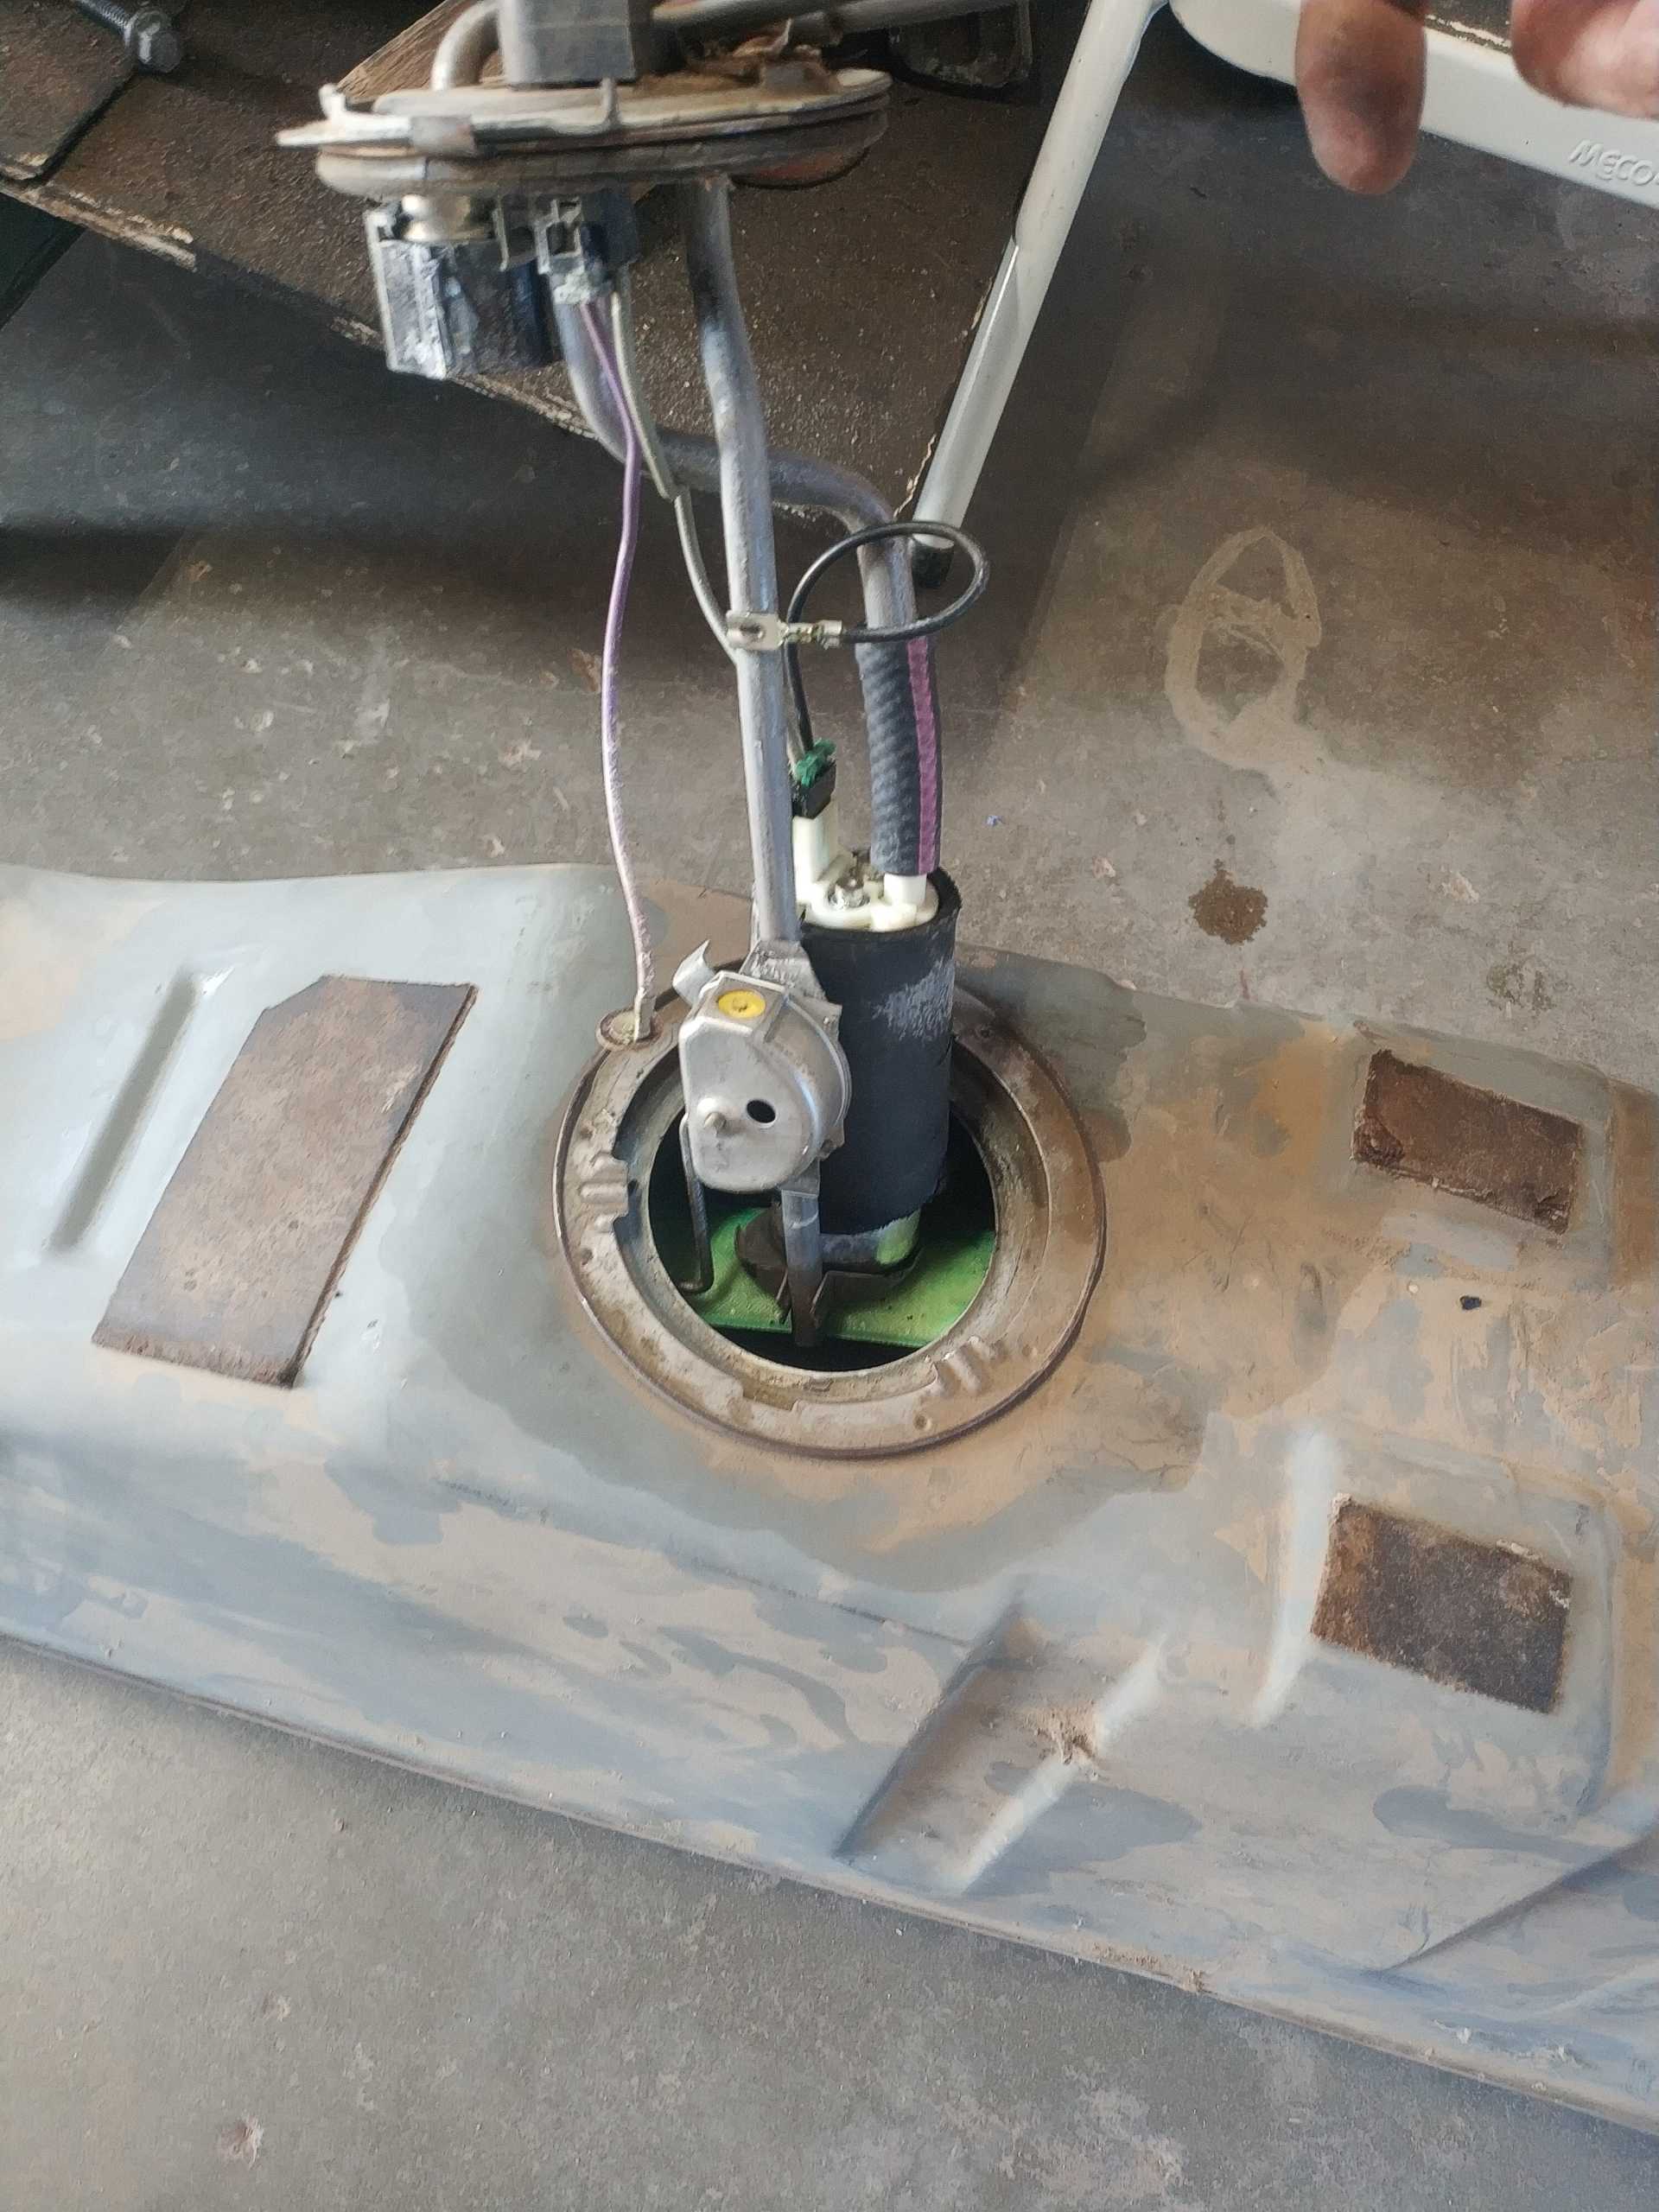
The fuel tank is up next. I didn't think the tank in the car that had been sitting forever was going to be as bad as it was.. It was bad. Thankfully I had a parts car that had been on the road a lot more recently than this one.
There was probably 2 gallons or more of crusted fuel and I couldn't get it all out with what i had available so I went to get the other tank.
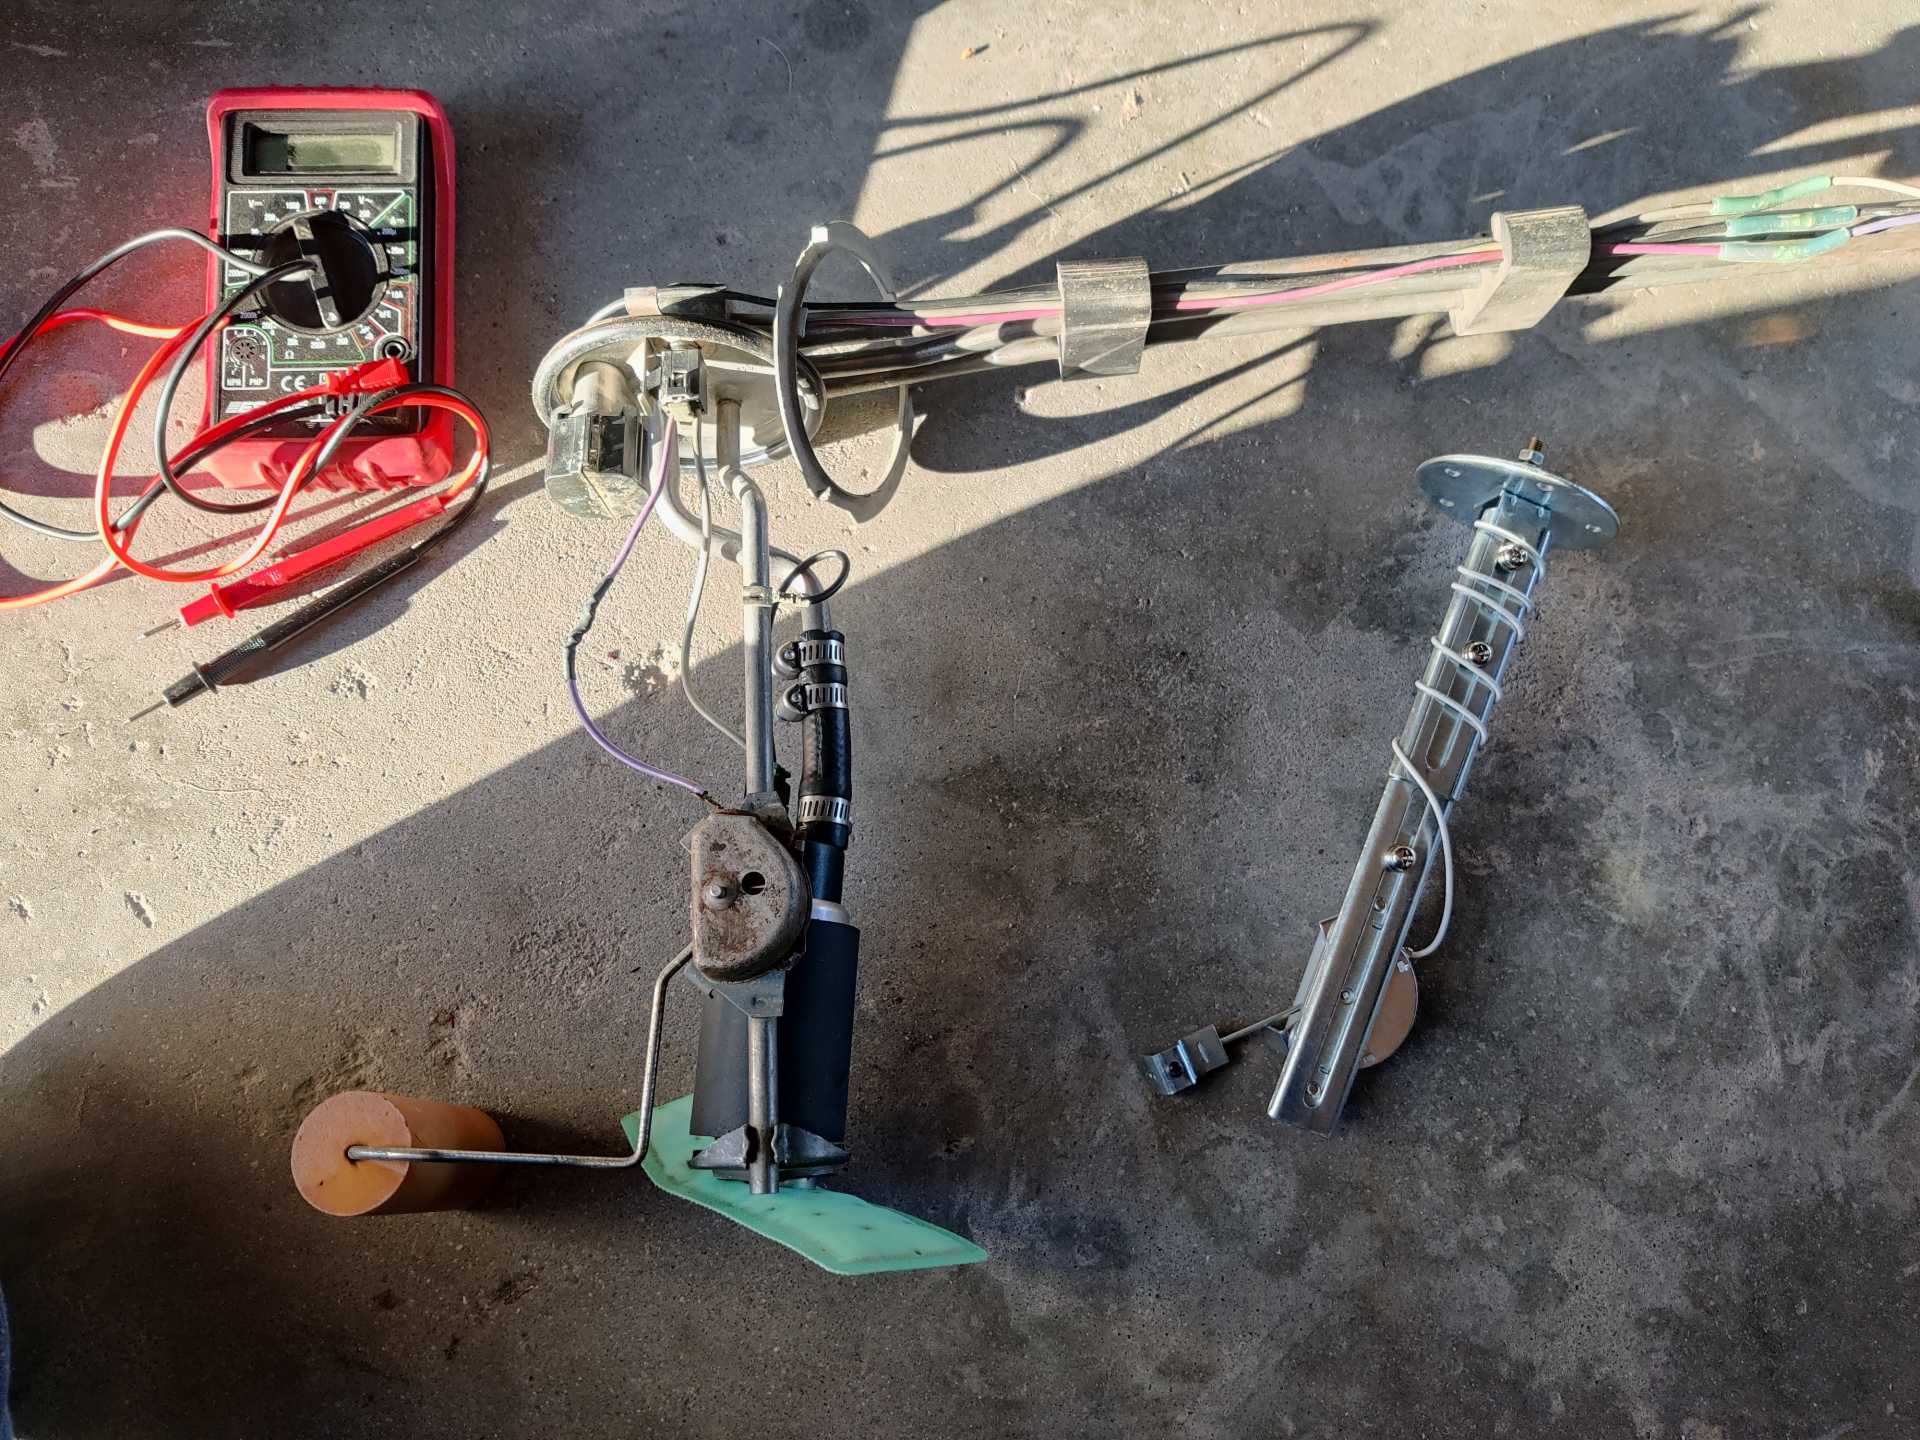
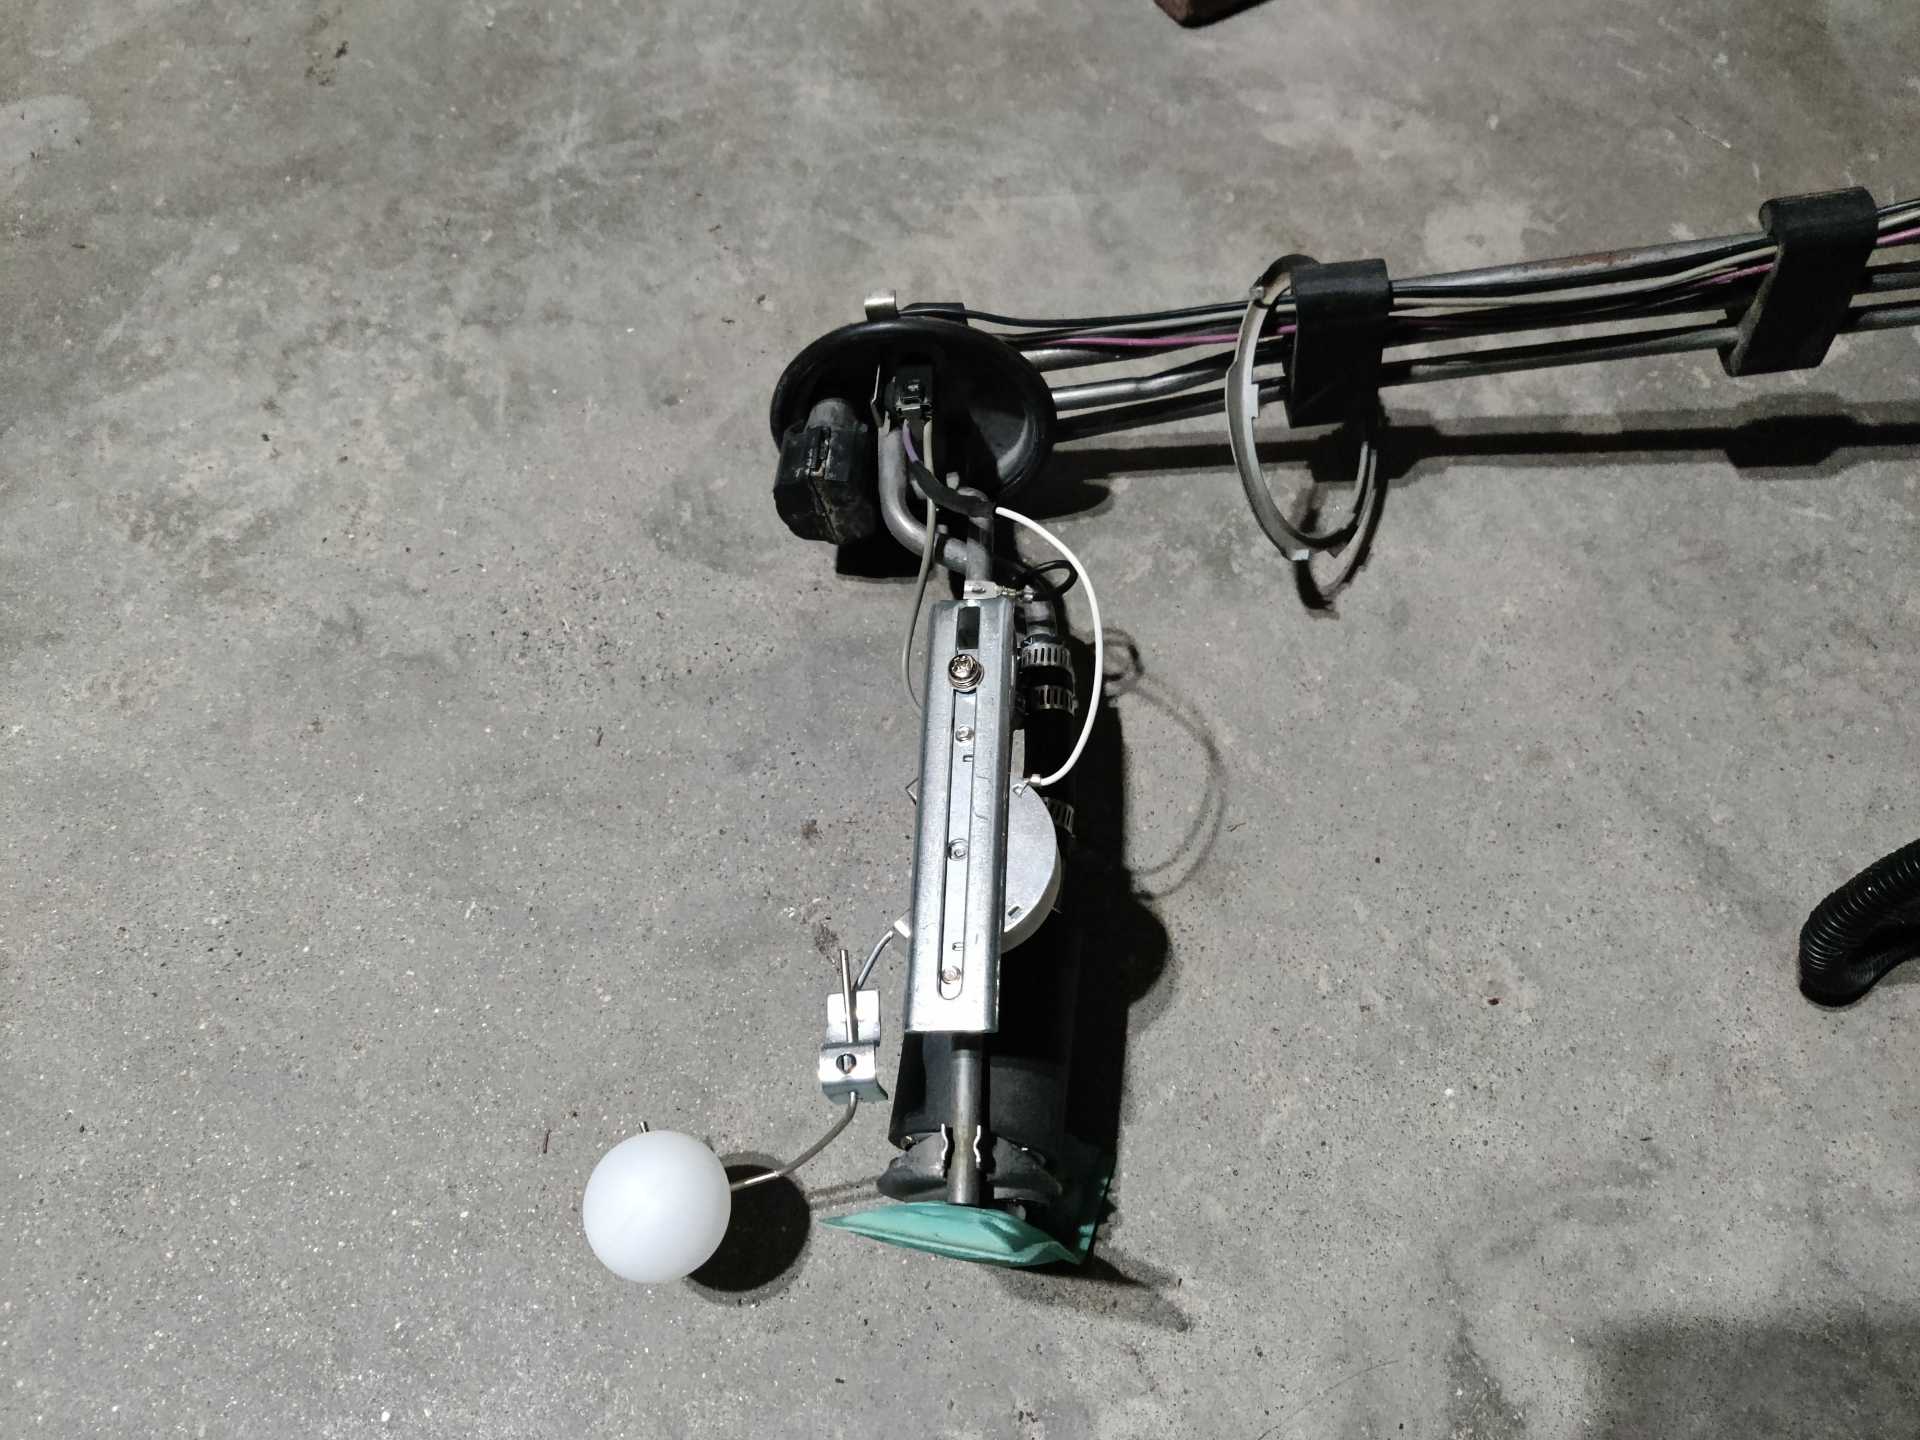
It was much better and clean on the inside. I had a lot of trouble getting the fuel level sender to read right. Ohms would jump all over the place when I tested it so that needs to be addressed while its out. The set of gauges that's going in the car is going to be Equus 7000 series black and chrome. I bought the Equus fuel level sender 9982, took it apart, and reattached it to my hanger assembly.
Now it reads correctly.
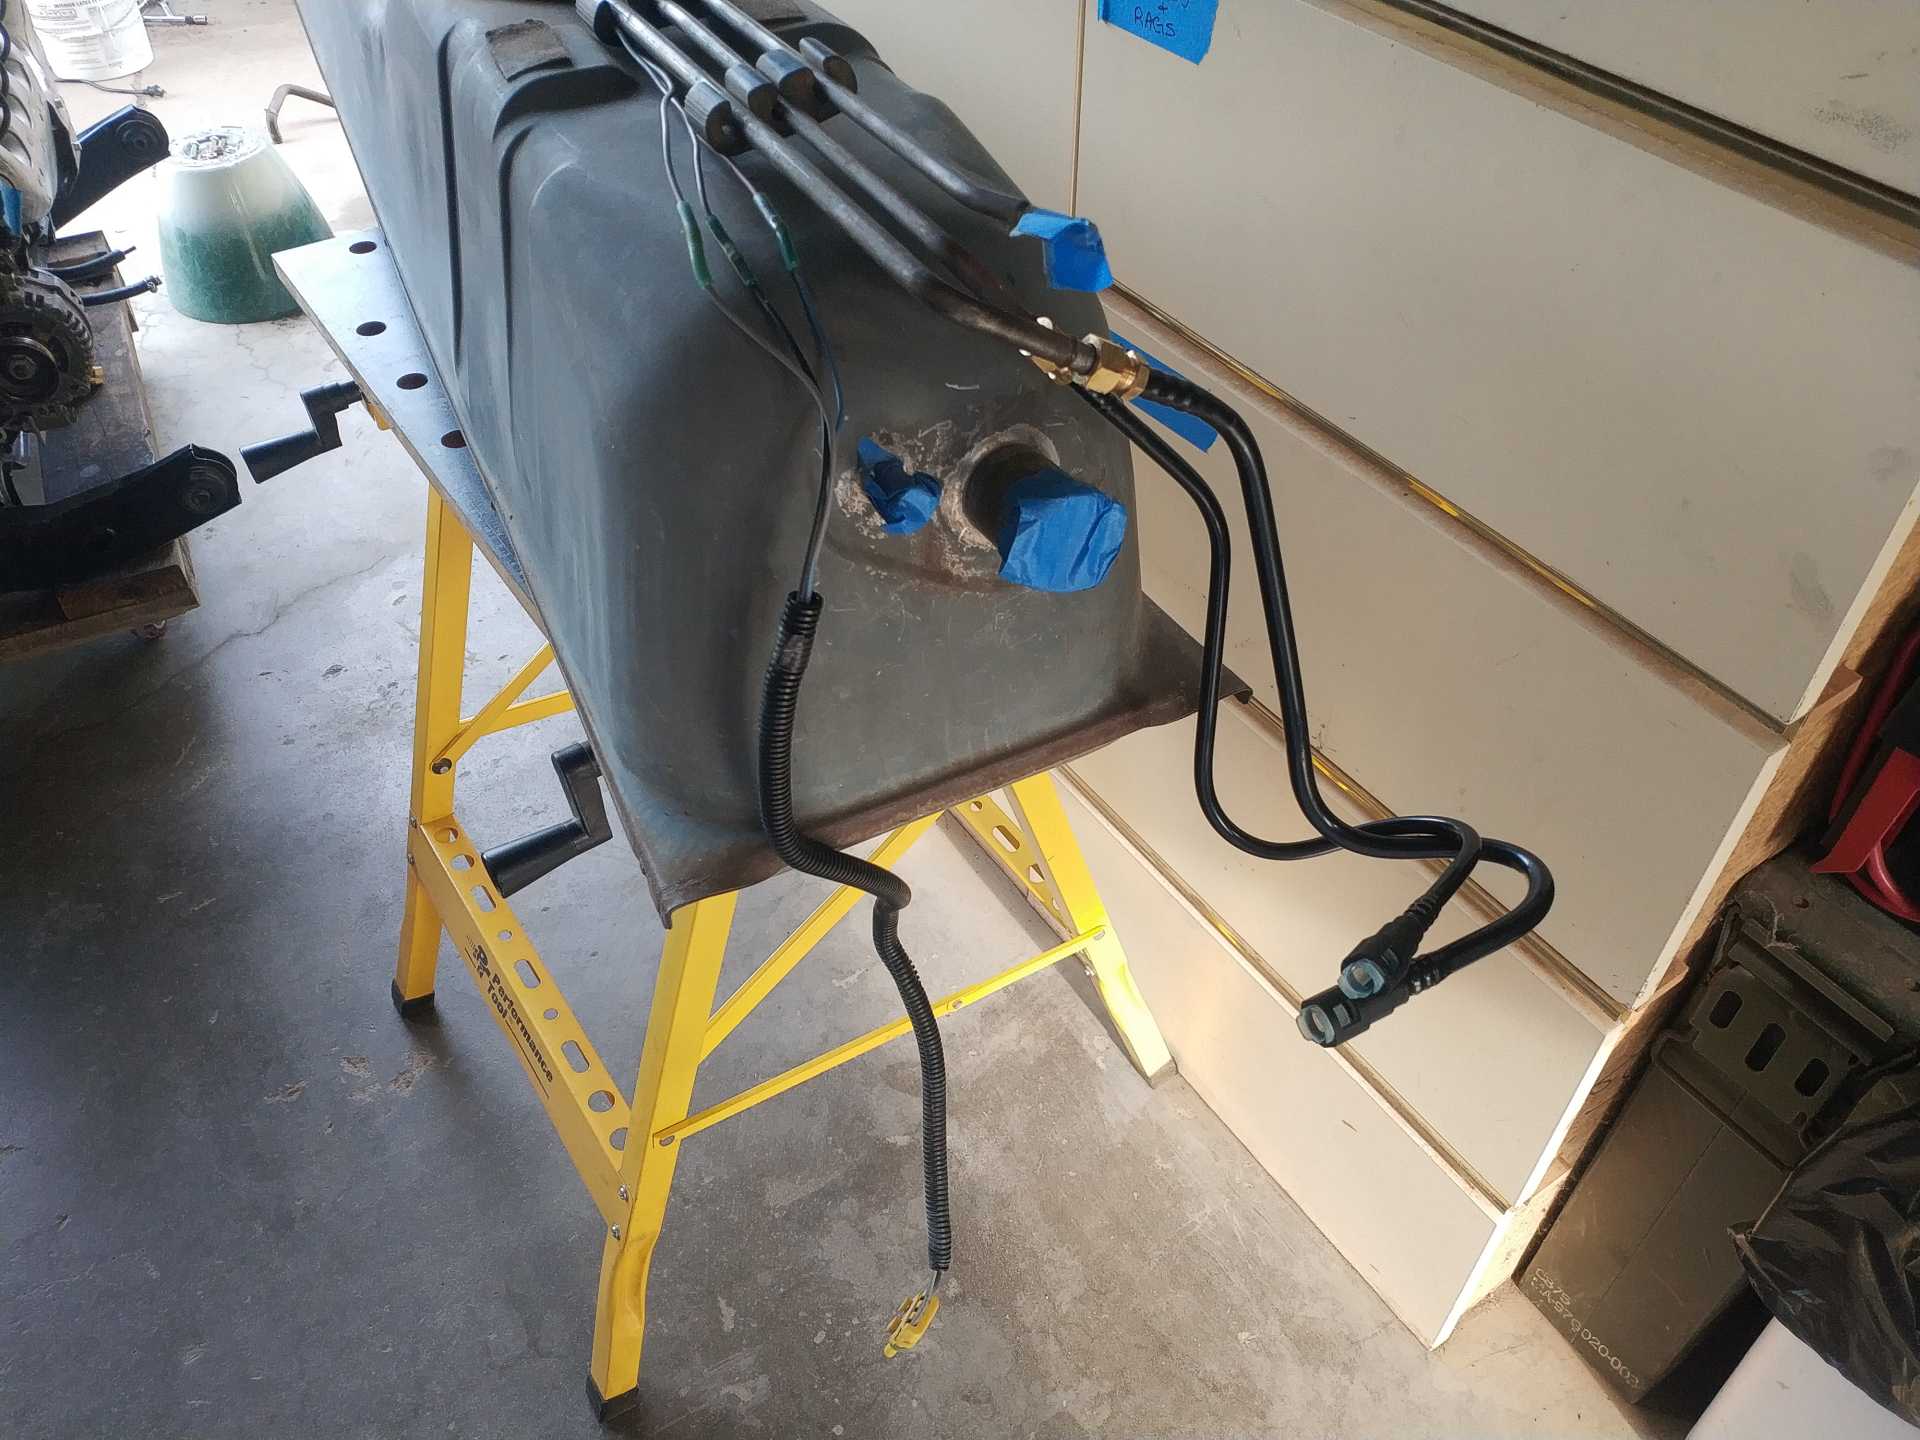
The fuel pump I used for this was a Carter P90005. It says it's a minimum of 58 psi so I paired that with a Wix 33737 filter and regulator. It should be sufficient for this swap. I used Dorman 800-035, 800-036, 800-057, & 800-058 to get the feed and return lines to the regulator. I'm not quite sure what to do with the third line on the hanger assembly yet so if someone could let me know what I should do with it I would greatly appreciate the knowledge. I used a tubing bender and a heat gun to get the bends in the nylon tubing.
For after the regulator I have a Dorman 800-155 I'm going to attempt to bend slightly and finish off the rest up to the intake with nylon tubing.
Originally posted by lsfiero: Next it was time to figure out the alternator. I'm on a pretty strict budget but I have some metal and a welder so I decided to make my own tensioner and alternator bracket. (Sorry Guru) I had to oval out one of the mounting holes on the alternator a little bit to make sure the pulley lined up well with the harmonic ballancer. One bolt mounting the alternator on is going to go through my bracket and into the block.
Just as helpful hint to the other DIYers... you can add a spacer behind the alternator pulley to line up the belt. This allows you to use the factory engine block boss for 1 of the 4 alternator mounting holes w/o any modifications to the alternator.
Thank you Guru. I honestly don't know why I didn't think of doing that.
quote
Originally posted by Hudini:
Isn't the 3rd line for the fuel vapor canister? It's been a while since I tackled that area.
I live in a state where this car will not be tested for emissions and was wanting to eliminate it. Is a vapor canister and purge valve necessary? Theoretically couldn't I just run it to atmosphere somewhere with maybe a little filter on it to keep junk out? And if so does it have to be higher than the tank or looped in some way or even blocked off completely? The cap is vented right? Let me know please and thank you.
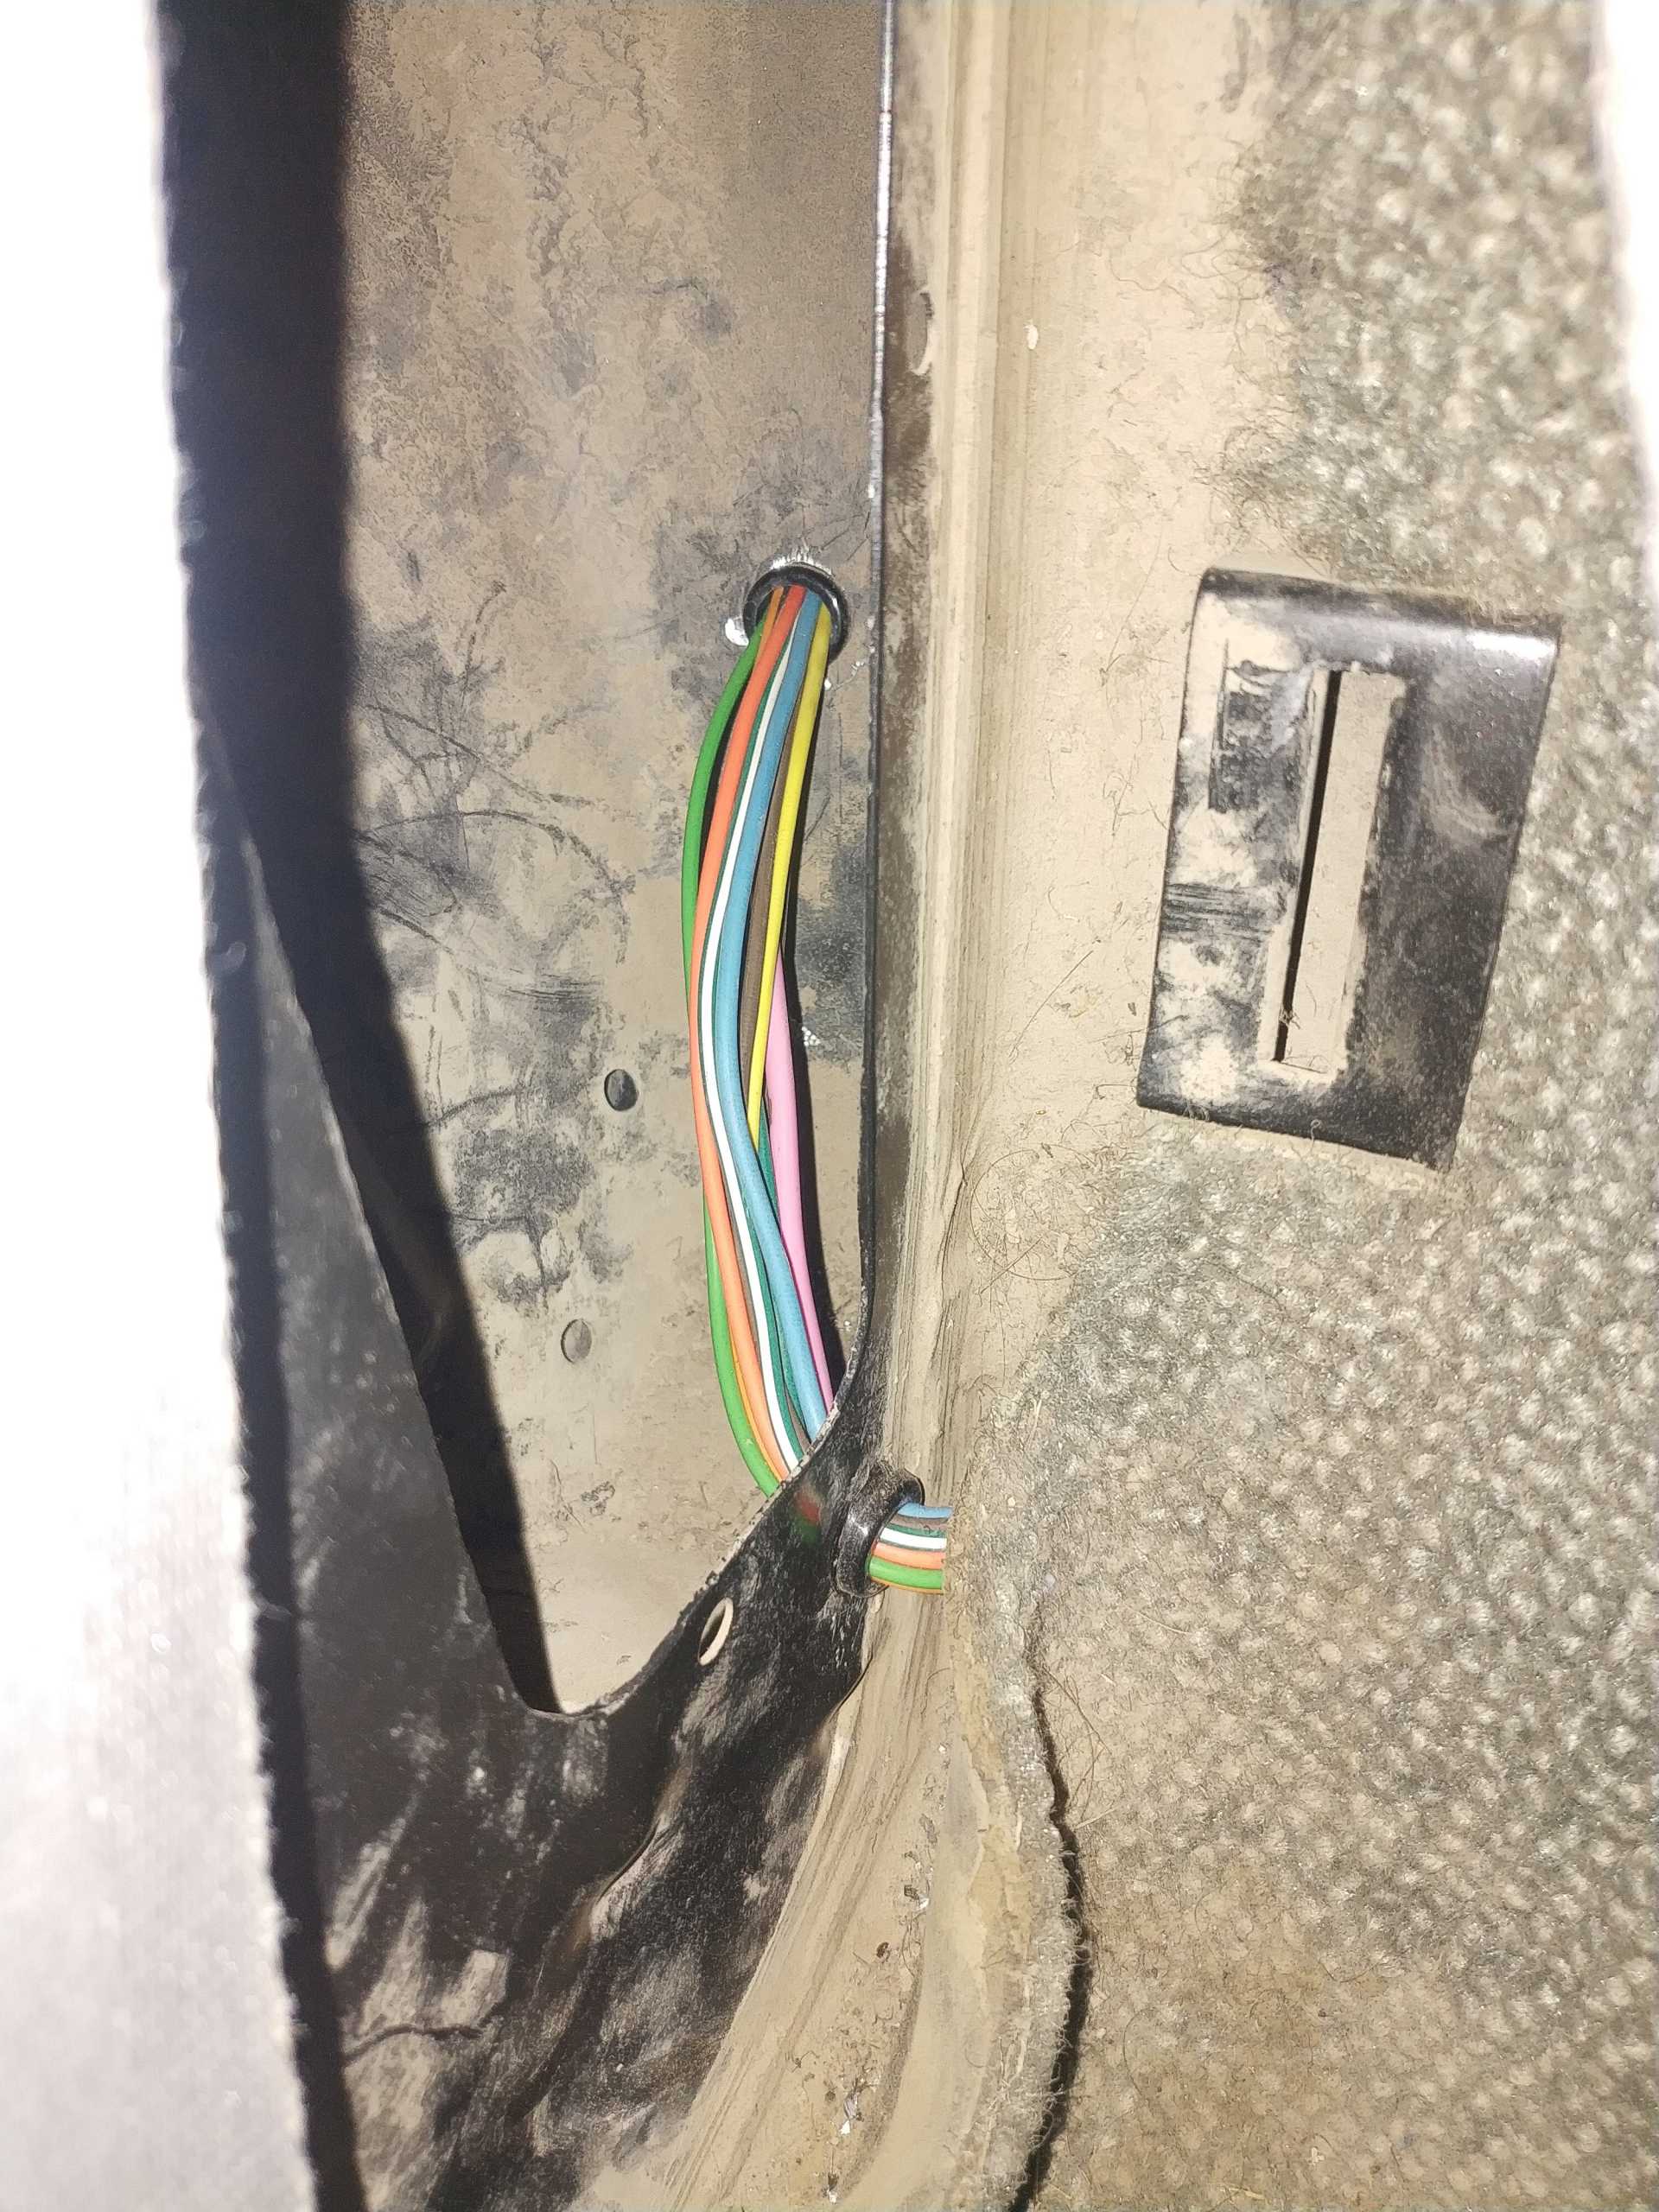
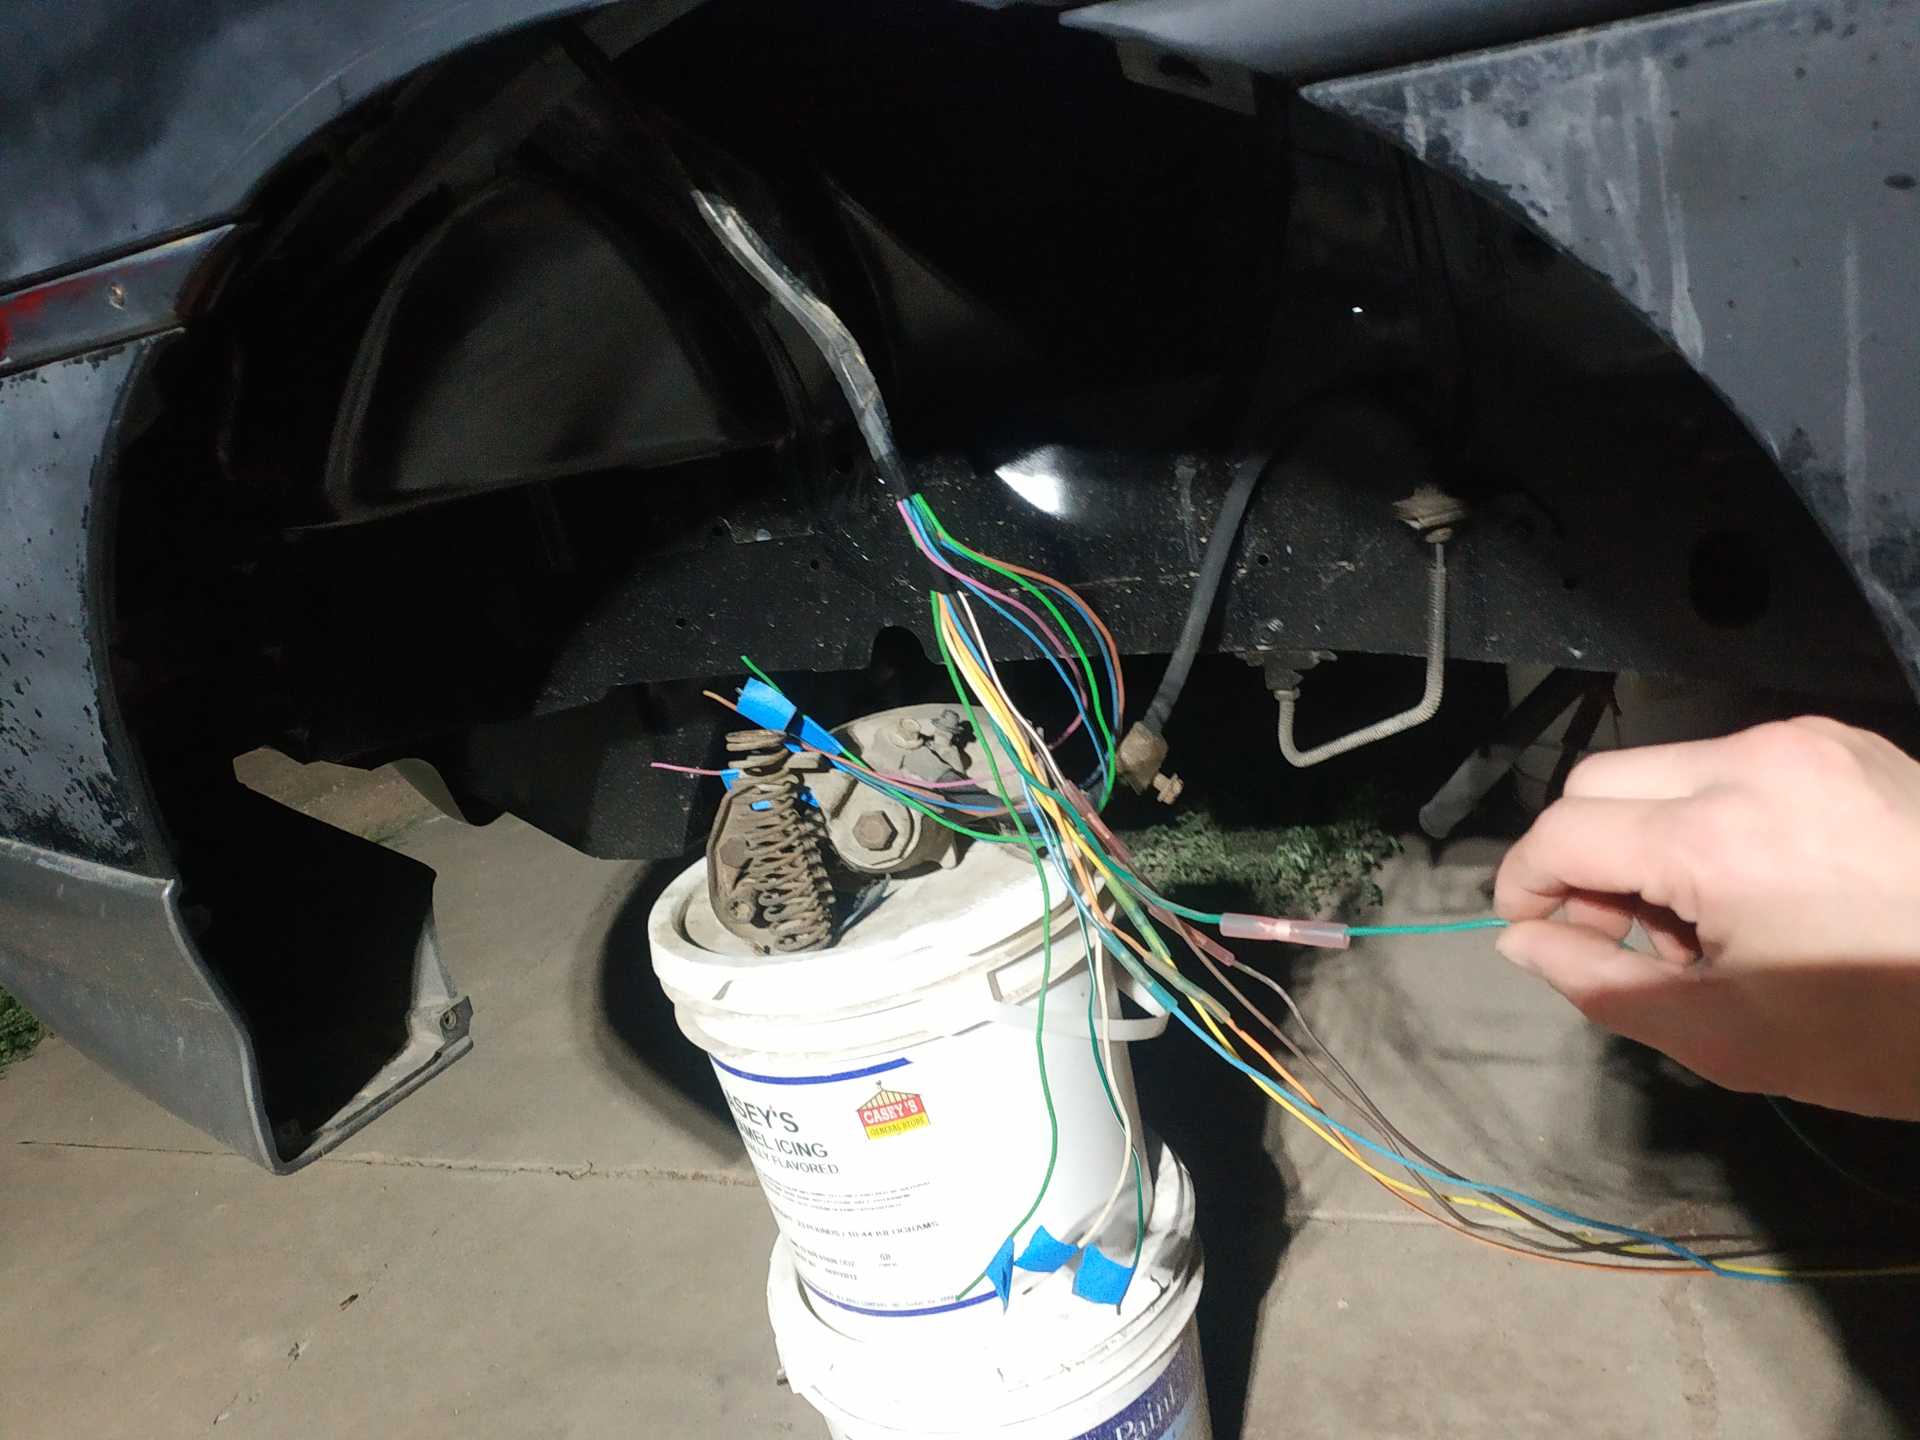
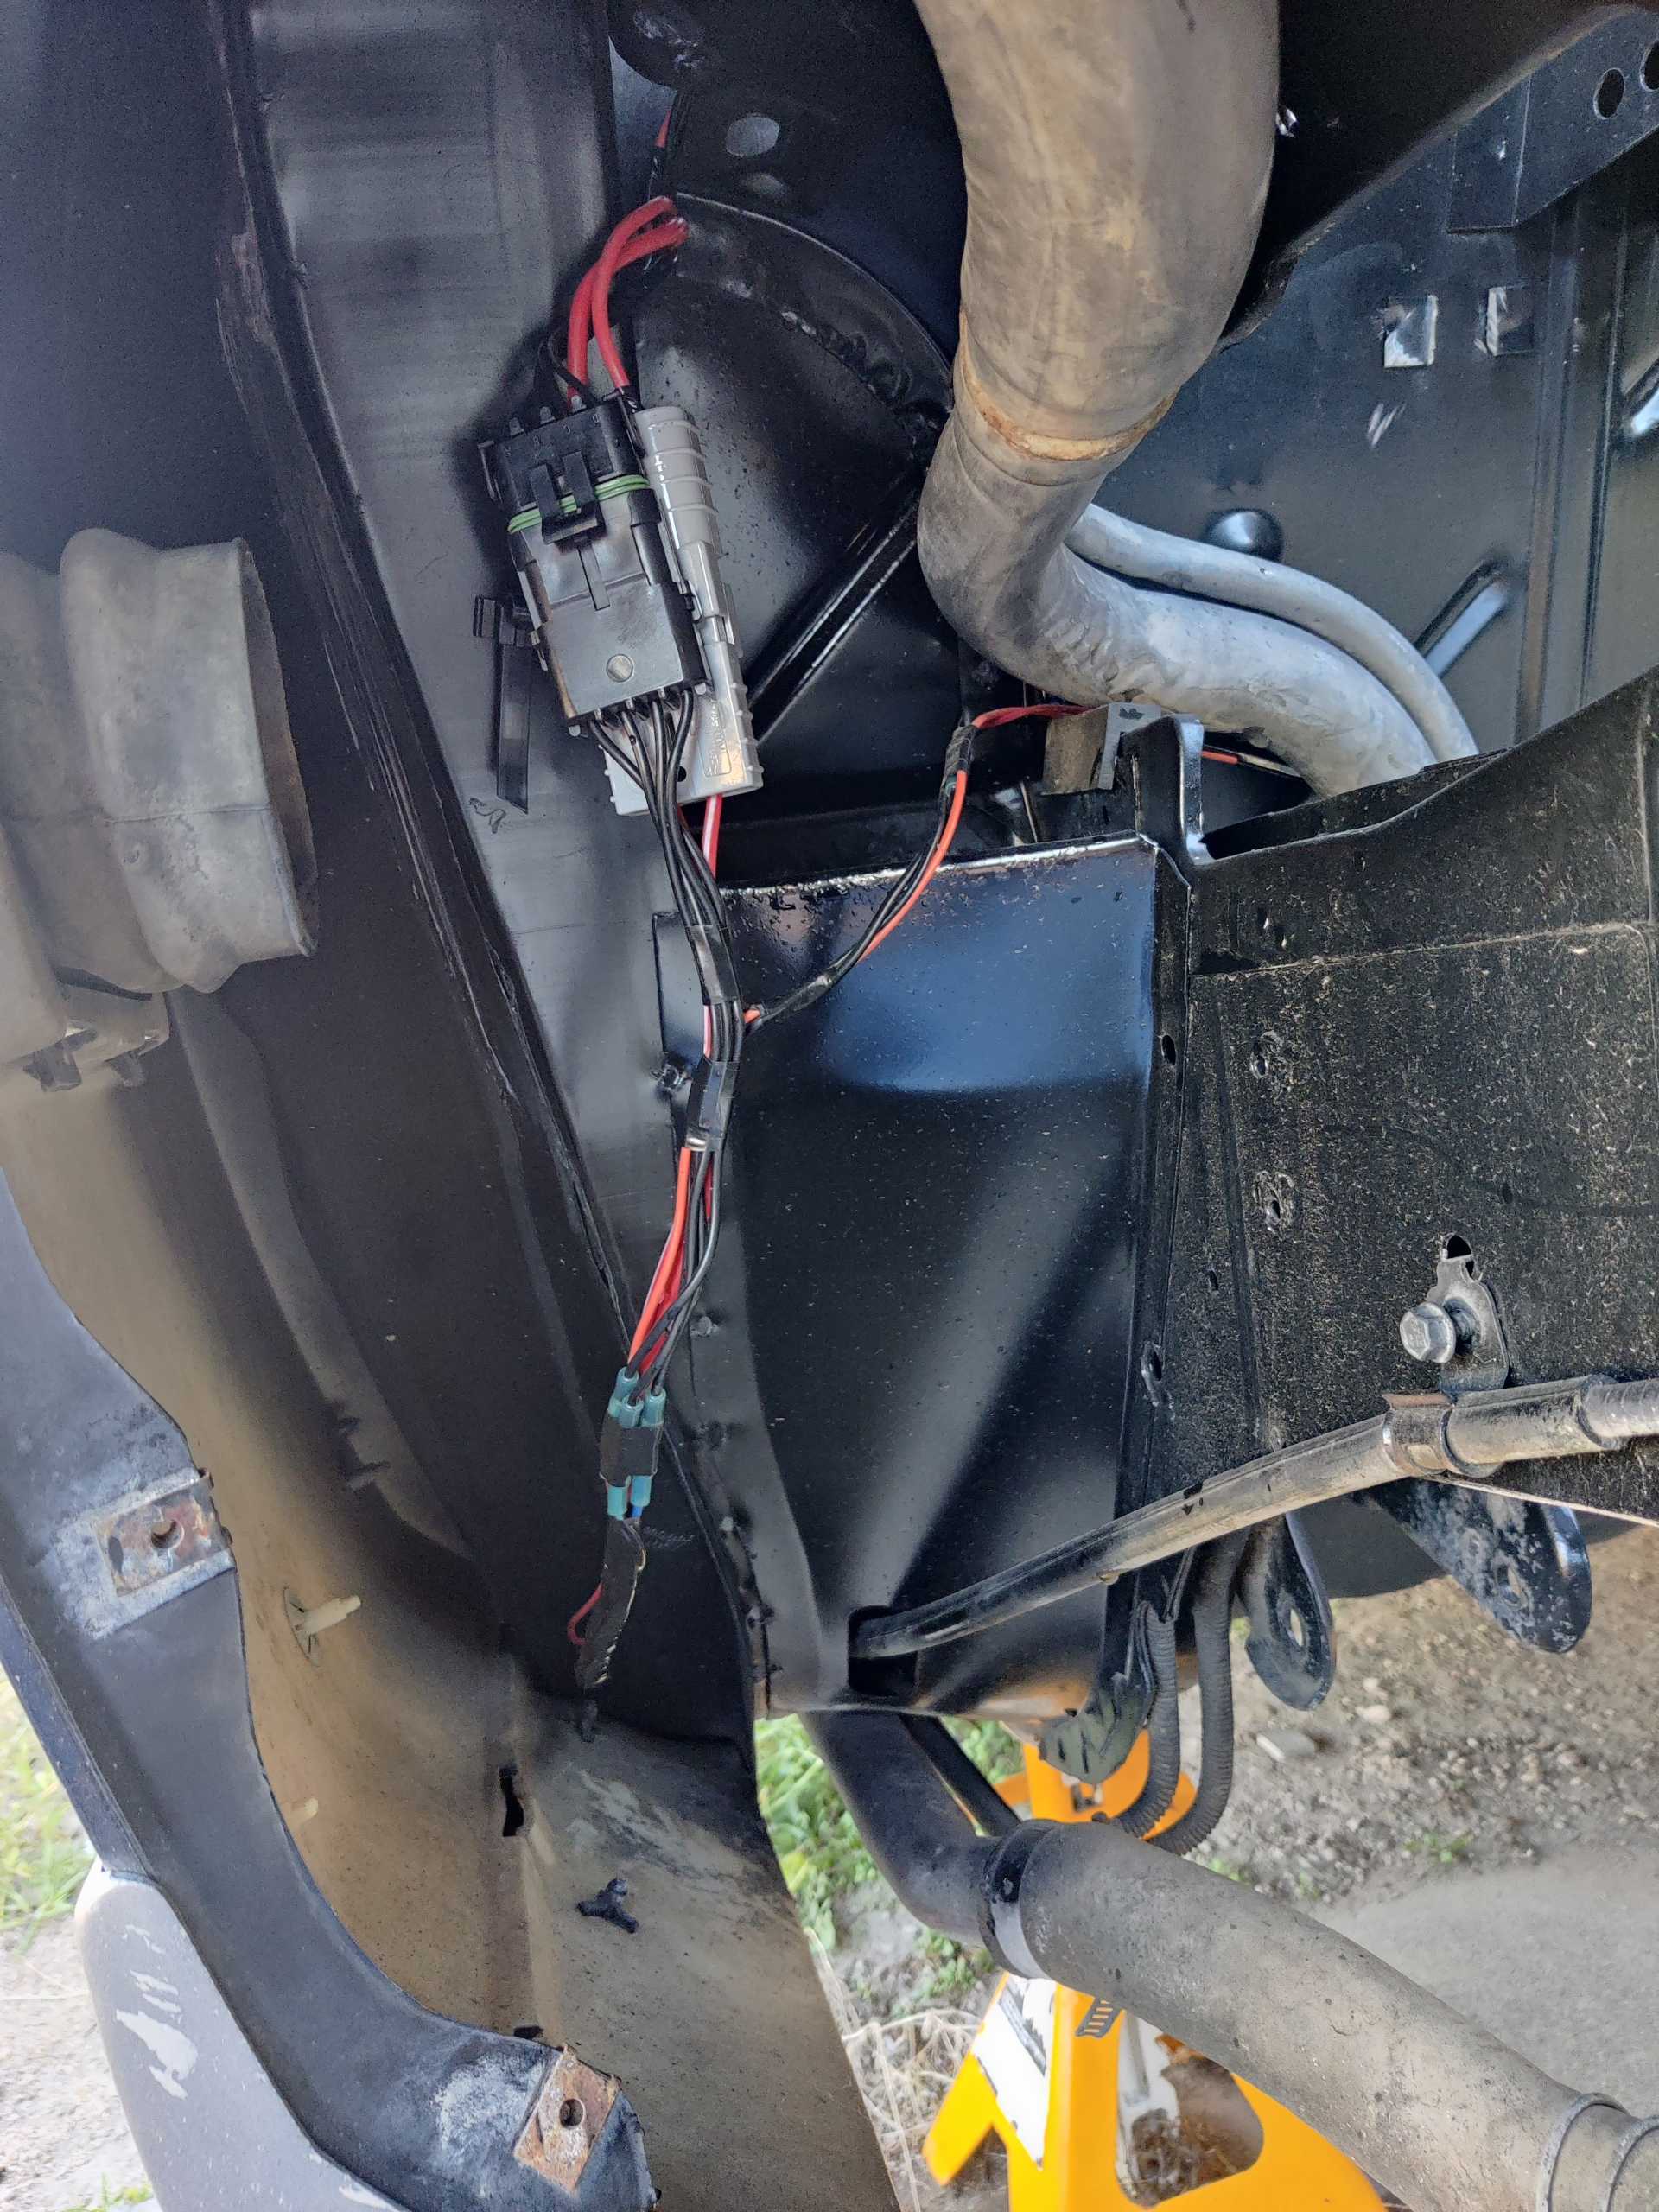
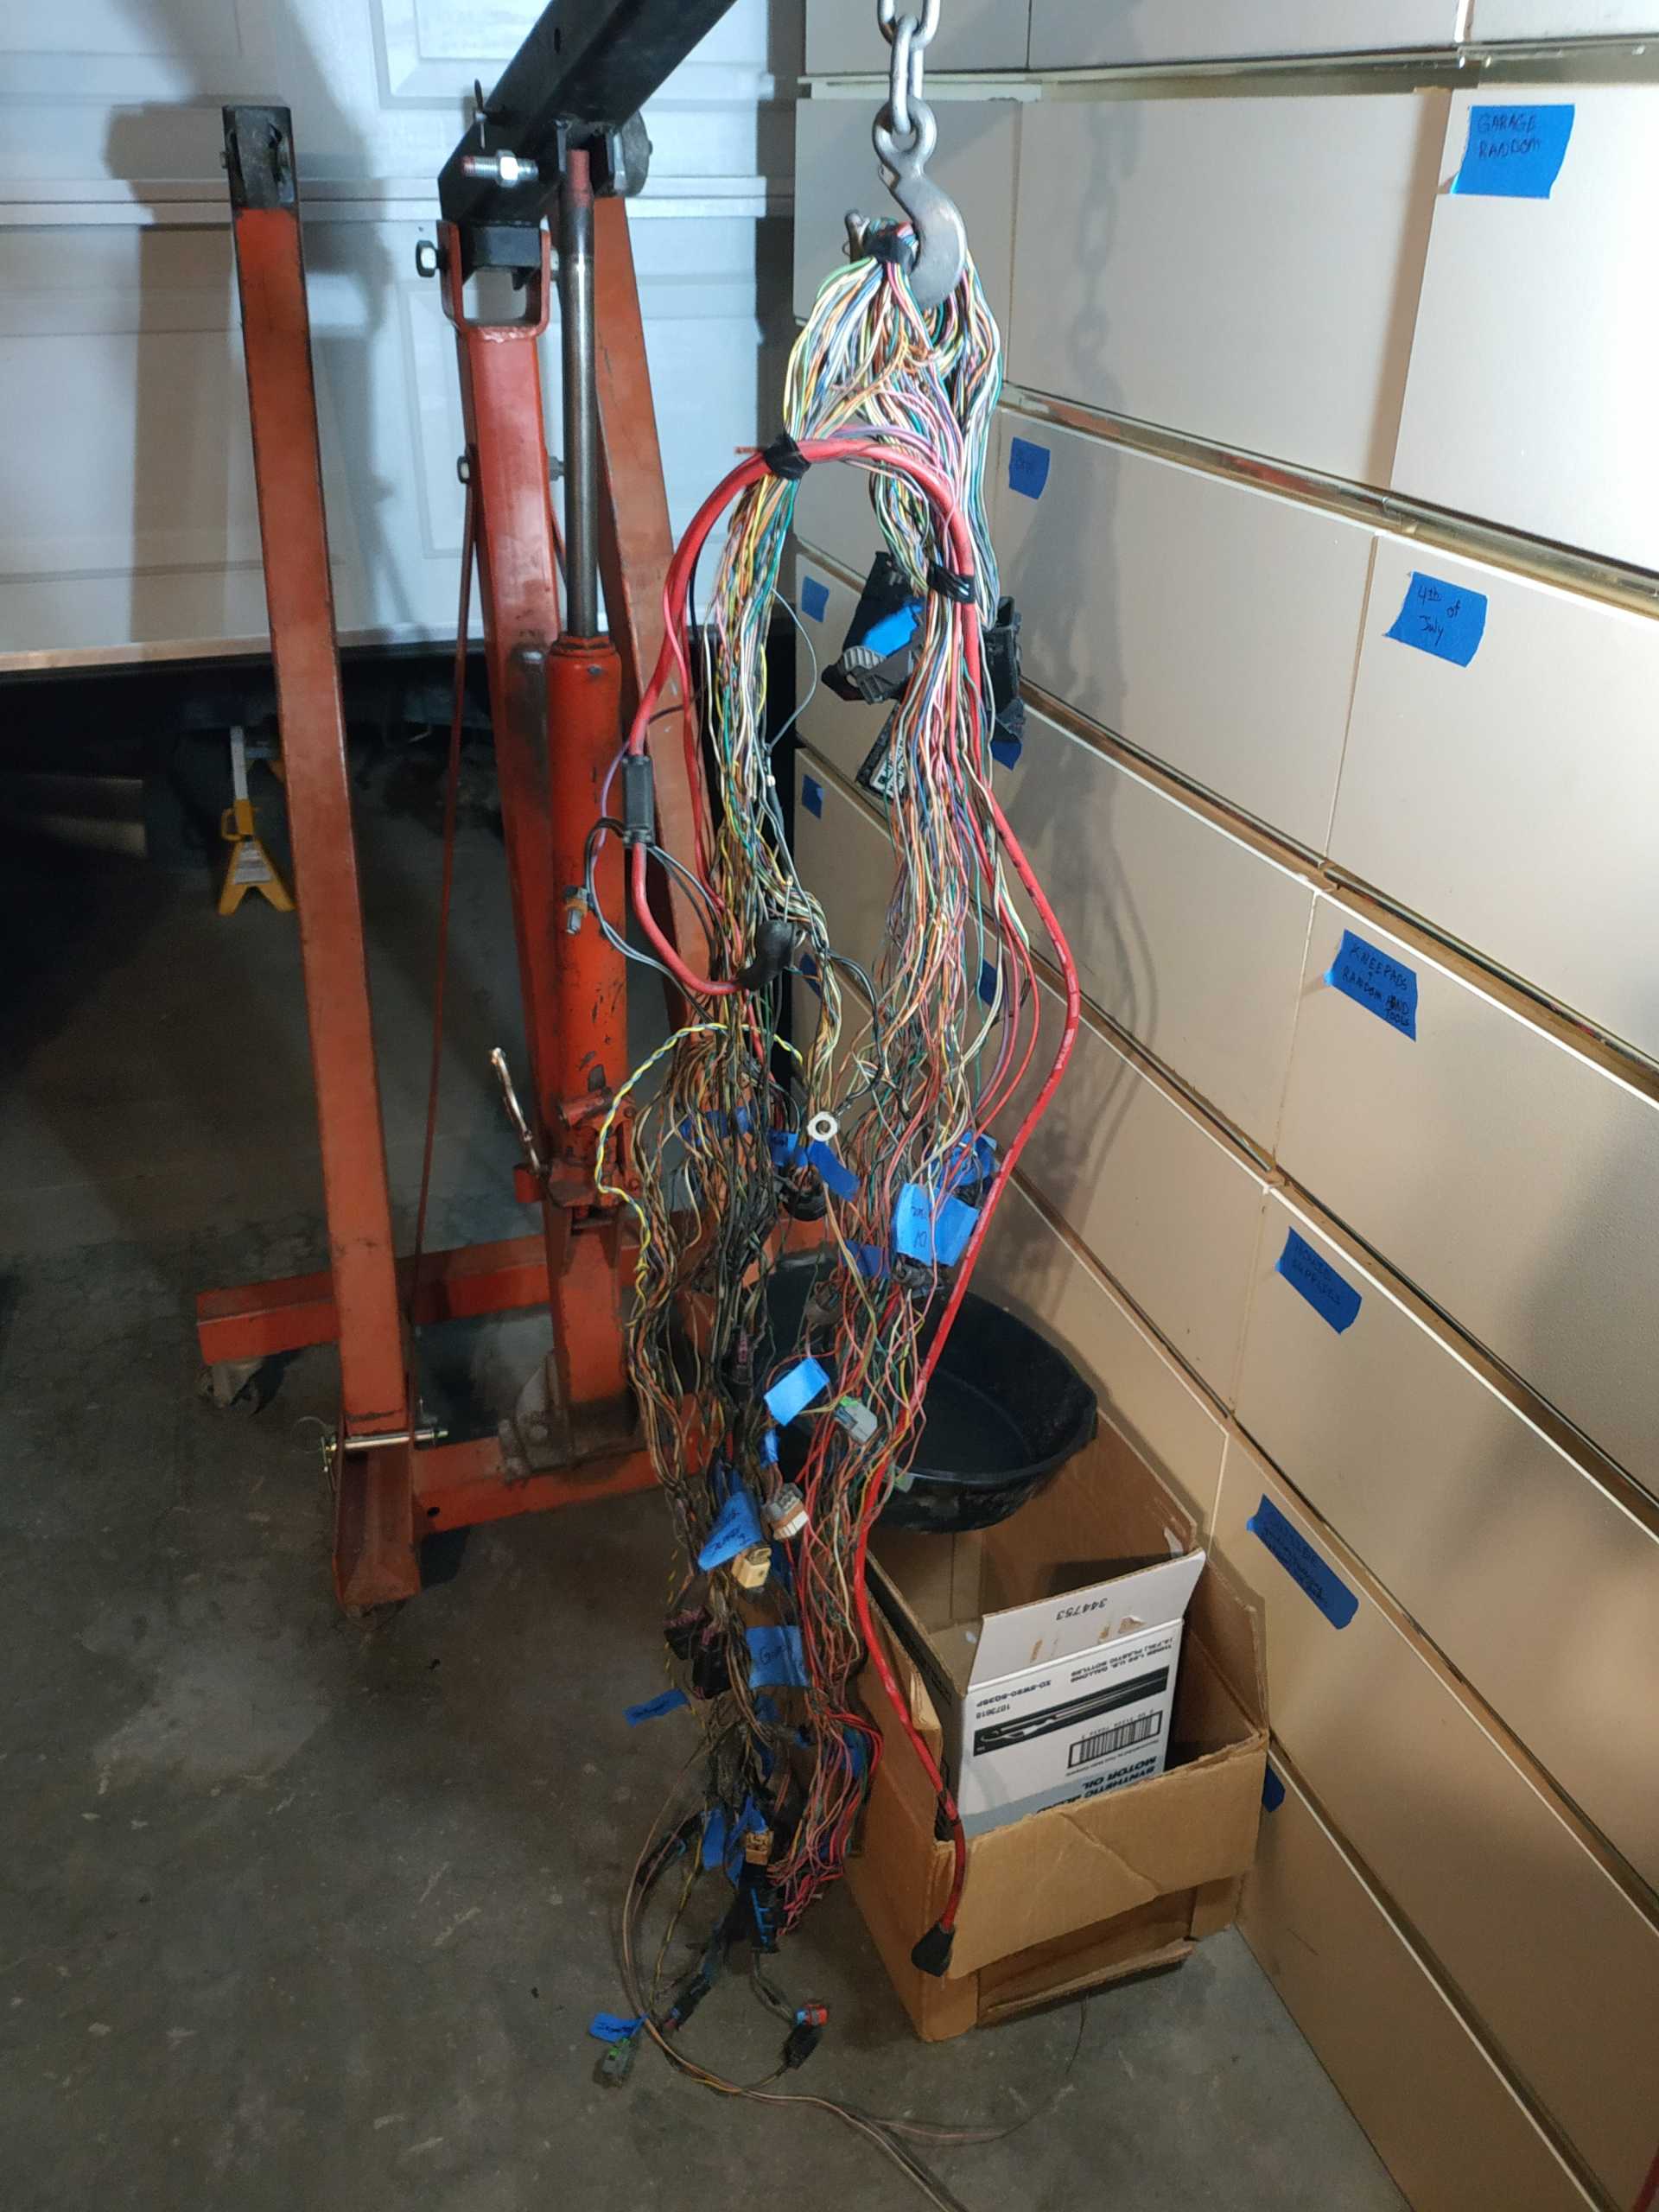
When I had gotten to the wiring, I did not think it would be as bad as it has been. And then I decided to make it worse for myself to clean up the engine bay a bit. And since the battery can no longer stay in it's stock location. I decided to get rid of the c500 connector altogether and do what I've seen some others have done and go through the corner of the cab. The taillight harness passes through the passenger side and the A/C, power wires, an ignition turn on for the engine fuse box, and fuel level and ground pass through the drivers side. I will still be using one pass through located in the center of the engine bay for gauges, pedal, etc. I used the coil power wire to provide power for the electric water pump and I believe I used the original ECM turn on for the main relay for the engine.
Yea I think the water pump is now fused twice but it'll be ok. It's grounded near in the wheel well at an existing ground.
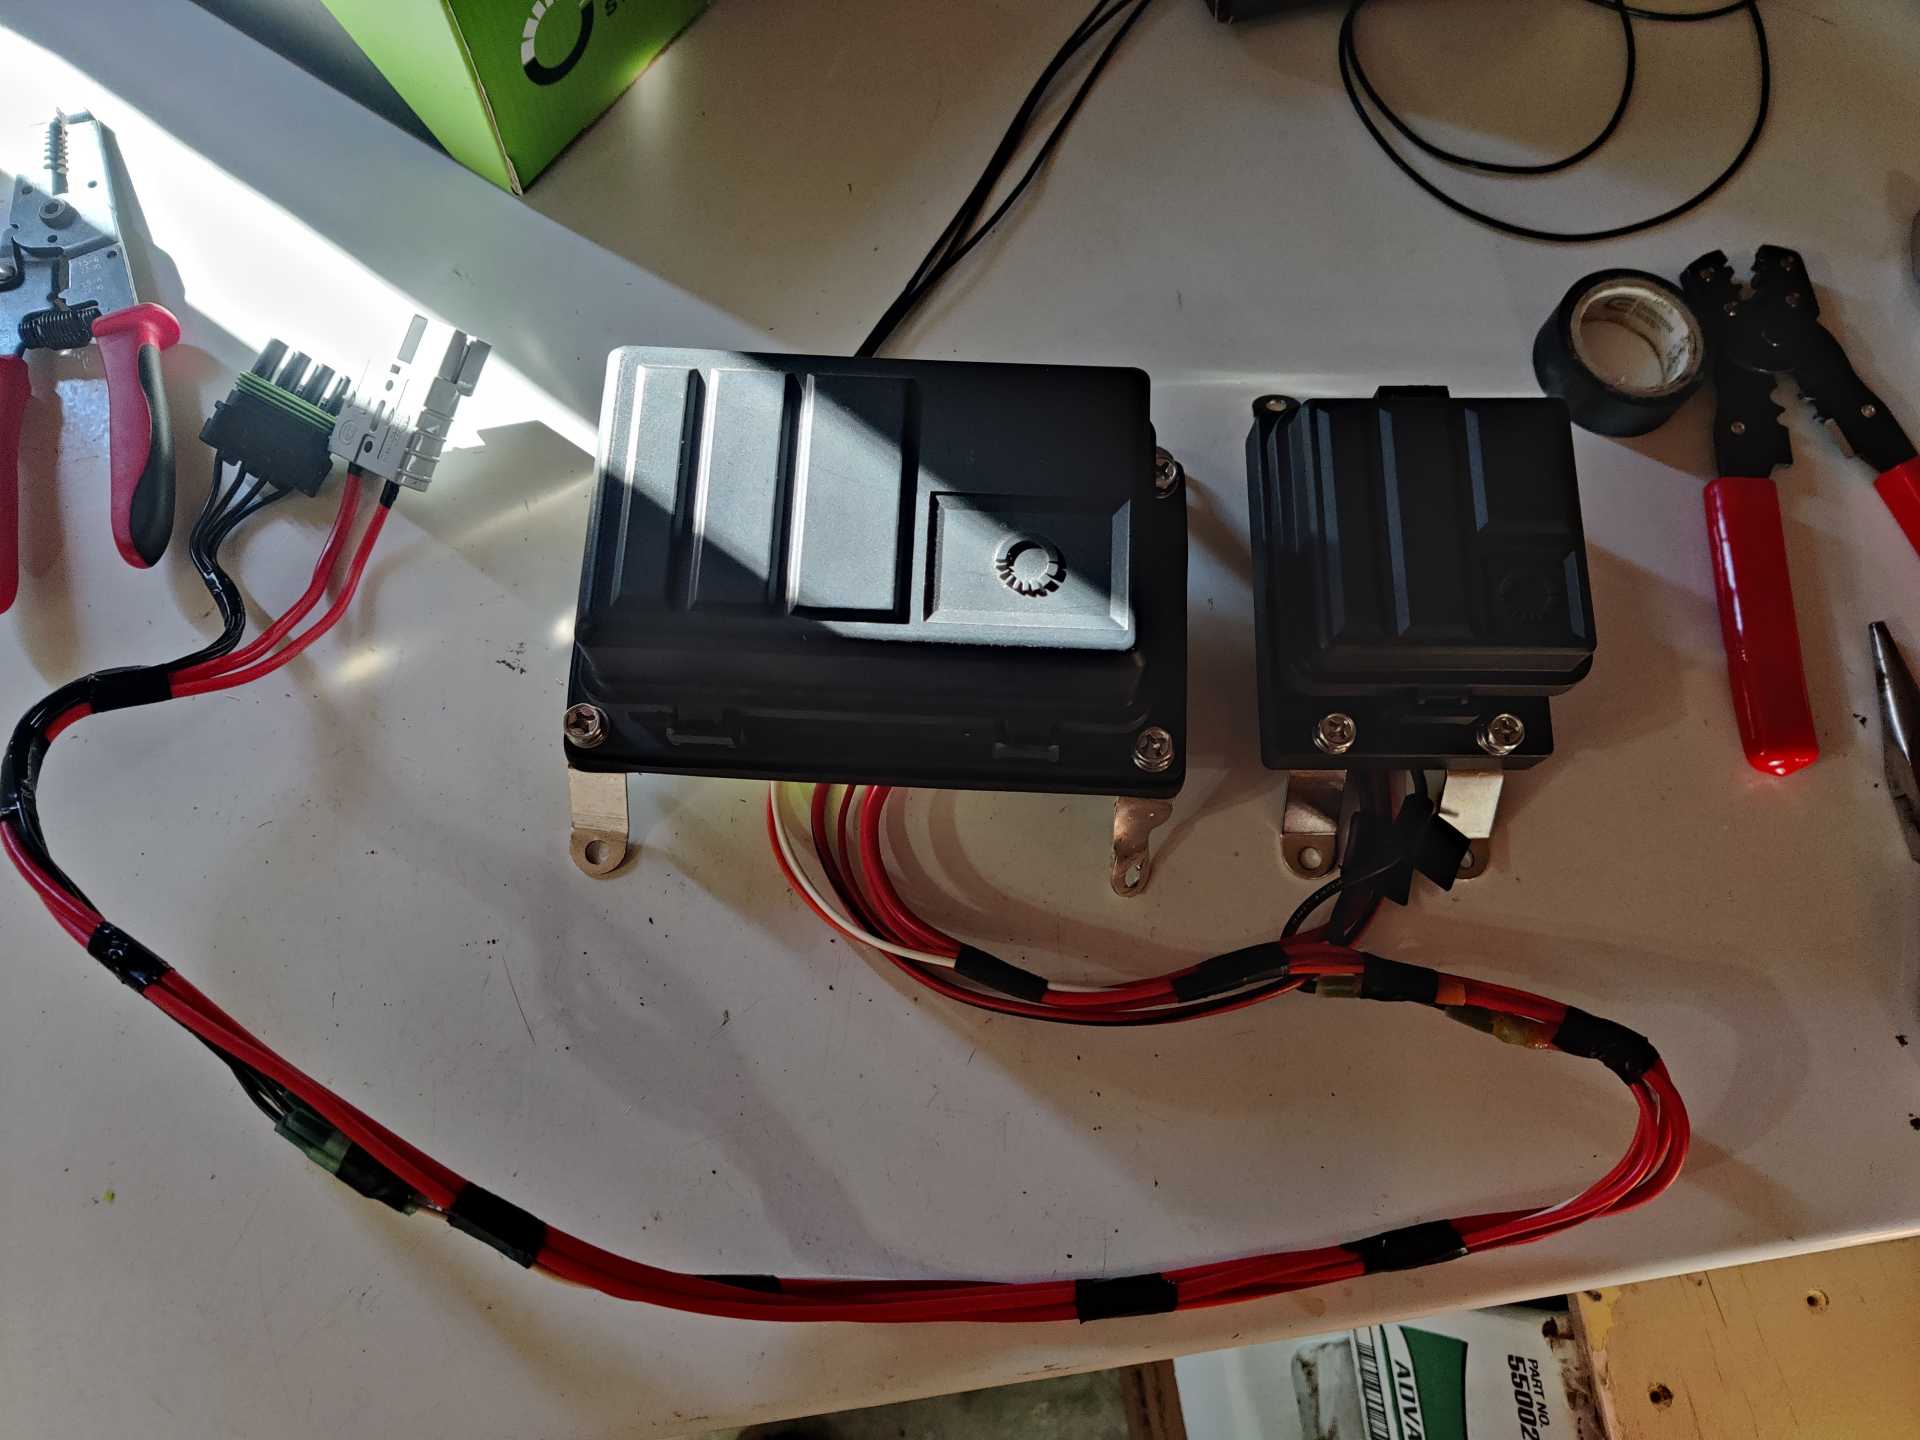
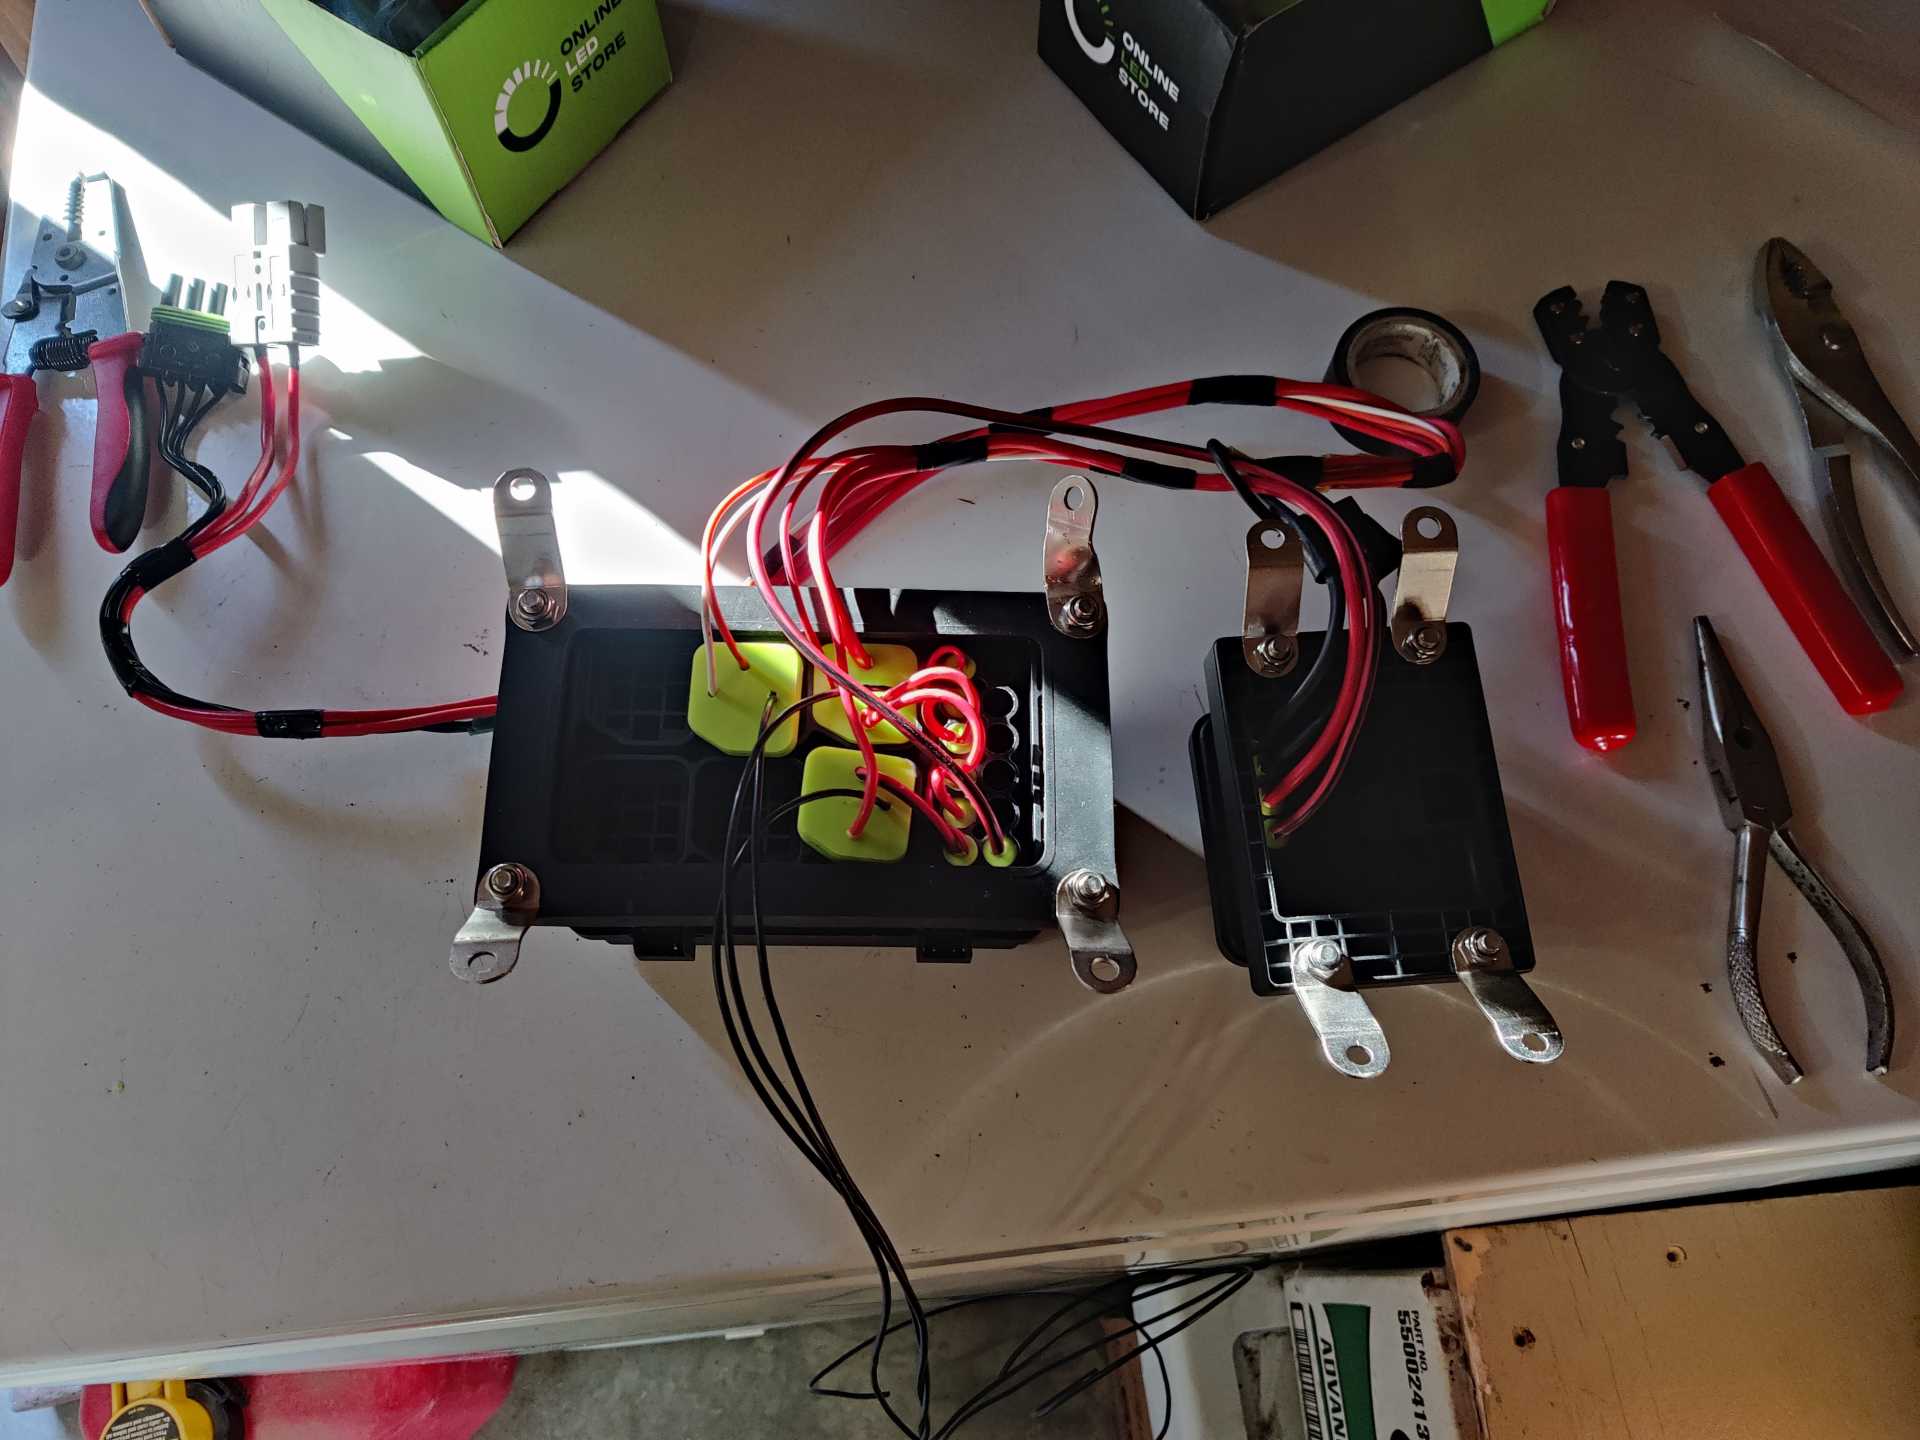
Fuel pump power comes from up top on the drivers side (where the new fuse box will be) and the 3 wires will sneak behind the fuel fill tube and will follow along the ledge to the tank. I wanted to make this build in such a way where I could keep the fuse box with the engine harness and be able to start the engine on the ground. I originally got the cheap relay and fuse holders for this and then my friend told me 'If you're guna do it, do it right'. That may have played a huge part in deciding to do all this with the wiring being cleaned up and my over-analyzing of everything over and over again. I got a somewhat cheap, but waterproof, distribution and fuse & relay boxes off Amazon and mocked up where I wanted them to be. I also welded bolts to the body where the ECM & TCM will be. They are mounted on non-conductive plastic and the plastic will be mounted to the body.
This is correct isn't is? Having the computers cases not grounded or touching the body. Could I get a little more help with this one too? I've heard to not let the computers be grounded from the cases and I've heard to ground the case. I thought they were grounded through the wires for ground but lately I've been told it wouldn't matter. I just don't want to fry my computers over something so little.
I got the engine harness all deloomed and removed the extra wires not needed for this build. I wanted to keep the wires from drooping over where the coolant lines were so I purchased some of the ECM pins and moved the O2 sensor and cam position sensor wires to the rear (left) underside of the engine. I have so many left over it isn't funny. I planned to mount the computers on the inside of the car but this was the route I took. I also added a coolant temp sender on the opposite side of the motor from stock for the gauge. Ive seen the 3 wire ones that run the ECM and gauge but the sender came with the gauge so I just ran the wire for it. The coolant temp and alternator wires were routed under the front (right) side of the engine along with the alternator power cable. A wire for the oil pressure gauge was also ran along here. I may still get ahold of you, Guru, for the adapter at the filter housing if I can't drill and tap the original one.
I haven't got the fuse box connected to the harness yet but soon.
Nice job but does the stock cam work with the AFM/DOD delete? Most LS4 swaps that I have come across replace all the lifters, lifter cradles, valve springs and camshaft but this could be as a performance mod. Have you figured out the changes needed to the PCM program to make this all work?
------------------ " THE BLACK PARALYZER" -87GT 3800SC Series III engine, custom ZZP /Frozen Boost Intercooler setup, 3.4" Pulley, Northstar TB, LS1 MAF, 3" Spintech/Hedman Exhaust, P-log Manifold, Autolite 104's, MSD wires, Custom CAI, 4T65eHD w. custom axles, Champion Radiator, S10 Brake Booster, HP Tuners VCM Suite. "THE COLUSSUS" 87GT - ALL OUT 3.4L Turbocharged engine, Garrett Hybrid Turbo, MSD ign., modified TH125H " ON THE LOOSE WITHOUT THE JUICE "
Nice job but does the stock cam work with the AFM/DOD delete? Most LS4 swaps that I have come across replace all the lifters, lifter cradles, valve springs and camshaft but this could be as a performance mod. Have you figured out the changes needed to the PCM program to make this all work?
This was the kit I purchased: https://www.amsracing.net/c...-gen-iv-5-3l-engines One of the options was stock lift duration but it still needs to be programmed out of the computer. New cam, lifters & trays, valley cover, head & balancer bolts, gaskets & seals. I even called them with the engine info and they suggested this one also.
One of my buddies has hp tuners which will work for the ECM but I'm not sure for the TCM. I've also looked into getting TunerCat and just do it myself but I'm really not sure what I'm going to be using yet. I'm not sure what all changes to the TCM are needed.
Just spend the money and go through James Brewer with JOATS Performance. He is easy to work with and can get you tuned up in a hurry. He's also not particularly pricey although I'd have to check on what I actually paid.
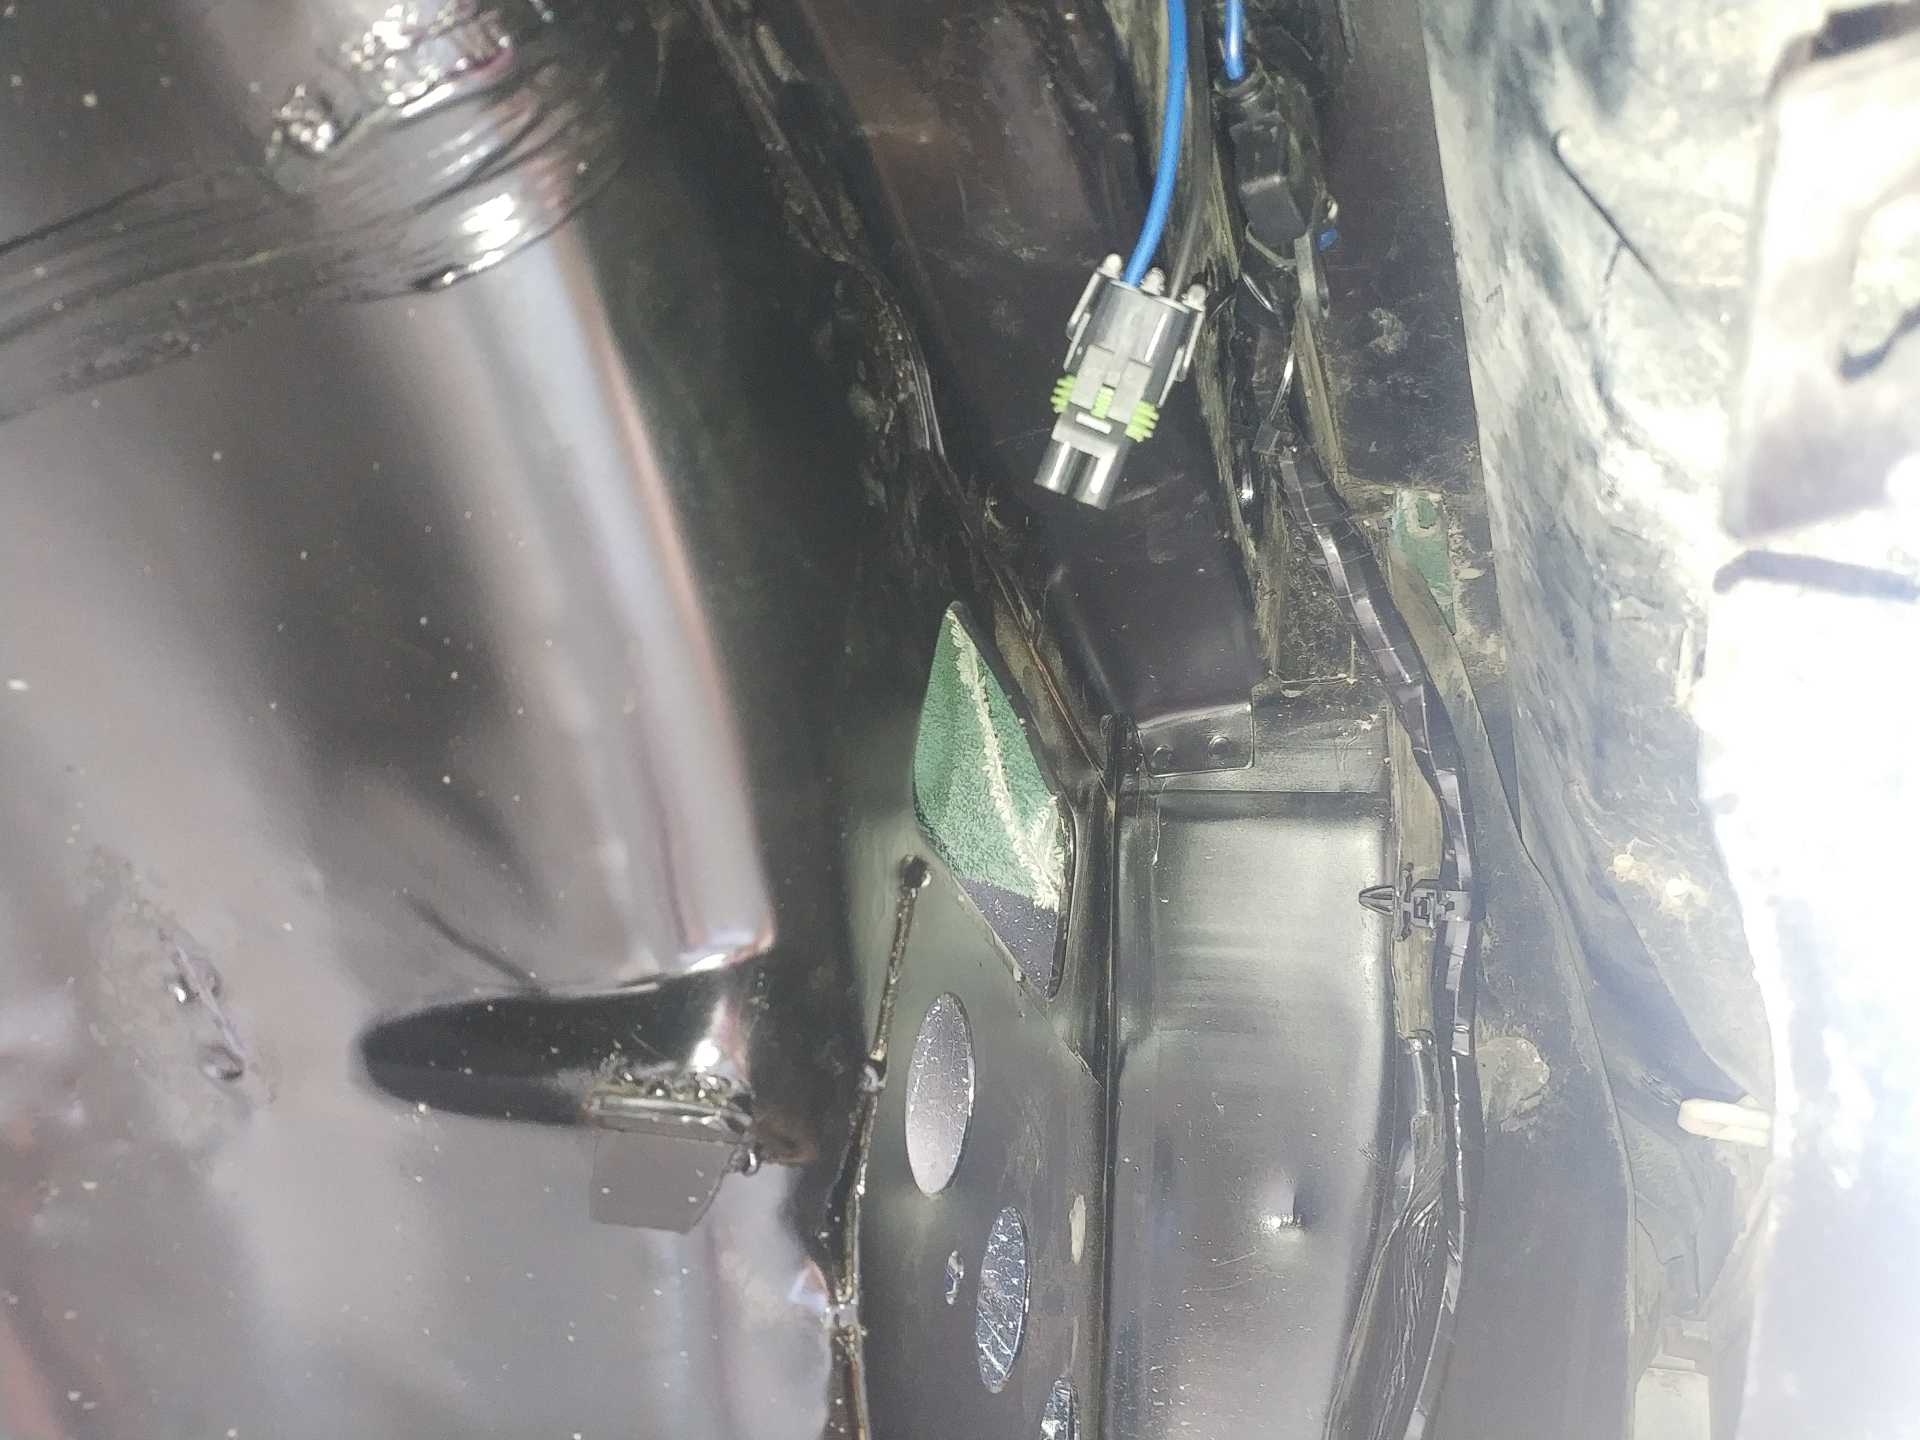
One of your electronic modules has the connector pointing upwards, allowing it to collect rainwater easily, especially being beneath the decklid vent.
Are you able to flip it upside-down?
I had thought about that too but I would think, the way the plug is designed, as long there's no water slipping by the wires to the back of the plug then it should be waterproof. I had also thought about using silicone where the wires enter the back of the plug after it's been tuned to make sure no water gets to it. I like the look of being able to see the computers but I get your point.
Just spend the money and go through James Brewer with JOATS Performance. He is easy to work with and can get you tuned up in a hurry. He's also not particularly pricey although I'd have to check on what I actually paid.
I will look into him also. Thank you for the suggestion
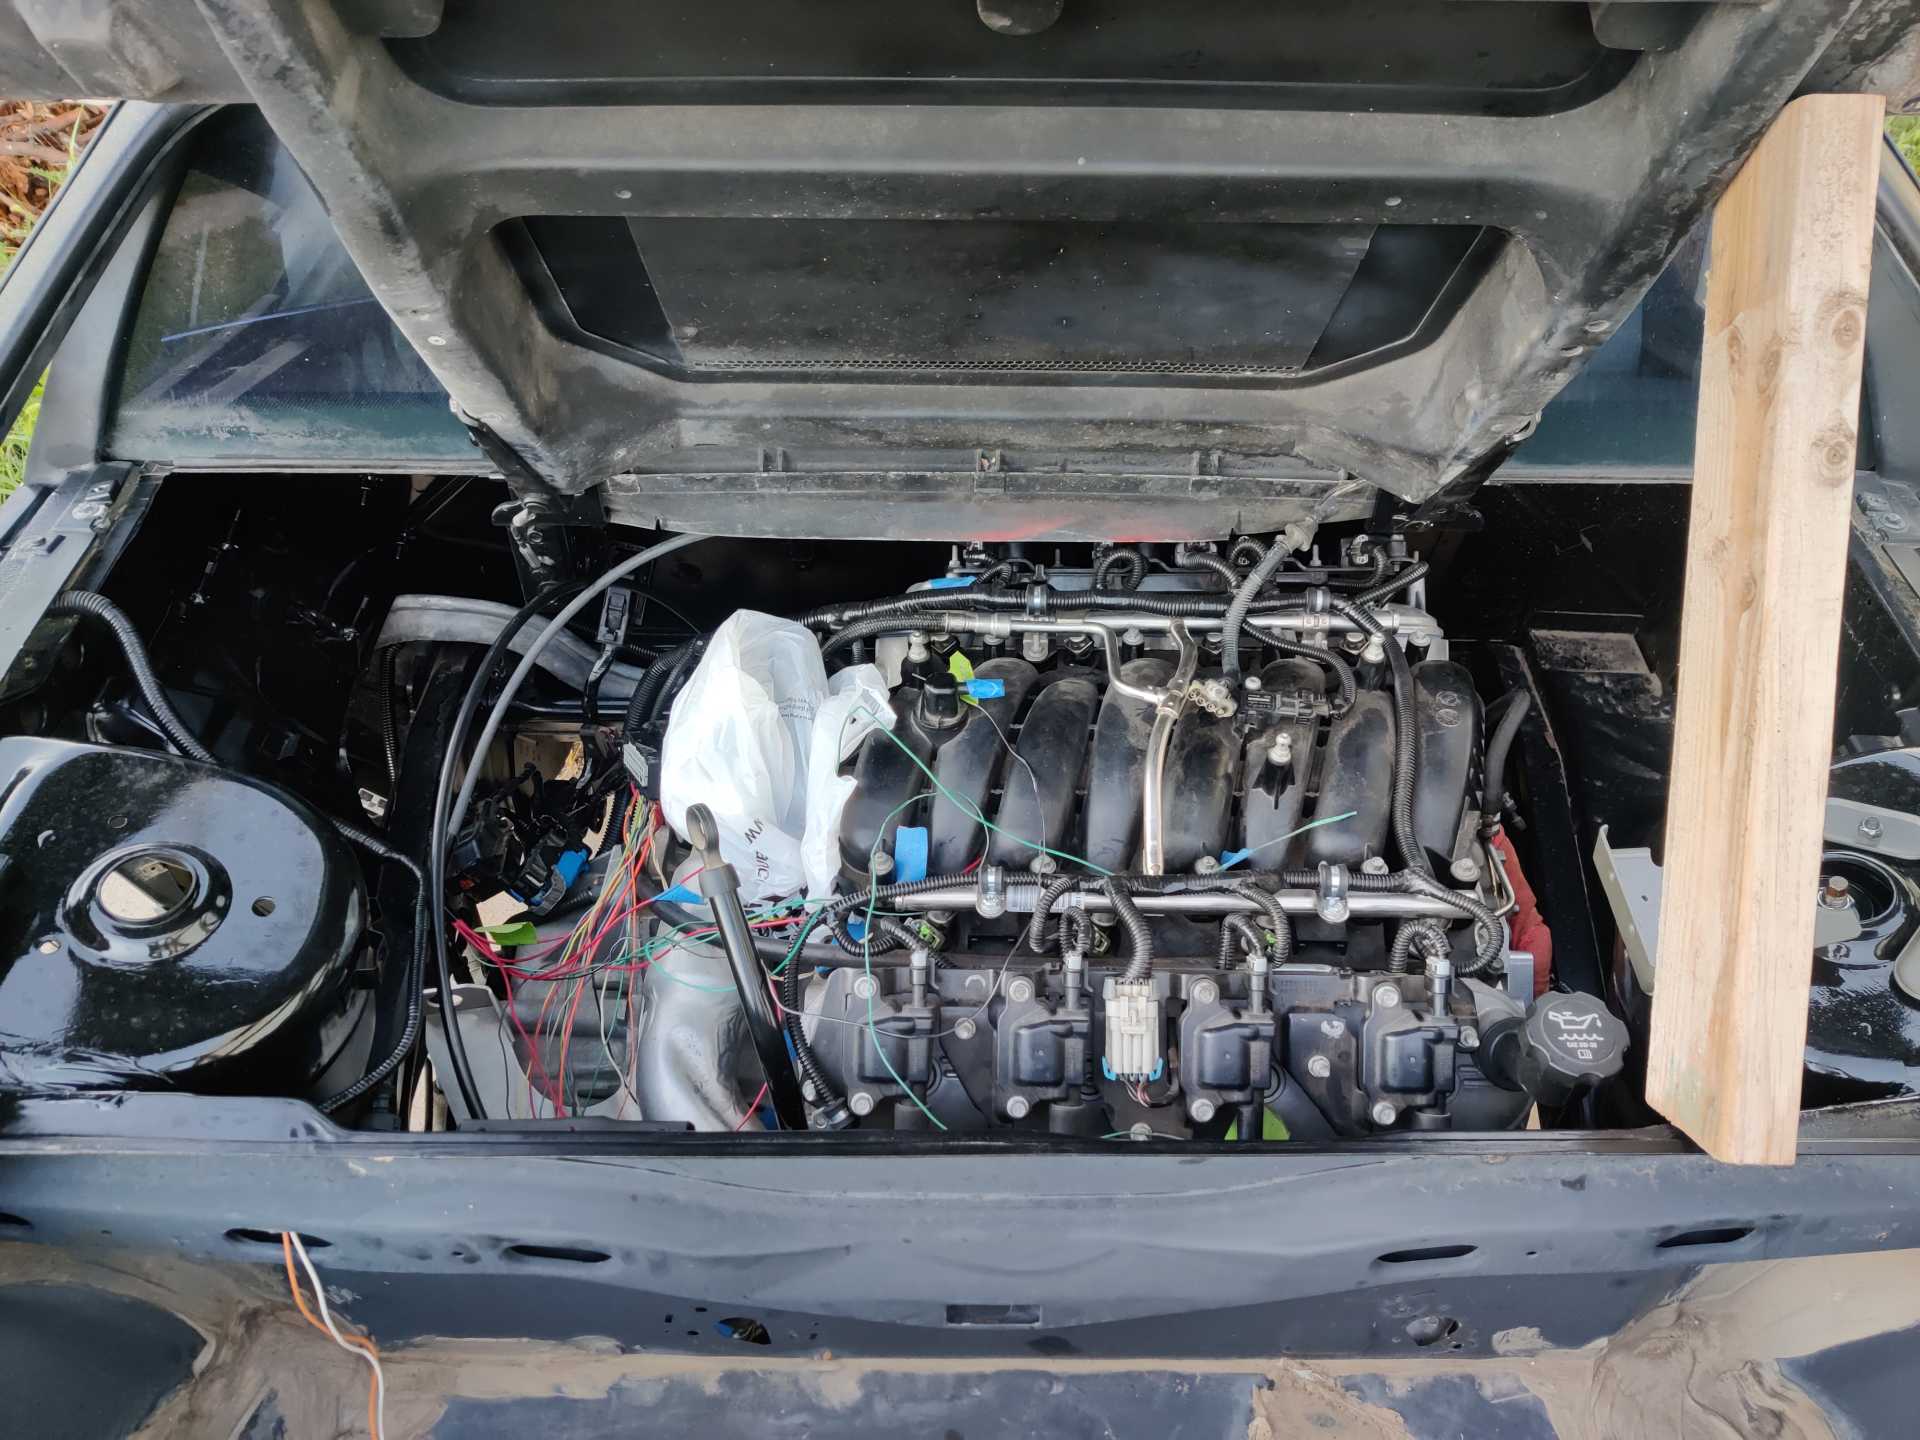
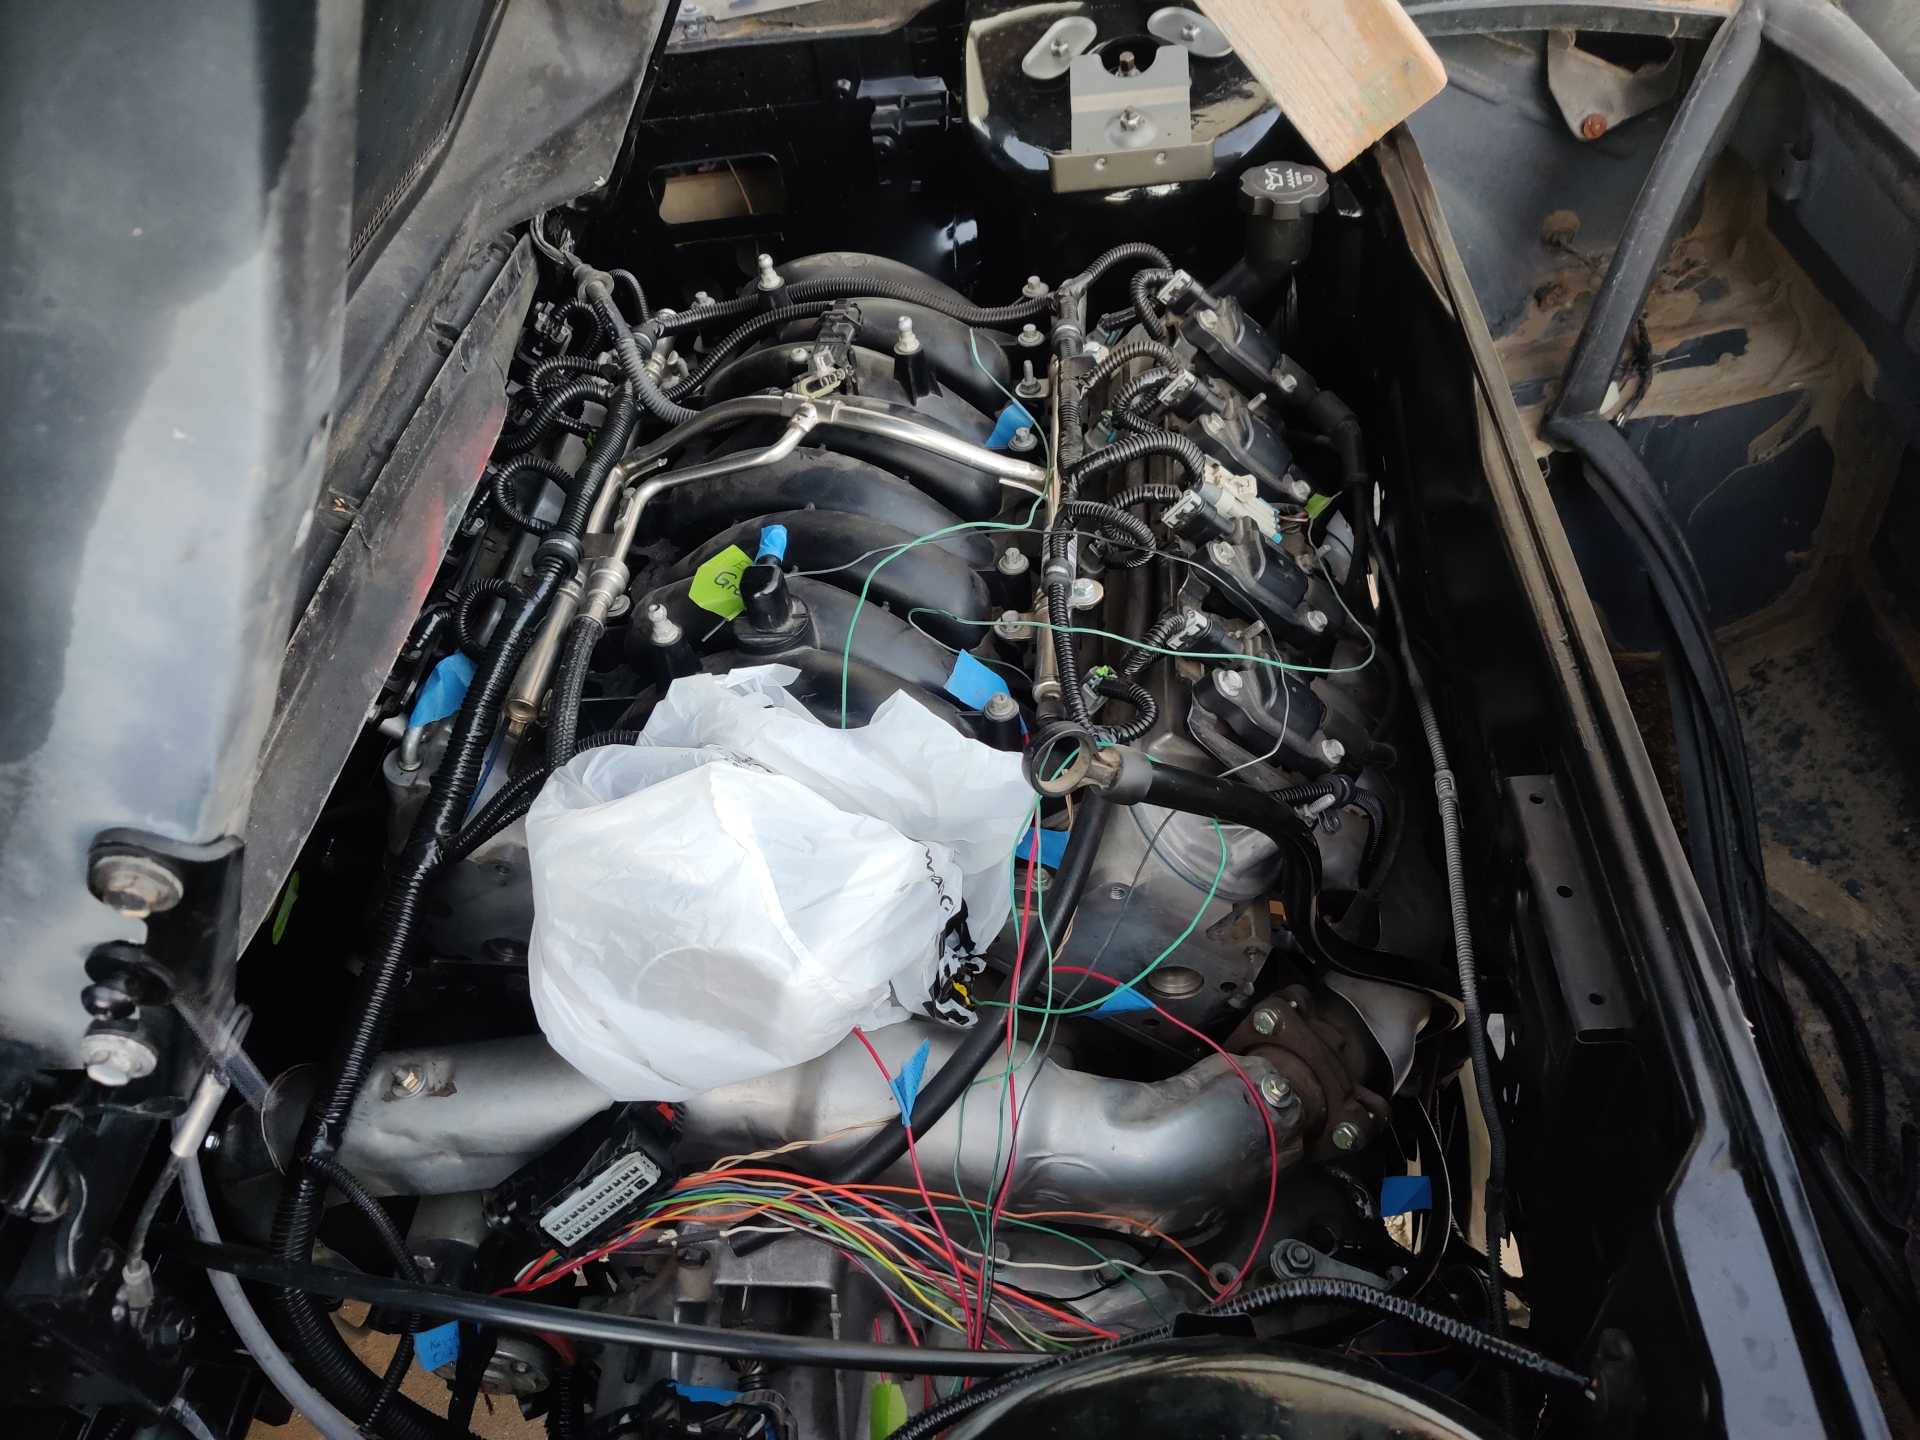
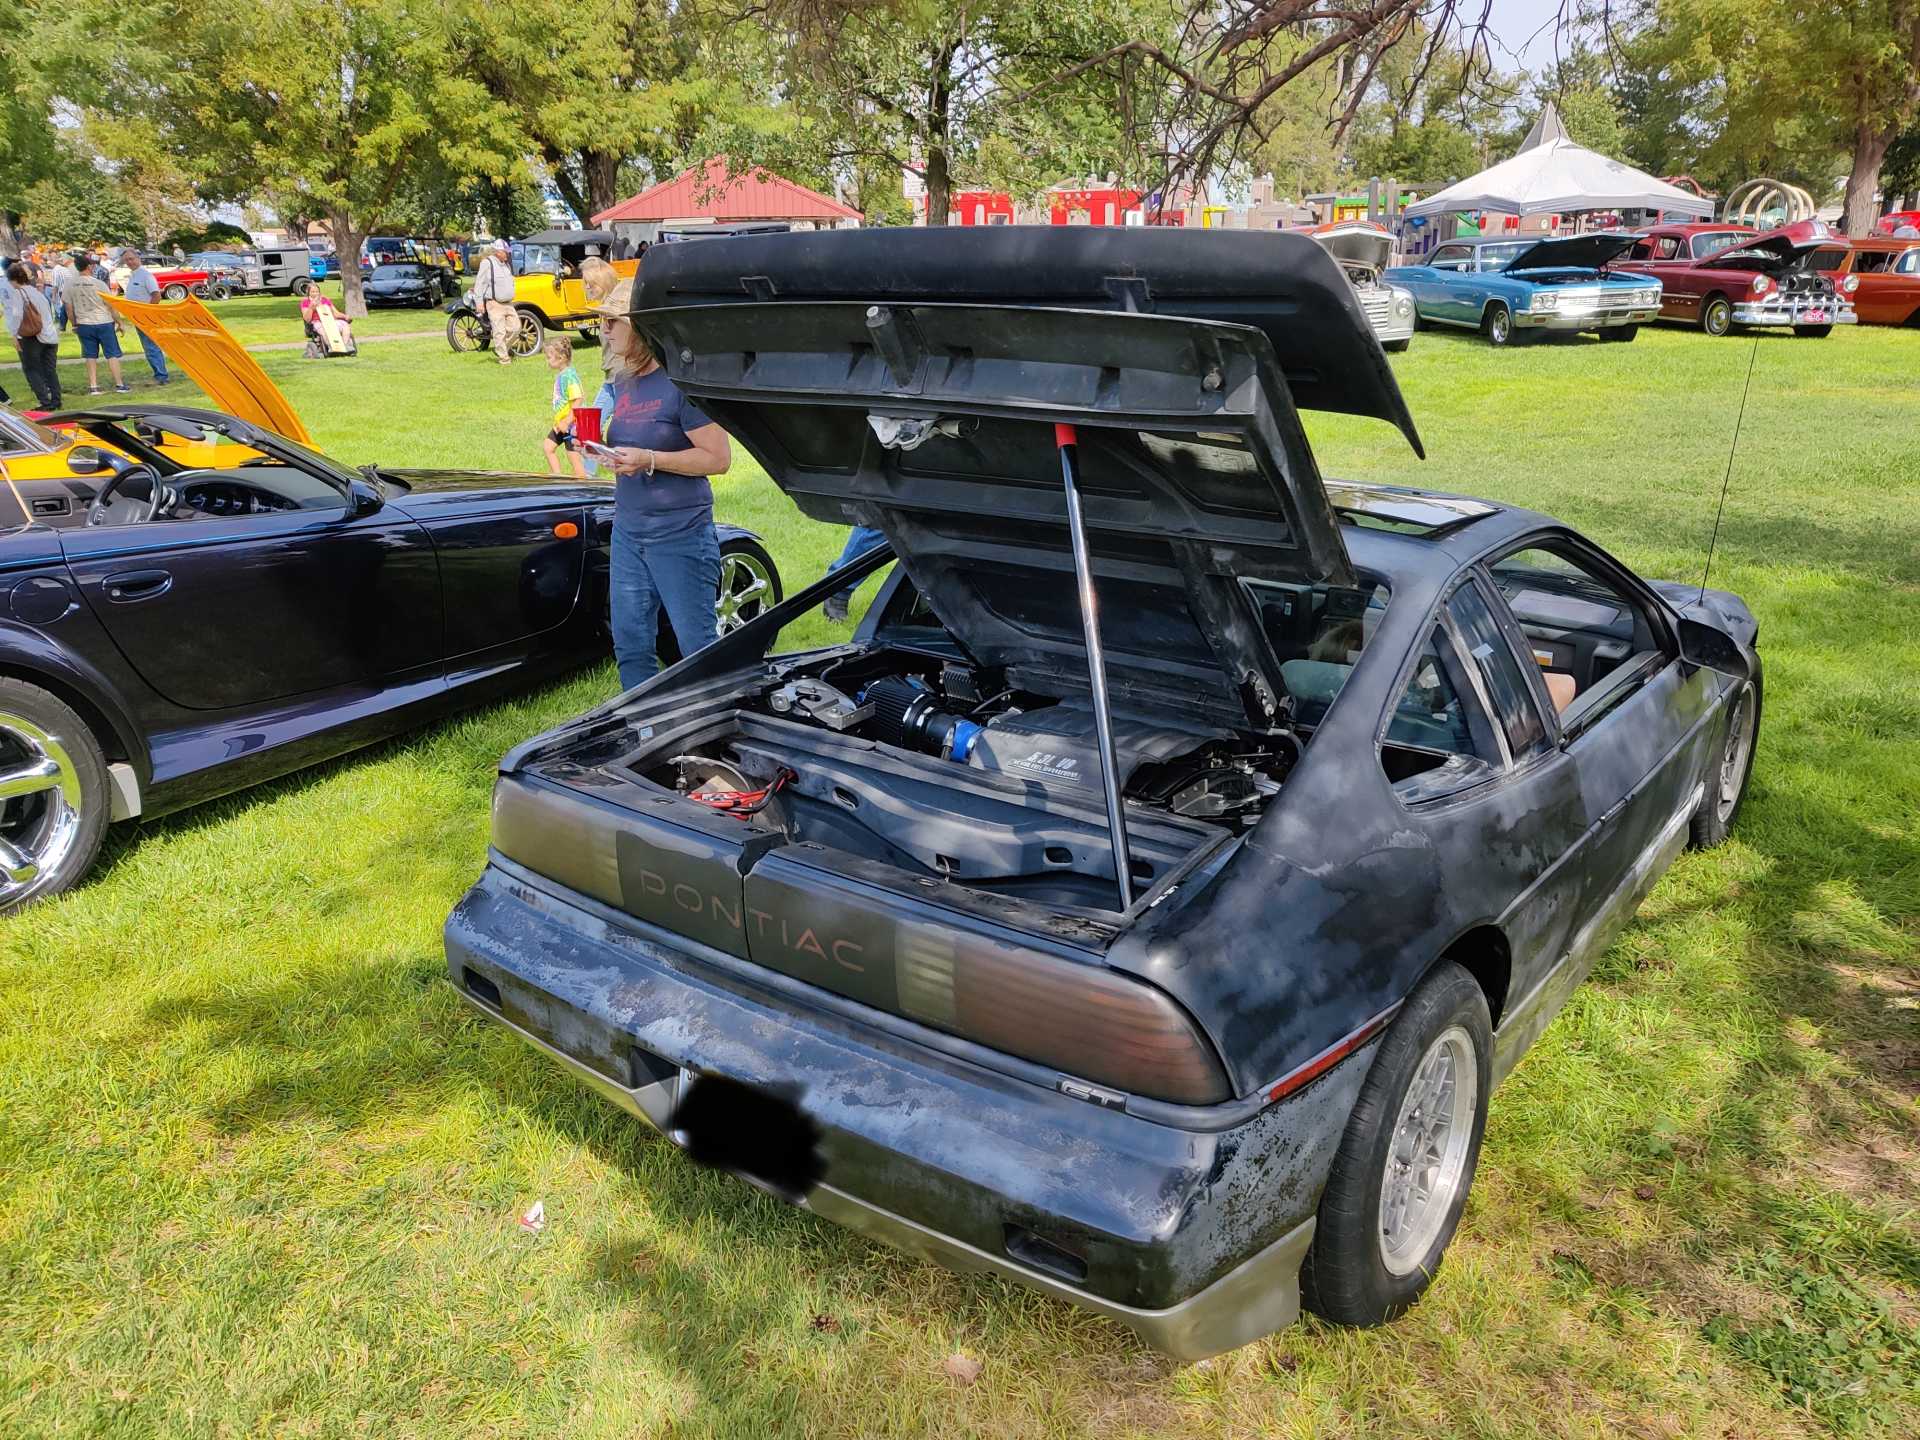
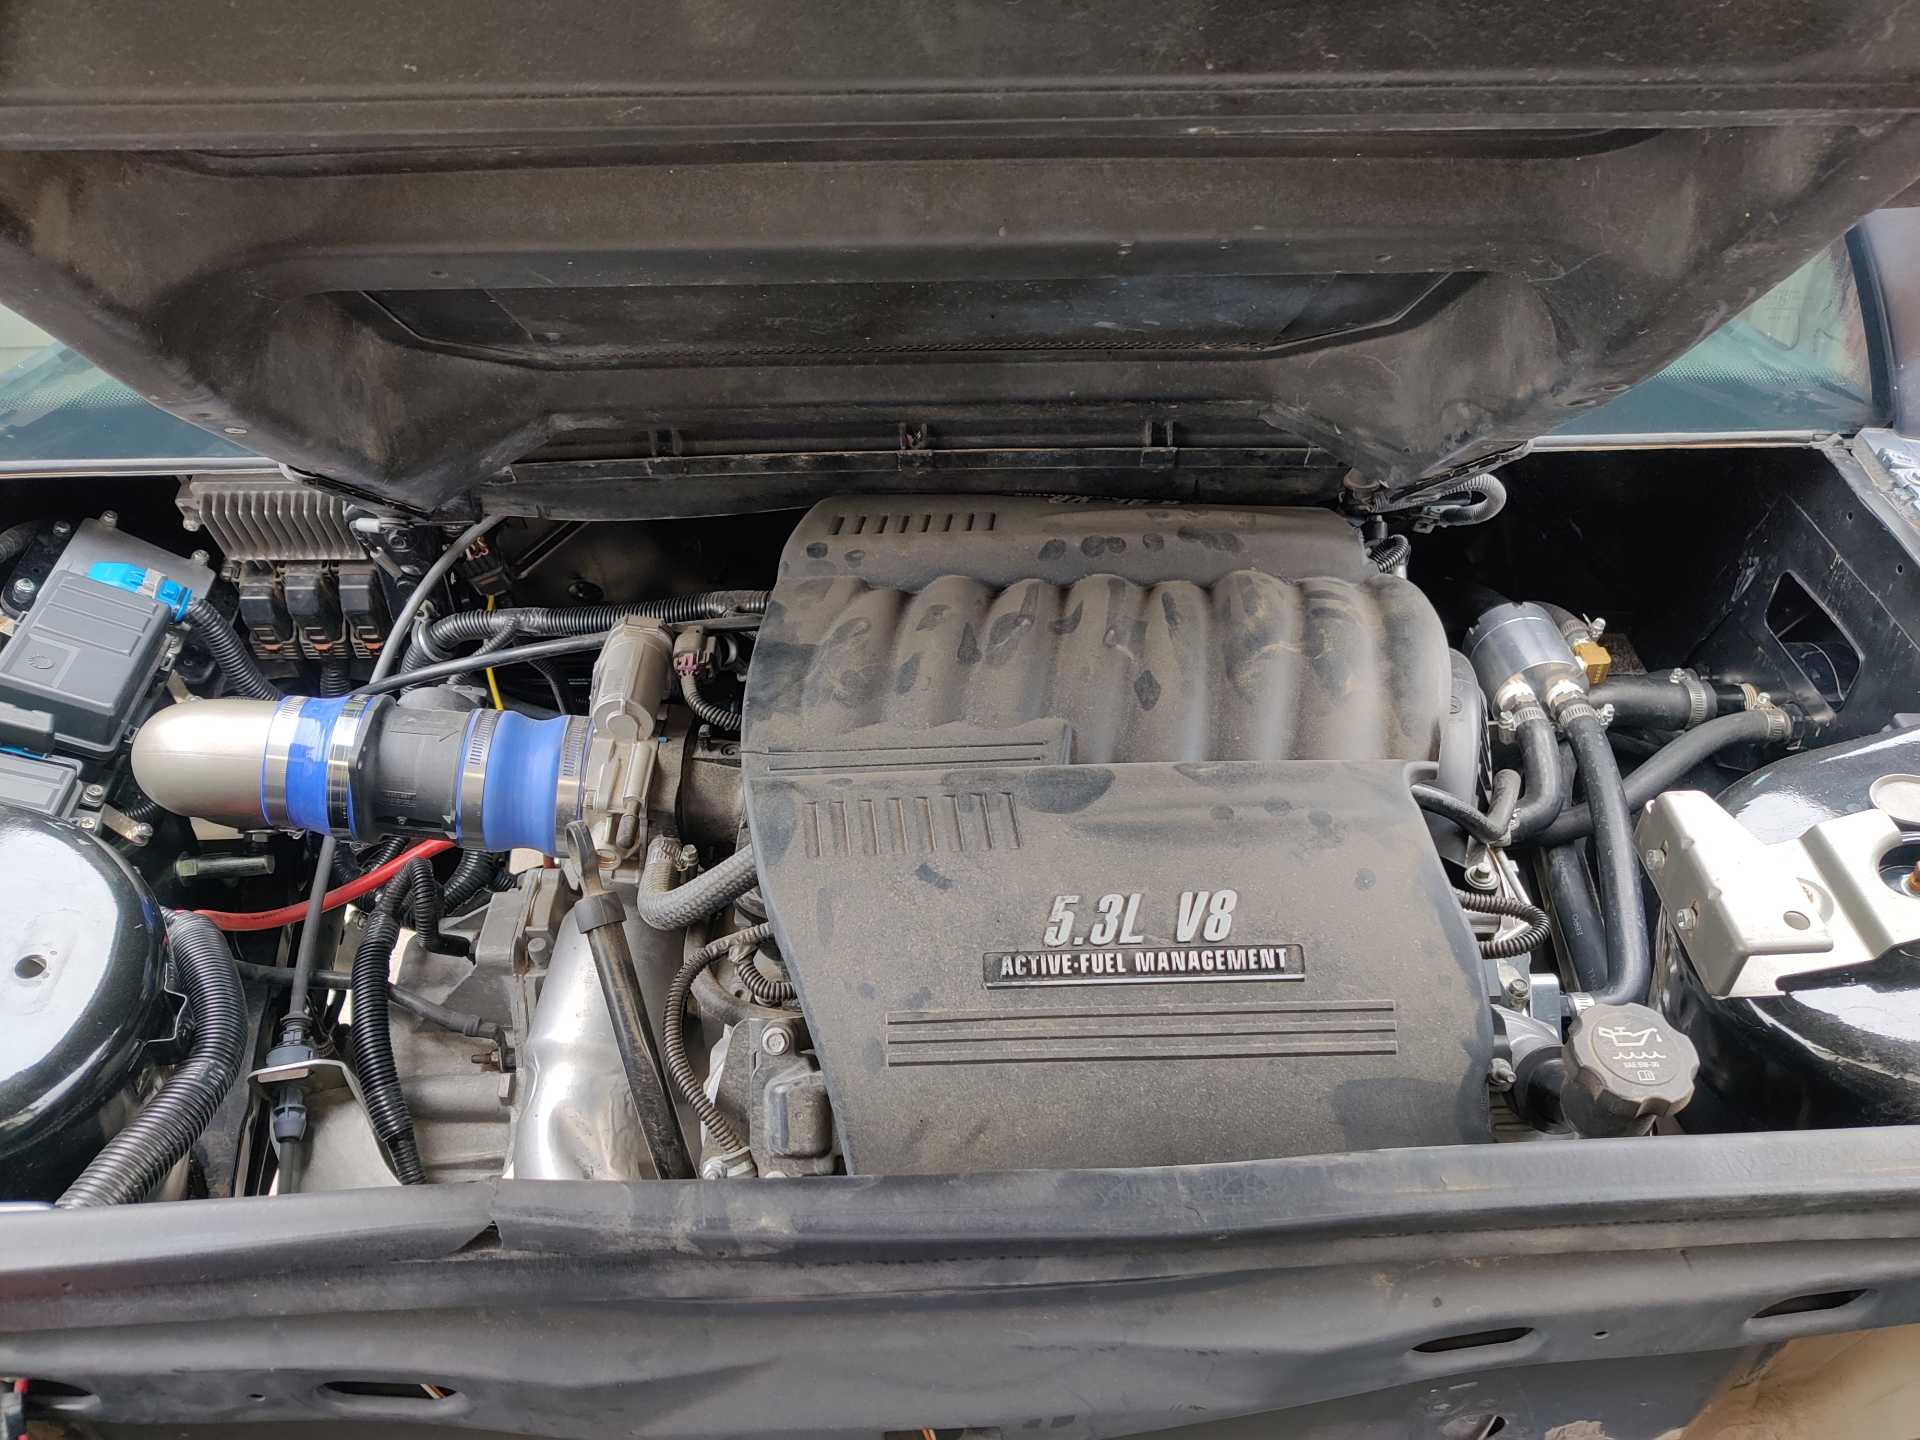
So it's been a while since I've posted on here. Over a year.. Sorry bout that all. The engine is in the car now and things are looking good. I underestimated the amount of wiring I would have to do for this project but I'm glad it's all over with and working properly. There was a problem with the fans not kicking on but this was easily fixed. It's my first wiring job and if that's the only thing that went wrong I think I'm doing pretty good.
The coolant plumbing was quickly thrown together (it will be changed) with some ace hardware fittings. There is temporarily no thermostat and the heater isn't connected either. This was done is such a hurry because there was the annual car show coming in about a week from the engine going in the car. We did install an aftermarket radiator to make sure everything stayed cool. The engine is an extremely tight fit.
All the wiring was then finished up (which took forever) and loomed in the car. Finally a test of the rest of the electrical for the car. Lights, windows, and door locks all work. I no longer have a working switch for the decklid but I think it's a minor problem that I just haven't looked into yet. Maybe the relay? I don't know yet. The car also received new door locks and decklid lock with matching keys. The ignition cylinder was also installed. I had read that the proper procedure to change the door locks is to take the outer skin off but I can confirm, with enough patience, these door locks can be changed with the door skins on.
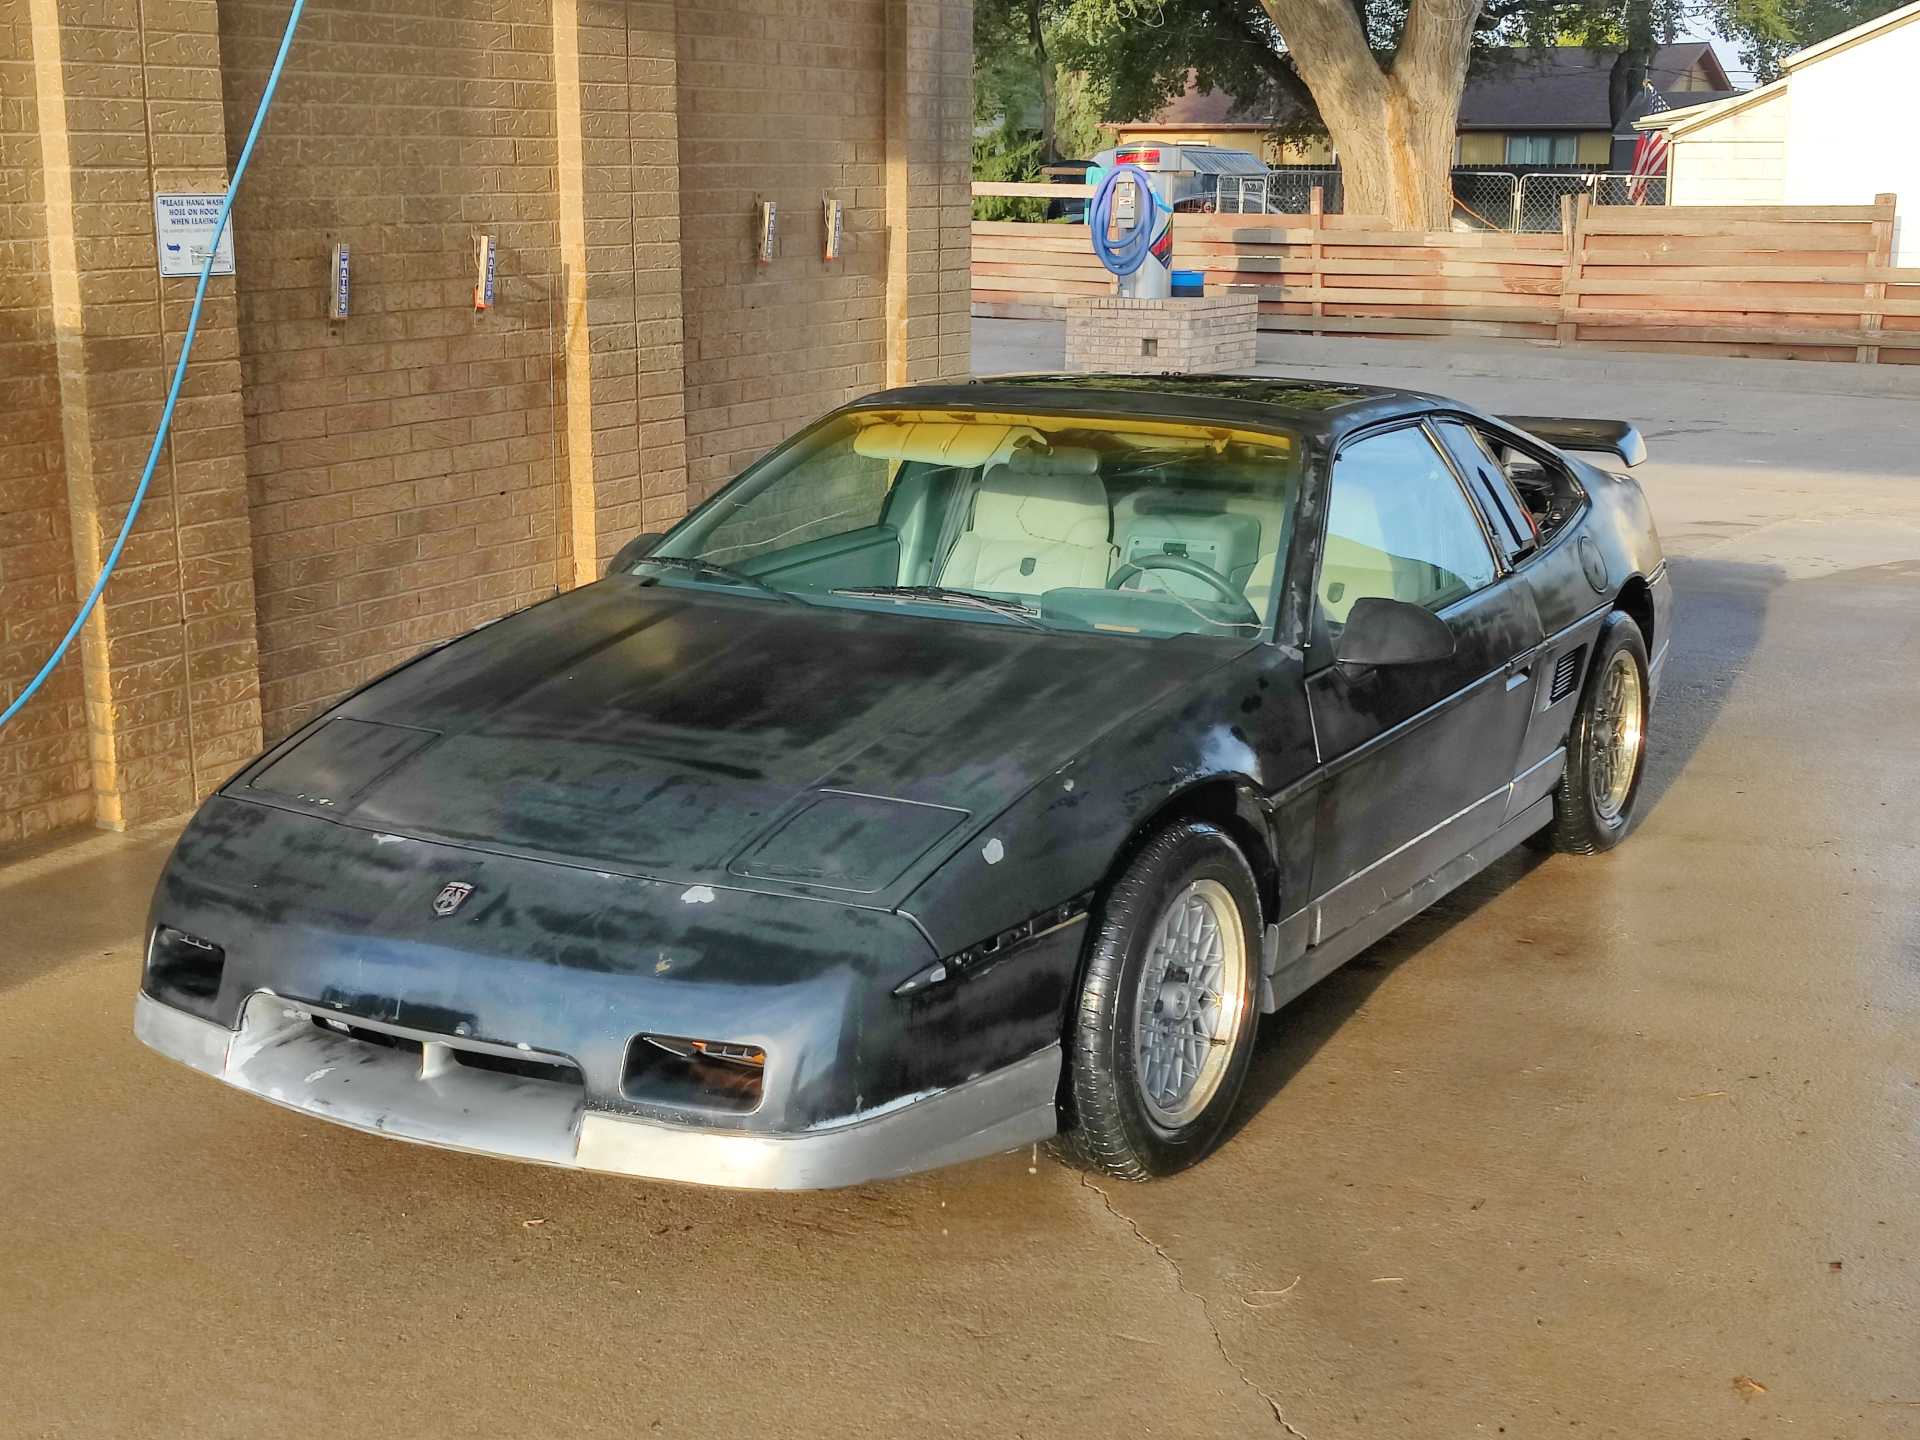
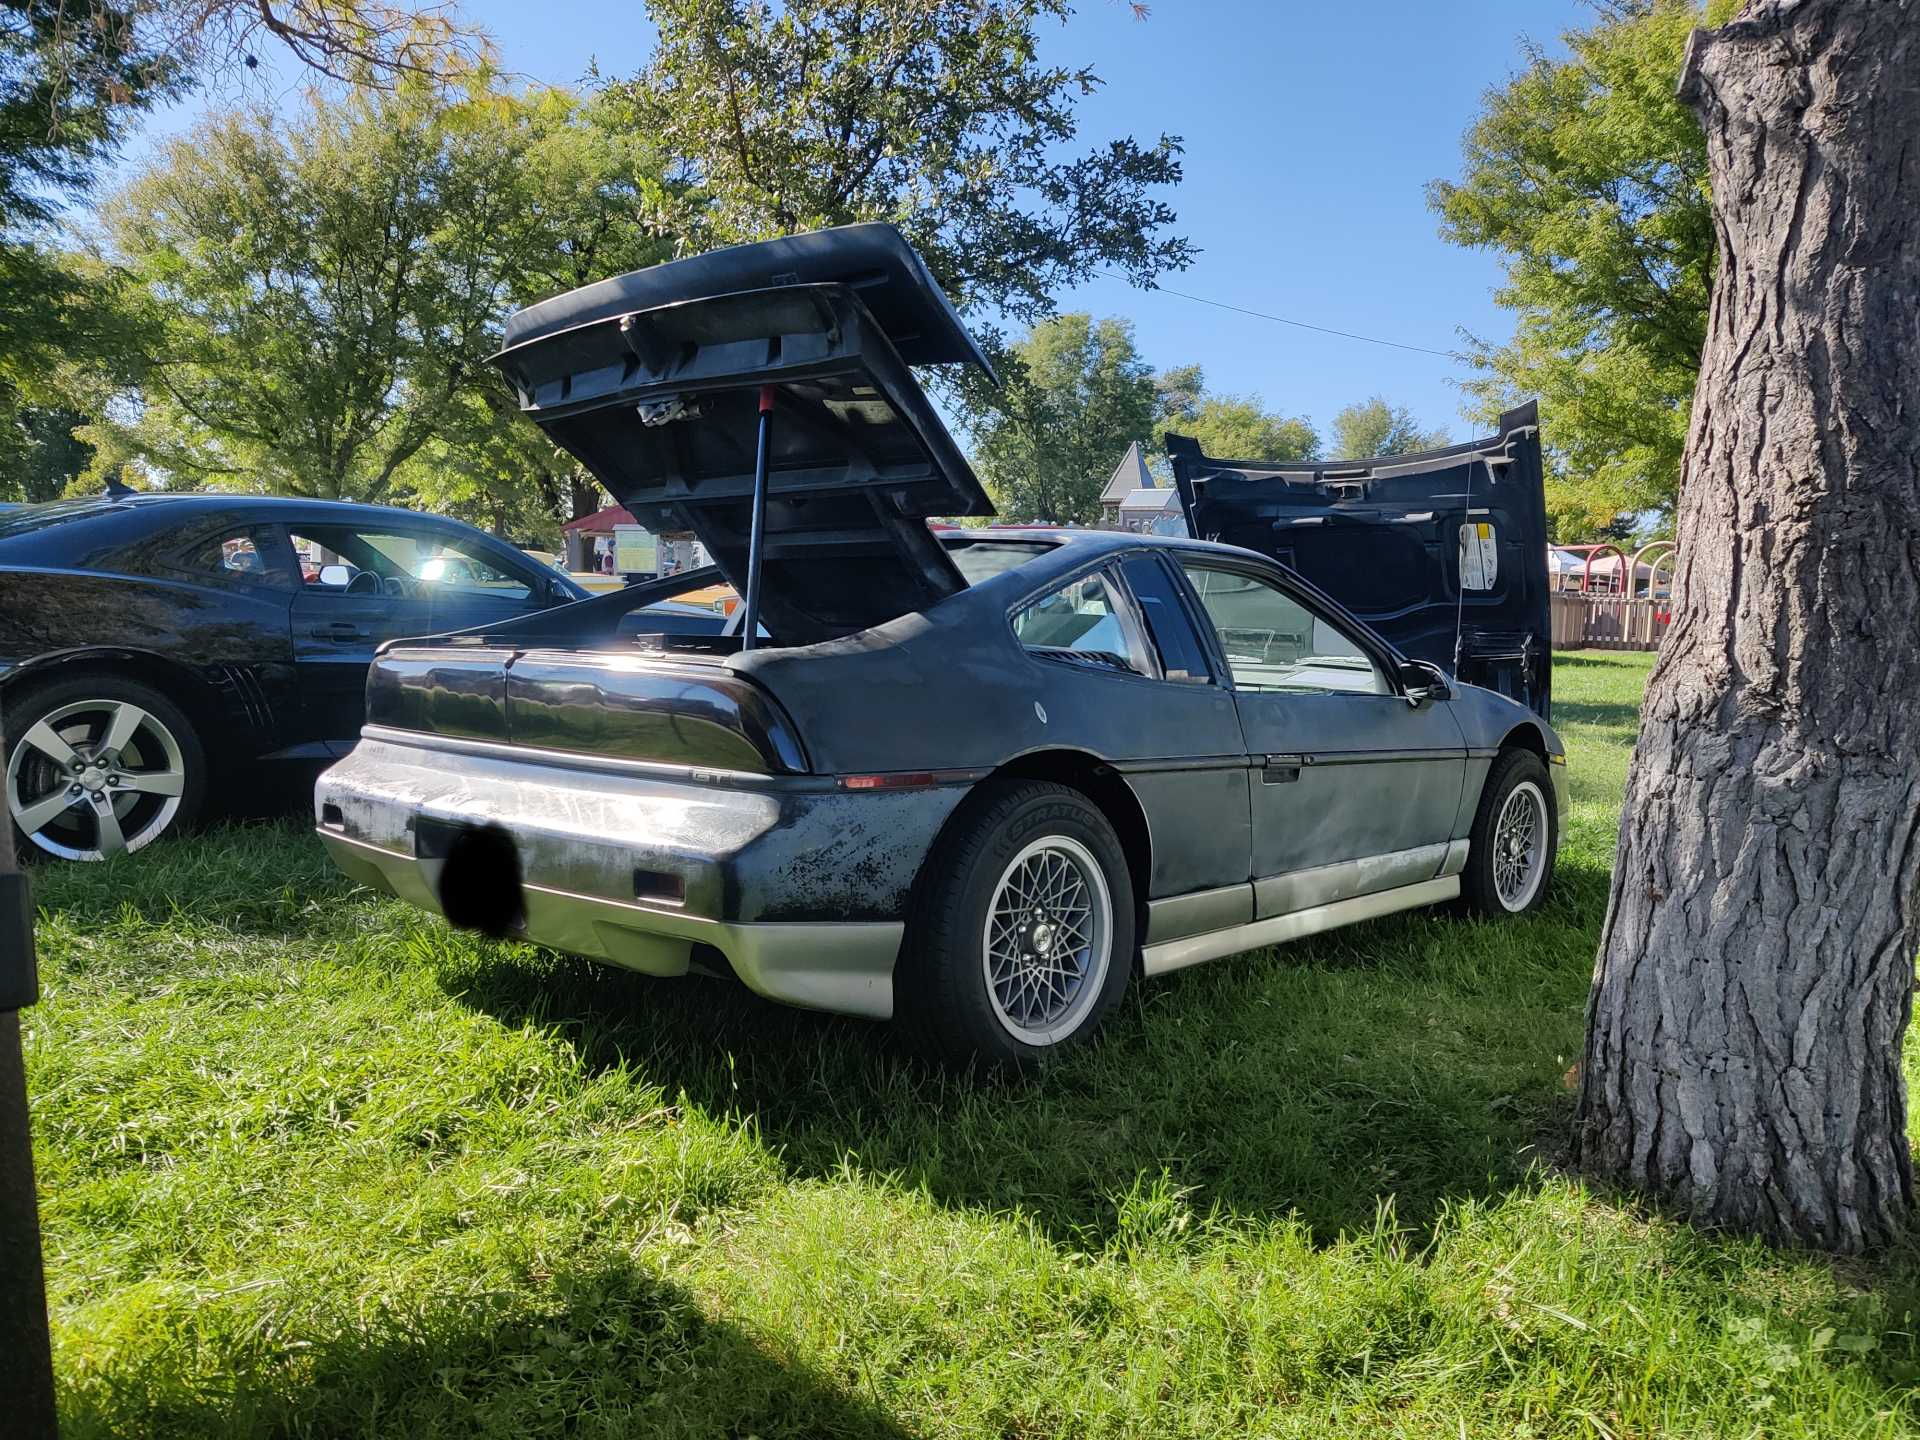
My friend, that has hp tuners, flashed the computer for me. Thanks bro. I wouldn't be anywhere near this far along without his help. Somehow, the night before the car show, my friend and I got the car hot for the first time since the engine went in. This is when we realized the fan wouldn't kick on. There was no time for that. I had to realign the rear end because of... reasons.. I also need a new strut tower top hat. (broken stud) This thing grips the ground like Spiderman's fingers. The only car I've been in that genuinely scares me. Anyway my wife and I stayed up until 4ish in the morning the night before the show piecing the interior back together and getting everything back to where it should be. Woke up at 8 and ran by the carwash real quick and then hit the show.
Yes paint will be sometime in the near future. Hopefully this year or possibly next year.
There's few things better than turning heads in this car when people hear it start up and rumble around. And then there's those that think it's a DeLorean.. I even had one guy ask me if it was a Porsche. But those that seen what work was done really appreciated it and that's what it's all about.
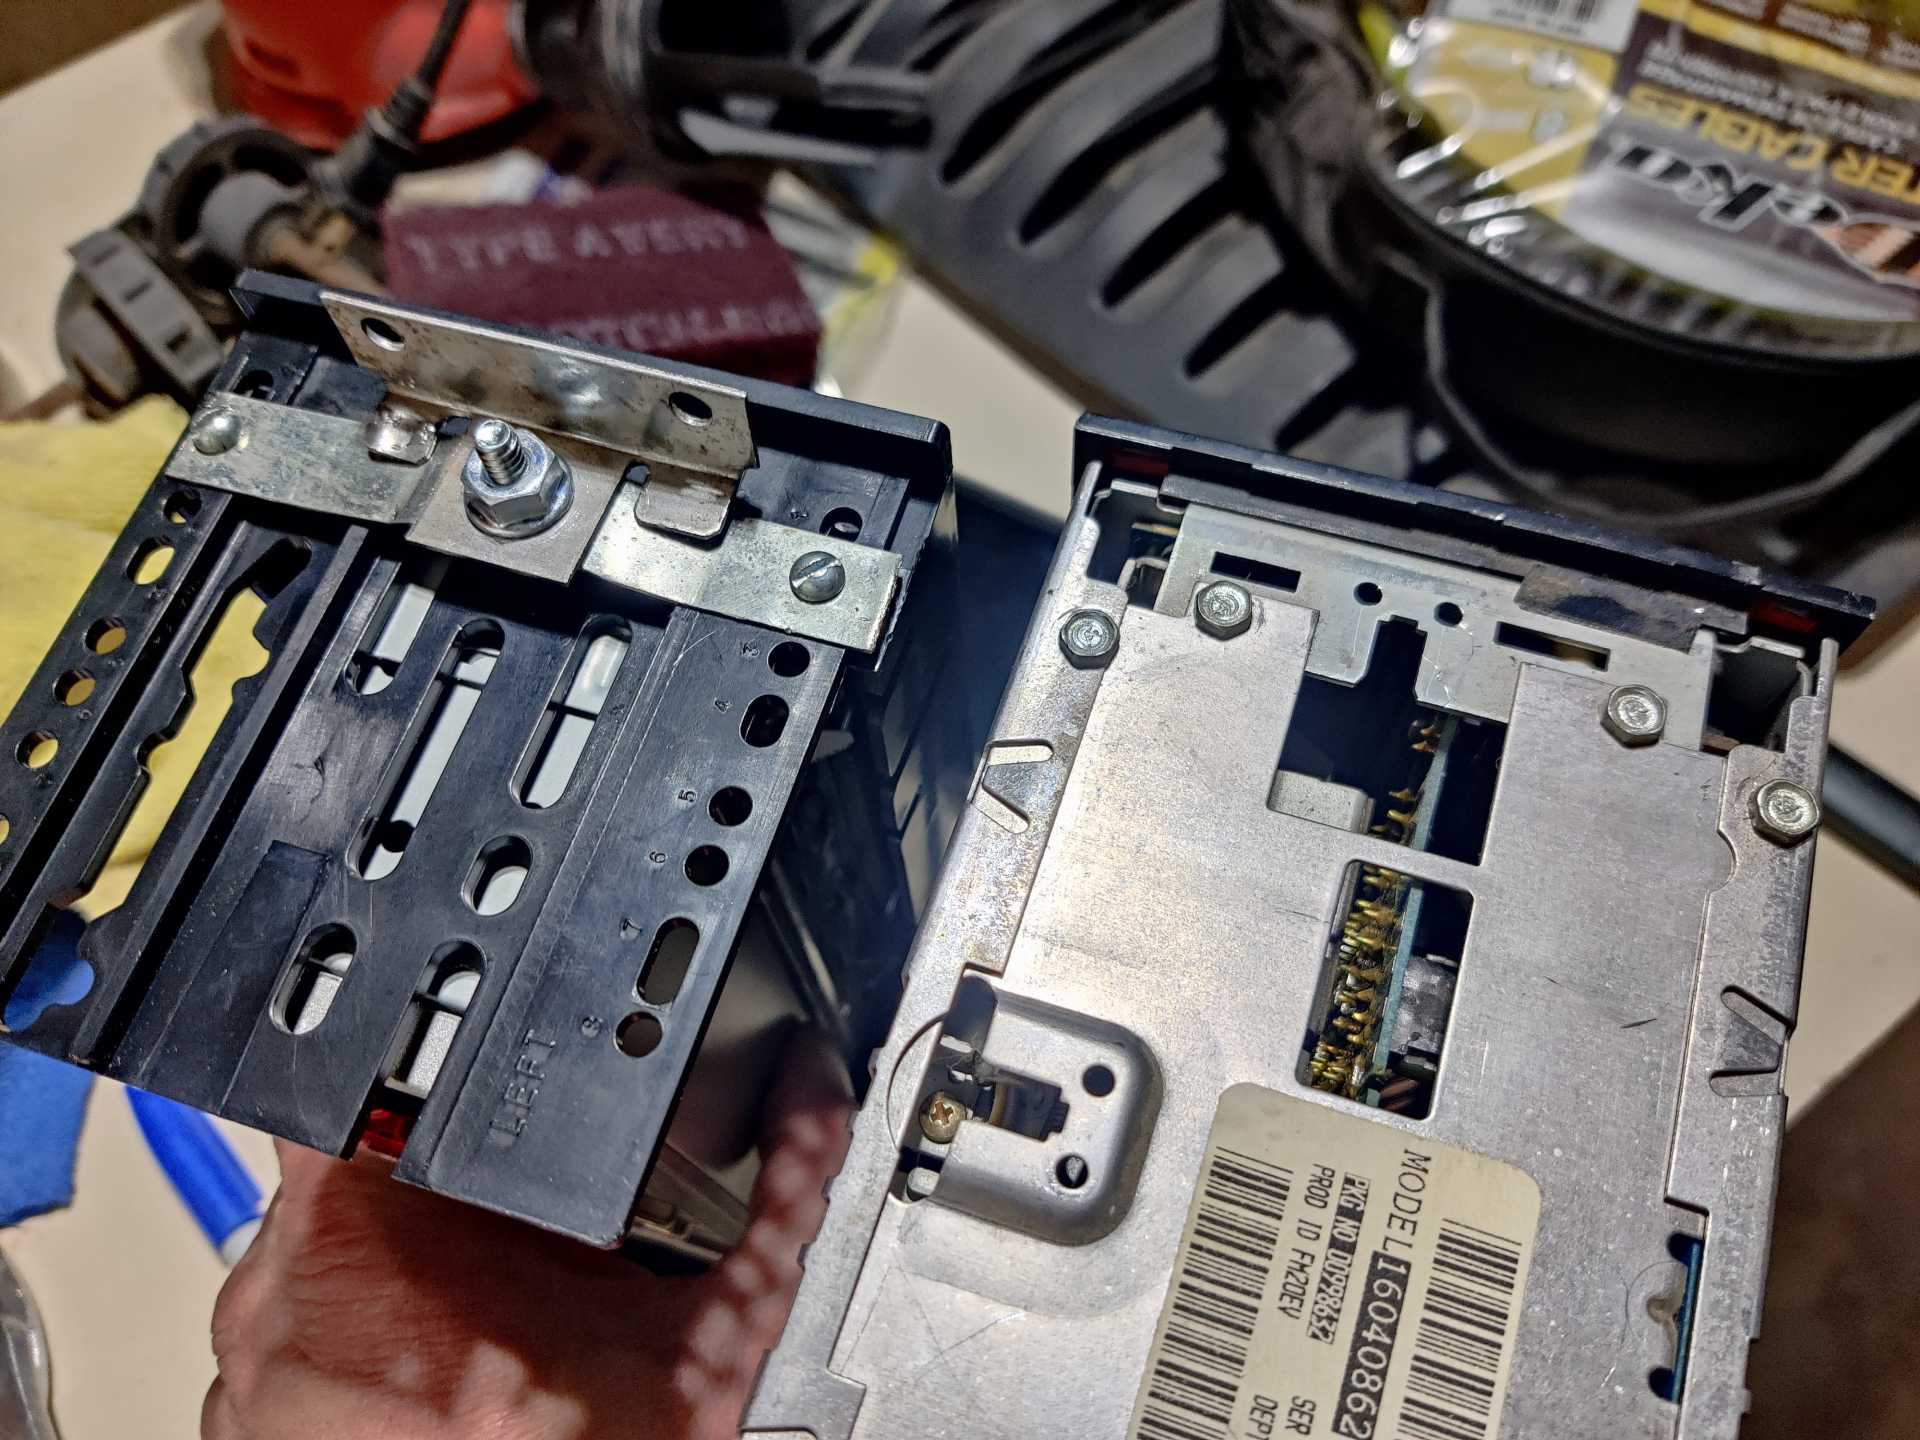
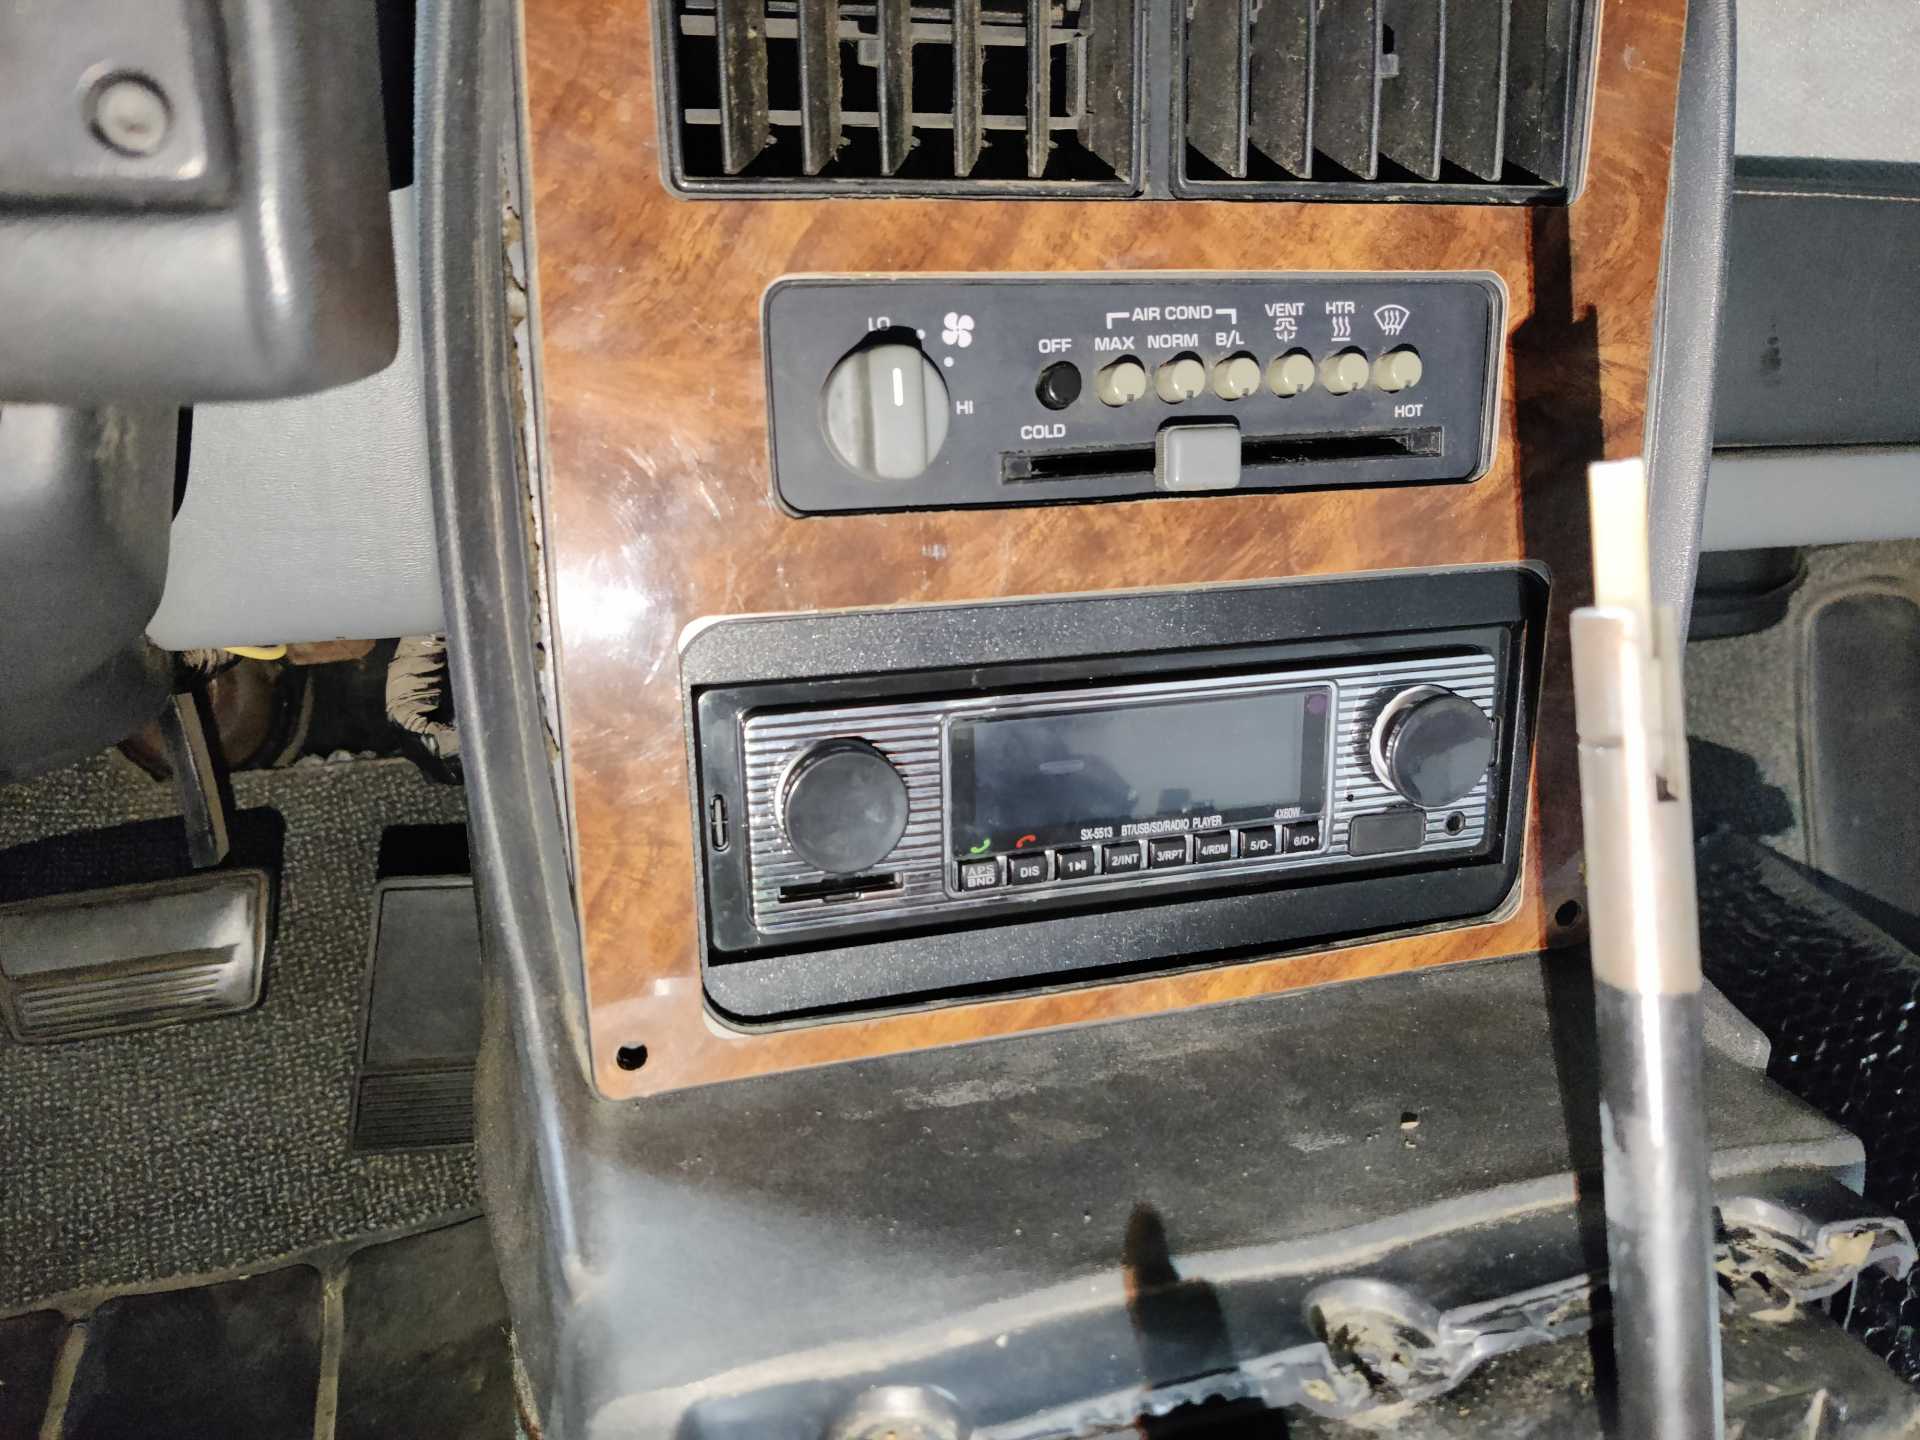
I noticed the radio clock never shut off at the car show which, after doing some research, these radios apparently do sometimes. I just got a cheap media player that looks like it would go in a car of this era. I completely messed up the install kit that I got so I improvised. I used the mounting bracket from the original stereo, the strap from a hose clamp, and some small machine screws and nuts to position the original mounting brackets on the new head unit.
The exhaust and tires are next.
[This message has been edited by lsfiero (edited 06-19-2023).]
What was the issue that kept the fans from coming on? You mentioned easily fixed, I assumed it wasn't just a loose plug?
It was a rookie mistake lol. The car has high and low speed wires but this just uses the high speed fan wire and I hooked it up to the low speed one. I wasn't sure at the time of wiring because I couldn't find my paper I printed out for it (I had a book of papers it seemed) but as soon as I found out the fans were not working I quickly realized it's suppose to send the signal to the high speed. Switched them around and now the computer can tell it to turn on when needed.
Just kidding the exhaust isn't next. I like to jump around from project to project to keep things interesting and so I, hopefully, don't get burnt out on any one thing. I think i'm going to be welding up the exhaust myself so I've ordered a few things to allow me to do that. I do have an idea of what I want to do and it will take some trunk modification but I think it'll be alright in the end.
I've got to make my own Y pipe as well so I don't know how this'll go but I'll get it done.
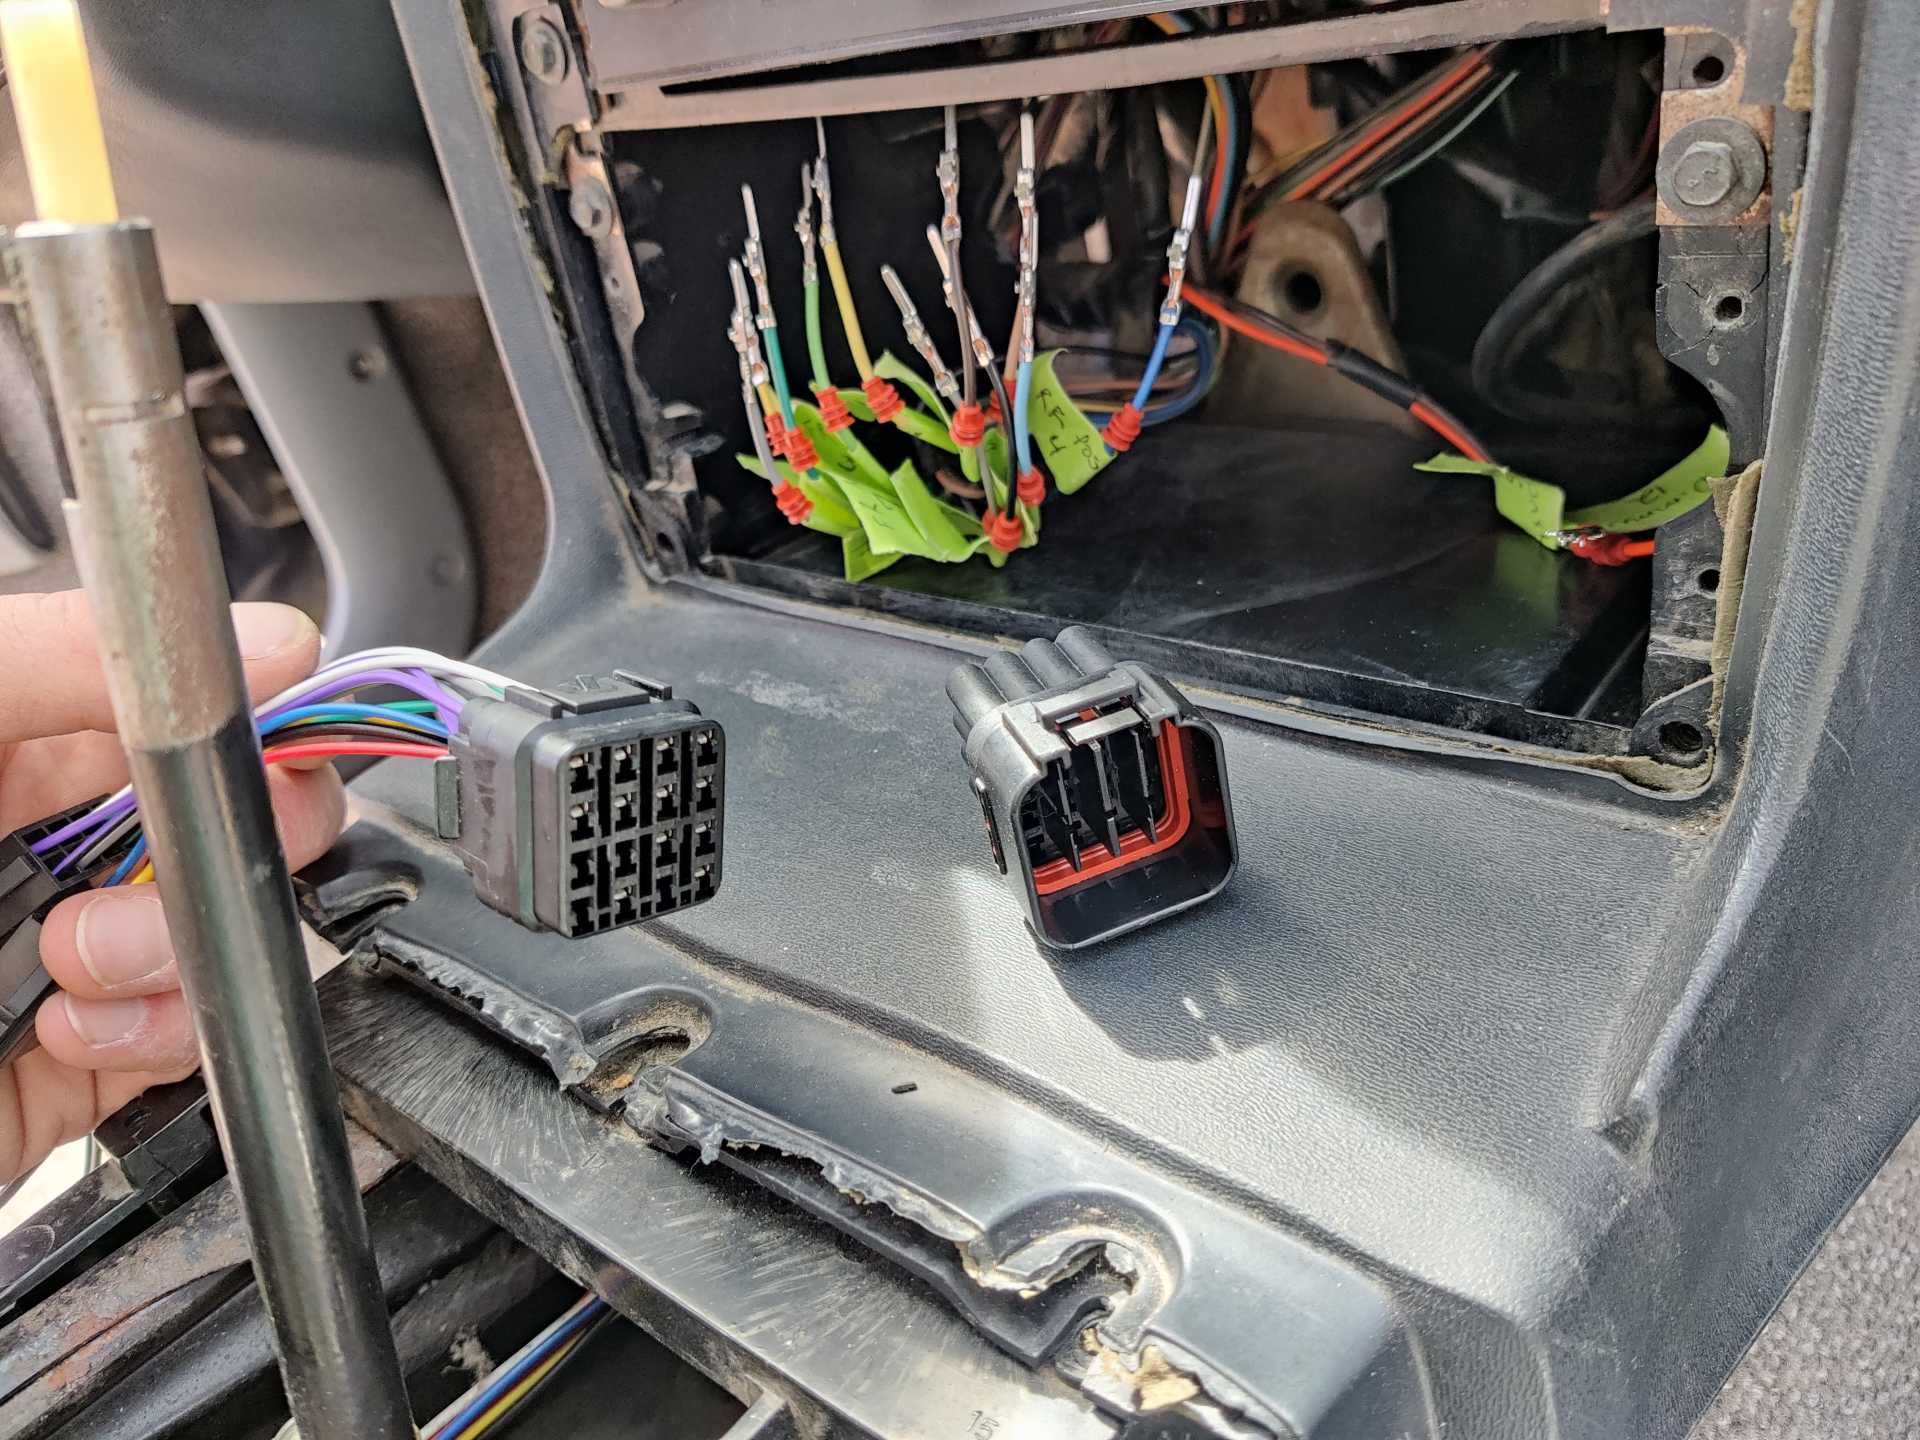
I picked up some of these 16 pin connectors that I've now used on the stereo and also the connection from the engine to inside the car on the firewall.
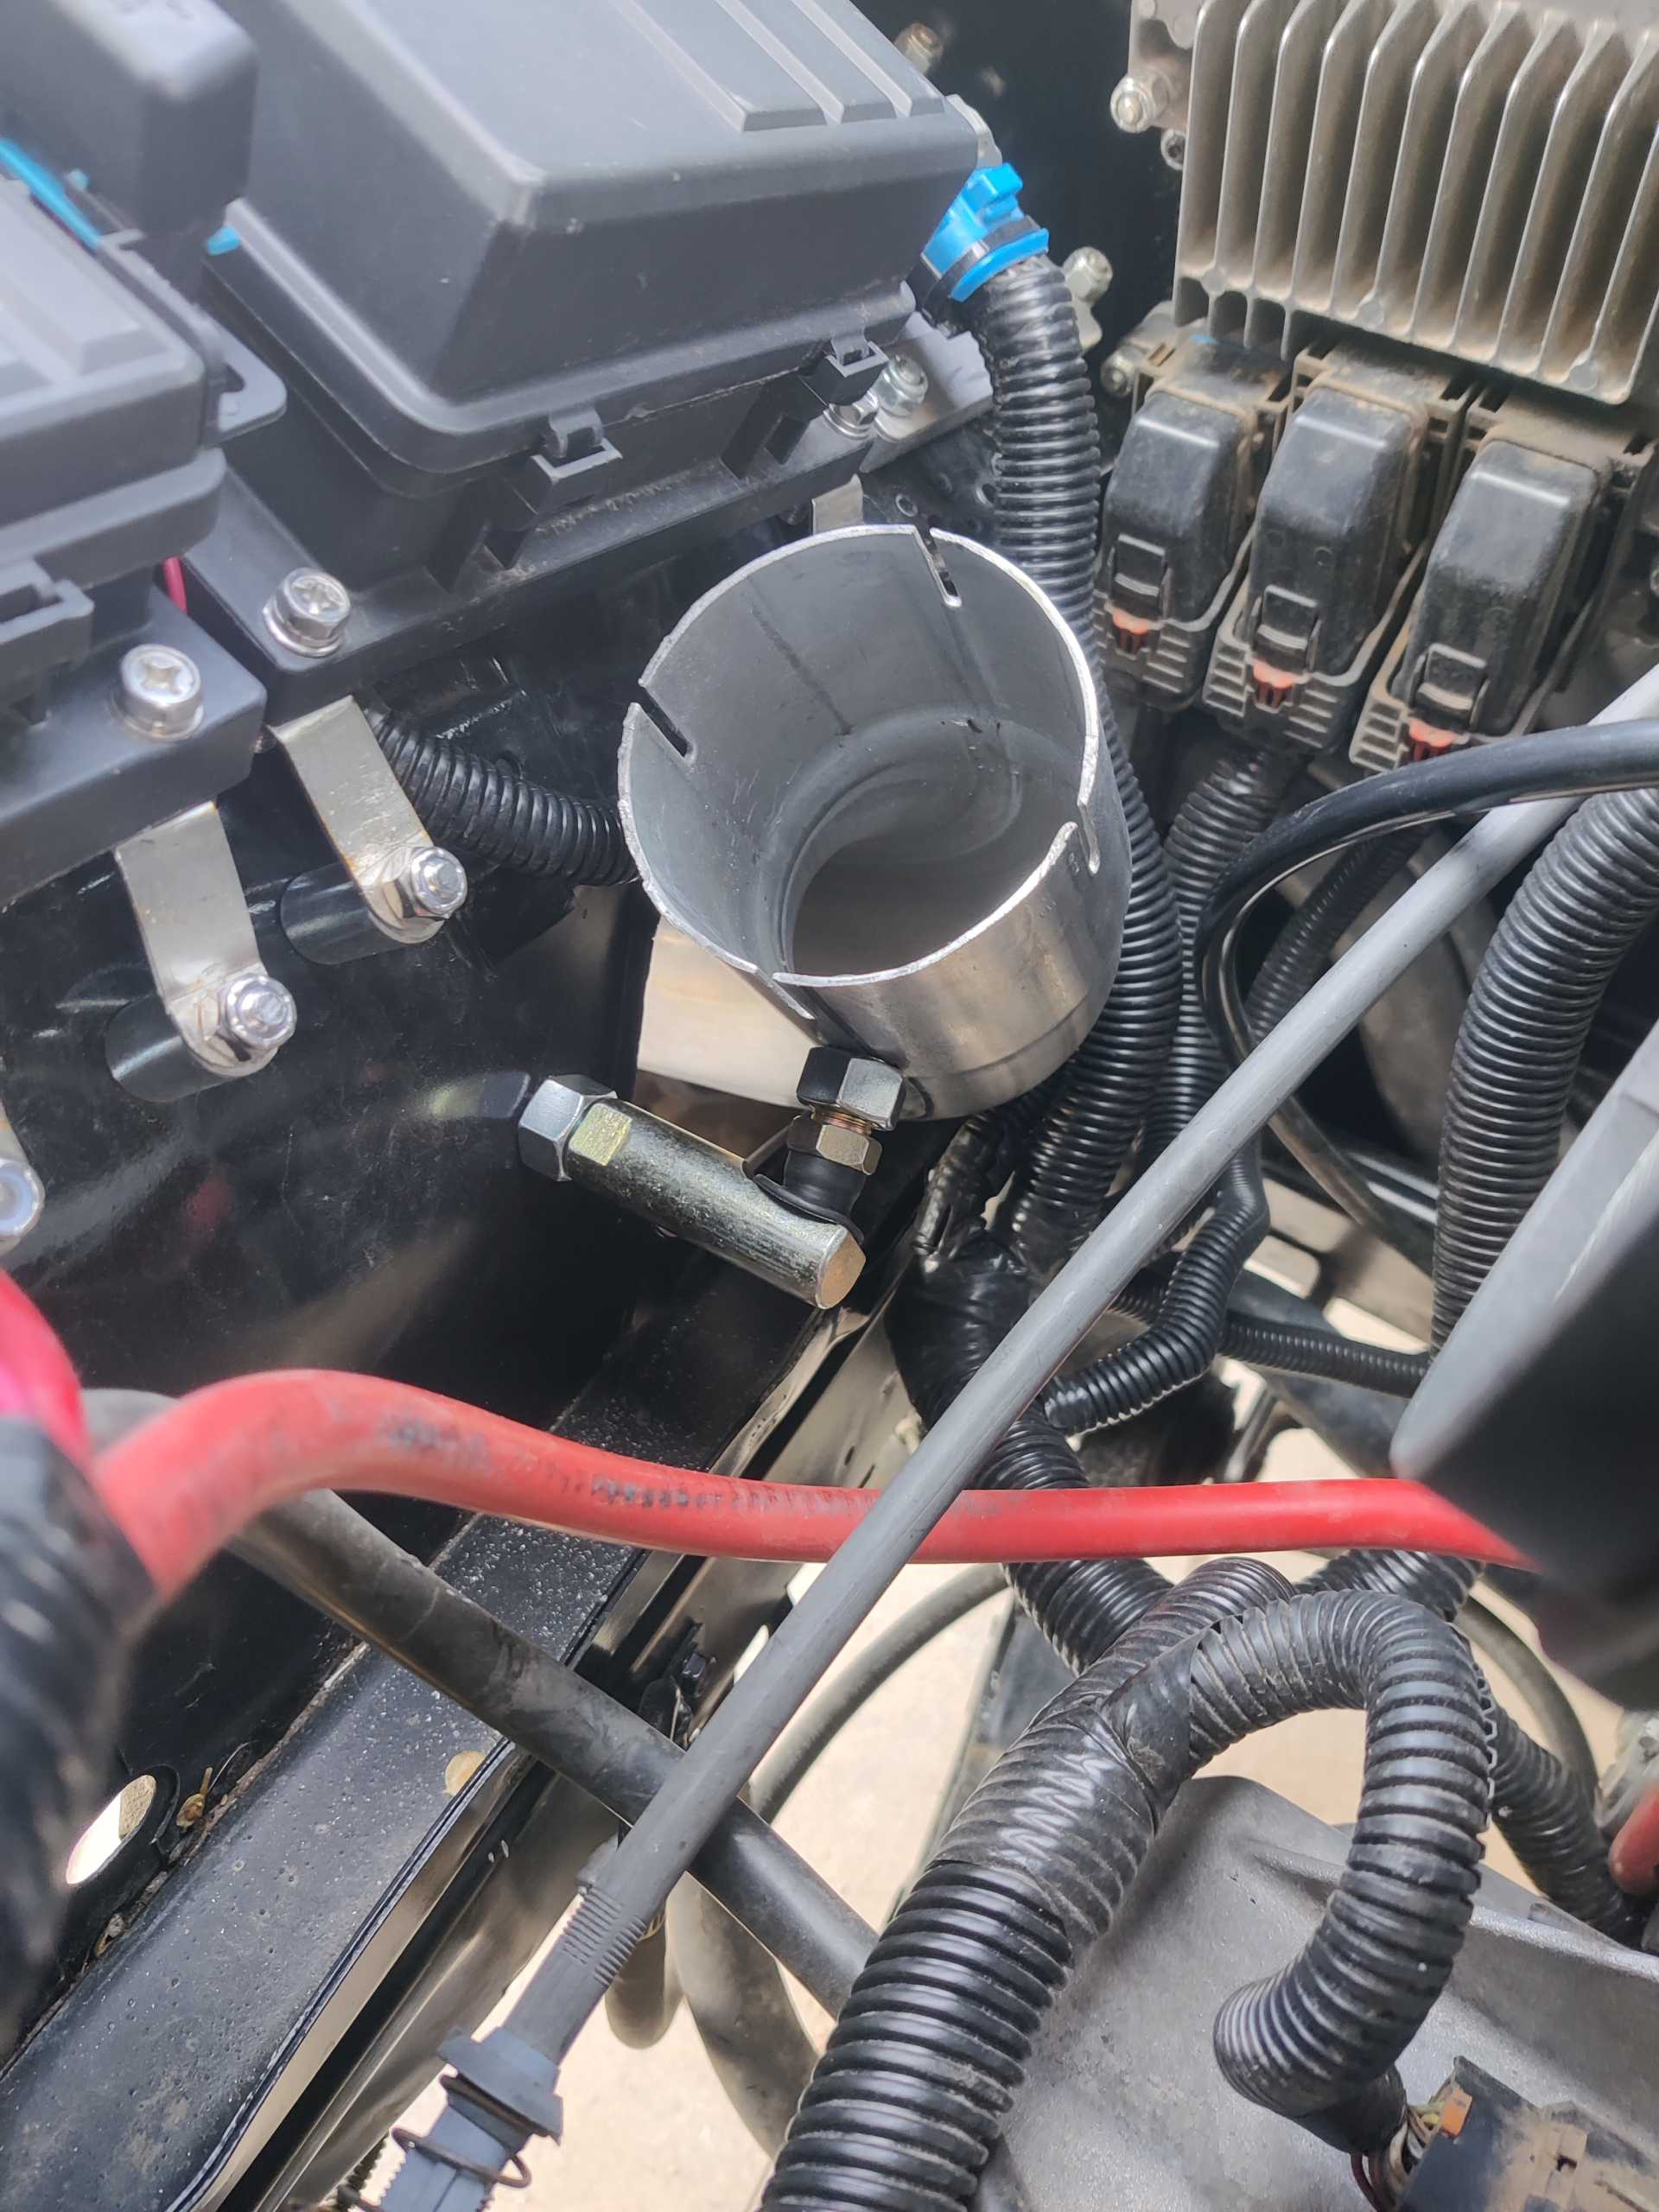
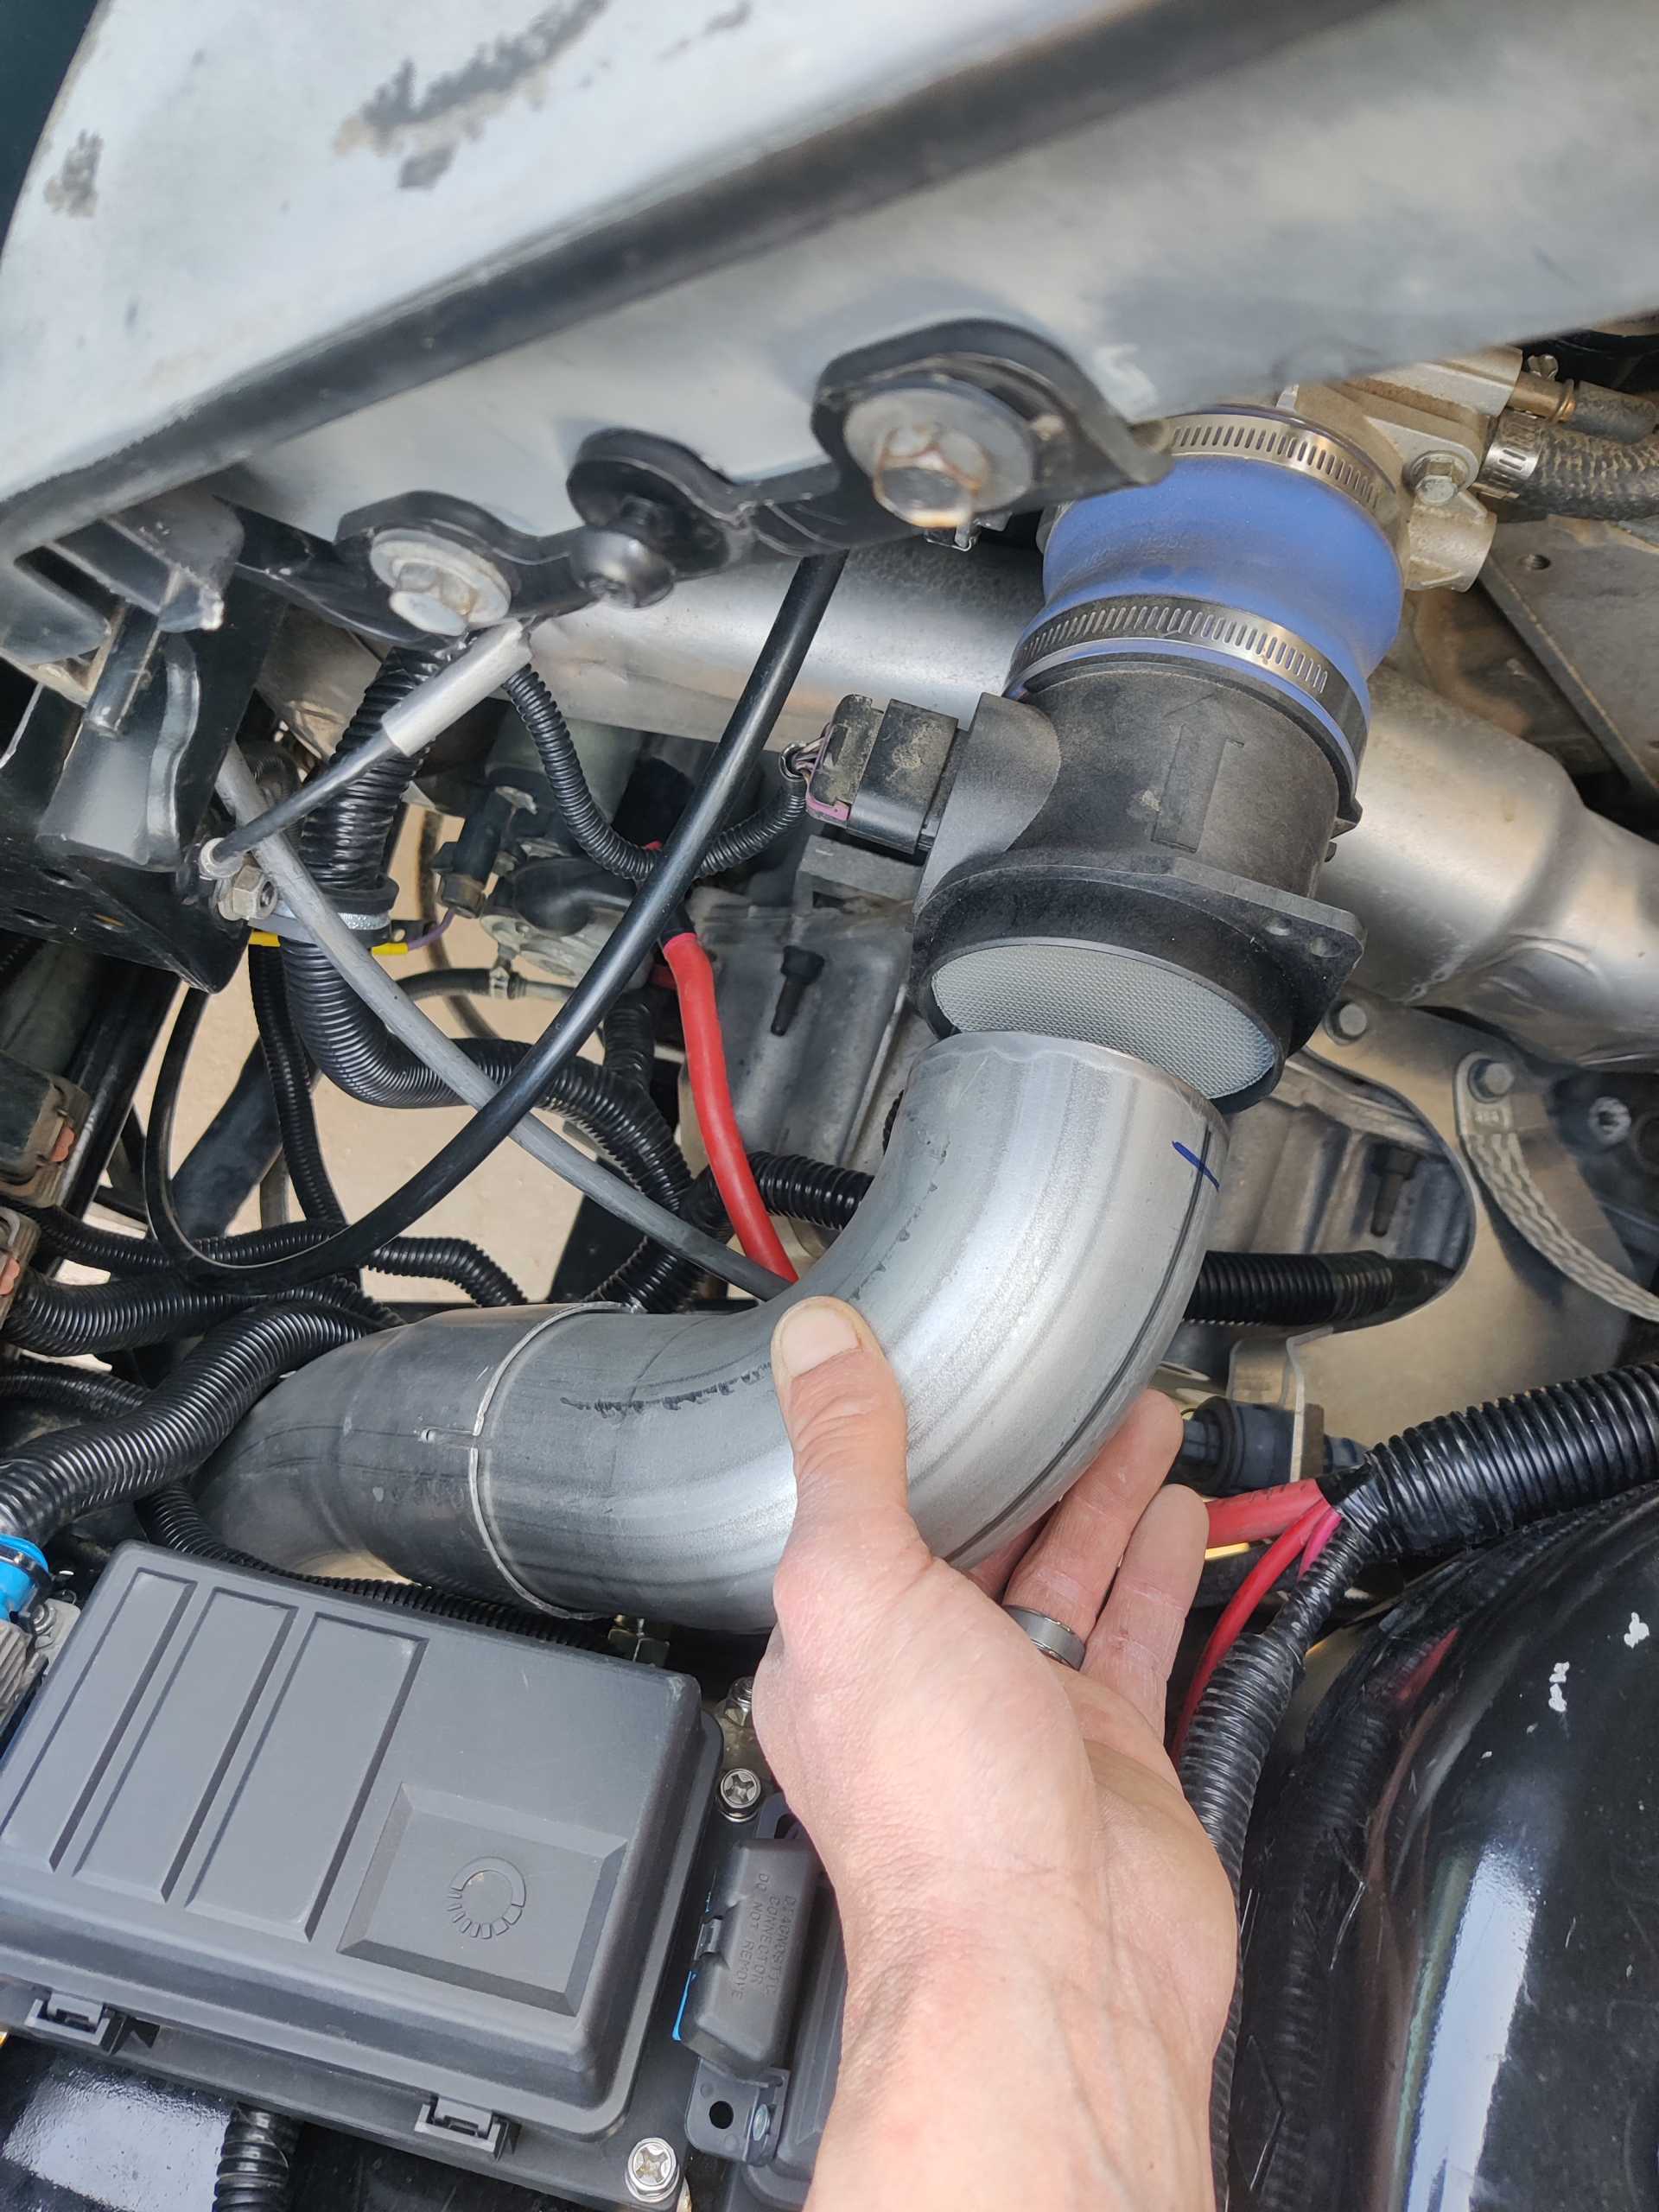
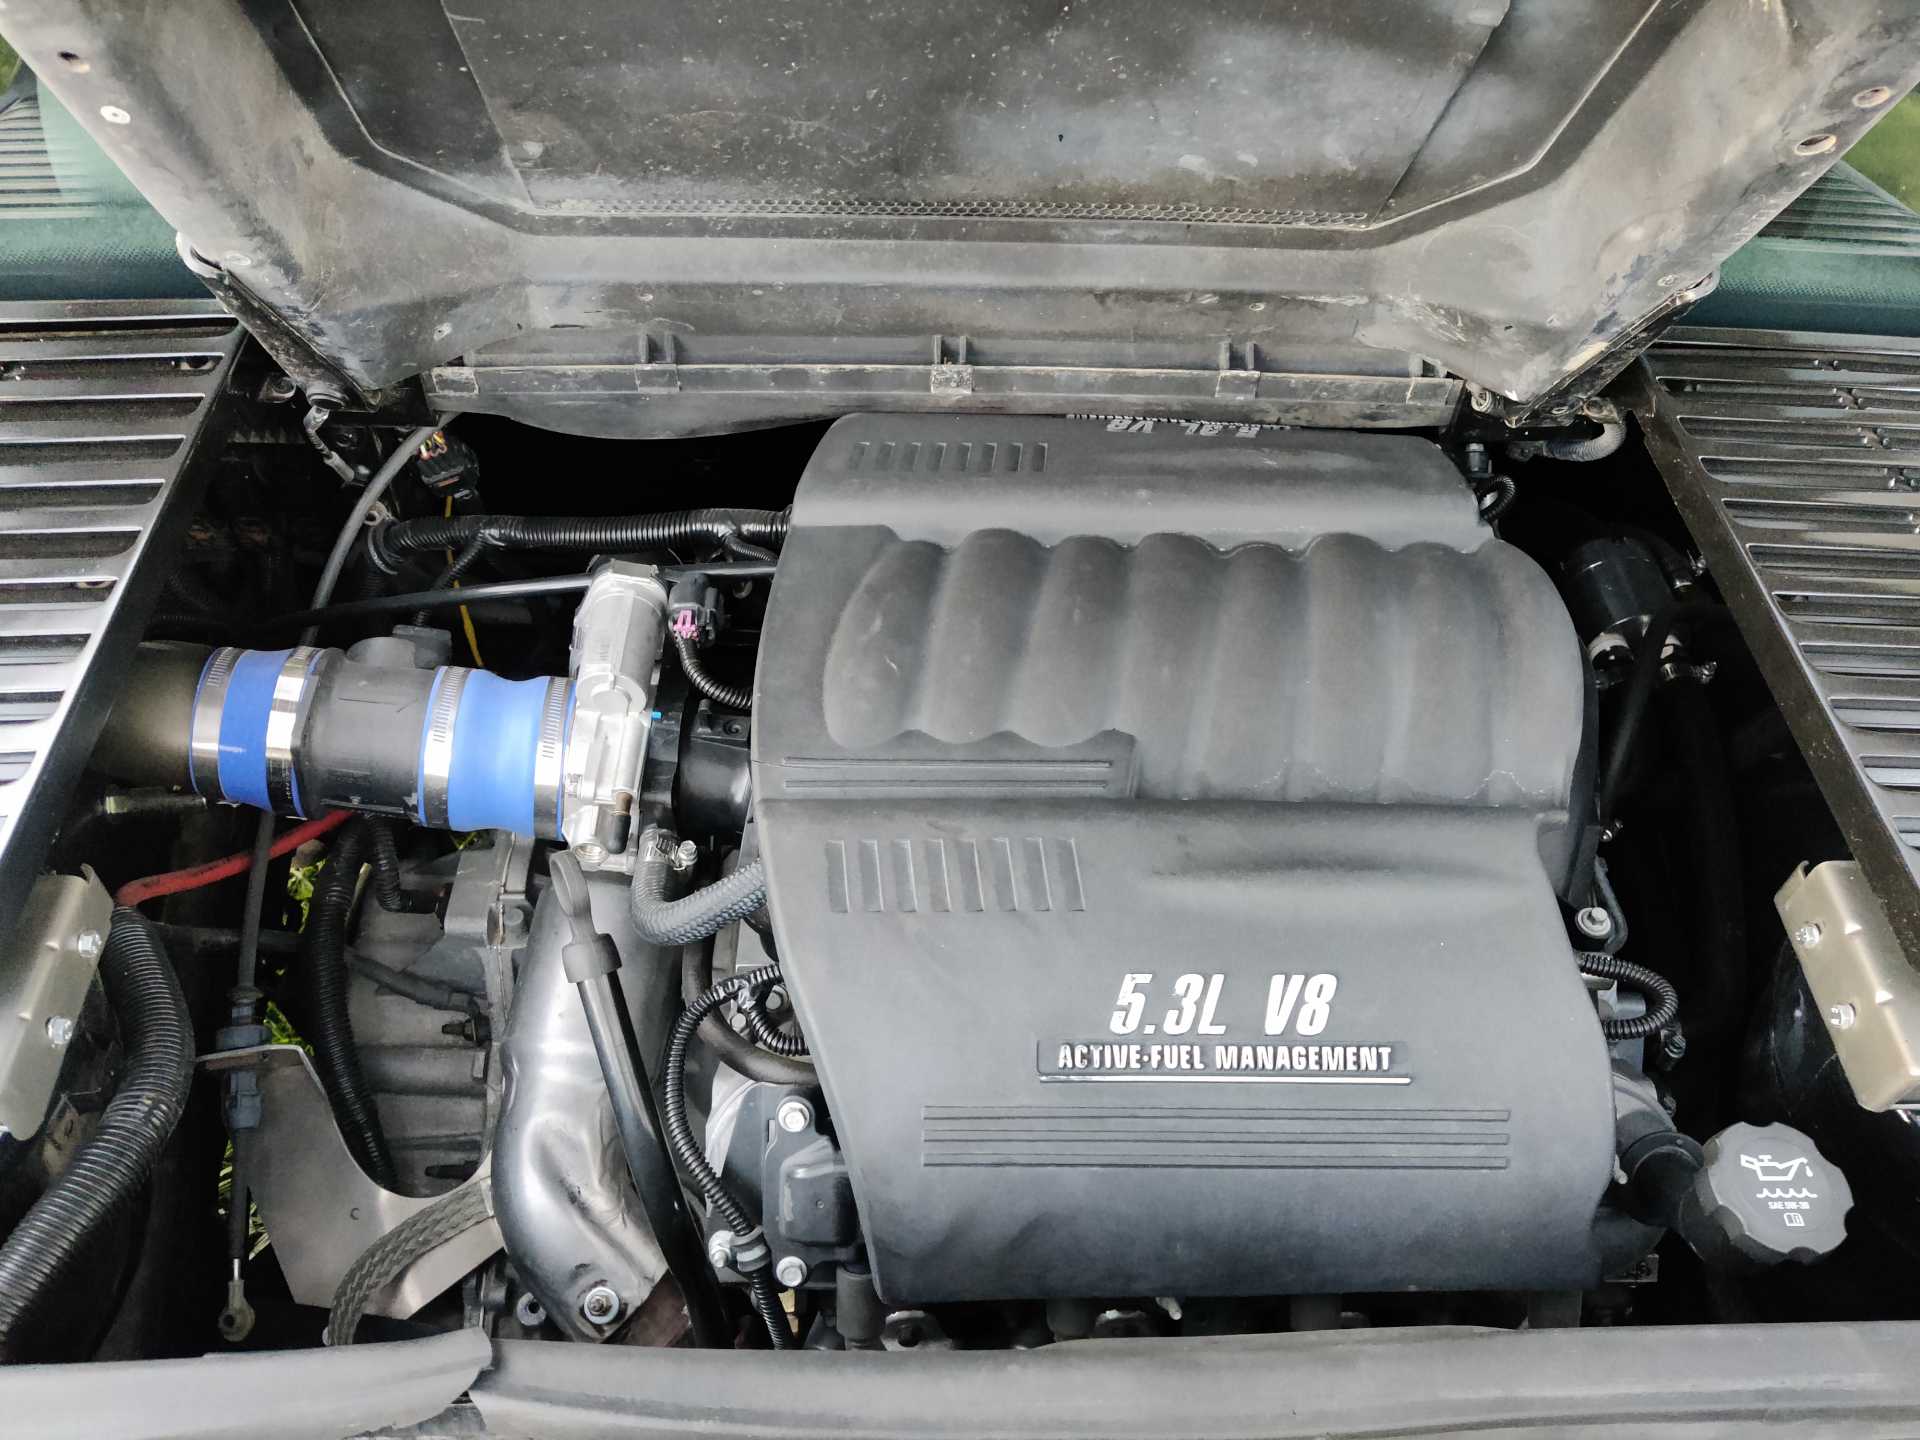
The air filter was moved underneath the fuse box. The tube is held up and can pivot on this 1/2 inch threaded ball joint and is held in the perfect position as to not hit anything.
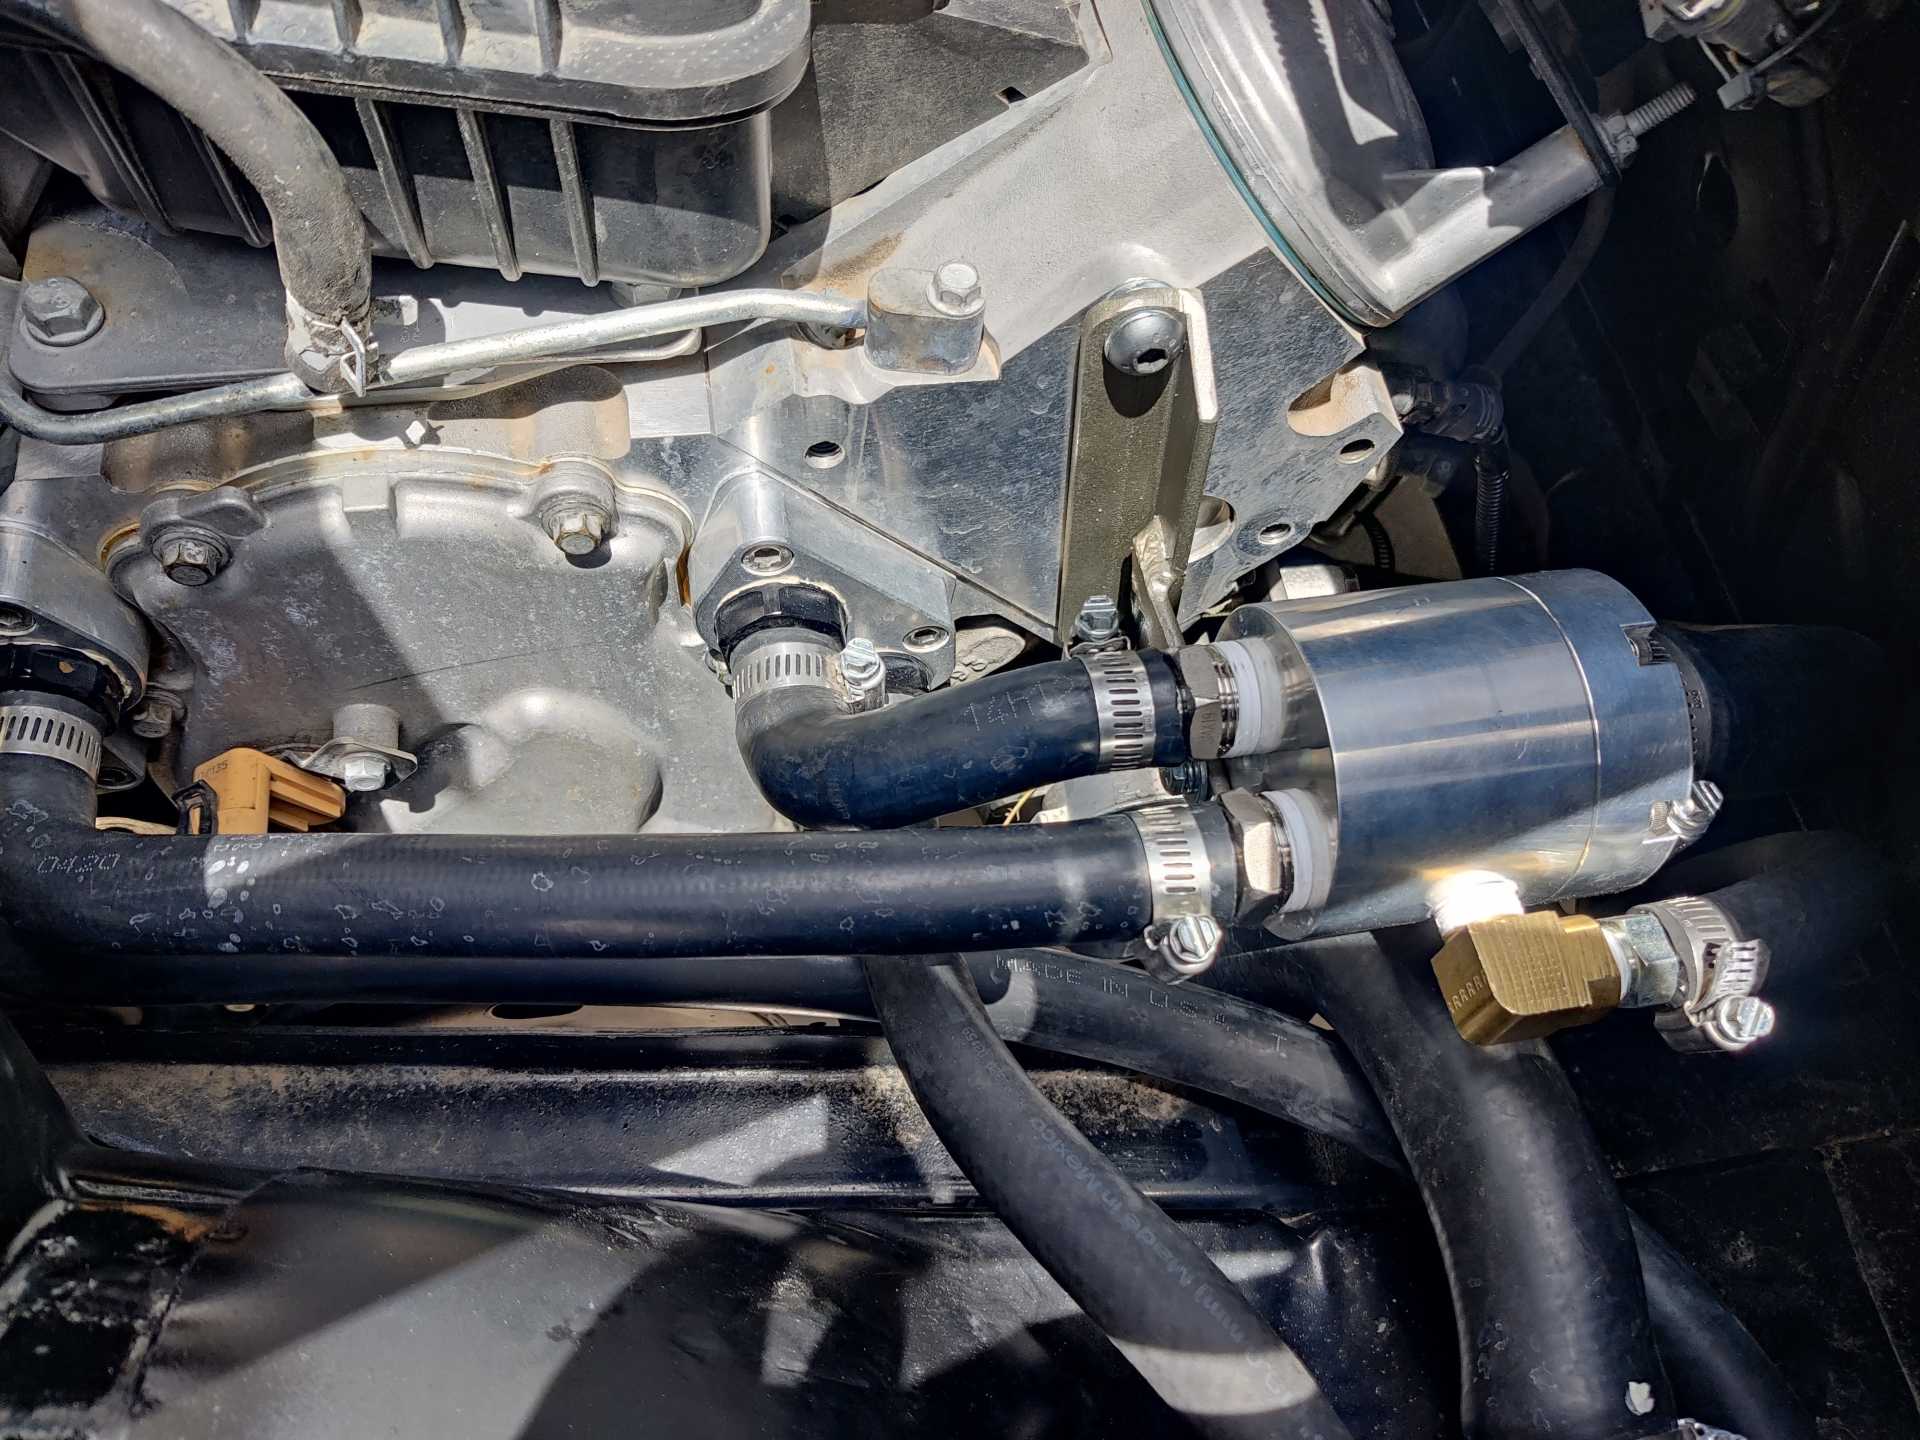
It's a little dusty haha but I think it looks better. It is less (not completely) of a water catch now. I've also completely redone the coolant plumbing on the passenger side. This is a thermostat housing from IPSCO LLC out of Colorado and hoses to fit. (except for the steam port) I'm thinking of adding a bleeder valve in the top/side of it which I will more than likely do. I've seen a build where the coolant fill is on the side of the head nearest the transmission. This is where the steam port will vent to. This is also yet to come.
[This message has been edited by lsfiero (edited 06-27-2023).]
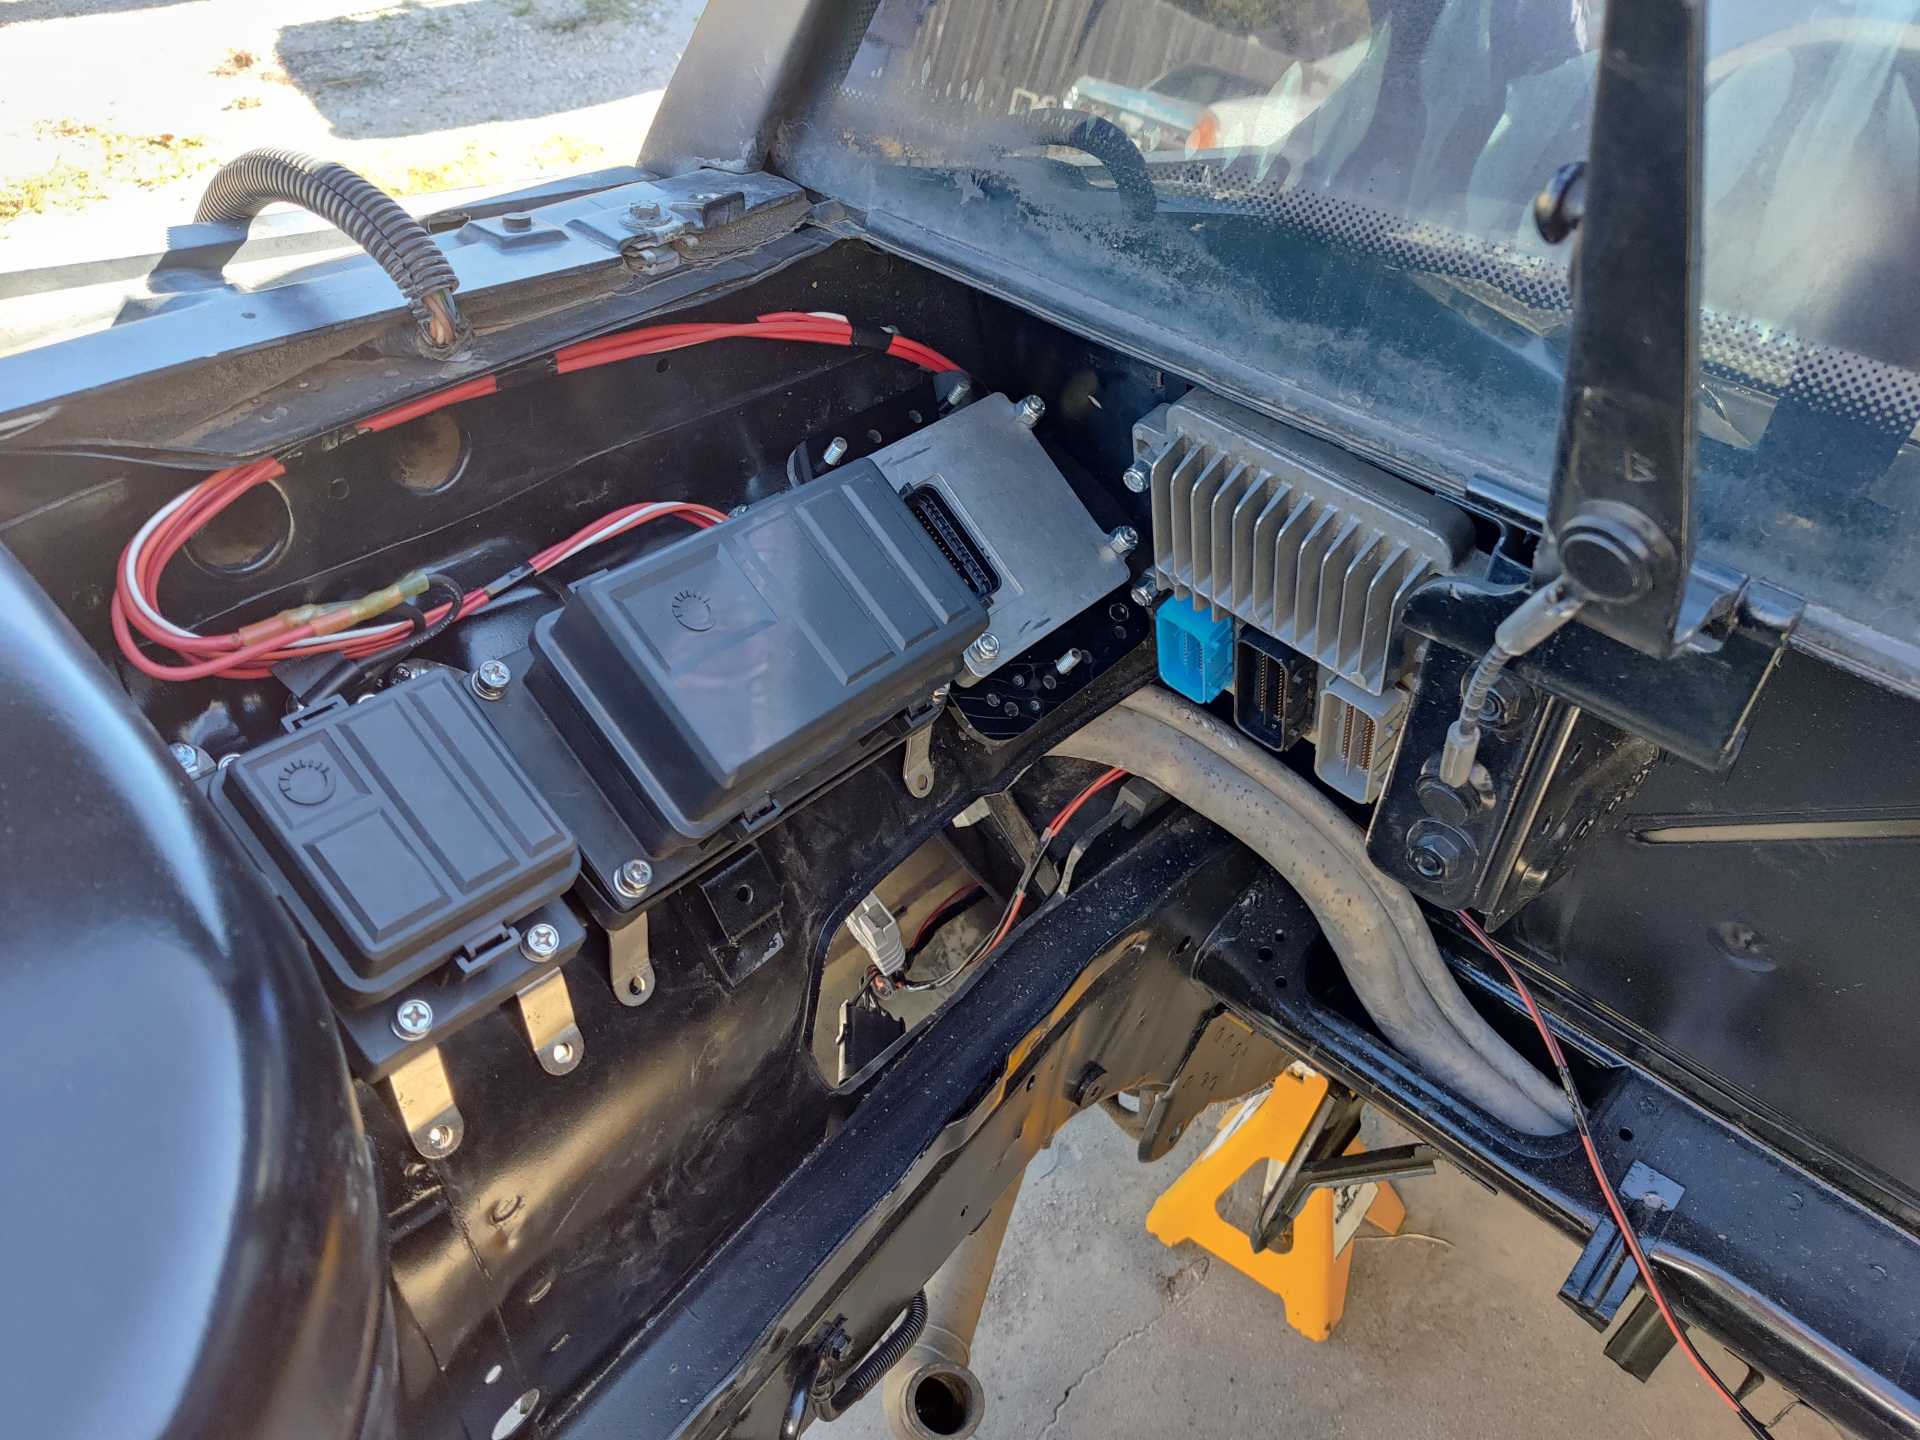
The fuse box in the engine compartment is only running the engine and is additional. The fuse box up front is still there and functional. I did reuse the coil power from up front to power the electric water pump. So now I have 3-4 extra power sources for whatever I want on the inside. The small lookin fuse box in the engine compartment is a power distribution block. It has the two original wires for up front, one for the engine fuse box, and one for fuel pump relay constant. I don't know why I decided to add another fuse box. This is just my version of a somewhat standalone and my first LS swap.
Here's how the air filter looks now. I did have to cut the rubber on the intake vent on the side of the car for this to all fit. And in case anyone was curious about why the fuel lines are formed the way they are..
The driver side engine compartment vent was completely disassembled, media blasted, painted and riveted back together. The passenger side wasn't as bad so it was just sanded and painted.
The entire front end was disassembled and is now getting the treatment.
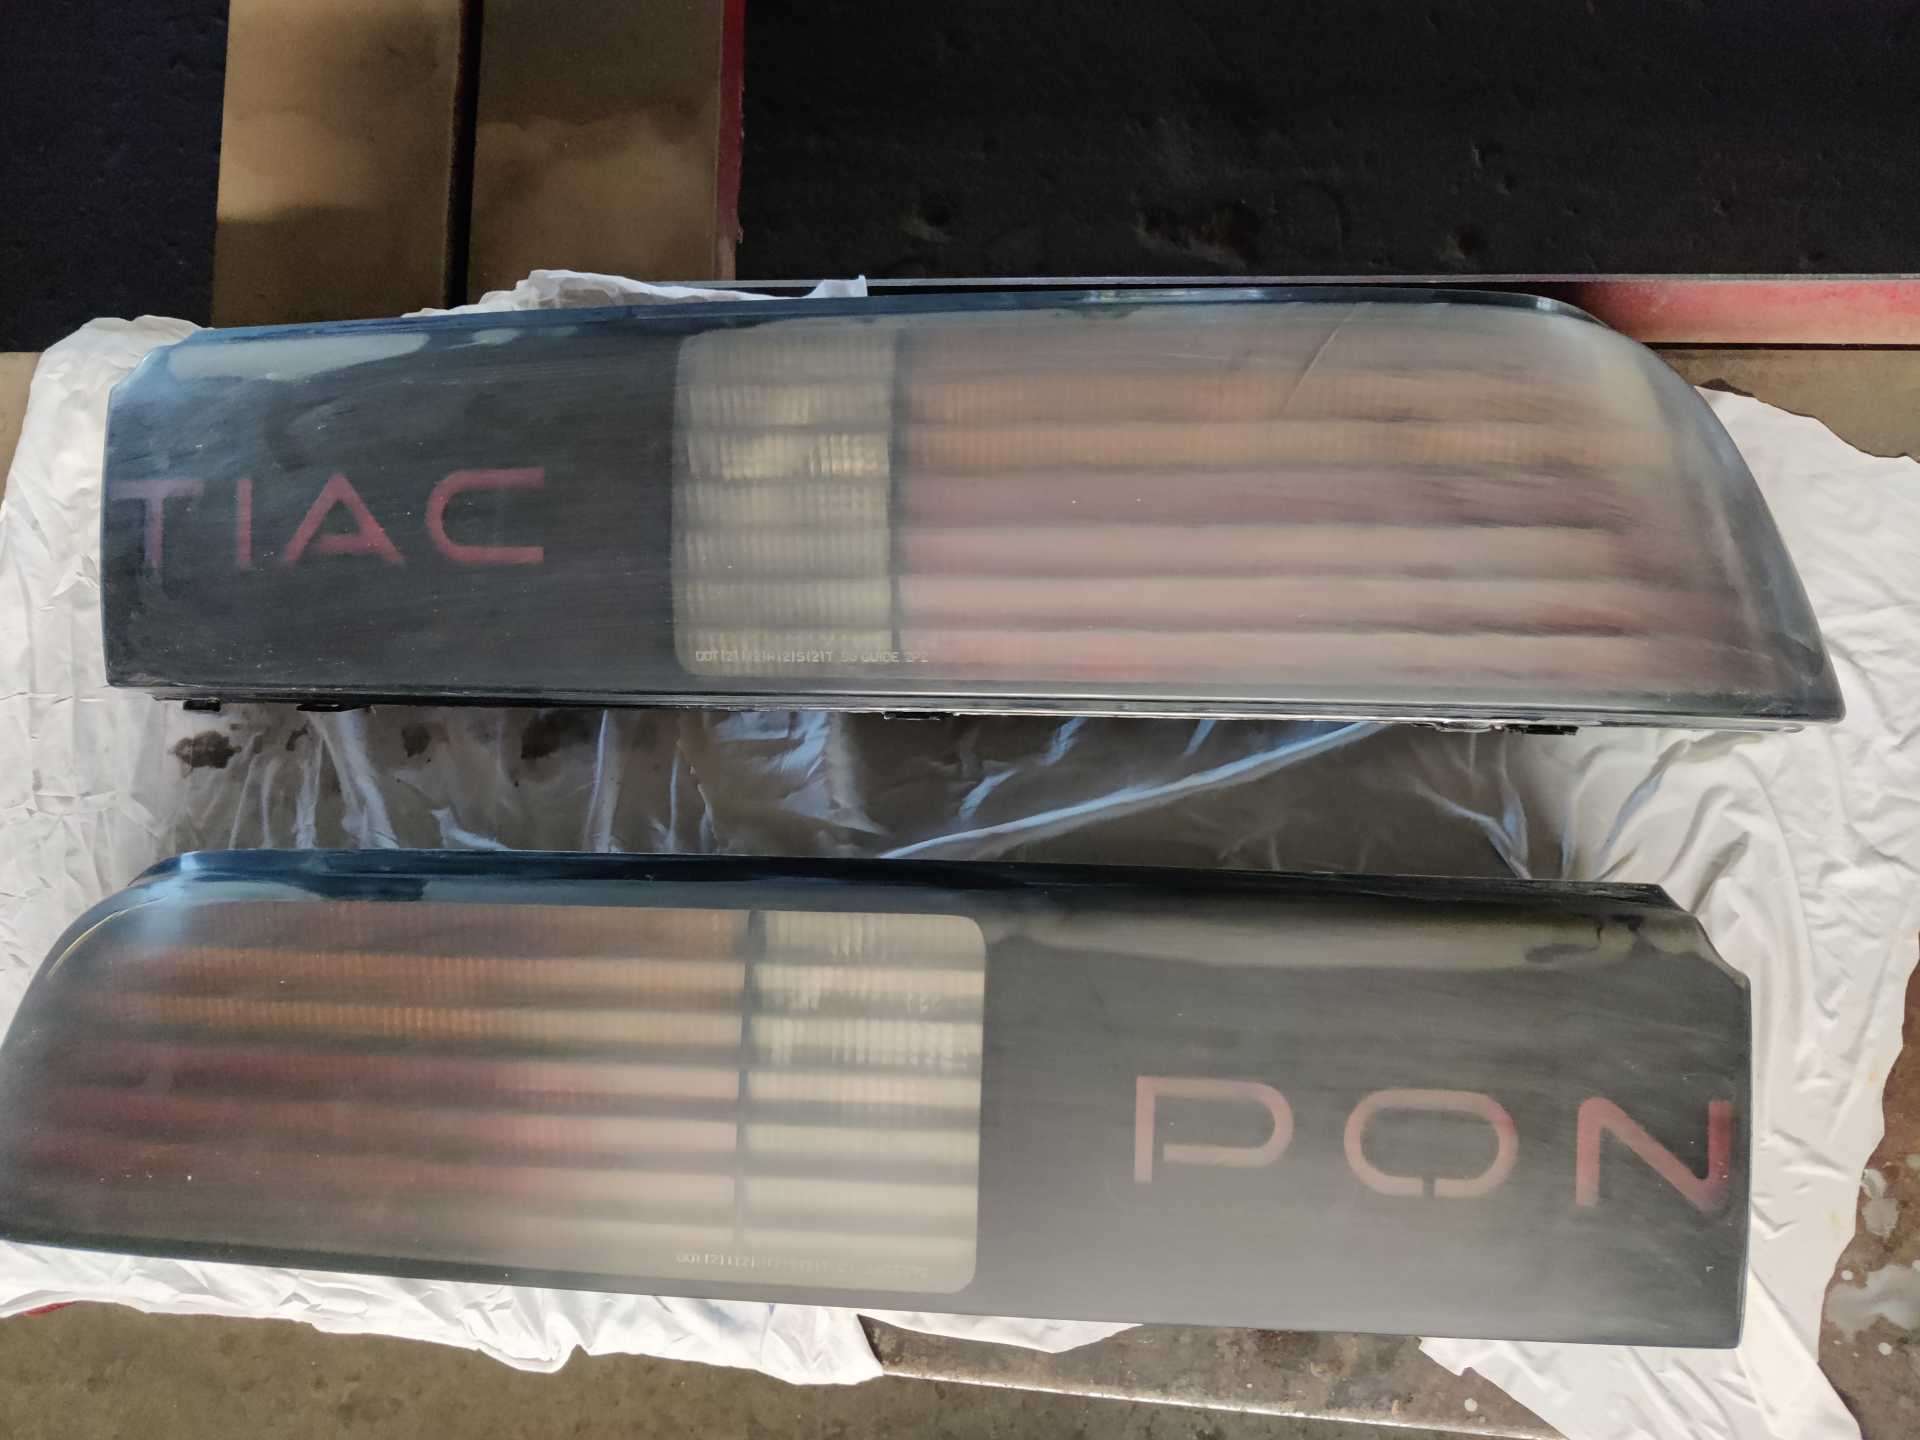
This next part is going to make a few cringe.. and I should have bought them when I was first looking them up, but now they're not being made and I can't afford them. It's the taillights.. I absolutely can't stand them coming apart and seeing it from the outside. I decided to nightshade them.. They may be a little dark and a ticket magnet but its still cheaper than taillight lens covers. If it starts to attract too much attention then I'll sand them back down and just cover the black areas with nightshades.
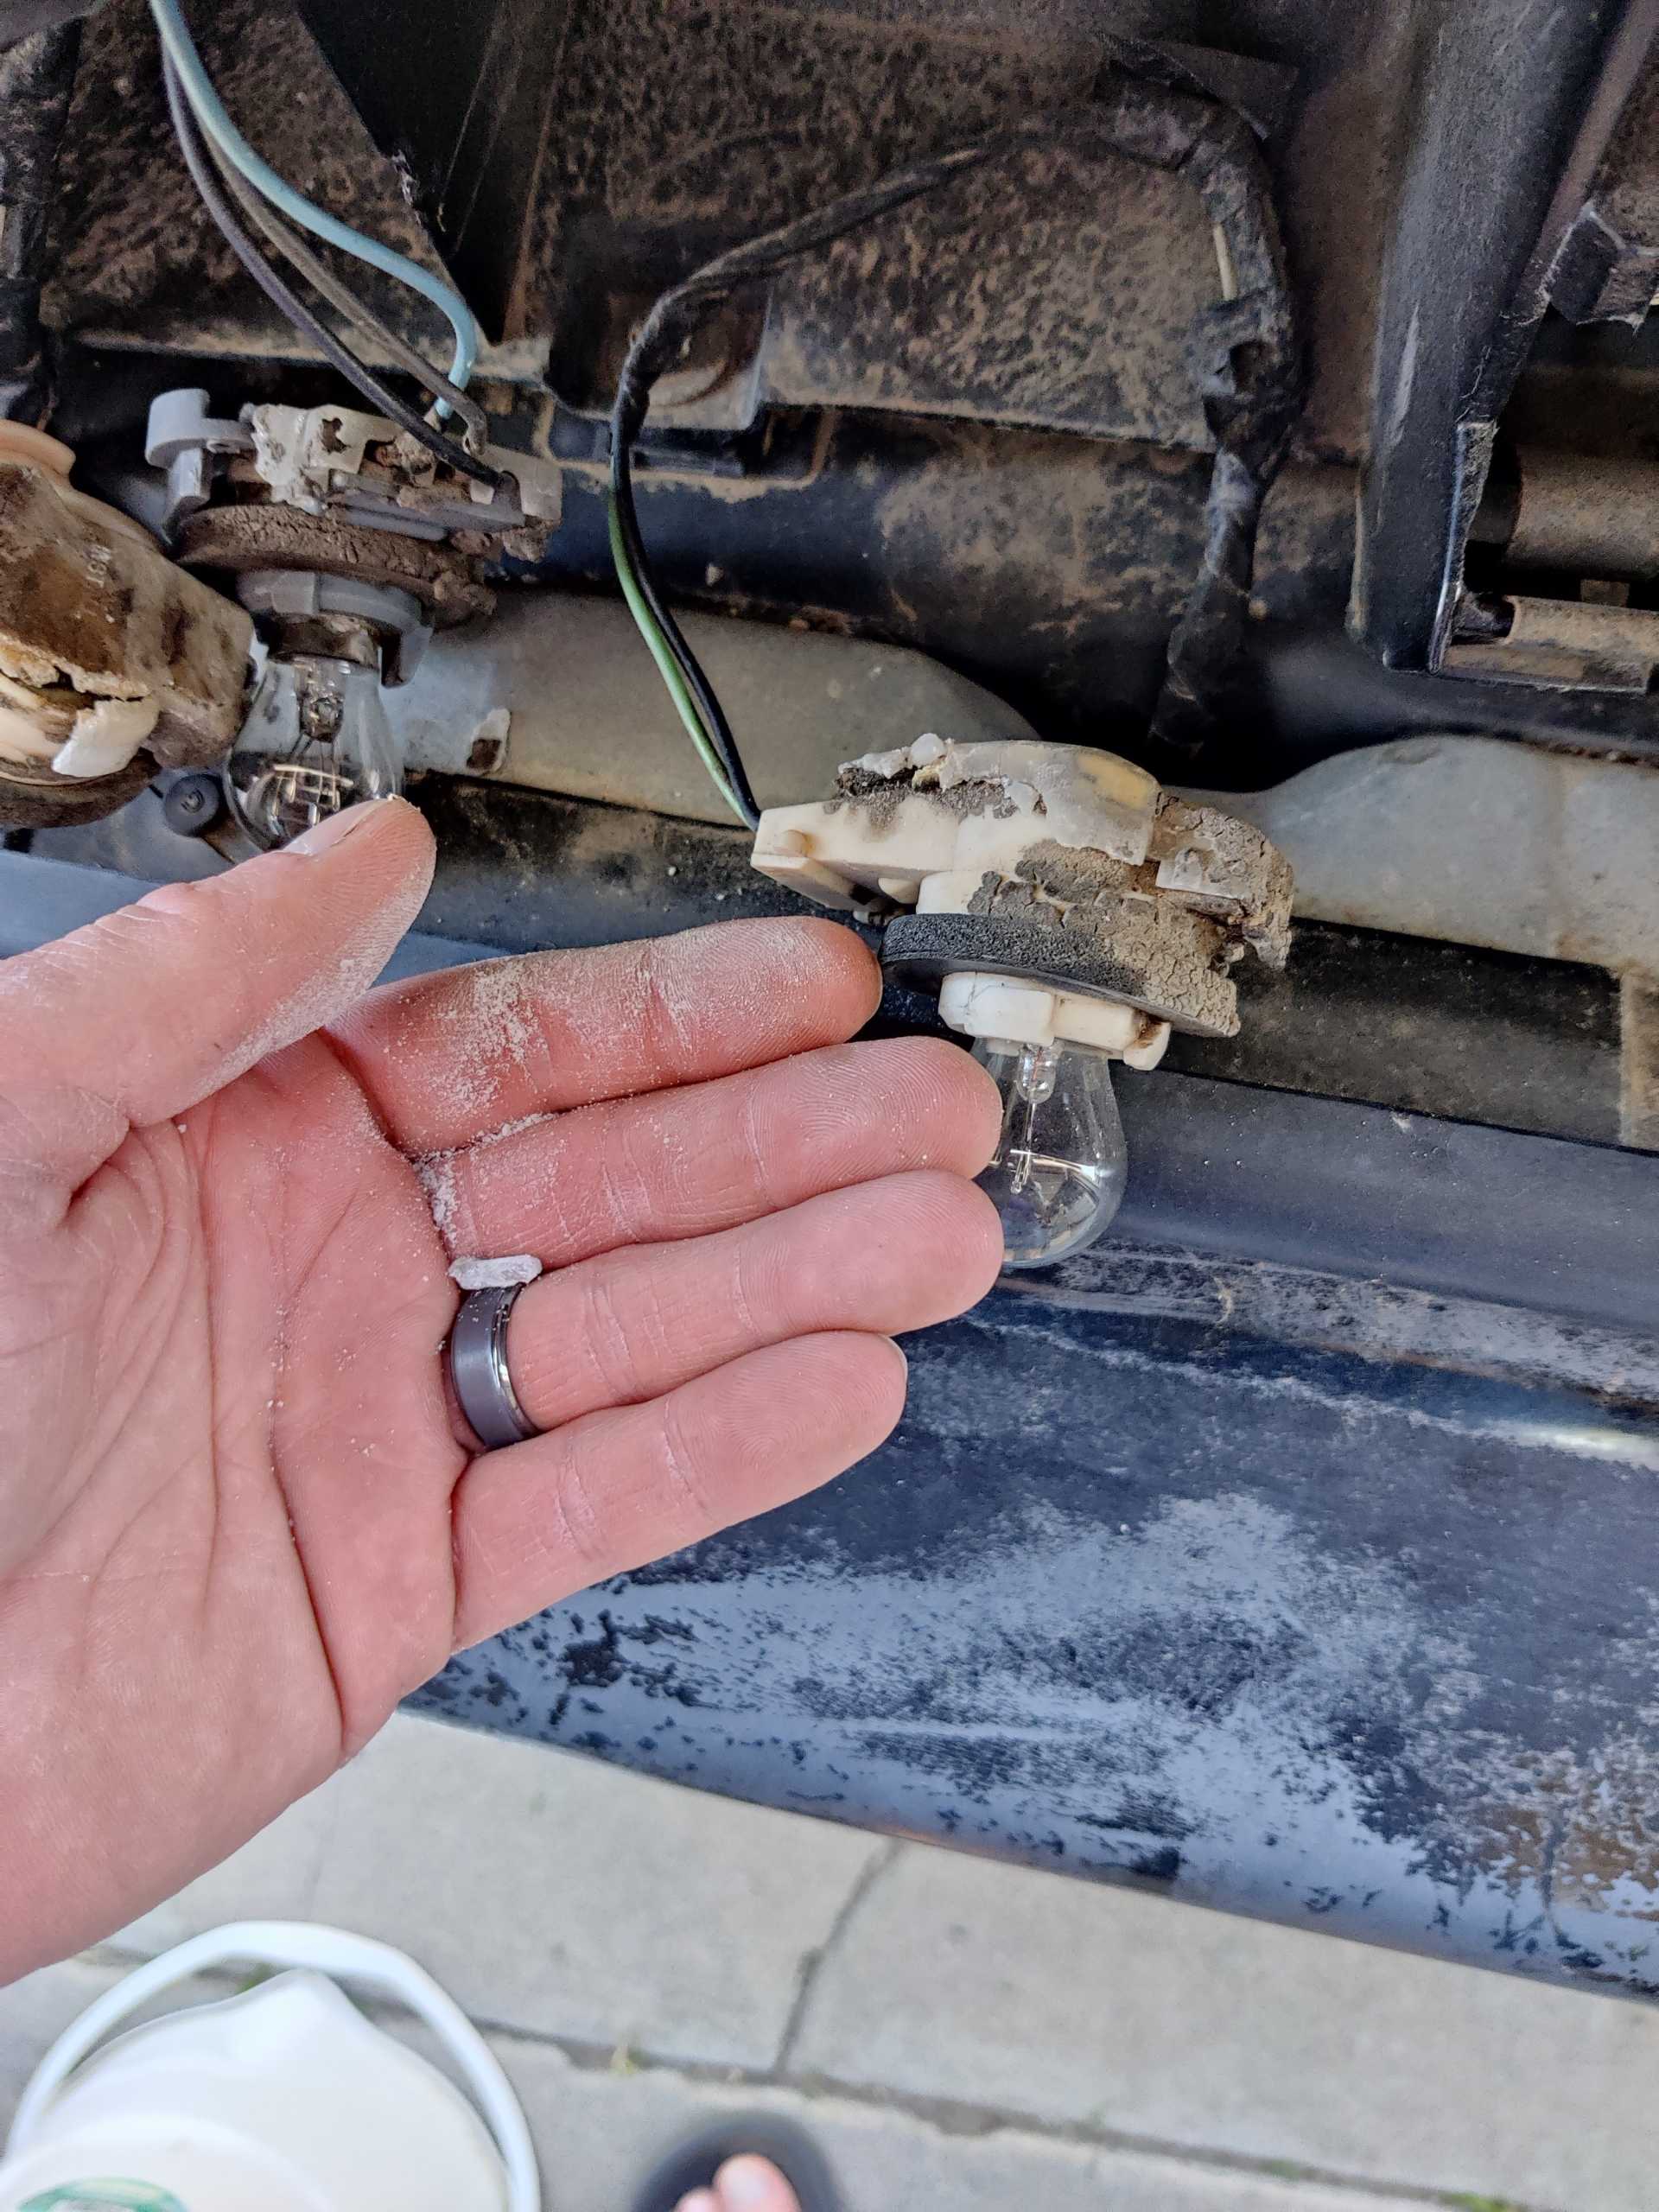
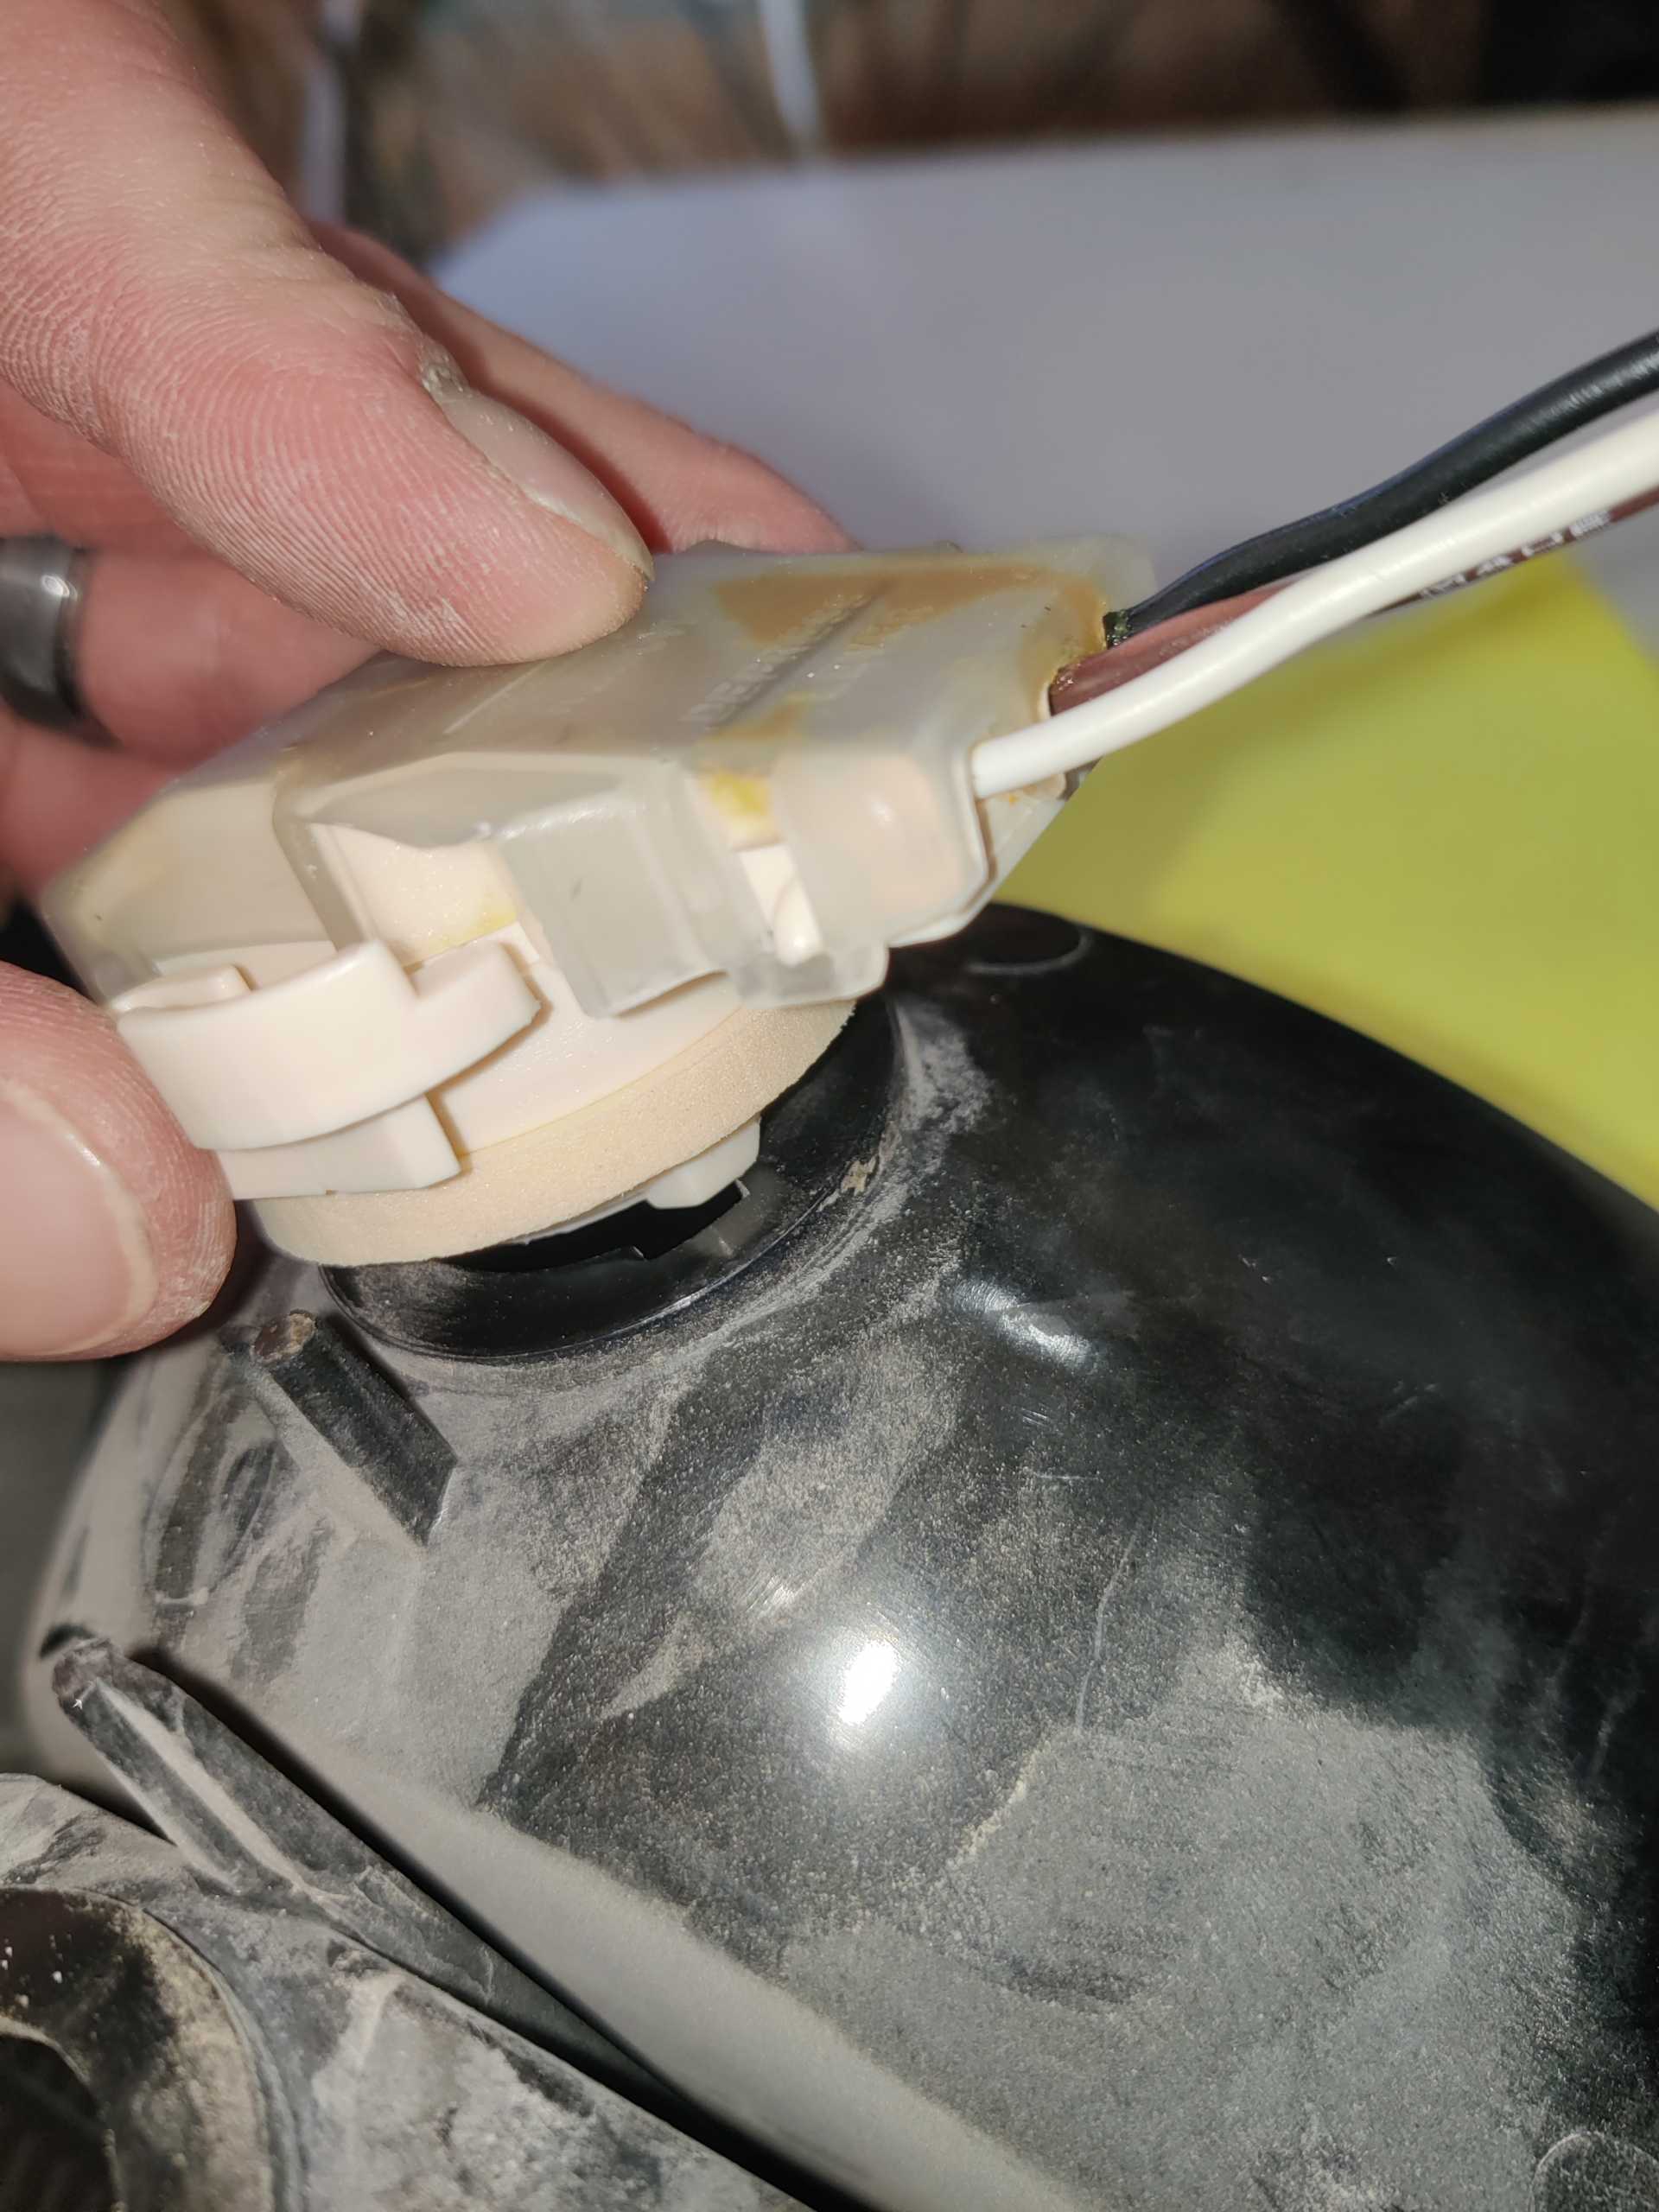
All of the brake and turn signal sockets are deteriorating so they were replaced.
Since I work at a parts store I picked them up. They were wrong but I modified it to work anyway. My system was saying the rear turn and brake were the same socket. I got them in and they were close but still different. The brake were closer to the original than the turns were. To resolve this, and actually have pigtails I can use now, I decided to modify the taillight holes to accept the new sockets.
This is the brake light and as you can see there is one tab that doesn't quite line up. Using a brand new razor blade I carefully cut out the plastic to accept the new pigtails. The turns were even further off but I realized if I trimmed all three of the tab holes just a little it would work and still catch the lock. Since they are now darker I need brighter lights. This is going to be outfitted with all LED lights. Before I had read Orge's cave about the lighting I had already gotten the LEDs. I will be buying brighter ones for the brake lights but for now this is going to have to do. I believe the turn are bright enough even in full sun. I plugged in the new LED bulbs in all the tail, third brake, license, and all four corner side markers. I expected it not to flash like everyone else but I also didn't expect it to have a flasher made for LEDs in it already. I had flashers on hand but I wanted to start troubleshooting from the beginning. I thankfully didn't have to do anything! All the lights flashed correctly with parking lights on and off. Even the hazard lights functioned properly. I got lucky buying 194's that the polarity can be reversed.
It looks like your solution for the tail lights is working!
There is/was a few people on the boards that were offering a refinishing service for de laminated tail lights. I loved the LED setup I had in my last Fiero, and will be getting the same ones for my current one. The LED 'post' had LEDS on a 360 plus the 'hat', they were brighter than stock lights but not obnoxiously so. The previous owner had used brighter lights in all the sockets (including the PON TIAC), and the heat had done socket damage, so I had replaced all the sockets while in there as well. The LEDs took care of any heat concerns.
What are the details on your LEDs for the different segments? Brand, number of diodes, lumens, did you get ones that were colored to better sync with the lense color, etc.
Yes the heat is a concern for me too. The third brake light housing had heat damage on mine but that was a few years back and I don't have pictures for it. It made it bubble out on the bottom and I think I filled it with body filler and sanded it down. The gaping hole on the top of the housing I'm assuming was to let some heat out but it was somewhat damaged as well. I got a little hammered one night and silicone adhesived a piece of aluminum beer can to it. My thought process at the time was 'well it'll be cooler now and I want as much light bouncing out the lens as possible.' When I bought LEDs I did go with color match ones for brake and turn but I'm thinking white color for the brake would be better with the nightshaded lens. There is a huge difference in appearance when looking at these straight on vs from the side a bit like what is talked about in ogre's cave. The viewing angle for the turn isn't as bad as the brake lights but it's still there too.
I also got some 50W 6ohm resistors but I really didn't want to use them because of the heat they'll put out. I thankfully didn't have to use them. I'm not sure how these look without nightshades and also I have not done the forward facing turn signals yet but I plan on replacing the entire housing and all with a sealed LED trailer light.. maybe. I would really like to replace/upgrade the headlights to something more modern and brighter also. I still want pop up up and down headlights but maybe LED ones? Any suggestions?
Sorry if the links don't work I don't know what I'm doing wrong.
[This message has been edited by lsfiero (edited 07-16-2023).]
The links worked fine. If you can take a shot at night with the headlights on and then with the brake pressed, it'd be great to get an idea of how they look. If you have another car that you can park next to yours to do the same so you can get some relative comparisons?
I'm glad to see you got bulbs that were in the color of the lens (where applicable).
For headlights I'm running the Hella 60mm twin lamp buckets. There are a lot of DOT approved 4x6 LED headlight units out there, I think the trick is finding actual end user pictures of them at night in addition to the review, so you don't drop money on ones you hate. Only other suggestion I can make is to see if the lamp lists the brand of LED they're using. Then you can research and make sure they are a good quality LED (like Cree, at one time, was a really good LED).
The links worked fine. If you can take a shot at night with the headlights on and then with the brake pressed, it'd be great to get an idea of how they look. If you have another car that you can park next to yours to do the same so you can get some relative comparisons?
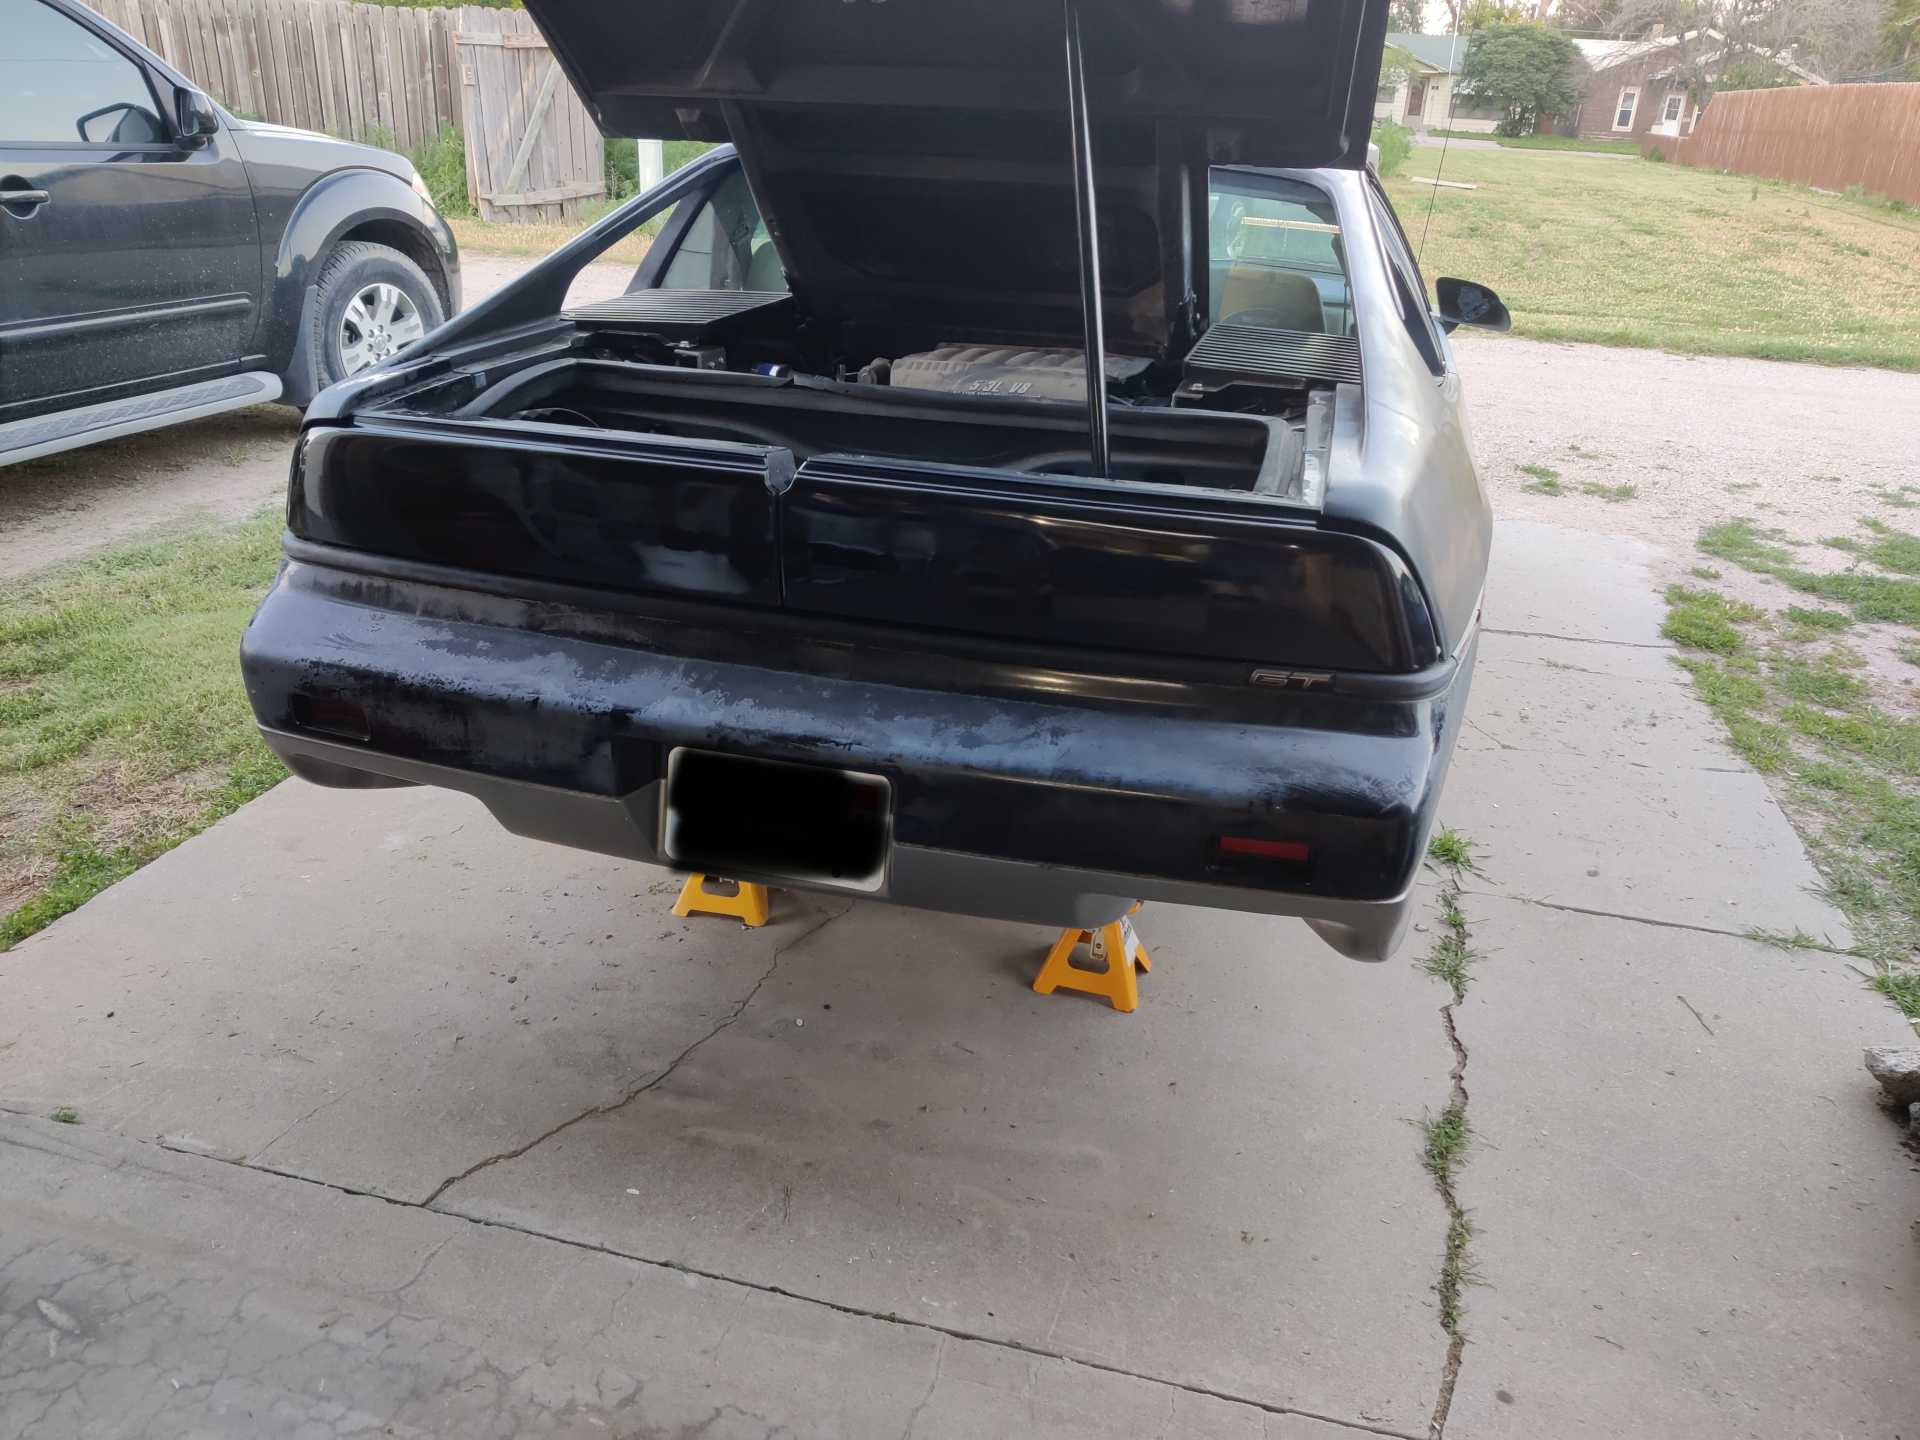
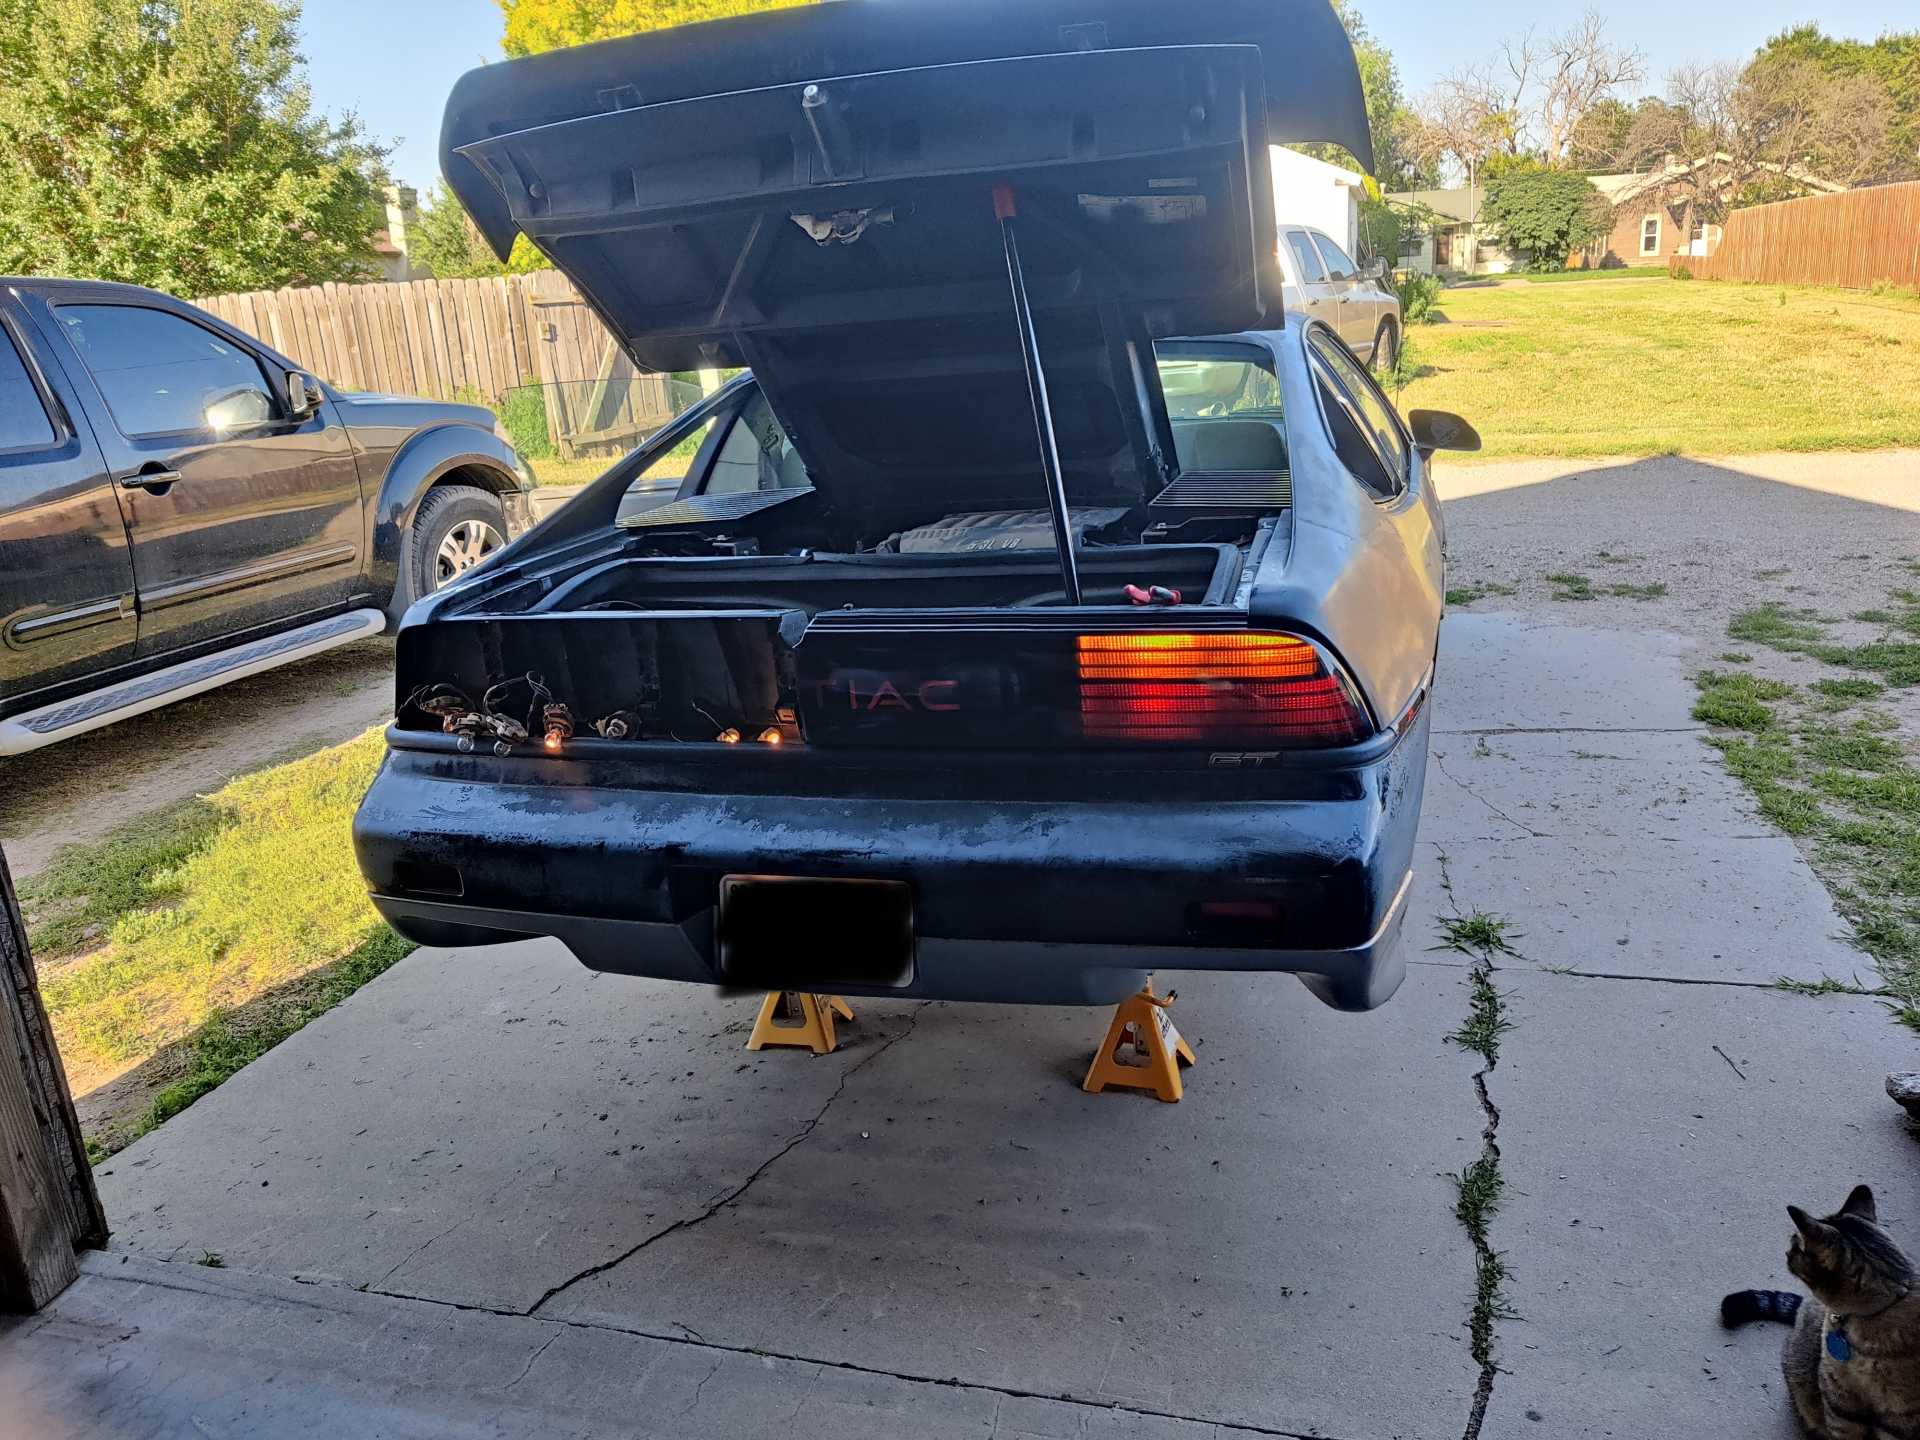
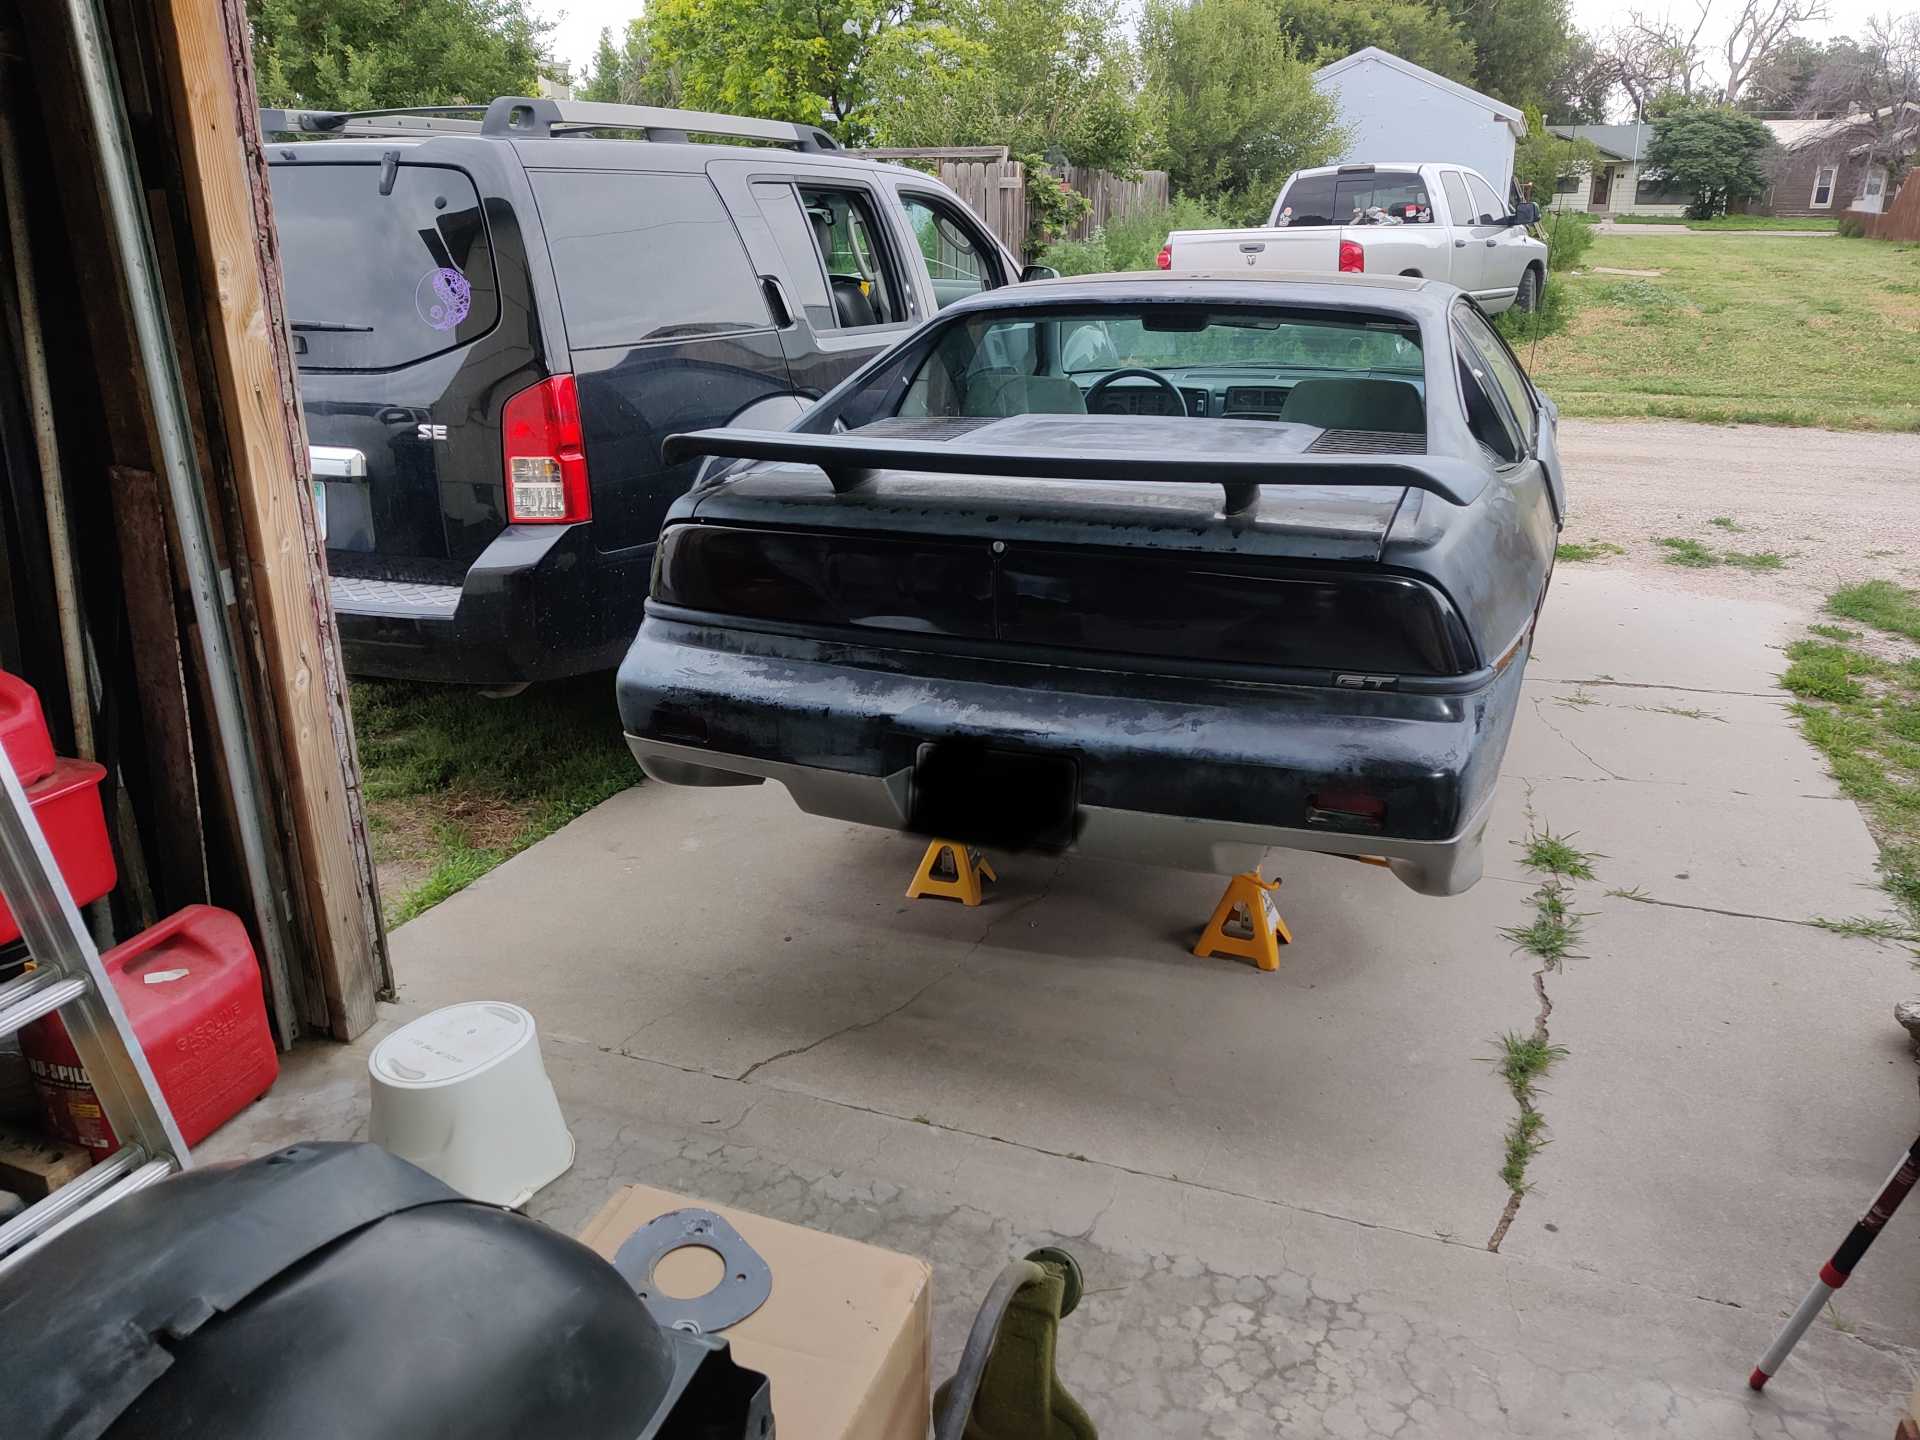
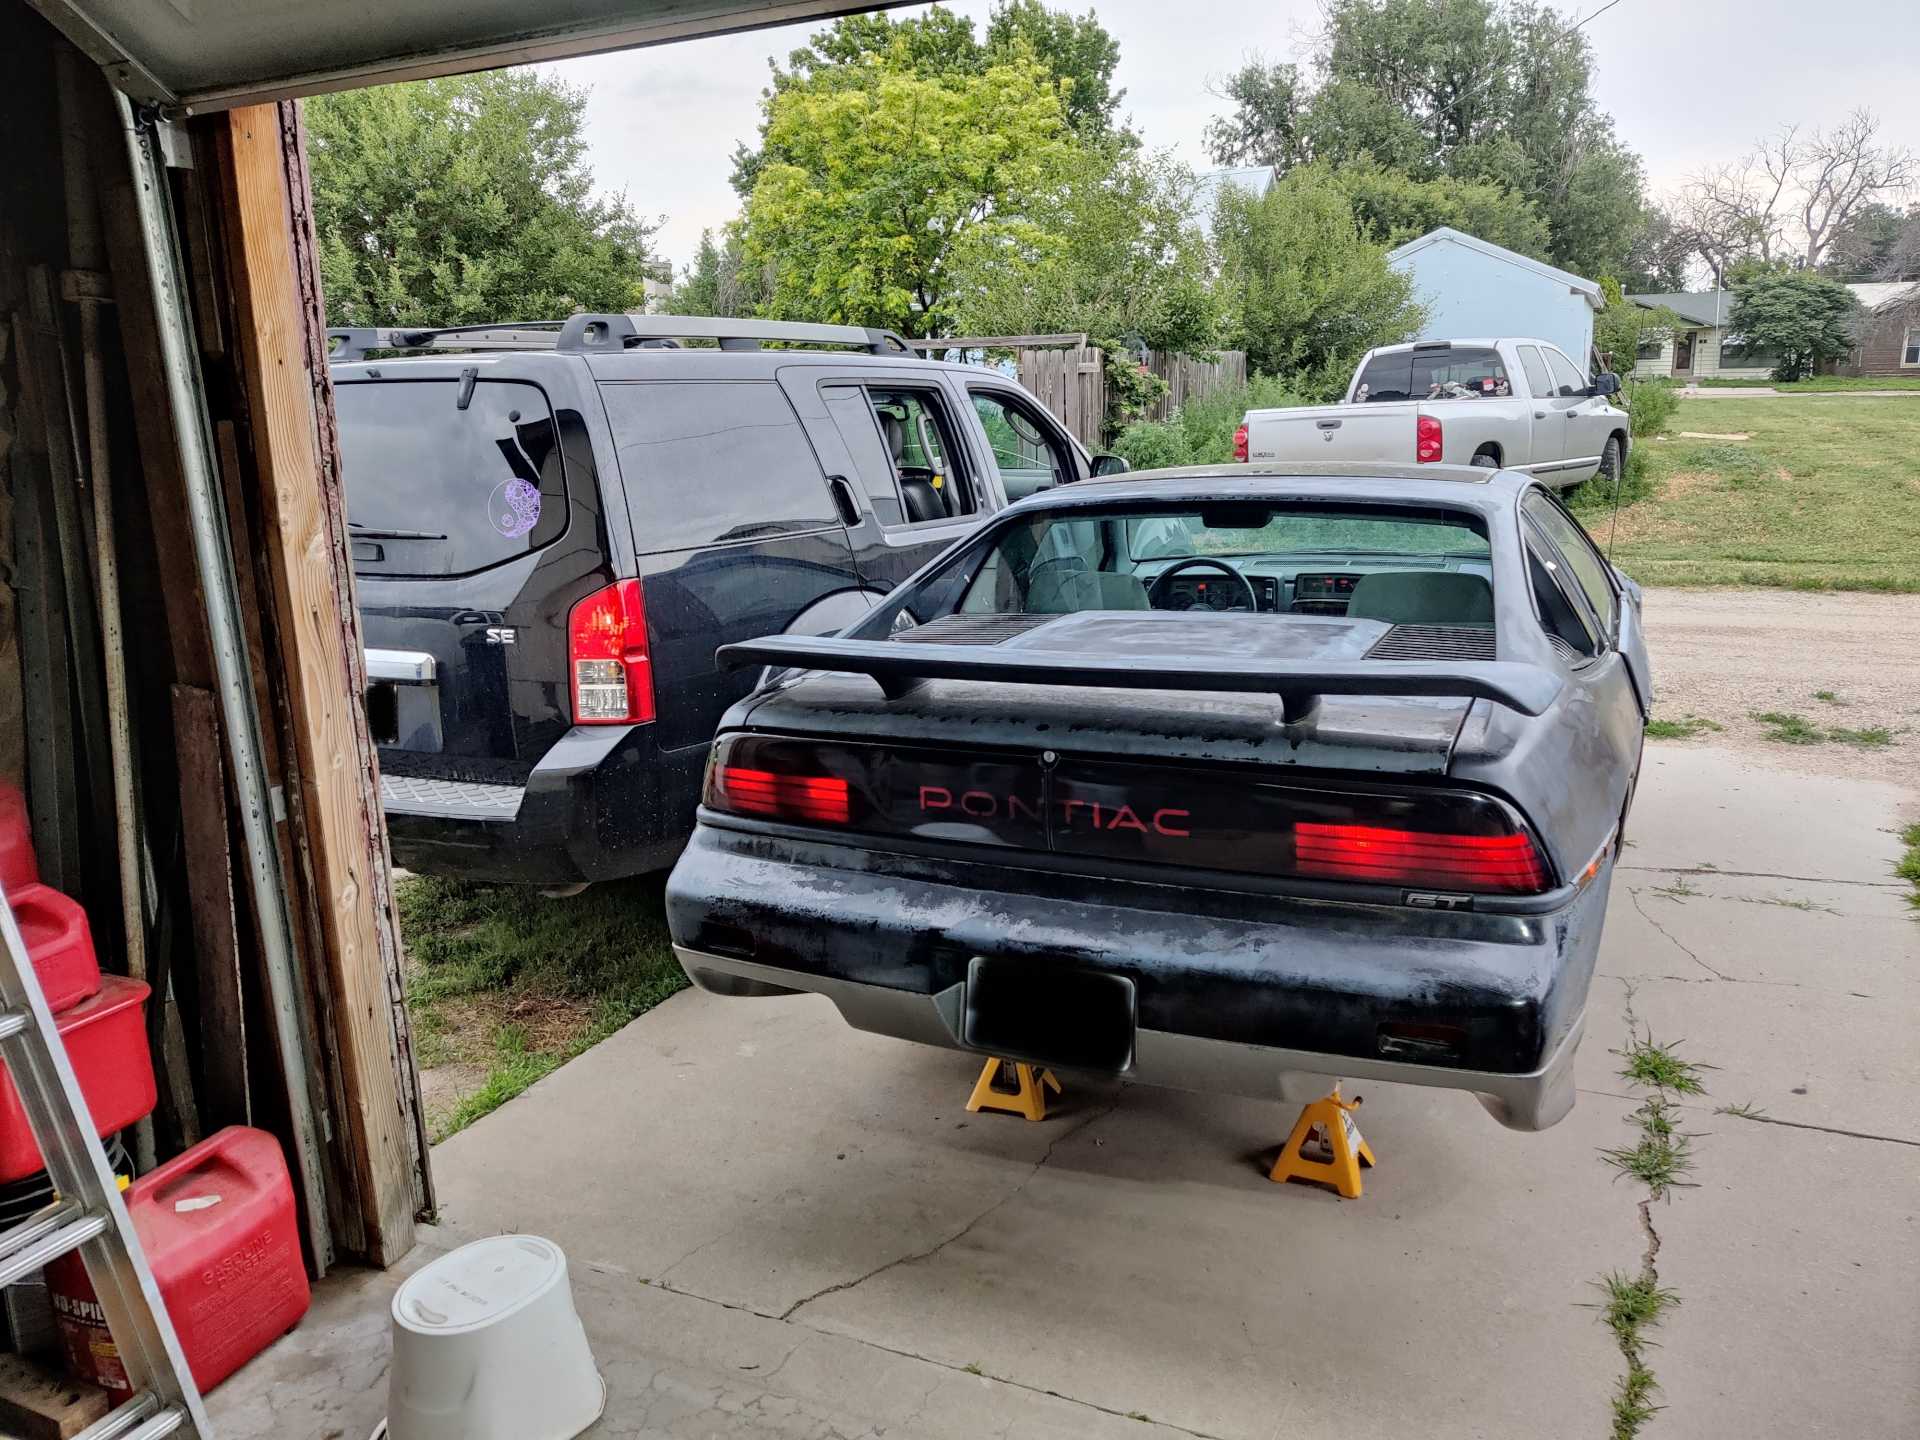
So I apologize for taking so long to get back to you on this and these aren't exactly at night like you asked but here's some pictures with them off, parking lights, then brake lights. There's not really a good angle to take at the moment since it's on jack stands and the other side is a car that doesn't run. I will get better pictures of the comparison later on.
It's still really hard to tell in the pictures but they are noticeably darker than a stock vehicle. Plus the bad viewing angle.. It may be a ticket magnet haha! How do I post videos? Do I just upload it like a picture or do I need to link it through youtube or something?
The OP is doing a great job and but don't believe that he's on the road as yet. The only suggestion that I would make is to get the air induction system connected to cooler outside air. Hot engine compartment air could decrease power and possibly cause detonation. With 300 HP stock he will enjoy one exciting ride.
------------------ " THE BLACK PARALYZER" -87GT 3800SC Series III engine, custom ZZP /Frozen Boost Intercooler setup, 3.4" Pulley, Northstar TB, LS1 MAF, 3" Spintech/Hedman Exhaust, P-log Manifold, Autolite 104's, MSD wires, Custom CAI, 4T65eHD w. custom axles, Champion Radiator, S10 Brake Booster, HP Tuners VCM Suite. "THE COLUSSUS" 87GT - ALL OUT 3.4L Turbocharged engine, Garrett Hybrid Turbo, MSD ign., modified TH125H " ON THE LOOSE WITHOUT THE JUICE "
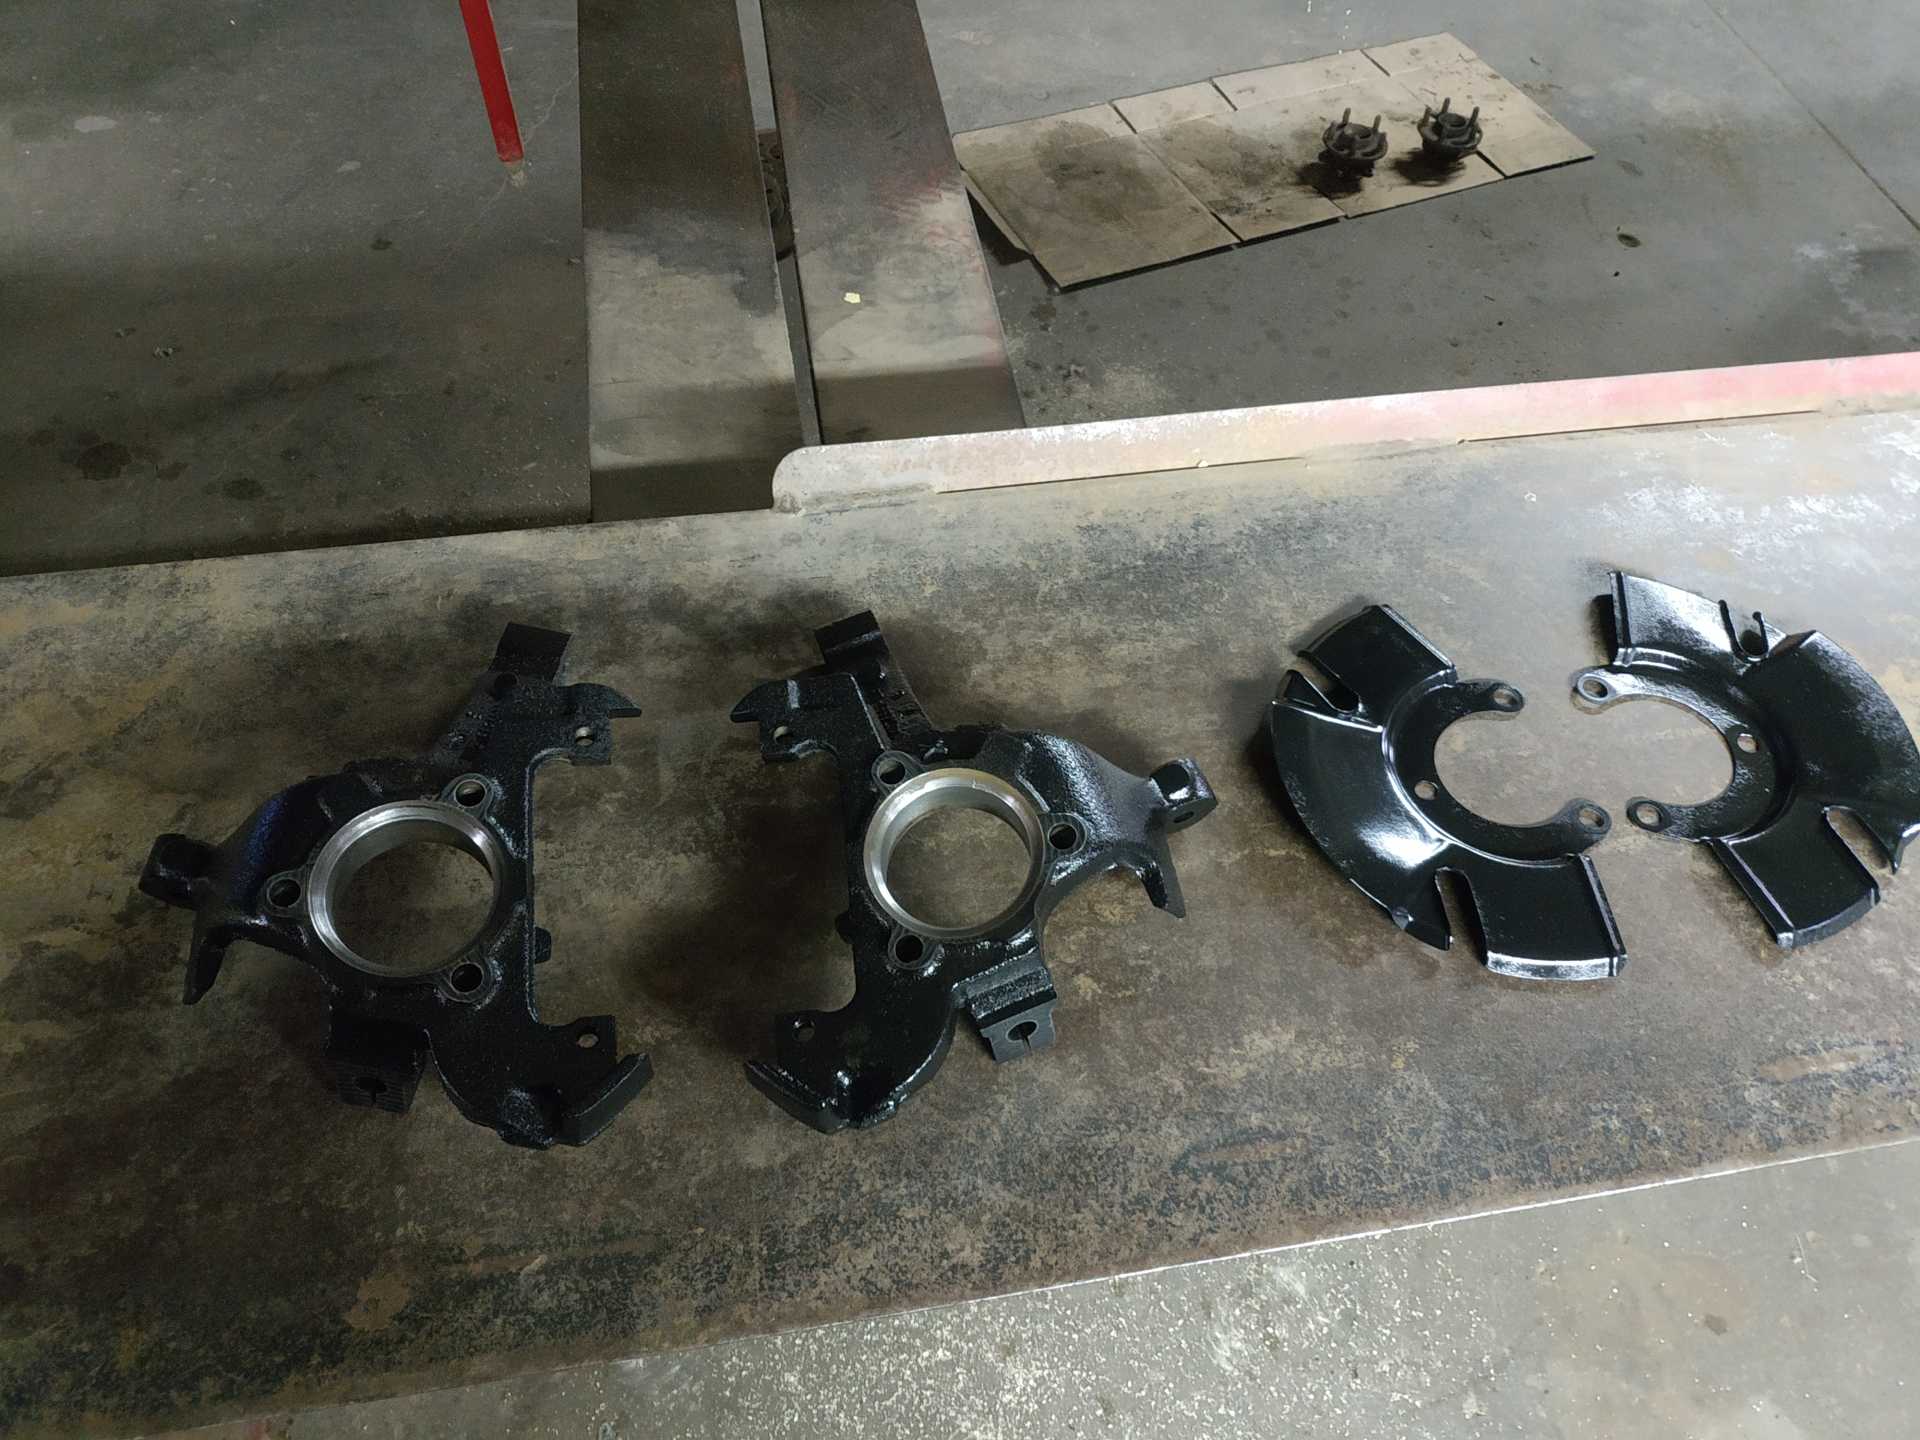
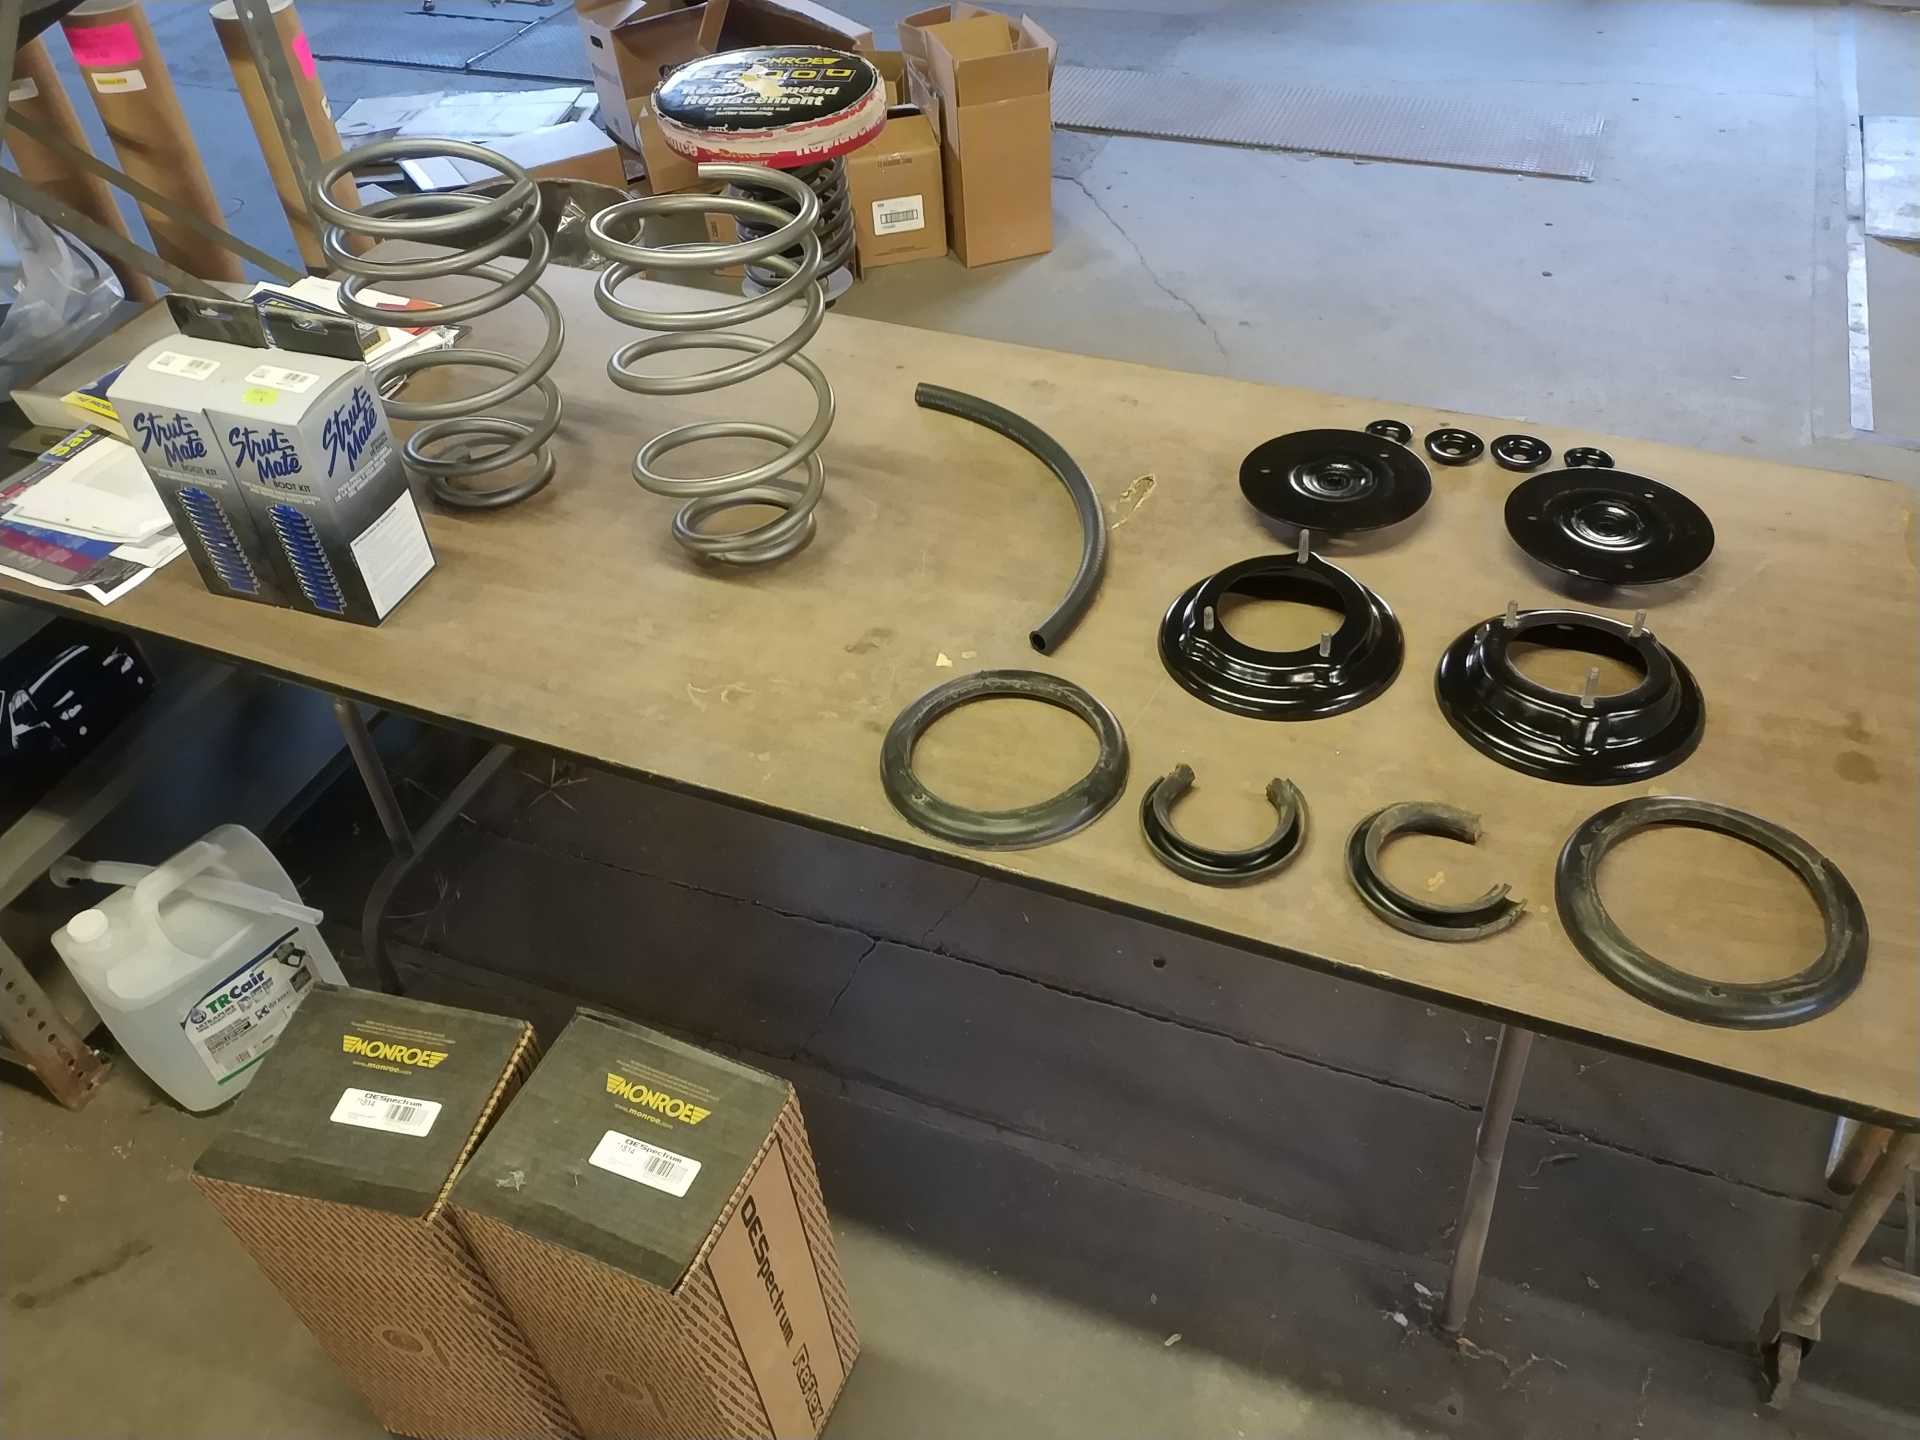
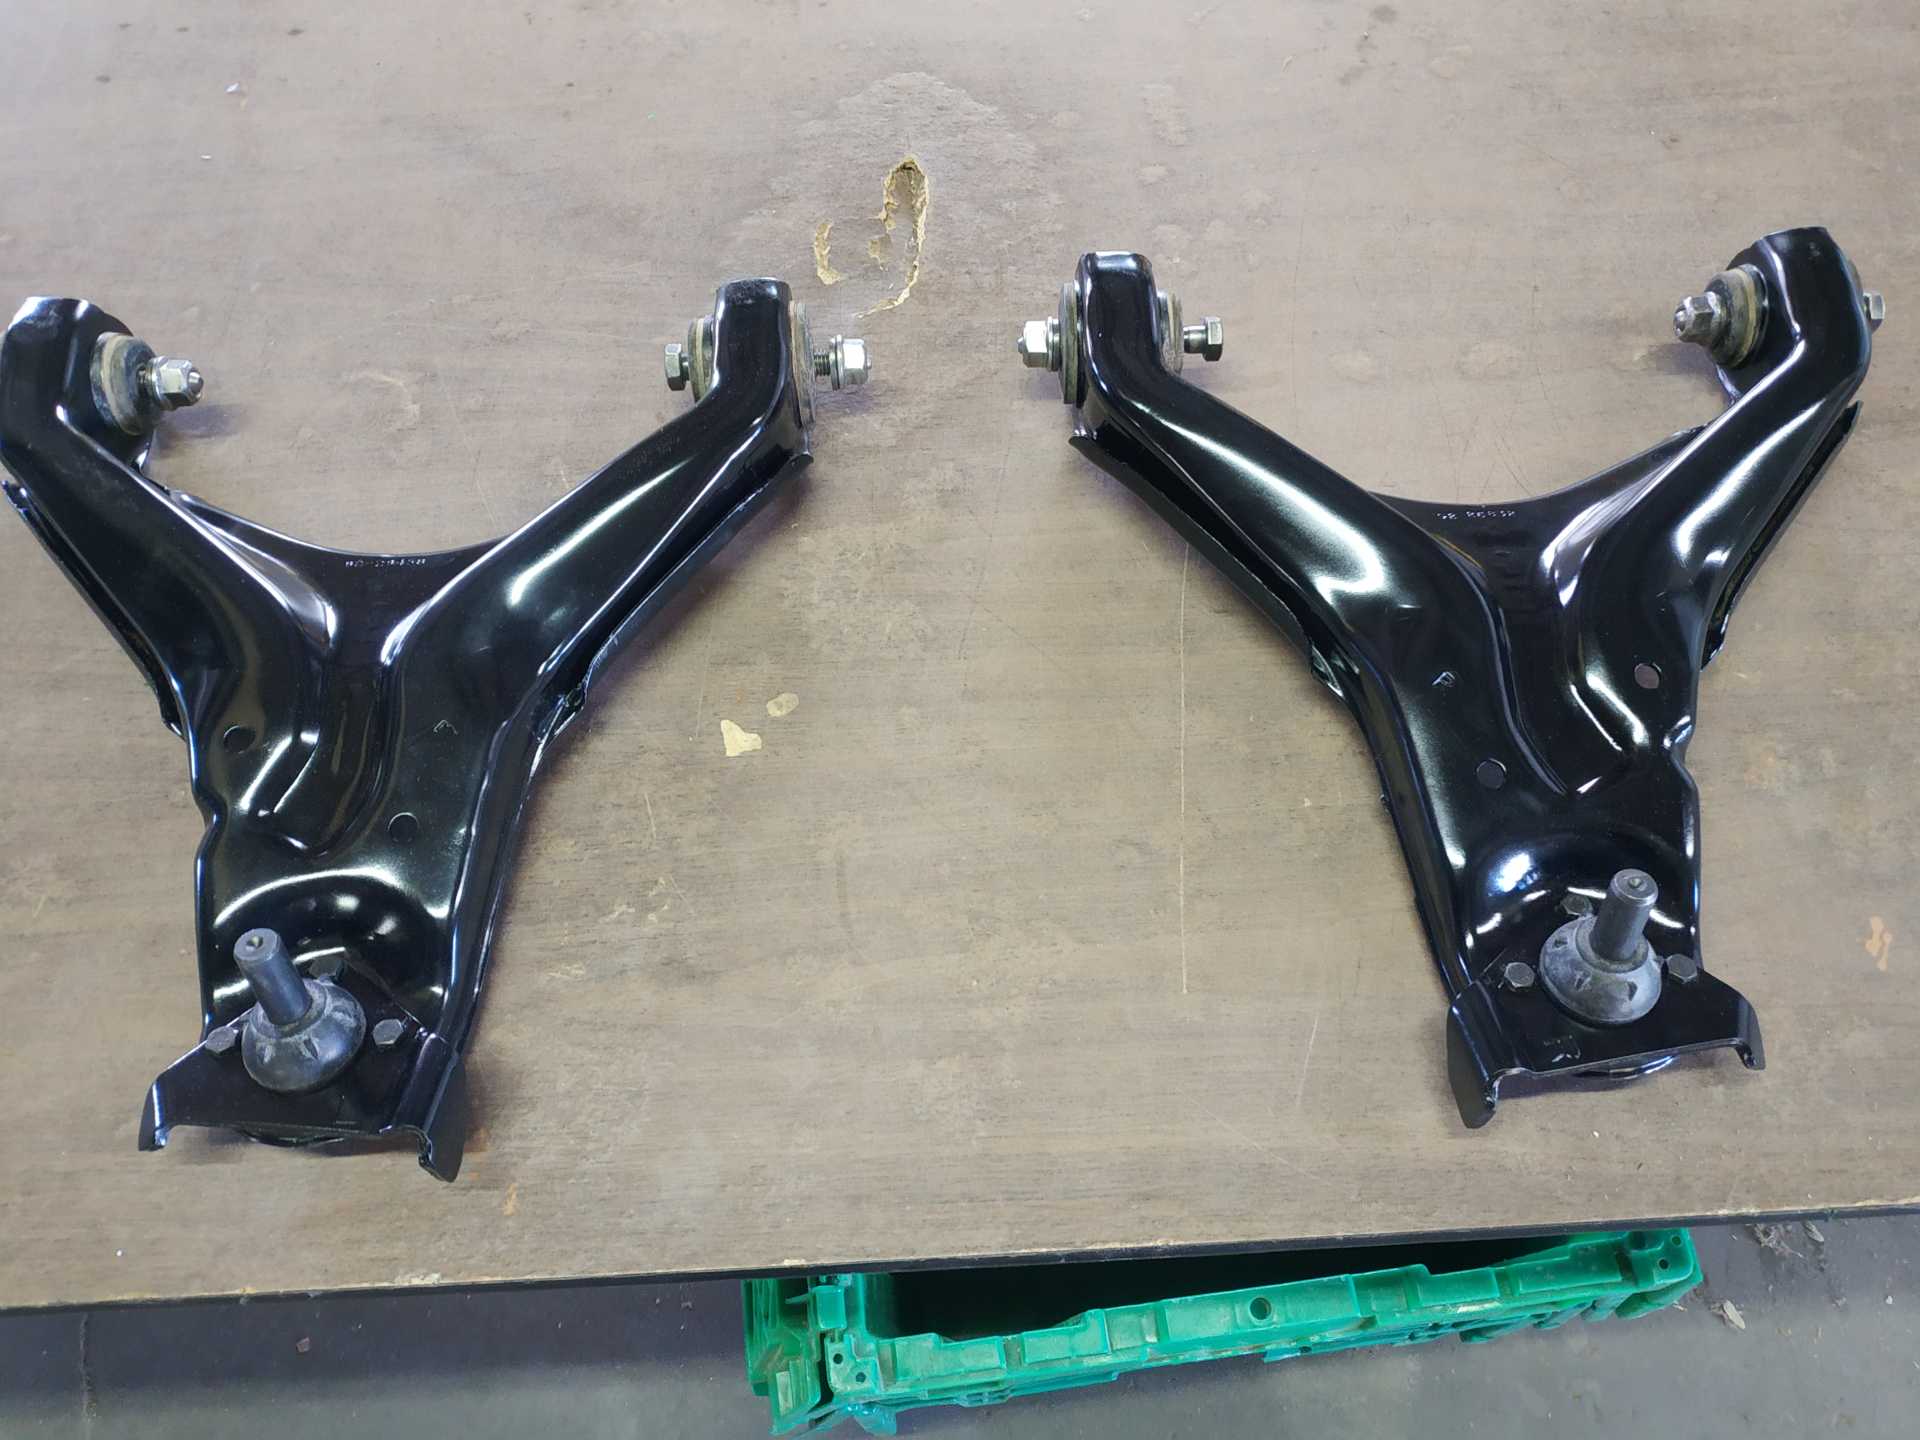
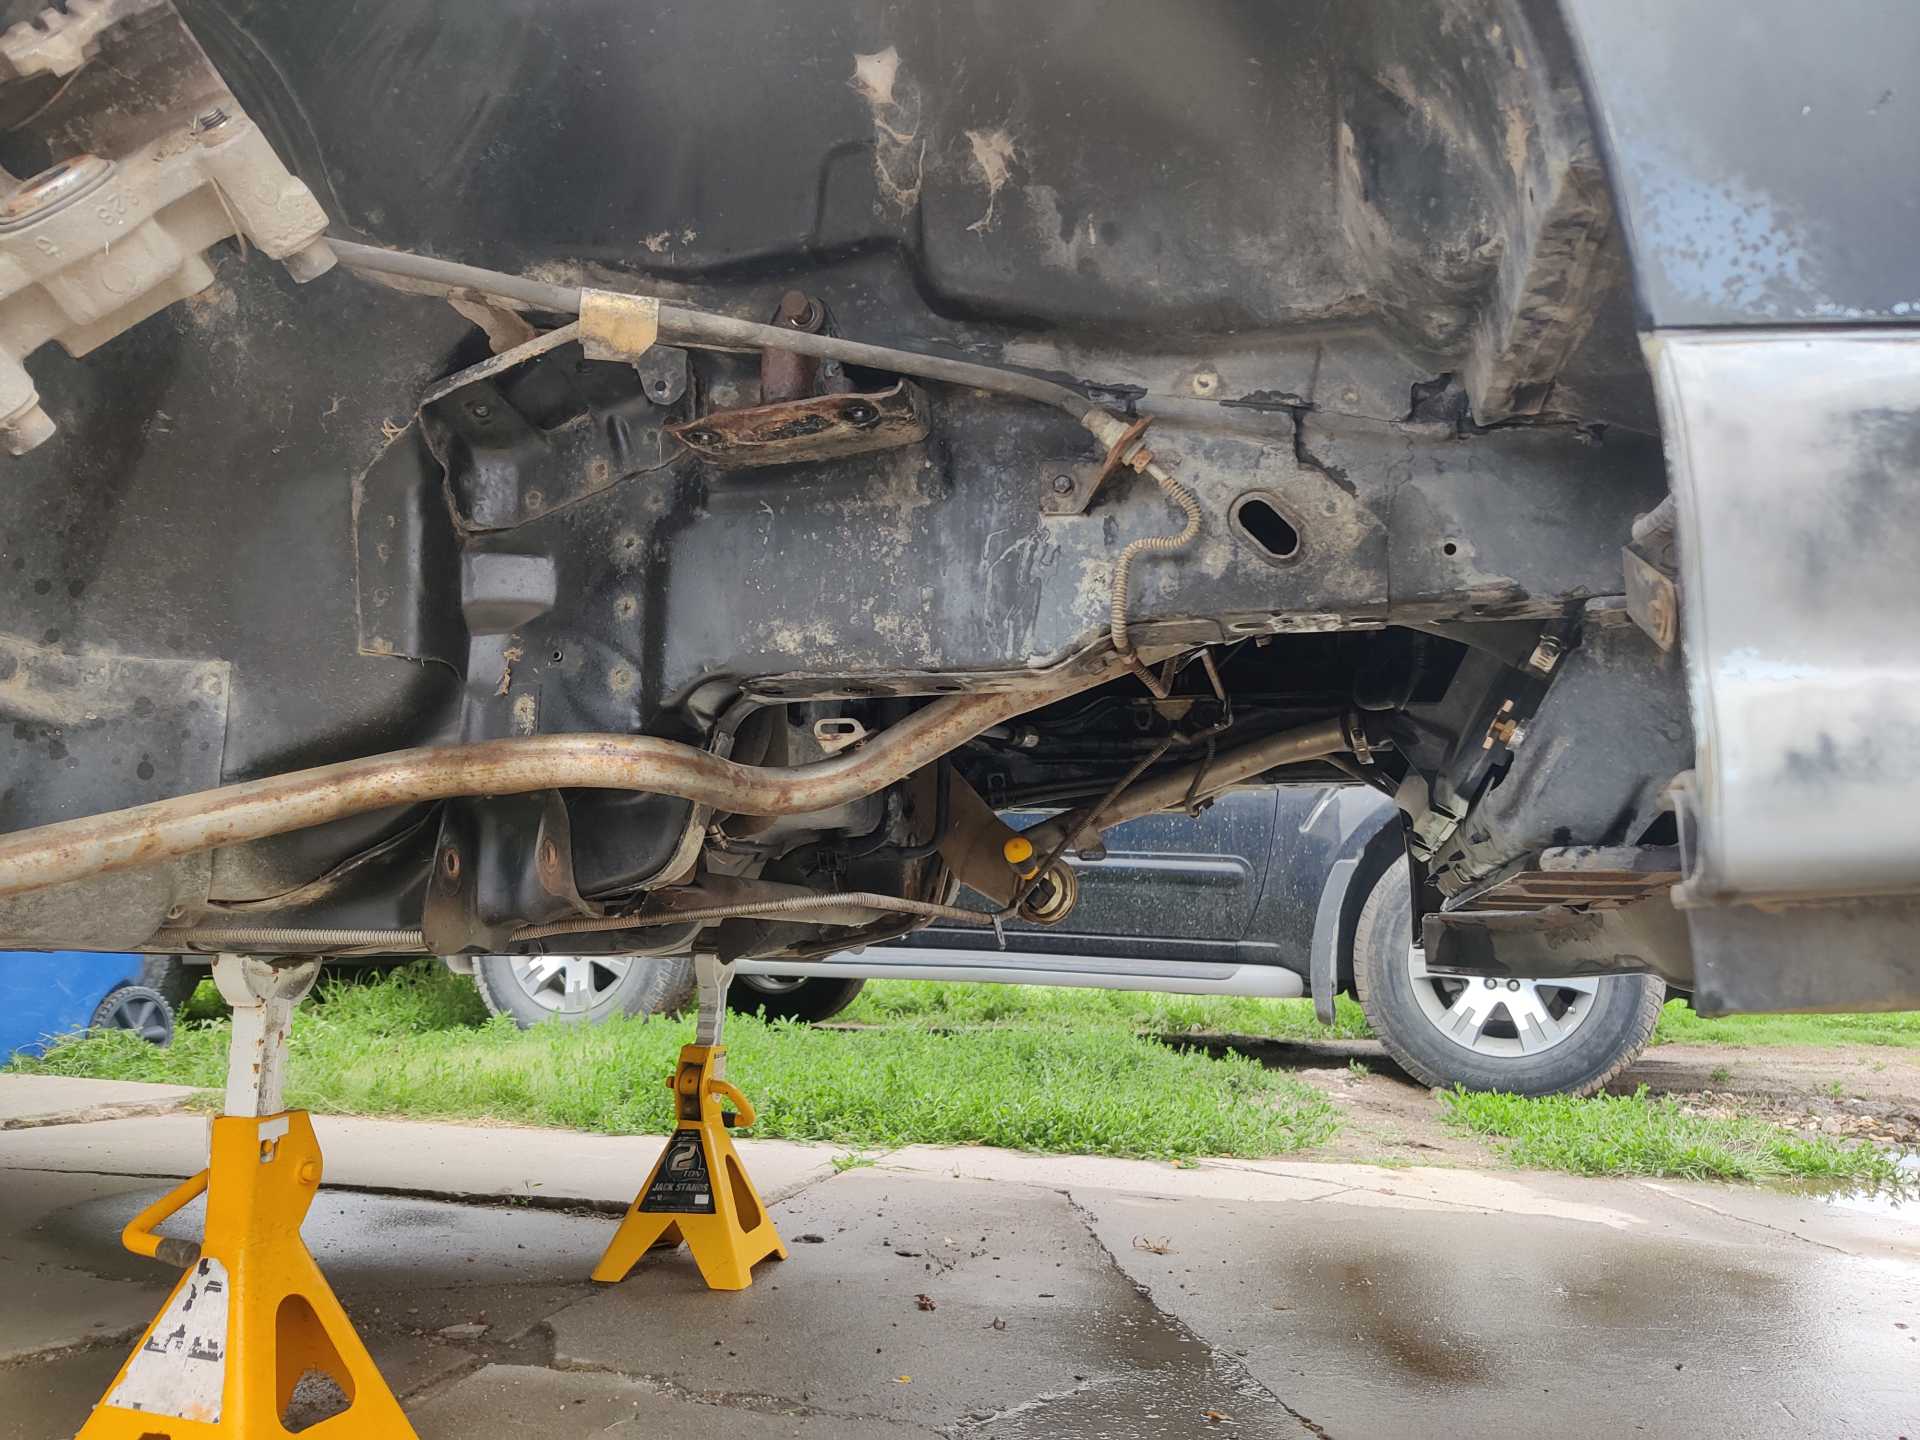
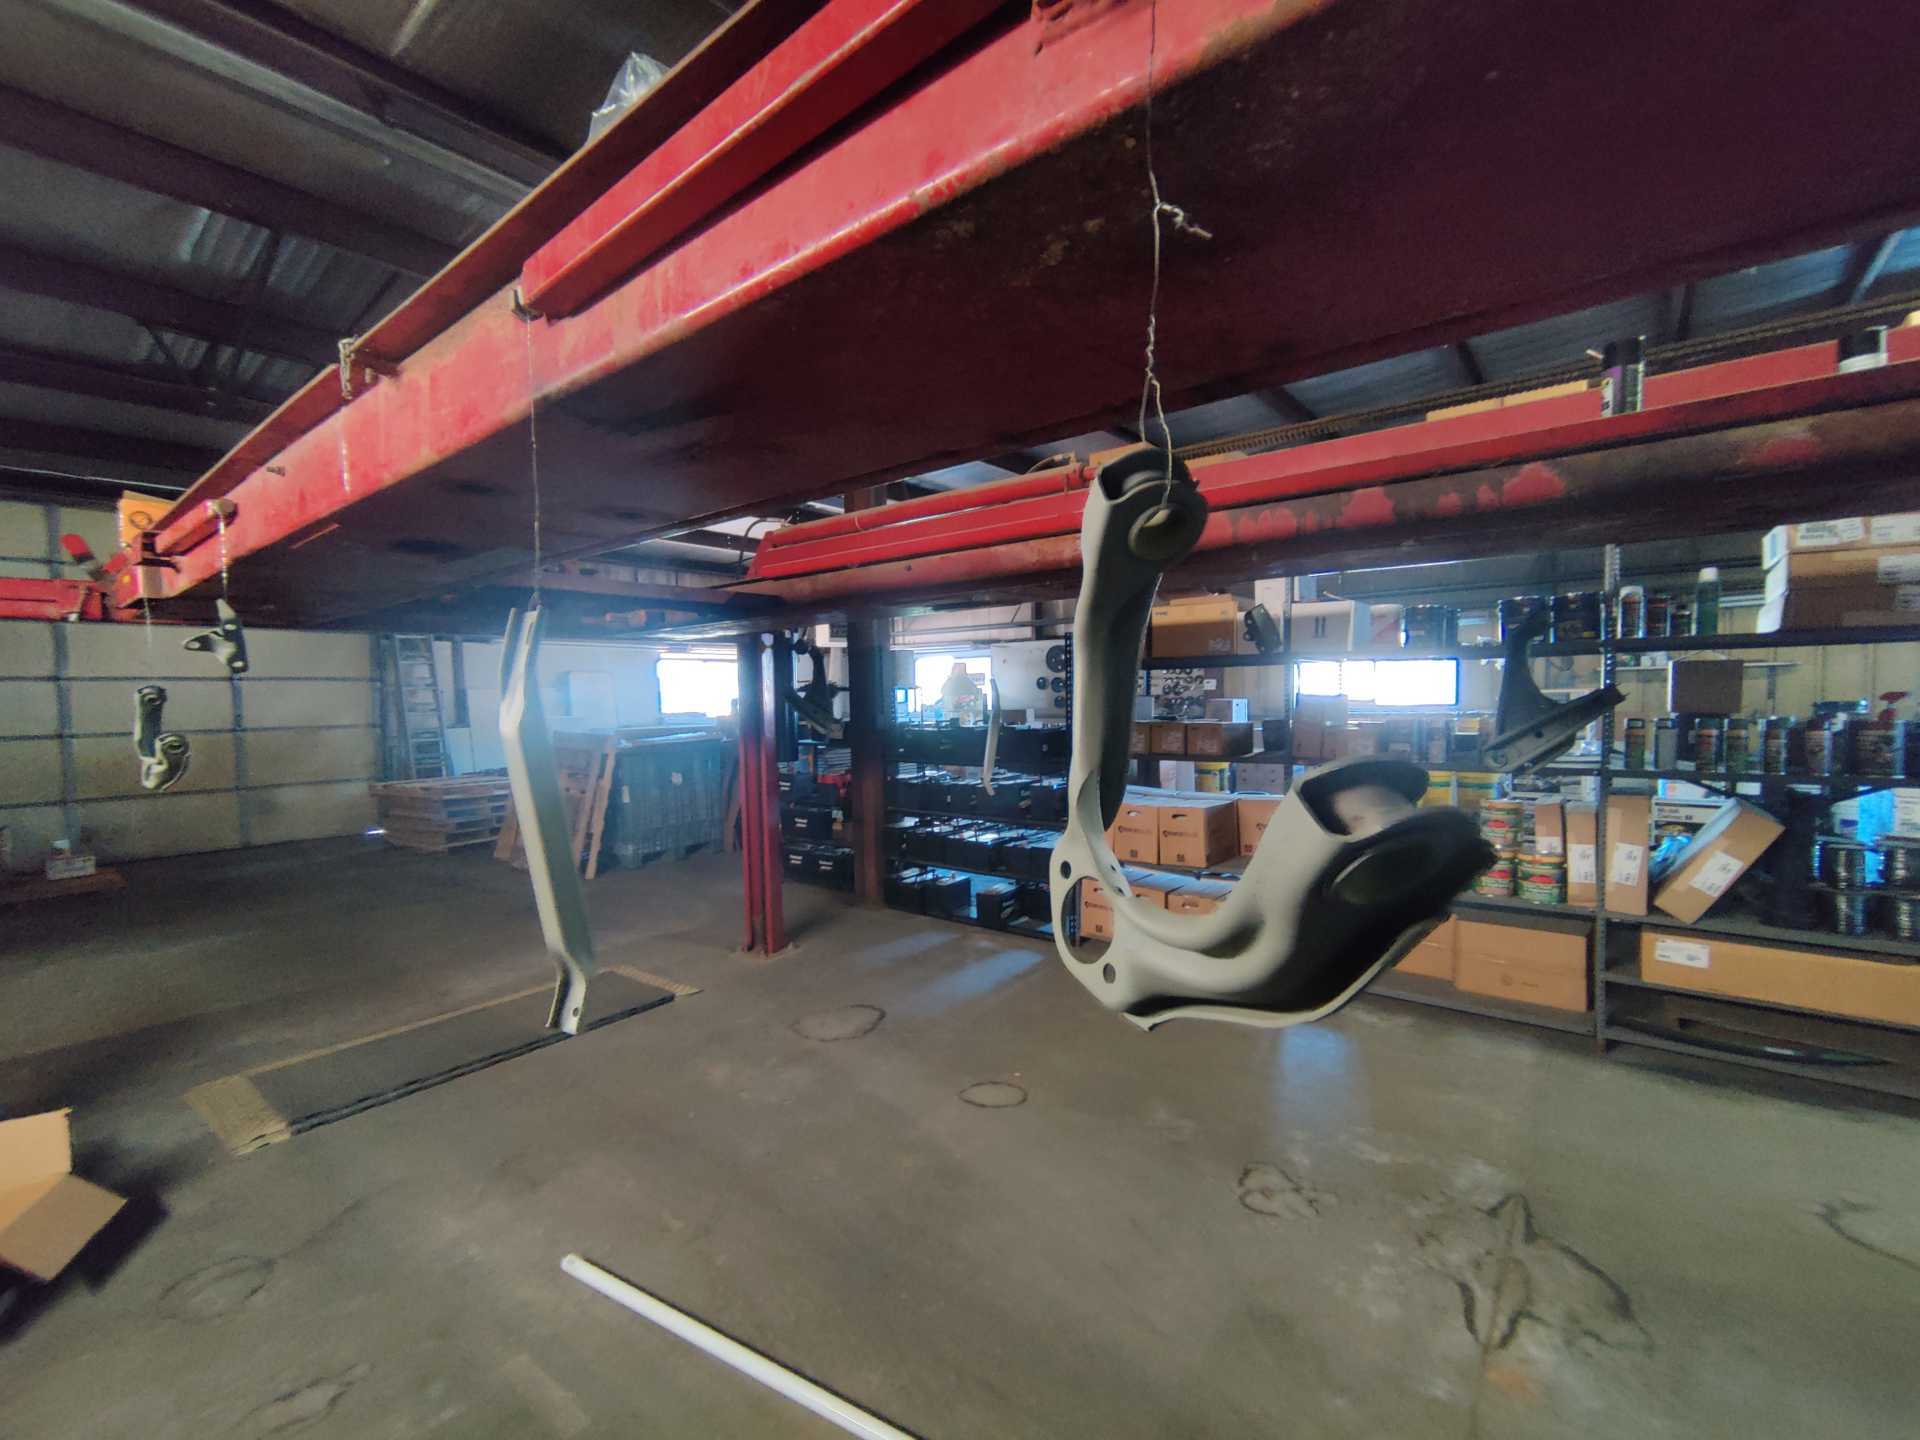
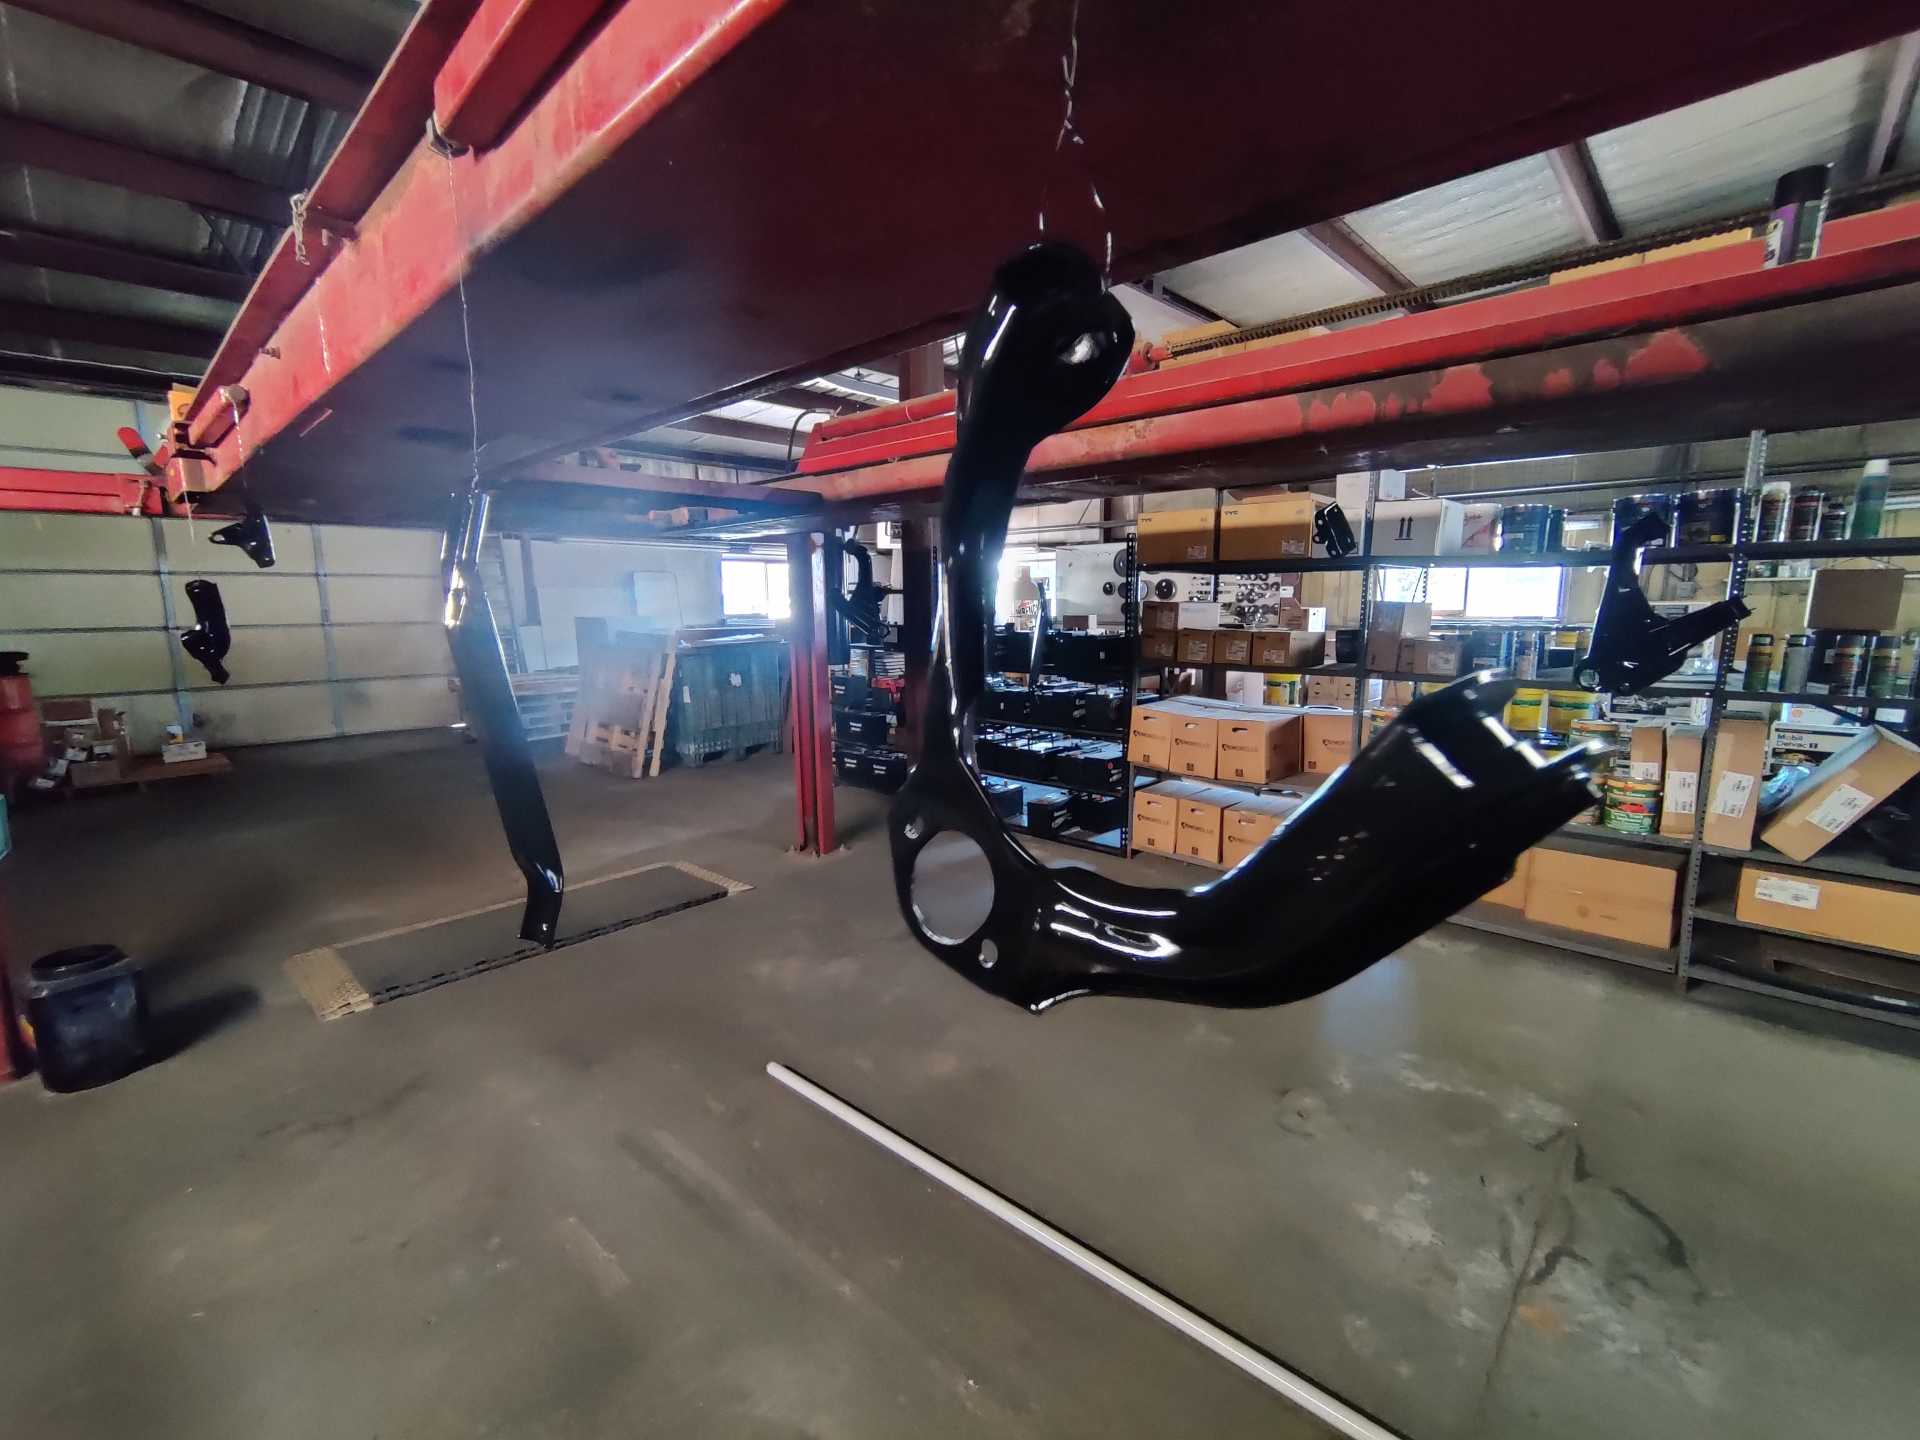
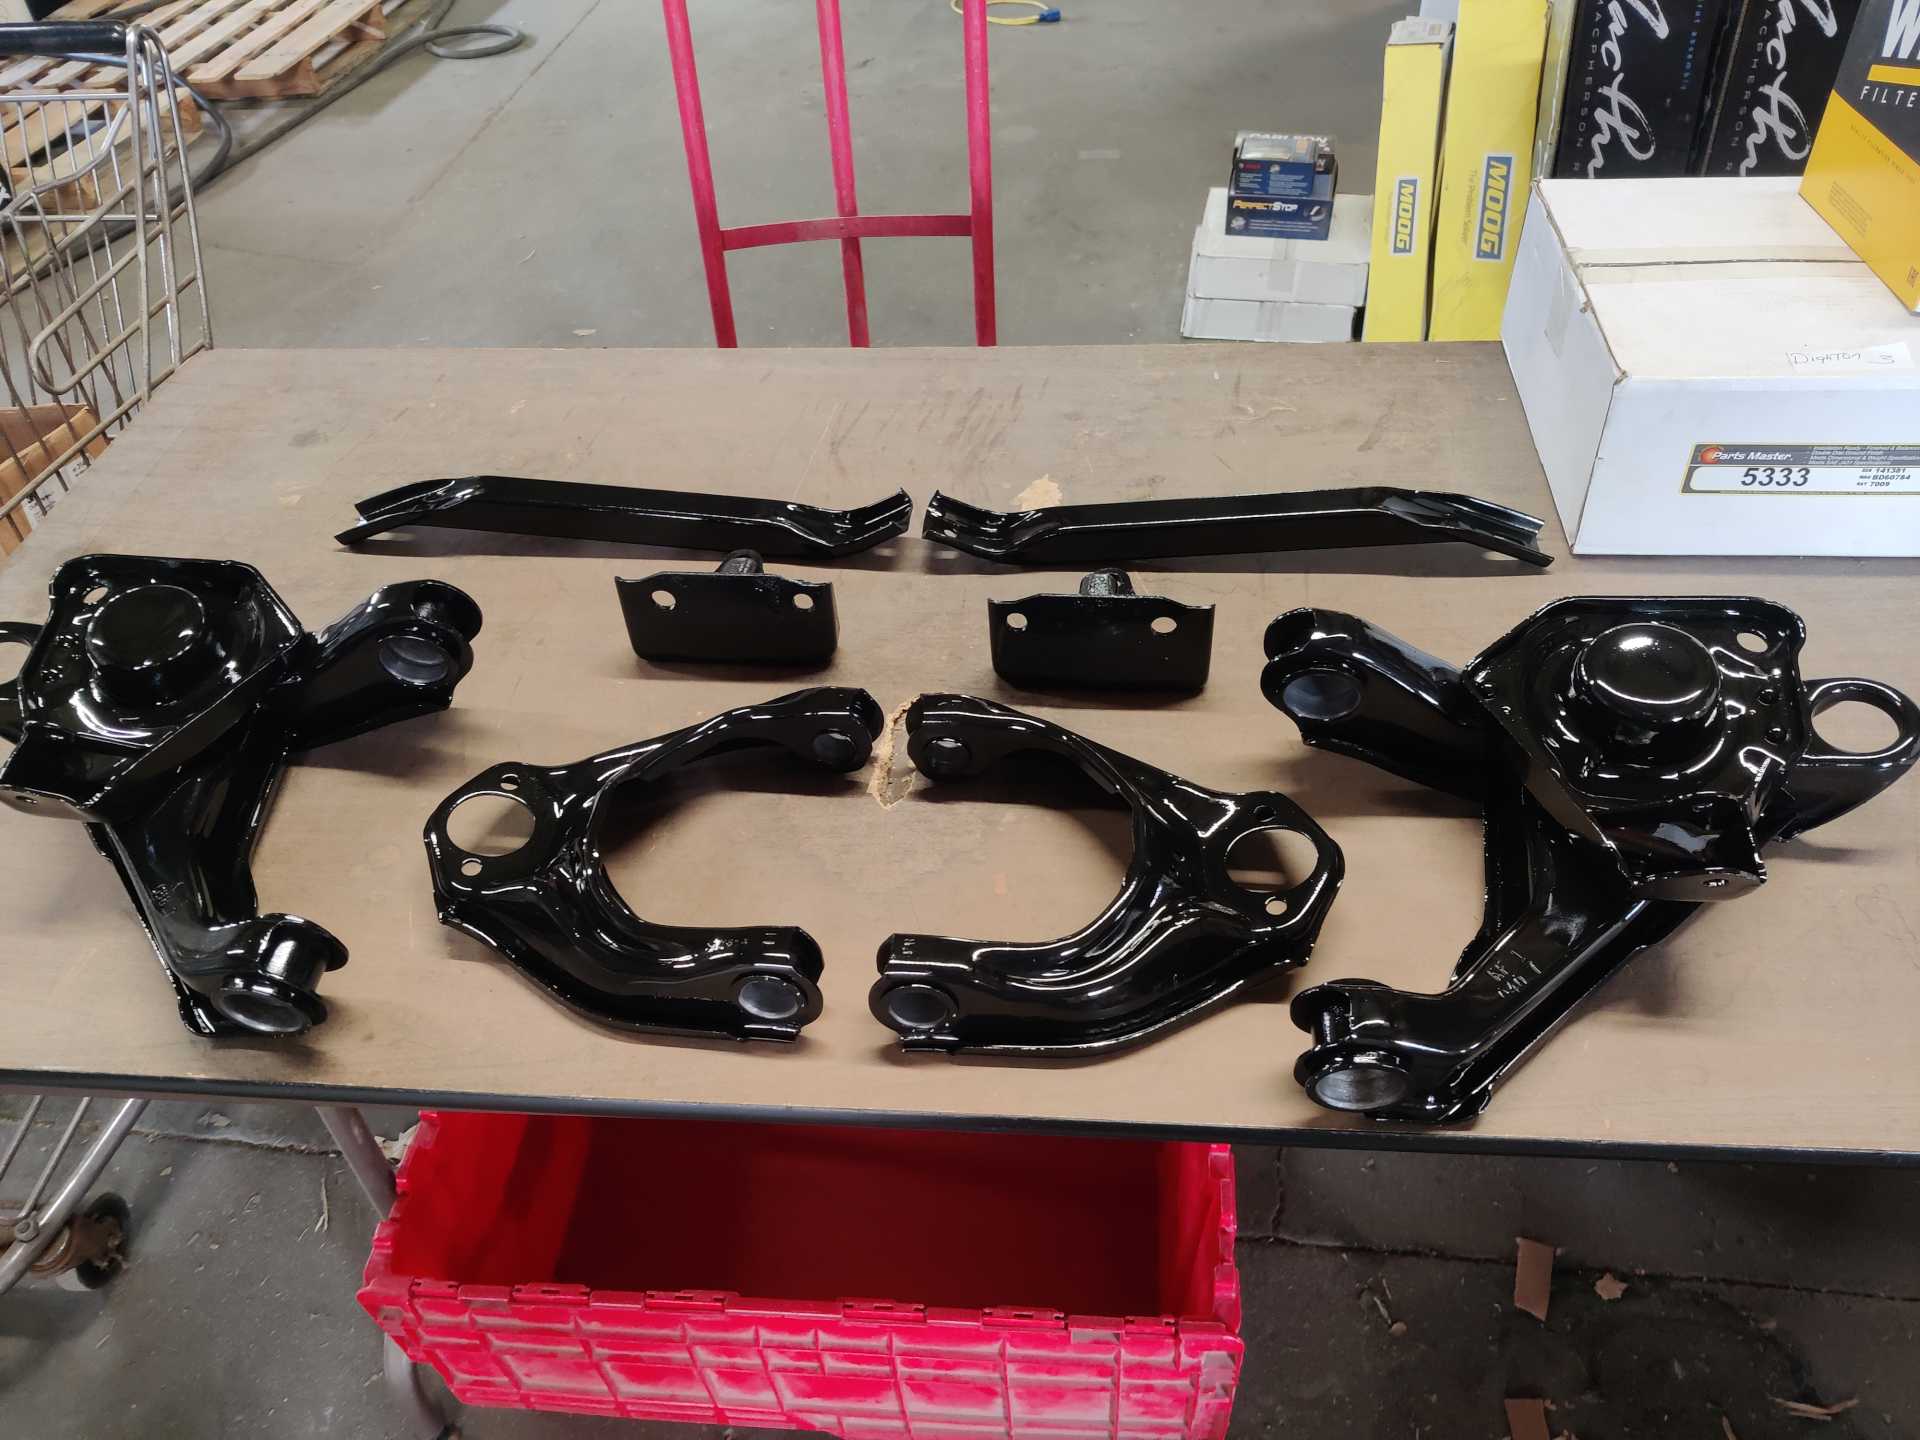
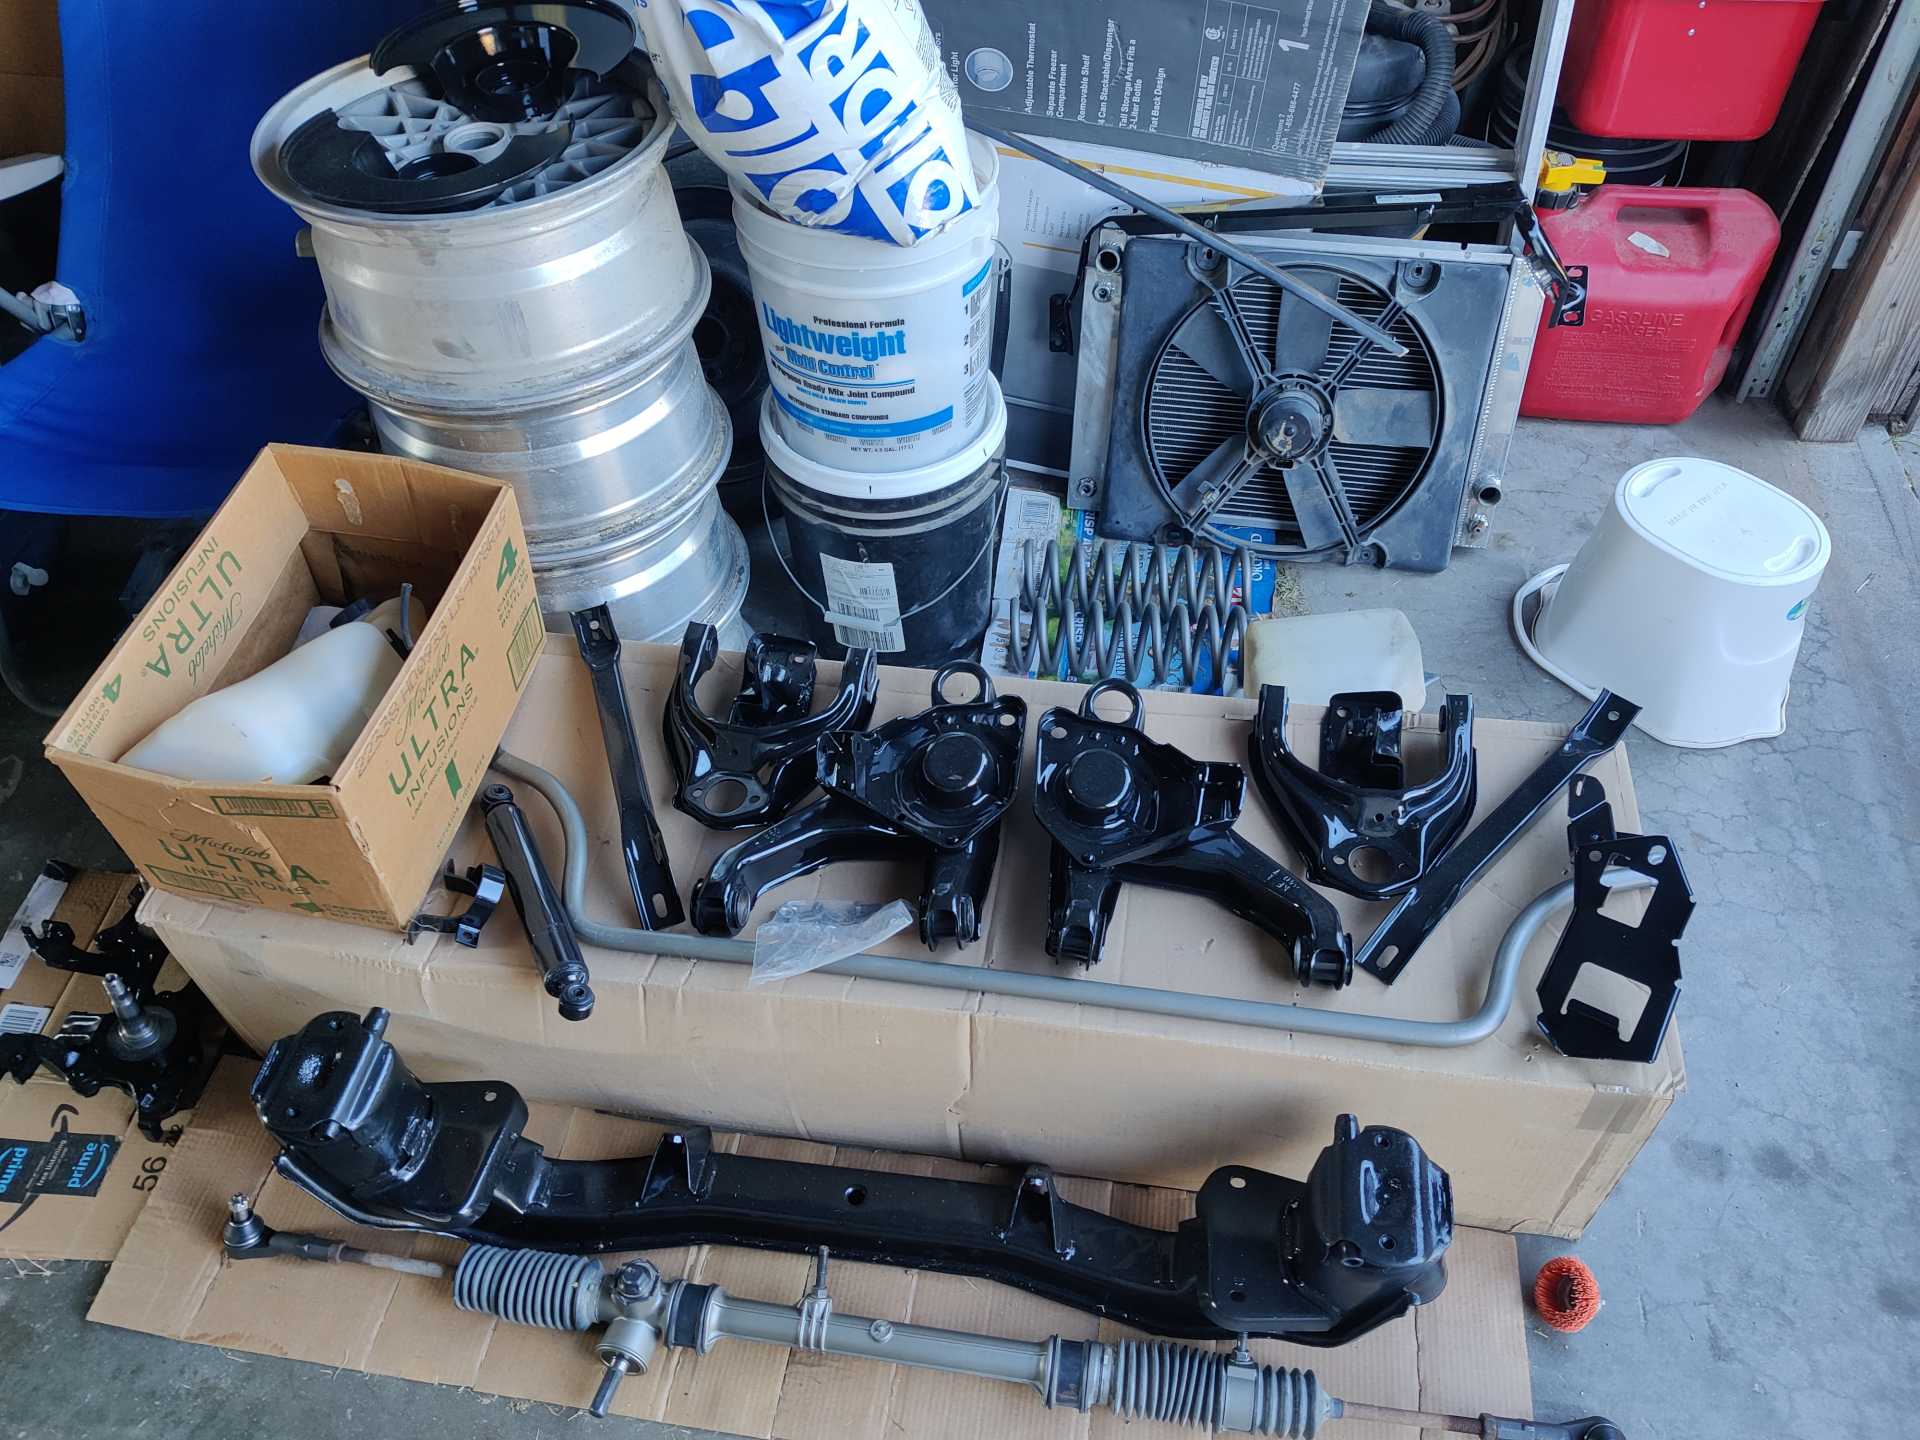
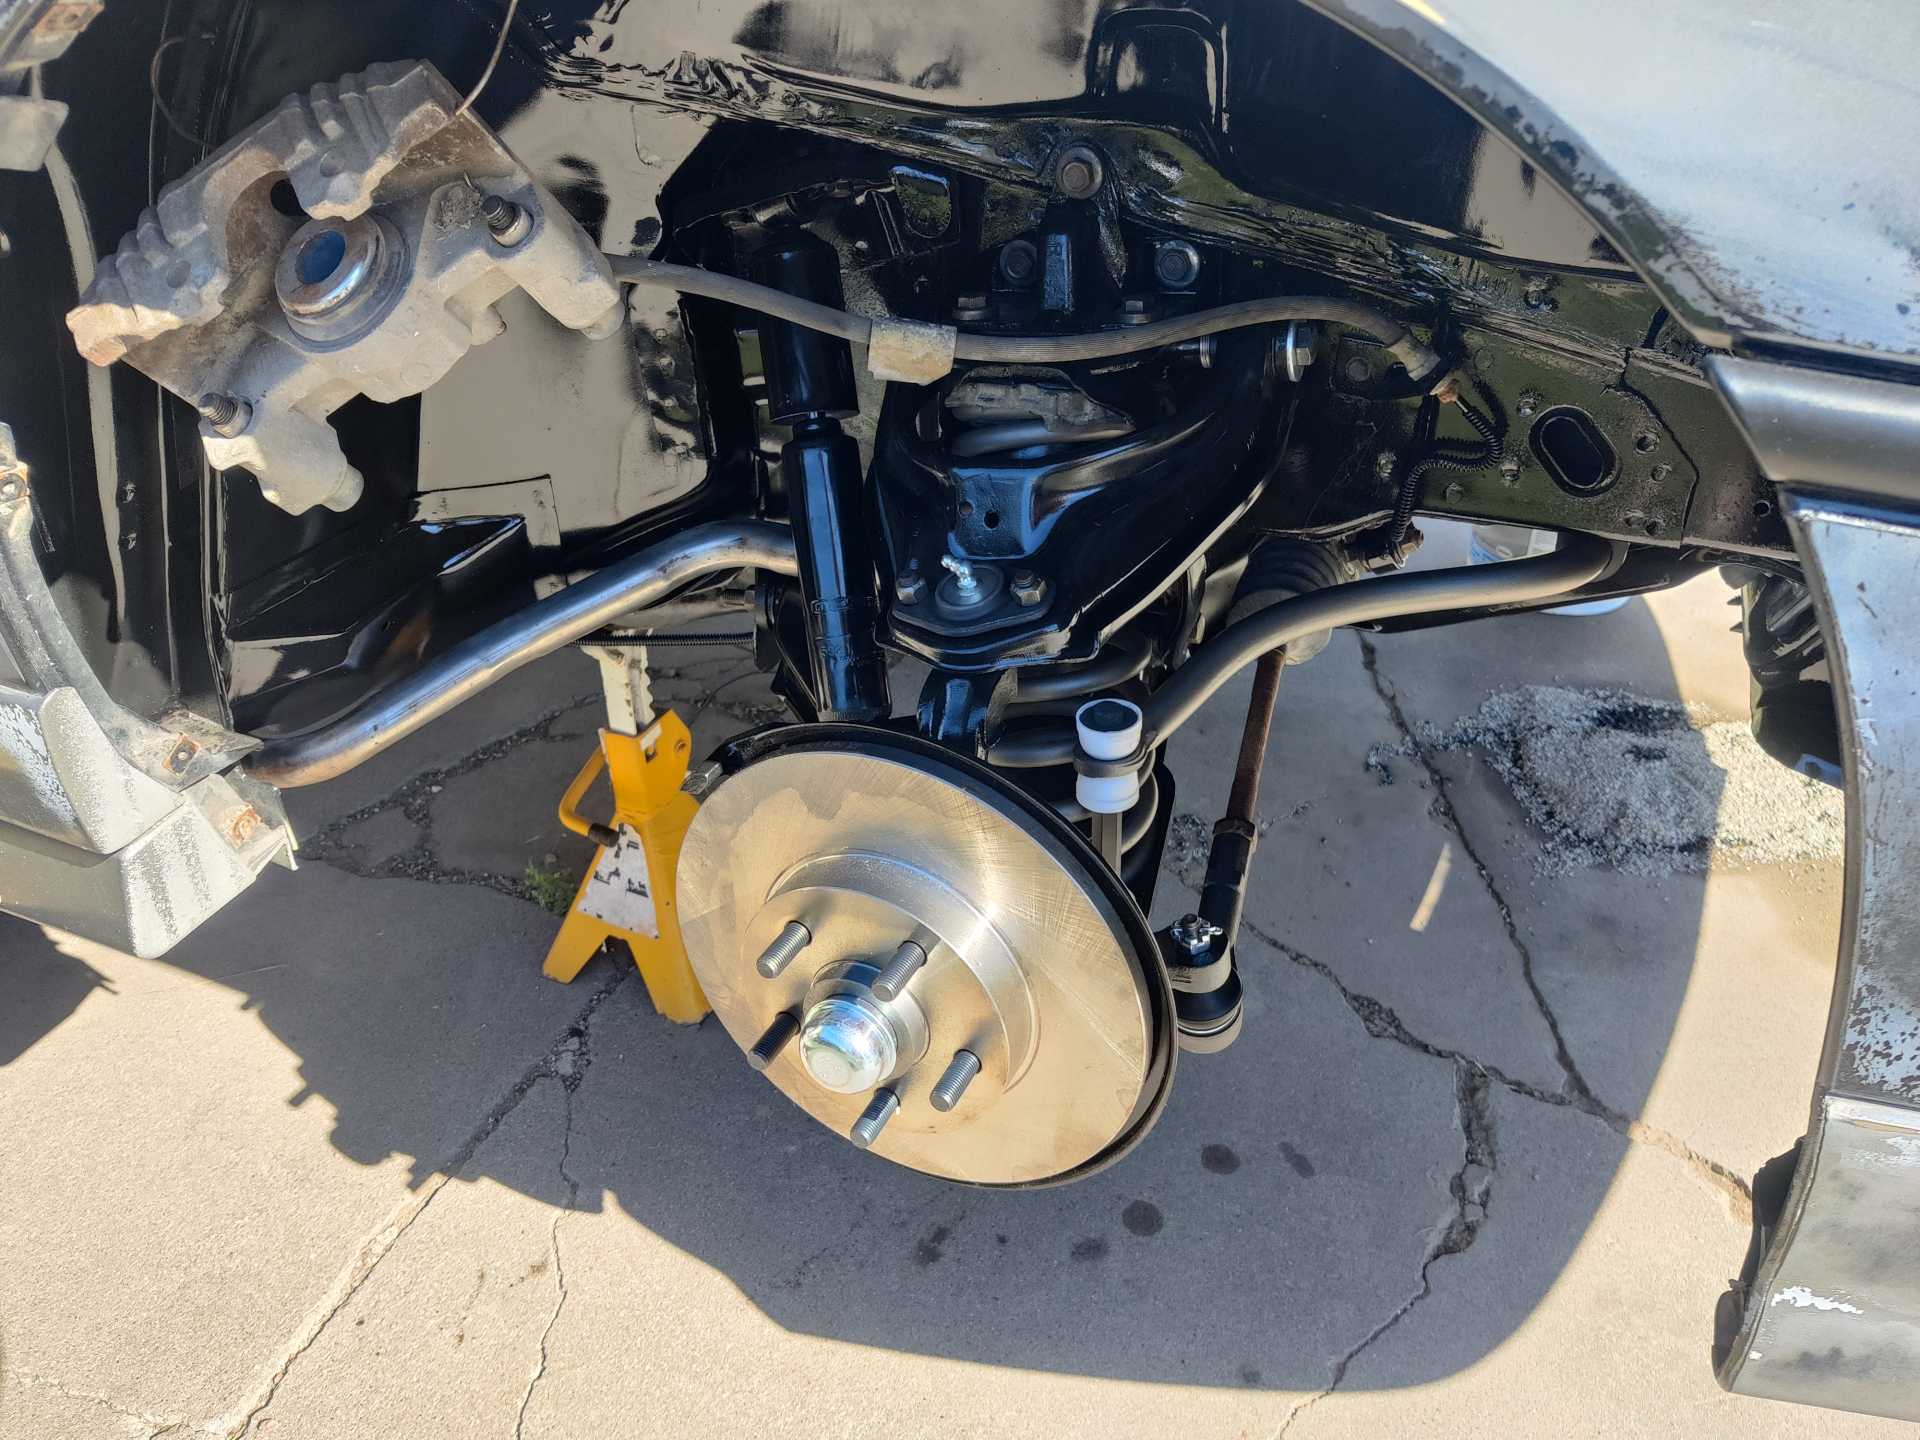
Got another progress drop for everyone. Everything from the front end that could fit in the sandblasting cabinet got blasted then sprayed with self-etching primer. The bigger items were just sanded down and prepped for paint. The rubber bushing were burned and cleaned out. They will be replaced with polyurethane bushings from the Fiero Store. The steering rack, sway bar and springs were painted cast coat iron and then gloss black for everything else.
Yea I'm more than likely going to scratch up the lower control arms getting the spring back on but it'll be okay. There is still a broken bolt in the frame that needs to come out and I need to figure out if I'm going to paint or powder coat the rims. The exhaust needs done too for it to be street legal but at least around the car show time, the police don't seem to mind the volume.
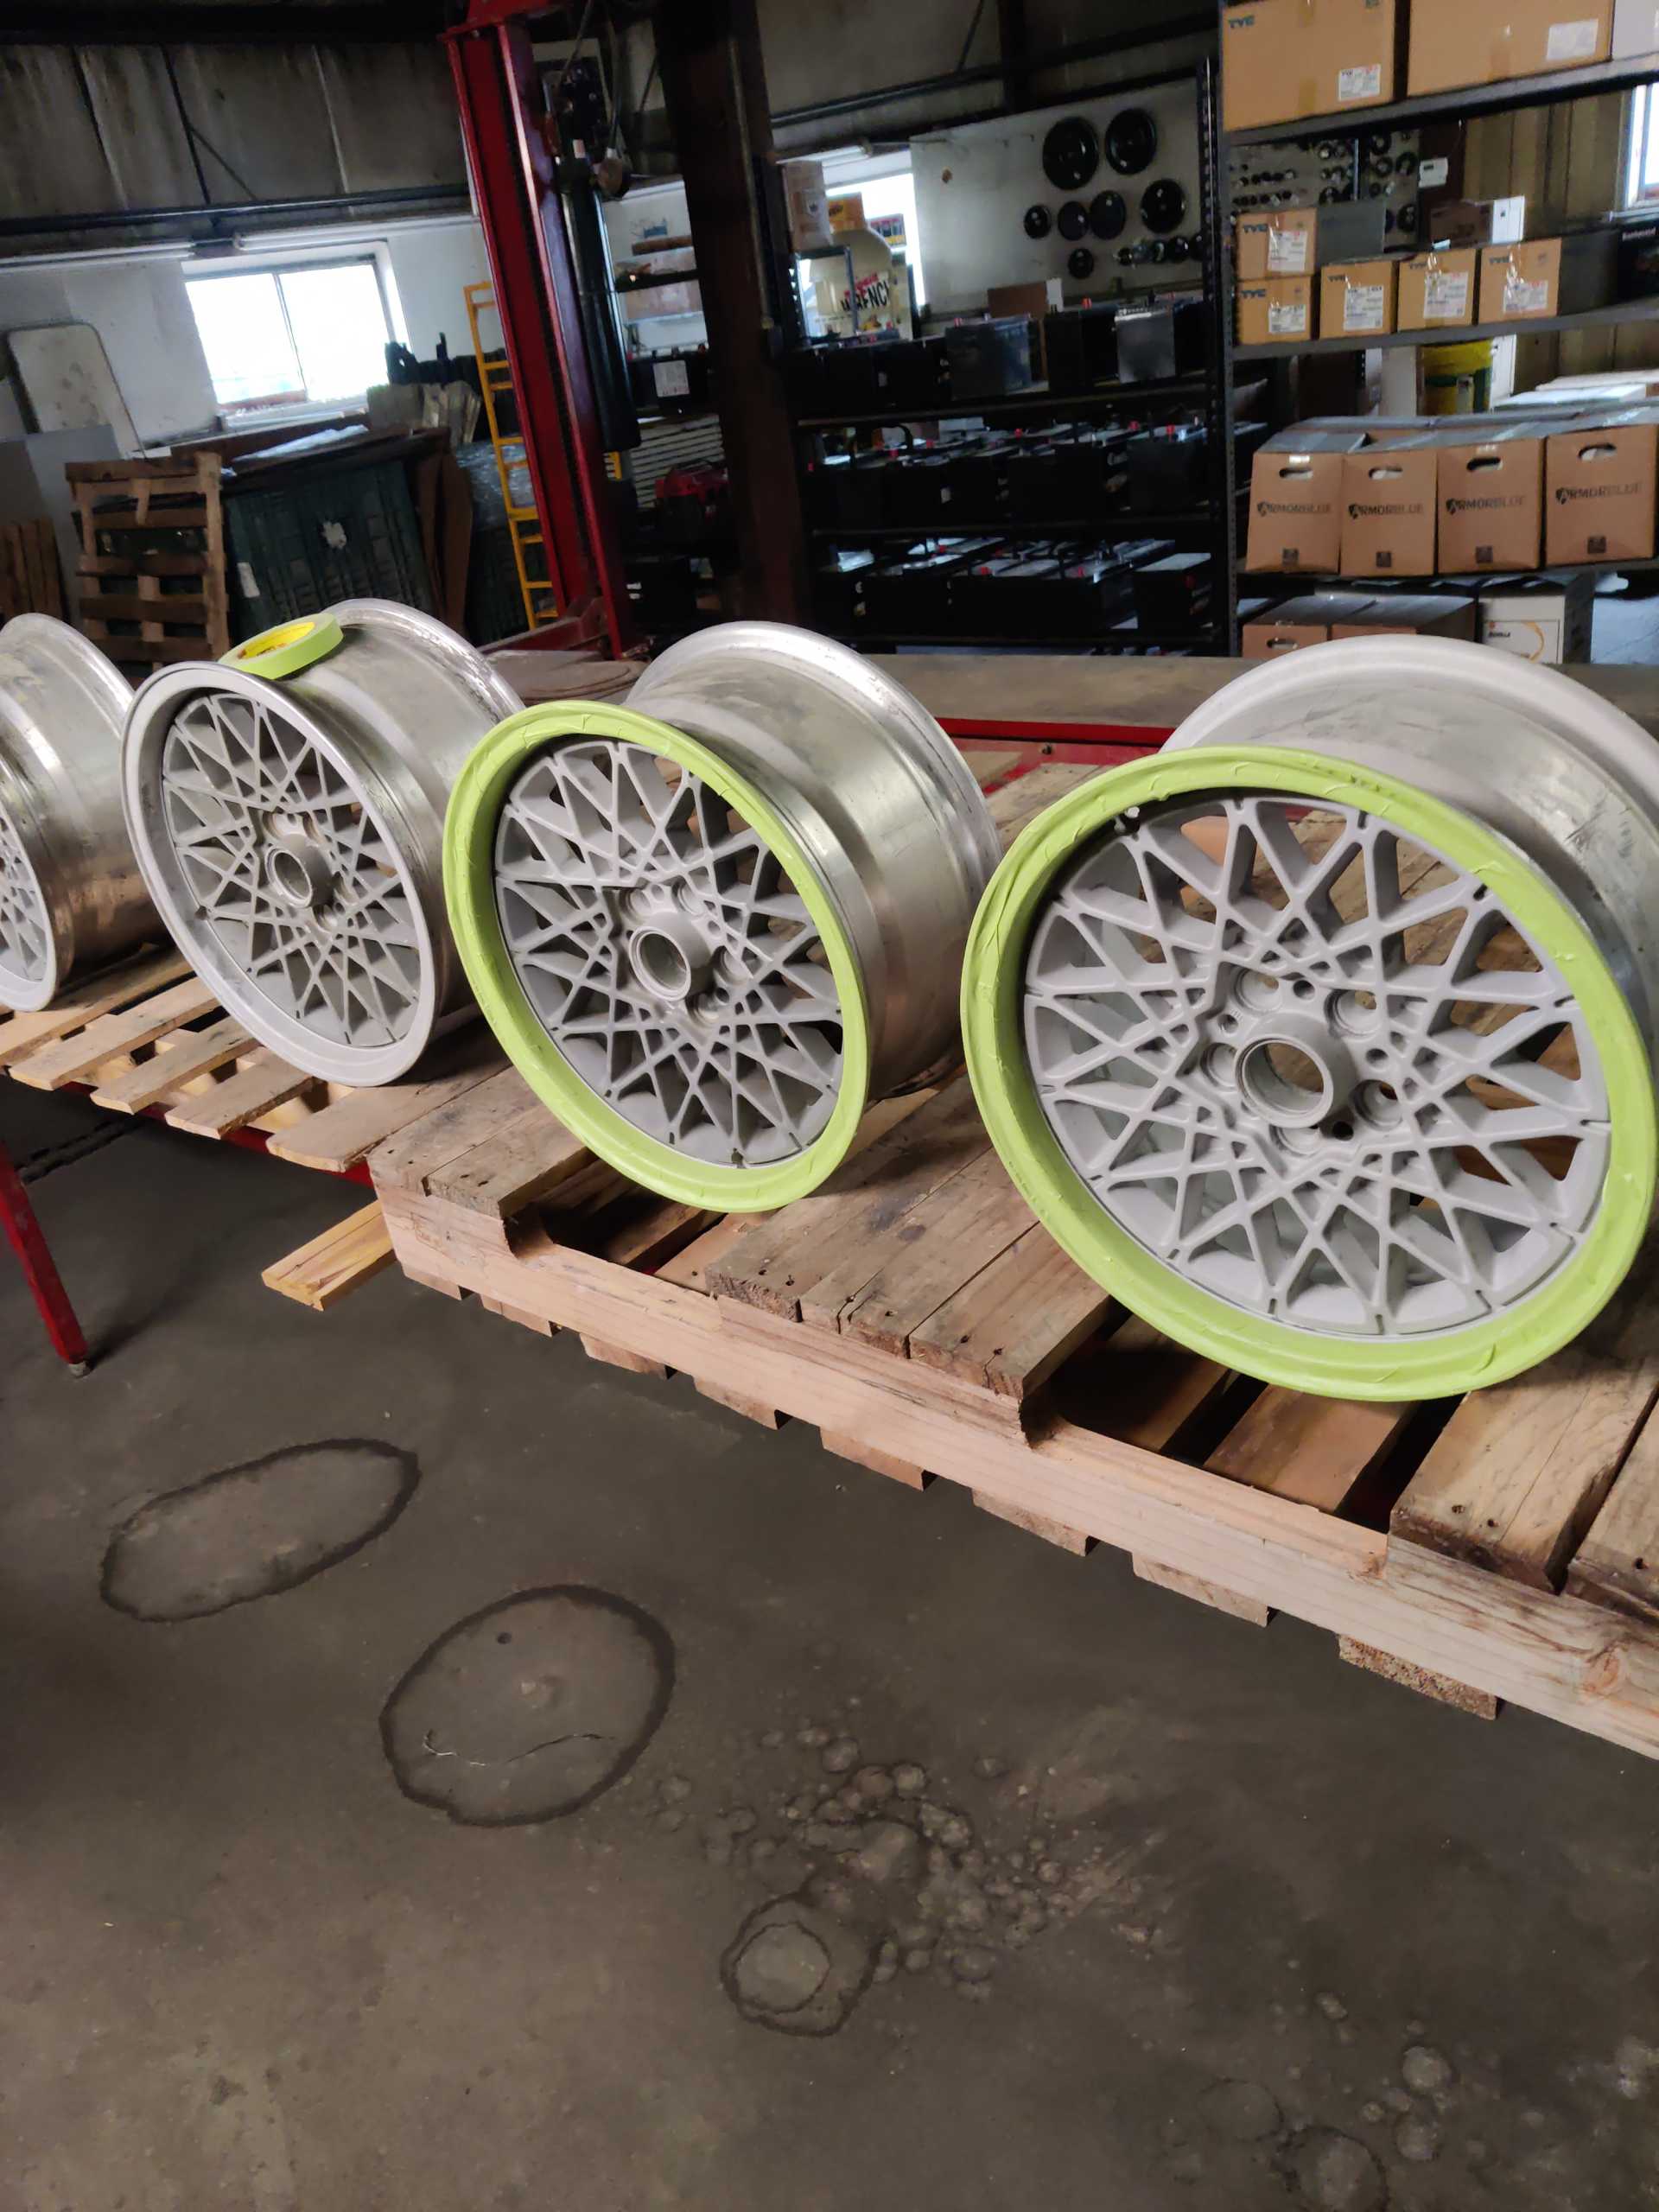
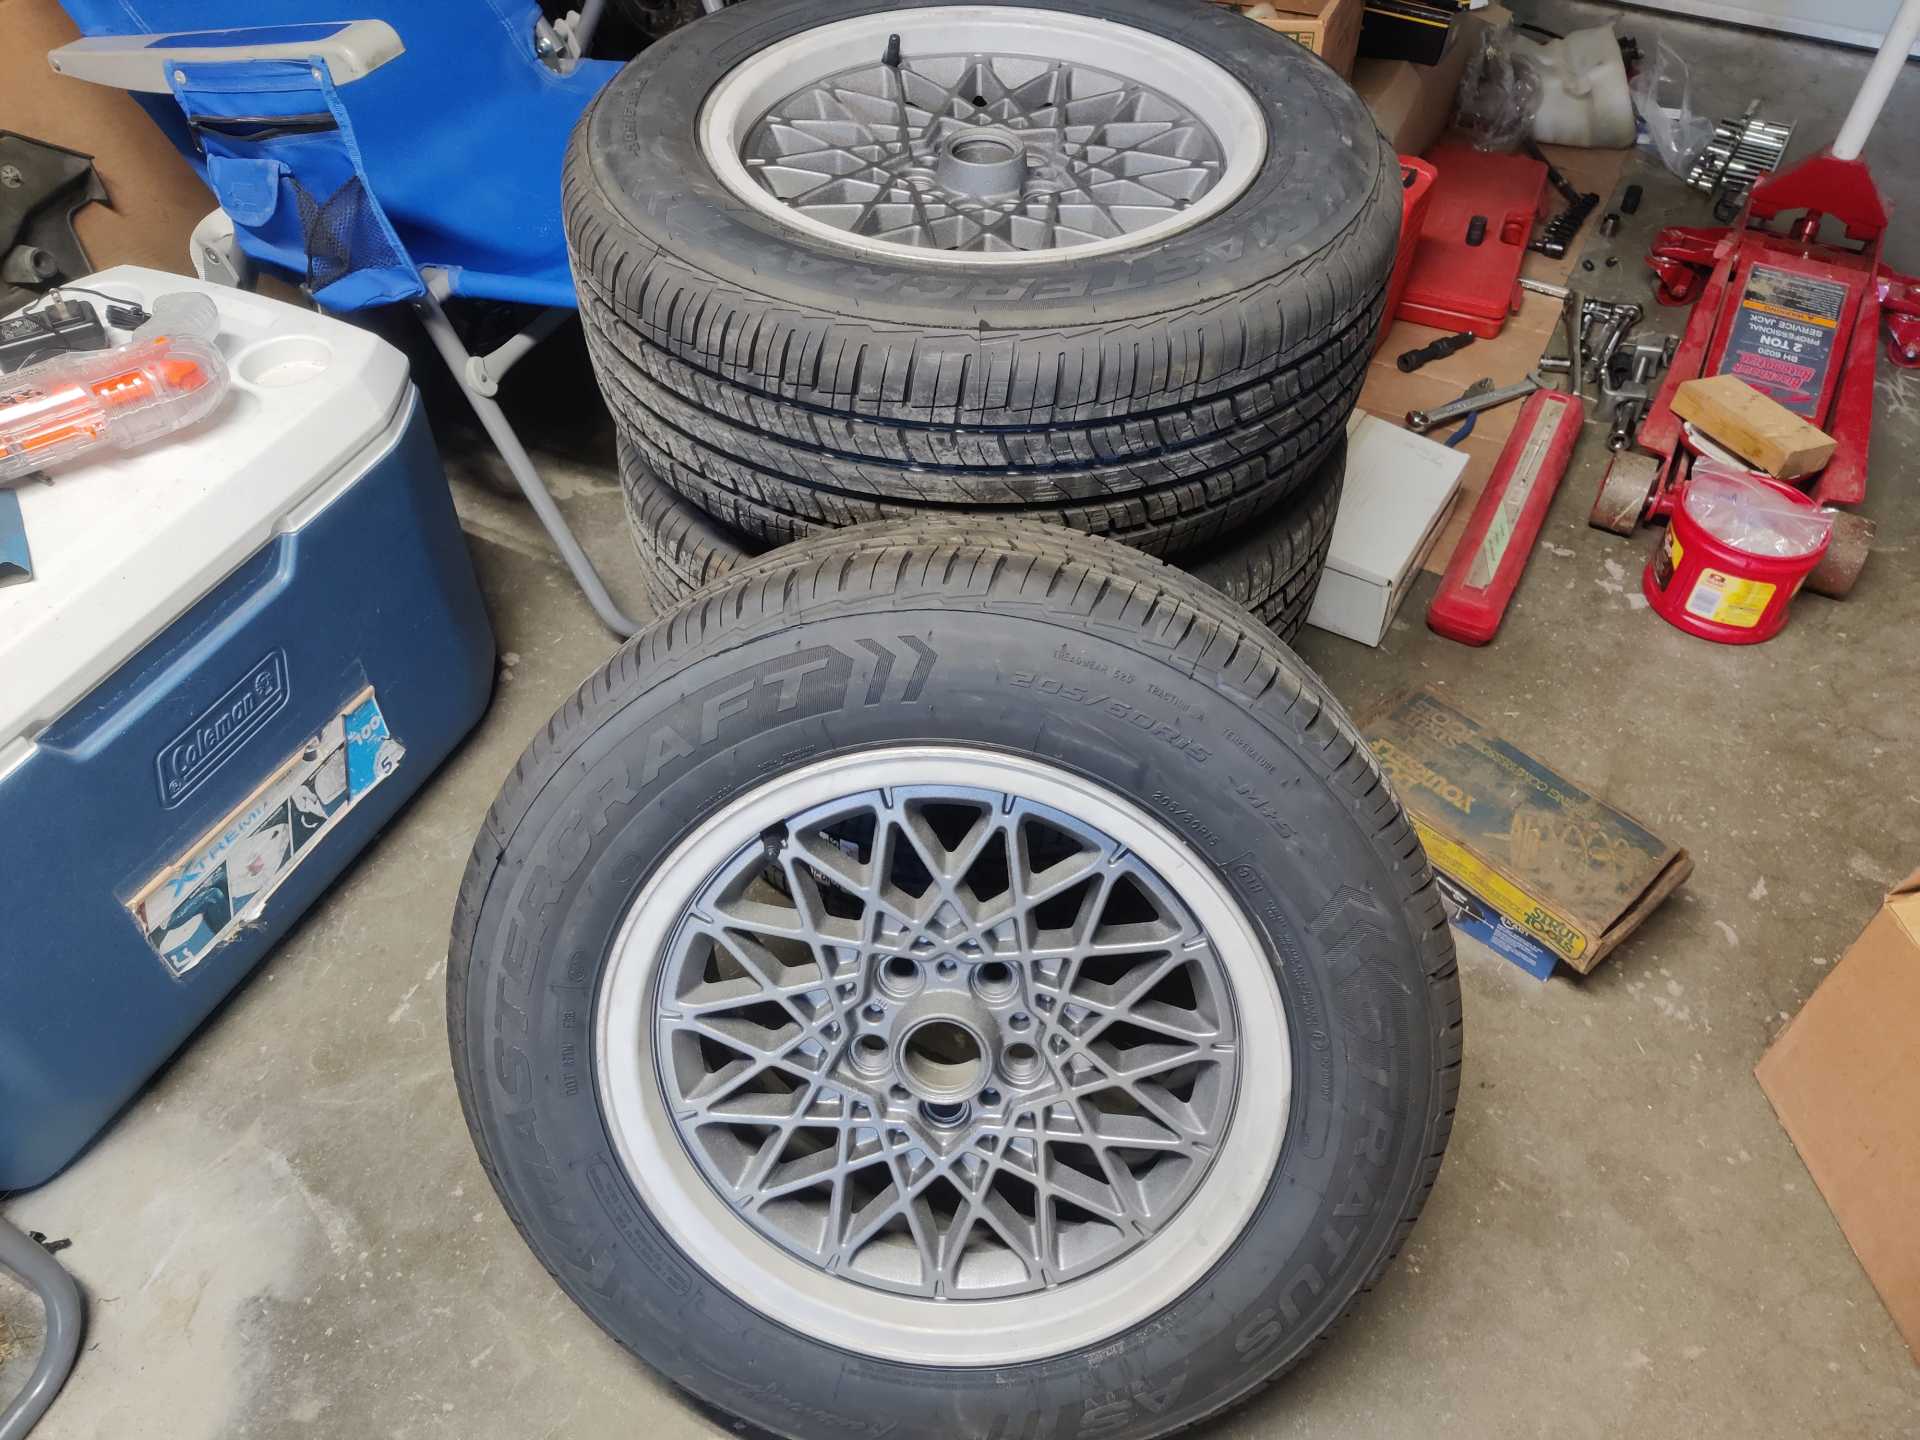
I've known about our local car show for quite some time so I don't know why I do this to myself. The last month or so before it I rush to get things wrapped up to make it to the show. I'm still fairly confident my wife and I will make it but it's on Saturday and today is Tuesday. This is where I'm at. The rims are going to have to wait for a more professional look. I media blasted the outer lip and lightly blasted everywhere else. Then taped them up and sprayed them with Graphite flavored wheel paint.
My plan with the rims was to sand and polish that lip and then powder coat the middle but it's going to have to wait. I ended up having to drill out two of the three bolts that broke disassembling the front suspension. Now I'm reassembling. Getting the spring in place without scratching everything up wasn't as difficult as I thought. I used mechanics wire to help me bend the spring. This was pretty sketchy too as you'll need to trust that wire not to break.
I'll hopefully get the rest of this side finished up tonight and keep plugging away at it until this weekend. Gosh I can't believe I did this to myself again this year. Maybe next year I'll have a better game plan. Or just not have so much stuff to do.