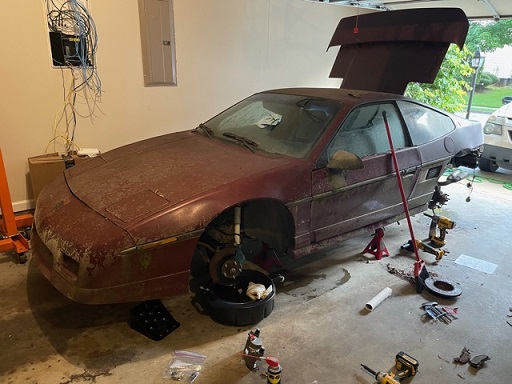
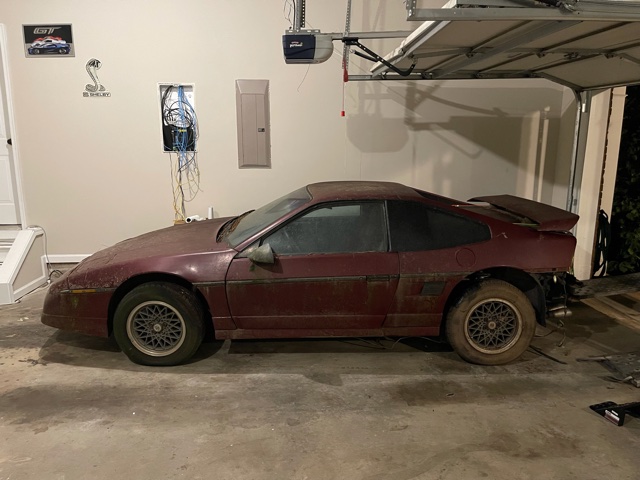
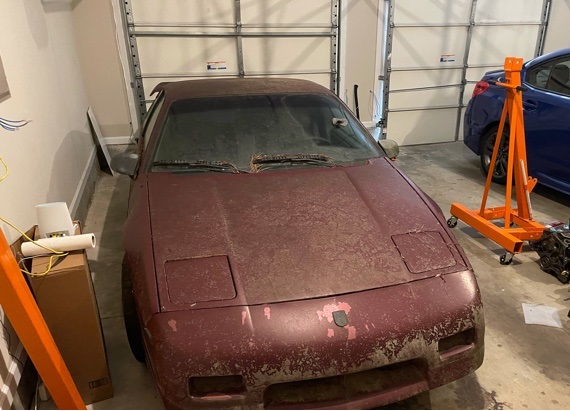
I was recently given an opportunity to pickup a 1987 Fiero GT that has been sitting for around 8 years (estimated). The previous owner decided to attempt a 3.4 swap on the car but was never able to finish it. He needed the car gone due to county rules of it sitting in his driveway. So, he offered it to me for free!
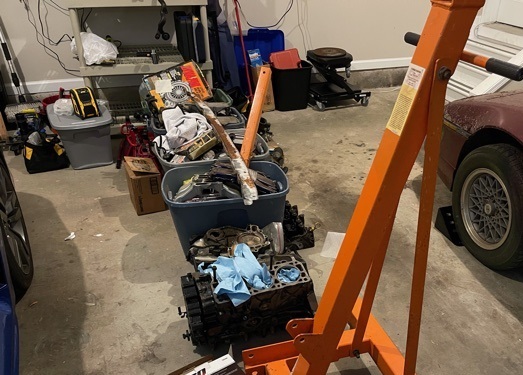
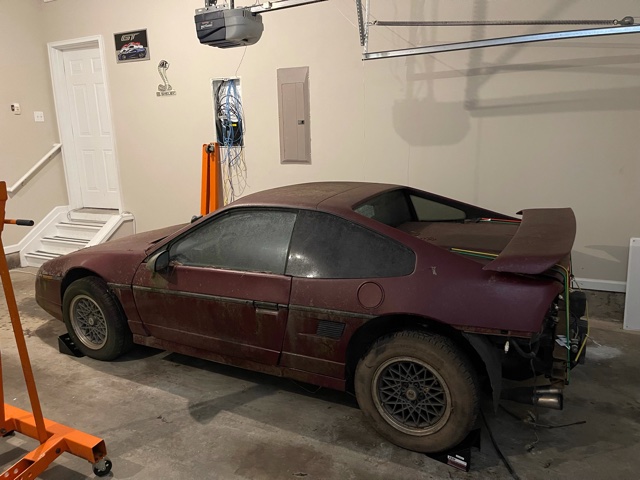
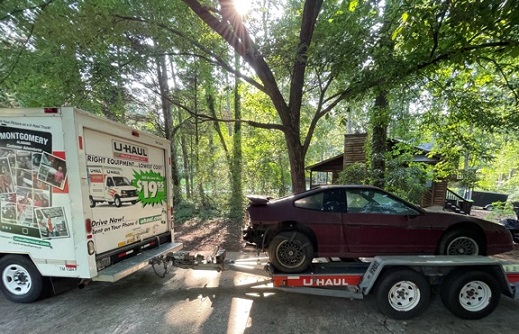
I went out one weekend to get the cradle placed back in the car (without the engine) in order to get the car good enough to drag up onto a trailer in order to get it into my garage. We were successful in the endeavor despite a few roadblock. And now, the Fiero sit happily in my garage with all of the spare parts, besides the rear bumper and original 2.8 engine block. The last few parts I will pickup once I get everything else organized and find a place for them.
The 3.4 block has been rebuilt already so its a matter of getting everything put back together and put it in (maybe)
The paint is shot, the suspense needs work and one of the stud studs is stripped. One cradle bolt capture nut came off making it impossible for me to get the cradle out, so I will be getting the Rodney Dickman kit to make the rear cradle bolts much better. Just need to figure out a solution for the stripped store mount bolt. So, the plans for the car is to: 1. tear everything down and replace everything old with new and to restore any parts that cannot be replaced 2. upgrade and update everything I can. Suspens, breaks, interior items such as radios gauges so on and so forth. 3. Perform and engine swap to finish the 3.4 swap. I am debating on either 3800SC with an F40 or F23, or doing a Honda k24 swap. Still very undecided but I want 100% reliability, between 300-400 HP, and ease of finding replacement parts. 4. Get the body panels repaired and painted. Thinking about going with the Gold color the Fiero came with (since I used to own one in that exact color) with a twist to it (going to work with my paint guy to thing of something neat)
So that's where I stand right now. I am going to need some insight on breaks, suspension, wheels, interior, and engine upgrades. I am trying to keep the car overall stock looking (because I love the look of the Fiero completely stock. But wheels HAVE to be upgraded for better tire choices, looks, and overall better performance.
More will follow as I start doing some work on it! Any advice/info on the upgrades or restoration tip is greatly appreciated!
I ordered a few things from Rodney Dickman yesterday. All new cradle bolts, his steel top strut mounting plate for the rear, the floating cradle bolt kit so I can get the broken capture nuts out and get a better setup in there for a more reliable way to remove the cradle.
Also, after going back and forth about swap options with a best friend, we both came to the conclusion to finish putting together the 3.4 engine and putting that in to get the car road worthy. That way, I can enjoy driving the car, make it easy to get to shops for things if needed, and piece together stuff needed for the full swap I want to do. Then get that swap done and sell off the 3.4 complete swap. so I also ordered Rodney deskman's starter relocation jig so I can get that done while I have the engine out.
Pics will start flowing in once I get the parts in and Strat replacing old with new!
Looks like Iv locked down a set of fully assembled struts! That one issue handled.
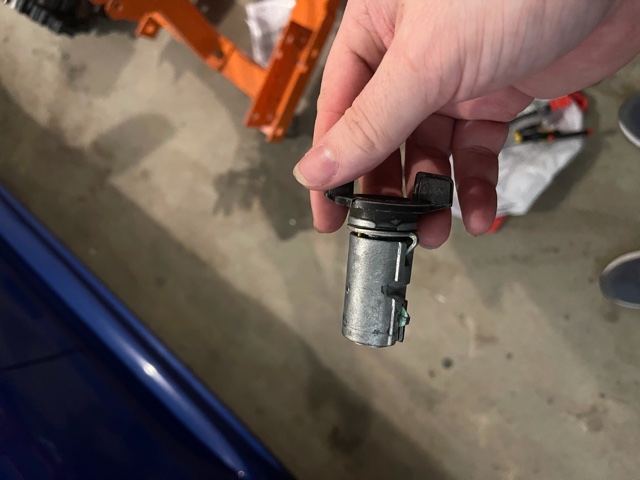
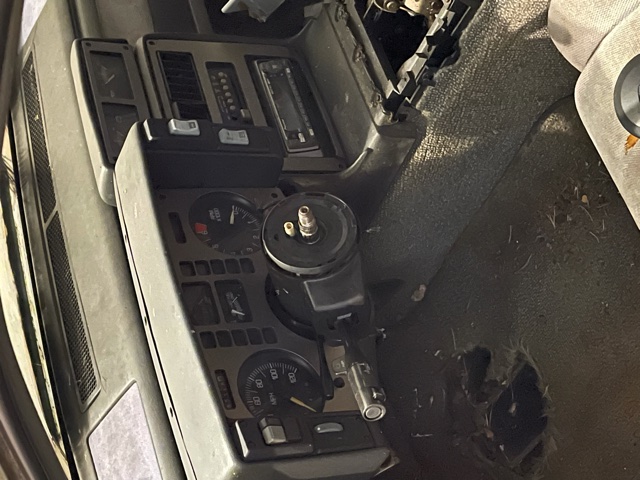
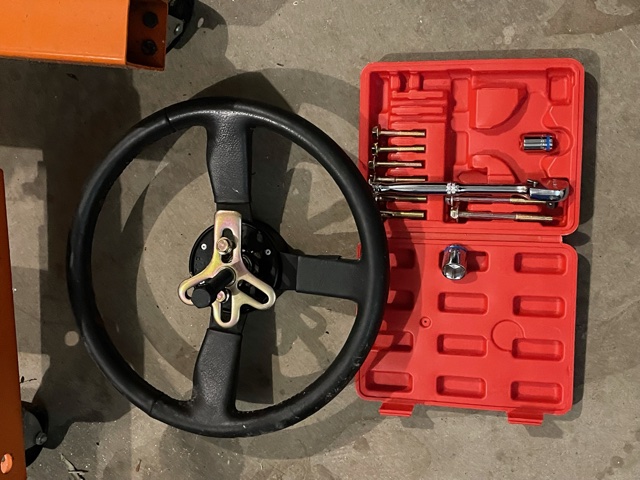
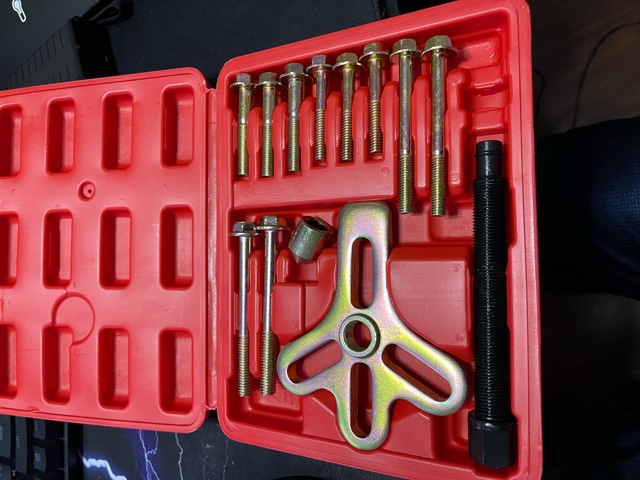
Next I’m waiting on a steering wheel puller to arrive in the mail. This will let me replace the ignition cylinder so I can 1. Have a set of keys to start it and 2. Be able to actually turn the wheels. Then it’s on to the other locks and the cradle bolts once the stuff from Rodney dickman arrives.
Also, after going back and forth about swap options with a best friend, we both came to the conclusion to finish putting together the 3.4 engine and putting that in to get the car road worthy. That way, I can enjoy driving the car, make it easy to get to shops for things if needed...
Probably a good idea. You might even find that you enjoy the car just fine with a 3.4, and don't really need to go through the added stress/expense of an engine swap.
Probably a good idea. You might even find that you enjoy the car just fine with a 3.4, and don't really need to go through the added stress/expense of an engine swap.
we shall see. There is always that possibility. Main reason im going to just finish the 3.4 swap is because the previous owner did have the block and heads fully machined and built by a shop (and provided the receipts for the proof)
So that just make it much easier to get the car going so I can restore everything else.
But, with all that said, I do tend to lean toward more power....hell my 19 mustang GT has around 470 wheel HP and I still feel like it needs more lol
my 19 mustang GT has around 470 wheel HP and I still feel like it needs more lol
If 470 wheel HP isn't enough, what's the point of going through a lot of extra work to swap 300-400 HP into the Fiero? A well-balanced car can still be fun to drive without the mega-power to be breaking things.
quote
Originally posted by spartan_chaz:
Still very undecided but I want 100% reliability, between 300-400 HP
If 470 wheel HP isn't enough, what's the point of going through a lot of extra work to swap 300-400 HP into the Fiero? A well-balanced car can still be fun to drive without the mega-power to be breaking things.
[QUOTE]Originally posted by spartan_chaz:
Still very undecided but I want 100% reliability, between 300-400 HP
[/QUOTE]
you have a good point there. I used to own an 86 GT with the stock 2.8 in it. while it was fun still just didn't have nearly enough "umph" in it. But it was also old and worn out, both engine and suspension. So maybe with a fresh built and all new suspension it may be a different story lol.
So, I have started the process of ordering parts to start getting things replaced on this 87 GT.
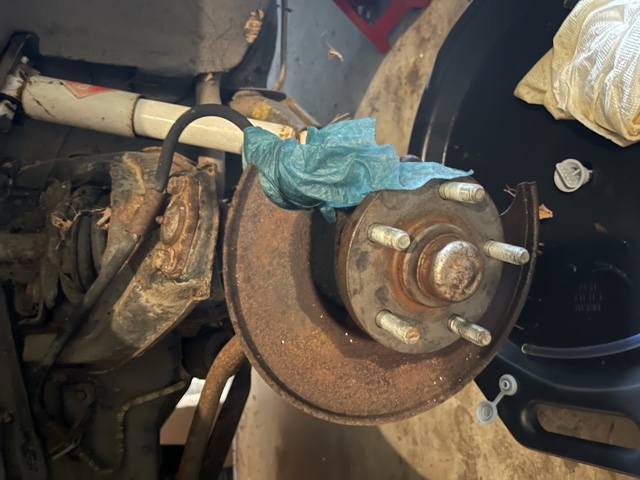
But, first hurdle is the break system. The primary thing I am attempting to figure out is calipers and rotors. I know the front rotors are built in hubs, but i would like to find an option where I can turn those rotors in just hub and use a more normalized rotor setup for future maintenance ease. What are my options?
Todays update. Got the steering wheel pulled off and replaced the ignition cylinder so that i can actually unlock the wheel and turn the front wheels.
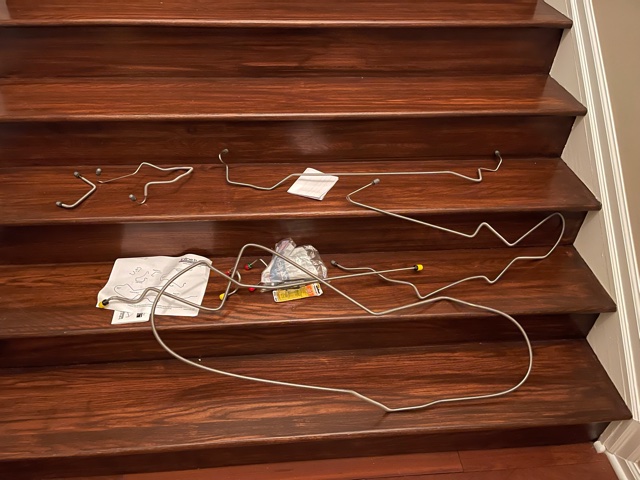
Also, just ordered all new parking brake cables, new rubber brake lines for all four corners, Grand Am calipers, pads and rotors for the front upgrade. Also ordered a new Master cylinder. Next step would be figure out what rear calipers i want to go with and order a set of reproduction metal lines from TFS. That will cover the full brake system refresh other than fluid.
Pics to come once parts start arriving and HOPFULLY start cleaning and installing stuff
[This message has been edited by spartan_chaz (edited 07-07-2021).]
Since it appears that you'll be posting lots of photos (which is great!), let me give you a tip. After each image link is created in your post, hit your Enter key twice before you add another image link. This will ensure two things... First, the images will present properly (It may not be as apparent on a phone, but on a monitor it's not good.) Second, it will eliminate the space in the third image URL address that is somehow created (I've seen this a lot), which then results in what you see in my quote above.
[This message has been edited by Patrick (edited 07-07-2021).]
Since it appears that you'll be posting lots of photos (which is great!), let me give you a tip. After each image link is created in your post, hit your Enter key twice before you add another image link. This will ensure two things... First, the images will present properly (It may not be as apparent on a phone, but on a monitor it's not good.) Second, it will eliminate the space in the third image URL address that is somehow created (I've seen this a lot), which then results in what you see in my quote above.
I've copied your image links, and corrected the one corrupted URL. Click on EDIT on my post and you'll see exactly what I'm trying to describe. If you wish, you can copy your image links from my post and use them to edit/correct your previous post. I'll delete the images in this post after you've had a chance to edit yours.
Thanks for the pointer! just edited!
[This message has been edited by spartan_chaz (edited 07-07-2021).]
Received my order from Rodney Dickman. This included top strut mount plate, the 3.4 Starter relocation Jig, all new cradle bolts, and the floating cradle bolt kit to repair the old and broken capture nuts for those bolts.
Also placed orders for ebrake cable connector and equalizer, and full set of replacement metal brake lines from TFS and Master cylinder (because my other order for one got canceled), banjo bolt and brake line washers, and 2 more grand am brakes for the rear upgrade.
All that it left to order for the brake system is, S10 booster upgrade, Seville upgrade bracket (which he said he would have a set ready next week sometime), wheel bearings, and brake fluid. Once I have all of those in then the work begins!
Got the ebrake equalizer and connecter along with new Stainless metal brake lines set from The Fiero store! Also, things will take a bit longer. I got ahold of a guy that makes "upgraded" front hubs. They are much lighter than cut factor rotors, better fitment, and has a better bearing setup. Should also be ordering the rear seville brackets this week.
So list to order as of right now is as follows: Both rear wheel hubs/bearings Booster upgrade Seville brackets Seville calipers Seville pads/hardware kit Front hubs upgrade new set of lug nuts and lug nut caps spindle nuts and washer
Since I cant find replacements for the distributions block/blocks, ill probably be do a super deep clean of them the best I can.
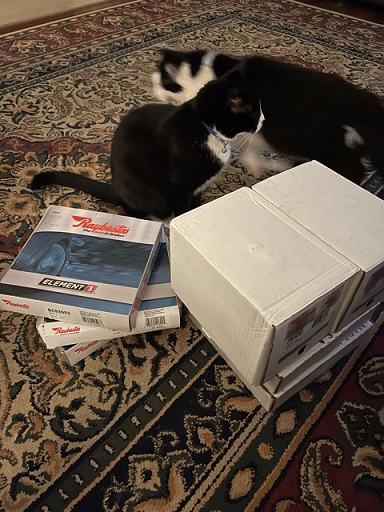
Also, won an auction from a local auction site yesterday for a set of 3 metal/wood shelves for my garage! This is gunna help keep everything organized and out my the way so the wife wont be as annoyed walking in there LOL
[This message has been edited by spartan_chaz (edited 07-15-2021).]
So Thursday I had my best friend over and we did some work on the Fiero! But it also brought some good and bad news with it.
We got the car up on all for Jack stands and remove and washed all four wheels. many spiders were purged.
We were going to remove the rear wheel hubs/bearings but soon found out we did not have a 30mm socket to get the spindle nuts off...so that will be a trip to the store today.
Something looked interesting about the front brake setup. Turns out, previous owner did get and install the grand am setup! So, there is no longer a need to buy the machined hubs! So, this will be as easy as replace the current parts with all the new stuff I already got once we get to that stage.
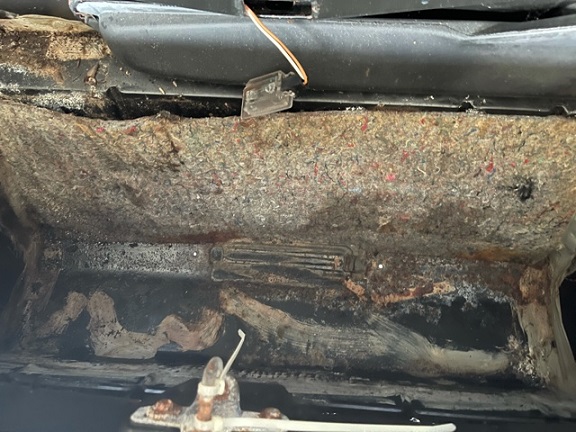
We then decided to pull the trunk carpet to check out how it looks. Overall, there is some decent surface rust but we are thinking with some time and a good wire wheel, it should clean up. There was also some rust on the front crossmember but does look like it could be cleaned up with some good elbow grease as well.
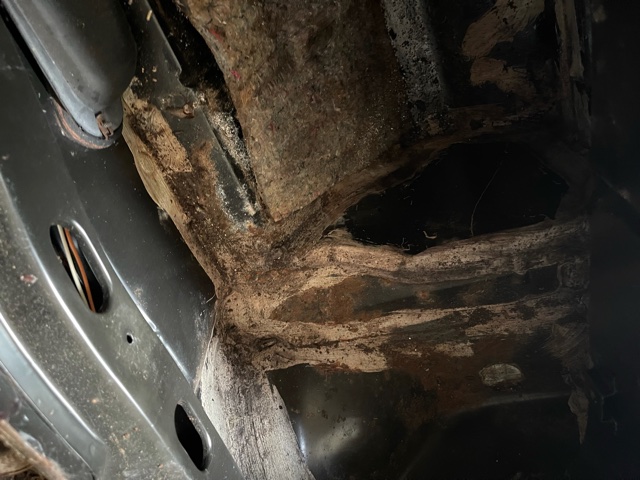
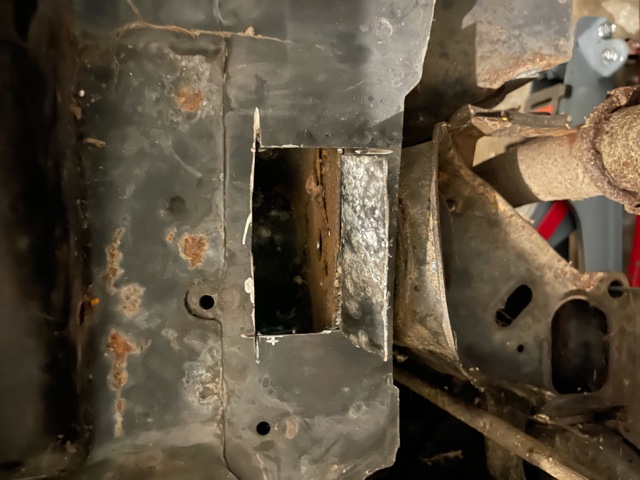
We also took the time to go ahead and cut into the drivers frame rail in order to get to the rear cradle bolt capture nut. The angle grinder made quick work on this and and that nut and retaining plate were pretty rusted, so a hammer and flat head were able to get it removed. But, I will need to get a furniture dolly so that we can drop the cradle out when we remove the passenger side bolt. That way i will be able to drill the needed holes for the Rodney Dickman floating nut kits.
Now the bad news.......the front hood is stuck. Neither cable inside the car would pop the latch. We spent time smacking it, hitting it with other things/tools, rocking the hood side to side, trying to pull the hood forward. Nothing would get it to pop. So we will be trying a few more things today to see fi we can get it open without damaging the hood in the process. Any help to figure out how to get it open is greatly appreciated!
We were able to get the hood off! For others who run into this problem, what we ended up doing was unbolt the hood from the front hinges. That gave us enough play to get our hands under it and rotate it back and fourth (carefully) on the hood latch. We measured where the hood latch is and pumped a hunch of PB blaster on it. Then after all that it still wouldn't come off. BUT, this did loosen the latch enough where the cable did move it slightly (from what we could hear). I then sat right on top of the latch while my buddy pulled at the release cable. At first it didn't seem like it did anything but i jumped off and pulled up and BAM! SOB came off!
Today i was able to do some work with the fiero! Not a ton but trying to do little by little. One so i don't hurt myself and two to make sure i take my time and make sure everything is done right.
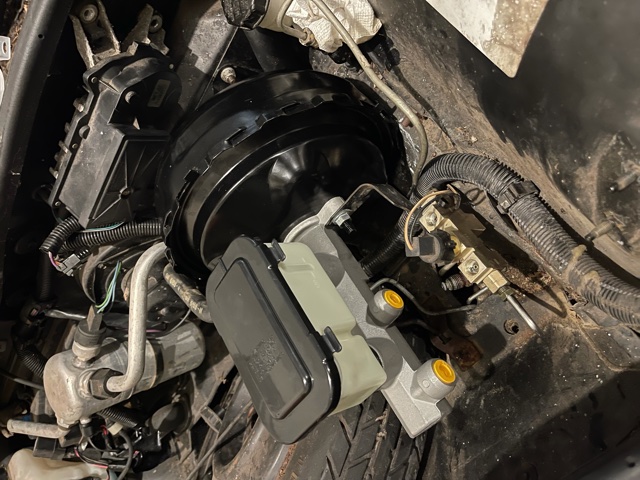
First, i have the summit racing brake boost set to arrive tomorrow. So, i took out the old factory booster and ground off the rivets holding it to the bracket. That way I am able to bolt in the new booster.
After that was done, i decided i would start tearing down the drivers front suspension to get it ready to replace things. First thing I did was take out the upper control arm and replace the old worn out factory rubber bushing with the new poly bushings from the set that came with the car (that were not installed before). I also ground off the rivet holding on the rubber brake line holder. The new lines come with a bracket attached already and will be getting a bolt and nut to make sure i would run into that issue in the future.
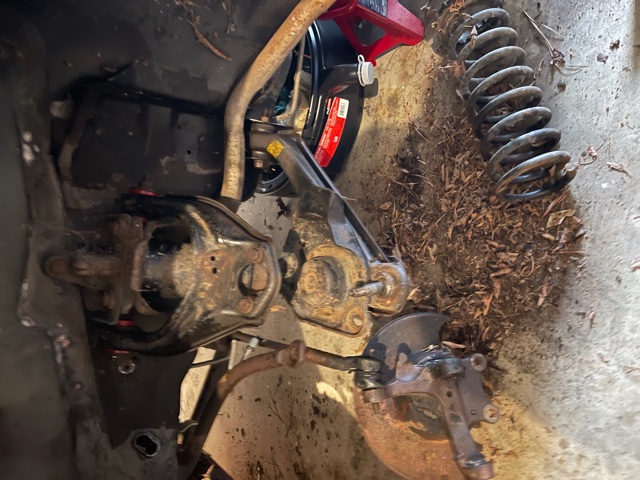
This is where i ran into a couple issues... 1. the knuckle will not separate from the tie rod....no matter how much persuasion was used...I dont really care able saving the tie rod since i intend to replace it with a brand new one anyway....so any suggestions would be appreciated!
2. The lower control are bolts are super stuck.....i would love to get them out so i can install the poly bushings for them as well....but these are being a super pita.....only thing I haven't tried is buy a huge breaker bar and hope.
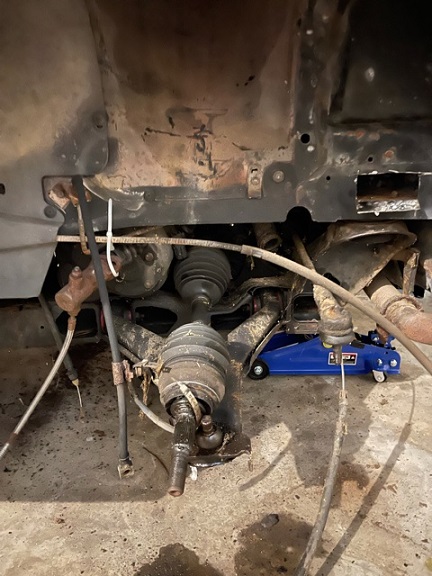
Here is a pick on where the front suspension stands at the moment.
So didnt have a ton of time today, But, i did get the summit booster in today and was able to get it bolted in with the new Master cylinder. I also had to find a replacement prop valve cuz the old one has one of the brake line nuts completely seized in it....This i will try to get out another day....for now i decided to just get another so i can start slapping things together.
Next is to start getting the new TFS stainless metal lines installed.....this I am not excited about doing LOL.
First off i was finally able to get the front drive tie rod off with some expert "percussive persuasion". Also picked up some PB blaster and got the front LCA bolt out and the nut for the rear LCS bolt off (that stuff is magic). But, the bolt itself looks to be rusted to the rear LCA bushing sleeve........RIP.
I have a large c-clamp on the way to assist with getting that bolt out....hopefully....
I wont be removing the rear LCA cuz it already has the poly bushings installed, YAY! I was also able to get the new Driver from metal brake line swap out with the new FS SS one.
So as it stands, the driver suspension is almost completely torn down and ready to accept new replacement/upgraded parts. May be ordering the rear calipers at the end of this week. We will see how everything goes!
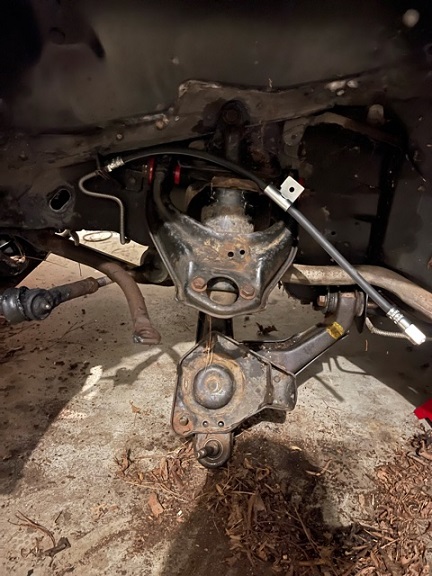
Been a bit since iv been able to work in the Fiero. Today, i wasnt able to get near as much as i wanted done today.....but good news is took down my current arch enemy (rear lower control arm bolt on the Driver front)
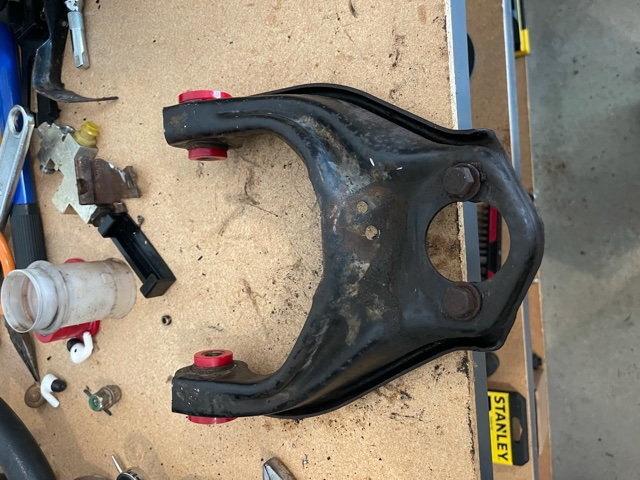
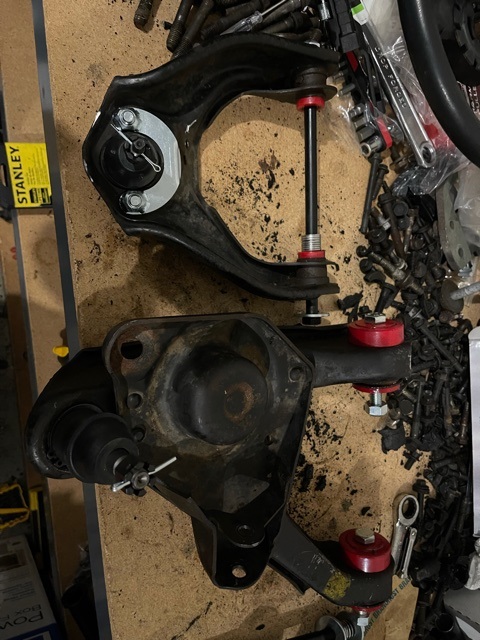
With that off I replaced the bushings with the poly ones i had, pressed out the old ball joint, cleaned it up a bit and pressed in the new Rodney Dickman 1" drop balljoint. Also installed Rodney's Adjustable upper ball joint and upper ball joint paddle plates. New bolts all around ready for install once i get the front subframe swapped out.
Hopefully all this make getting an alignment alot easier. Im hoping to have more time next weekend to tear down and replace stuff in the Passenger front suspension and get the subframe swapped!


 A well-balanced car can still be fun to drive without the mega-power to be breaking things.