(like The Holy Grail. Camelot! Camelot! Camelot! It's only a model. Shhh!)
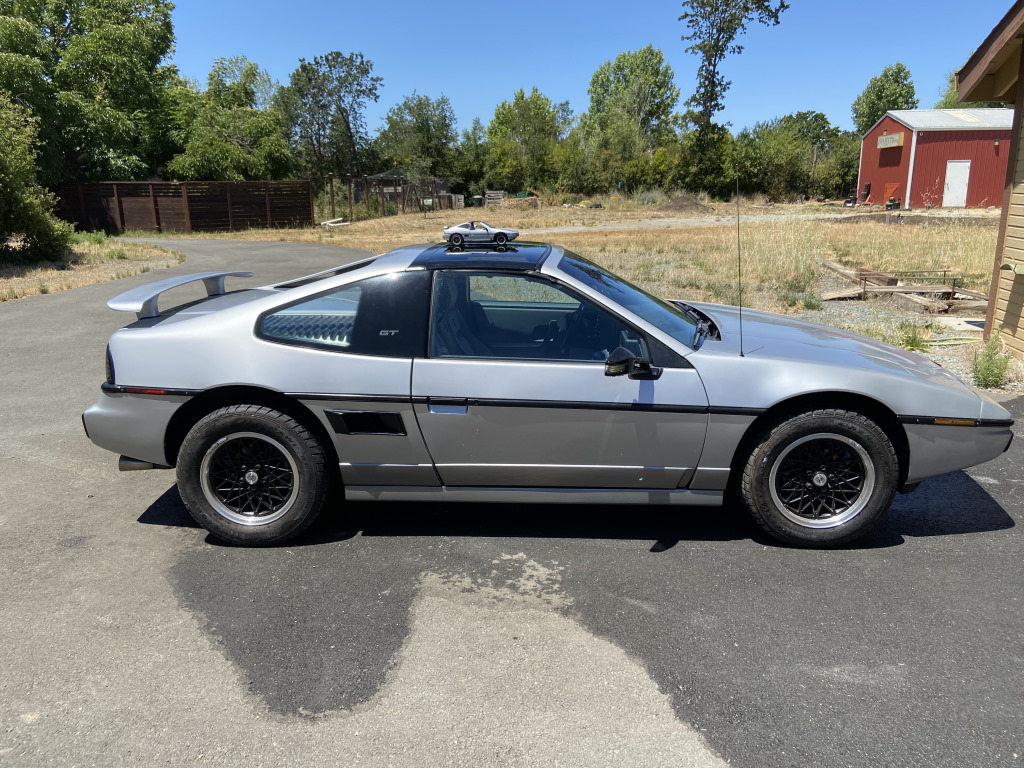
Besides the Fiero, one of my other hobbies is radio control vehicles. They're mostly scratch built, generally about 1:10 scale (ie fairly large, especially if you're talking about, say, an M-1 Abrams tank and its associated prime mover and trailer.) Was chatting with fellow enthusiasts in that hobby and came to discover that one such enthusiast and I share another hobby: Fieros. They were kind enough to share with me this picture of the cars:
Look very closely on the roof and you'll see a matching Fiero on top on his Fiero.
Anyway, I thought this was a great idea, appeals to both my OCD "match all the things!" and to my Fiero habit, without having to buy/store/maintain a second actual car. Plus, I could modify the little car to look like the big one. I mean,
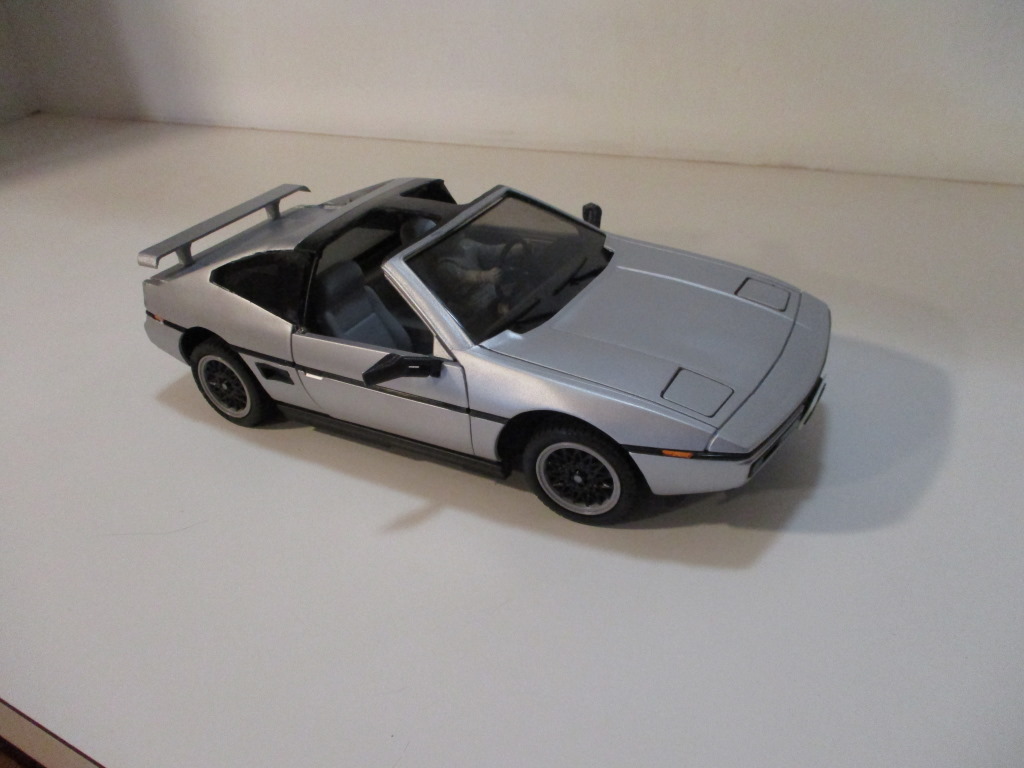
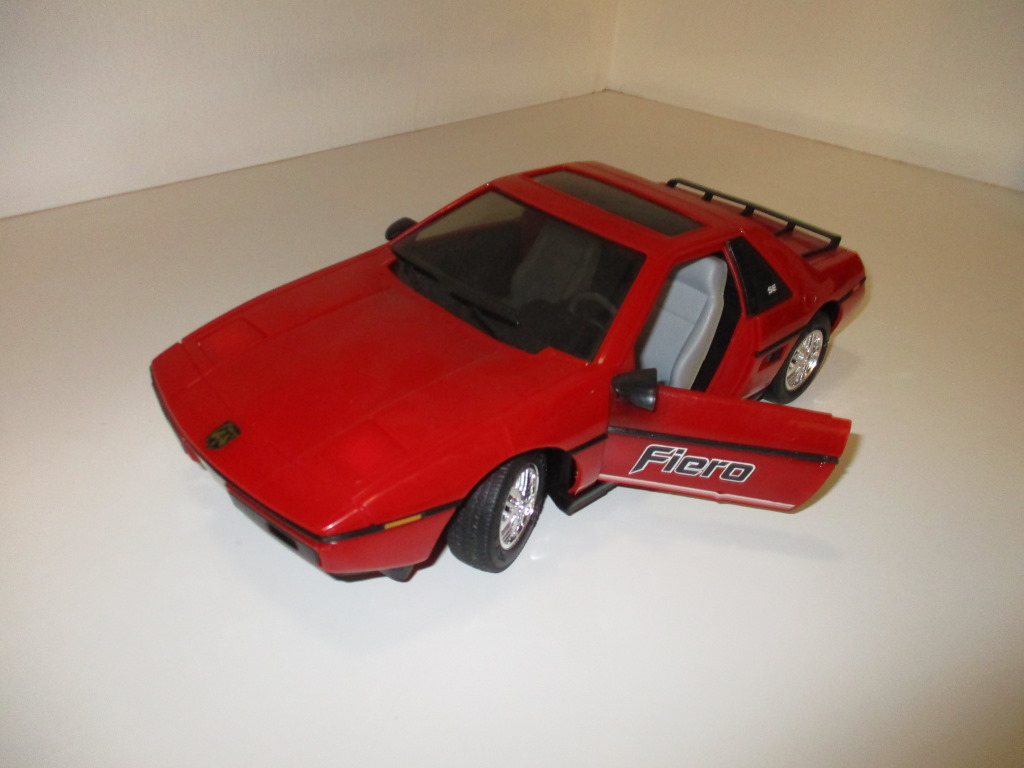
Okay, enough memes. So there's a few remote control Fieros like that, all those horrible cable-controlled ones (ie no actual radio.) Found one on Fleabay that wasn't exorbitantly priced (some people think they're made out of unicorn poop), good cosmetic condition. The mechanicals were pretty bad after 30 years, but that's all gonna get replaced anyway.
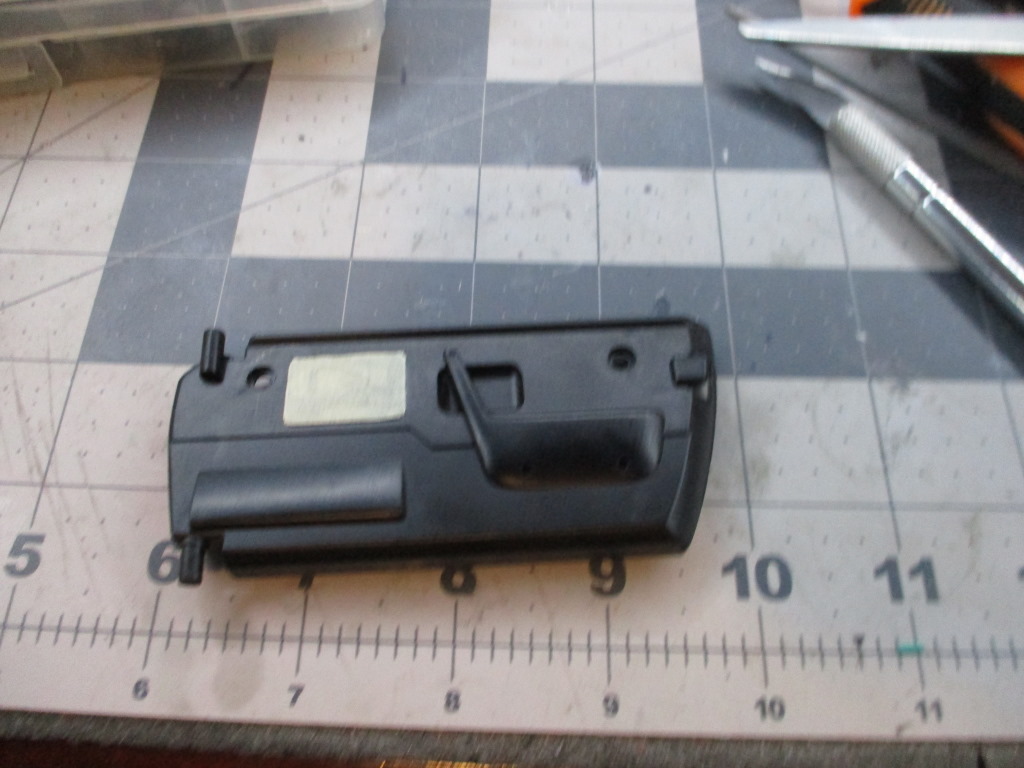
Started with this:
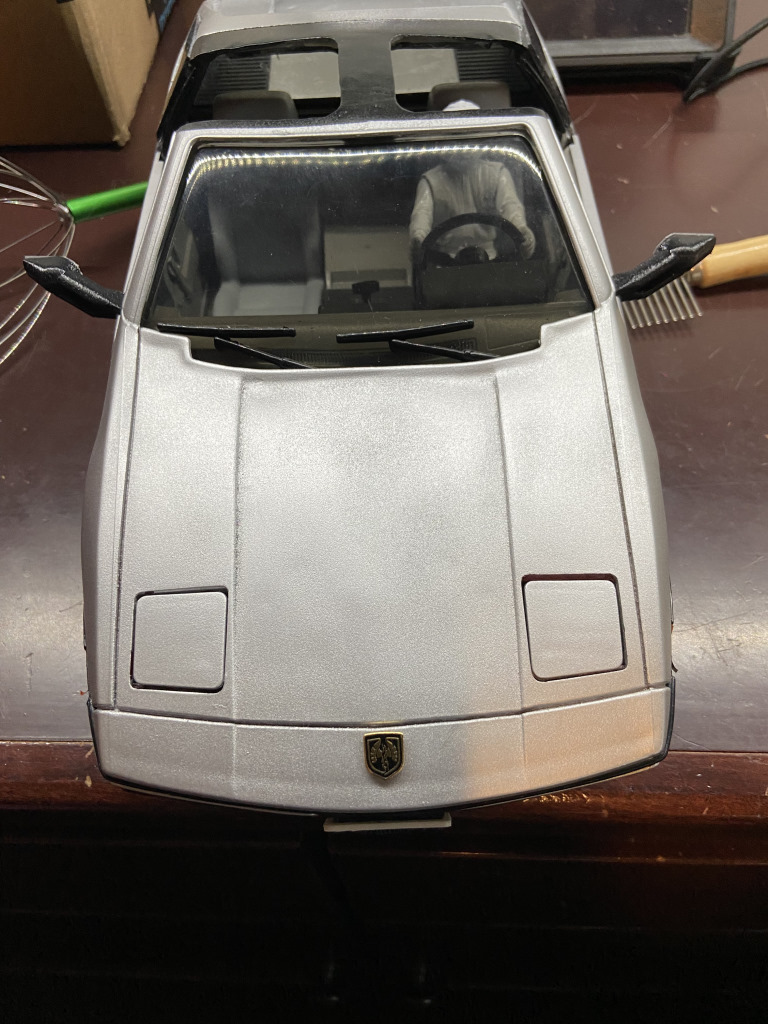
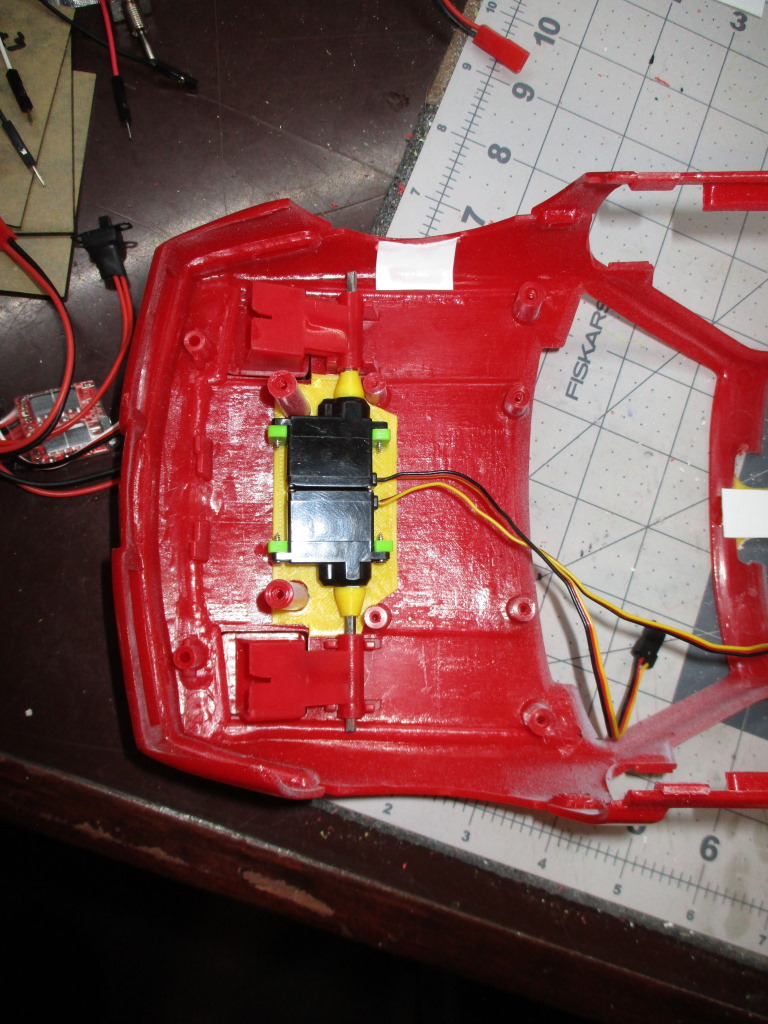
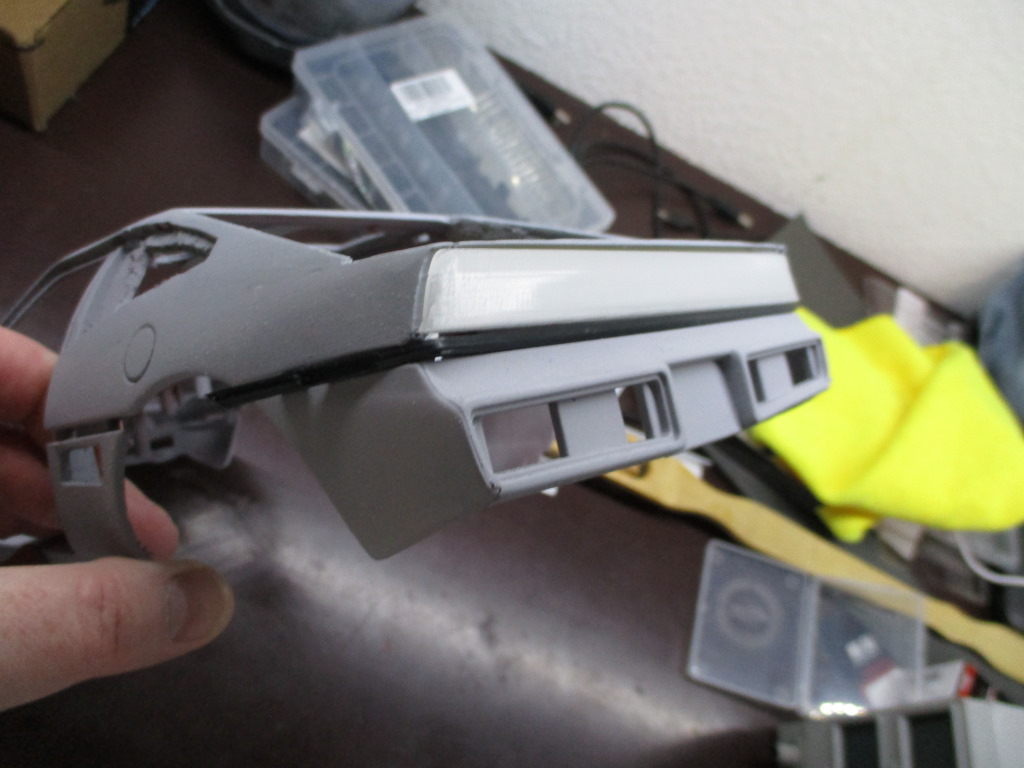
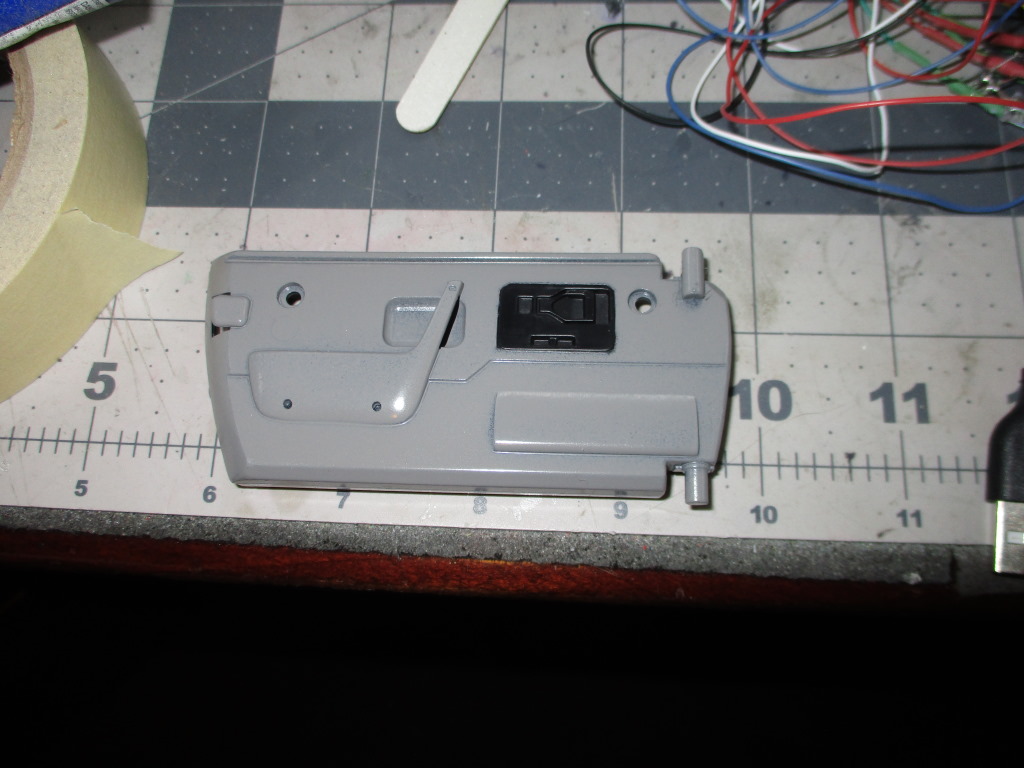
It's actually surprisingly accurate in dimension and detail and, besides the Rube Goldberg-esque electrics, fairly well-built. The steering mechanism was a convoluted worm-gear thing, and while yes, it has working pop-up headlights, they're actually MORE complicated than the Gen-1 setups =)) For this one, we just directly couple some appropriately sized servos to the pop mechanisms
(underside of hood, front to left of car. White patch in the driver's side front wheelwell is behind a crack in the plastic.) They're shmancy digital metal gear servos that are programmable, so you can set the start and stop points and reverse them so that they both spin the same way even though they're mirrored, and cleverest of all, you can slow them down so the lights just gliiiide up.
However, the model is a notchback and a sunroof car, and the big one is a fastback with T-tops. Oddly enough, I'm actually putting pad-style bumpers on the big one, so those match. The tail lights, however, don't match (Keith, how come you and George don't make your lenses @ 1:10 scale?), nor really does any of the back end. Sadly, you can't just swap the rear clip as I've never seen a fastback model, only the notchies.
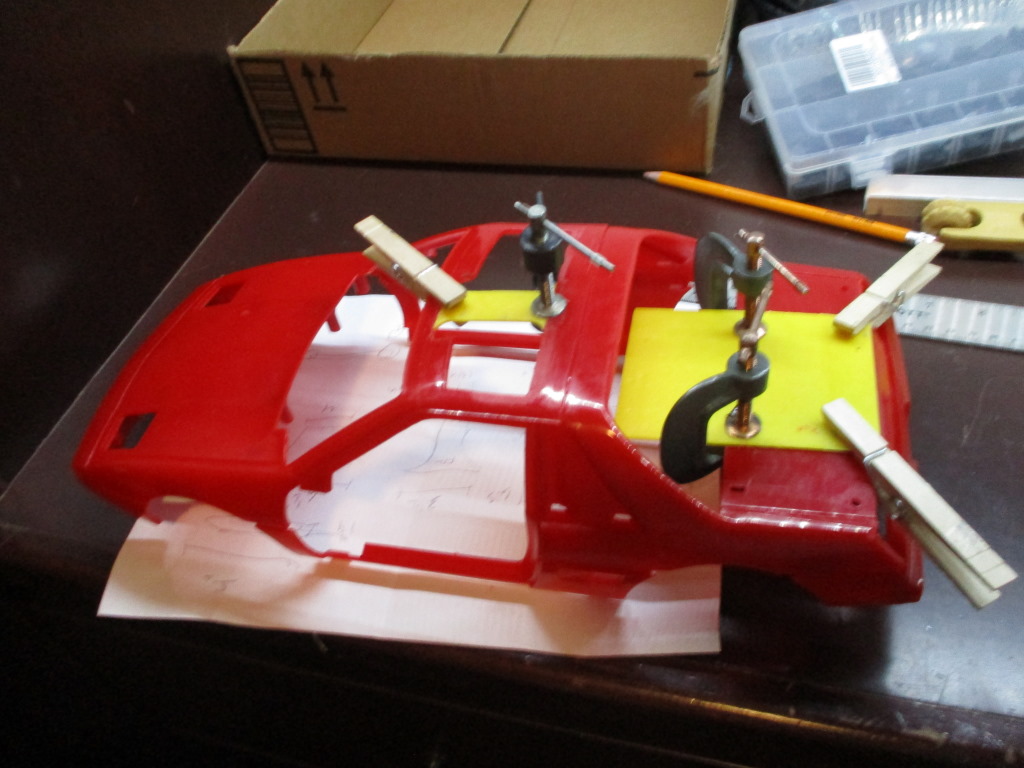
Fortunately one of my other hobbies is 3D printing, so I think we can make it all work. First, we tear the whole thing down and then start cutting into the shell. After some Dremel work, there's enough space down the center of the roof for the T-top bar, and the higher fastback trunk:
Just like installing the T-top kit into the big car, I won't cut off the tops of the doors and the front roof line until the very end of the body work. Must prevent any more cracking of 30+ year old plastic.
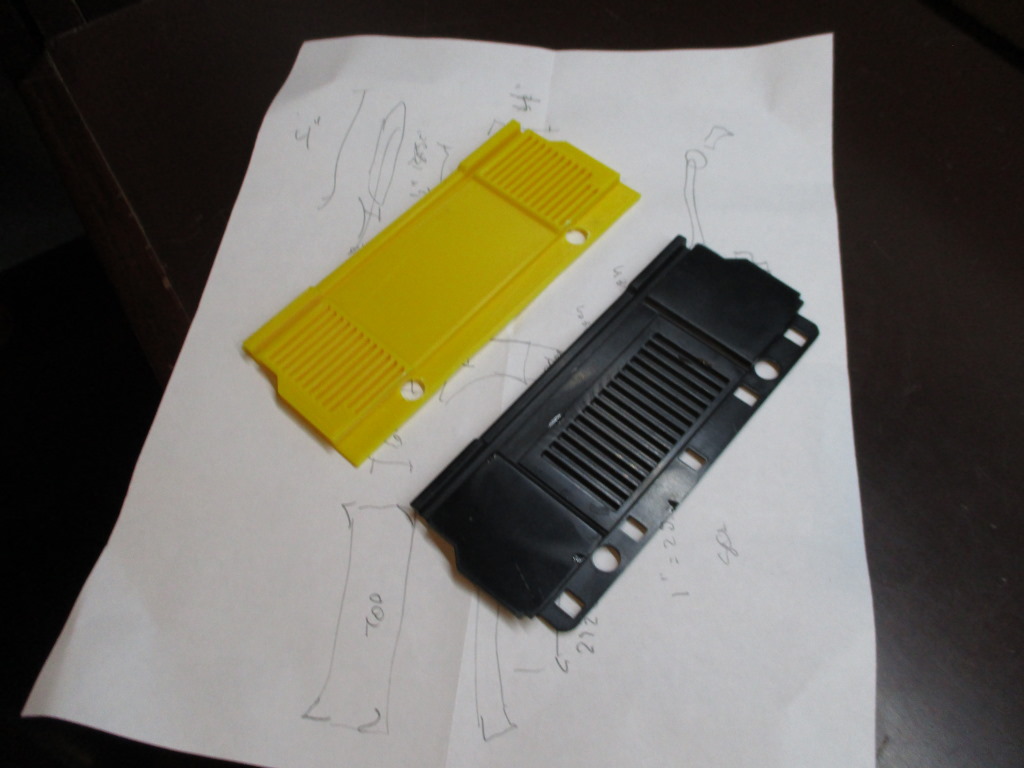
The notchback trunk has the vents forward of it (is that all notchies, or just early ones?), so gonna change out the black piece (original to the car) to a new one with the vents on the sides (here, yellow):
The yellow one is just a test piece as it was what I had in the printer, gonna do it black for the final version as it'll come out better than trying to paint it. The rectangular holes are for the luggage rack, which I'm not going to have, so aren't present in the printed version.
[This message has been edited by dremu (edited 05-30-2021).]
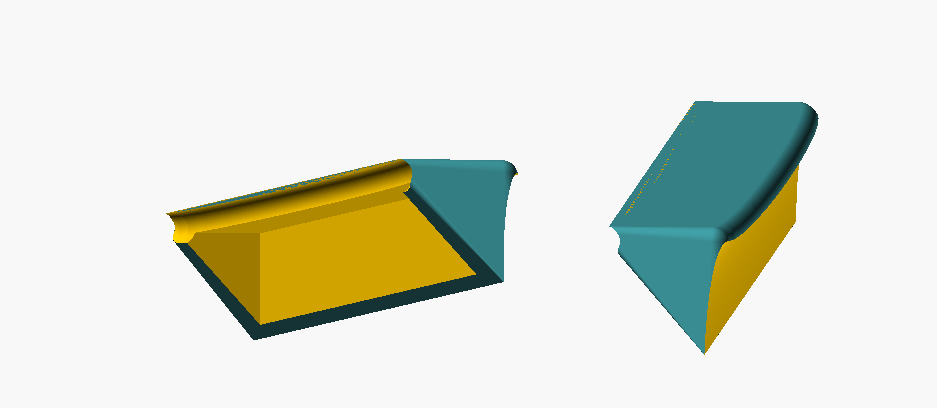
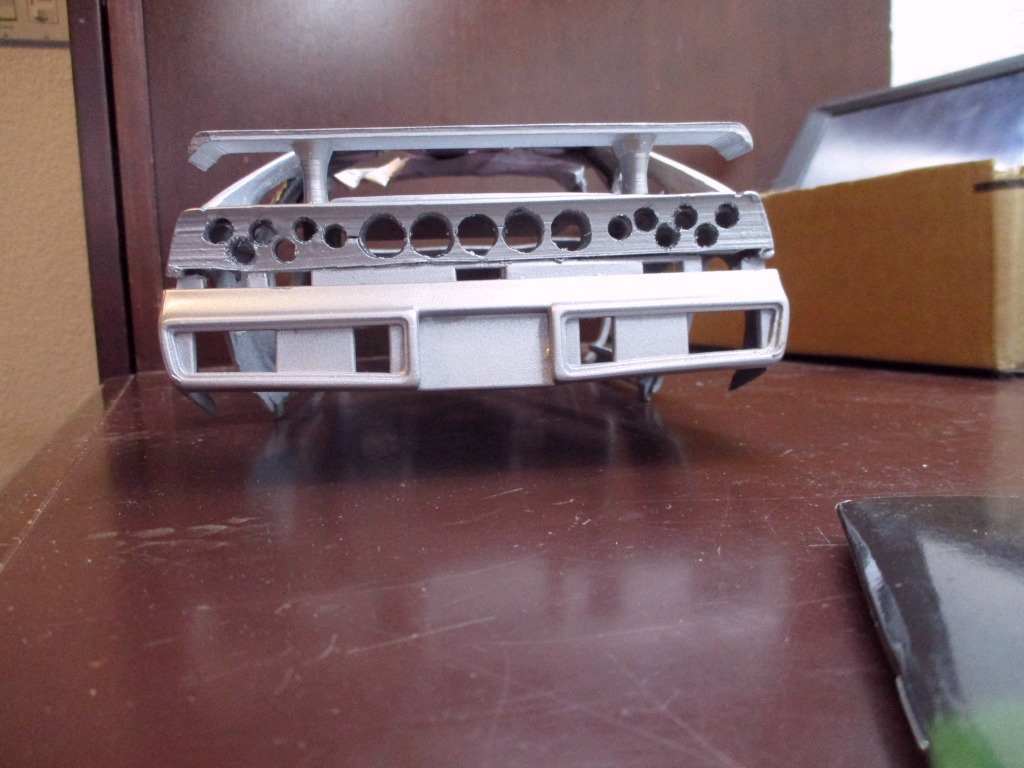
The next bit is to extend the notchie tail to the fastback's rounded butt. There is not a single straight edge on this car, and man, is it hard to model.
That glues onto the back of the car and gives it a fair approximation of the GT tail. Later I'll print one of these in translucent filament -- again, Keith, I'm hurt! =))
I just don't see bending actual clear plastic to those curves, thus the printing. Some details are still TBD, like whether I can get "PONTIAC" in the middle (might be too small or might not show through the translucent, might just have to do the center as black), and lighting is still TBD yet. Might only have red on the corners, might have turns too. It will all be illegal LED's, got some nice big white ones for the headlights. Pretty sure the DOT police don't enforce inside my house.
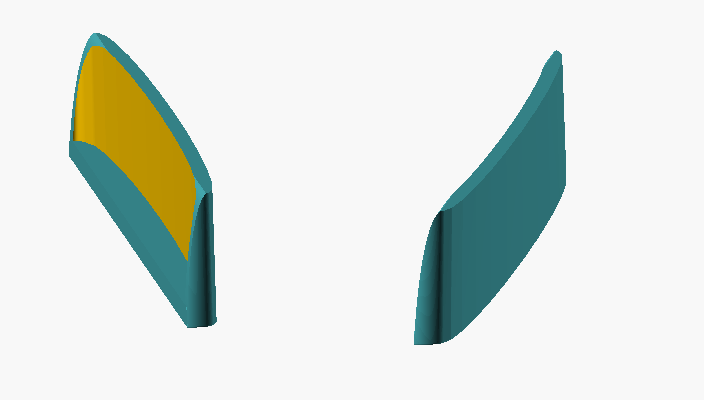
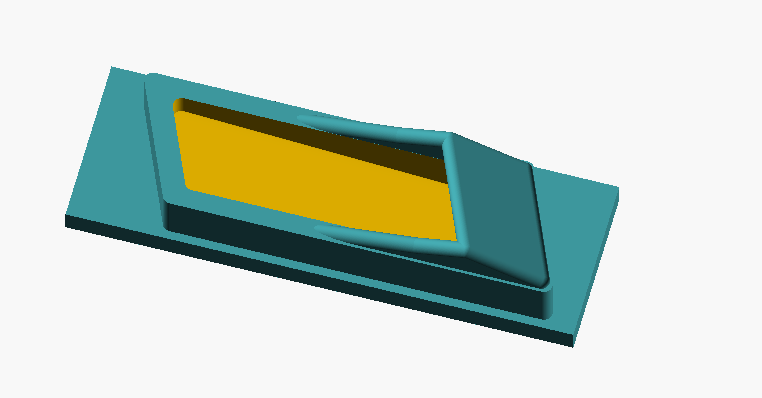
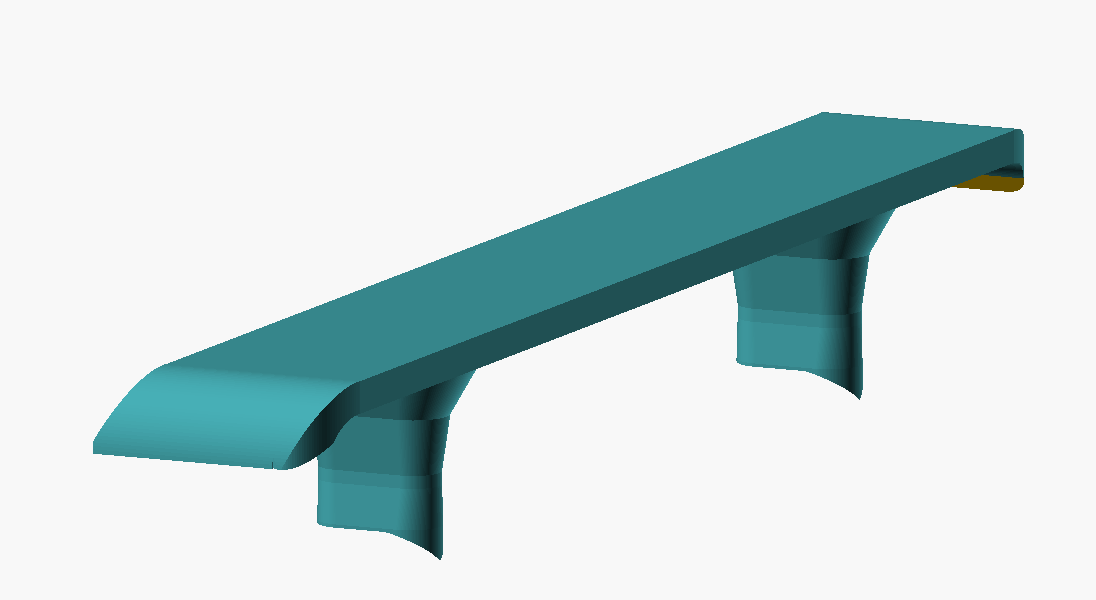
These guys then go inside and behind the existing rear wing. This is LH; one thing I love about printing is once you get a thing designed, you can get a mirror of it for the other side just by pressing a button.
Left image is the rear view, shows how it curves from the trunk lines in towards the roof. Right image is outer side of the piece. The left bit is what slides behind the existing notchback and glues in there and to the roof for strength. Part of the center will get cut out for the wing window (see below), but I'm trying to keep like 2-3mm top and bottom to attach the window.
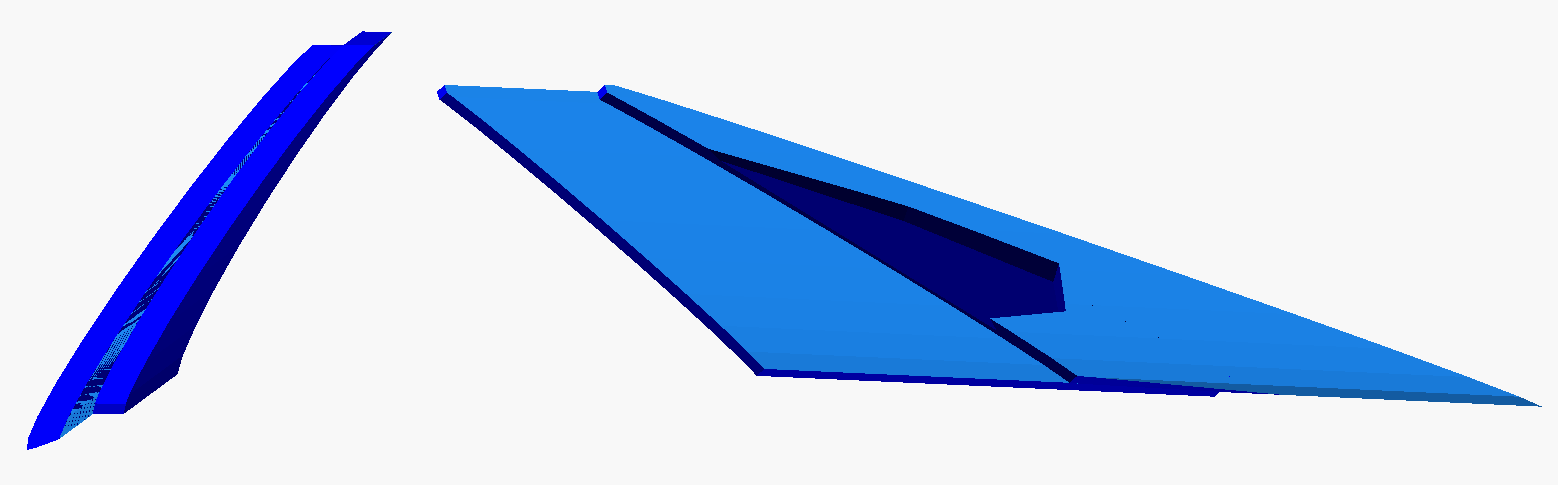
I am hopeful that the wing windows can be done in actual acrylic (vs printing), thinnest tinted I could find is ~2mm. These are templates for me to start from
Because, as mentioned, everything on this car is stupidly shaped. Gonna take a lot of manual work, Dremel sanding and filing, to get these Just So.
[This message has been edited by dremu (edited 05-17-2021).]
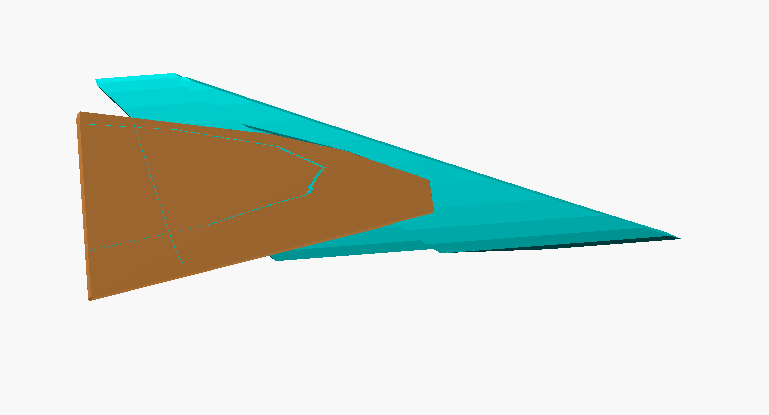
The big car has some other non-stock bits that need to be modeled, namely the side scoops (off a Fiat X1/9)
Again, just click "mirror" for the other side, yay. Did have to veeeeeery carefully Dremel out the LH slot for this, and then cut a new one on the RH.
and the spoiler
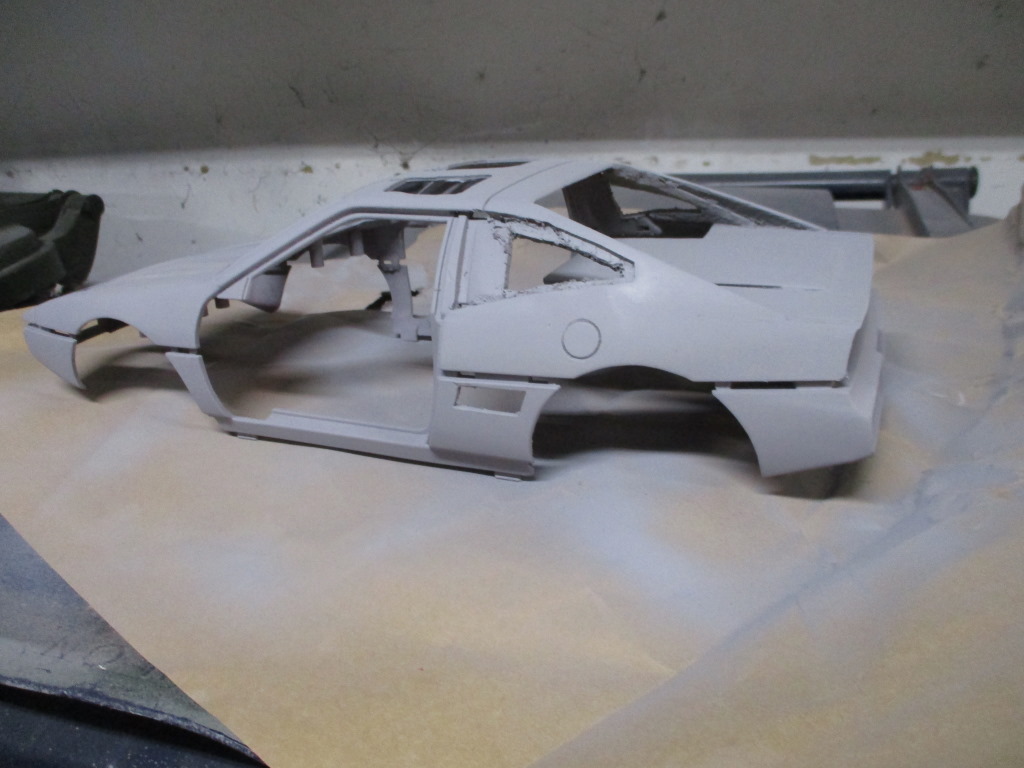
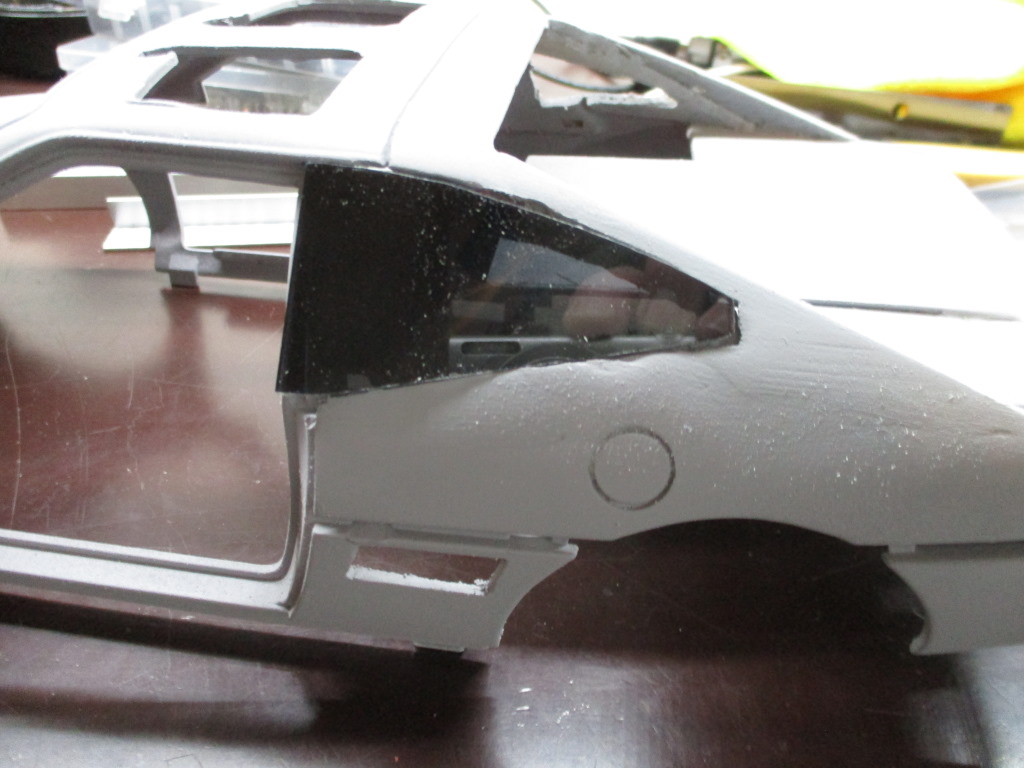
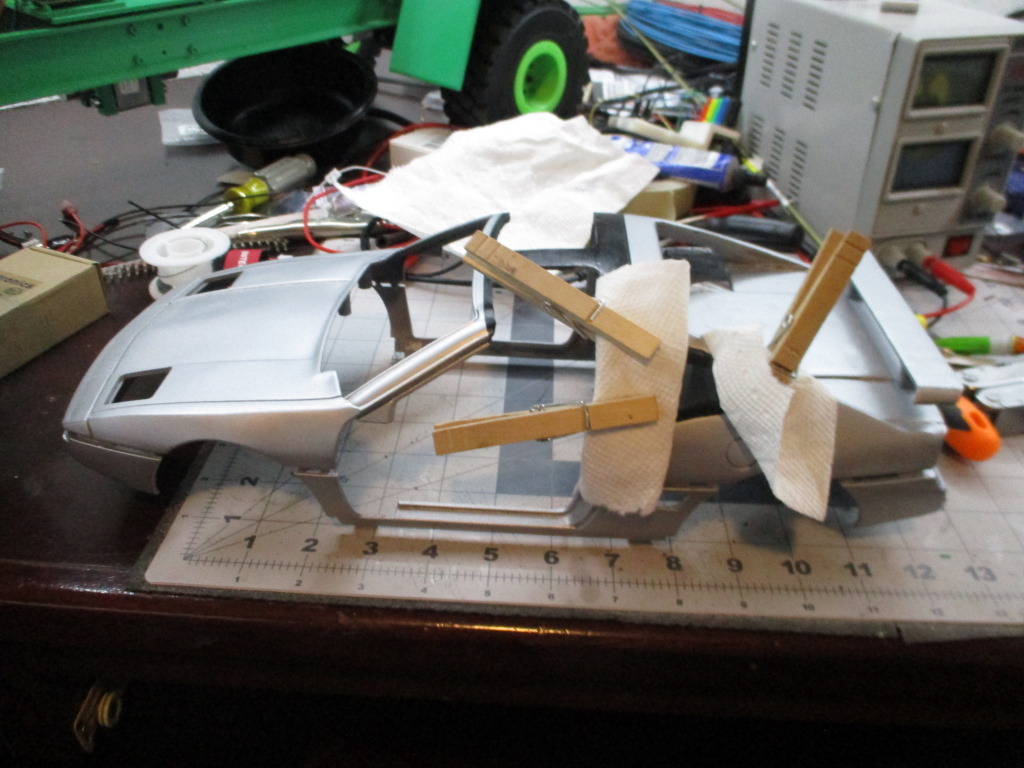
After repeated application of the Dremel and more filler than I'd care to admit, the shell now looks thus
The wing window cutouts still need a bit of filing and cleaning, see how that works once the tinted pieces are cut. But it's starting to resemble a fastback, yay.
Also will take some juggling to paint, as the T-top area and behind the wing windows is black, but the rest of the car is silver, etc. The little car just had removable plastic bits for each color, like the bumper pads and trim are molded in black vs the body molded in red, so at least they all come nicely without having to be masked for painting.
I do want to redo the interior to more accurately match (grey seats and steering wheel, but black floor and door panels). Another set of "burn that bridge when you get there" items.
Gotta see what tires I can find because the ones that are one there are (1) 30+ year old rubber and (2) securely glued in place. Really don't want to touch them for fear of irrevocably damaging them. New tires about the right size would mean I print matching lace wheels, yay.
More to come.
-- A
[This message has been edited by dremu (edited 05-17-2021).]
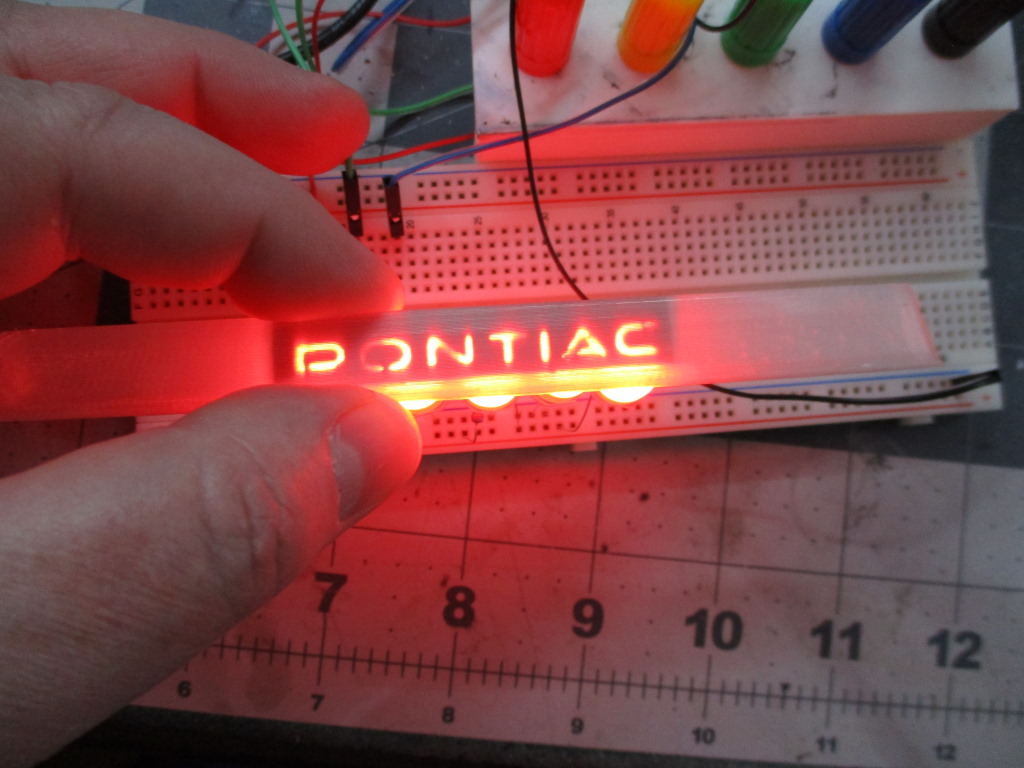
More packages arrived in the mail, including thin tinted plexi. Still need trimming and lordie the shell needs more sanding. Body work on little ones is just as much work as on the big ones! The tint on this is a bit darker than the existing windshield/rear, but it was all I could find. In any event it means I won't have to fuss so much over the black behind it, basically looks like the GT wing window as is:
The translucent filament printed properly for once (the last roll I had was so brittle it kept breaking in the printer)
Not as good as Keith's, but the LED's should show through just fine. Also, I have hope that this guy
will work in the center. A quick test of it with one 5mm LED had only one letter showing through legibly. Ordered some larger diffused LED's, hoping they do better. It's not so much the brightness, but the dispersion pattern of the light.
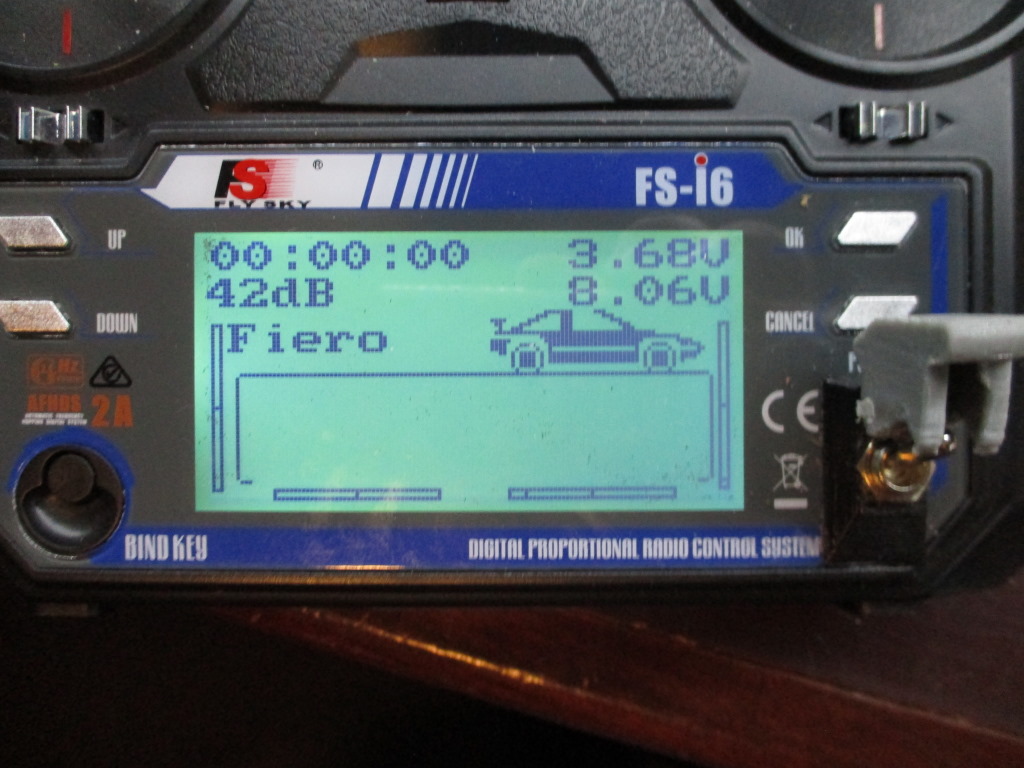
TX is now set up for the car; seems silly, but helps me remember which TX goes with which vehicle(s).
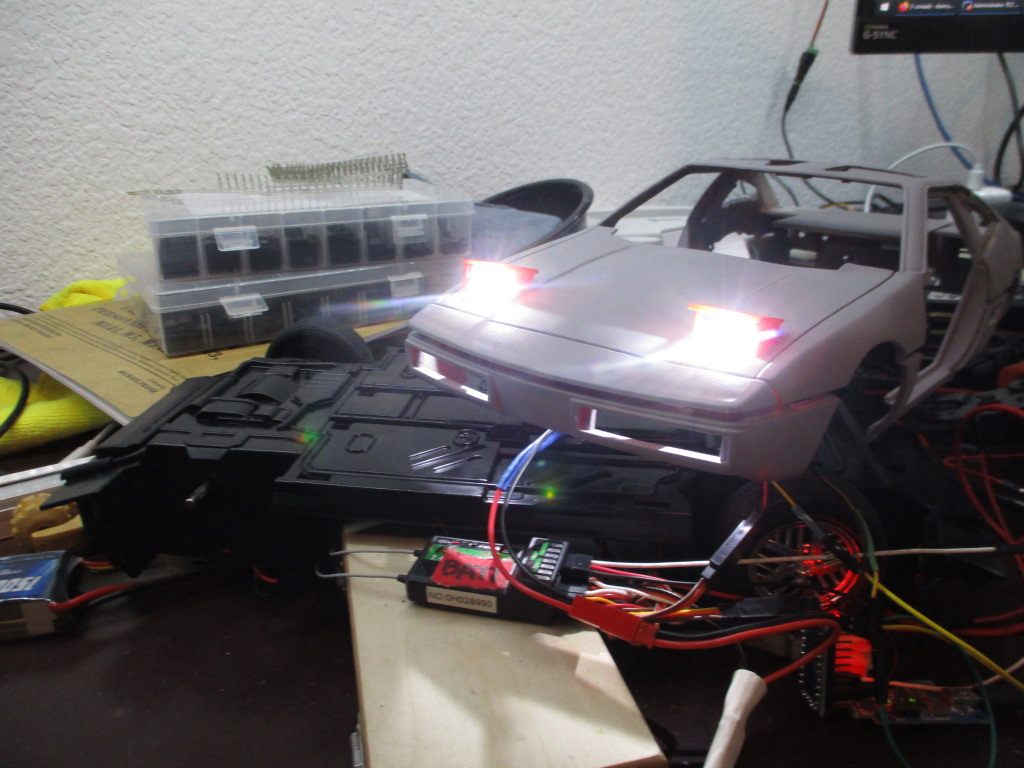
Finally, got the headlight pops working to my satisfaction. First, the illegal and blindingly bright LED's:
and then a demo of the mechanism (with lights disabled, as otherwise the camera got all confused and you couldn't see squat)
They don't quite lift simultaneously, but the big one's like that too =)) I gave up on using the servo's stupid digitally programmed end limits, now just driving them with an Arduino. This lets me set the up and down points with actual 1000...1500...2000 values, instead of arbitrary "37" numbers that don't mean anything, so they're at least aligned when up or down.
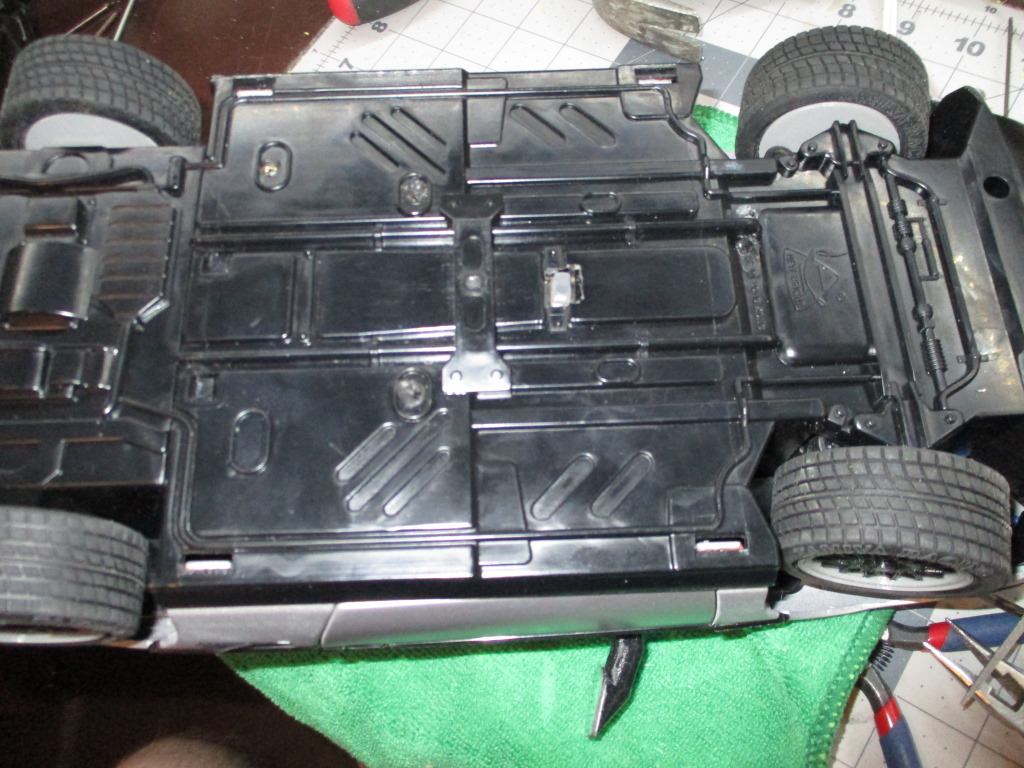
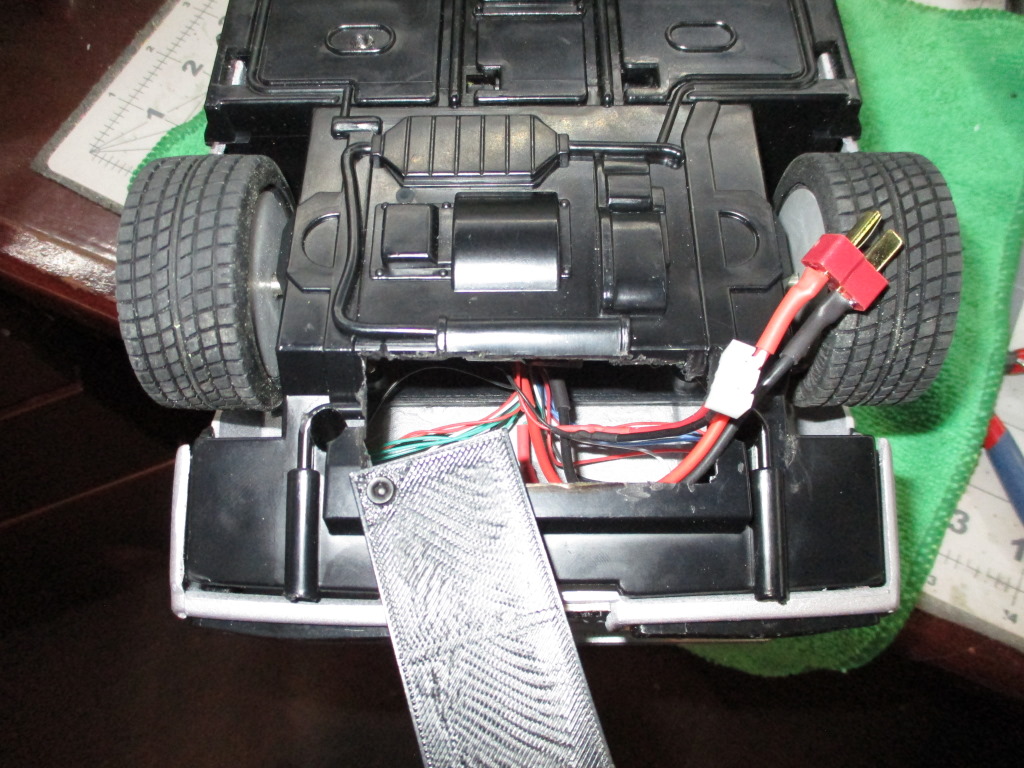
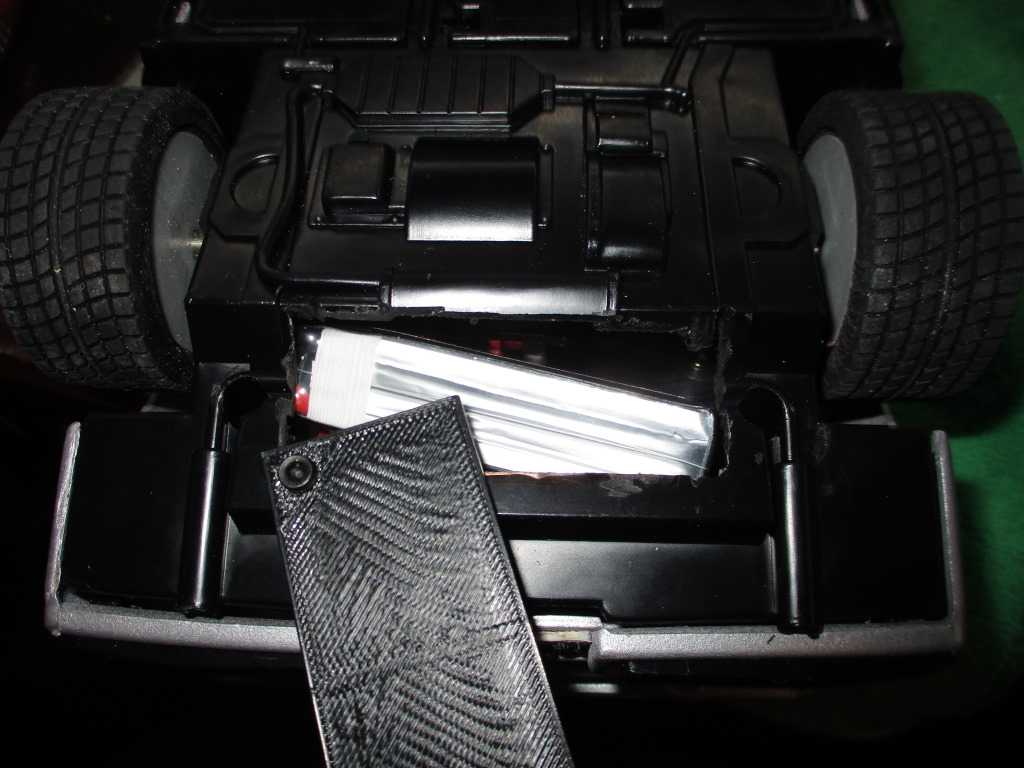
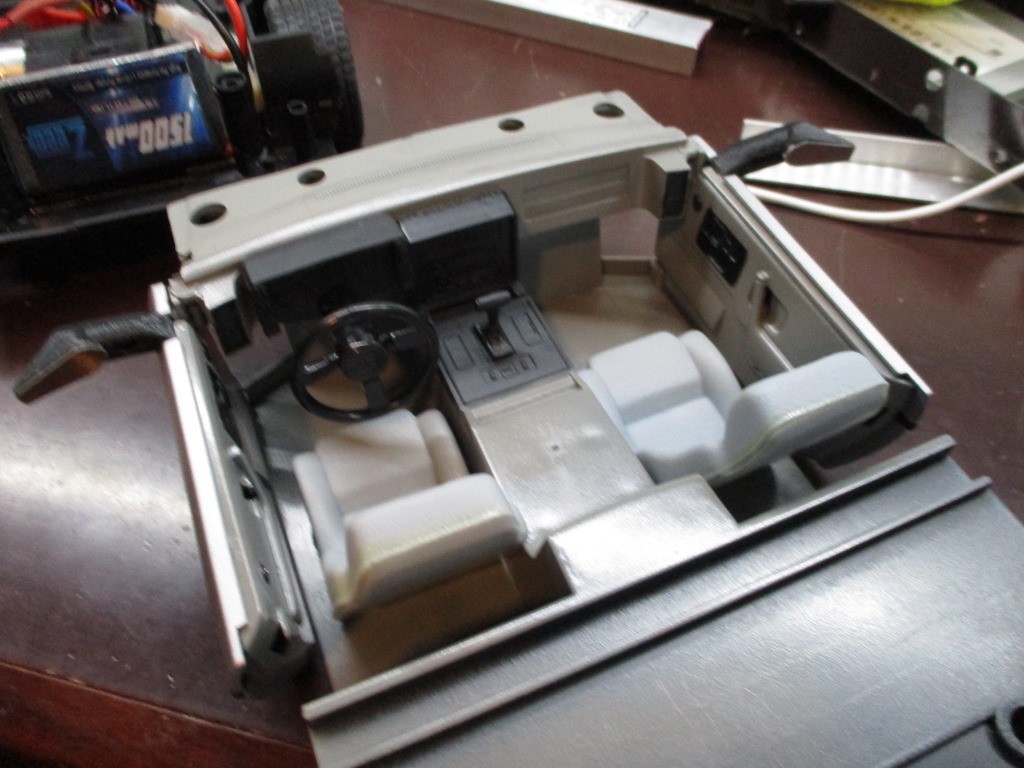
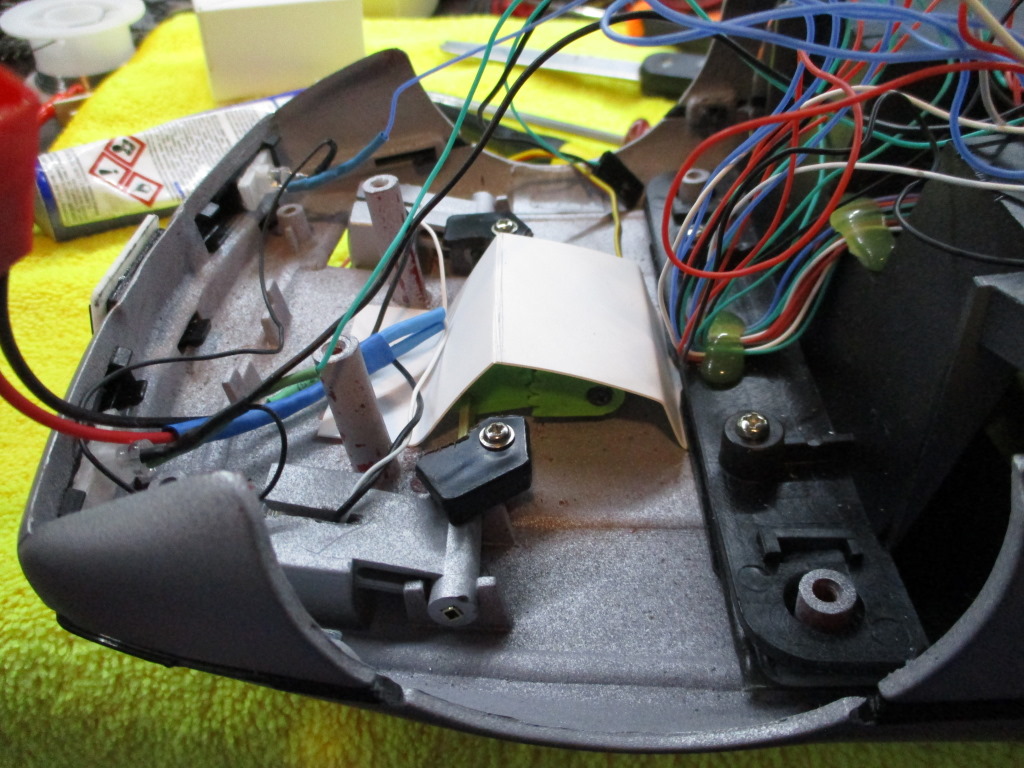
Also started laying out where to actually *put* the components inside the car, and there is surprisingly LITTLE room for the RX, battery, switch for the headlights, and the one Arduino for the headlight pops and the rest of the lights (gonna have brakes, backup lights, and turn signals, because LED's yay!) I see why the folks who do conversions from static models to RC tear their hair out doing so. My scratch builds generally don't have an interior, and/or are larger vehicles like trucks.
-- A
[This message has been edited by dremu (edited 05-30-2021).]
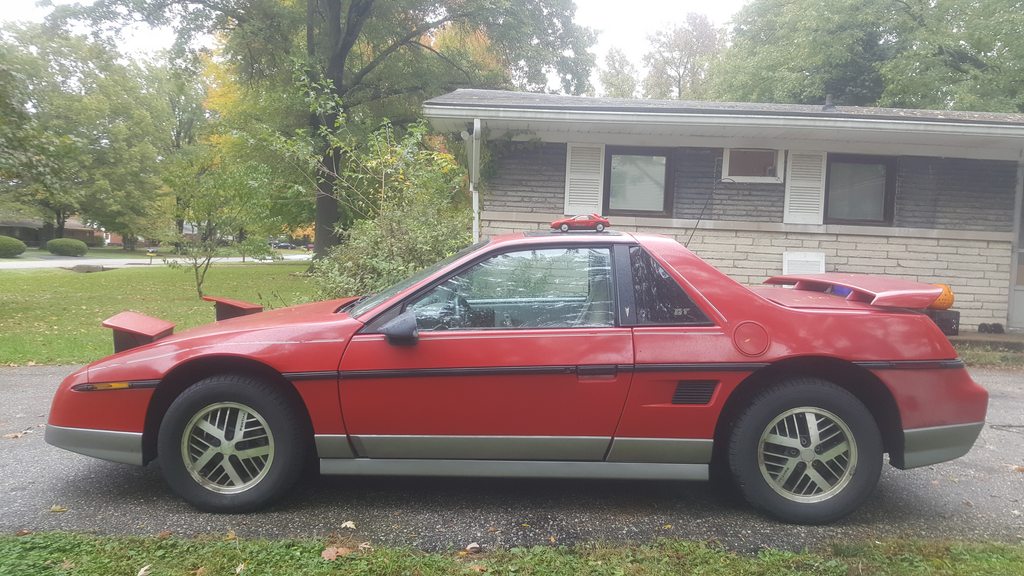
I went a different direction with mine...... No RC though. I eliminated the sunroof and made it a hardtop. Looks like someone parted out a nice yellow Formula and a Blue '87 too! Lots of clear coat fade on the roof and bumper; I did that with oil paints.
[This message has been edited by css9450 (edited 05-20-2021).]
Ooh, the trunk opens! I was tempted to do that to my little one, but trying to balance that and the GT wing windows and the spoiler and ... ugh. Would have made getting to the battery easier, but maybe I can cut a slot in the bottom for that.
That's a really sexy notchback GT that motivated yours!
Beautiful renderings from the printer, that's coming together great. The notchback center vent was an 84 only thing. (Maybe to make the flames more impressive while GM was trying to sandbag the car?)
How'd you do the custom pics for the flysky?
I like that model project car, that looks pretty sweet. Was that the 1/18 diecast or the 1/14 cable controlled?
The car was cable-controlled, one of the New Brights (not the wide-fender one, obvi.) Scale is fungible, as I measured like 1:12 for wheelbase but something entirely other for width, so I've taken to just measuring against the little car when printing parts and not even trying to scale them.
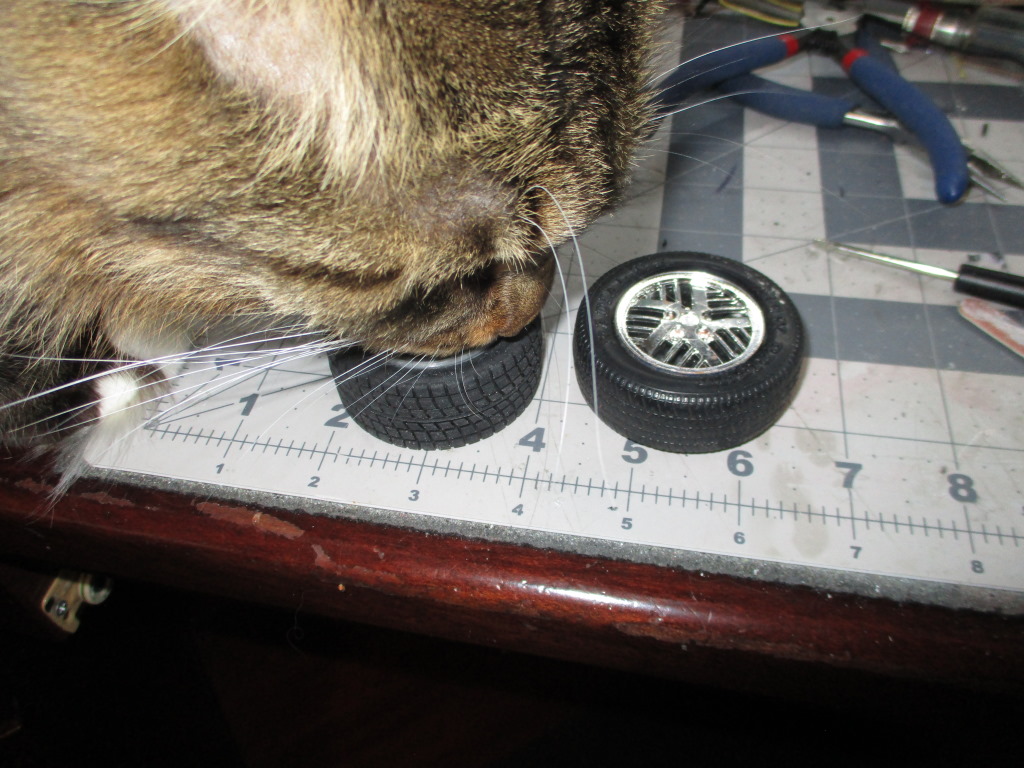
I really wanted to do lace wheels, but the little one's tires are of course 30+ years old (the miniature version of "Maypop" brand) and worse, are very securely glued to their wheels. I could have tried to Dremel out the wheels, but if anything went wrong, I'd be screwed trying to find another wheel/tire.
But it seems like finding stuff for the little Fiero is just as hard as it is for the big one. None of my usual RC places had tires anywhere close in size; lots of big ones, especially big knobby truck treads, and some smaller ones. Couldn't find anything for toy cars on Amazon or Ebay or even Aliexpress or Banggood, drove me crazy. After much Googling I discovered a Tamiya set -- NOT from their RC stuff, but from a separate product line for robots and educational toys -- that's pretty close. It's a bit wider and lower profile than the original, like going to a 16" wheel and like 215 or 225 wide. Which, fine, it's a model.
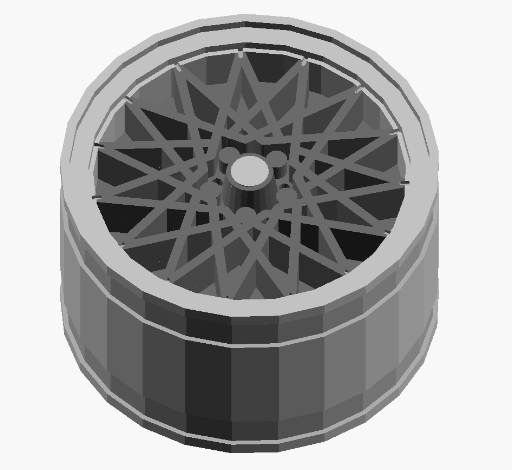
Also, since I'm printing my own wheels, I can fudge the design enough that they match unless you see 'em side by side. I can also account for the slight width increase by dinking with the wheel backspacing. (Yeah, I get a little too fixated on the RC stuff sometimes.) Though I tell ya, the lace pattern is more complex than you'd think and a royal PITA to model in CAD. Took me a coupla nights and a lot of swearing.
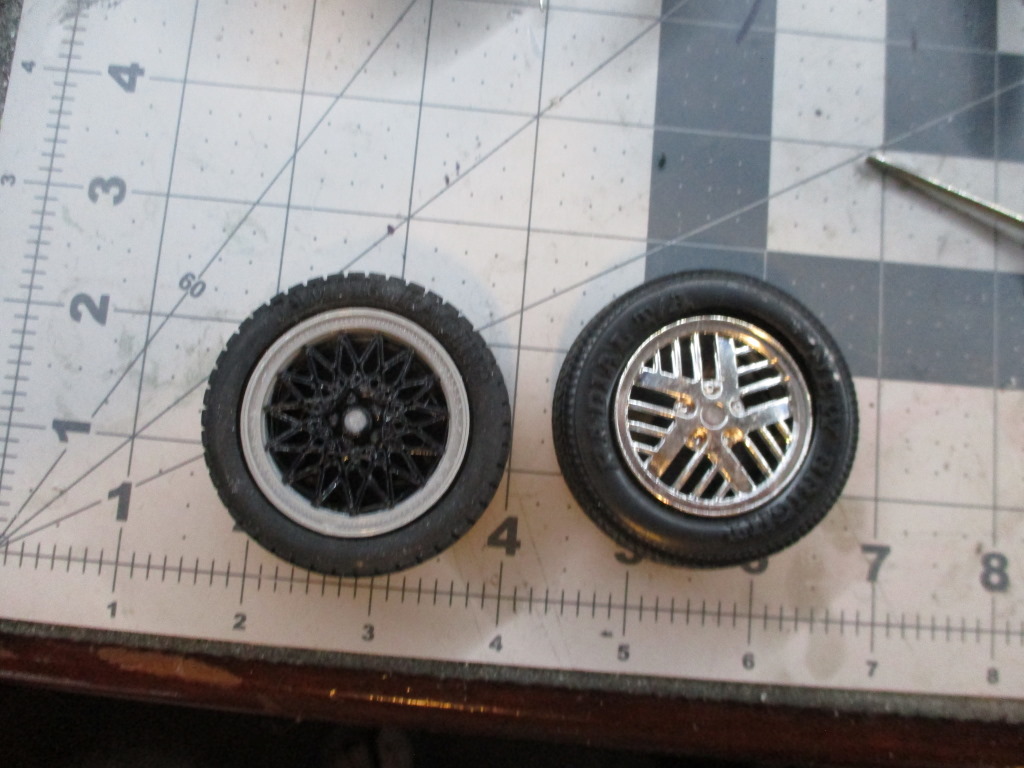
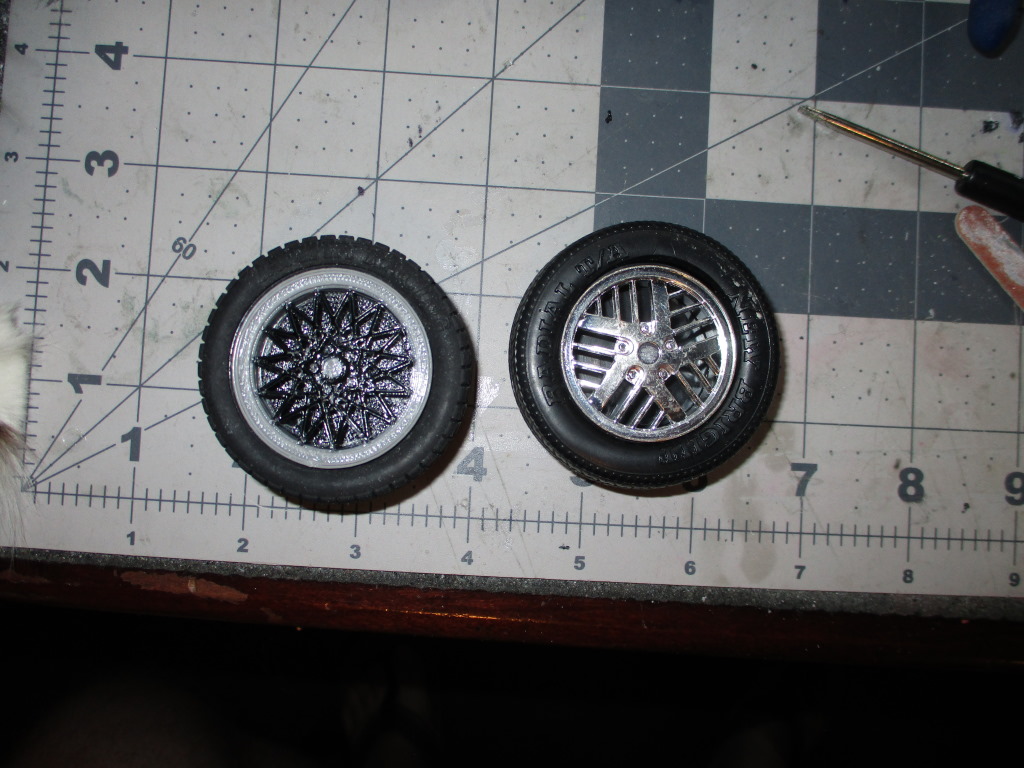
The end result, however, I like:
Camera flash does weird things to the plastic. I swear the black isn't that shiny nor that flat. The grey isn't properly silver either, but shiny filament is a whole other thing. Plus I had both these colors on hand.
As with all of my projects, the work must be checked by cat scanning. That's sixteen pounds of Maine Coon doing the scan there (which is fine, unless she decides to perch on something, when it gets precarious.)
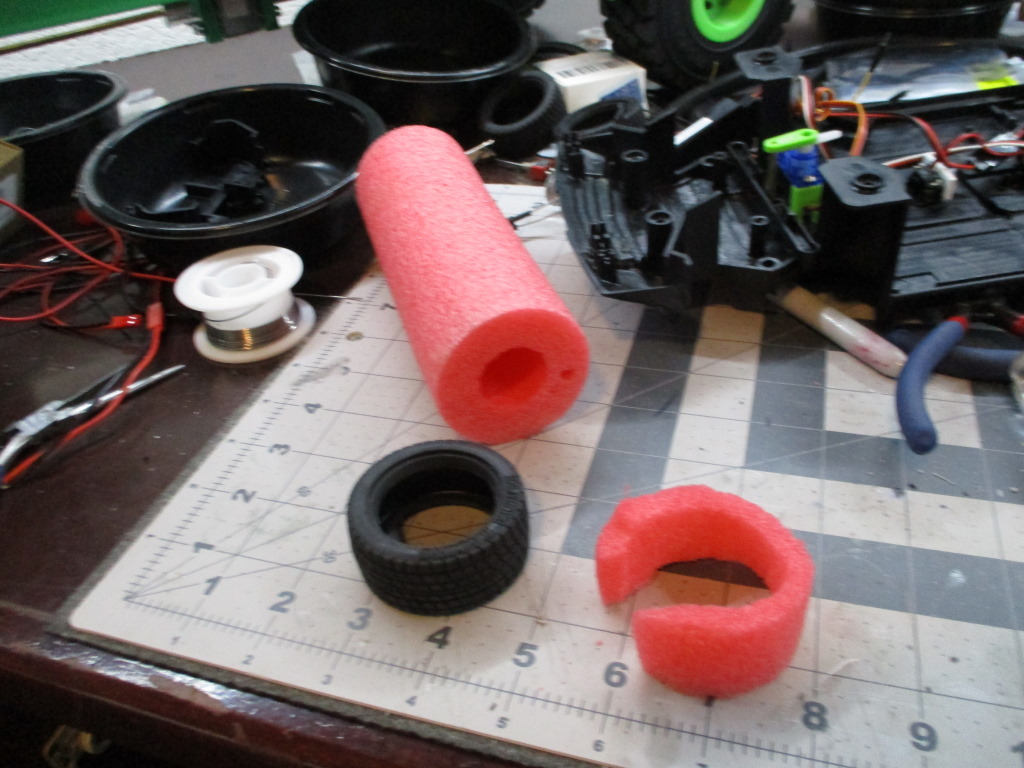
Finally, the tires didn't come with inserts to keep them "inflated" -- what the RC people call "tire foams." I coulda used some of my spares cut down, but the reason I have spares is I don't like the floppy foam ones that come with the tires. Most of my projects are large, heavy trucks, so I cut up the denser foam as found in pool noodles.
Looks silly, but does the trick. That one's a quicky size test done with scissors; final ones can be done with an electric wire knife that cuts through the foam like, well, a hot knife through foam. (Though it smells heinous!) Anyway, once cut they slide inside the tire, the wheel pops in, and the tire doesn't go flat with weight on it.
-- A
[This message has been edited by dremu (edited 05-22-2021).]
Those printed cross-laces look really sweet! (Would it be possible to get the file for those?)
Which tamiya science kit has tires that close to the original height? How does the tread pattern look? Be glad yours has still had Maypop tires, mine had checks and cracks on all sidewalls and a couple Didpop tires. It's kinda funny that it's nearly as impossible to get rubber for the real 14x6 slot rims as the ones for these cable-controlled cars.
(Update of the tiny one sitting on the sunroof of the real one from first post)
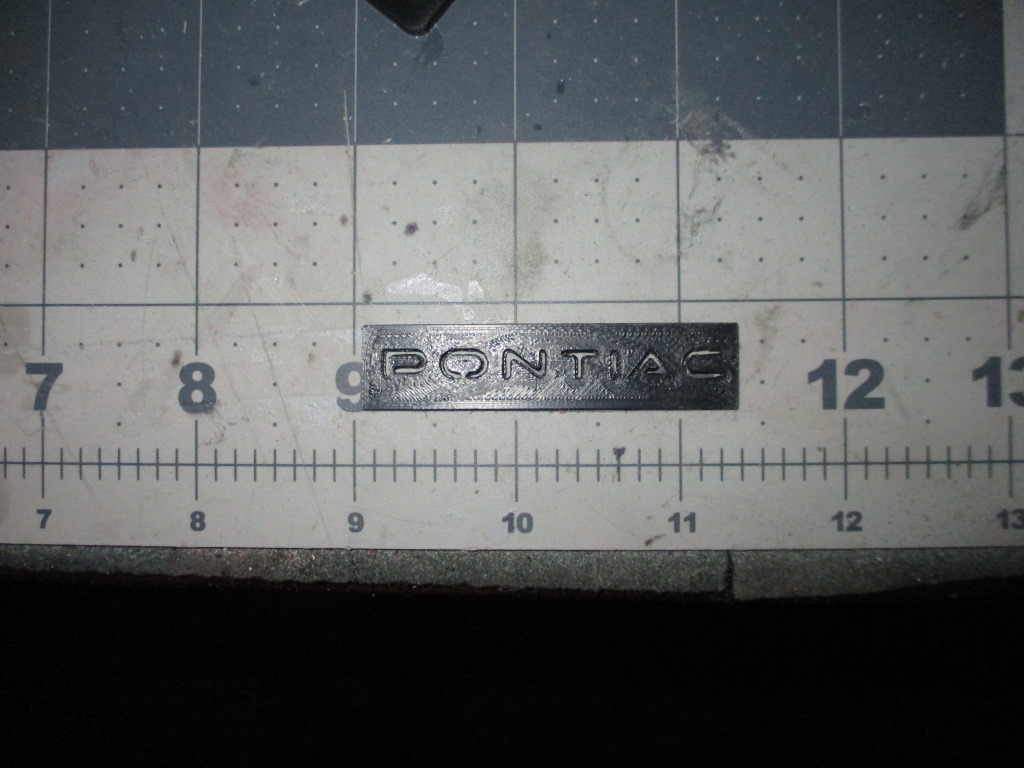
Also Rodney Dickman has some earrings that are a little better Fiero badge than the printed clown-nose sticker these came with.
[This message has been edited by Jerb (edited 05-23-2021).]
Those printed cross-laces look really sweet! (Would it be possible to get the file for those?)
Which tamiya science kit has tires that close to the original height? How does the tread pattern look? Be glad yours has still had Maypop tires, mine had checks and cracks on all sidewalls and a couple Didpop tires. It's kinda funny that it's nearly as impossible to get rubber for the real 14x6 slot rims as the ones for these cable-controlled cars.
Also Rodney Dickman has some earrings that are a little better Fiero badge than the printed clown-nose sticker these came with.
Thanks! I'll see if I can email you the files ... the OpenSCAD is ugly as sin, but may be helpful too as the STL's are two part and have to be aligned. (On my Makerbot knockoff, you just load one, say no, you don't want to put it on the platform, add the other one, also saying no, then select BOTH and move them simultaneously.)
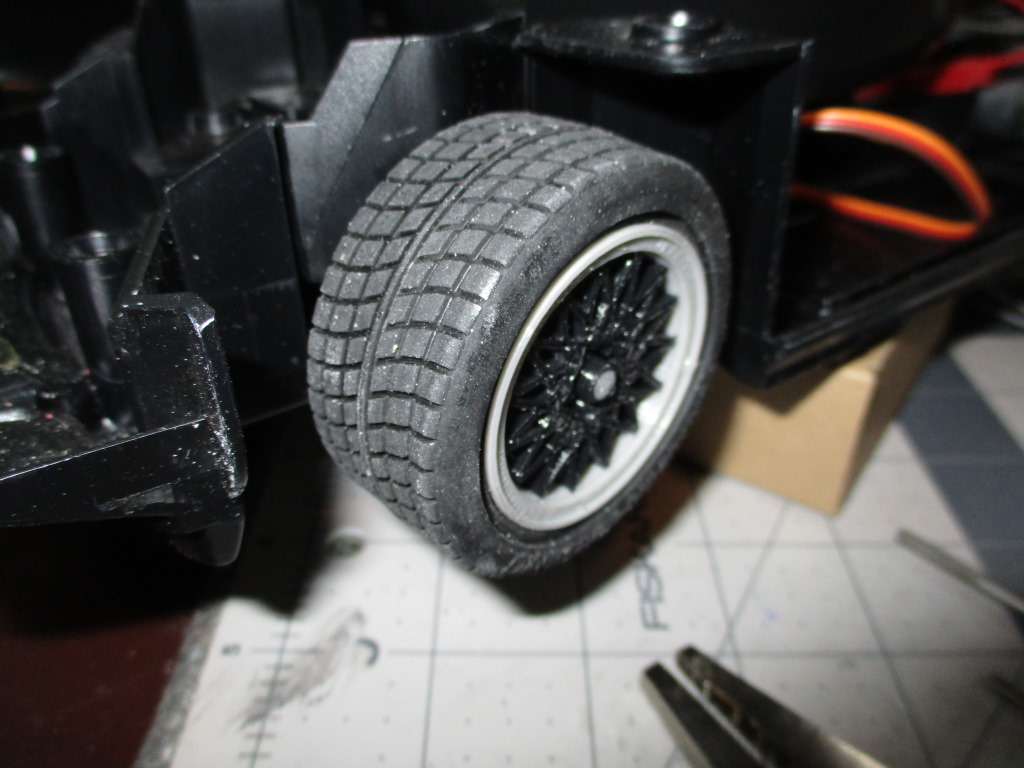
Tamiya 70111 was what I got, though there's also 69916 (same rubber, clear wheel instead of white.) They're all over Fleabay, but I actually bought from Pololu because they were kind enough to go out in their warehouse and verify for me that the "56mm wheel" part meant the actual *tire* OD and not the *rim*.
Tread pattern is reasonably road-tire-ish, not a knobby truck type:
Finally, umm, is "Rodney Dickman has some earrings" an auto-correct for something, or does he really sell jewelry on his site? =))
-- A
[This message has been edited by dremu (edited 05-22-2021).]
Well, I'll be a monkey's uncle. That guy has the most amazing collection of crap, I mean, peculiarly interesting Fiero-abilia. Which might be why I get stuff from him =))
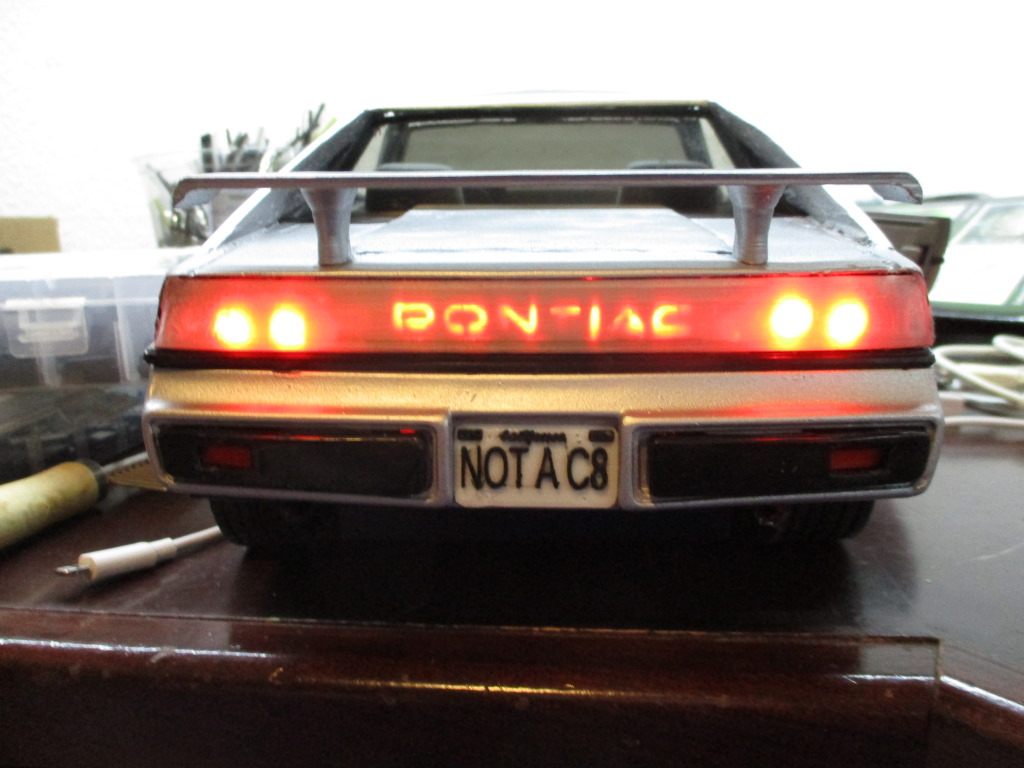
In other gnus, the fat LED's came in, and I think the GT tail light will work out:
Have to do some work on the sides and bottom to keep the light from bleeding, maybe dim the LED's a notch, but it's surprisingly legible through the translucent filament.
-- A
[This message has been edited by dremu (edited 05-23-2021).]
Just a suggestion: instead of using an LED for the PONTIAC light try using a red SMD but get them pre-wired as they can be really small but work the same. It will save you a lot of room. They can be glued onto cardstock and then installed.
I found out about the earrings and necklace a little while after my wife discovered the fiero was a lot more fun to drive than her econo-box. It's still more like a 1/8 or 1/10 scale badge, but its smaller and better looking than the wornout sticker.
You might want to scuff up one side of the translucent behind the rear Pontiac for a more even light distribution, or fill the lightbucket to lens air space with hotglue. If you do make lightbuckets for the rest of them, 'molotow' makes a paint pen that's about the best chrome you'll find without getting plating or vaccum metalizing.
Just a suggestion: instead of using an LED for the PONTIAC light try using a red SMD but get them pre-wired as they can be really small but work the same. It will save you a lot of room. They can be glued onto cardstock and then installed.
Hmm, didn't know SMD's can be had pre-wired. I don't solder anything smaller than an 1/8W resistor any more, too old for that crap. Have to look those up. Honestly, the little Fiero is kinda like the big one for me, it's just a toy. Neither have to be show quality (won't be, with my handiwork), just make me laugh.
..shrug.. We'll see how it goes. Jerb, there's only like 1-2mm at most between the LED's and the tail light panel, depending on the horizontal position (OHMIGOD IT'S SO HARD TO CAD WHY CAN'T THERE BE ANY STRAIGHT EDGES ON THIS CAR?!?!) so the LED's may yet turn out well. Scuffing's actually a good idea, since the translucent is more translucent than you'd think.
Oddly, I'm scuffing it anyway, as my paint skills tend to involved getting paint partially on the desired part, partially on not desired parts, partially on my fingers (which might be what led to the previous), etc. I forgot how much I hate model paint.
I was trying to black out the bottom of the translucent and got black spots on it. Sanding those off led to the aforementioned scuffing, so ..shrug.. we'll see once the paint (and my fingers) are dry.
More progress on the Fierito than on the big one. I hate body work, in any scale.
While detailed and, as mentioned, surprisingly accurate, the interior was monochrome and/or the wrong color. (It wasn't painted, just molded in whatever color.) I figured I could paint a few bits to at least add some flair to it. The grey in particular isn't the right shade, but it's what I had on hand and again, you gotta be a Fiero nerd to know the difference. Or even care.
Anyway, masked off the door handle area, which is actually manageable with an X-Acto knife. A skilled modeler I am not, but they came out passably:
And the same for the interior
resulting in
and
Also, a professional photographer I am not. And in looking at this I just realized that the outer edge of the center console (ie around the HVAC and radio stack) should have been painted, not left black. If I have to tear it down again I'll fix that.
In that last shot you can see my goofy mirrors. They're 3D-printed vague approximations of the F430-style ones on the big car:
With some adhesive-backed mirror plastic stuck on.
Got the shell painted in the right color. But it's metallic paint and shows every flaw. Of which there are many. Sigh. But the T-Tops are cut and the trim around them is painted black, yay. Glued in the GT side wing windows:
Paper towels to prevent glue from getting on the plexiglass. Like my paint skills, my gluing skills tend to involve getting glue on the intended area, on unintended areas, on my fingers, on the work surface, on my shirt, etc.
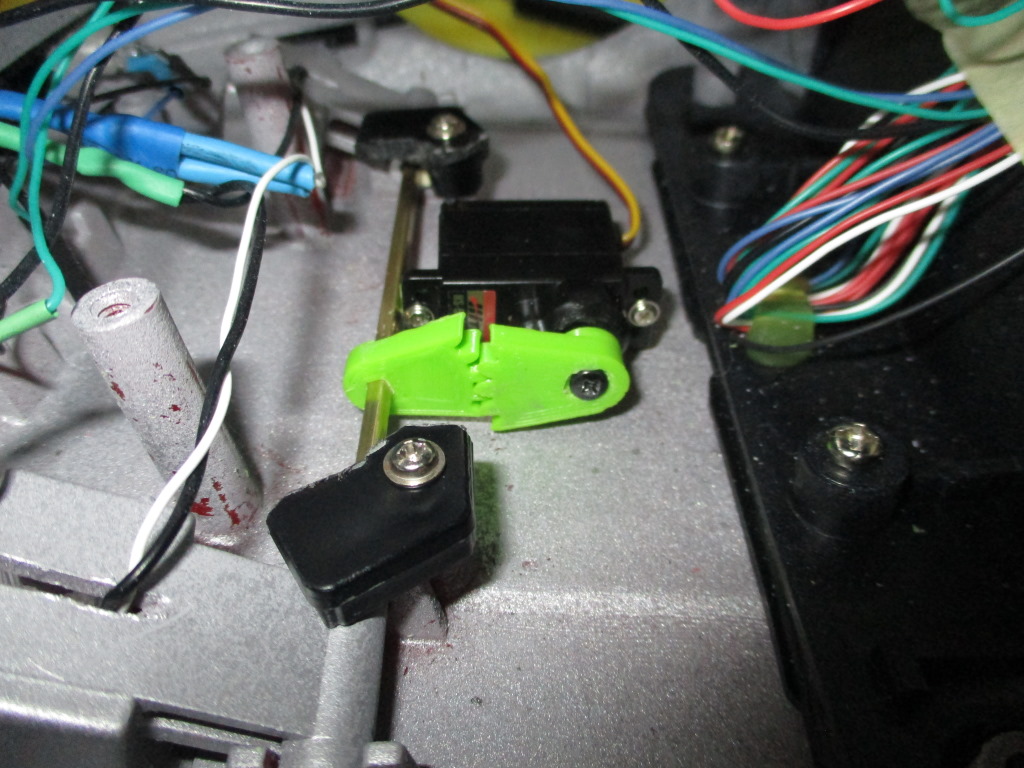
Started reassembling, and the stupid headlight pops just didn't want to align properly. Jerb/Frizzen, you were right, I should stuck with a single axis and servo. So, back to the drawing board:
One servo, drives a brass square rod down the both, works pretty well. Still don't like the stupid digital programmer for limits, so using the Arduino to drive the servo and programmed the limits there. At least the digital programmer means I can make the servo move nice and slooooowly, very smooth. Of course the Arduino and all the wiring goes right underneath that, and I don't want to get any of the wires get caught in the gears. I do NOT want Magic Smoke coming out of the electronics after all the hassle putting this thing together. A bit of styrene sheet bent up makes a nice protector:
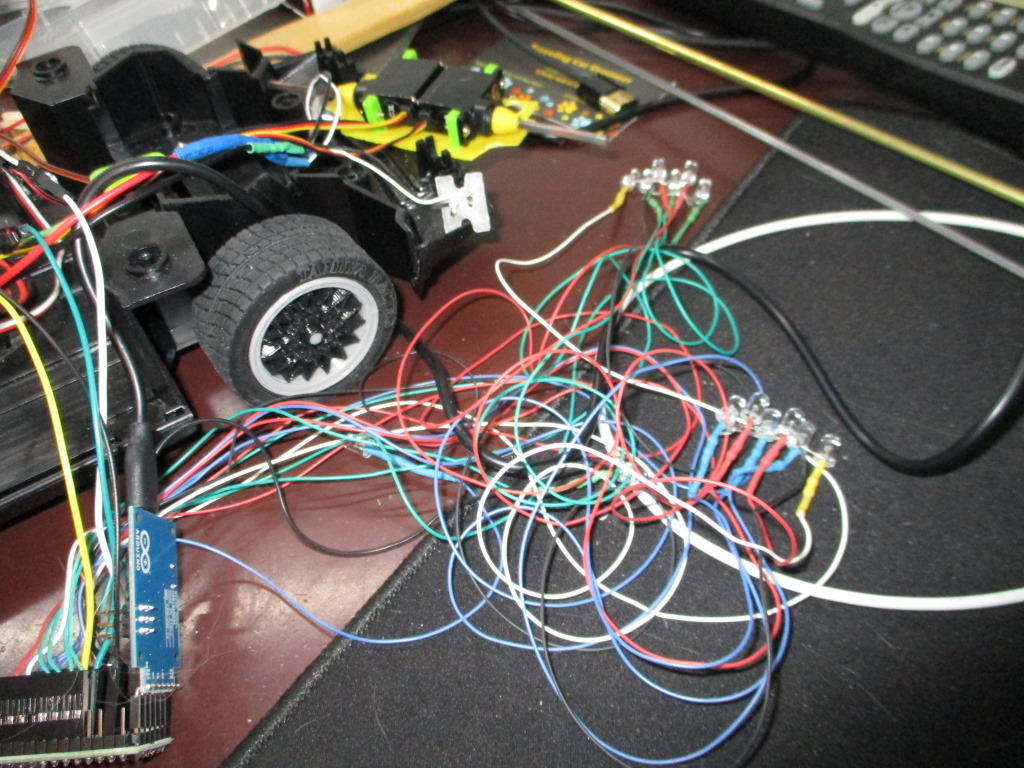
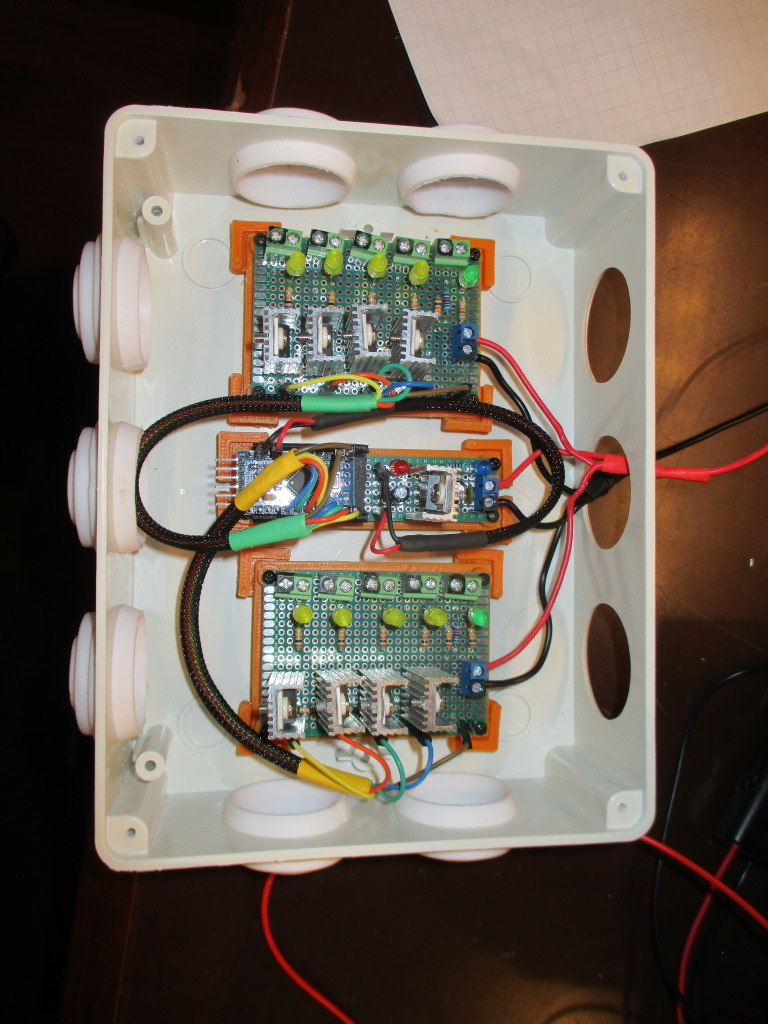
Programming the Arduino and the LED harness.
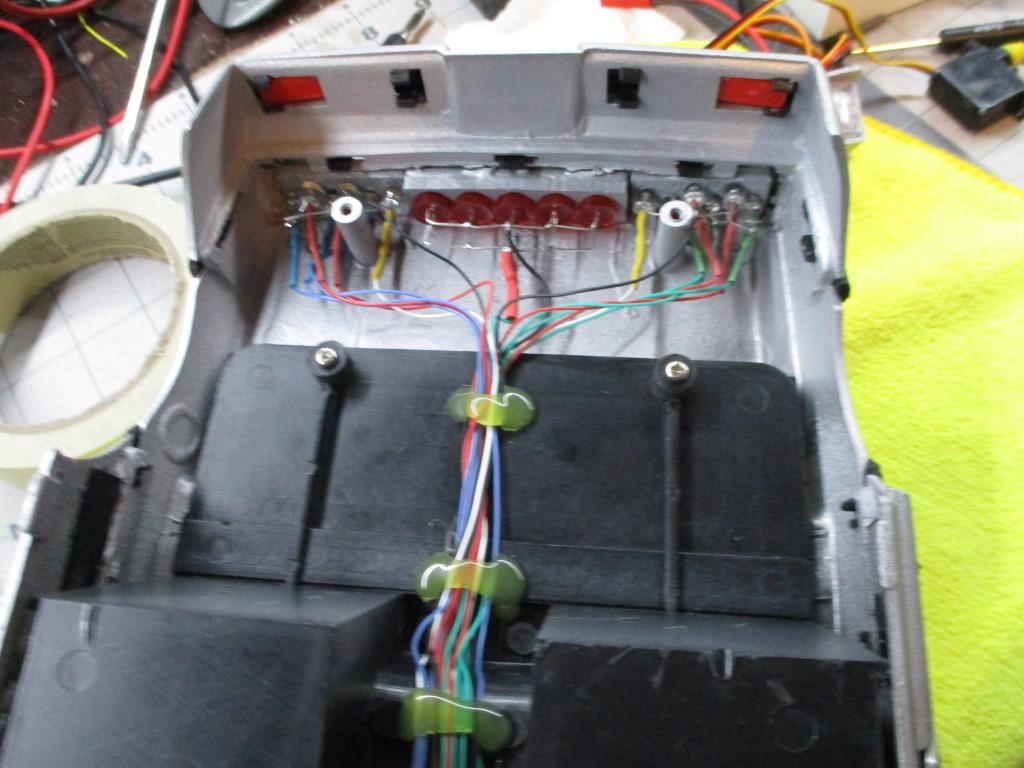
And yeah, it's spaghetti there, but the wiring is neatened up later:
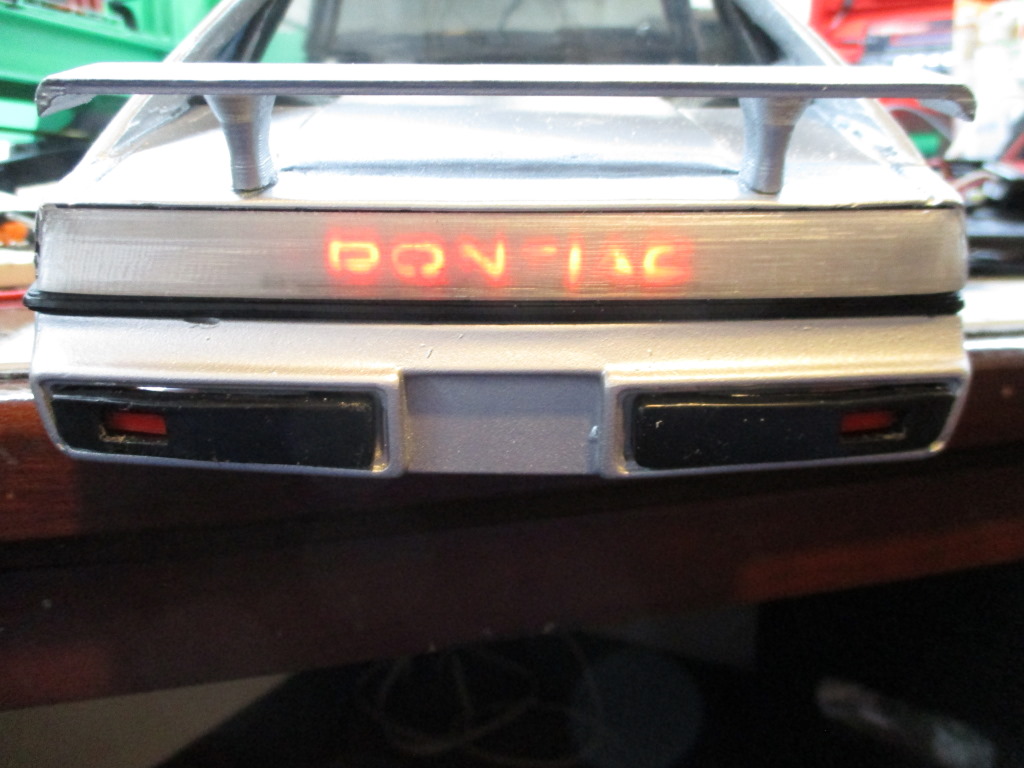
And yes, that's a lot of LED's! That part at least came out well, I think.
The LED's don't quite line up with the "T", depending on angle, but I'm still amazed that it's legible at all considering it's less than 1/2" tall.
Had to Dremel the living snot out of the inside, but the translucent covers it all up.
There's the brake lights, along with personalized license plates to match the big car.
-- A
[This message has been edited by dremu (edited 05-30-2021).]
Nice job on the interior, tamiya has a light grey that's almost a perfect match for the dash grey in mine
Thanks. Yeah, I coulda gone and actually bought paint, but I'm trying to restrain myself from going and buying things every time I feel the "need". Dangerous habit that.
quote
Originally posted by Jerb: All the body mods really came together on this, must have been a ton of work getting it to all play nicely.
Thanks! Yeah, took a metric TON of Dremel work. 3D printing is great and all, but you have to start with a good model, right, and drawing up that stupid fastback side wing is a nightmare. Heck, even the rear trunk extension was a pain (the fastback "butt" is bigger than the notchie.) It's a compound curve, and my OpenSCAD-fu ... well, I'm getting there.
Ooh! Hotmelt! Painting with silver is sort of obvious, IF you're using diffused or multi-directional LED's. I did that on my Series Land Rover if you recall. A lot of the stupidly bright ones are optically focused anyway, so you'd just need to hotmelt it. I think my current bag of glue sticks are all kinda orange-y, but that may be because they date to the last decade, at least. I will spring for new clear one though for an upcoming project.
quote
Originally posted by Jerb: I dunno, it might need a couple more wires in there. Also it turns out your cable rc 'new bright' car is bigger than my 'toy state' car.
Yeah, I got happy with the wiring, but it means that the Arduino can drive each LED directly, don't need a separate control unit for lighting. (I won't go down the rabbit hole of the details, but in short, I just barely stayed with the current and power limits.) I also really like lighting with the Arduino -- well, I just like lighting -- but on the Arduino particularly, it's so dang easy to change. If the TX goes offline, the thing has a blink pattern akin to hazards, so I instantly know there's been a connection loss.
Wrt dimensions, huh, I thought they were close. I'll have to go and compare measurements on this one to what you sent me for yours.
quote
Originally posted by Jerb: Which sequential kit are you running on the big one?
Duh, the kind I make myself with an Arduino. Double illegal according to Ogre I'm sure =))
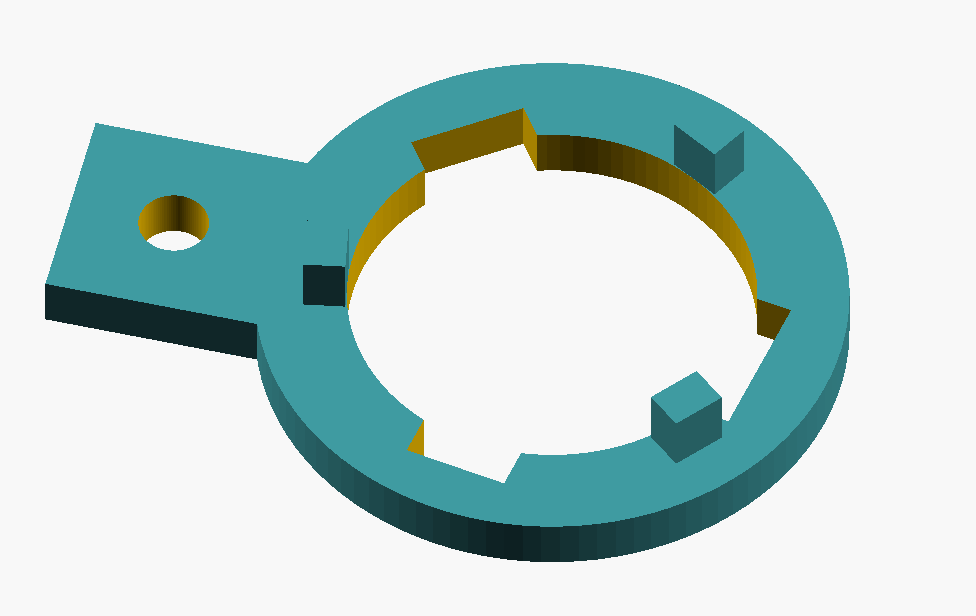
Added two more turns inside the stock lenses. 3D printed receptacle that matches the factory sockets for 1156 or 1157 or whatever they are, glued to the back of the lens.
Replacement sockets from Dorman, I think, and more wiring, et voila. This was early on, before I even got the plates.
[This message has been edited by dremu (edited 06-02-2021).]
Back in my day I added sequential lights to my notch back using a Dremel and junk yard sockets to extend the stop/turn signals to 3 bulbs from 2. Then got a hobby box and resistors and some other stuff from RadioShack and built a circuit. I fit it all in behind the taillights without modifying anything and still use normal bulbs. None of these arduino or leds you kids today play with
Back in my day I added sequential lights to my notch back using a Dremel and junk yard sockets to extend the stop/turn signals to 3 bulbs from 2. Then got a hobby box and resistors and some other stuff from RadioShack and built a circuit. I fit it all in behind the taillights without modifying anything and still use normal bulbs. None of these arduino or leds you kids today play with
The 555 might possibly be mankind's greatest invention since the wheel, don't get me wrong, but the Arduino doesn't require me to change RC circuits to change speed [NB: For those not electro-nerdy, that's "resistive-capacitive", not "radio control."]
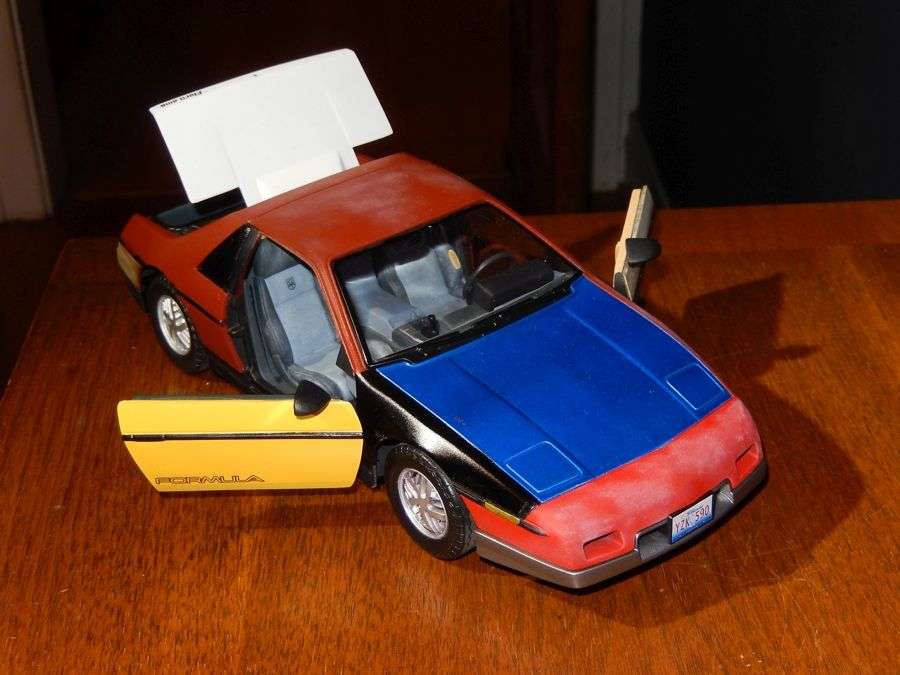
Thanks for the kind words and good ideas all. Coupla final pix. One, the package from Wisconsin finally showed, and Jerbfrizzen you were right, the earring is dead on:
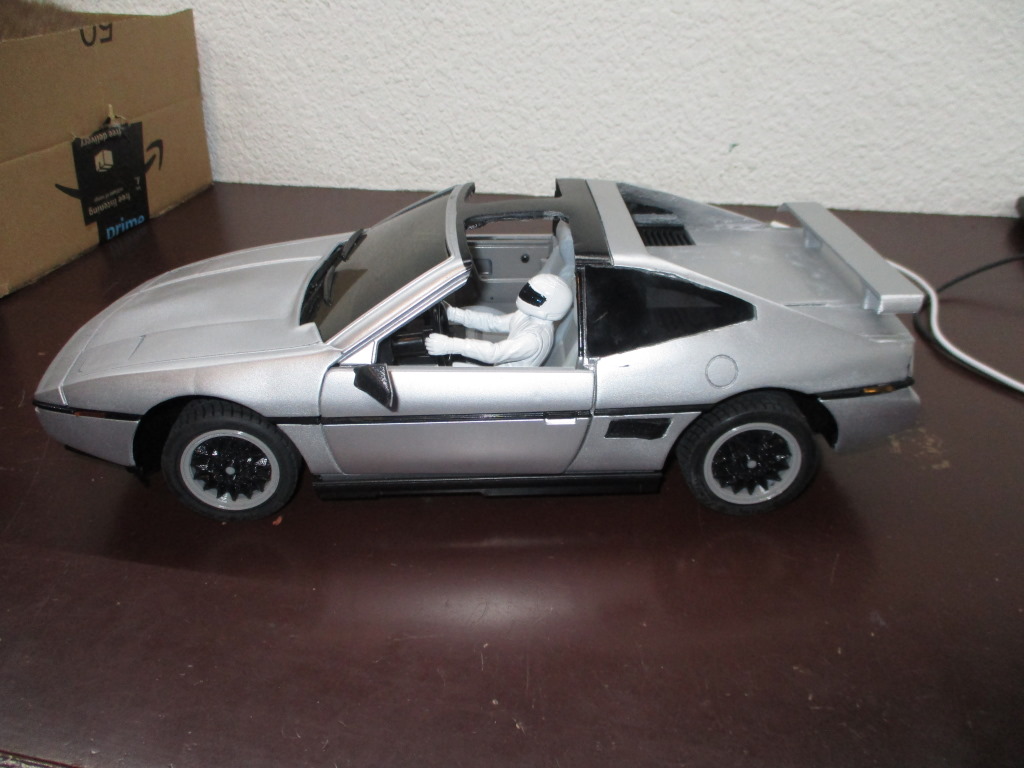
And the money shot, aka my version of "2GT's, one spot." =))
T-tops still on the big car because I'd just washed her and didn't want to dribble on the seats.
-- A
[This message has been edited by dremu (edited 06-15-2021).]
It's impressive how many of the custom touches you were able to translate down from the Big to Little.
I'm glad 'some crazy fiero guy' on another board helped convinced you to start the project. (Go repost this build for the other rc nerds to drool over)
It's impressive how many of the custom touches you were able to translate down from the Big to Little.
I'm glad 'some crazy fiero guy' on another board helped convinced you to start the project. (Go repost this build for the other rc nerds to drool over)
Thanks. I'm mostly pleased, but yeah, lots of fun detail. And much kudos to said other Fiero owner -- note that "crazy" is redundant when referring to Fiero people
As for RCT, I have one other finished build I wanna do there, but it's sooooo slow, so little traffic, I gotta see if I can find another forum with more happening. I miss scale4x4rc.org and watching Wombii's firetruck (now that sh!t is crazy!)


 [NB: For those not electro-nerdy, that's "resistive-capacitive", not "radio control."]