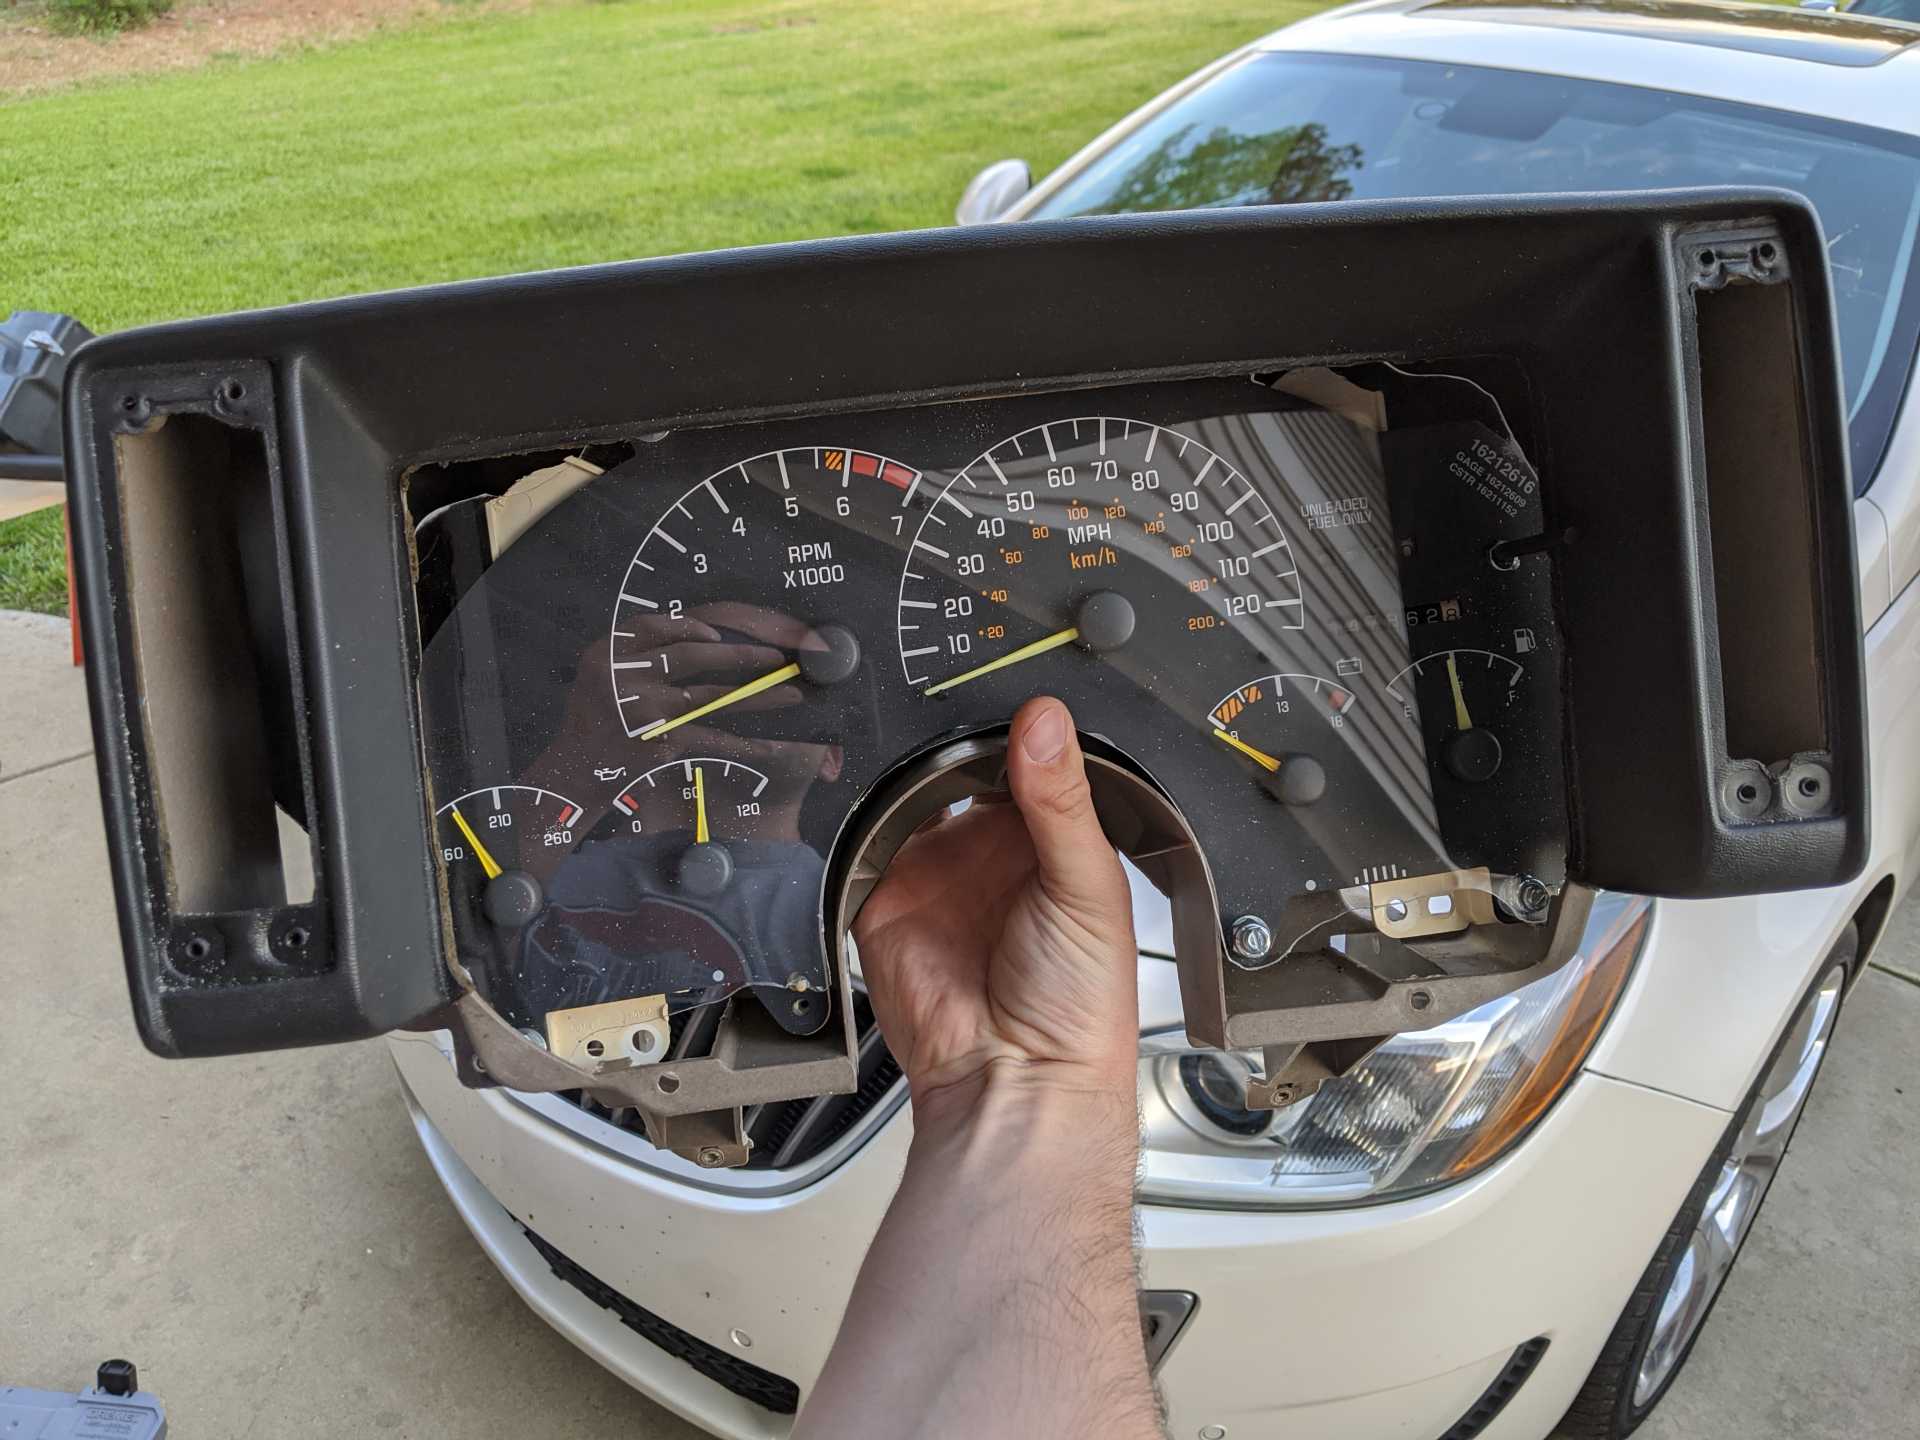
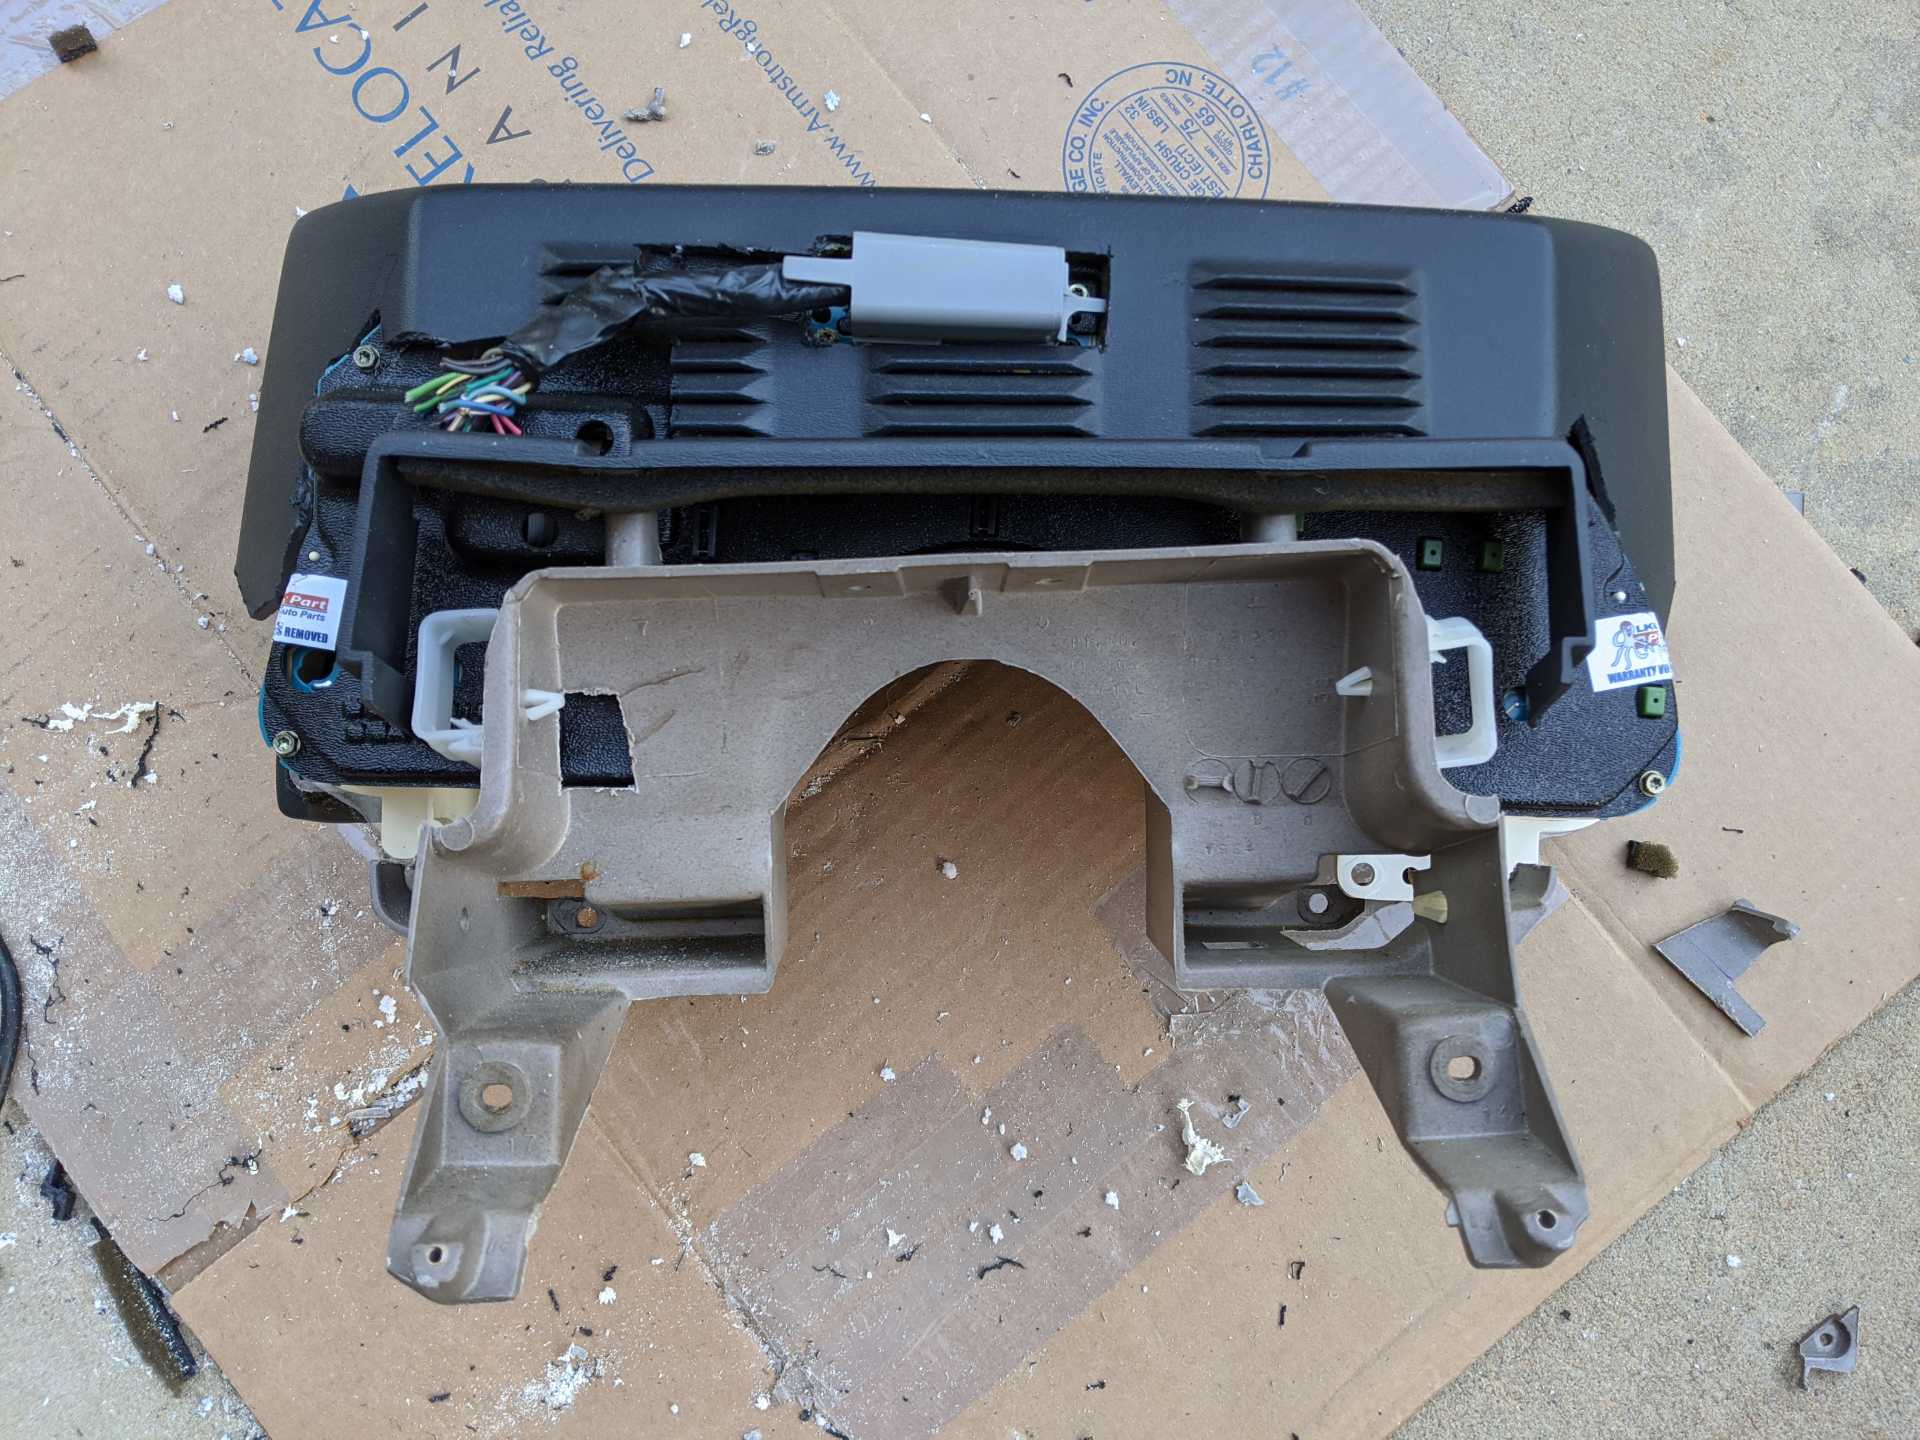
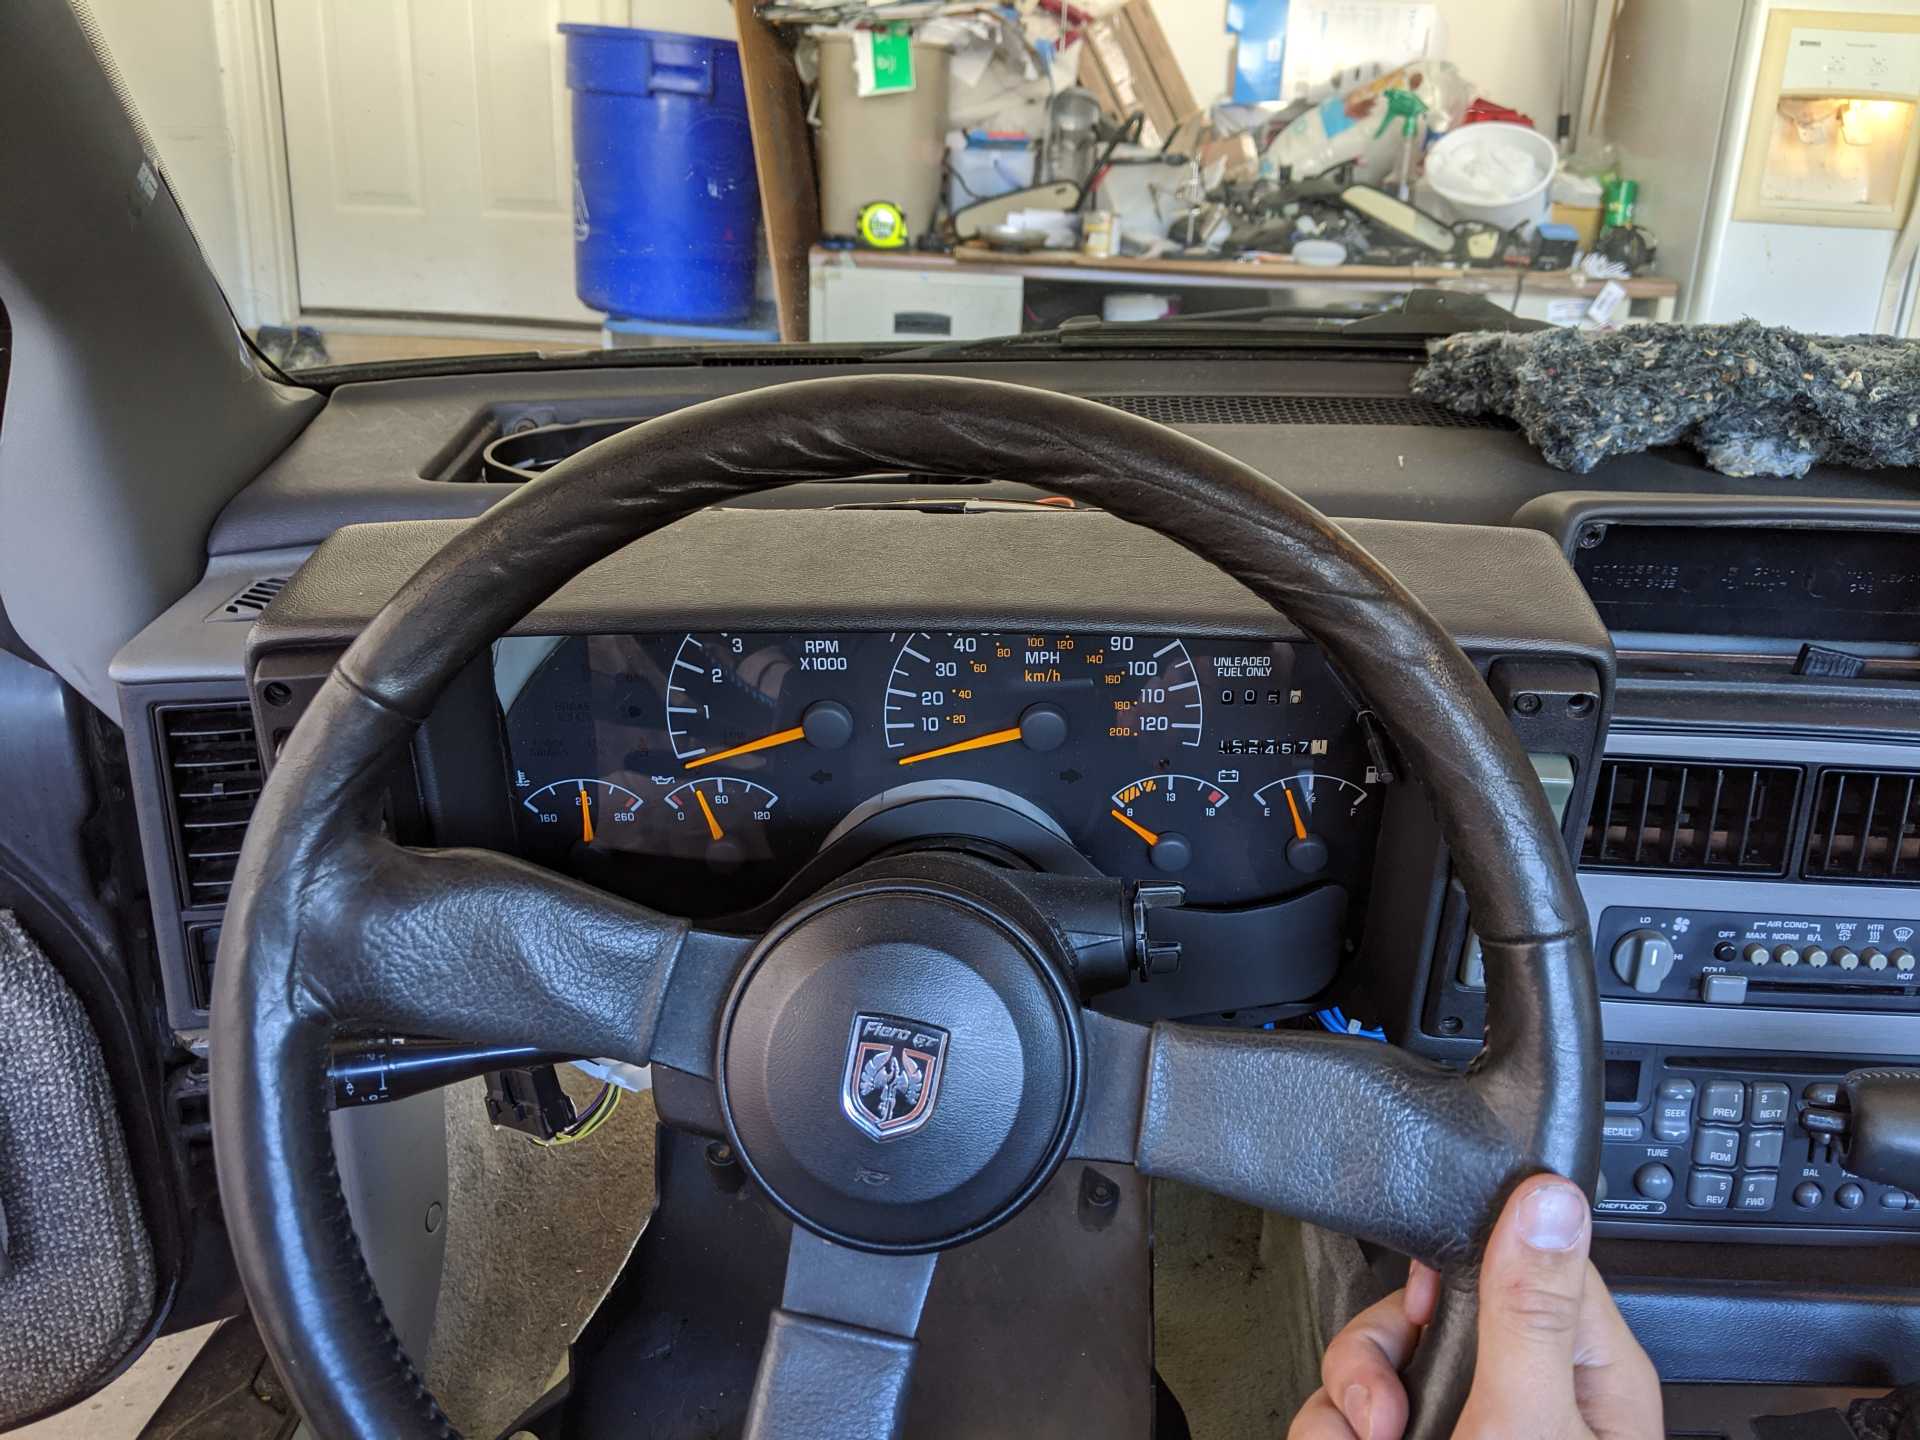
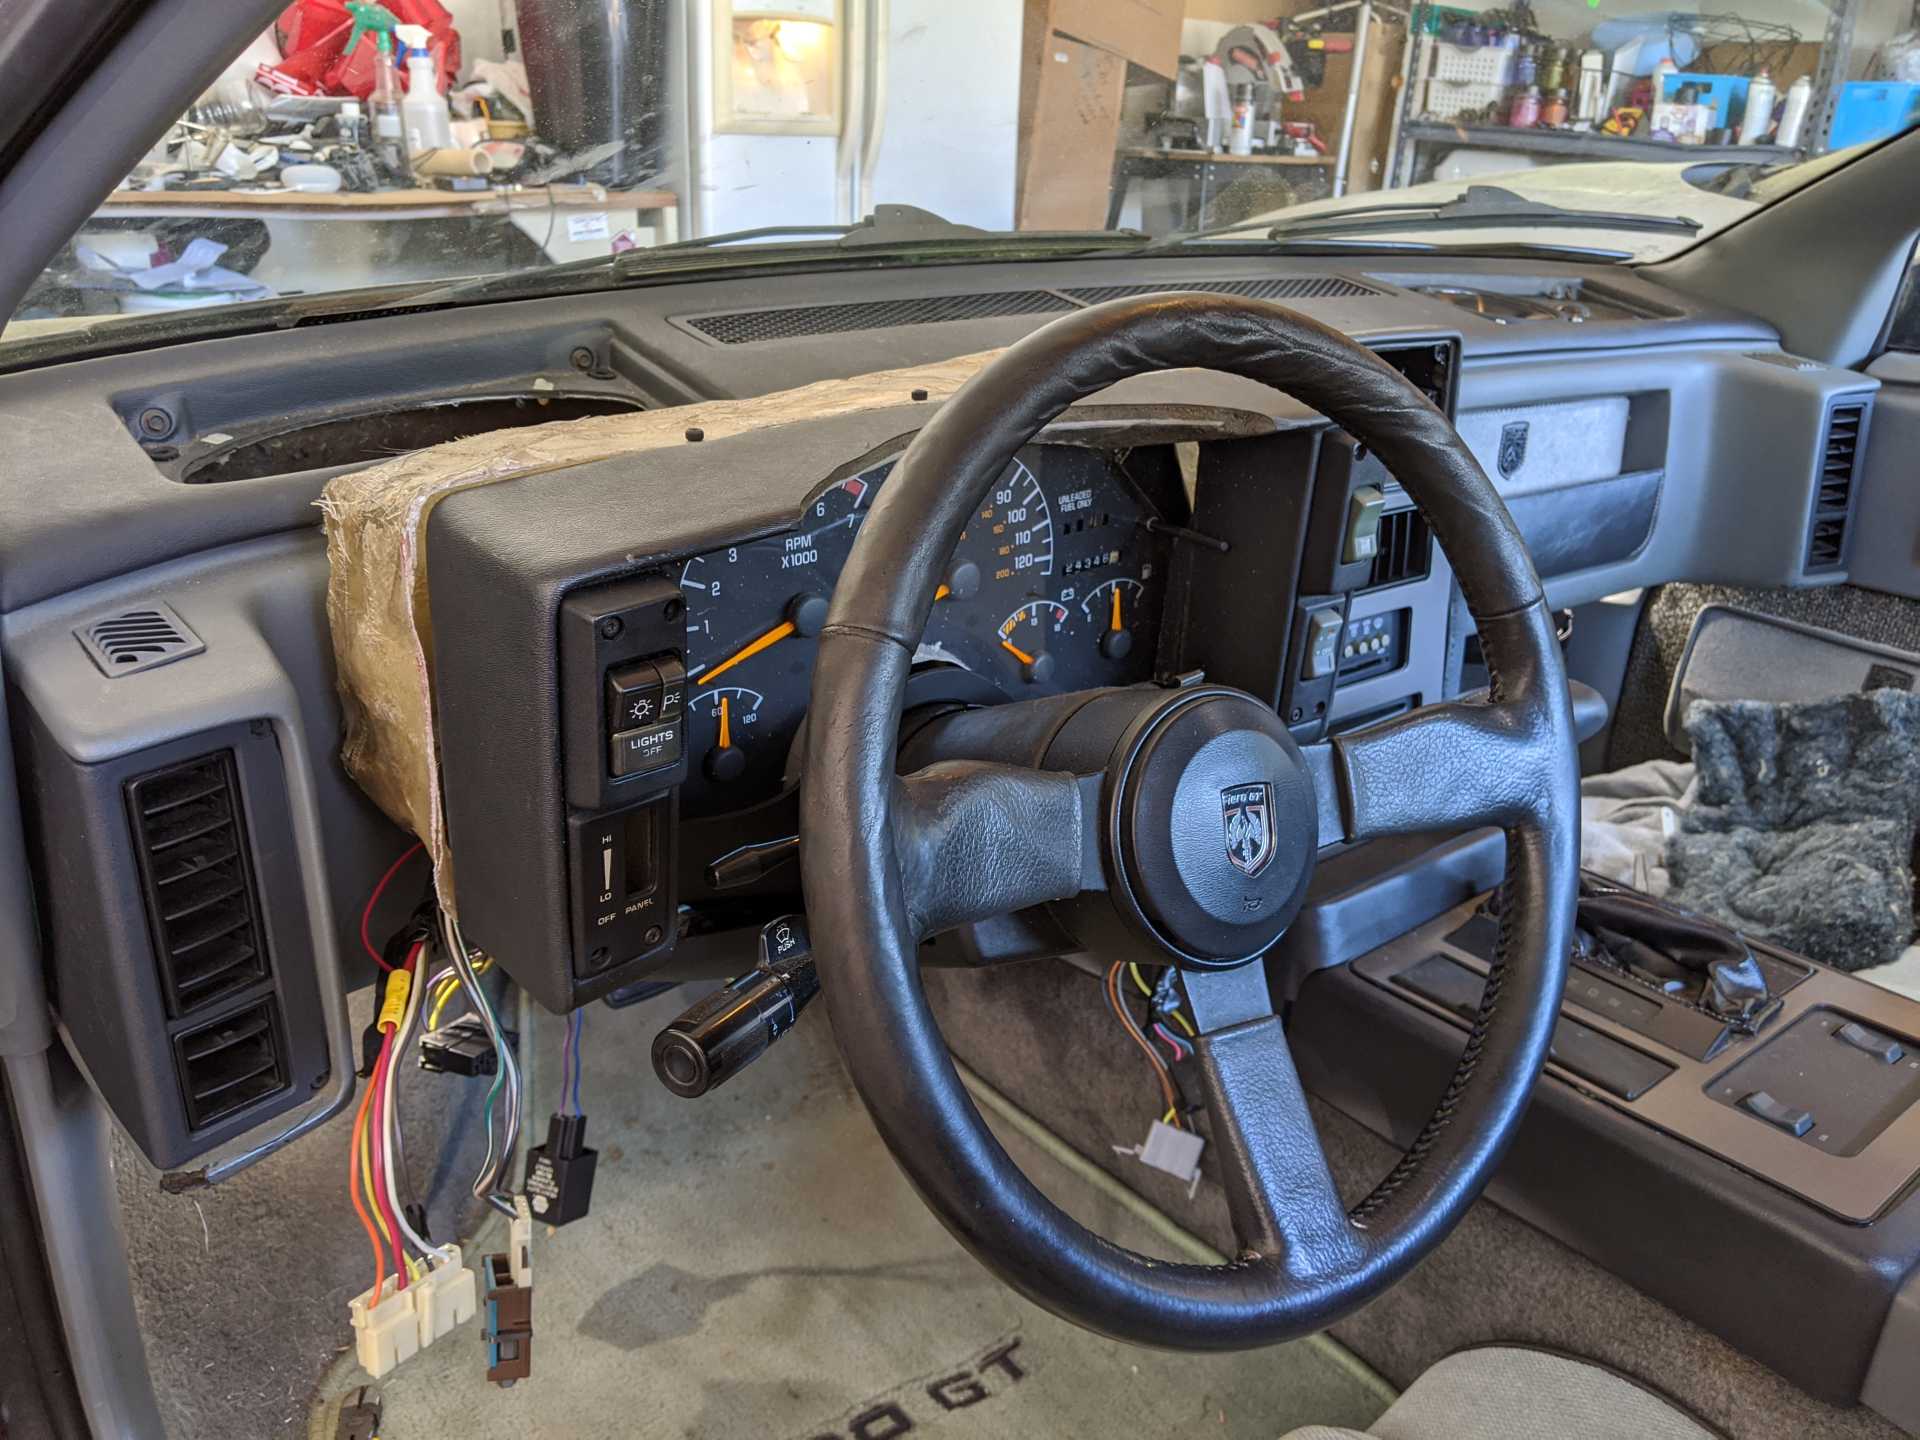
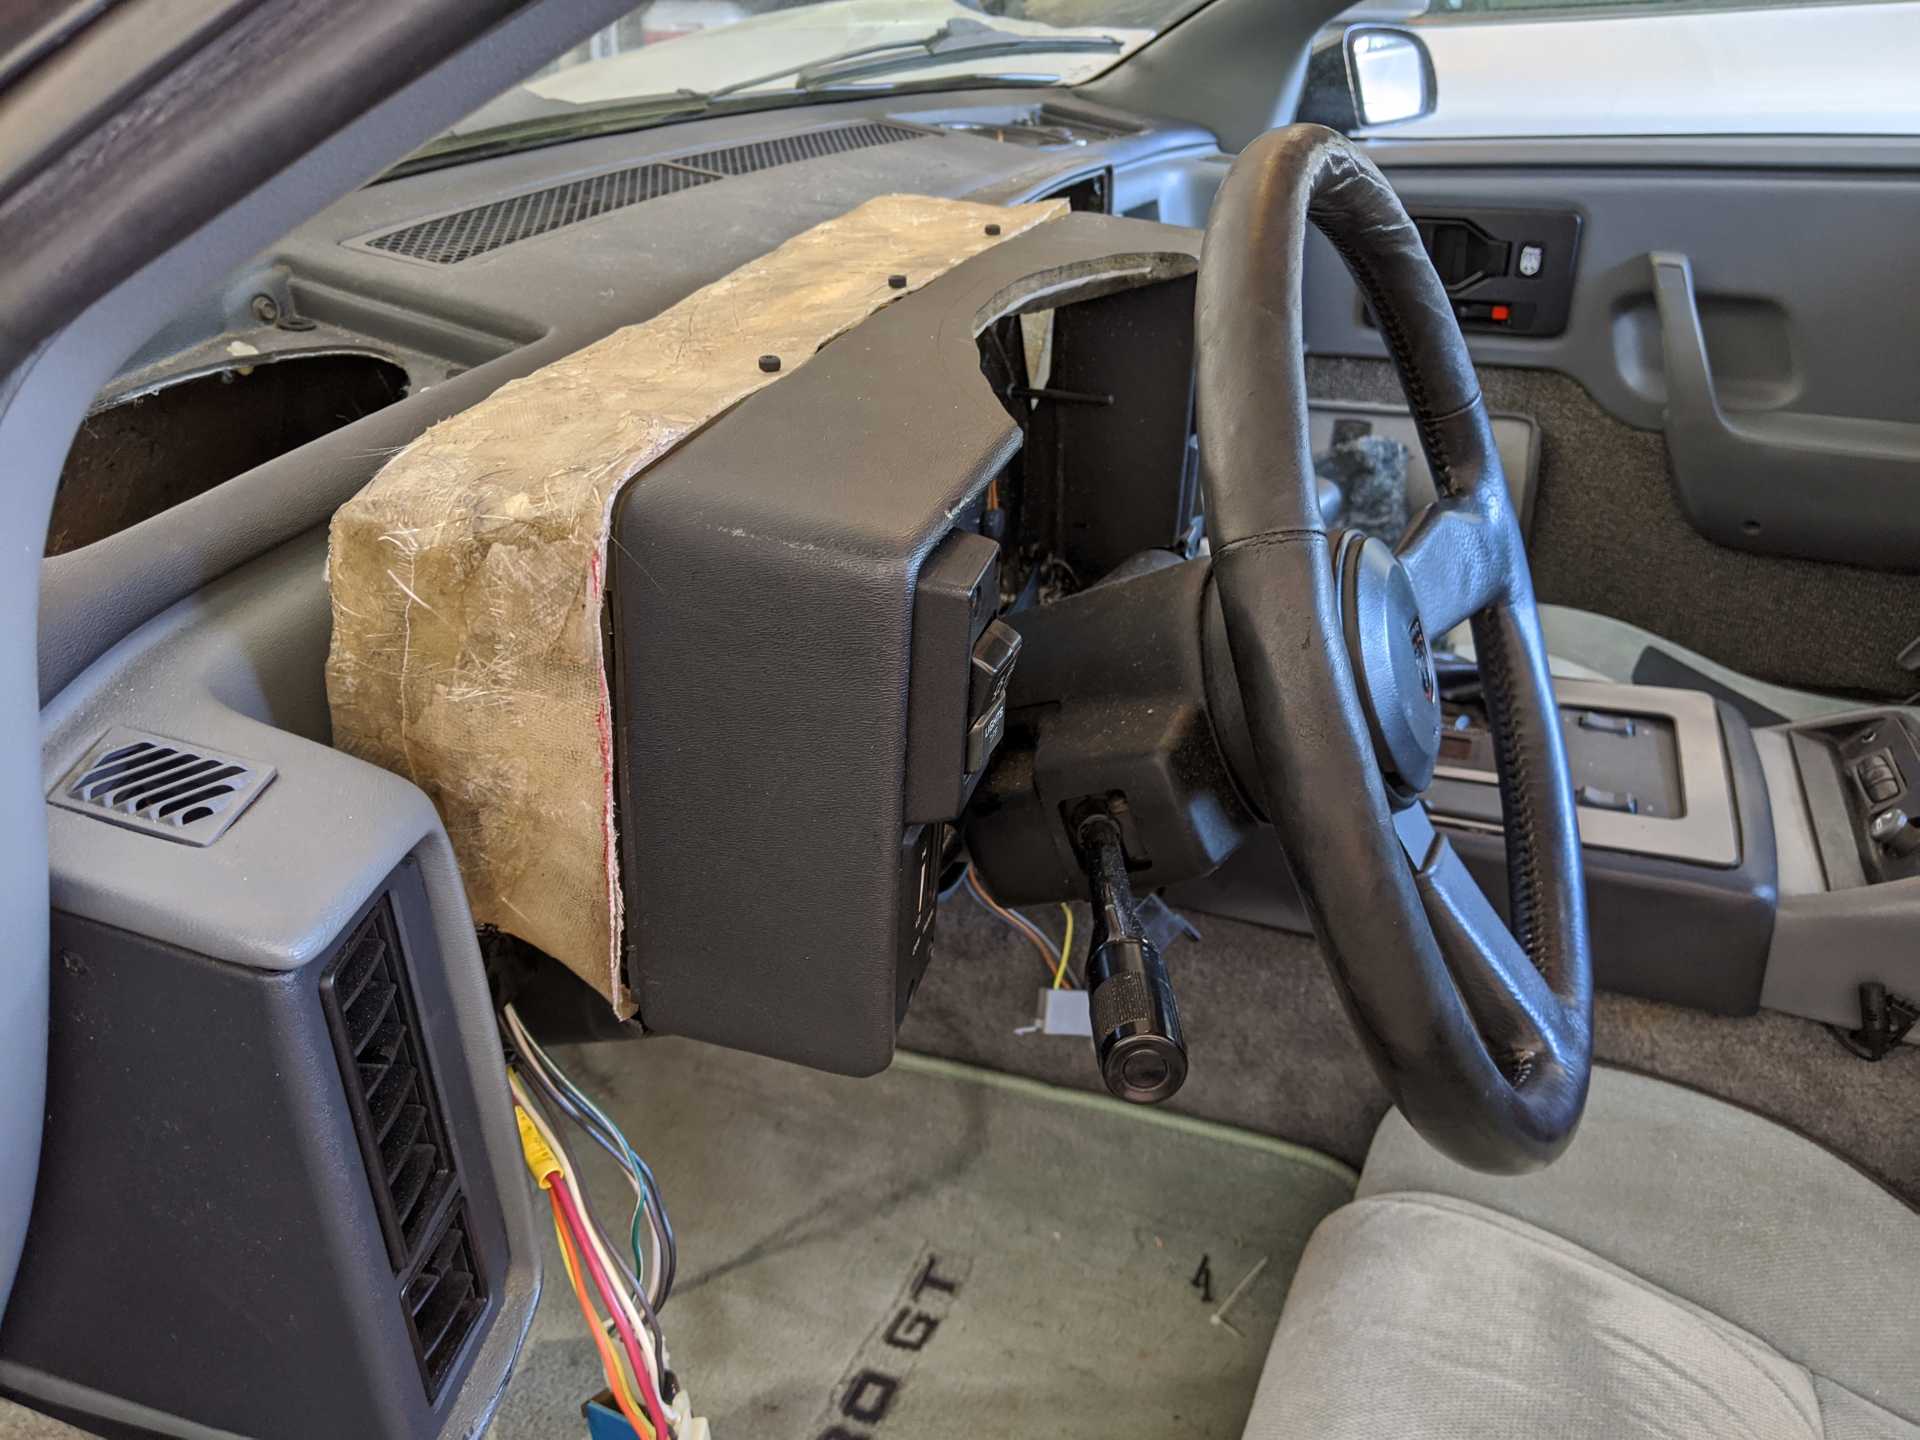
Hey there everyone, this is my latest project. I bought a spare gauge cluster housing and I pulled the gauges out of a 95 or 96 Firebird in the junkyard. After disassembling the spare Fiero cluster and doing some cutting and Dremel work, I was able to build this. Obviously there is more work to be done, such as the wiring (planning on building a plug and play harness utilizing the spare cluster's plugs and some soldering) and making the back look nice. Any thoughts or advice would be appreciated.
Overall was a productive day! Up next is the wiring. I want to test everything and make sure it works before I finish making the housing look good.
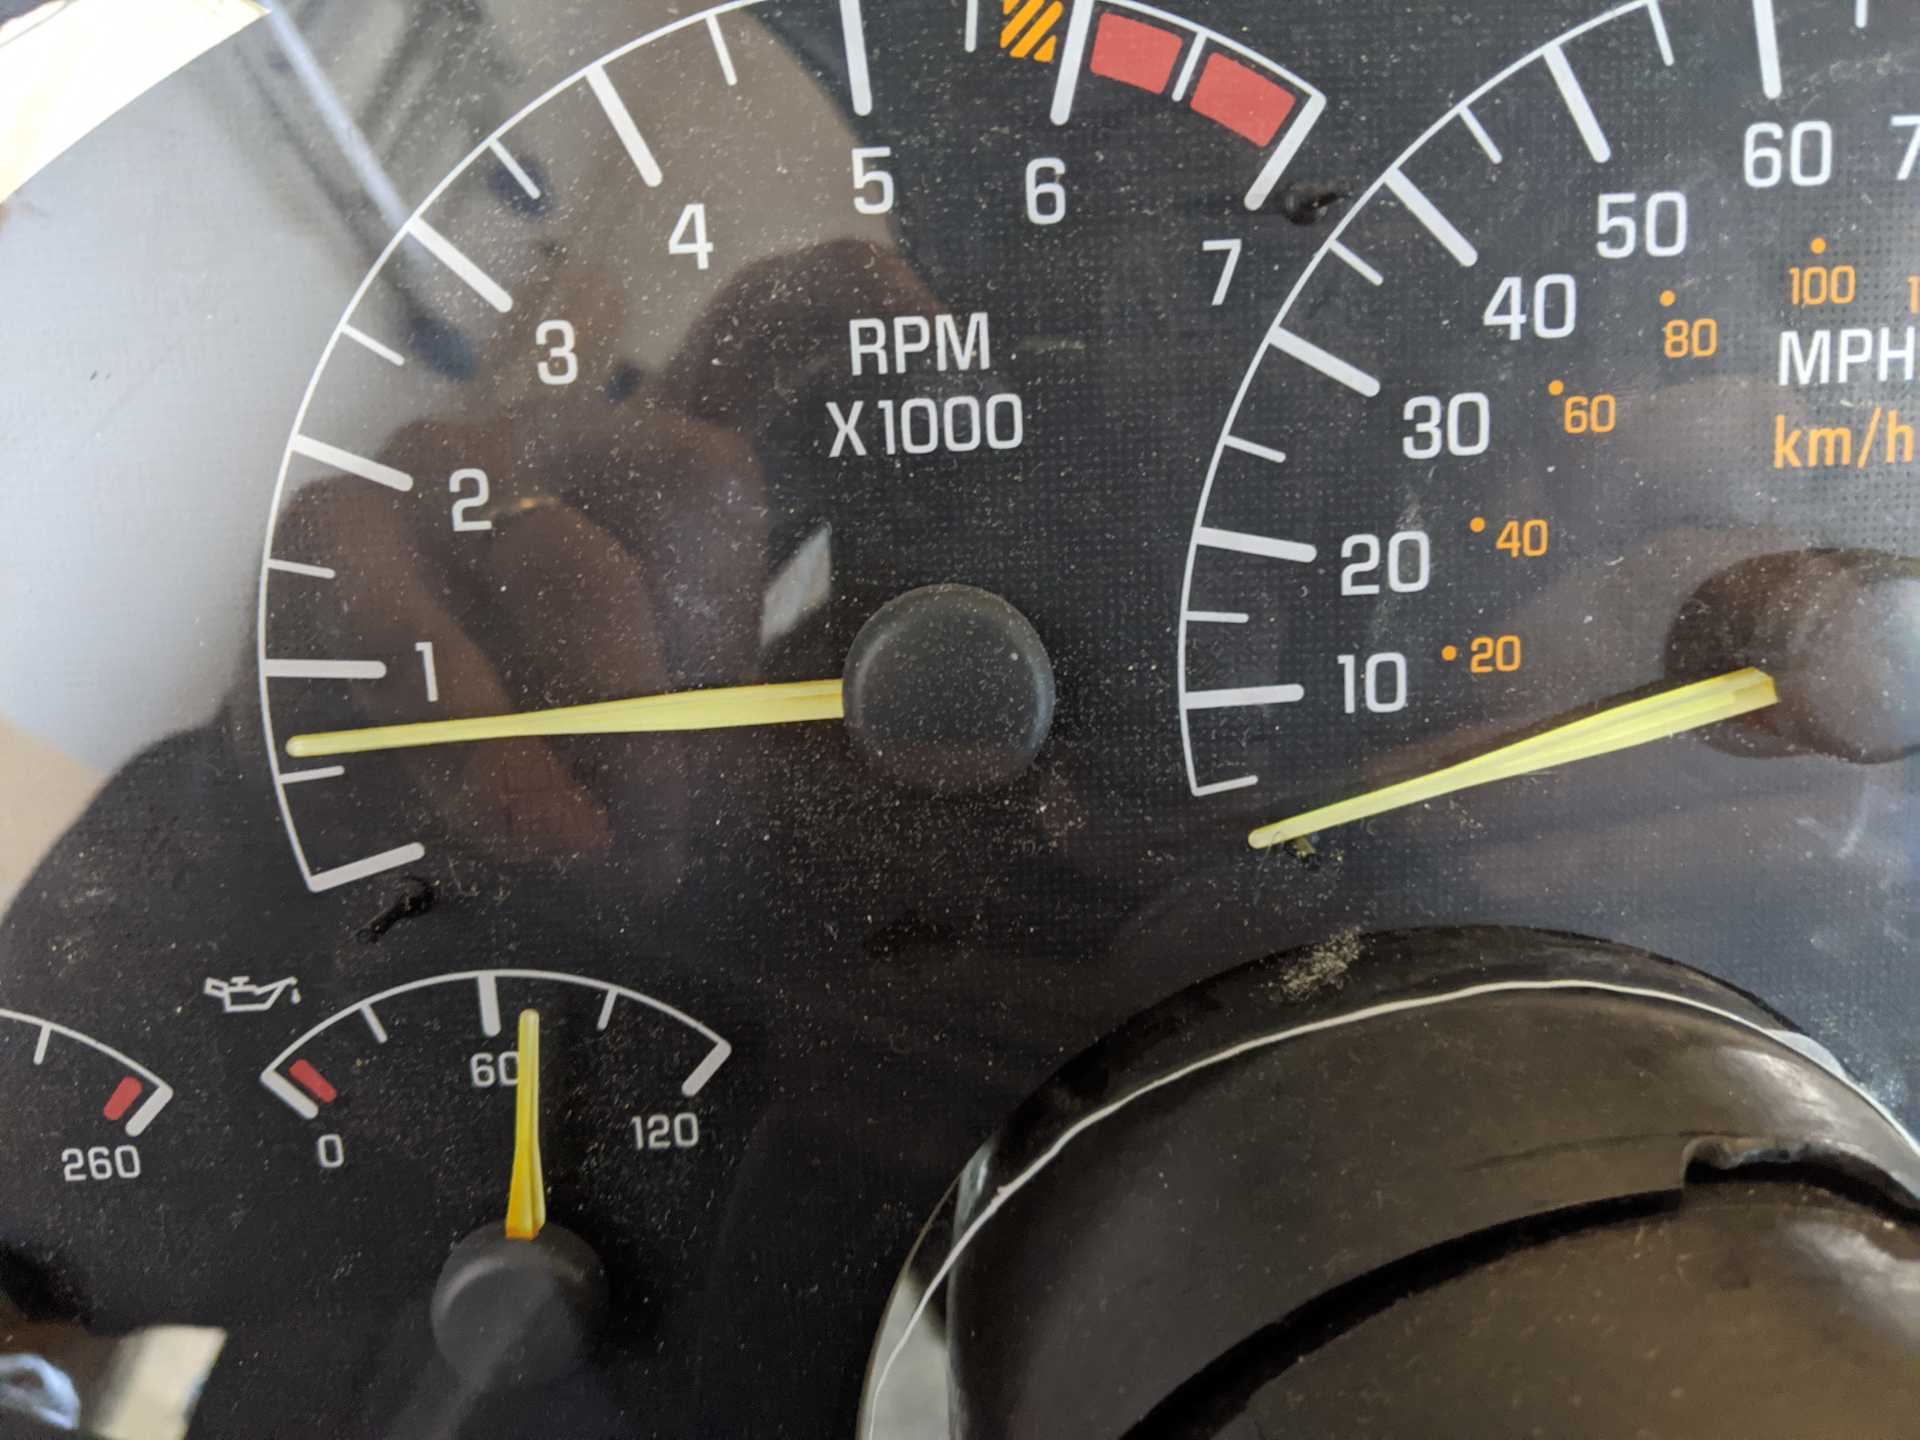
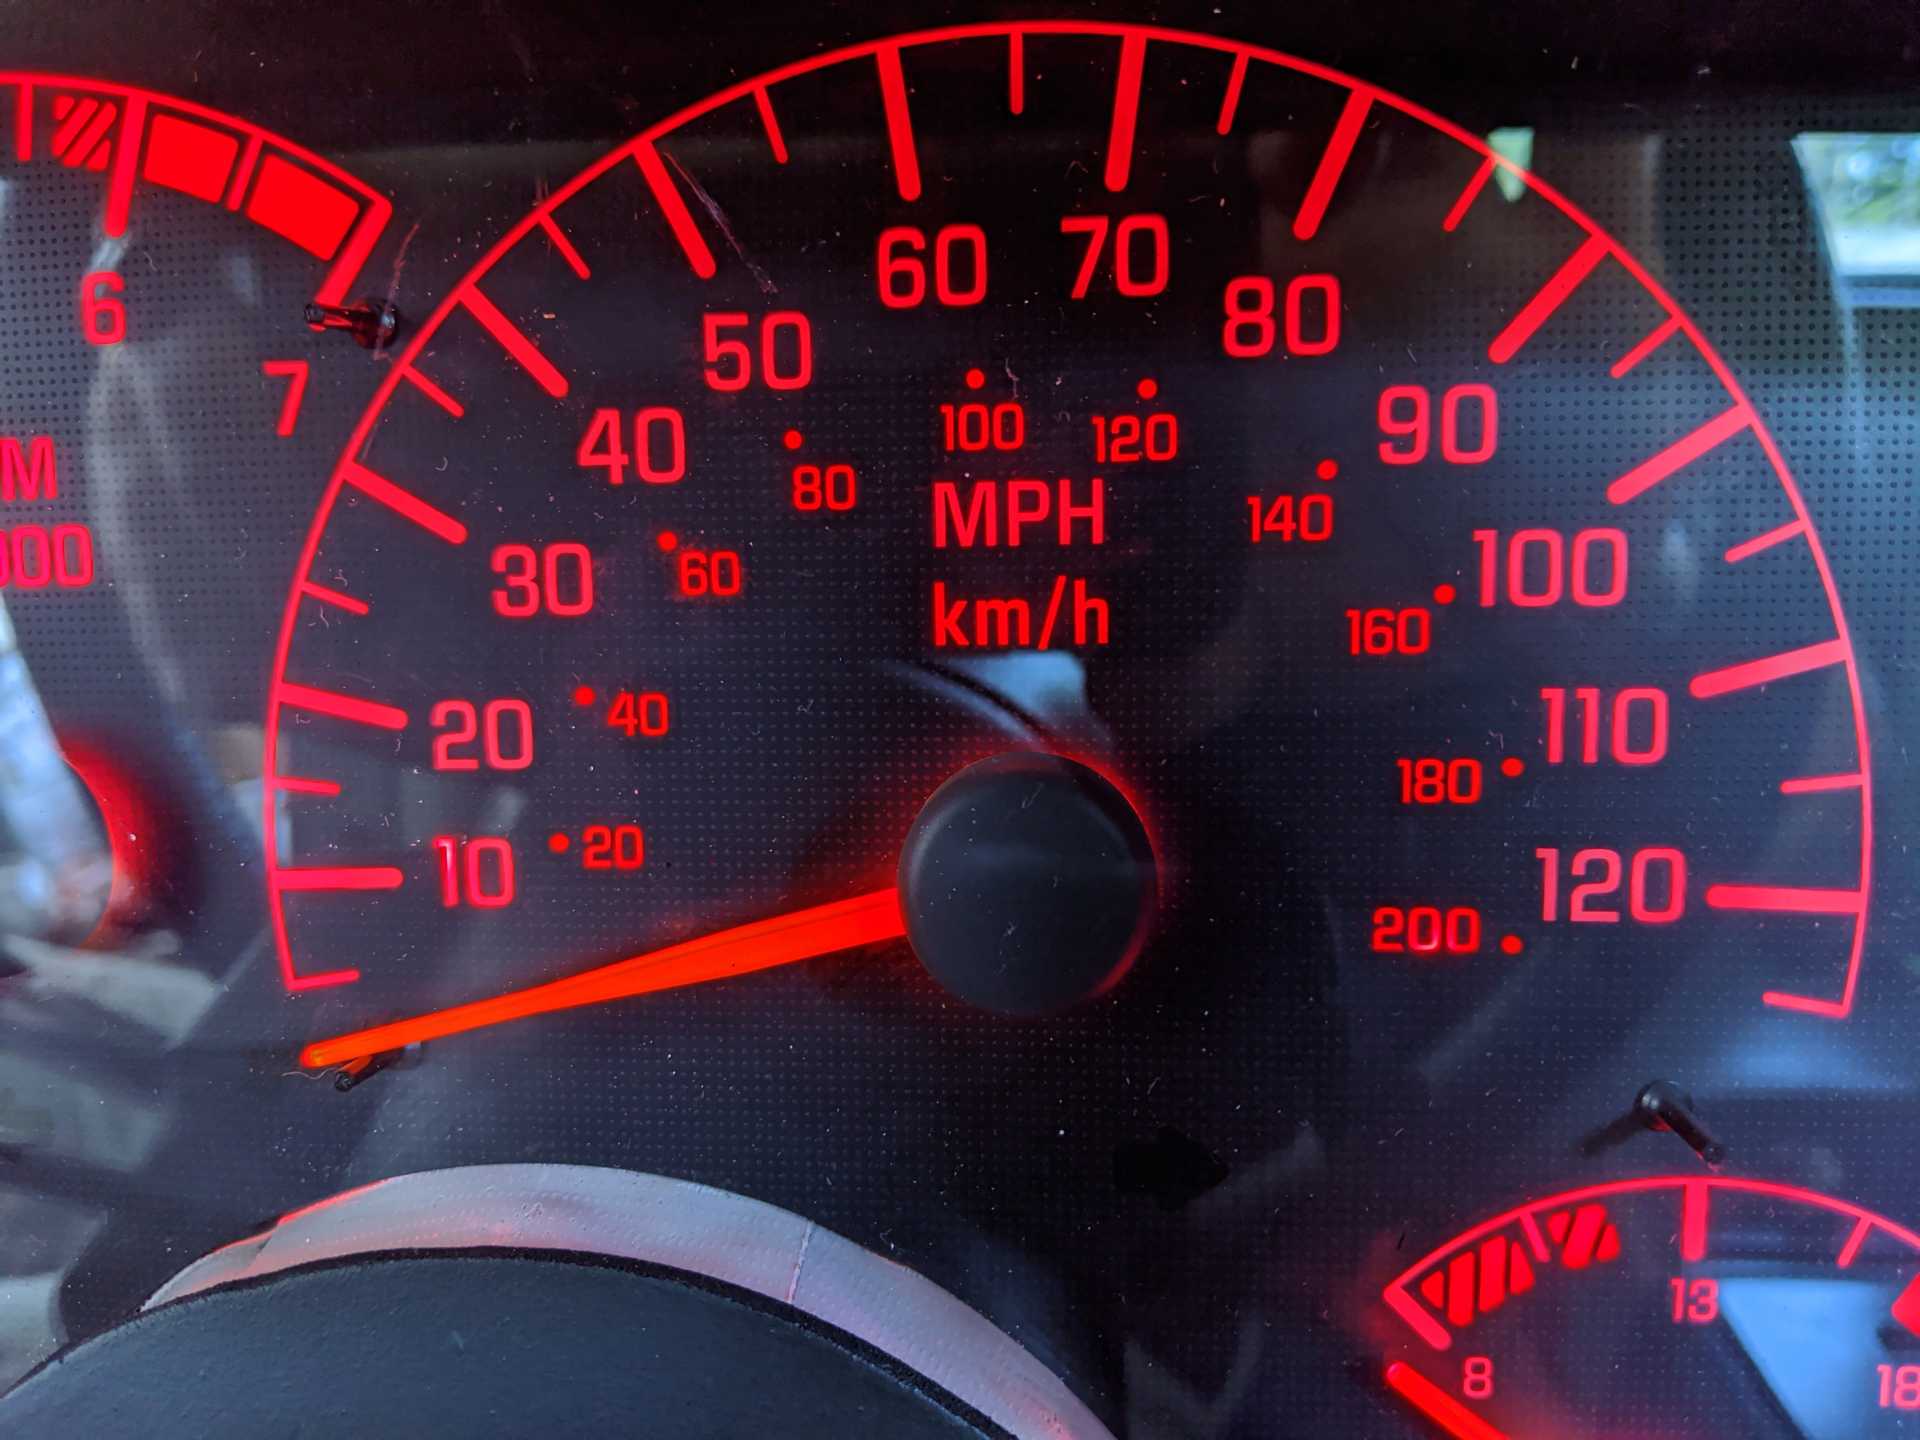
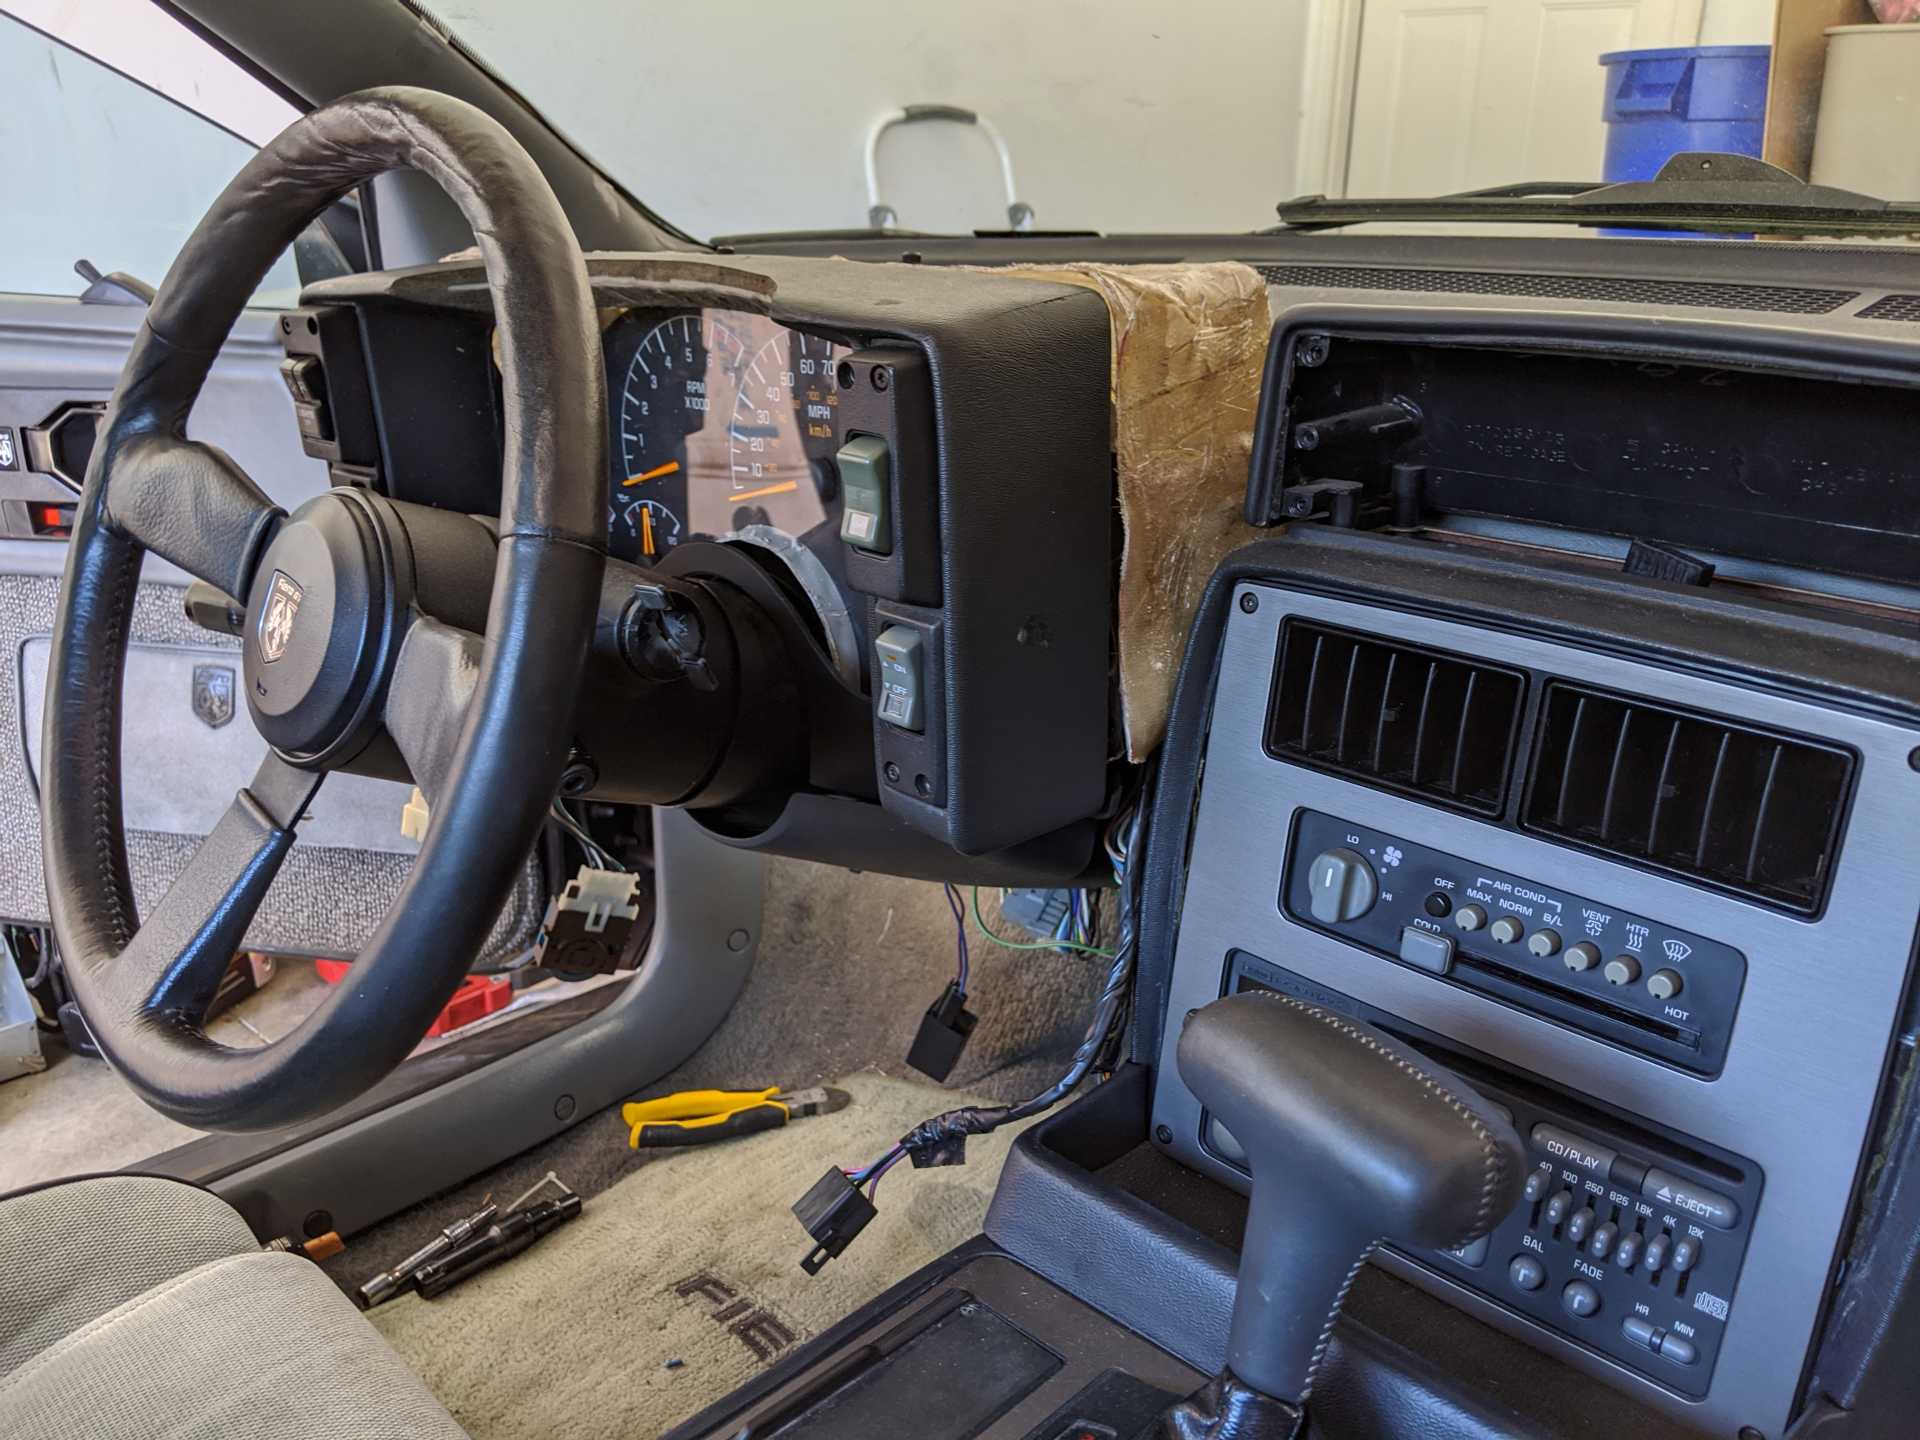
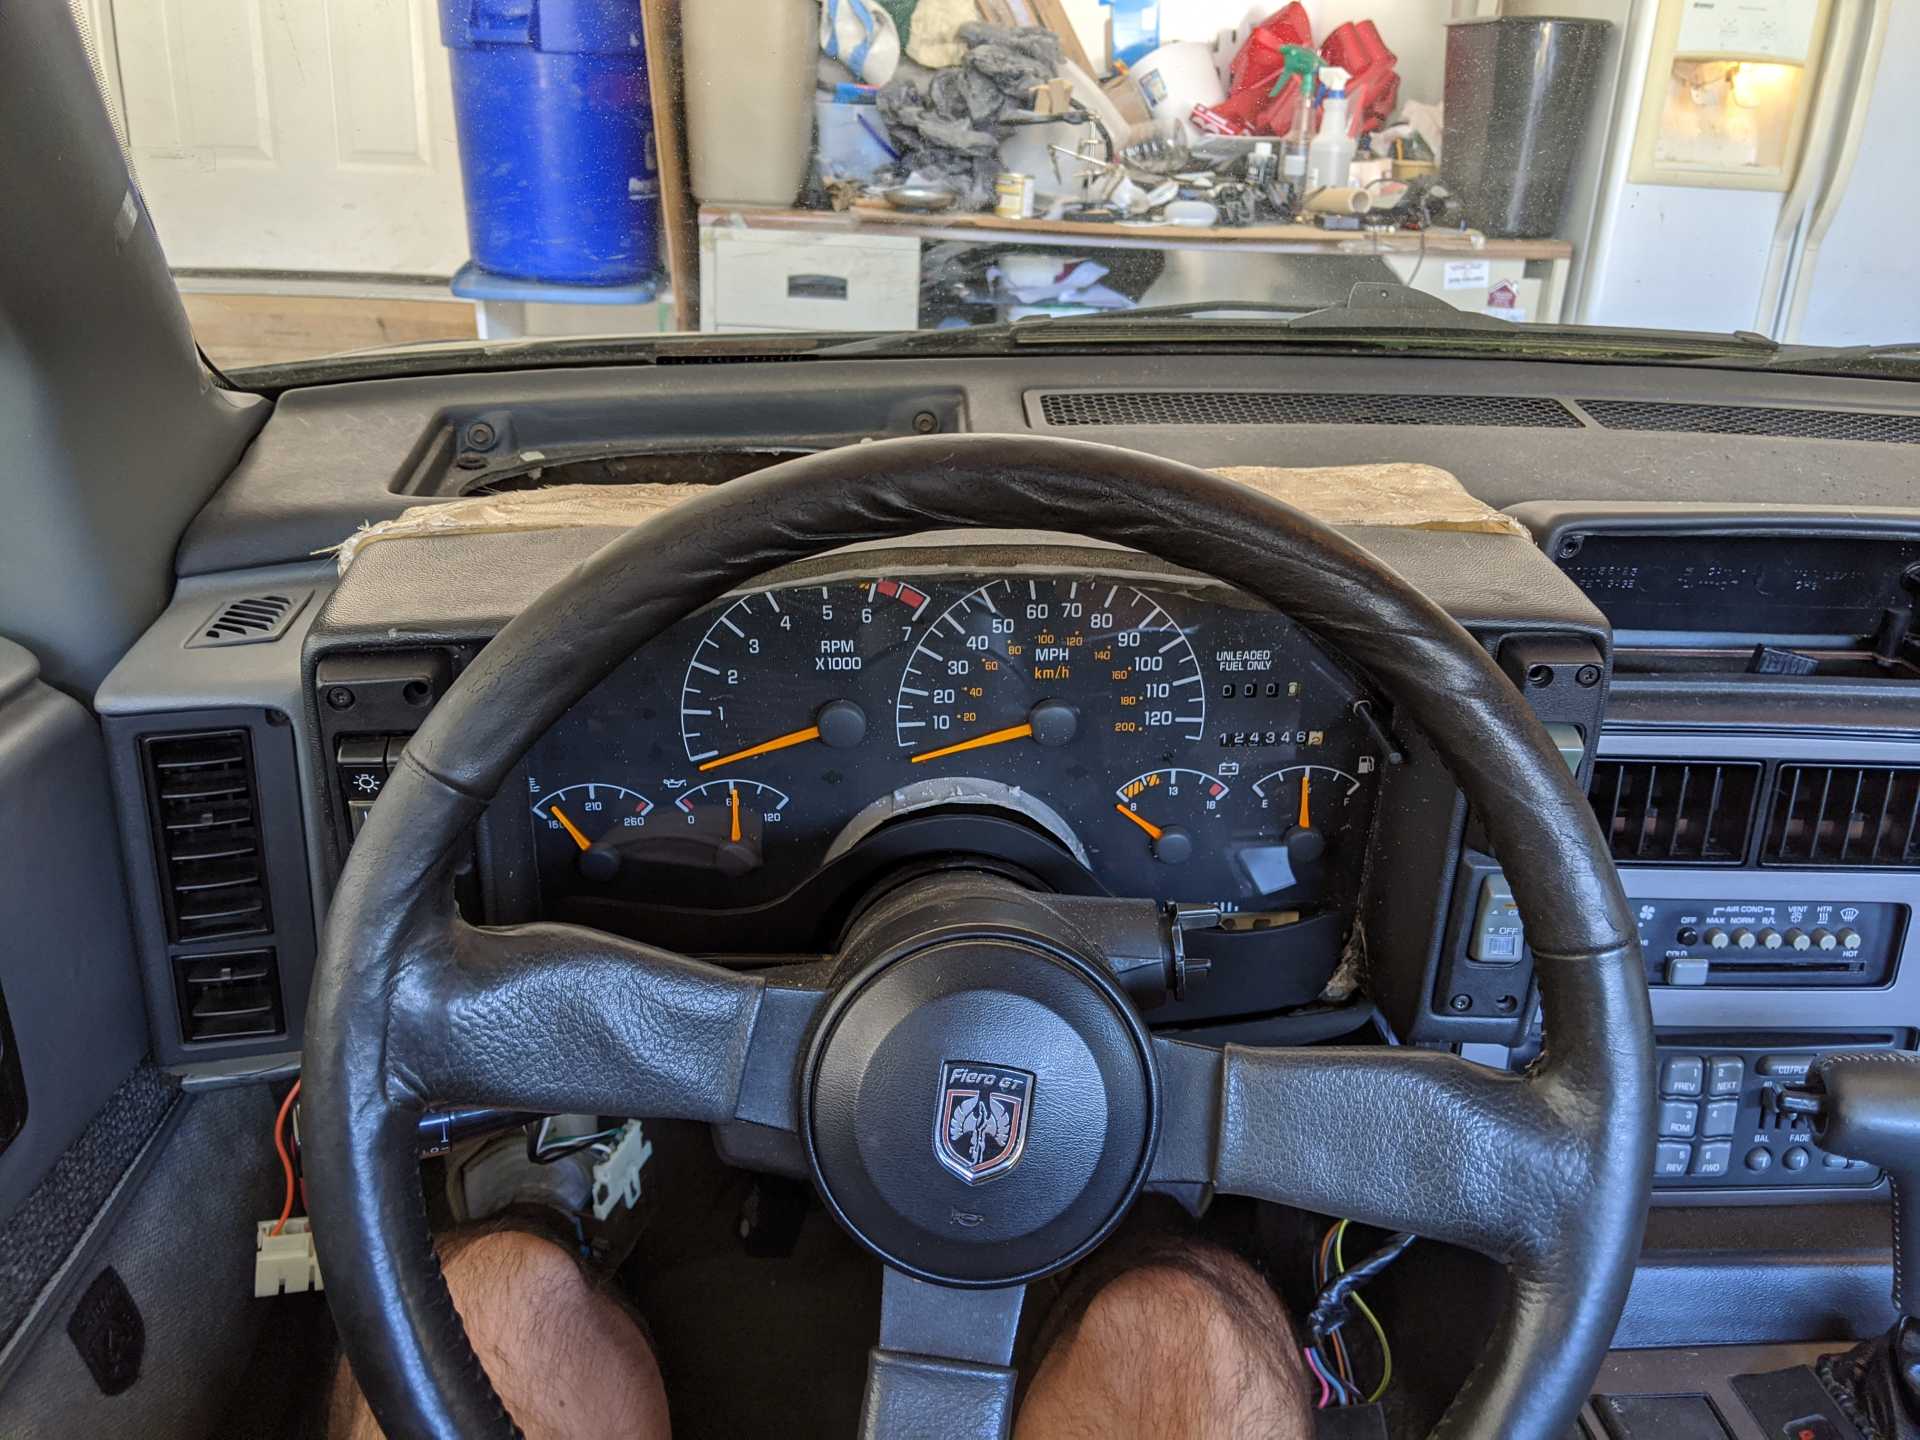
I completed the wiring harness and just finished testing it out. All of the warning lights are functional. The tachometer, volt meter, and fuel gauge are working as well. The speedometer is not getting any reading, the temp gauge isn't either. The oil pressure gauge seems to be reading 20-30 PSI high. I'm going to conduct continuity tests next to ensure everything has been connected successfully.
After conducting further testing, the temp gauge is getting 12v from the car's harness, through the adapter and gauge harness, and into the Firebird cluster plug. It appears that the gauge is broken. Going to try and scavenge the temp gauge from a 4th gen Camaro in the junkyard to replace it with.
Now I need to figure out the problem with the oil pressure gauge. I might try to use a potentiometer to drop the needle to the correct reading.
Nice job getting it going. Looks good in place. It's been a long time since someone has at least documented doing something like this.
Thanx for sharing.
Bob
Thanks a lot! I'm glad someone is getting some enjoyment out of this. I thought I would be getting some more traction in this thread.
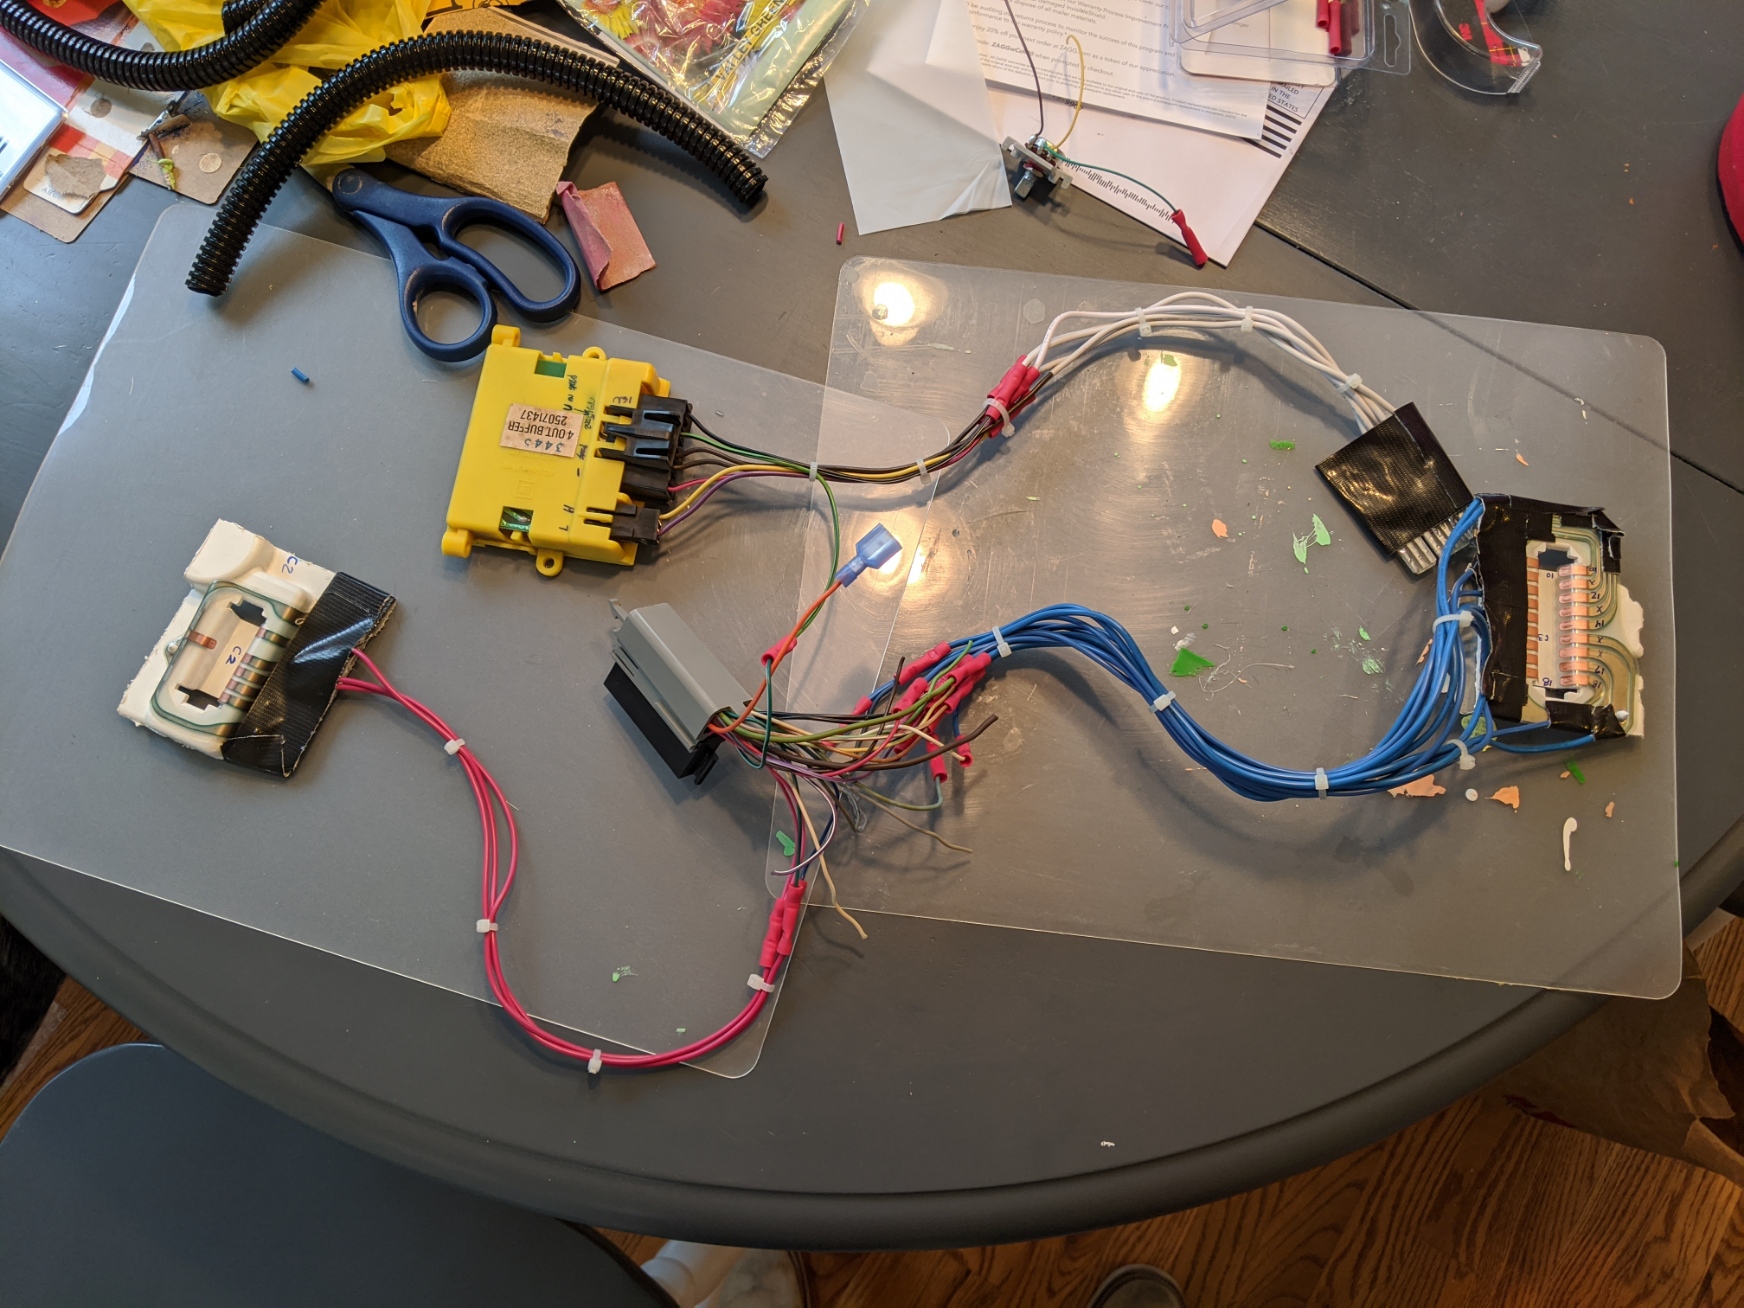
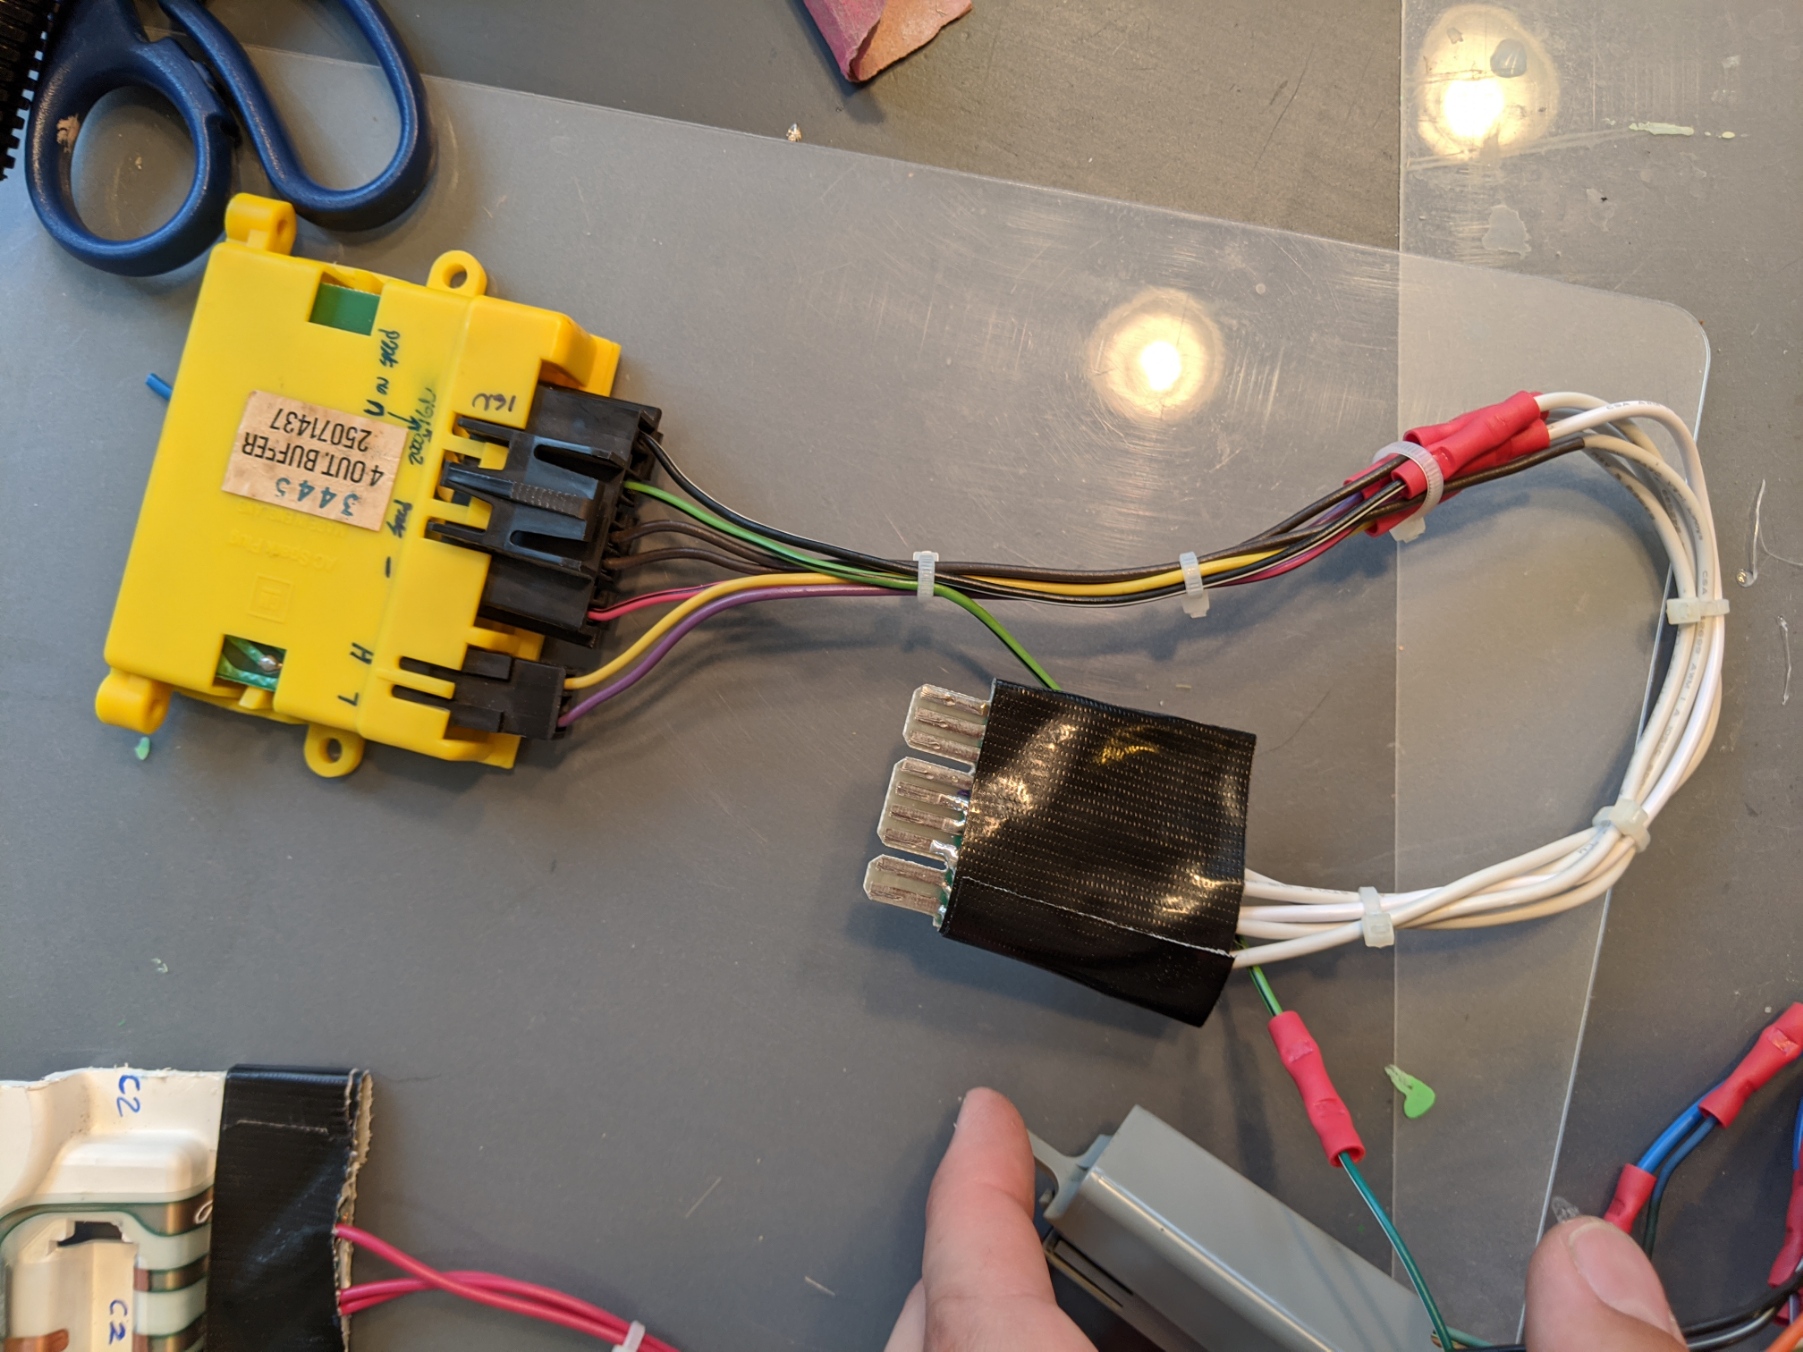
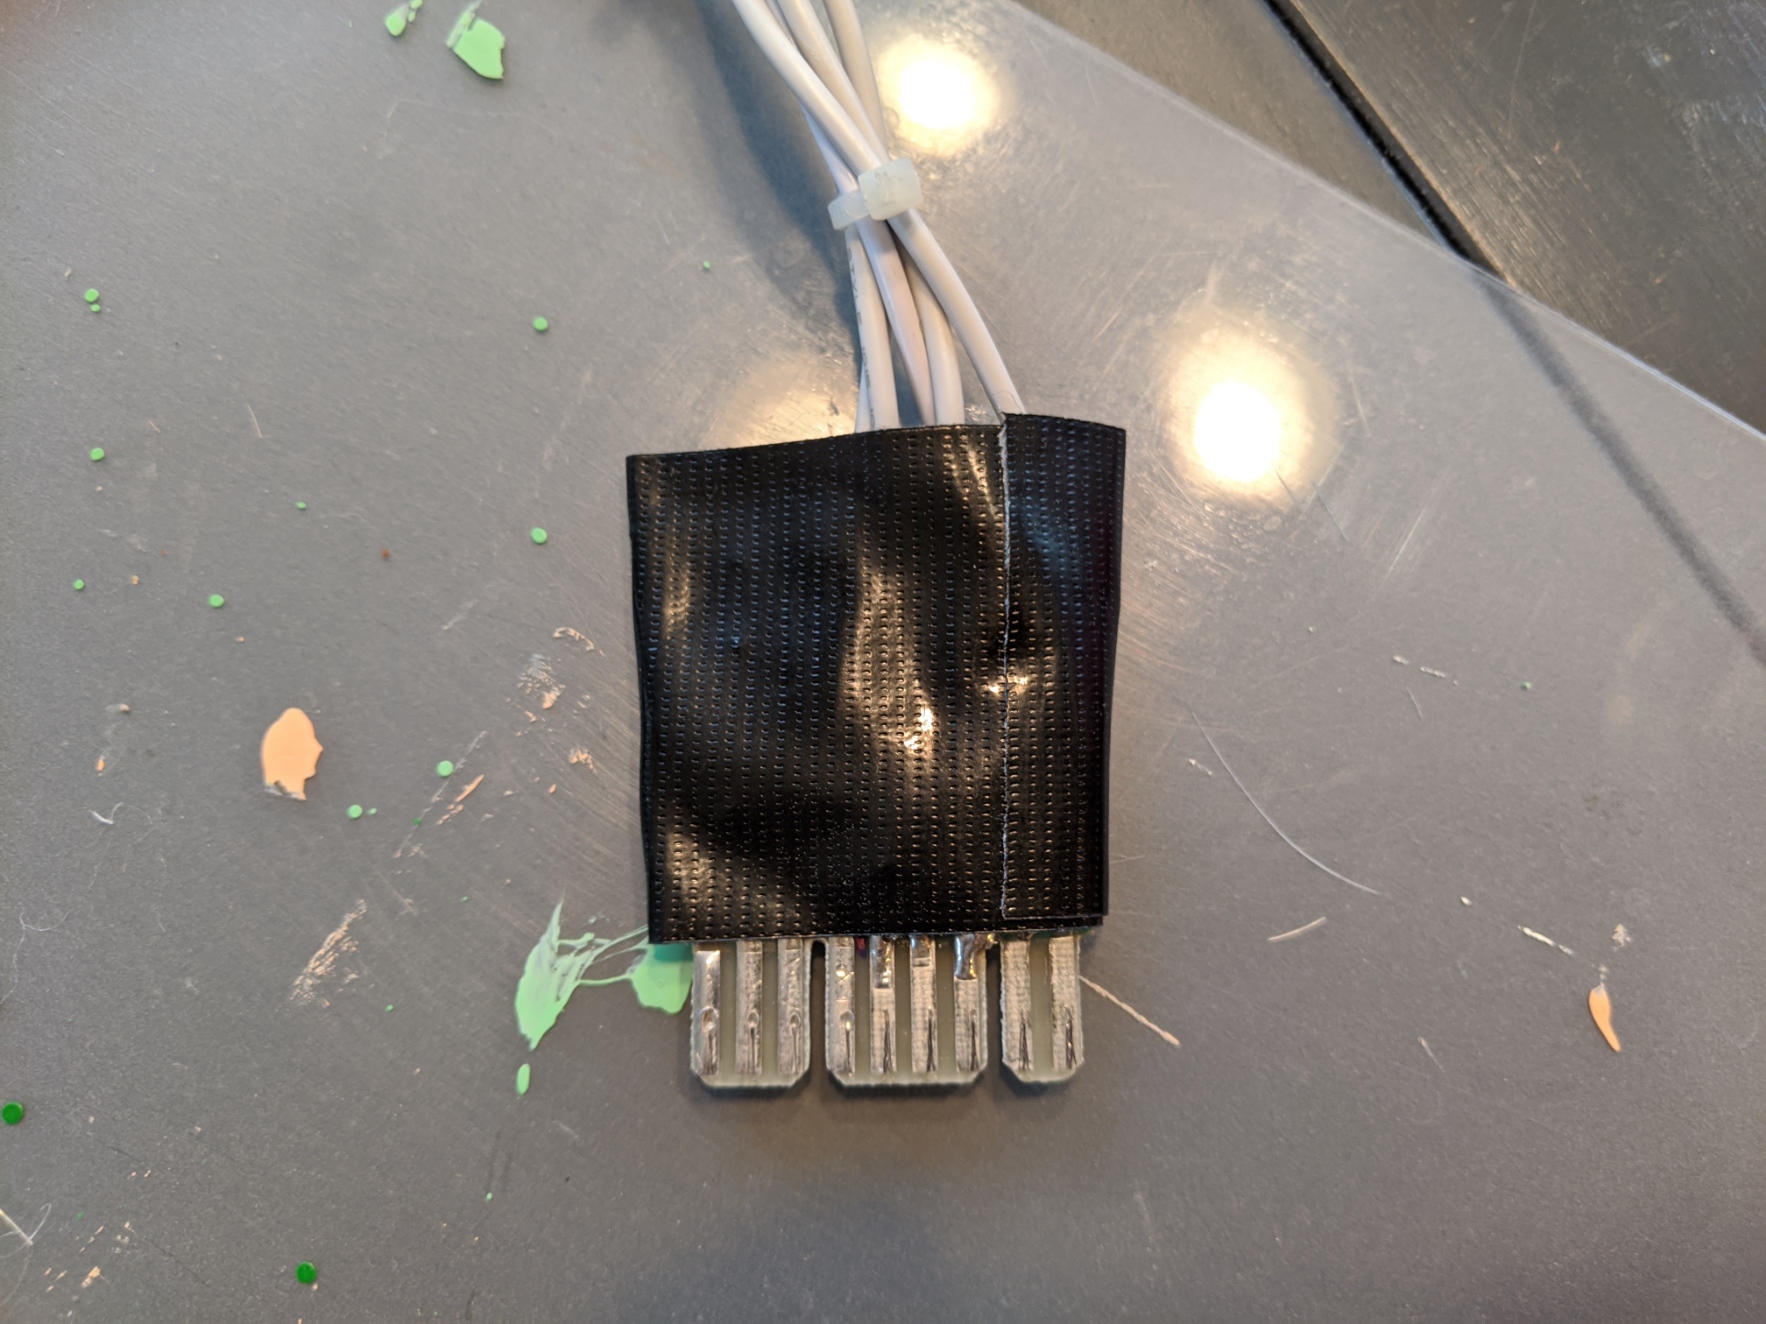
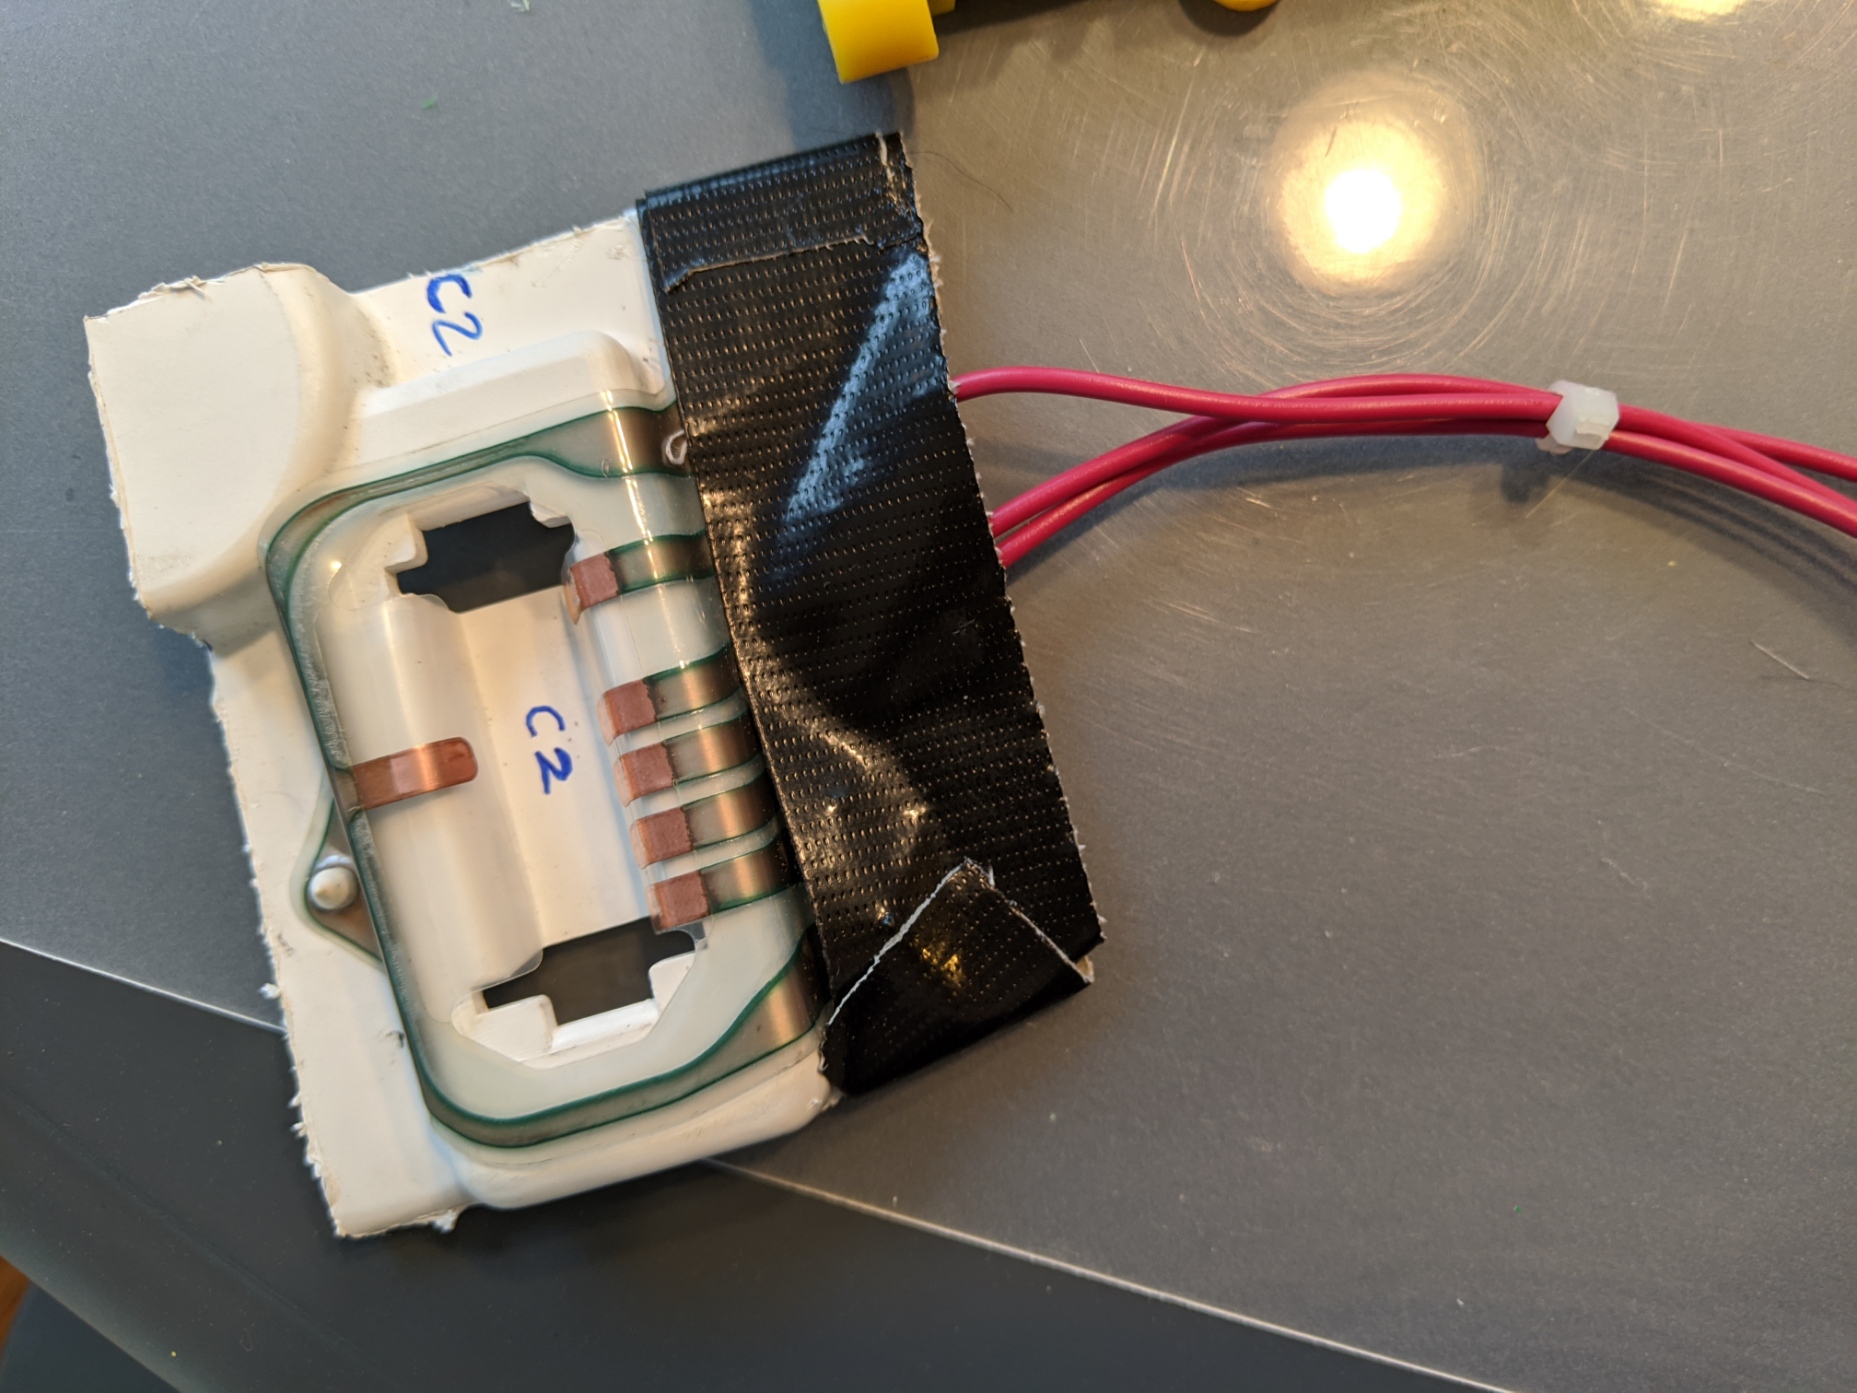
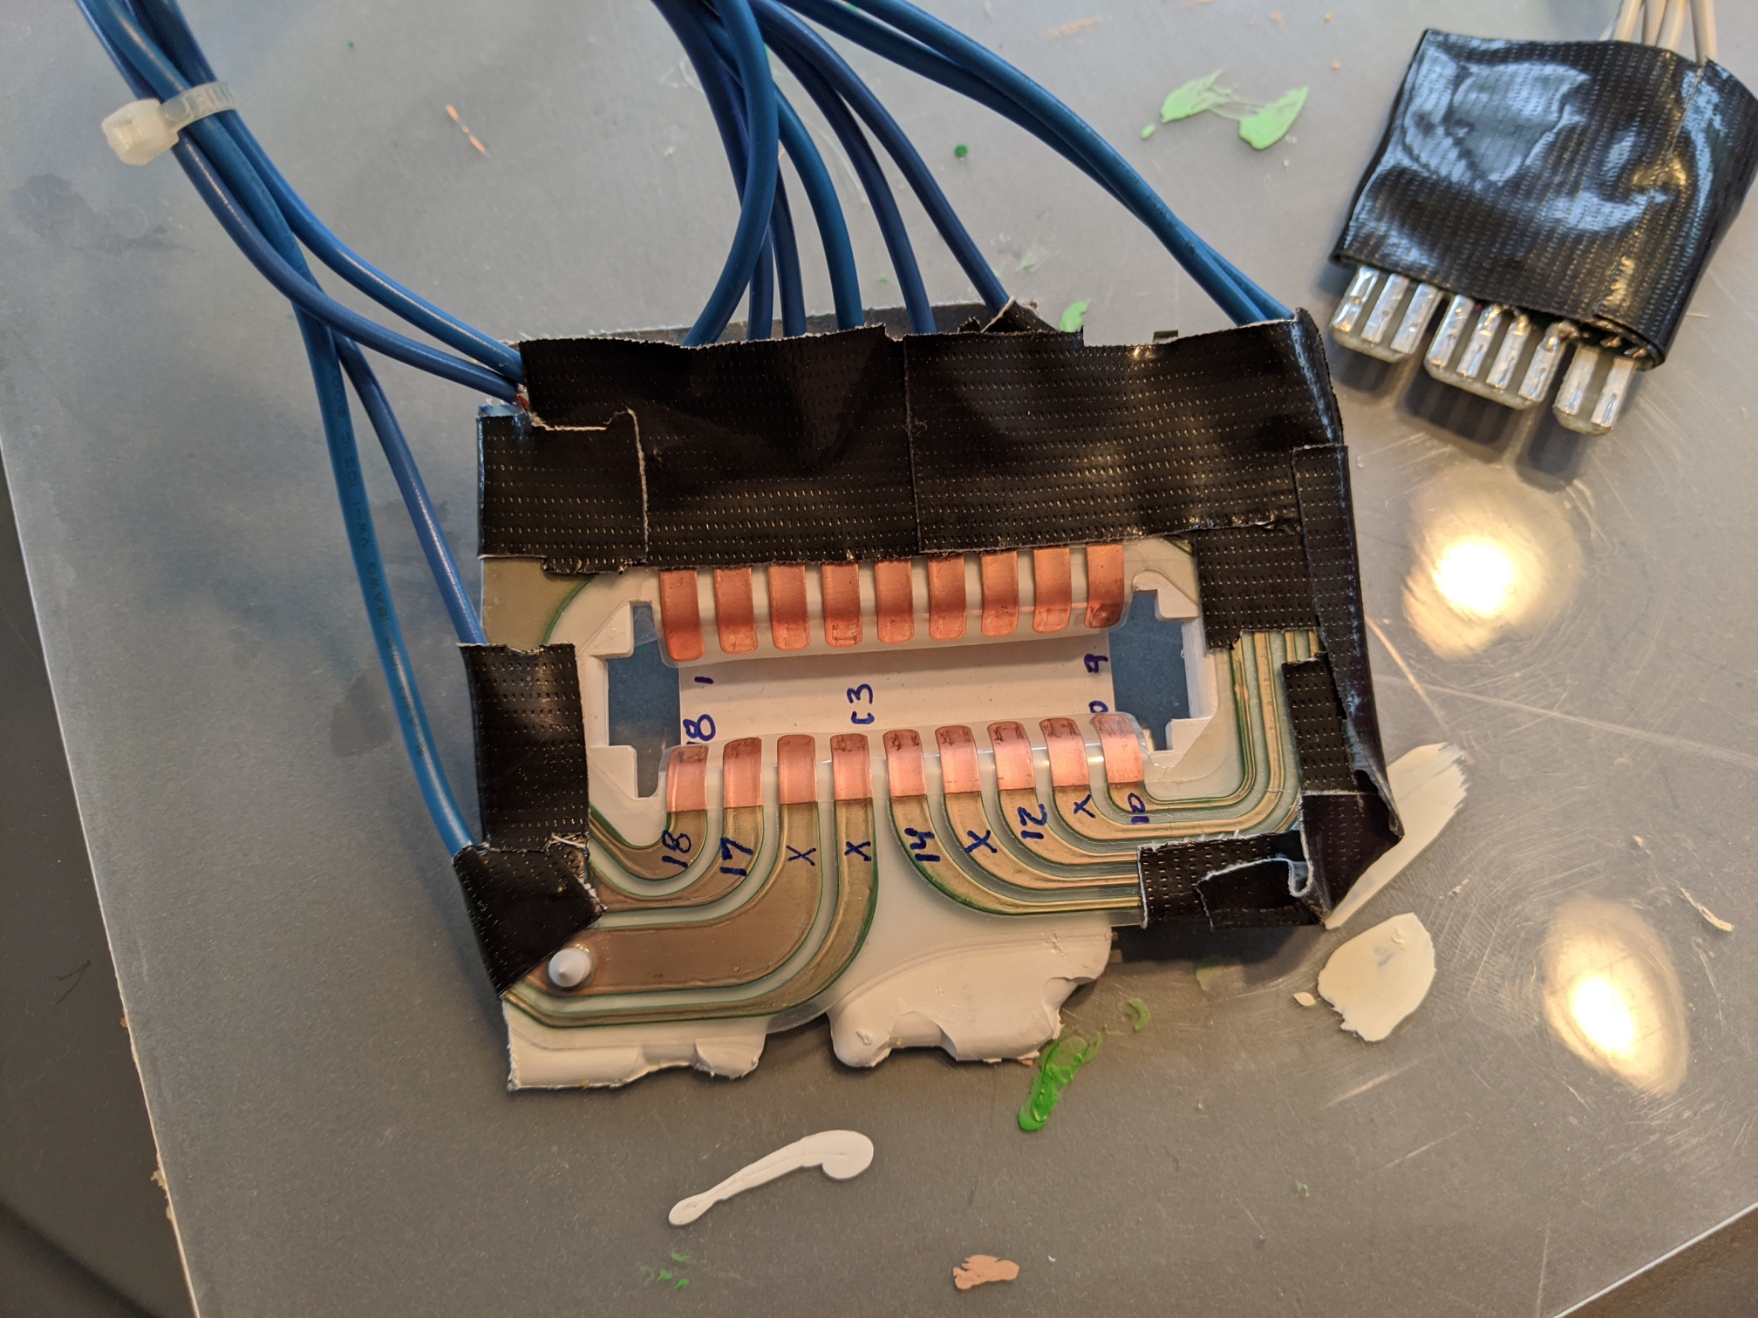
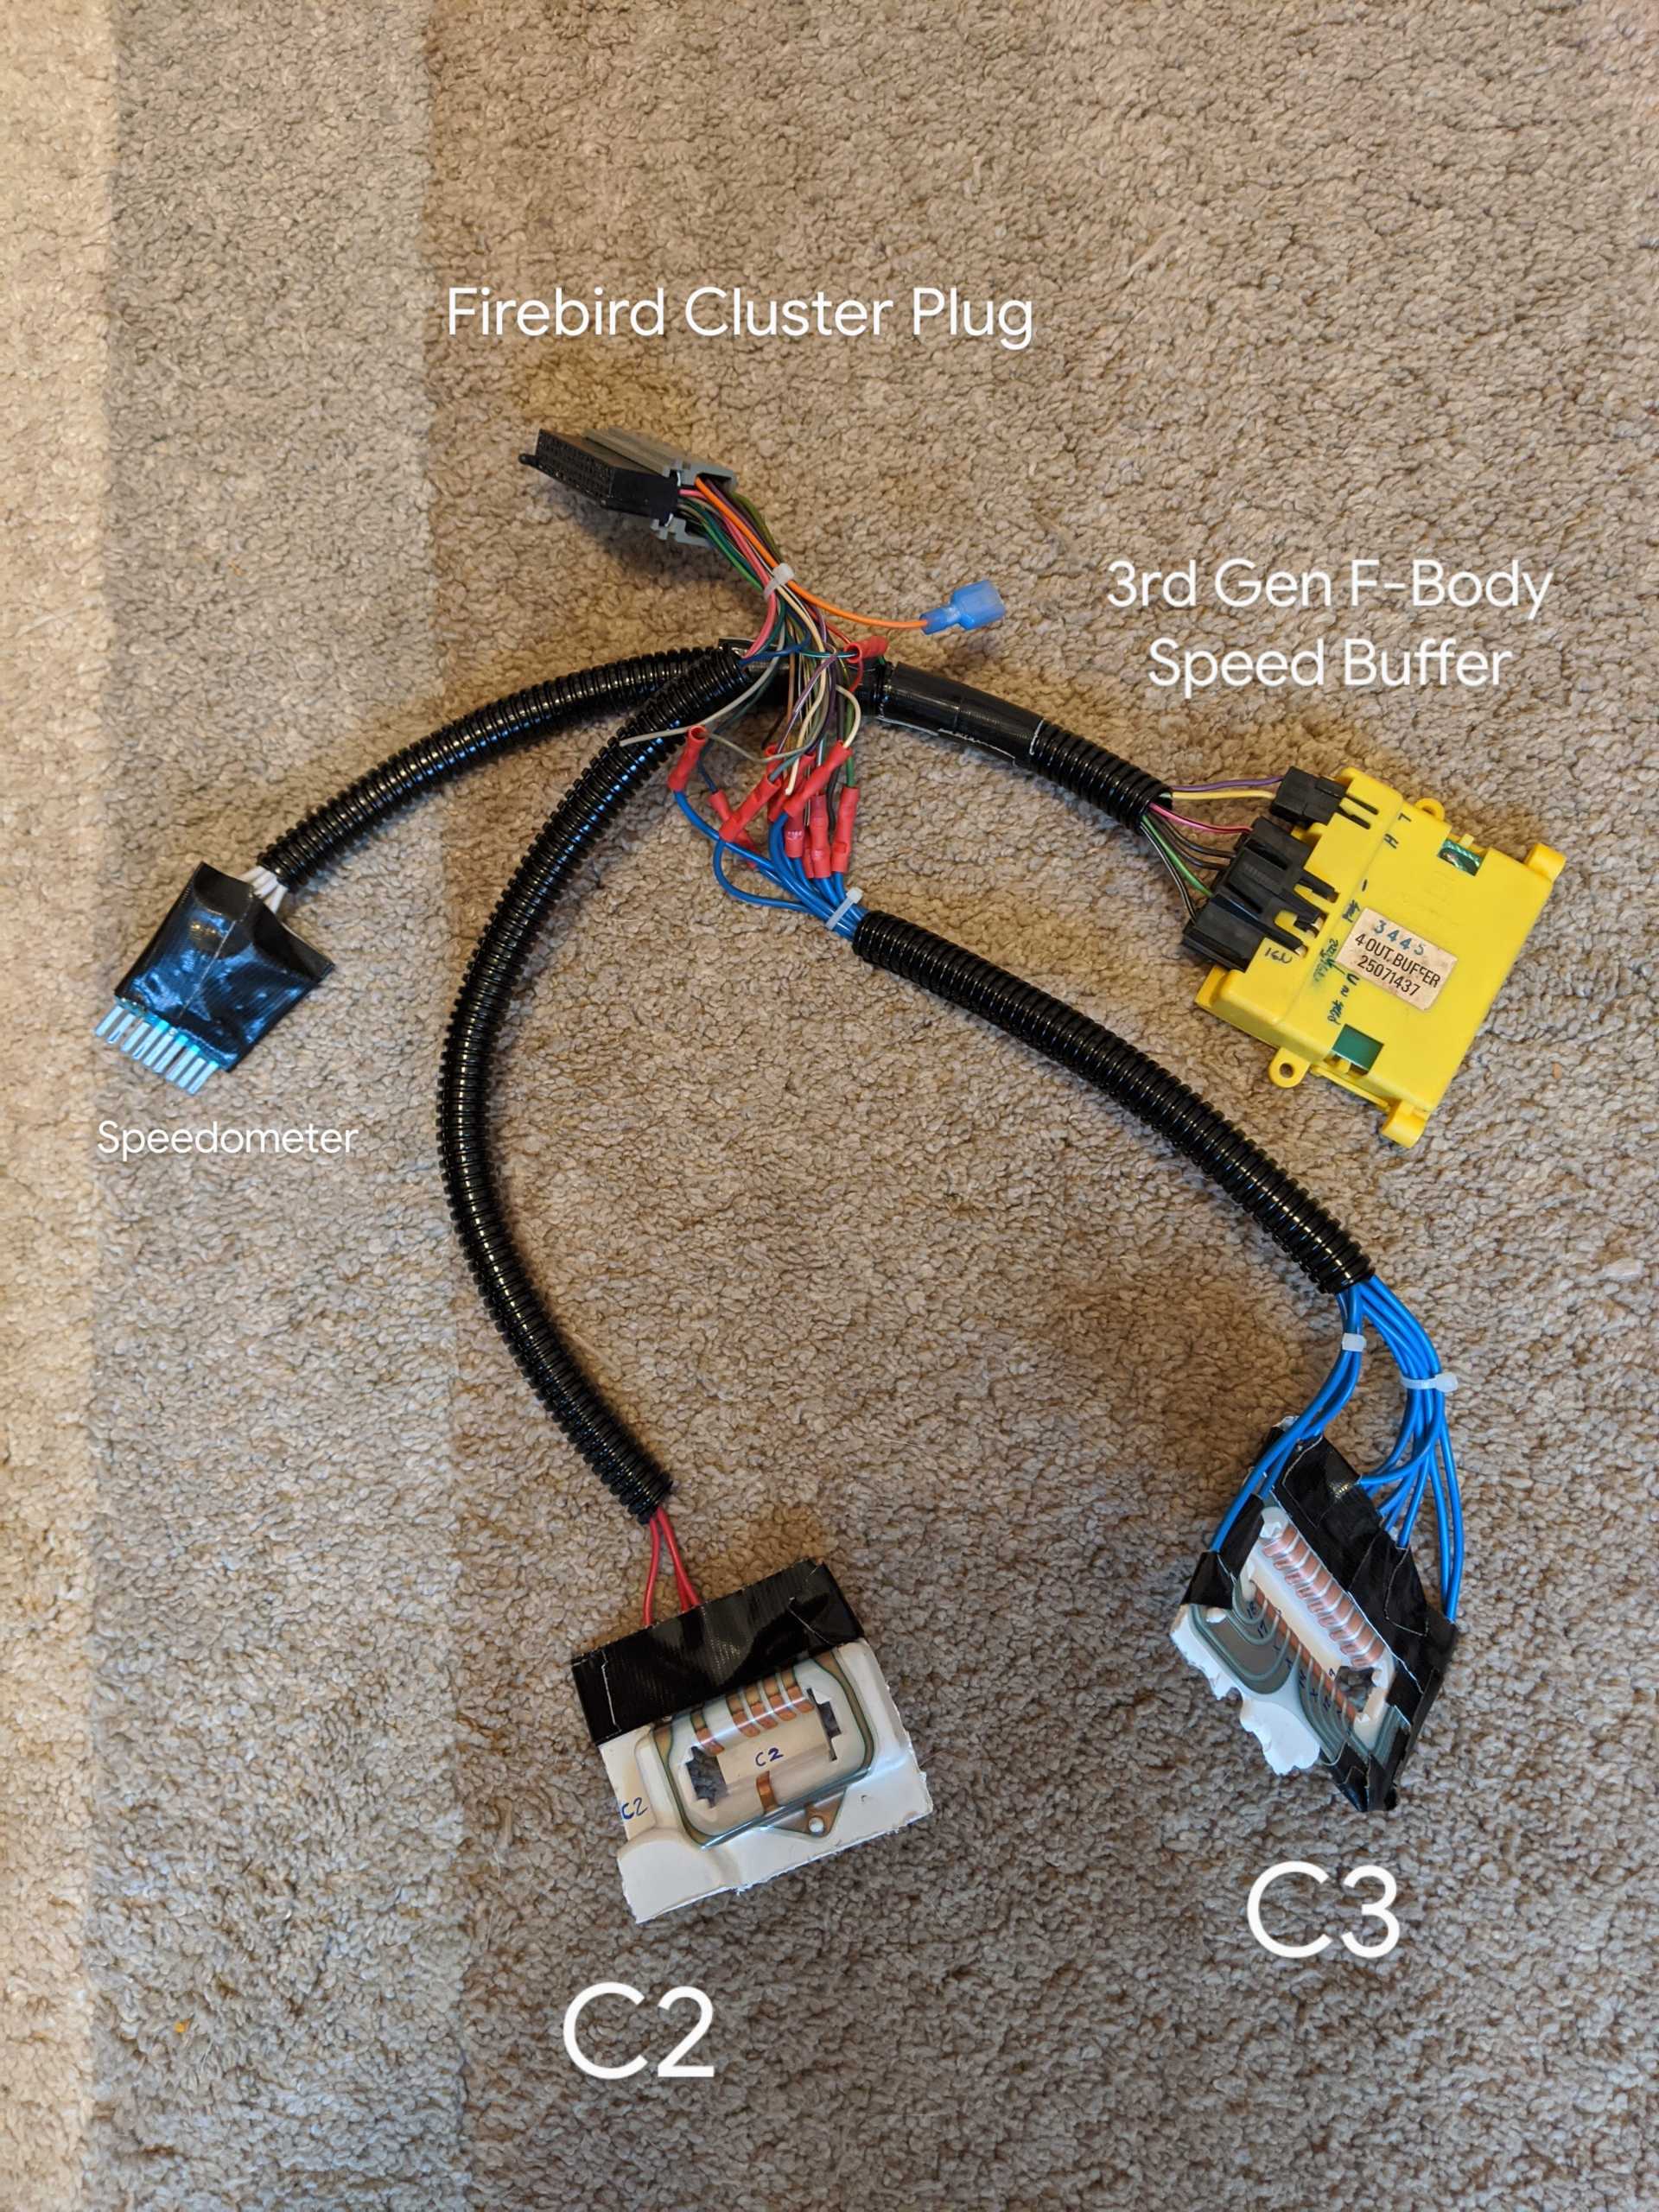
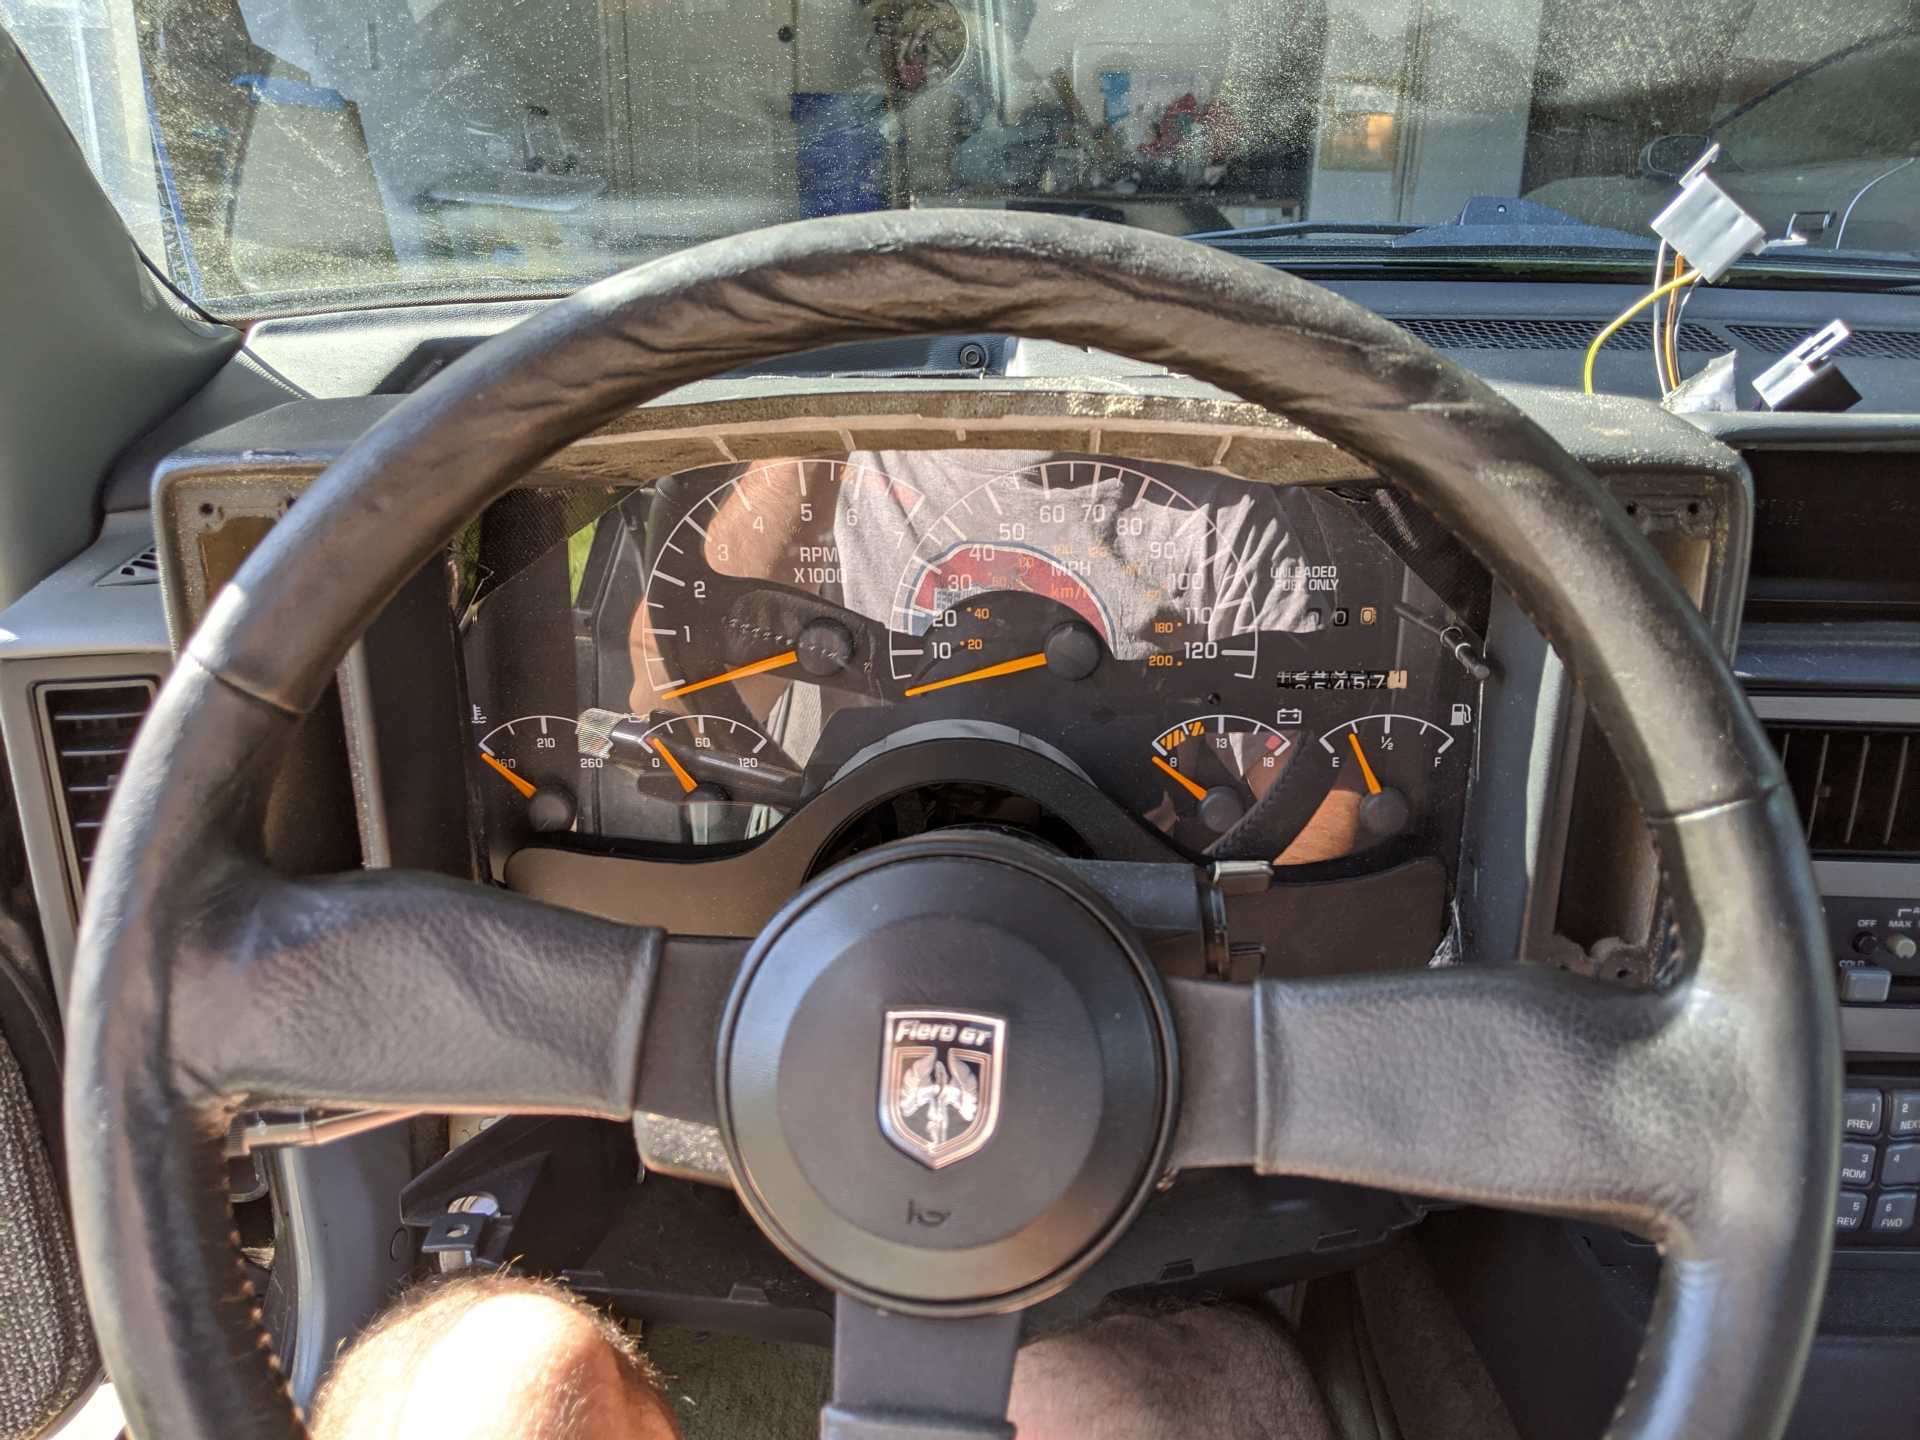
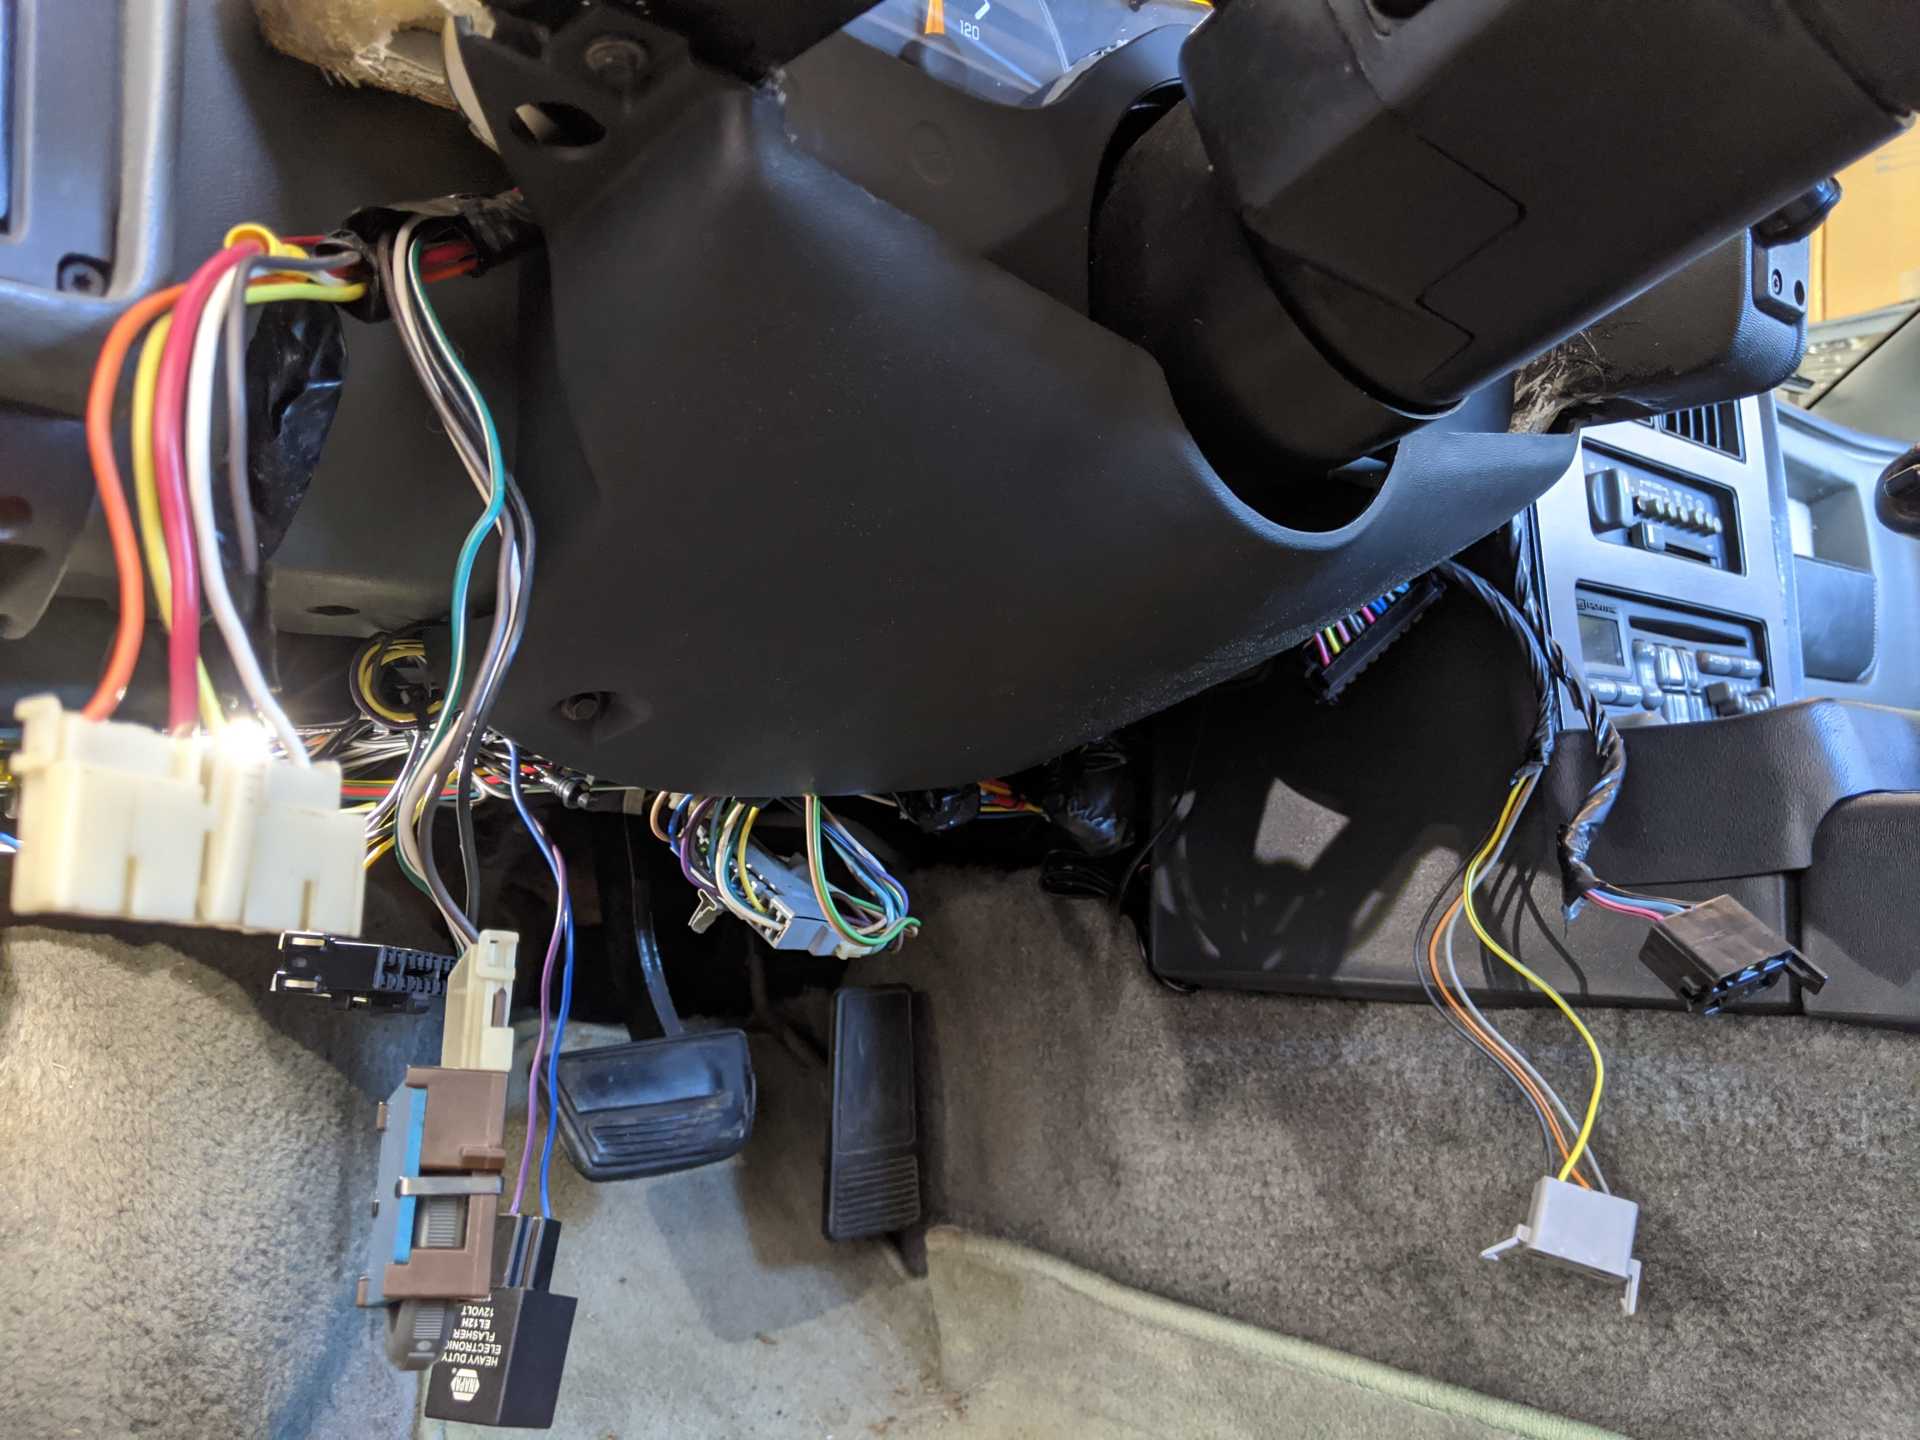
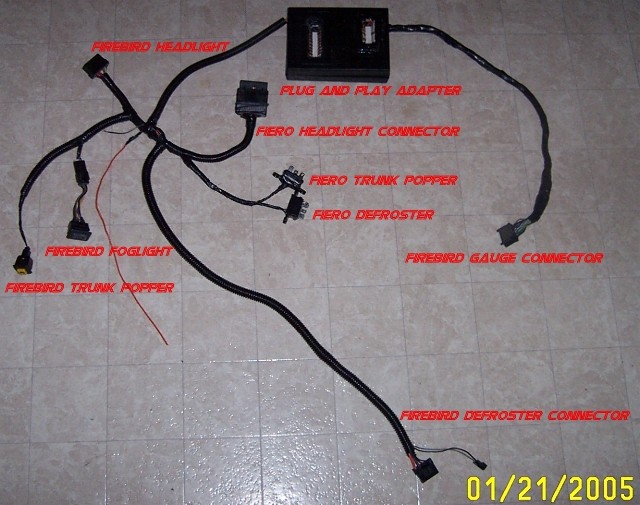
Here are photos of the wiring harness.
Since I didn't have a 120 mph speedometer to use, I had to use a buffer from a third gen 4/6 cylinder F-body in order to create a usable signal for the gauge cluster.
Here is a close up of the speedometer plug. I was able to cut off the excess board and diodes since the yellow buffer creates the signal I need. Everything is contained inside the buffer.
Here are the C2 and C3 connectors.
After I took these photos, I used some wire loom to cover the wires on the speedometer, buffer, and C2. Since I'm still working on the C3 connector I didn't cover those wires yet. I tried to wire in a potentiometer in order to turn down the oil pressure signal to the correct reading. Unfortunately, all three pots I used barely moved the needle. The next idea I had is to use a 3.4l oil pressure sender and rig that up to the Fiero's connector. I am hoping that changing that sensor will give me the correct reading that the gauge requires. I'm also going to the junkyard tomorrow in order to scavenge a fuel gauge from a 96 Camaro. Hopefully the replacement will work.
To go along with my ecotec swap I adapted a 2004 Cavalier instrument cluster. Not as much work as yours because my car has a cavalier wiring harness. Had to make a plexiglass cover to hide stuff that the cav dash normally covers and I disabled the warning lights for airbags abs etc by snipping the feeds to the diodes on the circuit board. Still some improving to do with the trim on the top but it works so I am happy with it.
[This message has been edited by wftb (edited 03-22-2020).]
I went to the junkyard and scavenged a temp gauge from a 97 Grand Am. I swapped it into the Firebird cluster and warmed the car up. Still isn't moving the needle.
I also swapped out the Fiero's oil pressure sender for the one in my father's 02 Firebird, I was thinking that the Fiero's sender wasn't compatible with the Firebird cluster. I'm still having the same issue with the oil gauge getting pegged. I'm beginning to think that the cluster is faulty. It's strange to me that it would break, but who knows.
Of course, I am out of warranty on the gauge cluster so I'm going to have to try eBay or another junkyard nearby for another cluster.
Reading through the thread in the construction zone, it appeared to me that making the speedometer work was the most difficult issue. No one has posted in the thread in years, so I'm most likely on my own trying to figure this out.
Up next:
Create a fiberglass cover for the rear of the housing. I've never fiberglassed anything before, so this will be an adventure.
quote
Originally posted by Spadesluck:
I believe I saw you post this on Facebook. I very much like it. The cluster looks at home for sure. Nice work!
Thanks a lot! Hopefully I can get these wiring issues sorted out soon. I just purchased some foam and fiberglass material to begin making the rear cover.
quote
Originally posted by wftb:
To go along with my ecotec swap I adapted a 2004 Cavalier instrument cluster. Not as much work as yours because my car has a cavalier wiring harness. Had to make a plexiglass cover to hide stuff that the cav dash normally covers and I disabled the warning lights for airbags abs etc by snipping the feeds to the diodes on the circuit board. Still some improving to do with the trim on the top but it works so I am happy with it.
That looks nice. I think that fitting making a bezel for the front might be a challenge to look good. But I'll find a way. I already took care of the warning lights. It's just those last two gauges that are giving me issues.
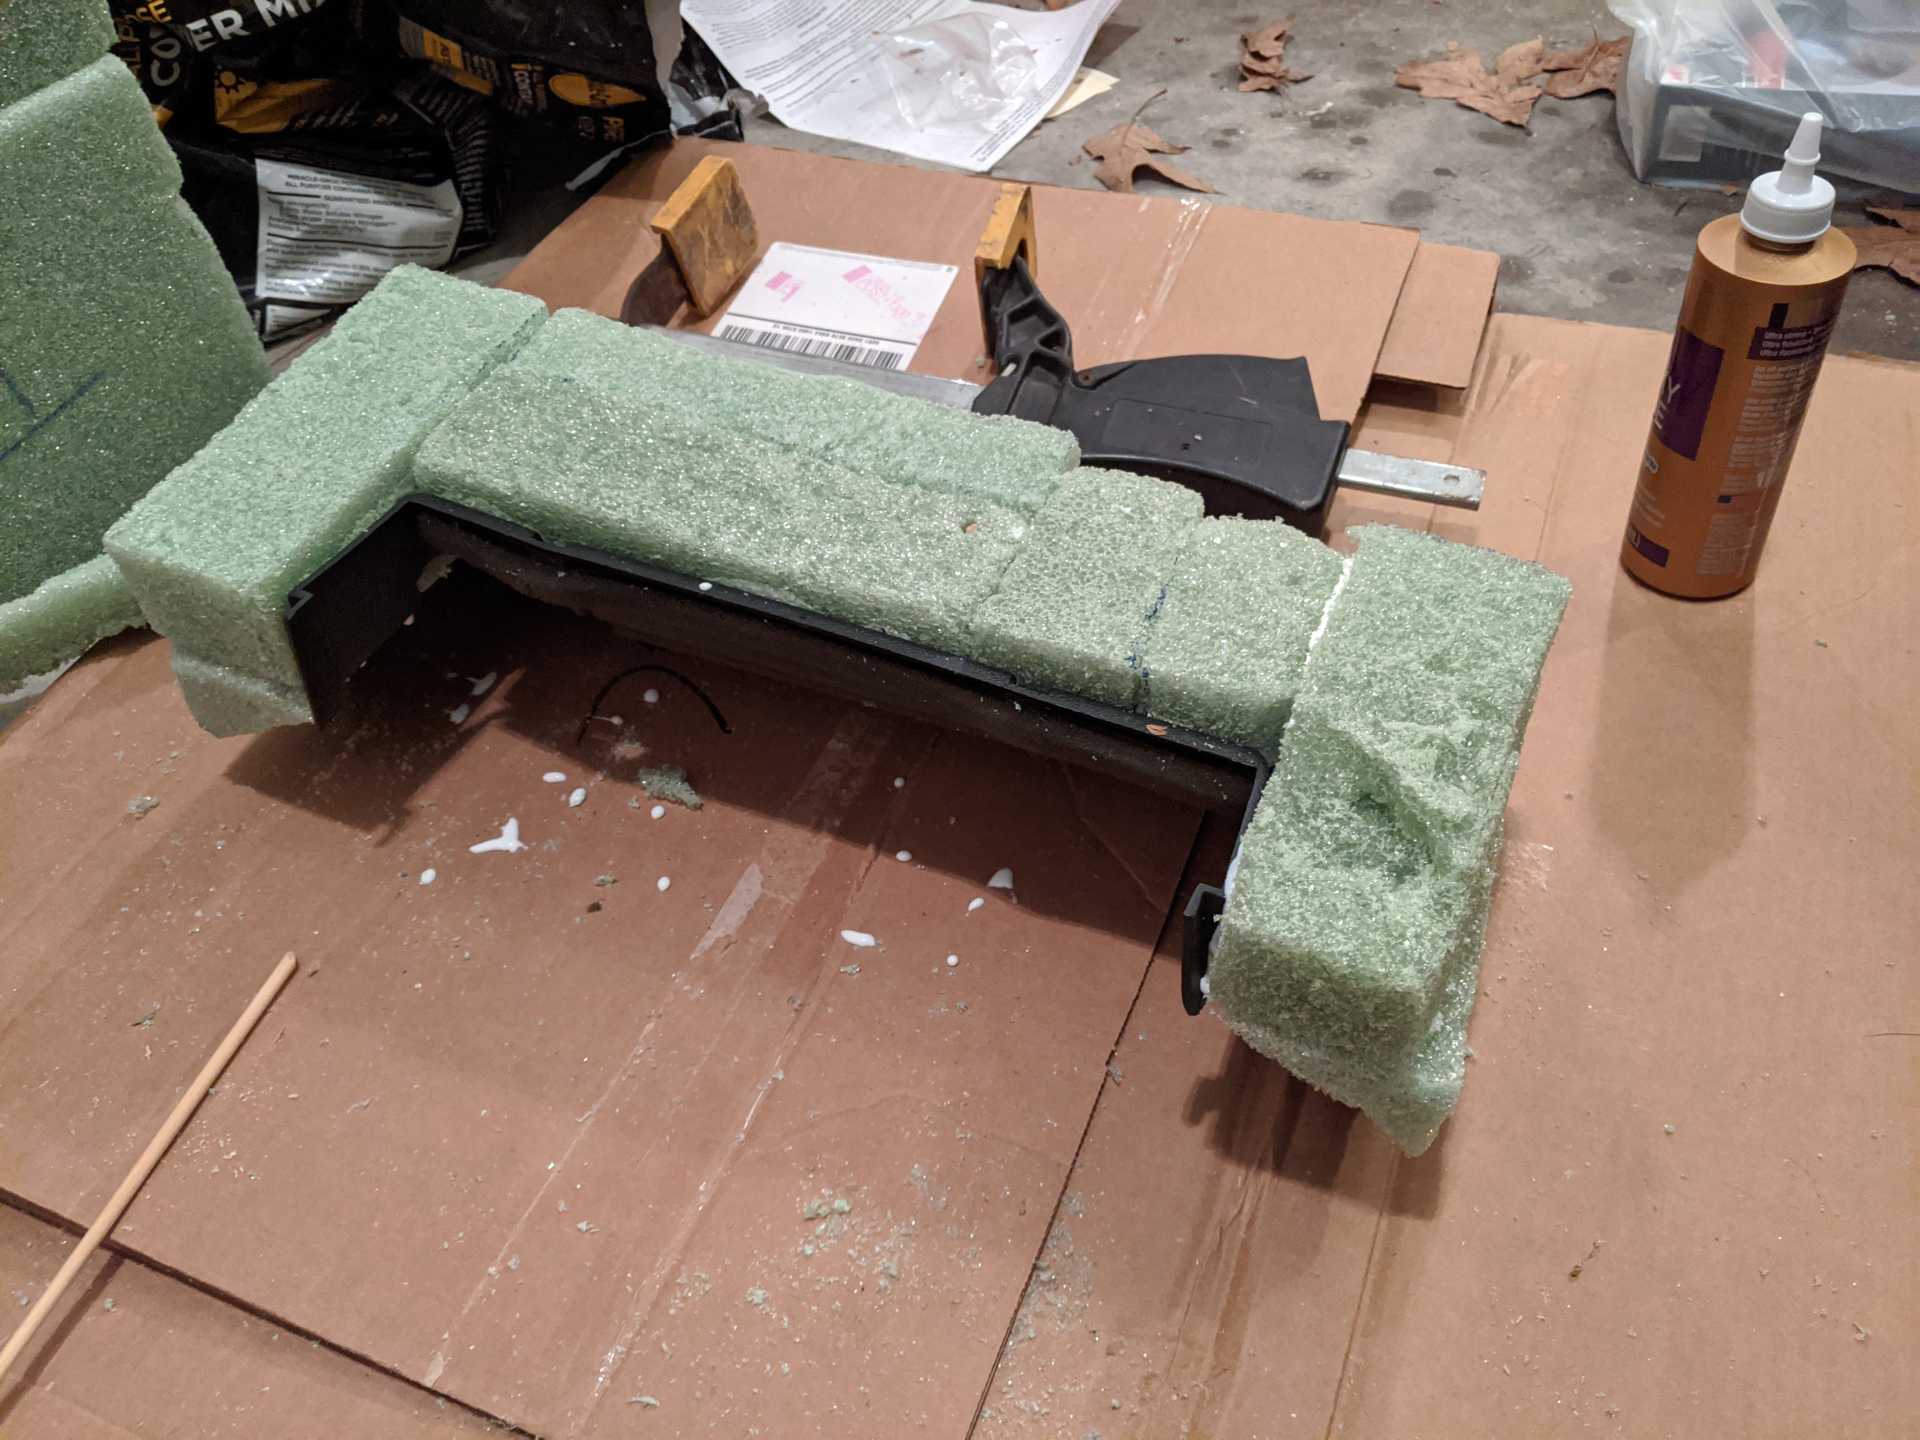
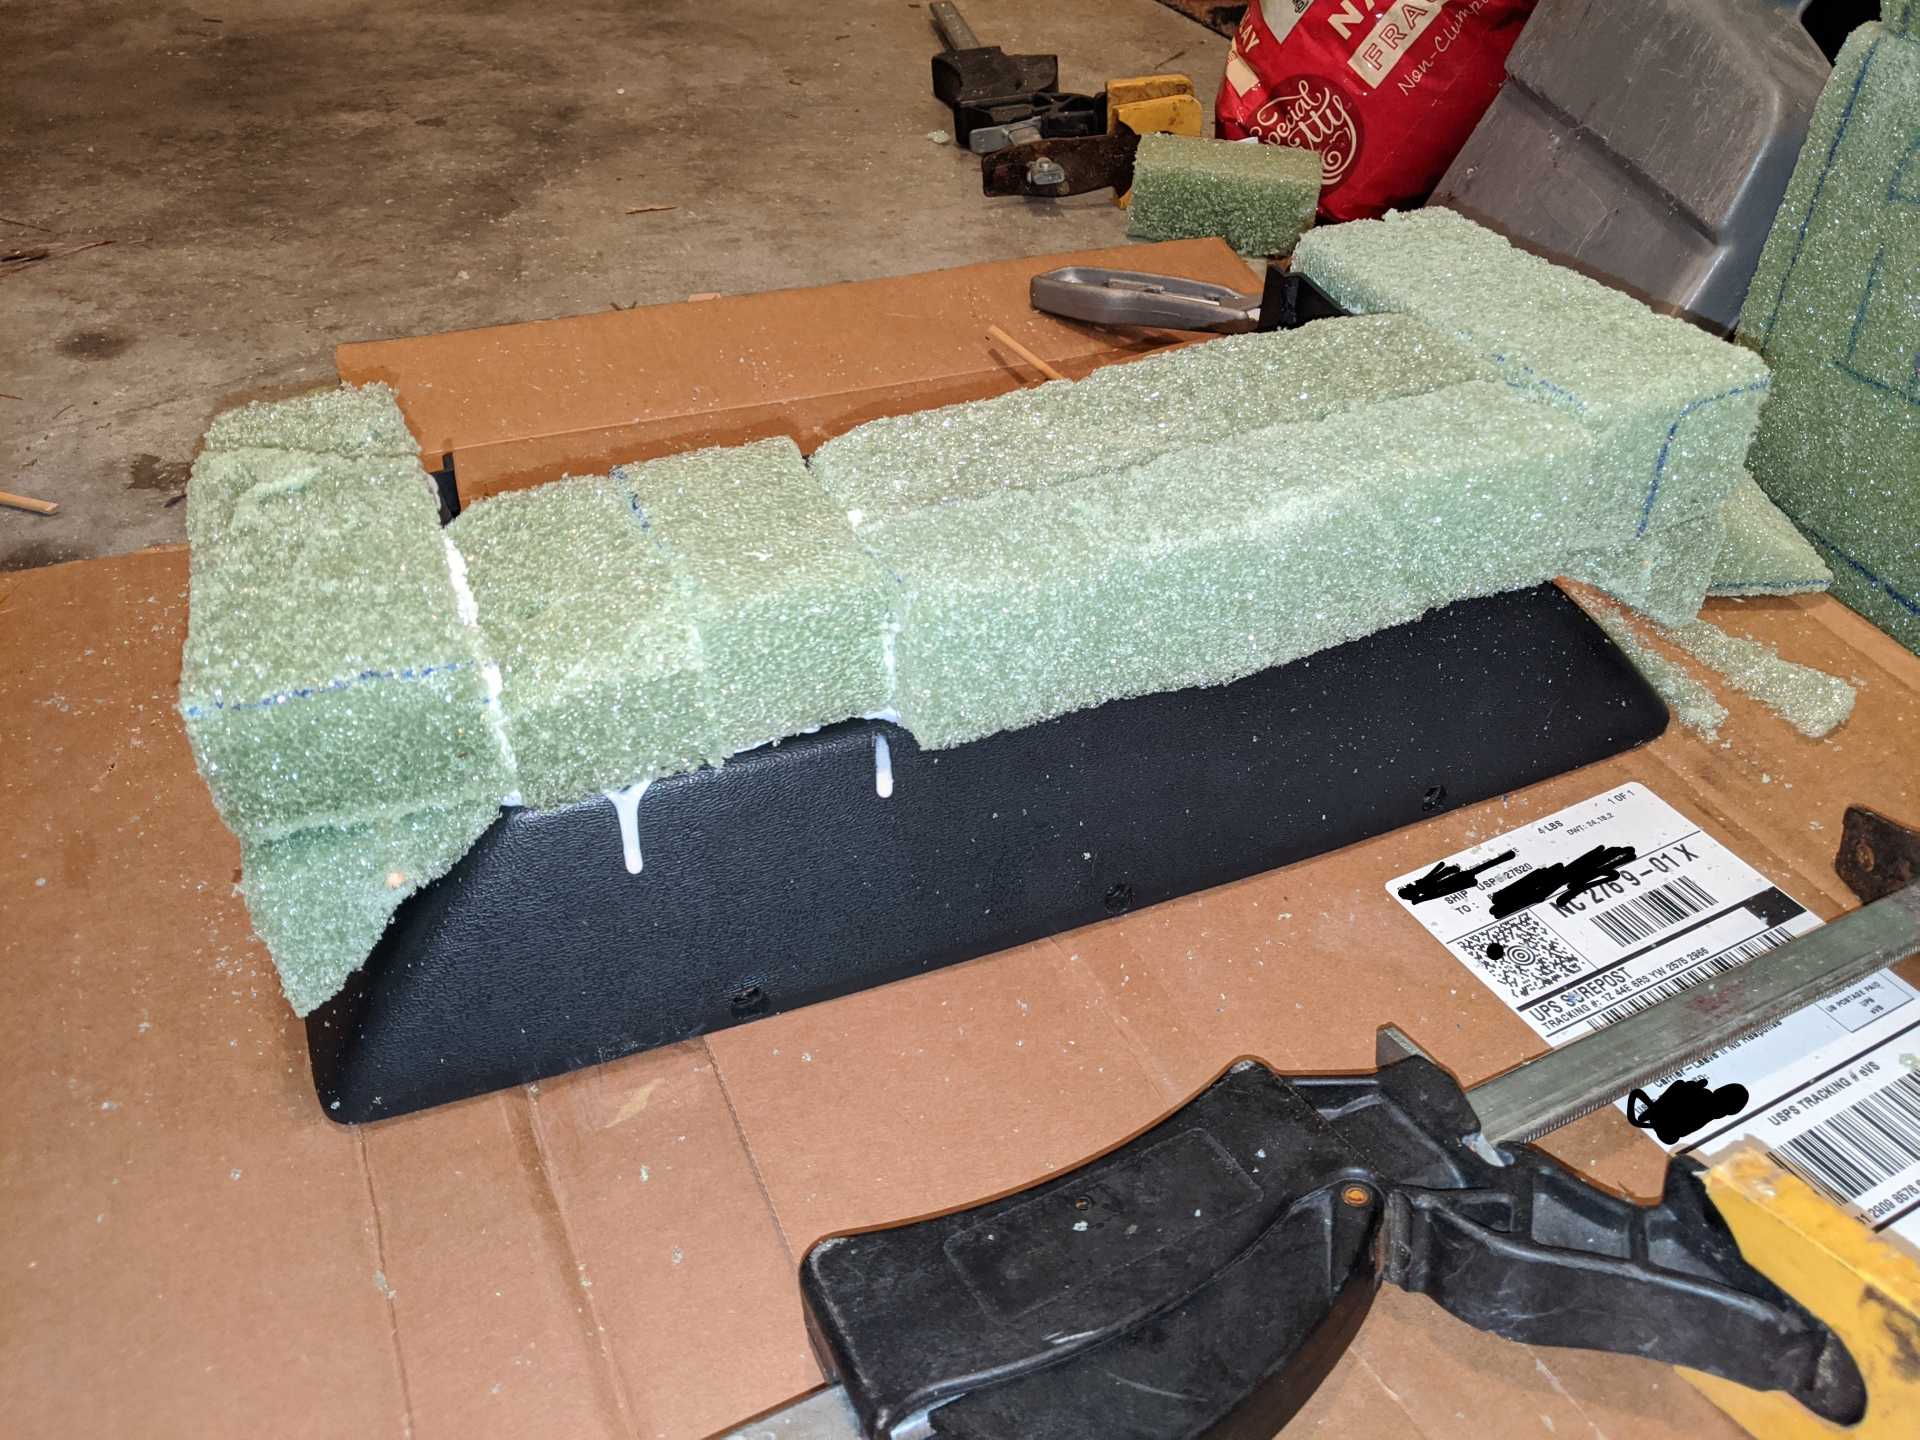
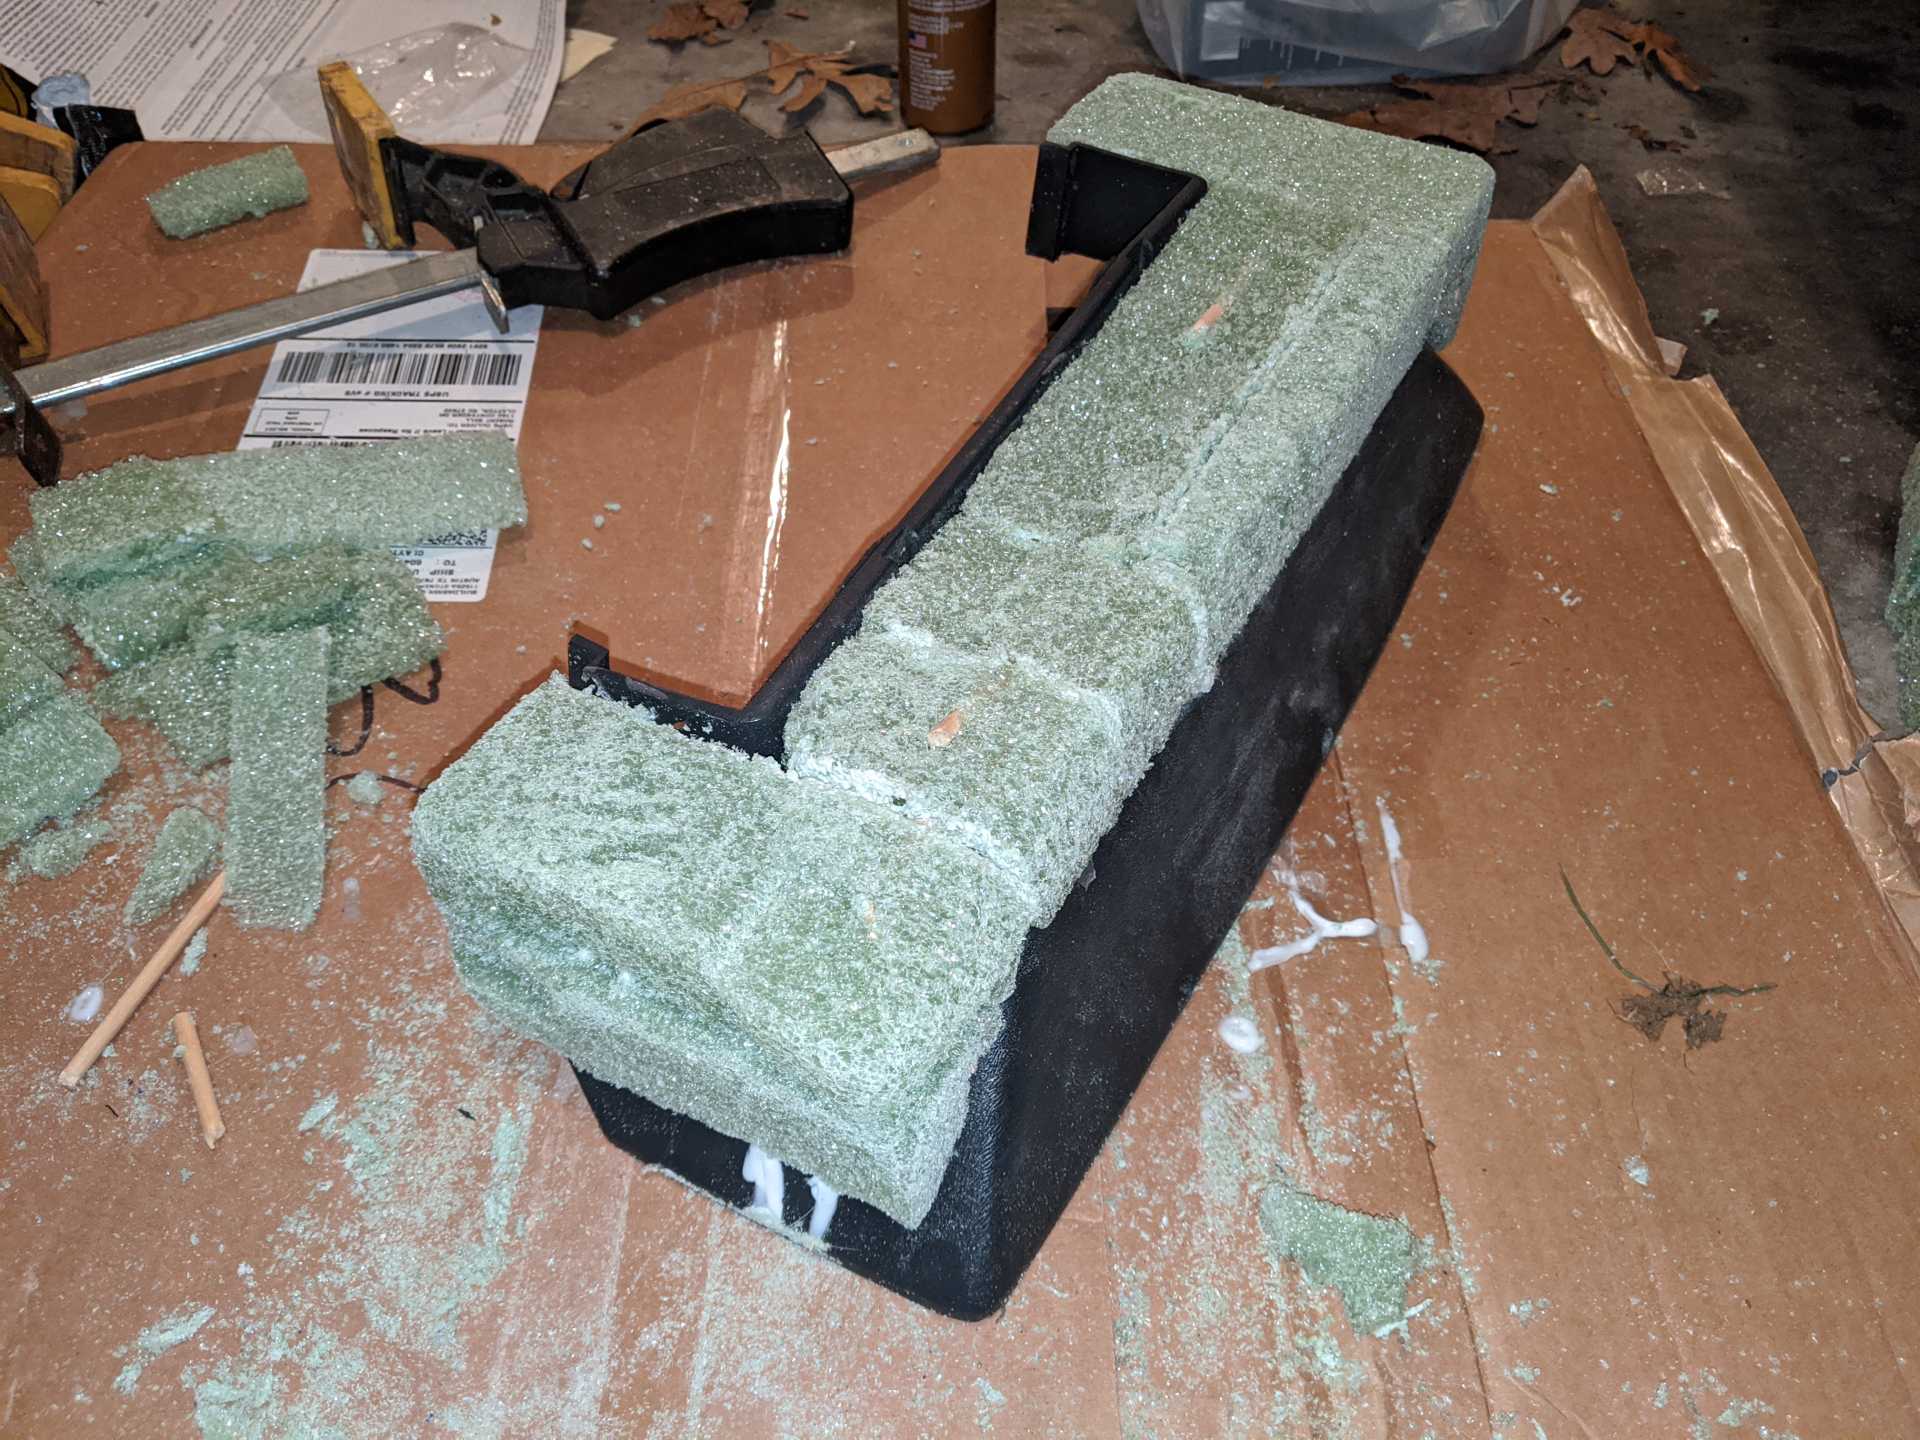
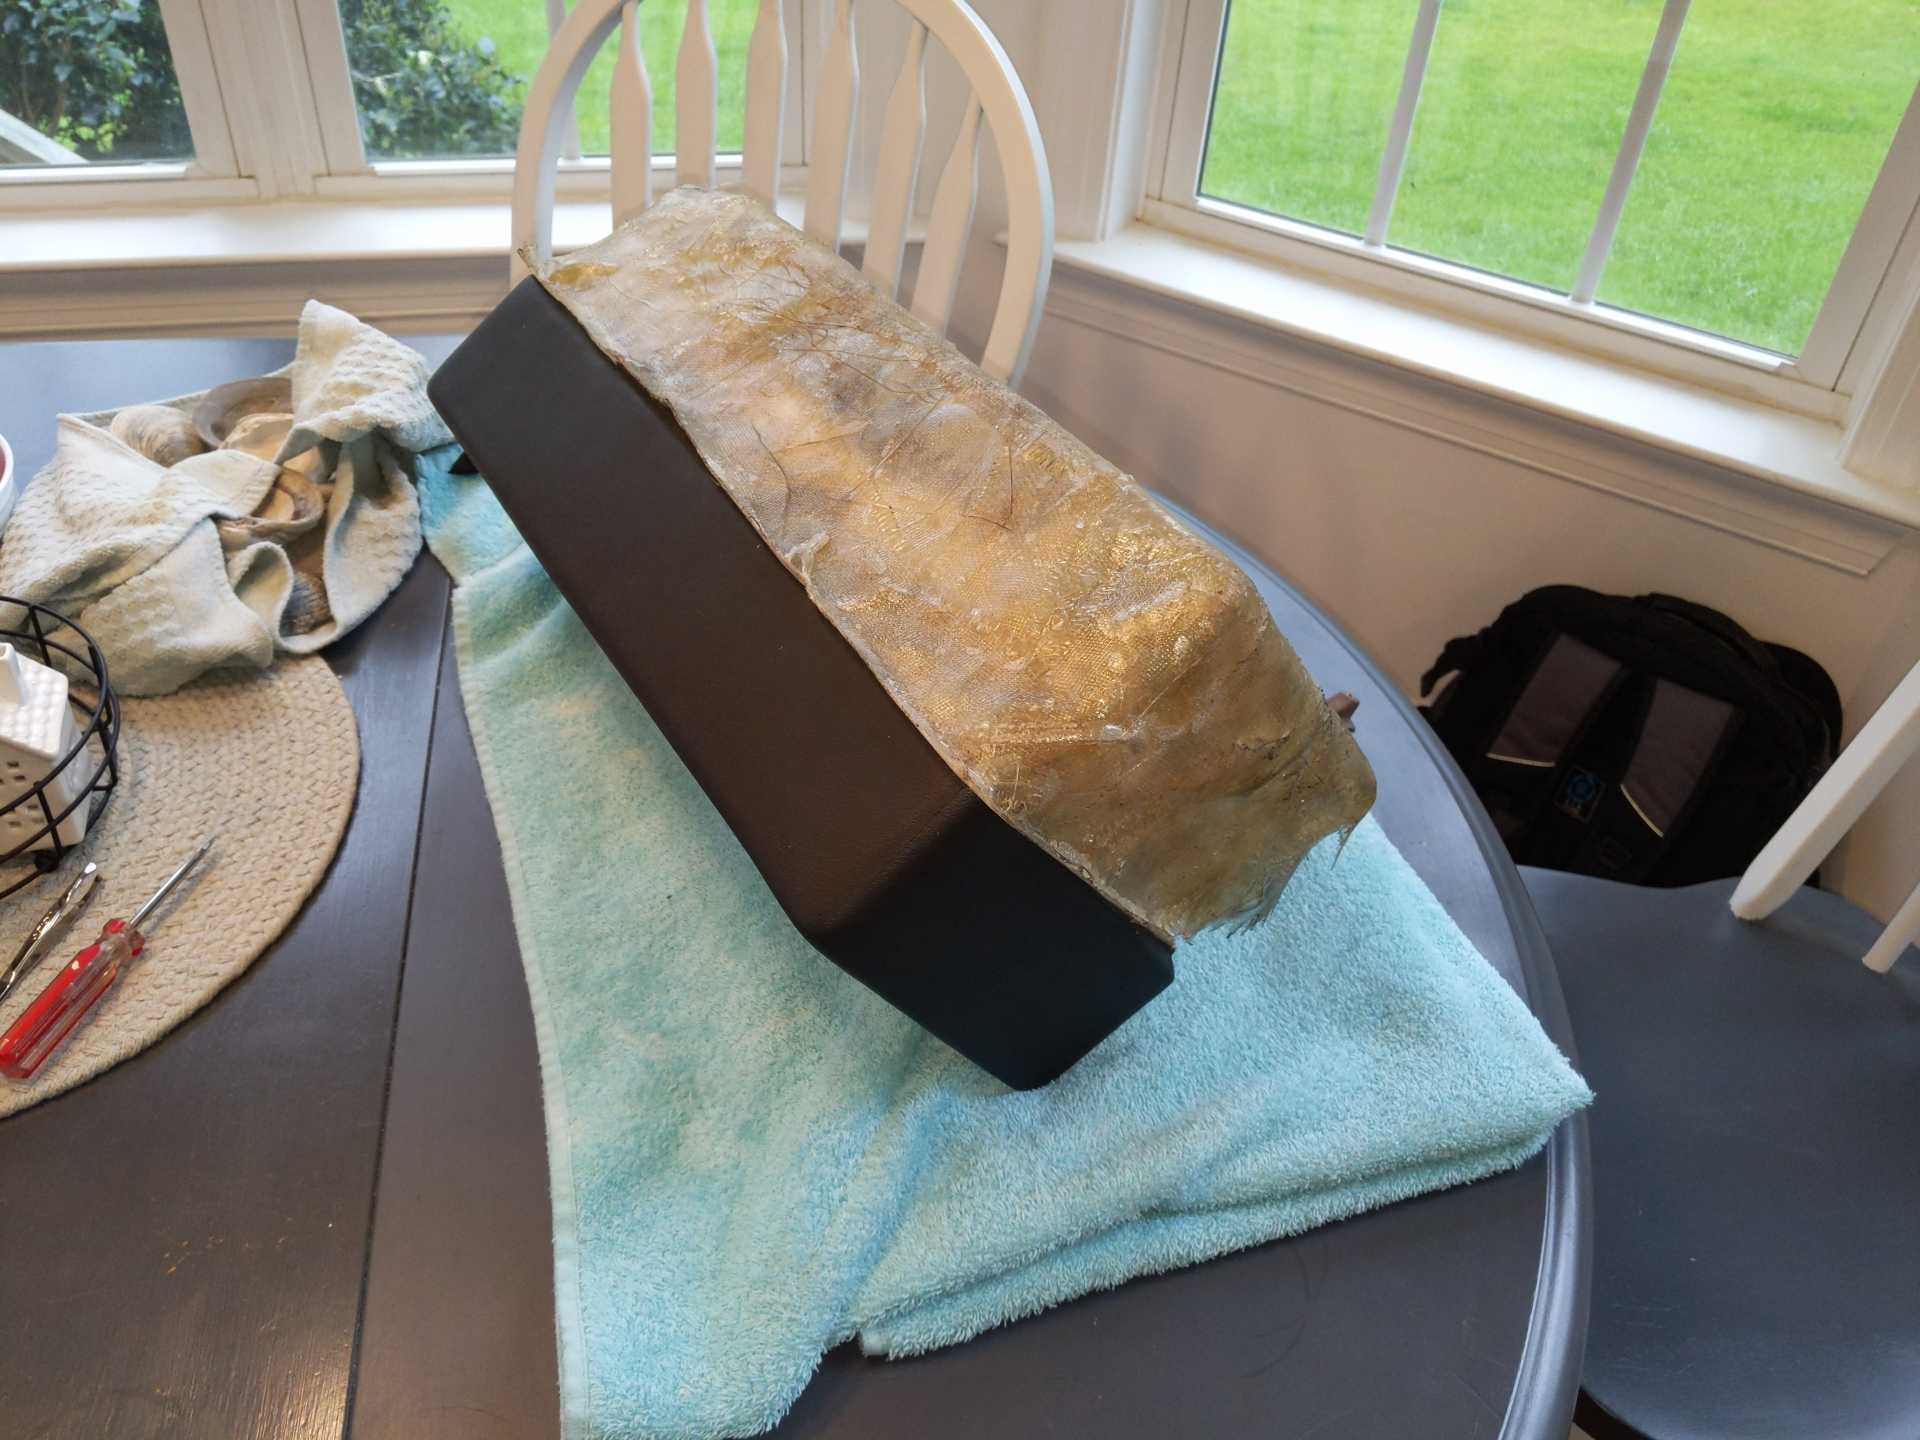
I started work on the rear housing. I took some blocks of foam and I glued them onto the plastic at a depth I believe will be sufficient for all of the wiring to be stored inside.
Time to let it dry overnight. It should be cured tomorrow and then I'm going to sand the foam down. After it looks satisfactory, I'm going to start the fiberglass procedure.
[This message has been edited by rbell2915 (edited 03-22-2020).]
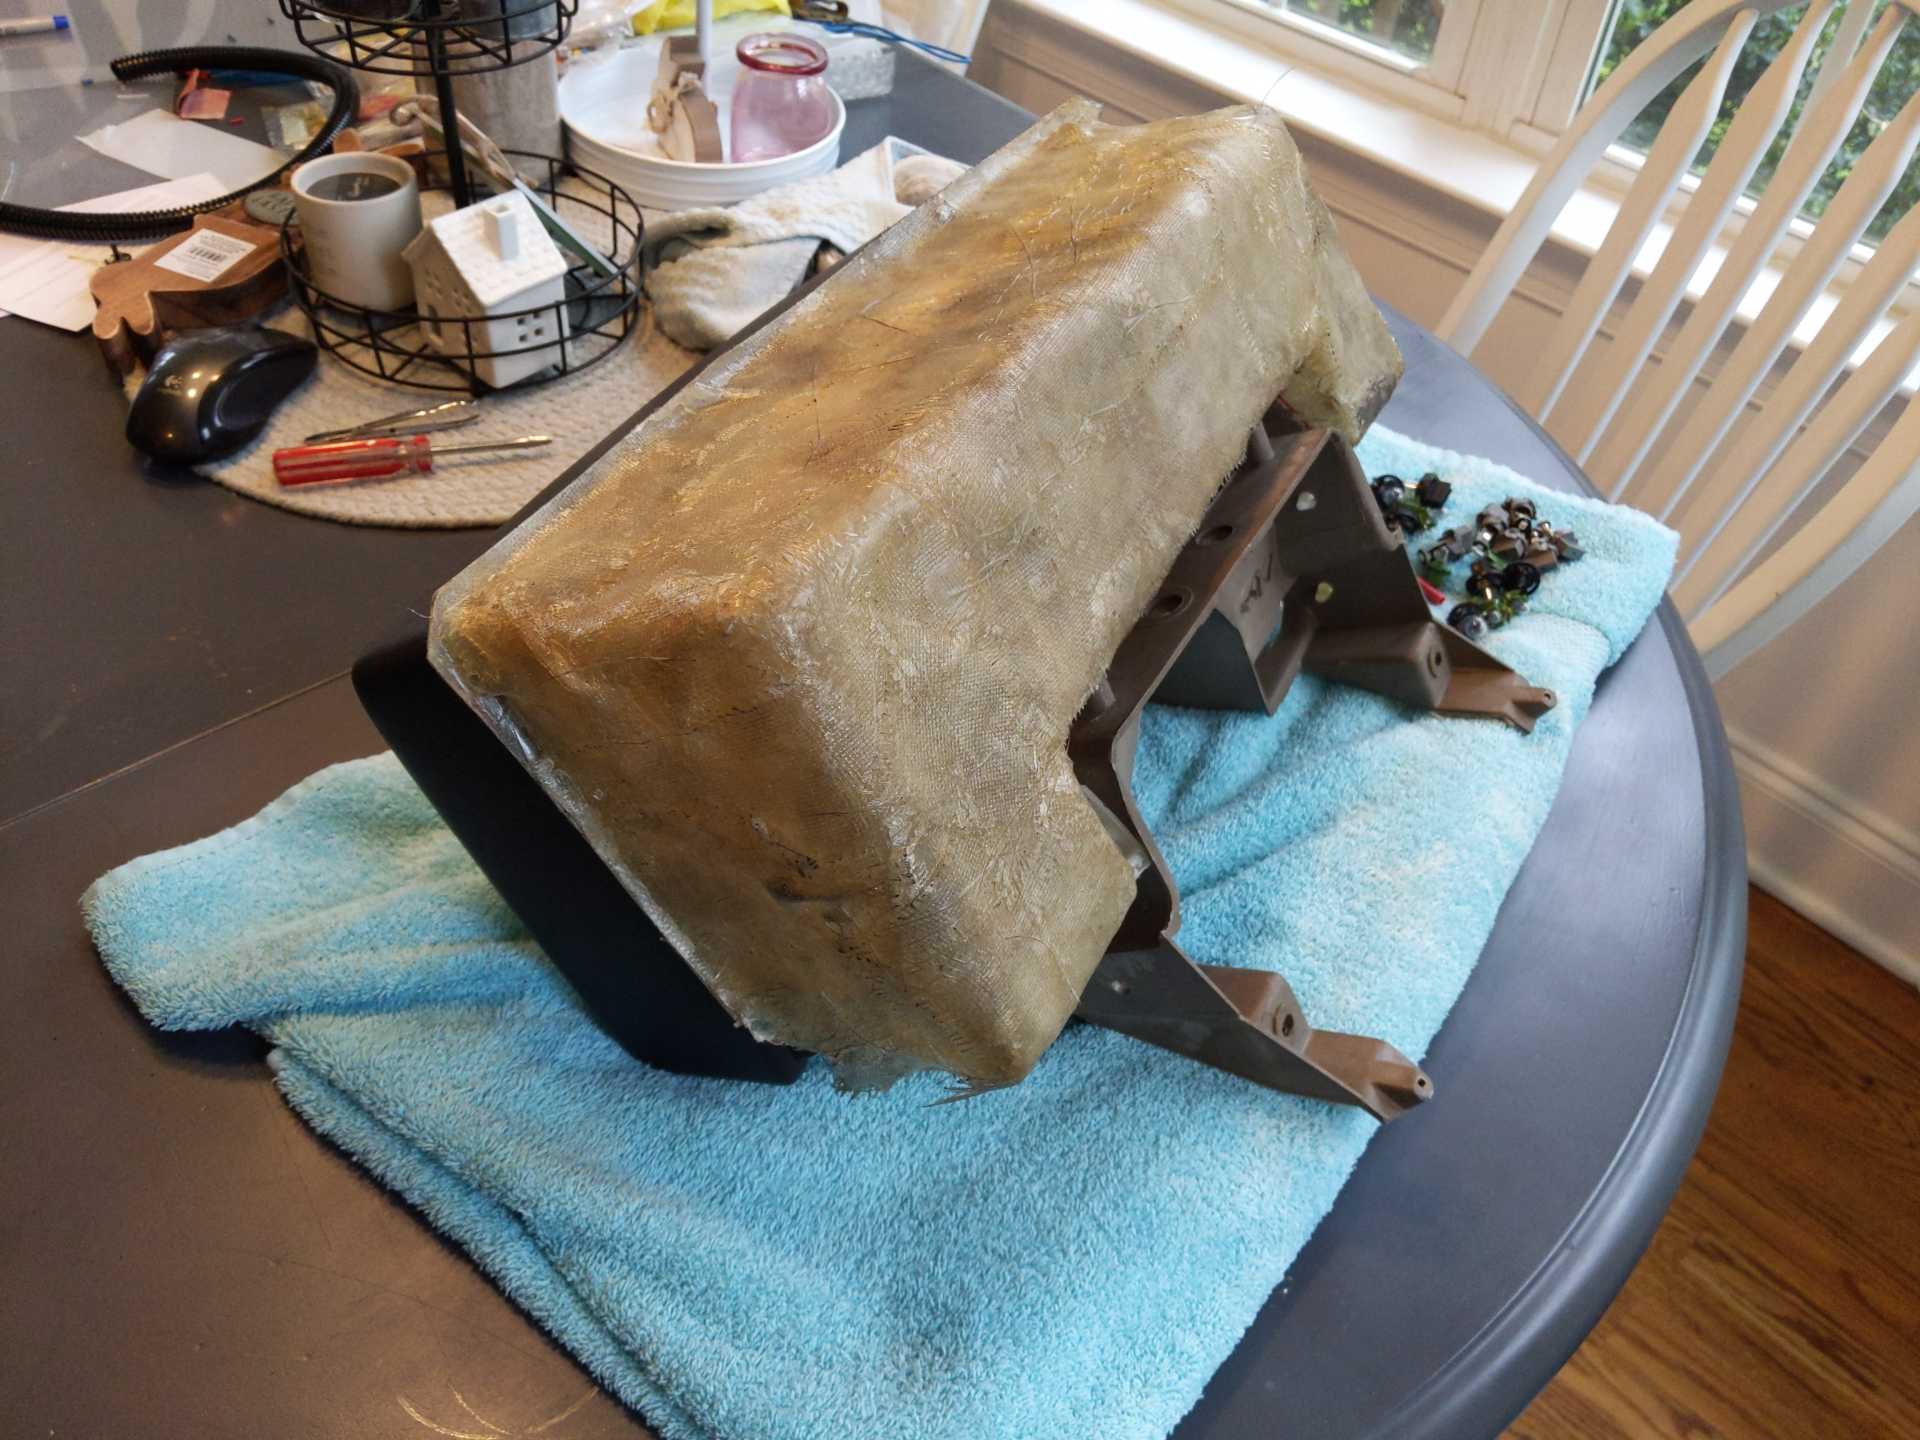
This morning I sanded the foam down into the shape of the rear housing.
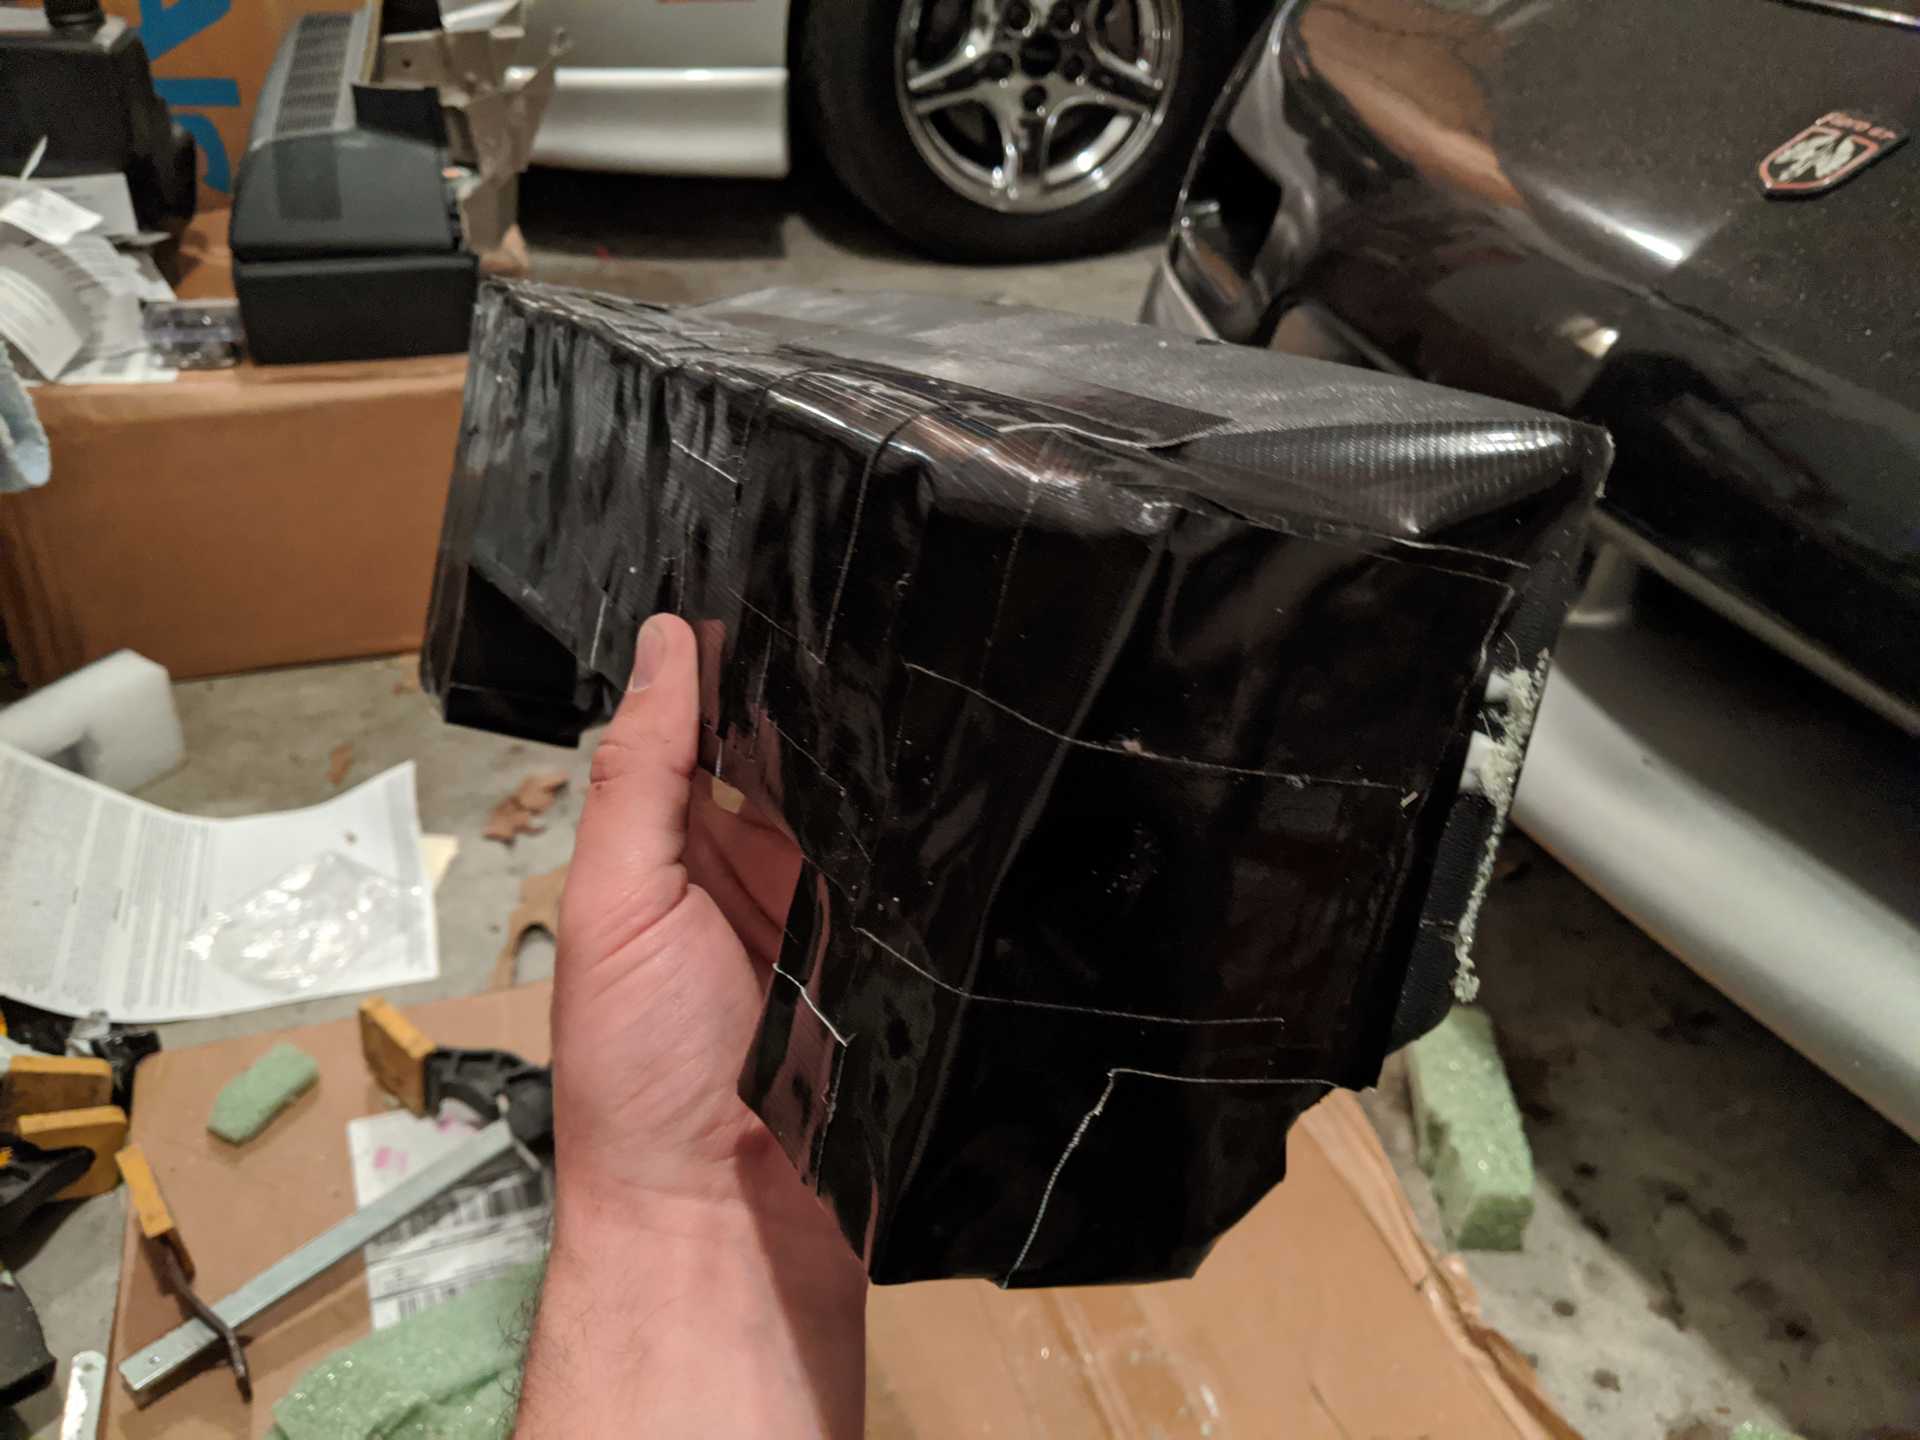
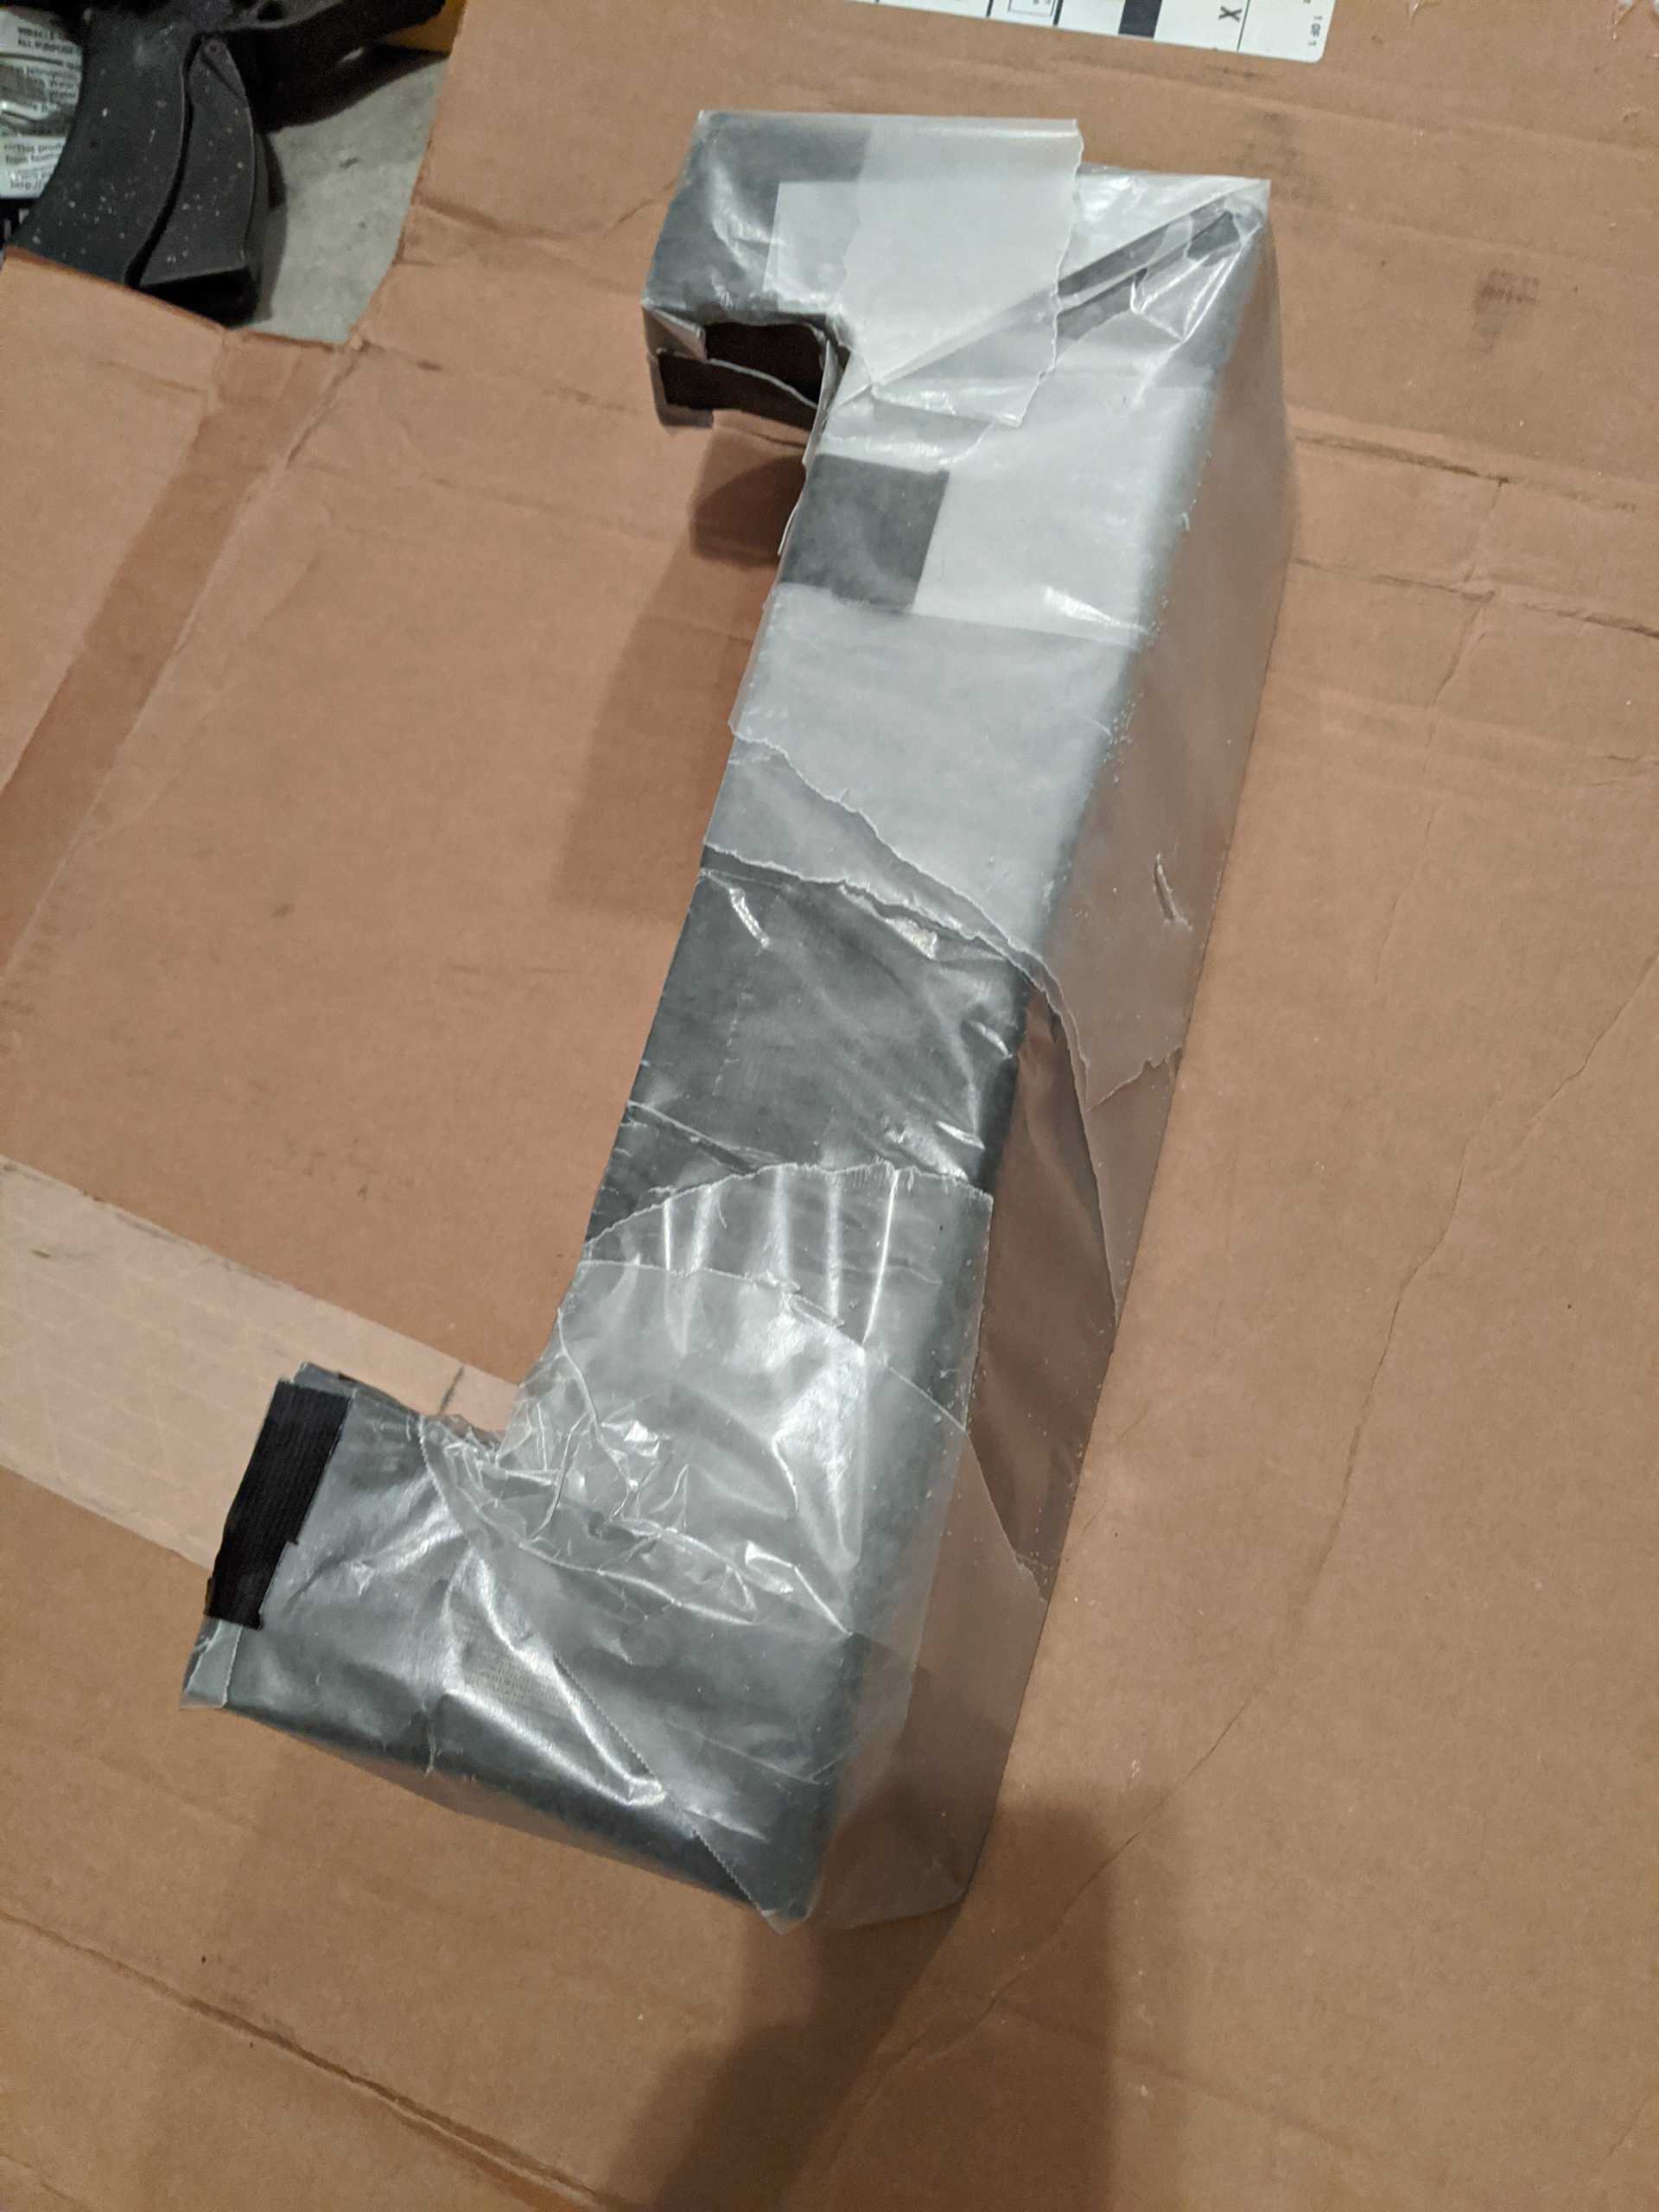
Then I taped everything up for added strength and to fill any gaps I couldn't with the foam.
Covered it with waxpaper so the mold would be easy to remove.
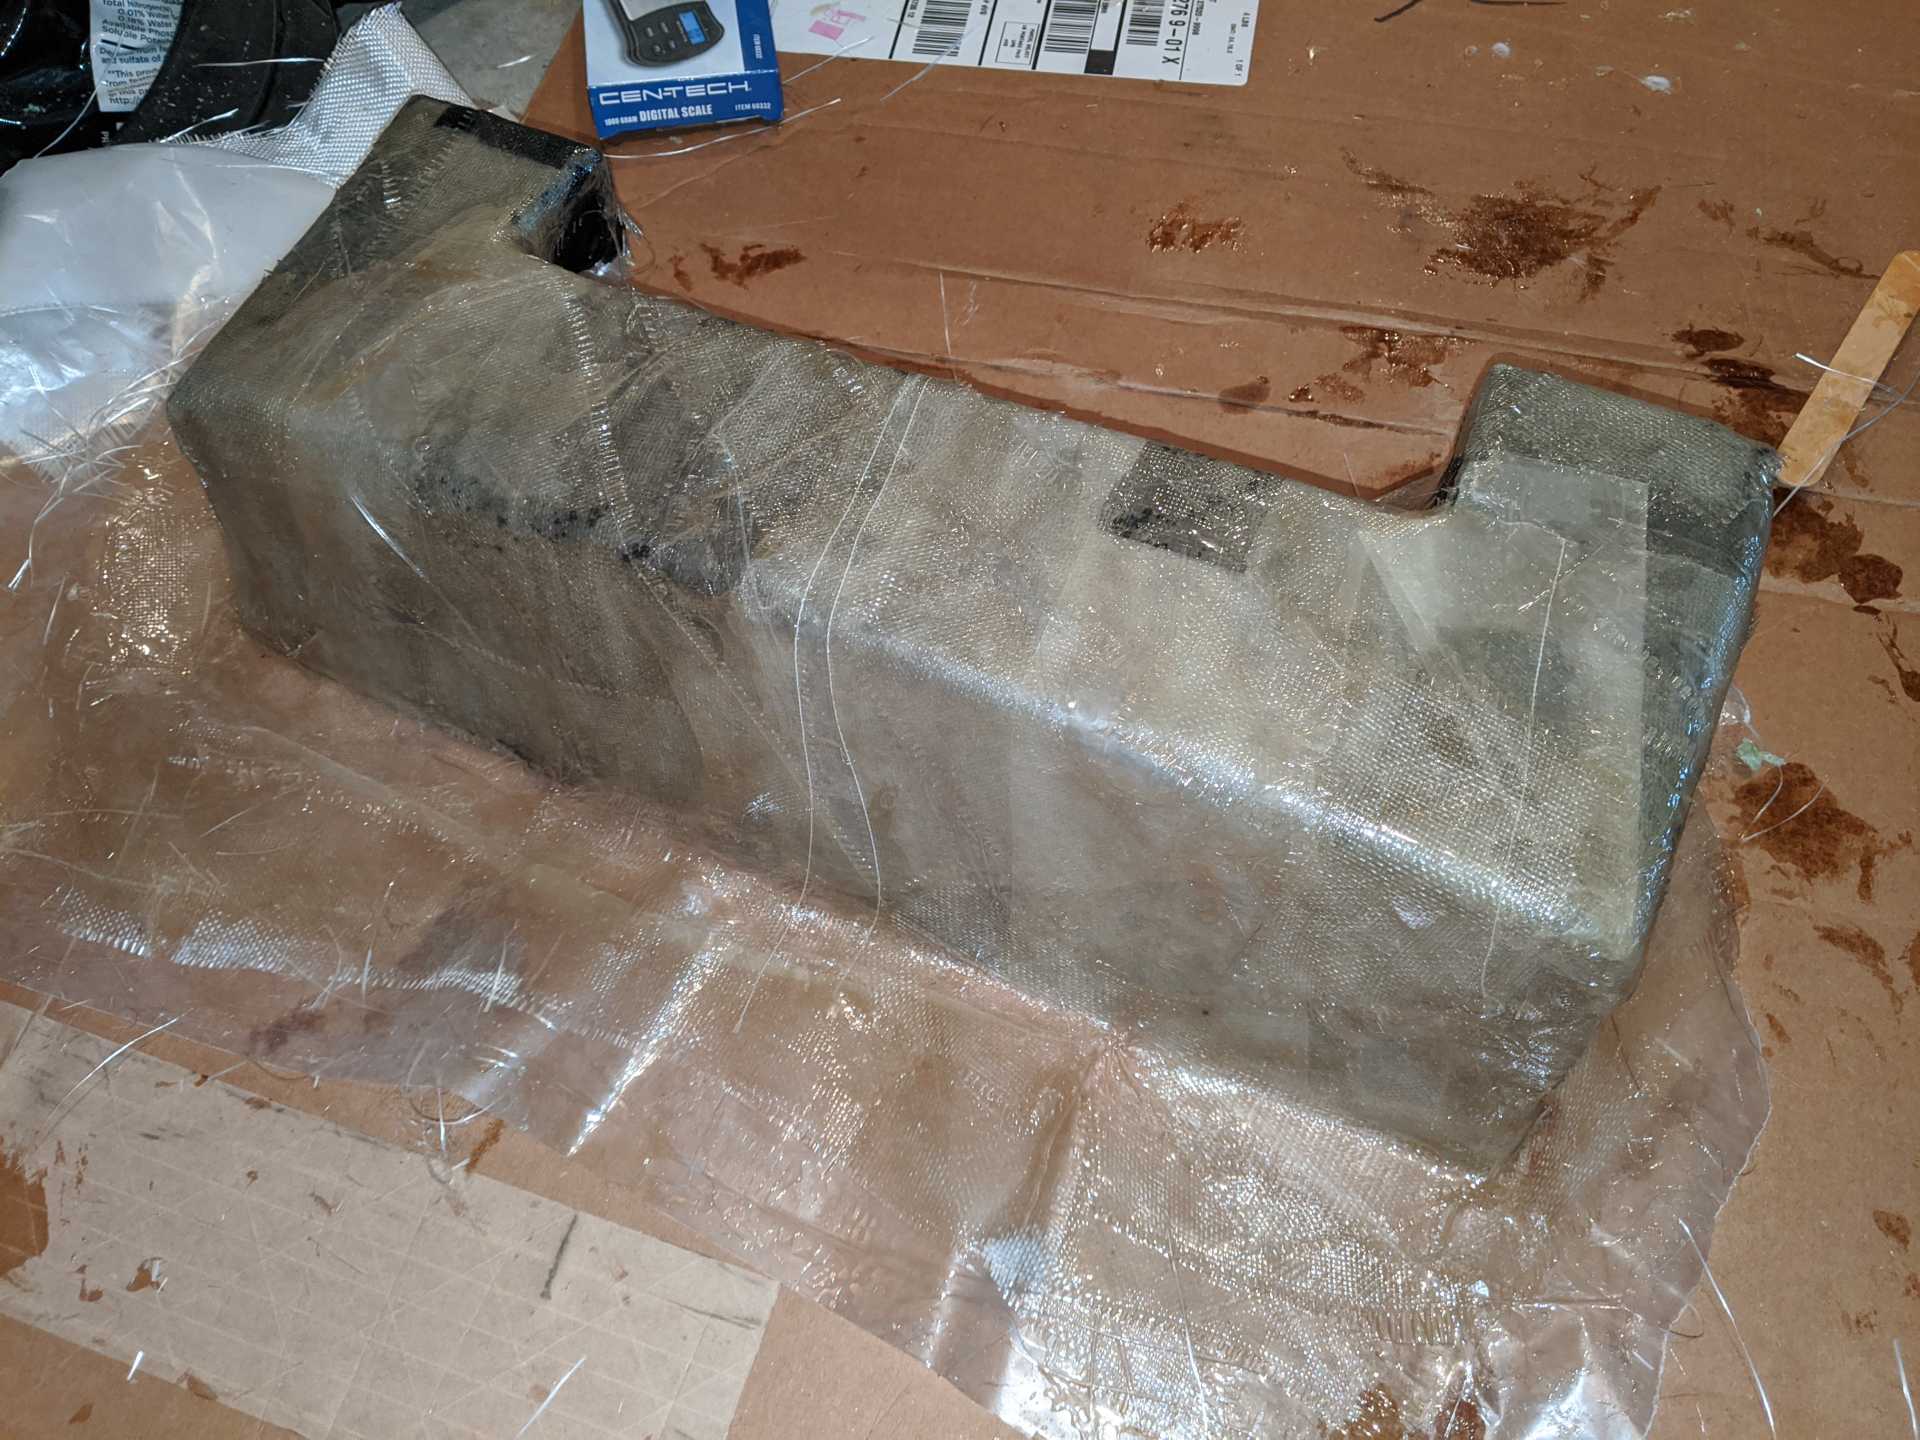
Here it is with the fiberglass on it. Now I'm letting it cure.
I am hoping that the fiberglass looks good. I'm not feeling too confident about my skills so if it looks bad I'm going to add more fiberglass to it. I also have some glaze that I can use to fill in the holes and imperfections.
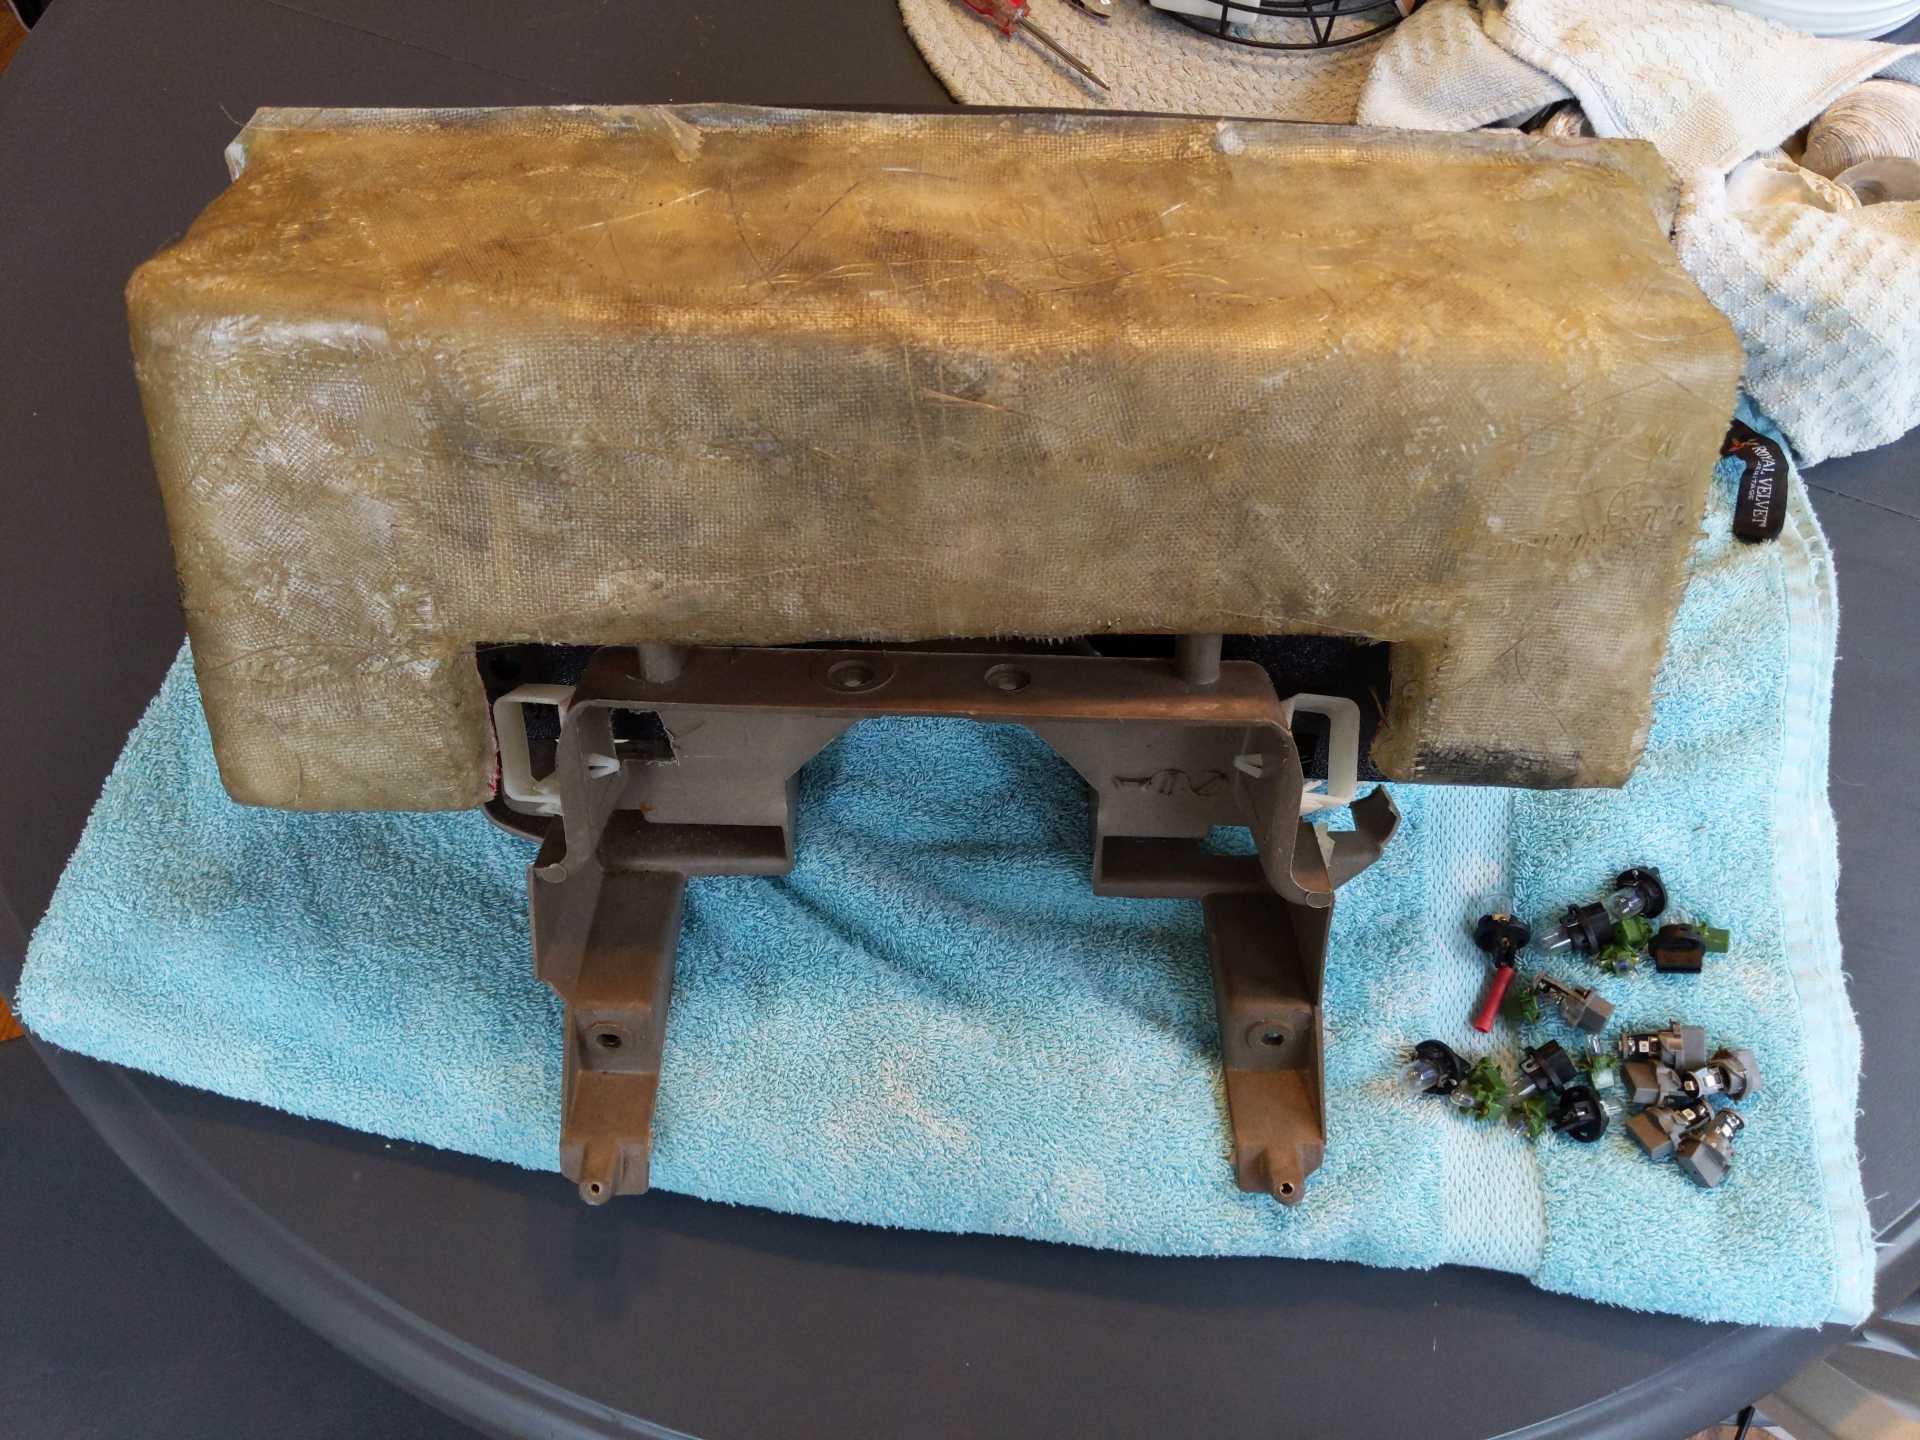
I did lots of trimming on the rear housing today. The edge doesn't sit flush so I'm going to try and correct that tomorrow. It's never going to be perfect, but when it gets wrapped it'll be fine.
I also ordered a replacement gauge cluster from another 1996 Firebird off eBay. Hopefully that one is fully functional.
Nice work for a DIY. Fiberglass is a skill that you only get better at by doing it more often. Just a very tedious procedure though.
Thanks a lot. I did a little bit of touching up on it and then tomorrow I'm going to trim it again. It's slowly fitting better.
I also had the idea to unplug the Fiero auxiliary gauges. That actually fixed the oil pressure issue I was having. Now it's reading correctly. Who would've thought that was the issue? Now I just have to get the temp gauge to work. I'm still under the impression that the cluster may be bad. I'll know for sure tomorrow, that's when the replacement shows up.
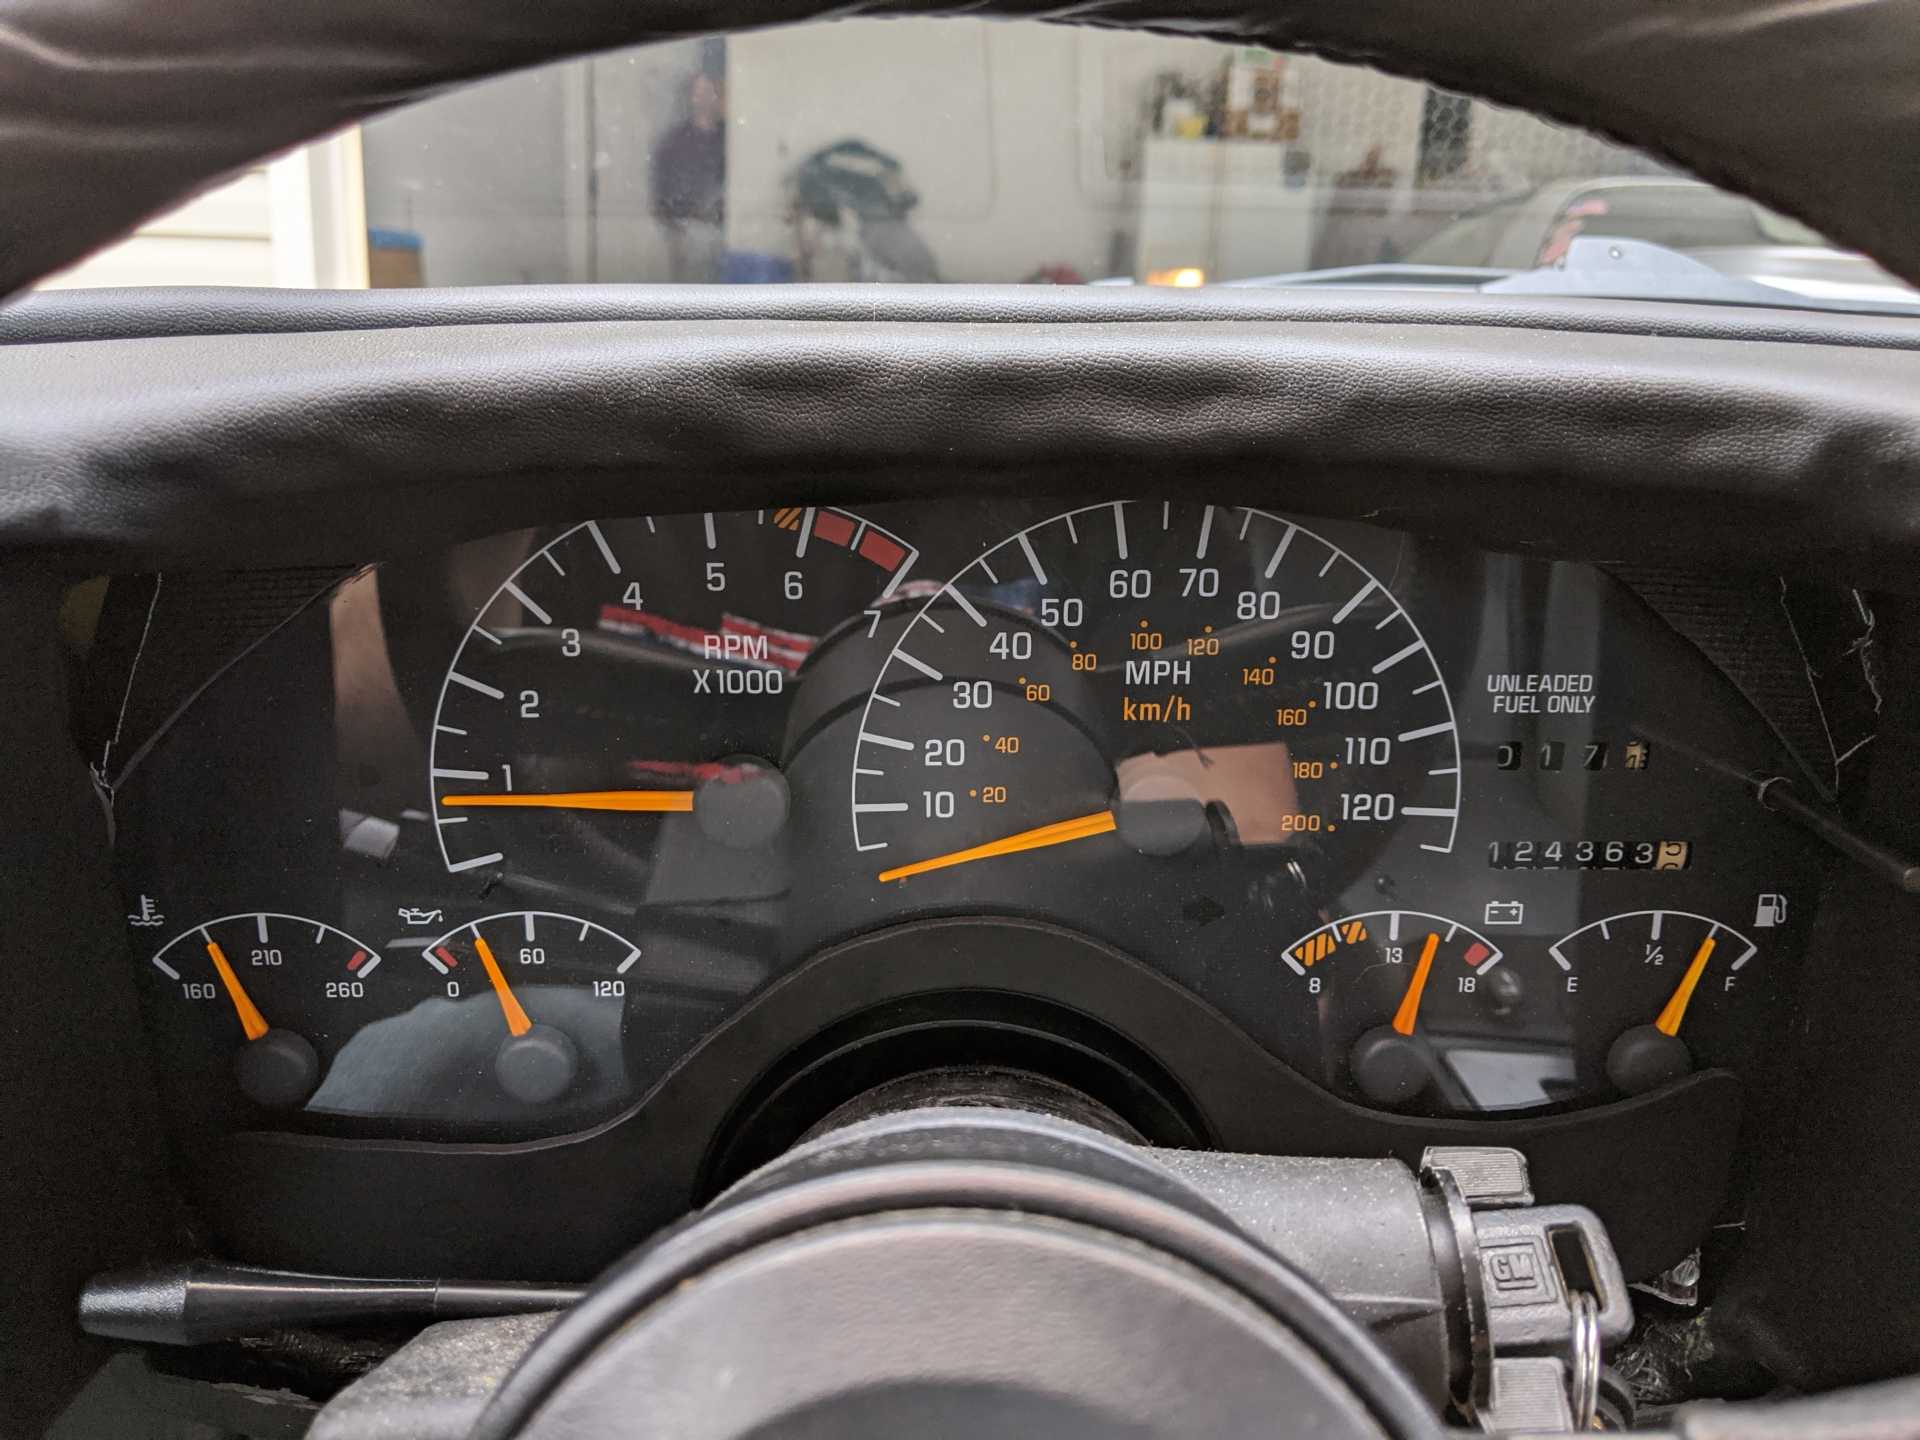
I just got my replacement gauge cluster in the mail and all of the gauges are working now! Glad to see it wasn't a wiring issue.
All that's left to do is to finish the cluster housing. I'm planning on getting both sections wrapped in leather or vinyl. I also have to make a new cluster lens. The current one is scratched all over from sliding it in and out of the housing.
Here is my progress on the front. I have some more trimming to do on the lower bezel. I'll be filling the holes and painting it black, and right now my plan is to silicone it into place. I also drew up a template for the upper bezel. I'm going to carve it out of foam and seal it with fiberglass resin. Hopefully it won't melt. But if it does, I'll think of another way to do it.
I also replaced the lights in the new cluster with red LEDs and it looks fantastic. I also need to spin the mileage up to what my Fiero has right now. So many things to do. Where does the time go?
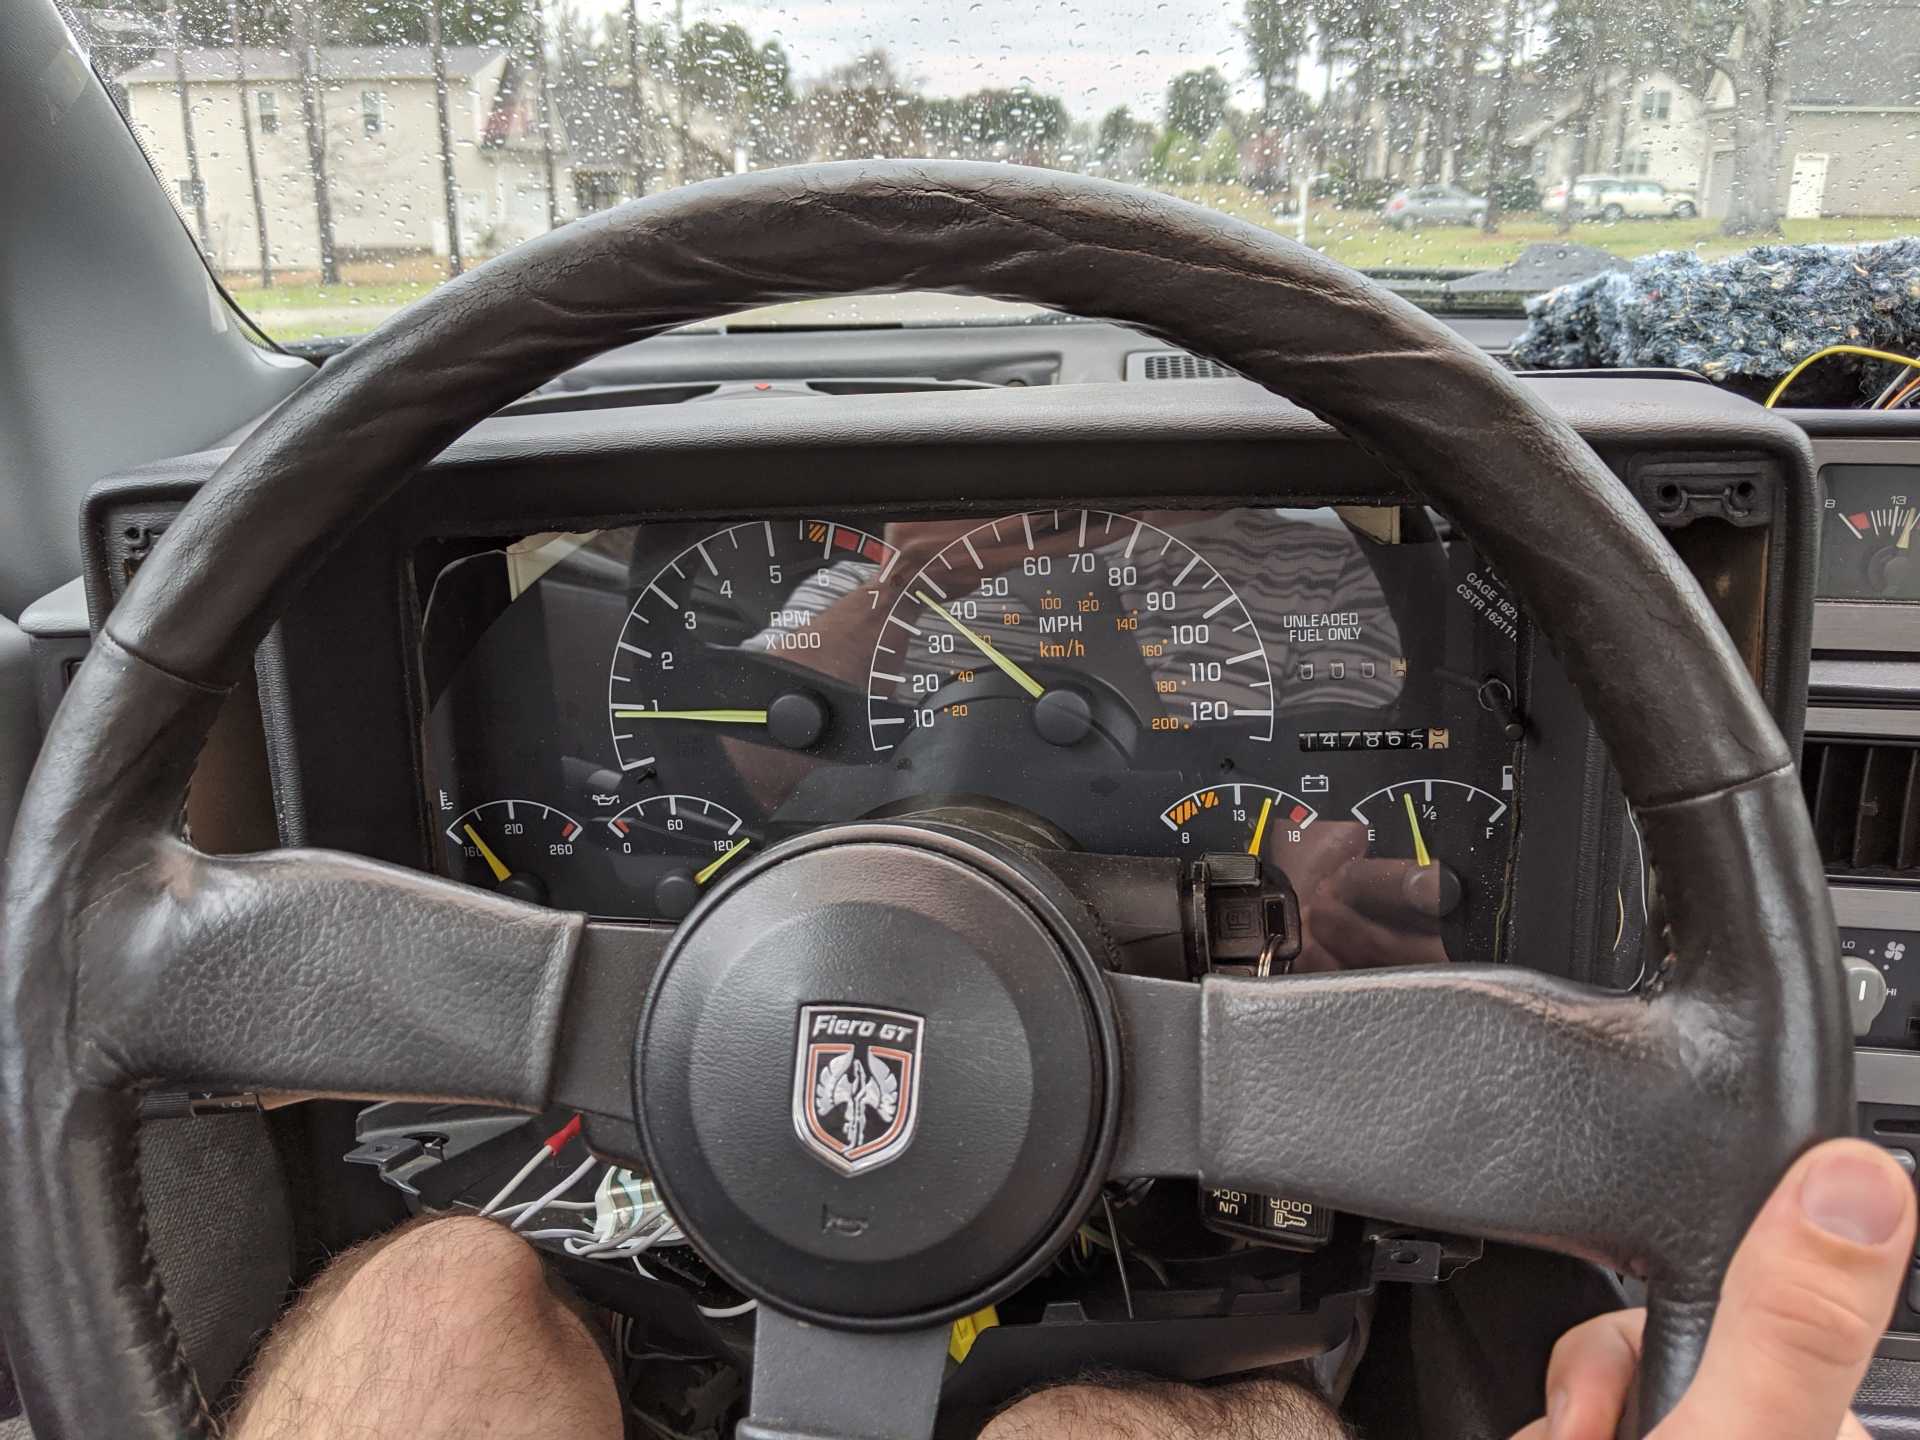
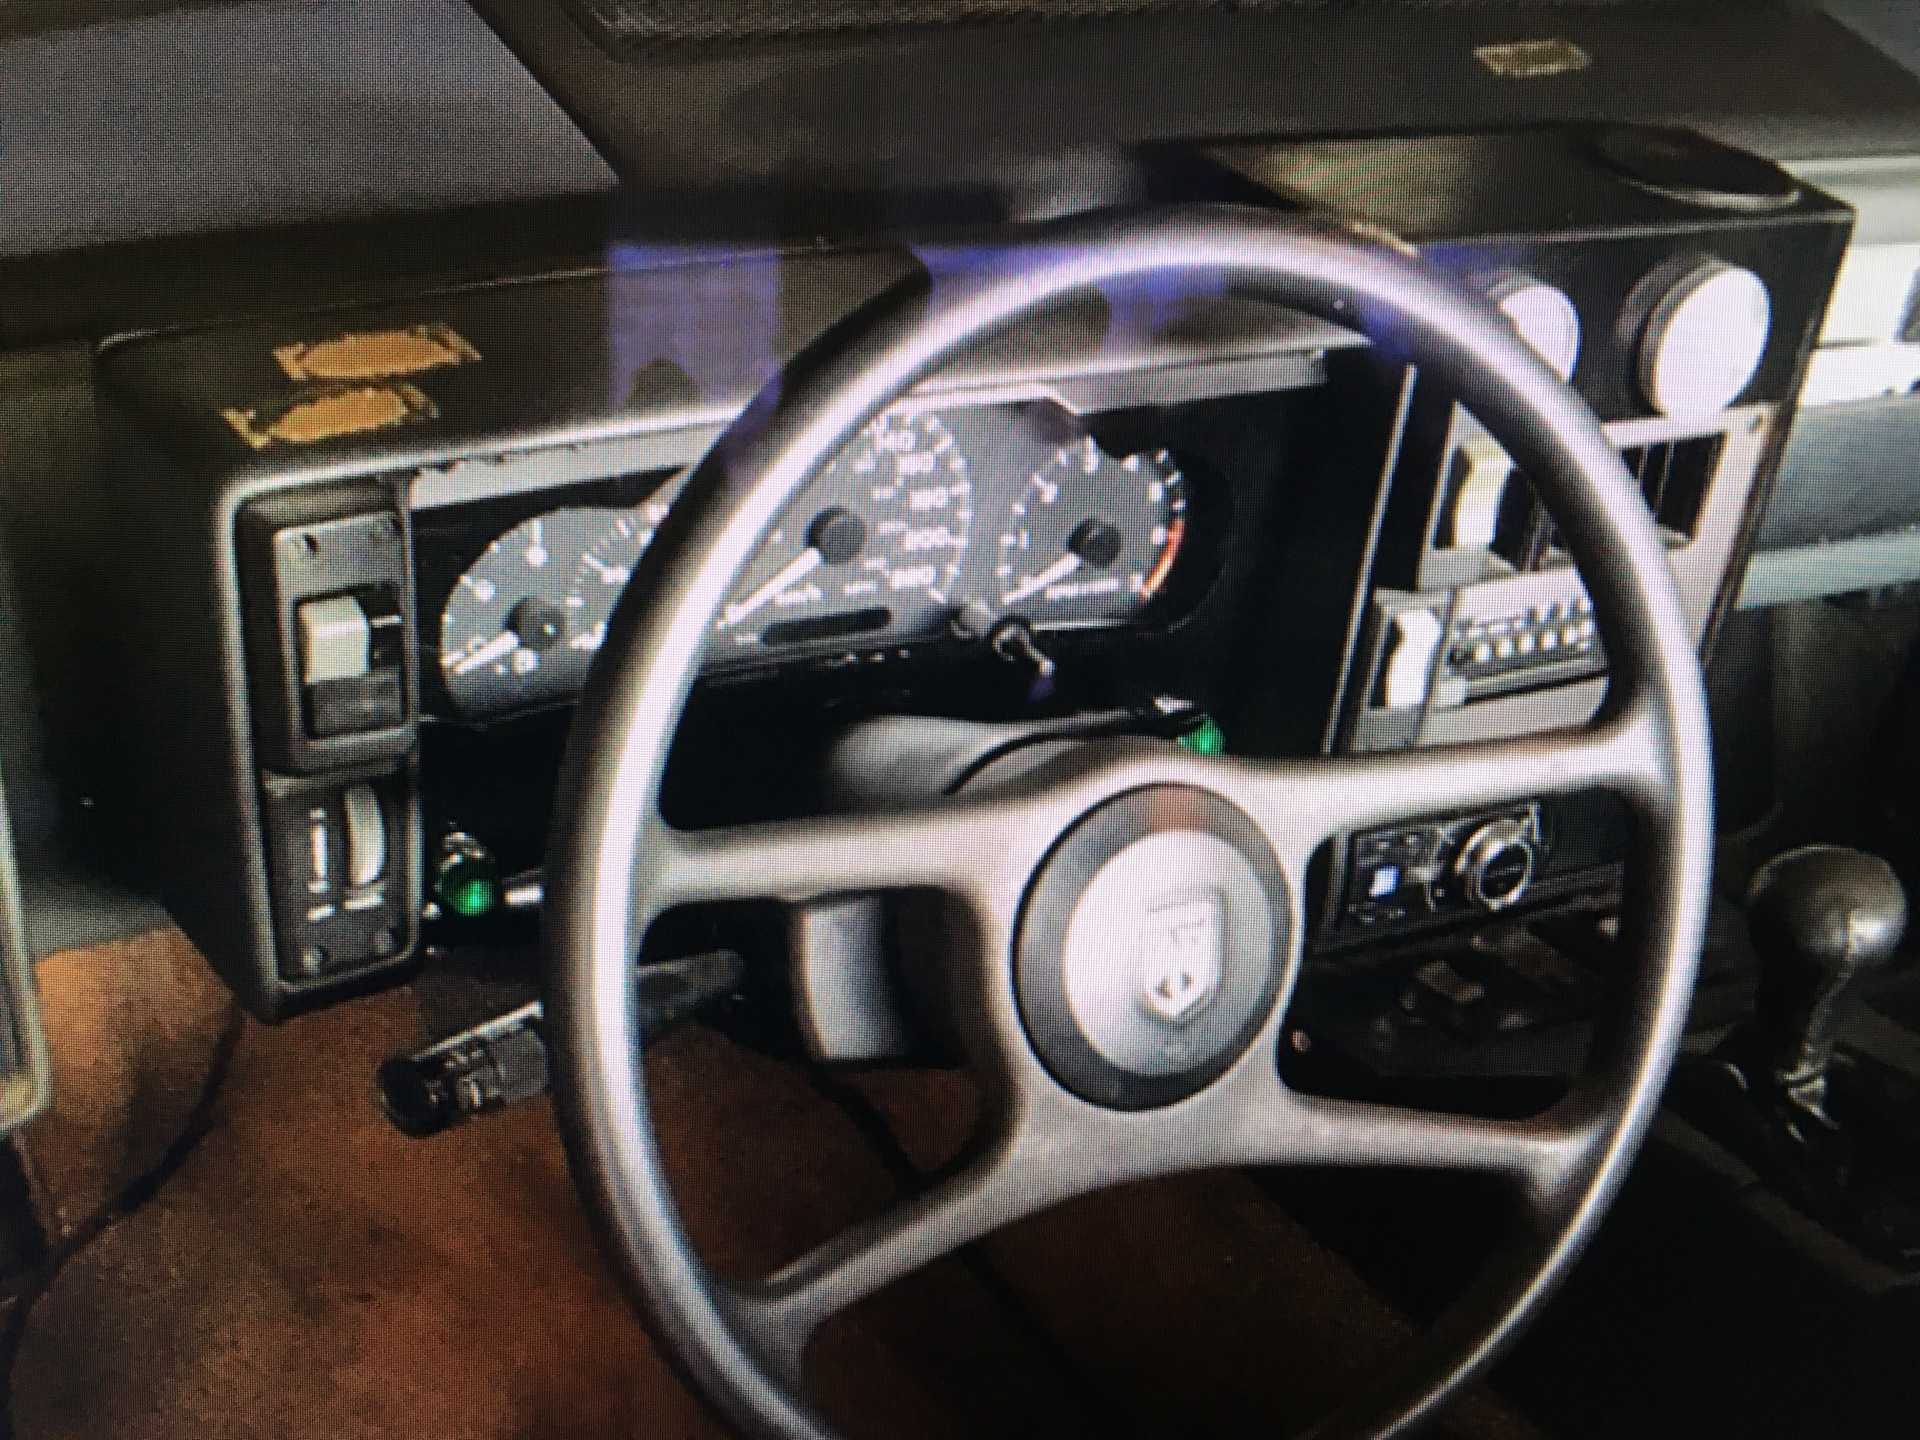
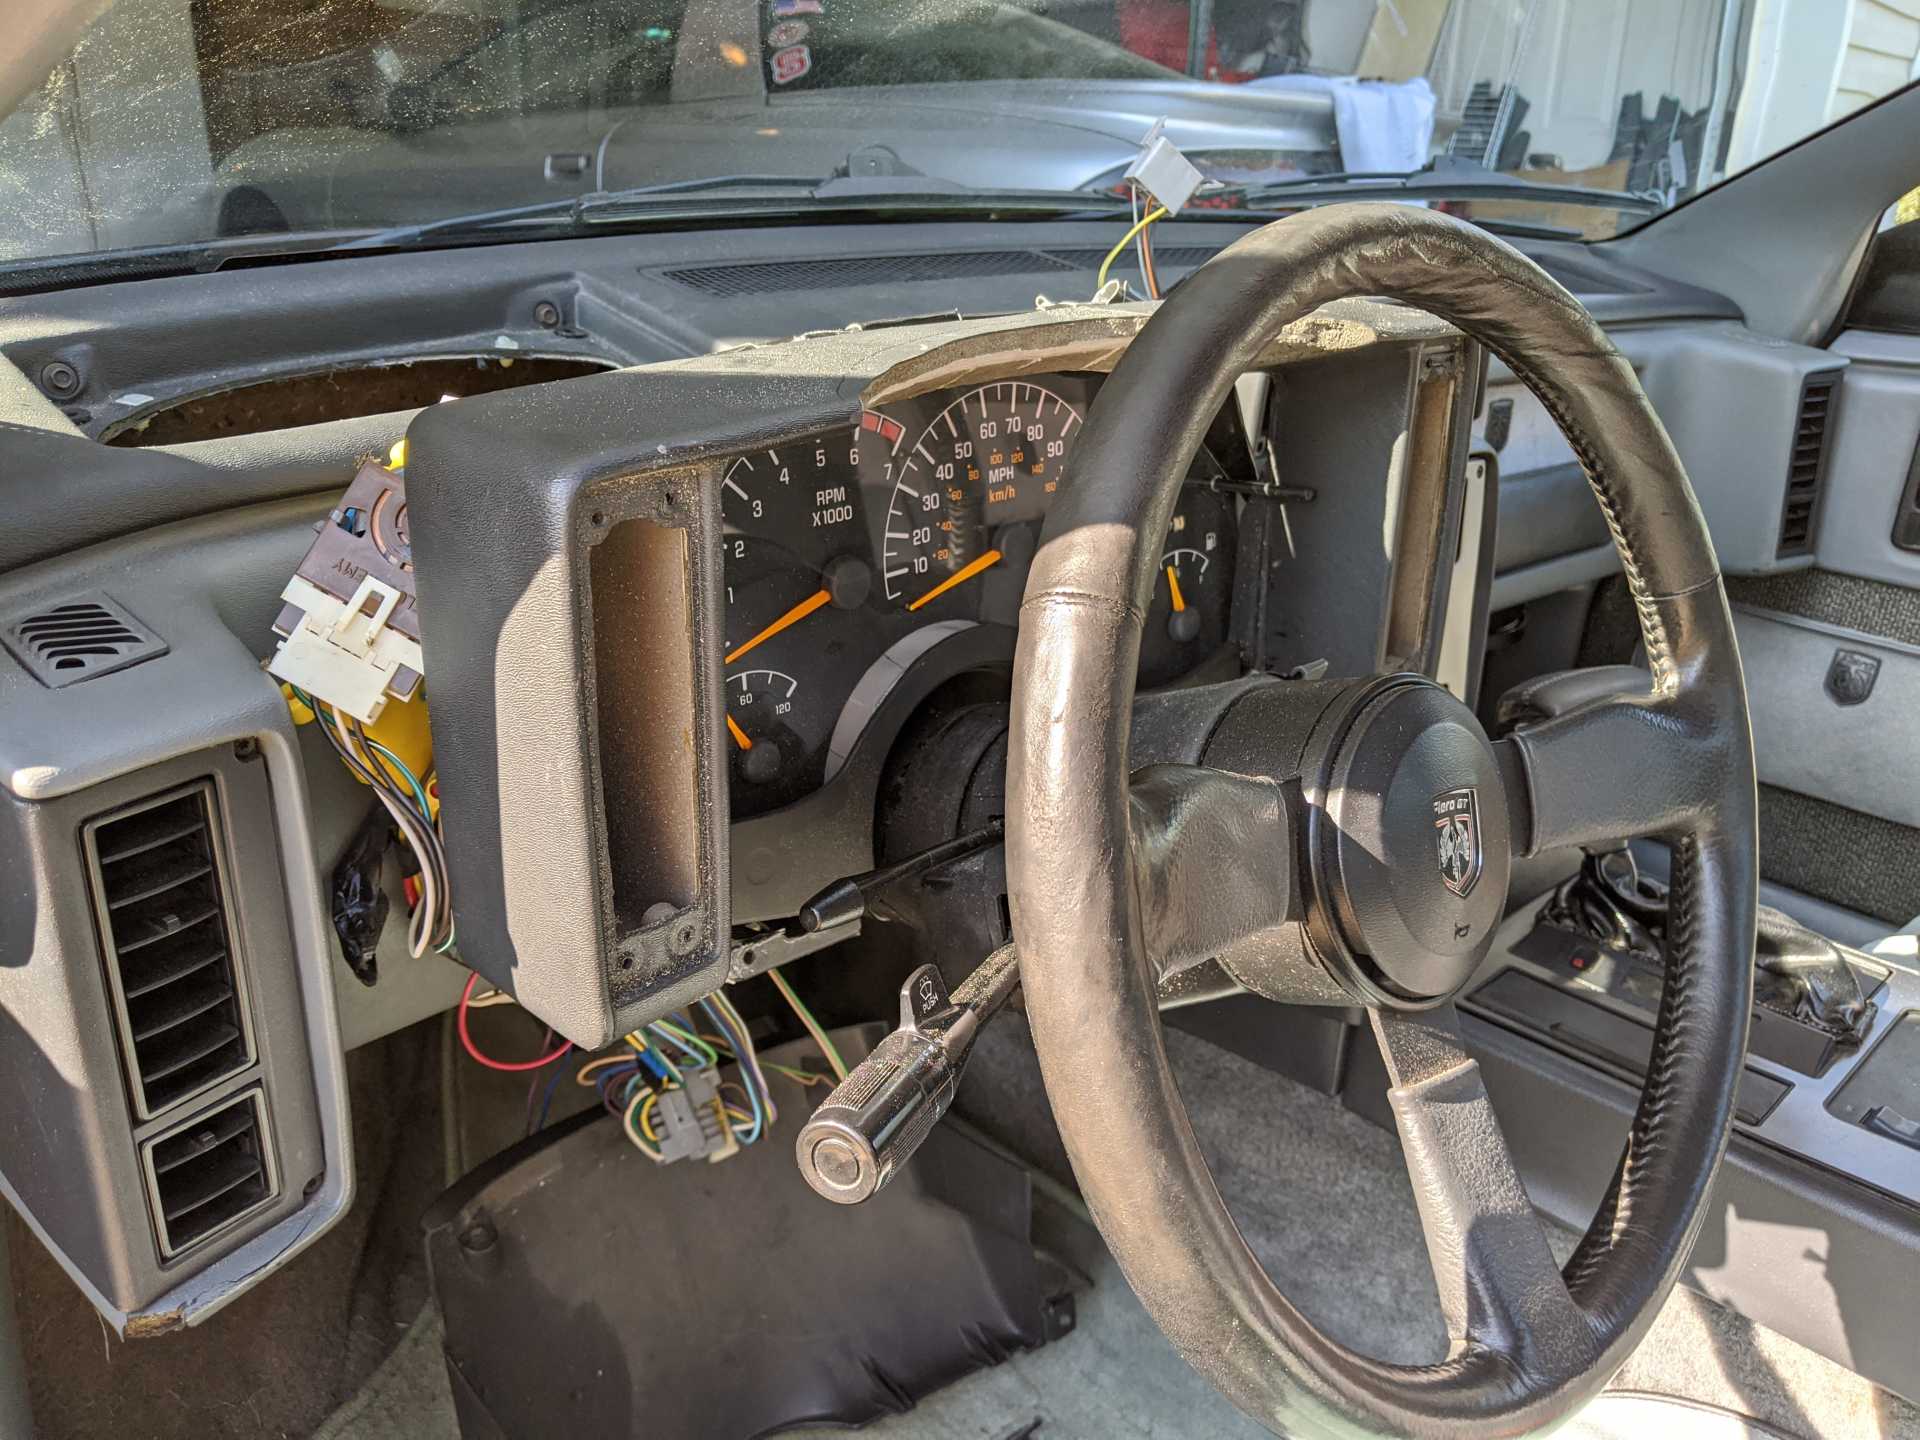
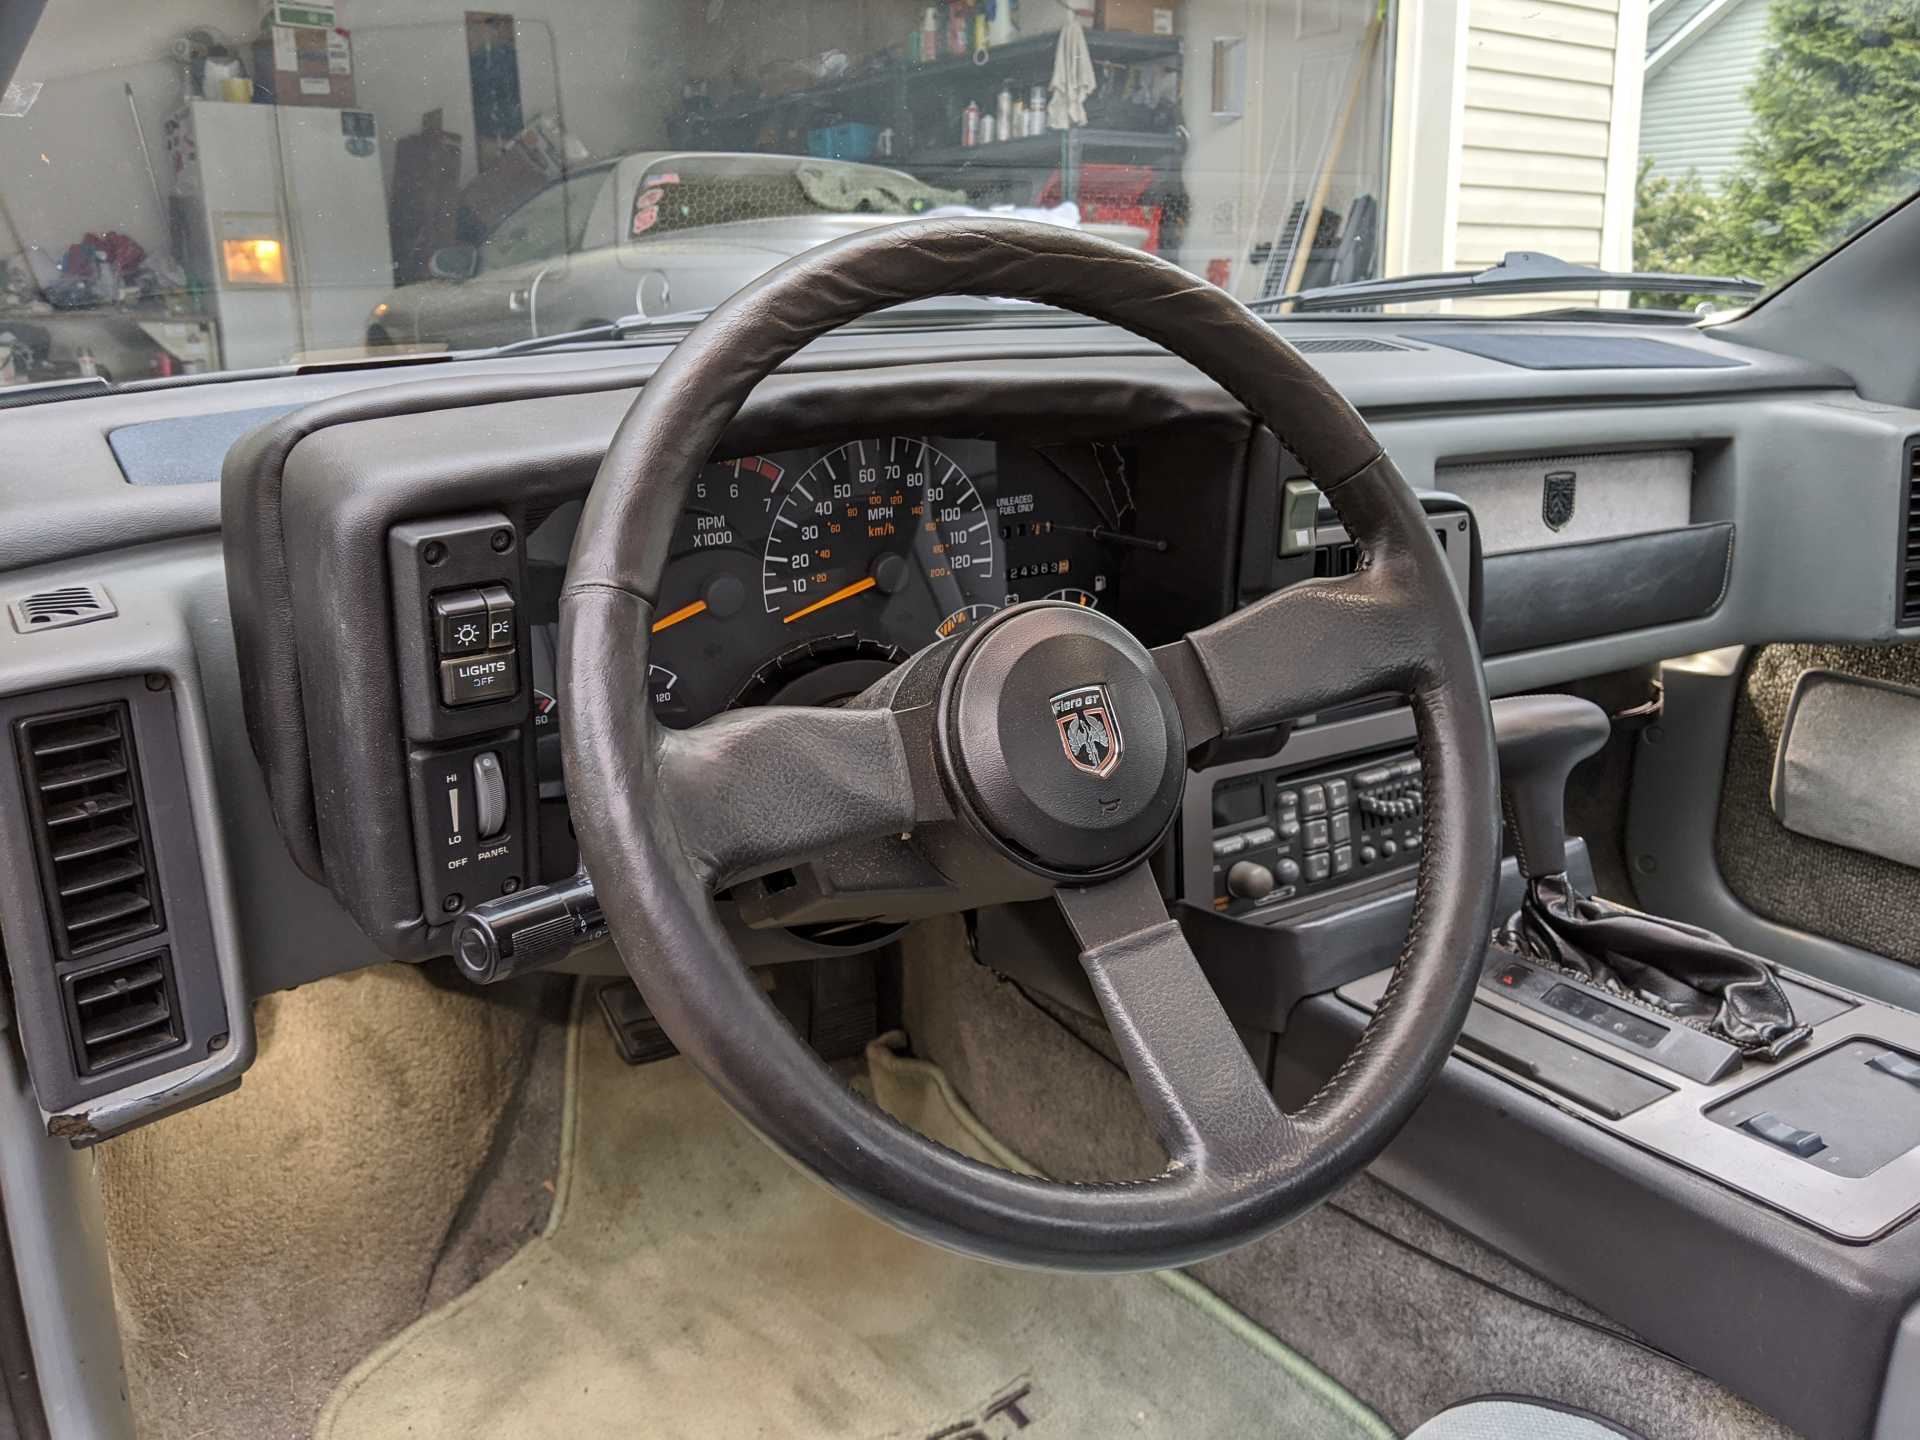
Finally got the gauge cluster mounted. But the hood of the cluster is so large that from the normal driving position cant see anything above 40mph. I'm thinking that I might have to grind out the hood in a semi-circle. I also cracked the housing so will have to reenforce the crack with some metal and JB Weld. It's also going to be difficult figuring out where all of the plugs are going. There's very little room everywhere I look.
I also installed LEDs. Looks amazing at night.
------------------ USMC V13 2015-2019 USMCR 2019-Present North Carolina REALTOR®
If it were easy, everyone would do it! The Fiero gauges stock in my opinion were not the most easily visible. I find myself moving my head around a little bit to see around the steering wheel at times.
If it were easy, everyone would do it! The Fiero gauges stock in my opinion were not the most easily visible. I find myself moving my head around a little bit to see around the steering wheel at times.
I accidentally broke my short lived braced JB Weld repair. I'm thinking about wrapping some fiberglass around the break. That should fix it permanently and strengthen it. I was grinding away at the top of the housing in a circular fashion and I believe it's fixing the visibility issue.
I'm so happy right now. Here is my current progress. I was able to grind the hood on the gauge cluster in such a way to FINALLY see all of the speedometer and tach. I got the four 10mm screws in place and everything fits. I will have to conduct some fine-tuning. I need to grind down the gauge window in order for the rear cover to fit into place. In addition I will need to remove some of the material on the drop panel since it is interfering with the gauges. I'm slowly but surely getting there.
------------------ USMC V13 2015-2019 USMCR 2019-Present North Carolina REALTOR®
I had to redo the wiring harness on the C3 connector. I believe some of the solder joints bridged when I was getting the harness into place and removing it over and over. I replaced the thick 18 gauge wire with 24 gauge speaker wire from Ace. It's now much more flexible so I shouldn't have that issue anymore and everything works great once again.
I also did a fitting test for the gauge cluster housing and I'm extremely happy with the results. I have an appointment on Monday to see an upholstery shop. There are some gaps, bumps, and divots with the rear cover so I'm assuming that it'll look much better when it's covered. I'm not looking for perfection, I just need it to look good enough.
Here are some photos. Any feedback would be appreciated. I thought this thread would be getting some more traction. Hopefully it's entertaining someone somewhere.
I think you are doing a great job. The only thing I am wondering about is when it is dark out how much reflection from the dash are you going to get on the windshield at night now that you cut the half circle out of the dash? Before you get it upholstered, roll it outside at night and check it out so if you need to mod it a bit more it wont cost more money.
------------------ 86 GT built 2.2 ecotec turbo rear SLA suspension QA1 coilovers on tube arms
I think you are doing a great job. The only thing I am wondering about is when it is dark out how much reflection from the dash are you going to get on the windshield at night now that you cut the half circle out of the dash? Before you get it upholstered, roll it outside at night and check it out so if you need to mod it a bit more it wont cost more money.
Thanks a lot and I appreciate the suggestion. I will look into that. I'm not expecting much light to show on the windshield. I was forced to cut that circle in order to actually see the gauges, I couldn't think of any other way to make it work. Worst case scenario I can dim the lights.
I got quoted $80 to get the gauge cluster upholstered so I'm dropping my car off with him on Saturday and he will also do my headliner as well.
In addition, I also grabbed a base model radio surround from a local Fiero owner and I'm repairing the warpage. I might get this upholstered too.
I also finished upgrading my stereo. I got rid of the tiny sub and installed the Tang Band sub with the Xtant 1.1 amp and a low pass crossover and went to Infinity Reference speakers in each corner. Sounds much, much better and I'm very happy with the results.
Since my project list is getting shorter, I got started on installing fender vents into a spare set of fenders I have. Tomorrow I'll be bonding them into place.
Very creative project and nice job. I was thinking about doing an F body gauge pod but if I make this a project I'd like to use the half moon design used on the prototype 90 Fiero. GM must have used a standard Camaro or Firebird unit. If I see any in this design next time I go to the junkyard I'll try to buy one.
------------------ " THE BLACK PARALYZER" -87GT 3800SC Series III engine, custom ZZP /Frozen Boost Intercooler setup, 3.4" Pulley, Northstar TB, LS1 MAF, 3" Spintech/Hedman Exhaust, P-log Manifold, Autolite 104's, MSD wires, Custom CAI, 4T65eHD w. custom axles, Champion Radiator, S10 Brake Booster, HP Tuners VCM Suite. "THE COLUSSUS" 87GT - ALL OUT 3.4L Turbocharged engine, Garrett Hybrid Turbo, MSD ign., modified TH125H " ON THE LOOSE WITHOUT THE JUICE "
Very creative project and nice job. I was thinking about doing an F body gauge pod but if I make this a project I'd like to use the half moon design used on the prototype 90 Fiero. GM must have used a standard Camaro or Firebird unit. If I see any in this design next time I go to the junkyard I'll try to buy one.
Thanks a lot, Dennis. I actually have two of the Firebird gauge trims. I tried to make it work, but that is way beyond my skill level. It would've made this project way more challenging and a lot longer.
Nice work. I've been building these firebird harnesses for a while. I could have saved you some effort, but the learning is the fun part.
I think installing the Firebird dash would have been less work than what you are doing. But it's a nice upgrade for those that don't want a full dash upgrade.
Nice work. I've been building these firebird harnesses for a while. I could have saved you some effort, but the learning is the fun part.
I think installing the Firebird dash would have been less work than what you are doing. But it's a nice upgrade for those that don't want a full dash upgrade.
- Jonathan
Hey Jonathan, it's great to see you in my thread, the wiring connections you posted over a decade ago worked great for me! And doing the harness actually wasn't so difficult, although mine doesn't look anywhere near as nice as yours. The difficult part for me is trying to fit everything. There isn't a ton of room anywhere.
I was looking through that thread and determined installing the Firebird dash would be a complete nightmare for me. So I decided to make a "Prototype" gauge cluster and save myself a ton of headache. I'm nearly finished!
Reglued the new radio surround and tomorrow I'm dropping everything off to get upholstered.
On a side note, my fender vents are having some issues with the bond cracking. I epoxy'd a piece of plastic behind the weak areas and hopefully that will provide the strength to avoid further cracks.
[This message has been edited by rbell2915 (edited 04-24-2020).]
Got my headliner redone today and the guy told me he wasn't happy with how the gauge cluster turned out so he only charged me $20 for the materials. Honestly, I'm happy with it. Everything is all back together and it looks great. Tonight I'm going to silicone my lower bezel in place and I'll be finished.
I believe my dimmer switch is broken because when I turn on my parking lights/headlights, ALL lights and radio do not dim and go to zero brightness. Probably just needs to be replaced. Will post an update with the fix and the gauge cluster all lit up.
My dash lights still will not turn on. I tried everything. I disconnected the transistor and jumped C and D and it keeps blowing the fuses. I disconnected the IP and it still won't stop blowing the fuses. What is the issue? What am I missing?
Finally figured out my short. Somehow my wiring harness was contacting a metal piece. I added more tape to the C2 and C3 connectors and that seems to have solved the problem.
Right now my wife's Saab has a bad ECM so it's in the garage. Once that is fixed I'm thinking about taking the gauge cluster apart and removing more of the bezel material in order to see the gauge cluster better and to smooth it out. I feel like I can remove a lot more. I was also given the idea of fabricating some sort of adapter to raise the angle of the cluster up so it's not at 90 degrees. I wish I had a 3D printer. I'll also be getting it recovered again. Probably at a local upholstery shop. The adhesive and vinyl isn't working that well.