I have Danyel's headlight buckets, and the 90mm headlamp housings. I can not figure out how to aim the headlights properly, They are pointed down so low, that the low beams are aimed at just 10 feet or so in front of the car.
I did mine a couple weeks back. Ideally you want the car parked on a flat surface about 20 ft or so away from a flat wall. I used my garage door. Go on youtube and search headlight aiming for projector lights. The videos will show you what the light pattern and cut off will look like and how to aim both headlights. If you used the Hella projectors, either 90mm or 60mm , the screws and springs used to mount the lights to the buckets is what you use to aim them. Each screw changes the position. Up/down, side to side. Watch your light pattern on the wall while you turn each screw. Do one screw at a time for each light until you get it right. Like I said, check youtube for more pointers. I got my 60mm projector low beams spot on! Still working on the high beams but the projectors are so good that the low beams are all I really use in my area.
the screws and springs used to mount the lights to the buckets is what you use to aim them. Each screw changes the position. Up/down, side to side. .
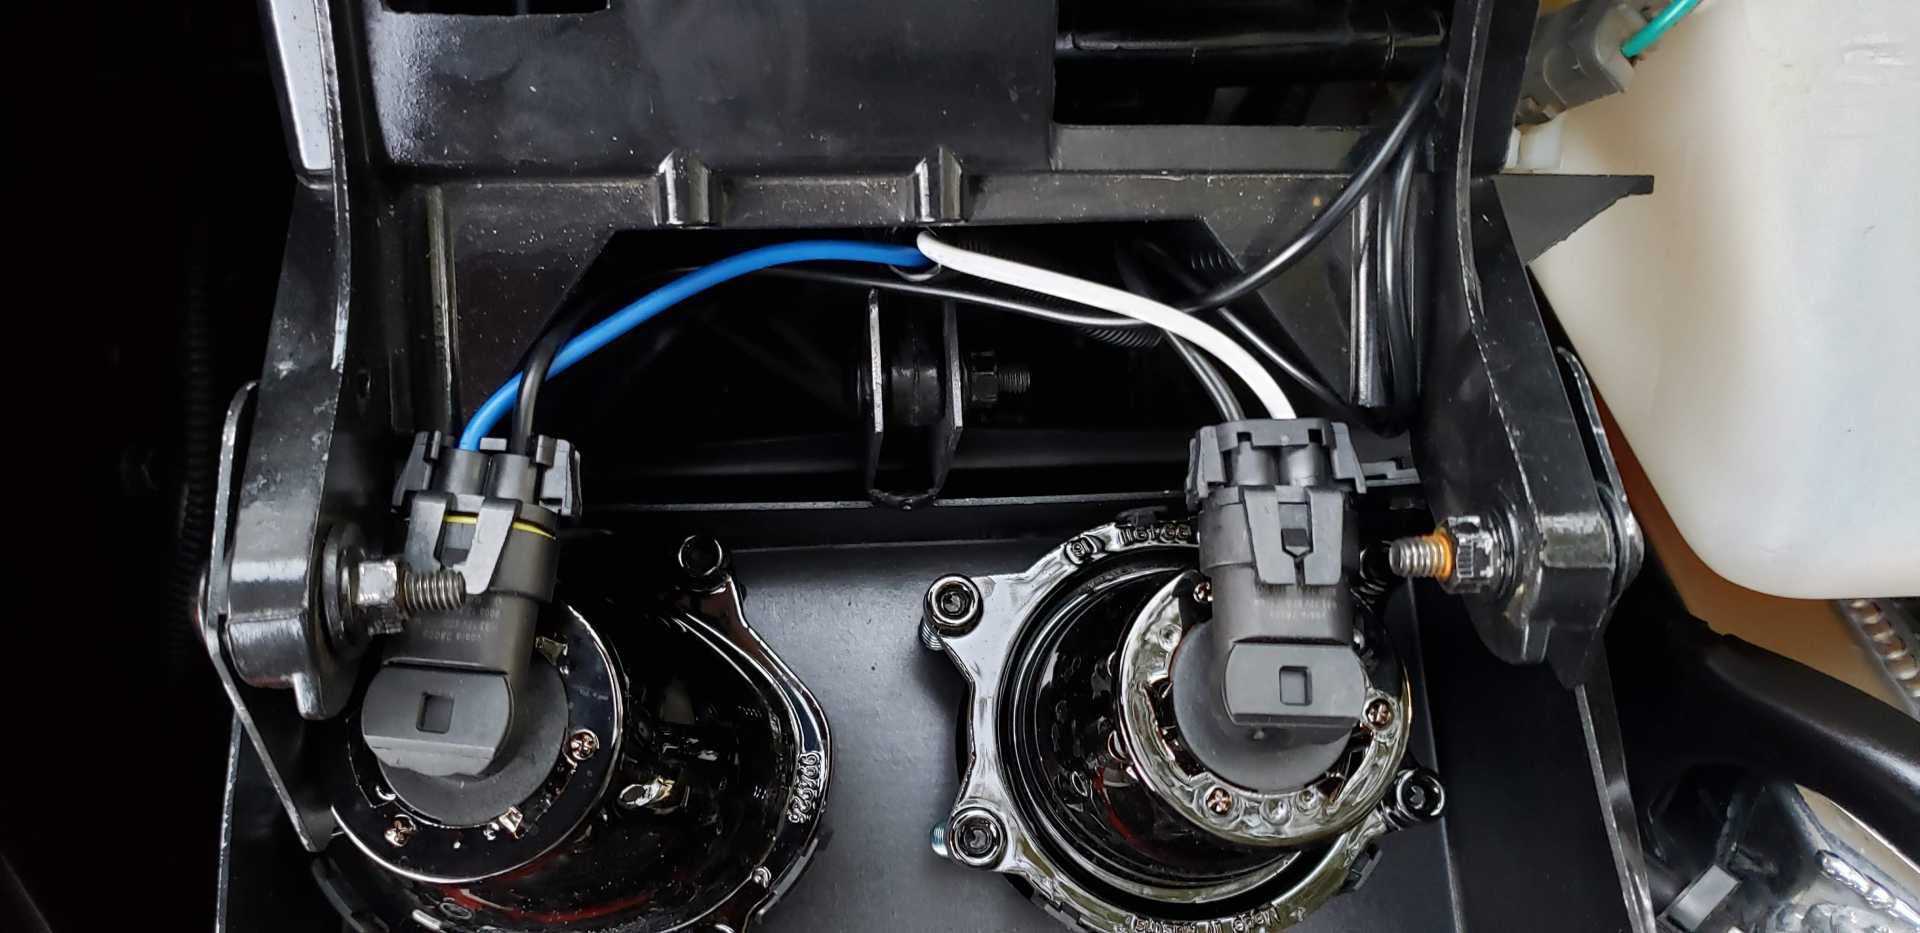
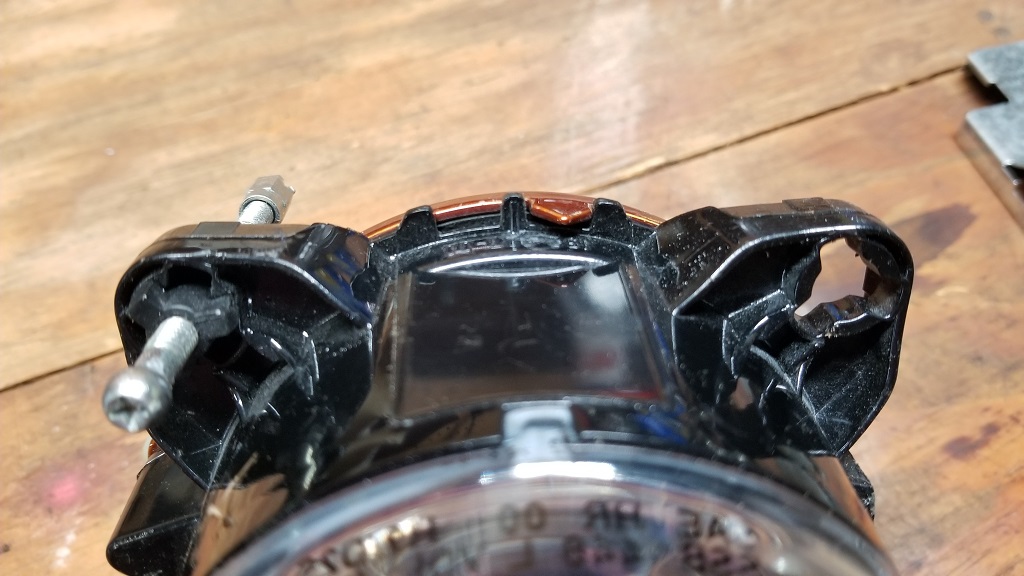
This I guess is where my problem lies. There are no springs and screws. The screws I have are in 3 "corners" of each light. I can turn them and turn them, and they do not do any adjustments whatsoever. They appear to be just screws to hold the lights into the buckets.
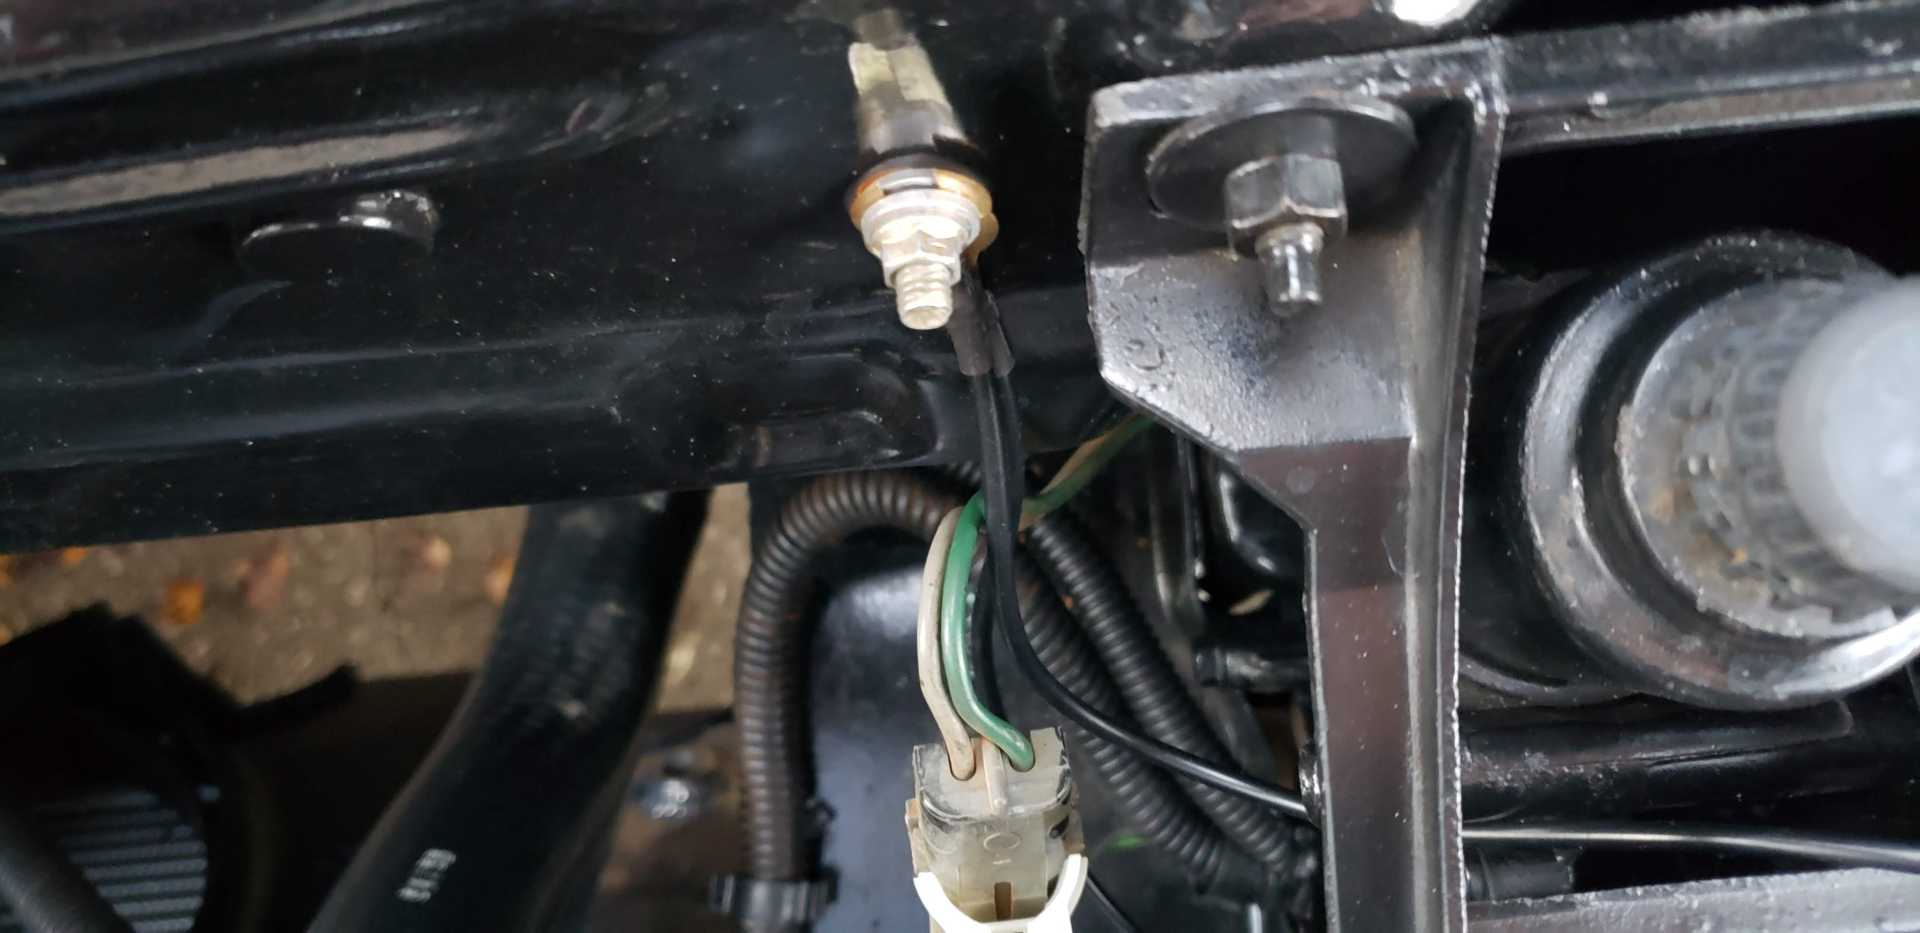
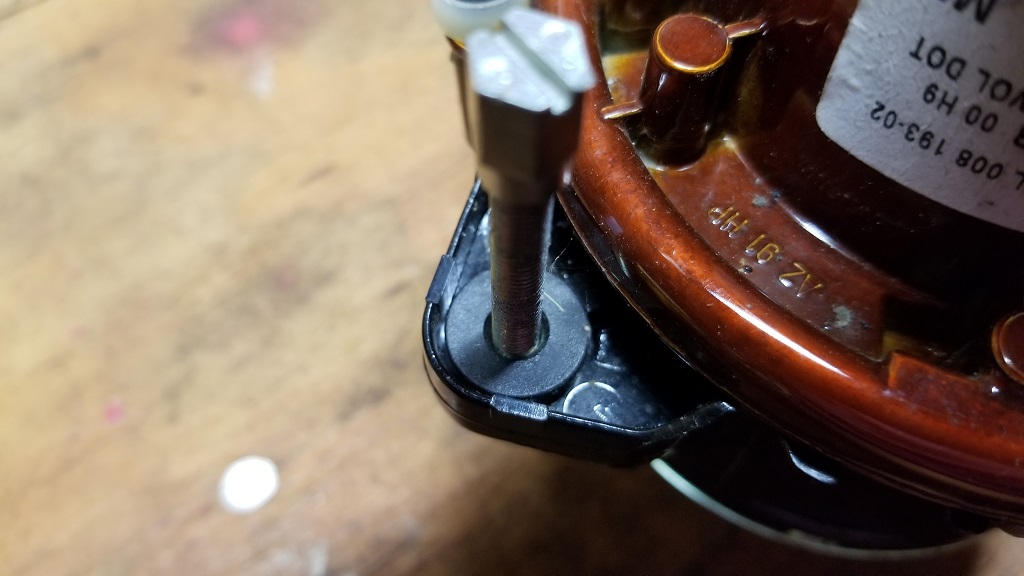
Here is an image showing the screw coming from the back, and into a plastic nut that pops into the headlight bucket holes.
From the back you can see the screws simply hold the lights in the buckets. There is no "slider" or anything on the screw that would move the headlight housings in any way when you tighten or loosen any of the screws.
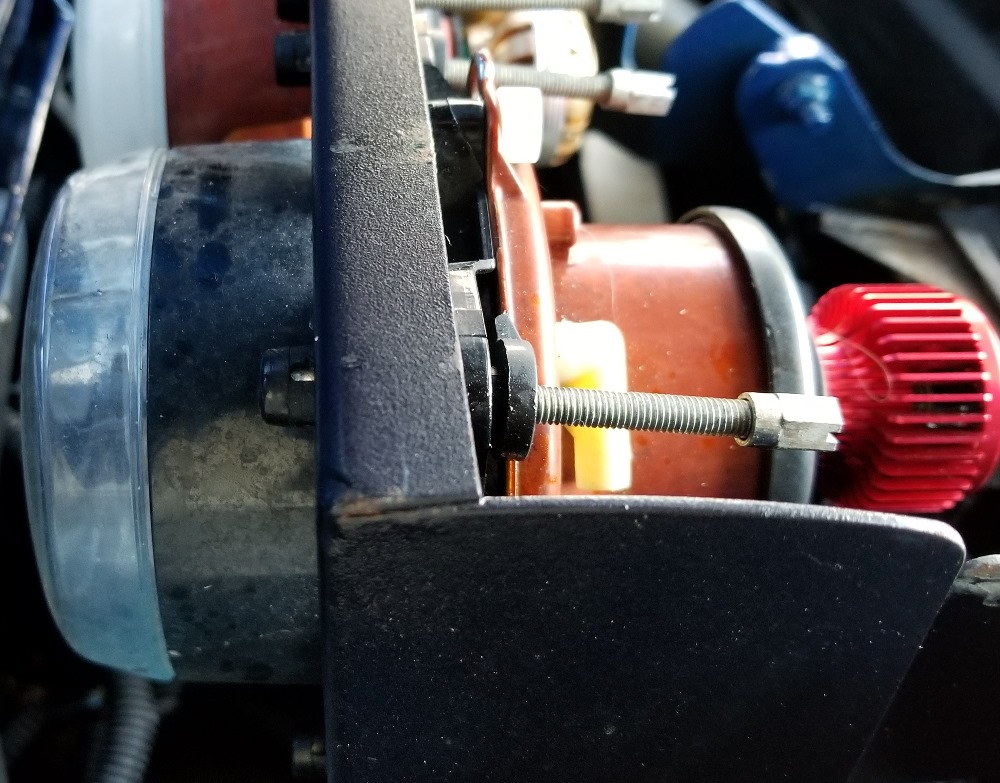
John, The ball end of the adjuster screws should be snapped into the plastic retainer so it is trapped in there. Then you need to back out the screws (all 3 of them and walk the light housing down the threads away from the bucket. The light should be supported on the 3 adjuster screws like legs, and not tightened against the bucket. then you adjust them individually to get the light to aim where you want it.
I had to grind the hole for the light to get a little more clearance but your mileage may vary. I had slightly different Hellas than yours.
John, The ball end of the adjuster screws should be snapped into the plastic retainer so it is trapped in there. Then you need to back out the screws (all 3 of them and walk the light housing down the threads away from the bucket.
Bruce, thanks for the tips. Do you happen to have access to take a photo of how it should look? That would show me how it is supposed to look when assembled correctly.
John, I don't know if this will help you but these are from Alex4mula's thread:
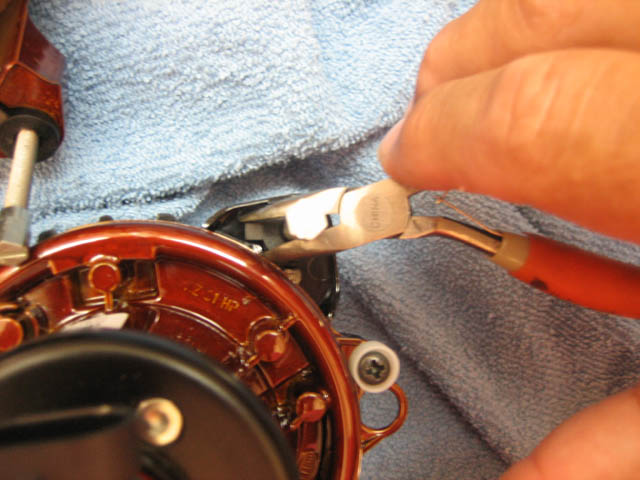
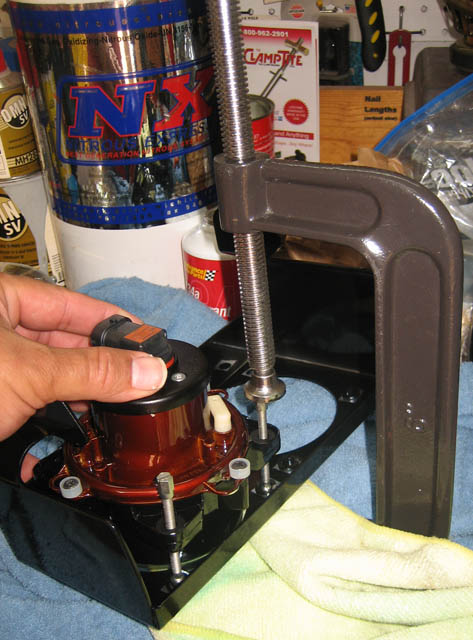
In the last pic, you can see how the lights are suspended by those "clips" that appear to be loose in you photo. I assume they are threaded and are secured into the light itself. Also in the last pic, he is showing how he popped the ball ends into the retainers using a c-clamp.
By the way, I have no idea what I'm talking about when it comes to these lights but it appears that the item I circled in your picture should be clamped onto the light housing and it should be threaded to allow the adjustment. I believe the first few pics show Alex installing that part onto the light.
[This message has been edited by IMSA GT (edited 10-30-2018).]
Amazing how I come here after a long time and see stuff I posted years ago. Glad it may helps but don't ask me now. I have no recollection of any of that. I'm old :-D Car is already in winter storage so I cannot pop up hood to check. By the way, mines are also pointing too low. Only notice when I rarely dive at night. Always say next time I'll adjust them but never happened since I got these.
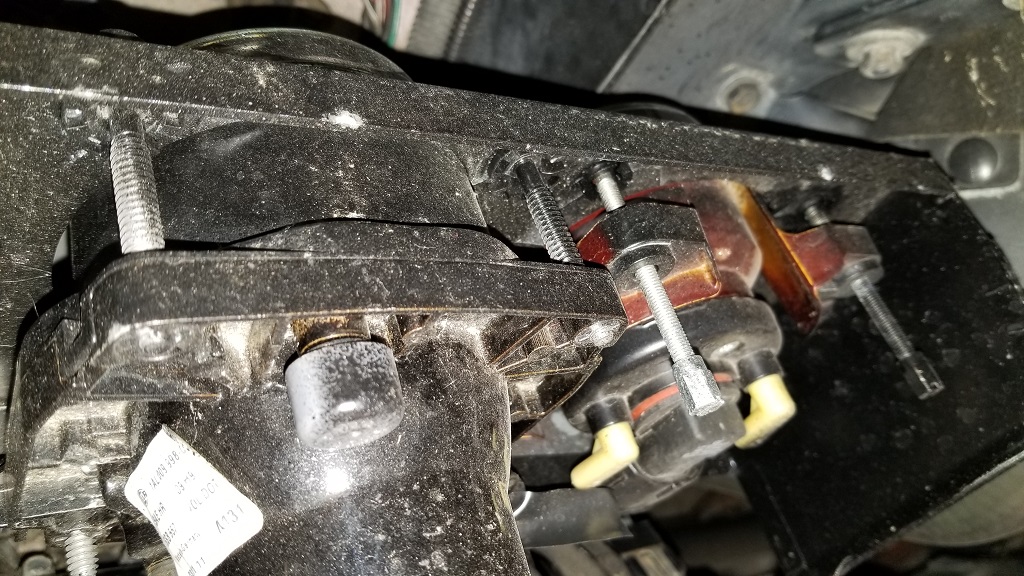
Went and took a picture and it looks like I really need to do some cleaning. I have a Bi-Halogen crammed in there and had to mod the bucket quite a bit, but you can see how the adjusters are.
the insertion nuts are inserted into the Hellas as in the pic above...... they are the ones that adjust the beams parallelism when you screw in or out the bolts....
I see that you are using LEDs. I recognize the yellow/gold ones. How well do they work down the road on the high beams. I am using 60mm Hella low beam modules and EOE( an Asian OEM manufacturer). Of course the Hellas are 9005. The EOEs are H1. The LEDs I am using on the high beams have CSP leds. While bright, don't seem to cast far enough down the road. But I do still have to tweak them in the housings a little. The pattern is very good. The pattern was good out of the box. But I think I can tweak them to cast further down. I still have halogens in the low beams. What are you using in your low beams?
I honestly do not know how far the high or low are casting at this point. I have yet to take the above advice and go attempt to adjust them. I have a few other projects currently, and have not touched the Blue Fiero in a couple weeks.
I recently purchased a Low-Profile 60mm headlight bucket kit from Mr. Danyel Potvin. I put together the buckets, but I am having a hard time with the wiring of the headlights. It came with a wiring harness, but I am unsure how it is run. I have tried to contact him regarding installation but no luck. If anyone has pictures of the installation or any guidance on how to, would be greatly appreciated.
Mike, Just installed a set of these last month. Mine needed power (the long red wire) grounds (the 4 black wires) and you plug the plug on the harness into your car. I can take some pics but I wired mine a little different (cut out the plug since my car did not have the other side) I may even have the directions around here some where....
Here are the shots of my install. A couple of the basic install.
Here is where I installed the relays that are part of the harness.
And finally I installed grounds on each side
As I said I cut out the connector that was included since my car had a different headlight set up already. I just spliced the wiring to the car harness.


 the insertion nuts are inserted into the Hellas as in the pic above...... they are the ones that adjust the beams parallelism when you screw in or out the bolts....