Pennock's Fiero Forum
  General Fiero Chat
  Good or Bad purchase idea? (Page 2)

Post New Topic  Post A Reply
Email This Page to Someone! | Printable Version

This topic is 2 pages long:  1   2 
Previous Page | Next Page
next newest topic | next oldest topic
Good or Bad purchase idea? by liv4God
Started on: 07-07-2017 11:58 PM
Replies: 49 (1389 views)
Last post by: liv4God on 10-27-2017 04:25 AM
liv4God
Member
Posts: 733
From: CA
Registered: Feb 2011


Feedback score:    (6)
Leave feedback

Rate this member

Report this Post08-01-2017 03:47 AM Click Here to See the Profile for liv4GodSend a Private Message to liv4GodEdit/Delete MessageReply w/QuoteDirect Link to This Post
Also been working on replacing vacuum and fuel hoses as necessary and braided stainless steelifying them. That's probably not the correct terminology for it, but that's what I'm calling it lol.
Start with braided stainless steel water hose. I've found that I can pick them up at Habitat for Humanity re-store for .5-2 dollars.


Cut off the water hose fittings and pull out the water hose.


Stretch it as far as it will go and then push it on the tube of choice.


Once on pull it as tight as possible and tape the ends to hold if necessary.


Lastly some heavy duty shrink wrap in color of choice. In this case I went with black, but did red on another car. Also, I've found the glue lined heavy duty shrink tube works exceptionally well for this. Unfortunately not available for a lot of the smaller sizes or other colors.

IP: Logged
liv4God
Member
Posts: 733
From: CA
Registered: Feb 2011


Feedback score:    (6)
Leave feedback

Rate this member

Report this Post08-01-2017 03:50 AM Click Here to See the Profile for liv4GodSend a Private Message to liv4GodEdit/Delete MessageReply w/QuoteDirect Link to This Post

liv4God

733 posts
Member since Feb 2011
Double post

[This message has been edited by liv4God (edited 08-01-2017).]

IP: Logged
wgpierce
Member
Posts: 376
From: Australia
Registered: Aug 2016


Feedback score: N/A
Leave feedback

Rate this member

Report this Post08-01-2017 07:51 PM Click Here to See the Profile for wgpierceSend a Private Message to wgpierceEdit/Delete MessageReply w/QuoteDirect Link to This Post
Awesome, ingenius I say
IP: Logged
liv4God
Member
Posts: 733
From: CA
Registered: Feb 2011


Feedback score:    (6)
Leave feedback

Rate this member

Report this Post08-02-2017 02:02 AM Click Here to See the Profile for liv4GodSend a Private Message to liv4GodEdit/Delete MessageReply w/QuoteDirect Link to This Post
 
quote
Originally posted by wgpierce:

Awesome, ingenius I say


Thanks! I've done it to several of my cars and have had good results for look and durability.
IP: Logged
liv4God
Member
Posts: 733
From: CA
Registered: Feb 2011


Feedback score:    (6)
Leave feedback

Rate this member

Report this Post08-19-2017 03:48 AM Click Here to See the Profile for liv4GodSend a Private Message to liv4GodEdit/Delete MessageReply w/QuoteDirect Link to This Post
Update, got the block out, torn down and taken to the shop for cleaning, boring, etc. In the meantime made a new wiring harness that includes all the sensors so things like temp gauge, fan, and oil pressure will work now (Assuming I go all the wires to the correct places).

Engine pulled out:


Me in the engine compartment (Just seemed like one of those pictures that are a must haha):


The oil drain bolt was mangled so I was never able to get it out. Dropped the pan to get the oil out before doing anything else to the block. Most difficult oil change ever lol:


While tearing down to the block I got that feeling I was being watched... Then noticed my cat's face peering through the cylinder


As mentioned earlier, the oil pan was nesting on the engine mount, here is the dentation caused by that:


Also noticed a lot of wear on the cam timing gear. Glad I decided to go with a total rebuild:


Lastly my finished engine harness. I really like the look of the braided nylon. I have the regular black coily wire cover stuff (what is that really called?) underneath for structure, but I prefer the look of the nylon.


That's it for now! More to come in the future

IP: Logged
fiero4.3L
Member
Posts: 71
From: ATL, GA
Registered: Oct 2005


Feedback score: N/A
Leave feedback

Rate this member

Report this Post08-20-2017 09:18 AM Click Here to See the Profile for fiero4.3LClick Here to visit fiero4.3L's HomePageSend a Private Message to fiero4.3LEdit/Delete MessageReply w/QuoteDirect Link to This Post
How about some pics of the flywheel assembly? There appears to be a large adapter hub on the crank in the photo.
IP: Logged
liv4God
Member
Posts: 733
From: CA
Registered: Feb 2011


Feedback score:    (6)
Leave feedback

Rate this member

Report this Post08-26-2017 04:24 AM Click Here to See the Profile for liv4GodSend a Private Message to liv4GodEdit/Delete MessageReply w/QuoteDirect Link to This Post
 
quote
Originally posted by fiero4.3L:

How about some pics of the flywheel assembly? There appears to be a large adapter hub on the crank in the photo.


Here's some pics of the flywheel. There was a strange piece of chopped up metal between the flywheel and crank about 1/8" thick. I assume it was supposed to be some sort of spacer. I will not be reusing it as I don't see a necessity for it and am sure it was not helpful to the engine balance. Didn't get a picture of it before throwing it out. Imagine taking a piece of steel 1/8 inch thick and trying to cut out a perfect circle using an oxyacetylene cutter without even first drawing a circle to follow. That's about what it looked like.


Curious kitty photobombing

[This message has been edited by liv4God (edited 08-26-2017).]

IP: Logged
liv4God
Member
Posts: 733
From: CA
Registered: Feb 2011


Feedback score:    (6)
Leave feedback

Rate this member

Report this Post08-26-2017 04:36 AM Click Here to See the Profile for liv4GodSend a Private Message to liv4GodEdit/Delete MessageReply w/QuoteDirect Link to This Post

liv4God

733 posts
Member since Feb 2011
Was working on rerouting and test fitting the water hoses today. I will be using an electric water pump which doesn't have a fitting for the heater core, so I T'd it into the main line. Does anyone know which direction flow should go, or if that matters? In the picture below I have the lines hooked up so that flow would be the same as it was before I took everything apart. However, the old setup had the pump going backwards and based on other mistakes on this build, I can't assume the original swapper knew what they were doing.
IP: Logged
fiero4.3L
Member
Posts: 71
From: ATL, GA
Registered: Oct 2005


Feedback score: N/A
Leave feedback

Rate this member

Report this Post08-26-2017 09:11 AM Click Here to See the Profile for fiero4.3LClick Here to visit fiero4.3L's HomePageSend a Private Message to fiero4.3LEdit/Delete MessageReply w/QuoteDirect Link to This Post
The pump hose can tee off the lower hose/pump inlet. The upper hose needs to connect to the intake. The idea is to provide a thermostat bypass where coolant can flow when the stat is closed to prevent hot spots in the engine during warm up as well as heat.

You might want to take the spacer to a machine shop to be turned down to an even/balanced od. The spacer puts the flywheel in the right position relative to the starter gear. There are crank shims that you can buy (for fitment when the flywheel has been machined for repair) but they are typically not any thicker than 0.089". If the spacer you have does not fit the crank with a close tolerance, then have a new spacer made but it will be much more expensive than just turning down what you have.

EDIT: Misplaced decimal point!
------------------
Formerly "squid" (joined in 99). Still running 4.3 swapped around 2000.

[This message has been edited by fiero4.3L (edited 08-29-2017).]

IP: Logged
liv4God
Member
Posts: 733
From: CA
Registered: Feb 2011


Feedback score:    (6)
Leave feedback

Rate this member

Report this Post10-27-2017 04:25 AM Click Here to See the Profile for liv4GodSend a Private Message to liv4GodEdit/Delete MessageReply w/QuoteDirect Link to This Post
Hi guys, an update on this, since a lot has happened and I haven't said anything in a while:
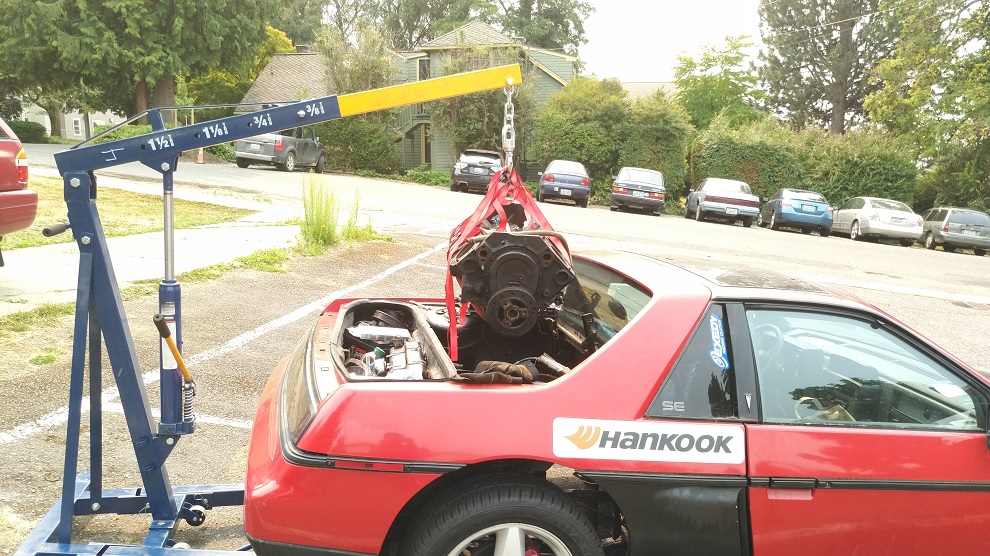
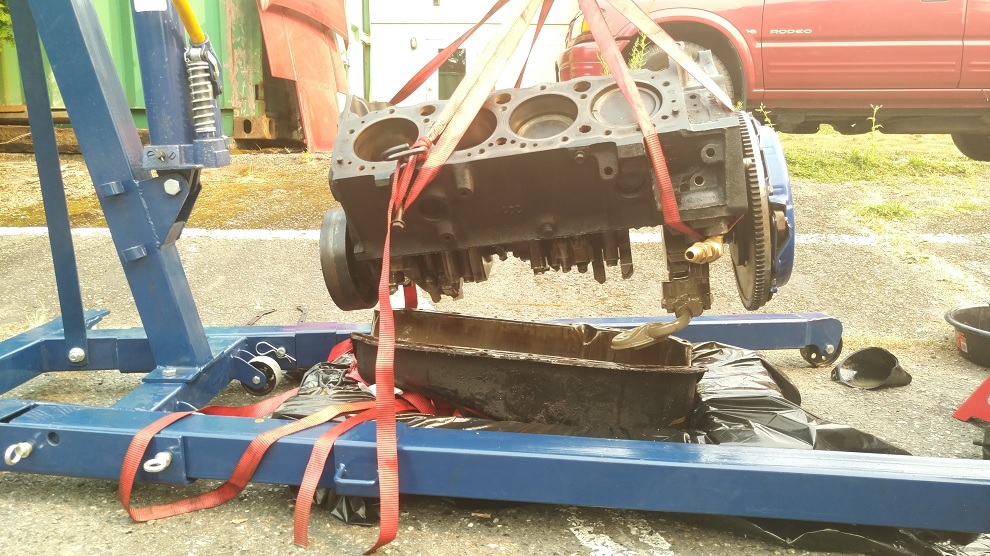
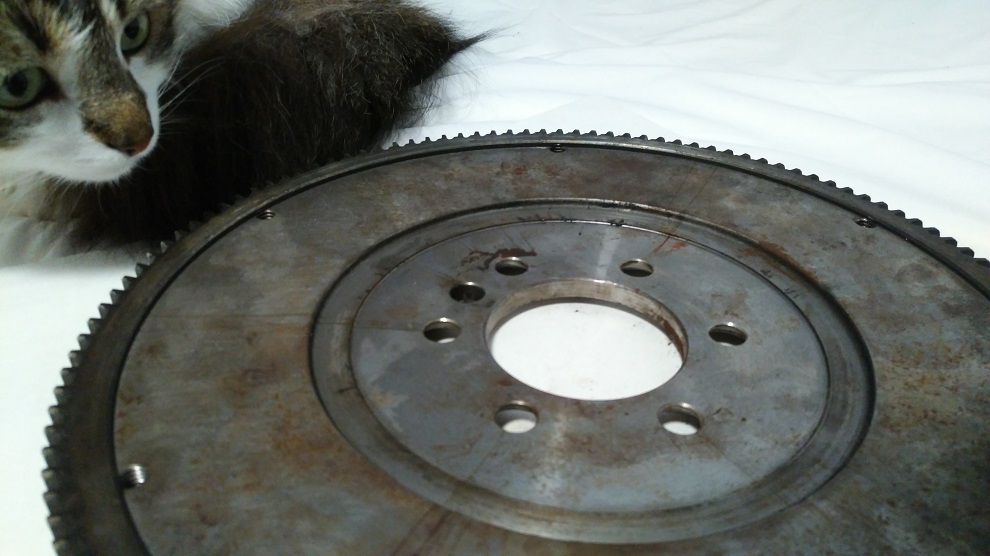
While getting into the 305 I found that the cylinders were hour glassing, timing chain was super loose and timing gears were torn up with particles in the oil pan. With that in mind I tossed the 305 and decided if I was going to spend money on fixing a block it should at least be a 350. So I got a 350 and went from there. And got a front engine mounting bracket from Street Dreams.

Anyway, I'm back home now I Cali and taking the car apart, swapping what is good on it onto one of my other cars. That being:
-engine
-SE body panels
-aluminum 3 core radiator
-wheels and the pretty new tires
-2 inch drop spindles! (This was a big and very happy surprise)
-Front Corvette brakes (although missing the concentric rings, so I'm looking for some now)
-rear coil over shocks
-power mirrors

Oh and I ended up only paying $1200 for her instead of 2k.
All in all, I'm pretty happy with the ordeal, although the original reason I bought it for a v8 swap ended up being trash, and a lot of work and dough, so there was no saving there.
IP: Logged
Previous Page | Next Page

This topic is 2 pages long:  1   2 
next newest topic | next oldest topic

All times are ET (US)

Post New Topic  Post A Reply
Hop to:

Contact Us | Back To Main Page

Advertizing on PFF | Fiero Parts Vendors
PFF Merchandise | Fiero Gallery | Ogre's Cave
Real-Time Chat | Fiero Related Auctions on eBay


Copyright (c) 1999, C. Pennock