Not having ever had to do this in the past, I thought I would see if anyone has any "special" instructions when I do this soon.
Only looking at the front shocks as I know the rear struts are all pretty much the same procedure.
Probably just like the earlier years, but want to make sure I have everything I need when I do get around to doing the job. My T-top came with new struts and shocks, and my Formula's were good also, so the '88 suspension is all new to me.
Much appreciated in advance..... and yes, I did a ton of searching and nothing showed up specific to the front shocks.
Replacing the 88 front shocks is pretty simple. Remove the nut at the top of the shock shaft and the 2 small bolts at the Lower a-arm and the shock will drop out the bottom of the lower a-arm.
Since the shock comes out the bottom, you will need to have the front jacked up to get the needed room.
Replacing the 88 front shocks is pretty simple. Remove the nut at the top of the shock shaft and the 2 small bolts at the Lower a-arm and the shock will drop out the bottom of the lower a-arm.
Since the shock comes out the bottom, you will need to have the front jacked up to get the needed room.
Thanks fieroguru, that is pretty much what I was expecting, but you just never know. A + for you from me.
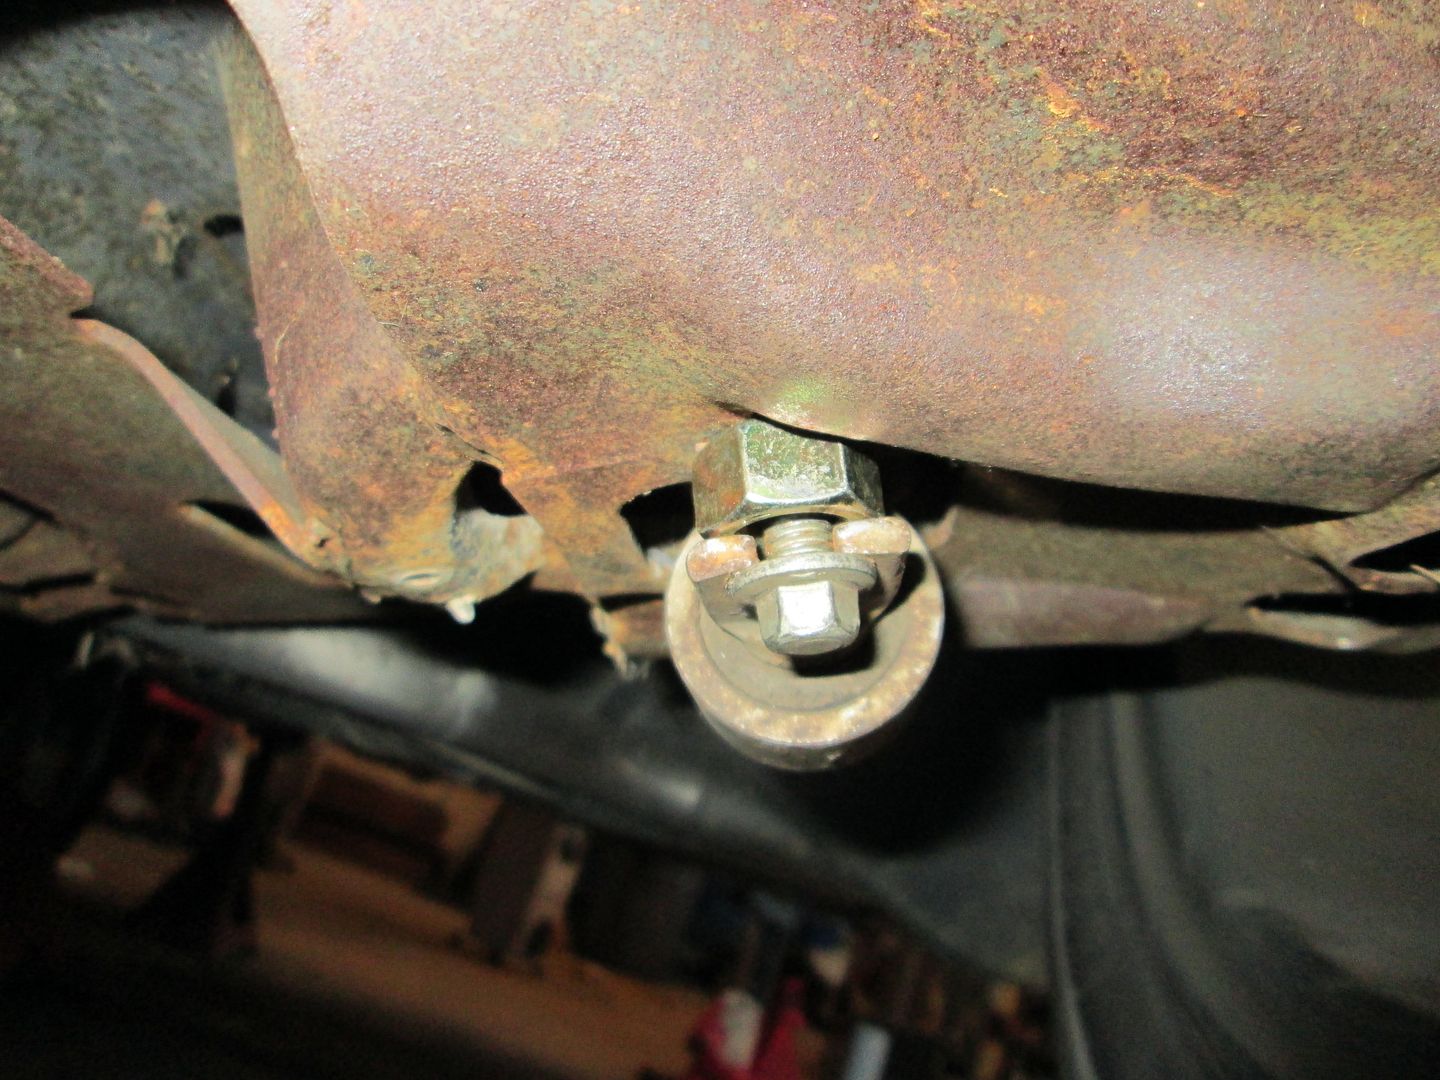
The front shocks are held in with two 13 mm bolts on the bottom which thread into clips on the lower control arms and on top the shocks have a threaded stud that pokes through the top of the "shock tower" and receives a 13 or 15mm nut. The top is assembled like a sway bar end link with a metal washer and rubber spacer under the shock tower and a rubber spacer and metal washer on top followed by the nut.
When you go to remove the top nut it is usually seized to the shock stud and spins the shock requiring penetrating oil, heat, vice grips, cussing, and eventually cutting the stud off. The latter is what I do. I take a grinder and grind through the nut and stud until it "pops" and the shock falls out (assuming you removed the two bottom 13mm bolts first).
For assembly, take the new shock, apply anti-seize to the stud! then put a metal washer and rubber on, feed it up through the bottom of the lower control arm until it pokes up through the shock tower. Add the other rubber and metal washer followed by the nut. Apply anti-seize to the two 13mm bolts and install and tighten them, then tighten the top nut until it is snug and stops turning (may have to use two wrenches to prevent the shock from spinning). Usually there is just over an inch of stud poking above the nut.
EDIT: Fieroguru beat me, but I was finding and modifying a picture Also be mindful of the brake hose when grinding!
[This message has been edited by 88cryan (edited 04-22-2017).]
If you cut the top bolt, it is best to support the lower a-arm as the shock limits droop before the upper a-arm hits the stop on the crossmember. So when you cut the bolt, the suspension will drop quickly. It won't drop much, but if your fingers are in the wrong place they can be pinched.
A+ for you to 88cryan! Pictures always help, and I know somewhere down the road others will be using this..... Thanks for taking the extra effort!
All good suggestions, and being safe is of the utmost to me. I would rather take an extra minute or two to do a job safely and be able to drive when I am done vs the other possible outcomes.
I have done a shock or two in my day, but nothing inside the spring like this is, but it really does sound pretty durn easy. lol
If you cut the top bolt, it is best to support the lower a-arm as the shock limits droop before the upper a-arm hits the stop on the crossmember. So when you cut the bolt, the suspension will drop quickly. It won't drop much, but if your fingers are in the wrong place they can be pinched.
Good advice, yes it will move so its best to be safe and aware of what your doing, but if your swaybar and endlinks are still in place it doesn't move much.
Originally posted by railshot: A+ for you to 88cryan! Pictures always help, and I know somewhere down the road others will be using this..... Thanks for taking the extra effort!
All good suggestions, and being safe is of the utmost to me. I would rather take an extra minute or two to do a job safely and be able to drive when I am done vs the other possible outcomes.
I have done a shock or two in my day, but nothing inside the spring like this is, but it really does sound pretty durn easy. lol
I agree with Railshot! This is useful info for the rest of us down the road.
Many thanks! A+ for Fieroguru & 88cryan!!!
[This message has been edited by Fiero Vice (edited 04-22-2017).]
I have done a shock or two in my day, but nothing inside the spring like this is, but it really does sound pretty durn easy. lol
If/when you lower the front end on an '88, don't neglect to trim the bump stops and to put the spacers under the bottom shock mounts... as Fieroguru explains Here.
[This message has been edited by Patrick (edited 04-23-2017).]
Just got back from a 20 mile drive, and night and day difference!
Forget the 15mm for the top nut, angle grinder and care not to hit anything else (brake lines are very close, so go slow) and a 13mm socket for the bottom mount bolts.
Having a couple of Milwaukee cordless impact really sped things up for wheel removal and install. 1/2 inch for removal and 3/8 inch for install. 3/8 inch max tourqe is 100 ft lbs... almost perfect, well it is perfect.
Now this did include getting all the tools out, jacking the car, and having a cold one after. LOL, piece of cake!


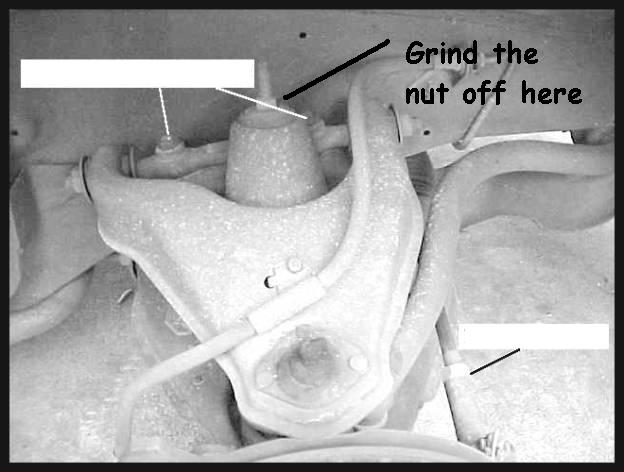
 Also be mindful of the brake hose when grinding!