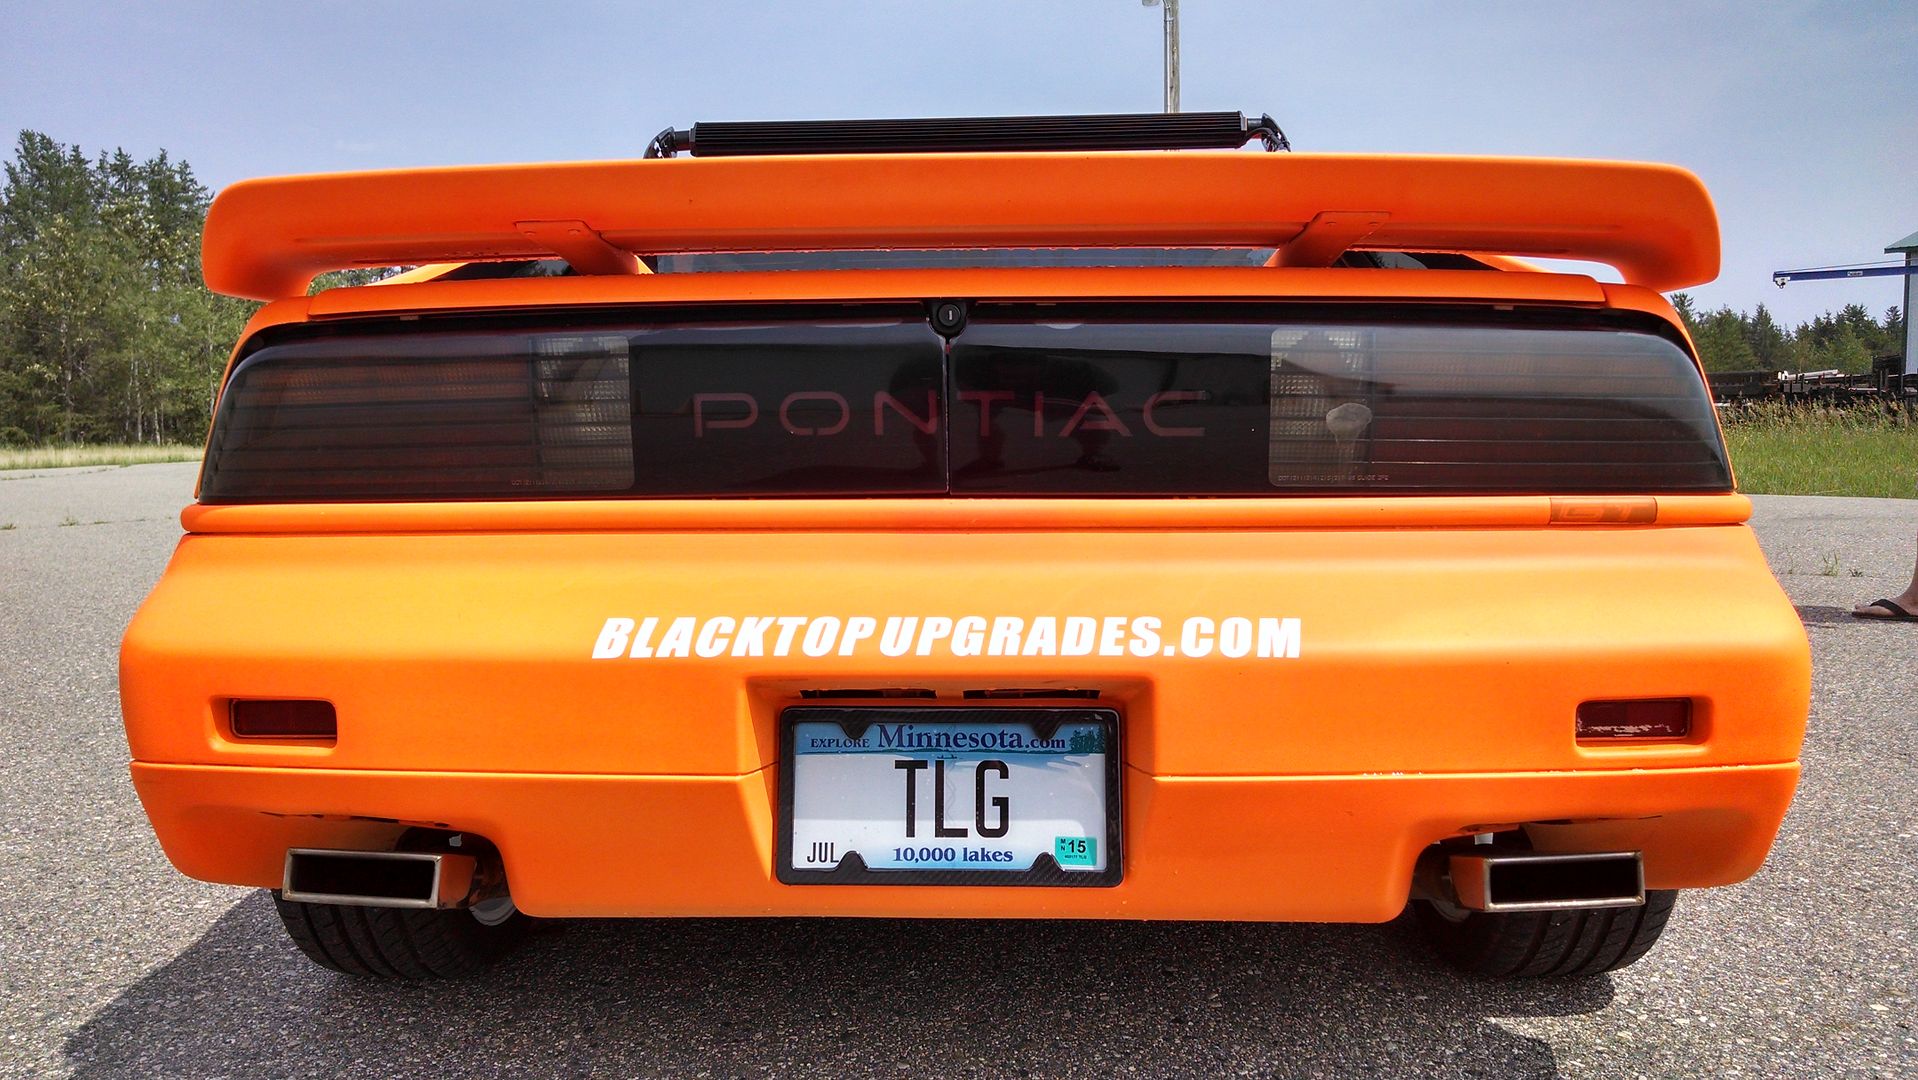
Black Top Racing is the new name / brand for Top Line Group Automotive (www.TLG-Auto.com) and sometime this month the evolution of our company into Black Top Racing will be complete. The new URL will be www.BlackTopUpgrades.com
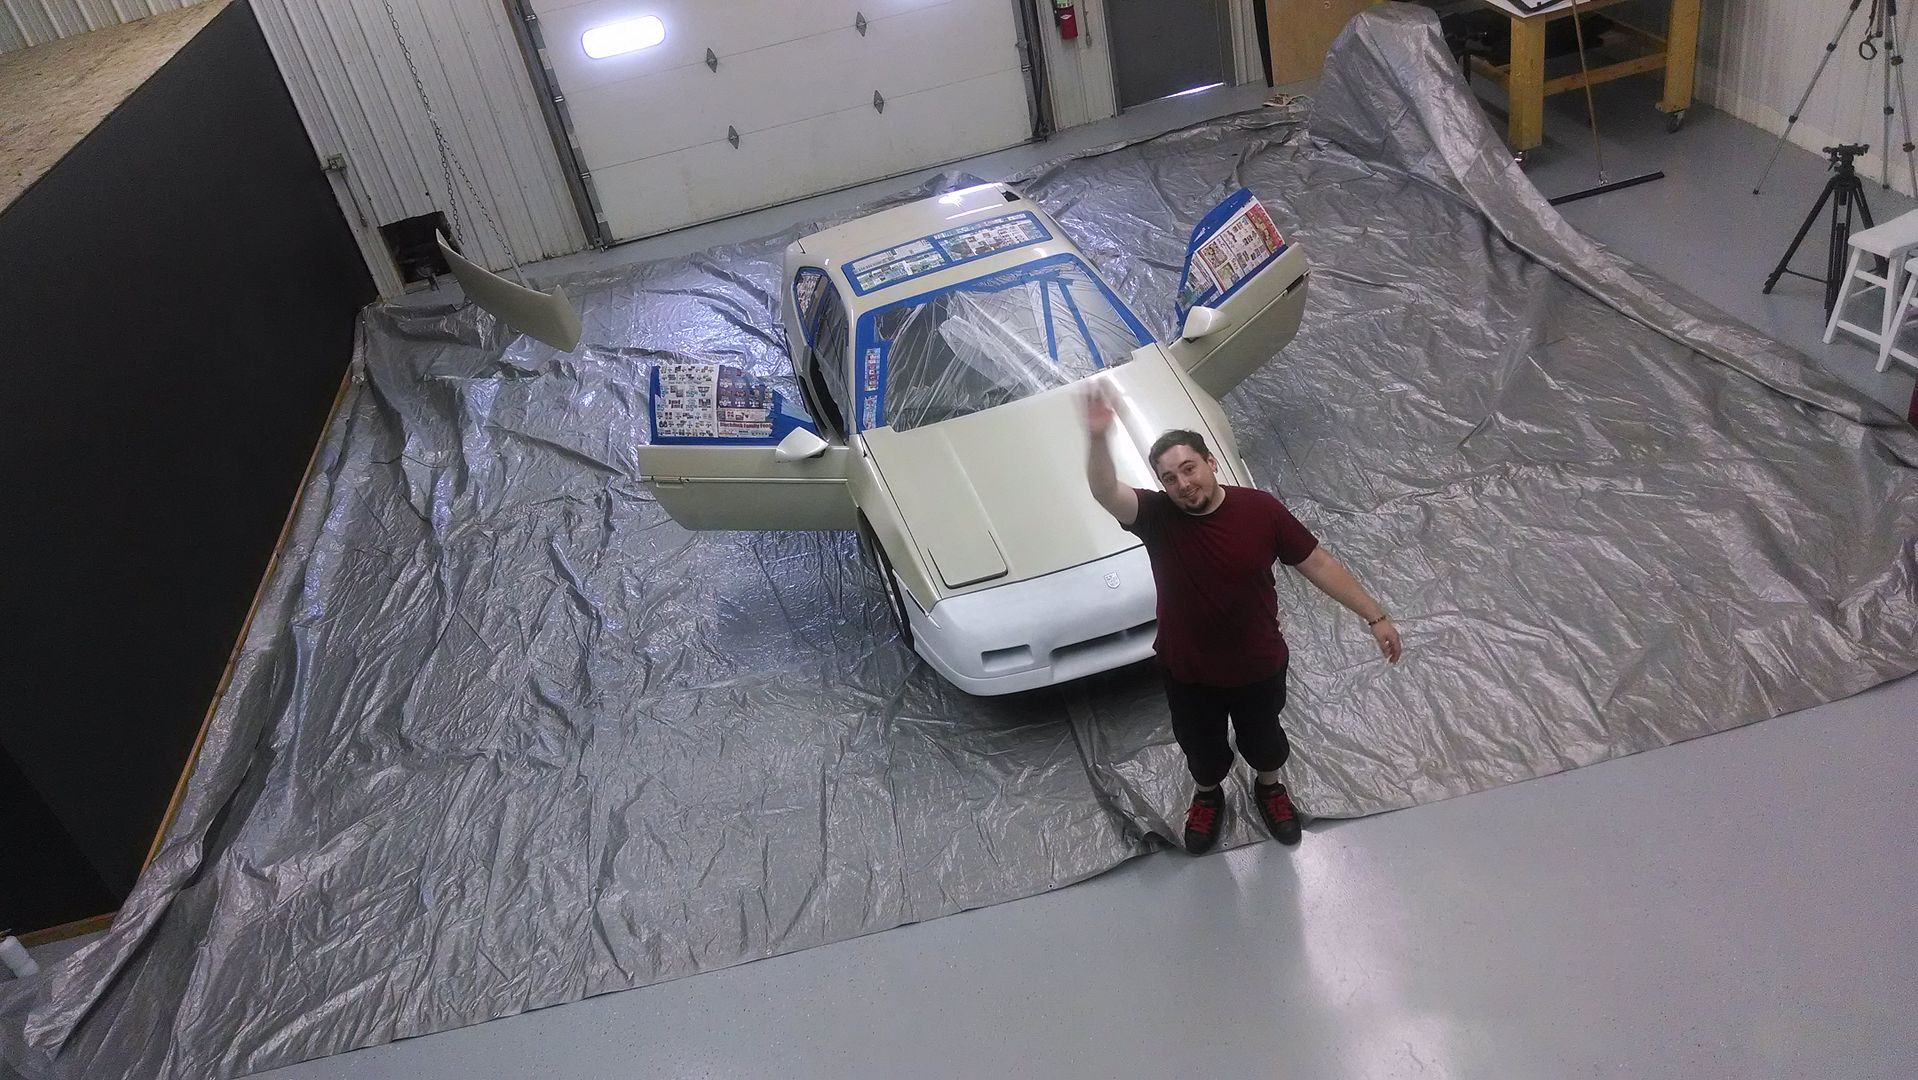
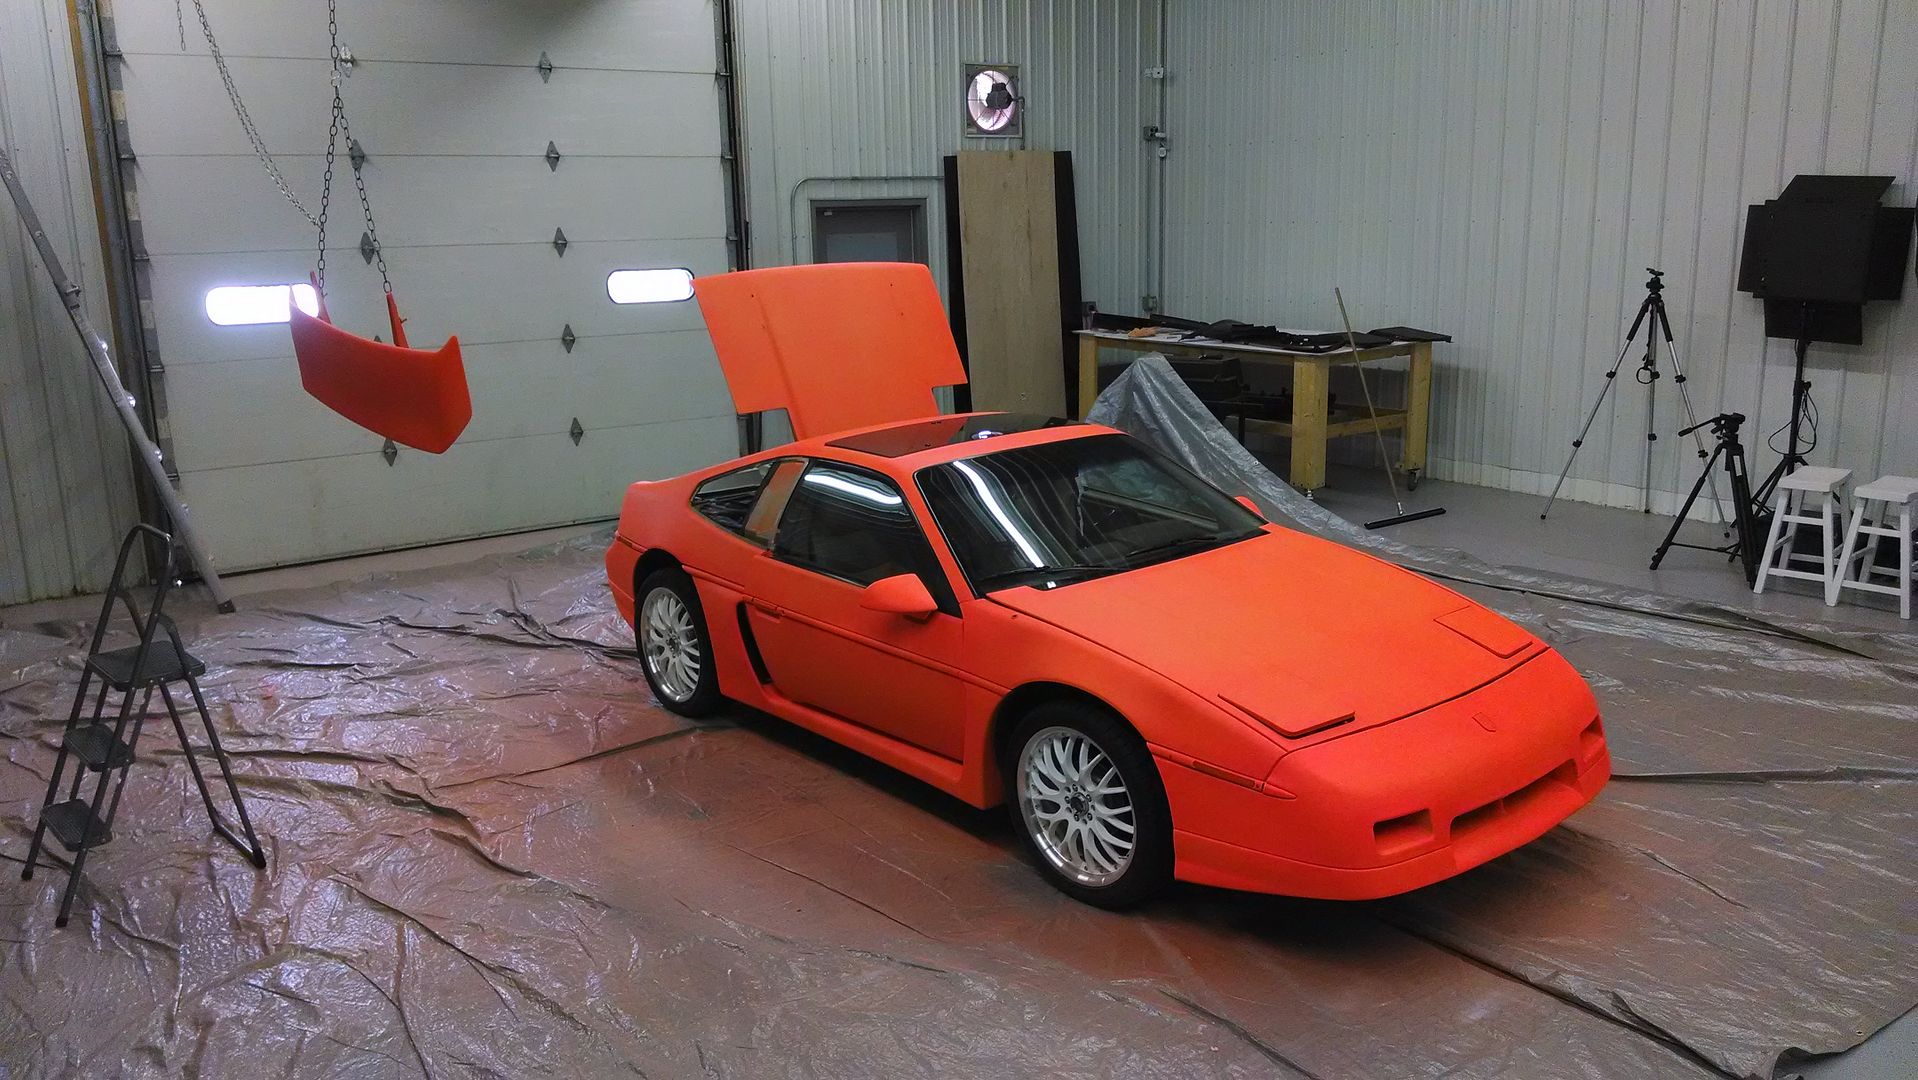
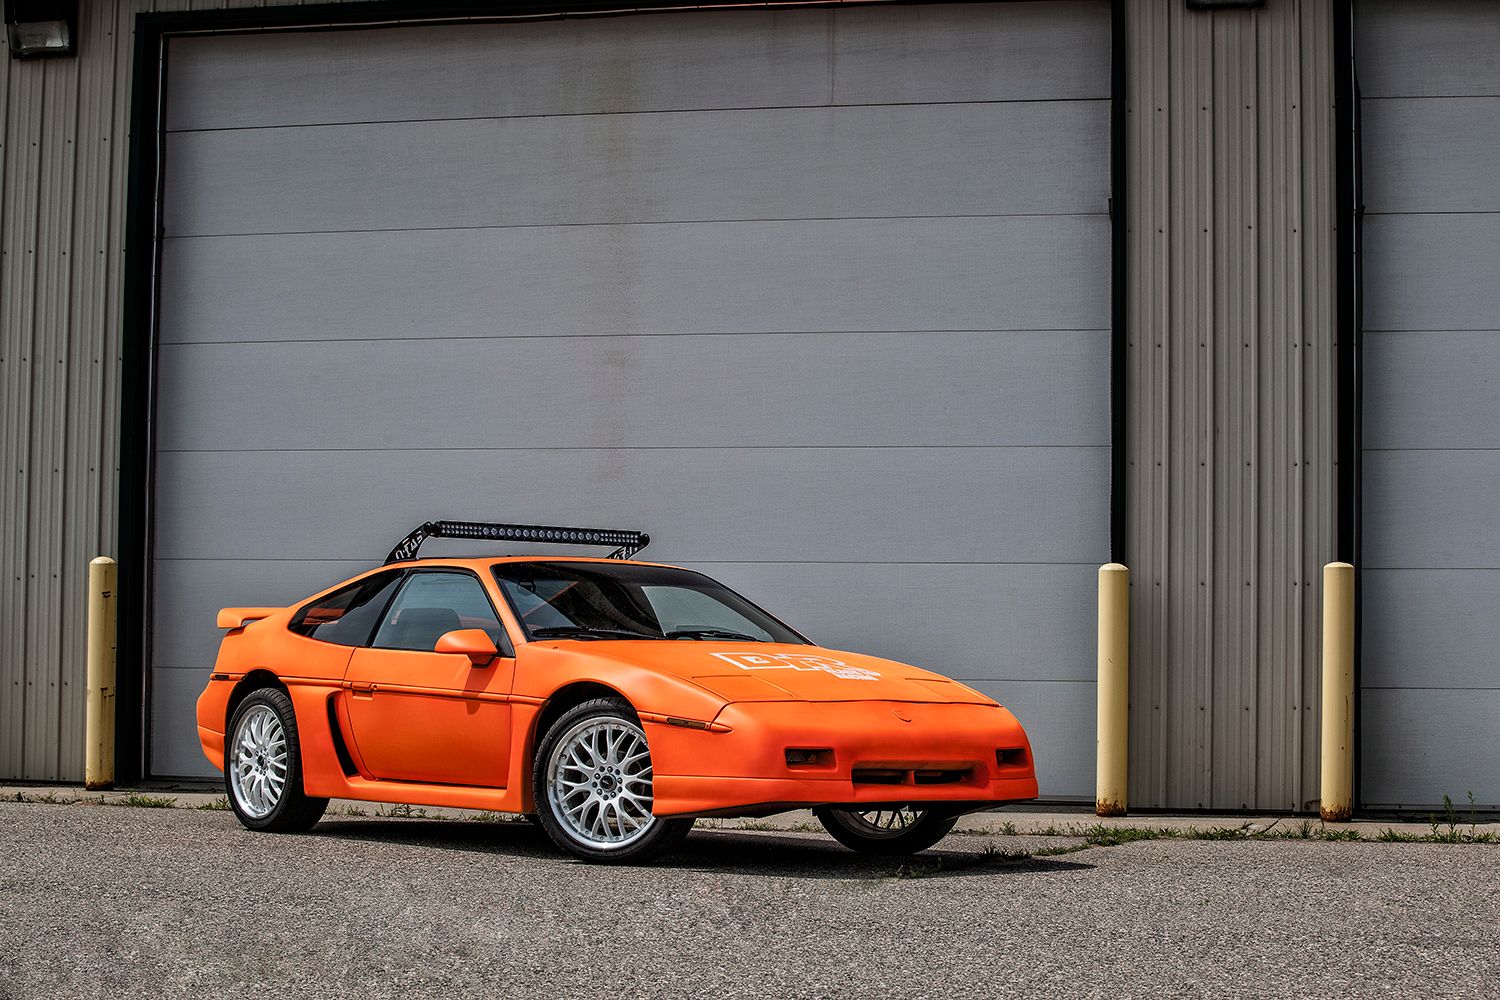
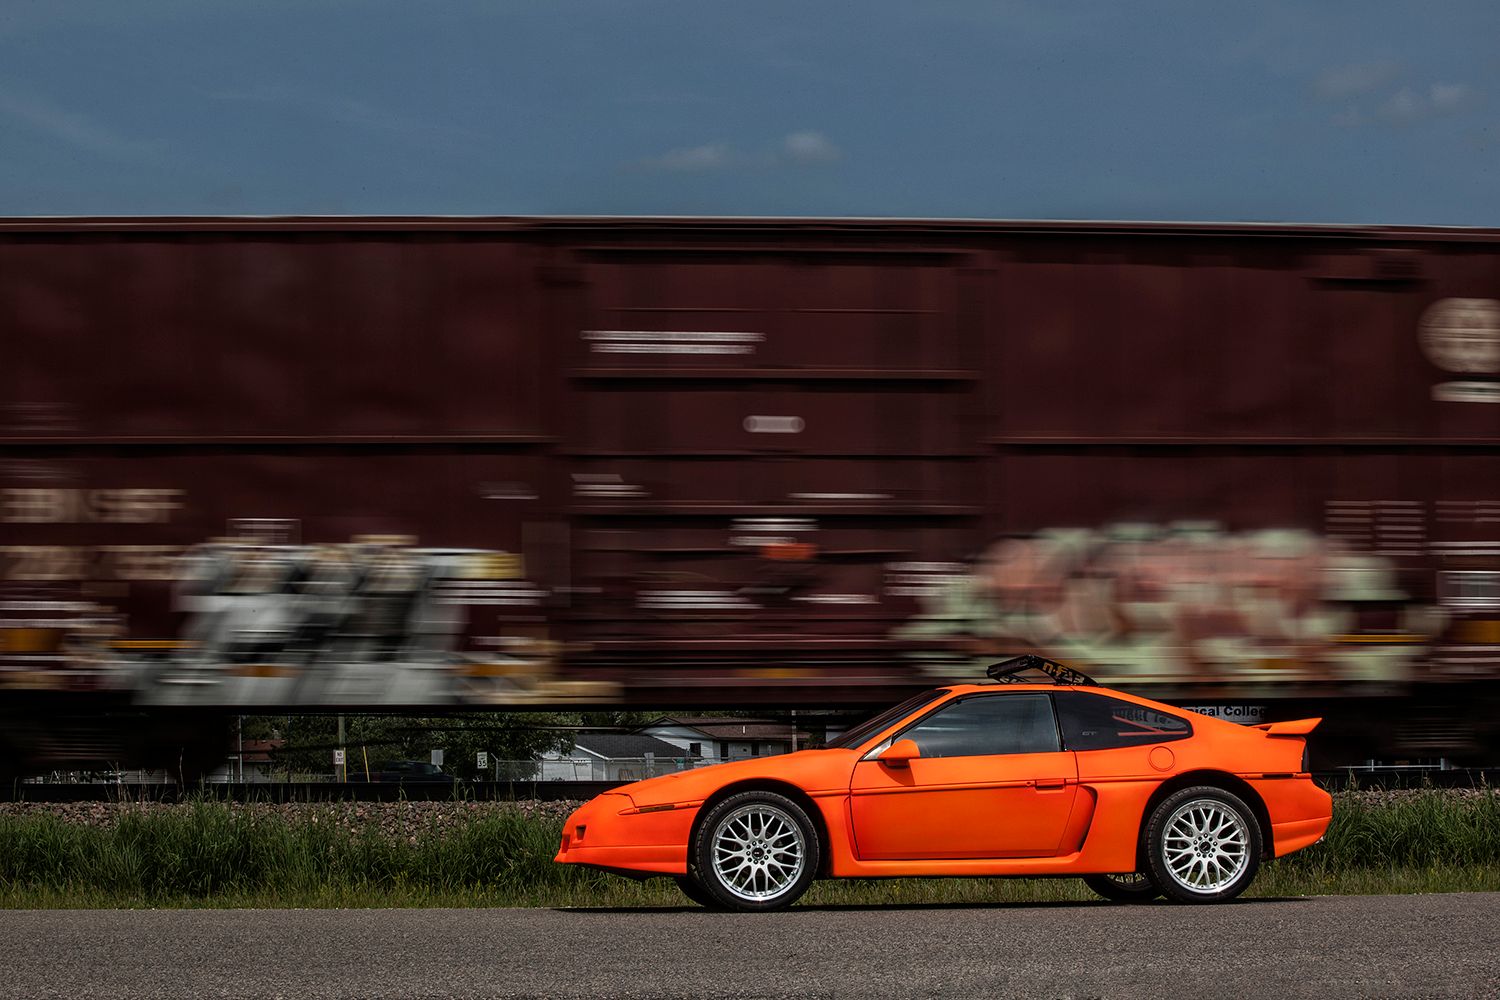
Anyways, this year we bought a "new" 1986 Fiero GT and we wanted to get a little crazy with it. Having seen and read a LOT of buzz about Plasti-Dip on this forum and others we decided to give it a shot! We were all very very optimistic at first but now that the romance of this fad product has wore off here are the things we learned during our experiment with Plasti-Dip:
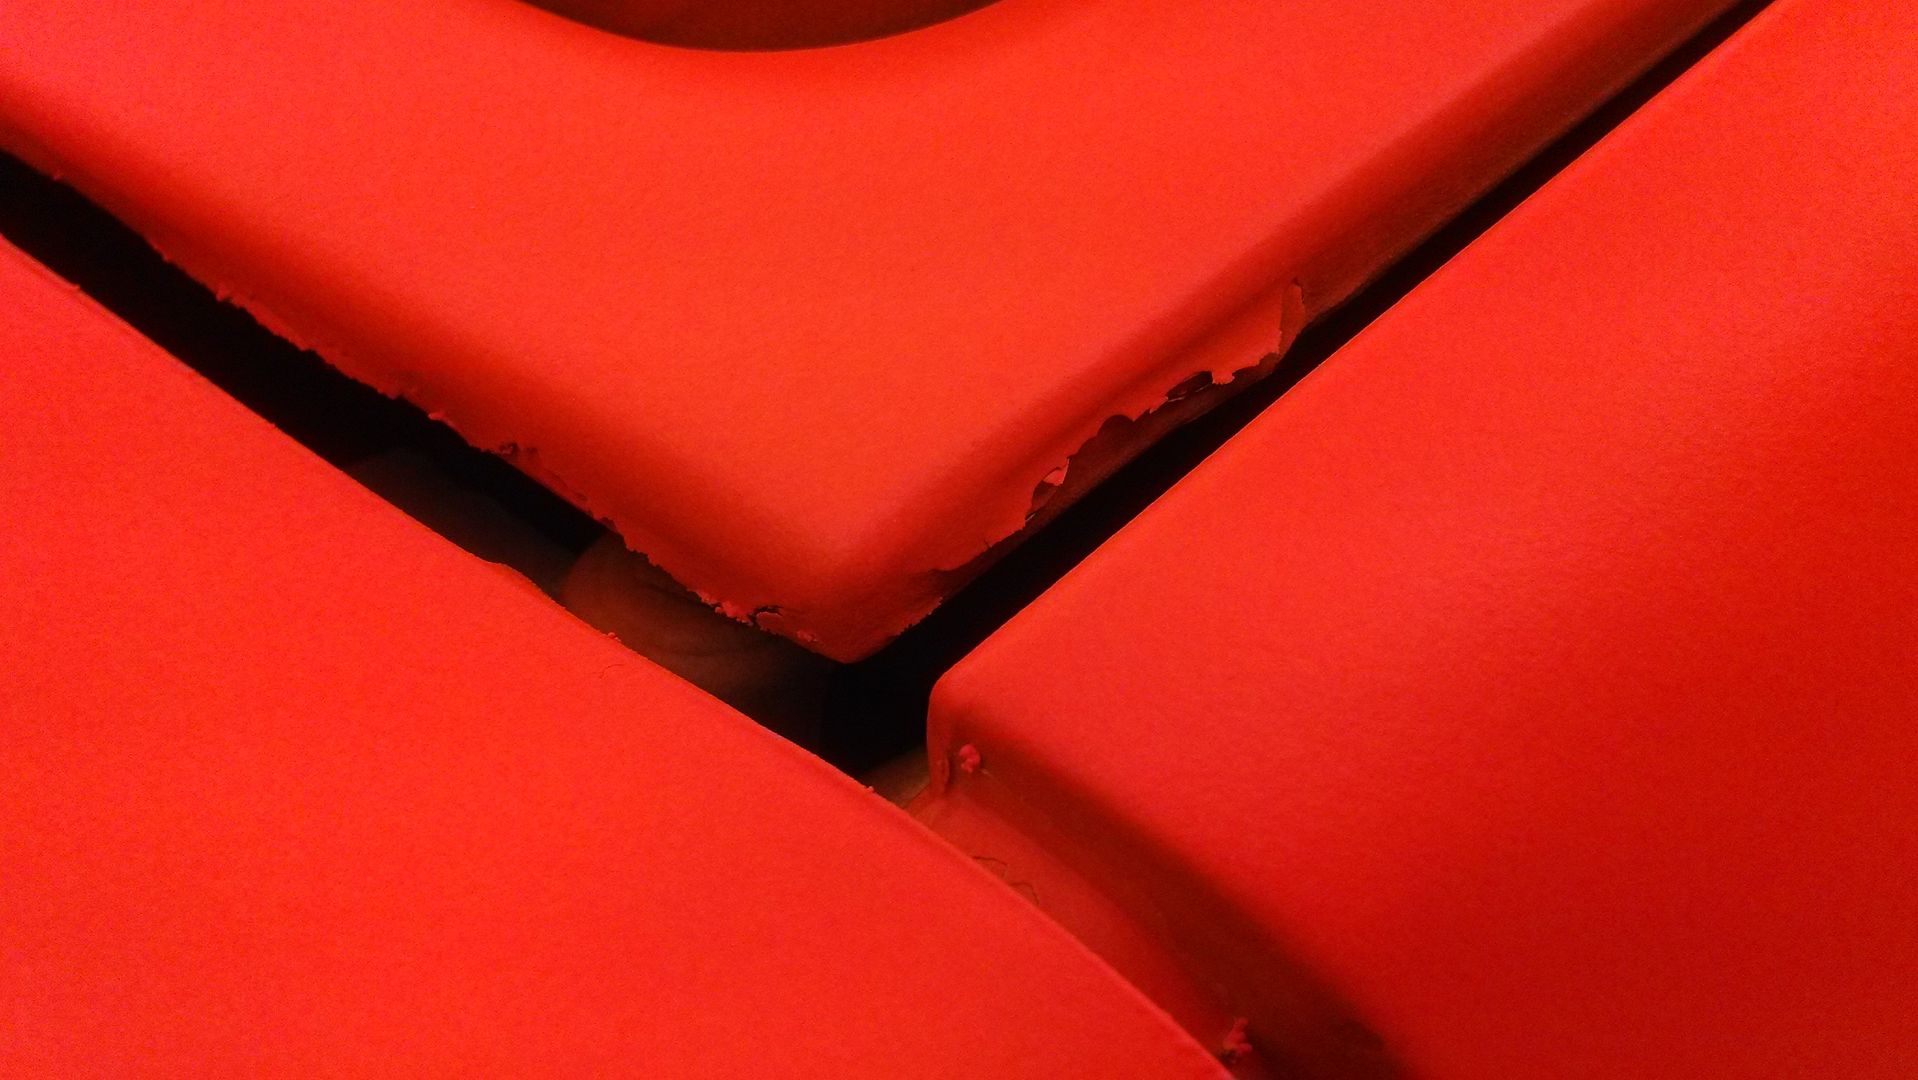
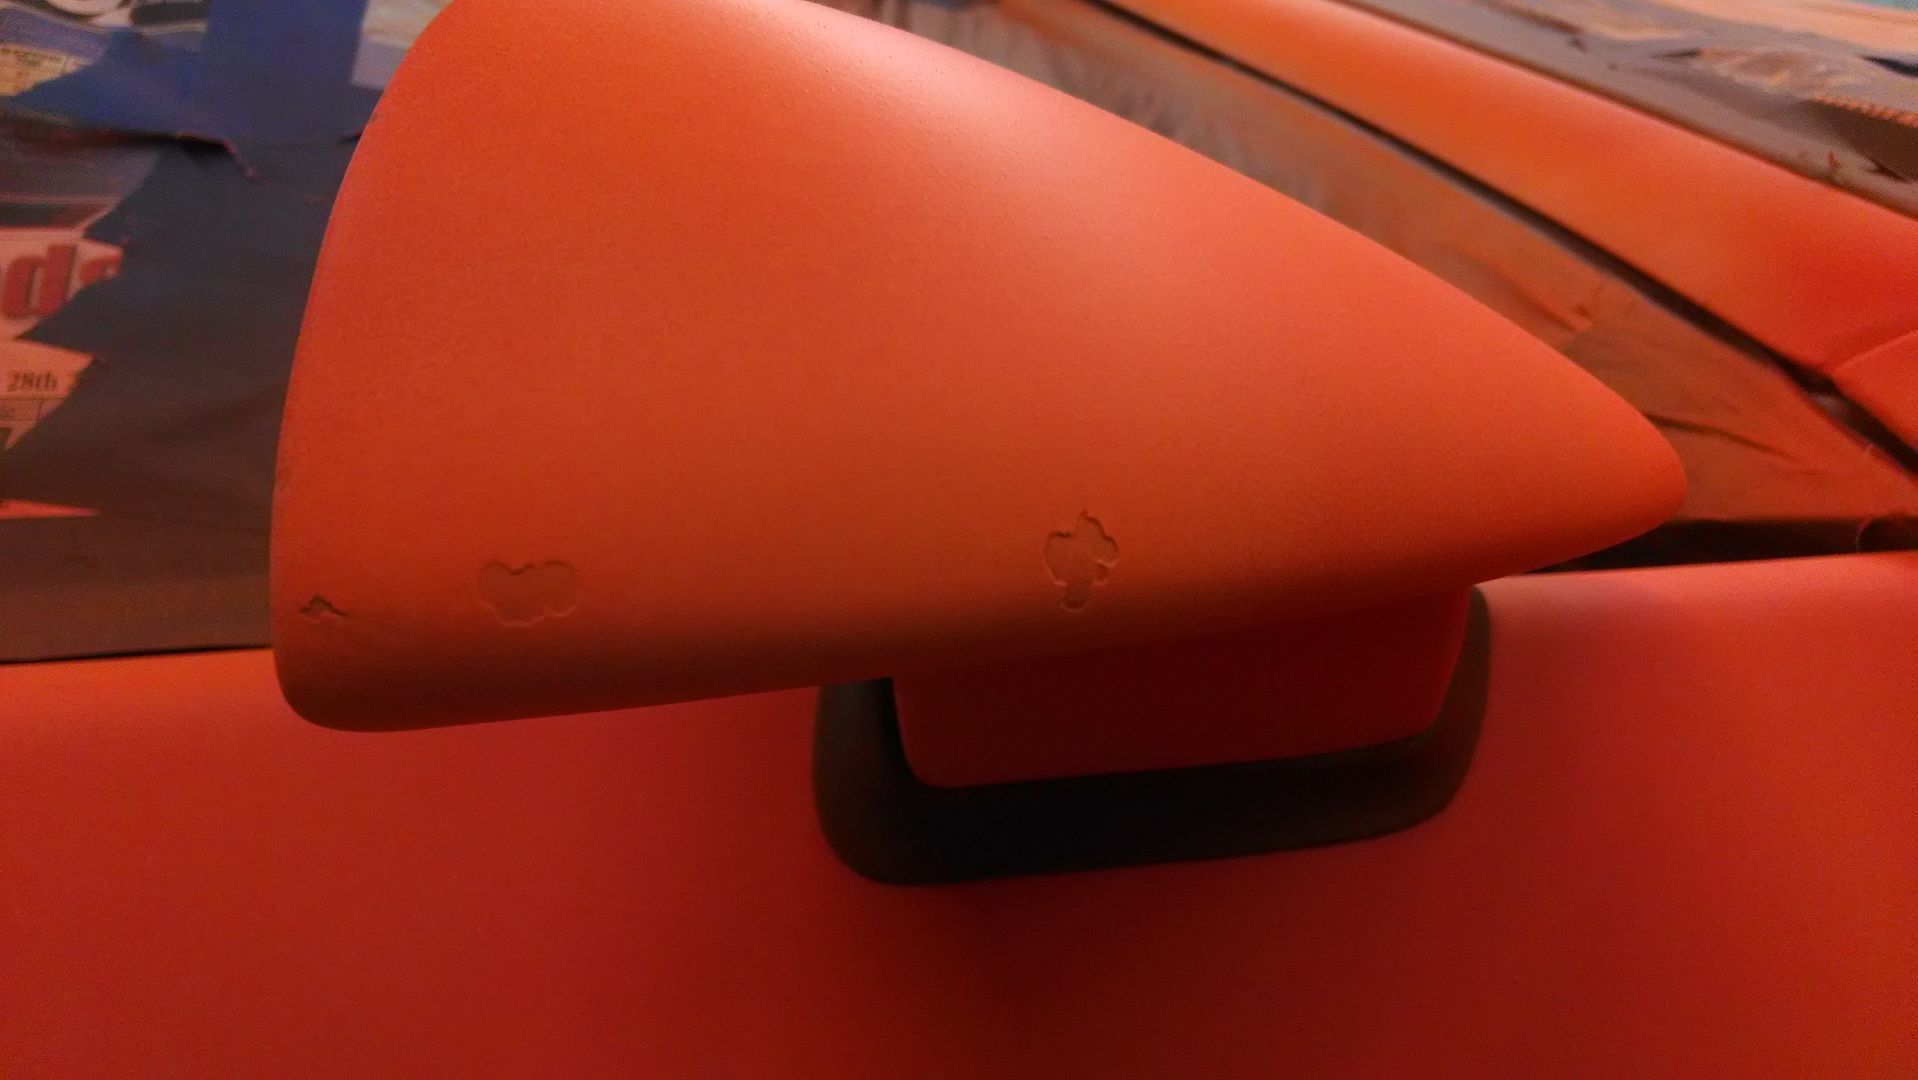
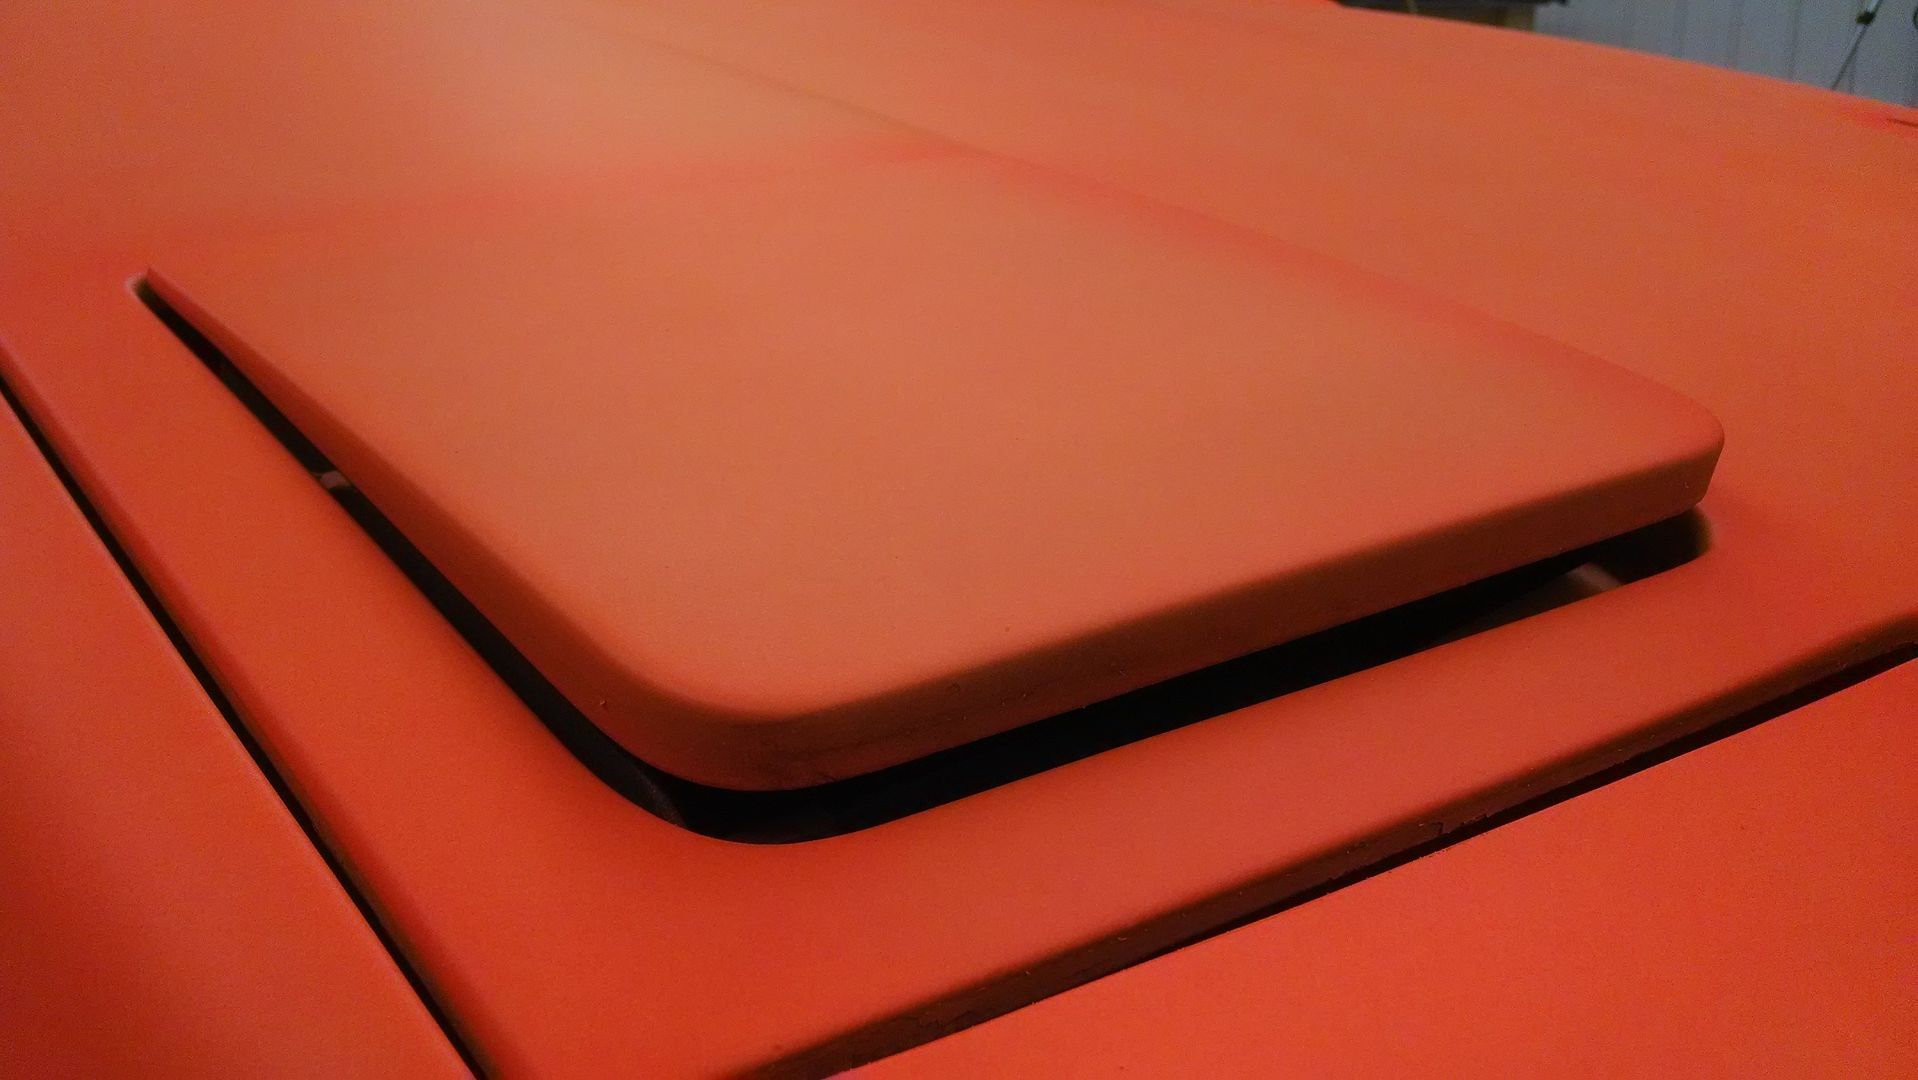
**The more you prep your car like a real paint job (fixing scratches, cracks, etc...) the better the Plasti-Dip job will turn out. We thought the rubber coating would fill in rock chips a lot better than it did and I would say that basically it DOES NOT FILL IN anything. If anything it accentuates imperfections.
**Once it's done it is a real pain to clean. You cannot use any sort of microfiber towel on it, to wash it or detail it. Actually, there is no detailing. Your only cleaning option is to spray it down and hope it looks clean afterwards. The finished plastic rubbery product is very bumpy and all the little pieces of dust and junk on the paint hide out inside and between the bumps in the dip.
**Plasti-Dip is very fragile! We let it sit for 2 days before really doing anything else to the car after the paint job and it's quite surprising how easily it is to damage the rubber. I believe a good rock chip will pretty easily damage the front bumper. However it is also VERY EASY to fix. We just use an aerosol spray can of the color we sprayed on the car and when there's a blemish or a rock chip we just spray new dip over the damage. That part is kind of fun because it's like adding new skin to the paint job.
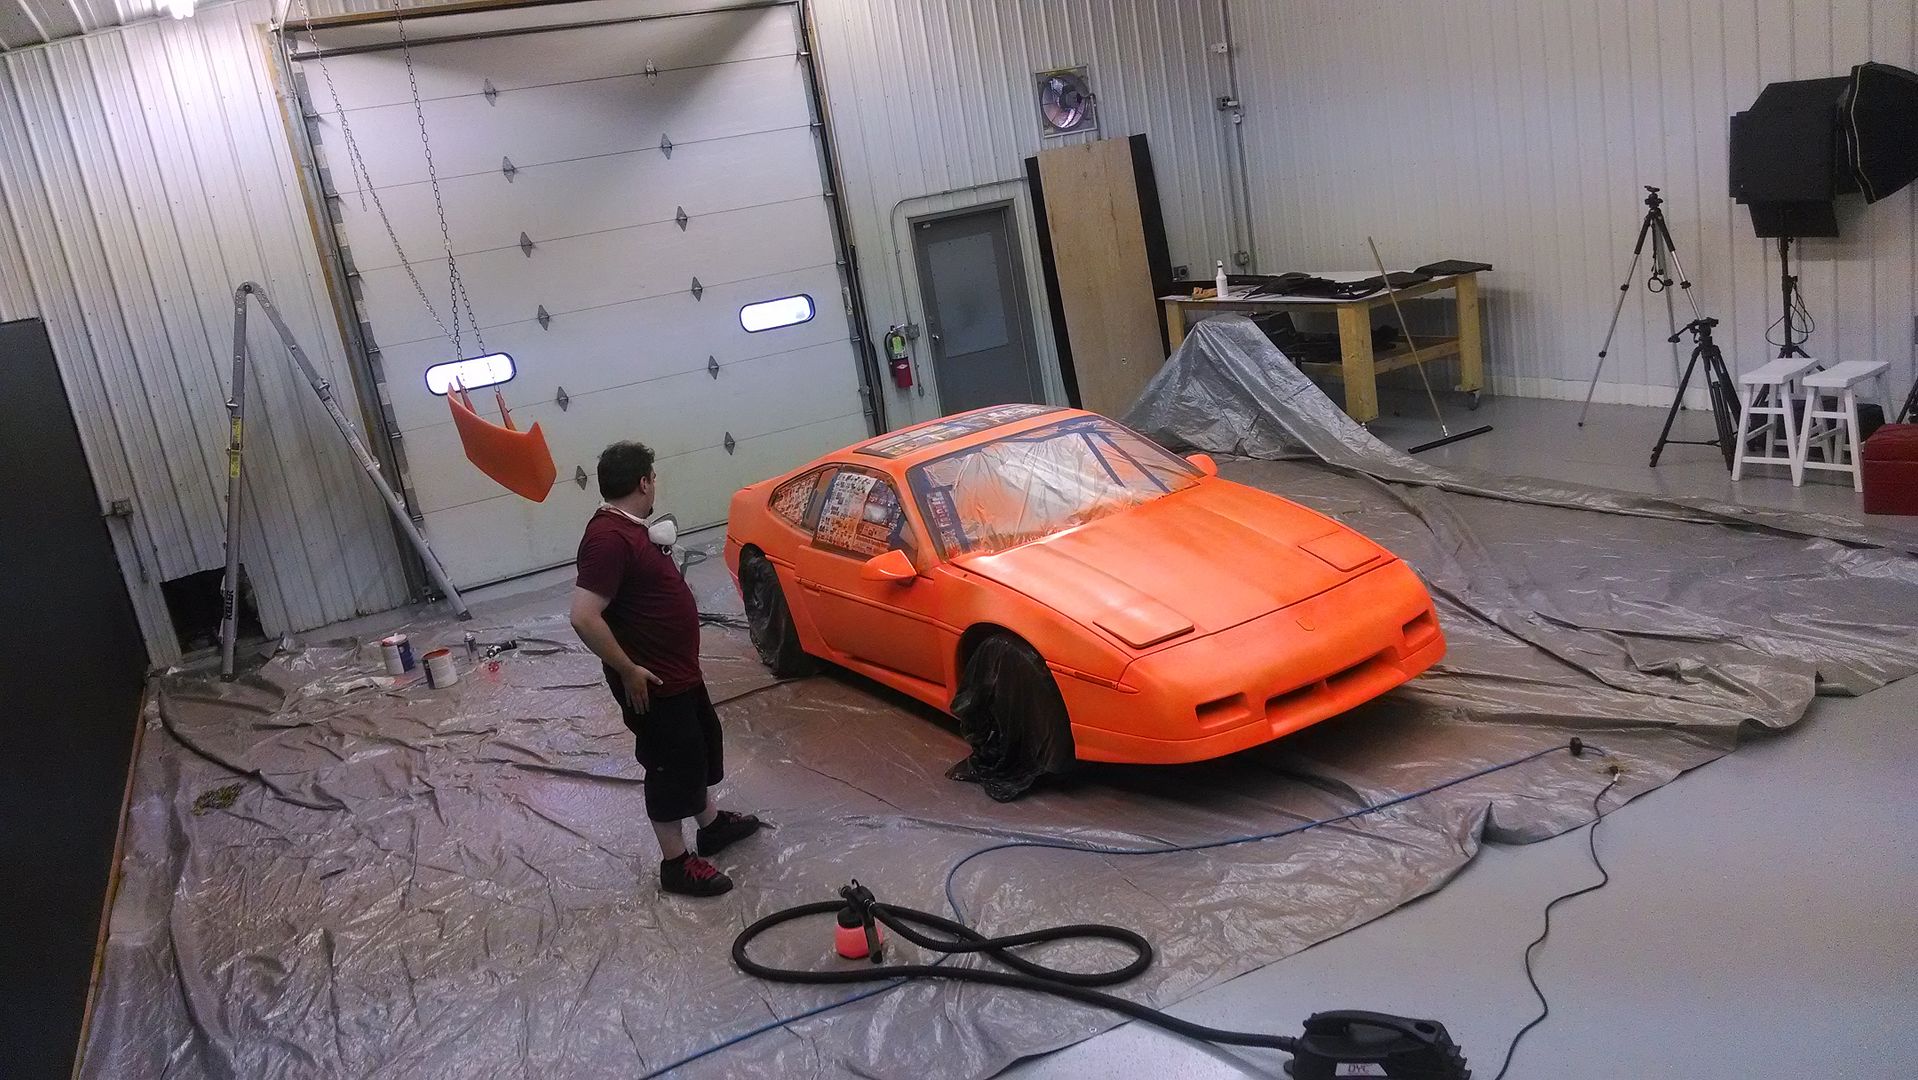
**The overall look of the finish is not impressive. I've seen people Plasti-Dip their vehicles and it looks blotchy and spotty and I thought it was because they did it with the spray cans. We purchased the "Dip Your Car" ready to spray rubber and the air-powered spray gun that they sell for this product and we went through 3 gallons of the coating to produce 6 coats of dip and it is still tiger-striped, blotchy and not perfect looking in a lot of places. Also, we know how to paint a car. There is no lack of experience in using a paint gun with our crew, so it's quite surprising that we did everything "the right way" and it still came out looking fairly amateurish.
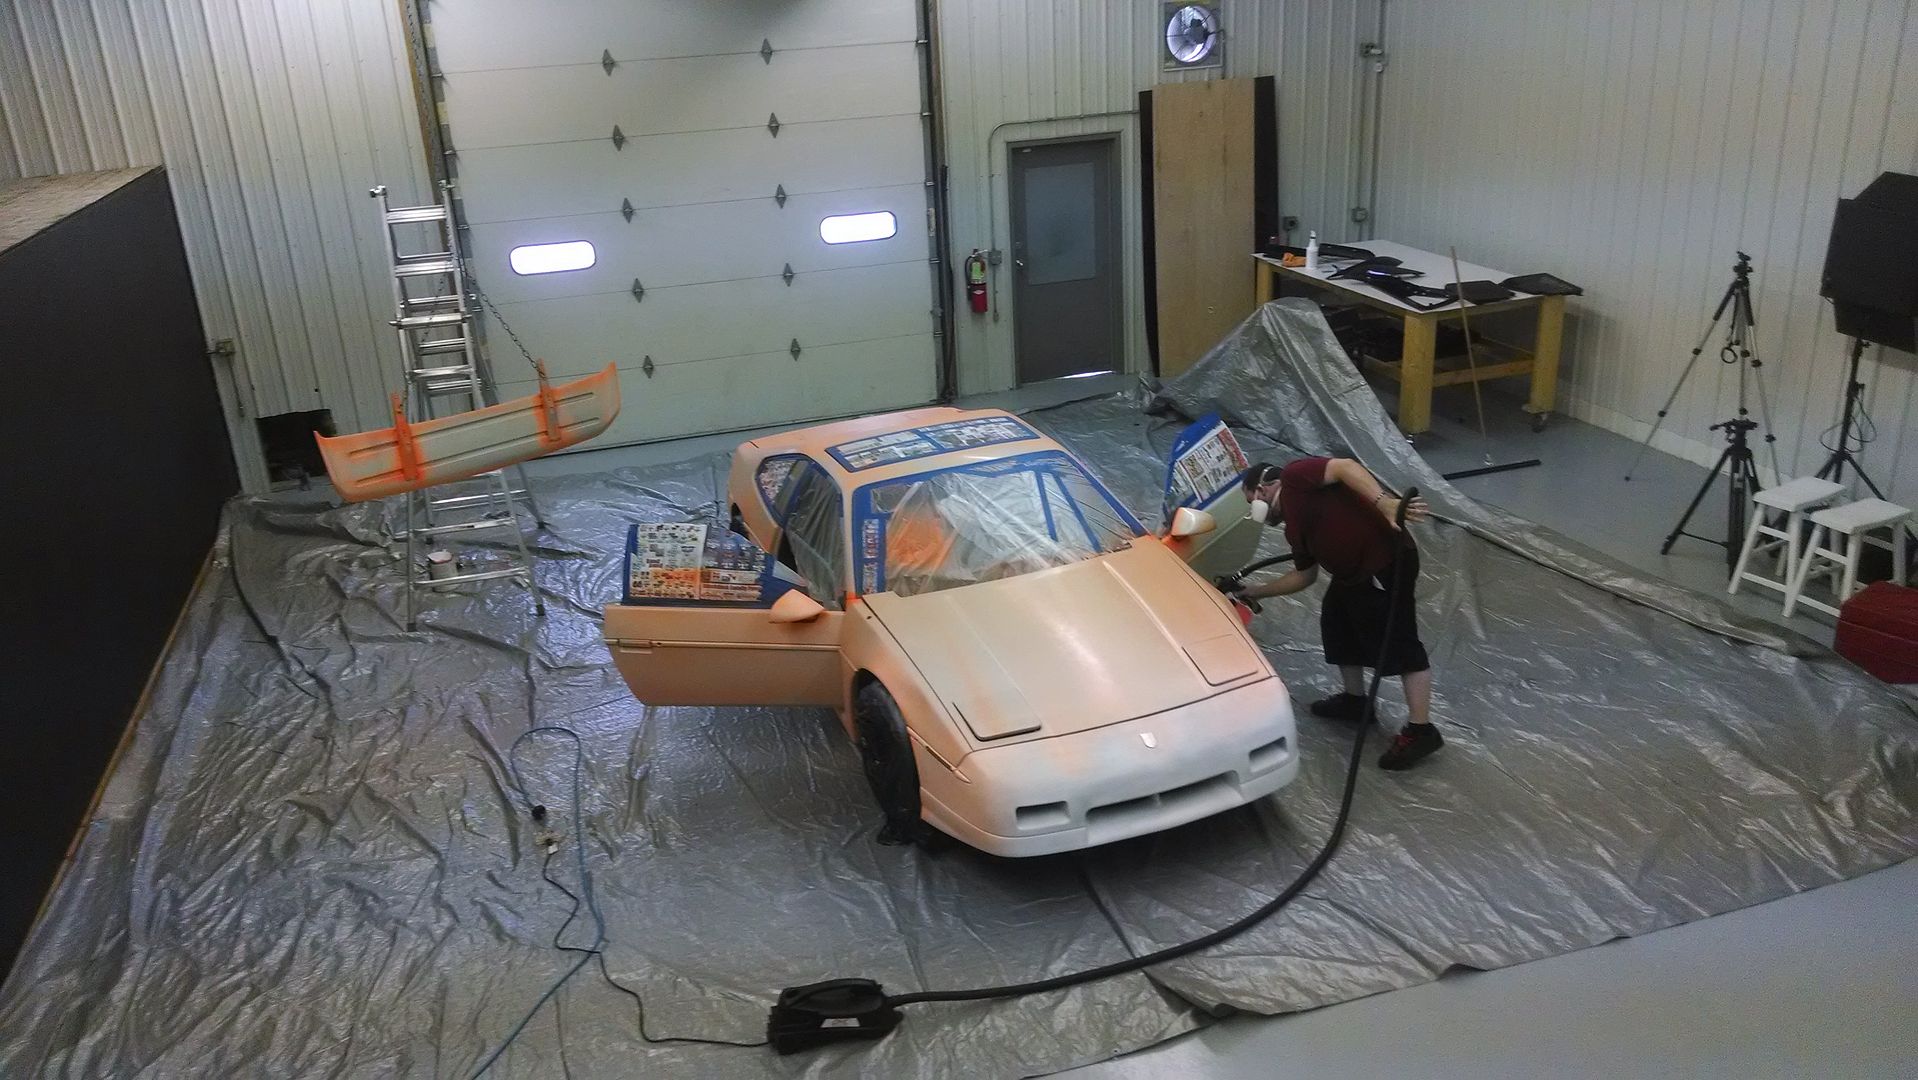
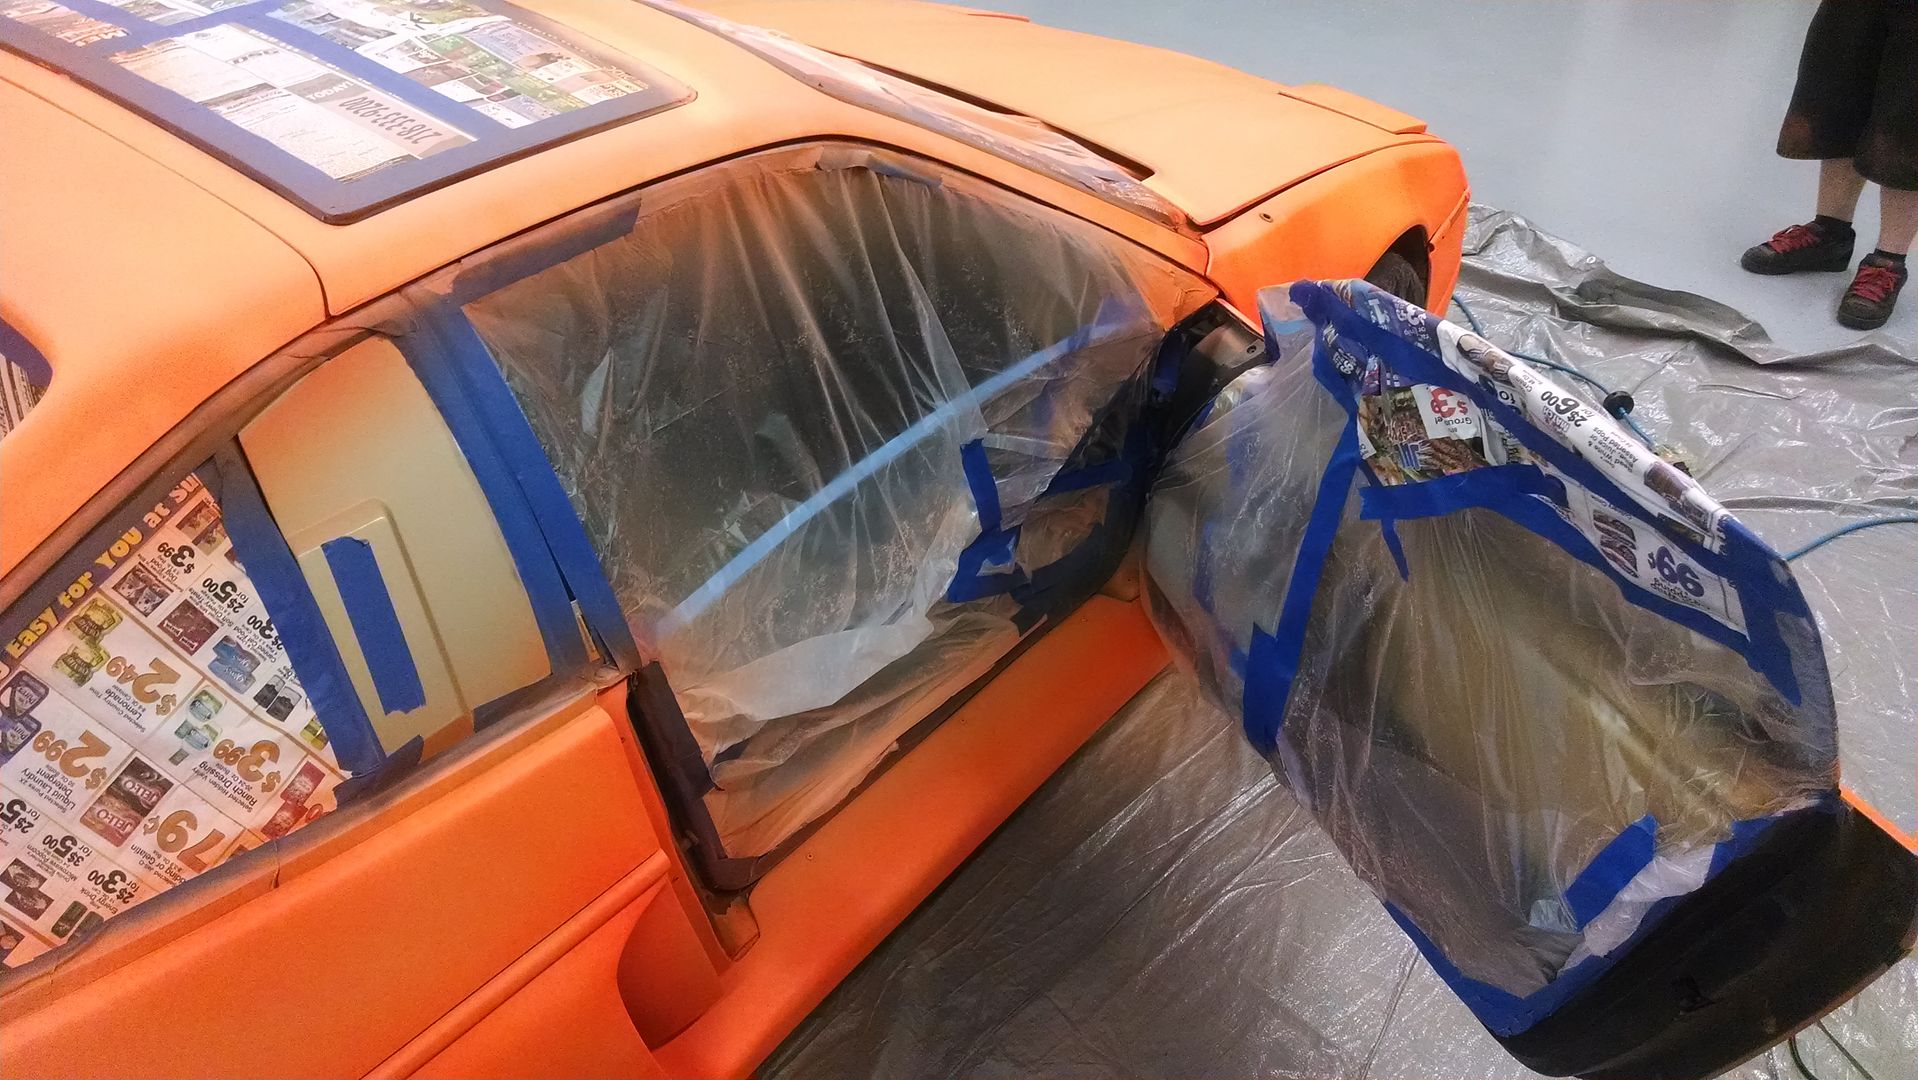
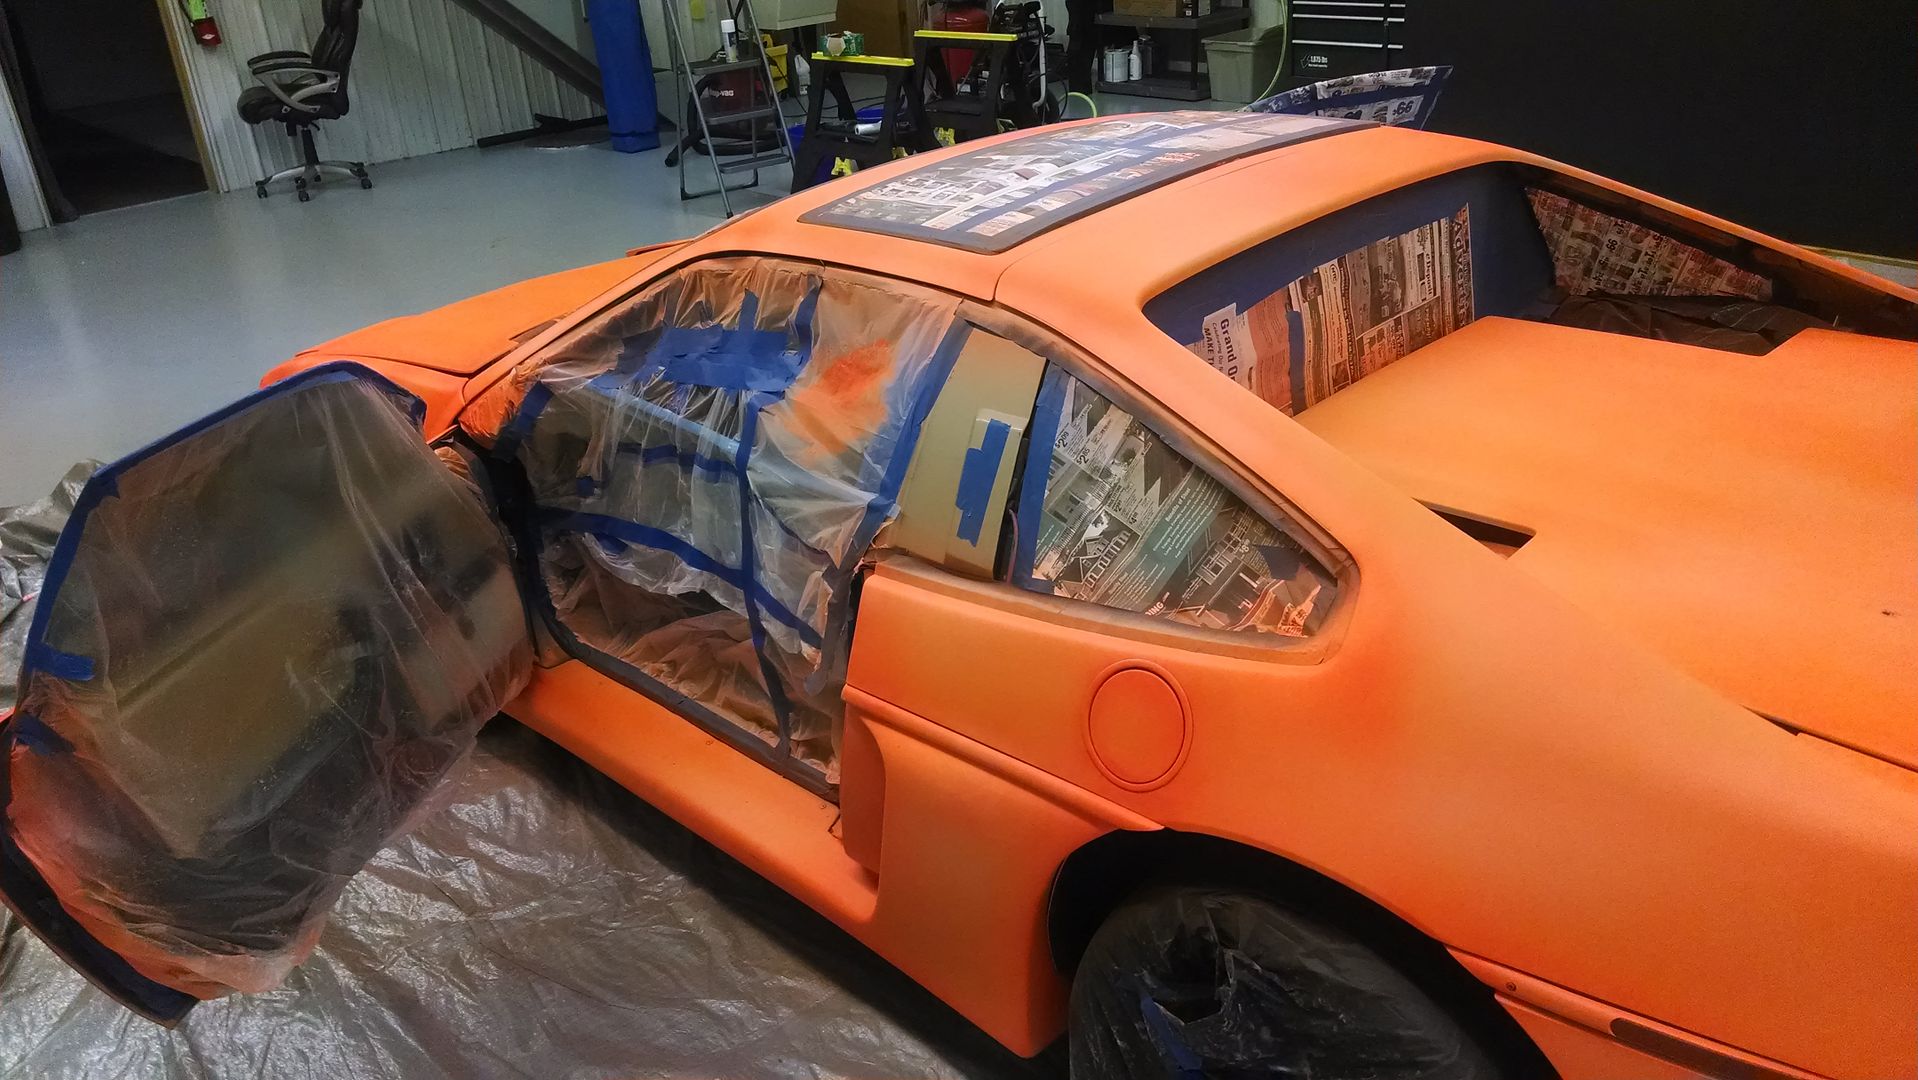
**The whole process took about 8 hours giving 20 minutes between coats of dip. This 8 hour time period includes dismantling some parts of the car to spray them off, taping off the wheels, exhaust tips, windshield, door glass, inside door panel and draping plastic over the interior of the car so we could do the door jams. Also this 8 hour period includes cleanup after finishing and ripping all the tape off the car.
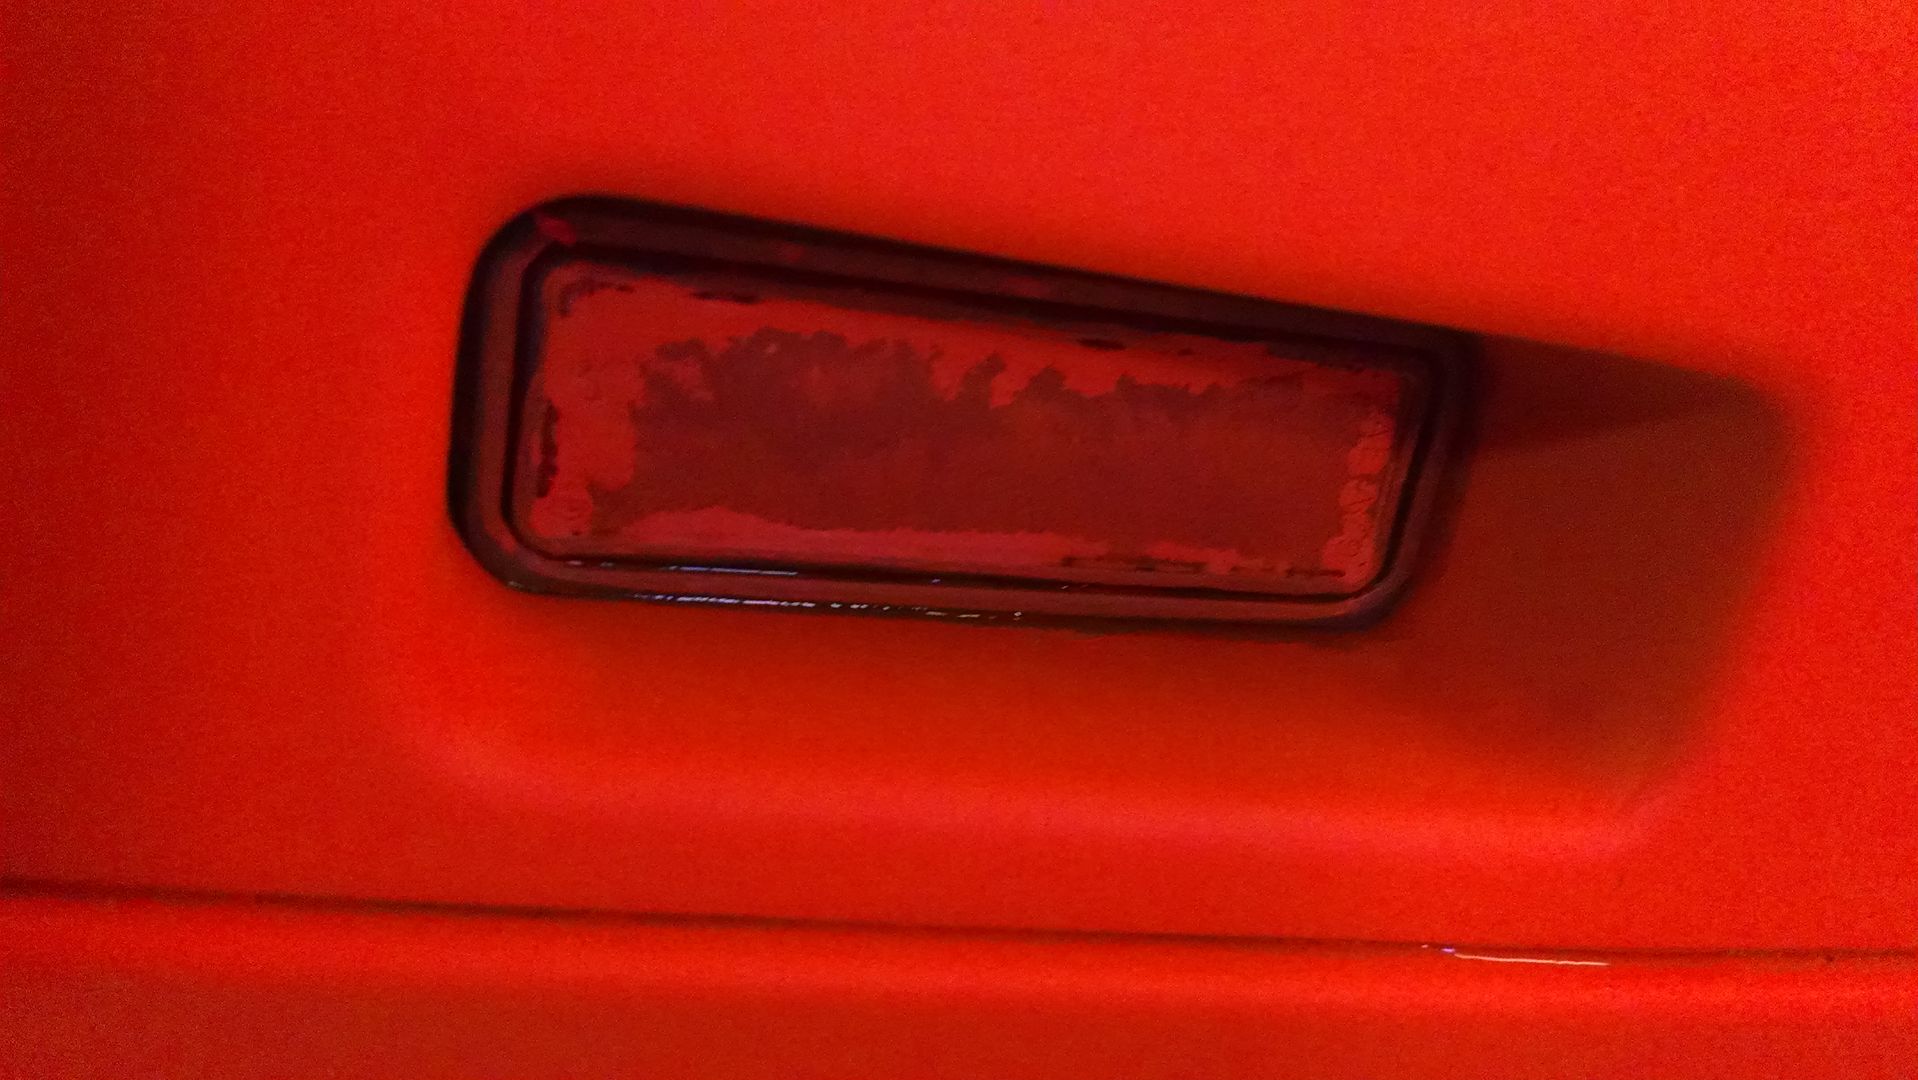
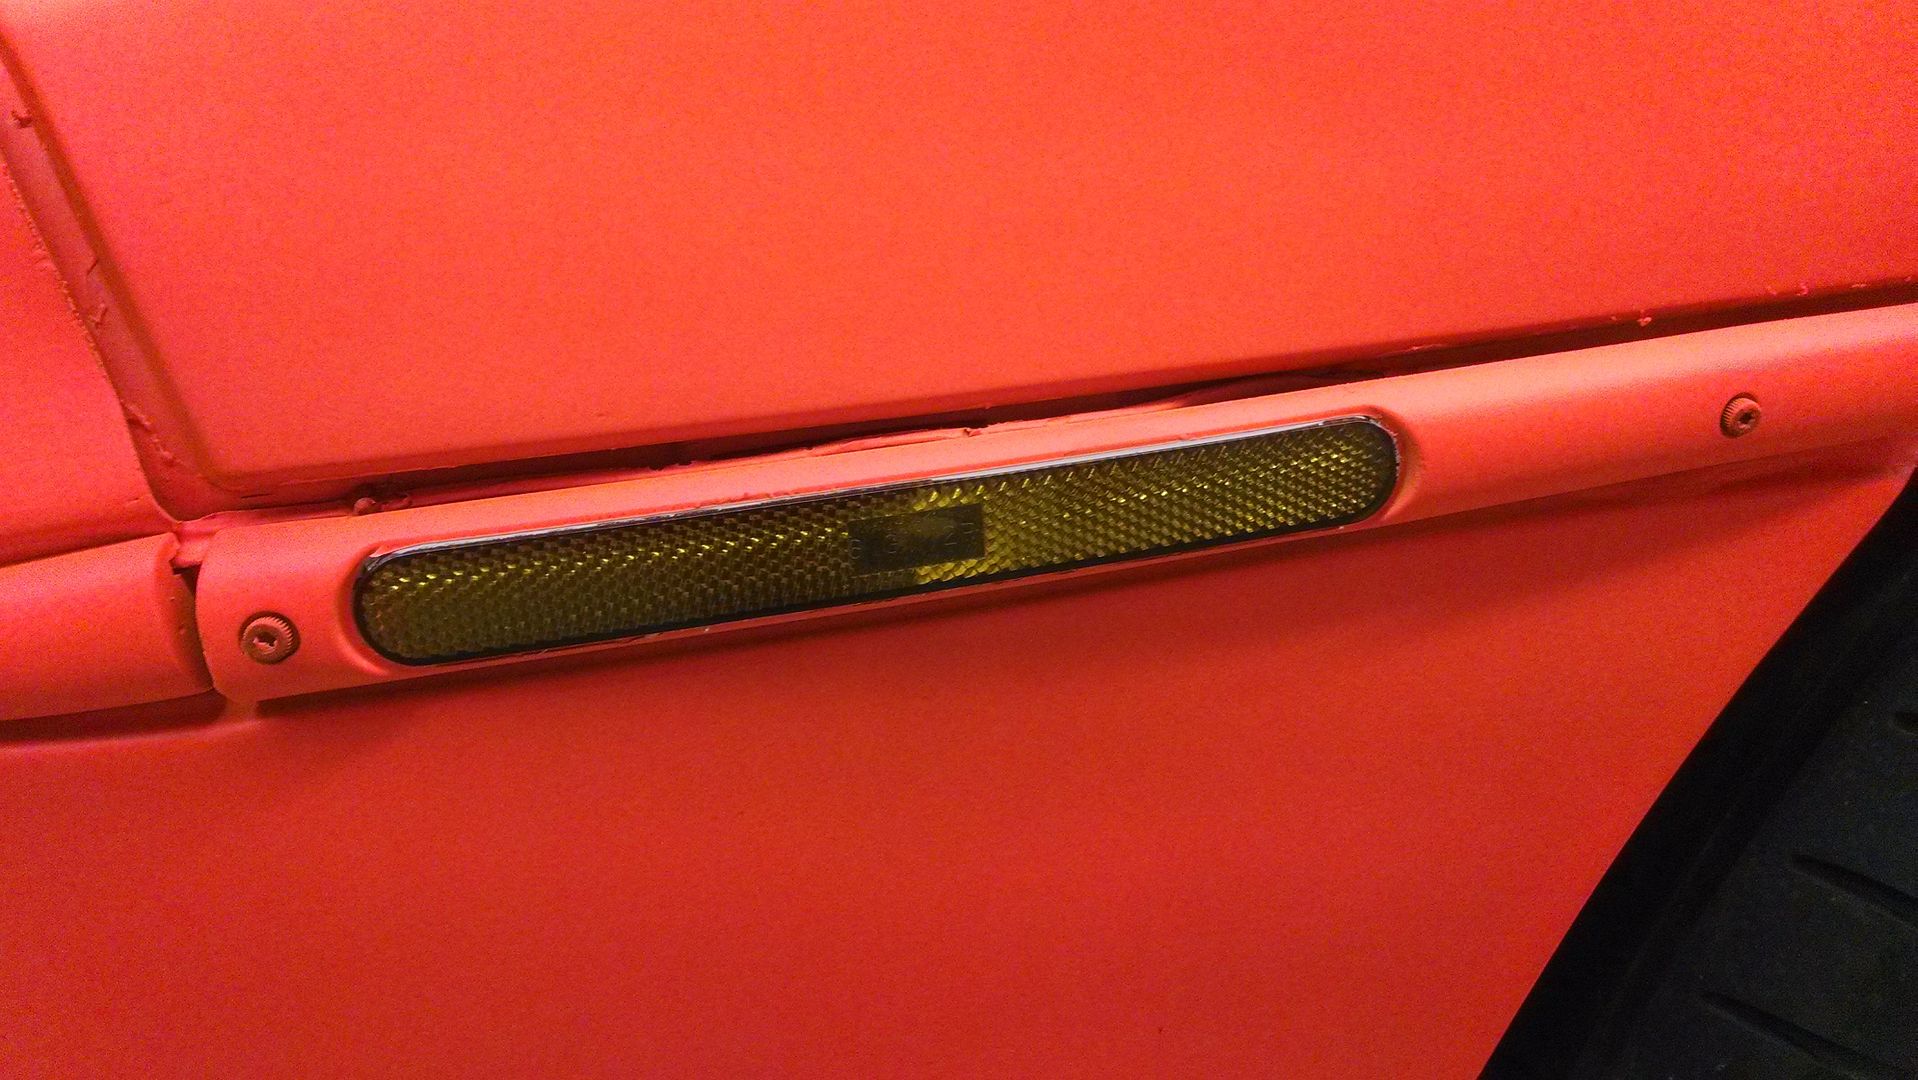
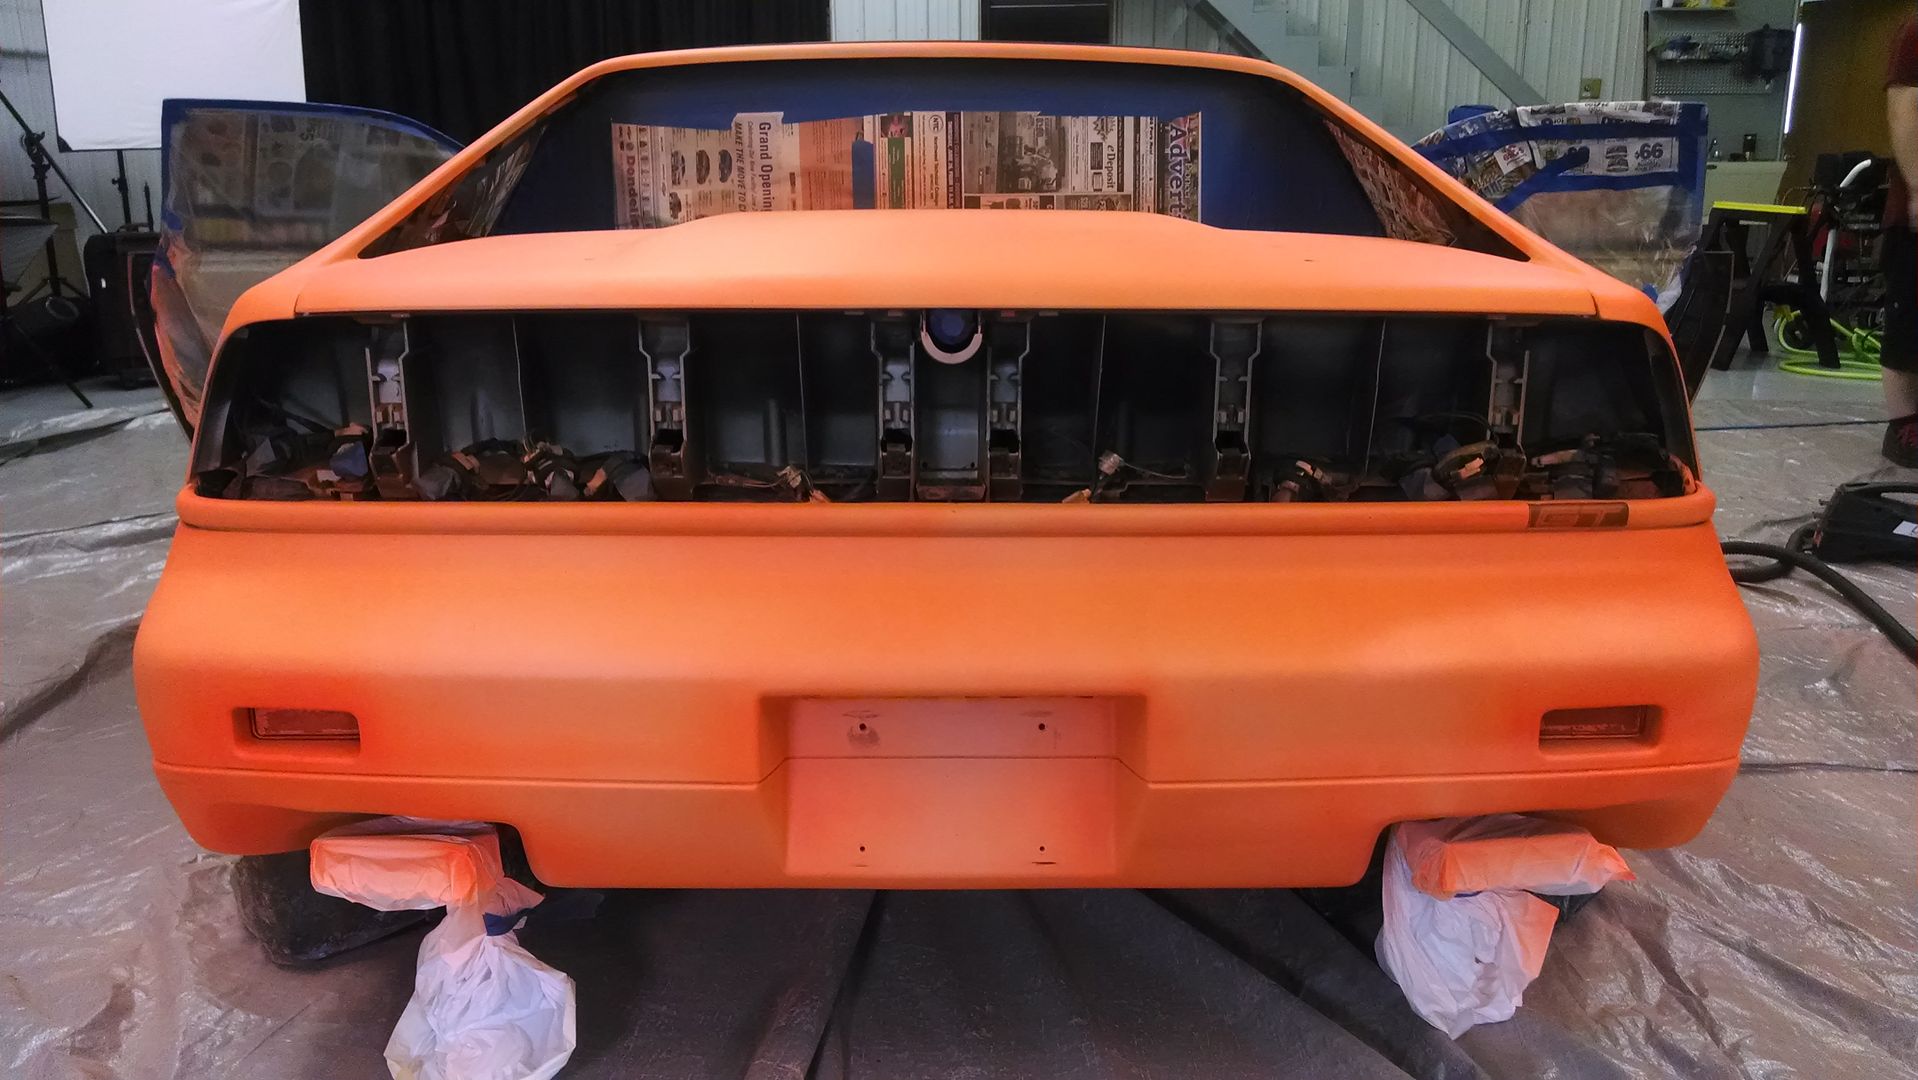
**Plasti-Dip does not go on very well on clear or translucent plastic surfaces. The "GT" inlay on the back bumper in the side molding didn't cover up very well, the front Fiero logo badge didn't cover very well, the rear bumper reflectors and the front turn-signal housings all did not cover very well. It's like the dip didn't want to stick to any of it, so in the final product we will remove all remaining dip from those products.
**It really does come off as easy and safely as they say it does. In my opinion, almost too easily. But this is also good news for you if it didn't come out as nice as you thought it would.
**We used 3 gallons of "Ready to Spray" Plasti-Dip and the professional spray gun and did roughly 6 coats on the car. I wish we had another gallon to do a really thick last coat but we didn't order that many.
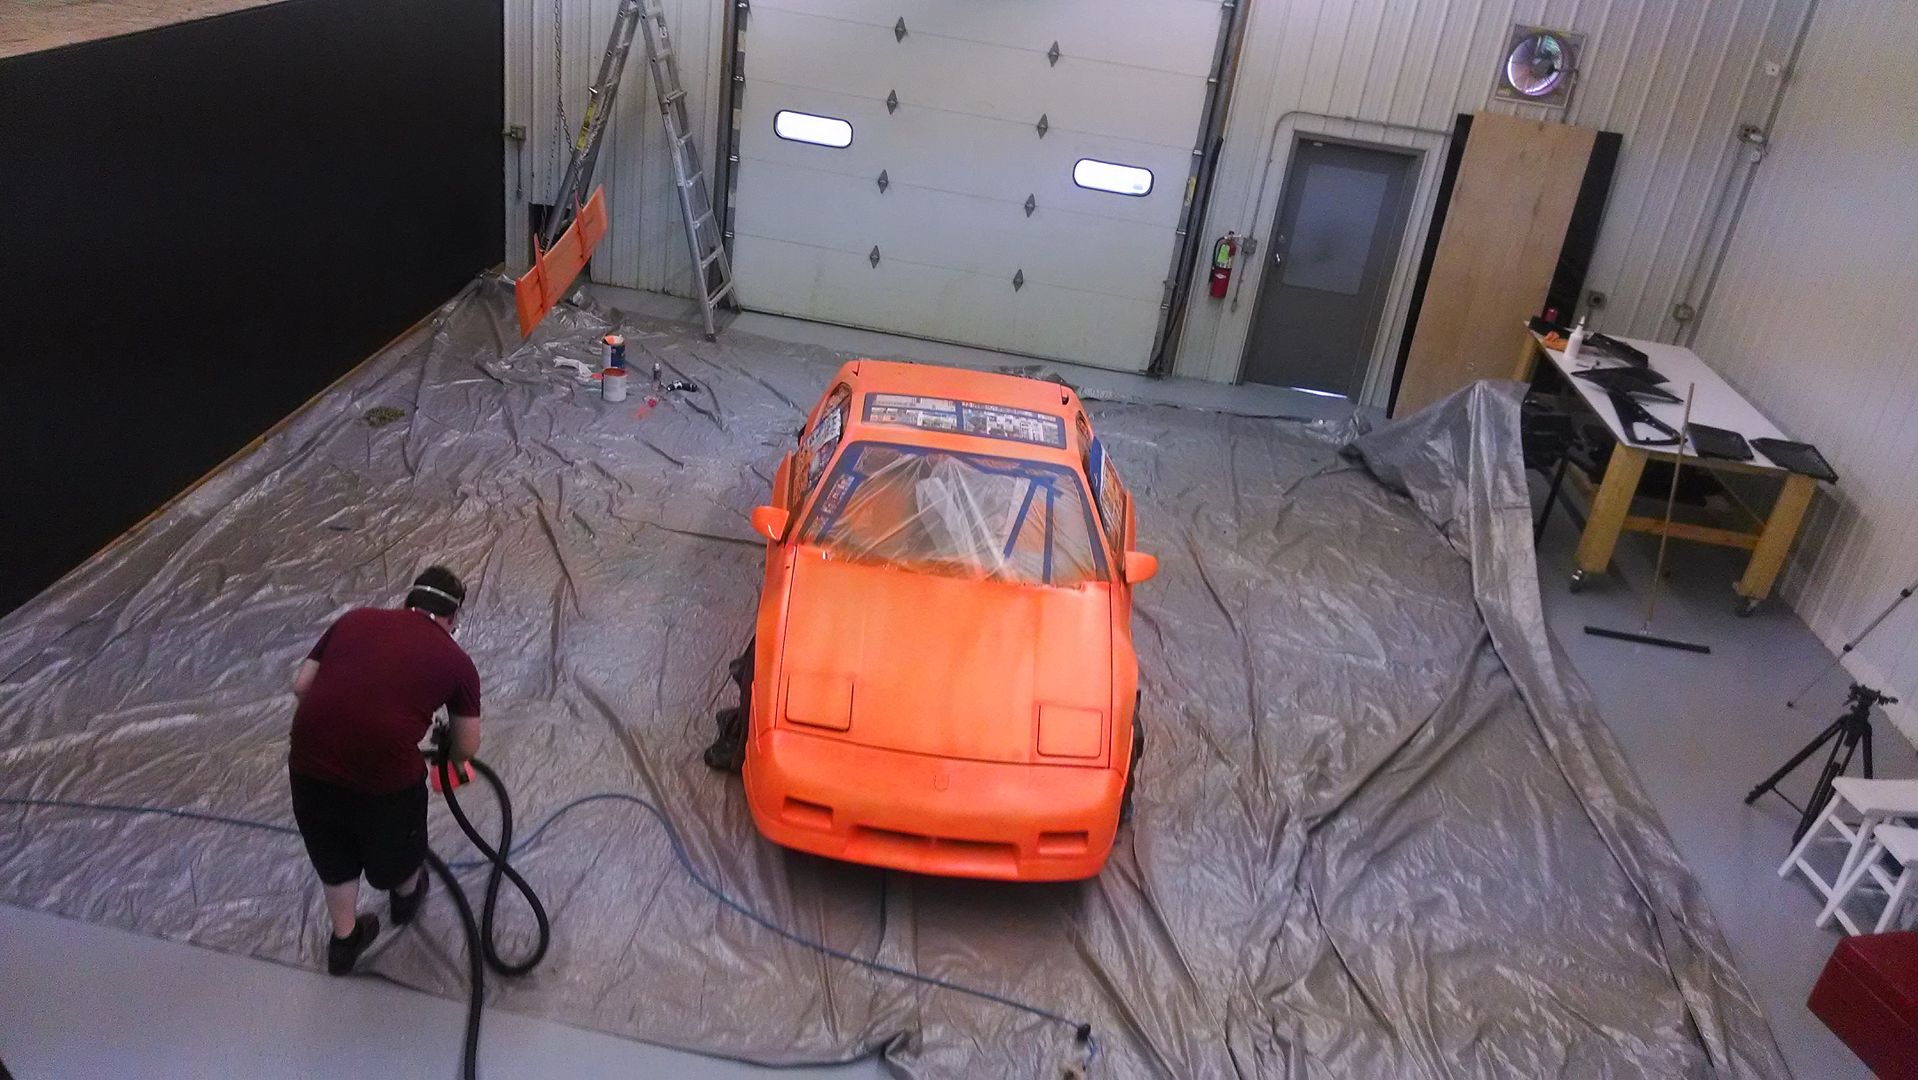
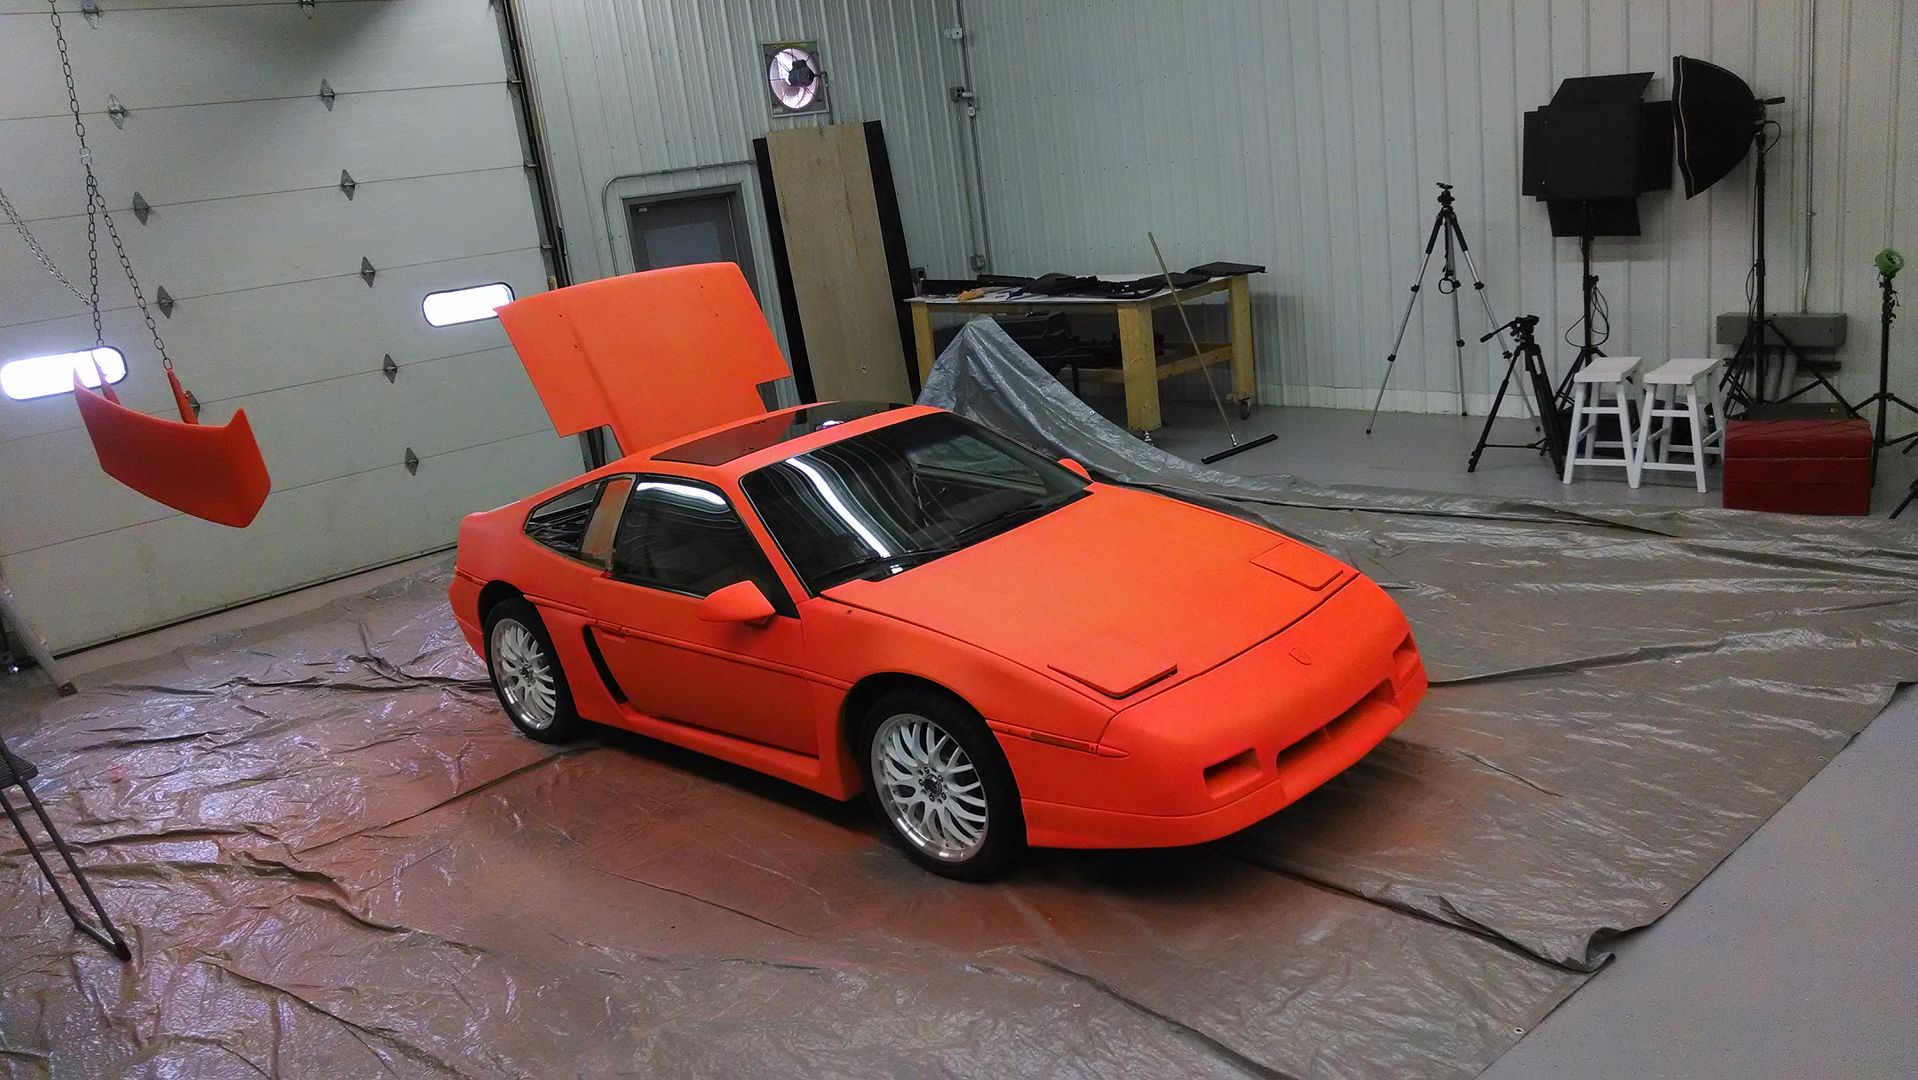
Anyways, here are the pictures from our process. Tomorrow we're getting the car outside to take some more pictures and play around with it more. We'll post more then! Here's Dusty with the Fiero right before starting:
Now we start the process:
[This message has been edited by BlackTopRacing (edited 07-08-2014).]
Here are some more pictures showing the bad parts of the finished product:
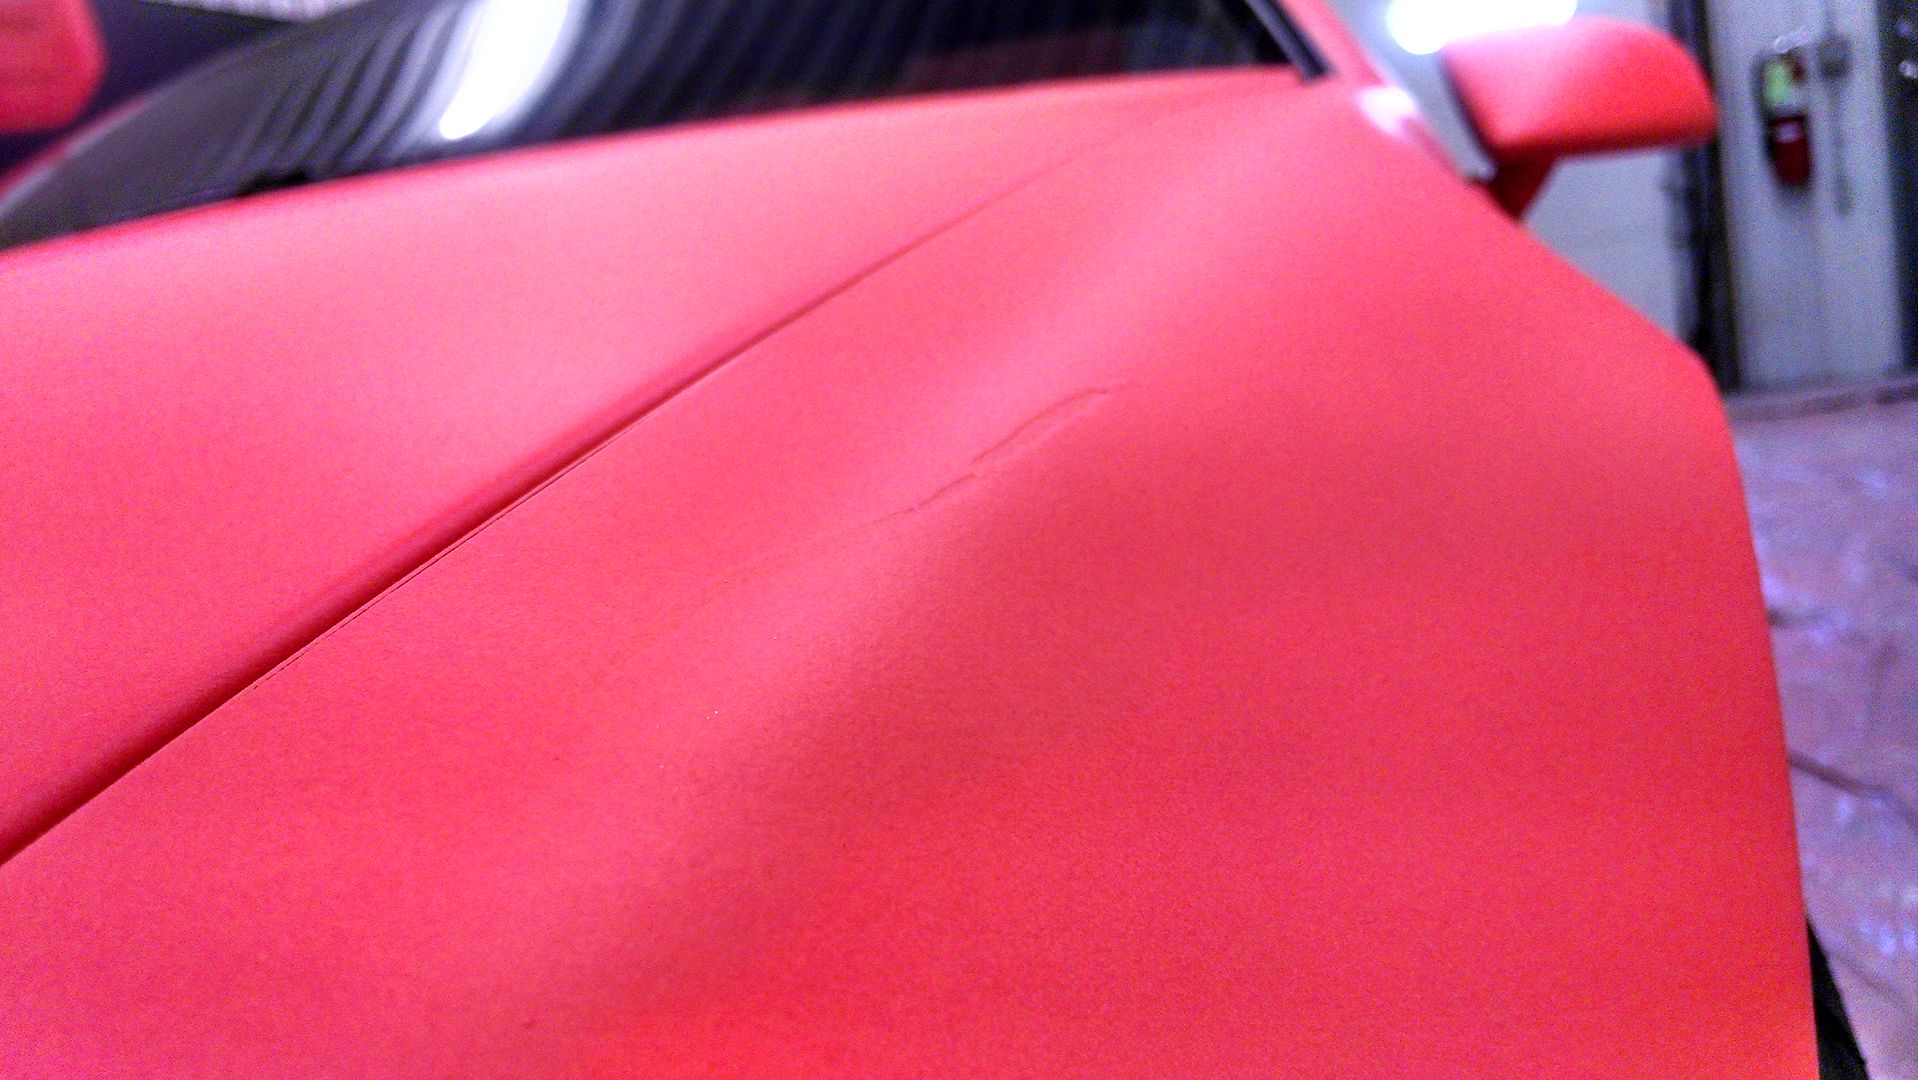
Here you can see a key-scratch from the original paint job covered up by the Plasti-dip. This is a standard example of how well, or how poorly the dip filled in imperfections:
Some of the dip lifted here on the top of the door when the tape was removed so we sprayed some more down on top of it and it seemed to solve the issue. It blends surprisingly well:
More rock chips that didn't get covered very well. In hindsight we should have at least sanded these imperfections smooth:
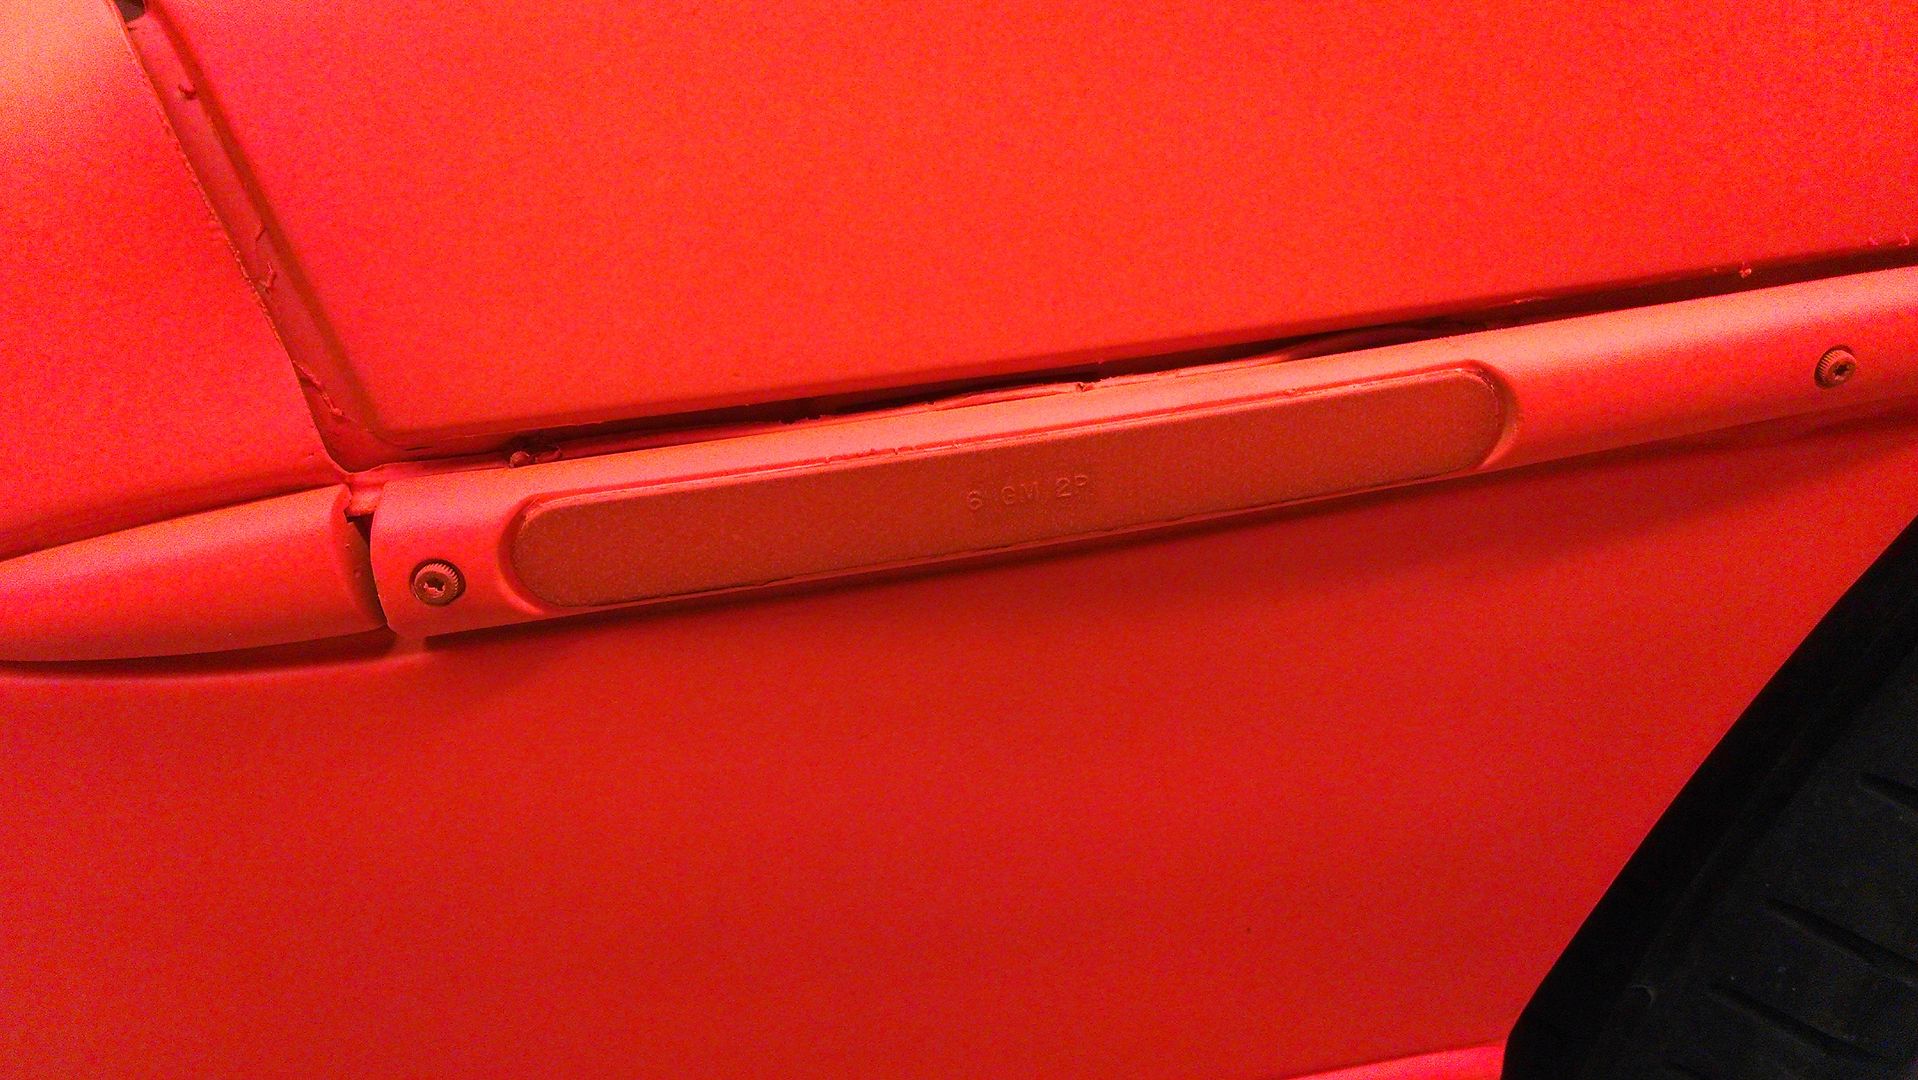
Here's an example of how poorly it covers the hard plastic pieces:
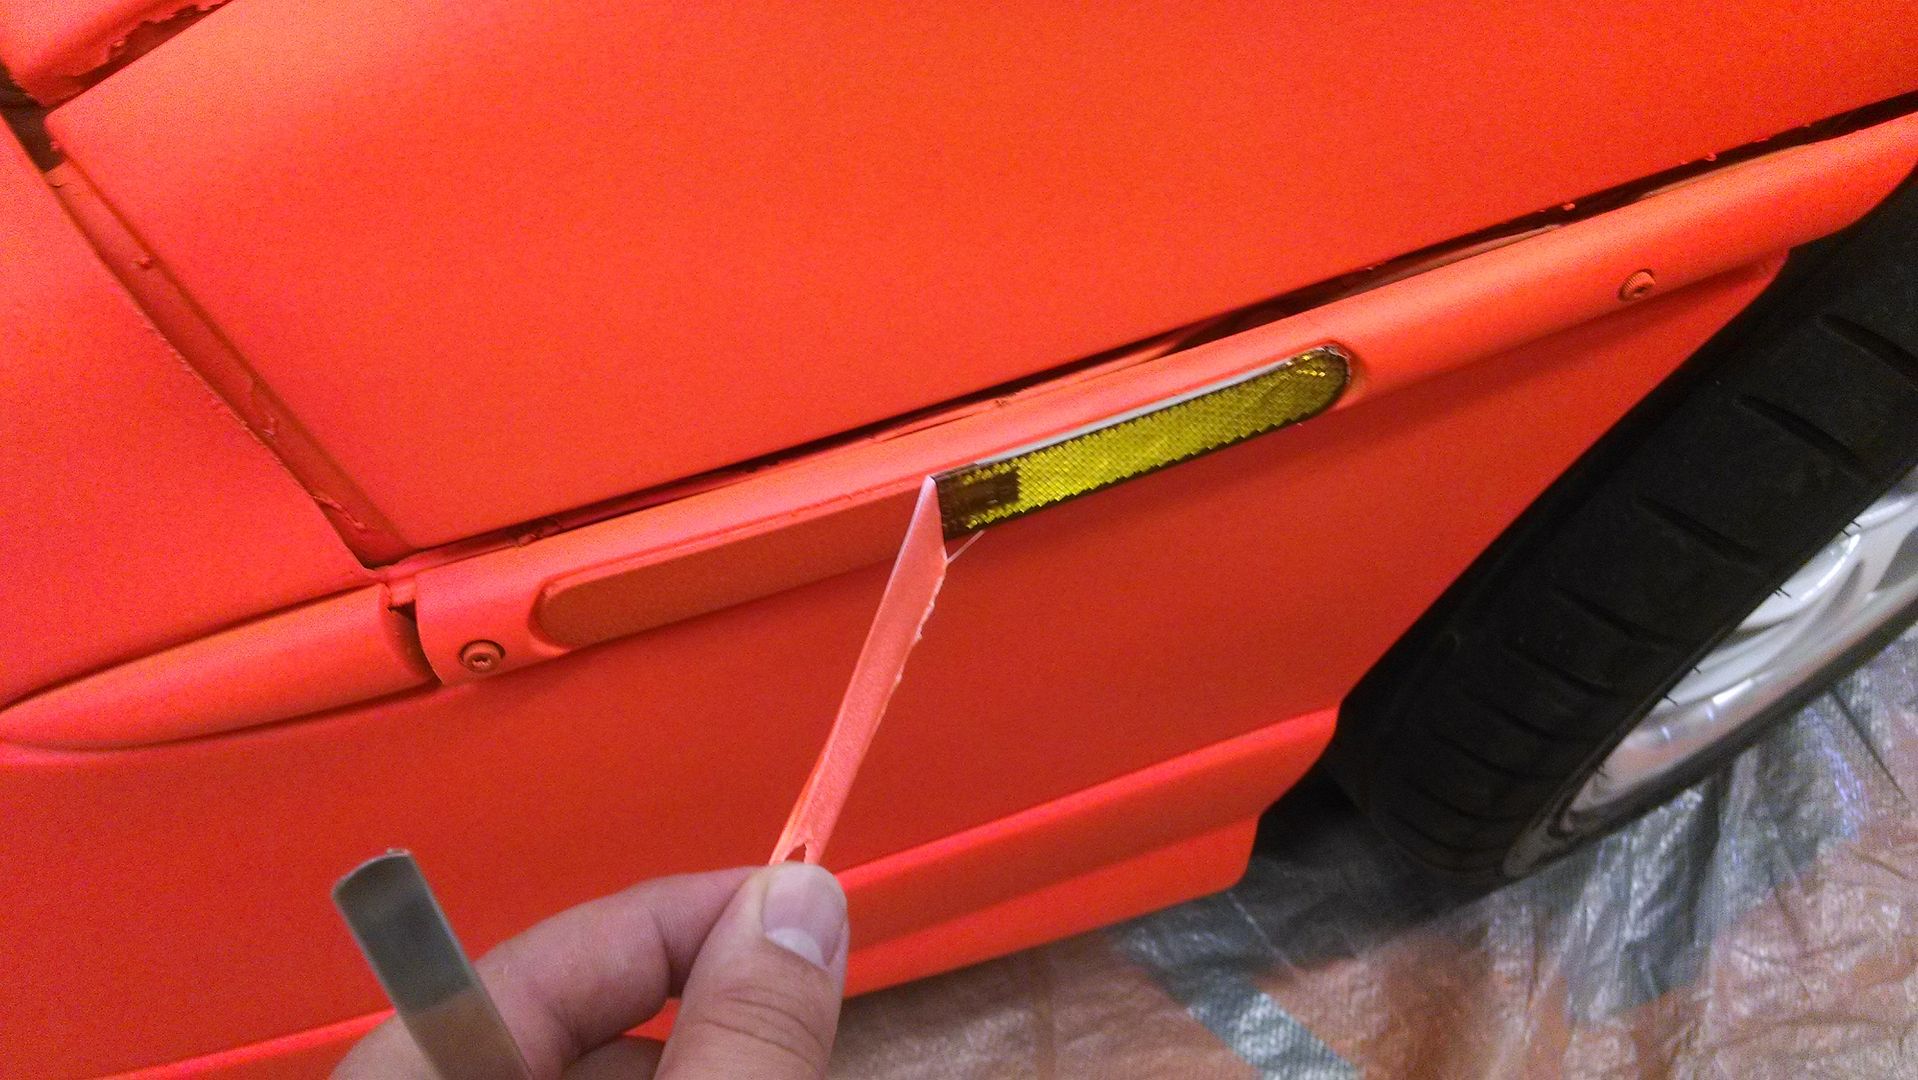
For the side markers we just sprayed right over them and then cut out the oval shape over the lens with a razor blade. Then all you need to do is grab a corner and lift - it comes right off with zero residue:
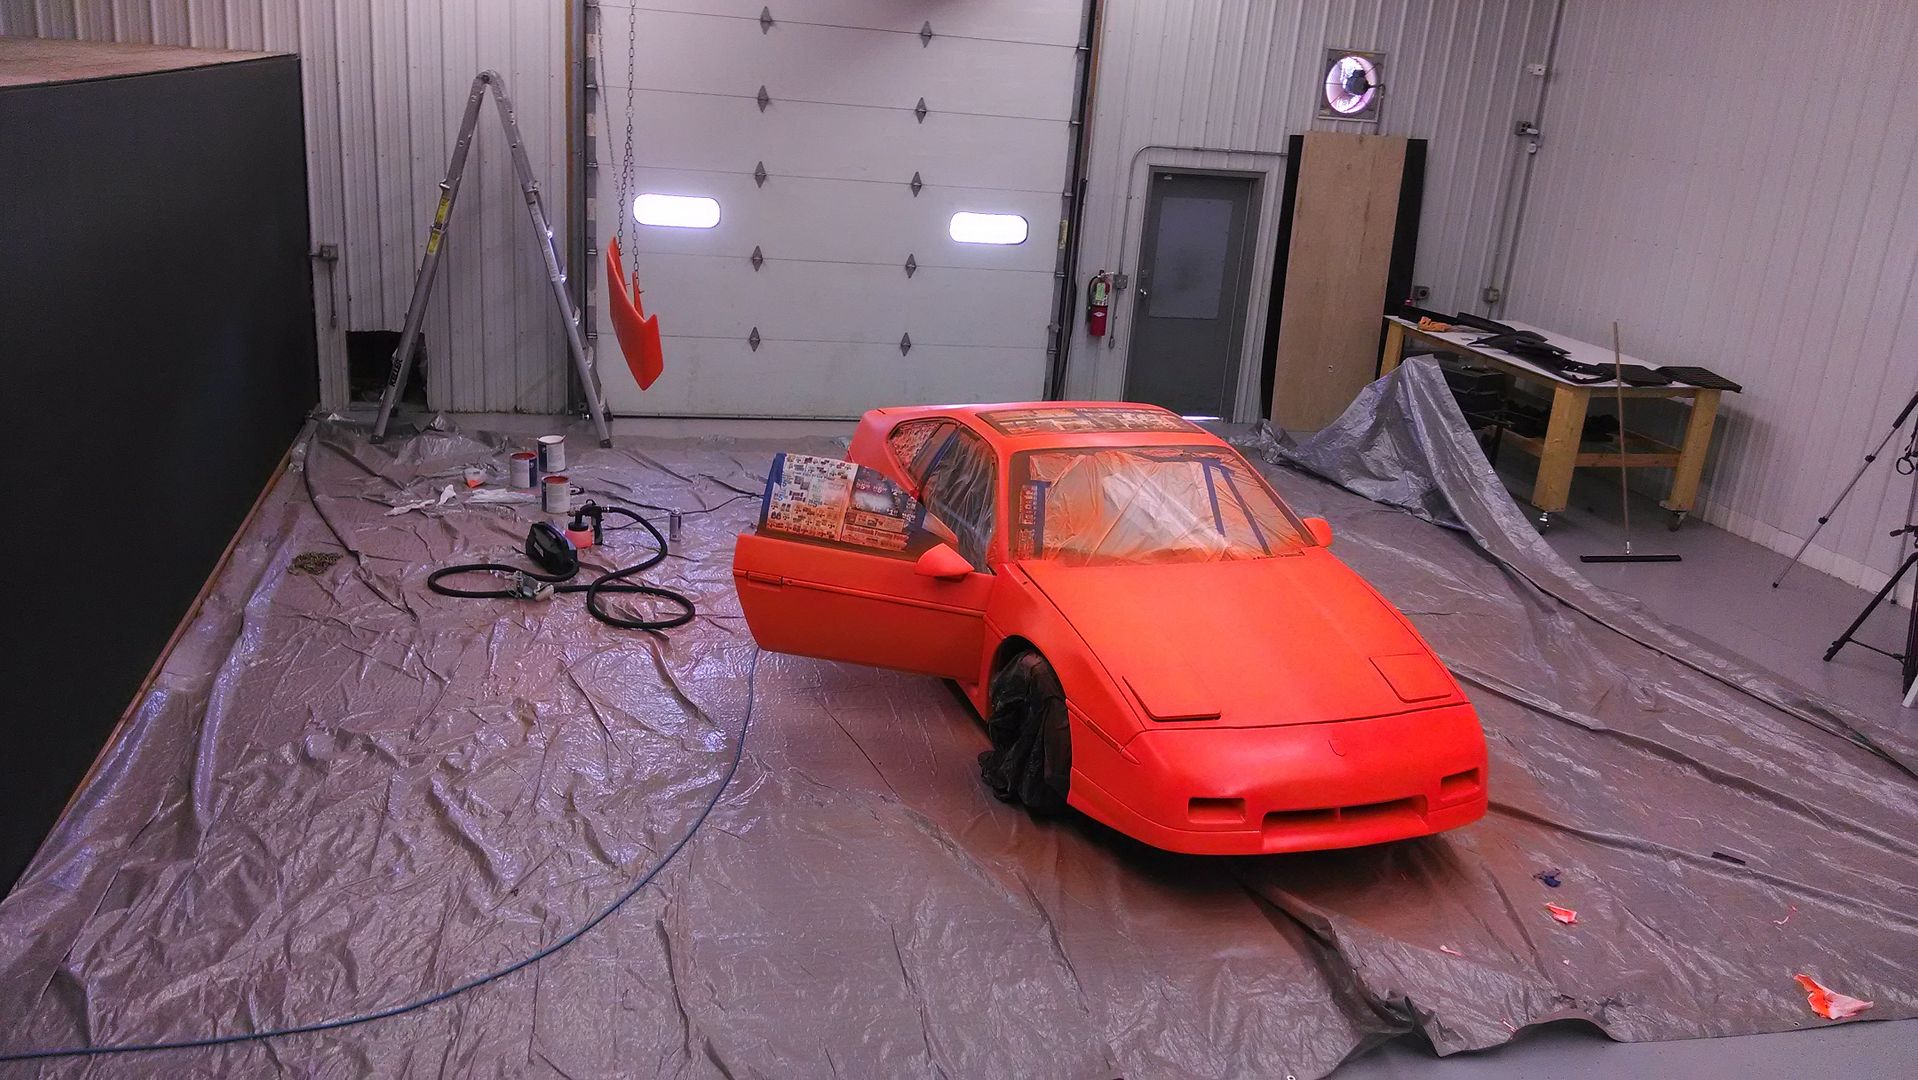
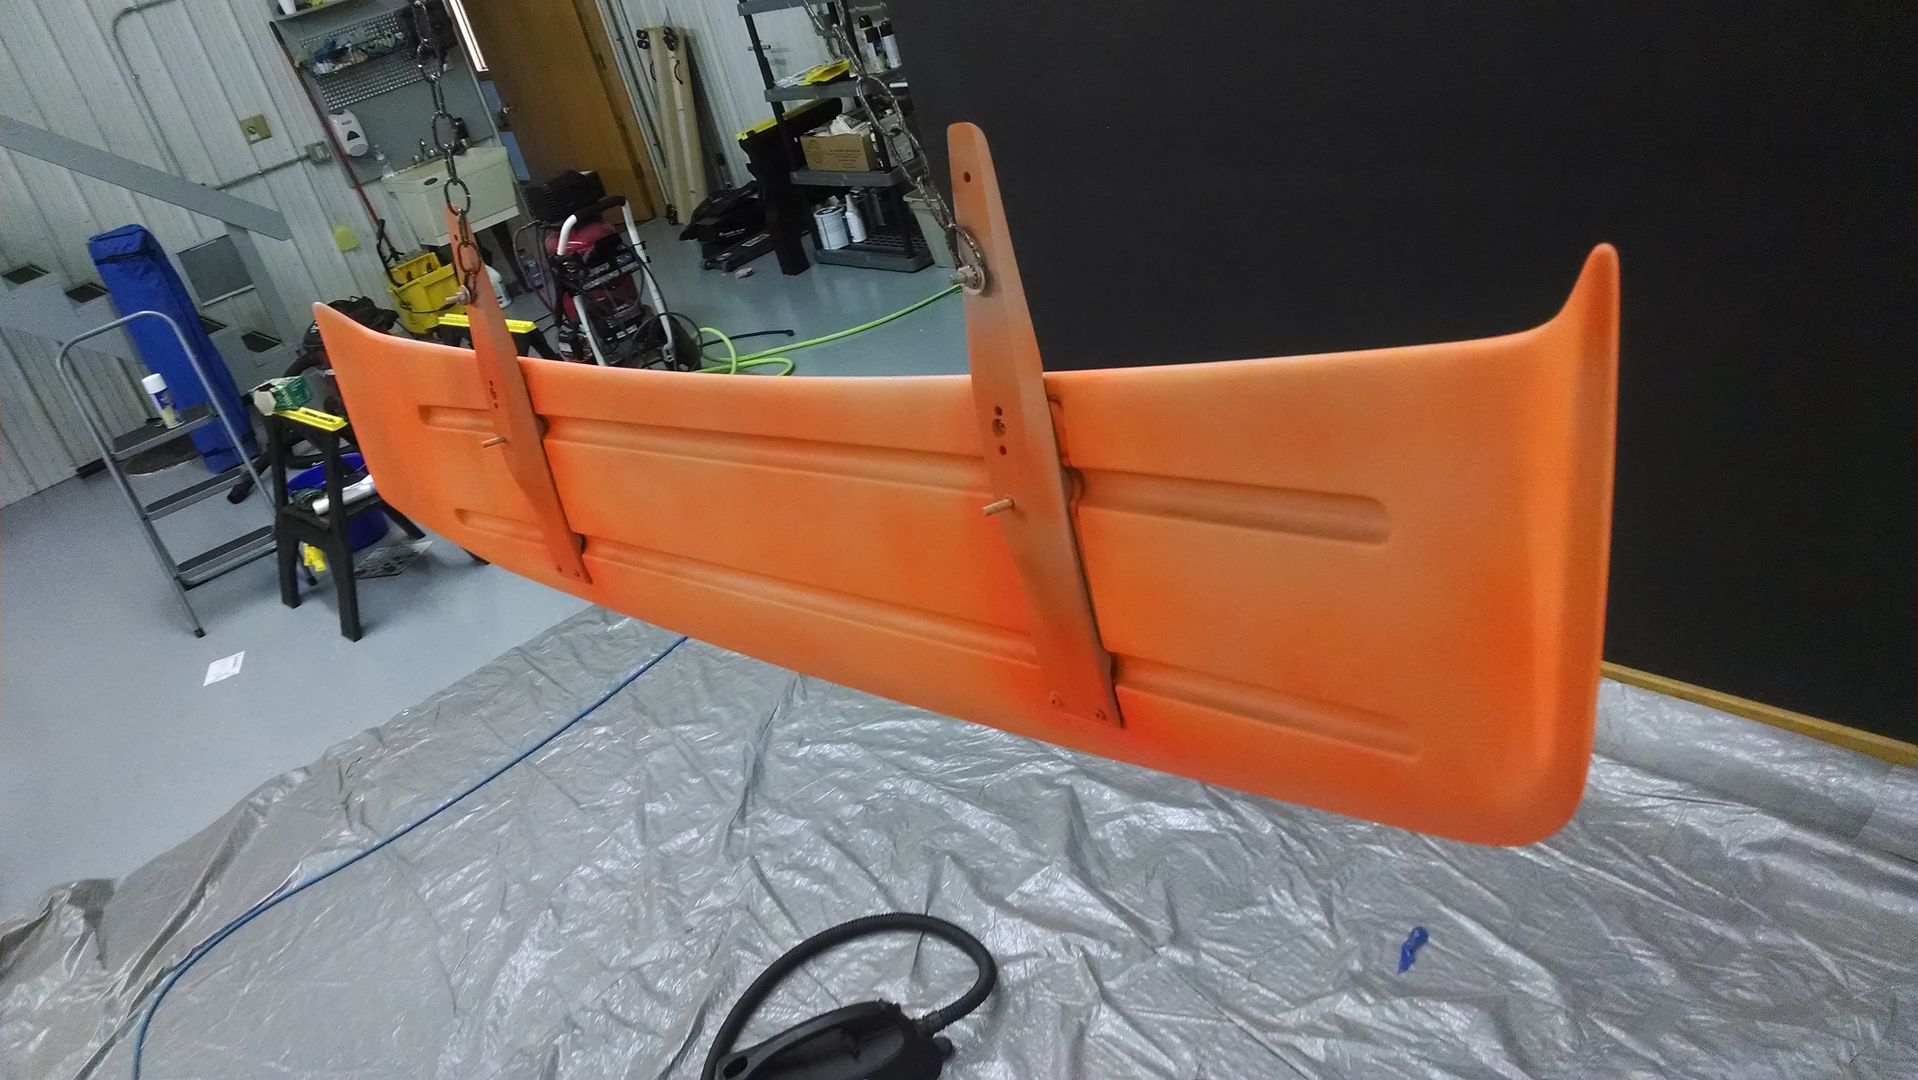
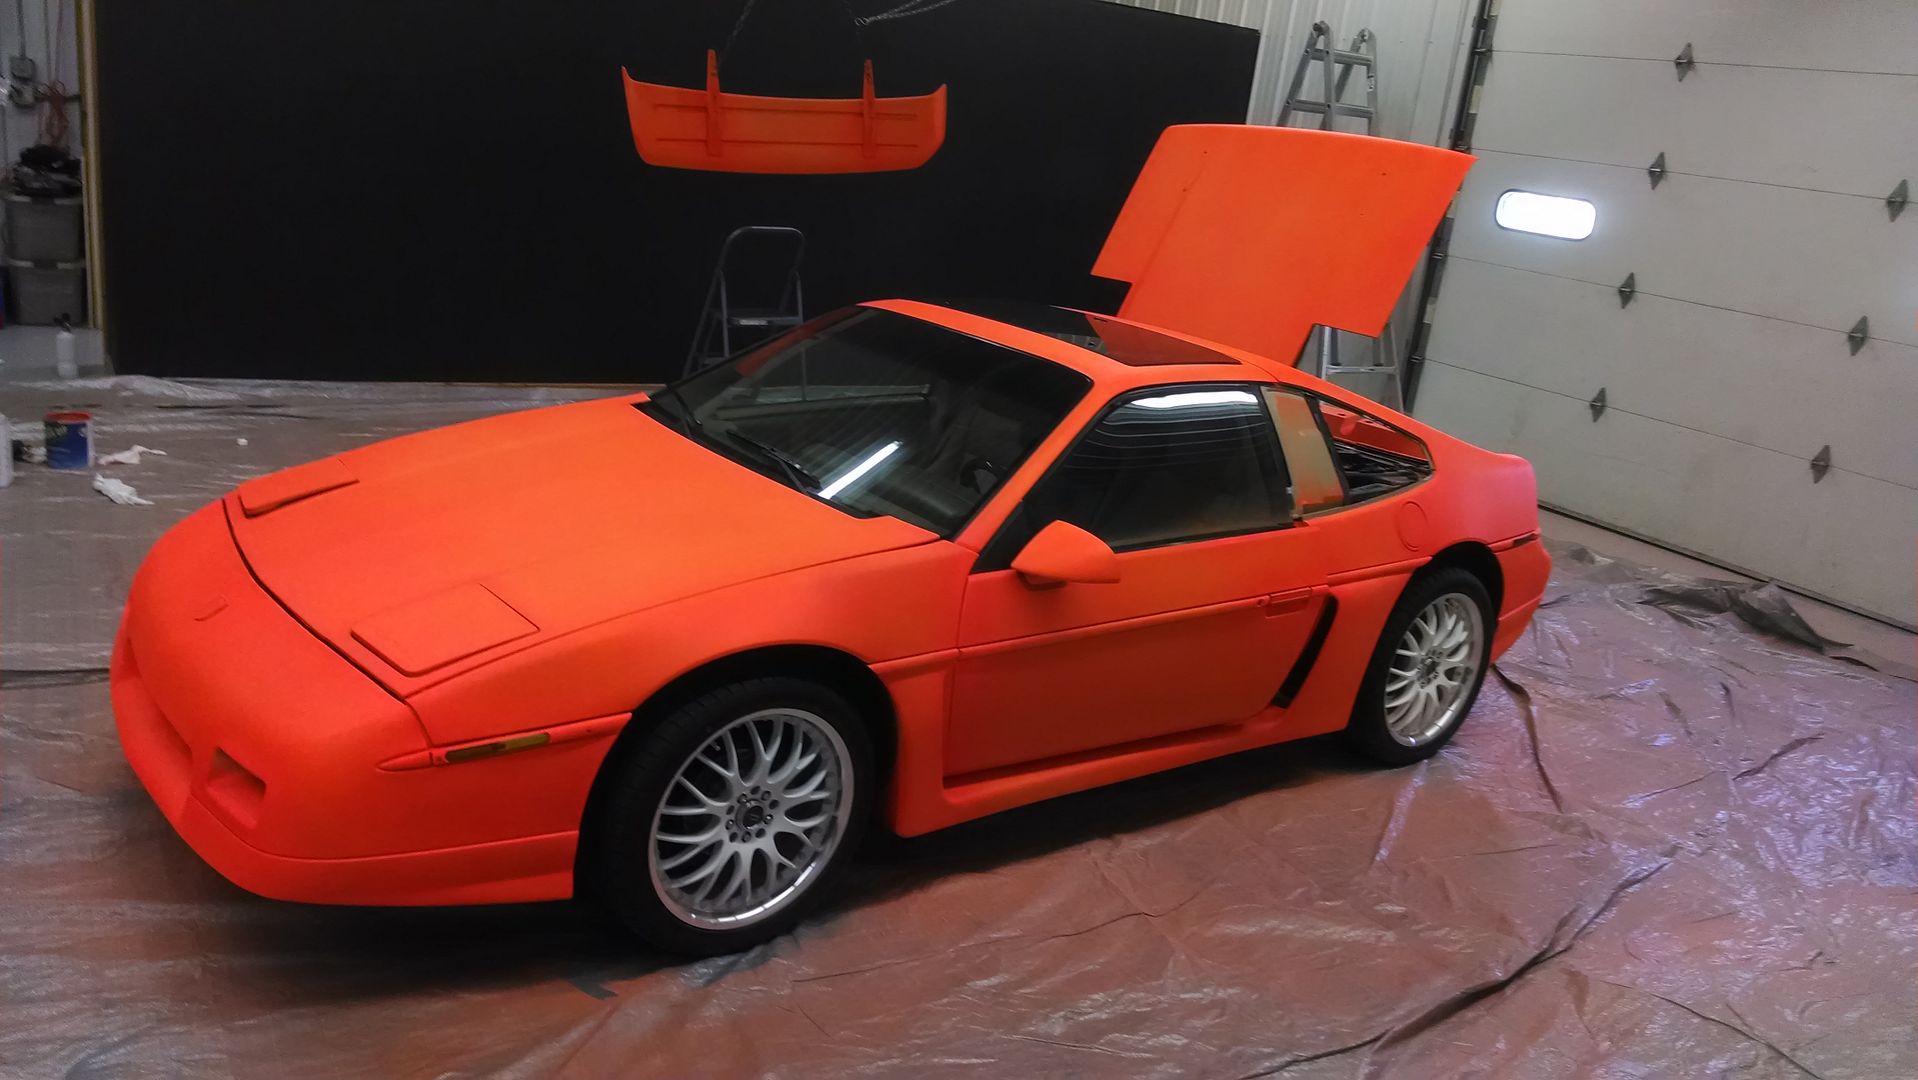
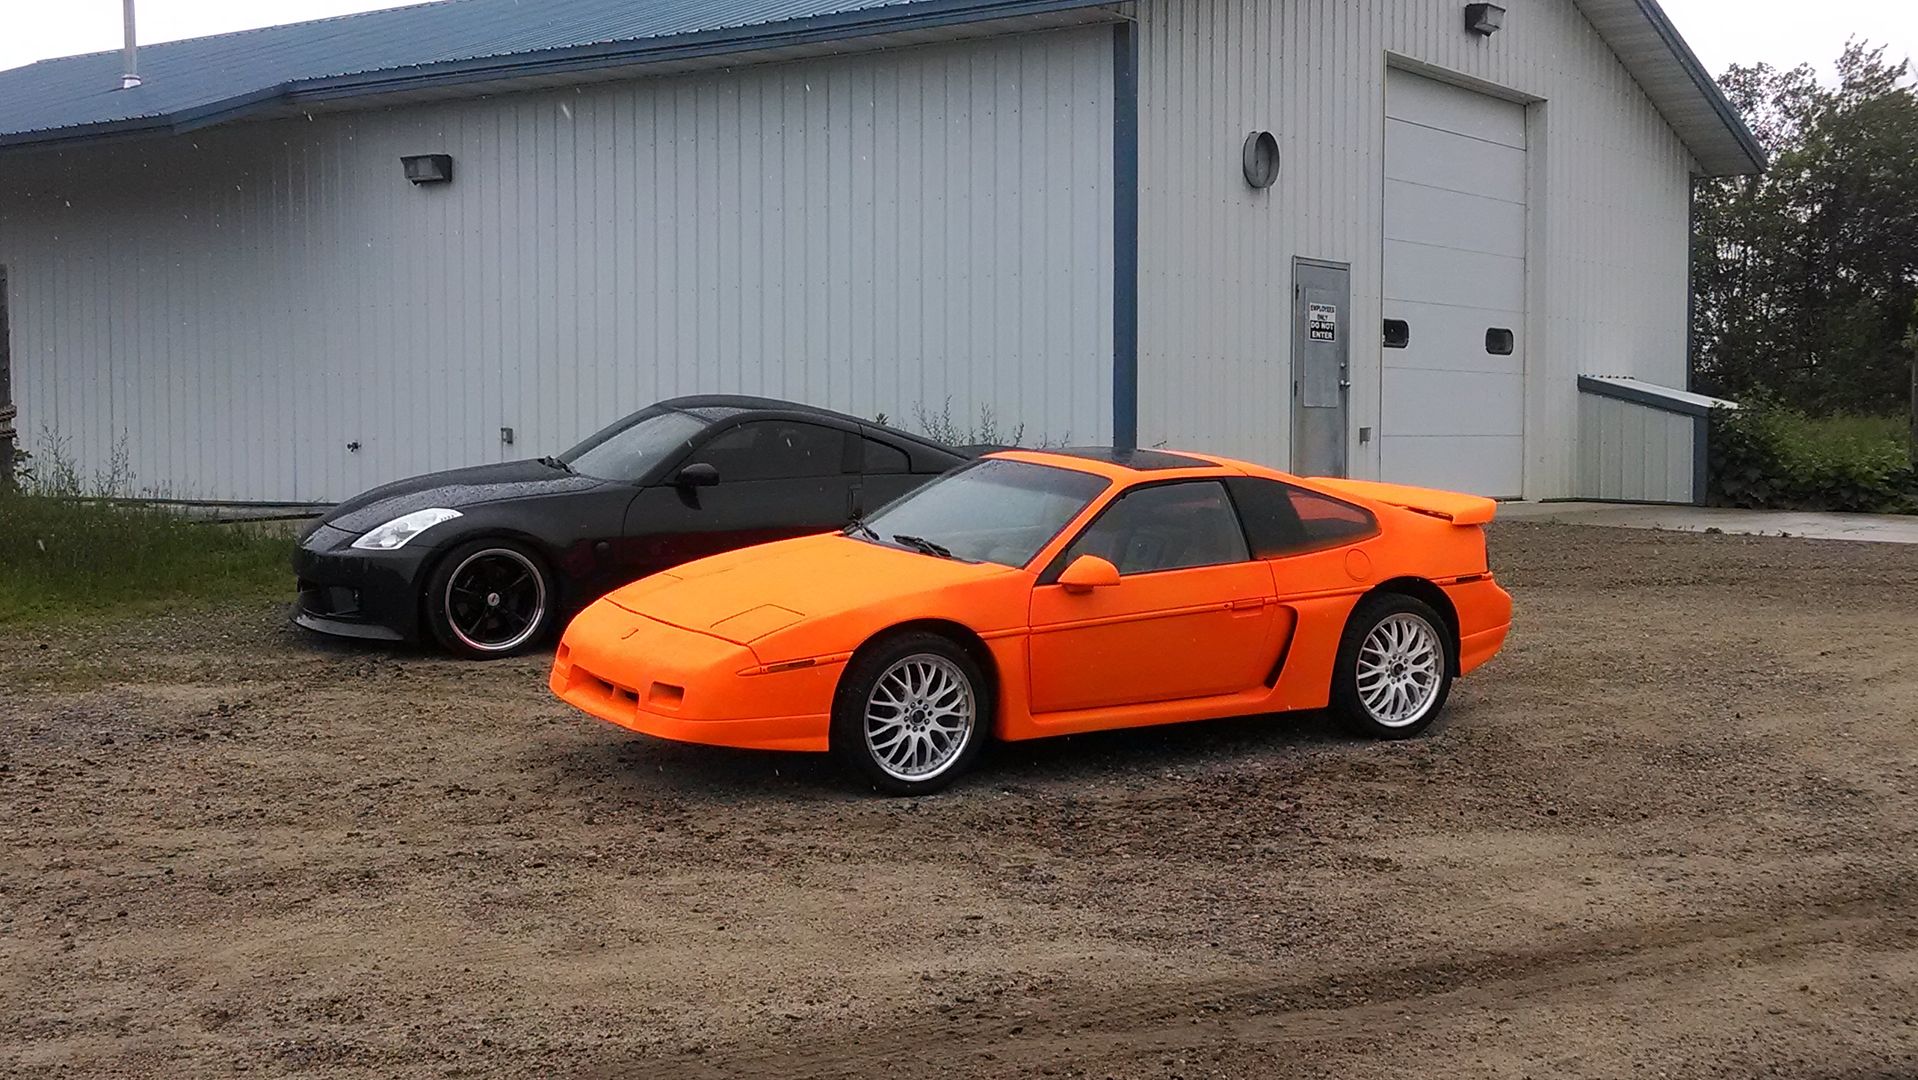
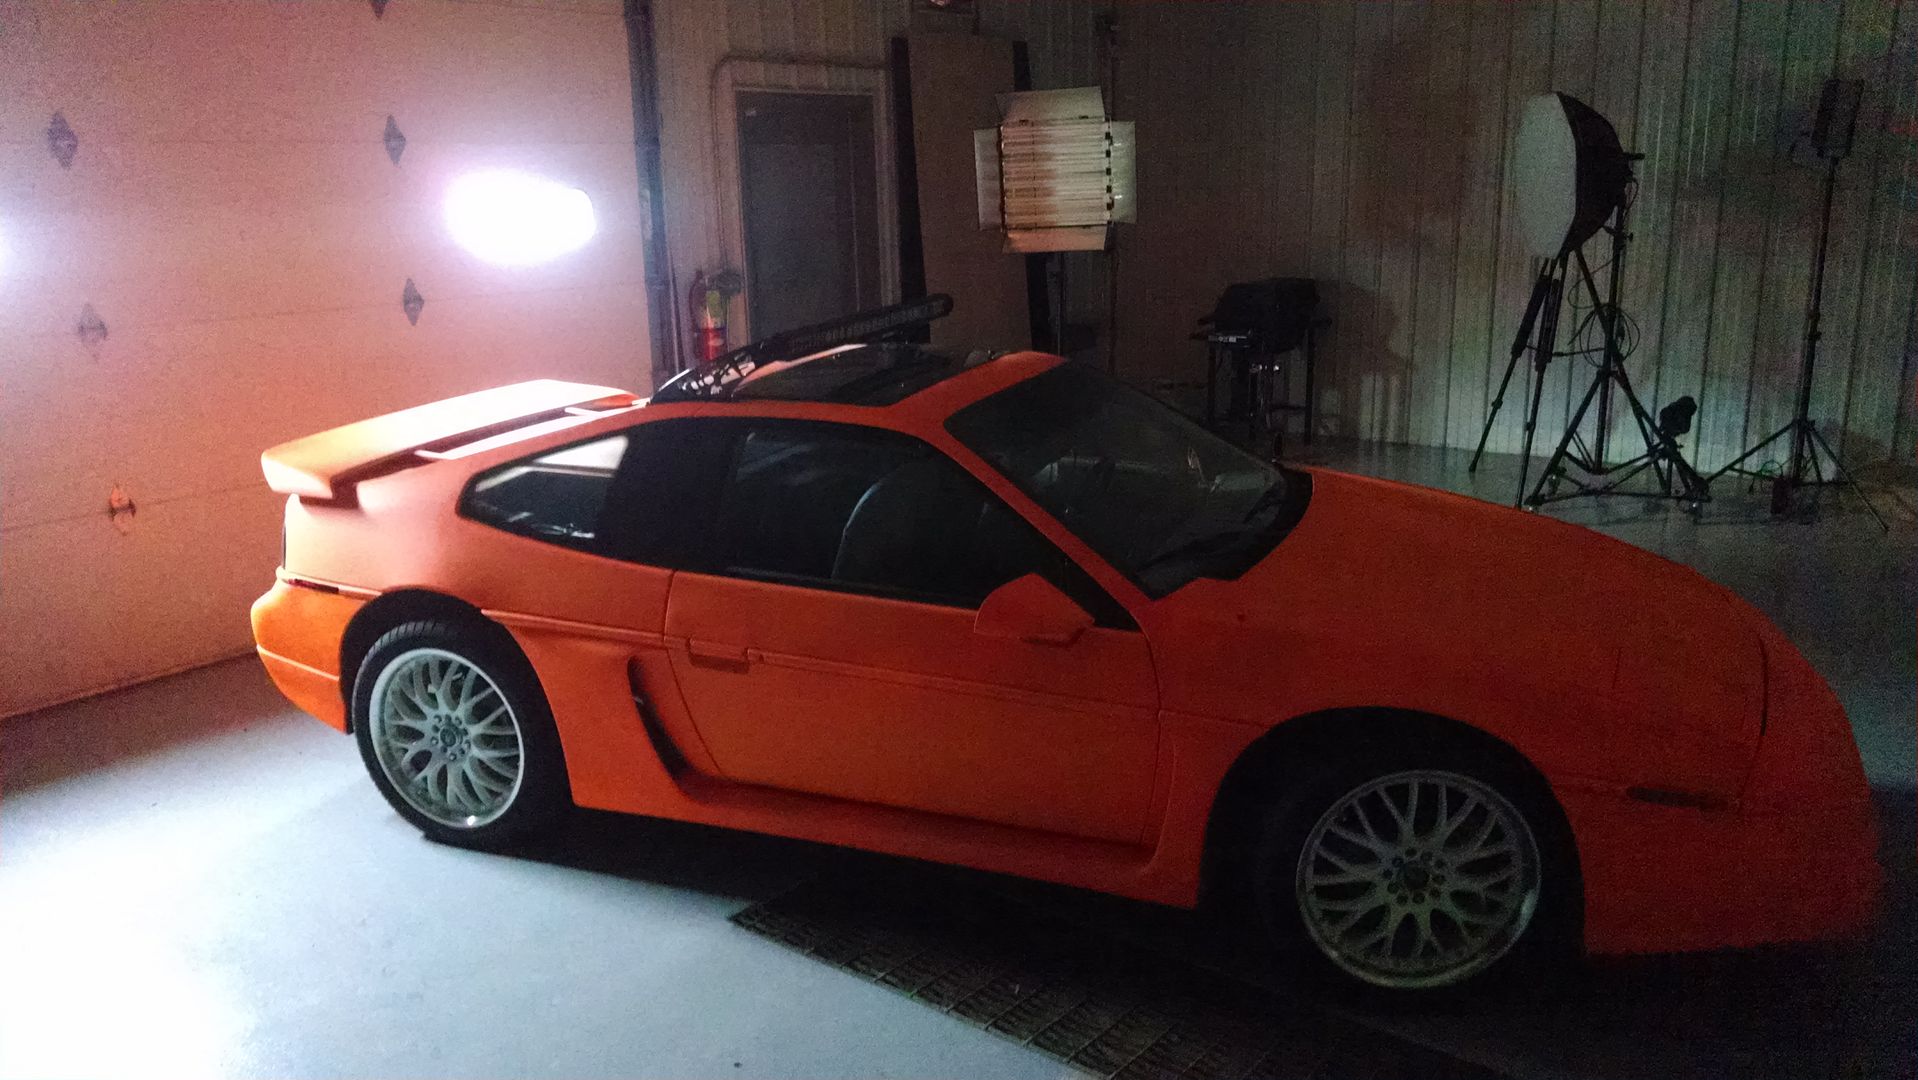
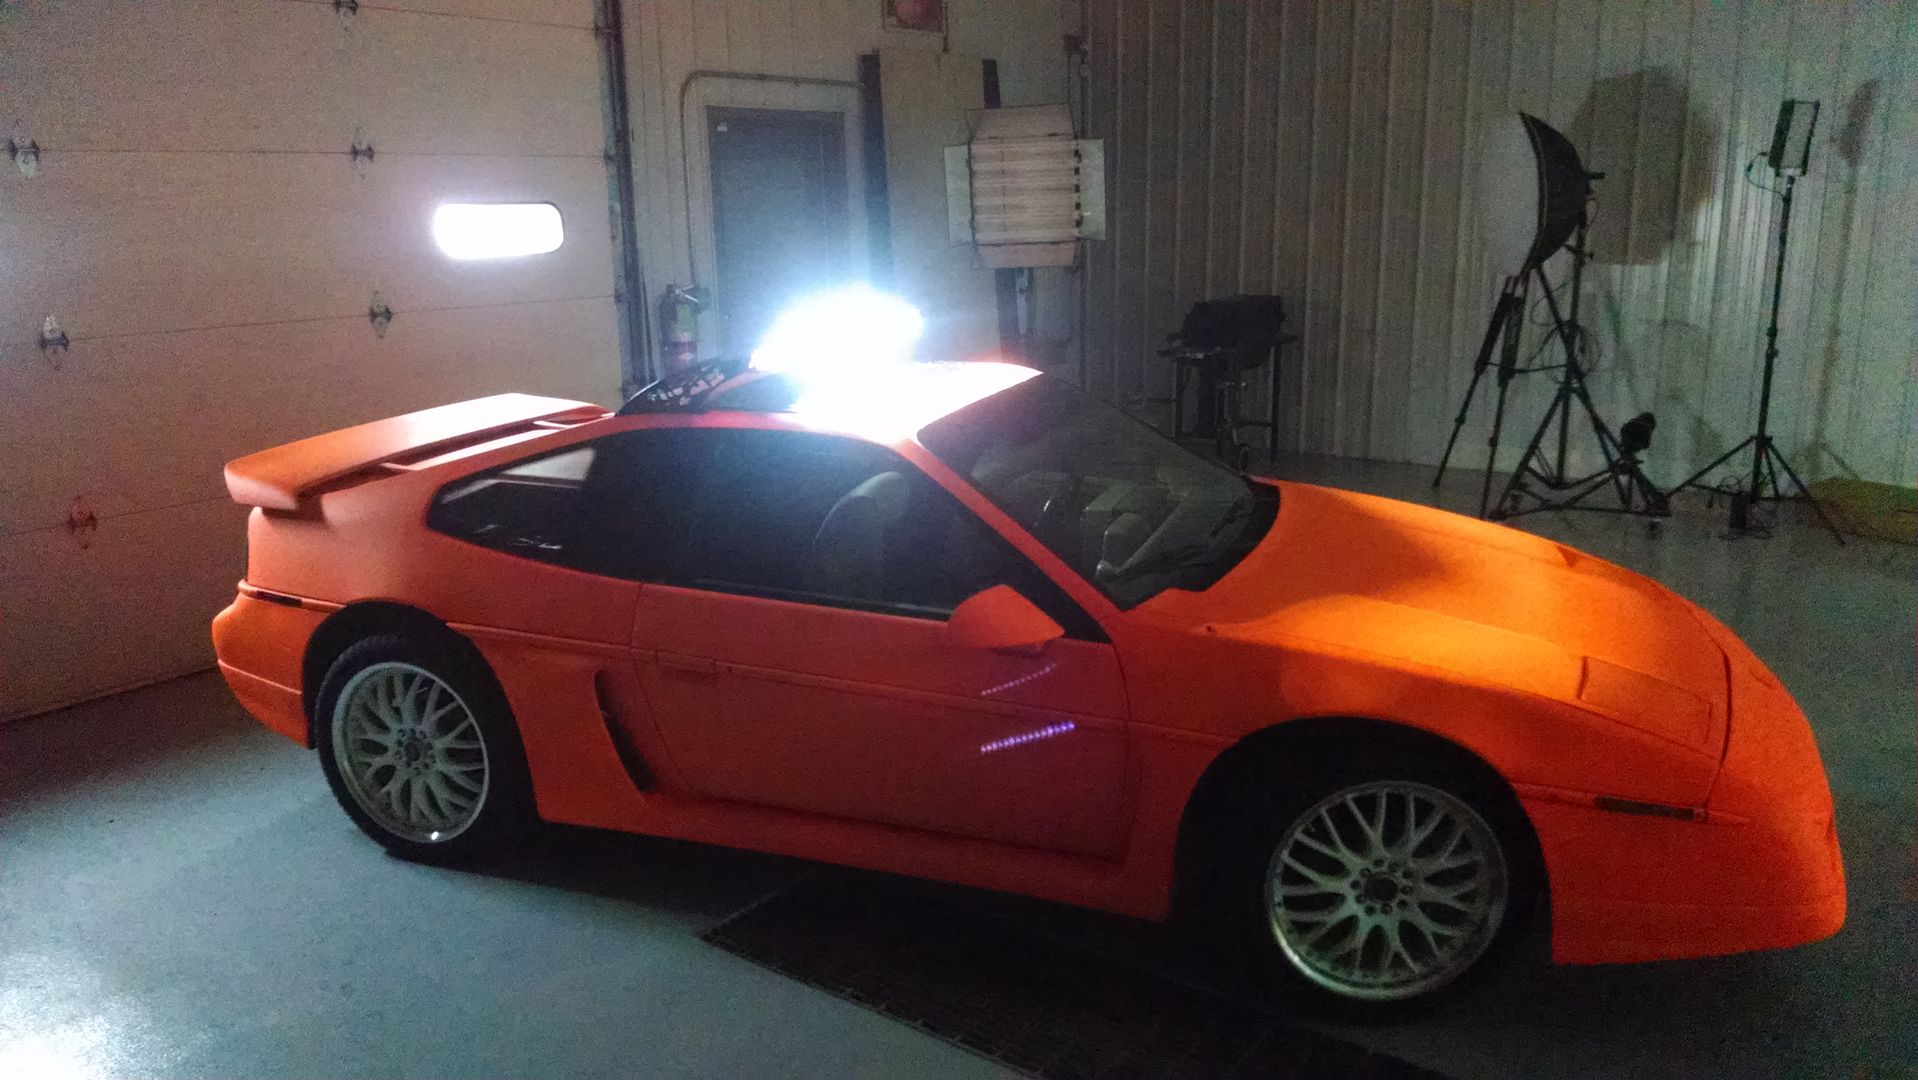
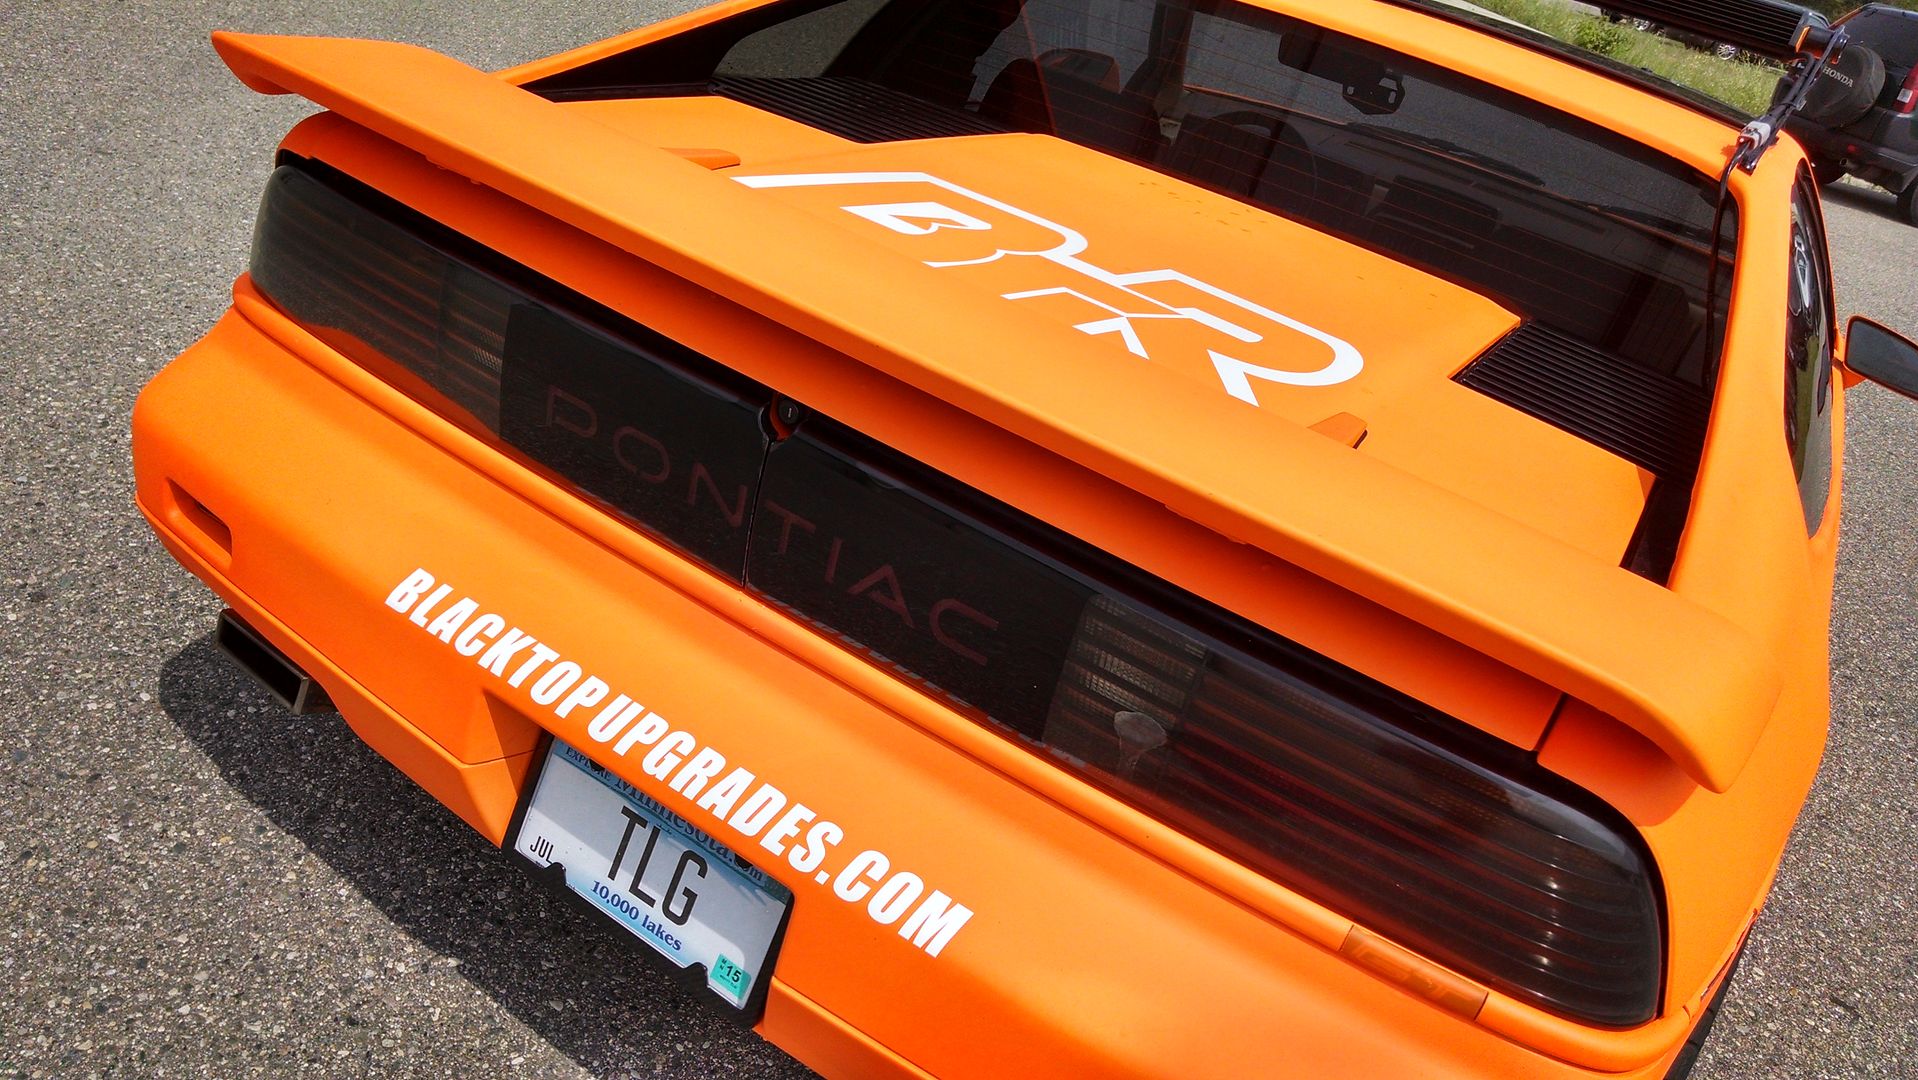
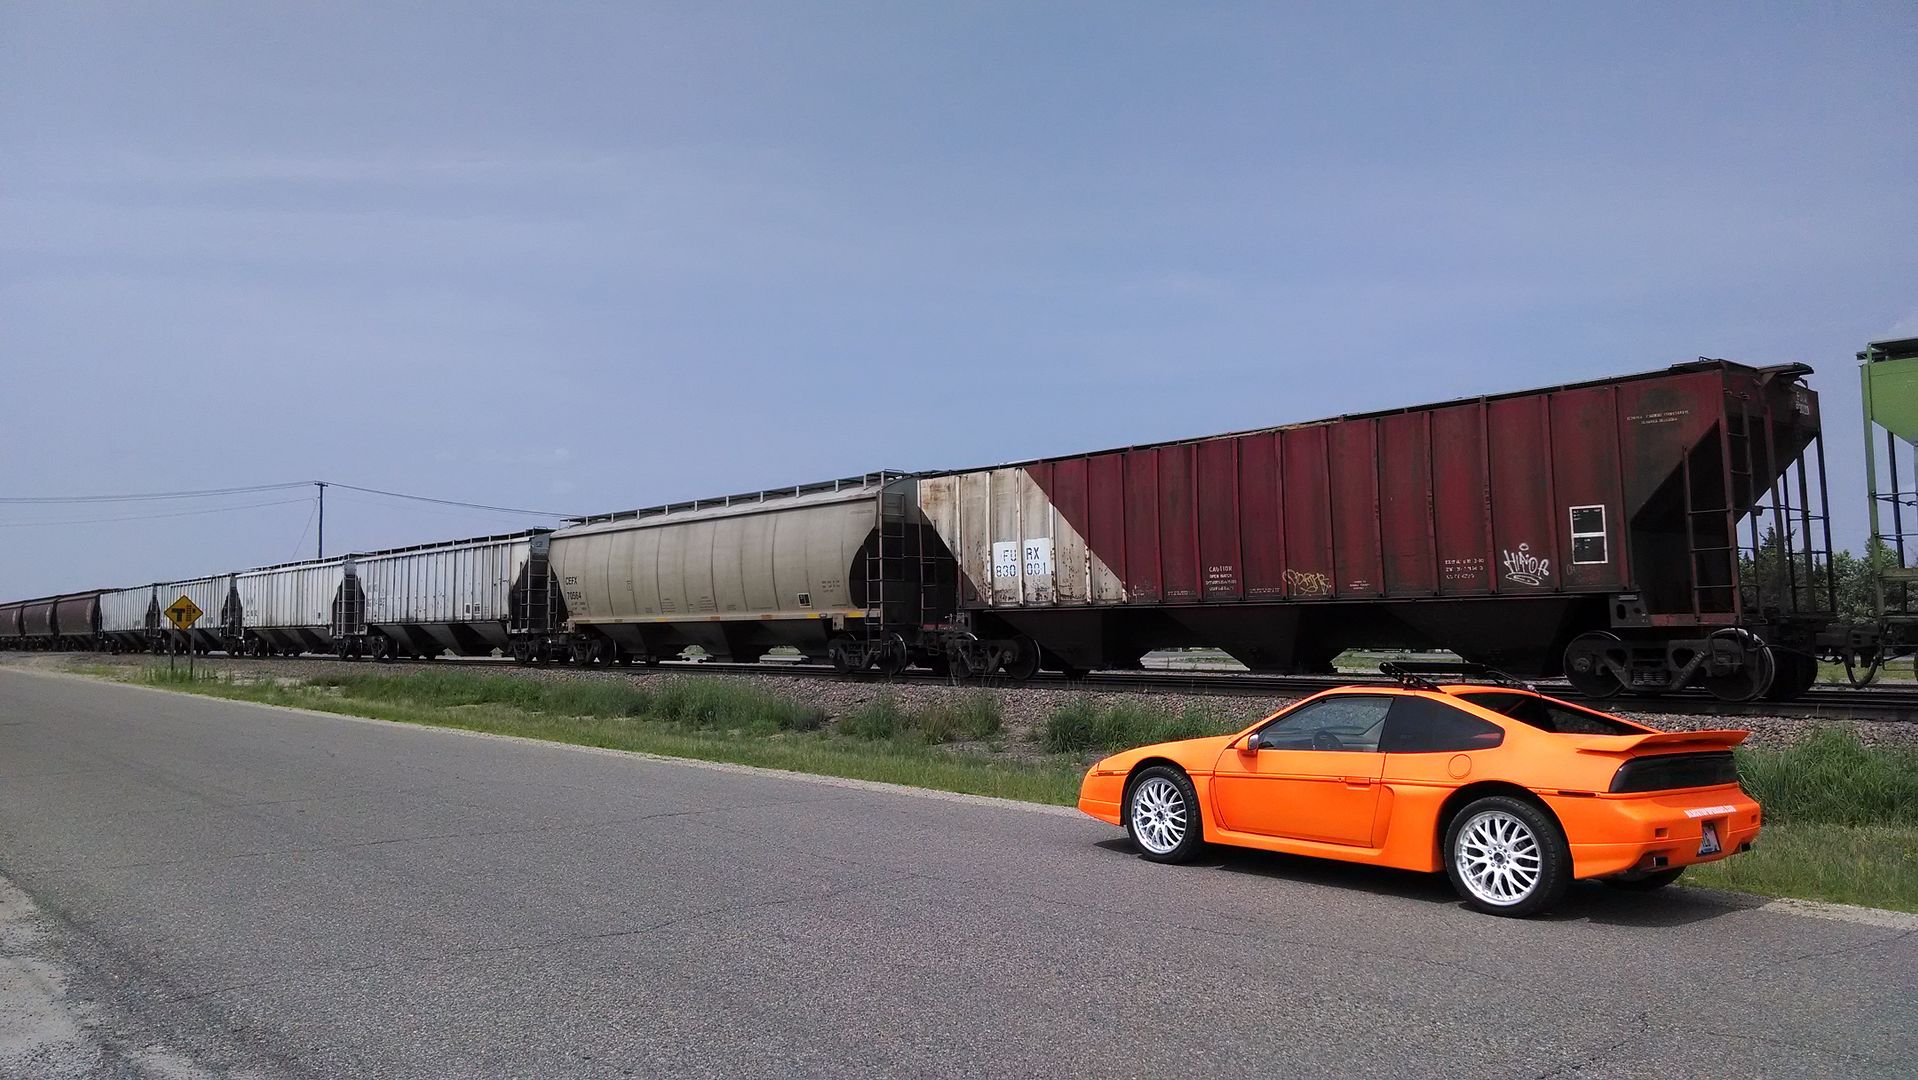
Here are a few finished and semi-finished pictures.
Like I said, we'll have some really nice pictures (not from a cell phone) tomorrow to post up. This is just an appetizer!
Overall the "paint job" went OK but not as good as we had hoped or as good as we were anticipating. It still looks cool from 10 feet, but up close it's pretty disappointing.
I would not really recommend doing this to your car unless it's a darker color and you're prepared to do a lot of the little nitpicky paint job prep things ahead of time like fixing scratches and rock chips. Also, make sure all your panels are the same color by using a base of some kind otherwise your final color might come out looking different on different panels.
Let us know what you think and stay tuned for more pictures tomorrow!
I gotta tell you. I don't hate it. I have some damaged areas on my notch that include the rear clip, decklid and rear facial/bumper cover. I thought I might do these in a gunmetal grey for a 2 tone effect. I would however try to fill the areas that are damaged before spraying. But all in all I think your car looks great
Did you get your stuff from dipyourcar.com? Is that Koi orange? From what I have read, the dip needs to cure for a week or so before it becomes more durable. Check out this video on waxing Plastidip: http://www.youtube.com/watch?v=3ua9GQgVAfs it looks like it really helps make it less likely to mark up and easier to clean. I did my trunk lid a few days ago and it seemed kinda soft the next day but it seems to be firming up as the days go by.
[This message has been edited by seajai (edited 07-09-2014).]
Great review. Very informative and in depth. I'm thinking about trying this next summer and this was a great read ahead. I'll be ordering some more things from you guys when I get back from Korea.
It appears that if you want a really good looking Plasti-dip finish you should spend as much work prepping as you would for a "real" paint job.
Or just have nice smooth paint. I guess the point is it doesnt cover defects. In my opinon you dont want to sand for it to adhere, or i would think it would be harder to remove.
[This message has been edited by 2.5 (edited 07-09-2014).]
This is a very good write-up and thank you for the time you took to put it together.
One of the things that would be interesting is to see how well this compares to performing the Rustoleum "rolled-on" paint jobs that were the rage a few years back. I actually did do that to a car I owned, and I have yet to even attempt to "dip" a whole car. My initial assumptions would be performing the Rustoleum paint job would be less initial cost investment, but more prep and labor intensive.
Did you get your stuff from dipyourcar.com? Is that Koi orange? From what I have read, the dip needs to cure for a week or so before it becomes more durable. Check out this video on waxing Plastidip: http://www.youtube.com/watch?v=3ua9GQgVAfs it looks like it really helps make it less likely to mark up and easier to clean. I did my trunk lid a few days ago and it seemed kinda soft the next day but it seems to be firming up as the days go by.
Thanks for the info! We did not know about waxing Plasti-Dip, but we'll definitely look into it. Looks like a great option to keep the finish looking better.
We did get the product from dipyourcar.com and we used the Firebelly orange color, not Koi.
Great review. Very informative and in depth. I'm thinking about trying this next summer and this was a great read ahead. I'll be ordering some more things from you guys when I get back from Korea.
Thanks!
Sounds good! Please let us know if you have questions or need help!
It appears that if you want a really good looking Plasti-dip finish you should spend as much work prepping as you would for a "real" paint job.
Absolutely right. This is something we wanted to test. Everyone online on forums for Plasti-Dip or on Youtube demonstrating this process seem to portray the idea that Plasti-Dip is a miracle paint job that takes no effort at all and obviously this is not true.
The question we have now is if you're going to go through all that work to prep the surface and make it perfect, why not just do a real paint job??
This is a very good write-up and thank you for the time you took to put it together.
One of the things that would be interesting is to see how well this compares to performing the Rustoleum "rolled-on" paint jobs that were the rage a few years back. I actually did do that to a car I owned, and I have yet to even attempt to "dip" a whole car. My initial assumptions would be performing the Rustoleum paint job would be less initial cost investment, but more prep and labor intensive.
Well, now our official opinion is that the prep is very important. I don't know how much a rolled-on Rustoleum paint job would cost, but we have about $350 + 8 hours into this one. I think if we were going to do it again we would probably be into it for another $450 (extra plasti-dip material for more coats) and much more time in prep. I think if you're going to do this Plasti-dip job very well you need to expect to spend about $500 and a whole weekend. The first day for prep and cleaning, then the next day to shoot the car.
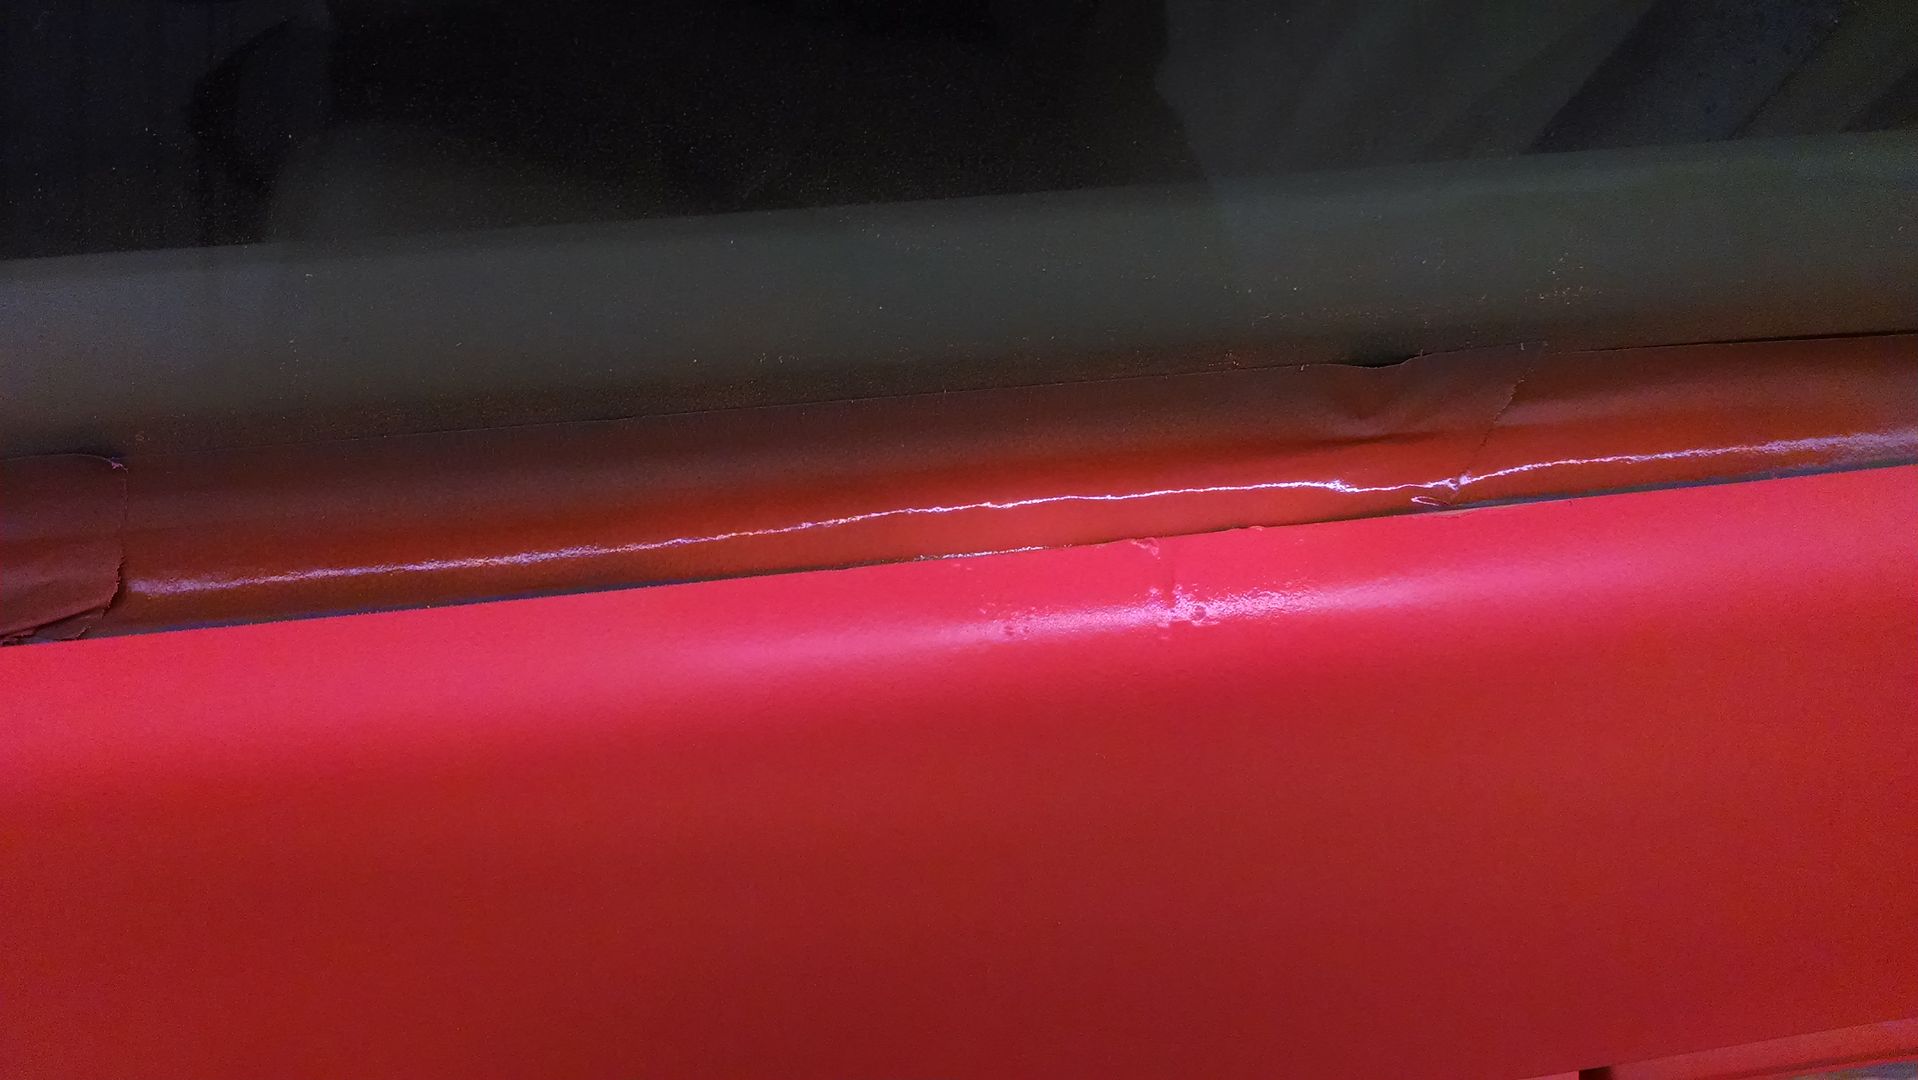
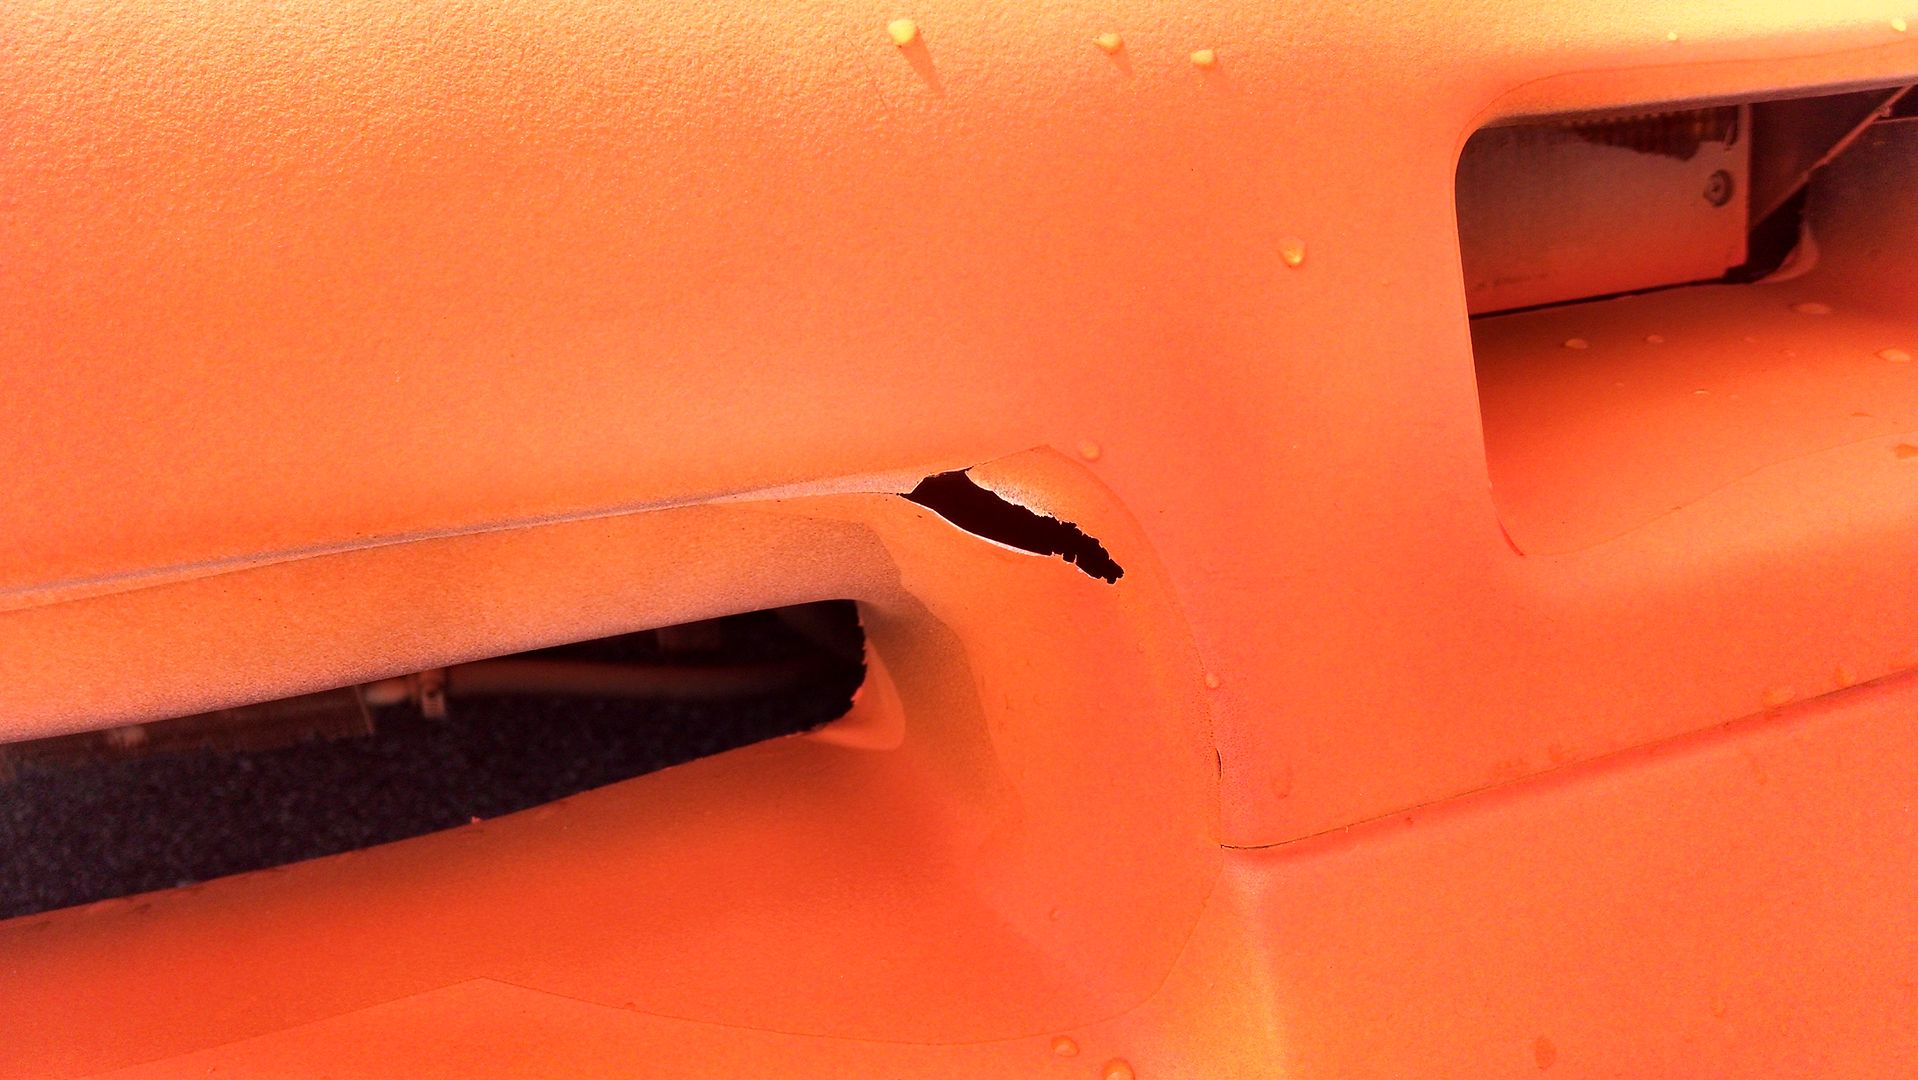
So, after washing the car again today to get it ready for the photoshoot we ran into another Plasti-Dip issue. The top corners on the front bumper are lifting:
This just goes to show again how important the prep stage is.
We actually started with a brand new replacement bumper from the Fierostore and didn't do much cleaning to it other than run over it one time with a degreaser spray. I believe this is the reason for the lifting, because the new bumper from the Fiero Store was kind of greasy when it showed up and probably needed to be cleaned better than what we did.
Now we will DEFINITELY have to re-do the front bumper, hopefully we'll have some better luck on the second time around.
You DO have to do at least minimal prep work. Painting over paint that is already flaking off like the hood edge you showed, never should have been done. The guy next door does them and they look good...if you like the look...for at least several years. His own Mustangs been done 2 or 3 years and looks the same now. You cant expect to paint over sap and bugs and expect anything to stay on. I do it over chrome wheels for winter and never had it peel until I took it off in the spring. I do clean them good first with wax and tar remover, then Dawn dish soap, rinsed well and dried.
You DO have to do at least minimal prep work. Painting over paint that is already flaking off like the hood edge you showed, never should have been done. The guy next door does them and they look good...if you like the look...for at least several years. His own Mustangs been done 2 or 3 years and looks the same now. You cant expect to paint over sap and bugs and expect anything to stay on. I do it over chrome wheels for winter and never had it peel until I took it off in the spring. I do clean them good first with wax and tar remover, then Dawn dish soap, rinsed well and dried.
Thanks Roger. I'd like to make sure people understand that one of the reasons we did it with minimal paint prep work is because all over the internet there are so many people doing it this way and claiming that their rust is covered, their scratches are gone and rock chips have disappeared through the magic of Plasti-Dip! We didn't believe them so we tried it ourselves and this is the outcome we got.
We've already stated that we recommend proper paint job prep work before doing a whole car, and this is simply the proof of that.
I've had my car dipped for a whole year, and did it in my driveway. Link in sig. I had NONE of the issues you did, and started with 4 different colored panels that were way less than perfect.
I have to assume that you didn't setup the gun right, and didn't remove the wax. Also, after it's cured, spray wax works well, and I always use microfiber cloth to wash and dry with no problems.
Aw come on! I am ordering plasti dip tomorrow and I thought I was going to be the first to use firebelly orange on a Fiero! I CANNOT BELIEVE YOU JUST DID THIS! Looks great guys!!!!!
Speaking of Plasti-Dip, I sprayed my EGR solenoid with the basic black spray and I have not set a Code 32 since. I wanted to seal up any and all minor vacuum leaks in and around the hoses and fittings, etc. I think it worked.
We are going to re-do this Fiero in Koi orange instead of Firebelly orange because we learned something very important yesterday about our choice of Plasti-Dip materials:
Apparently the fluorescent group of Plasti-Dip colors (which our Firebelly color is a part of) doesn't last long in direct UV rays, and typically will only last a month.
It doesn't cover as well so you need to spray way more dip than normal, AND it goes on much thinner so it doesn't hide imperfections! This is both a bummer (because we already sprayed the car...) and a relief (that we can do it again to get better results) so we have ordered more dip and we're going to do the car over.