Yesterday I brought home my new toy. It is an 87 Fiero GT with a 3800SC and a 4t-65e HD from a 2004 Grand Prix GTP with ~50,000-60,000 miles. The previous owner has done a lot of the hard work, (hopelully) all I have to do is little odds and ends to finish it up. Time for some pictures. Loading it up for the trip home: A quick pic from the parking lot where we stopped for lunch on our way back on to the good stuff the trunk needs a little work to be of any use as it sits in my driveway 17" BMW wheels with 12" Corvette brakes behind them. Hubs were switched over to Corvair hubs in order to change the bolt pattern All powdercoated suspension and crossmember with new poly bushings, Rodney's lowering ball joints and zero lash links, and new tie rods Same deal in the rear, all powdercoated with new poly, ball joints, and tie rods Coil overs with new struts 12" Corvette rear brakes as well with custom machine work to change the bolt pattern over.
It still has a few bugs to work out but I think I got a good deal. I plan to swap the interior over from my other Fieros and get it all cleaned up that's why there is no interior pics. I fixed the first thing on it yesterday, only one end of the decklid strut was connected so I bolted up the other end so now the deck stays up by itself. I am guessing that will probably be the easiest fix I'll have since it doesn't get much easier than that lol.
have you driven it yet....test drive or something?? these 3800 SC's, get!! i got a '98 3800 SC swap last year and was totally impressed. you got the Corvette brake swap already done!?? man mine came with tons of new parts but i got chonky brakes. yours on the other hand........awesome. you will love it after the bugs are smoothed over!! welcome to the club! soooo first to ask.....what color are you doing??
[This message has been edited by batousai666 (edited 06-09-2014).]
have you driven it yet....test drive or something?? these 3800 SC's, get!! i got a '98 3800 SC swap last year and was totally impressed. you got the Corvette brake swap already done!?? man mine came with tons of new parts but i got chonky brakes. yours on the other hand........awesome. you will love it after the bugs are smoothed over!! welcome to the club! soooo first to ask.....what color are you doing??
I took it around the block, the previous owner suggested that everything be gone over to make sure everything is tight first, he said he took it up and down his street, but I don't know if he put any actual miles on it yet, and the 3.4 pully is too small for the gen V blower with the mods the motor has from what I have been told so I don't want to drive it too much until I switch that out and I need to see what codes it's throwing. It has a small coolant drip coming from the hoses on the on the rear coolant fill so I am gonna try snugging up the clamps and seeing if that takes care of it. Couple little things before I take it for a test drive.
Long term, I will be swapping my tan/brown interior from my 86GT, and my intentions were to paint that sunset orange metallic, so that's probably what this will end up being. Although it might be fun to tear up the town with a multi-colored car for a while and have them give me a hard time about pulling into cruise night until I open the hood lol.
Yeah, he said it needed an alignment so maybe he didn't bother to tighten them up. Not real sure, but I'll definitely snug it up before I drive it anywhere. Found out the lugs weren't very snug this morning either, so I don't know if he just threw those wheels on it to get it on the ground or what, but I'm definitely going to check things over.
Had a pretty productive evening after work on the car. I switched out the stock open ended rusty lug nuts that were all missing their black caps for a nice set of Chrome ones. Before After
Also switched out the front turn signals, someone had tinted them black, but they were so black the light barely could shine through. I adjusted the latch on the decklid because it had a lot of play in it when it was closed and did not line up right. I also switched out the tail lights which had been tinted so dark that the lights were useless, and one of them was sanded on, not sure if they were trying to remove the tint or smooth it out or what exactly. Before You can really see how dark they were in this picture After
And I gave it a nice bath. What a difference some soap water and time can make.
[This message has been edited by zmcdonal (edited 06-10-2014).]
Don't forget to finish your wrap, you look like you are close to being done. What is your schedule like on Wednesday? I want to get over and see this while I am in your neck of the woods.
Now for the part that needs a little TLC, the interior.This is how it looked when I picked it up, except there was a pile of parts in the passenger seat area. This is the second car I've bought that the previous owner had mounted an aftermarket Grant steering wheel, and I just don't see the apeal. Not to mention that BOTH cars the bolts that hold the adapter to the wheel were loose, like real loose. I don't know about you, but a loose steering wheel in a 300+HP Fiero is a little bit scary. I got the pile of parts out of the passenger side so I can see what I am working with here.
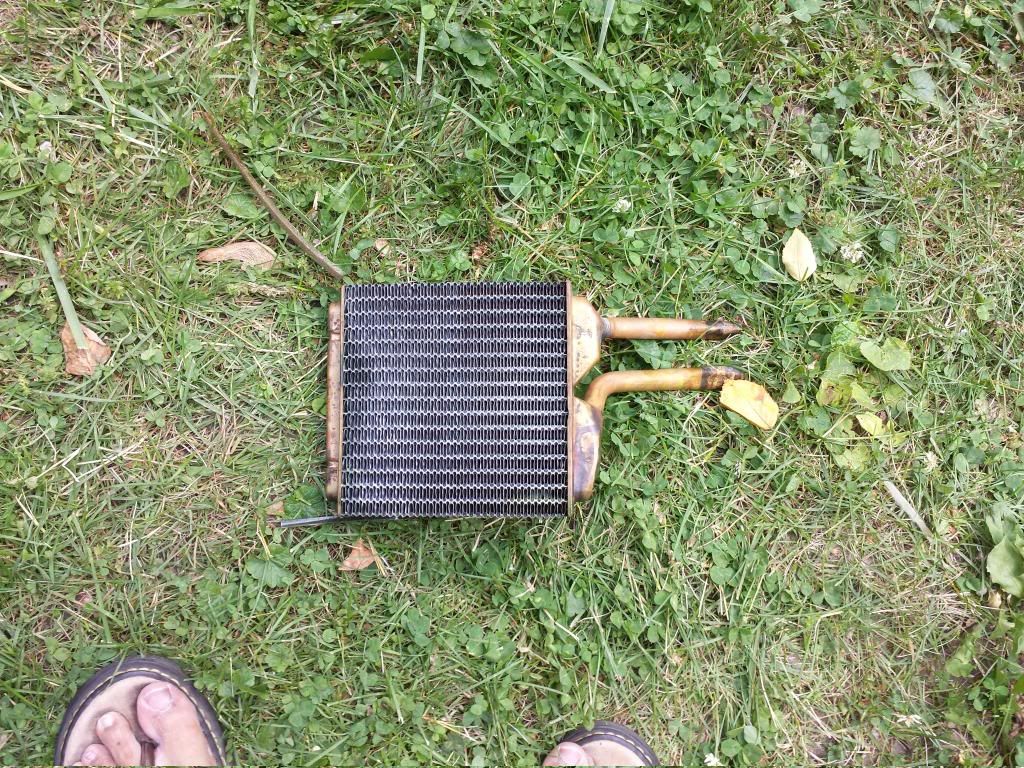
I started stripping the interior today because my tan/brown interior from my other car will be going in here. Almost ready to pull the dash. Found out that the heater core is leaking, which shouldn't be too bad to replace since I will have the entire dash removed. Better to find that out now, then after I finish the interior swap.
This is the interior that will be going into the car.
Should look pretty good when I get it finished up.
I took a few minutes this afternoon to tidy up some of the wiring in the engine bay as well. I am not sure why he ran the injector harness on the outside of the fuel rail in plain site, so I ran it the way that EVERYONE else seems to, which is behind the rail which makes for a much nicer cleaner look.
I've got a lot of work ahead of me but it should be worth it when I get finished.
What color(s) (I know how you like the multi-color cars haha) are you going to paint it? I assume that you are not going to do the vinyl on the new car.
What color(s) (I know how you like the multi-color cars haha) are you going to paint it? I assume that you are not going to do the vinyl on the new car.
Do you have lots of money? Have you driven a 3800 before? I had a 2.5 that I drove for 12 years, now a 3800. Quite a difference. One problem, keeping the right foot from pressing down a lot and often. Which leads to the money issue, because when you press down a lot and often it cost $$ as the gas mileage goes to heck. Plus other things like driving style changes and gets ummmm more radical. SO BEWARE of the pitfalls of the 3800, it can lead you astray. Many a good person have been lead astray by the 3800! Surgeon Generals Warning: It may cause a smile that wont go away.
Steve
[This message has been edited by solotwo (edited 06-13-2014).]
Do you have lots of money? Have you driven a 3800 before? I had a 2.5 that I drove for 12 years, now a 3800. Quite a difference. One problem, keeping the right foot from pressing down a lot and often. Which leads to the money issue, because when you press down a lot and often it cost $$ as the gas mileage goes to heck. Plus other things like driving style changes and gets ummmm more radical. SO BEWARE of the pitfalls of the 3800, it can lead you astray. Many a good person have been lead astray by the 3800! Surgeon Generals Warning: It may cause a smile that wont go away.
Steve
That's funny. No I have not driven one with a 3800 in it yet, been on a couple rides though. My daily driver has a modified 2.8 that doesn't get very good gas mileage so I am not too worried about that. From what I've read the 3800 should do better if I can keep my foot out of it.
Been working more on the interior swap. I think a couple more hours and I should have both cars stripped. Here are all the tan pieces I've removed in the staging area waiting to be installed. Have to install the new heater core first, I think the biggest hold up will be cleaning the carpets. Any tips on the best way to get the carpets clean? I think there are a lot of pop stains because there was pop sprayed everywhere in the interior of the car when I got it.
[This message has been edited by zmcdonal (edited 06-13-2014).]
I think the biggest hold up will be cleaning the carpets. Any tips on the best way to get the carpets clean?
Replacing the heater core while the dash is out is an excellent idea. 4 screws to remove the heater box cover are all out in the open. there is a long thin metal strap holding the core on the left side. When i did mine, the 7mm socket didn't wanna go on the bottom screw so i tried to bend the strap out of the way. It started to bend then snapped. Got another strap at the junkyard. Push the socket on the bottom screw - it might be a tight fit; don't bend the strap too far. Tighten everything SNUGGLY cause the screws will strip the plastic easily. Before you put in the new core, vacuum and wipe out the inside of the heater box. Maybe even wipe out the inside of all the black plastic ventllation housings - mine had black dust and dirt all over.
i would put the carpets in the driveway, get a bucket of warm water and some Tide or ERA clothes detergent and scrub them with a nylon brush. Hose them off and let them dry. Maybe even hit them with some Scotchgard carpet protector afterwards. Do the seat belts too.
Post some pics of the finished interior - that's gonna look awesome, especially if you paint the outside orange. Food for thought - did you see BMWguru's black and orange 2-tone paint ?
[This message has been edited by PaulJK (edited 06-14-2014).]
Replacing the heater core while the dash is out is an excellent idea. 4 screws to remove the heater box cover are all out in the open. there is a long thin metal strap holding the core on the left side. When i did mine, the 7mm socket didn't wanna go on the bottom screw so i tried to bend the strap out of the way. It started to bend then snapped. Got another strap at the junkyard. Push the socket on the bottom screw - it might be a tight fit; don't bend the strap too far. Tighten everything SNUGGLY cause the screws will strip the plastic easily. Before you put in the new core, vacuum and wipe out the inside of the heater box. Maybe even wipe out the inside of all the black plastic ventllation housings - mine had black dust and dirt all over.
i would put the carpets in the driveway, get a bucket of warm water and some Tide or ERA clothes detergent and scrub them with a nylon brush. Hose them off and let them dry. Maybe even hit them with some Scotchgard carpet protector afterwards. Do the seat belts too.
Post some pics of the finished interior - that's gonna look awesome, especially if you paint the outside orange. Food for thought - did you see BMWguru's black and orange 2-tone paint ?
Thanks for the tips, hopefully the carpets won't take too much work to get clean.
Yeah, I've seen BMWguru' car, his paint job is awesome. I have considered a two tone like that. It's a difficult decision, I'm glad I have a while to ponder it.
This morning I finished modifying the grant steering wheel with that goofy adapter. 2 of the 3 bolt holes in the adapter where almost striped out. I redrilled the pattern on the wheel itself to accept the stock GM fiero hub. In my opinion it looks much better, not to mention it's a lot more secure. Still not sure I will like the grant wheel since it's smaller, not really my thing, if rather have a nice recovered GT wheel but this will have to do until that time comes, maybe I'll grow to like it.
[This message has been edited by zmcdonal (edited 06-16-2014).]
Great looking car and swap so far, looks like a great find!
As far as the pulley is concerned you are right, a 3.4 is too small for a GenV without some additional mods. Luckily there's a modular pulley setup on there now so changing that will be quite easy. I'd recommend starting with a 3.6 pulley and go from there, that's why I have on my L67 engine with a GenV s/c on it.
Good luck with your build and be sure to keep posting pictures!
Thanks for the advice on the pulley, 3.6 sounds like a good place to start.
I had a pretty productive day today, I finished removing the dash and replaced the heater core. After that I took out the passenger side carpet and started to install sound deadening where the previous owner left off. [URL=http://s100.photobucket.com/us er/zdmcdonal/media/Mobile%20Uploads/20140617_123125_zpsj16pwq5g.jpg.html][/URL][URL=http://s100.photobucket.com/user/zdmcdonal/media/Mobile%20Uploads /20140617_121552_zpsvufw95zv.jpg.html][/URL][URL=http://s100.photobucket.com/user/zdmcdonal/media/Mobile%20Uploads/20140617_142717_zpszxoz8wgr.jpg.ht ml][/URL]
Making some progress. Not as much as I'd like because I have to work around the weather, the mosquitoes, my work schedule and yard work so I've only had a little bit of time to work on it.
Did I mention that this thread is going to have a lot of pictures. Lol.
[This message has been edited by zmcdonal (edited 06-19-2014).]
I like the BMW wheels. I noticed a dust cap to keep the wheel bearings clean missing. How is the transmission? What are you using for the sound deadening?
[This message has been edited by solotwo (edited 06-20-2014).]
Yeah both dust caps are missing, with the hub conversion I'm not even sure what kind I need to find. The castle nut sits flush with the face of the wheel so maybe that's why they're missing. I'm guessing that's why the front wheel centers are missing too.
The trans is a 4t-65e HD, which I'm assuming is OK. Haven't really driven it enough to be sure, it seemed to shift fine when I went around the block on the test drive, it looks real clean on the outside.
I'm using some stuff called b-quiet ultimate, which they claim works better than dynamat, and it's like 1/3 the cost so even if it's not quite as good I think it's worth it for the cost difference.
Finally got some more time to work on the car today. It's been raining like every day here. I finished installing the sound deadening material on the passenger side.
And I started cleaning the tan carpet. I've got the passenger side ready to go in, just need to wait for everything to get completely dry. It came out looking like new except for where it's slightly faded on the tunnel part, nothing I can do about that though.
Passenger side carpet and padding cleaned and installed.
Drivers side carpet removed from both cars. More sound deadening to do on the drivers side. Kind of glad he didn't get very far with his sound deadening, it's real thin and flimsy, must be that seal and peel stuff compared to the stuff I have been using.
Originally posted by exoticse: zmcdonal, congrats on a really good find. Man,...you have some really cool fieros.
Can't wait to see you finish this one.
Thanks, that's a big complement, they're both definitely slow projects due to budget.
Today I made a lot of progress. I removed the previous owners peel-n-seal sound deadening on the drivers side. I would not waste the effort of stripping the interior to put that down, I'm sure it can't do much if anything.
I was able to get all my sound deadening material installed as well as sprayed all the insulation to kill any mold or bacteria and installed the drivers side carpet. I just barely had enough material to finish up the back wall and floor, I will need to order more to redo the peel-n-seal on the doors.
I was also able to get the back firewall piece cleaned and installed. I think I may want to recover it with vinyl or fake suede at some point but it cleaned up real nice, so that I'll save that project for later. Right now I just need to get these intreriors swapped asap to get the 3rd fiero sold. The dark spots are just a little wet still, later I vacuumed out the rest of the water with the shampoo machine.
I also swapped in some pioneer 4x6's in the pillars, should sound a lot better than the 30 year old stockers.
Up next, the dash should be going in! It's starting to look pretty good.
[This message has been edited by zmcdonal (edited 07-03-2014).]
I spent some more time working on it this morning. Made some decent progress. Although the car had a brand new windshield when I bought it, I discovered that a large section of it was not attached to the car.
This is the section of adhesive that was not holding to the glass
I don't think he used the right kind of adhesive because from my experience windshield urethane dries like a rock and this stuff was still very flexible. Applied urethane to the glass and installed the windshield trim.
Also got the dash installed. This brown/tan dash is in fantastic shape, pretty much prefect aside from a little bit of the color worn in a couple small spots on the corners.
I also re-installed the hidden radio antenna closer to the front of the roof so that the antenna cable is long enough to make it to the radio and tested it out, seems to work great. I might have to invest in one of these for my other car because the under the fender mod kind of sucks.
I also installed some 4x10 Eclipse 2 ways that I had laying around in the dash.
I discovered yesterday that the spring on the accelerator pedal was broken. I thought it felt a little strange and extremely touchy when I drove it around the block and revved it up. Luckily I saved the pedal assembly from my old parts car, so that was a pretty quick fix.
Then I took a break and went to the casino and won $55 so it was a pretty good day.
It's starting to come together and look like an interior again. I installed the center counsel skeleton and the HVAC controls and radio and surround along with the aux gauges. Unfortunately for some reason the front speakers don't work. I bypassed the factory wiring and ran wires straight from the back of the head unit to the speaker and nothing, so I think I will blame the cheapo dual head unit that I had removed from a car I bought a while back so I could replace it with something better.
I do have a couple questions that I've come across while putting things back together. What are my options as far as how to fit the PCM under the arm rest? Currently is mounted to a tray and looks to be nicely installed, however the arm rest does not seem to go all the way back into place. So what are my options or what is the most common solution?
My next question deals with the cruise control. I know that the previous owner had a post on here a while back trying to work out bugs with the digital cruise and could not seem to get it to work. Is the small black box that's mounted to the drivers side of the counsel skeleton used for the cruise on a 3800 swap? My 2.8 had digital cruise installed but I know it also used this box as well.
[This message has been edited by zmcdonal (edited 07-09-2014).]
I am going to order some "b-quiet ultimate" and was wondering how much of the material did you used
I think I ordered 50 sq ft. I think, I ordered it a long time ago. I did the roof of my other fiero and the entire floor/back fire wall and center tunnel area of another. I would think it should be just enough to do both doors and floor of you don't do the roof.
Here is a short video clip, hopefully if I did this right, I took yesterday of it running in the driveway. The video is a little shaky but I think it sounds pretty good for a cell phone video.
[This message has been edited by zmcdonal (edited 07-09-2014).]
I also swapped in some pioneer 4x6's in the pillars, should sound a lot better than the 30 year old stockers.
They will sound a Lot better if you put insulation on the metal inside the B-pillars (behind the speakers) . Use the carpet insulation so the sound doesn't reflect off the metal and back toward the speakers. You can also put in battting if you want (pillow batting from WalMart works).
Looks super so far. Keep it up
[This message has been edited by PaulJK (edited 07-10-2014).]
They will sound a Lot better if you put insulation on the metal inside the B-pillars (behind the speakers) . Use the carpet insulation so the sound doesn't reflect off the metal and back toward the speakers. You can also put in battting if you want (pillow batting from WalMart works).
Looks super so far. Keep it up
I did put some carpet insulation behind the pillar speakers. I have to agree, it makes a big difference.
I finally figured out why my front speakers weren't working after spending a lot of time trouble shooting. Turns out the Eclipse 4x10's are dead. So it looks like I'll be in the market for some new dash speakers, I've been thinking of going the 5.25 component route instead of the 4x10's. In the process of trying to figure out the problem I switched out the cheapo Dual head unit because I thought maybe the front channel had gone out for an old Nakamichi that I forgot I had. I think it fits the car better and is probably way better quality even though it's older. It's also got an Aux input so that's pretty sweet.
I got the rest of the center counsel put together, not the final assembly, still need to velcro the PCM in place and hopefully find a fiero ECM tray that I can cut up so I can have mounting points for the armrest. Cleaned the carpet in the door panels and got those installed as well. I'll need to take them back off down the road as well for new dew wipes though. I figure I'll get the big stuff out of the way, then I can go back and finish up the little projects.
The more I work on this tan interior the more it has been growing on me. It looks really nice.
[This message has been edited by zmcdonal (edited 07-10-2014).]


 [/URL][URL=http://s100.photobucket.com/user/zdmcdonal/media/Mobile%20Uploads /20140617_121552_zpsvufw95zv.jpg.html]
 [/URL][URL=http://s100.photobucket.com/user/zdmcdonal/media/Mobile%20Uploads/20140617_142717_zpszxoz8wgr.jpg.ht ml]
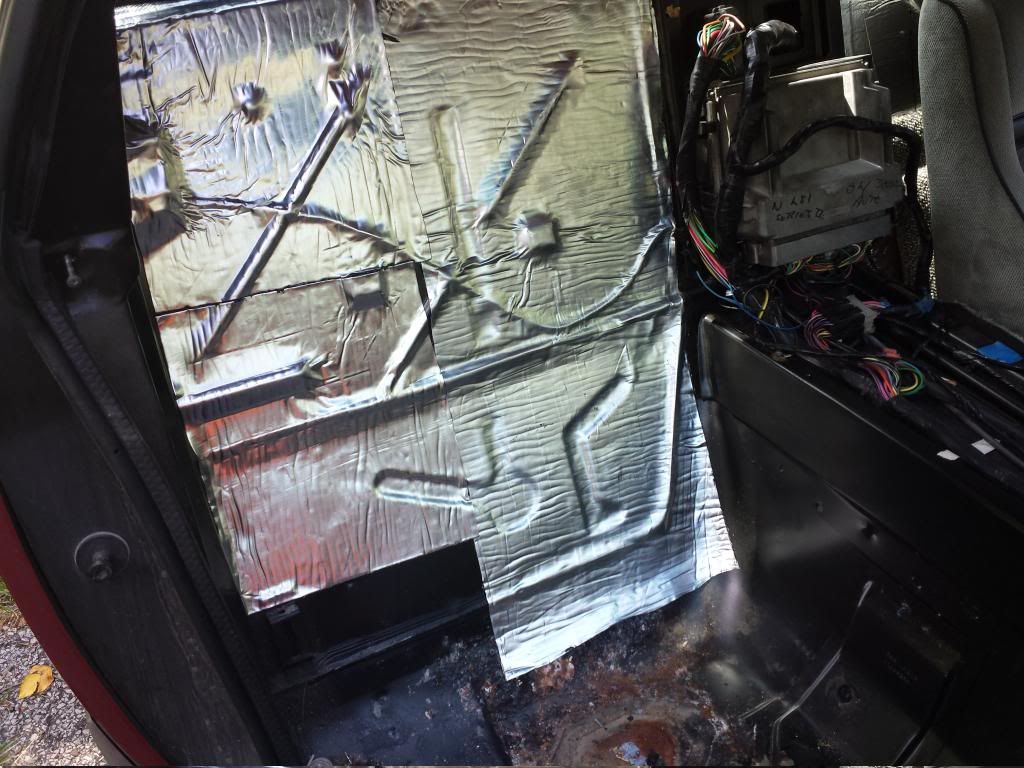 [/URL]