Good morning,
These are, and always have been Timo's product. I manufactured them here in the states on his behalf.
Full disclosure:
I still owe Timo a lot of money for the last batch of buckets. I used the majority of the incoming funds to pay off several large medical bills that had gone to collections. Timo was made aware of this a long time back, but may not have known the extent of the bills. My pay checks were being garnished another 35% on top of the 30% child support at the time.
I was in the hospital overnight very recently for signs of a heart attack. I am fine, my heart is healthy, and it was caused by stress.
Timo and I have not talked in a while, and that is my own fault due to not reinstalling Skype on my PC after a reformat. I have three people on my Skype list, and I rarely chat with them so it slips my mind to reinstall it.
I am unable and unwilling to continue making this product as I do not have the time or funds to do so at this point. I would love to continue making them, but I need to pay down owed funds before I do anything else.
My suggestion is that you partner with Timo to manufacture the next batch. He IS still out there, and is available on Skype from time to time. I had sent him both the PDF dimensional print as well as the cad file a long time back.
As for concerns about documentation:
Yes, the information about the light installation could be easier to find, but it is out there.
I'll make it easy:
Insert the clips in three of the four holes per light.
Insert the adjusters in the corresponding three mounts of the light so that the module is oriented upright in relation to the bucket (so the light doesn't get installed upside down)..
The adjuster rounded ball faces forward toward the lens.
Use a C-clamp. One end on the end of the plastic adjuster clip, the other on the hex end of the lamp. Compress slowly. It will resist, and then pop into place.
Wash, rinse, repeat for the rest.
Cutting the hood:
That's not a flaw of the bucket design. That's a flaw in your vehicle (things out of alignment?)..
Narrower buckets?
Yes, they could likely be narrowed by approx 1/4", but this may result in the low/high beam modules contacting during adjustment. There could also be some minor design tweaks made to the back side of the design, as well as the pivot points of the buckets.
There is definitely some contact in some places if you don't tweak the buckets a bit after installation (tweak = bend slightly)...
Should you need to do this? No.
Do you NEED to do this? No. Not on every car. Welcome to the wonderful world of varying tolerances in the vehicle during manufacturing.
The buckets that were originally manufactured in Germany were made from several pieces of steel welded together. This worked, made the buckets easy to assemble, but also resulted in spots to collect and hold water and form rust, weakening the weld point.
The re-design, approved by Timo and designed by a shop of very experienced engineers, resulted in a dimensionally identical bucket made from a single piece of steel and CNC bent with four weld points.
The only other parts on the buckets are the two brackets welded to the bottom for the lift arm.
These were MUCH stronger, and are much more difficult to "adjust" when aligning the light and making things fit perfectly. Other than this, they were identical.
Galvanized coating:
Several protective coatings were experimented with. Hot dip galvanized (think of the old school chain link fence with all the little blobs and sharp pieces), electro-plate galvanization, nickel plating, hard chrome, powder-coating...
A set of powder-coated buckets made it through one winter on the roads here in Minnesota before developing holes due to rust.
Without the coating, the mild steel wouldn't last two years on the road in a winter driven condition.
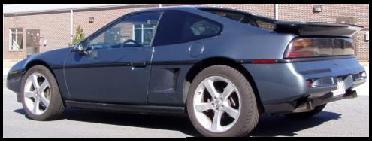
Why did we choose to protect the buckets? Because at the time of manufacture, I was daily driving my Fiero in the winter, and I wanted the product that both mine and Timo's name was attached to to last through anything.
I take pride in the products I have something to do with, even if my abilities to meet demand and pay my debts are sorely lacking, I wanted them to last.
Electro-plate galvanization was the final coating choice. It was the thinnest coating that fit within the price point and provided a very durable finish.
Can it be painted? Yes! With the proper prep work. My buckets have been painted and running for the last several years without any issues. There is some minor paint chipping caused by rocks.
How do you prep? You use a light acid wash to etch, or an acetone bath to remove any oils from skin contact and then an etching primer.
Two to three coats of primer, and then a coat or two (or three) of your color of choice. If this has issues, look closely at your paint/primer. They may not be compatible, chemically.
Again, my suggestion: Speak to Timo first. I realize he may be unavailable, but I have seen him pop up on Skype the other day, just after I re-installed. I'm sure he'd like to enter a partnership with someone who can invest the time and money, and make sure Timo gets his share on time.

I'm working on it Timo...
Chris
Jordan, MN
[This message has been edited by Synthesis (edited 02-25-2014).]


