Pennock's Fiero Forum
  General Fiero Chat
  Tail light delamination repair.

Post New Topic  Post A Reply
Email This Page to Someone! | Printable Version


next newest topic | next oldest topic
Tail light delamination repair. by LornesGT
Started on: 10-05-2013 11:22 PM
Replies: 21 (2420 views)
Last post by: seajai on 10-09-2013 12:40 AM
LornesGT
Member
Posts: 1356
From: Granite City, IL
Registered: Jan 2013


Feedback score: (4)
Leave feedback

Rate this member

Report this Post10-05-2013 11:22 PM Click Here to See the Profile for LornesGTSend a Private Message to LornesGTEdit/Delete MessageReply w/QuoteDirect Link to This Post
I have seen the suggested way to repair and it looks great but for the original look type people. I have an idea.
I used a very small drill bit to drill into the black plastic and managed to get a little water in between the two pieces. This "reconnects" the 2 together and looked good. I know the water will just create fog.

Since mine is in such great shape I don't want to experiment any further with it. Anybody want to donate a set or one so that I can try a glue or other material to see how it will turn out. It can be cracked ( preferably no holes or chunks missing) or pretty scratched up. Actually wanting to try a lighting mod to them as well. I will pay shipping.
IP: Logged
PFF
System Bot
AusFiero
Member
Posts: 11513
From: Dapto NSW Australia
Registered: Feb 2001


Feedback score: (2)
Leave feedback


Total ratings: 326
Rate this member

Report this Post10-06-2013 07:09 AM Click Here to See the Profile for AusFieroClick Here to visit AusFiero's HomePageSend a Private Message to AusFieroEdit/Delete MessageReply w/QuoteDirect Link to This Post
Skitime and I played with some sets years ago trying to inject stuff into them. Just didn't work. Air always gets trapped.
IP: Logged
seajai
Member
Posts: 1541
From: Linwood Township, Minnesota
Registered: Feb 2012


Feedback score:    (42)
Leave feedback


Total ratings: 52
Rate this member

Report this Post10-06-2013 08:59 AM Click Here to See the Profile for seajaiSend a Private Message to seajaiEdit/Delete MessageReply w/QuoteDirect Link to This Post
I'd be willing to bet the lens could be put into a vacuum press bag to draw out the trapped air in the delaminated areas after injecting the adhesive, and it would put a lot of clamping force down to help the adhesive stick. Maybe an extra poke hole or two in the area to help the air escape. A strip of felt laid over the repair area would absorb any excess adhesive and aid in the clamping force. I think this could have a good shot at working, the glue will be the key though. It would be a great solution to a very common problem. What type of adhesive do you think would be good to inject? CA glue? What material are the lenses made from? I have a bag and pump setup if anybody has a extra lens they want to send me to try. Maybe one with multiple areas to try different glues.

[This message has been edited by seajai (edited 10-06-2013).]

IP: Logged
Old Lar
Member
Posts: 13797
From: Palm Bay, Florida
Registered: Nov 1999


Feedback score: N/A
Leave feedback


Total ratings: 214
Rate this member

Report this Post10-06-2013 09:49 AM Click Here to See the Profile for Old LarSend a Private Message to Old LarEdit/Delete MessageReply w/QuoteDirect Link to This Post
The easiest fix is to mask off the clear areas and spry paint black, remove the tape and clear coat. Tony Kania offered that service at one time. I have a set I plan on sending to him. When done right they do look really good.
IP: Logged
Tony Kania
Member
Posts: 20794
From: The Inland Northwest
Registered: Dec 2008


Feedback score:    (7)
Leave feedback


Total ratings: 305
User Banned

Report this Post10-06-2013 12:19 PM Click Here to See the Profile for Tony KaniaSend a Private Message to Tony KaniaEdit/Delete MessageReply w/QuoteDirect Link to This Post
Good morning,

Yes, I have done several sets for the community. I no longer have the time to do these. Kid, work, life.

IMSAGT is the real innovator on this subject. He deserves the credit. I merely worked off of his great write up, and ran with it.

This is the thread that IMSAGT shared with us...

//www.fiero.nl/forum/F...1/HTML/074495-2.html
IP: Logged
XThirtySeven
Member
Posts: 149
From: Sacramento CA
Registered: Aug 2013


Feedback score: N/A
Leave feedback

Rate this member

Report this Post10-06-2013 02:00 PM Click Here to See the Profile for XThirtySevenSend a Private Message to XThirtySevenEdit/Delete MessageReply w/QuoteDirect Link to This Post
Another Idea is to Vinyl Wrap the lenses and leave the illuminated areas out. This would however get rid of the PONTIAC lettering across the back unless you could have the vinyl stenciled out prior to laying it. With this method you could also creat patterns over the brake and turn area such as horizontal stripes going over it. Just a thought.
IP: Logged
dobey
Member
Posts: 11572
From:
Registered: Sep 2001


Feedback score: N/A
Leave feedback


Total ratings: 371
User Banned

Report this Post10-06-2013 02:30 PM Click Here to See the Profile for dobeySend a Private Message to dobeyEdit/Delete MessageReply w/QuoteDirect Link to This Post
Mask off the clear area of the tail lenses where the brake/reverse lights actually show through. You can try to precision mask the PONTIAC too, if you want. Paint the rest with VHT Night Shades.
IP: Logged
JohnWPB
Member
Posts: 5181
From: West Palm Beach, Florida
Registered: May 2009


Feedback score:    (21)
Leave feedback


Total ratings: 144
Rate this member

Report this Post10-06-2013 05:10 PM Click Here to See the Profile for JohnWPBClick Here to visit JohnWPB's HomePageSend a Private Message to JohnWPBEdit/Delete MessageReply w/QuoteDirect Link to This Post
 
quote
Originally posted by seajai:

I'd be willing to bet the lens could be put into a vacuum press bag to draw out the trapped air in the delaminated areas after injecting the adhesive, and it would put a lot of clamping force down to help the adhesive stick.


That would probably pull air bubbles out of the glue and such, but it would not apply any "clamping force". The vacuum will pull air out, but not press things together. Think of a quarter sitting on top of another quarter in a vacuum chamber. The air will get sucked out, but it will not force the quarters together in any way.


quote
Originally posted by dobey:

Mask off the clear area of the tail lenses where the brake/reverse lights actually show through. You can try to precision mask the PONTIAC too, if you want. Paint the rest with VHT Night Shades.


No real need to mask anything yourself. FieroSails.com (3.4 of the way down that page) has made it super easy with a pre-made stencil to cover the lettering:


IP: Logged
dobey
Member
Posts: 11572
From:
Registered: Sep 2001


Feedback score: N/A
Leave feedback


Total ratings: 371
User Banned

Report this Post10-06-2013 06:46 PM Click Here to See the Profile for dobeySend a Private Message to dobeyEdit/Delete MessageReply w/QuoteDirect Link to This Post
 
quote
Originally posted by JohnWPB:
No real need to mask anything yourself. FieroSails.com (3.4 of the way down that page) has made it super easy with a pre-made stencil to cover the lettering:


Using the Night Shades paint, you can get away with not masking the letters at all. They'll just be tinted, but will still light up. But a few good coats will definitely get rid of ugly sight of the paint separating from the plastic on the inside. And it'll look much better than regular black paint, be it gloss, flat, semi-gloss, or whatever; plus you don't have to mask the lettering to do it, just the already clear part (or don't and just tint the whole thing).
IP: Logged
LornesGT
Member
Posts: 1356
From: Granite City, IL
Registered: Jan 2013


Feedback score: (4)
Leave feedback

Rate this member

Report this Post10-06-2013 08:50 PM Click Here to See the Profile for LornesGTSend a Private Message to LornesGTEdit/Delete MessageReply w/QuoteDirect Link to This Post
 
quote
Originally posted by AusFiero:

Skitime and I played with some sets years ago trying to inject stuff into them. Just didn't work. Air always gets trapped.


What did you inject? Water went in pretty easy even without injecting, I just kept touching the hole.

IP: Logged
LornesGT
Member
Posts: 1356
From: Granite City, IL
Registered: Jan 2013


Feedback score: (4)
Leave feedback

Rate this member

Report this Post10-06-2013 08:59 PM Click Here to See the Profile for LornesGTSend a Private Message to LornesGTEdit/Delete MessageReply w/QuoteDirect Link to This Post

LornesGT

1356 posts
Member since Jan 2013
That would probably pull air bubbles out of the glue and such, but it would not apply any "clamping force". The vacuum will pull air out, but not press things together. Think of a quarter sitting on top of another quarter in a vacuum chamber. The air will get sucked out, but it will not force the quarters together in any way.

That is not quite the same thing, pulling a vacuum between to items that are able to move would pull them together if there is a seal so that the pressure on the other side of the object remains greater (atmospheric). So the edge of the black plastic to the lens would need to be sealed.
IP: Logged
PFF
System Bot
Kitskaboodle
Member
Posts: 2972
From: San Jose, Ca.
Registered: Nov 2004


Feedback score:    (8)
Leave feedback

Rate this member

Report this Post10-06-2013 08:59 PM Click Here to See the Profile for KitskaboodleSend a Private Message to KitskaboodleEdit/Delete MessageReply w/QuoteDirect Link to This Post
 
quote
Originally posted by Old Lar:

The easiest fix is to mask off the clear areas and spry paint black, remove the tape and clear coat. Tony Kania offered that service at one time. I have a set I plan on sending to him. When done right they do look really good.


For the record Eric Hinnekamp (aka Racingman24) used to paint them on the outside and lacquer them as we'll. He did one heck of a job.
Mine still look great years later. Alas, I haven't seen him here on the Forum in years.
Kit
IP: Logged
seajai
Member
Posts: 1541
From: Linwood Township, Minnesota
Registered: Feb 2012


Feedback score:    (42)
Leave feedback


Total ratings: 52
Rate this member

Report this Post10-06-2013 09:14 PM Click Here to See the Profile for seajaiSend a Private Message to seajaiEdit/Delete MessageReply w/QuoteDirect Link to This Post
Placing an item in a bag and removing all the air puts atmospheric pressure on every square inch of what ever is in the bag, that is approximately 2160 pounds per square foot. I use vacuum pressing all the time when veneering table tops or doing bent wood laminations. It's also used in the production of carbon fiber parts as well.
IP: Logged
LornesGT
Member
Posts: 1356
From: Granite City, IL
Registered: Jan 2013


Feedback score: (4)
Leave feedback

Rate this member

Report this Post10-06-2013 11:30 PM Click Here to See the Profile for LornesGTSend a Private Message to LornesGTEdit/Delete MessageReply w/QuoteDirect Link to This Post
 
quote
Originally posted by seajai:

Placing an item in a bag and removing all the air puts atmospheric pressure on every square inch of what ever is in the bag, that is approximately 2160 pounds per square foot. I use vacuum pressing all the time when veneering table tops or doing bent wood laminations. It's also used in the production of carbon fiber parts as well.


I think the biggest thing to over come is the glue discoloring in the sun.

IP: Logged
project34
Member
Posts: 2424
From: Menasha
Registered: Jan 2007


Feedback score: (1)
Leave feedback

Rate this member

Report this Post10-06-2013 11:43 PM Click Here to See the Profile for project34Send a Private Message to project34Edit/Delete MessageReply w/QuoteDirect Link to This Post
 
quote
Originally posted by Kitskaboodle:

For the record Eric Hinnekamp (aka Racingman24) used to paint them on the outside and lacquer them as we'll. He did one heck of a job.
Mine still look great years later. Alas, I haven't seen him here on the Forum in years.
Kit

Actually, Racingman24 has initiated dozens of threads betwween 2007 and 2013, but apparently none outside of the "Totally O/T" section of this forum in over 6-1/2 years. Maybe one could try sending him a P.M., because otherwise --- given his focus on initiating threads within "Totally O/T" --- he presumably won't see this thread in "General Fiero Chat".

I'd think that if nothing else, he'd appreciate learning of your compliments re his work on Fiero taillights.
IP: Logged
Kitskaboodle
Member
Posts: 2972
From: San Jose, Ca.
Registered: Nov 2004


Feedback score:    (8)
Leave feedback

Rate this member

Report this Post10-07-2013 12:28 AM Click Here to See the Profile for KitskaboodleSend a Private Message to KitskaboodleEdit/Delete MessageReply w/QuoteDirect Link to This Post
Ok, thanks for the input on Racingman24. I don't go to the OT section very much.
Oh, and he already knows what I think of his workmanship.
Kit

[This message has been edited by Kitskaboodle (edited 10-07-2013).]

IP: Logged
infinitewill
Member
Posts: 2327
From: Overland Park, KS U.S.A.
Registered: Mar 2009


Feedback score:    (55)
Leave feedback


Total ratings: 85
Rate this member

Report this Post10-07-2013 08:52 AM Click Here to See the Profile for infinitewillSend a Private Message to infinitewillEdit/Delete MessageReply w/QuoteDirect Link to This Post
.

[This message has been edited by infinitewill (edited 01-05-2016).]

IP: Logged
Tom Slick
Member
Posts: 4342
From: Alvarado, TX
Registered: May 2003


Feedback score:    (24)
Leave feedback


Total ratings: 66
Rate this member

Report this Post10-08-2013 06:43 PM Click Here to See the Profile for Tom SlickSend a Private Message to Tom SlickEdit/Delete MessageReply w/QuoteDirect Link to This Post
Since I'm a big fan of Plasti-Dip and several people have done it, I'd figured i would give it a try. I sprayed two light coats of black PD, a lot of other people will spray about 3 to 4 coats of gloss PD to give it the nice shine and peel ability. I want mine to stay at the matte finish so I sprayed 3 to 4 coats of smoke PD over the black. The light is still visible when the brakes are applied and when the lights are turned on. Here are a couple of pics of the outcome.


I could of used Night Shade but I didn't want anything permeant.
IP: Logged
LornesGT
Member
Posts: 1356
From: Granite City, IL
Registered: Jan 2013


Feedback score: (4)
Leave feedback

Rate this member

Report this Post10-08-2013 07:30 PM Click Here to See the Profile for LornesGTSend a Private Message to LornesGTEdit/Delete MessageReply w/QuoteDirect Link to This Post
 
quote
Originally posted by seajai:

I'd be willing to bet the lens could be put into a vacuum press bag to draw out the trapped air in the delaminated areas after injecting the adhesive, and it would put a lot of clamping force down to help the adhesive stick. Maybe an extra poke hole or two in the area to help the air escape. A strip of felt laid over the repair area would absorb any excess adhesive and aid in the clamping force. I think this could have a good shot at working, the glue will be the key though. It would be a great solution to a very common problem. What type of adhesive do you think would be good to inject? CA glue? What material are the lenses made from? I have a bag and pump setup if anybody has a extra lens they want to send me to try. Maybe one with multiple areas to try different glues.


I googled UV glue and I get stuff related to head light repair. I am just not sure with the lack of air the glue would dry but I am will to try.
I have a air conditioner vacuum pump but no bag. I would try sucking the glue from one end of the delam to the other with what I have.
Anybody want to send a set to me and seajai?

[This message has been edited by LornesGT (edited 10-08-2013).]

IP: Logged
seajai
Member
Posts: 1541
From: Linwood Township, Minnesota
Registered: Feb 2012


Feedback score:    (42)
Leave feedback


Total ratings: 52
Rate this member

Report this Post10-08-2013 10:34 PM Click Here to See the Profile for seajaiSend a Private Message to seajaiEdit/Delete MessageReply w/QuoteDirect Link to This Post
 
quote
Originally posted by LornesGT:


I googled UV glue and I get stuff related to head light repair. I am just not sure with the lack of air the glue would dry but I am will to try.
I have a air conditioner vacuum pump but no bag. I would try sucking the glue from one end of the delam to the other with what I have.
Anybody want to send a set to me and seajai?


I bought my vacuum bag here. They're not cheap, I spent the the money on a poly bag because vinyl can't take too much stretch.
IP: Logged
LornesGT
Member
Posts: 1356
From: Granite City, IL
Registered: Jan 2013


Feedback score: (4)
Leave feedback

Rate this member

Report this Post10-08-2013 10:54 PM Click Here to See the Profile for LornesGTSend a Private Message to LornesGTEdit/Delete MessageReply w/QuoteDirect Link to This Post
Does the vacuum pump have to run continuously? How many cfm pump is needed?
IP: Logged
PFF
System Bot
seajai
Member
Posts: 1541
From: Linwood Township, Minnesota
Registered: Feb 2012


Feedback score:    (42)
Leave feedback


Total ratings: 52
Rate this member

Report this Post10-09-2013 12:40 AM Click Here to See the Profile for seajaiSend a Private Message to seajaiEdit/Delete MessageReply w/QuoteDirect Link to This Post
 
quote
Originally posted by LornesGT:

Does the vacuum pump have to run continuously? How many cfm pump is needed?


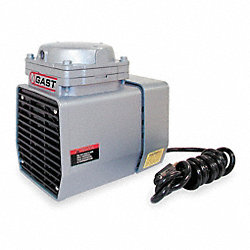
I have a GAST brand single diaphragm pump rated at 1.1 cfm. It works fine with the size bag I have and will evacuate all the air within a minute. I just let mine run, that way I'm sure to get every bit of air out of the bag. And it also makes up for any air leaks I may have in my bag closure.

IP: Logged

next newest topic | next oldest topic

All times are ET (US)

Post New Topic  Post A Reply
Hop to:

Contact Us | Back To Main Page

Advertizing on PFF | Fiero Parts Vendors
PFF Merchandise | Fiero Gallery | Ogre's Cave
Real-Time Chat | Fiero Related Auctions on eBay


Copyright (c) 1999, C. Pennock