"Why build one when you can build two for twice the price" quote from the movie Contact
This odyssey started back last September when I purchased my first Fiero and has evolved into building a set of twins I am calling Jack and Jill.
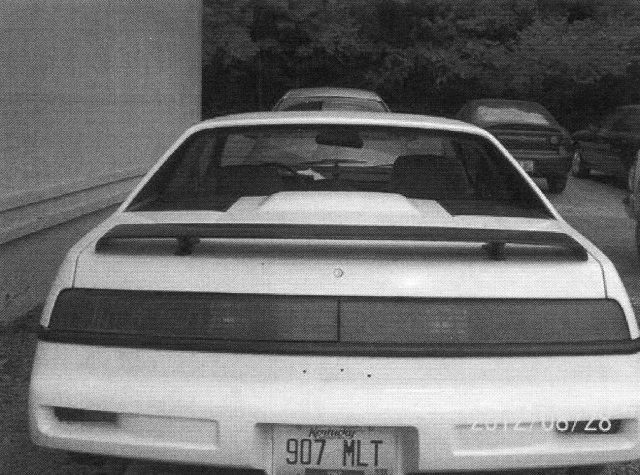
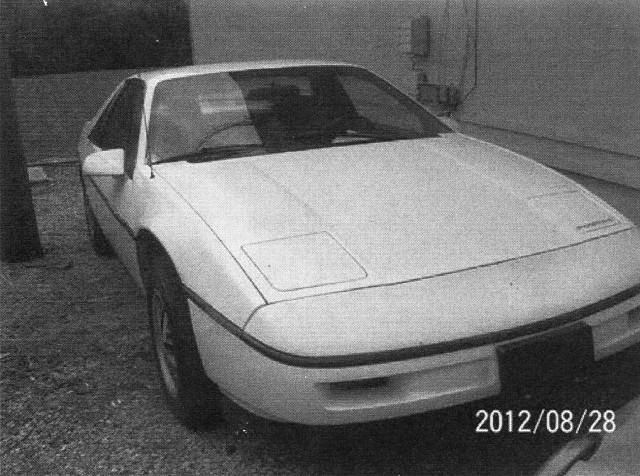
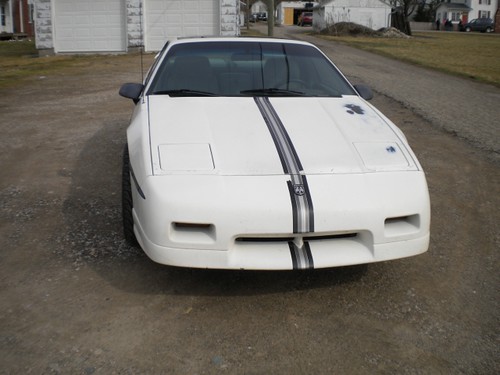
Jack is a white 88 Fiero Notchback and Jill, which was acquired in March, is a white 88 GT.
Over the next months, as I get pictures downsized and up on the web to be referenced, I will document the build of both cars. This will likely be on-going over the summer as I am about 1/3 the way through Jack's build and probably 1/2 way through Jill's.
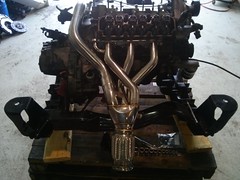
Jack is being powered by a 5.3L Vortec mated to the G6 6-speed and Jill is a 3800SC with a 5-speed Getrag.
Both will be fairly custom on the inside but with mild mods on the exterior.
When I acquired Jack, I had originally considered doing a kit car but in the end, decided to keep it as a Fiero.
For those of you who know how much Murphy hits single build, you can well imagine the challenges of building two at once.
So I hauled it back to Mount Vernon and dropped it off at the local GM dealer. Since it had an out of state title, the first step is to get an inspection as required by the Title office and the GM dealer is one of the authorized places. Since I believe in safety inspections, I also had the dealer run through their full inspection process. The dealer in KY said it would pass an Ohio safety inspection, but I take the talk of a buy here pay here dealer with a few grains of salt.
and the GM dealer cannot get any of the parts. I ended up sourcing and supplying them and it took until the end of November before it was back in my hands. I ended up having to send the old steering rack in for a rebuild.
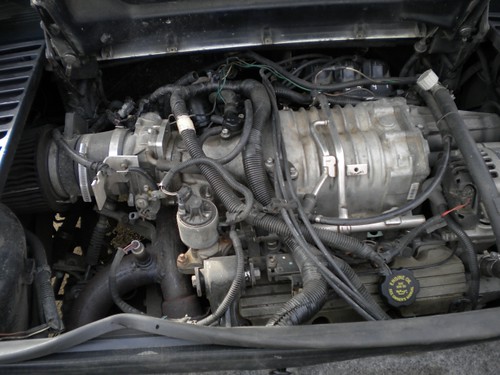
When I finally got it back, I took it out to my mechanic who is a country mechanic and lives about 17 mi outside of Mount Vernon. Putting up on the hoist, we took a good look at the engine and trans. According to the seller, the PO had rebuilt the engine. I am not sure how because it was leaking oil and the dust cover wasn't even secured to the transmission. Ok -- time to replace and it might as well be a V8 as I have followed what Archie has been up to on and off for 20 years.
So the next few months were spent acquiring parts. Archie's V8 conversion, a brand new G8 6-speed, Archie's conversion for the 6-speed, his waterfall and door panels for the interior, Pisa fiero's ZR2 dash, fierosails notchback sail panels, S-10 booster and cradle reinforcements from other PFF members, various parts from E-bay sellers, a spare cradle, and a complete set of front and rear suspension parts, new shock and struts, a laundry list of stuff from Rodney and Fiero warehouse and a slew of electronics.
I went shopping for a used engine and the only one I could find within the area was a 5.3l Vortec from a salvage yard -- supposed to be totally usable with about 100k on it.
The salvage yard dropped the engine off in my mechanics driveway in mid DeC. When he came out to see what the noise was, the driver was already turning out of the driveway and onto the road. It sat in his garage for about 6 weeks until we were ready to pull the heads and deliver them to another local racer who would polish and port the heads, clean the fuel rails and get them ready to go. This took until early Feb.
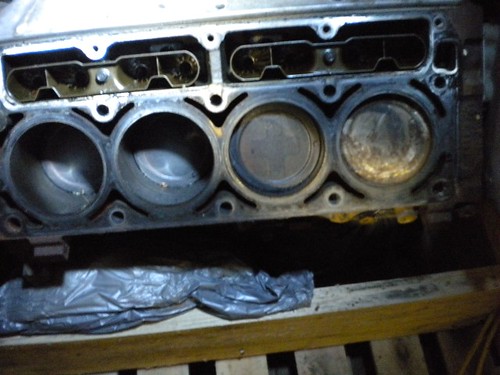
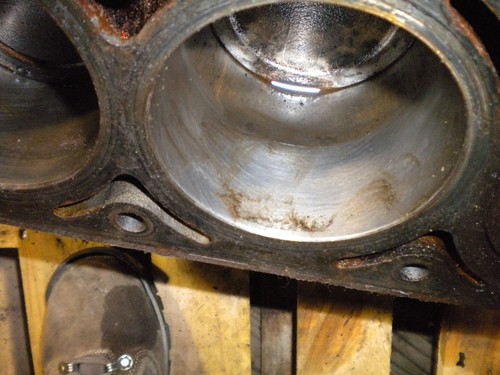
As the point where he was going to be finished, the mechanic and I started getting the bottom end ready. When we first pulled the heads, we discovered that the cylinder walls still showed all the honing marks and we found reman marks on the heads. Based on the wear, it looked like there wasn't any more than 25k mi on the engine. Obviously the original vehicle 2006 Yukon had a rebuild engine installed at around 80k. Bonus!
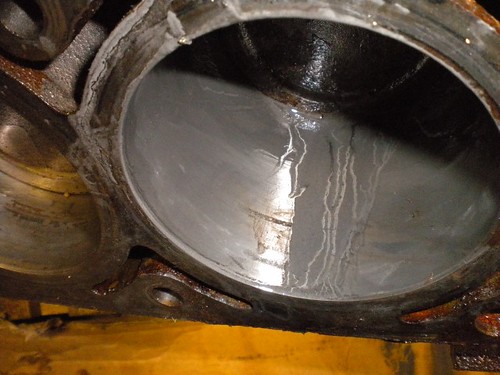
However as I was cleaning the cylinders of crud I started feeling etch marks in the cylinder walls that corresponded to the amount of crud on the top of the pistons on two of the cylinders. On one cylinder there was an etch line at the top and another one that would match the second set of rings on the piston.
I remember when we took the intake off, there was some gooey goop that was spilling out of it.
Analysis --- I believe the accident the truck was in that resulted in it being a write-off cause the truck to end up on its side or full turtle. This caused the antifreeze in the block ( good old GM Dextron) to spill back up all the way into the intake. When the vehicle was righted, the coolant leaked back down through the manifold and down onto the pistons. the amount per piston was dependent on how open each of the intake valves were so two cylinders got the worst of it since the rest were mostly closed. On one cylinder the opening on the ring was towards the center of the engine so the Dextron pooled at the top of this ring and only etched above it. However on the other cylinder, the ring opening was oriented towards the outside and allowed the Dextron to leak down and pool on the second ring resulting in two etched semi-circles on that cylinder.
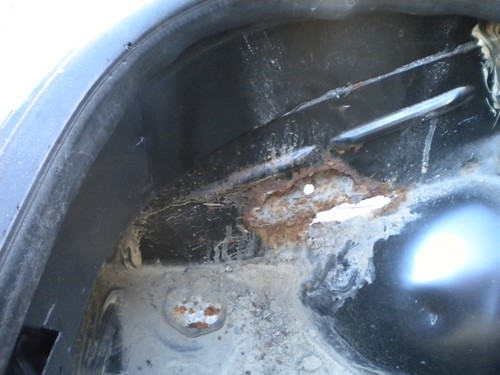
When we pulled the bottom off, the crank was also severely scaled with rust.
Pictures to follow
So the engine had to go off to the machine shop for a rebuild.
Jill was the result of a post I came across in the Mall in march. The seller was about 15 mi away from me and I figured it was worth a look. When I did the test drive it was really rough. The seller called back the next day to tell me he had found a loose connection to the ICM and it was running ok now. Went back out, took a short test drive to verify that it was running better and eventually made a deal.
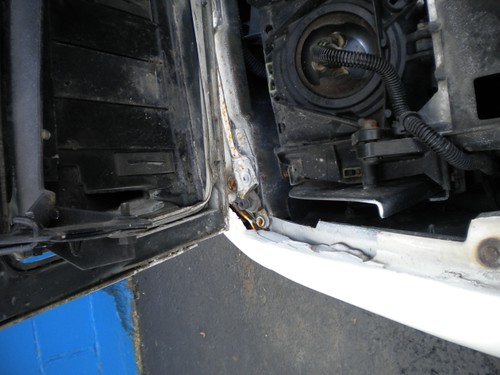
However the engine compartment was a mess
the pictures are no longer available in the thread
Bringing it home it still seemed to run rough to my way of thinking so once it was legal, I drove it down to Intense Racing in Columbus to have John go over it. On the way I found that it warmed up, it was emitting a steady stream of blue smoke. Hmmm seller didn't say anything about that.,
Over the past few weeks john has gone through the car and here is what we found:
Loud exhaust -- dent in muffler sliced open oil leak on back side of engine -- cracked valve cover around one bolt of rear valve cover was causing leak compression good on all cylinders but one which actually had higher compression -- found that that cylinder's spark plug was gapped way to wide to the point that the cylinder was probably not firing most of the time ---- hmm 5 cyl 3880Sc anyone blue smoke -- ended up pulling the SC to see what was going on -- you might have noted if you read the for sale thread that this engine had work done by ZZP. When we looked under the SC we found that the gasket installed was blocking the PCV port. As a result , engine oil was being pumped up into the manifold and sucked back through the valves into the engine === lots of blue smoke
Also found that a section of hard line going to the heater core was partially crushed ( not good for flow) and the hookup to match the smaller dia hose from the 3800SC to the Fiero's AC lines used a metal size adapter and the rubber AC lines were connected to it with gear clamps (Yeesh).
Shifter select cable needed to be replaced
Links on the rear sway bar needed to be replaced
Exhaust system was not well thought out by the person doing the conversion
A laundry list of things that needed fixing -- none catastrophic but definitely annoying.
So while it is there, time to bring it up to snuff with Jack
Cradle has been cleaned and is about to be painted
While Jack is getting a number of powder coated pieces, Jill is going to be a DD so I am setting for some accent paint work on the engine only.
the engine was off to the machine shop to determine what needed to be done --
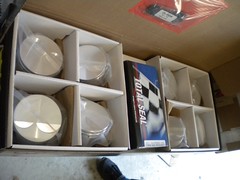
results - cylinders bored, crank polished, new bearing, pistons and rings -- 20 over Now this engine is being built up a bit so I needed to go to a grade better than stock pistons -- no problem right ?
Umm -- wrong Nobody makes 20 over pistons for the 5.3l other than in stock grade. Ended up having to have custom machined Black Diamond pistons made. Another few weeks of delay. Then when the machine shop goes to install, we find out that the wrist pins are too big. Diamond machined the pistons down from the 5.7 pistons but forgot about the size difference in the wrist pins. Another delay and more $$ to have the machine shop hone the rods out for the larger wrist pins.
hiccup #3 to come shortly !
[This message has been edited by MCDUCK (edited 05-25-2013).]
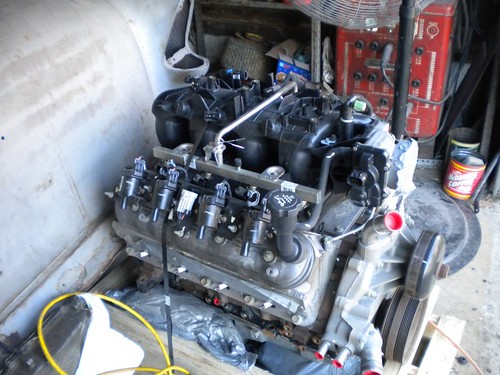
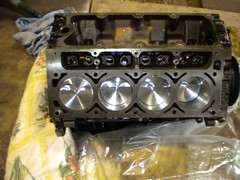
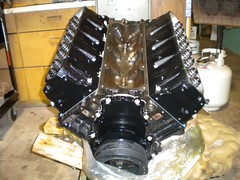
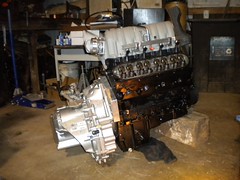
So on May 15th, I went to the engine rebuilders to get the engine. I expected to pick up a fully assembled engine with the flywheel, pressure plate and clutch installed. I got back the completed block and a box of parts including the flywheel, pressure plate and clutch. Okay not a beg deal, so I brought it back up to my mechanics garage.
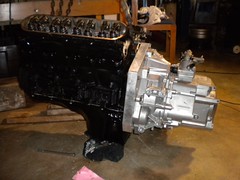
Thursday night I got the heads mounted
On Sat (may 18) I went over to the mechanics and started to work on getting the pieces installed. No such luck. Missing from the box were the bolts for the flywheel and the pressure plate. Weekend dead ! I called on Mon and ended up bring the box in to show that they not in the box. Owner could not find the missing bolts.\
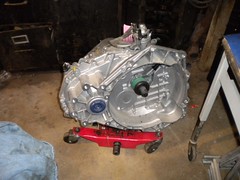
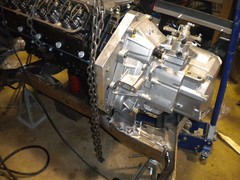
Try to acquire the missing parts and by Wednesday night we were assembling the adapters and eventually completed the transmission integration.
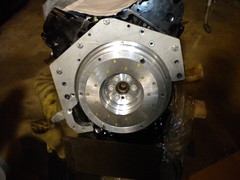
Flywheel and pressure plate mounted
Clutch mounted -- you can see the balancing marks
machine shop said I should be good up to about 8000 rpm
Now to the clutch ---- G6 F40 6-speed
After about 1/2 hour of playing around
[This message has been edited by MCDUCK (edited 05-25-2013).]
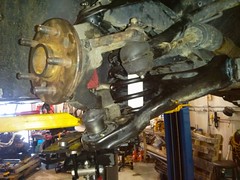
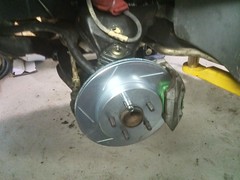
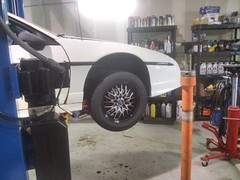
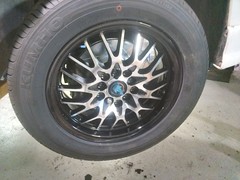
Been travelling for the past week so Jack was on hold. However Jill is progressing along at Intense. The front end has been redone,. New slotted rotors, all new prothane bushings and Rodney's lowering ball joints and end links. Cradle cleaned and repainted with Arraut coilovers installed. The valve covers and SC has ben painted. Now working on replacing the exhaust system. We have gone to W-body headers and will have to shorten up the trunk to route the exhaust and provide enough space for muffler.While it has hoisted, we dropped the gas tank and replace the fuel level sender and upgraded the pump to a 255 lph Walbro. We have dropped the pulley on the SC to a 3.6 and the guys at the shop are trying to talk me into a 3.5 since we are making a major improvement in the exhaust flow. The 17 in Lightstar wheels that were on it when I bought it have come off and been replaced with 15" Konig Lace wheel and Kumho Esta Platinum LX tires. With the drop, the wheel/tire combination nicely fill out the wheel wells and I have dropped 10 lbs of unsuspended weight on each corner of the vehicle with the wheel/tire change. This car should be a lil pistol. Jack is getting the same suspension treatment so they should be very similar other than Jack's extra 100+ HP over Jill. Tuned, I think Jill might dyno out around 300 Hp and Jack in excess of 425,
Not racing class but enough to give most Riceburners serious indigestion :-)
Hoping to have Jill back on the road sometime during the week of the 17th.
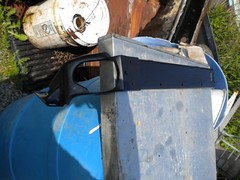
Jack's gas tank arrived yesterday. Thank you FieroJoe for putting me in touch with Tony. This is the custom aluminum tank and is very well built. Due to maintaining flex fuel capability I have to run two fuel level senders, one for the dash and one for the ECM. That drove me to using the custom tank. I finally found a suitable (i.e. E85 compatible sender ) from Royce Industries. I have sent the tank dimensions and they are doing a custom calibration for it. Also one of the senders will also include a Low Fuel ground contact so I can have a low fuel warning light on the dash. Should have these in about two weeks.
I will be using a 255 lph external Walbro to feed the rails via a Corvette filter.
While I was travelling I got a call from the city that my building permit application for building a garage behind the house was approved, so shortly I will be dealing will three builds, 2 cars and a 25x28 foot heated garage. Going to need it to tackle the interior rebuilds and exterior prep.
Will post pictures when I get them resized.
[This message has been edited by MCDUCK (edited 06-09-2013).]
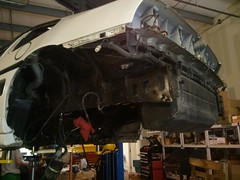
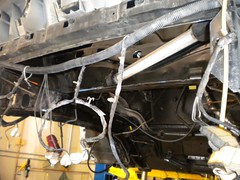
So yesterday and today I worked on Jack. The rad shroud is now modified for the new high capacity rad and POR15'd.
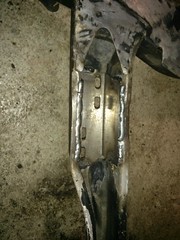
And then we tackled the motor mounts. As of tonight the engine is tack welded in place with three of the 4 motor mounts set. Will try to get the fourth built and tacked into position tomorrow night if possible.
[This message has been edited by MCDUCK (edited 06-09-2013).]
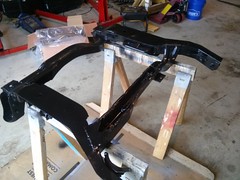
We got the last motor mount pieces drilled and cut tonight. Should have it tacked in place and welded in by Fri PM. Next step is to unbolt the engine and finish the welding and cutting on the cradle, power wash and then POR 15 the whole assembly. Once that is complete, I can re-mount the engine and start building out all the parts and pieces.
I would like to note that V8Archies parts and pieces for both the V8 conversion and the F40 conversion has gone together very well so far. There is cutting, fitting and drilling for the motor mounts but because of the number of different V8 versions and two different cradles, I can understand why they cannot be precut and pre-drilled.
Thank you for the comment on the wheels! closest thing I could find that would be a modern version of the original wheels.
There isn't much of a selection anymore in 15" wheels !
and I didn't want to add the extra unsuspended weight that larger wheels and tires would create. On Jill the difference between the Konig's and kumho tires compared to the LightStar's and low profile tires was over 10 lbs per wheel. my Guru indicated that that ten lbs unsuspended is the equivalent of 100 lbs suspended so from a handling perspective its like taking the car from 2600 lbs up to 3000 lbs
Things has been at almost a standstill for most of this week.
Jill did get a butt -errr trunk lift
before
after
Before John can proceed with the exhaust welding, the new welder has to be dialed in so it will be later this coming week before Jill starts moving forward.
Jack is in a holding pattern until next weekeknd. My mech had his son move back in and had to upgrade his electrical service and rewire the shop so maybe by the middle of this week, we can get the last mount welded and the cradled fully welded, blasted and painted so the engine buildup can proceed. Hope to get the front suspension redone over next weekend.
The third project kicked off this weekend
That big flat area should be a new garage in about 6 weeks. And yes that is a pair of 84/85 Cabriolets.
Next update probably won't be until next weekend -
Its been slow over the past weeks and all this rain in Central Ohio has not helped any.
Jill (the GT) is at the point of having the custom exhaust welded up with the trunk shortened and welded back in place. Along the way, the engine has been cleaned up, 65lb injectors installed and the fuel rails modified from single ended to a return style to even out the flow on all the cylinders. Hoping to have the exhaust system finished by the end of this coming week and the engine back up in the car.
Jack (the Notchie) finally has all the mounts for its L59/F40 in place and the cradle all tacked up. This week should see all the welding and cutting on the cradle hopefully completed and the cradle sandblasted and painted. Once that is complete we can re-mount the engine and I can start dressing it out. Since Archie has only done one LM7/L59 and that is very recent, Archie expects that I will have some fine tuning and trimming of his parts to make thing work on this setup.
If it ever stops raining around here, I can finally get Jack's new aluminum gas tank (via FieroJoe) cleaned and coated. Fuel level Sensors have arrived, so I just need to do the inside coating and it will be ready to install.