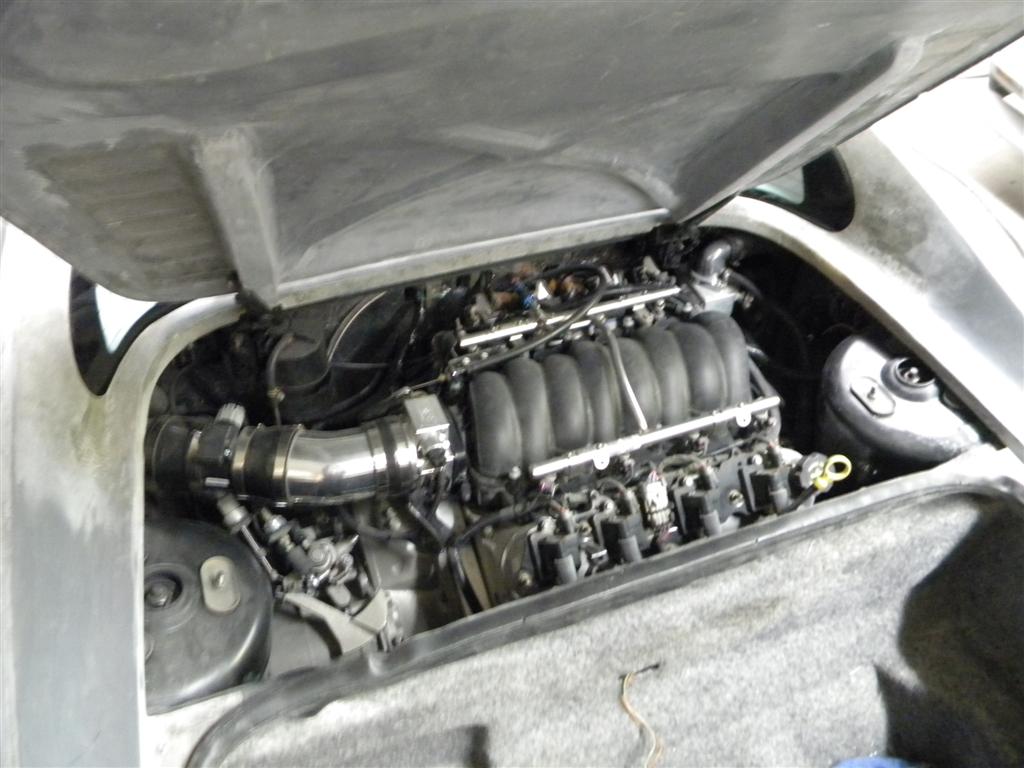
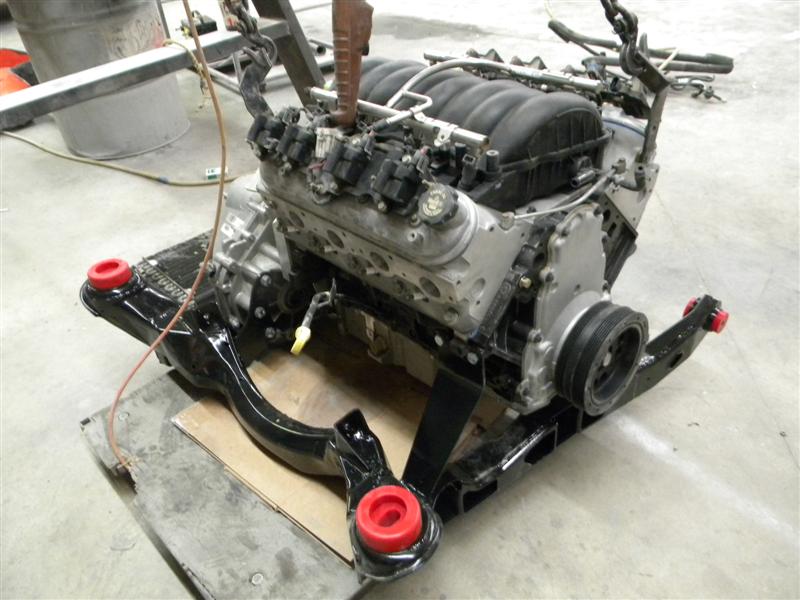
Don't see any headers on there yet. Just curious if it's getting your standard exhaust for the LSx swaps, or if this is getting a turbo or something special, as it was previously stated the engine was built based off the concept of the big twin turbo 4.8 build that was in Hot Rod.
Don't see any headers on there yet. Just curious if it's getting your standard exhaust for the LSx swaps, or if this is getting a turbo or something special, as it was previously stated the engine was built based off the concept of the big twin turbo 4.8 build that was in Hot Rod.
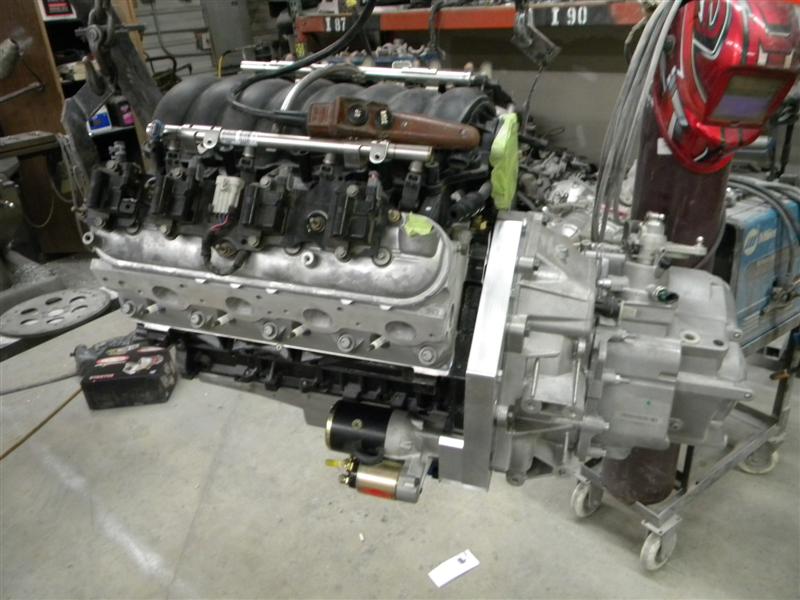
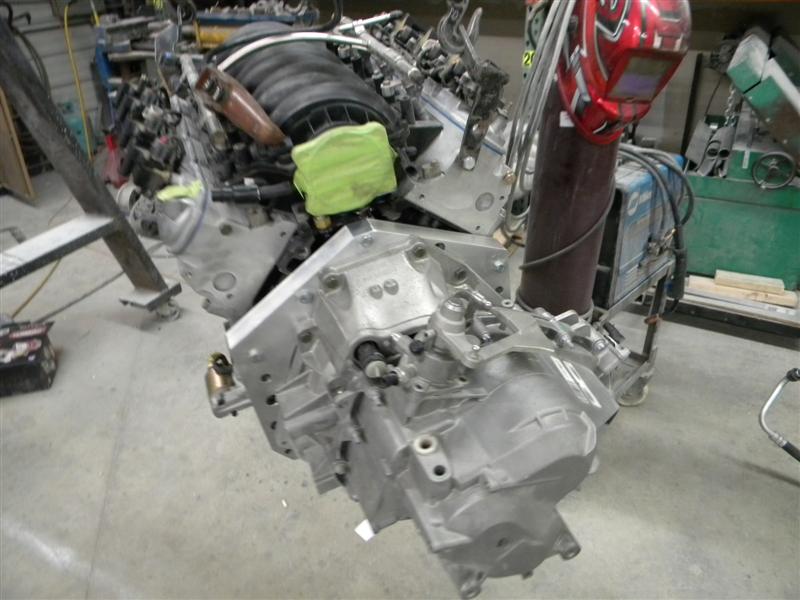
Yes, the engine was built by a LS Turbo guy in TX & the Hot Rod magazine thing was about a Twin Turbo setup. The plan is for us to build it without the Turbo(s)we will be able to get it running for some test driving but not doing a lot of Hot Rodding. Then the car will go to San Antonio for tuning & to put together the turbo plan for it. The the owner will drive it a while while the Turbo guy gets all the parts together & schedules it back in.
We are putting the headers on it & a simple 2.5" dual exhaust system (but it won't be ceramic coated) Then they can modify the exhaust as needed to feed the Turbo(s).
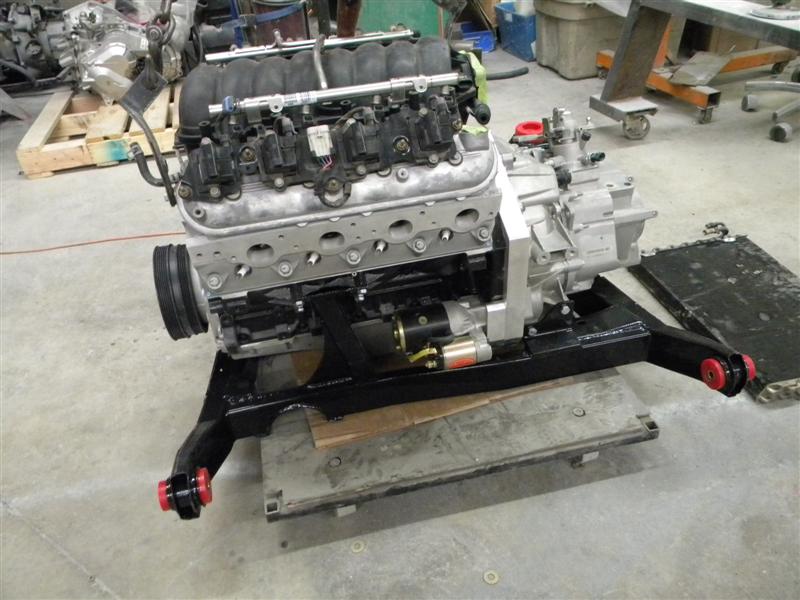
I know, It needs to be lowered but (It Ain't Done Yet)
We've been doing quite a bit on the car lately. Including some of the conversion from an automatic car to a stick shift car & hoking up some of the shift cables, hyd. lines, throttle body, battery box, Big Brakes & the like.
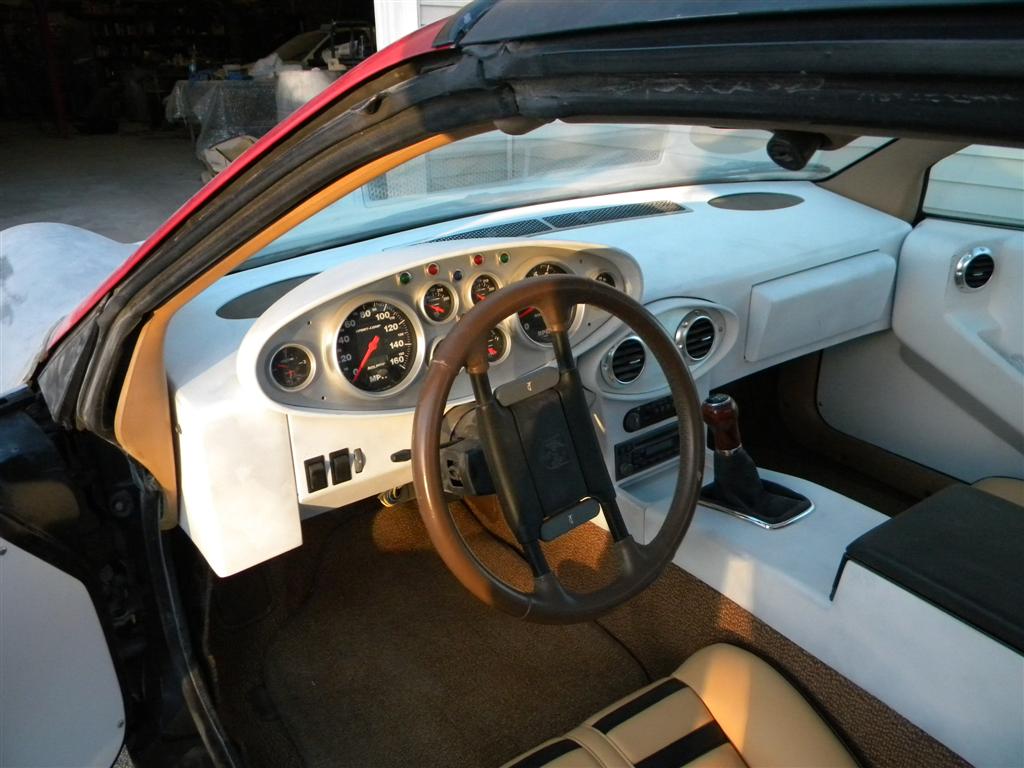
Mostly we've been working the interior.
The owner has supplied us with a lit of information on how he wants the interior to look & we've been executing his plan with our own twist & ideas.
Mocking up ideas for dash.....
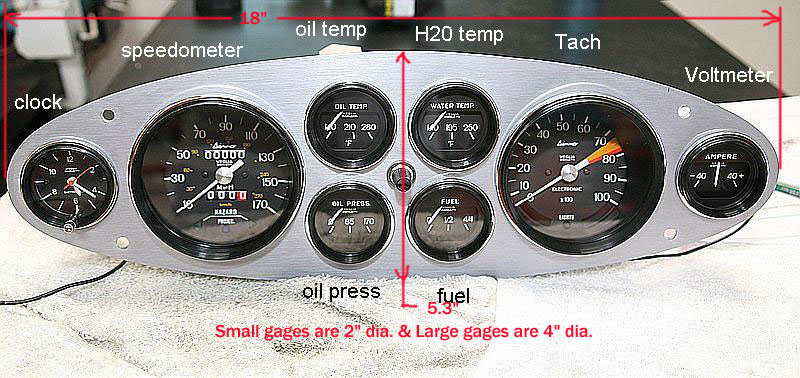
We like the style of the instrument pod we've seen pictures of. By scaling it we determined the gage sizes in the picture & the pod size.
From that we made a pattern.
The customer wants 5" dia. Speedo & tach. & to do that we had to increase the size of the instrument pod & made a new pattern.
Making sure the top of the pod isn't going to e too high avove the steering column.
Then, from parts in the parts bin labeled "Parts I've had long enough that I don't remember where I got them.", we pulled out this dash to begin with....
From there Kris made some flat fiberglass sheets & built the initial version of the dash pod.....& back to Mock Up.
You'll notice that when scaling the original pod size up to be able to handle 5" gages, the pod also got wider. Wider to the point where it's into the canter section of the dash & ctr. console. Not to worry, we've got a plan.
We also are going to modify a set of my inside door panels from my Interior Kit, so we fitted one of them into the car too.
More glass work to get the bottom line of the pod established where it sets on the top of the doner dashboard.
More fitting.....
We decided that we wanted the top of the pod more rounded where it sits on the top of the dash....
Kris modified that & we started on what we call the center pod. We also glassed in the speaker openings in the top of the dash & glassed in the mounting for the defroster vent. Starting to get somewhere now.....
While doing this, he's building the center pod from scratch.....
Note how we got the center pod on the center of the car by tucking it up under the end of the instrument pod.
Here you can see where we rounded up the top of the Instrument pod....
Sanded it up & made new speaker openings.... Note the oval theme.....LOL
We also are modifying the door panels but I'll show you more on that in the next post.
The customer is also considering having a Turbo (or 2) put on the car by his engine builder. He wanted us to make provisions so he could add a couple of gages to monitor the Turbo(s).
Here the fiberglass face of the center pod as holes in it to allow 2 gages that can be added later. The brushed aluminum plate that we are going to cover the pod with will not have the 2 holes for the gages. But now they can be added easily by the Turbo installer with just the correct size of hole saw.
I suppose the customer is always right, but that instrument pod looks way too big. Very nice work on it, but it sure fills a lot of the dash.
I have to agree the pod intrudes into the windshield to much put the clock and fuel gauge into the center pod and drop the dash pod over the steering coloum to lower its profile
Here, we have hardwired the instrument panel. At to top, you can see 2 plugs, this will allow someone to service the gages & remove the gage panel by just unplugging the 2 plugs.
Then with notes in hand, we get inside the car & wire up the Fiero harness with the mating plugs.
Rob made some custom exterior door handles from 1" x 1.5" Alum. bar stock...
We will be rounding off the edges & polishing the handles & then getting them chrome plated.
Next time we get to door panels off, we will be making an extension of the door panel to cover the shaft od the door release.
Continuing the building of the Radio/AC control console & the forward end of the center console.
Mounting the shift boot....
Making the cover for under the steering column.....
Here we have th main dash out & are glassing to close up the spaces around the pods.
A little more work on the column cover & revising the mounting of the instrument pod cover...
Checking the fit of the dash mods...
We made a little fiberglass radius mod directly under the column....
The chrome lower boot retainer snaps right into a crrectly sized upening in the top of the console.
We built what I call a Cell phone tray below the radio & towards the shifter. It goes up under the radio a little bit.
Glassing up both sides of the rear bulkhead cover.....
The ECM for this engine is larger than for the later LS engines, so we're building an ECM cover...
When we build something like this, we do it out of flat fiberglass sheets. We typically hot glue it together & it will initially have sharp corners.
To round off the corners (as in the pics above) we use some body filler & lay down about 1/2" of a radius of filler on the inside corners. Then after that cures, we hand lay fiberglass mat & resin over the filler radius & about 1 inch up onto each of the 2 walls. Then later when it's cured, we use a grinder on the outside of the square corner. Removing the fiberglass corner & the filler to get to the new "rounded" corner on the inside.
Ok, back to the ECM cover......
The ECM cover will fit over the ECM when mounted like this.....
But that is kind of awkward where it meets the rear of the console, so we're mounting it a little forward at the base.
We are making a couple of wings on the rear bulkhead cover so that it goes up to the inside edges for the MR@ window.
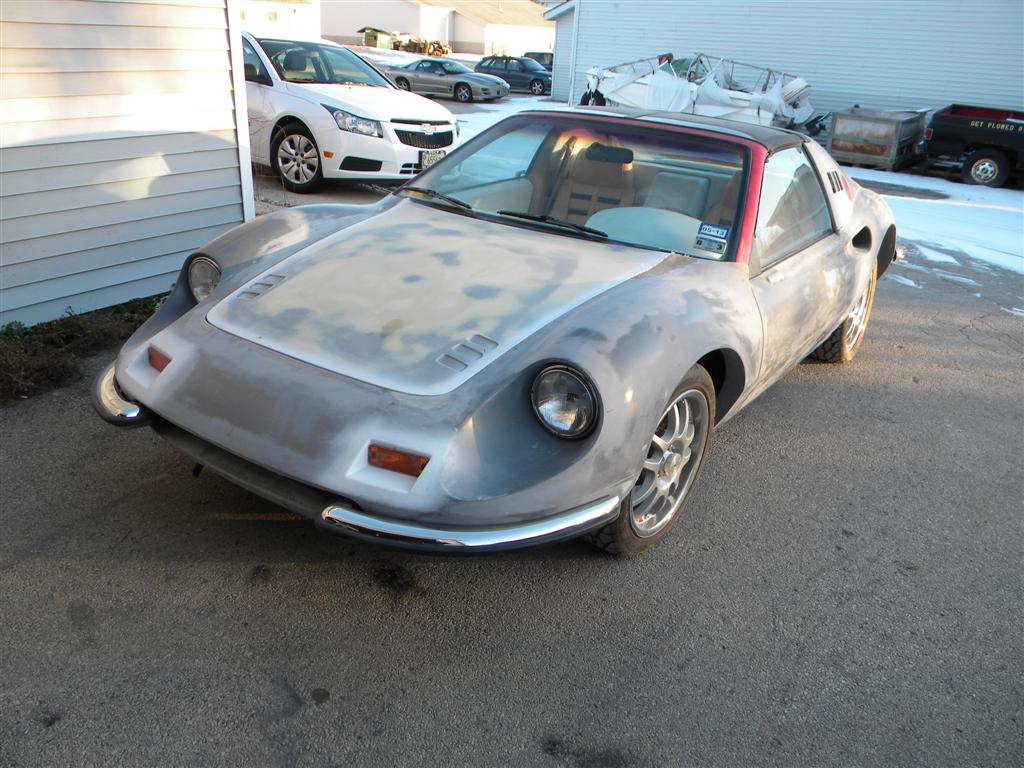
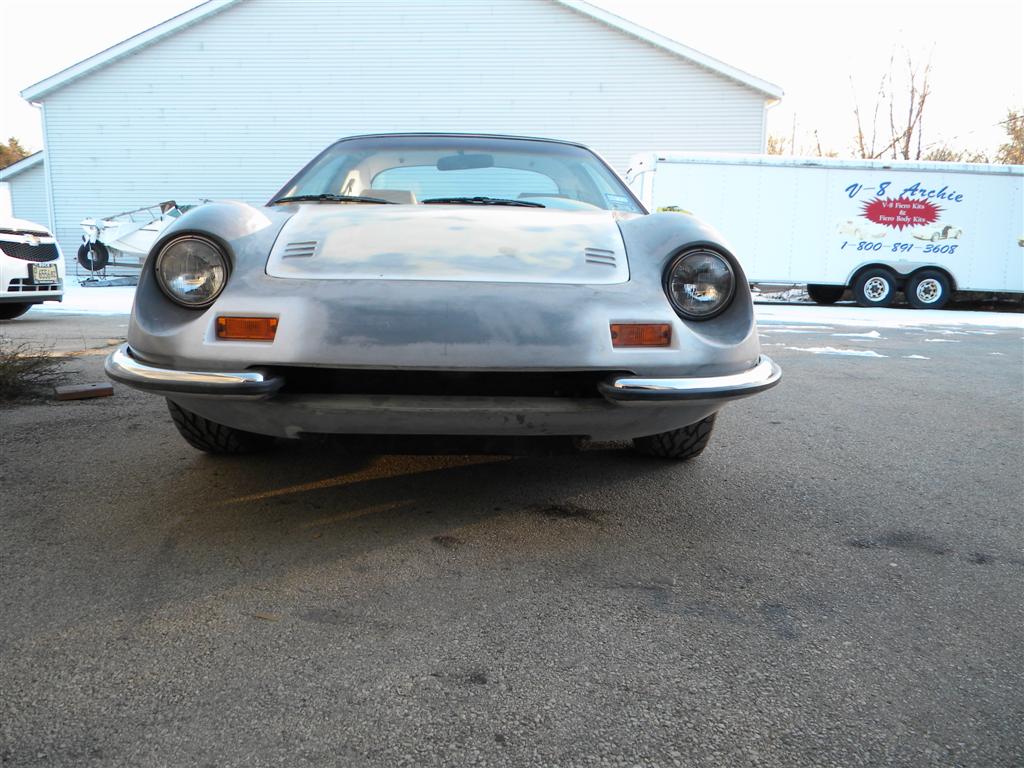
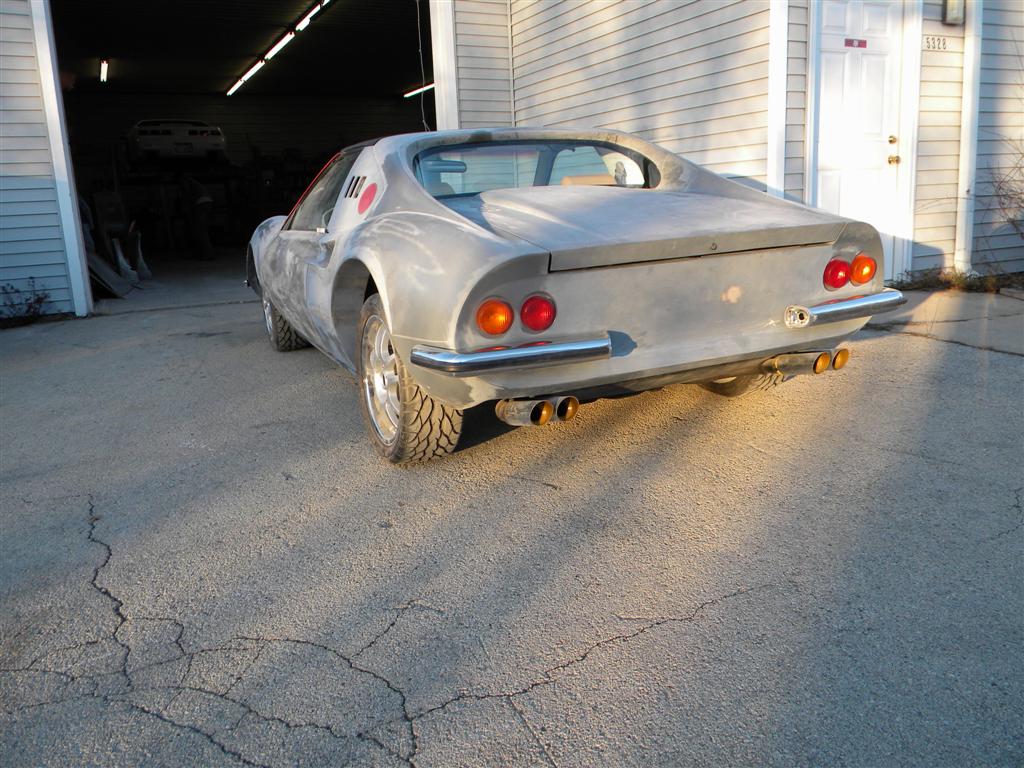
I ended up with this car. I couldn't stand to see all that work sit go unappreciated. I actually have that same Dino kit on a car I've had for 23 years and currently redoing it as well. Current challenge is to get a engine builder/programmer to tame that race engine. Holy Schmoly!! Whiplash. Archie smoothed out the rear quarter panel to get rid of the unusual step off there. He also did a great job getting smoothing out the fiberglass to match the side view mirrors. I'm especially happy with the MR2 rear glass instead of the Fiero glass I have on my other Dino.
Those familiar with the Robert Carter / Norm Dino kit will know of the raised area on the rear quarter panel. Not sure what the thought was since it is not seen on any Ferrari Dino. Archie did a great job of eliminating it. Need help on how to post photos
[This message has been edited by Lurate (edited 04-11-2015).]
Those familiar with the Robert Carter / Norm Dino kit will know of the raised area on the rear quarter panel. Not sure what the thought was since it is not seen on any Ferrari Dino. Archie did a great job of eliminating it. Need help on how to post photos
Click on "Pennock's Image Poster"...it's the red/blue icon at the bottom of the webpage. Just follow it's directions. I use Microsoft Paint to resize images to .jpgs that are no wider than 1024 pixels, and compressed to less than 300KB.
[This message has been edited by Neils88 (edited 04-11-2015).]
I have always been in awe of the work coming out of Archie's shop. This by far is my favorite. Thank you for letting us know where this fine automobile ended up. Pics will always be welcome here.
Archie is incredible, no doubt. I looked at the picture posting instruction above; and, unfortunately, it is for Windows and I have only Macs. Bummed. If you don't mind sneaking over to the MadMechanics forum, I started a thread there:


.JPG)
.JPG)
.JPG)
.JPG)


.JPG)
.JPG)
.JPG)
.JPG)
.JPG)
.jpg)
.JPG)
.jpg)
.JPG)
.JPG)
.jpg)
.JPG)
.JPG)
.JPG)
.jpg)
.JPG)
.jpg)
.jpg)
.JPG)
.jpg)
.JPG)
.jpg)
.jpg)
.JPG)
.JPG)
.JPG)
.JPG)
.JPG)
.jpg)
.jpg)
.jpg)
.JPG)
.JPG)
.jpg)

.JPG)
.JPG)
.JPG)
.JPG)
.JPG)
.JPG)
.JPG)
.JPG)
.JPG)
.JPG)
.JPG)
.JPG)
.JPG)
.JPG)
.JPG)
.JPG)
.JPG)
.JPG)
.JPG)
.JPG)
.JPG)
.JPG)
.JPG)
.JPG)
.JPG)
.JPG)
.JPG)
.JPG)
.JPG)
.JPG)
.JPG)
.JPG)


.JPG)
.JPG)
.jpg)
.JPG)
.jpg)
.jpg)
.JPG)
_1.JPG)
.JPG)
.jpg)
.jpg)
.jpg)
.jpg)
.JPG)
.JPG)
.JPG)
.jpg)
.JPG)
.jpg)
.jpg)
.JPG)
.jpg)
.jpg)
.JPG)
.jpg)
.jpg)
.jpg)
.jpg)
.JPG)


.JPG)
.jpg)
.jpg)
.jpg)
.jpg)
.jpg)
.JPG)
.jpg)
.jpg)
.JPG)
.jpg)
.jpg)
.JPG)
.jpg)
.JPG)
.JPG)
.JPG)
.JPG)
.JPG)
.JPG)
.JPG)
.JPG)
.JPG)
.JPG)
.JPG)
.JPG)
.JPG)
.JPG)
.JPG)
.JPG)
.JPG)
.JPG)
.JPG)
.JPG)
.JPG)