My return to model building after a 10+ year hiatus.
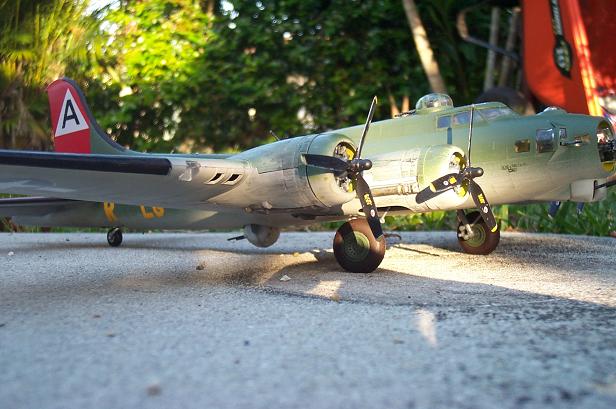
It took me about 2 weeks to get to this point. There are just a few things I need to finish up but it looked so good I just had to snap a few pics. Naturlly I had to MOD it just a bit, I cut free the tail surfaces for a more realistic appearence. The elevators are in a more natural position and the rudder will have a slight cant to the left.
Sooooooo..... What do ya think?
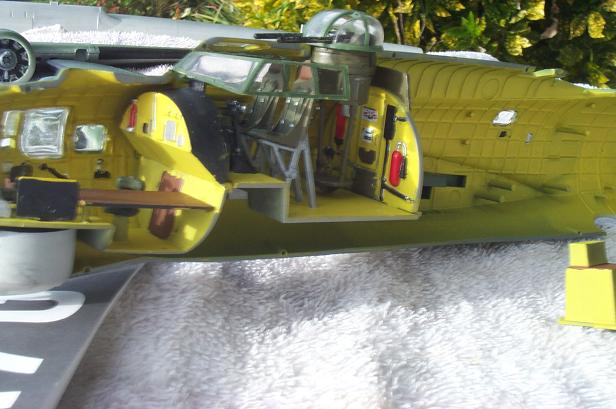
Interior, Note the seatbelts and buckels...
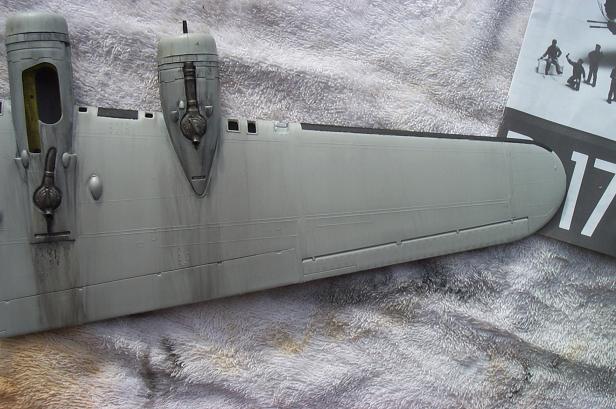
Typical oil smears barfing from the R-1280 Wright "Cyclone" radial engines. Note: the extra oil spit from the exhaust because of a bad turbo charger bearing.
Nearly complete and shows oil streaking on the upper side of the wing
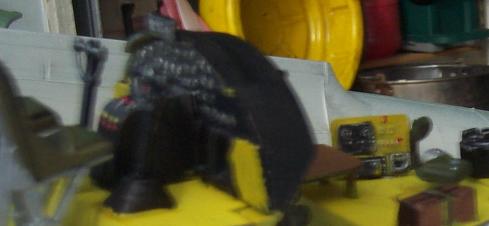
A close shot of the "Ball" turret.... Man.. that is one heck of a way to fight a war.
IP: Logged
05:56 PM
PFF
System Bot
FieroPilot Member
Posts: 342 From: Lethbridge, Alberta, Canada Registered: Oct 2003
Good heavens man! it is a crime to put bullet holes in an airplane
However I will be adding some "repaired" holes later on.
In my minds eye (the snapshot in time) this airplane has been ferried to England where it was assigned a crew and has completed a few missions ( 5 or 6 ) It will eventually fly 30 missions before being shot down
[This message has been edited by 84Bill (edited 03-04-2004).]
IP: Logged
06:07 PM
jetman Member
Posts: 7799 From: Sterling Heights Mich Registered: Dec 2002
I do ships and airplanes. That's a nice looking B-17! Do you use the photo-etched brass parts?
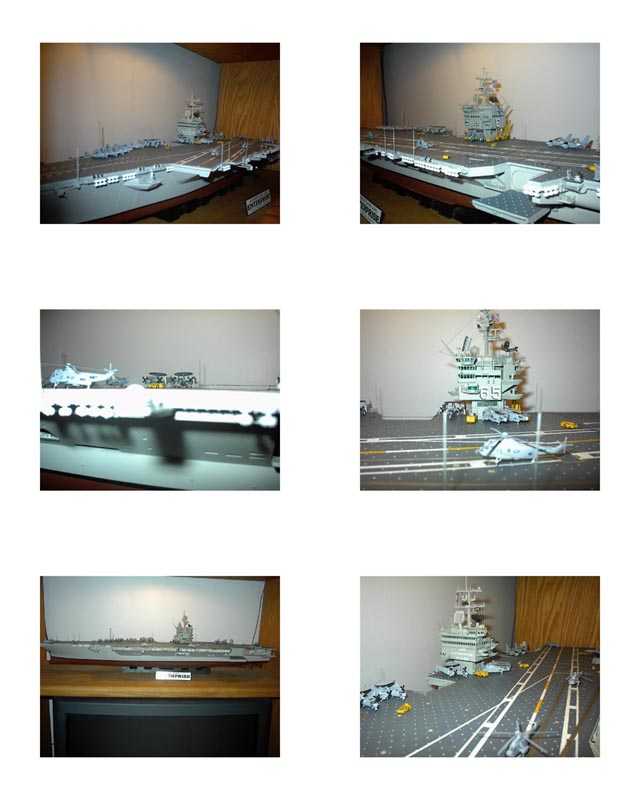
Here is an aircraft carrier (1/350 scale) that took me a few years to do:
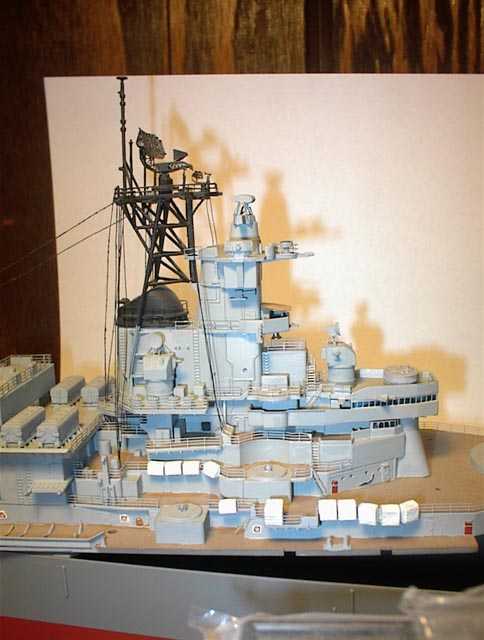
I'm working on a Battleship (1/350 scale) now, All the stairs, rails, and antenna's are brass etchings.
Once it's finished, I have a 1/48 scale PBY and F4U Corsair to do.
What?? no rust or water stains??
Nice work btw.. Now let me show my ignorance, what are brass etchings? I remember a friends dad doing a real wood sailing ship about 1/350th that actually had brass cannons and fittings are this similar or completely different?
IP: Logged
02:13 AM
rogergarrison Member
Posts: 49601 From: A Western Caribbean Island/ Columbus, Ohio Registered: Apr 99
I think the process (photo etching) is where they take a photo of the part and metal parts are cut with maybe a laser very precisely using the photo for the pattern. Really small detailed parts can be made very tiny as opposed to plastic castings, like actual grill work on 50s cars. I love the tiny details on any model, they add so much more to the model. In high school I turned out models like a factory. I like almost all, planes, boats and cars. The B-17 looks great. I used to like to hang ones like that from ceiling like big dioramas. A few bombers with some fighter cover, enemy planes, bombs falling on thread, even some shot down planes in parts falling with cotton dusted in black stretched out like smoke trails.
About 15 years ago I built my own 'Navy' of remote control ships. Built a Sterling USS Missouri that railings were all cut off straight pins with 3 or 4 threads running down them. Had working remote control turrents. Included a scratch built USS Hornet Carrier, loaded with Bachman miniature planes on the flight and storage decks. Finished off with destroyer and submarine. Carrier was about 4' long
Right now only plane i have left is a 1/6 scale F-4D Phantom II. Its a remote control turbine powered jet. Has working flaps, retracts, landing and running lights. Even a working (lite up) radar screen in the cockpit. I just dont have the time to build anymore, too busy with bigger ones
Keep up the good work.
[This message has been edited by rogergarrison (edited 03-05-2004).]
IP: Logged
05:11 AM
PFF
System Bot
Hartz Member
Posts: 1511 From: Plymouth, MI USA Registered: Jul 99
Wow. Those are some amazing models. You guys are very talented.
I am just starting my first model in over 20 years. I am amazed at how far some of the kits have come in that time. I ordered a detailed 1/25 engine, and it came with spark plugs, pistons, rocker arms, a crank shaft, etc. It's pretty neat. I've also got some photo etched parts on the way. Now if only I had the talent to match...
Nice work btw.. Now let me show my ignorance, what are brass etchings? I remember a friends dad doing a real wood sailing ship about 1/350th that actually had brass cannons and fittings are this similar or completely different?
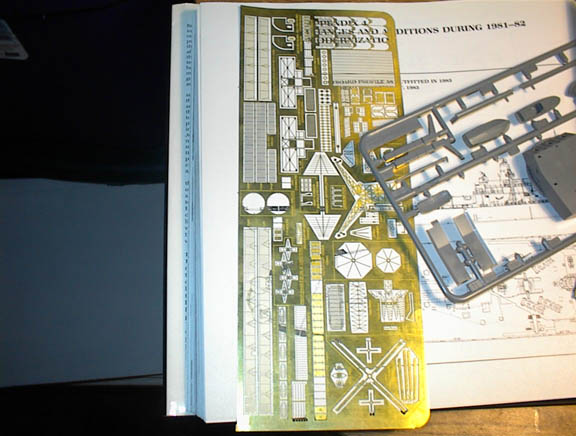
The brass etching have rails, stairs, doors, the radars, cranes,etc. When I did the aircraft carrier I bought extra planes so I have 44 planes on deck. Each one had to have the bomb/missle racks, landing gear, landing gear doors, wheels, props, rotors, refueling probe (A-6 planes) etc. Each plane took about an hour each. This is what a brass etching sheet looks like:
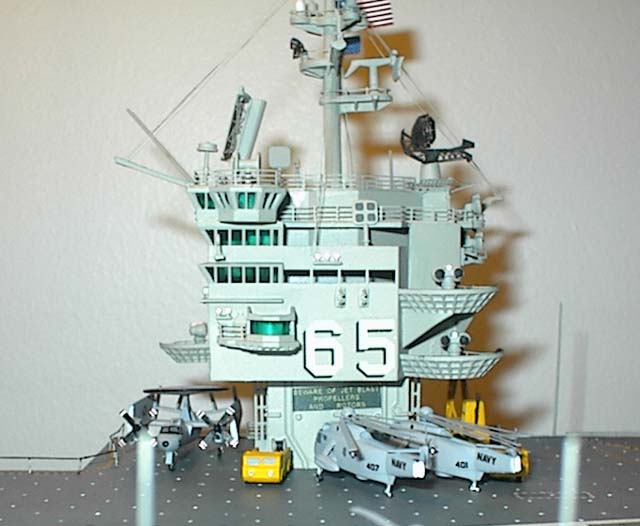
Here is a close-up of the carrier island and some aircraft:
[This message has been edited by Oreif (edited 03-05-2004).]
IP: Logged
09:50 AM
GOLDSE Member
Posts: 388 From: St. Louis, MO, US Registered: Apr 2001
Hartz, can you post some info on this detailed engine? I have a small instructional pamphlet somewhere (buried in a box in the basement) on how to do the detailing yourself, but have never seen a comprehensive kit. TIA
Mike
IP: Logged
09:53 AM
Hartz Member
Posts: 1511 From: Plymouth, MI USA Registered: Jul 99
Great work Oreif! Nope never worked with photo etched parts, they must be great to work with.
Thanks Guys!
I encourage anyone to give it a try, it is not as dificult as you may think. Here are some tips. The main ingredient is not dextarity or skill though those qualities will come in time but the BIG ONE is PATIENCE! To sit and work on a single part for hours requires vast ammounts patience, mistakes will happen and almost all can be corrected (particularly when painting) for example: by scraping lightly with a(n) hobby (exacto) knife.
Test fitting parts and trimming edges. For canopie frames the best way to paint them is to mask the windows with scotch tape, cut around the window area with an exacto knife then peal the tape off the frame.
In the picture, each of the window panels were cut from a single piece of tape that was laid over the whole part. It was not hard to do (with a sharp knife) but it took a while because there were so many windows in this B-17.
For painting large areas I use "Tamiya Color" the stuff aint cheap but it the absolute best paint and just blows the doors off the old enamals because it is more resistant to thinners. Enamals can be used on top of the acrylic and they can be taken off with mineral spirits and not hurt the underlying (acrylic) paint.. Thats how I did the oil streaks on the wing. I dabbed a paper towel into some thinner and dabbed some flat black paint on top of it, then drew it across the wing. I just kept at it until I got the desired look. If I didnt like it I could just clean it off with mineral spirits on a clean towl and try again.
Anyhow this B-17 is the best I have ever done to date because I just took my time at it but I did suffer "hurry up itus".
IP: Logged
02:54 PM
rogergarrison Member
Posts: 49601 From: A Western Caribbean Island/ Columbus, Ohio Registered: Apr 99
Hobby shops sell a sheet of self stick foil, like gold, silver, black thats really thin. You cut a piece and can put it on canopy or parts that are supposed to be metal. It forms over just about anything, so thin all details like rivets show thru perfectly. You just trim it after sticking it and rubbing it down. I use it a lot for stuff like side moldings, car window frames or anything thats supposed to be chrome. Only costs a few dollars a sheet. Another nice way to make exhaust stains like you did on your wings and fuselage is to use an acetyln torch set so it soots bad and go past the part sparingly and then spray dull clear over it. I put wheel touchdown marks from tires on my flight deck of the carrier with a piece of soft rubber before i dull cleared it. I did the canopy frames on my F4 with auto pinstriping tape since its quite a bit bigger (about 6' long).
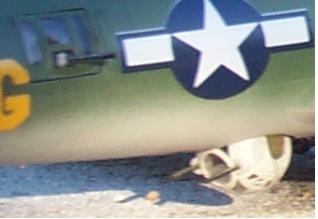
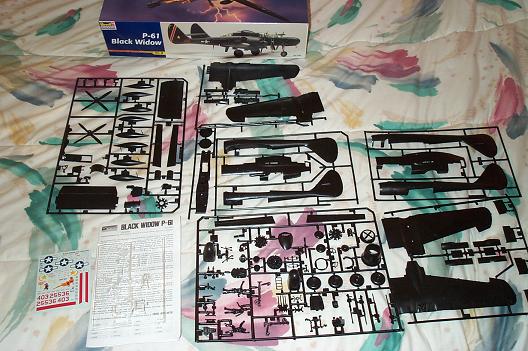
My next project is the P-61 Black Widow... This was one badass airplane and you did not want to bump into during a night patrol.
This sneaky little bugger flew mainly at night, it packed a sofisticated air radar system to find enemy aircraft and swiftly dispached them with 4 20mm cannons and 4 50 cal machine guns.
Comperable to a medium bomber it was the largest aircrft to be given the P (Persuit) designation.
The two Pratt & Whitney R-2800-65 Double Wasp 18-cylinder radials (B model) produced a whopping 2200 horse power (max) each and yanked the P-61 through the air smartly.
Maximum speed: 425 mph Cruising speed: 275 mph
I'll model this one after the airplane in this photo
Bill, isnt that the plane that Howard Hughs was trying to build, or one similar, maybe competition for that? I know it was a twin engine fighter/bomber. I know he crashed the prototype, i think in a St Louis suburb and almost died from it. Like his 'Spruce Goose', he always did his own test piloting.
Bill, isnt that the plane that Howard Hughs was trying to build, or one similar, maybe competition for that? I know it was a twin engine fighter/bomber. I know he crashed the prototype, i think in a St Louis suburb and almost died from it. Like his 'Spruce Goose', he always did his own test piloting.
The Spruce Goose is in Oregon now. They built a museum around the airplane. They've also got a B-17 they'll let you walk around in. They're building a catwalk system to allow people to walk through the fuselage of the spruce goose. The plane is enormous. They make a point of pointing out the tailspan of the spruce goose is larger than the wing span of the B-17. I HIGHLY recommend the trip out to the museum if you're ever in Oregon. There's quite a bit more to see than just the spruce goose.
That would have been the XF-11 or D-2 bomber (laminated wood like the Spruce Goose AKA "Flying lumber yard"). The first one had 2 counter rotating variable pitch propellers (that caused the crash) attached to 2 Pratt & Whitney R-4360's. They produced a mind bending 3000 horse power each! The later XF-11 had the standard single propeller arrangement on the same engines. The Spruce Goose also used 8 of the Pratt & Whitney R-4360 engines.... talk about power man!
The first XF-11 crashed into a house on Wilshire blvd in down town hollywood.... eeek!
Interesting tidbit While Hughs was recovering from the XF-11 crash he was so uncomfortable that he sketched plans for a mechanicly adjustable bed complete with remote controll bed pan and ordered his engineering team to build it, they did but he recovered so fast he never got to use it. Take that Craftmatic!
The XF-11 was eventually turned down by the military because the war was over and they had no need for it.
He built the H-1 (or Hughs prototype # 1) He also crashed it into a beet field. The H1 held almost every speed record in the country but it was rejected as a fighter because it "was not built to government specifications" In reality he was rejected (not the airplane) because of his "unortadox methods". Oddly, the Japanese Zero closely resembles the Hughs H-1...