Pennock's Fiero Forum
  General Fiero Chat - Archive
  Slim Pop Up Headlights Build (HID) (Page 3)

T H I S   I S   A N   A R C H I V E D   T O P I C
  

Email This Page to Someone! | Printable Version

This topic is 4 pages long:  1   2   3   4 
Previous Page | Next Page
Slim Pop Up Headlights Build (HID) by doublec4
Started on: 06-06-2009 10:38 PM
Replies: 120
Last post by: BlackEmrald on 04-25-2013 08:10 PM
LR8523
Member
Posts: 21
From: North Aurora, IL, USA
Registered: Jul 2009


Feedback score: N/A
Leave feedback

Rate this member

Report this Post01-17-2010 06:53 PM Click Here to See the Profile for LR8523Send a Private Message to LR8523Direct Link to This Post
what company made your HID kit?
IP: Logged
doublec4
Member
Posts: 8289
From: Oakville, Ontario, Canada
Registered: Jun 2003


Feedback score:    (20)
Leave feedback


Total ratings: 150
Rate this member

Report this Post01-17-2010 06:58 PM Click Here to See the Profile for doublec4Send a Private Message to doublec4Direct Link to This Post
Not sure, just some generic slim ballast brand. Probably made in China

------------------

Check out my build!
https://www.fiero.nl/forum/Forum3/HTML/000100.html

IP: Logged
Oslo
Member
Posts: 5423
From: Bemidji, MN
Registered: Sep 2002


Feedback score:    (53)
Leave feedback


Total ratings: 126
Rate this member

Report this Post01-18-2010 01:03 AM Click Here to See the Profile for OsloClick Here to visit Oslo's HomePageSend a Private Message to OsloDirect Link to This Post
Hey guys, just want to let you know that we have every HID conversion kit available here:

http://www.tlg-auto.com/sho...id=45&category_id=20

We sell them for $199 + shipping (not your everyday cheap HID kit) but if you contact me on here I can get you a better deal on what you are looking for.

------------------
Top Line Group Automotive
-Aftermarket accessories for the Fiero
www.TLG-auto.com

IP: Logged
gtxbullet
Member
Posts: 4164
From: Pewaukee, Wisconsin, USA
Registered: Apr 2008


Feedback score:    (88)
Leave feedback

Rate this member

Report this Post01-19-2010 02:58 PM Click Here to See the Profile for gtxbulletSend a Private Message to gtxbulletDirect Link to This Post
FINALLY!!!! an in expensive way to get low-profile headlights.
Great job dude!!

you don't mind if I copy your idea do you?

------------------
F.I.E.R.O. - Fantastically Imaginative Engineering Racing Object

For any Paint Work: http://www.kurtcarloni.com/
www.fquick.com/GTXBULLET
Certified Tech/Mechanic (Restorations, Modifications, and Maintenence)
1985 Fiero GT 69k Miles (All Options) - Daily Driver
1988 FIERO Coupe "IRON DUKE" 5-Speed (the show car ;-)
1992 Firebird T-Tops V-8 30k original miles(collectors car)

IP: Logged
doublec4
Member
Posts: 8289
From: Oakville, Ontario, Canada
Registered: Jun 2003


Feedback score:    (20)
Leave feedback


Total ratings: 150
Rate this member

Report this Post01-19-2010 03:46 PM Click Here to See the Profile for doublec4Send a Private Message to doublec4Direct Link to This Post
Of course I dont mind, I posted hoping to inspire someone to improve on my idea

------------------

Check out my build!
https://www.fiero.nl/forum/Forum3/HTML/000100.html

IP: Logged
LR8523
Member
Posts: 21
From: North Aurora, IL, USA
Registered: Jul 2009


Feedback score: N/A
Leave feedback

Rate this member

Report this Post04-09-2010 11:47 AM Click Here to See the Profile for LR8523Send a Private Message to LR8523Direct Link to This Post
how did you wire your HIDs? did you run wires from the front to the battery in back or did you tap into power wires somewhere up front?
IP: Logged
doublec4
Member
Posts: 8289
From: Oakville, Ontario, Canada
Registered: Jun 2003


Feedback score:    (20)
Leave feedback


Total ratings: 150
Rate this member

Report this Post04-09-2010 02:54 PM Click Here to See the Profile for doublec4Send a Private Message to doublec4Direct Link to This Post
My HID set up came with a H4 connector to plug into my wiring harness.
IP: Logged
Rick Morehouse
Member
Posts: 311
From: Conway,S.C.,USA
Registered: Jan 2008


Feedback score: N/A
Leave feedback

Rate this member

Report this Post04-10-2010 11:00 PM Click Here to See the Profile for Rick MorehouseSend a Private Message to Rick MorehouseDirect Link to This Post
If I may chime in; I've used the 93 Camaro/Olds small cubies, side by side, made my brackets, chopped the hard plastic back frame to
just keep the adjustments & rocker towers intact, welded strips of 1/8" X 1/2" X 3" to an angle & bolted up. I welded 2 fiero metric studs
to the head light/body stiffener cross member about 1" down from seal lip. Wired up high/low beams: for low beams-a relay isn't needed-I checked the fiero/camaro wiring diagrams & found that I could remove the 2 yellow wires that go to the same pin in the main
fiero head light connector-remove them-solder in a jumper to those 2 yellows & run the jumper to the head light on/off rocker switch.
This swap was just completed this week & YEP-I will get some pics. I'll have to get the wife to get them loaded/sent-what ever ya
call it to this page? as my computer skills would make a second grader mad!?! I did do some chopping on the hood & fender mount
flange-had to cut out 1 mount bolt. Plan full pans under the set up & glass on some flaring panels using polyurethane foam behind the
lights as they are about 3/4 " above hood edge. Already have dual heat extractor vents in the hood. The hood mount hinges will be
swapped side for side & mounted inside the hood mount braces, & bolted thru. Ya-some cuttin & weldin is needed-but this will allow a
wider opening-smoother finish-I HOPE. Pics will help clear up the mud-Rick
IP: Logged
doublec4
Member
Posts: 8289
From: Oakville, Ontario, Canada
Registered: Jun 2003


Feedback score:    (20)
Leave feedback


Total ratings: 150
Rate this member

Report this Post04-10-2010 11:02 PM Click Here to See the Profile for doublec4Send a Private Message to doublec4Direct Link to This Post
 
quote
Originally posted by Rick Morehouse:

If I may chime in; I've used the 93 Camaro/Olds small cubies, side by side, made my brackets, chopped the hard plastic back frame to
just keep the adjustments & rocker towers intact, welded strips of 1/8" X 1/2" X 3" to an angle & bolted up. I welded 2 fiero metric studs
to the head light/body stiffener cross member about 1" down from seal lip. Wired up high/low beams: for low beams-a relay isn't needed-I checked the fiero/camaro wiring diagrams & found that I could remove the 2 yellow wires that go to the same pin in the main
fiero head light connector-remove them-solder in a jumper to those 2 yellows & run the jumper to the head light on/off rocker switch.
This swap was just completed this week & YEP-I will get some pics. I'll have to get the wife to get them loaded/sent-what ever ya
call it to this page? as my computer skills would make a second grader mad!?! I did do some chopping on the hood & fender mount
flange-had to cut out 1 mount bolt. Plan full pans under the set up & glass on some flaring panels using polyurethane foam behind the
lights as they are about 3/4 " above hood edge. Already have dual heat extractor vents in the hood. The hood mount hinges will be
swapped side for side & mounted inside the hood mount braces, & bolted thru. Ya-some cuttin & weldin is needed-but this will allow a
wider opening-smoother finish-I HOPE. Pics will help clear up the mud-Rick


Sounds good Rick.

Post up some pictures when you can, or email them to me and I can post them for you. Just private message me and I'll send you my email address.
IP: Logged
Rick Morehouse
Member
Posts: 311
From: Conway,S.C.,USA
Registered: Jan 2008


Feedback score: N/A
Leave feedback

Rate this member

Report this Post04-11-2010 10:03 PM Click Here to See the Profile for Rick MorehouseSend a Private Message to Rick MorehouseDirect Link to This Post
Doublec4, pm sent-thanks
IP: Logged
LR8523
Member
Posts: 21
From: North Aurora, IL, USA
Registered: Jul 2009


Feedback score: N/A
Leave feedback

Rate this member

Report this Post04-12-2010 12:41 PM Click Here to See the Profile for LR8523Send a Private Message to LR8523Direct Link to This Post
 
quote
Originally posted by doublec4:

My HID set up came with a H4 connector to plug into my wiring harness.


i got my HIDs from DDM tuning for $54 shipped and they came with a wire harness that only needs to plug into one headlight connector. I found out that that connection is only used/needed for the signal saying the headlights are turned on, and then there's two power wires (1 positive and 1 ground) that are intended to be connected directly to the battery. However since most cars have their batteries up front, these power wires obviously aren't long enough to reach the fiero's battery. Did you have to do something similar or do your HIDs draw power directly from the stock H4 connectors? I'm wondering because I'm having trouble deciding if i should splice into wires up front, and the problem there is what wires do I splice into, or if i should do as the instructions say and connect the harness directly to the battery, and then where/how do i run the wires, under the car? thru the cabin? any thoughts would be greatly appreciated.
IP: Logged
PFF
System Bot
doublec4
Member
Posts: 8289
From: Oakville, Ontario, Canada
Registered: Jun 2003


Feedback score:    (20)
Leave feedback


Total ratings: 150
Rate this member

Report this Post04-12-2010 01:52 PM Click Here to See the Profile for doublec4Send a Private Message to doublec4Direct Link to This Post
Mine draw power directly from the H4 plug and I haven't had any problems with it. I moved my battery upfront so if I really needed to draw power, it would be very close by anyways.

Try drawing power from the regular H4 plug?
IP: Logged
LR8523
Member
Posts: 21
From: North Aurora, IL, USA
Registered: Jul 2009


Feedback score: N/A
Leave feedback

Rate this member

Report this Post04-12-2010 02:43 PM Click Here to See the Profile for LR8523Send a Private Message to LR8523Direct Link to This Post
 
quote
Originally posted by doublec4:


Try drawing power from the regular H4 plug?


That was one idea i had, but i thought i read somewhere that with the three wires one is a ground, one is for high beams and the other is for low beams, i don't remember exactly which ones were which. i don't know maybe I'm mistaken on that knowledge about the wire setup. And just a thought if i did take power from the other H4 plug, the one not connected to the wire harness for the signal, would i have to connect the harness' power wire to both the high beam and low beam wires, so that i would have power regardless of whether high or low beams were selected?
IP: Logged
doublec4
Member
Posts: 8289
From: Oakville, Ontario, Canada
Registered: Jun 2003


Feedback score:    (20)
Leave feedback


Total ratings: 150
Rate this member

Report this Post04-12-2010 03:20 PM Click Here to See the Profile for doublec4Send a Private Message to doublec4Direct Link to This Post
From my understanding, one wire is low beam +, another is high beam + and the other is ground.

So if you took power from this harness you would need to maybe take power from both lines? So when you switch high to low or low to high you have power either way. And then those "signal" lines that tell your ballasts if you're using high or low beam, just keep those hooked up as is with each wire going to the respective high/low

Im not much of a wiring guy, but thats my best guess.
IP: Logged
LR8523
Member
Posts: 21
From: North Aurora, IL, USA
Registered: Jul 2009


Feedback score: N/A
Leave feedback

Rate this member

Report this Post04-14-2010 11:22 AM Click Here to See the Profile for LR8523Send a Private Message to LR8523Direct Link to This Post
thats what i was thinking. ill have to give it a try and see how it works. it might be awhile though im still looking for projectors, but all the junkyards around dont seem to have any cars with decent projectors, so we'll see. thanks for your help.
IP: Logged
mtownfiero
Member
Posts: 1779
From: Mansfield, Mass
Registered: Mar 2007


Feedback score:    (6)
Leave feedback

Rate this member

Report this Post04-27-2010 07:23 PM Click Here to See the Profile for mtownfieroSend a Private Message to mtownfieroDirect Link to This Post
heres what i came up with using a mix of everyones ideas

S10 headlight buckets and ebay s10 h4 conversion buckets, i didnt want to go for the HID until i figured out of it worked and i liked it or not.


Mine seem to be a little high compared to doublec4's but i think looking at his pics now its because of how they were cut. Ill try to fix that tomorrow.
IP: Logged
kyunderdawg
Member
Posts: 4373
From: Bowling Green, KY. USA
Registered: Aug 2008


Feedback score: N/A
Leave feedback


Total ratings: 62
Rate this member

Report this Post04-27-2010 07:57 PM Click Here to See the Profile for kyunderdawgSend a Private Message to kyunderdawgDirect Link to This Post
Looks good. I don't know when I'll ever get started on mine.
IP: Logged
mtownfiero
Member
Posts: 1779
From: Mansfield, Mass
Registered: Mar 2007


Feedback score:    (6)
Leave feedback

Rate this member

Report this Post04-27-2010 08:34 PM Click Here to See the Profile for mtownfieroSend a Private Message to mtownfieroDirect Link to This Post
i still gotta clean it up to make it look right but it didn't take to long really.
IP: Logged
doublec4
Member
Posts: 8289
From: Oakville, Ontario, Canada
Registered: Jun 2003


Feedback score:    (20)
Leave feedback


Total ratings: 150
Rate this member

Report this Post04-28-2010 10:25 AM Click Here to See the Profile for doublec4Send a Private Message to doublec4Direct Link to This Post
Post some more pictures guys!

------------------

Check out my build!
https://www.fiero.nl/forum/Forum3/HTML/000100.html

IP: Logged
Kolskeggr
Member
Posts: 26
From: Warwick, Rhode Island
Registered: Oct 2009


Feedback score: (3)
Leave feedback

Rate this member

Report this Post05-17-2010 02:24 AM Click Here to See the Profile for KolskeggrSend a Private Message to KolskeggrDirect Link to This Post
Does the 4x6 reflector have a manufacturer label/stamp and/or part number molded into it or anywhere on it? I'm having a difficult time trying to find one with the 4 mount screws.
IP: Logged
doublec4
Member
Posts: 8289
From: Oakville, Ontario, Canada
Registered: Jun 2003


Feedback score:    (20)
Leave feedback


Total ratings: 150
Rate this member

Report this Post05-17-2010 10:02 AM Click Here to See the Profile for doublec4Send a Private Message to doublec4Direct Link to This Post
Sorry, even if I had the box still I couldn't tell you what the name was. They were some japanese brand thing from a booth at an auto show around here. I'm sure some of the generic brands online have mounting bosses on the back?

------------------

Check out my build!
https://www.fiero.nl/forum/Forum3/HTML/000100.html

IP: Logged
PFF
System Bot
mtownfiero
Member
Posts: 1779
From: Mansfield, Mass
Registered: Mar 2007


Feedback score:    (6)
Leave feedback

Rate this member

Report this Post05-17-2010 01:20 PM Click Here to See the Profile for mtownfieroSend a Private Message to mtownfieroDirect Link to This Post
parts nation or something like that sells nearly the same ones for s10's on ebay.
IP: Logged
cloaked
Member
Posts: 78
From: MI
Registered: May 2007


Feedback score: N/A
Leave feedback

Rate this member

Report this Post07-10-2010 02:40 AM Click Here to See the Profile for cloakedSend a Private Message to cloakedDirect Link to This Post
I just did the slim headlight build on my car like doublec4 did. Looks fantastic, and stock too.

I couldn't find headlights with 4 screw holes like doublec4, so I ended up getting regular 4x6 headlights. Then I got a chrome headlight retainer from a 95-97 chevy s10 to hold the headlight onto the plate i made. I bent the top tabs on this retainer down, and made a bend at the top of my plate, so that I could screw the retainer down without increasing the height of the headlights:


I drilled out a hole in the bottom of the housing for the adjuster screw receiver. I cut one side of the receiver off, and silicone'd it tight:


I remounted the spring that holds the plate, so that it has a similar 'traingle' configuration with the two adjuster screws:


The back of the headlight had some plastic ridges that stuck out, so I ended up having to put some spacers between the headlight retainer and the plate on the bottom. I also used springs on the adjuster screws between the plastic housing and the plate:


Not shown, but you'll have to cut out a notch in the detachable bottom plastic piece to make room for the bottom adjuster screw.


My only regret is the sheet metal I used for the plate isn't at all sturdy enough. It flexes with the adjuster screws, so I have very limited adjustment available. Luckily, the headlights seem to be pointing right about where I want them to. I'd suggest getting some metal that wont flex.


Edit:
Just upgraded to an HID kit from ebay! note to any HID installs: there is a hot 12volt wire going to the radiator fan that you can tap into.

[This message has been edited by cloaked (edited 04-02-2011).]

IP: Logged
johnyrottin
Member
Posts: 5464
From: Northwest Florida
Registered: Oct 2007


Feedback score:    (8)
Leave feedback


Total ratings: 85
Rate this member

Report this Post07-10-2010 08:08 AM Click Here to See the Profile for johnyrottinSend a Private Message to johnyrottinDirect Link to This Post
I really like these lights. Amazing how one guys idea just spurs everyone else to action and adaptation modes!!!! Keep the ides flowing!!!
IP: Logged
JSzpotek
Member
Posts: 227
From: Ottawa, Ontario, Canada
Registered: Jun 2010


Feedback score: N/A
Leave feedback

Rate this member

Report this Post04-28-2011 01:12 PM Click Here to See the Profile for JSzpotekSend a Private Message to JSzpotekDirect Link to This Post
4x6 headlights & 6000K HIDs came in!


IP: Logged
doublec4
Member
Posts: 8289
From: Oakville, Ontario, Canada
Registered: Jun 2003


Feedback score:    (20)
Leave feedback


Total ratings: 150
Rate this member

Report this Post04-28-2011 02:15 PM Click Here to See the Profile for doublec4Send a Private Message to doublec4Direct Link to This Post
Good to see you guys are still using this thread and coming up with new ideas/solutions. Tony Kania started a new thread with a nice install too.
IP: Logged
jwrape
Member
Posts: 1000
From: Monroe
Registered: Apr 2011


Feedback score: N/A
Leave feedback

Rate this member

Report this Post07-08-2011 01:27 PM Click Here to See the Profile for jwrapeSend a Private Message to jwrapeDirect Link to This Post
I just bought a set of the 4x6's. They are in the mail. I am going to reproduce the original thread. I can't wait to lower the profile to the more Level look that it gives.

------------------
86 Fiero 2M4 Silver, and 86 GT

IP: Logged
doublec4
Member
Posts: 8289
From: Oakville, Ontario, Canada
Registered: Jun 2003


Feedback score:    (20)
Leave feedback


Total ratings: 150
Rate this member

Report this Post07-09-2011 09:37 PM Click Here to See the Profile for doublec4Send a Private Message to doublec4Direct Link to This Post
Sounds good! Always interested to see what people are doing!
IP: Logged
jwrape
Member
Posts: 1000
From: Monroe
Registered: Apr 2011


Feedback score: N/A
Leave feedback

Rate this member

Report this Post07-15-2011 01:13 PM Click Here to See the Profile for jwrapeSend a Private Message to jwrapeDirect Link to This Post
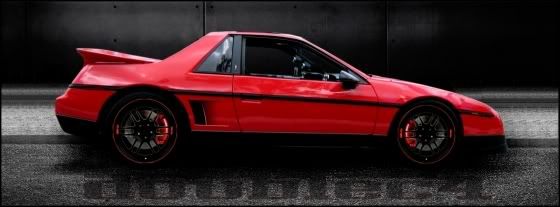
I finished both buckets yesterday although I only installed the driverside right now because the passengerside motor isn't ready to install. But I absolutely love the new look. Thanks for the write up.
I sort of used your ideas and then improvised with the material I had and my naked eye to make my bracket from 1/4" plexiglass. Really looks the same and almost functions the same. But I love the way it turned out.


I ended up using three seperate pieces of plexiglass for plates on 3 sides of the headlight lense. I JB welded them and then drilled 3 holes (2 for each adjustment screw and one other on the opposite side for a tension spring). I used a new spring instead of the rusty original.. I then taped off the lensse and sprayed it all black.
The only complaint I have with mine is that the finishing side covers were moving a little too much every time the light went up and down. I had to end up putting one set screw in the outside finishing cover to keep it steady. After I had to cut the notch for the bottom adjustment screw it was necessary to have more than just the one attaching screw to the finishing plate cause it would move and get in the way. I didn't want it to break all together and have to replace it.
Here is my Sport on the right with stock lights and the GT on the left with the one modded low profile light bucket.


------------------
86 Fiero 2M4 Silver, and 86 GT

[This message has been edited by jwrape (edited 07-15-2011).]

IP: Logged
DaleR
Member
Posts: 55
From: Fayetteville, Ohio, US
Registered: Apr 2009


Feedback score: N/A
Leave feedback

Rate this member

Report this Post07-27-2011 07:31 PM Click Here to See the Profile for DaleRSend a Private Message to DaleRDirect Link to This Post
Hello, thought I would chime in.
I am currently working on this same build. I am using 98 S10 headlights, and I took two spare retainers from a 86 Monte Carlo we have. I'm trying to have the back plate cut on a laser. I'll be making the design in AutoCAD 2012 and I'll send it on CD to my Father so he can cut it out at work. If everything works out id be more than glad to send a copy of the file. I'll post a few pictures when I get a chance.

the goal is to move one adjuster to the bottom of the Fiero housing and simply attach the adjusters, the headlight will then be held on with a retainer.

like I said ill post photos when I have everything worked out.
IP: Logged
FieroDev
Member
Posts: 246
From: Regina, Sask, Canada
Registered: Jan 2010


Feedback score: N/A
Leave feedback

Rate this member

Report this Post08-12-2011 07:23 PM Click Here to See the Profile for FieroDevSend a Private Message to FieroDevDirect Link to This Post
Does anyone know which housing to get so I can use screws just like Doublec4? i keep looking and all i see are ones with plastic tabs.
IP: Logged
PFF
System Bot
kk86 2m6
Member
Posts: 40
From: Charleston, IL USA
Registered: Jul 2010


Feedback score: N/A
Leave feedback

Rate this member

Report this Post02-28-2013 10:49 AM Click Here to See the Profile for kk86 2m6Send a Private Message to kk86 2m6Direct Link to This Post
Doublec4--- since you have those new headlights out, are you looking to sell your slims from this thread? jw
IP: Logged
GADJet
Member
Posts: 1466
From: Star City, AR, USA
Registered: Sep 2010


Feedback score: (1)
Leave feedback

Rate this member

Report this Post04-23-2013 09:56 AM Click Here to See the Profile for GADJetSend a Private Message to GADJetDirect Link to This Post
http://www.ebay.com/itm/CHE...252086446#vi-content

Nice Camaro H4 Lamps.... This should work well with this setup.
IP: Logged
doublec4
Member
Posts: 8289
From: Oakville, Ontario, Canada
Registered: Jun 2003


Feedback score:    (20)
Leave feedback


Total ratings: 150
Rate this member

Report this Post04-23-2013 10:51 AM Click Here to See the Profile for doublec4Send a Private Message to doublec4Direct Link to This Post
 
quote
Originally posted by kk86 2m6:

Doublec4--- since you have those new headlights out, are you looking to sell your slims from this thread? jw


Sure, pm me an offer.

They look cool since they're slimmer, but they're a little difficult to aim right. Light output is mediocre compared to a true HID projector set up.

------------------

Check out my build and my website!
https://www.fiero.nl/forum/Forum3/HTML/000100.html
Embrace Racing

IP: Logged
theogre
Member
Posts: 32246
From: USA
Registered: Mar 99


Feedback score: N/A
Leave feedback


Total ratings: 568
Rate this member

Report this Post04-24-2013 12:56 PM Click Here to See the Profile for theogreClick Here to visit theogre's HomePageSend a Private Message to theogreDirect Link to This Post
I don't read GFC often and sorry, I don't have time to read 3 pages...

You know that HL bucket has 1/2 for Door "Bearing..."
Door has 2 plastic parts is other 1/2. Shorten bucket removes Bearing areas.

Bucket has only these two points making contact w/ the door.

Door open less but If not used then two parts can eat each other. Doesn't take long before Fiberglass parts eats and breaks when hit each other directly.

------------------
Dr. Ian Malcolm: Yeah, but your scientists were so preoccupied with whether or not they could, they didn't stop to think if they should.
(Jurassic Park)


The Ogre's Fiero Cave (It's also at the top and bottom of every forum page...)

IP: Logged
Banshee
Member
Posts: 88
From: Kaukauna WI
Registered: Apr 2013


Feedback score: (2)
Leave feedback

Rate this member

Report this Post04-24-2013 06:11 PM Click Here to See the Profile for BansheeClick Here to visit Banshee's HomePageSend a Private Message to BansheeDirect Link to This Post
If you can send me a sample of the sheet metal piece I can turn it into a CAD drawing.
This is a project I would like to do.
IP: Logged
Danyel
Member
Posts: 6087
From: Lévis, Québec, Canada
Registered: Sep 2008


Feedback score:    (91)
Leave feedback


Total ratings: 171
Rate this member

Report this Post04-24-2013 10:58 PM Click Here to See the Profile for DanyelClick Here to visit Danyel's HomePageSend a Private Message to DanyelDirect Link to This Post
 
quote
Originally posted by Banshee:

If you can send me a sample of the sheet metal piece I can turn it into a CAD drawing.
This is a project I would like to do.


Are you trying to make these 4 x 6 head light .... in a CAD file ?


------------------

My Build Thread
Tylers Toy

[This message has been edited by Danyel (edited 04-24-2013).]

IP: Logged
LoW_KeY
Member
Posts: 8081
From: Hastings, MI
Registered: Oct 2001


Feedback score: N/A
Leave feedback


Total ratings: 150
Rate this member

Report this Post04-25-2013 10:30 AM Click Here to See the Profile for LoW_KeYSend a Private Message to LoW_KeYDirect Link to This Post
how's light output... I still want hid in fiero difference Is amazing....

just ask I've tried numerous setups recessed etc hated them

------------------

3800 SC/IC Formula whines more than your girl...
08 Cobalt SS TC - ZZP tuned, K&N SRI, 6k HID's 13.31@107
07 HHR - Wifes (tried to have her get the SS)

IP: Logged
Banshee
Member
Posts: 88
From: Kaukauna WI
Registered: Apr 2013


Feedback score: (2)
Leave feedback

Rate this member

Report this Post04-25-2013 10:42 AM Click Here to See the Profile for BansheeClick Here to visit Banshee's HomePageSend a Private Message to BansheeDirect Link to This Post
I thought it might help all of those that may want to have them but dont have access to build the mounts. I did this for a few people of other Ponitac parts on PYI site.
IP: Logged
Danyel
Member
Posts: 6087
From: Lévis, Québec, Canada
Registered: Sep 2008


Feedback score:    (91)
Leave feedback


Total ratings: 171
Rate this member

Report this Post04-25-2013 07:49 PM Click Here to See the Profile for DanyelClick Here to visit Danyel's HomePageSend a Private Message to DanyelDirect Link to This Post
 
quote
Originally posted by Banshee:

I thought it might help all of those that may want to have them but dont have access to build the mounts. I did this for a few people of other Ponitac parts on PYI site.


Cool... have a link to that??
IP: Logged
Previous Page | Next Page

This topic is 4 pages long:  1   2   3   4 


All times are ET (US)

T H I S   I S   A N   A R C H I V E D   T O P I C
  

Contact Us | Back To Main Page

Advertizing on PFF | Fiero Parts Vendors
PFF Merchandise | Fiero Gallery | Ogre's Cave
Real-Time Chat | Fiero Related Auctions on eBay


Copyright (c) 1999, C. Pennock