Hah, bigger brakes are next on the list for sure. I've never had any issues with the stock brakes as far as stopping power goes - I can lock up the tires so there's not much more to get out of the braking system. Of course, this isn't at all a race car, so brake fade or cooling aren't an issue.
The darker blue is still my favourite, although a lighter blue is growing on me..
Brad
IP: Logged
10:56 AM
MountainHiBlue87GT Member
Posts: 369 From: Yavapai County, AZ Registered: Jan 2009
For what its worth,my blue Series III auto, DBW, swap:
Regards,
David
------------------ Metallic Blue/Silver 1987 Fiero GT - 2006 3800 Series III Drive by Wire; Ported & Polished by TrippleEdge; 1.7 Yella Terra Full Roller Rockers; VS Cam; Tuning by Darth; WCF CAI & 1 5/8 Stainless Headers, 3" Exhaust, Power Steering & Much More; MSD Coils & Wires; Porsche (Brembo) Calipers on 13" Viper Rotors; 18X8 TSW Indy Wheels; Paint by Phoenix Auto in California City.
[This message has been edited by MountainHiBlue87GT (edited 03-30-2011).]
IP: Logged
09:48 PM
Apr 3rd, 2011
BtotheB Member
Posts: 2581 From: Peterborough, Ontario Registered: Dec 2001
Well, it's been a productive weekend. Unfortunately, the hobby is starting to feel a bit too much like work...
Anyways, I picked up all the paint supplies needed, a compressor and my paint gun. The blue I'm going with is a GM colour, called Bright Blue. It's a little lighter than the dark blue from my PSing, but I went with a slightly lighter gunmetal for the trim to match the wheels.
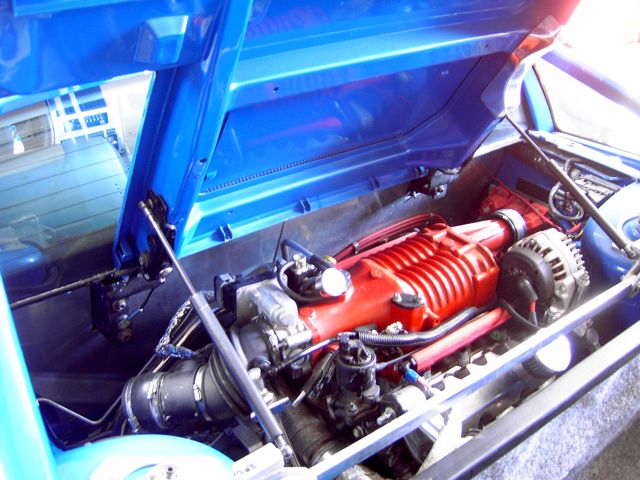
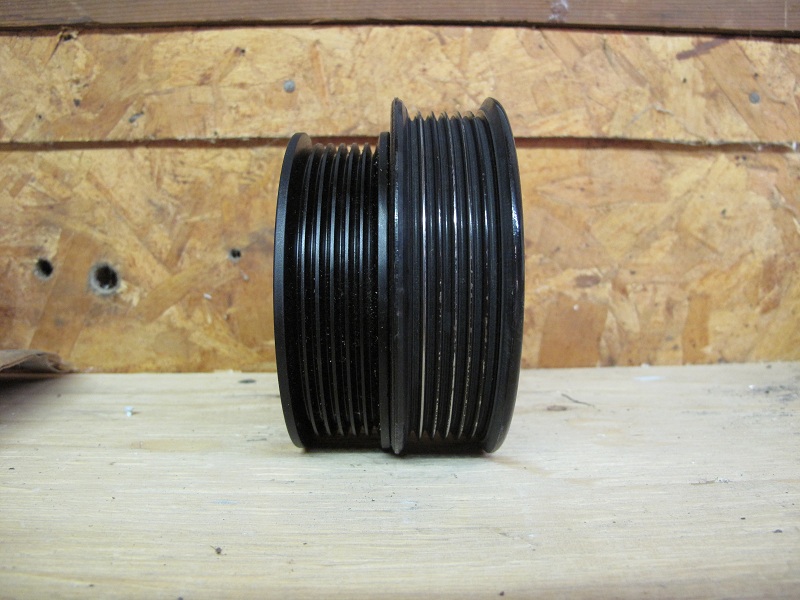
Before I masked and taped everything up, I installed a 3.5" supercharger pulley earlier in the week. See it here compared to stock..
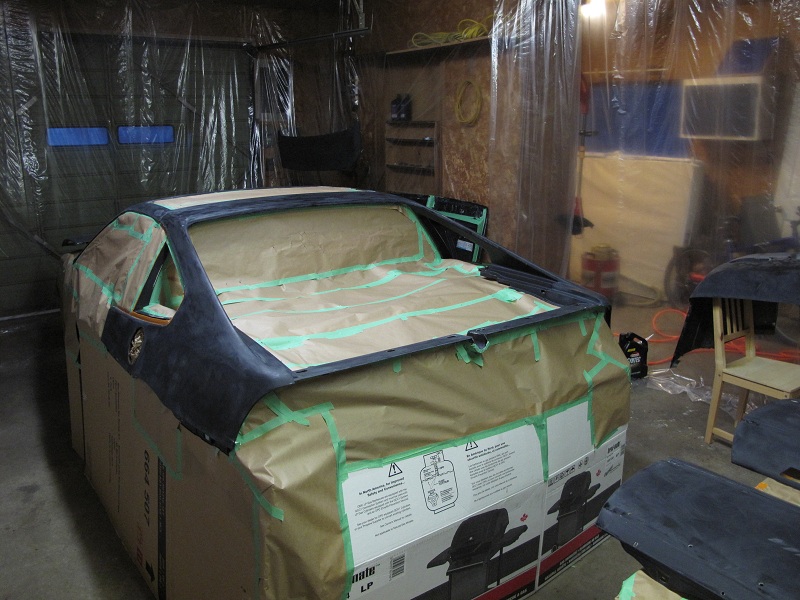
Yesterday I had just about finished all the sanding except for a few more minor repairs and fills. I started masking and taping everything up, and putting together a temporary spray booth. Here it is earlier this evening, with everything ready to go for primer.
Seems to be working pretty well so far to isolate the paint fumes from the rest of the garage. I have an oil furnace in the corner up to the left in the second photo, I wanted to keep all fumes away from that.
As of now I've got two coats of primer on about half the body panels. I'll finish up the rest later this week and start sanding before basecoat and clear. No photos of that unfortunately, my back is killing me from being on my feet all weekend and I had to finish up earlier than I wanted to.
I've got a couple questions if there are any painters reading this. I've got the spray pattern set up nicely on my HVLP gun, but every once in a while when I pull the trigger I don't seem to get any pressure and it just spits paint. It's not a lack of flow or pressure in my tank - I've got the regulator at the tank set to about 100psi, and the regulator at the gun set to 28psi when flowing (maximum specified for my gun). 95% or more of the time it sprays great, the compressor has no trouble keeping up, but occasionally it does this even though the tank pressure is well over 150psi. This is okay with the primer as I can sand out any rough spots, but I want to get it sorted out before I start shooting the base/clear.
Also, is it normal for painting to create a lot of dust? There is a fine dust over everything in the area, more than I expected. My ventilation system seems to clear the area fairly well...
Brad
IP: Logged
09:55 PM
Apr 5th, 2011
BtotheB Member
Posts: 2581 From: Peterborough, Ontario Registered: Dec 2001
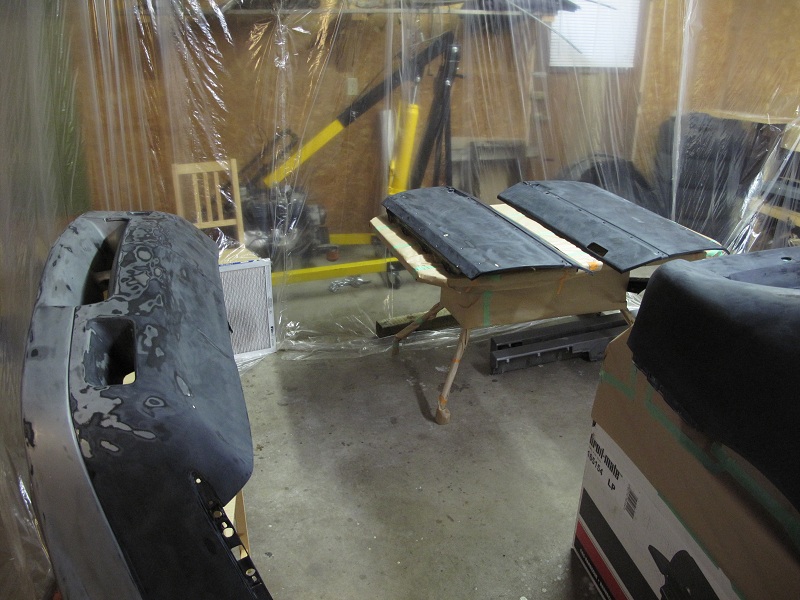
First, some panels primered and out of the way. You can see my compressor and in-line filter as well.
And more... I've got three coats on just about everything now.
I figured out my gun problem.. I had an air leak at the fitting going to the regulator on the gun. Replaced it and problem solved, the gun shoots great now.
Painting is actually pretty fun, now that I've mostly figured it out. Beats sanding at least...
Brad
IP: Logged
11:15 PM
Apr 6th, 2011
rynelson85 Member
Posts: 2178 From: Wichita, KS Registered: Aug 2002
Perhaps I misunderstood what happened, but I am rather impressed the clutch held stronger than the bolts. What brand of clutch and pressure plate do you use?
IP: Logged
01:39 PM
BtotheB Member
Posts: 2581 From: Peterborough, Ontario Registered: Dec 2001
Thanks Ryan, definitely good to have some visible progress after months of bodywork and sanding. Well, an hour or two here and there over a few months, but it adds up.
It's just a Spec stage 3, I don't think it failed the way you're thinking. When the bolts finally all let go I was just cruising at probably 10-15% throttle. They were sheared through over time, about 500kms from when I first started hearing a noise and failure. My conclusion was that it was weak bolts plus flywheel movement creating an impact on the bolts during hard acceleration.
I'm certain that issue is in the past at least, I took every precaution when I reinstalled the flywheel. The ARP bolts and shimming the holes will hold anything I can throw at it.
Brad
IP: Logged
09:44 PM
Apr 10th, 2011
BtotheB Member
Posts: 2581 From: Peterborough, Ontario Registered: Dec 2001
Lots of work this weekend, although not nearly as much visible progress. Most of my time was spent filling in small holes and sanding them down.
I used Evercoat Spot-Lite for these repairs, hopefully it holds up. This stuff was easy to apply and to sand, although it had a very short working time, only 3-4 minutes.
It's a lot of work for stuff only I'd ever notice (especially spots down near the bottom of the front bumper), but I'm hoping this sort of attention to detail on the prep will be what separates this from most paint jobs. If this paint job is going to turn out lousy, I want it to be my terrible painting skills that do it, not my prep work.
As of now I've got only a few things left to do before it's ready for base/clear - finish shooting primer over the repaired spots, finish wet sanding everything with 600 grit and give it a final go-over with wax and grease remover. Barring any unforeseen issues, I'll be shooting base and clear next Saturday.
Brad
IP: Logged
09:38 PM
Apr 16th, 2011
BtotheB Member
Posts: 2581 From: Peterborough, Ontario Registered: Dec 2001
I was hoping to get all the painting done today, but no such luck. Like most things Fiero related, this has been two steps forward, one step back... more about that after some pictures.
First, painting the lower part of the rear bumper in gunmetal, plus some trim pieces.
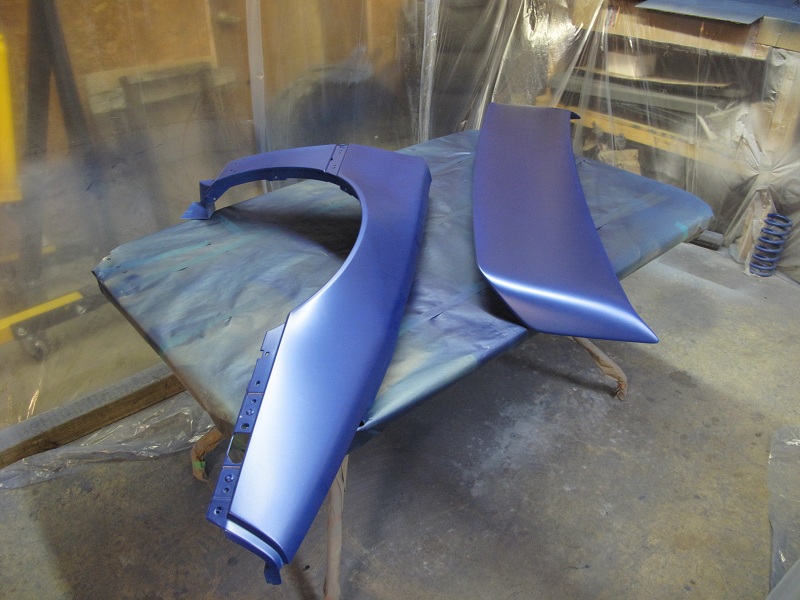
And painting some of the other body pieces in blue..
I didn't manage to paint everything unfortunately, I ran out of thinner before doing the decklid, the roof and the fastback clip. Oh well..
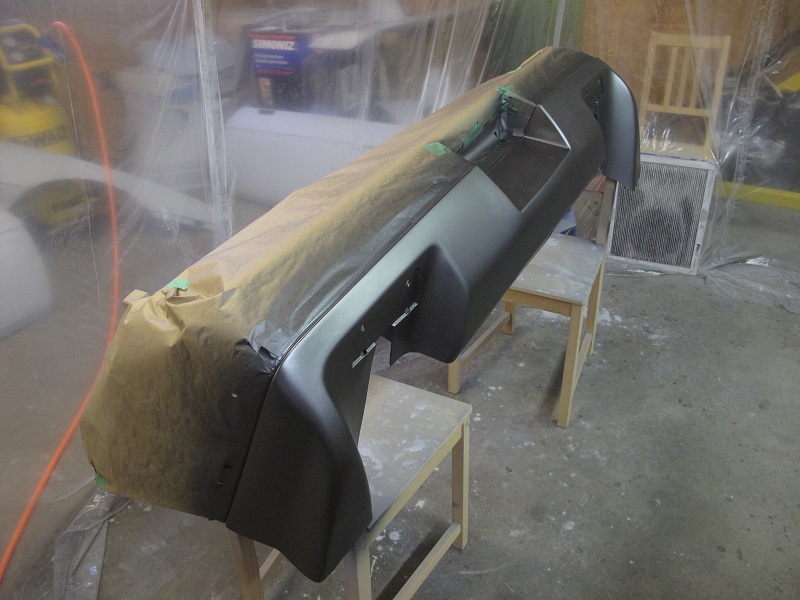
Here's the front bumper all finished and cleared.
If you look very carefully in this photo you can see the one step back thing. I had the front bumper and a door panel sitting there completed, plus a fender and the other door panel with just the basecoat. I had a couple spots on the fender and door panel to fix, so I didn't clearcoat them. Anyways, when I was cleaning the gun after shooting all the clear I could, I accidentally splashed thinner all over these panels. Bleh. I wiped it off the front bumper and door panel right away, hopefully repairs won't be too bad on those. On the fender and other door panel without a clearcoat, it left some nice spots I'm going to have a lot of work to fix. sigh..
On the plus side, I really like the colours, and after I get all the minor repairs done I think this is going to turn out really good. I have some orange peel in spots, but nothing that won't come out easily when I cut and polish.
Brad
IP: Logged
11:02 PM
Apr 24th, 2011
BtotheB Member
Posts: 2581 From: Peterborough, Ontario Registered: Dec 2001
Painting is finished. Overall I'm happy with how it's turned out. I was able to fix most of the mistakes I made, and should be able to fix most of the remaining mistakes when I cut and polish. The rest of the problems are things only I'm going to be able to see, because I know where to look.
On to some pictures... as of now, I'm about a third of the way through reassembly. I'll skip any more painting photos unless anyone wants to see more individual parts painted.. haha.
And the passenger quarter panel installed, really like these...
I'll finish assembly this week and should have it on all four wheels next weekend.
Brad
IP: Logged
09:27 PM
PFF
System Bot
May 1st, 2011
BtotheB Member
Posts: 2581 From: Peterborough, Ontario Registered: Dec 2001
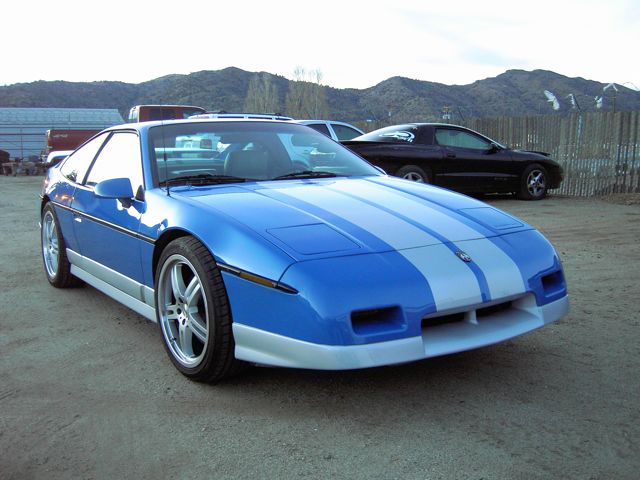
All done. Quite happy with how it all turned out. In the direct sunlight there's plenty of spots that aren't perfect, but it's better than I expected. The photos don't really show the true colour - you can't see any of the metallic.
Got the ride height exactly where I wanted it too - the 275lb springs in the rear are just right for the roads around here. The front feels good as well, with one coil cut off.


.JPG)
.JPG)
.JPG)
.JPG)


.jpg)
.jpg)
.jpg)


