Way back in June of 1999, near the beginning of the forum, I bought my second Fiero. It was a silver 1985 SE that had a V8 conversion kit mostly installed. The person that started the conversion was a former local dirt track stock car racer. He started with a nearly wore out car and used a nearly wore out 350 engine from a mid-80's truck. It was a bit of a hatchet job and when he had cobbled it together enough to drive, he naturally ran the crap out of it. I pointed out to the seller that it had bad tie rod ends, a loose wheel bearing, messed up brakes, erratic speedometer, and a non-working tach. I bought it cheap and worked on it all one weekend in the guy's driveway to make it safe enough for me to drive it home. Here is the history of that car, affectionally referred to as the "batmobile".
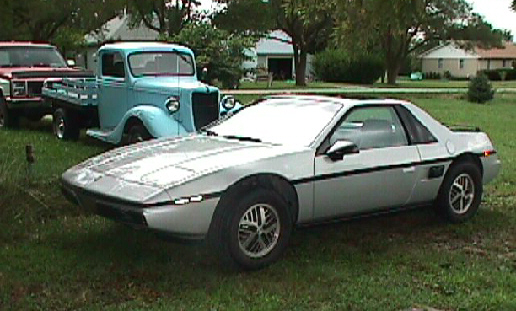
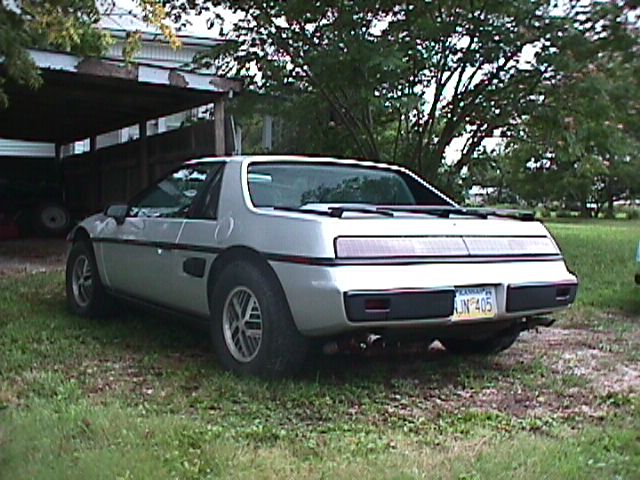
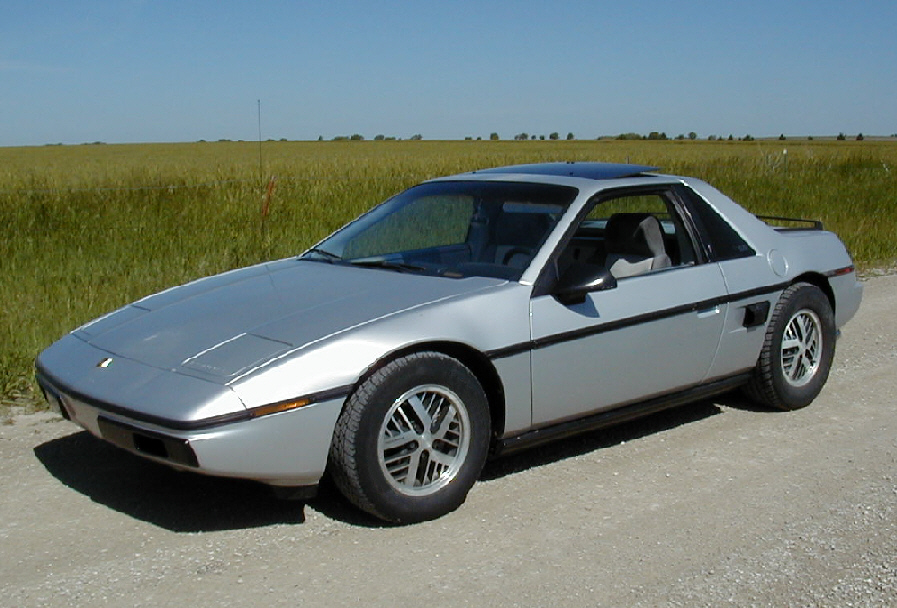
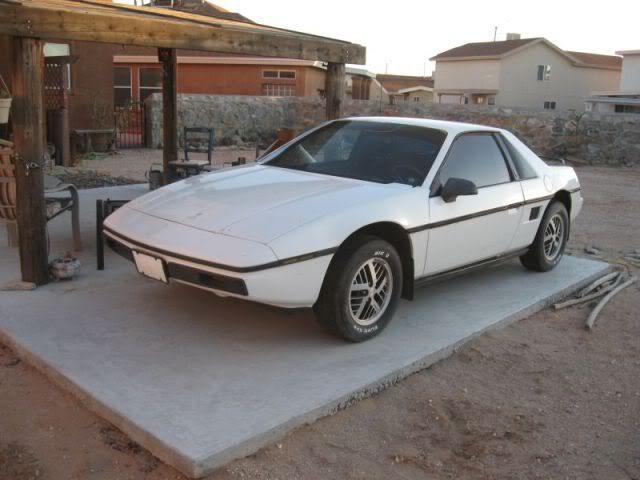
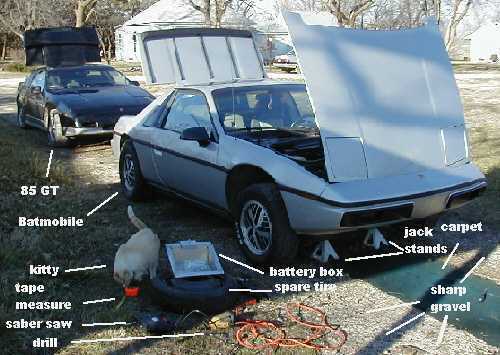
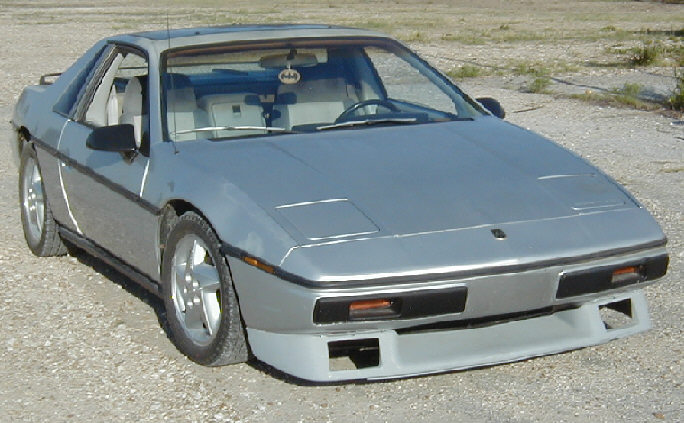
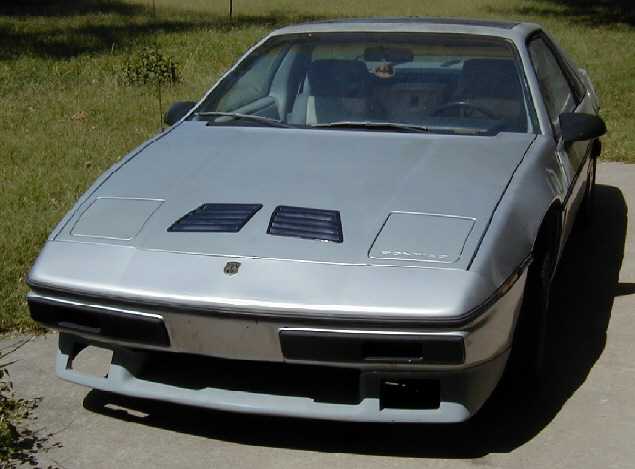
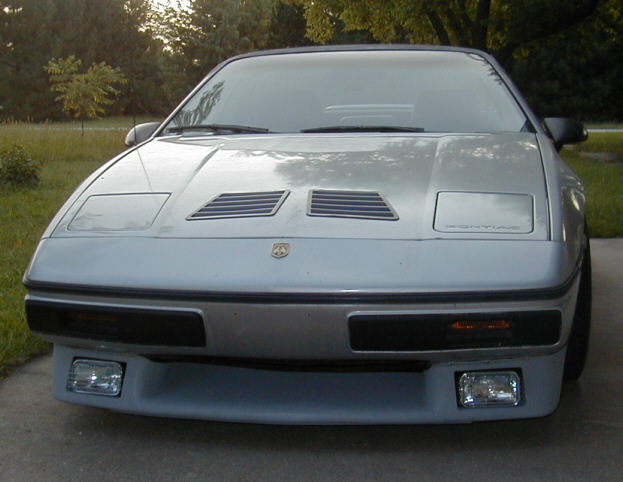
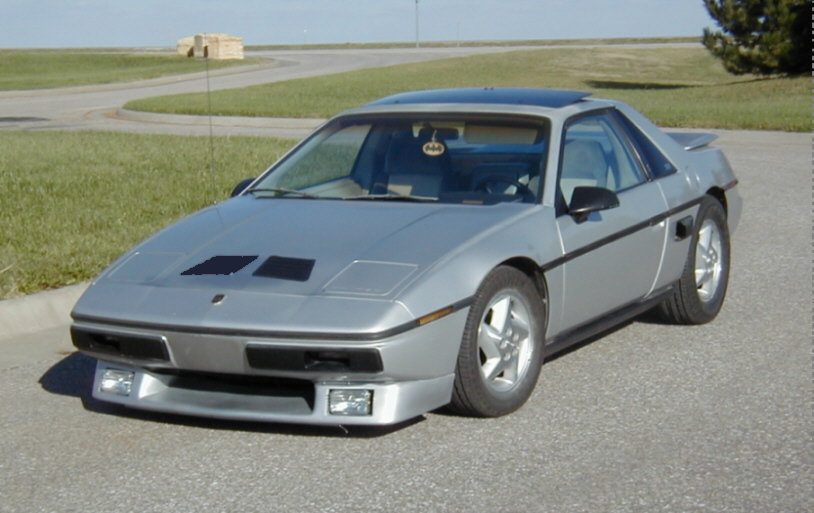
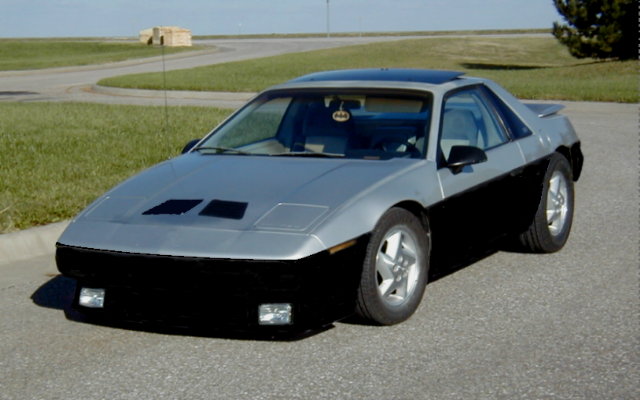
Here are a few photos of how it looked shortly after I first got it.
Wow, check out the wheel well openings above the front tire. Looks like a 4X4. That's my old 1936 Ford truck in the background.
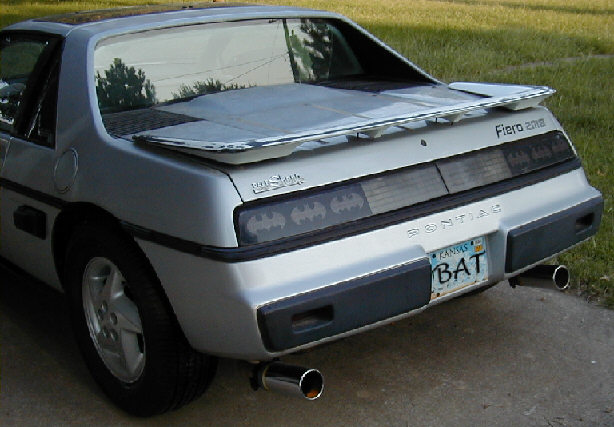
The car originally had a gawd awful looking luggage rack on the trunk.
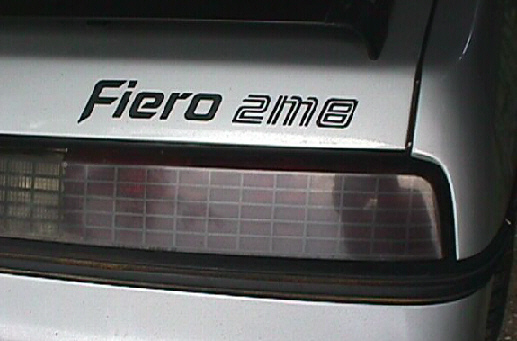
It was originally a 2M6 (had a 2.8L V6). The previous owner made the "6" into a "8".
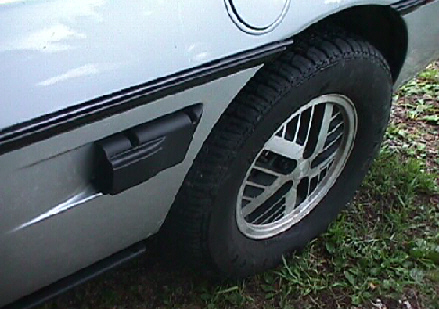
The first thing I did was install a side scoop. One of the forum members named Bruce had bought it for his car, but didn't like it, so he gave it to me for free.
------------------ 1985 SE auto with a 350 Chevy V8 engine (Batmobile) lowered, suspension mods, Grand Am brakes and wheels, Trans Am hood louvers, side air scoop, DGP front spoiler, Mustang hood scoop on deck lid, Dodge Shadow rear spoiler front mounted battery, custom gauges, stereo mods, etc.
[This message has been edited by batboy (edited 11-04-2010).]
IP: Logged
11:54 PM
PFF
System Bot
Aug 7th, 2010
litespd Member
Posts: 8128 From: No where you want to be Registered: Aug 99
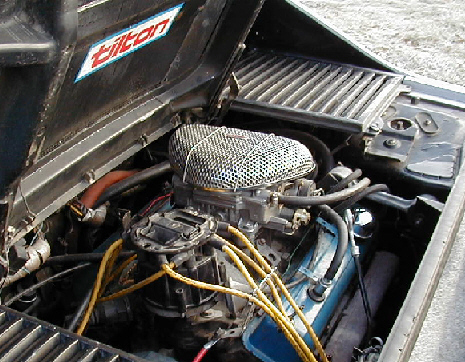
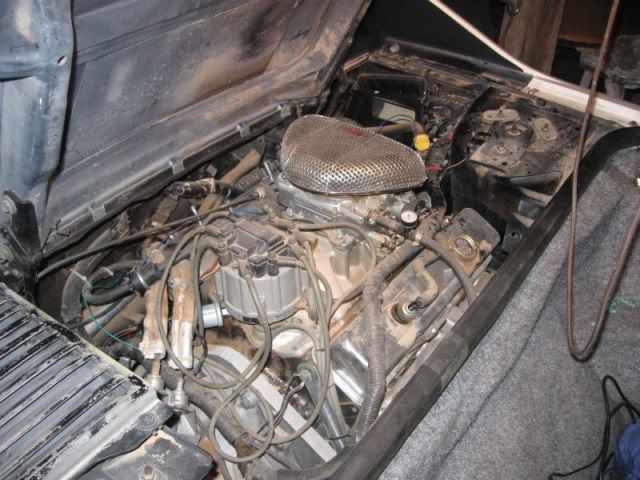
The engine compartment looked nasty. Lots of wiring problems needed to be sorted out. After cleaning it up a bit, here is what it looked like.
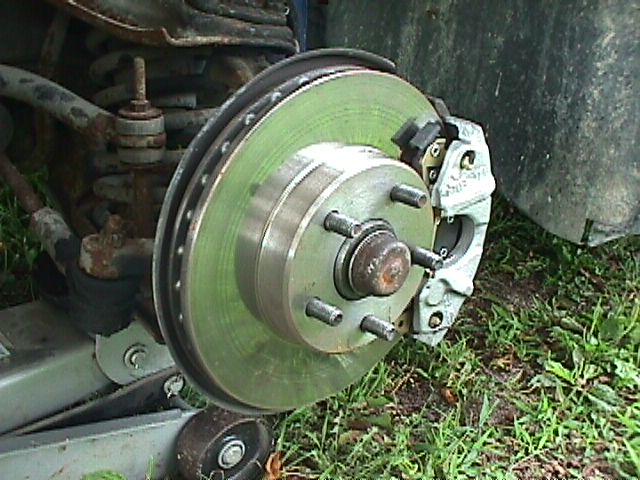
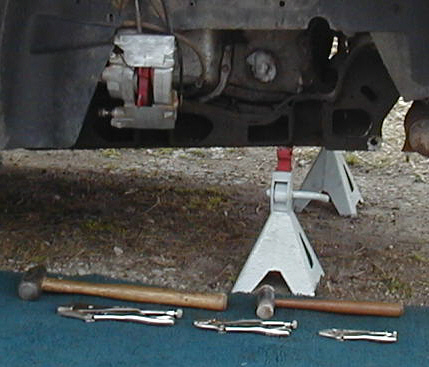
July 1999: I fixed some of the wiring, worked on the brakes, and noticed a ripped CV boot. One of the forum members, Greendano, offered to turn down my front hubs in order to swap in Grand Am brakes. I took him up on it and installed new front/rear calipers/rotors and hoses.
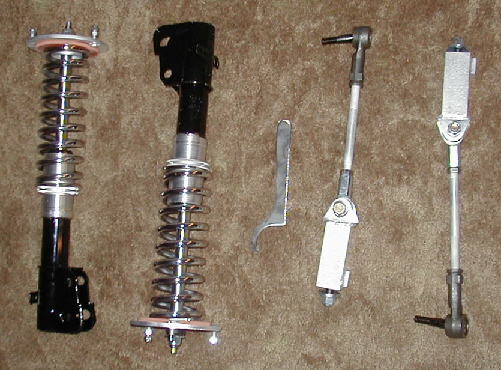
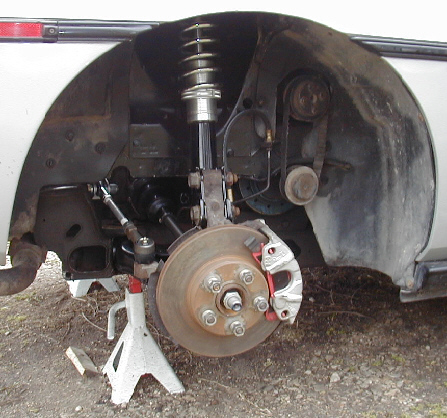
In the fall of 1999: I completely rebuilt the front suspension and steering. I replaced all the tie rods, balljoints, control arm bushings, sway bar bushings, shocks, and swapped in Suspension Techniques sport lowering front springs. Here is what it looked like after the front suspension was rebuilt and lowered.
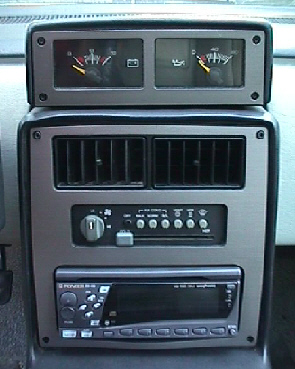
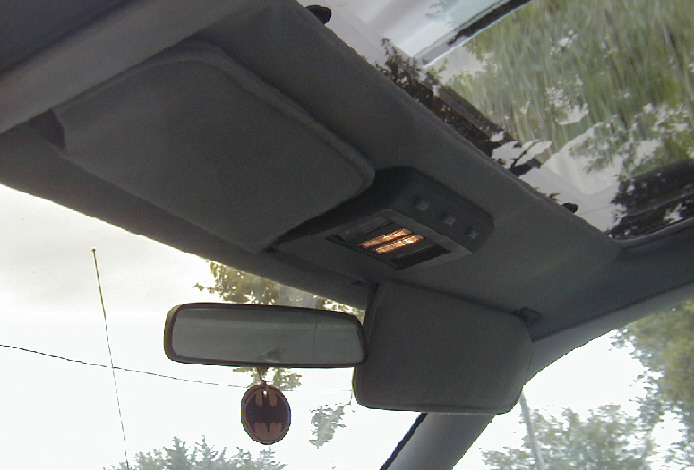
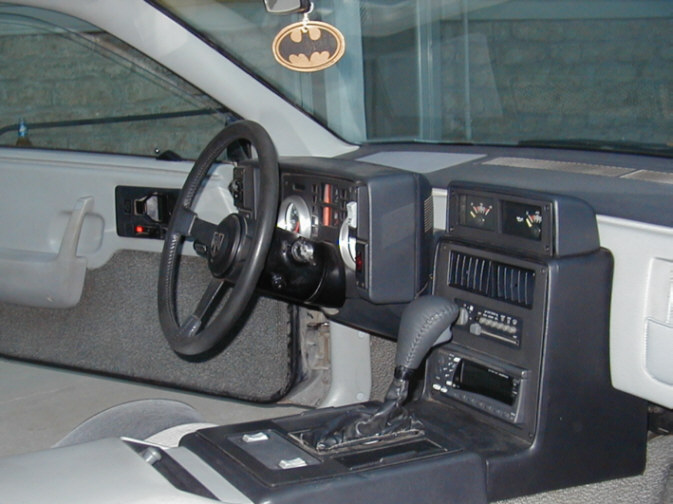
In December of 1999, I added ralley gauges. I don't remember exactly when I swapped in the new stereo head unit, but this pic shows off both.
[This message has been edited by batboy (edited 08-07-2010).]
IP: Logged
12:12 AM
Rainman Member
Posts: 3877 From: Cincinnati, Ohio Registered: Jan 2003
Wow. Blast from the past regarding that username. I haven't even read the thread, but had to comment when I saw batboy was posting again. What's next? DXR_DAD or 1FST2M6?
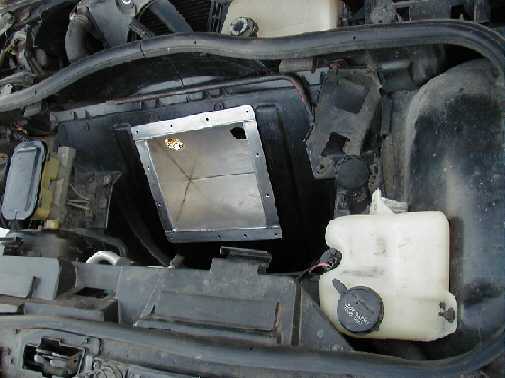
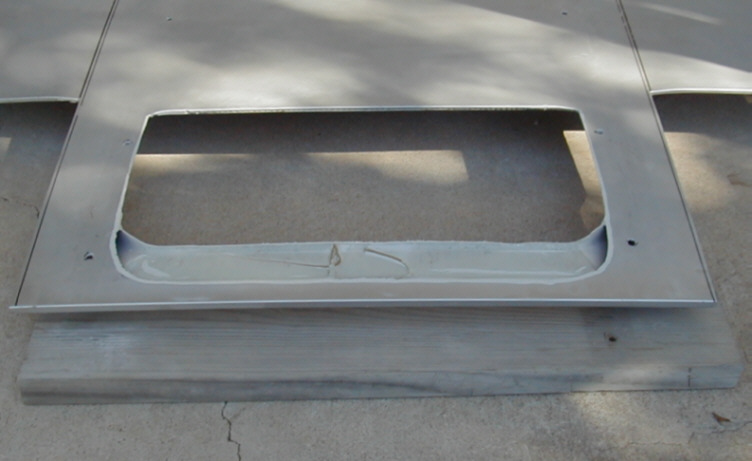
Also in the spring of 2000, I started working on moving the battery to the front. The previous owner had just crammed in some blocks of wood in the trunk and had the battery in a cheap battery box sitting in the trunk secured by nylon straps. I can't find a photo of the before, but it looked crappy. I bought a West Coast Fiero front battery kit and started working on it out in my driveway. By this time, my first Fiero (a silver 1987 SE 4 cylinder) had spun a rod bearing, so I bought another Fiero (a black 1985 GT V6). I have since sold the other two Fieros. The only one I have left is the silver V8 Fiero.
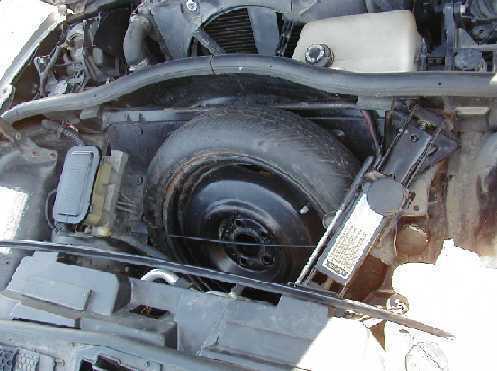
The kit required me to cut a hole into the trunk spare tire well. Here it is during a trial fitting.
Here is a top view of the finished project.
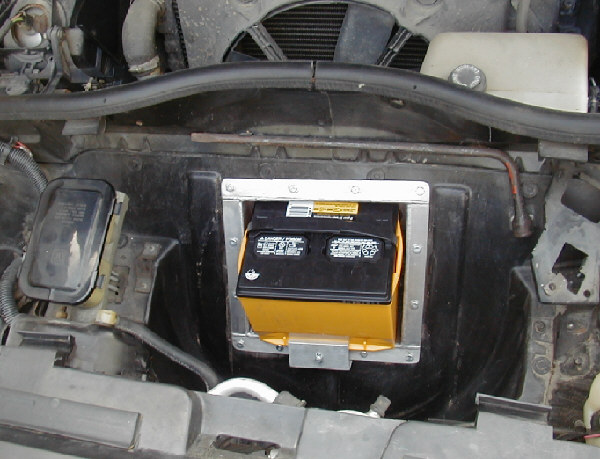
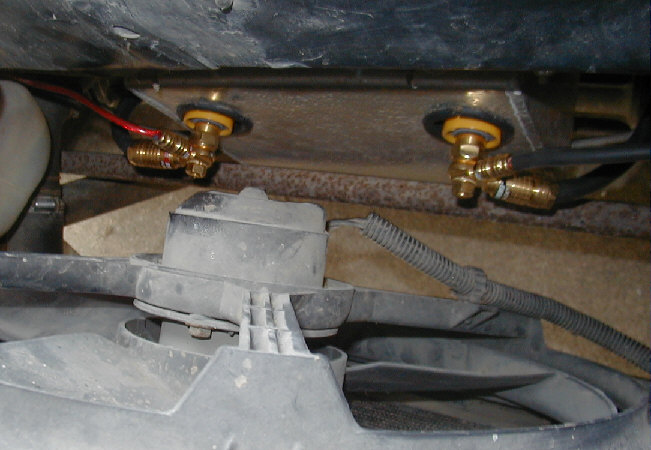
Here is what it looks like looking down from the radiator side. I used some fancy terminal connectors like the stereo builders use. I ran 2 gauge welding cable back to the starter and ran two grounds, one back to the engine and one shorter 4 gauge wire to ground the chassis. The smaller hot wire goes to my stereo amp behind the driver seat. I have a small box with a 8" sub behind the passenger sieat.
The spare tire fits down over top just like normal.
[This message has been edited by batboy (edited 08-07-2010).]
Apparently, I didn't do much work on the car for a couple years. By now it was running decent and fairly reliable. At some point I installed big exhaust tips. I also replaced broken or missing bits and pieces of the interior and bought some good seat skins (the old driver's seat had the usual wear and everything was sun faded). I also replaced one of the sail panels.
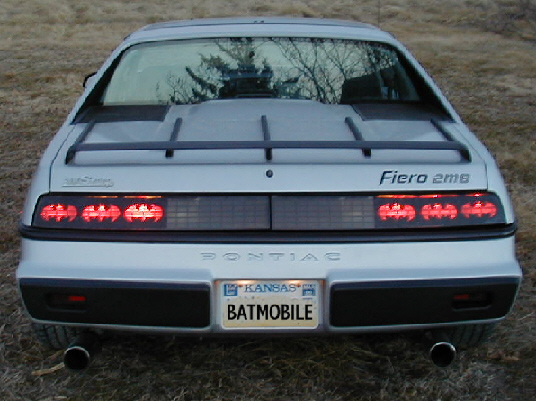
A forum member named monkeyman gave me some batman taillight masks.
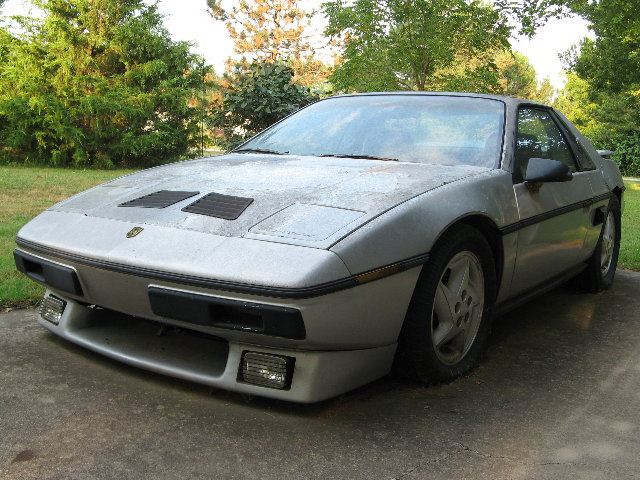
In July 2002 I bought new tires and wheels. The wheels were 15 inchers from a 1995 Grand Am. I stuffed 245-60-15 Dunlop tires under the rear and smaller Dunlop tires under the front. I also replaced the dew wipes. I had bought a new DGP chin spoiler with openings for driving lights a couple years earlier (which are no longer available). Now was time to install the spoiler (driving lights were on back order).
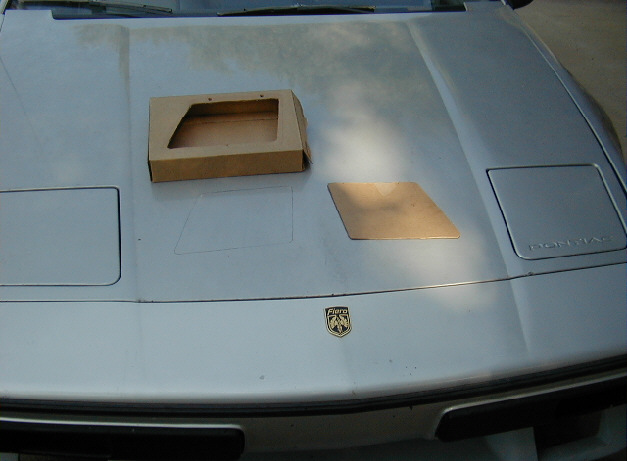
Next I installed hood louvers to help with cooling and to keep air from pooling up under the hood at high speed. Handling had vastly improved with the suspension mods and the front battery mod, but at triple digits, the front end still felt a little floaty with that heavy V8 sitting in the rear.
The first pic shows me tracing an outline with cardboard templates.
The louvers are from a 1985-1986 Trans Am (I bought them new at the Dealership).
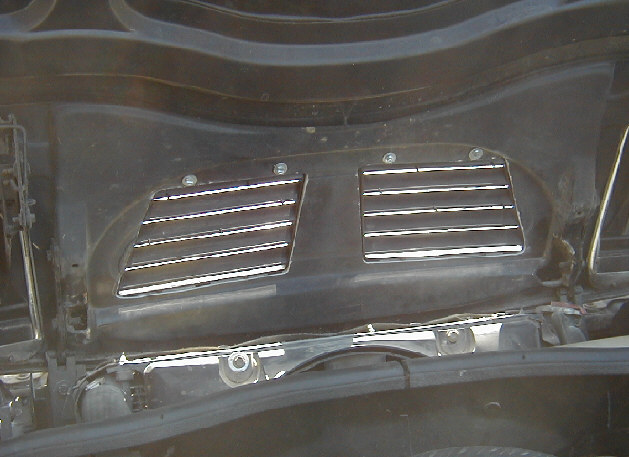
Here is what it looks like from the back side.
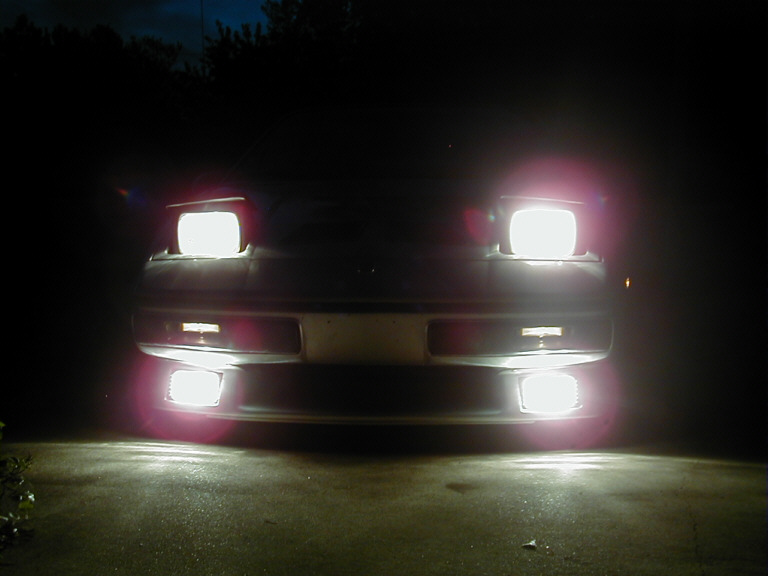
Using some cheap Blazer brand driving lights, I combined the clear lenses onto the Fiero turn signals.
[This message has been edited by batboy (edited 08-08-2010).]
The interior was starting to shape up, with the notable exception of the headliner. In August of 2002 I pulled the thing out of the car. The liner was old, stained, and falling apart. The backboard was cracked and crumbling.
I bought some fiberglass fabric and fiberglass resin to reinforce the backboard. Then I covered the backboard with new headliner fabric that closely matched the original color. I saved back a little material and had an upholstery shop recover my sunvisors. Here is the finished product, looks good!
During August and September 2002, I replaced the alternator and finally installed the driving lights.
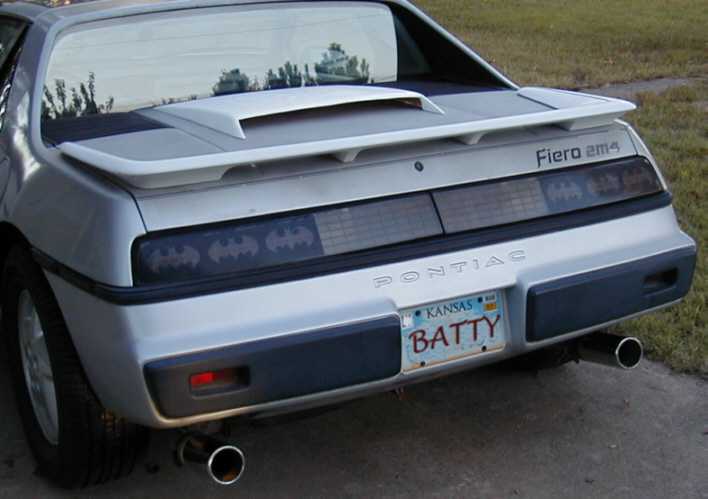
Next on the agenda was installing a rear spoiler. I won a 1994 Dodge Shadow rear spoiler in good condition on eBay. I also picked up a different deck lid from the boneyard to replace the one with holes drilled for the luggage rack.
Next I began the rear deck lid scoop project. I bought a replica 1979 Mustang hood scoop to mount on the rear deck lid. First step was to cut a hole and drill the mounting holes.
A photo of the batmobile tail after it was back together.
[This message has been edited by batboy (edited 08-07-2010).]
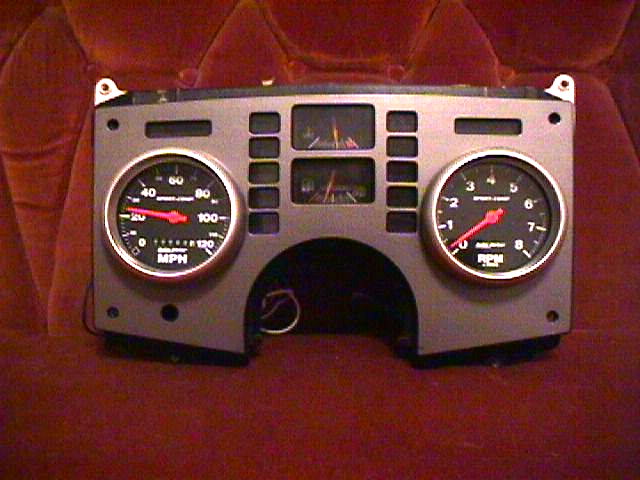
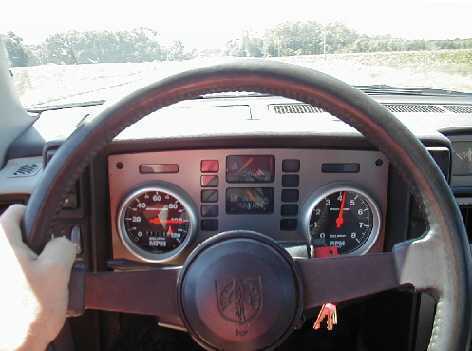
I forgot about my speedometer and tachometer mod. I can't find the original thread that covers it. Think I did that back in 2000. If you recall, the stock speedo and tach were all goofed up. I bought a matching set of Autometer speedo and tach. After a lot of modding and trial fitting and tweaking, I finally got them mounted into the original gauge cluster.
Here I'm testing out the gauges at triple digit speeds (seriously, I was going 100 mph when I snapped the pic).
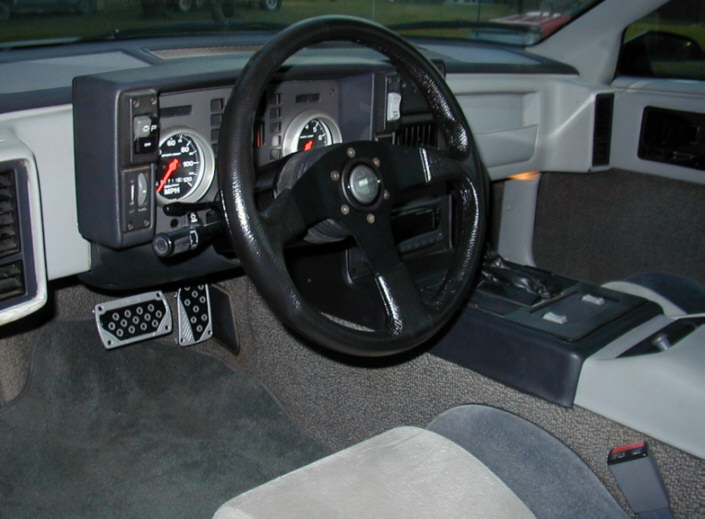
The summer of 2002 found me doing more interior mods. I swapped out the stock shifter knob for a late model Grand Prix leather shifter knob.
I finished sprucing up the interior by installing a Momo Corse steering wheel and some sport petals I bought at Advance Auto.
Here is what the car looked like in the fall of 2002. I touched the body up a little in places with Duplicolor spray paint.
Let there be light! I finally got the driving lights wired up. I also installed clear lenses onto the turn signals.
[This message has been edited by batboy (edited 08-07-2010).]
After all that blood, sweat, tears, time, and money spent, my poor Fiero was eventually neglected. The engine started burning oil badly, it had basically no compression in 2 cylinders. Blue oil smoke poured out everytime I started it. The engine needed to be rebuilt and the tired old TH125 was starting to slip. I did not completely abandoned it, but I certainly left out in the cold for several long years.
I remarried and settled down. I bought a new "arrest me red" 2004 Pontiac GTO with a LS1 engine that I spent time and money on. It's currently putting down 430 HP to the wheels N/A and about 550 HP to the wheels with nitrous. I got back into drag racing.
Here is a video of me putting the hurt to a 2010 Camaro SS. This is a N/A run, on the bottle I'm running low 11's and hope to be in the 10's this fall.
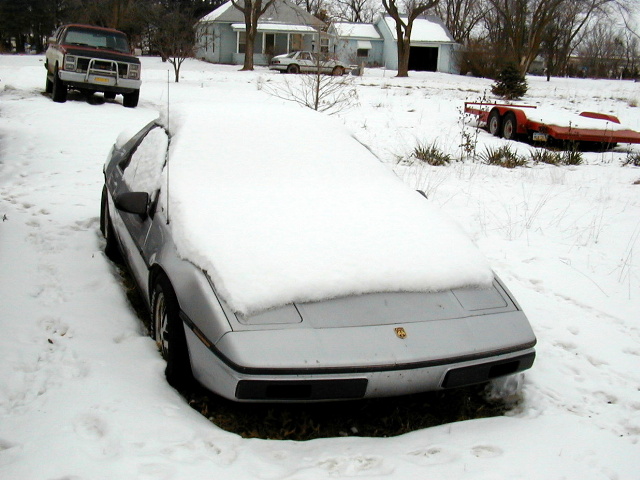
The years have not been kind to the once mighty batmobile. The Kansas summer heat has bubbled up the clear coat paint. A bad hail storm broke the taillights and sail panels. The tires have gone half flat. It's been at least 5 years since I've started it. She is looking a bit sad.
But, there is hope! The batmobile will ride again! I have a 350 short block with 4 bolt mains lined up and plan to get AFR aluminum heads. I already have a lot of performance parts stockpiled and waiting. Think I'll get Fierox to swap in a 4T65E HD transmission (4 speed auto) for me.
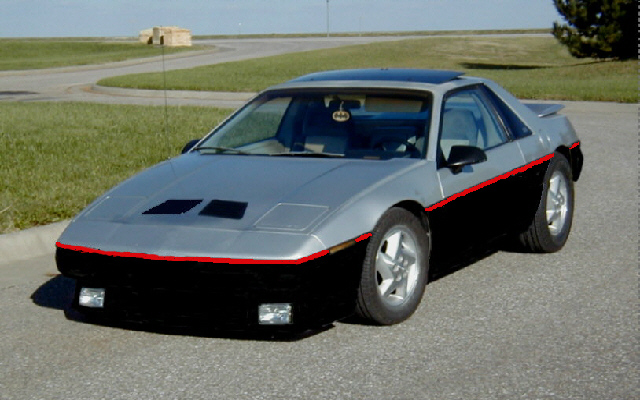
Once she's running again, then it'll be time for a much needed paint job. Here is a photoshopped pic of what I'm thinking about for the new paint. Planning on repainting to the original silver on top and black on the bottom. What do you think? Does it need a red stripe to separate the two tone colors?
The plan is to remove the front emblem and fill the holes.
[This message has been edited by batboy (edited 08-07-2010).]
Glad to see you have a renewed interest in your car. Personally I think you need something separating the two colors, I don't know about red I would have to see it.
Not much work actually done other than spending money. I did line up the transmission work with Fierox. He's going to build and install a 4T65E HD that will handle 350 HP to the wheels.
I bought an assembled 355 short block (350 +0.030" over). It'll be about 4 weeks before the machine shop will have it built. Here is the info:
Fully blueprinted, 4-bolt mains, seasoned GM roller block, line honed, decks squared to crank, bored and honed with torque plate and all dimensions equalized. New dowels, galley plugs, 1-piece cam bearings, and brass freeze plugs. Stock stroke 3.48" cast steel nodular crankshaft. GM reconditioned 5.70" rods with ARP wave lock rod bolts. Forged flat top pistons with floating pins. Completely assembled, clearanced, and balanced.
I'm inventorying what parts I already have in hand and what I still need to pick up. At this time, a pair of AFR 195 Eliminator aluminum heads and a Comp Cams roller cam kit will most likely get the nod. I'm still deciding on which intake manifold (clearance is critical). The goal is 440 HP at the flywheel.
[This message has been edited by batboy (edited 09-19-2010).]
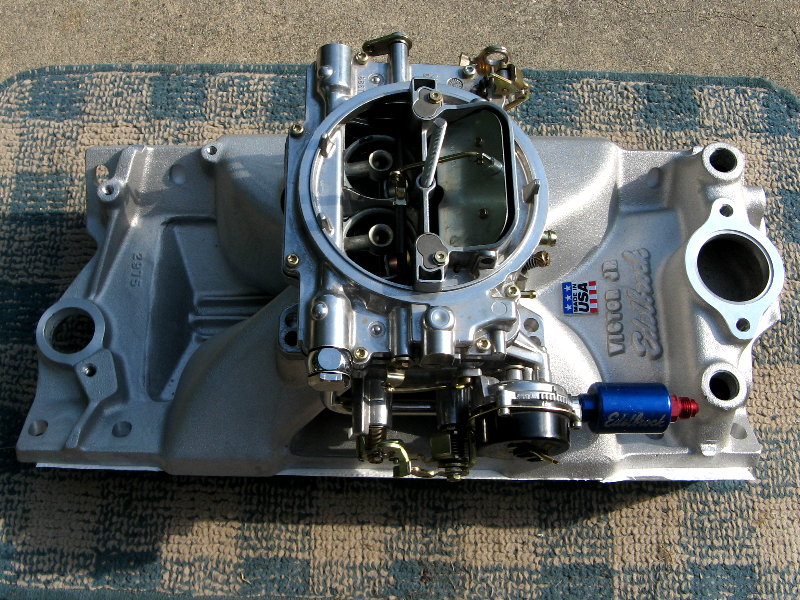
I bought an Edelbrock Victor Jr. intake manifold that has been CNC port matched to Fel-Pro 1205 gaskets. The AFR 195 Eliminator heads I'm getting are also CNC port matched to the same gaskets. The carb is an Edelbrock Performer 750 cfm (model 1411) with electric choke.
The 355 short block is currently being built and should be done in another 2-3 weeks. The cradle poly bushings arrived from the Fiero Store the other day. I also ordered a pair of Sanderson CC90 headers with 1-5/8" primaries and 3" collectors. I'm having them ceramic coated.
IP: Logged
06:34 PM
PFF
System Bot
blakeinspace Member
Posts: 5923 From: Fort Worth, Texas Registered: Dec 2001
Wow. Blast from the past regarding that username. I haven't even read the thread, but had to comment when I saw batboy was posting again. What's next? DXR_DAD or 1FST2M6?
1FST2M6... What ever happened to him..?? Welcome back BATBOY... SmoothGT
------------------ Steve Aka. "SmoothGT" 1987 GT 4.9L~V8 ~4T6OE SmoothGT~II
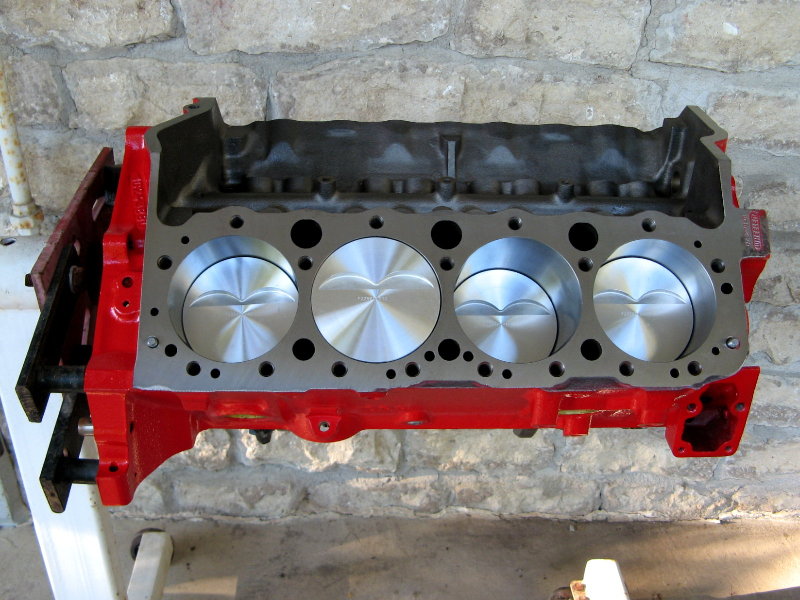
My new V8 355 short block, 4-bolt mains, Probe forged flat top pistons, fully blueprinted and balanced. Still waiting for the heads, they should be here by next weekend. I'll take a few pics as I assemble the motor.
[This message has been edited by batboy (edited 09-19-2010).]
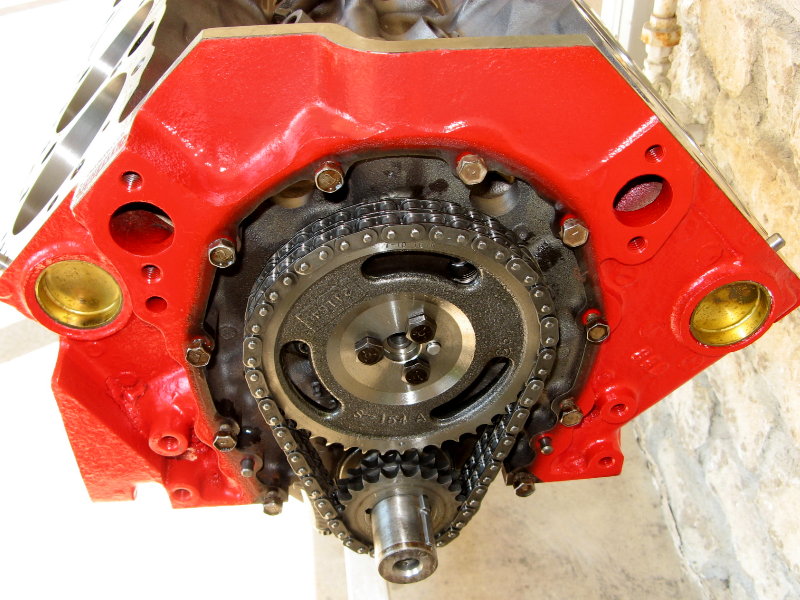
Comp Cam 280HR roller cam and double roller timing gears/chain were installed today.
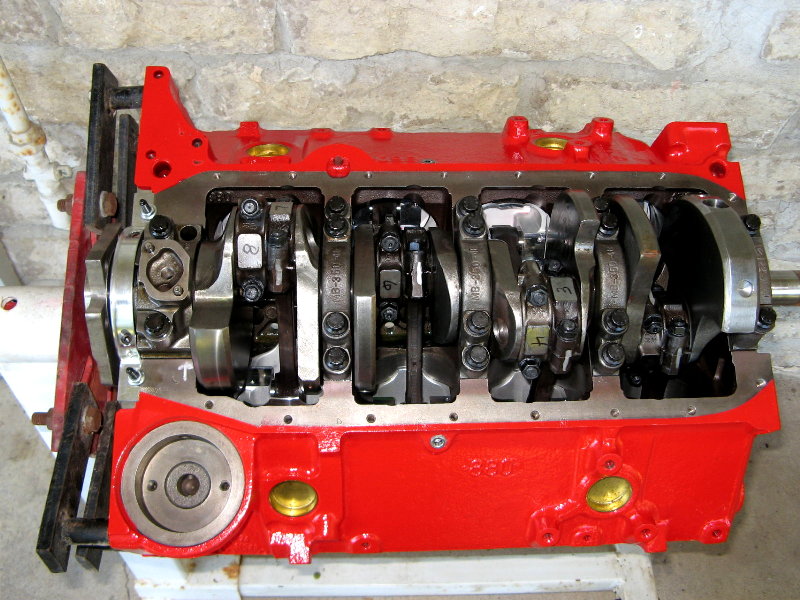
Installed a high performance Melling oil pump and pickup. Then I found out neither oil pans I have will fit. All small blocks before 1980 have a driver side dipstick. Newer engines have a passenger side dipstick. Starting in 1986 GM went to a one piece rear main seal. I have a later block that was machined for a one piece rear seal, but have an earlier style crank, so there is an adapter that converts to the old two piece rear seal (and uses a two piece seal oil pan). Since this block has the passenger side dipstick, I need to get an oil pan for a 1980-1985 engine. Of course, I have oil pans that are older and newer, so I have to order a new pan.
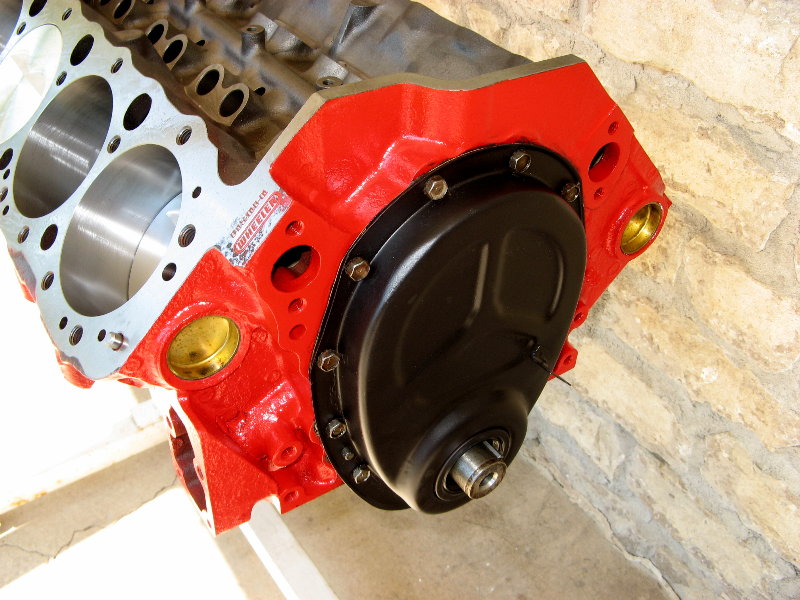
I also installed the front timing cover and took another photo.
[This message has been edited by batboy (edited 09-19-2010).]
IP: Logged
01:21 PM
Oct 4th, 2010
Patrick Member
Posts: 38577 From: Vancouver, British Columbia, Canada Registered: Apr 99
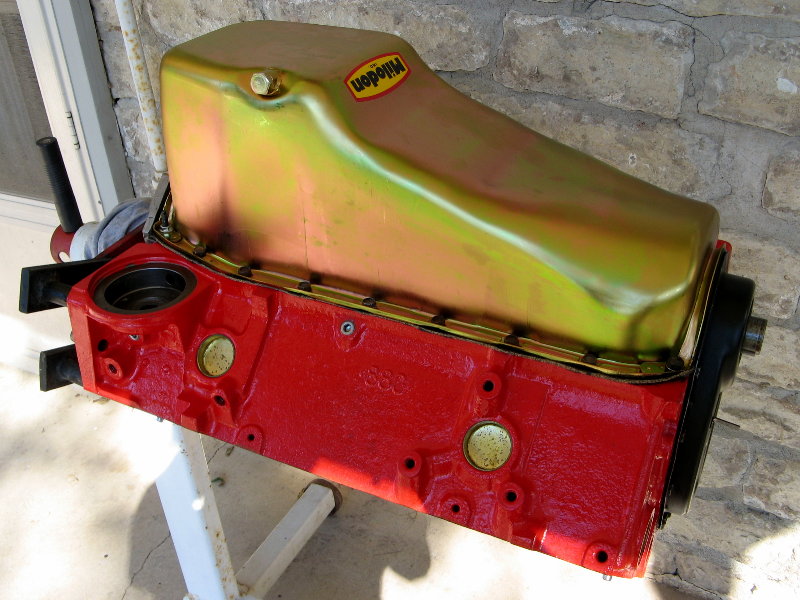
Still waiting on the heads. This is the third time they didn't ship on the deadline they gave me. I did get the oil pan on though, even though the gaskets they gave me the first time didn't fit. I had buy another set. The oil pan is a Milodon 5 quart pan (stock is 4 quarts).