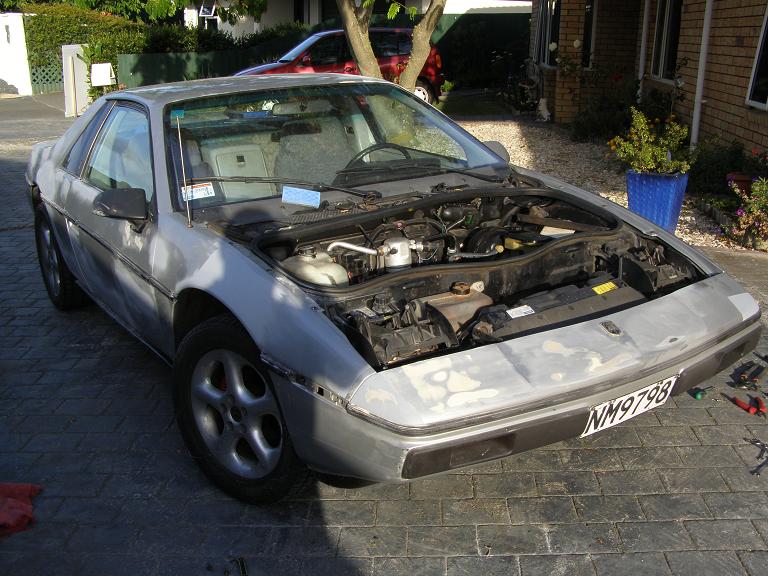
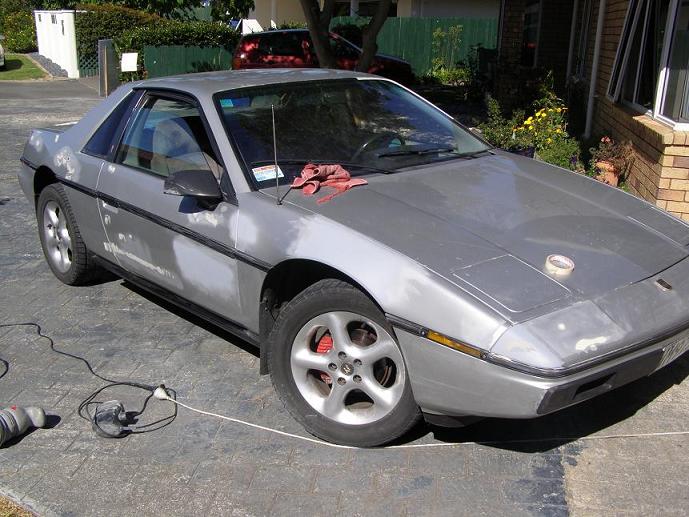
well i really didnt want another project for a while. Ive just finished a Mini and sold it, and a Honda Magna Rebuild Motorcycle thats now finished. so i wanted to buy another car. looked for ages on Trade Me similer to Ebay but for New Zealanders ( www.trademe.co.nz ) and what do i see. somthing called a Pontiac Fiero, what the hell is a Pontiac Fiero, hay we drive on the left hand side of the road and the only thing I new about Pontiac was a Trans Am. so it looked cool and it was cheap so I brought it. eeeeeemmmmmmm my first LH drive car,eeeeemmmm.
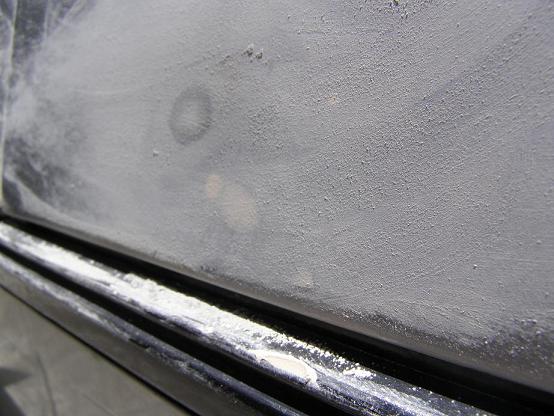
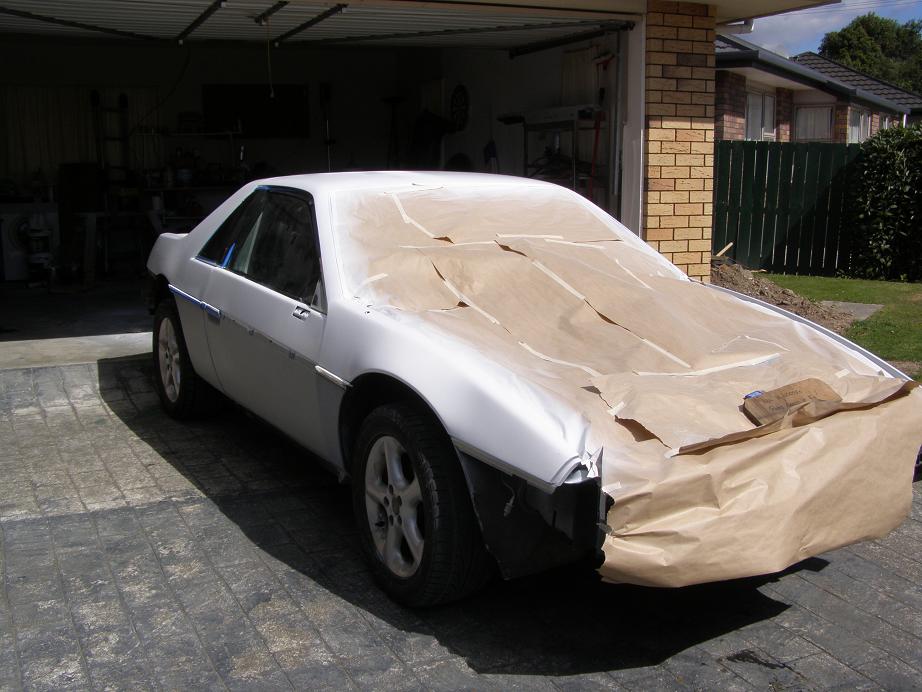
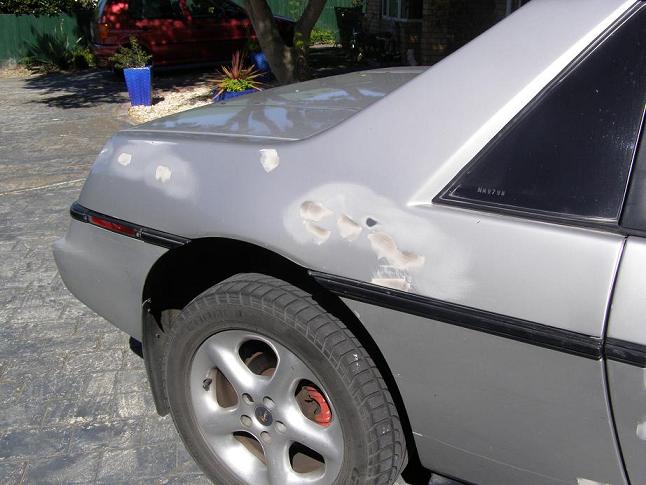
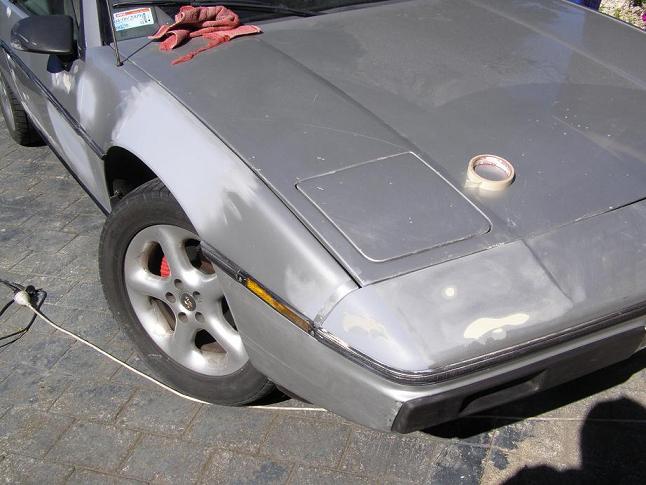
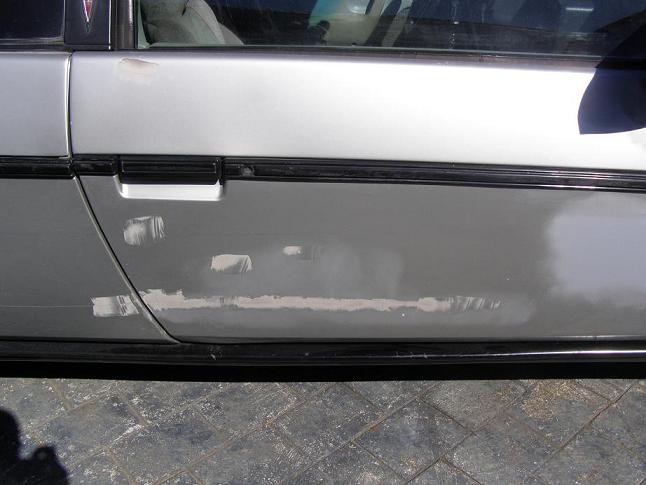
so its been a month and well yip i coulnt resist it all in boots and all startingsanding the car down where the chips were and starting filling them in
that where im at folks.....
------------------ It Changes All The Time
[This message has been edited by radar1 (edited 01-04-2009).]
IP: Logged
11:52 PM
PFF
System Bot
Jan 4th, 2009
radar1 Member
Posts: 135 From: Lower Hutt New Zealand Registered: Dec 2008
ok well let me tell you all I Hate Car Filler, Bog whatever you call it ( stuff to fill cracks and chips ) its me i know its me i put the stuff on i let it dry i sand it off and yip the blasted crack, dent, chip dip can still be sean. aaaaahhhhhhh. i need some suggestions on how people do it. ive tried spray putty, that dont work.
How I did it? Build 'tree' to hold all body panels in an 'exploded' fashion. All body panels in the relative position they should be in. But 'exploded' like, so you can get the paint gun into and around the edges of each panel/part. Make sure tree won't contaminate your painting surfaces when you hit it with a blast of air from your spray gun. (sawdust,rust,etc.) Remove all body panels from car. Throughly wash all panels, inside and out. I used a harsh dish washing soap. Inside and out. Use plenty of water and Rinse, Rinse Rinse! Any residue left on the panels can affect the paint job. Clean now, save time/headaches later. Hang panels on tree. Be sure they are securely mounted ! Hang mirrors, headlamp doors, gas filler assembly, etc. on a crossbar. Parts should hang right at the level you would narturally stand and comfortably paint in front of you. Allow enough room between hanging parts to turn them while you spray. Wipe down all surfaces to be painted with prep solvent. You can't get part too clean. Use a glazing paddle & apply glazing compound to blemished areas/spots (out of the little metal tube).Let dry, let dry, let dry. it needs to get hard. "FEATHER" block or soft touch, what ever works ***WHEN FEATHERING, LEAVE A "FEATHER" THAT IS LARGER THAN THE BLEMISH*** The contrast may look bad now but a raised area will disappear when you primer. Primer, MEDIUM fill material. Work on spots with a rattle of primer first, then use your spray gun to primer all the panels at once, while mounted on your tree. Block Sand 220 Two coats of Dupont CHROMA Base. DID NOT SAND. Two coats of Dupont CHROMA Clear, high gloss. Let cure. Install panels. Park car inside, use quality cleaning products & soft mitt. No Wax. In a couple of months, or so, have a competent PAINT professional to help you color sand. (you'll want to be there to answer any questions as to how the paint went on and they'll want to have you help sand). Same Competent PAINT professional, (someone that polishes paint with a particular polisher-every week), polish. Apply quality CLEANER/WAX. Only need to softly apply it by HAND. Apply 3M GLAZE, by HAND. The result should knock you out. That's how I did it.
[Edit] WHOOPS!!!!!!
I forgot to mention, in my earlier post, that I send out the front and rear facias (the front and back 'noses') to a company named KEYSTONE. They shoot them with plastic beads or walnut shells (or something) and I get them back in raw form, all original paint removed -no paint,naked- IF you try to primer the cracks or try to repair them in any way, it has been my experience that the cracks will come right back through the new paint at the first bump. Go to your local body shop and find out who they use to strip the front and back bumper area panels (the paint/body shops send them out to be done, many modern cars use this material, especially on the front, so they know about it) and see how much they will charge to do it. They can also repair any tears or breaks in these panels at the same time. Don't waste any time trying to do these panels yourself, leave these to the pros. Invariably, these panels will be bumped or pushed soon after a new paint job, the new paint should either be Urethane or have a Flex agent so that it will be pliable, the old paint will not, it has lost its flexing ability. Old paint underneath has lost its pliability and will crack and will show through the new paint. I think this is a very important step to achieving a super quality paint job that will stand the test of time. These are the only two panels on the car that you will have to do this with.
[This message has been edited by 85GT3.4Track4spdCar (edited 01-06-2009).]
IP: Logged
06:19 PM
Khw Member
Posts: 11139 From: South Weber, UT. U.S.A. Registered: Jun 2008
Ok thanks for all support. i went off into town today due to my day off work ( monday ) went into my panel and paint shop to tell them all that all the product i had spent with them was crap and was very dissapointed. ( well thats what i felt like saying.
After showing the guy behind the counter the car he looked at me, then the car, then back at me then the spotty bits of filler all over the car........... then back at me, see where im going with this?
ok he said lets start from the beginning.
what sander are u using, a cheap one mouse electric ) ok dont use that anymore...OK
what filler are u using? a really expensive one from you guys....when did you buy it..... a year ago.... ok dont use that anymore...OK
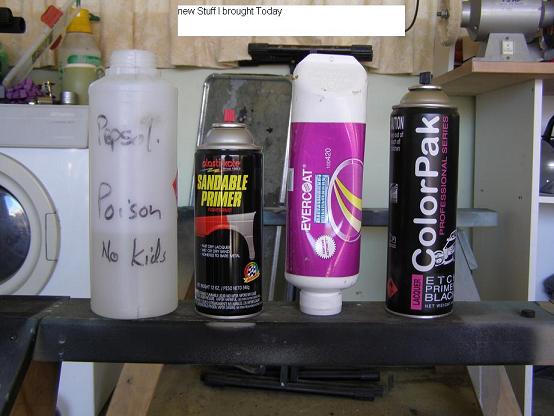
so i brought a hand sanding block one that bends. Some new sand paper 220 grit for the filler. A Black spray can for blocking back ( i never did that ) Some new filler, thinner one for small chips and all.
just got home and trying the new technique seams to be working.
Oh and also he said to use a Filler primer once Im ready this will fill all inperfections that the sanding didnt fix
wa la so easy.....eeeeeemmmm
IP: Logged
12:07 AM
RCR Member
Posts: 4454 From: Shelby Twp Mi Registered: Sep 2002
FWIW, I've found that the two-part spot filler works better than the "primer in a tube" stuff. It doesn't shrink as much. Your Evercoat stuff should be pretty good.
Bob
IP: Logged
01:06 PM
Jan 6th, 2009
radar1 Member
Posts: 135 From: Lower Hutt New Zealand Registered: Dec 2008
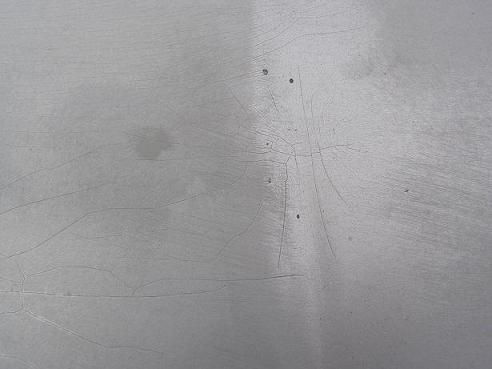
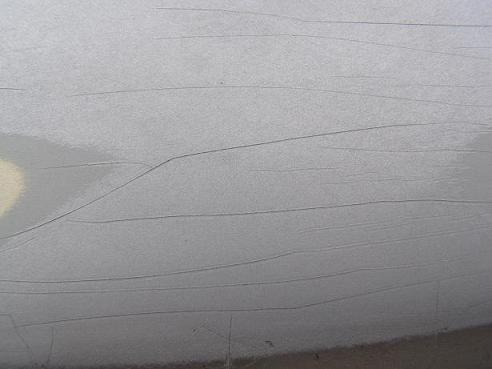
HELP! .. everything was goinmg fine until tonight when i tried to sand the cracks out of the paint, nothing worked and im scared of going to deep ( im used to sanding bear steel back not plastic... any ideas???
IP: Logged
01:29 AM
radar1 Member
Posts: 135 From: Lower Hutt New Zealand Registered: Dec 2008
HELP! .. everything was goinmg fine until tonight when i tried to sand the cracks out of the paint, nothing worked and im scared of going to deep ( im used to sanding bear steel back not plastic... any ideas???
IP: Logged
01:33 AM
PFF
System Bot
radar1 Member
Posts: 135 From: Lower Hutt New Zealand Registered: Dec 2008
I would've just scuffed it up with some 220 then used a fast filling primer to fill the cracks. If you keep sanding here and there to remove them your going to have more waves than the South Pacific! Marc
edit:I noticed the primer your using....crap! Go to NAPA and get a 2 part fast filling primer. Excellent thread here to help you along. https://www.fiero.nl/forum/Forum2/HTML/090549.html Do it once....do it right!
[This message has been edited by Gokart (edited 01-06-2009).]
HELP! .. everything was goinmg fine until tonight when i tried to sand the cracks out of the paint, nothing worked and im scared of going to deep ( im used to sanding bear steel back not plastic... any ideas???
WHOOPS!!!!!!
I forgot to mention, in my earlier post, that I send out the front and rear facias (the front and back 'noses') to a company named KEYSTONE. They shoot them with plastic beads or walnut shells (or something) and I get them back in raw form, all original paint removed -no paint,naked- IF you try to primer the cracks or try to repair them in any way, it has been my experience that the cracks will come right back through the new paint at the first bump. Go to your local body shop and find out who they use to strip the front and back bumper area panels (the paint/body shops send them out to be done, many modern cars use this material, especially on the front, so they know about it) and see how much they will charge to do it. They can also repair any tears or breaks in these panels at the same time. Don't waste any time trying to do these panels yourself, leave these to the pros. Invariably, these panels will be bumped or pushed soon after a new paint job, the new paint should either be Urethane or have a Flex agent so that it will be pliable, the old paint will not, it has lost its flexing ability. Old paint underneath has lost its pliability and will crack and will show through the new paint. I think this is a very important step to achieving a super quality paint job that will stand the test of time. These are the only two panels on the car that you will have to do this with.
[This message has been edited by 85GT3.4Track4spdCar (edited 01-06-2009).]
IP: Logged
07:01 PM
radar1 Member
Posts: 135 From: Lower Hutt New Zealand Registered: Dec 2008
ok just got a quote, the panel shop says they just use good old fashioned sand paper and cut iut right back and take off all the old paint. cost $600.00
I DONT THINK SO!...eeeeeeemmm
so I geuss im gonna have to do it myself. any ideas on what sand paper to use? and when i get it back to no paint what color is the plastic ( BLACK ) at least ill no where to stop
no no no no sanding too much on those pieces will get you through the gelcoat and that is way too far. Look around your area for a person who does soda blasting. Usually runs 40-50 dollars an hour 2 hour minimum and they can do most of the car for that not just the bumper do a search on it really awsome stuff.
IP: Logged
02:11 AM
radar1 Member
Posts: 135 From: Lower Hutt New Zealand Registered: Dec 2008
You dont want body filler. What you want to use is called 'icing' by pros. Its a 2 part filler that can be put on painted parts for scrapes, dings, nicks and gouges. I use Evercoat MetalMate myself. It just needs the paint sanded with 220 first and its easy to sand. You just primer over it and paint. I use it all the time for door dings and hail damage. Obviously since its on top of paint it dont make a difference if the body is metal or plastic. Just use you finger or edge of a block to sort of taper what your fixing before filling it. It also dont bleed thru finished paint like some fillers do, leaving a ring around the spot. Dont try to use it to fill all the surface cracks in the bumpers.
On the bumpers, I sand them all the way down with DA and by hand with 180 paper, then primer, sand the fuzz, reprime, sand and paint. When you put the first primer coats on youll see what 'fuzz' is. The urathane bumpers DONT have a gel coat. Thats only on fiberglass parts. Soda blasting is by far the best way though...I usually dont have time to take off, go to blaster, remount when Im only getting a few hundred to refinish it in the first place. Really bad ones, I just replace with new. My average bumper replacement cost is $60-$75 for average used car.
------------------
Owner / Operator Custom Paint and Body... specializing in Corvette & Higher End Autos for 40+ years Ferrari, Mercedes and Porsche Approved ____________________________________________ 88 Corvette convertible 05 Dodge Magnum Hemi R/T 66 Dodge Killer Bee Coronet
[This message has been edited by rogergarrison (edited 01-09-2009).]
IP: Logged
01:59 PM
vinny Member
Posts: 1690 From: starkville MISSISSIPPI Registered: Mar 2003
I use 3M Pirahna putty! Good stuff. There are lots of different kinds that are good just don't use the red PUTTY from wal-mart. It suxs. I don't mean the red cream hardener though. It works fine.
Good luck Vinny
IP: Logged
02:49 PM
Jan 10th, 2009
rogergarrison Member
Posts: 49601 From: A Western Caribbean Island/ Columbus, Ohio Registered: Apr 99
I also used Pirana too when my supplier had a great deal on it $12 @ tube. I started getting the Evercoat when it went up, pretty much same results.What they are is what USED to be also in regular filler that made it better. Now they dont put that finer particle stuff in the regular and sell you this for a premium price. Ive also found that the blue hardener makes it feather out better than the red/brown one even though dealers say there the same except for the color. (theyre not). They all told me the same thing about red and gray primers, but that was proven wrong too.
IP: Logged
08:31 AM
Jan 11th, 2009
radar1 Member
Posts: 135 From: Lower Hutt New Zealand Registered: Dec 2008
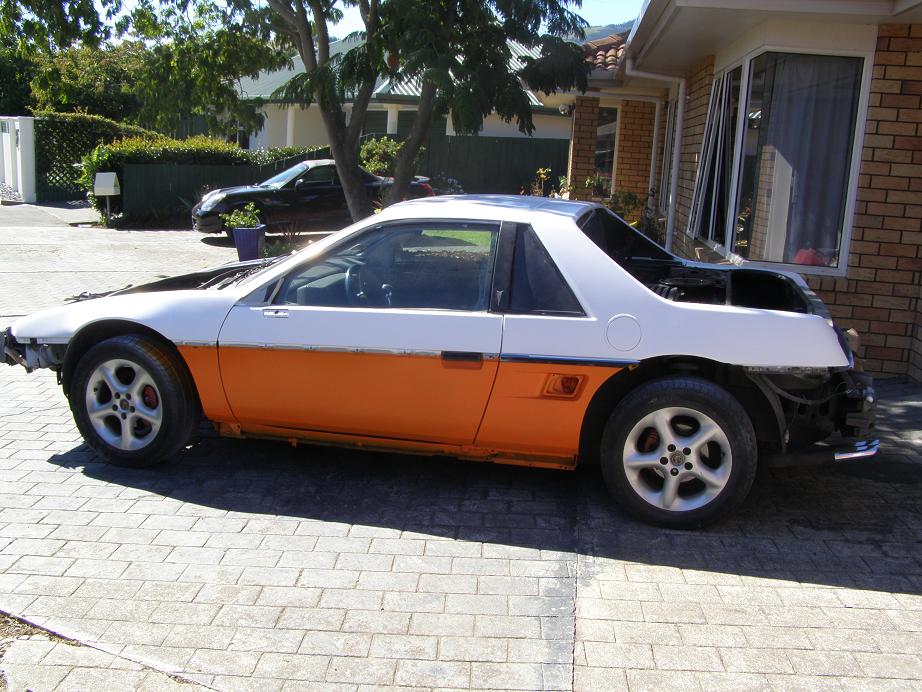
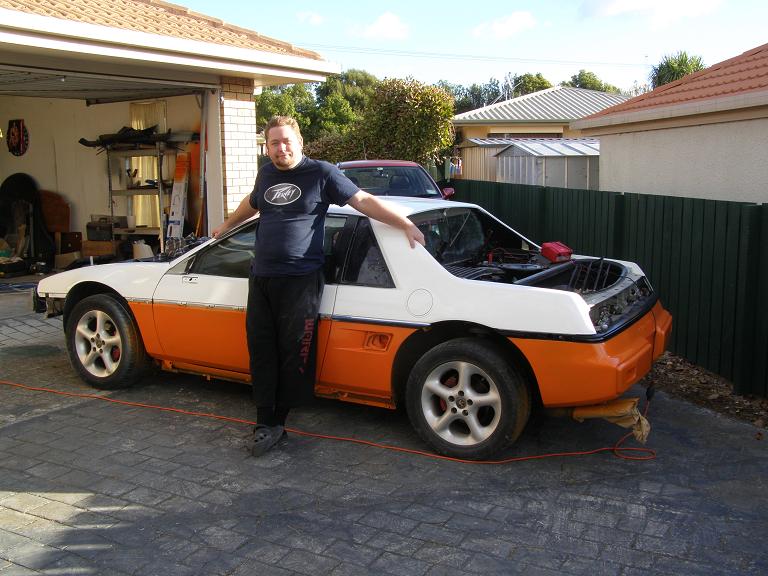
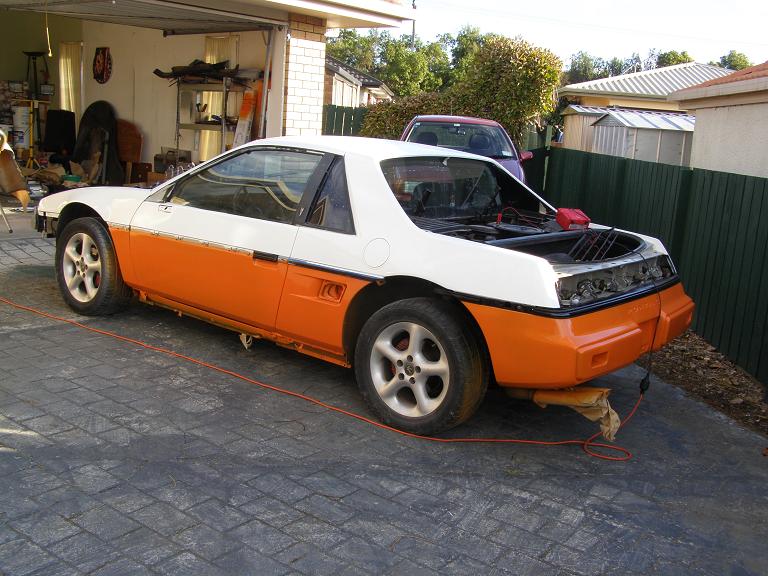
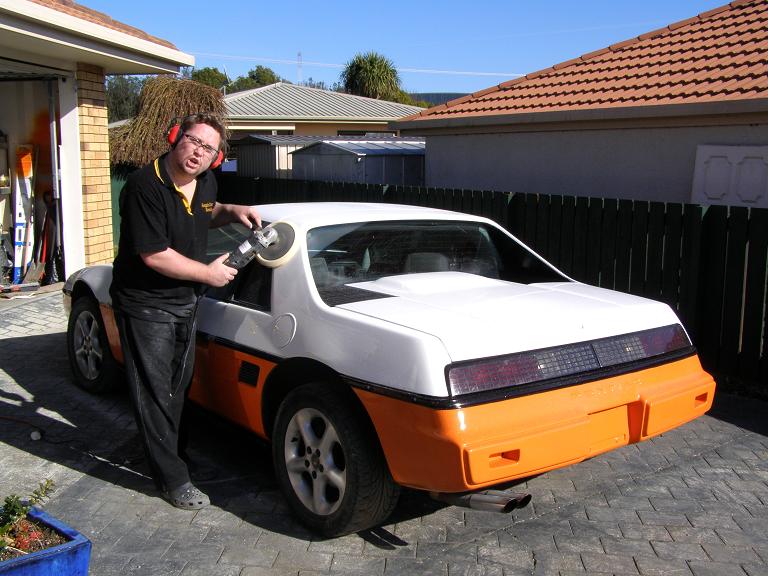
ok well its time ive painted the white and nearly finished the orange stil need to clearcoat and buff but here are some pics upto now anyway
Its now saturday afternoon 28th march just finshed work so ill get stuff on th eorange and try and finish her off and then sunday or monday clearcoat the whole car, prey for me!
------------------
IP: Logged
09:49 PM
Apr 1st, 2009
radar1 Member
Posts: 135 From: Lower Hutt New Zealand Registered: Dec 2008
Hi there, It's coming along nicely. I bet that is one unique car, driving around NZ. Are you going to convert it to RHD? I think there is a thread here someplace about how to do it.
IP: Logged
07:17 AM
Iron_Mark_2003 Member
Posts: 1767 From: Northeast Kansas Registered: Jun 2004


 .
.