I think that hinge you found is going in the right direction. You'll find the right combo. That's what's so great about building your own. You can make any change you want. Now is not the time to be discouraged - forge on! I want to see what you do with the door panels.
Pat
Thanks... I'm moving forward... I just got frustrated. Sometimes it takes a swift kick in the head and somebody saying "...hey stupid, stick to the plan..."
With the hinges ordered I will fill the "Dremmeled" areas of the console and lid and then sand smooth to include the areas I drilled for the bolts for the first hinge. The new hinges do not have any holes cut so I will have to tap those and start the whole process over again. But at least we're moving forward...
I'm still working ideas for the cup holder. I realized after receiving the part that I have to "pull" the cup holder open. I'm debating whether to find a "push button" cup holder. I don't want to put any undo stress on the console or the fiberglass. Also, it would be cool just to have the cup holder pop out.
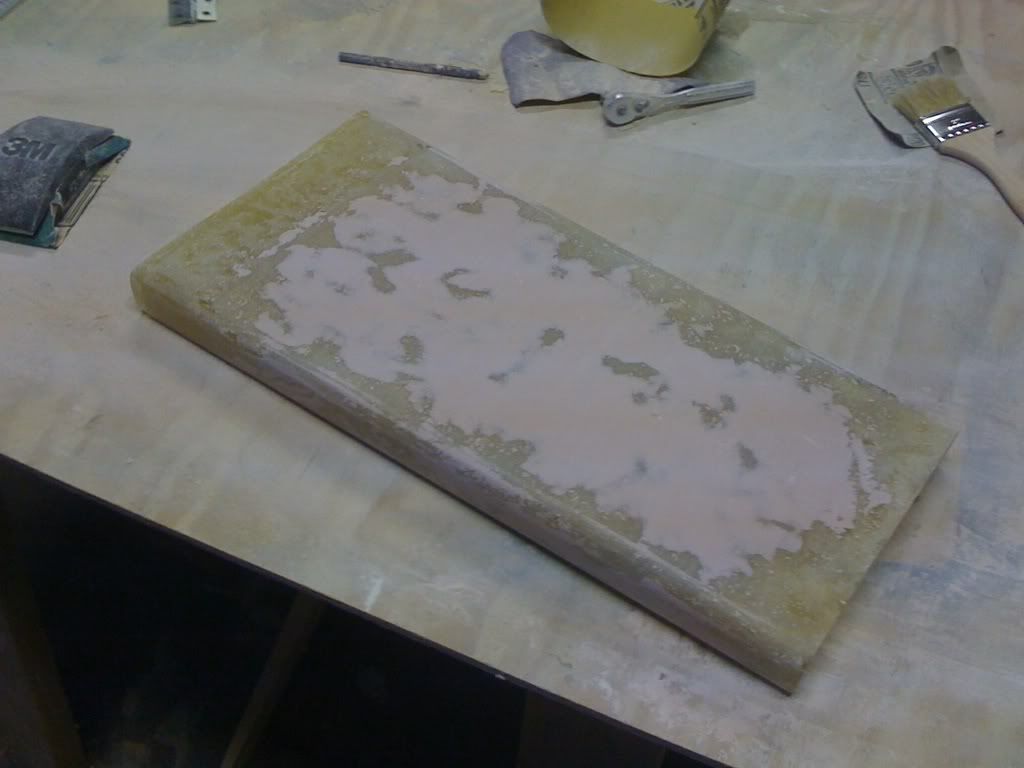
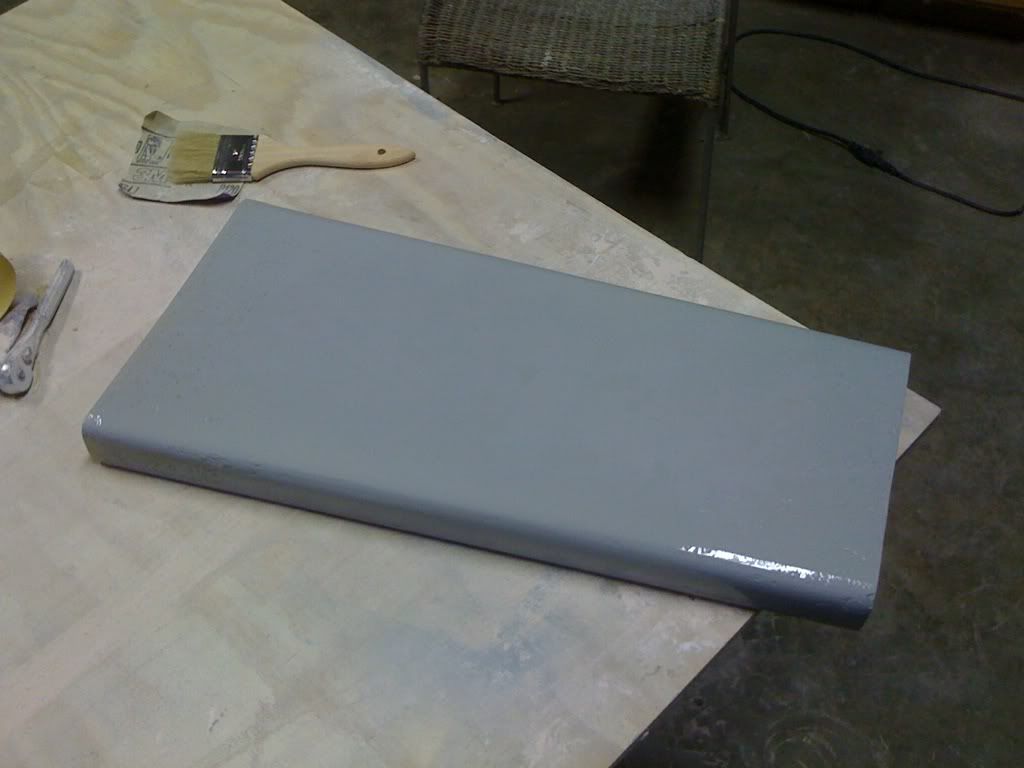
Not much to report. I slopped a bunch of filler on all 4 pieces last night (lid, console, armrest and glovebox). This afternoon I will sand them all smooth, shoot with primer and then start working the fabrication part of armrest and cup holder.
Sitting in the sun
UPDATE iPhone / iPod Connector. OK... I've been talking to the guys at www.replacementradios.com. They sell every make and model of OEM radios - it's awesome! They also list any and all stock AC Delco radios that will fit in our cars:
The radio I have (U1CPA) does not have any aux connectors. So, if I want to have XM Satellite and / or iPod capability I will have to go with the Monsoon radio (UP3McdcPA) which of course is the most expensive. Here's the good part. The cost is 230.00 - that's not a bad deal considering what your local Pontiac or GM parts dept would charge.
With Christmas coming up and gifts to buy I'll have to hold out buying the radio. I cannot possibly justify any new big purchases like the radio and connectors to the "boss" - I like my life.
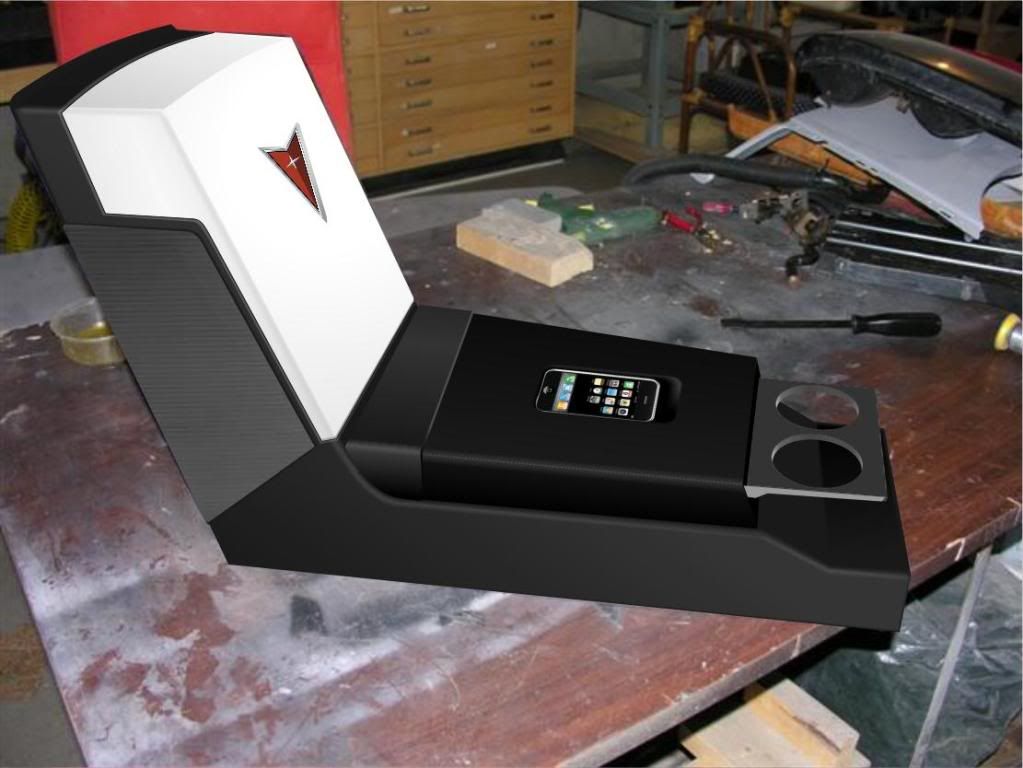
My orignial idea for the iPod was to create a "Docking Station" between the two power window switches. I was thinking... What if I created a docking station on the armrest where the iPod or iPhone slid in at a slight downward angle / horizontal to the armrest? Very similar to Fie Ro's idea? See below:
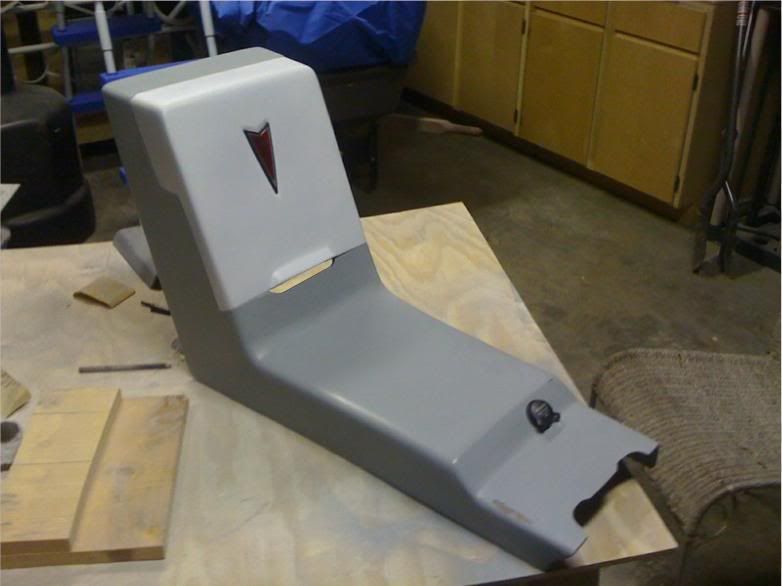
I sanded the body filler down on all 4 pieces and shot a few layers of primer. Found a few holes here and there but nothing major. I worked on the armrest a little - not much and I did clip some of the metal brackets off the cup holder to prep for a permanent home in the armrest. I even managed to get a shot of color on the lid.
I might scratch the armrest mounted iPhone idea. Since the cupholder will be taking up a lot space I will either have to push the iPhone back toward the lid or build a docking station on top of the console. I really don't want to add more height.
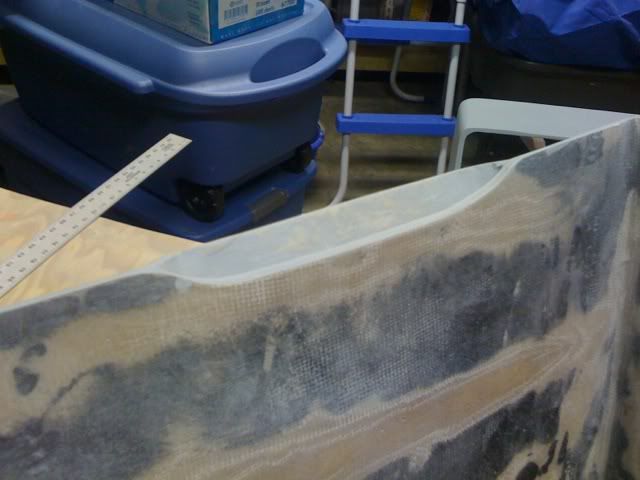
Finally, I took the Dremmel and ground down the area behind the lid lift.
The armrest after sanding
With a shot of primer
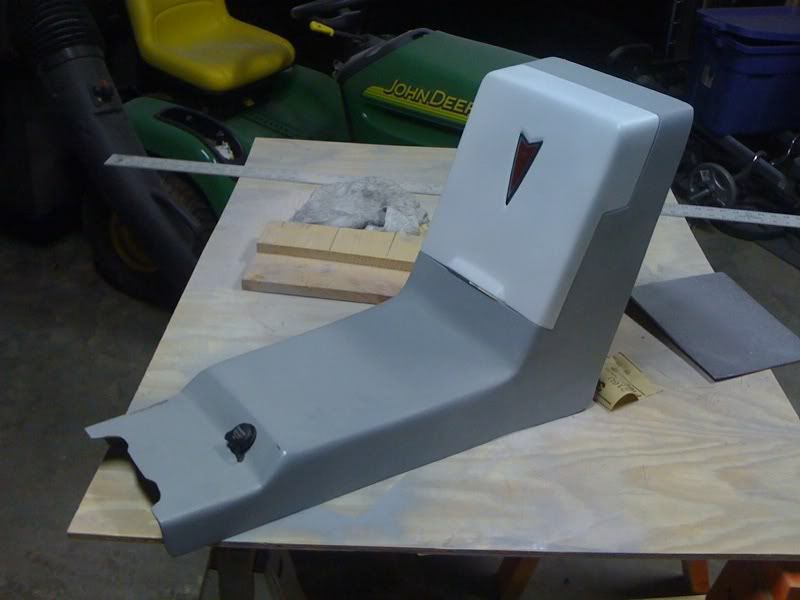
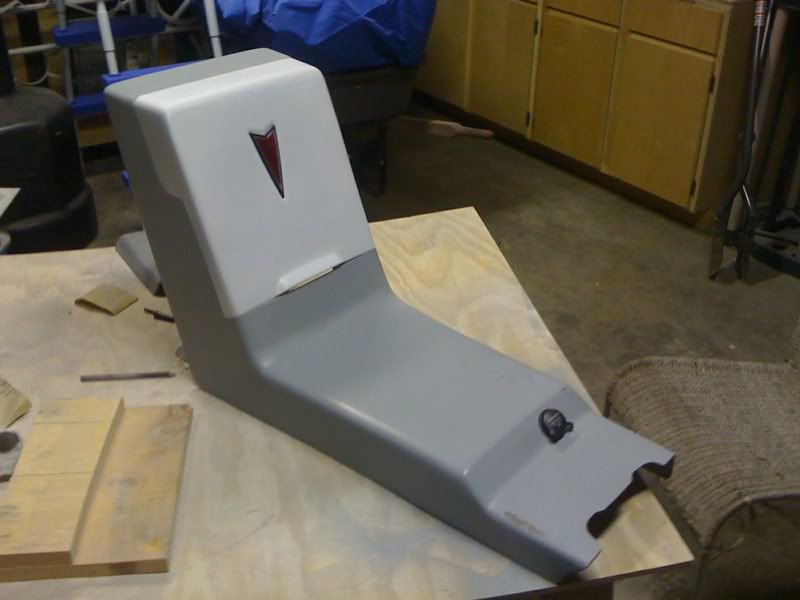
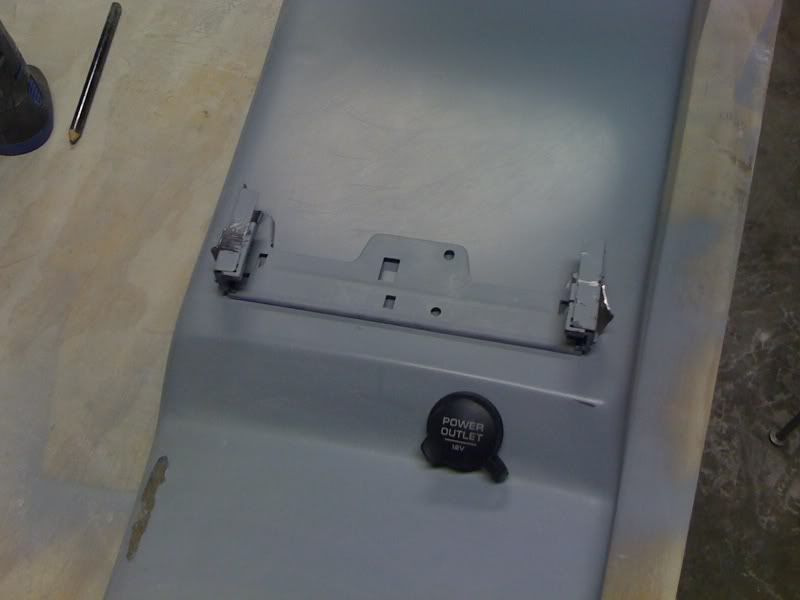
Everything put together - inlcuding the logo and 12 Volt Outlet
Another
No more hinge on top! BAD HINGE!
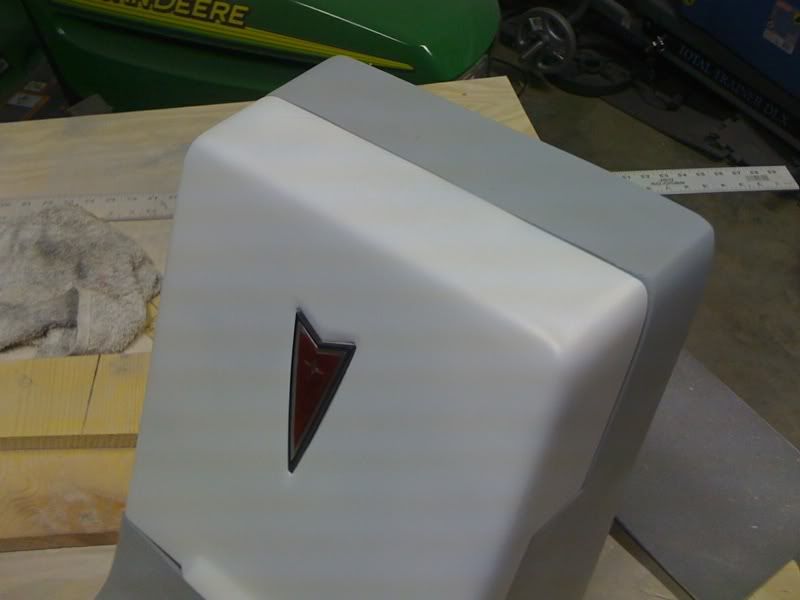
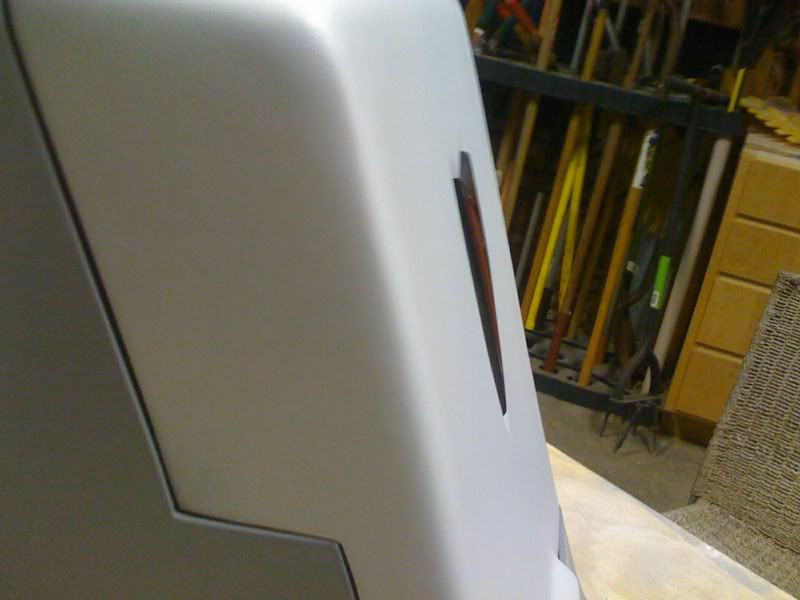
Showing the recessed logo - I'm really happy with the way that turned out
In all, a "so-so" productive night. I was hoping to get a little further on the armrest but the primer took a little longer to dry on this piece - weird. The hinges should be here by Friday - I'm hoping. It is nice to see the console back to a near finished product. When the hinges do arrive it's back to drilling the recessed holes then a little resin to keep them in place. With that new hinge I will have cut a hole in the glove box so the lid can open and close. Still no real ideas for the glove box yet but I'm still tossing ideas around.
Quick Edit - IDEA: To help me better visualize a final product during the build, I'm going to buy white and black primer - The lid is white and the armrest is black and everything else is grey... makes perfect sense to me!
More pics soon
[This message has been edited by Sofa King (edited 12-02-2009).]
Close up of the Dremmel as I removed the area under the lift
All done - although I might remove a little more
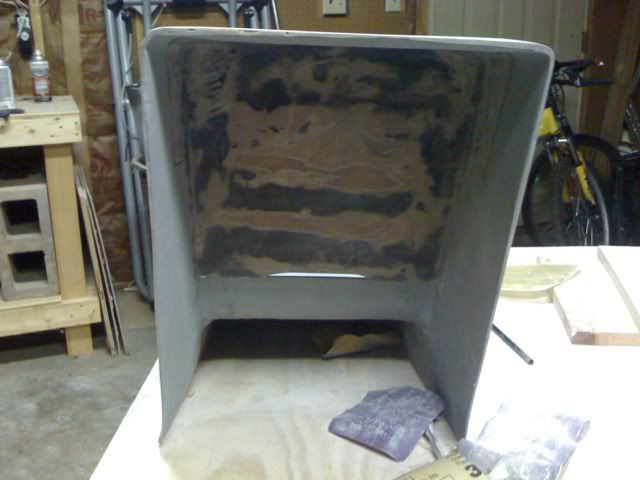
The sometimes forgotten backside - the console looks uneven but it's not. It was resting on dried filler and the board its resting on is warped - thus the tilt
Cup holder bracket trimmed
I used this piece of fiberglass scrap to measure the curve of the console. This curve will be traced onto the armrest piece for a snug fit against the console
I'm considering removing more material under the lift part of the lid - it would look something like this. That part would be black because of the glovebox - what do you think?
More to come
[This message has been edited by Sofa King (edited 12-03-2009).]
IP: Logged
08:52 PM
katatak Member
Posts: 7136 From: Omaha, NE USA Registered: Apr 2008
Looking better each day Greg. I think you should put the Ipod between the window switches - easy access and you won't be resting your arm on it. Th eglove box looks better - hidden hinge is the way to go there.
I am still cleaning glss dust out of my hair and ears - did a lot of grinding, trimming and sanding today. I hate that part! Back to work!
Pat
IP: Logged
09:18 PM
katatak Member
Posts: 7136 From: Omaha, NE USA Registered: Apr 2008
I learned a new trick today! Once I get all the layers down and the wax paper rolled out, I take a piece of hardwood veneered lywood and place it on top of the wax paper then apply a few spring clamps. Let it cure fore 15 or 20 minutes then remove the plywood and the wax paper - leaves the glass nearly as smootha nd flat as the glass and there are no air bubbles. It work good for small areas, Larger areas would be tougher to get the clamps on but I am going to try using something with wieght on top of the plywood.
I learned a new trick today! Once I get all the layers down and the wax paper rolled out, I take a piece of hardwood veneered lywood and place it on top of the wax paper then apply a few spring clamps. Let it cure fore 15 or 20 minutes then remove the plywood and the wax paper - leaves the glass nearly as smootha nd flat as the glass and there are no air bubbles. It work good for small areas, Larger areas would be tougher to get the clamps on but I am going to try using something with wieght on top of the plywood.
P,
Another great idea. The local home improvement stores sell those ready made shelves - that would work perfectly. But that's a great idea. Weight could be evenly distributed with paint cans? I usually leave the wax paper on the entire "curing" time. I don't want to run the risk of any dust or other foreign material sticking.
Looking better each day Greg. I think you should put the Ipod between the window switches - easy access and you won't be resting your arm on it. Th eglove box looks better - hidden hinge is the way to go there.
I am still cleaning glss dust out of my hair and ears - did a lot of grinding, trimming and sanding today. I hate that part! Back to work!
Pat
Hey P,
Thanks much! Its so cool watching things progress. I just wish it was a little faster. I think you're right. The iPod docker will look best and be more functional between the window switches. Did you read... I have to get a new radio. UGH... BUT, I swear... if that hinge doesn't work... LOL!
I was using the Dremel last night grinding down material under the "lift"... Like you, I had a lovely white tint about me... I stood in front of the fan and it looked like i was running at 200 miles per hour! The sanding is the worst part of all. I don't mind the exercise... its the dust. It's amazing. Anybody out there reading these posts and getting ready to tackle this type of work - invest (cough) in a few dozen (cough) masks...
IP: Logged
08:28 AM
katatak Member
Posts: 7136 From: Omaha, NE USA Registered: Apr 2008
It's 7:55pm here in El Paso and no update yet.....Greg, you slacking off or what? I'm stuck working till 9pm so I will get absolutely zippo done today. I feel jittery and sick and light headed. I need my glass fix...I think I'm addicted to fiberglass work. Or is it the resin?
Pat
IP: Logged
09:57 PM
Dec 4th, 2009
PaulJK Member
Posts: 6638 From: Los Angeles Registered: Oct 2001
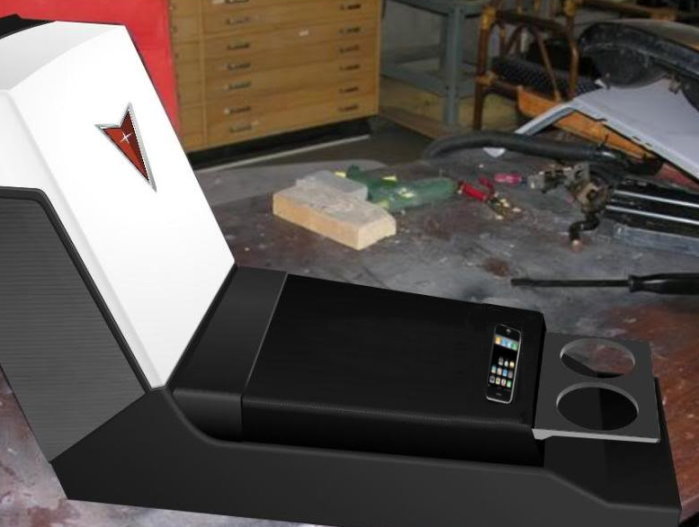
I created a quick image of the iPhone docked into the armrest.
... What do you think?
I think it looks balanced with the phone face up in the center of the arm rest, BUT i think it will quickly become a PIA when you're driving and have the urge to rest your arm and lay it on the face of the phone. Personally i'd do something like this; it's out of the way and maybe even within finger-reach while you're resting your arm
[This message has been edited by PaulJK (edited 12-04-2009).]
It's 7:55pm here in El Paso and no update yet.....Greg, you slacking off or what? I'm stuck working till 9pm so I will get absolutely zippo done today. I feel jittery and sick and light headed. I need my glass fix...I think I'm addicted to fiberglass work. Or is it the resin?
Pat
LOL! I think it's a combination of both... There was a time when I thought I was getting too much fiber. Not you, you fiber junkie! You're not sitting in the corner of the bathroom rocking back and forth are you? If so... hey... pics? That's part of the build process.
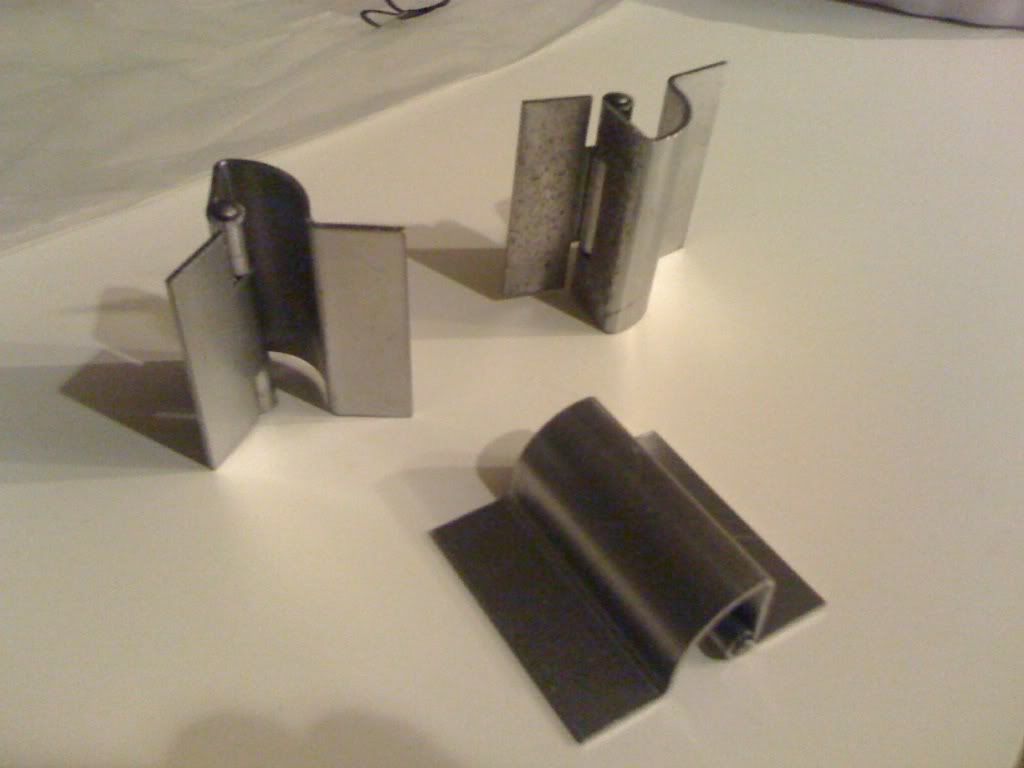
UPDATE: Check it out! Guess what arrived?
SWEET! I know what I'll be doing this weekend. I swear to god... this hinge better work! LOL
I think it looks balanced with the phone face up in the center of the arm rest, BUT i think it will quickly become a PIA when you're driving and have the urge to rest your arm and lay it on the face of the phone. Personally i'd do something like this; it's out of the way and maybe even within finger-reach while you're resting your arm
Hey Paul,
hmmmm... that might work. I'll have to look at how the wiring will be affected. The goal is to have a seamless look with no wires sticking out. Also, the cup holder will be mounted in that same area. So if I mount anything atop the cupholder I have to make sure any and all wiring will clear the cup holder but also keep within the armrest. It's a good idea. I'll definately take some pics and do a few graphic mock ups.
On a different note, I did get the white and black primer. Not a huge update but it will help better visualize the finished product.
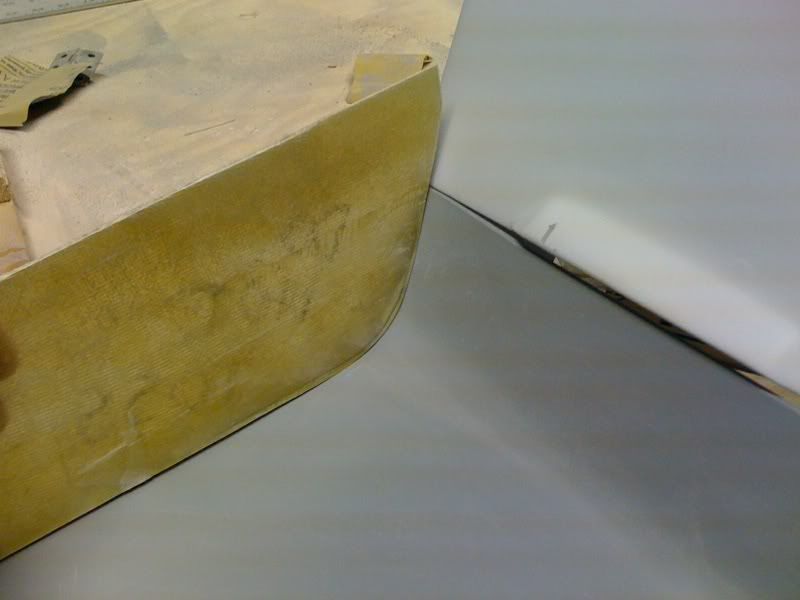
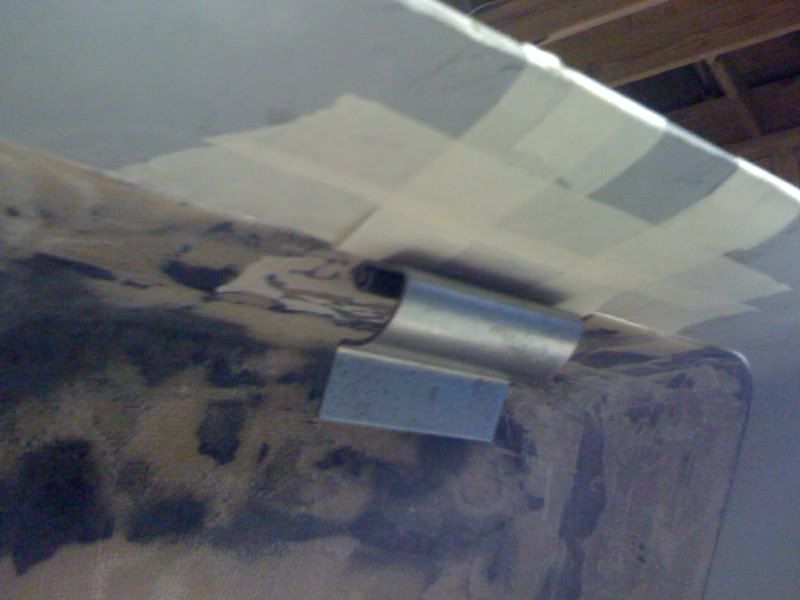
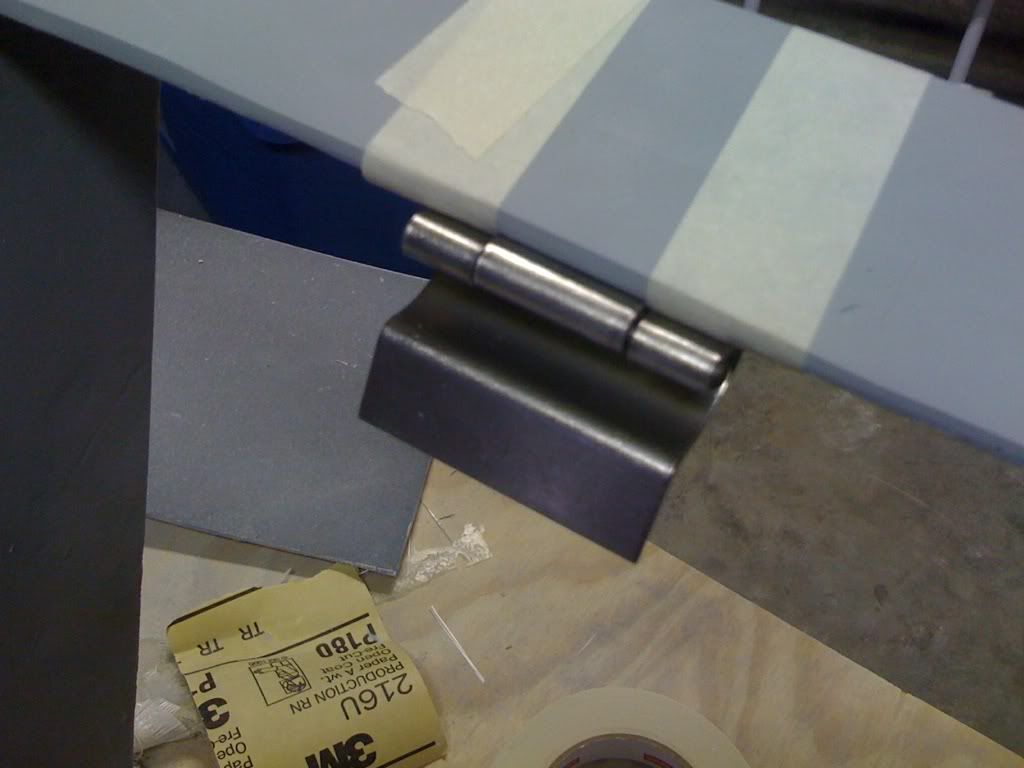
The hinge did NOT work. The edges of both the lid and the console are still hitting each other. I really thought this was going to solve the problem. I have NO IDEA what to do at this point. I might call the hinge manufacturer and describe my situation and see if he can help me. EDIT - Just a had a thought - maybe I'm attaching the hinge too close to the edge on the console side? OK all you math and physics guru's - help me out here!!!!
I'm really frustrated. Anywho... I did begin trimming the armrest and shot a quick layer of black primer. I couldn't get too involved. I have a "function" to attend this evening. "Function" is code for "...do I really have to go?"
Here are a few pics:
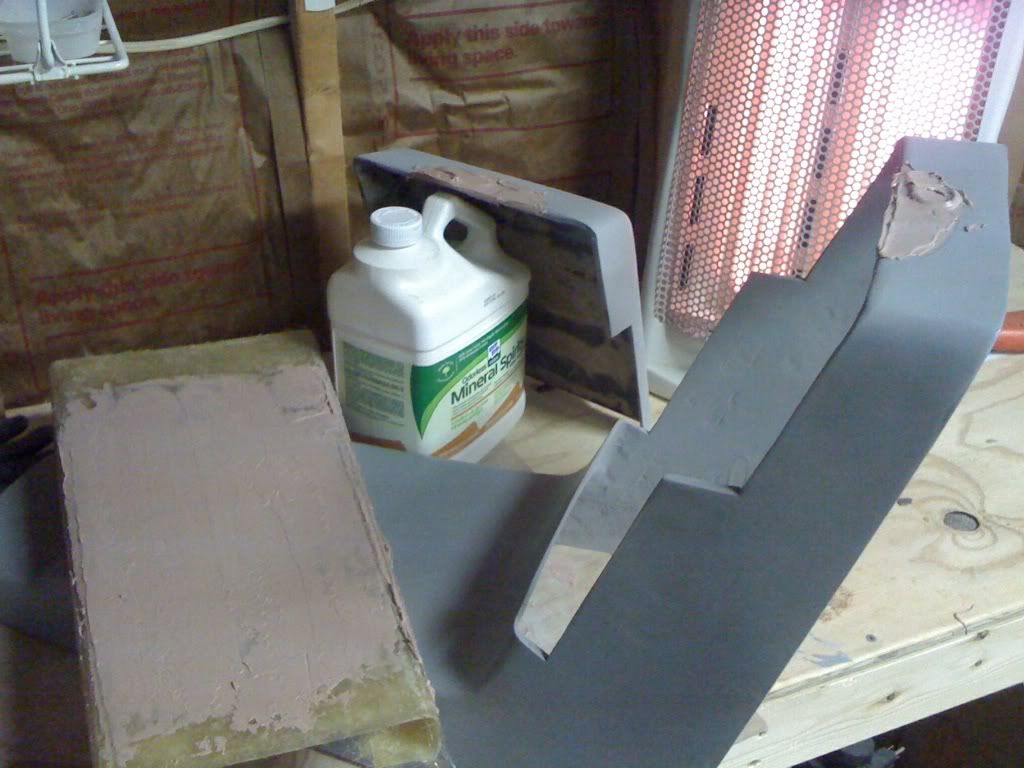
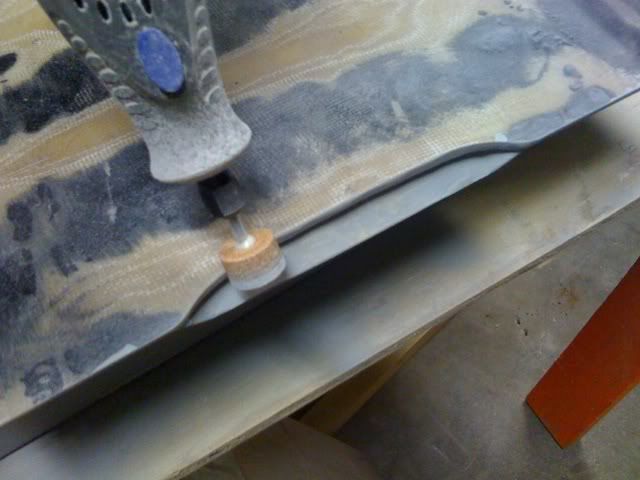
Hinge mocked up under the console
From the top - as you can see the hinge is resting right on the edge - maybe if I move it in?
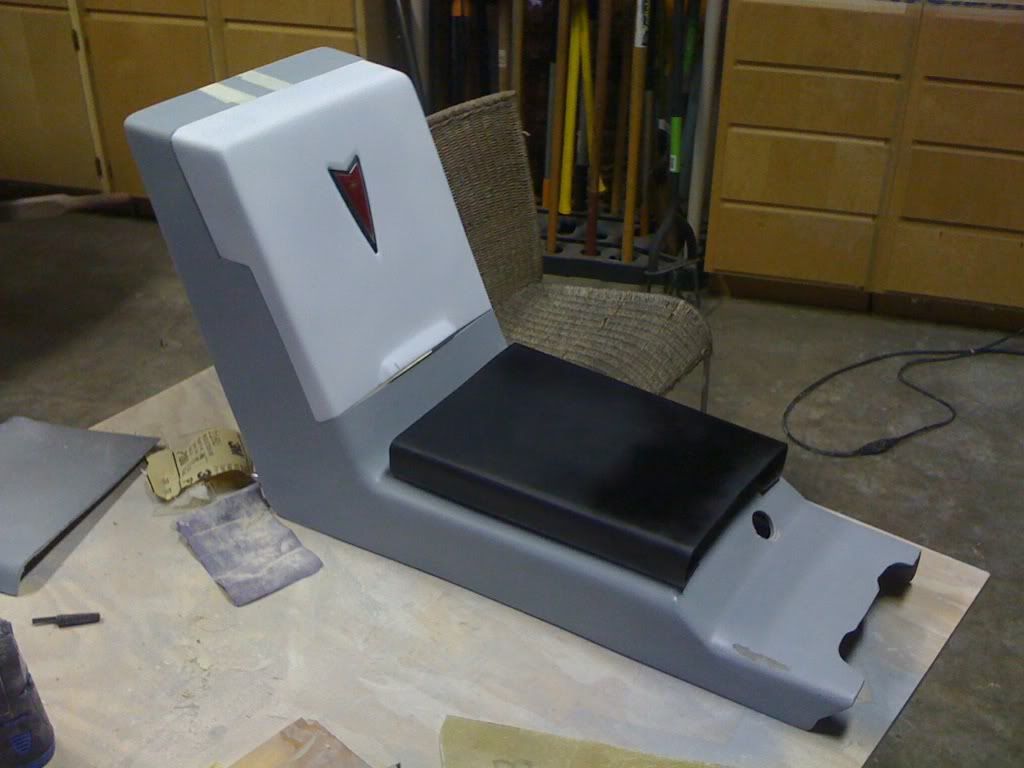
Armrest trimmed (slightly) and primered
More tomorrow - UGH
IP: Logged
05:19 PM
87GT2M6 Member
Posts: 1302 From: Miami, Florida The Sunshine State Registered: Jan 2008
The hinge did NOT work. The edges of both the lid and the console are still hitting each other. I really thought this was going to solve the problem. I have NO IDEA what to do at this point. I might call the hinge manufacturer and describe my situation and see if he can help me. EDIT - Just a had a thought - maybe I'm attaching the hinge too close to the edge on the console side? OK all you math and physics guru's - help me out here!!!!
Here's my Idea:
Add two little boxes shown in red (wood, fiber glass) make it out off whatever I guess and then drill the appropriate holes etc to be able to add the invisible hinge. Here is the website with an animation so you can see what I mean http://www.soss.com/ and below is my rendering of how it might look.