Pennock's Fiero Forum
  General Fiero Chat - Archive
  Project XTC - The Rehabilitation! (Page 4)

T H I S   I S   A N   A R C H I V E D   T O P I C
  

Email This Page to Someone! | Printable Version

This topic is 4 pages long:  1   2   3   4 
Previous Page | Next Page
Project XTC - The Rehabilitation! by katatak
Started on: 03-14-2009 05:57 PM
Replies: 131
Last post by: katatak on 07-18-2009 07:13 PM
katatak
Member
Posts: 7136
From: Omaha, NE USA
Registered: Apr 2008


Feedback score:    (8)
Leave feedback


Total ratings: 82
Rate this member

Report this Post07-08-2009 02:56 PM Click Here to See the Profile for katatakSend a Private Message to katatakDirect Link to This Post
 
quote
Originally posted by BlackThunderGT:

Pat,

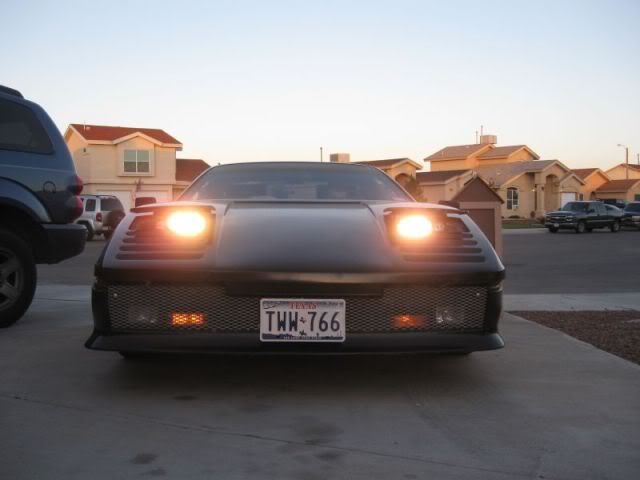
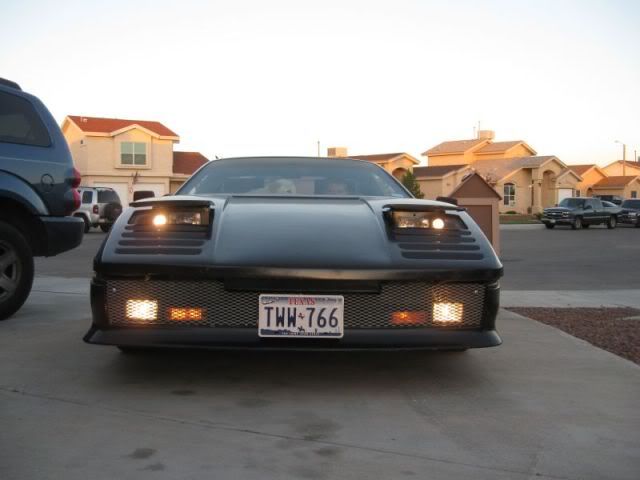
Great job!!! I really like what you done with the driving lights...might have given a lot of us some new Ideas for our light mods

So did I read right and the XTC is now your baby? so we will see it at the Ruckus?

Paul


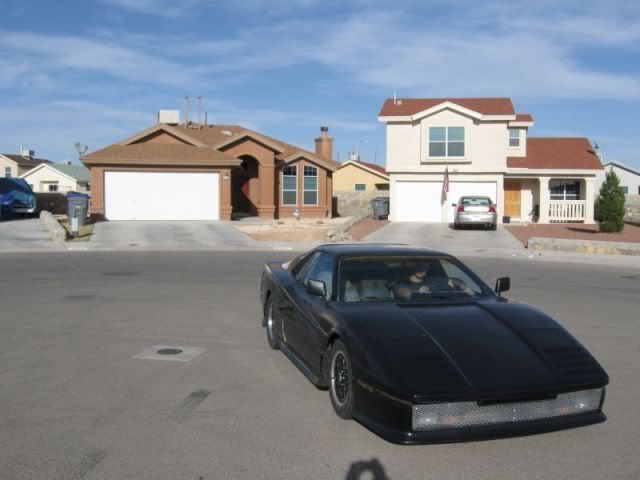
Hey there Paul - thanks for the reply. Well yes the XTC is in my posession. It will end up being my 16 year olds first car....... and yes, my plan is to bring it to the Ruckus. Just have a few more things to finish on it.

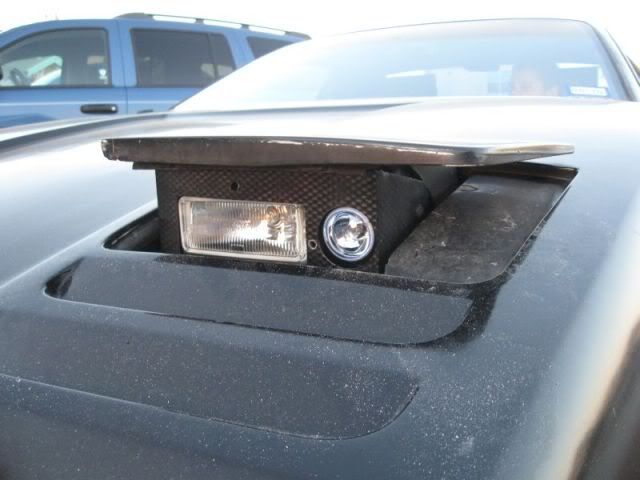
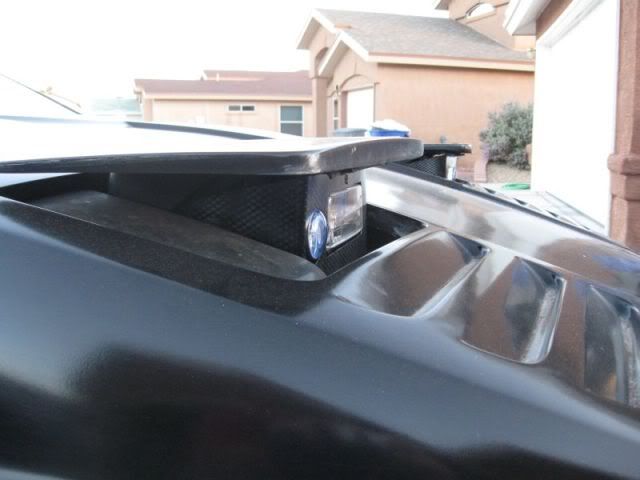
I really like the way these turned out - there are a few changes I want to make but they are minor and easy. I have to take them apart for paint and a few finishing touch's. I will take a bunch of pics how they are assembled and post em up for anyone interested. The 2 new headlights were the biggest expense - 50.00 for the pair. I got the Camaro headlight assembly at a junkyard for 20.00 but none of the lights worked. If you could find a set with working lights, it would be cheaper. The driving lights were 25.00 so I got under 100.00 in the setup. I am actually starting a set for the Formula.

Pat

Edit to add - Page 4 ownage - Yahooooooo............

[This message has been edited by katatak (edited 07-08-2009).]

IP: Logged
katatak
Member
Posts: 7136
From: Omaha, NE USA
Registered: Apr 2008


Feedback score:    (8)
Leave feedback


Total ratings: 82
Rate this member

Report this Post07-08-2009 03:03 PM Click Here to See the Profile for katatakSend a Private Message to katatakDirect Link to This Post

katatak

7136 posts
Member since Apr 2008
 
quote
Originally posted by jgrotzin:

Those look great! They really fit the look of the XTC! Good job!


Thanks J. It was pretty easy to do. I was dreading it at first - worried about the possibility of having to do some fiberglass work or mixing up a bunch of epoxy, etc. All I had to do was trim the Fiero bucket a little and cut it down then trim up the Camaro bucket to fit squarly in the Fiero bucket, drilled some holes, put in a few screws and done. I will take them back apart and clean them up with some paint - make sure everything is tight. I spent maybe 4 hours building the first one and an hour on the second one.

Pat
IP: Logged
katatak
Member
Posts: 7136
From: Omaha, NE USA
Registered: Apr 2008


Feedback score:    (8)
Leave feedback


Total ratings: 82
Rate this member

Report this Post07-08-2009 11:43 PM Click Here to See the Profile for katatakSend a Private Message to katatakDirect Link to This Post

katatak

7136 posts
Member since Apr 2008
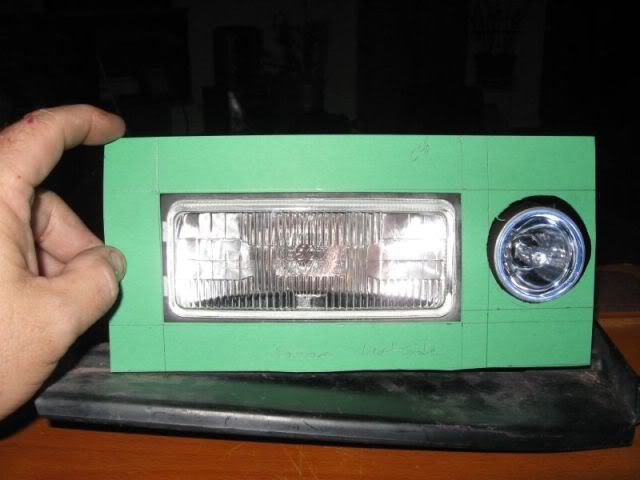
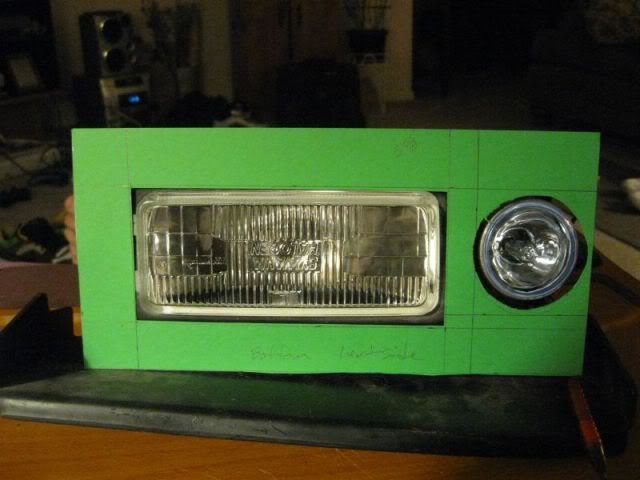
One more piece of the lo pro headlight project completed this evening. I got the template made for the face plate/cover for the new headlight buckets. I have some 16ga aluminum sheet that i will fab the cover's from. With any luck, I will have the covers done tomorrow night. Then I will disassemble both buckets and paint them up. I also got a packag from the AC ferry today via Fed Ex - new AC compressor, Accumulator, Variable orifice tube, hi and lo pressure switchs w/new connectors and the R134 control valve. Guess I'll be rehabing the AC Saturday......I Can't wait. I drove the car this evening - it was 101 out at 8:00pm and I am cooked. I will never have another "black" car!

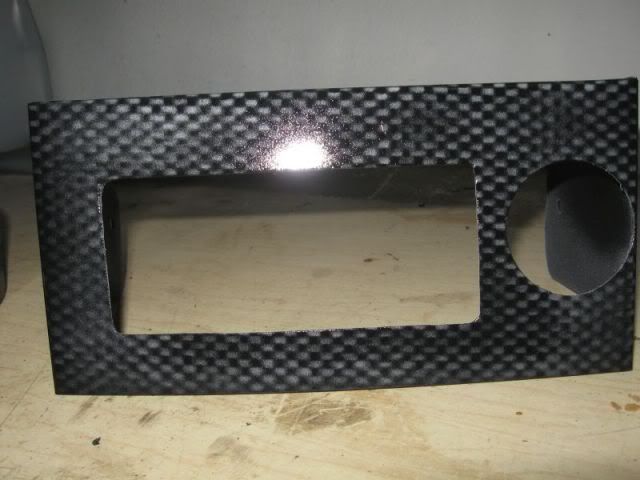
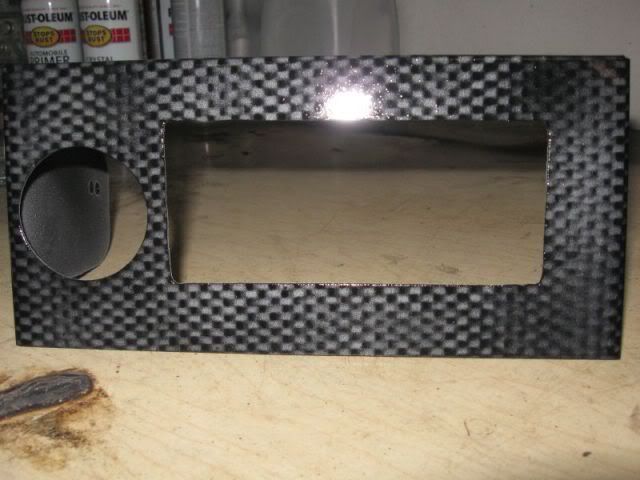
The template is a "rough outline. I will radius all the inside corners to fit the light better and the round hole for the driving light will be - well - round. I'll use a whole saw to cut the hole. There will also be "sides" bent back to cover each side and will attach at the stock points on the Fiero bucket.


More later.
IP: Logged
katatak
Member
Posts: 7136
From: Omaha, NE USA
Registered: Apr 2008


Feedback score:    (8)
Leave feedback


Total ratings: 82
Rate this member

Report this Post07-09-2009 02:50 PM Click Here to See the Profile for katatakSend a Private Message to katatakDirect Link to This Post
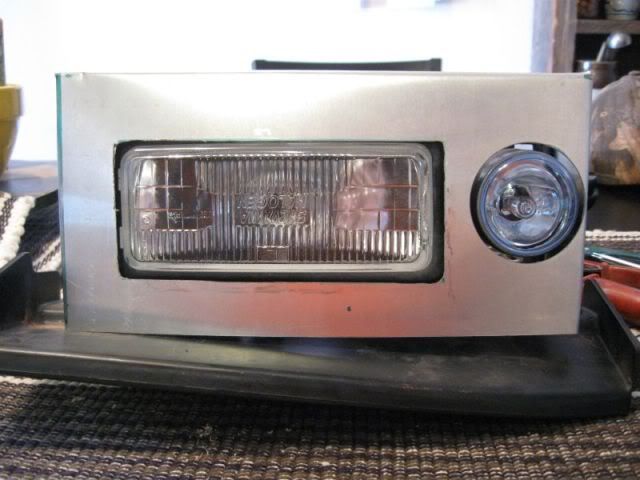
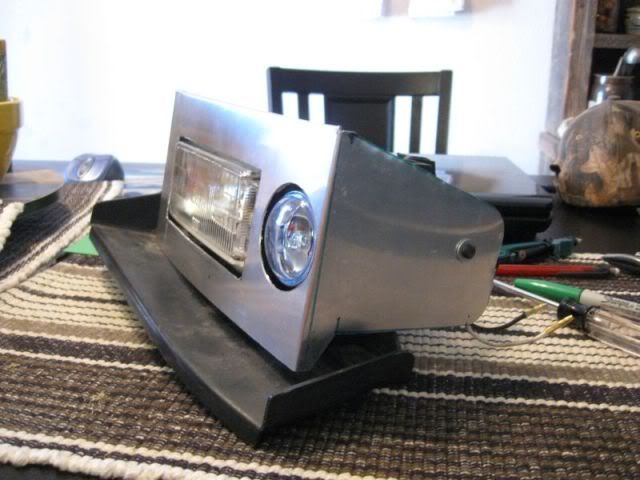
I had a little time during the lunch hour today so I made a quick run at fabbing a cover.


More later

[This message has been edited by katatak (edited 07-09-2009).]

IP: Logged
katatak
Member
Posts: 7136
From: Omaha, NE USA
Registered: Apr 2008


Feedback score:    (8)
Leave feedback


Total ratings: 82
Rate this member

Report this Post07-09-2009 06:44 PM Click Here to See the Profile for katatakSend a Private Message to katatakDirect Link to This Post

katatak

7136 posts
Member since Apr 2008
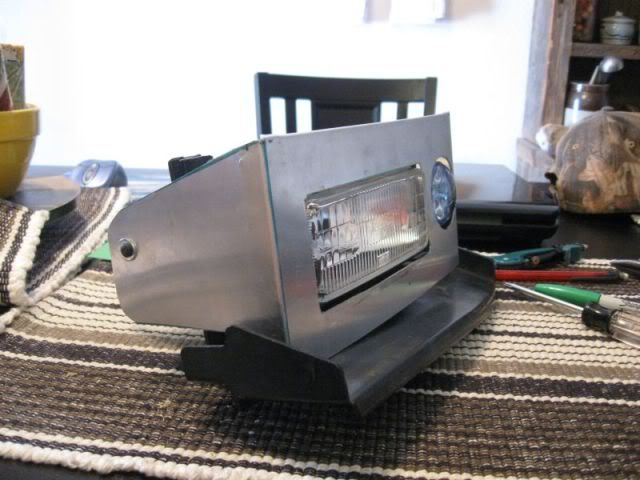
Got the other cover done!


IP: Logged
kwagner
Member
Posts: 4258
From: Pittsburgh, PA
Registered: Apr 2005


Feedback score: (3)
Leave feedback


Total ratings: 62
Rate this member

Report this Post07-09-2009 09:53 PM Click Here to See the Profile for kwagnerClick Here to visit kwagner's HomePageSend a Private Message to kwagnerDirect Link to This Post
Just read through this whole thread. Neat project I have one suggestion:

 
quote
Originally posted by katatak:


With the rest of the car being black, the front wire mesh stands out like a sore thumb IMHO. Maybe try making it black or some darker color?
IP: Logged
Carver1
Member
Posts: 2843
From: Edgewood, New Mexico
Registered: Nov 2000


Feedback score:    (11)
Leave feedback


Total ratings: 62
Rate this member

Report this Post07-09-2009 11:10 PM Click Here to See the Profile for Carver1Send a Private Message to Carver1Direct Link to This Post
 
quote
Originally posted by kwagner:

Just read through this whole thread. Neat project I have one suggestion:


With the rest of the car being black, the front wire mesh stands out like a sore thumb IMHO. Maybe try making it black or some darker color?


HEYYYY! I spent alot of time on that front grill. The old one was black. It didn't look that great.


------------------
86 SE 4 Speed 3.4 "The Short Bus"


88 Coupe 4.9 "Hibernating"
For Sale. Make offer.

IP: Logged
katatak
Member
Posts: 7136
From: Omaha, NE USA
Registered: Apr 2008


Feedback score:    (8)
Leave feedback


Total ratings: 82
Rate this member

Report this Post07-10-2009 12:05 AM Click Here to See the Profile for katatakSend a Private Message to katatakDirect Link to This Post
 
quote
Originally posted by kwagner:

Just read through this whole thread. Neat project I have one suggestion:


With the rest of the car being black, the front wire mesh stands out like a sore thumb IMHO. Maybe try making it black or some darker color?


I do agree. The plan is to eliminate the mesh all together. Benihd the mesh grill is wide open and the air is not directed into the radiator like it should be. I am going to mold a "funnel" out of fiberglass into the radiator. The driving lights and turn signals will be molded into the "funnel" at the outer edges and it will be open to the radiator kinda of like the stock Aero nose.

IP: Logged
katatak
Member
Posts: 7136
From: Omaha, NE USA
Registered: Apr 2008


Feedback score:    (8)
Leave feedback


Total ratings: 82
Rate this member

Report this Post07-10-2009 12:09 AM Click Here to See the Profile for katatakSend a Private Message to katatakDirect Link to This Post

katatak

7136 posts
Member since Apr 2008
 
quote
Originally posted by Carver1:


HEYYYY! I spent alot of time on that front grill. The old one was black. It didn't look that great.


I took it out to do some measuring and I can concur - it is tough to get out and then back in - but I will say you do excellent work, it fits very good. Nice and ight and no rattles..... I just got to learn some fiberglass skills now..... I also want to add an extractor hood scoop and I want to fill in the louvers in front of the headlights - smooth the hood out.
IP: Logged
katatak
Member
Posts: 7136
From: Omaha, NE USA
Registered: Apr 2008


Feedback score:    (8)
Leave feedback


Total ratings: 82
Rate this member

Report this Post07-10-2009 07:15 PM Click Here to See the Profile for katatakSend a Private Message to katatakDirect Link to This Post

katatak

7136 posts
Member since Apr 2008
So I got the crazy idea that I would attempt to paint the headlight covers to give them that "carbon fiber" look. So I spent a few hours on the net, watching some yuotube, reading some posts and decided what the heck. If it does not turn out, I can just paint em black and be done. So here's my first run at it. Not too bad - there is room for improvement but I was surprized how they turned out.


IP: Logged
katatak
Member
Posts: 7136
From: Omaha, NE USA
Registered: Apr 2008


Feedback score:    (8)
Leave feedback


Total ratings: 82
Rate this member

Report this Post07-11-2009 10:30 PM Click Here to See the Profile for katatakSend a Private Message to katatakDirect Link to This Post
The plan for the day was to get the AC going on the XTC but all the parts did not show up. Got everything but the 2 new switch connectors. I decided that it was too hot anyway - 105 in my driveway today.

I needed to finish up some of the wiring for the headlight project and finish the assembly of the buckets. So off to the parts store I went. I needed to build some headlight connectors and run some wire for the driving lights. I sat in the living room in the AC and built the connectors and the wiring harness. Then I "rebuilt" the buckets - they were put together with some sheet metal screws so I removed the screws and drilled out the holes then installed some #10 bolts & nuts with locktite and double nutted. When I got shade in the driveway, I went to work. I could last about 30 - 45 minutes in the shade then I had to go in and cool off. It took most the day to get the lights finished up.

Now that I'v done this once, there are a few things I would do different (cheaper and quicker) but I guess if I did not learn something in the process, it was not worth doing. Got them done for now but I will fab some new covers. I used 18ga aluminum and it is too flimsy. I will use 18 or 16ga steel for the new ones. I also learned some tricks for the "carbon fiber" paint. I have a few more plans for this process on some interior parts. I also was able to do some measuring so I can build an insert for the grill to direct the air into the rad. This is where I will learn to do fiberglass?


IP: Logged
PFF
System Bot
katatak
Member
Posts: 7136
From: Omaha, NE USA
Registered: Apr 2008


Feedback score:    (8)
Leave feedback


Total ratings: 82
Rate this member

Report this Post07-18-2009 07:13 PM Click Here to See the Profile for katatakSend a Private Message to katatakDirect Link to This Post
Today was the big day. The plan was to rebuild the AC system on the XTC. Here's a list of all the parts:

Remanned V5 compressor - 47.95 off E Bay
R134 control valve - 78.00 from Rock Auto
Normal Service - Variable Orifice tube - 19.99 - Autozone
New Accumulator - 19.99 - Autozone
New high pressure switch w/new connector - 35.00 - Autozone
New low pressure switch w/new connector - 24.99 - Autozone
16oz PAG 100 oil - system uses 11oz - 15.00 - Autozone
3 12 oz cans of R134 freon - 24.00 - Autozone
Nice Cold AC in a black car = Priceless!

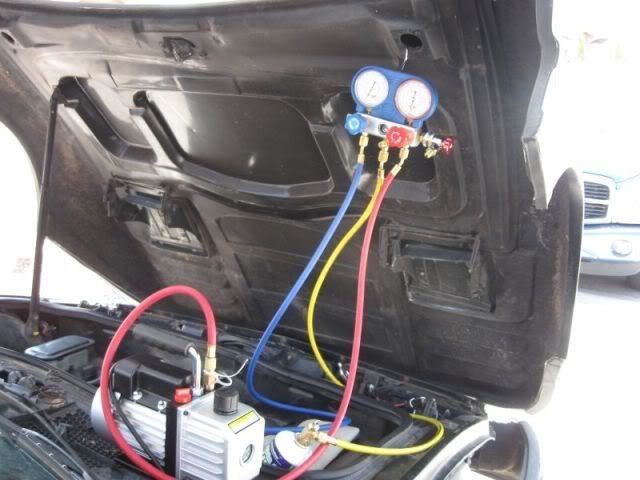
I also bought a electric 2.5 CFM vacuum pump from Harbor Freight. It was the floor model so the Manager gave it to me for 40.00 - regular 90.00. I had been using the 10.00 air compressor version but thet electric one works so much better. I am always messing with AC so it will pay for itself. So without the vac pump, I got about 250.00 in parts and goodies.


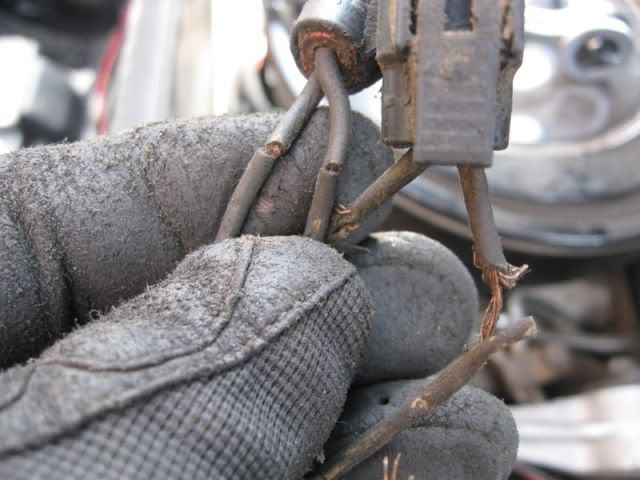
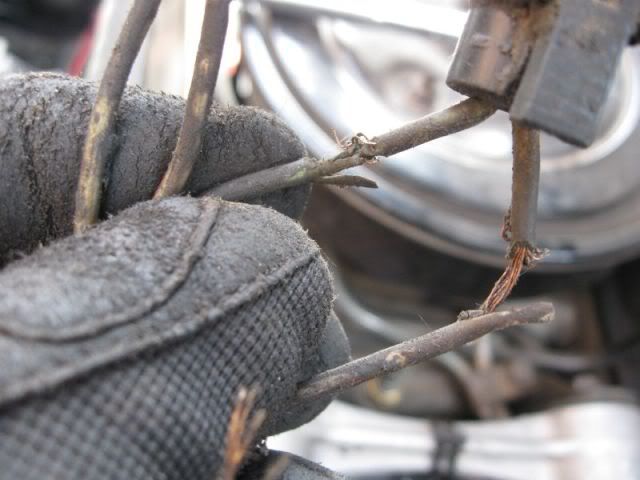
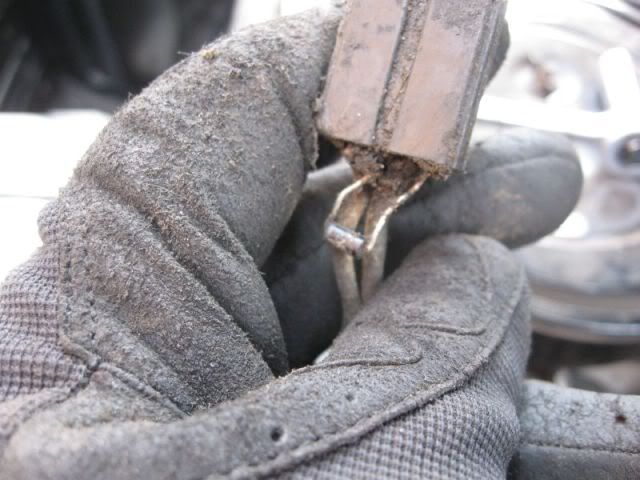
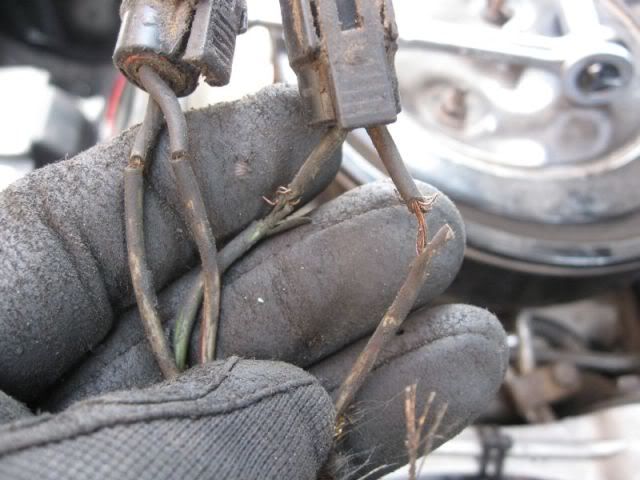
I removed the old compressor, removed the old accumulator and orifice tube, flushed the lines and blew them out with a lot of air. I found several bad spots in the wiing for both the hi and lo switch's. The majority of the time spent was fixing the electrical issues. After looking at it, I noticed that where the wires come down behind the water pump (duke), they are fairly close to the exhaust manifold - probably why all the wires and the plastic loom was so hard and brittle. I replaced all the wires, installed new plastic loom and used "Simmons" High heat spark plug boots made from nomex to cover the lower end where it runs close to the exhaust. They come in sets of 2 so I put the other one on the starter cables to protect them. They work very well. I installed the new switches and the control valve in the compressor and filled the comp with oil. I put half in the compressor and the other half in the "suction" side of the accumulator. I buttoned everything up and put the new vac pump to work.

I let the vacuum pump run for a few hours then I closed the valves and let it sit for an hour. The cool thing about the electric vac pump is that you can see it pull the moisture out of the system. Once I new it would hold good vacuum, I opened the valve on the first can (1st one I put in has dye in it). I let the system take as much of the can as it will without starting the car. Then I check for leaks around the fittings up front and at the compressor. When I'm sure there is no leaks, I start the car and feed the rest of the 1st can into the system. With the 1st can in, I was already getting 75* air at the vents. Toward the end of the 3rd can, my pressures were around 30 on the low and 230 on the high. I put a large fan in front of the car to get some air moving over the condensor and I was able to get 46.7* air out of the center vents. Good enough for me!

Bad Wires!


And my new vac pump & setup ready to charge:

I took it for a little drive and going down the highway @ 70 mph I am gettin 46* air out of the center vents. Sitting at a traffic light it blows 50* air. I have an air flow issue in the front of the XTC right now. I can't wait to get that issue fixed to force more air into the radiator. One other thing I found was that where the 2 tubes go into the firewall, they were leaking cold air. The factory goop that is there to seal it off was hard and crumbly. I used some silicone sealer to seal them up and it made a noticable difference inside the car. It was like getting one higher speed on the fan!

I also think I broke my wrist getting the old compressor out but that's another story.........

More later!

Pat
IP: Logged
Previous Page | Next Page

This topic is 4 pages long:  1   2   3   4 


All times are ET (US)

T H I S   I S   A N   A R C H I V E D   T O P I C
  

Contact Us | Back To Main Page

Advertizing on PFF | Fiero Parts Vendors
PFF Merchandise | Fiero Gallery
Real-Time Chat | Fiero Related Auctions on eBay


Copyright (c) 1999, C. Pennock