Pennock's Fiero Forum
  General Fiero Chat - Archive
  Changing the Front Crank Seal!

T H I S   I S   A N   A R C H I V E D   T O P I C
  

Email This Page to Someone! | Printable Version


Changing the Front Crank Seal! by katatak
Started on: 02-21-2009 04:32 PM
Replies: 12
Last post by: katatak on 02-24-2009 06:26 PM
katatak
Member
Posts: 7136
From: Omaha, NE USA
Registered: Apr 2008


Feedback score:    (8)
Leave feedback


Total ratings: 82
Rate this member

Report this Post02-21-2009 04:32 PM Click Here to See the Profile for katatakSend a Private Message to katatakDirect Link to This Post
Afternoon everyone!

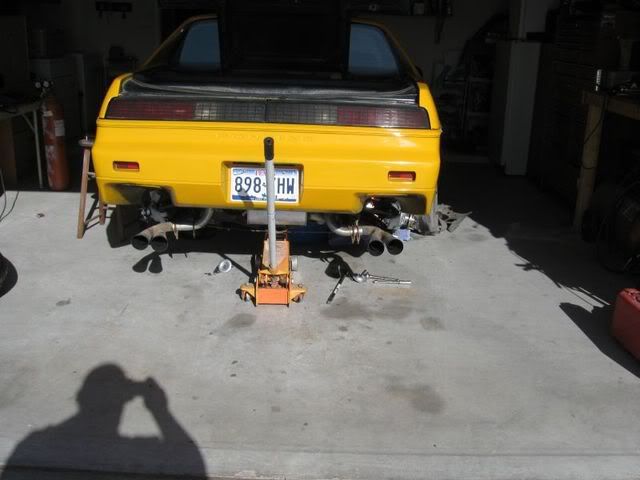
Got up early this morning to repair an oil leak on Old Yeller.

My plan was to "tilt" the cradle so I could get to the balancer to replace the seal. First I got the car up on jacks then pulled the rear tires. Pulled the right fender well out and I drained the coolant (changing out the heater core too and I have to change a heater hose from the rear tube to water pump). I went around under the car first to disconnect everything:

Removed the calipers
Took the flex lines loose
Pulled the rear cradle bolts - yes the jack was still under the cradle.

Then went up top:

Unbolted the struts
Disconnected the heater hose that goes from the back trunk wall to the water pump - the one that needs replaced.

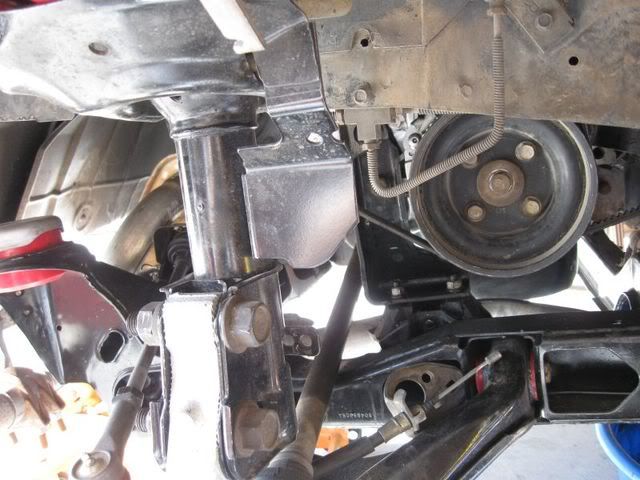
Then tilted the cradle down far enough so I could get to the balancer.


Loosened the AC and alternator belts
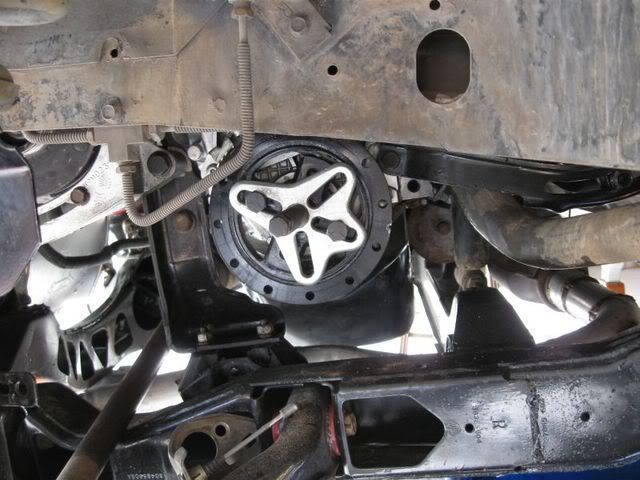
Removed the pulley
Removed the balancer
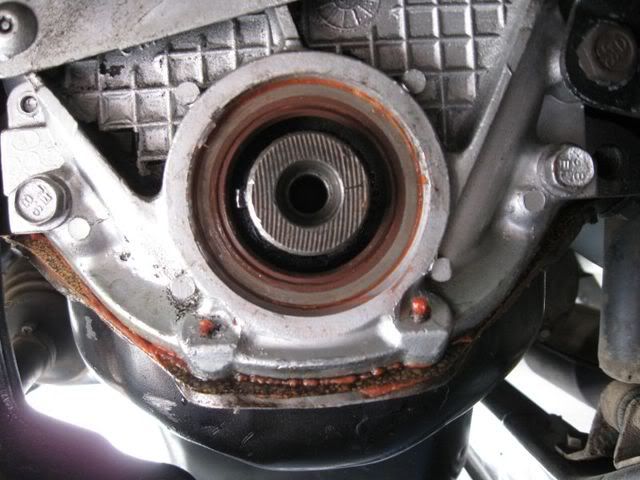
Pulled the seal


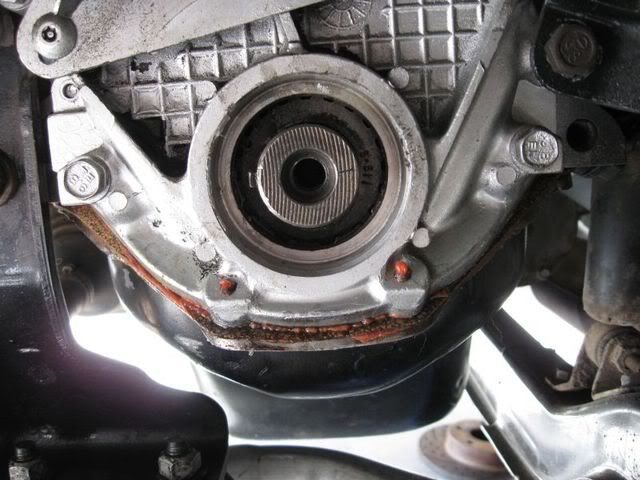
I noticed a few things about the seal. The first was that it was not seated all the way into the timing cover and second was that there is a lip inside the timing cover and when I pulled the seal there was a lot of oil puddled there between the back of the seal and the lip. Don't know if this was a good idea or not but I gave it a shot. I drilled a small hole in the lip to allow the oil to drain back to the pan versus puddling against the back of the seal.

New seal seated all the way


It only took me 4 hours with help - probably could cut that to 2 if I were to have no help!

[This message has been edited by katatak (edited 02-21-2009).]

IP: Logged
PFF
System Bot
Carver1
Member
Posts: 2843
From: Edgewood, New Mexico
Registered: Nov 2000


Feedback score:    (11)
Leave feedback


Total ratings: 62
Rate this member

Report this Post02-21-2009 04:38 PM Click Here to See the Profile for Carver1Send a Private Message to Carver1Direct Link to This Post
 
quote
Originally posted by katatak:
It only took me 4 hours with help - probably could cut that to 2 if I were to have no help!


That is the story of my life.

And that is a good looking ride! (for a notchie )

[This message has been edited by Carver1 (edited 02-21-2009).]

IP: Logged
katatak
Member
Posts: 7136
From: Omaha, NE USA
Registered: Apr 2008


Feedback score:    (8)
Leave feedback


Total ratings: 82
Rate this member

Report this Post02-21-2009 04:48 PM Click Here to See the Profile for katatakSend a Private Message to katatakDirect Link to This Post
Yep, Not too abd for an old yellow beater.......heehee.......
IP: Logged
Carver1
Member
Posts: 2843
From: Edgewood, New Mexico
Registered: Nov 2000


Feedback score:    (11)
Leave feedback


Total ratings: 62
Rate this member

Report this Post02-21-2009 04:55 PM Click Here to See the Profile for Carver1Send a Private Message to Carver1Direct Link to This Post
I have a comment on the "oil puddle"
Do you think it was there because the seal wasn't all the way in? I don't mean the leak itself, but having a little gap between the seal and engine might be a good hiding place for oil.
I don't think the hole drilled hurts anything either.
IP: Logged
1MohrFiero
Member
Posts: 4363
From: Paducah, Ky
Registered: Apr 2003


Feedback score:    (37)
Leave feedback


Total ratings: 157
Rate this member

Report this Post02-21-2009 05:57 PM Click Here to See the Profile for 1MohrFieroSend a Private Message to 1MohrFieroDirect Link to This Post
Hey, thanks for the pics. Nice job. Don't it feel good to fix something like that?

------------------

IP: Logged
ARKaiser
Member
Posts: 1305
From: lansing,michigan,usa
Registered: Feb 2003


Feedback score: (1)
Leave feedback


Total ratings: 62
Rate this member

Report this Post02-21-2009 07:02 PM Click Here to See the Profile for ARKaiserSend a Private Message to ARKaiserDirect Link to This Post
I just had a talk with my mechanic about this very thing. It seems that the front seals are known to "walk out" and cause oil leaks. He said that when he worked for Chevy that he had done several of these under warranty. He said that he ended up with a special bolt on something or other that held it in place. He described the gap you mentioned and that it was the "source" of the leak. If I understood him correctly the gap is there because the seal had moved and that when you install the new seal the gap goes away. If that is true then the hole you drilled would sever no purpose. Not that I think it will do any harm either.

As a side note to this - the reason I was talking to him about this was that when my engine warms up the oil pressure drops to next to nothing when the engine is at idle. He was saying that even though I am not having any real leaking at the seal that it might be the reason I am losing pressure.

Also thanks for the photos and write up. It will give me something to help him when he goes to replace the seal.
IP: Logged
JazzMan
Member
Posts: 18612
From:
Registered: Mar 2003


Feedback score:    (7)
Leave feedback


Total ratings: 653
User Banned

Report this Post02-21-2009 08:30 PM Click Here to See the Profile for JazzManSend a Private Message to JazzManDirect Link to This Post
.

[This message has been edited by JazzMan (edited 04-21-2009).]

IP: Logged
TopNotch
Member
Posts: 3537
From: Lawrenceville, GA USA
Registered: Feb 2009


Feedback score:    (7)
Leave feedback


Total ratings: 60
Rate this member

Report this Post02-21-2009 09:27 PM Click Here to See the Profile for TopNotchClick Here to visit TopNotch's HomePageSend a Private Message to TopNotchDirect Link to This Post
I thought the seal was against the harmonic balancer/crank pulley, not the crank. So if there is a groove, it will be in the in the harmonic balancer/crank pulley, and you can get a sleeve to cover the groove and a special seal to match the sleeve diameter.
IP: Logged
Patrick
Member
Posts: 38688
From: Vancouver, British Columbia, Canada
Registered: Apr 99


Feedback score: (1)
Leave feedback


Total ratings: 466
Rate this member

Report this Post02-22-2009 02:55 AM Click Here to See the Profile for PatrickSend a Private Message to PatrickDirect Link to This Post
 
quote
Originally posted by katatak:

My plan was to "tilt" the cradle so I could get to the balancer to replace the seal...


Hope I don't spoil your day , but there's absolutely no reason to tilt the cradle to replace that front seal. I replaced my balancer and seal (as reported Here) and all I had to do to make access easier was to remove the skirt and tub in the wheel well. If I remember correctly, it's possible the tub didn't even need to be removed.

IP: Logged
katatak
Member
Posts: 7136
From: Omaha, NE USA
Registered: Apr 2008


Feedback score:    (8)
Leave feedback


Total ratings: 82
Rate this member

Report this Post02-22-2009 01:02 PM Click Here to See the Profile for katatakSend a Private Message to katatakDirect Link to This Post
I beleive that the reason for the leak was that the seal was not seated all the way into the front cover. The new balancer does not have a grove worn in it but between the machined seal surface and the hub of the balancer, there is a factory groove and when the balancer is seated onto the crank, this groove lines up with the leading edge of the seal where it had "walked" out. I could actually see the "steps" of the seal on the balancers machined surface. I aggree that the hole I drilled probably will not make any difference but I don't think it will hurt either. I drilled the hole befroe I realized that the seal was not seated all the way.

As for tilting the cradle, I believe that it could have been done with out tilting but I had a few other things that I wanted to "fix" on the front of the motor that are simpy easier to get to with it tilted. Plus I wanted to pull the rear plugs just to check the "burn".
IP: Logged
BrewCheese
Member
Posts: 1809
From: NW Indiana
Registered: Feb 2003


Feedback score: (5)
Leave feedback

Rate this member

Report this Post02-22-2009 05:29 PM Click Here to See the Profile for BrewCheeseSend a Private Message to BrewCheeseDirect Link to This Post
Nice write up and very clean car! By the way what brand of exhaust do you have on that thing?

Jason
IP: Logged
PFF
System Bot
Frizlefrak
Member
Posts: 2921
From: El Paso, Texas
Registered: Aug 2003


Feedback score: (5)
Leave feedback


Total ratings: 72
Rate this member

Report this Post02-22-2009 06:01 PM Click Here to See the Profile for FrizlefrakSend a Private Message to FrizlefrakDirect Link to This Post
Nice work Pat. Wanna try to get together for lunch on Friday if you're in town?
IP: Logged
katatak
Member
Posts: 7136
From: Omaha, NE USA
Registered: Apr 2008


Feedback score:    (8)
Leave feedback


Total ratings: 82
Rate this member

Report this Post02-24-2009 06:26 PM Click Here to See the Profile for katatakSend a Private Message to katatakDirect Link to This Post
 
quote
Originally posted by BrewCheese:

Nice write up and very clean car! By the way what brand of exhaust do you have on that thing?

Jason


Jason,

It's a stock aftermarket replacement from Autozone! - Cat is empty. Exhaust and Y pipe is ported, coated and wrapped.
IP: Logged


All times are ET (US)

T H I S   I S   A N   A R C H I V E D   T O P I C
  

Contact Us | Back To Main Page

Advertizing on PFF | Fiero Parts Vendors
PFF Merchandise | Fiero Gallery
Real-Time Chat | Fiero Related Auctions on eBay


Copyright (c) 1999, C. Pennock