Half a can of resin? How much hardner did you use? The reason they don't put markings on it, because its suppose to be used by body shops with scales.
For the amount of work you are doing, I wouldn't use very much resin, let alone much hardner. You can always mix 'more' later, or if you put too much hardner in, you won't waste much at all, if any. I understand what you are doing when you taped it, however make sure you sand that front painted side very very far down, when all the paint is gone, all the gelcoat, right down to the fiberglass. I learnt that the hard way .
I think you need to finish the rest of that GT kit, maybe some nice skirts? If you want some ideas to play around with while your learning to use fiberglass, stop by my build thread.. You might be making a widebody next year with these talents .
Best of luck, Chase.
------------------
IP: Logged
10:20 PM
crytical point Member
Posts: 569 From: sanford FL USA Registered: Feb 2006
if you wanna know what you could do with fiberglass check out the link because I have done numerous things. Right now im doing door panels for a 93 thunderbird that will have 4 speakers and the 7in woofer will be seperatly enclosed with a port. I have made custom lighting, speaker box's, dash boards, door panels, and numerous ods and ends. I will be in a RX7 magazine next issue showing people how to build custom interior and specificly for a 91 RX7. So it can get you places and doing custom stuff and wierd people calling you to do custom jobs and make mad cash. http://community.webshots.com/user/crytical_point
[This message has been edited by crytical point (edited 04-07-2006).]
IP: Logged
10:55 PM
Apr 8th, 2006
rogergarrison Member
Posts: 49601 From: A Western Caribbean Island/ Columbus, Ohio Registered: Apr 99
read the can of resin to see how much is in it and then the tube of hardener, they give you just enough. Divide the can by the tube and you can roughly figure how much to use. (ie/ 1/4 can to 1/4 the tube). I generally mix mine about 15-20 drops of hardener to an ounce of resin in normal room temp. Yes you have to be ready to go when you mix it, no time to dally. The warmer it is the faster it hardens. Once its started to gel, its done, dont use it. If you mix it in a vinyl or plastic container when its clear hard, all you have to do is twist it and it will all pop right out, none if very little cleaning to do. I use plastic butter dish myself for small amounts. Hobby shop also has packages of small brushes that are cheap enough to be disposable just for fiberglassing. Good start...keep it up.
Great work! The best way to learn is by expirmentation and you've got a great start so far! Since I haven't yet started down the learning process and can say thank you for more education on the process!
------------------ -Nickster
IP: Logged
11:24 AM
crytical point Member
Posts: 569 From: sanford FL USA Registered: Feb 2006
I use a plastic 1 gal jug and cut the top off of it and fill it up to the first line which is a little more than 3 cups and I put 30-40 drops depending on how fast I feel or how thick im going. But the best part is sanding and bondo and sanding and more bondo and sanding then priming then sanding then painting then pass out or enjoy some fresh air. I started with fiberglass when I was 17 and had to make my own mold for a side panel for my old motorcycle, then moved onto boats and car stuff.
IP: Logged
11:40 AM
motoracer838 Member
Posts: 3751 From: Edgewater Co. USofA Registered: Jan 2006
You sould see how long it takes for one person to hand lay a complete body kit!!! After my molds and body #1 I have started using a local fiberglass company to build my bodies, I don't have enough time to do it on that scale by myself any more.
You'll get the hang of it, as you can see there are things about fiberglass that have to be learend by experienc. It is almost impossible to describe the whole procsses to somebody else and have them understand. Cheers Beers n Gears. Joe
[This message has been edited by motoracer838 (edited 04-08-2006).]
IP: Logged
01:17 PM
jscott1 Member
Posts: 21676 From: Houston, TX , USA Registered: Dec 2001
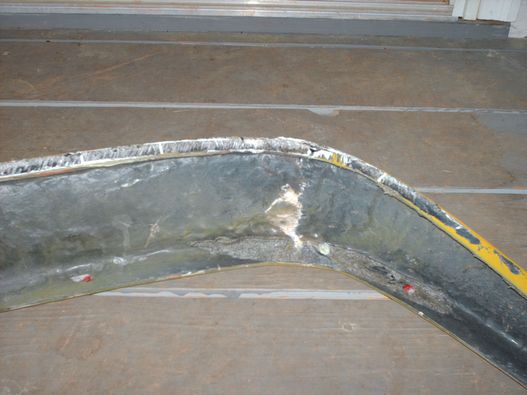
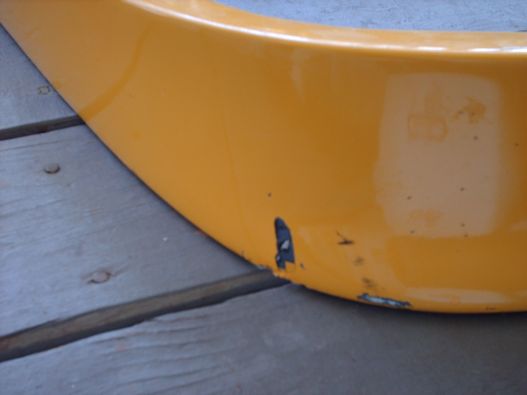
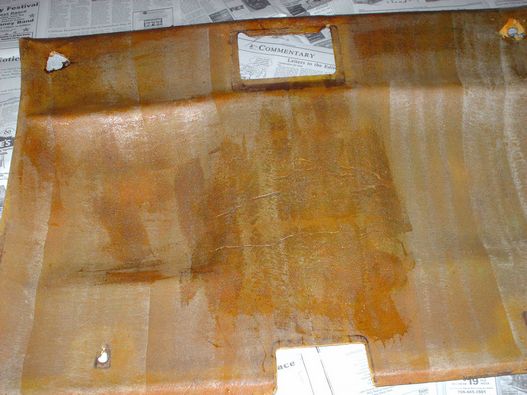
Here's a closeup of the damage from the inside. It shouldn't be too hard to fix. You can see that it's been reinforced in that area before. Kinda lets me know that I'll probably be doing this again at some point. LOL
Real good work for your first time. I found out I have a LOT to learn about fiberglass. It is definitely an art and something you have to learn from practice, and I know I need a lot of it.
I hope you figure out a way to make those chin spoilers stronger. You begin to understand why Pontiac angled the nose up like that after you break the spoiler. Someone needs to cast that closed mouth spoiler in urethane. Until then I'll stick to the "Lawrence/Skitime spoiler" which is flexible.
IP: Logged
07:28 PM
Apr 12th, 2006
exoticse Member
Posts: 8656 From: Orlando, Fl Registered: Jun 2003
LMAO I did the same thing about 2 years ago. I "tried" to make cup holders for the fiero but it didn't go too well. Matt and I ended up makeing speaker boxes out of fiberglass but Matt did most of the work. Oh make sure you use the gloves Matt got his hands stuck together the first time he tried it and I had to take a screwdriver and chizzle his hands apart LOL
IP: Logged
11:12 AM
RCR Member
Posts: 4454 From: Shelby Twp Mi Registered: Sep 2002
Nice work so far. Nothing like neccessity to make you learn something new. Might I suggest a trip to a "Walmart" for chip brushes. Our local store has 1" brushes for $.50 ea. Grab a handful, otherwise you'll spend more on Acetone to save a brush. You can pick up a box of latex gloves pretty cheap, too. They had 10 latex gloves for $6 in automotive, and 50 gloves for $8 in home improvement. So, look around the store.
Bob
IP: Logged
12:31 PM
Brian Lamberts Member
Posts: 2691 From: TUCSON AZ USA Registered: Feb 2003
I used to do a lot of fiberglass repair stuff (I was a stagehand on one of those Las Vegas style shows, except it was in Reno.) I alway hated that loosely woven mesh stuff and even hated the mat 'sh**" worse. So I got to lookin' . If you go to Home Depot or an RV repair store, you can by a very tightly woven mesh, it runs about 5" wide and comes in a long roll--it's used as seam reinforcement for Sno Roof products. It works great! Doesn't shed fibers like the more loosely woven stuff, and almost looks like white carbon fiber when you're done. It requires a little more brush working to find contours, but it provides such a nice look that it's worth it. When I was doing fiberglass repairs on a daily basis, neatness did count (speed did too.) I got to be the 'go to' guy in the stage and convention depts at Bally's Grand Hotel in Reno. I even would get loaned out to other depts. Sure beat workin'! The $5 or $6 I paid for the material was more than covered by the extra work I got (and the raves.) They thought I was an expert! (I'm not.) Stage management seemed mystified by fiberglass repairs.
Always used disposeable brushes, too. And for small jobs, a tuna can is really nice for mixing. I never used a roller, it doesn't do well in contour repairs, and is usually just one more thing to clean up (quick before the resin sets!)
As most of my repairs were between shows, I use a pretty hot mixture. Lots of hardener, and the stuff would set so fast, it would radiate heat. Tacky hard in less than 5 minutes.
IP: Logged
02:35 PM
PFF
System Bot
RCR Member
Posts: 4454 From: Shelby Twp Mi Registered: Sep 2002
Brian made me remember to mention something else. My batches are usually so small, I mix them in old Gatorade bottles. I just cut the tops off. I've also used aluminum pop cans.
Bob
IP: Logged
04:59 PM
Miss-Tress007 Member
Posts: 541 From: New Orleans, LA, USA--now in Greensboro, GA thanks to Hurricane Katrina Registered: Feb 2004
Sorry about the wait for pics and updates guys. I've been pretty busy the last couple of days. So without further ado......
Here's how the cured fiberglass came out for my repair:
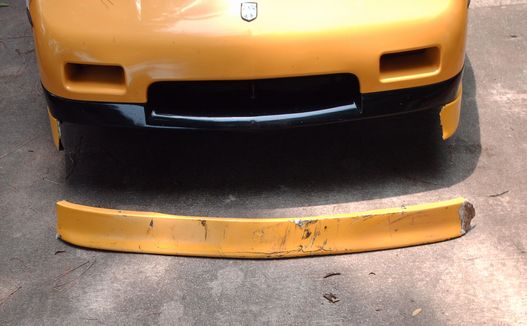
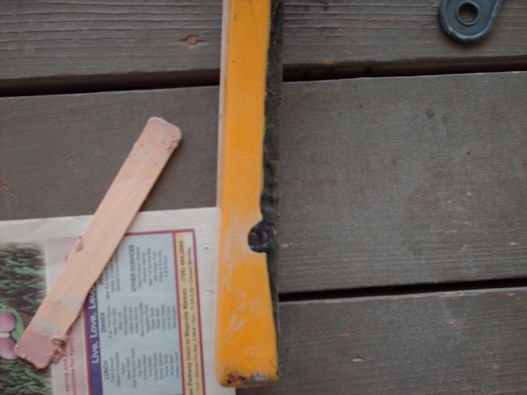
This is the piece before the repair:
Not too shabby for the first time working with this stuff. I wouldn't have had the clumps in places if I hadn't tried to push it and add more of the resin mix after it had started turning to gel and hardening. After checking it out more closely, I decided not to sand it down on the inside since I wanted it to be as strong as possible so the repair would last longer. The added "clumps" of fiberglass made the curve a bit stronger since there was more of the fiberglass collected in that area. It looked a bit messy, but felt really strong. If this part of the spoiler was going to be seen, I'd definitely be alot neater and get it all completely smooth, but since I was doing a "quick and dirty" repair job, I figured this was good enough.
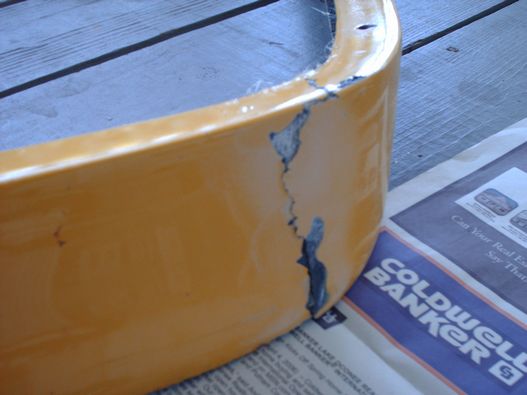
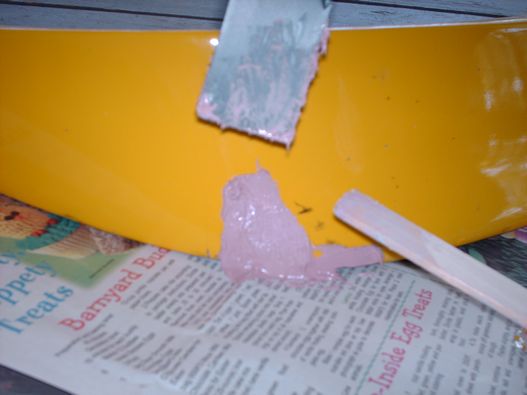
Now that I had the crack repaired and strengthened on the back of the spoiler, I now had to deal with the cracked fiberglass showing in the front.
the left side:
the right side:
This meant---Bondo time!
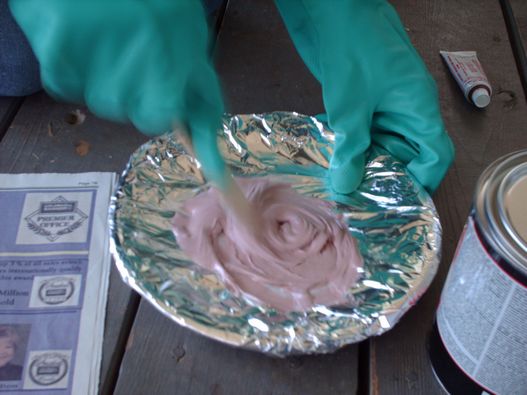
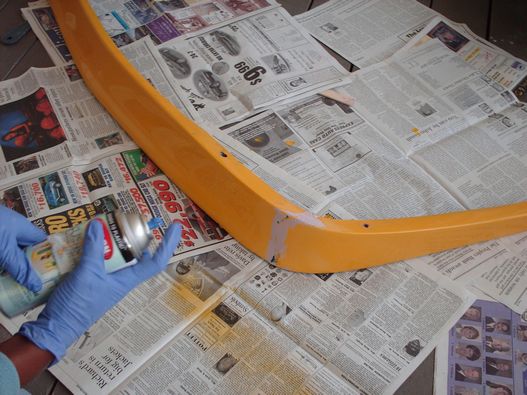
I mixed the bondo and hardener using a styrofoam plate covered in aluminum foil as my mixing plate. (The foil makes for really easy cleanup.)
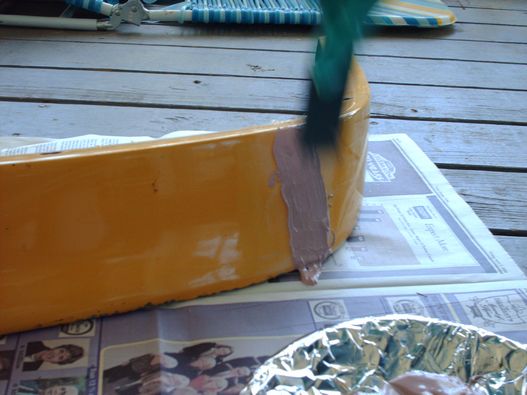
I used a spatula to spread out the bondo to fill in the cracked places on the spoiler. (Kind of like spreading icing on a cake.)
The left side was a bit more tricky since the crack was so long. I had to make sure to get most of the Bondo on the area to be repaired and not spread it out over a larger area of the spoiler than was necessary, since I didn't want to have to sand it all down and repaint the whole thing.
The cool thing about Bondo is that it only takes 30-45 minutes to set. Since I hadn't gotten the paint yet to complete the project, this was as good a time as any to go and try to find a matching color for the paint. We'd checked AutoZone and Advance Auto in the next town over and came up empty on finding a match, so it was off to Wal-Mart to see what could be found.
~cont~
IP: Logged
11:32 PM
Miss-Tress007 Member
Posts: 541 From: New Orleans, LA, USA--now in Greensboro, GA thanks to Hurricane Katrina Registered: Feb 2004
Well, they really DO have everything at Wal-Mart! LOL I took a couple of paint chips with me from the cracked area to use when trying to match the paint color and got lucky. Sunbeam/Safety Yellow Krylon Fusion spray paint for Plastic matches almost perfectly. hehe I got the kind that dries in 15 minutes or less that didn't require any sanding or priming (yeah, I know I was taking the lazy way out LOL).
So armed with my can of spray paint, I get back to the house to check on the bondo. It was already set, so I get started sanding.....and sanding.......and sanding......and, well, you get the idea. LOL It really wasn't that bad though, 'cause I managed not to put too much bondo on the other areas of the spoiler, so I didn't have to sand too much to get it pretty smooth and contoured the way that I wanted it.
I used a 100 grit sandpaper sponge, which meant I could be really exact and make some extra passes to shape it the way I wanted it. There were some spots that I could have added more bondo to and resanded in order to get it precise, but I wanted to go through the entire process first and then do it all over again once I had more time and a better place to work.
After sanding, I took care of a problem that we'd run into when trying to take out the screws to remove the spoiler. The screws on the corners are really difficult to get to with a screwdriver because the bottom lip of the spoiler gets in the way of the screwdriver. This means you have to angle the screwdriver to get it onto the screw in order to turn it---which doesn't really work that well. You'll either spend alot of extra time trying to turn the stupid screws to get it out, or you end up almost taking off a finger or risk scratching the spoiler because the screwdriver keeps slipping.
So to take care of this problem, I needed to make notches in the spoiler lip to allow access with the screwdriver. I used a cutting disk and the dremmel tool to create a half-circle on each corner above the hole where the screws need to go:
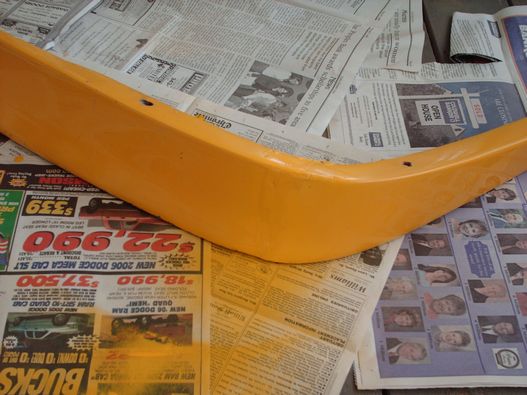
Once I got those cut out, it was time to paint and see how this would turn out:
As you can see from this pic, there were a couple of areas that I could have gone back to fill in with the bondo and resanded so there wouldn't have been any black showing at all. I didn't use any primer before I painted the repair, but I probably should have, since I wouldn't have had to use as many coats of the spray paint. I didn't account for the bondo being a different color other than white, so it just took a little more to cover things up.
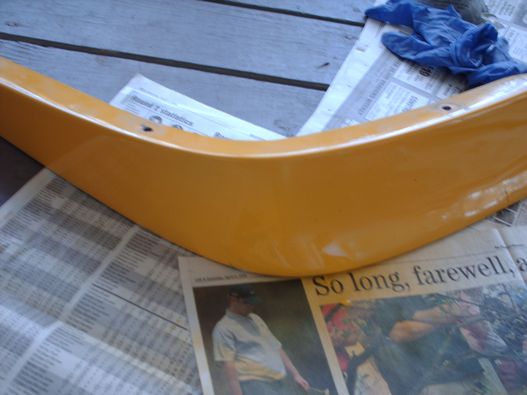
The left side after a couple of coats of spray paint:
You can kind of see the repaired area if you look really closely....but like I said, this was a "quick and dirty" repair job, so I didn't really take the time to make it perfect. I just wanted to get my feet wet so I could know what to expect when working on a repair and doing fiberglassing.
The right side came out almost perfectly. The sanding and bondo job on this side was soooo smooth!
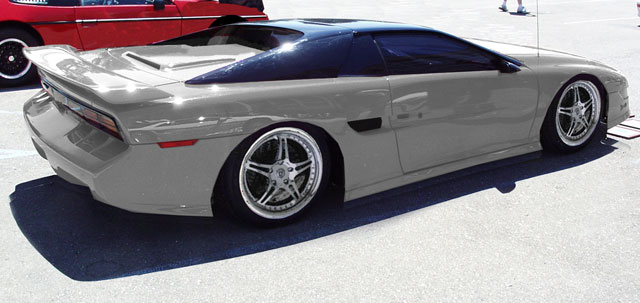
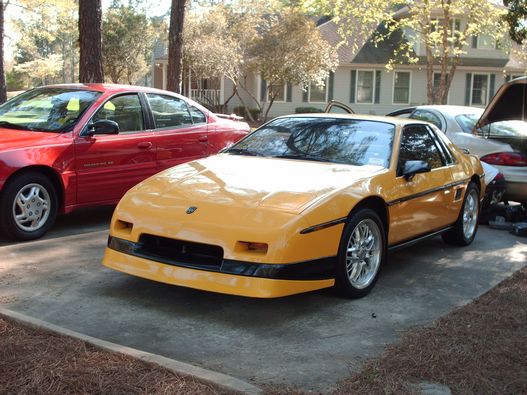
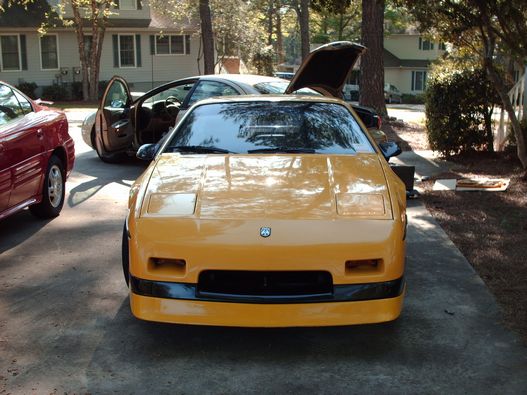
Here's my baby all back together!
You can't even tell there was anything wrong!
We discovered that we needed to add nuts to each of the screws in order for them to hold the spoiler in place since the holes had become a bit loose after we removed the screws the first time so they didn't tighten as well. A quick trip to the hardware store and that problem was solved. I'd also managed to cover up one of the holes with the fiberglassing resin, so I had to drill it back out before I could attach the spoiler. (Note to self, make sure to watch out where holes are before spreading fiberglassing mixture around. hehe)
I know I'm going to end up getting a sander, taking the entire spoiler off and redoing the whole thing at some point. I just couldn't go too long without the spoiler on the car 'cause it just doesn't look the same. hehe Now that I've worked the entire process with fiberglass, I've gotten the "itch" (no, not from the fiberglass mat hehe) so I've already started planning my next "project". LOL
~Tress
[This message has been edited by Miss-Tress007 (edited 04-12-2006).]
Nice job on your first job Tress! It'd take a highly observant (and really short) person to notice the repair down there. =P Especially on the passenger side�WOW!
It's got to be unnerving to post pictures of your work when you know there are pros watching�mega kudos to you for having the guts. And thanks for the encouragement you're providing to the rest of us who are intimidated by learning something new (but might just have the guts to try it if you keep posting like this!).
+ to you!
IP: Logged
01:58 AM
Gokart Mozart Member
Posts: 12143 From: Metro Detroit Registered: Mar 2003
Originally posted by Miss-Tress007: So to take care of this problem, I needed to make notches in the spoiler lip to allow access with the screwdriver. I used a cutting disk and the dremmel tool to create a half-circle on each corner above the hole where the screws need to go:
Why the hell didn't I think of this. I guess I like doing things the hard way. LOL. Also I'm very interested to see this in person hopefully at the next club meeting. Since the color of the spoiler is what is on my car, I'd like to see exactly how close that paint you got matches it. It's not really possible to tell in pictures I know. Kudos on a job well done. Next time it'll be much easier. And you've opened up a whole new avenue for creativity.
[This message has been edited by Suufmeister (edited 04-13-2006).]
IP: Logged
09:32 AM
exoticse Member
Posts: 8656 From: Orlando, Fl Registered: Jun 2003
Tress you continue to put myself and others on this forum to shame !
Fixing a chin spoiler may not seem like much to some, but it is a heck of a lot more than i have ever done with glass. I think you are right, it is really not that tough, people just need to give it a try.
Congratulations.
IP: Logged
10:24 AM
May 18th, 2006
Miss-Tress007 Member
Posts: 541 From: New Orleans, LA, USA--now in Greensboro, GA thanks to Hurricane Katrina Registered: Feb 2004
For some reason (don't ask me why), I decided to redo the headliner with a "little something different". (Kind of got that feelin' like you do when it's time to rearrange the furniture--there's really no reason to do it, you just want a little updating. LOL)
Since this was supposed to be an "easy" job--(I emphasize the supposed to be part hehe)--I figured it wouldn't take too much time or effort.
After getting the headliner out of the car (finally), I noticed that I had two problems: 1) part of the headliner had cracks in it and 2) the part that falls in the front of the light console had broken off. No biggie, right? After all, I've got resin & fiberglassin' materials----so let the repairs begin! LOL
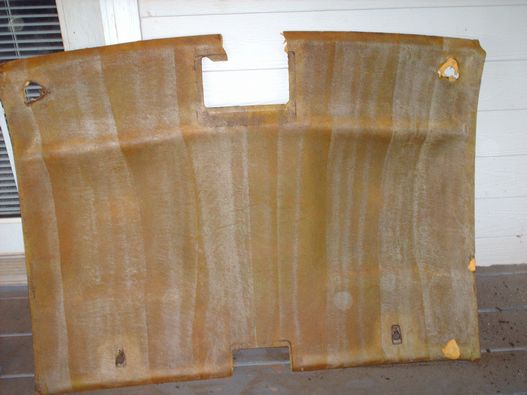
Here's a pic of the headliner after I'd removed the old material: (You can see the broken part in this pic.)
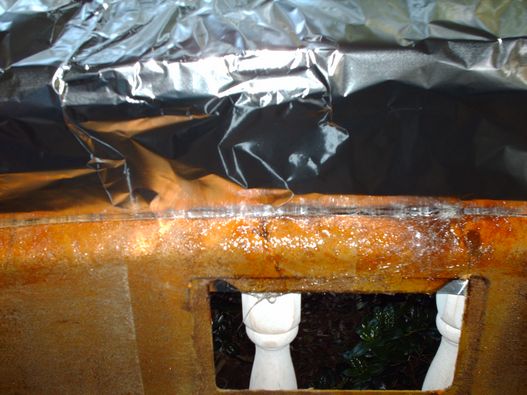
I refit the broken piece, then used a small amount of fiberglassing cloth and resin to do a quick and dirty repair job. Then placed aluminum foil behind the repaired area so the resin wouldn't stick to the porch railing.
Here's the finished repair. It came out pretty good and I was able to line up everything with no problem. There were also cracks across the middle of the headliner, so I brushed some resin across the area in order to strengthen it.
This time around I didn't use alot of hardener 'cause I wanted to be able to brush the resin across a larger area. I got it timed pretty well, so I didn't have the resin harden too fast and I could finish the repairs to both areas without having to rush.
Not a major repair, but good practice with using the fiberglass materials. I'm not showing pics of the final headliner install---that was another story all together. You guys would laugh at the results of that experiment. LOL
This could be good. Fiberglass and me historically have not got along too well. I need some inspiration and guidance. Here's a suggestion on what to build...
Damn, That's hot
IP: Logged
06:06 PM
Aug 13th, 2006
Miss-Tress007 Member
Posts: 541 From: New Orleans, LA, USA--now in Greensboro, GA thanks to Hurricane Katrina Registered: Feb 2004
Not in a while. She was going to be doing the club newsletter a while back (last spring?) but hasn't done one in a while. Probably due to lack of submissions.
Haven't actually seen her or Earl in over a year.
IP: Logged
06:03 AM
gt7 Member
Posts: 277 From: suffolk, va, usa Registered: Feb 2006
Hmm, fiberglass - I'd forgotten what that stuff can accomplish. Wonder how well I could recover shape of my truck, custom mold a replacement for Pontiac's air intake "water trap," fabricate some decent speaker pods... I Love high-q jazz, esp the Dulfers, Davis, Coltraine, Coz, Yellowjackets, etc. Bass takes a backseat to sealed enclosures every time. And not altering console or firewall clearance, etc. So basically stock. Speaker backing a great idea for glassing. I'm also gravitating to making a mild box for behind pass dash area. When that's right and my jazz sounds right, AC/DC, Foreigner, Dire Straits and the like sound good to me. Still can never compare to good studio 'phones. Still, I was blasting Candy Dulfer's Candy Store album just before work in my little standard cab pickup with cheap Jenson head unit. Sounds GOOD with rear 3-way boxed 6x9's (my early summer project) and cruddy little 2-way 5-1/4 Blaupunkt door speakers that my truck came with. Hard to tell truck can sound good as it looks cheap with no visual cues to see other than 45x4 on headunit if you look closely. To me, this is paramount to running as daily driver. And then make some bicycle fairings, portable boompack toys and whatever else comes up.
IP: Logged
03:28 AM
Feb 21st, 2008
madcurl Member
Posts: 21401 From: In a Van down by the Kern River Registered: Jul 2003


 .
. 


 You guys would laugh at the results of that experiment. LOL
 Thanks for the encouragement!