This weekend I finally got back to building my finale and I wanted to post pictures in my original thread but, it's been archived! How sad is that? I haven't worked on it in so long the thread got archived. Well, that won't happen again!
I got a lot accomplished this weekend and a little bit tonight.
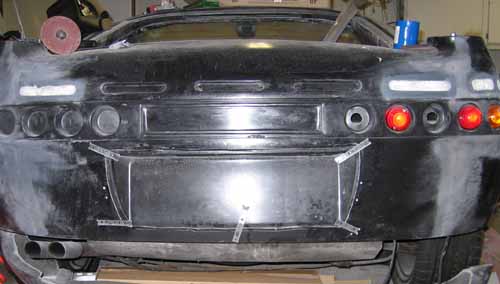
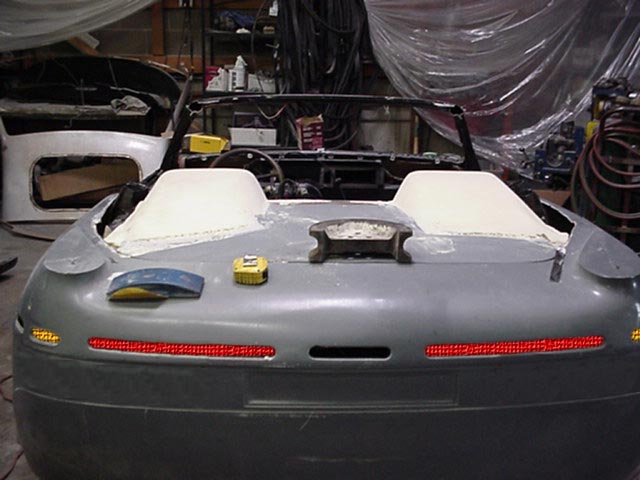
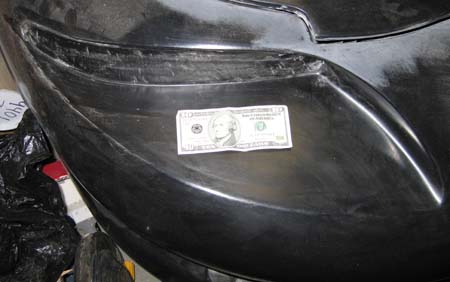
I cut out the license plate area. There are some lines on the body that give you a good idea of where to cut. The directions are to cut out the hole and then use the piece you cut out to trace on the insert. After cutting out the hole, I had about 20 lines drawn on the new plate when I decided to do it a little different. I screwed the piece into place behind the body. Then I cut the body about a 1/4" larger and it cut the new plate at the same time. When I finished I had a plate that fit in the body with a tiny gap all the way around. You'll also see some white(ish) foam in some of the vents. I'm going to seal this up and leave just the middle three:
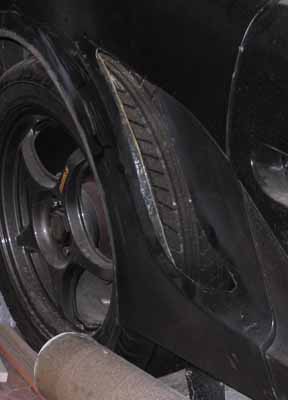
Cut out some vents:
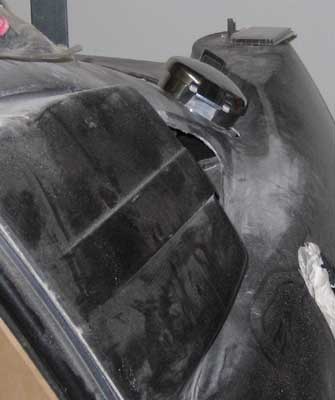
And started work on the fuel filler cap:
Plus a whole lot more that will have to wait for another night of story time.
If you used pour in or foam in a can to fill those vents drill some holes in the back side (about 1/2") before you glass them closed. The instant foams will slightly outgas for months and outgas more when hot than cold. If you leave it sealed in the back and then close the front, something often has to give and it can bulge your glass or even delaminate it. Usually if I use pour foam and it's going to be closed on both sides, I'll drill the holes before I pour and then put some packing tape over them. As soon as the foam is expanded, pull the tape off and just leave it open.
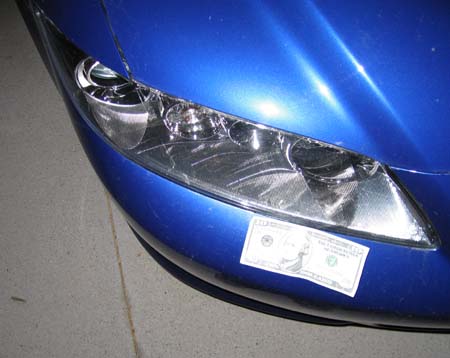
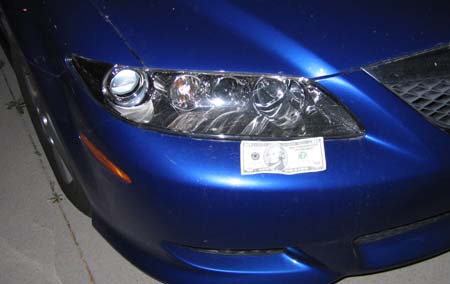
Nice to see you back on the project. Did you ever get a chance to compare the curve of the Mazda 6 headlights to the Finale openings?
John Stricker
quote
Originally posted by bdjones:
This weekend I finally got back to building my finale and I wanted to post pictures in my original thread but, it's been archived! How sad is that? I haven't worked on it in so long the thread got archived. Well, that won't happen again!
I got a lot accomplished this weekend and a little bit tonight.
You'll also see some white(ish) foam in some of the vents. I'm going to seal this up and leave just the middle three:
--Brett
IP: Logged
09:19 PM
Jan 27th, 2005
DandRauto Member
Posts: 419 From: Middletown, NJ Registered: Mar 2001
Thanks for the advice John! I'll get a couple pictures of the Mazda6 lights tonight and post the findings on the curve (I forgot about that task long ago )
I don't remeber where I got the cap from, but it was a shelby cobra kit car company. I'll look around tonight to see if I can find the receipt.
What kind of headlights are on the Yellow finale? I like them a lot. I have plans for my turn signal and I don't want the yellow in the headlight area and it looks like yours address that problem!
IP: Logged
04:20 PM
bdjones Member
Posts: 153 From: Orange County, CA Registered: Mar 2003
Here it is. It is a pretty good fit scaled up to close as I could get it. I changed the car colour just to contrast it. Crap colour but it helps visualise.
[This message has been edited by AusFiero (edited 01-28-2005).]
IP: Logged
01:32 AM
fiero_silva Member
Posts: 1493 From: Winnipeg, Manitoba, Canada Registered: Jun 2003
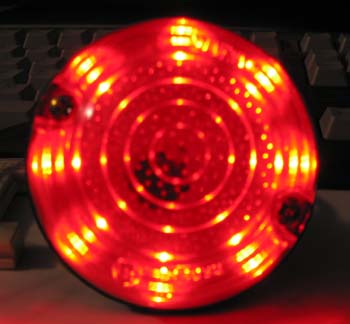
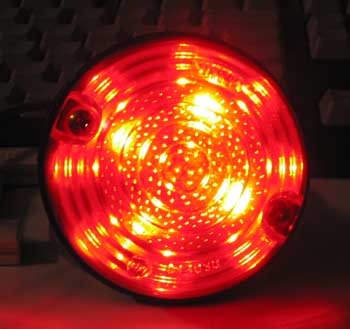
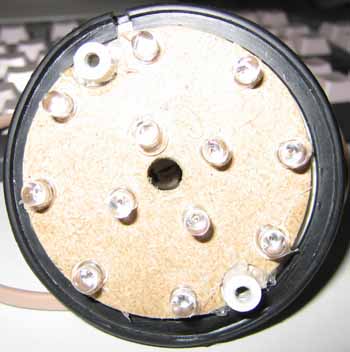
I'm redesigning the tailights so they will be LED instead of bulb...
Here is them on (but not brakes):
Here is them with the brakes on:
And here is the inner workings:
This is just the prototype/test and it turned out great. The outside lights are on when the headlights come on, and the 4 in the middle come on for the brakes. I'm running the whole thing off a microcontroller to pulse the LEDs so they appear brighter. I'm thinking about controlling the LEDs separately (or in banks) so I can create some patterns with them like spinning once when you first hit the brakes, or building the same in amber and having them spin for the turn signals... not sure yet but I'm open to ideas!
Brett
IP: Logged
06:24 PM
jstricker Member
Posts: 12956 From: Russell, KS USA Registered: Apr 2002
Thanks for taking the time to do that. It shows that it's definitely close enough to find a headlight from the junkyard to look at the install further.
And pricey. Haven't found a non-OEM source for them, yet, and they're rare at the yards bringing up to $250 each. I'd like to find a broken one that has enough left on it to play with before I commit to $500 or more and find they won't fit.
Whats going on bdjones you didn't put this on the backburner again did you? lol. I can't wait to see this car finished, it's going to rock. I can't wait till the day I finally get my own Finale kit, it's gonna rock, plus to your creativity and good luck man!
-Josh-
IP: Logged
04:54 PM
Feb 27th, 2005
bdjones Member
Posts: 153 From: Orange County, CA Registered: Mar 2003
Originally posted by Fiero Finale: Whats going on bdjones you didn't put this on the backburner again did you?
Of course I did!
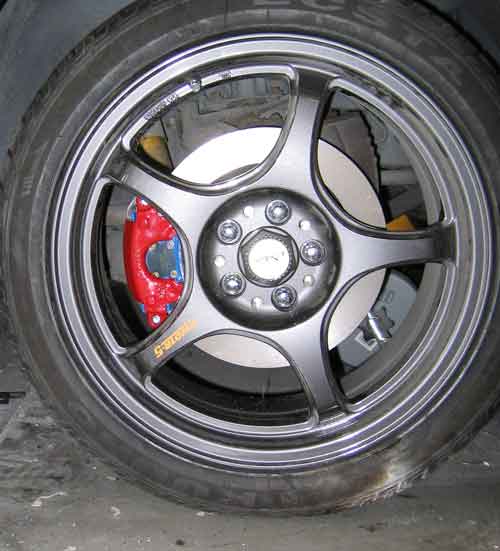
I didn't have much time today but I did put on one of the new brakes. I ran out of time and didn't want to keep the car in the air so the old caliper is still connected and tucked behind the wheel.
I'll have more updates during the week.
--Brett
[edit: spelling]
[This message has been edited by bdjones (edited 02-27-2005).]
IP: Logged
06:28 PM
Mar 8th, 2005
bdjones Member
Posts: 153 From: Orange County, CA Registered: Mar 2003
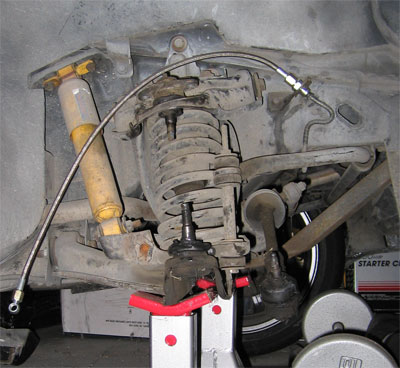
I did more work on the front suspension. By this weekend I should have the control arms pulled, cleaned and powder coated for the front passenger side. I picked up an oven for powedercoating today for the low price of a 12 pack of beer. I'll keep it around until the suspension and engine are done then I'll send it off to the dump.
I just got my 4 wheel spacers in today. All 2":
I'll post more this week.
IP: Logged
10:51 PM
bdjones Member
Posts: 153 From: Orange County, CA Registered: Mar 2003
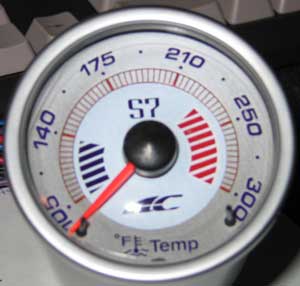
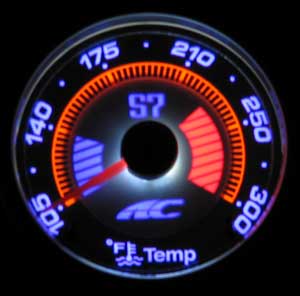
I will be doing a complete new dashboard and my gauges came in. I need to find a speedometer that looks similar (at least similar without the lights on). If anyone has any ideas please let me know. Picture time!
Off
On
IP: Logged
11:33 PM
PFF
System Bot
Mar 10th, 2005
bdjones Member
Posts: 153 From: Orange County, CA Registered: Mar 2003
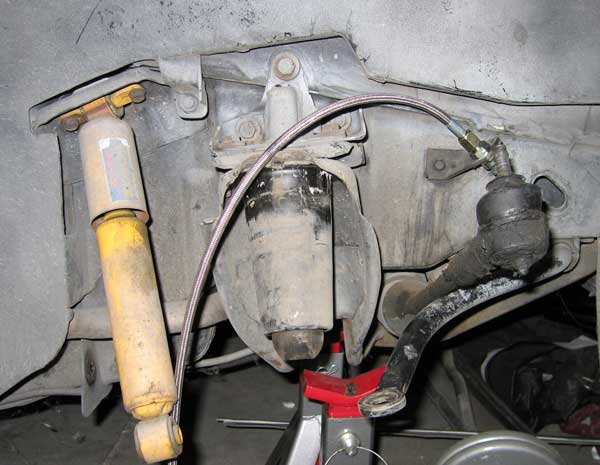
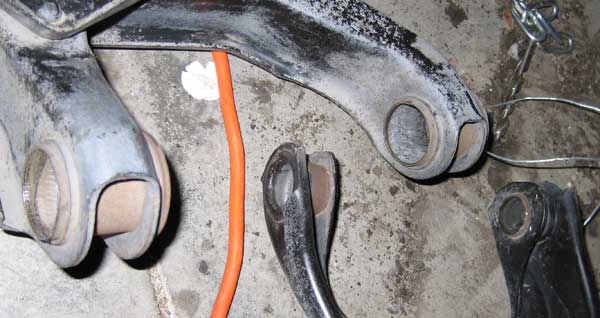
Now on to the fun part - control arm bushings! I spent a good hour pressing, prying, hammering, pounding, burning one bushing until it finally came out. I then started searching the forum and someone had posted a way to do it with a small drill bit. 20 minutes later the other 3 are out. What a time saver that tip was!
This weekend I'll blast and powder coat them. I bought new upper and lower ball joints and new outer tie rod ends from rodney so I will put those in. I hope the have the complete front done this weekend.
Question for anyone looking: What can I do to make the wheel wells nice and black? Is there a special paint, or do I use any paint that works on plastic?
Brett
[This message has been edited by bdjones (edited 03-16-2005).]
IP: Logged
12:50 AM
Apr 23rd, 2005
Fino Member
Posts: 813 From: St. Johns, MI. USA Registered: Jan 2002


 )
)


 lol.
lol.