Using the technique you applied, would it have not been better to cover the foam with plaster (or something else someone can suggest )first, before fiberglassing in order to better retain the mold ?
IP: Logged
10:53 PM
Wholf Member
Posts: 379 From: Cleburne, Texas Registered: Mar 2003
Using the technique you applied, would it have not been better to cover the foam with plaster (or something else someone can suggest )first, before fiberglassing in order to better retain the mold ?
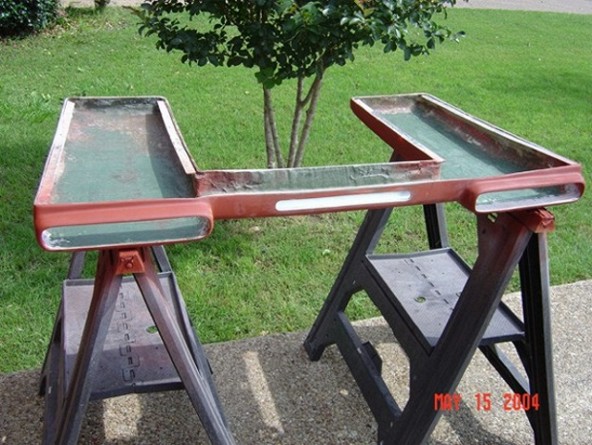
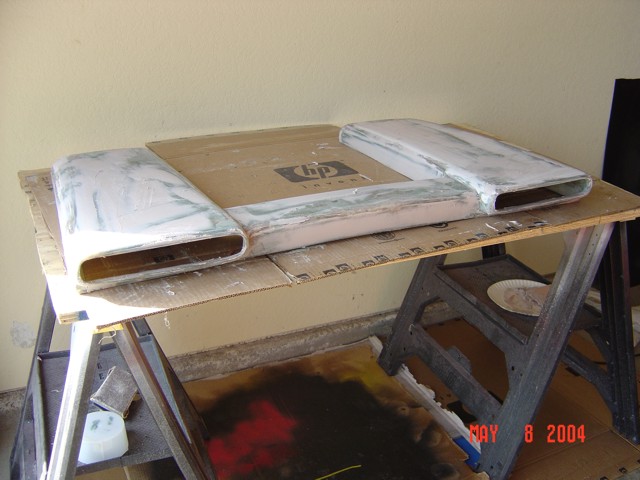
More then likely, but my major interest was not in saving the molds, it was just getting a good mold to work with. I had to allow for the thickness of the glass to compensate for the fit. If I would of used plaster or something else to cover the foam with, that would of had to of been considered also. Plus that would of been even more work on the mold itself. It would of been nice to of had the molds out in one piece, but I doubt anyone would have really used them because of the work involved. I could easily make another mold if I had to, that was the fun part .
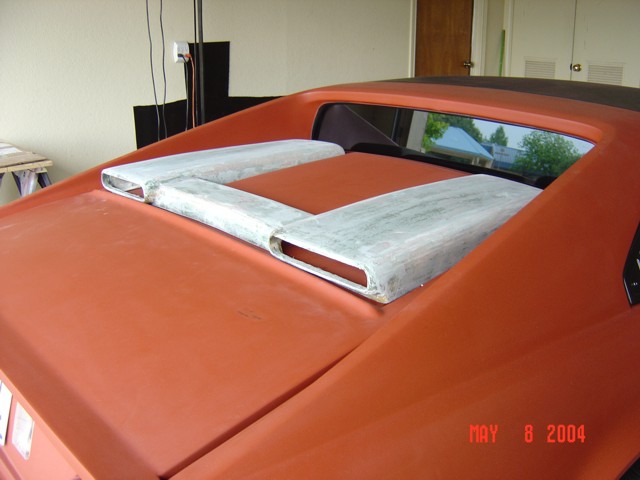
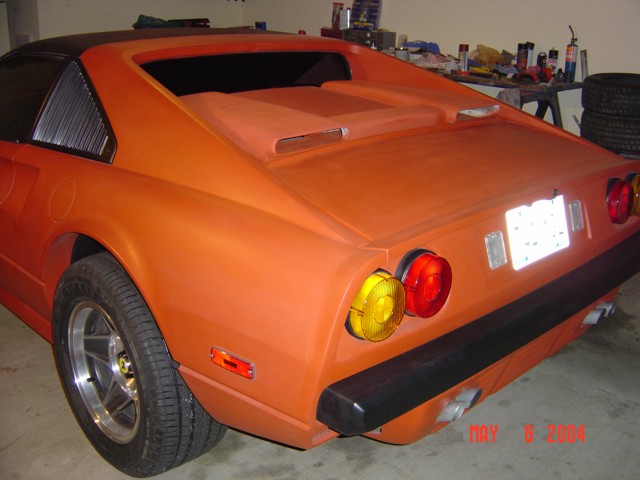
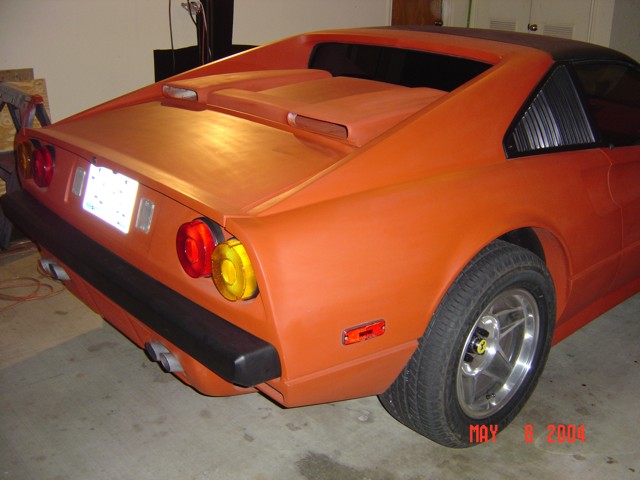
To me..... it seems like the center section should be smaller. high wise and width wise. Kinda like the rear (spoiler?) area. It does seem a little "blocky" as in square. For a third brake light, I used a elclips wing light. very small and it is fitted up between the rear window and the rear of the roof clip.(no one knows it's there till I hit the brakes.)
Before you mold it in...do me the favor and make a smaller center section for it just to "see" the difference. not for your line of sight, but for the aesthetics of the surrounding lines of the car. all thin lines right?
BUT all in all it is your car and you will be the one driving(or me ) just have fun with it as you would say.....
oh and leave the side vents alone (or mold them in )
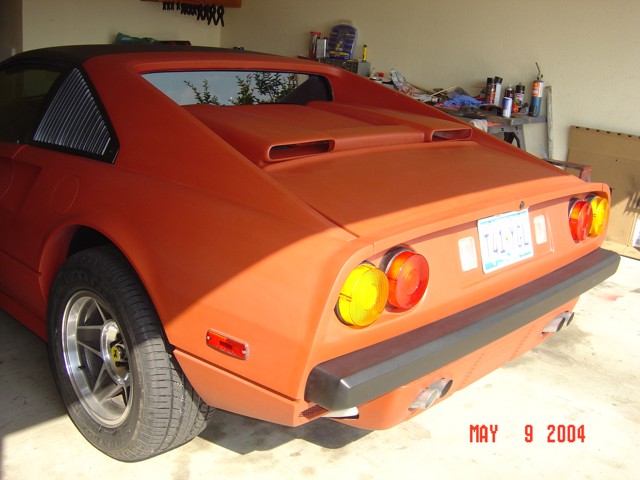
Well it is a little to late for that on this one.... If you notice in the beggining of this thread where the casting is upside down, it is all one piece. I made it this way to be removable. I guess that accounts for the thickness of the middle section especially since it supports both scoops. In all honesty it does look chubby in the pictures, but I am also not finished shaping it down. Also for some reason in the rear shot of the scoop it looks like the center section sticks up higher then it actually does( I do have to shave the bottom of the entire scoop down), but in person I only have a little over an inch showing above that lip. This inch is where the 3rd brake light is going. Try to picture everything a real glossy black, and I think you will see the picture I have in my mind. The good thing about it being removable, is that down the road, I can always make a new one. Right now though, I just want to get it done so I can finish prepping the body for paint. " I " WANT TO DRIVE IT!!!!!
Harold
[This message has been edited by Wholf (edited 05-11-2004).]
IP: Logged
10:34 AM
Fie Ro Member
Posts: 3735 From: Soest, The Netherlands Registered: Sep 2001
You can have the middle section sloping down at the rear side (use/copy/match the lines of the rear clip!)...it will match better to the car and it will make the vents "bigger".... my $0,02
Shape it untill you're completely satisfied! Or you will be making another one soon.
...You can drive it without paint...it will be faster too without the weight.
IP: Logged
01:31 PM
madcurl Member
Posts: 21401 From: In a Van down by the Kern River Registered: Jul 2003
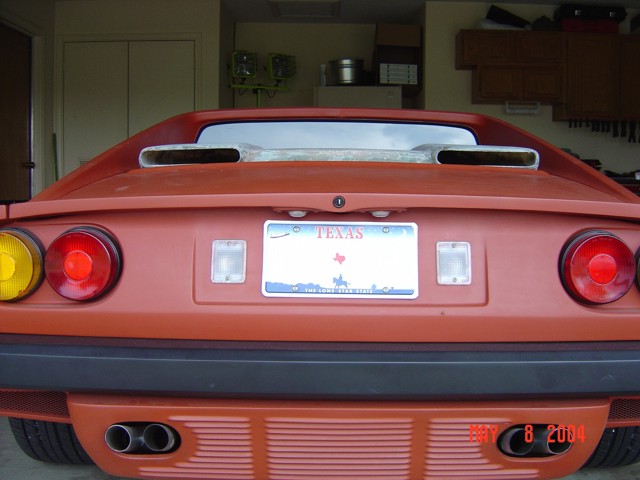
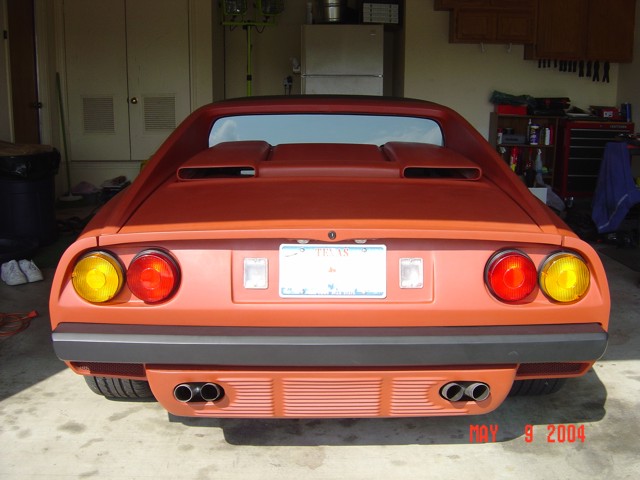
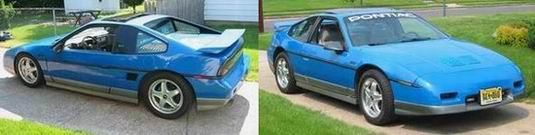
Yeah, looking at the rear view pic, you may need to do some additional modification to the side deck vents?
Hmmm.........I think your running into the same problem I had prior to my rear vents.
Whats the problem? IMO, the side deck vent don't flow with the rear deck fascia line. What I mean is: the outer rear deck line as it slopes down towards the rear end is similar to the GT fast back, right? What I had my glass man to do was: Right were the end of the side vents "start' to appear from side angle was to stop there and add some "slopes" or "extend" it to memick the slope of the rear deck. The pics of the Silver choptop demonstrates this. Otherwise IMO my vents would appear "shortened or stubby looking. I not saying that you need to make it look just like mine, but similarly is what I'm constructivly trying to suggest.
the center piece or rectangular item. I don't know what is/may not be needed right now IMO. Elongate the vents first, and then visually inspect it later?
------------------
IP: Logged
01:39 PM
May 9th, 2004
Wholf Member
Posts: 379 From: Cleburne, Texas Registered: Mar 2003
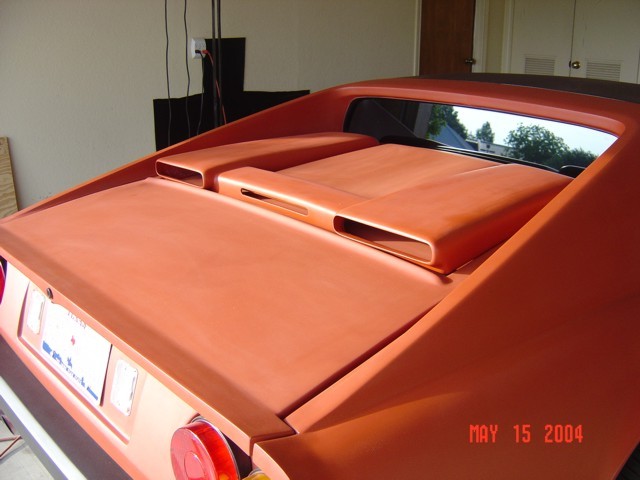
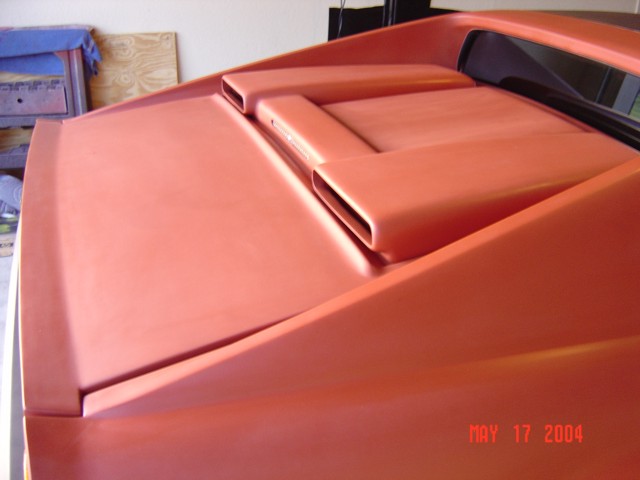
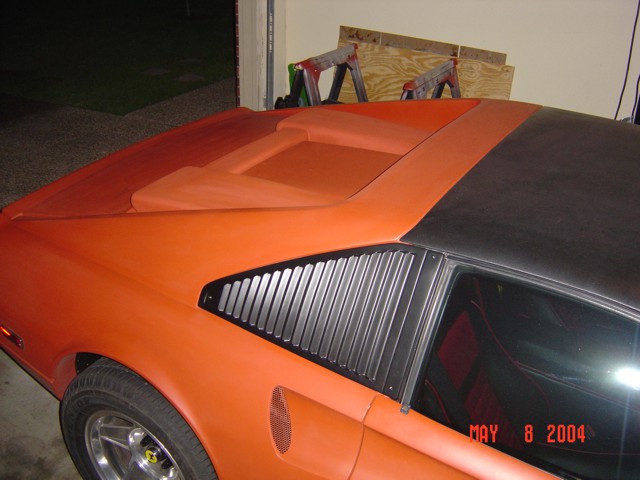
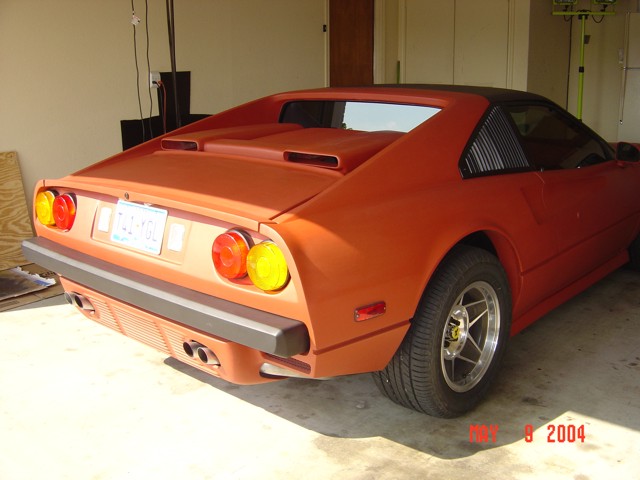
After adding some bondo and a little wet sanding I decided I needed to throw some primer on to see where I was at. The following pictures should give you and Idea how it is going to look when done, except it will all be black.. The primer has really showed me where I need to do more sanding to straighten everything out. I also need to cut out where I am putting my 3rd brake light, but I will wait until she is completely straight.
Amazing what a little foam and fiberglass can do for a car....
ohhhh diggin it man.. coming together really well..
now be a good boy and make sure to use a flush mouning led brake light No need for a ugly light bulb style light in such a good looking spot. And plus just think about the fun it would be replacing the bulb each time shutting the lid takes it out. L8
------------------ Ferrari 308 GTB rebody on a modified 86SE chasis Soon to have a highly hooped up 3800SC..Ohh yeah baby!! Contacts _ AIM / Zildjianfx _ Yahoo / djdraggin Remember, always brush your milk, drink your teeth, dont do sleep and get eight hours of drugs.
IP: Logged
06:19 PM
Wholf Member
Posts: 379 From: Cleburne, Texas Registered: Mar 2003
ohhhh diggin it man.. coming together really well..
now be a good boy and make sure to use a flush mouning led brake light No need for a ugly light bulb style light in such a good looking spot. And plus just think about the fun it would be replacing the bulb each time shutting the lid takes it out. L8
Way ahead of you Eric, that is why I have the rear center section sticking up about 1 1/2" above that lip.... The LED is only about 1/2 wide and about 8" long, and it is going right in the center!
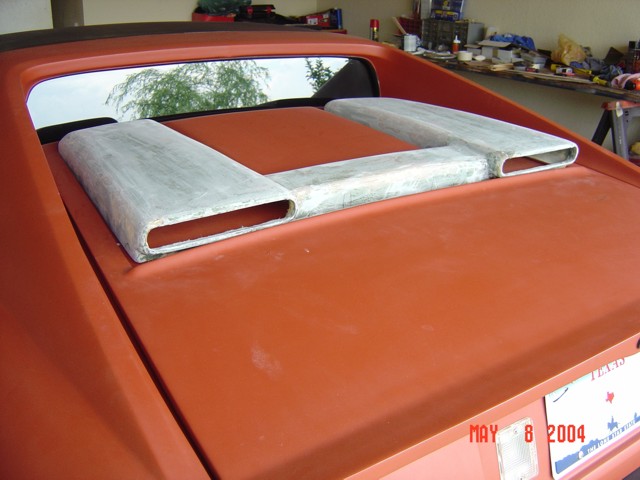
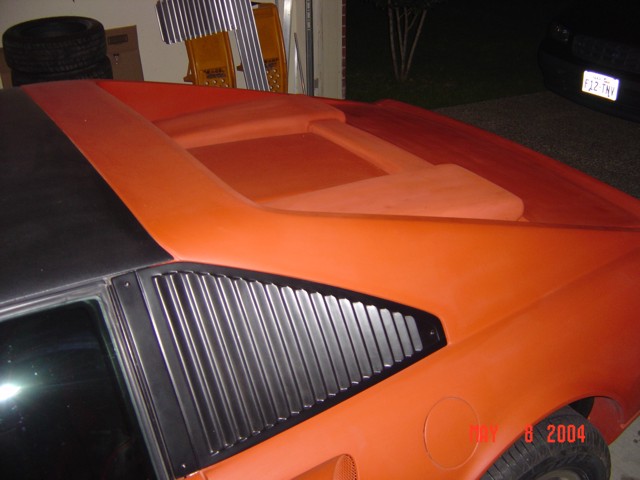
You can't really tell that a whole day of wet sanding and filling went into these, but believe me it did. I ran out of filler primer, so I had to quit.
I was originally going to put mesh screen over the opening, but after looking at it, I kind of like them open the way they are..... What do you all think???
I don't know how I missed this thread, but that's a really nice job there Wholf. Sorry I can't give you more plusses. Look forward to seeing you over at Ari's, too.
Later, Bob
PS, too bad it's 10:30(pm), now I want to get back in the garage and do some sanding....
IP: Logged
10:25 PM
GTFiero1 Member
Posts: 6508 From: Camden County NJ Registered: Sep 2001
Paul, where in the world did you find that, and what is it? Not tooting my own horn, or putting anyones work down, but I like my design much better . However it appears that I was not the first one to think of covering those openings. As far as the mesh/screen, I am going to look around and see what is available.... If I can't find something that looks right, I am going to leave them open.
The scoops turned out nice! There are a lot of different screens available, different styles, colors, sizes and materials. I will be using 2 different styles on mine: round hole black plastic for the big openings and fine aluminium mesh for smaller vents.....Try to find something matching your car again, nice work!
IP: Logged
11:56 AM
Wholf Member
Posts: 379 From: Cleburne, Texas Registered: Mar 2003
I have something in mind, kind of honeycomb shaped. Plus I have some of the mesh that is already on the car to play with. If it don't look right I will leave them open.
IP: Logged
11:35 PM
May 13th, 2004
PaulJK Member
Posts: 6638 From: Los Angeles Registered: Oct 2001
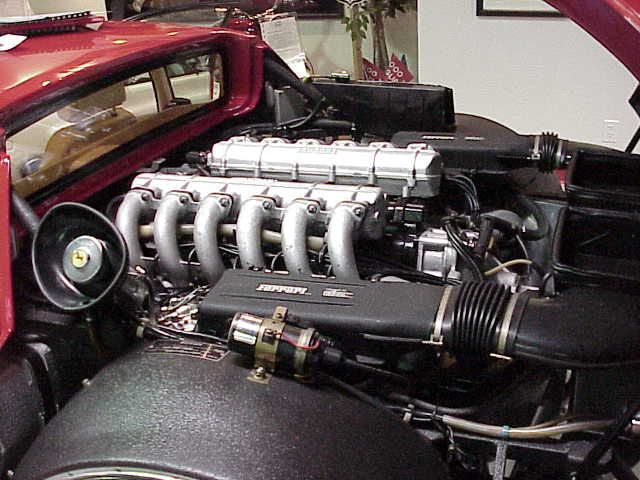
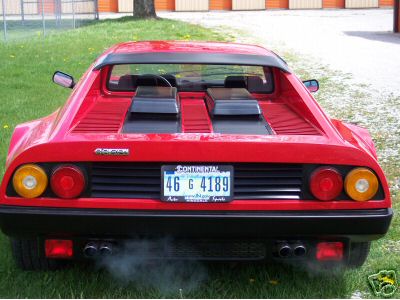
Harold, that's a real 1984 ferrari 512 BB (Berlineta Boxer) - you'll have to take up the styling issue with Pininfarina . My Corson kit looks just like it but the pic of my kit wasn't that good. Here's a treat for you - check THIS out (the engine from the car in the previous pic):
Nah, I wouldn't want it cause I'd lose my trunk space ...
[This message has been edited by PaulJK (edited 05-13-2004).]
IP: Logged
01:43 AM
Wholf Member
Posts: 379 From: Cleburne, Texas Registered: Mar 2003
Harold, that's a real 1984 ferrari 512 BB (Berlineta Boxer) - you'll have to take up the styling issue with Pininfarina . My Corson kit looks just like it but the pic of my kit wasn't that good. Here's a treat for you - check THIS out (the engine from the car in the previous pic):
Nah, I wouldn't want it cause I'd lose my trunk space ...
Sweeeeeet, and I agree with you about the trunk space............ "NOT!"
Time for another update.... I finally got it straight enough, and decided to cut out where the third brake light is going. I used a piece of L shaped aluminum for the mounting bracket of the light.
This next shot is of the opening with out the lights in it...
The next two shots are with the lights just stuck in their with tape to show how they will look (only straighter)
What do you think about the 3rd light? After talking to a few people, I think Stuart is going to put a switch in to turn off/on the lighting effect when the lights are on. We are not sure of the legality of having a red moving strobe on the back of the car.
Revin, I purchased the LED lights from Autozone, they cost like $30.00 for the kit. Stuart said he can install a switch to make the effect only happen when I want them too(like at a car show). My main interest was in having a 3rd brake light back their since my car is so low to the ground. I have seen that screen you are talking about, matter of fact I had to use it back when I had a couple of Rott's, its pretty stout material.. However I have decided to leave the vents open for now. I have got to get to work on getting her ready to paint in two weeks. Take care...
Harold
IP: Logged
09:06 AM
May 19th, 2004
bryson Member
Posts: 737 From: Mt. Pleasant, SC, USA Registered: Sep 2002
Just wanted to let you know that you inspired me to try a new decklid scoop, as opposed to the one I made before by cutting out a section and raising it up using cardboard I fiberglassed over. Excellent writeup! --Bryson
Just wanted to let you know that you inspired me to try a new decklid scoop, as opposed to the one I made before by cutting out a section and raising it up using cardboard I fiberglassed over. Excellent writeup! --Bryson
How did it turn out? You got any pictures of it? Thanks for the compliment, and I am glad I helped in some little way
Harold
IP: Logged
08:40 AM
May 31st, 2004
datacop Member
Posts: 1426 From: Indianapolis, IN, USA Registered: Jan 2004
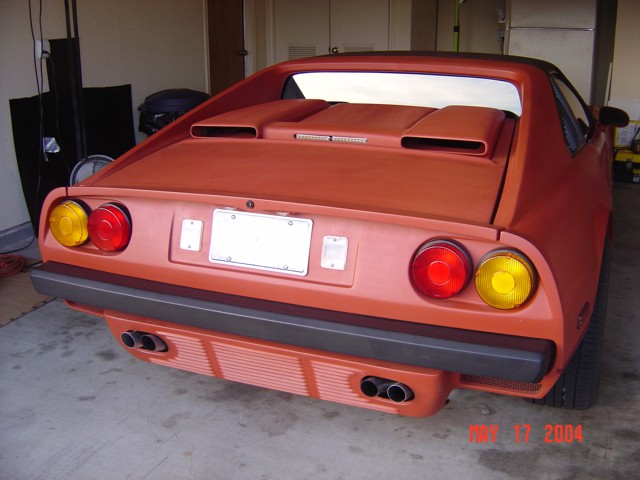
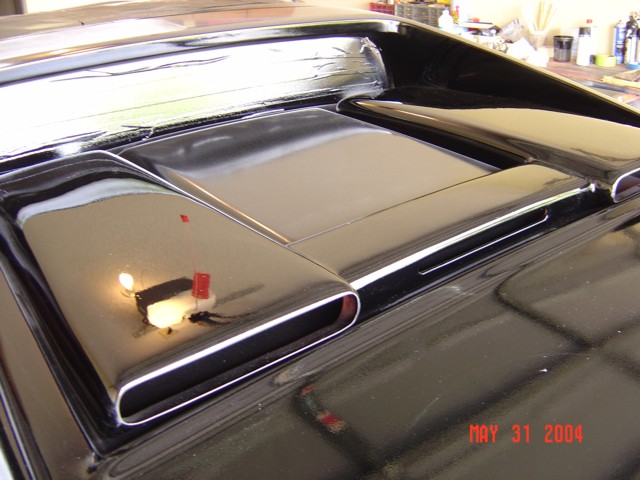
Didn't think anyone was really following this, but I was wrong.... Sorry! Here is a quick update. I attempted to paint my car this weekend, but failed drastically. Everything that could go wrong, went wrong. Trash, bugs, runs, you name it, it happened. I am now sanding down the whole body and I will have a pro do it right. The only good thing that has come out of this, is that the BC/CC has made one hell of a nice filler for the next guy to shoot on. The body work should be A+ by the time I get her to the shop. Here is a picture of what the scoops look like painted. Please ignore the orange peel and dust... You get the idea though!
As always, thanks for looking, and I will update everything with a new thread when the paint is finished.


 .
.

 ) just have fun with it as you would say.....


 . However it appears that I was not the first one to think of covering those openings.