What is your opinion based on what you just received? Any problems with fit-up or bolt holes in the wrong place?
BTW very nice work.
Karl
I've had no problems with them. Actually, I have heard some concerns on here before that were with the first batch, so I have asked the guy at their shop on the phone (can't remember his name). He said if there were any problems, they've been worked out. That was good enough for me. They fit really well and I didn't need to do any rework. I am actually quite happy and would recommend these to anyone who wants the 'look' and comfort at the same time.
IP: Logged
10:17 AM
Voytek Member
Posts: 1924 From: Calgary, Alberta, Canada Registered: Jan 2001
Are you worried about the lack of flexibility the bondo has? Duramix also makes a flexible body panel repair epoxy which is also sandable. I used it to install my lower door trim for my Stage 2 scoops.
If I were to do this... I would use flexible stuff to prevent slight bumps and bumper flex from cracking all your hard work. I dont remember the part number of the duramix epoxy, but I have a catalog around here somewhere. If I find it, I will edit this post.
Agreed - Duramix / flexible filler is actually what I have used (it's somewhere in the earlier posts in this thread).
I was worried about cracking with the rigid fiberglass-to flexible panels combo. Duramix is expensive so I use it to do the contours and to attach fiberglass cloth to the body for strength. Then I fill in the rest with some cheaper flexible stuff.
Good point.
IP: Logged
10:23 AM
RiceCooker Member
Posts: 1178 From: Calgary, Alberta, Canada Registered: May 2000
------------------ --Adam-- 1987 Blue GT 5-speed IM AOL: FieroGT5speed 16 years old and already selling my stuff to pay for repairs to my Fiero...which i sold my stuff to buy in the first place
IP: Logged
04:29 PM
RiceCooker Member
Posts: 1178 From: Calgary, Alberta, Canada Registered: May 2000
Hey Cooker - how's things? You've been so quiet I figured you've sold your Fiero and moved.
I meant to ask you - who did your exhaust? I will be shopping for one soon and I know yours was done really well.
Thanks!
Things are great! Still got my car of course! but I don't exactly live in 'the hood' anymore. I read the boards sparingly during the winter but not much.
My exhaust was done by Unlimted Performance & Exhaust. I don't have the # but they should be in the book. They're just off of Blackfoot i think.
So are you gonna borrow Flashy's old "Turbo" emblem?
IP: Logged
06:00 PM
Voytek Member
Posts: 1924 From: Calgary, Alberta, Canada Registered: Jan 2001
It's not that hard. Some people say you have to incorporate a wood block in the opening, permanently to hold the opening. I did not use one and don't think you have to (have had this for about 3 months now w/o any cracks).
First, I marked and cut the hole where I wanted it. Since I have a/c, my fan is that much farther back so my opening could not be that long and had to come right to the edge of where the rubber seal is for front compartment (I did not want to affect the sealing surface for fear of leaks).
There is a catch here: the hood is made from two layers of fiberglass. When you open the hood, around the fan area the layers are 'glued together', i.e. the hood is thin, like a single layer. Where the hood becomes thicker, the two layers split leaving a holow space inside. The problem? You can't bend that! What you need to do (if your opening goes that far back, where the hood becomes 'thicker') is to cut only the inside layer. I did it using a Dremel tool. Other cuts around were made with a jigsaw.
Once this was accomplished, I bent down the piece and stuck 2 little blocks of wood in the opening to hold it in place. Again, depending on how long your 'lip' is that you are bending down, there may be a lot of stress there, which may be more prone to cracking once the fiberglassing is done.
Since my 'lip' was short, it was difficult to bend. I ended up putting another groove on the outside of the hood, right at the bend with a Dremel tool. It was about 1.5" wide and about 1/8" deep (you DON'T want to go right through). This improved flexibility of the lip significantly.
Then, I sanded all around the cuts (underneath and on top of the hood) all the way to 'white' fiberglass was showing for best adhesion. I've seen people fiberglass directly onto the black surface but it will not stick very well in the long run.
Then I brushed on the fiberglass, including the groove I made on the outside, along the bend (just for some added strength).
Once it dried, i applied one more layer and then shaped it with rigid body filler.
Thanks for the information on the vent, I have started one but it has been put on the back burner for now. I also have a Dodge Shadow spoiler that I am currently preparing to mount this summer.
If I read this all correctly the most important step is to make sure I am down to unpainted fiberglass before I try to bond any new fiberglass to it.
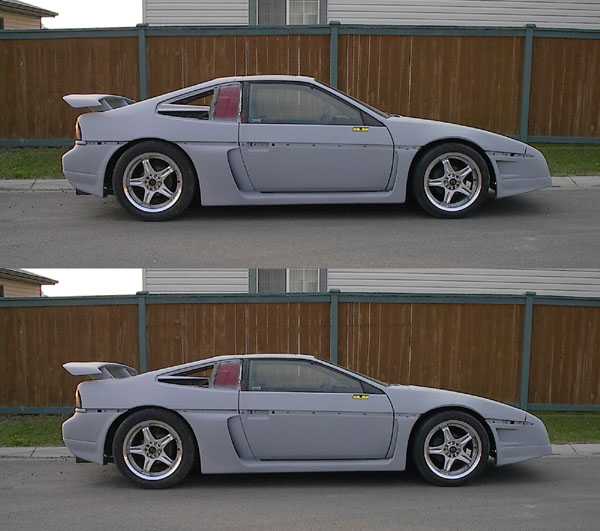
It's definitely staying one color, i.e. no stripes. I've matured.
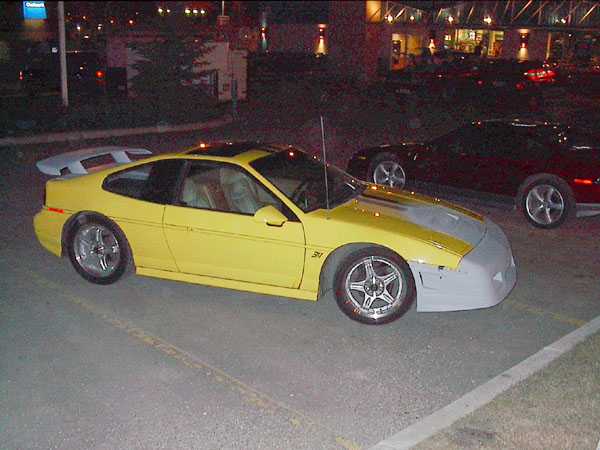
I'll post pics of it painted next week. BTW, it will be yellow again.
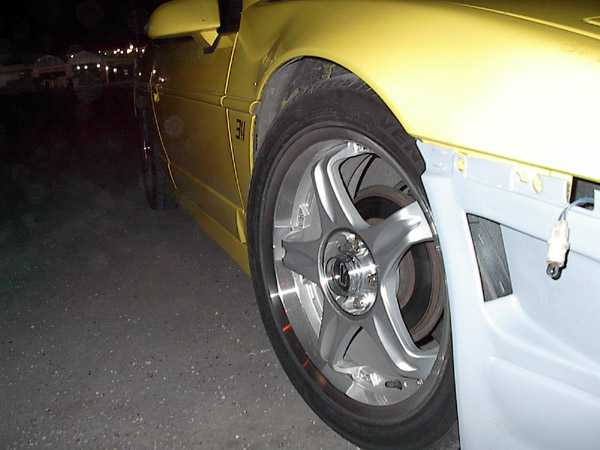
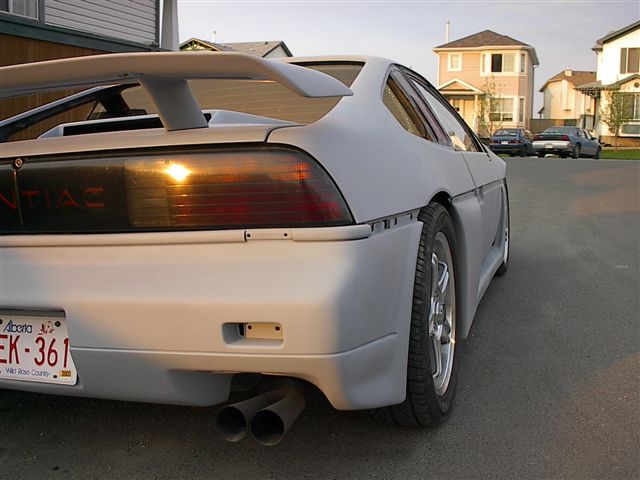
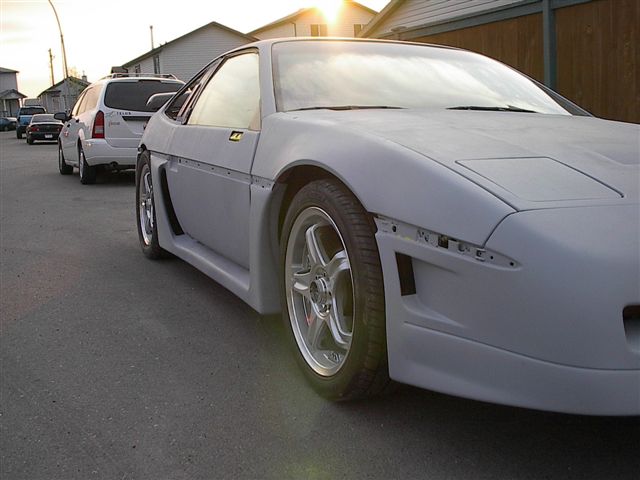
Oh yeah, this is fairly subtle but the front fenders are extended out and down about 1/4" each way. I wish I had gone more aggressive. You can kinda see from the side that the top of the fender does not follow the same 'roundness'.
[This message has been edited by Voytek (edited 06-09-2003).]
i think your car is really coming together well. only thing i see that detracts from it is that spolier. your stands are a good hieght, but those bends on either side look bad. put a nice stock fiero spoiler with good convex bow to it on there and you will be in the butter zone!
IP: Logged
01:58 PM
FLASHY Member
Posts: 1079 From: Calgary, Alberta, Canada Registered: Feb 2001
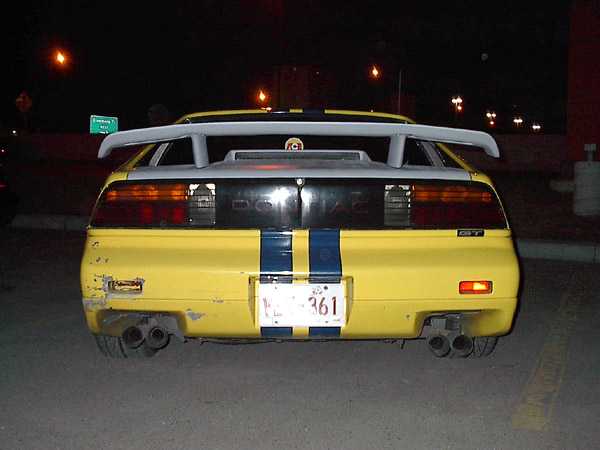
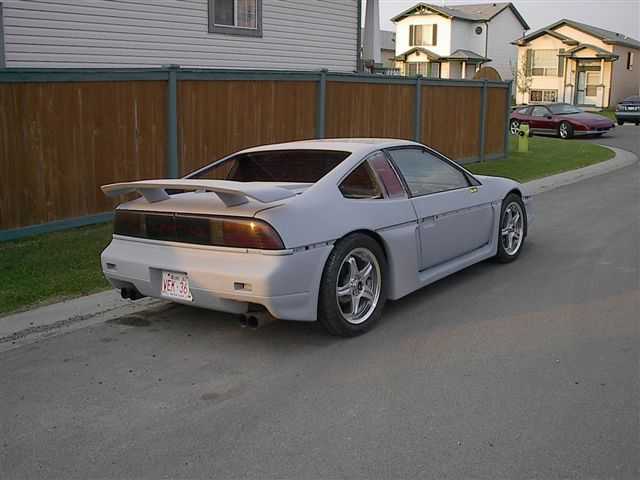
I really like the simplicity of this rear fascia mod! I assume that you created it much like you did the one on the front? (You described cutting two pieces from an old panel and basically bonding them in place then smoothing them in).
Now you got me thinkin'... Hmmm.
Oh yeah- can't wait to see it painted!
IP: Logged
02:46 PM
RiceCooker Member
Posts: 1178 From: Calgary, Alberta, Canada Registered: May 2000
Look's GREAT!! I love the way you did the rear and front fascia's... I amglad I am not doing anything on SmoothGT, except finishing up before it's gone. If not I would have to do something along the same line's as you!! Great job, look's great!!
Look's GREAT!! I love the way you did the rear and front fascia's... I amglad I am not doing anything on SmoothGT, except finishing up before it's gone. If not I would have to do something along the same line's as you!! Great job, look's great!!
SmothGT!!
Thanks! All it needs now is a chop top (I've ran out of time for the front facia-a-la-Smooth).
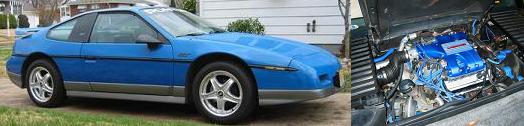
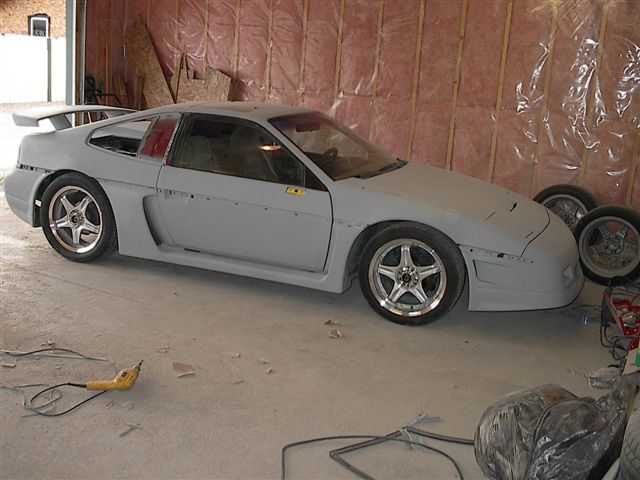
A list of mods to-date (since November '02): 1. Turbo 2. Fiero Store rear sway bar 3. GroundControl rear coilovers 4. Street Dreams 2" drop spindles (front) 5. All poly bushings (actually done last spring ) 6. Fibersmith's Rear decklid scoop glassed in 7. Front hood vent 8. Front facia wide-job + intakes (fake) 9. Rear bumper wide-job 10. Wing mod (with taller stands, had earlier) 11. V8 Archie side scoops / skirts 12. Fiero Store floor mats
Still to come: 13. Custom 2.5" exhaust 14. Mr. Mike's leather seats 15. Some kind of front air dam
I have one other idea that I've seen on here but won't disclose for now. You'll see.
Stay tuned...
IP: Logged
06:01 PM
skitime Member
Posts: 5765 From: Akron, PA, USA Registered: Aug 2000
Voytek, I like your style and willingness to try new things. That car will be great! Can't wait to see it with a shine to it.
------------------ Red 88 GT T-Top 3800 Supercharged White 88 GT Stock Please give me a rating if you appreciate my contribution. History of Skitimes Car
IP: Logged
06:07 PM
Jun 10th, 2003
FLASHY Member
Posts: 1079 From: Calgary, Alberta, Canada Registered: Feb 2001
Now *that* I would love to see.. Ive never seen a yellow choptop fastback yet, I seriously debated between yellow or white for mine, but of course Im a sucker for white GT's so as you all know by now which color won out
IP: Logged
11:02 AM
FLASHY Member
Posts: 1079 From: Calgary, Alberta, Canada Registered: Feb 2001
WOW. That looks good!! May have to go dig out the old reciprocating saw tonight and have some fun. I still have one more day to paint job - should be able to make it, right?
IP: Logged
11:30 AM
FLASHY Member
Posts: 1079 From: Calgary, Alberta, Canada Registered: Feb 2001
Or just cut the roof off completely and make a convertible. Hey that'd be cool, a hard top convertible. Just cut off the roof and then have it clip back on whenever.
My brain thinks too much.
IP: Logged
11:39 AM
rynelson85 Member
Posts: 2178 From: Wichita, KS Registered: Aug 2002
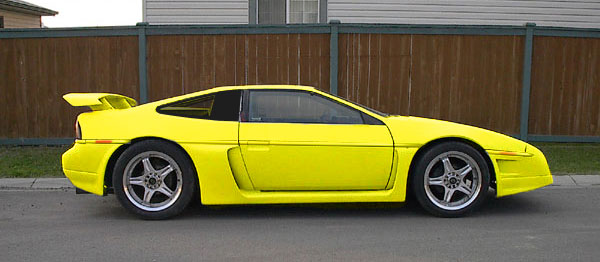
I Love the curve in the wing, it really makes the raised look fit the back of the car better.
MOBILE
P.S. Hey MinnG, that yellow does look nice, whatdayathink Voytek??
Man, that yellow DOES look good. What are you guys doing to me???!!!! Now the stock roof looks high!
BTW, this yellow is very similar to what I have seen on a Corvette at our annual car show. This is what I wanted to get. Unfortunately GM doesn't have a paint code for this shade. I'm told this was a 'one-of' jobbie.
I picked up a can of Ford zinc yellow instead (there is the F word ). It will be a bit more subtle.
IP: Logged
12:15 PM
Smoooooth GT Member
Posts: 8823 From: Lake Palestine, Texas Registered: Jun 2001
Originally posted by MOBILE: P.S. Hey MinnG, that yellow does look nice...
Yeah, oddly enough I thought of your GT while I was coloring his
quote
Originally posted by GMGW3:
Rob , you have way too much time on your hands hehe.. ( pssst..could u do that to mine too? just curious what it would have looked like yellow )
PS You can PM it to me, dont want to clutter up Voyteks thread with O/T stuff
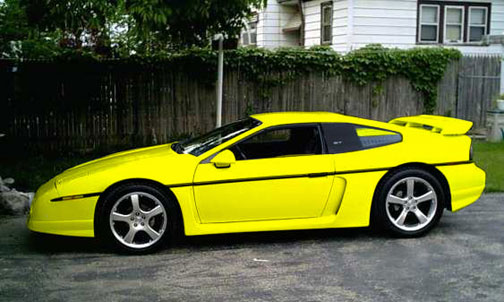
Well, last week was hell here at the office (worked over 50hrs, 13 1/2 on Friday alone- Ugh). So I'm taking advantage of some of my quieter day today and doing a few things that I enjoy... and being that people are looking at the yellow choptop image, I figure it's still near-topic and others will want to see it (Voytek- if you do mind me posting this, let me know and I'll move it to another thread )
quote
Originally posted by Voytek:
Man, that yellow DOES look good. What are you guys doing to me???!!!! Now the stock roof looks high!
Ya know... when you put the two side-by-side like that - it really does make the stock roof look "tall"! (Remind me never to photo-chop my GT!)
IP: Logged
12:30 PM
Neal Member
Posts: 1247 From: Calgary AB, Canada Registered: Jun 2001
Lookin good voytek will it be painted for the next meeting? I might actually make that one, but it will likely be the only one i make all year.
edit, i suppose it will be done but will you have the car there?
Also just a thought with your turbo setup id go larger than 2.5" exhaust. Id really go 3" if it will fit. You really cant go to big on a turbo setup. ------------------ 3.4L 87GT
[This message has been edited by Neal (edited 06-10-2003).]
IP: Logged
12:36 PM
GMGW3 Member
Posts: 471 From: West Allis, WI Registered: Dec 2001
Umm wow, thats sure.. yellow lol. Actually there is some benifit to seeing this, The yellow looks cool, but seeing it now with black trim pretty much supports what I thought, Yellow and Reds look better with the trim painted > IE: the Stinger, Skitimes ect, White seems to look better with the trim blacked out, if its the same white color it just looks like its been painted over like someone forgot to mask it off. With Voyteks car It looks much better with the painted yellow trim!


 )
)