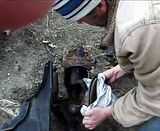
I bought all 6 ball joints (Moog) and I am now trying to get the old one on the rear out. I know that you need to drill out the rivits and I did both side because I wasnt sure where it was actually holding at. So the rivit heads are off. Other than the ball joint itself, There are the 2 (flanges?), 1 that comes with the new ball joint and the one on top of the control arm. Do either of these 2 come loose when you drill out the rivits? I know the lower one comes off because you replace it but is it also pressed on to the ball joint?
Just cant seem to get anything loose and I am using a 4" vise. Maybe Im covering something I shouldnt be (socket too small/big ect... hope you understand what I mean) Any help is welcomed.
Ok...Thanks. It was the rivits holding it in. As I look at it though, the service manual says that the ball joint goes up through the control arm, the Moog install down into the control arm. Still having trouble pressing it in and keeping the holes lined up. Just takes time i guess lol. Thanks again.
Any chance of a pic of the Moog lower ball joints before install?
Edit: it's hard for me to imagine a LCA ball joint going in from the top side of the LCA. Wouldn't by default of safety, they have to be pressed up through the LCA?
[This message has been edited by weloveour86se (edited 03-31-2012).]
Ive never heard of a lower rear ball joint going in from the top on the fiero. Should come with bolts to replace the rivots and go in the same way. May be wrong, any chance of a picture?
Jason
[This message has been edited by BrewCheese (edited 04-01-2012).]
IP: Logged
07:52 AM
JumpStart Member
Posts: 1412 From: Central Florida Registered: Sep 2006
Ok, been sick and have not been able to work on it but since it seems questionable and I don't want to mess anything up, heres some pics...
I had already started pressing in the balljoint so I checked the size of the hole in the flange and it seems to be "Almost" the same size, maybe 1/2 milimeter larger and still a snug fit but you should get an idea.
Heres the bottom of the balljoint in the flange.....
Heres the top of the balljoint in the same hole. Notice the amount of slop there. This side cant press into the LCA, just too loose.
And heres the balljoint I have already started pressing in and you can see that the hole in the LCA and flange are about the same size.
Anyone have any ideas? I could use the help. Thanks
Steve
IP: Logged
08:01 PM
jelly2m8 Member
Posts: 6274 From: Nova Scotia, Canada Registered: Jul 2001
This is correct when installed onto the control arm. Not sure why your trying to press the balljoint in, as they are not susposed to press into the rear control arms, thats what those rivets were for.
Like was already said, balljoint goes in from the bottom then the other plate goes on top. Did it come with nuts and bolts to tighten it back together?
Look at the rust pattern in this pic... Its the underside of the lower control arm. That pattern looks aweful familiar doesn't it? That ring of notches on your new ball joint sits inside the LCA. Take a look inside the hole, you will see more notches.
Press it up from the underside.
Good luck!
Edit; Ahh now i see it. No press needed? They just bolt right up to the underside of the rear lower control arm. No need for a press on the rear LCA?
[This message has been edited by weloveour86se (edited 04-01-2012).]
IP: Logged
11:03 PM
Apr 2nd, 2012
JumpStart Member
Posts: 1412 From: Central Florida Registered: Sep 2006
Well I asked at Advanced Auto parts where I got them and they were also confused as to why the Moog are not pressed in. Everyone, including me, seems to agree that they go in from the bottom but why so much slop? Seems like putting aftermarket wheels on your car without hub centric rings. Yes it will work but not a safe idea as the rings hold the wheel where it needs to be and the nuts just keep it from backing off the hub for the most part.
There wont be any slop once you tighten down the bolts. When its installed from the bottom all the tension is pulling up on the balljoint against the lower control arm, the bolts just keep it from moving around.
Jason
IP: Logged
07:03 PM
joesfiero Member
Posts: 2181 From: North Port,FL,USA Registered: Jan 2008
Not to nitpicky but there's no tension on the lower rears pulling up becase they are not a load carrying ball joint like the front lowers. In the rear the weight of the vehicle is carries by the struts and the lower ball joint just keeps everything in place.
But I agree, they need to installed from the bottom and the plate slid on top of the lca (which pretty much centers it) and the bolts hold it in place. I've done a few......
-Joe
IP: Logged
07:15 PM
Curlrup Member
Posts: 2590 From: Havre De Grace, MD Registered: Apr 2007
OK, I searched the Moog website and found PDFs for different products. I couldnt find one for my part # but did find one for a rear ball joint and it does say that the Moog balljoint goes in the same direction that the old one comes out and has a picture of the Moog balljoint installing DOWN into the control arm after removing the old one DOWN out the bottom. This is just perplexing, isnt it?
Edit to add pics....
Steve
[This message has been edited by JumpStart (edited 04-02-2012).]
IP: Logged
07:37 PM
jelly2m8 Member
Posts: 6274 From: Nova Scotia, Canada Registered: Jul 2001
No it's not, stop trying to find a reason to make the rear balljoint press in, it doesn't. throw those generic instructions away and install it the same way that the original one came out and EVERYBODY here is telling you.
It's not hard, balljoint in from bottom, plate over top of control arm- install the 3 bolts and tighten, done.
The Fiero rear balljoint MOOG number is K6527, your looking at the wrong instruction sheet........ The 500063 is for a Dodge Caliber / Jeep Compass.
[This message has been edited by jelly2m8 (edited 04-02-2012).]
Yes I knew that was a Dodge #, it just didnt make sense to me. Anyway I did find instructions for this one and it does go in from the bottom. Thanks everyone for hounding on me, kept me from making a bad mistake. Now off to start putting it back together.
Steve
IP: Logged
06:21 AM
Apr 7th, 2012
JumpStart Member
Posts: 1412 From: Central Florida Registered: Sep 2006
Ok, I got the rears done and thanks for the help. I am now trying to get the front ones out. I have started on the top one and got the balljoint out of the control arm but the stud is still stuck in the spindle so I rented a balljoint remover/installer. Thing is, the largest sleeve in the kit is not larger than the ears on the top. Do you have to or anyone had to cut the ears/ top of the balljoint off to use a kit like this?
Ok, I got the rears done and thanks for the help. I am now trying to get the front ones out. I have started on the top one and got the balljoint out of the control arm but the stud is still stuck in the spindle so I rented a balljoint remover/installer. Thing is, the largest sleeve in the kit is not larger than the ears on the top. Do you have to or anyone had to cut the ears/ top of the balljoint off to use a kit like this?
Thanks,
Steve
Put the ball joint back into the upper control arm and bolt everything back together. Take the outer control arm (the one that makes the car turn, you can't miss it) cotter pin out. Remove the castellated nut. Get your big hammer and whack the part of the spindle that that joint goes into. It will pop loose after the right amount of whacks. Now you can freely swivley the spindle and you have lots more room to work.
Then take the cotter pin out of the upper ball joint. Then take the castellated nut off of the upper ball joint stud. Then get your big hammer and whack the part of the spindle that the stud goes through. Same thing, eventually it will pop loose. The spindle will now tilt away, be easy with it. Prop it on a jack stand maybe. Pull the two bolts holding the upper ball joint in and put the new one in it's place.
Good luck!
Edit; the ball joint press is only for the lower front ball joints.
[This message has been edited by weloveour86se (edited 04-07-2012).]
IP: Logged
10:03 PM
PFF
System Bot
Apr 8th, 2012
JumpStart Member
Posts: 1412 From: Central Florida Registered: Sep 2006
Put the ball joint back into the upper control arm and bolt everything back together. Take the outer control arm (the one that makes the car turn, you can't miss it) cotter pin out. Remove the castellated nut. Get your big hammer and whack the part of the spindle that that joint goes into. It will pop loose after the right amount of whacks. Now you can freely swivley the spindle and you have lots more room to work.
Then take the cotter pin out of the upper ball joint. Then take the castellated nut off of the upper ball joint stud. Then get your big hammer and whack the part of the spindle that the stud goes through. Same thing, eventually it will pop loose. The spindle will now tilt away, be easy with it. Prop it on a jack stand maybe. Pull the two bolts holding the upper ball joint in and put the new one in it's place.
Good luck!
Edit; the ball joint press is only for the lower front ball joints.
Well I tried to hammer out the top one but no luck. I used the tool to press out the lower balljoint and it did come out but the stud is still in the spindle and is now bent.
Well I tried to hammer out the top one but no luck. I used the tool to press out the lower balljoint and it did come out but the stud is still in the spindle and is now bent.
I think I need a new hobby.
Steve
No maybe you just need to take a step back and take a break.
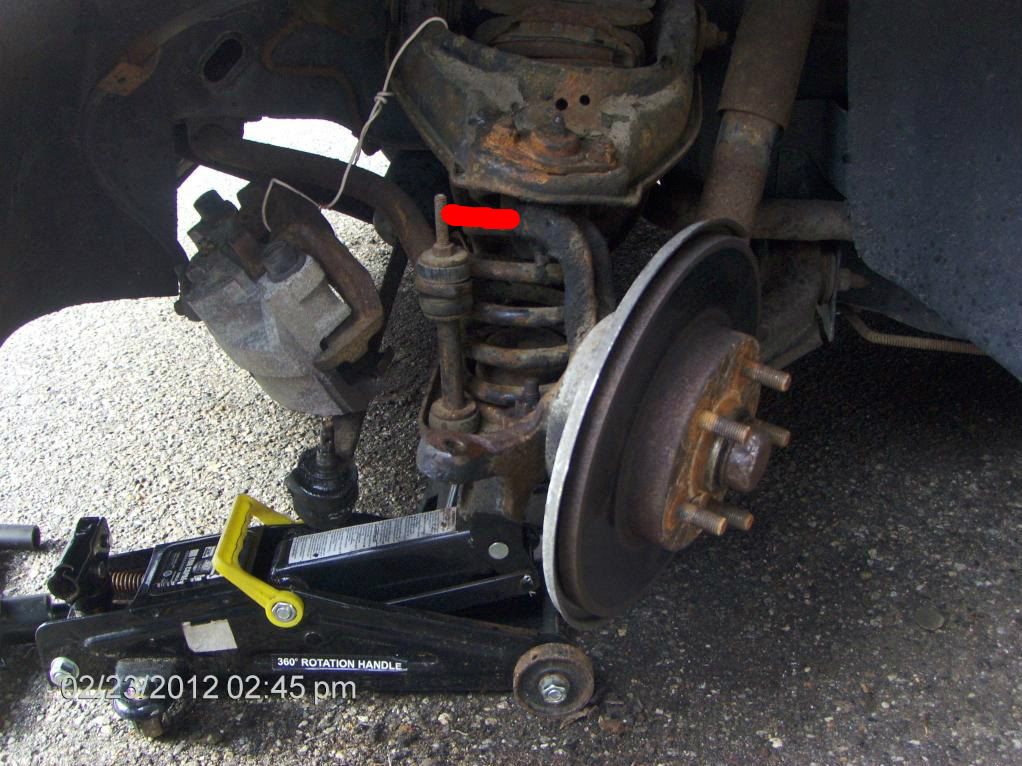
First take the castellated nut off of this. Whack it with your big hammer (where my upper red mark is) to get the shaft to fall out of the spindle. Then you can swing the spindle around freely. Lots more room to work.
Now if your upper ball joints all back together like I said in my last post it will look like this...
So now you wanna take the upper ball joints castellated nut and cotter pin off, get your big hammer out again and hit the spindle here. See how the spindle is turned all the way so I can get a good whack..
The shaft of the ball joints are tapered. You gotta use hammer force to break them free. Hit it right enough times and it will drop right down. You will see it move if you watch closely. When the spindle finally pops free you can just unbolt the upper ball joints and put the new one in it's place. Don't put it back together yet though. You still need to get those lowers out. That's for next time .
Your soooo close! Don't give up, please! I did it, and I've never changed a ball joint in my life before this cursed fiero disease
Heres a quick video. It's the front upper ball joint. Just a mock up. The castellated nut and ball joint bolts have been removed to the sake of time...
Up and out with the upper ball joints...
Man I really hope this is clear enough and helps. Good luck!
IP: Logged
03:36 PM
JumpStart Member
Posts: 1412 From: Central Florida Registered: Sep 2006
FINALLY got them both off. Thanks for the pictures. After beating on it for awhile, I decided to use a propane torch to heat it up a bit and it came right out. Makes it alot easier to get to them with the tierod end off and the spindle out of the way. Now that it is this far down, I might as well replace the bushings as well. Thanks again for the help as I am now making progress again.


 Stick with the original, its time tested and works!
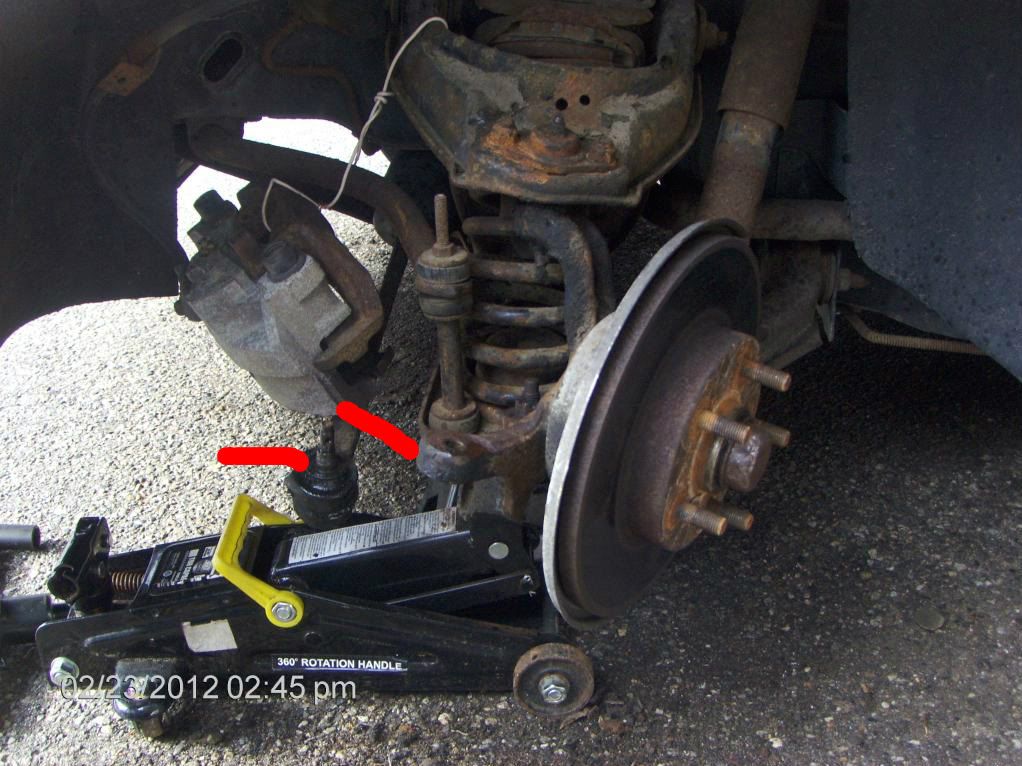
 .
.