Pennock's Fiero Forum
  Technical Discussion & Questions - Archive
  How to fix spinning cradle bolts and a review of a new product from Rodney Dickman.

T H I S   I S   A N   A R C H I V E D   T O P I C
  

Email This Page to Someone! | Printable Version


How to fix spinning cradle bolts and a review of a new product from Rodney Dickman. by GT-X
Started on: 04-25-2010 01:08 PM
Replies: 14
Last post by: g2 on 02-13-2011 12:32 AM
GT-X
Member
Posts: 1507
From: Crestwood, KY
Registered: Feb 2003


Feedback score:    (10)
Leave feedback


Total ratings: 106
Rate this member

Report this Post04-25-2010 01:08 PM Click Here to See the Profile for GT-XSend a Private Message to GT-XDirect Link to This Post
I recently had the opportunity to test run a new product from Rodney Dickman. These brackets will fix the spinning cradle bolt problem common on many Fieros, especially ones that reside in the rust belt. My first impression of the product is that it is very high quality. The angles, shape and hole locations match up identically on the pair. The welds are very impressive. All the included hardware is high quality and exactly what is needed. The directions that came with the kit are simple, straight forward, easy to follow and quite well written. the only suggestion I had was to include standard dimensions for the hole that needs cut as everyone may not have a way to measure in metric. In short this kit is nothing less than what you would expect from a Rodney Dickman product, high quality, perfectly engineered and the best fix for the problem! Now on to the how to.

Step one involves measuring out the flap that needs cut open to access the inside of the frame rail. The flap will be 130mm by 50mm as indicated by Mr. Dickmans instructions. You'll notice the po of my car had already removed the cradle so there is already a hole in my frame rail. Please ignore it.

Here I measured 65mm left of the center of the cradle bolt:

This images is larger than 153600 bytes. Click to view.

Next I measured the 130mm from the first mark:

This images is larger than 153600 bytes. Click to view.

The final mark is made 50mm up from the bottom of the frame rail itself. This is a bit tricky as there is a seam that sticks down past this point.

This images is larger than 153600 bytes. Click to view.

At this point I used a grease pencil and a straight edge to mark where the cuts will be made:

This images is larger than 153600 bytes. Click to view.

Now use your favorite available method to cut along the lines. I chose a pneumatic cut-off wheel: (Please remember safety glasses)

This images is larger than 153600 bytes. Click to view.

After completing the cut carefully pry down the flap to expose the offending nut.


At this point you can grab the nut with vice grips to remove your cradle bolt. Then if you cant get the original nut out hit it with a BFH and a drift:


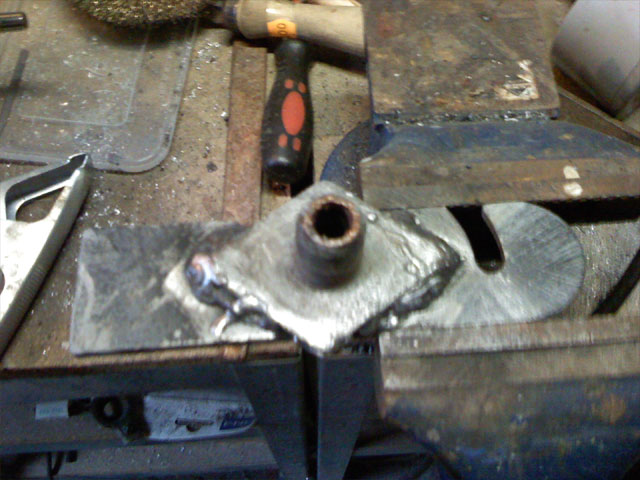
What you are left with is some rusted metal that is welded to the "nut pad"


This all has to be removed via the method you deem most appropriate. I opted for my air chisel:

This images is larger than 153600 bytes. Click to view.

Now you need to make the "nut pad" as smooth and flat as possible. I accomplished this with a die grinder:

This images is larger than 153600 bytes. Click to view.

We are working on the driver side frame rail. At this point when install the special bolt supplied by Rodney to the bottom side of the Passenger side bracket. Like so:


Then you position the passenger side bracket upside down on the bottom of the frame rail. Align the edges of the bracket parallel to the edges of the frame and mark the centers of the two large holes:


Using a hammer and punch, punch the marks you have made so that your drill will not wander.

This images is larger than 153600 bytes. Click to view.

A fresh 5/16 drill bit will put the exact size holes you need:

This images is larger than 153600 bytes. Click to view.

Now would be the best point to clean up and paint/rustproof the inside of the frame rail and the two new holes. I'm have not done this yet as I'm in the middle of a project and this will all be taken care of later.

Now we install the driver side bracket into the frame rail. The bolts will be assembled like this:


After being installed and tightened down, this is the result. Note this new system is allowed to float around just as the factory nut could. this will make it easier to install your cradle or any other cradle should you ever need to switch.

This images is larger than 153600 bytes. Click to view.

Here is the final pic with the cradle installed:

This images is larger than 153600 bytes. Click to view.

.

To finish up you would fold the flap back up and weld it shut then grind it smooth and repaint.
In conclusion, if you have spinning cradle bolts this is the best method I've seen to cure it, hands down.
My brackets were painted. I have been informed by Mr. Dickman that the final product will be zinc plated, so rust should never be an issue. Another thing he mentioned is possibly including new cradle bolts. I think this would be a great addition to the kit as my bolts, as I'm sure most cars with this problem are, were fairly well rusted, though still usable after I rad a die down them.

Thanks for reading and good luck with yours,
~Tyler
IP: Logged
PFF
System Bot
Tinkrr
Member
Posts: 412
From: Whitby,ON, Canada
Registered: Aug 2004


Feedback score: N/A
Leave feedback

Rate this member

Report this Post04-25-2010 01:19 PM Click Here to See the Profile for TinkrrSend a Private Message to TinkrrDirect Link to This Post
Great assesment of Rodney's new product. Well illustrated
A + for you
IP: Logged
GT-X
Member
Posts: 1507
From: Crestwood, KY
Registered: Feb 2003


Feedback score:    (10)
Leave feedback


Total ratings: 106
Rate this member

Report this Post04-26-2010 09:57 PM Click Here to See the Profile for GT-XSend a Private Message to GT-XDirect Link to This Post
 
quote
Originally posted by Tinkrr:

Great assesment of Rodney's new product. Well illustrated
A + for you


Thanks!
IP: Logged
hookdonspeed
Member
Posts: 7980
From: baltimore, md
Registered: May 2008


Feedback score:    (9)
Leave feedback


Total ratings: 131
Rate this member

Report this Post05-26-2010 04:15 PM Click Here to See the Profile for hookdonspeedClick Here to visit hookdonspeed's HomePageSend a Private Message to hookdonspeedDirect Link to This Post
question... i tried to call rodney and ask but his answering machine seems to not be working properly and cut me off

in your picture and rodneys picture


i see the square plate on both sides, but i was only given 2 square plates, and in rodneys picture of whats included he only shows 2 of the small plates,
so, my question, should there be 4, or am i just missing something here? the washers included will just slip right over the plates, so i dont see how they would work to hold one side in...

IP: Logged
hookdonspeed
Member
Posts: 7980
From: baltimore, md
Registered: May 2008


Feedback score:    (9)
Leave feedback


Total ratings: 131
Rate this member

Report this Post05-26-2010 11:17 PM Click Here to See the Profile for hookdonspeedClick Here to visit hookdonspeed's HomePageSend a Private Message to hookdonspeedDirect Link to This Post

hookdonspeed

7980 posts
Member since May 2008
update: rodney sent me a message, and is shipping out the other 2 squares

ill have pics posted up of the installed product in my 3500 swap thread this weekend, these things look very nice! too bad they are not on the outside for people to admire :P
IP: Logged
Bloozberry
Member
Posts: 7760
From:
Registered: Jan 2009


Feedback score: N/A
Leave feedback


Total ratings: 311
Rate this member

Report this Post05-27-2010 07:59 AM Click Here to See the Profile for BloozberrySend a Private Message to BloozberryDirect Link to This Post
Great review GT-X. If you've got a welder or access to one, then here's what I did... it worked great too:

IP: Logged
hookdonspeed
Member
Posts: 7980
From: baltimore, md
Registered: May 2008


Feedback score:    (9)
Leave feedback


Total ratings: 131
Rate this member

Report this Post05-27-2010 08:20 AM Click Here to See the Profile for hookdonspeedClick Here to visit hookdonspeed's HomePageSend a Private Message to hookdonspeedDirect Link to This Post
 
quote
Originally posted by Bloozberry:

Great review GT-X. If you've got a welder or access to one, then here's what I did... it worked great too:


that works for a busted cage, but in my case the threads got borked
IP: Logged
labbe001
Member
Posts: 814
From: Alabaster, AL
Registered: Jun 2008


Feedback score:    (6)
Leave feedback

Rate this member

Report this Post10-11-2010 11:32 AM Click Here to See the Profile for labbe001Send a Private Message to labbe001Direct Link to This Post
so can someone give me the total width of these pieces? i'm wondering if these can be installed through the rear of the frame rail...i'm restoring an 87 GT and have the rear bumper removed...there's enough room for me to reach my hand in from the back and grab the captured nut and removed it (it rusted very badly and barely hanging in there) by hand....i would like to avoid cutting a window in the frame if i can...so i was thinking about installing these by going trhough the rear or the frame....any ideas?
IP: Logged
fieroparts.com
Member
Posts: 4831
From: Maine 207-934-1969
Registered: Jun 2000


Feedback score:    (57)
Leave feedback


Total ratings: 185
Rate this member

Report this Post02-10-2011 07:22 PM Click Here to See the Profile for fieroparts.comClick Here to visit fieroparts.com's HomePageSend a Private Message to fieroparts.comDirect Link to This Post
 
quote
Originally posted by Bloozberry:

Great review GT-X. If you've got a welder or access to one, then here's what I did... it worked great too:


That's how I have been doing it for the past 24 years. no need to cut a hole in the frame.
IP: Logged
fieroguru
Member
Posts: 12609
From: Champaign, IL
Registered: Aug 2003


Feedback score:    (45)
Leave feedback


Total ratings: 258
Rate this member

Report this Post02-10-2011 07:57 PM Click Here to See the Profile for fieroguruSend a Private Message to fieroguruDirect Link to This Post
 
quote
Originally posted by labbe001:

so can someone give me the total width of these pieces? i'm wondering if these can be installed through the rear of the frame rail...i'm restoring an 87 GT and have the rear bumper removed...there's enough room for me to reach my hand in from the back and grab the captured nut and removed it (it rusted very badly and barely hanging in there) by hand....i would like to avoid cutting a window in the frame if i can...so i was thinking about installing these by going trhough the rear or the frame....any ideas?


Here are the ones I installed from the rear... no frame cutting:
IP: Logged
labbe001
Member
Posts: 814
From: Alabaster, AL
Registered: Jun 2008


Feedback score:    (6)
Leave feedback

Rate this member

Report this Post02-11-2011 10:03 AM Click Here to See the Profile for labbe001Send a Private Message to labbe001Direct Link to This Post
 
quote
Originally posted by fieroguru:


Here are the ones I installed from the rear... no frame cutting:


i took a chance and ordered a set of rodney's hoping i would be able to install them through the rear of the frame and w/o cutting an access panel...i was successful in doing so...so for the record, w/ the rear bumper removed, Rodney's Kit can be installed through the rear of the frame...not very very easy but definately not out of the realm of possibilities

[This message has been edited by labbe001 (edited 02-11-2011).]

IP: Logged
PFF
System Bot
Blue87Fiero
Member
Posts: 245
From: Onsted, Michigan, U.S.A
Registered: Mar 2009


Feedback score: (2)
Leave feedback

Rate this member

Report this Post02-11-2011 09:19 PM Click Here to See the Profile for Blue87FieroSend a Private Message to Blue87FieroDirect Link to This Post
Why couldn't you just make the access cut and put a nut a on the back side of it? This seems overly complicated to me, am I missing something?
IP: Logged
Bloozberry
Member
Posts: 7760
From:
Registered: Jan 2009


Feedback score: N/A
Leave feedback


Total ratings: 311
Rate this member

Report this Post02-12-2011 07:52 AM Click Here to See the Profile for BloozberrySend a Private Message to BloozberryDirect Link to This Post
You can, but most people want to close up the hole they've made in the side of the frame by welding it shut again. If you don't close up the hole it just provides another place for road grime and salt to enter the frame and corrode your nice new shiny nut and bolt. If you do close it up, then to avoid having to cut it open the next time you need to drop the cradle (and there will be a next time), you need to have a way to keep the nut from spinning on itself since there is no way to reach in with a wrench to hold it.
IP: Logged
Fie Ro
Member
Posts: 3735
From: Soest, The Netherlands
Registered: Sep 2001


Feedback score: N/A
Leave feedback


Total ratings: 132
Rate this member

Report this Post02-12-2011 10:23 AM Click Here to See the Profile for Fie RoSend a Private Message to Fie RoDirect Link to This Post
Nice product.

I also made my own with a piece of scrap metal and a cheap arc welder, then tacked it to the framerail to keep it in place. I use copper grease on bolt threads that go back into the chassis
IP: Logged
g2
Member
Posts: 74
From: Houston, TX, USA
Registered: Oct 1999


Feedback score: N/A
Leave feedback

Rate this member

Report this Post02-13-2011 12:32 AM Click Here to See the Profile for g2Send a Private Message to g2Direct Link to This Post
I have successfully cut inspection windows in a couple of project cars over the years to remove spinning cradle bolts. Once the spinning nut and welded nut assembly have been removed, the cradle nut was replaced with a flat plate (used as a washer), a lock washer, and a hardened nut. Everything was coated with antiseize lubricant and torqued to factory specs. The slot from the inspection window was then covered with an oversize magnetic plate. This method allowed enough access to the slot to use common hand wrenches, and the magnetic places can be pried off if needed for future access. So far, the magnetic plates are still in place and I've had no follow on issues.

IP: Logged


All times are ET (US)

T H I S   I S   A N   A R C H I V E D   T O P I C
  

Contact Us | Back To Main Page

Advertizing on PFF | Fiero Parts Vendors
PFF Merchandise | Fiero Gallery
Real-Time Chat | Fiero Related Auctions on eBay


Copyright (c) 1999, C. Pennock