Welcome to the forum and I look forward to seeing your pictures. Incidentally, Mike did my conversion and it looks great! I got in it the other day, sat behind the wheel and went vrooom! vroom! a couple times and Mike reminded me that I am 72 and shouldn't act like a kid. Sometimes he is a spoils port. I was having fun.
Again, welcome and look forward to seeing your pictures.
IP: Logged
09:29 AM
mattman134 Member
Posts: 643 From: Buford, Ohio Registered: Dec 2009
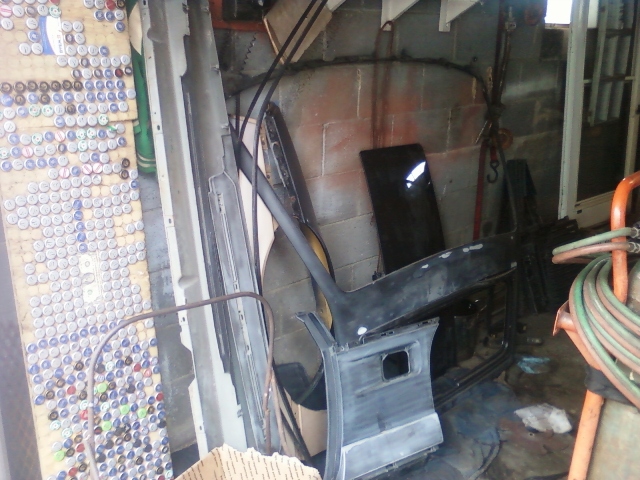
Ok. as I have mentioned earlier, I am currently in the process of swapping a 3800 Series II/4t65e-hd into my 1986 Fiero SE. I figured out the picture inserting process so I will give it a try.
Here is how everything went up to the present time:
I have always wanted to perform one of these engine swaps into my fiero, because my whimpy 2.8 just doesnt cut it anymore. I have seen many 3800 swaps in person and on the net, and it seems that it is one of the most popular swaps for the Fiero. I got to searching on the internet for mor info, and parts to do the swap.
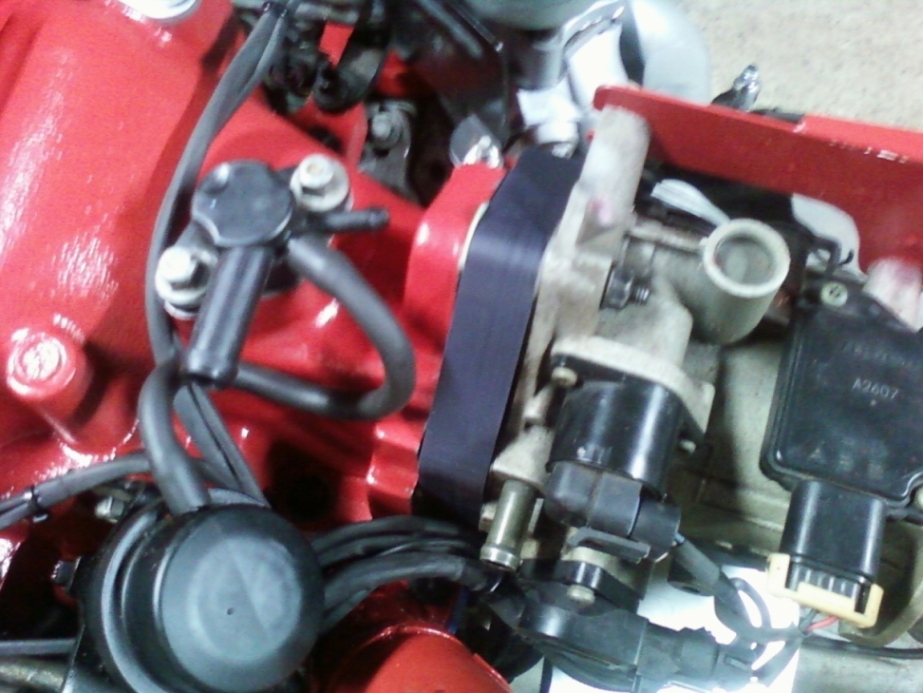
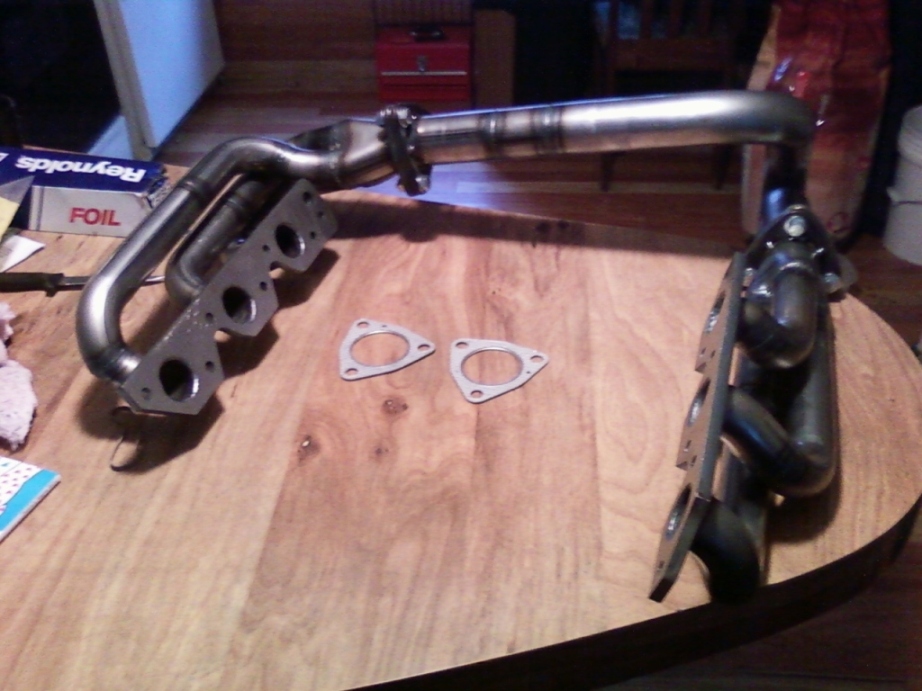
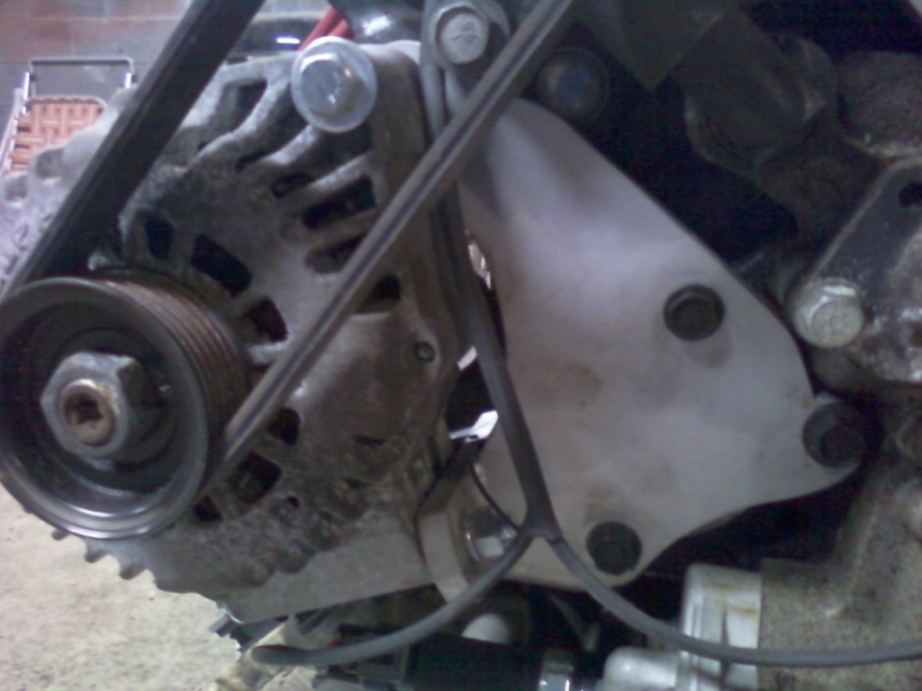
I came across http:\\www.westcoastfiero.com, which is where I have been purchasing many of my parts. My first round of parts from WCF that I have purchased so far is low alternator mount, oil filter bracket, alternator idler pulley, headers, Modified fiero thermostat housing/fill and fiero shifter adapter, which allows me to use my stock fiero shifter cable.
I am currently trying to get parts together.
Back in January, I bought a 3800 Series II SC/4t65e-hd out of a 2003 Pontiac Grand Prix GTP from D&S Auto Salvage in Hamersville, Ohio (AKA McKinneys). The motor included the uncut wiring harness, PCM, tranny and all sensors/goodies for $800.00. The engine/trans had 65,000 miles on it. They loaded my motor/tranny into my El Camino and I drove the motor to my grandpa's garage, chuckling all the way about the "theft" that I just pulled off.
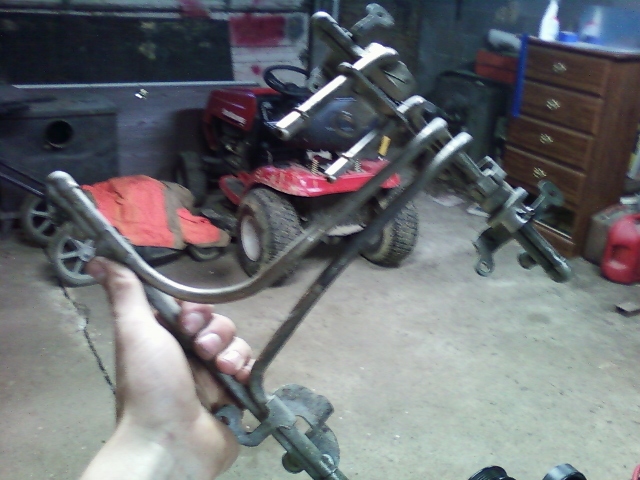
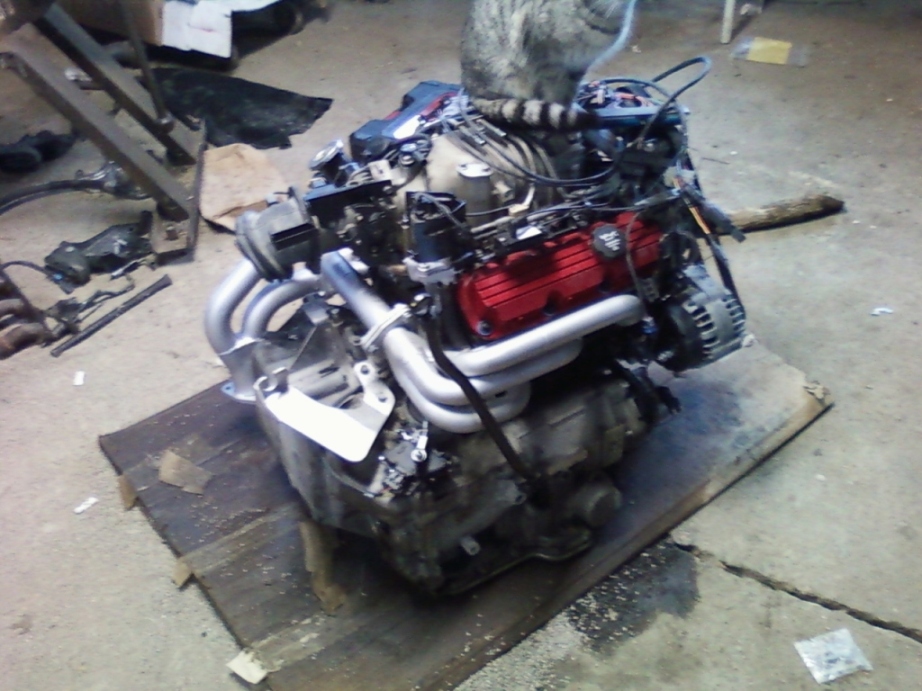
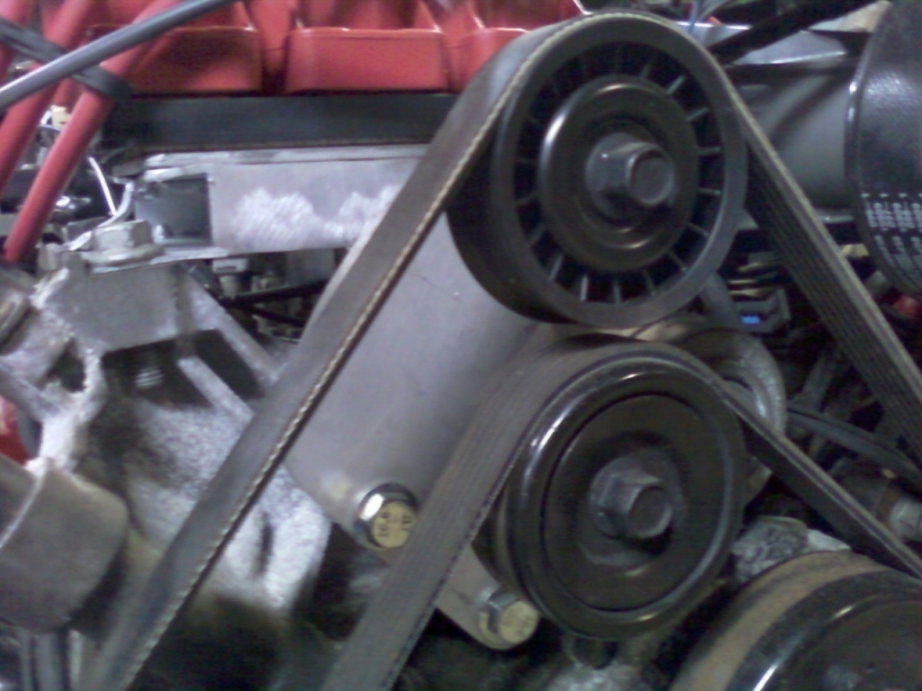
I got the motor unloaded out of the back of the truck with the Big Red Jacks(R) cherry-picker that I bought exclusively for this swap. ( will sell it once I am competely done this summer, so make an offer. I set the package down on cardboard on an old shop cart. I started taking the motor apart in order to get it up on the engine stand. I removed the exhaust, both belts, alternator, axles (Tranny fluid went everywhere) P/S pump(wont need it), A/C compressor, TB. I separated the engine/trans on the cart. and put the motor up on the stand. and put the motor up on the stand. Whenever I buy an engine from a salvage yard, I always go through and make sure that nothing is broken inside. It is a lot better to do this now than wait until it is in the car and find out you have a rod knock.
Once I got it up on the stand, i then found out that it was a mistake to leave the SC and heads on the motor. This made it very topheavy and when I tried to turn the motor over to get to the oil pan, it come round and hit me in the knee. The Thermostat housing hit the engine stand. Im glad that the impact didn't crack it.
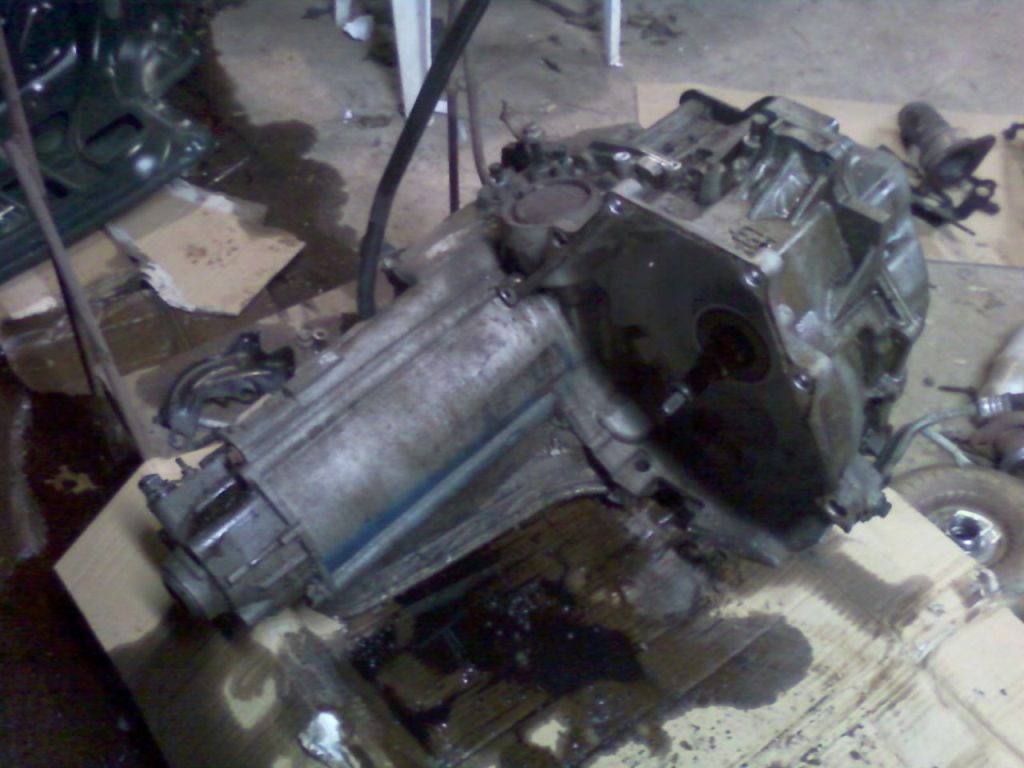
I got a look at the oil pan and It was busted in. (uh-oh) Also, the starter was pushed back toward the engine block enough to bust one of the cast bosses off of the starter. The transmission case was also busted when the starter was pushed back. The starter pivoted on the bolt that DIDNT snap off and broke a chunk out of the side of the bellhousing. Time for a new tranny.
I took the transmission and starter to D&S and they gave me a new tranny from a 2004 GTP with 48000 miles on it. They also gave me a new starter with no hassle whatsoever. D&S is a good yard to do business with. The old tranny had the internal mode switch along with the external PNP switch under the shifter arm. My PNP only had one connector for the starter and backup lights. The new tranny had the internal mode switch as the old tranny did, but did not have the external PNP. So I bought a new one.
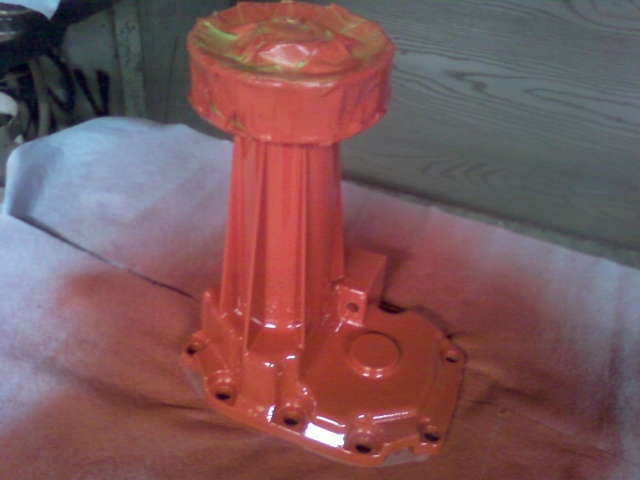
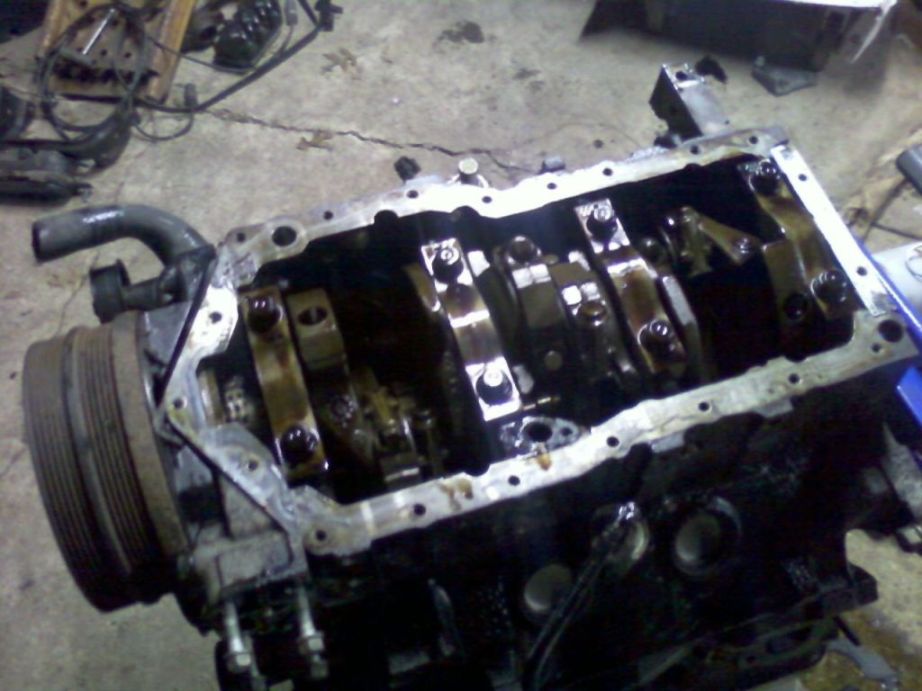
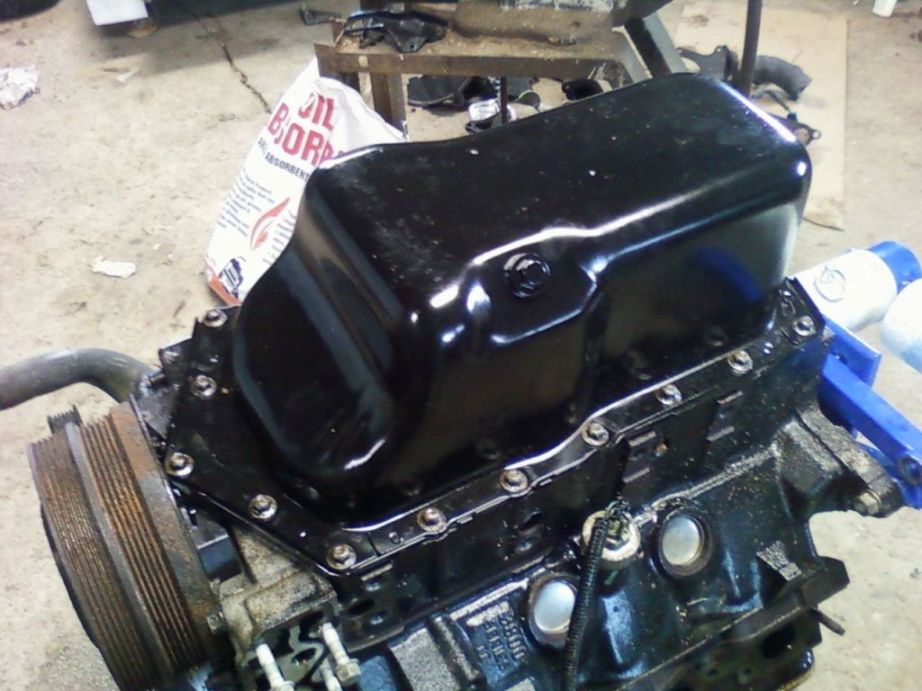
Oil pan came off I checked to see if anything was damaged from the wrecked pan. No Damage. I checked all the clearances (End Play, Mains, Rods, Wrist Pins, etc.) All were at the low end of the spec, so this engine was pretty fresh. Got a new Oil pickup because it was bent up. New gasket, and pan. Once I got the pan on, I put in the Oil Level Switch and the WCF Oil Filter Adapter Bracket. Yesterday I found out that I spent 99$ on a bracket that was the same exact bracket that was on it before. You live and learn i guess. I attached the cherrypicker to the engine to assist me in turning the engine back over because I could not do it it was so topheavy.
On to next post...
[This message has been edited by mattman134 (edited 03-27-2010).]
IP: Logged
10:40 AM
mattman134 Member
Posts: 643 From: Buford, Ohio Registered: Dec 2009
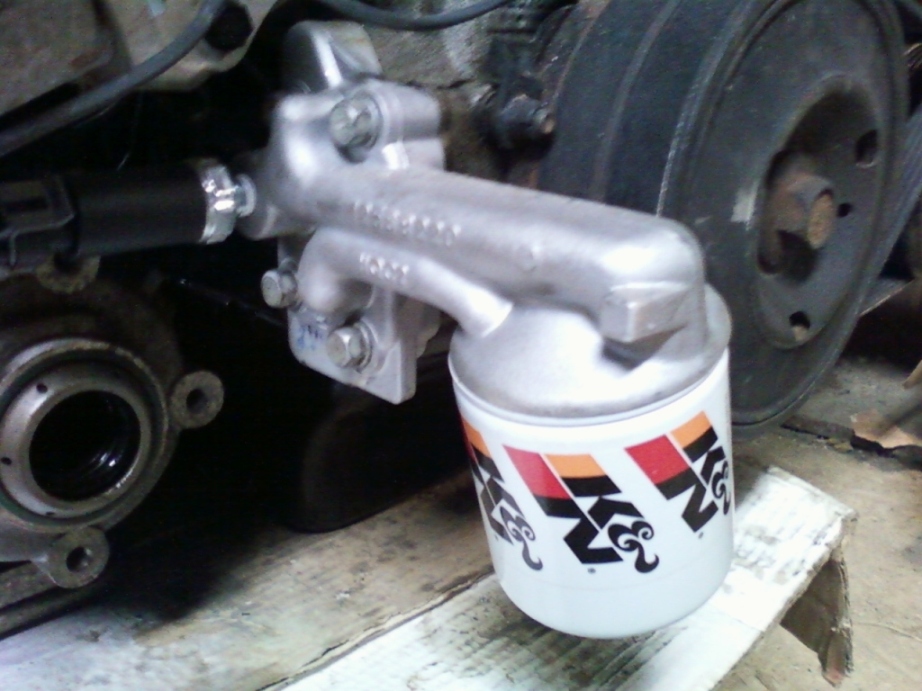
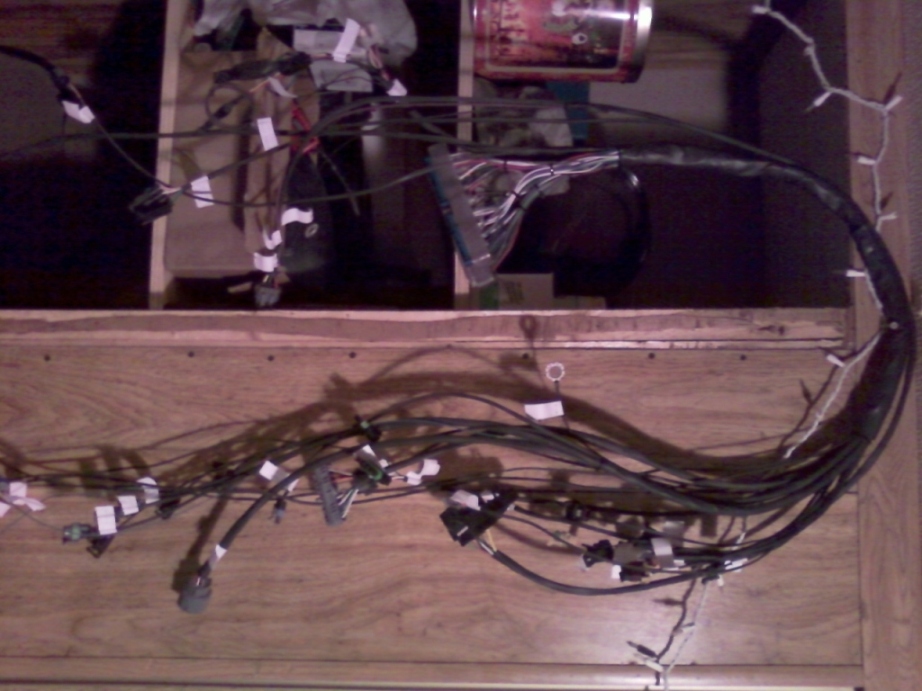
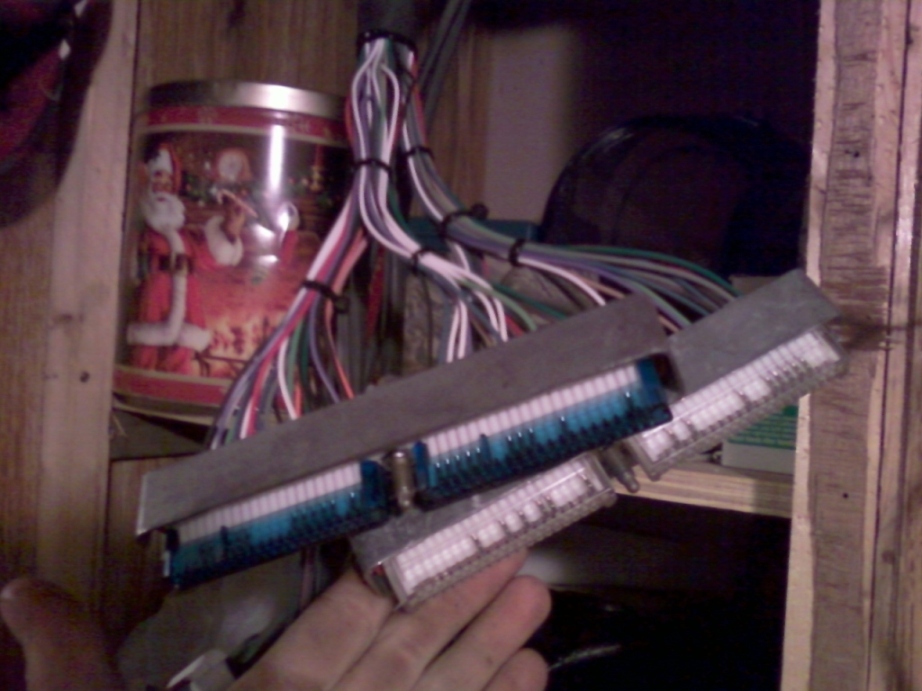
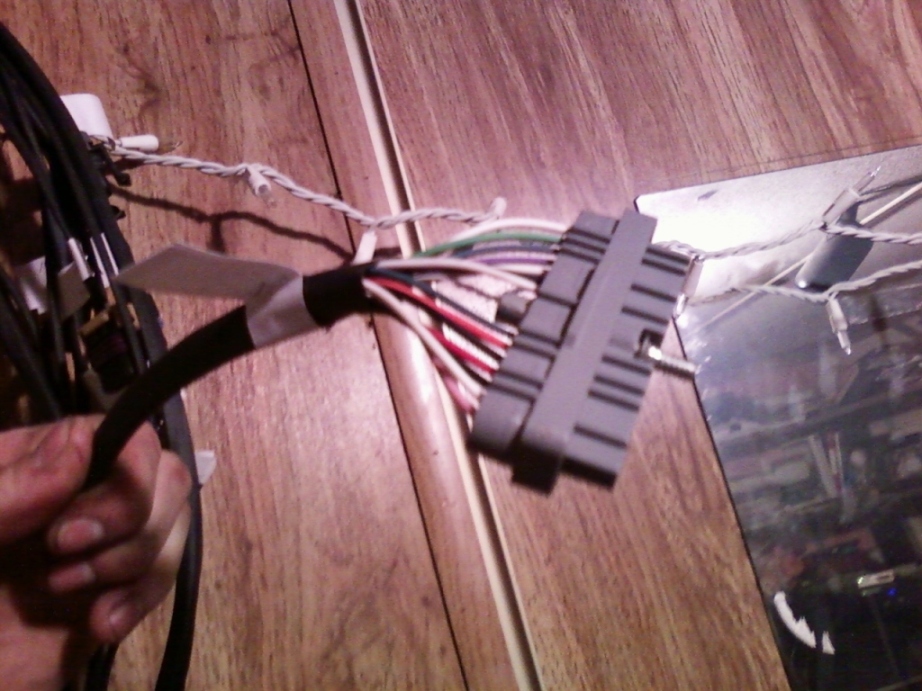
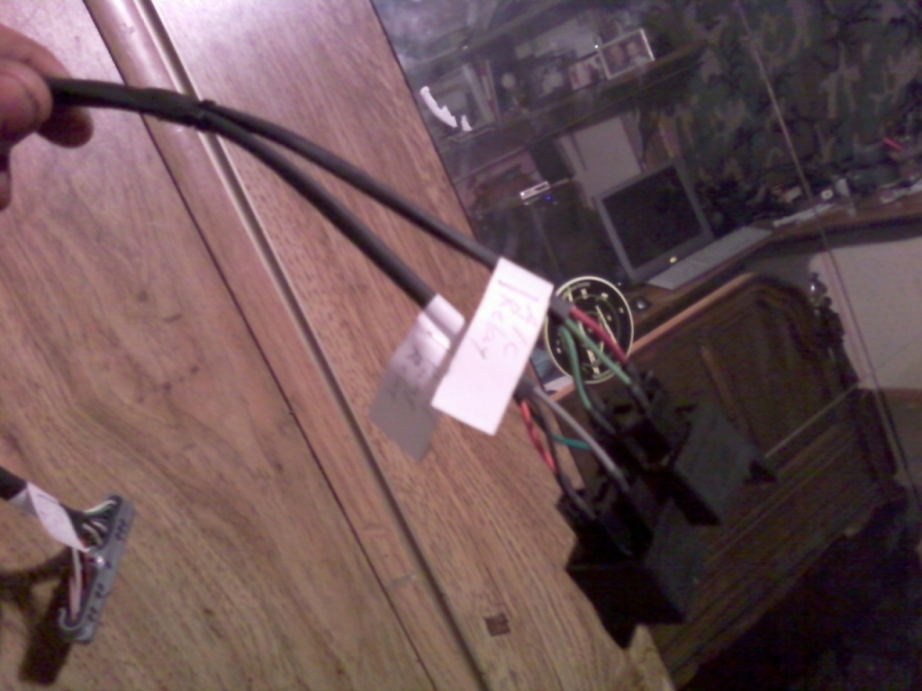
The oil filter adapter that I bought from WCF turned out to be the same bracked that I had in the first place. The bracket puts the oil filter under the crank pulley. This allows the filter to clear the inner CV housing. Oh well. It is already installed and I dont want to mess with it. I also ordered an oil pressure sender for a 1988 fiero 2.8 so I can retain the fuel pump backup feature. Next is the wiring harness. I ordered a custom wiring harness from Injection Technology out of Little Rock, AR to adapt the new 3800 to my fiero. The harness was a little pricy at $650, but money buys quality, right? I sent my original wiring harness out as a core charge. I received a package in the mail. The box was only 2"x14"x10". I opened the box and it was my new harness. PCM Connectors ICM Connector Fuel Pump and A/C Compressor Relays I could not believe that the whole swap harness could fit in that little box, but it did. I was surprised at the quality of the harness also. GM Harnesses are big and bulky, but this harness was very thin, without all the extra tubing and tape. It was completely shrinkwrapped, and had all new wire from connector to conector. (No Splices) All wire and connectors are brand new. Overall best harness I have seen. Well worth 650$ I think. (I highly recommend Injection Technology for all your Fiero Swap needs.)
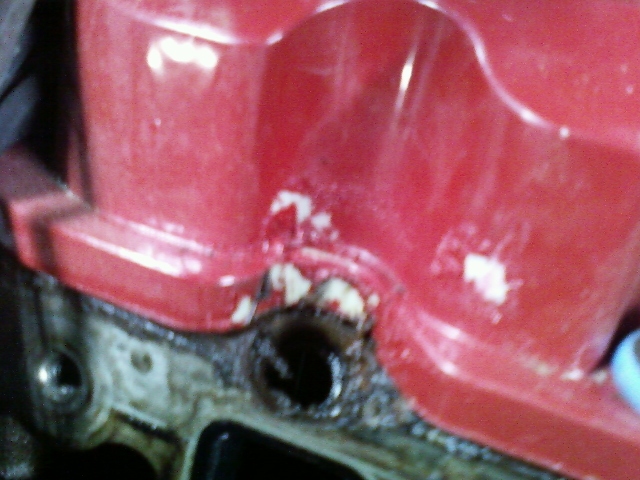
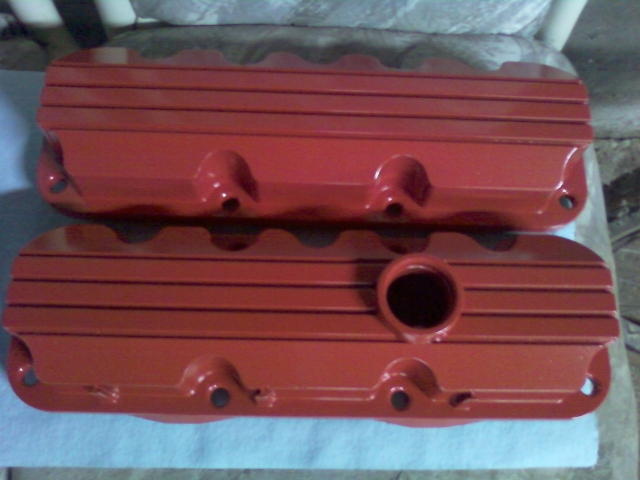
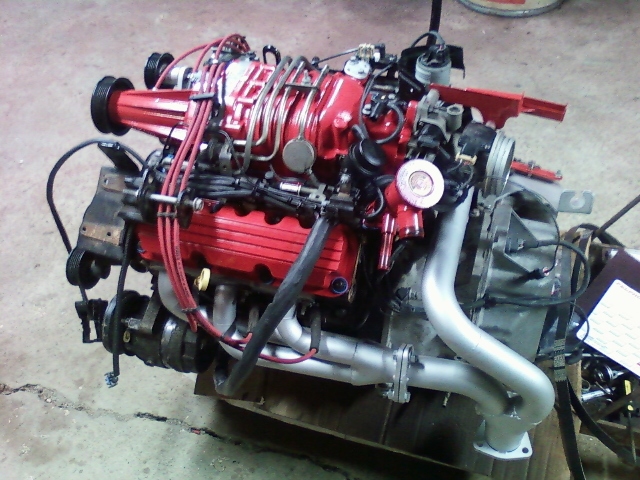
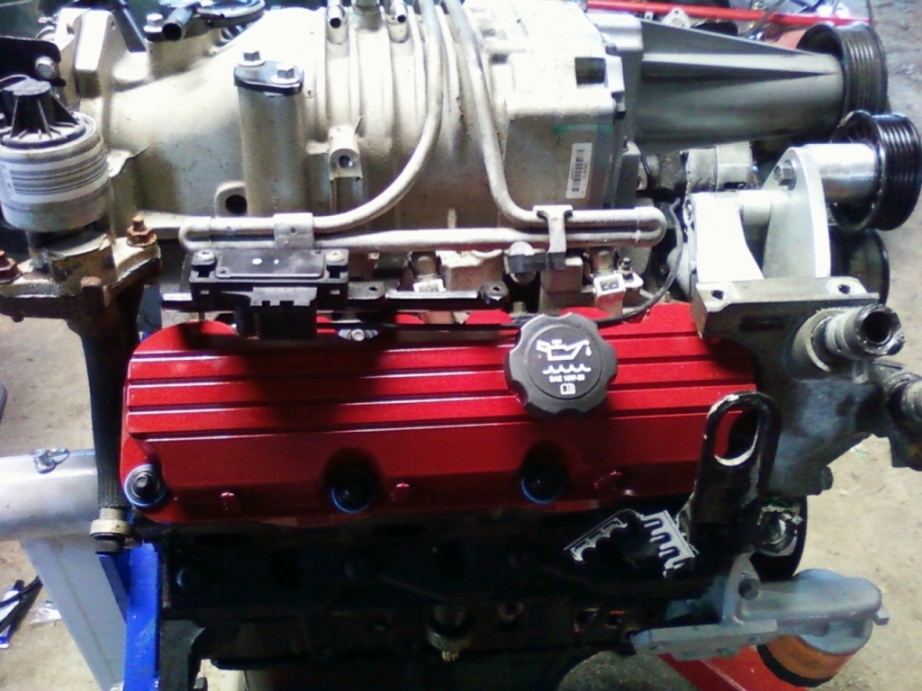
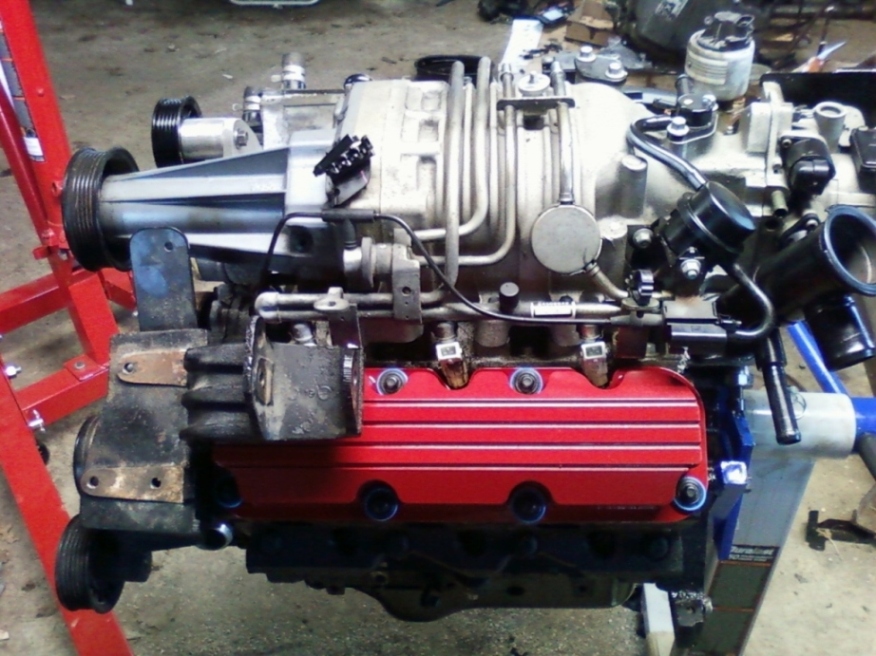
I took off my valve covers and painted them to compliment my red fiero Rear (The one that is going to be seen) Front Tell me what you think
I went to change the supercharger oil. The old oil was clear and it smelled new (still stank) Seems it was changed recently. Also, NO play in coupler.
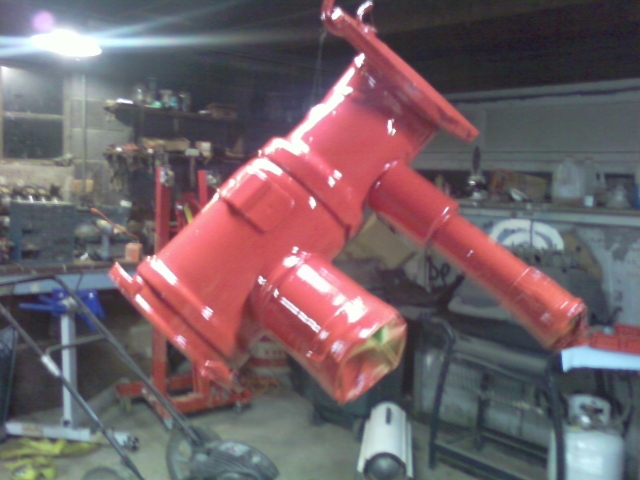
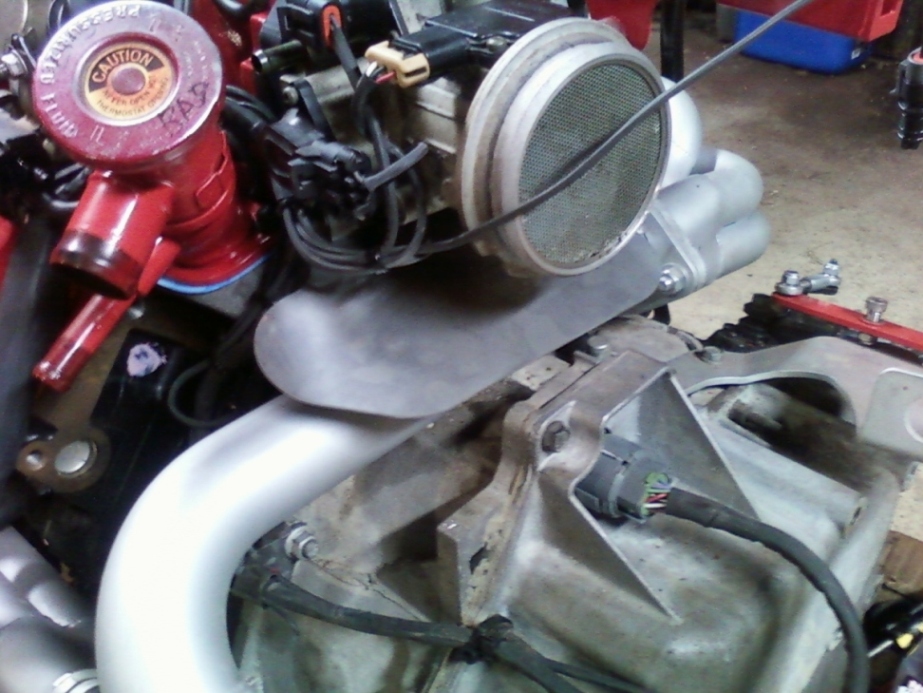
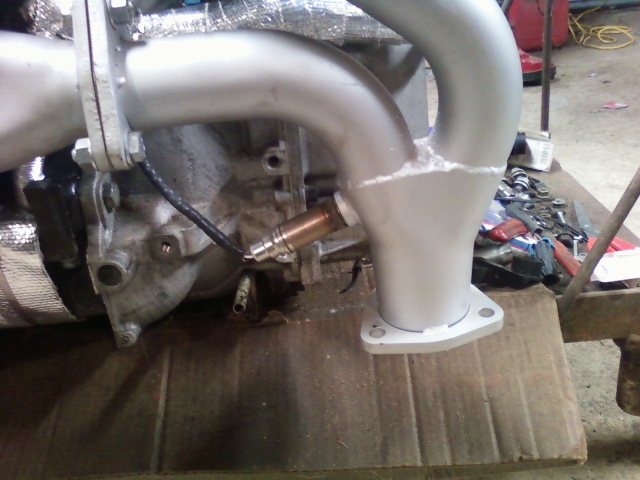
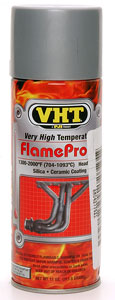
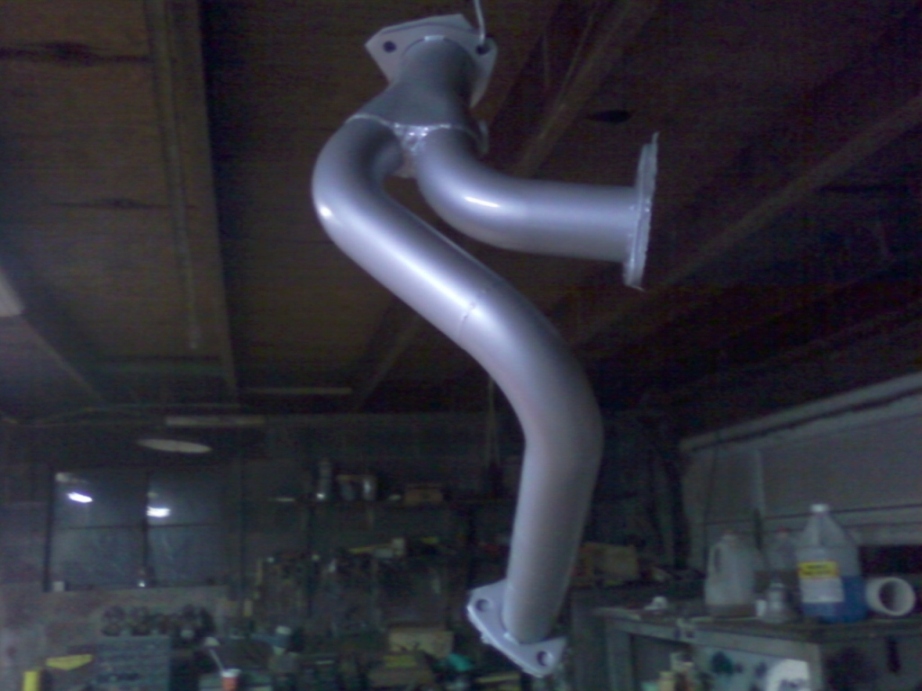
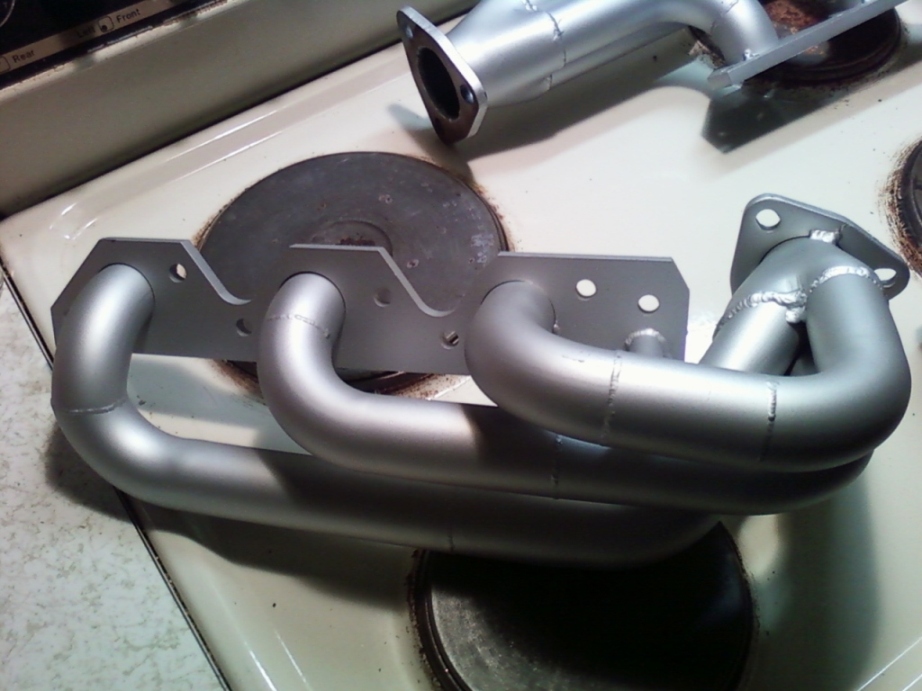
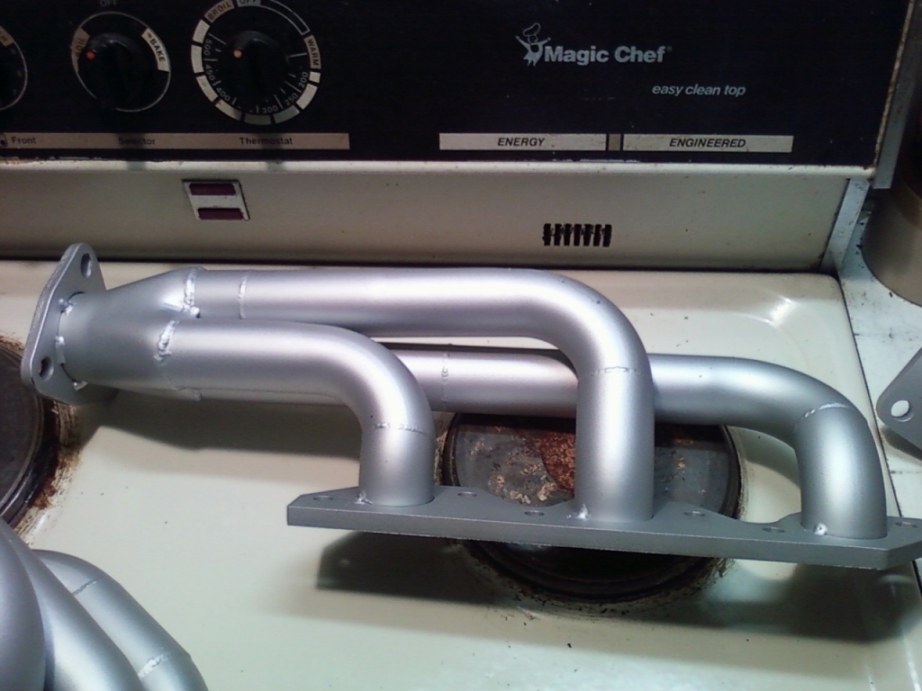
Again, nice quality. They are available in 1 1/2" primaries, 2" collectors, or 1 3/4" primaries, 2 1/2" collectors. They are available in either stainless or high grade steel. They also come with the y-pipe that brings the exhaust out where the stock location is on the fiero. I ordered the 1 1/2" steel headers and I ceramic coated them with VHT FlameProof Ceramic white primer, then FlameProof aluminum. Three coats each.
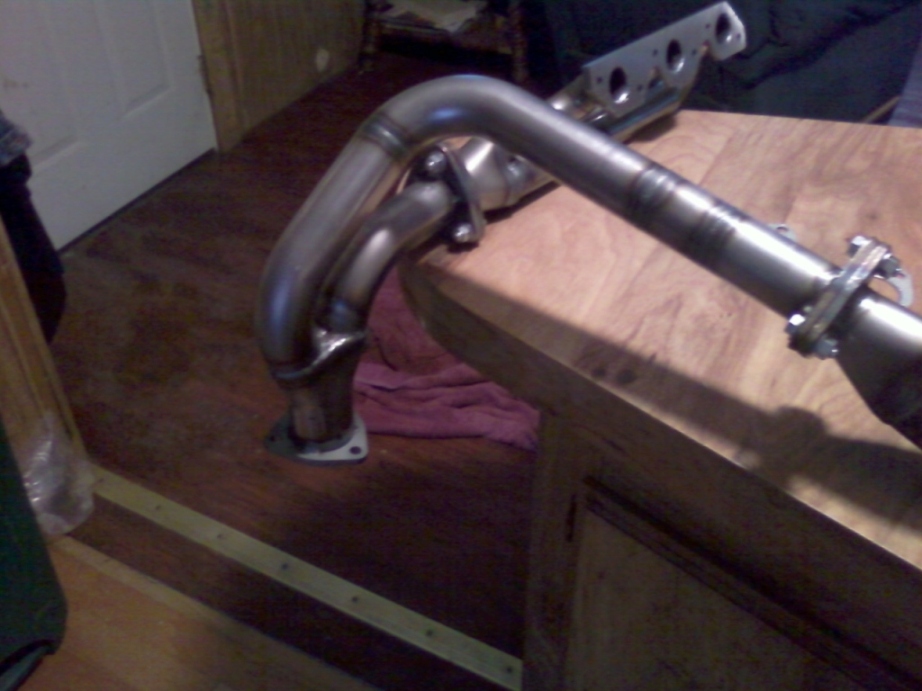
I then baked them at 250 for 30 min, 400 for 30 min, then 650 for 30 minutes to cure the ceramic coating.
Finished curing
Installed on the Motor
On to more mods...
IP: Logged
11:35 AM
mattman134 Member
Posts: 643 From: Buford, Ohio Registered: Dec 2009
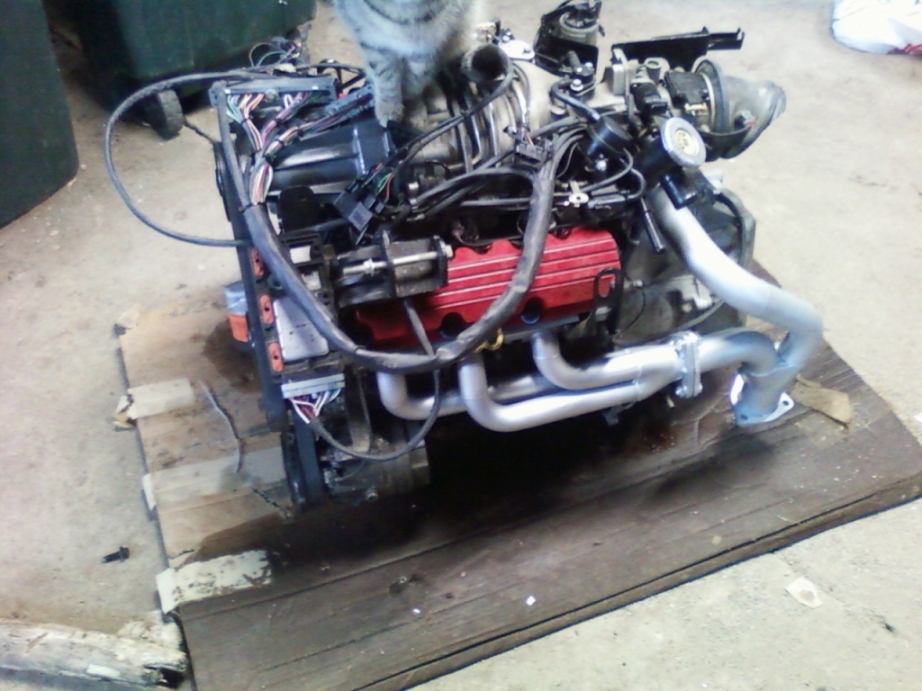
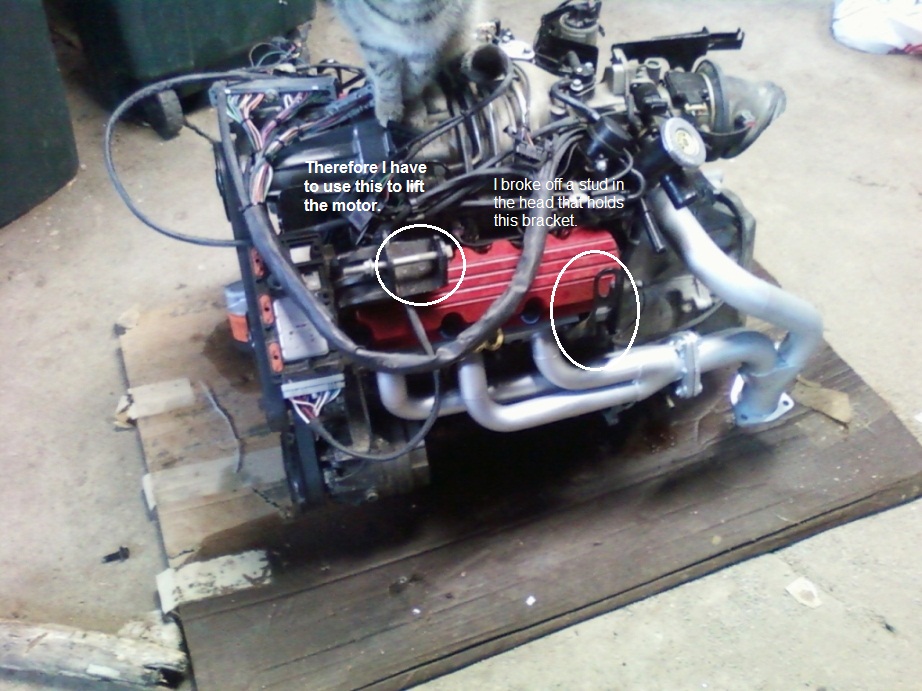
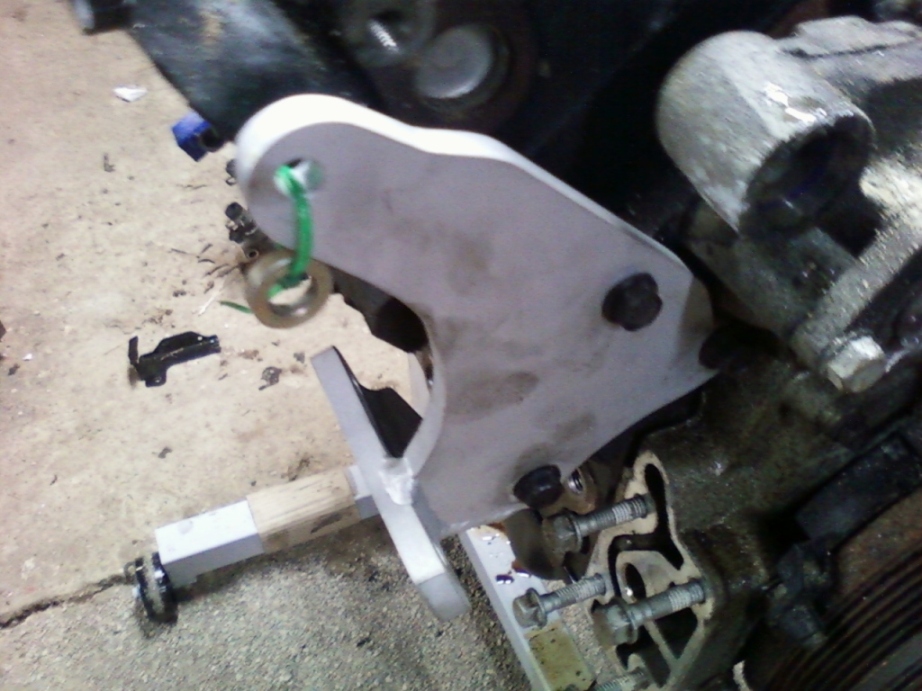
I think once I get the engine into the car, I will cut off that dogbone bracket. Right now, I am using it to lift the motor because I broke off a stud in the head for the engine lift bracket on that side. I have to connect the hoist to the rear bracket, the dogbone bracket, and finally a strap to the crossover pipe to level the engine.
[This message has been edited by mattman134 (edited 03-27-2010).]
IP: Logged
11:43 AM
mattman134 Member
Posts: 643 From: Buford, Ohio Registered: Dec 2009
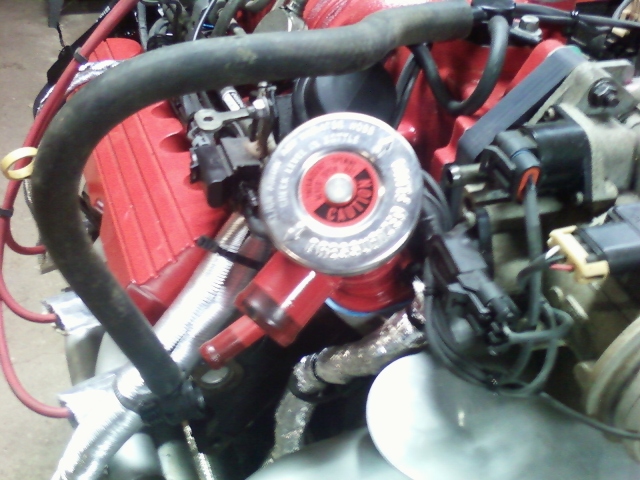
I intstalled the InjectionTechnology wiring harness onto the motor. The pictures just dont do it justice though. I had a little trouble with getting everytthing to reach at first, but then it all fell into place.
Oil Pressure and Cam Sensor EGR Valve Throttle Body (IAC, TPS, IAT, MAF)
IP: Logged
11:58 AM
mattman134 Member
Posts: 643 From: Buford, Ohio Registered: Dec 2009
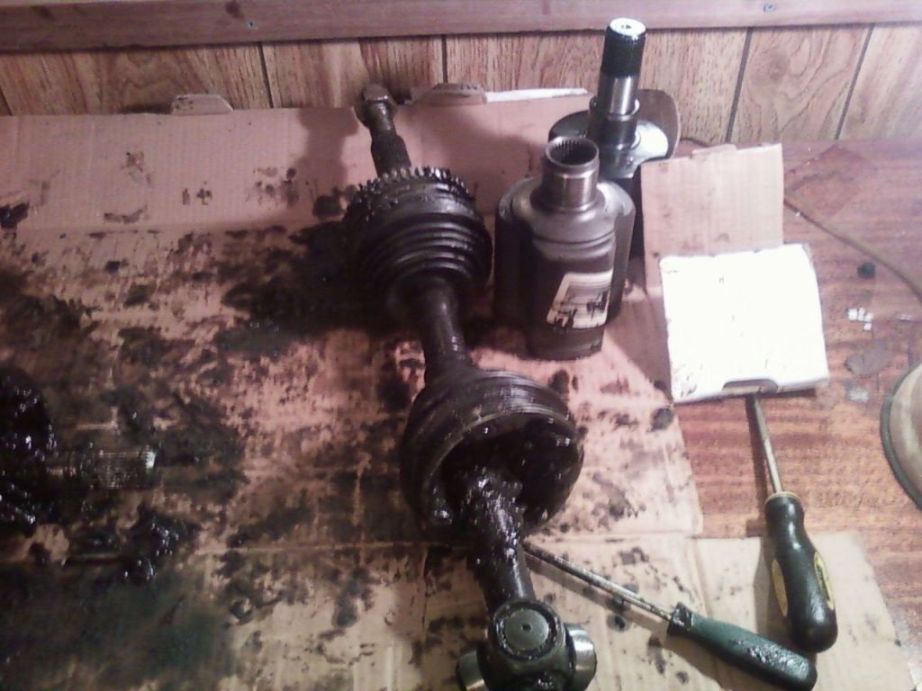
I thought it would be a good idea to try and build my own custom conversion axles. Things did not go as planned.
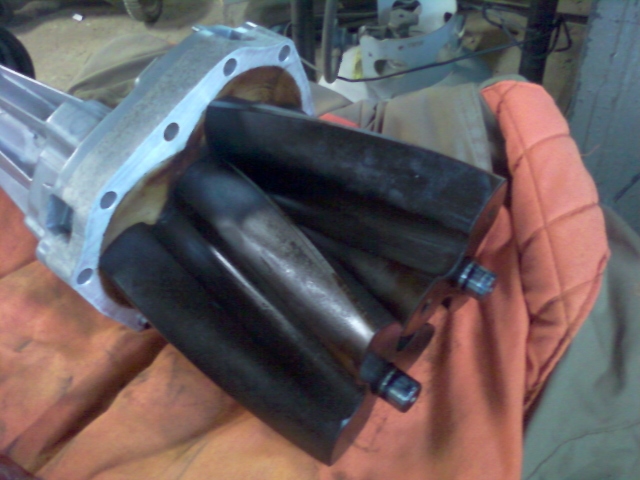
I bought both sides axles at autozone for a manual fiero, a driver side axle for a 2001 impala with 3.4, and driver side for a 1994 beretta 3.1. I took apart the beretta and driver side fiero axle, and connected them together. Everything went fine, and I clamped down the boots and cleaned everything up. Now is when everything went to crap. I took apart the passenger axle and impala axle to mate them together.... When I disassembled the fiero axle, the inner tripod was DRIFTED onto the shaft with a large punch. (You cannot see the holes where it is drifted in this pic) I put it on a drill press, and rounded off off 13 cobalt drill bits, while only drilling into that hard iron about 1/8 inch. Immediately I said screw this. I put all the axles back together in which they came from autozone, ordered new boot clamps with the little slotted bolt tool, band clamped them, and returned them to the store.
I got in way over my head on the axles. I then called up Ryan Gick (DarthFiero) over at Sinister Performance and had him make me a SET of custom axles for $250.00. Not $250.00 APIECE that WCF wants for axles. I can tell you that Ryan really does good work. (No hard feelings to WCF, just a little overpriced on axles.)
Here are the axles Ryan made for me:
Thanks Ryan
[This message has been edited by mattman134 (edited 03-27-2010).]
Ryan is the bomb! I've been out to see him a couple times. I wish I could afford to have finish my swap. This is because I don't have any money, not because he is high priced. Matter of fact, I think he is very reasonable.
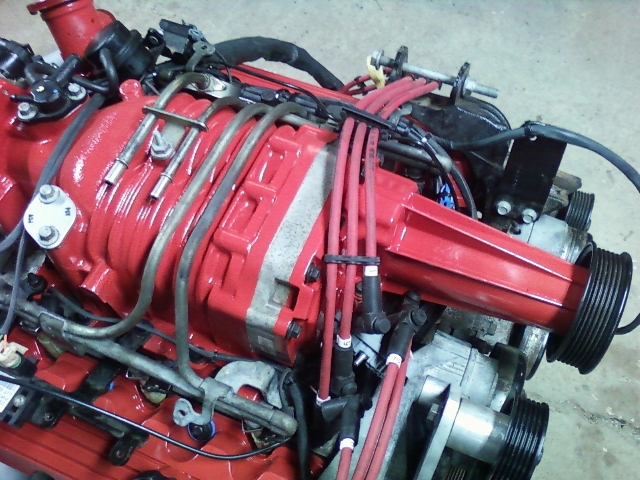
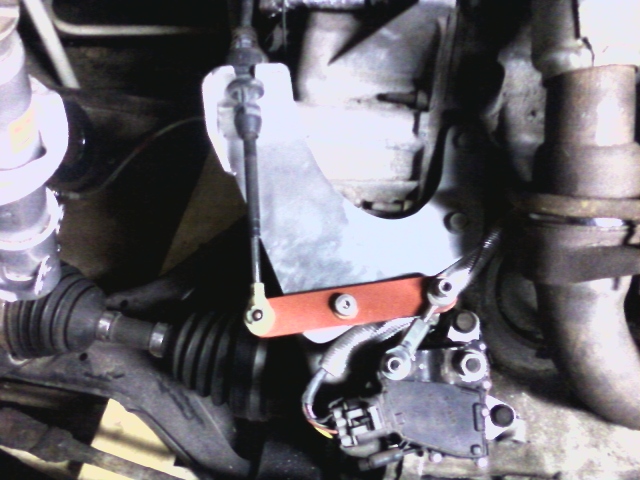
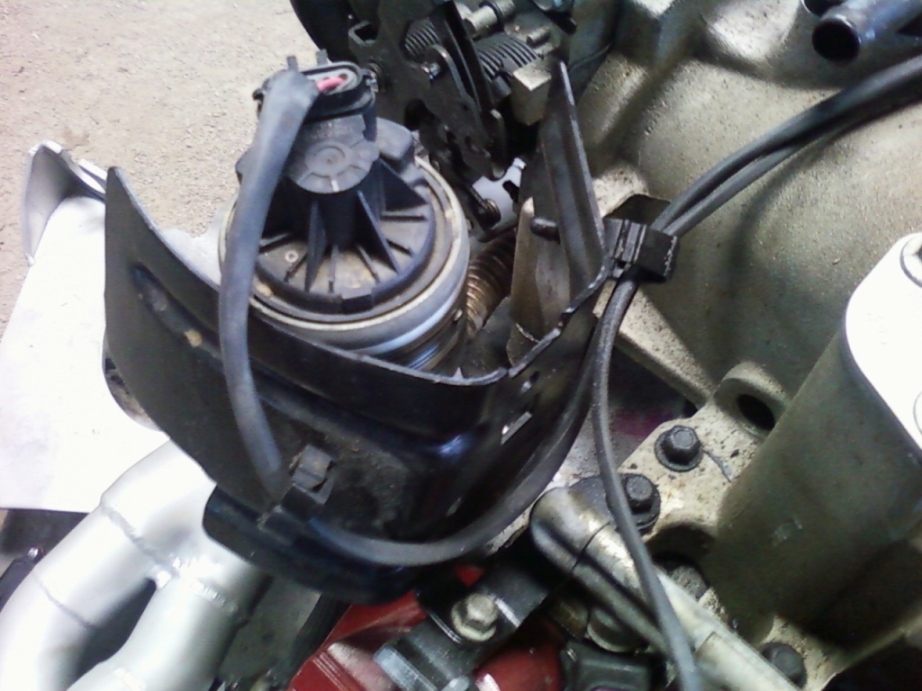
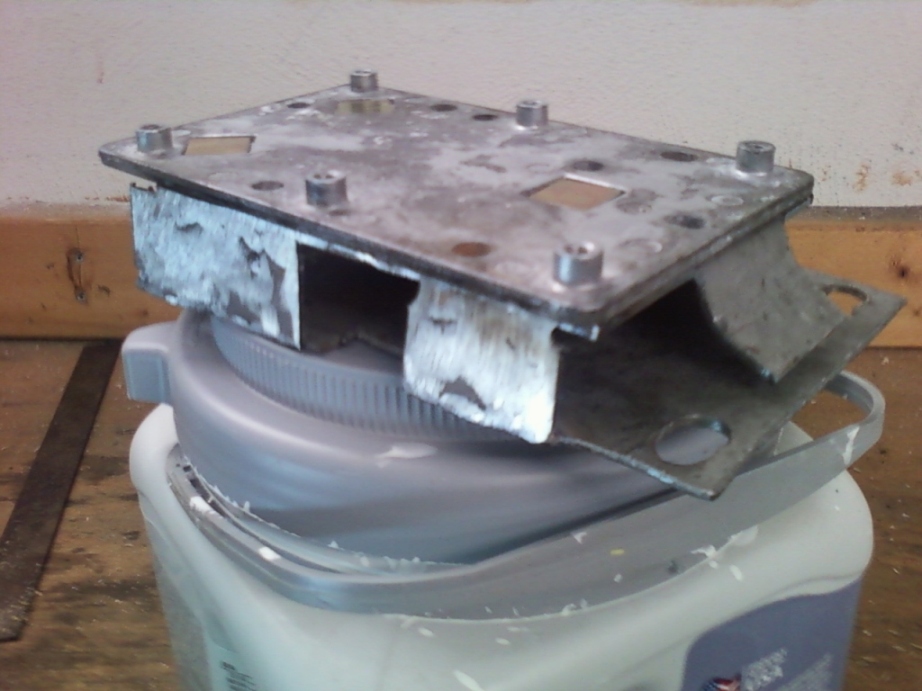
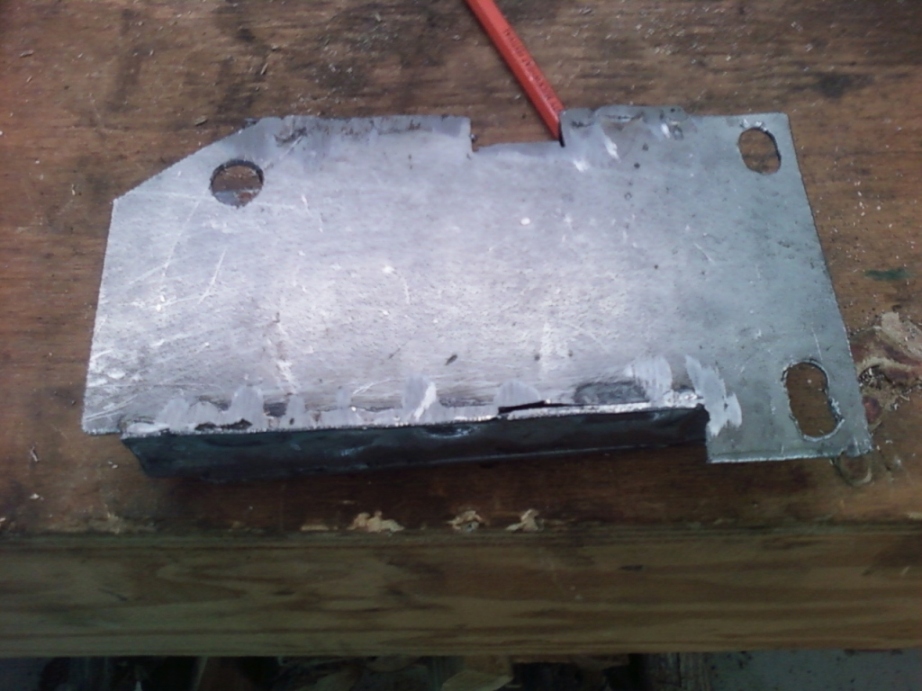
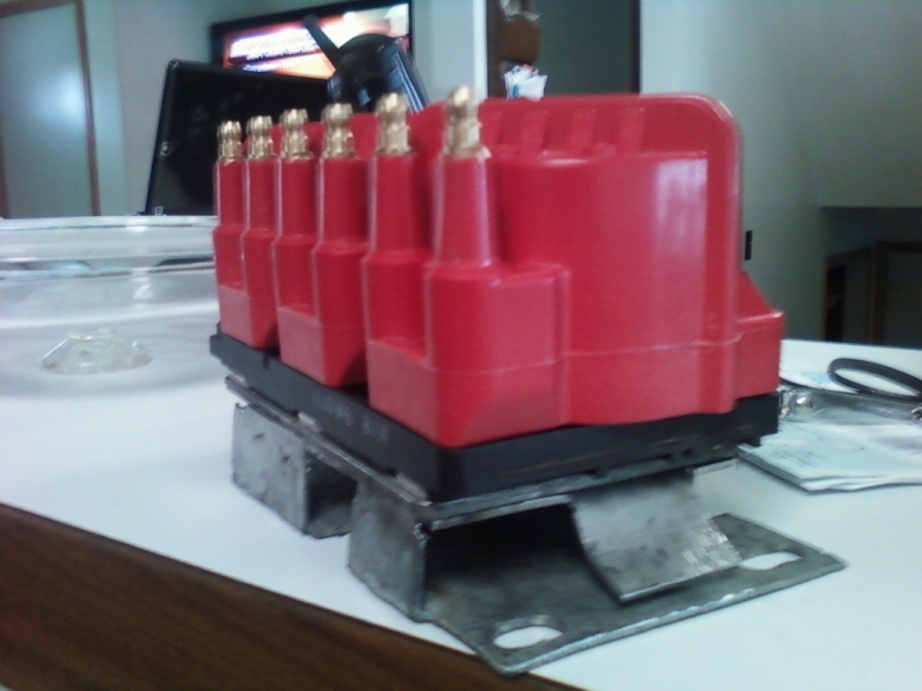
I have been debating on where to mount my ignition coils and I have decided to mount them where my alternator used to be in front of the Supercharger snout. There is a nice flat area to mount them. In order for the coils to mount here, i need to make a bracket that raises the ICM/coils by one inch. This is to clear the fuel rail and the idler pulley bolt for my custom alt delete pulley. I started digging in my garage for some steel and came up with a 10x24" piece of 16 gauge steel. It is galvanized and plenty thick enough to weld. First, I made up an outline from cardboard. I laid it in, and traced around the fuel rail and idler bolt. I also had to round off a corner to clear the supercharger snout. Once I got that done, I traced it to the steel with a permanent marker for the bottom plate (the plate that bolts to the alternetor bracket) and again for the top plate.
I consulted the help of my uncle Les to help me with some of the fab work on this swap. He has been fabbing and welding for 45 years. He can weld MIG, TIG, Stick on Aluminum, Magnesium and of course, steel. For the top plate, i left out the cutouts for the bolt and fuel rail because it was high enough that it would clear. i did leave the rounded corner for the sc snout. I cut 1" strips to weld to the side of the bracket. When my uncle was done welding, it formed a "box" with open ends for air to pass through. I ground off the weld, smoothed it out and painted it with the Flameproof coating, making sure to not paint the ICM bracket. (Painting this can lead to a bad ground, which means fried module.) I am going to drill a hole, and put a self-tapping screw into the bracket and run a ground strap down to the engine grounding point to be safe.
side/top view
bottom view
I put on the ICM and coils to see if they fit nicely, which they did.
I then bolted it to the engine. Nice.
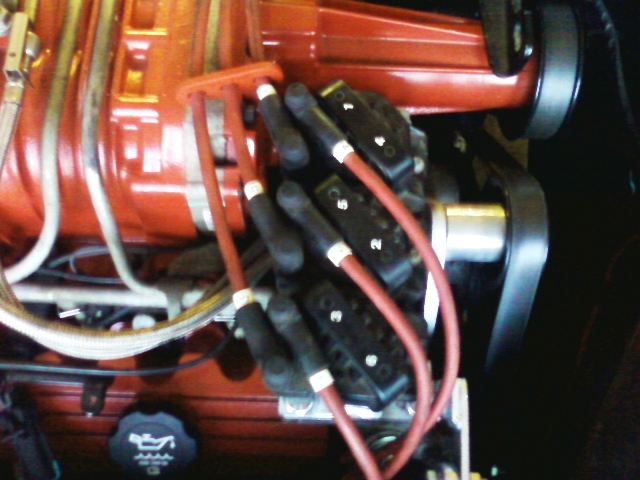
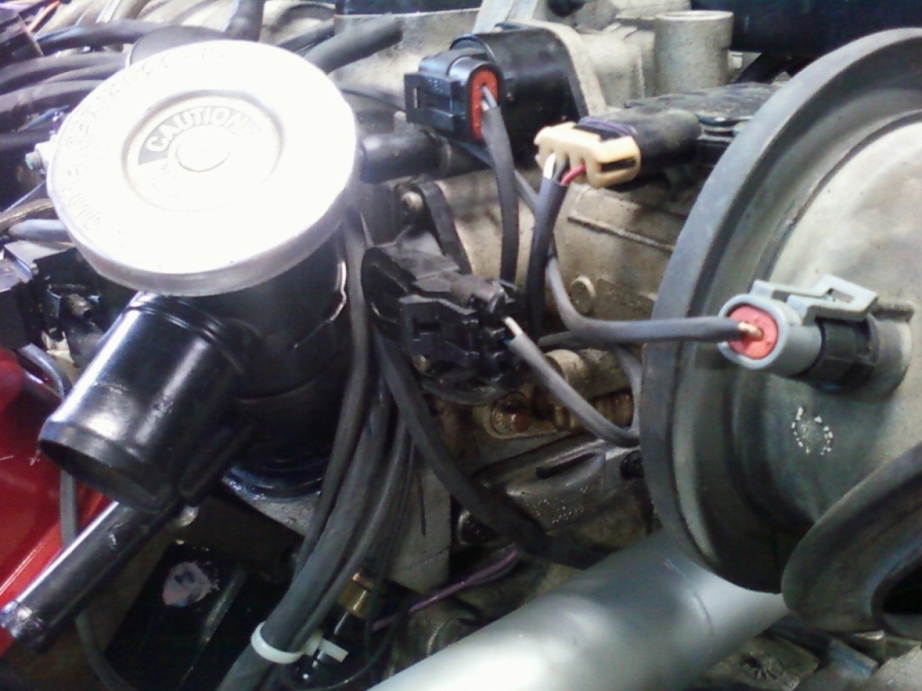
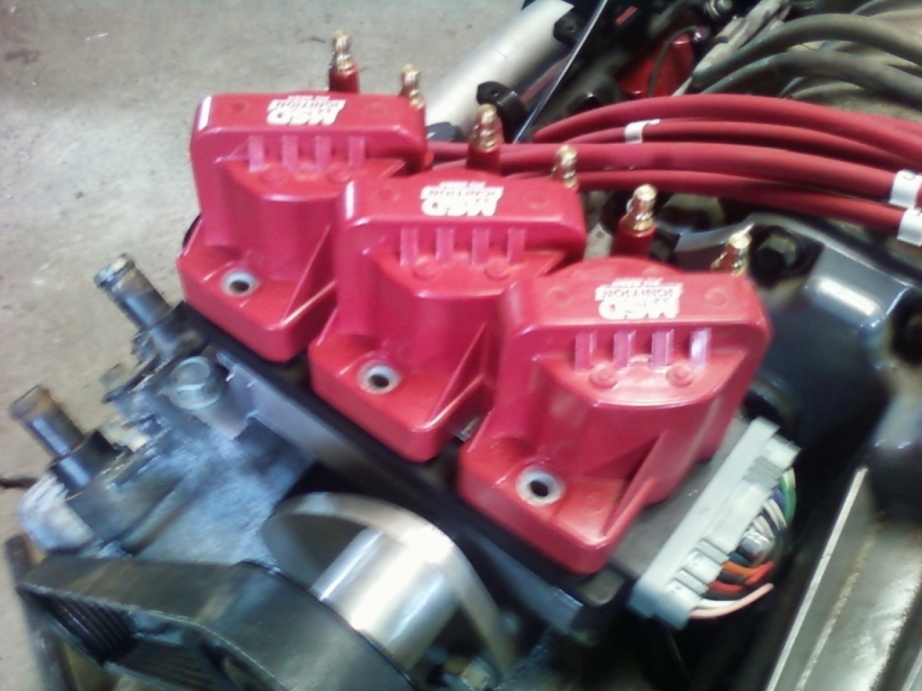
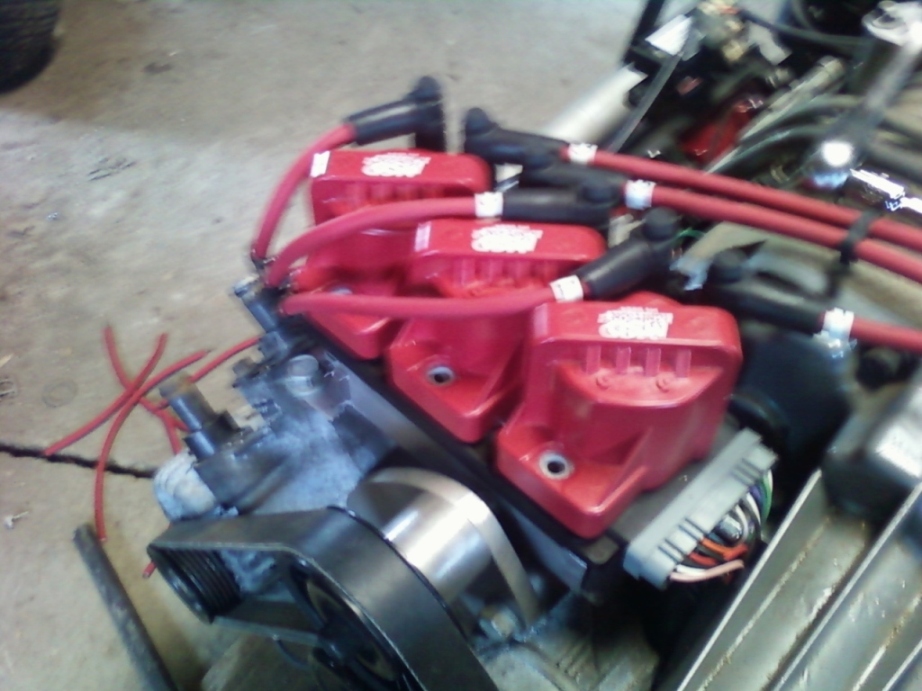
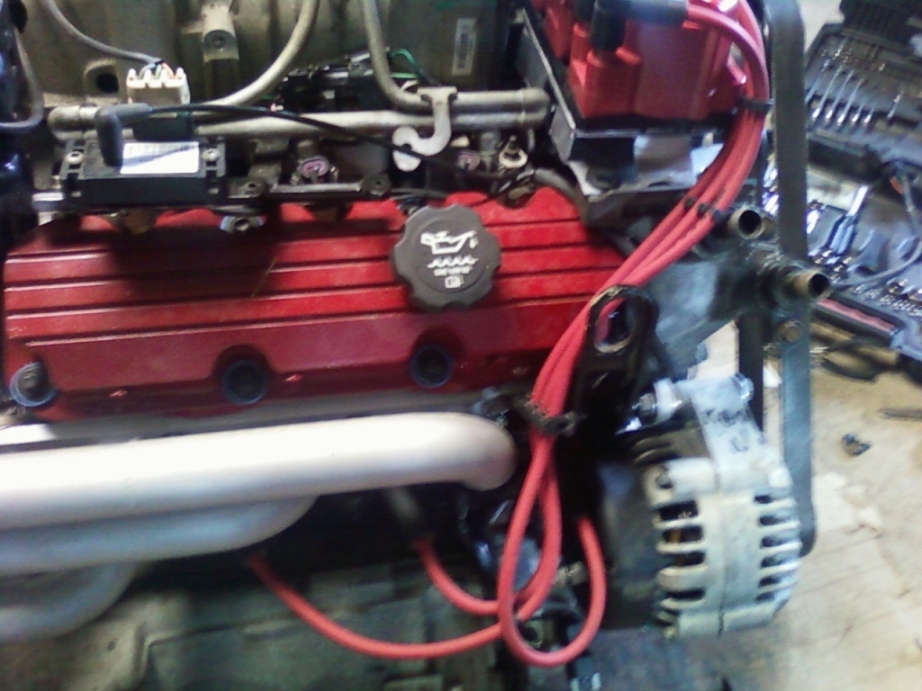
Once that was done, I decided to put in my NGK TR55s an make my plug wires. I purchased 8.5mm wires with multi-angle boots. they are universal, so i had to crimp my own ends. I completed them and they are now routed as follows:
wires at coil packs
wires in rear
wires in front
Once all the wires were, on the overall height of the coil packs/wires is only about 1 1/2" above the supercharger snout. I think this will be fine, but I hope they will clear the decklid. If not, I will act accordingly.
IP: Logged
09:24 PM
Mar 28th, 2010
Fierostarvin Member
Posts: 292 From: Hazleton Iowa Registered: Mar 2006
Great looking swap. Using all pre-made quality components certainly makes the swap costly but greatly simplifies it. I would dump the MSD coil packs and put back the originals. Not trying to be critical but the MSD coil packs have been shown to produce less spark energy than the stock GM coil packs. If you want backup info, check on the club GP forum. Sorry to be a bearer of bad news but aftermarket doesn't always translate to better.
------------------ " THE BLACK PARALYZER" -87GT 3800SC Series III engine, 3.4" Pulley, N* TB, LS1 MAF, Flotech Exhaust Autolite 104's Custom CAI 4T65eHD w. custom axles, HP Tuners VCM Suite. "THE COLUSSUS" 87GT - ALL OUT 3.4L Turbocharged engine, Garrett Hybrid Turbo, MSD ign., modified TH125H " ON THE LOOSE WITHOUT THE JUICE "
IP: Logged
09:47 AM
Khaos88GT Member
Posts: 329 From: Lake Charles, LA Registered: Sep 2007
Yeah just thought I'd ditto the "Ryan is the bomb" part. LOL!! Great guy. I do like all the premade parts as Dennis mentioned, but Holy Crap all WCF I feel bad for your wallet. Lol! I will say that their headers are horribly restrictive, but in their defense they state they are simply made to route the exhaust similar to stock.......Anyway beautiful swap my friend.
IP: Logged
09:52 AM
mattman134 Member
Posts: 643 From: Buford, Ohio Registered: Dec 2009
Wow I did not know they were restrictive. I have no idea why they would be, considering the primaries and collectors are larger than stock.
Also put a good flex in the exhaust of the headers will crack or better put a flex in the exhaust and in the middle of the Y-pipe. The WCF headers are known to have cracked on several people including the set I have in my shop right now. For your stock setup the headers will be fine and serve you well but if MODs come in the future then they will have to go. Also be sure to run a nice mandrel exhaust with the headers or if you can find a Borla setup that would be ideal. I ran these headers on my first swap with a Borla and it performed well and the sounds was good. Also ditch the MSD coils and go back to stock coils as they are nothing but trouble. Sell them before you run them so you can make back most of your money your spent on them.
More info from ZZ Performance 3800 website: Aftermarket coil packs
The stock ignition on a Grand Prix is very good. It is so good that we run stock coil packs on all of our cars at ZZP. Failure rate of stock coil packs is low and the spark output is extremely high. We have A/B dyno tested aftermarket coil packs and seen no difference in HP. We have seen many aftermarket units fail and when customers have a problem it's very hard to diagnose with extra unneeded mods on the car.
The ignition control module sits under the coil packs. It sends a limited current to the coils for a predetermined pulse (dwell). You cannot change the wires or the coils to get 'more spark' because the ignition control module will not send more power to the coils. You would have to change the ignition control module for a significant increase. The MSD coils and/or the MSD wires are a downgrade in your ignition system in regards to the 3800. The best you can do is run a wire with slightly less resistance or more insulation. These are very small improvements but the only meaningful ones
------------------ " THE BLACK PARALYZER" -87GT 3800SC Series III engine, 3.4" Pulley, N* TB, LS1 MAF, Flotech Exhaust Autolite 104's Custom CAI 4T65eHD w. custom axles, HP Tuners VCM Suite. "THE COLUSSUS" 87GT - ALL OUT 3.4L Turbocharged engine, Garrett Hybrid Turbo, MSD ign., modified TH125H " ON THE LOOSE WITHOUT THE JUICE "
IP: Logged
12:09 PM
Apr 3rd, 2010
mattman134 Member
Posts: 643 From: Buford, Ohio Registered: Dec 2009
Hello to All For right now, I have run into a bind with my unemployment running out sunday. I dont know if congress will pass the extension or not, so my first priority is saving as much money as possible. So, the engine is going to sit for awhile. All the work to the engine is done, so it is just a matter of putting it ito the Fiero. I am doing 15 credit hours at school, and with my UC running out, I wont have any money to work on the engine until probably summertime, so I guess I will post when I start working on the car again. Funny how things come up at precisely the wrong time...
IP: Logged
01:57 PM
PFF
System Bot
May 21st, 2010
mattman134 Member
Posts: 643 From: Buford, Ohio Registered: Dec 2009
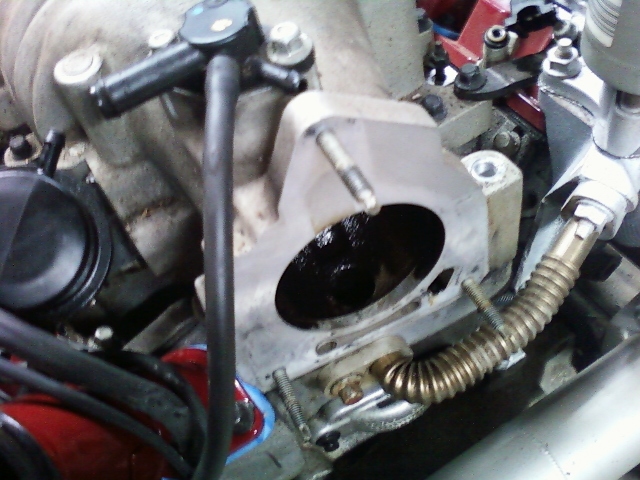
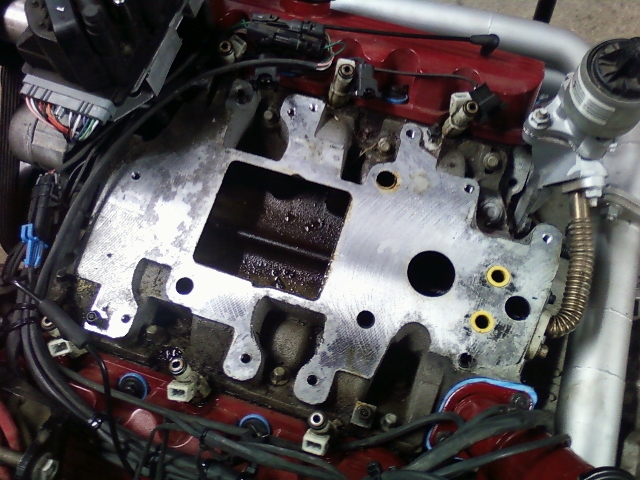
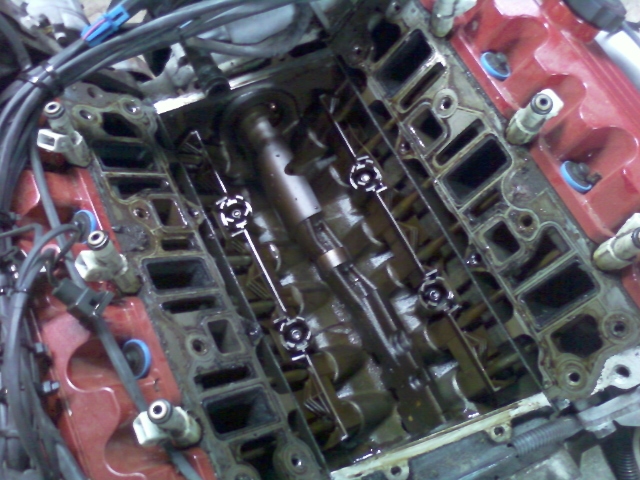
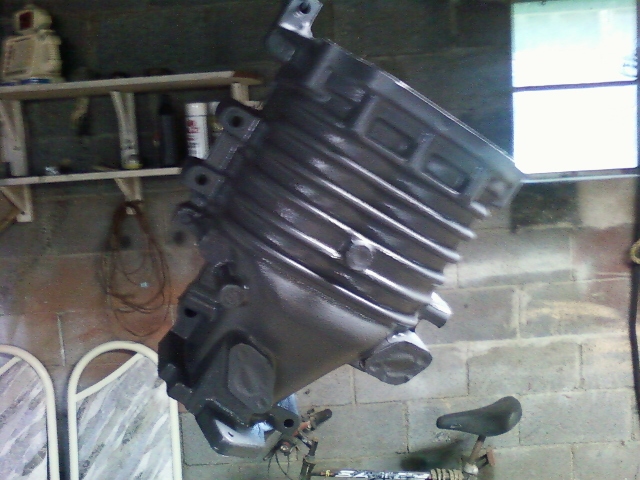
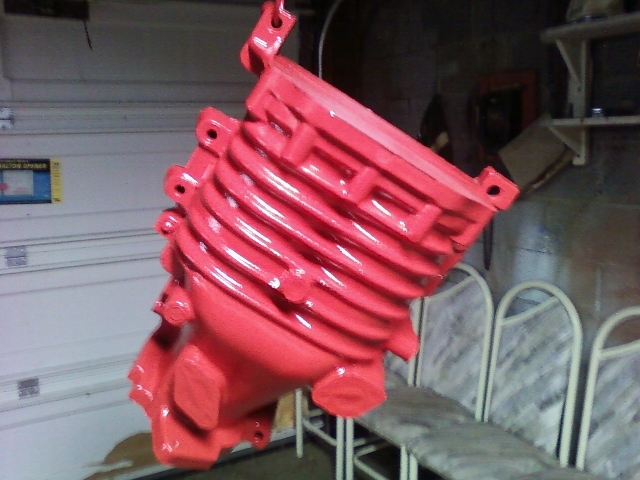
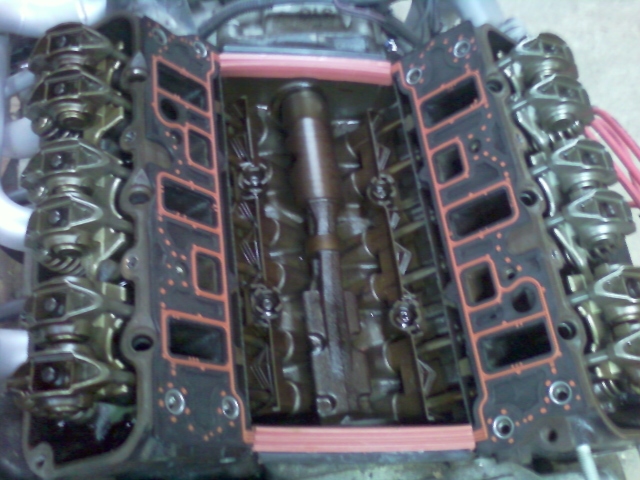
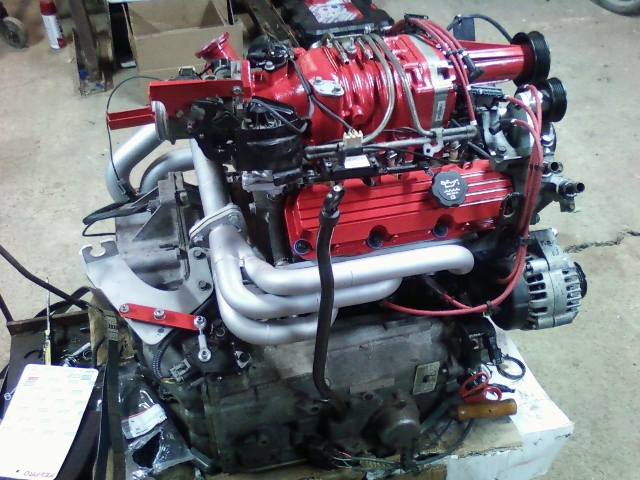
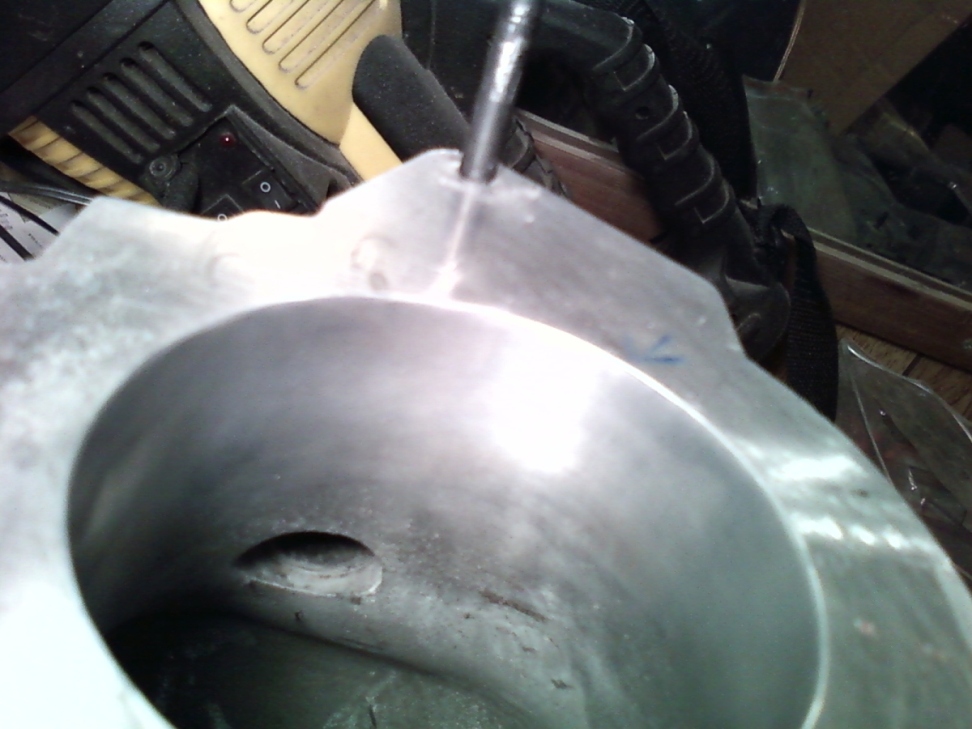
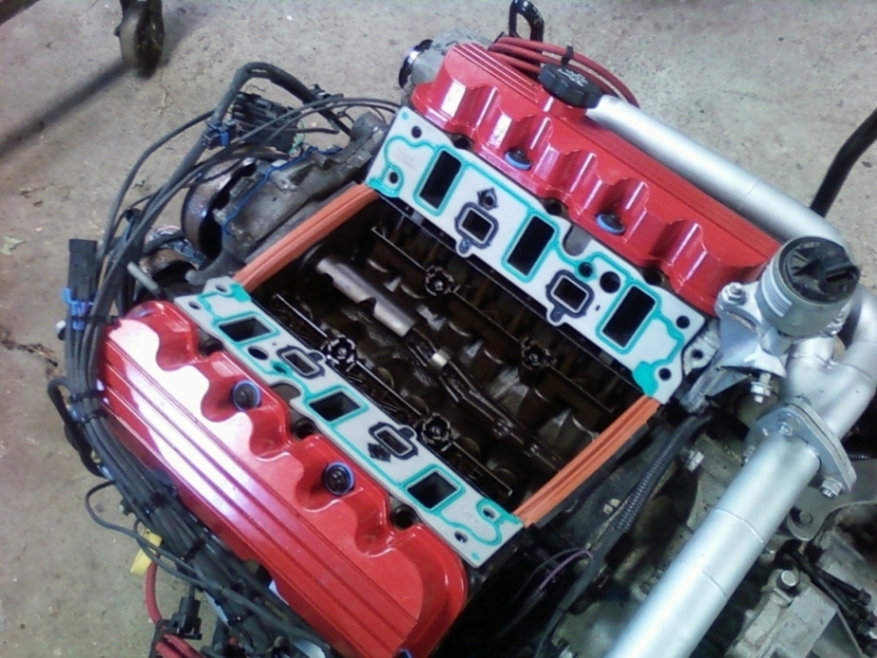
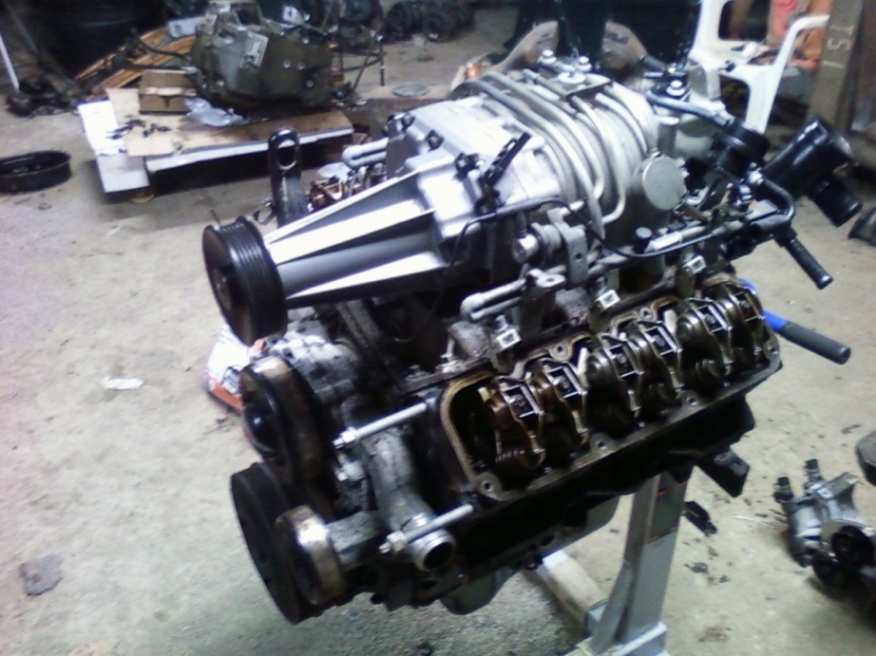
Ok after a long hiatus, I have finally got back into building my new 3800 Series II. I went ahead and bought a set of mounts and brackets for the swap and decided to replace the top end gaskets. While I was in there, I did a little cleaning and painting. I have been putting off romoving the supercharger and LIM because of all the stuff you have to take off and move out of the way. I finally started removing things and it turned out to be easier than I had previously thought. I had the blower and LIM off in 45 minutes. PICS I Removed the fuel rails (I want to modify the rails, but dont know how to go about doing it. I dont want the rails to go over the top of the supercharger, but I want them to wrap around the front, under the blower snout.) I think will pain them flat black. Throttle Body removed I removed the blower. Luckily old gasket cam right off without sticking. Lower intake was full of oil, caused by the donor car flipping over a guardrail I removed the lower intake, and saw balance shaft, pushrods and lifters Gas from the fuel rail dripped on the valve covers and this is what happened. Looks like I will be redoing them. Oh Well, I didnt like the color anyway. I taped up the blower housing, hung it up, and put on three coats of primer. Blower after paint When I took out the roots, I found this. Covered in oil and carbon. I decided to paint the snout, so I taped up the pulley. When I seperated the snout and gear/coupler housing, it stunk really bad. Snout after paint Valve covers repainted with 500 degree GAS RESISTANT engine enamel Thermostat housing/coolant fill New intake gaskets in
AFTER 4 hours of cussing and having to take stuff off and repaint it a million times...
[This message has been edited by mattman134 (edited 05-21-2010).]
IP: Logged
01:39 PM
darkhorizon Member
Posts: 12279 From: Flint Michigan Registered: Jan 2006
I had to take the blower and intake back off because I overtorqued all the bolts. I decided to go with ZZPs Aluminum intake gasket anyway. I did some home porting and polishing of the blower and intake also. Pictures soon
IP: Logged
12:59 AM
Jun 5th, 2010
mattman134 Member
Posts: 643 From: Buford, Ohio Registered: Dec 2009
As I stated earlier, I had to take off the blower and intake because I overtorqued the bolts and smashed the gaskets. So here are the pics:
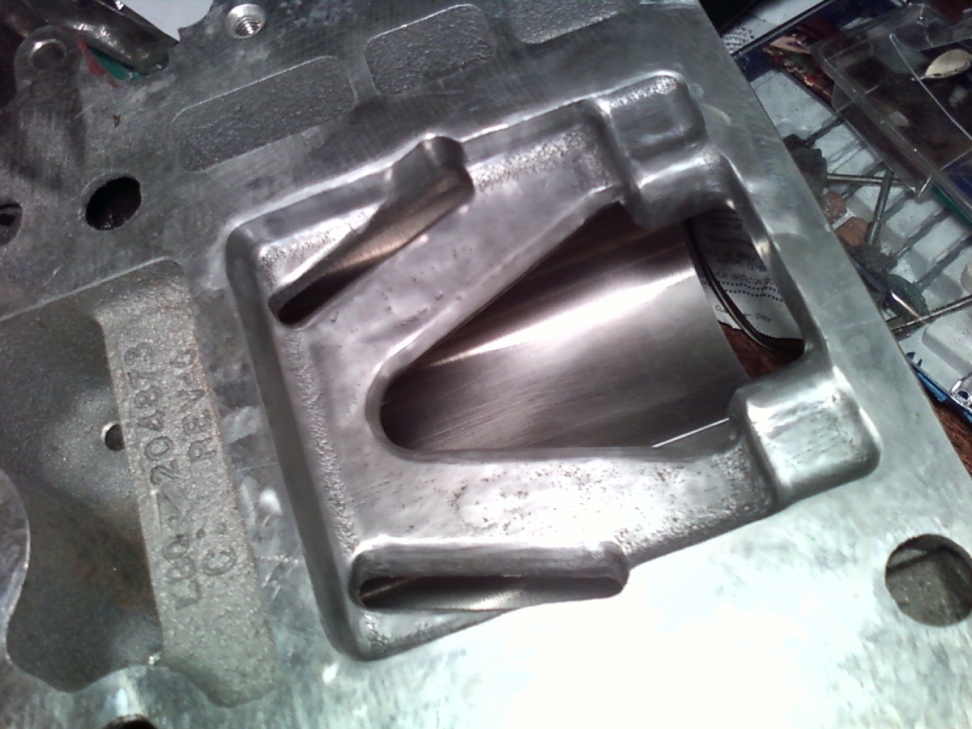
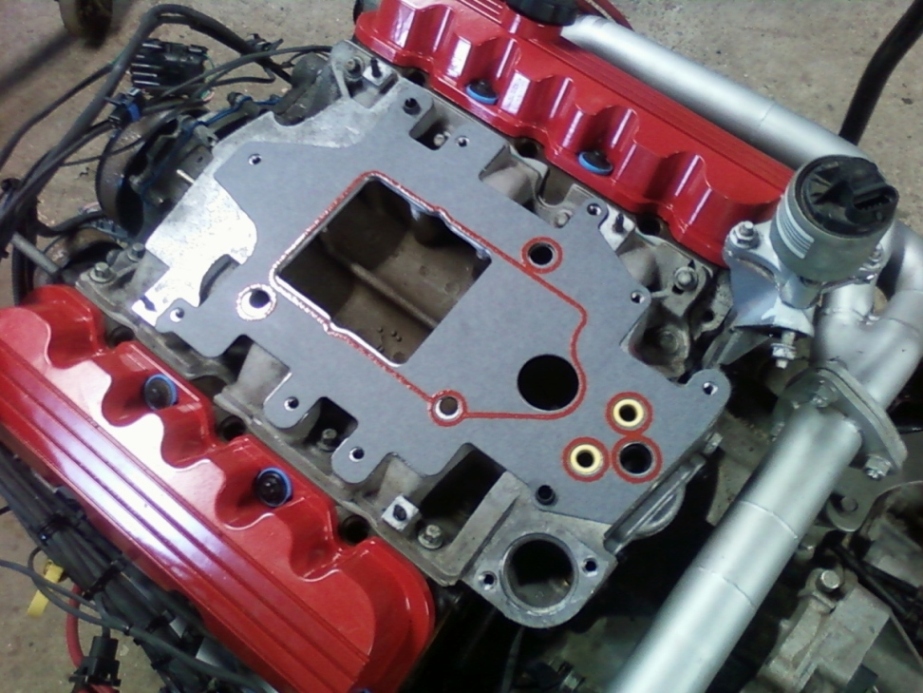
While I had the blower and LIM off, I decided to clean up all the rough edges and polish them. Here is the intake of the SC Another intake pic, polished. These pics really dont do it justice as to just how smooth the blower really is Blower outlet: I didnt enlarge any of the holes, I just ground off the sharp edges, burrs, and casting, radiused the openings, and polished with felt wheel and polishing compound. After porting and polishing, I put on the ZZPerformance aluminum GM Recall Intake gaskets: Put on the intake and torqued to 11 ft lbs with new water bypass and SC gaskets: ZZPerformance TB Spacer: Keeps coolant out of TB (Heat reduction) ZZPerformance Throttle Body Heat Shield (Heat Reduction) Completed Motor (I may end up painting fuel rails Black or Silver)
IP: Logged
01:59 PM
Jun 6th, 2010
darkhorizon Member
Posts: 12279 From: Flint Michigan Registered: Jan 2006
At this point I would probably take the blower back off and finish porting it. Just "polishing" things probably moved you backwards in efficency. There are a bunch of easy gain areas in the gen3 m90 that you can take advantage of.
IP: Logged
09:47 AM
mattman134 Member
Posts: 643 From: Buford, Ohio Registered: Dec 2009
so far I have spent $3860 plus various odds and ends. I have $1932 in parts to buy still. There are many junkyards that will sell you an L67 for cheap. I got mine with 67,000 miles, with trans, wiring harness(uncut) and pcm, fully dressed with all accessories for $750. The reason my swap is so expensive is because I am either having all my parts custom made or buying them already made. I dont have any welding skills, so I cant just weld up a set of mounts. My main vendor is West Coast Fiero. Their quality is very good. They tend to be on the high side on price, but it is well worth it to have things done right. The only problem I have had with them is that the bolt that is welded to the back of their 4t65e-hd shifter adaptor assembly arm is ground too thin and the bolt shank breaks off of the weakened head. I had them send me a new arm, only to have the replacement be too short. I ordered headers, low mount alt bracket, throttle/cruise adaptor bracket, modified thermostat/ coolant fill, oil filter adapter,and the shifter adapter from WCF. I got my PCM reprogrammed by ZZ Performance. I had my custom axles made by DarthFiero (Ryan Gick at Sinister Performance), who really knows what he's doing. My wiring harness was done by InjectionTechnology in Little Rock, AR. Harness is very good quality and is completely shrinkwrapped with all new wire and connectors (except for c203 and c500, which are the fiero connectors). So in total, with a $200 buffer for "murphys" (murphy's law-related complications) it will come out to roughly $6000. This is my very first swap BTW.
If you have any other questions, please dont hesitate to ask. I wish you the best of luck on your swap Matt
IP: Logged
01:18 AM
hawkins04 Member
Posts: 19 From: Lawrenceville, Ga Registered: Jul 2010
thank you i will not be starting my swap anytime soon since im going to school but i would like to start a collection of parts. For the wiring harness how did you go about that? i mean did you just tell them what motor/trans you were using and the car you started with and they made it or what/ i do not what to do the wiring myself. the welding and fab will be fine with me since i took a 3 year welding/fab class in high school. i was wondering the price cause i did see that you bought alot of the pats.
Thanks Brandyn
IP: Logged
04:35 PM
PFF
System Bot
Nov 23rd, 2010
mattman134 Member
Posts: 643 From: Buford, Ohio Registered: Dec 2009
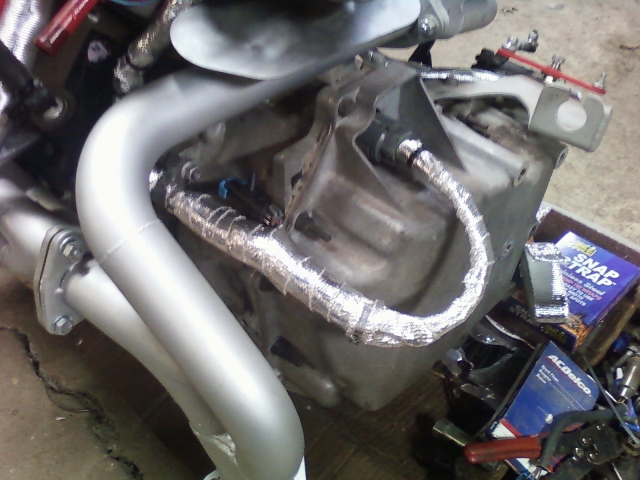
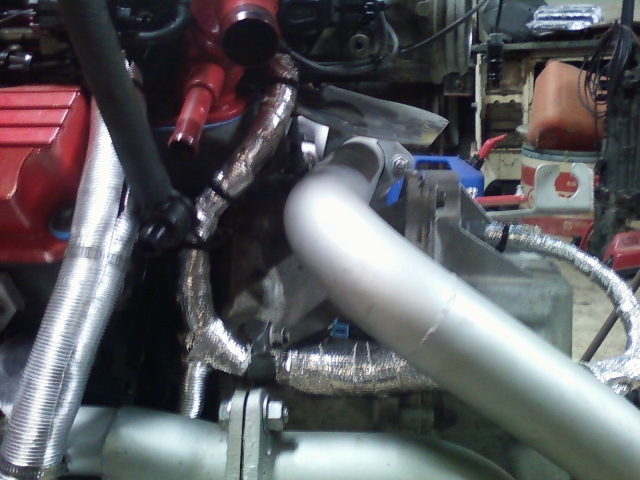
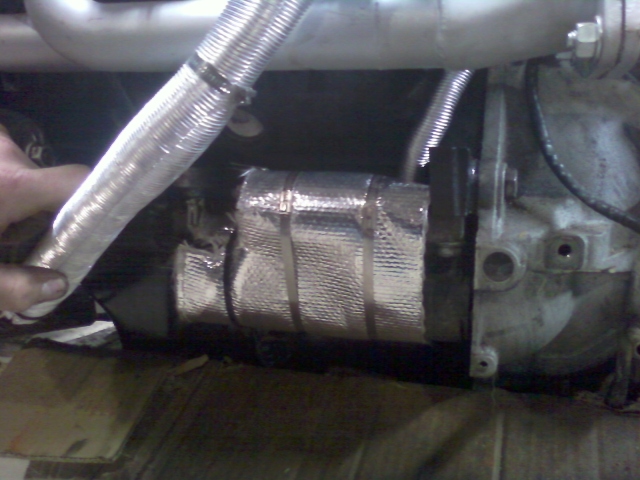
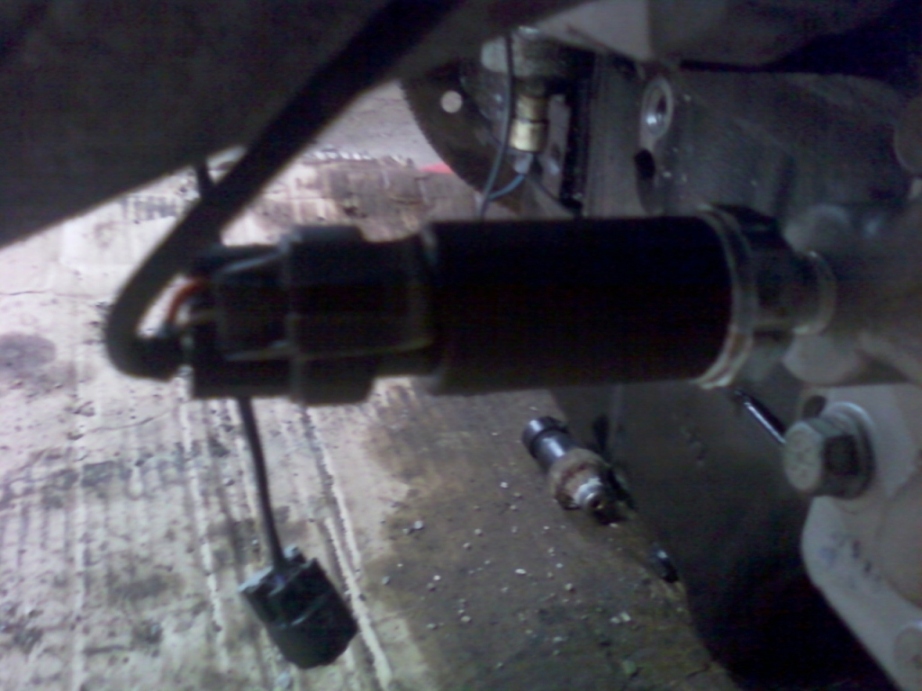
I started adding some Thermotec heat wrap to the wiring and heat shield to the starter. I also added a new O2 sensor and Knock Sensor on transmission side. I put on spark plug shields also.
Trans Harness: Under exhaust, firewall side: By Tstat Housing, around ZZP TB shield: Starter Head Shield: New O2 Sensor:
Matt
IP: Logged
07:32 PM
Feb 10th, 2011
mattman134 Member
Posts: 643 From: Buford, Ohio Registered: Dec 2009
Now that I got my tax refund of $2350, I am hitting this swap hardcore. I went ahead and purchased the rest of my engine swap hardware and materials. I bought all of the following items
-WCFs Rear coilover and front drop spring kit, Braided A/C Lines and their Brake booster vacuum line extension pipe (Pics to come). -Grand Am Brakes, Strut Plates, 2 gal Oil, 15 qt Trans Fluid, 4 gal Coolant, 2 cans of Epoxy paint and 2 cans of Caliper Paint, Hose Clamps, Rad Hoses, Spark Plug Shields, Battery Cables, Oil sensor, and Heater Hose from Advance Auto Parts. -2 paks Cushion Clamps, 2.5" ID 10"L Exhaust Flex, 3/8 and 5/16 Fuel Hose, 3/8 Trans Hose, 2 2.5"ODx3.5"R Jbends, and 3/8 barb Fuel Filter from Jegs. -PCM Tray, ARP Header Bolts, False Knock Elimination Kit, and Cat-Back Exhaust Downpipe Gasket from IntenseRacing -2x 4'x2"x16GA square tubing from MetalsDepot to make rear frame rails (Mine are starting to show rust holes) -Transmission 3/8" Quick-Disconnect Adapters and release tool from NTXTools.com. These fittings clip into the factory trans cooler fittings, and adapt to 3/8" hose barb. -Powdercoated Front crossmember and rear cradle with new poly, ball joints, tie rods. New KYB shocks and struts, braided brake and fuel lines from MulletProofMonk -F+R HD Swaybars, Evap Can Filter, Teflon Grease, Ground Strap, Front Spring Pads, Bearings, Axle Nuts from Fierostore -Full set of BrandX Swap Mounts and Brackets for the L67 and 4t65e-HD Auto. Grand total: $3027.70
Now that the list is out of the way, now I can explain what I have been doing the last few days:
Once I got my refund, I started looking for new suspension(poly, Ball joints, tie rods, powdercoating) then I came across MulletProofMonk's ad in the mall for complete front and rear suspension, that already was powdercoated and had all new hardware for $500. I called him up, and arranged the deal. I also got new KYB GR2 Struts and KYB Gas-A-Just front shocks, Fierostore braided brake lines, and braided Series II fuel lines, all for $800. Once I got there, we talked about fieros for 2 hours, and finally got everything loaded up. He even threw in a Grand Prix performance shifter in for free.
I went ahead and ordered all my other stuff, like Grand AM Brake upgrade (New calipers, rotors, Ceramic pads, slider pins and bolts, banjo bolts, etc.) I also went ahead and got all my fluids, filters. I got paint and prep materials for my engine bay and brake calipers.
I have been having a hard time deciding how I want to go about doing the trans cooler lines. At first, I was going to run 3/8 copper line with hose barb compression fittings on the end. Then I decided to use the stock fiero trans lines, because DarthFiero does, and he hasnt had a single trans overheat. According to DarthFiero (Ryan), the Grand prix lines are 3/8" OD all the way to the radiator, THEN the transmission cooler fittings get stepped down to 5/16 OD. So there is really no point in having 3/8 lines, because the Grand prix threaded cooler fittings is stepped down at the radiator anyway.
I came across a website called http://www.ntxtools.com that has special fittings that snap into the factory quick-disconnect fittings on the 4t65e-HD trans, and the other side is a 3/8 hose barb. This simplifies things so much, because otherwise I would have had to find a 9/16-18 fitting for the trans cooler ports, which were only on the 2004-up transmissions. (My engine is an 03, but the trans is an 04). http://www.ntxtools.com/net...ouse/SOL-FIT404.htmlhttp://www.ntxtools.com/net...ouse/SOL-FIT416.html
I will then double-clamp 5/16 hose onto the 3/8" hose barb, and the other end will be double-clamped to the factory fiero trans hardlines. Where the lines go in the radiator, the factory line nuts will be cut off, the ends will be double-flared, and will be connected to a 22,000 BTU auxiliary cooler with 3/8 hose. I should definitely not have a problem with the transmission overheating.
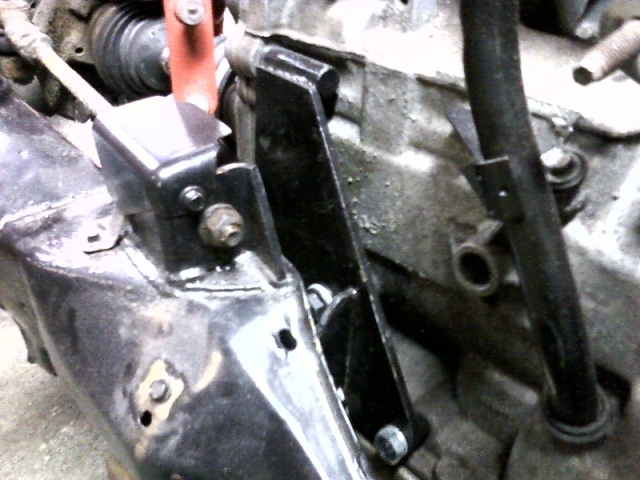
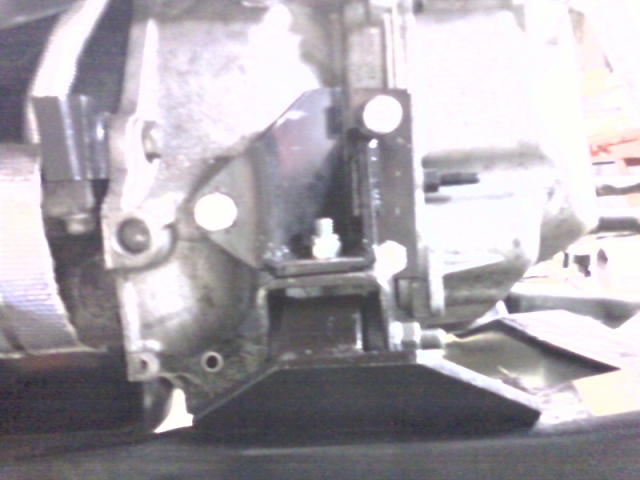
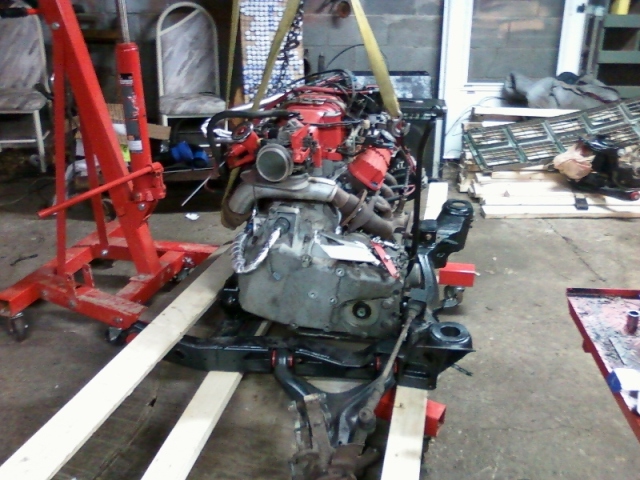
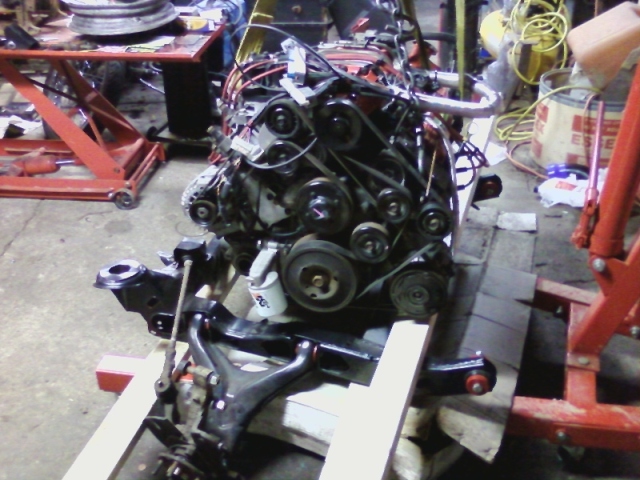
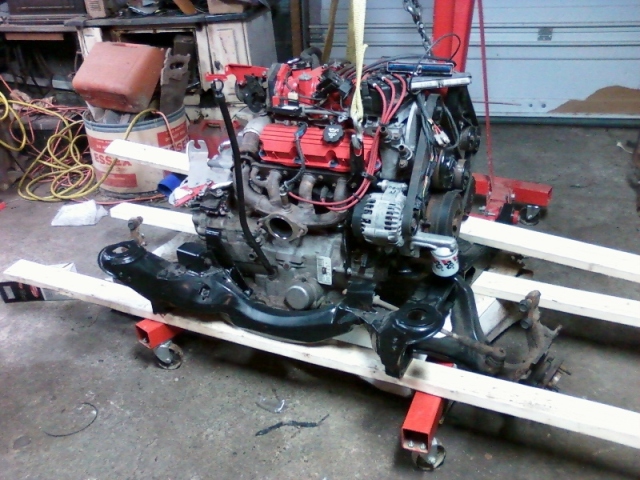
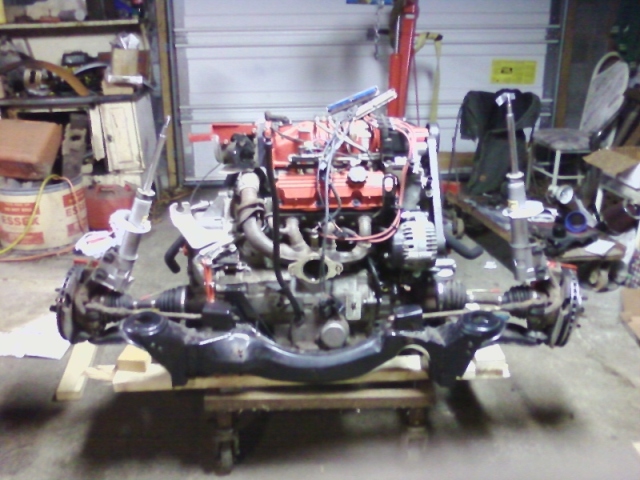
I decided to go ahead and mount the engine/trans to the cradle. I first installed the rear trans mount and bracket, and used this as a pivot point. With the engine/trans supported by the cherrypicker, I used a piece of 1/8 steel rod taped to the top ridge in the rear valve cover to center the engine to the cradle.
Once this was set, I drilled the mounting holes in both the front trans mount and the engine mount. On the BrandX Mounts, you will need to cut off 1" from the long side of the engine mount for it to fit if you have an 84-87 car. You must leave it uncut for an 88 car. Once the holes were drilled and I double-checked everything, I bolted it down permanently. It is solid as a rock now. BrandX install thread: https://www.fiero.nl/forum/Forum2/HTML/104608.html
Mounting Pics:
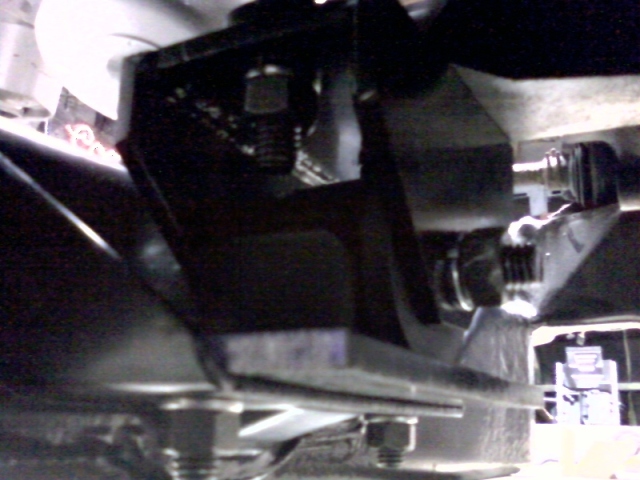
Front engine mount from underneath
Front engine mount from right side of engine
Rear Late-model (2003-up) Trans bracket (lower mount not visible)
Front transmission mount and bracket
In the process of positioning, etching and getting mounts ready to bolt in (engine suspended by engine hoist)
Engine mounted to cradle, all bolts tightened down
Again these are BrandX mounts, which are done by FieroX's local machins shop. The build quality of these mounts is A+. Very well built, and I dont have to worry about my engine going ANYWHERE!
For the coolant hoses from the engine to the coolant pipes, I used: Dayco 71030 (or AutoZone XL-295 ) – 3800 water pump to R-side coolant tube Dayco 71082 (or AutoZone XL-183 ) – 3800 T-stat housing to L-side coolant tube V6 cars
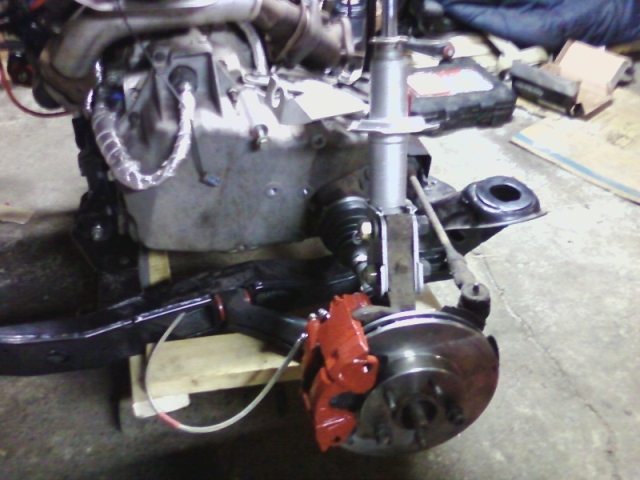
Now I decided to begin on the rear brakes. I bought 4 new calipers, rotors, and ceramic pads. I decided to go with the 4-corner Grand Am setup for proper balance. I even got the 1994 Blazer MC, for more positive pedal feel. I will eventually go to an S10 booster like the one rodney sells.
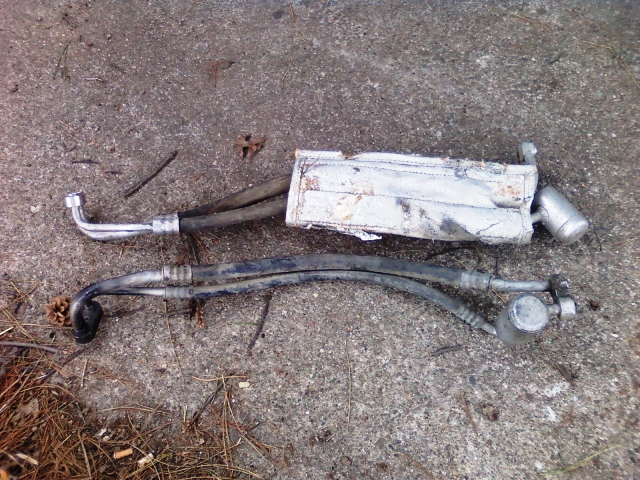
I decided to clean the calipers off with caliper cleaner and paint them with red Duplicolor Caliper paint. Once I was done with that, I installed new caliper slider pins and bolts, cleaned and installed the rotors, and put the calipers on the knuckle. I installed the Fierostore braided brake lines and installed the axles also:
Brake and axle Pics: Left Side (Note strut already installed, waiting on WCF coilovers) Right Side (Same thing)
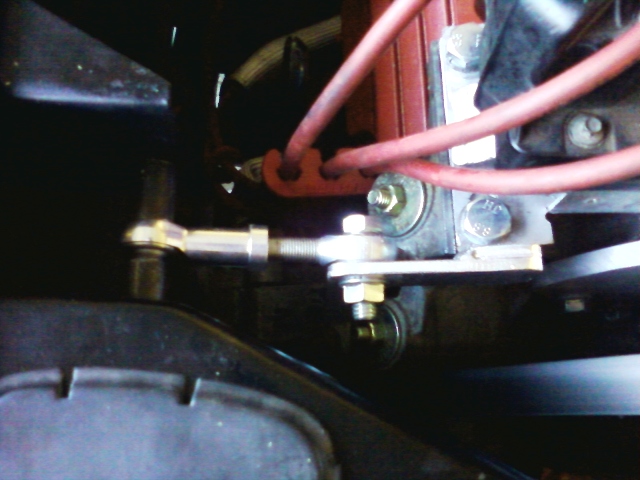
I also installed the braided fuel lines also. I ran the lines underneath the supercharger snout and over the valve cover. I may make a bracket for this soon.
I guess I will keep working on the motor and getting things finalized until my car is done getting painted The shop, unfortunately, is an insurance-preferred shop, so they always do the insurance jobs first. Since all the snow, they have been slammed to the walls because of more wrecks coming in. They can only work on my car when there is free time.
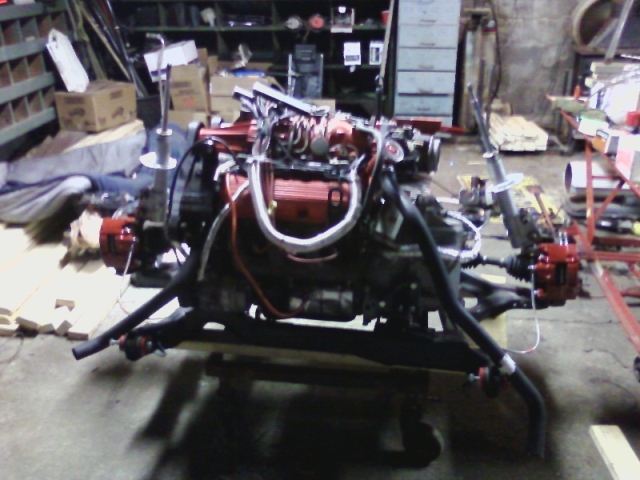
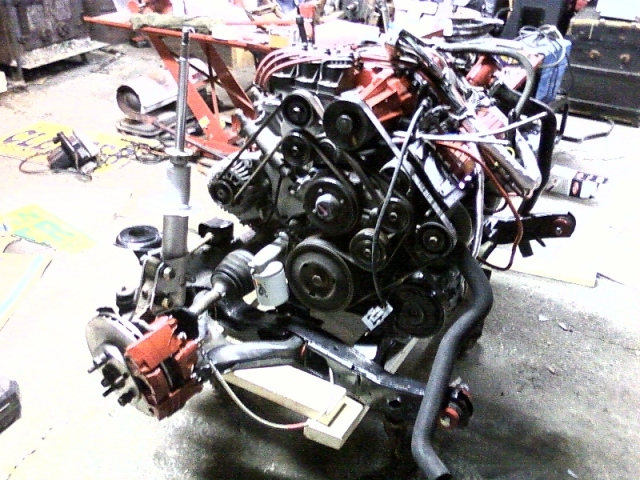
Engine as it sits right now:
Matt
[This message has been edited by mattman134 (edited 02-10-2011).]
IP: Logged
12:33 AM
L67 Member
Posts: 1792 From: Winston Salem, NC Registered: Jun 2010
Hey Matt looks nice glad to see you were able to get mounts I guess the ones i mailed to you are lost for ever thanks to Canada post !! I wish i was at this point in my build, matt it looks like she is ready to go in ???
IP: Logged
02:18 PM
mattman134 Member
Posts: 643 From: Buford, Ohio Registered: Dec 2009
Everything on the cradle is complete. All I am waiting for now are the coilovers and the brake booster vacuum line from WCF. Then, there will be nothing left to do to the cradle. I am beginning work on the front suspension as we speak. My car is originally a 4spd, but I will be converting to auto. I will be replacing the driver side coolant tube due to a pinhole leak, and I will be putting on the factory trans cooler lines from my other parts car. Turns out the 5/16" fiero lines are plenty enough to cool the 4t65e-hd, especially with a shift kit installed. Shift Kit=less slippage=less friction=less heat. I will also be running an auxiliary trans cooler for a motorhome, which dissipates 22,000BTU.
Matt
IP: Logged
03:32 PM
Feb 23rd, 2011
mattman134 Member
Posts: 643 From: Buford, Ohio Registered: Dec 2009
I got the engine out on February 18th, and it turned out to be a lot easier than I thought.
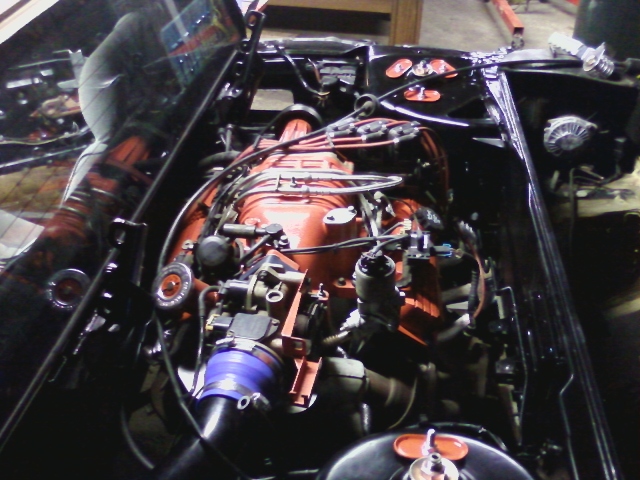
PFF customary Engine Bay shot:
I have been doing a little bodywork on the side getting it ready for paint.
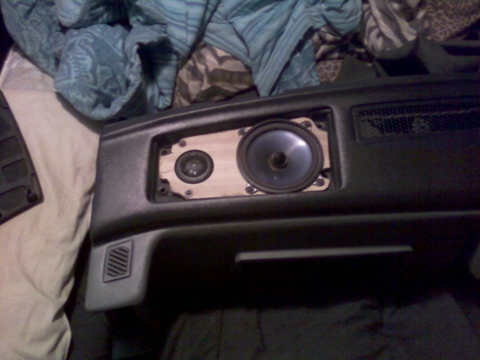
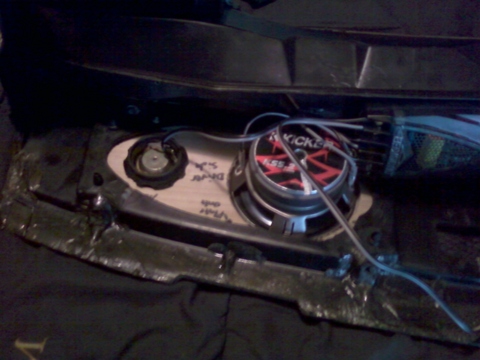
Installed Kicker 5.25 component speaker system with crossovers in the dash, using fierosound's speaker plate design:
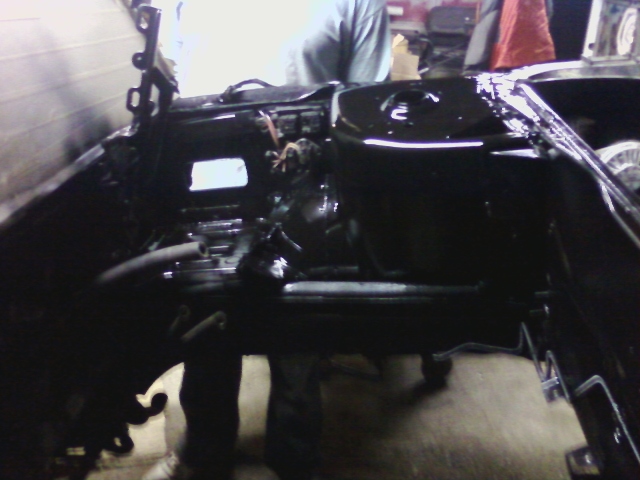
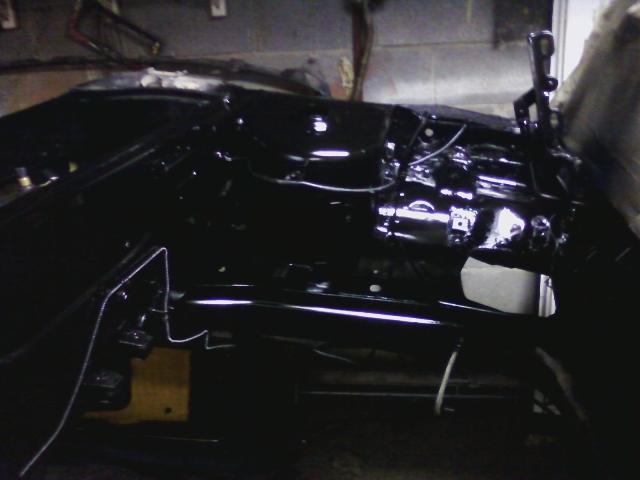
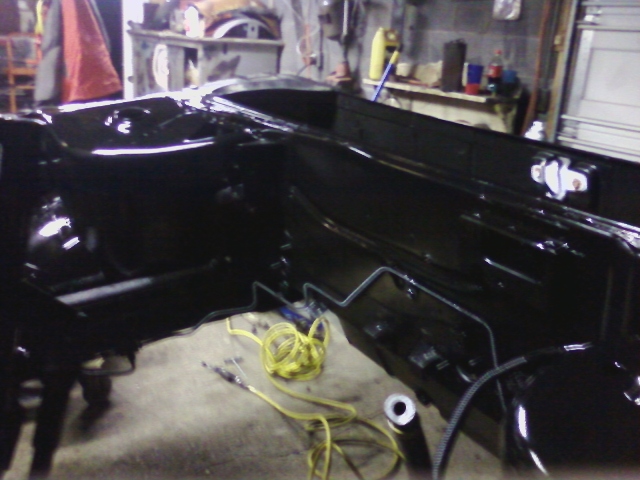
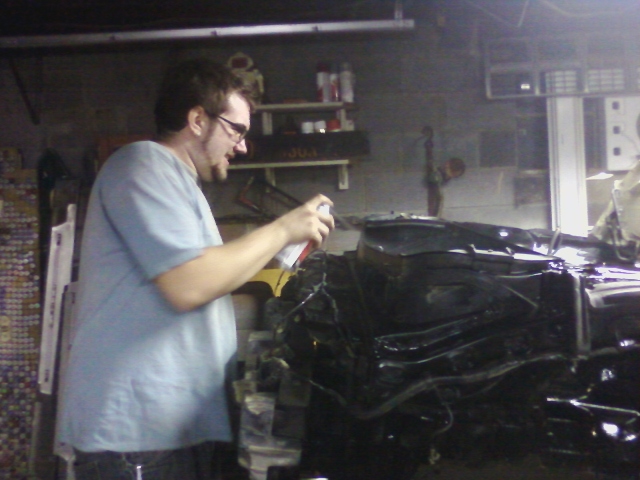
I sanded down and painted the engine bay, and the frame/trunk: I filled in the rust holes with polyester body filler:
My friend Will helping out:
Installed braided fuel lines from MulletProofMonk:
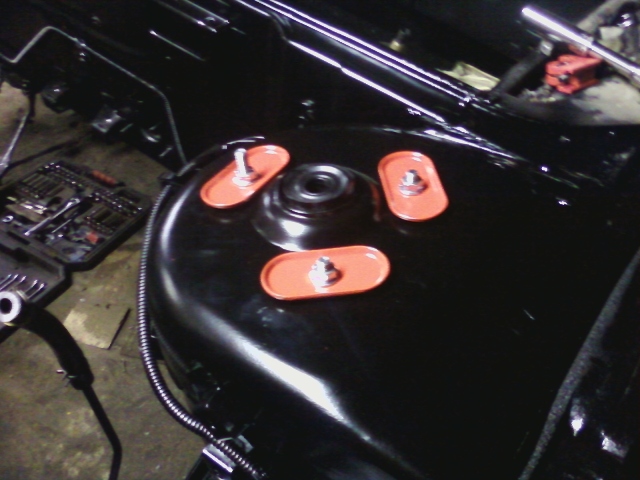
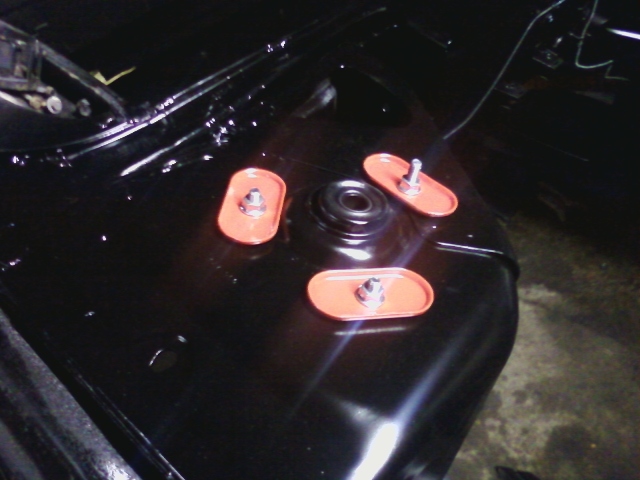
I installed West Coast coilover spring retainers, with new strut plates. I turned the strut plates upside down, and ground down one side to make it fit. Then I painted the stiffener plates to match the supercharger and valve covers:
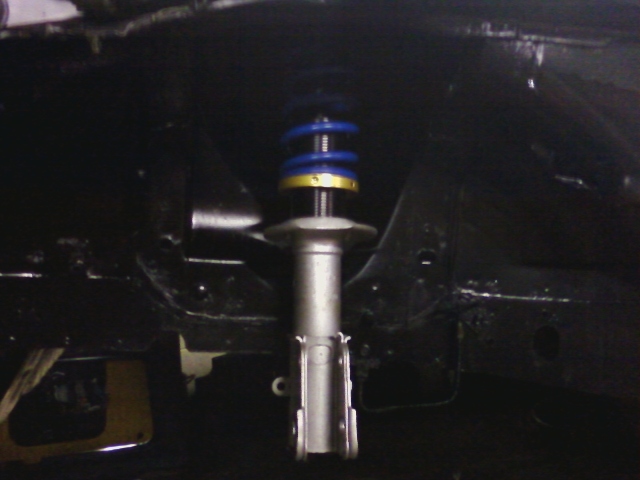
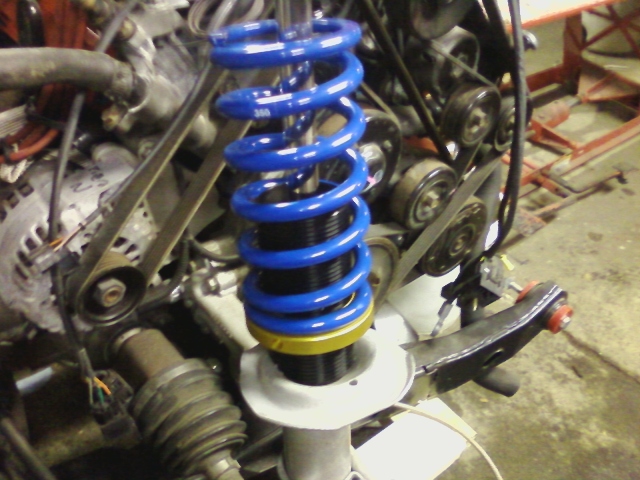
Then I got my new West Coast Fiero Blue Coils installed:
I took the WCF Shifter adapter back off and painted it. I polished and clearcoated the aluminum bracket as well:
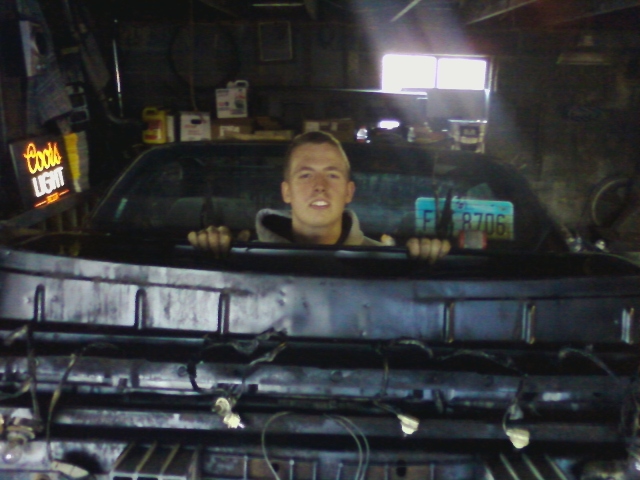
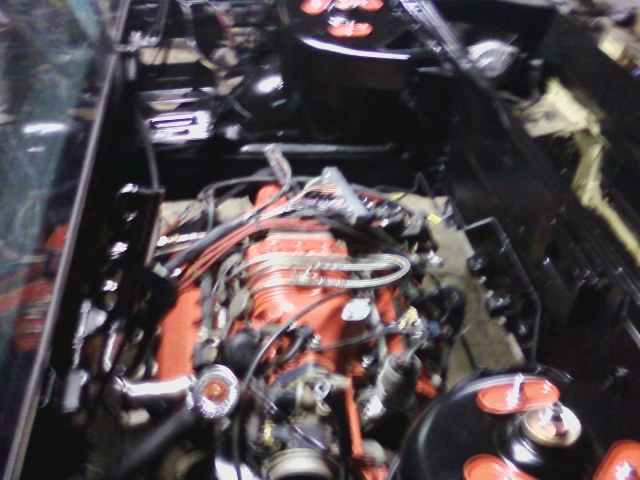
Putting the motor in: Closer... Bolted in: INSTALLED!!!
Now I just need to connect all the lines/wiring/cables/etc and fire it up.
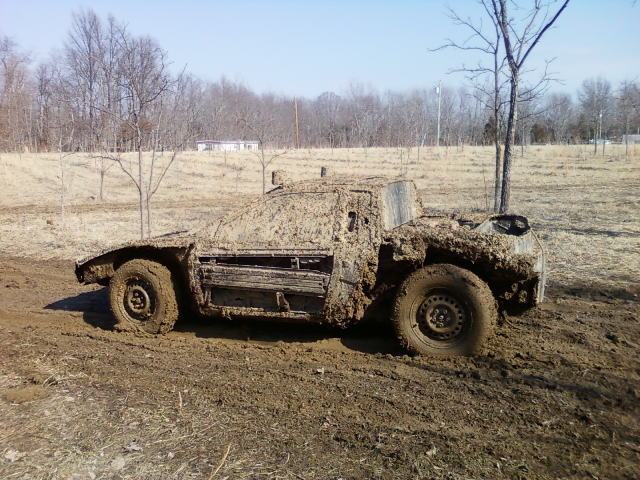
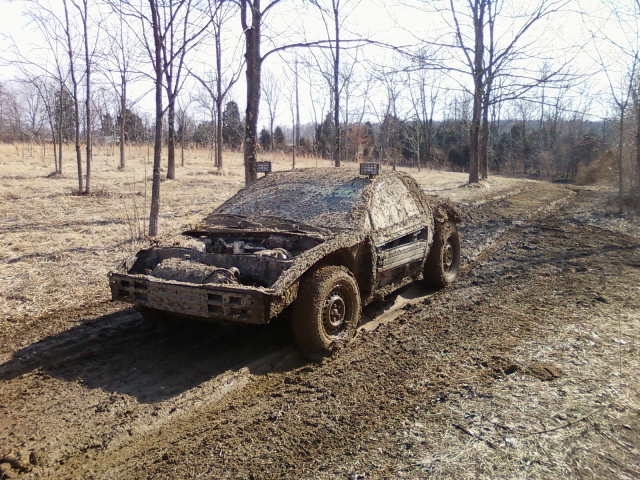
After I got this done, I took a ride in sloppy soup mud with the Fiero buggy. It has studded snow tires and it goes ANYWHERE.
Thats it for now. More updates to come shortly...
[This message has been edited by mattman134 (edited 02-23-2011).]
So here is the latest update since February on my build:
*****ENGINE/TRANSMISSION*****
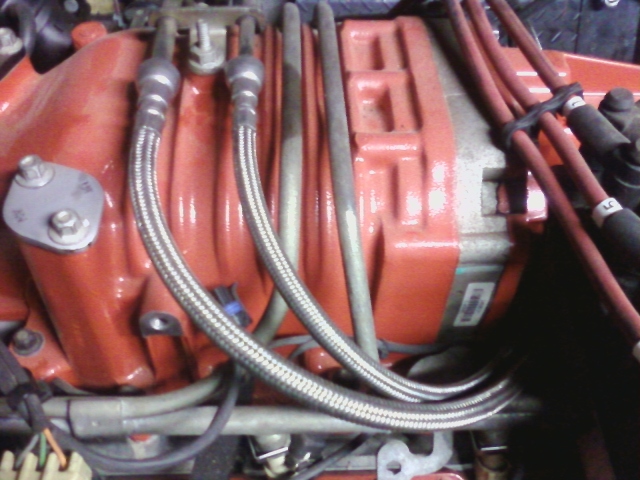
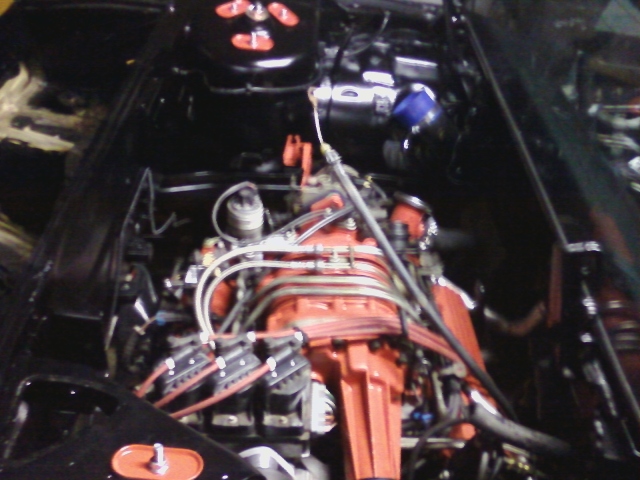
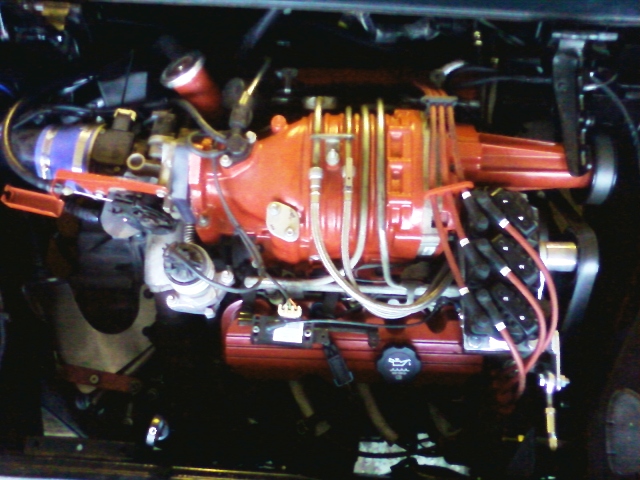
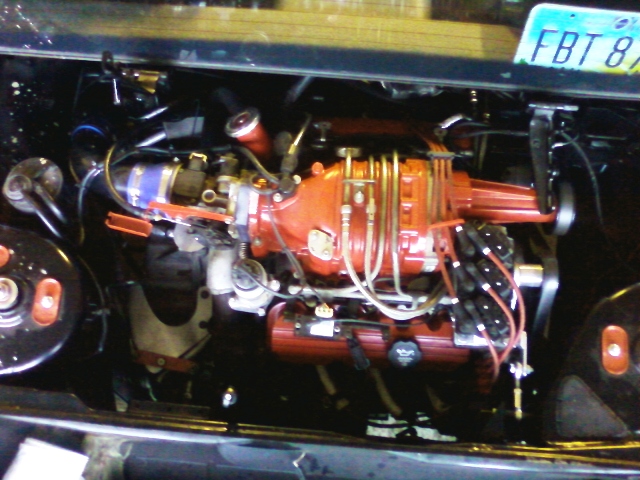
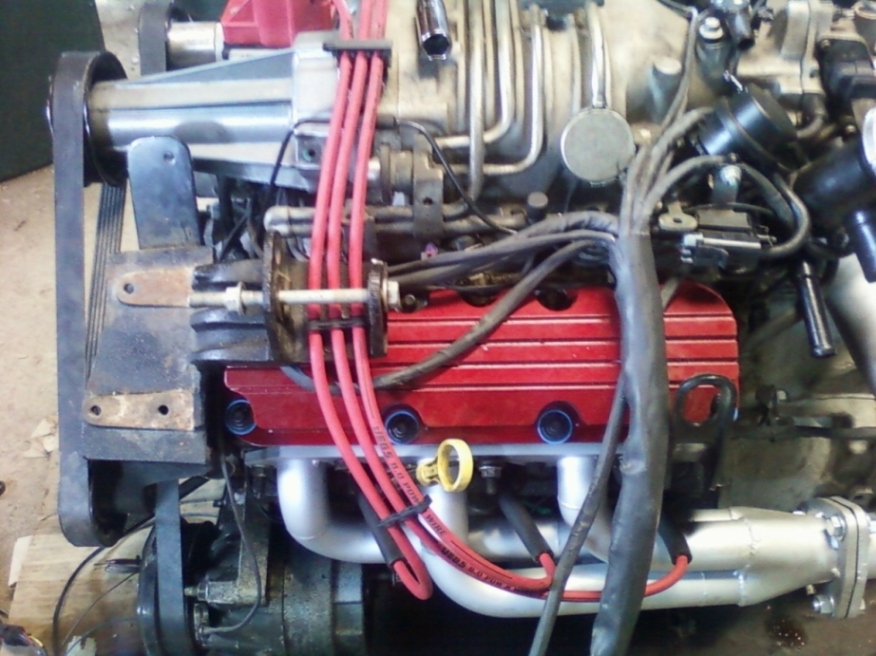
I connected all the wiring, hoses, lines etc. and it would not start. I traced it down to a bad crankshaft position sensor, which happen to go bad on 3800s. I replaced the sensor... and IT RUNS!!!!! It runs quite well actually. I am getting a Coolant fan control circuit 1 code (even though the fan turns on), and a System Lean (Bank 1) code. I will figure it all out later. Final Engine Pics: Engine Installed Ignition Coil/Wires Braided Fuel Lines Exhaust Dogbone Mount I made using 3/8" Spherical Rod Ends from Grainger. They are rated to 3100 lbs. :O I finally figured out how to modify A/C lines to work. I just bent the stock V6 lines intil they fit. Works great. I had to get special adapter washers. Now, I need to replace the control valve in the compressor, because it is leaking. (Common on the V5 compressors, happens all the time over on ClubGP)
*****SUSPENSION/BRAKES*****
I got a chance to work on the front suspension also.
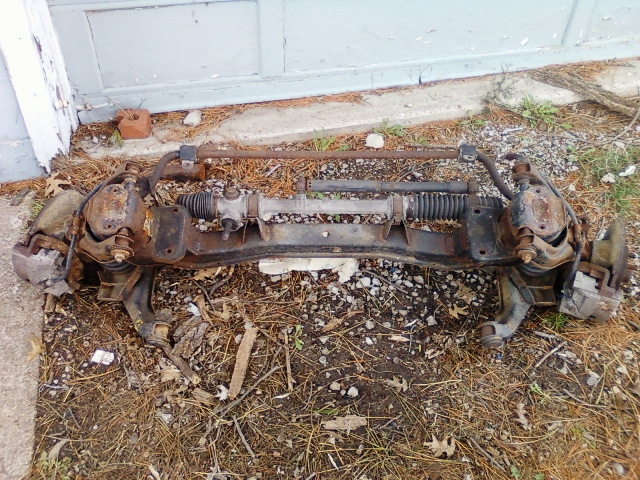
I got the old suspension out of the car:
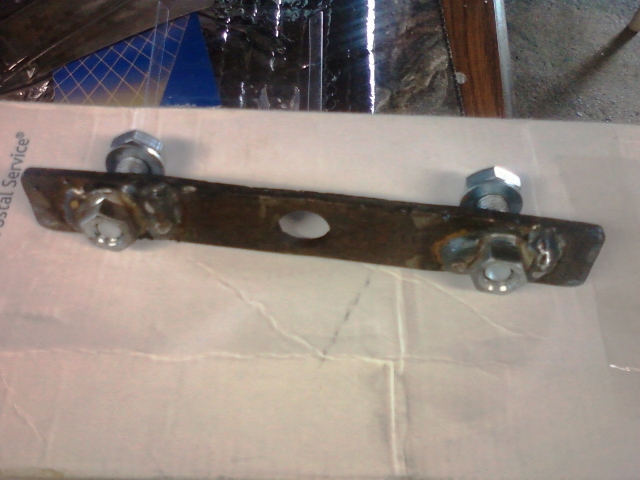
And when I did, I SNAPPED OFF the two lower bolts that hold the crossmember IN the frame!!! So I had to CUT into the side of the frame rail to extract this bar. , that had stamped "nuts" on it. I cut off the stamped nuts so it was a flat piece of steel, then welded NEW M10x1.5 nuts to it:
Once that was done, I welded the nut bar back into the frame, and welded the flap shut again. I painted the metal where I welded.
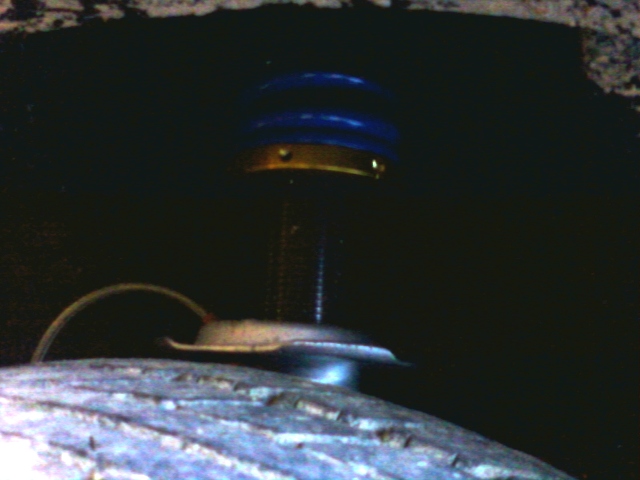
I put the new front crossmember/suspension that I got from MulletProofMonk into the car. I installed the WCF lowering springs as well (sorry for the poor pic) When I was in there, I put on the Fierostore Heavy-Duty front swaybar:
Once that was done, I lowered the car, took measurements, and adjusted the coilovers.
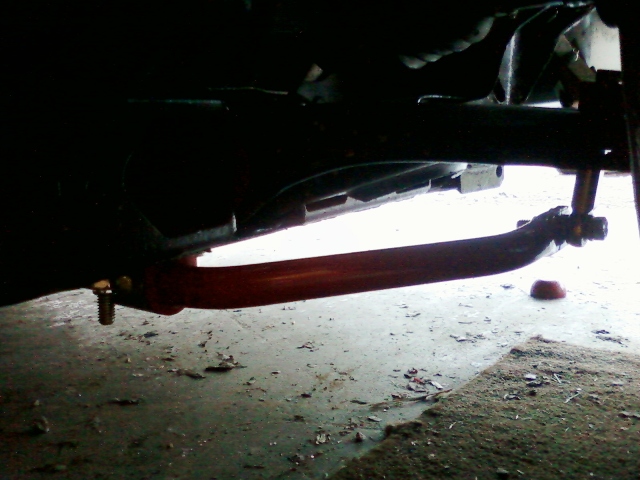
I then installed the Fierostore add-on rear swaybar.
I then bled the brakes. I found out that the Blazer MC I got from Advance Auto Parts may be bad, since it is leaking fluid out the back and down the front of the brake booster.
*****INTERIOR*****
I got my interior put back together. I installed a 2001 Pontiac Firebird radio/cd player, which was plug and play, with the exeption of the power wire for the performance sound. Everything works great! Even my performance sound works well.
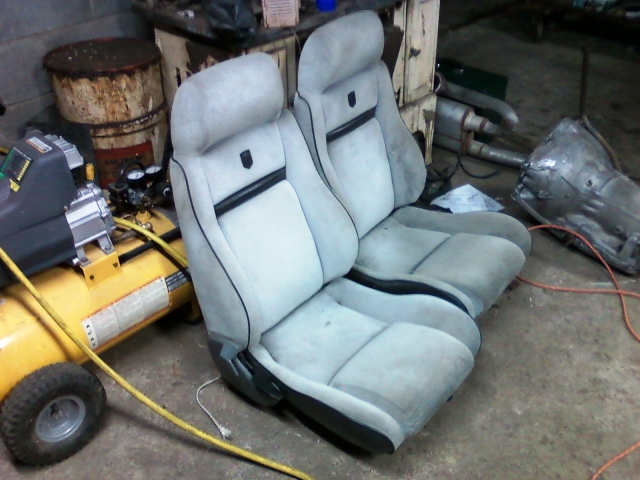
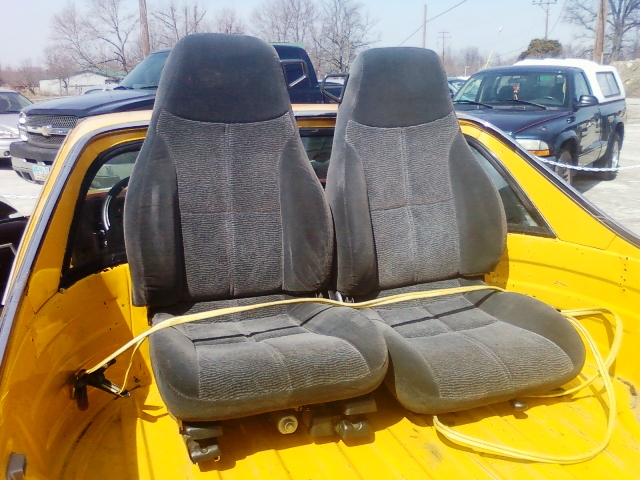
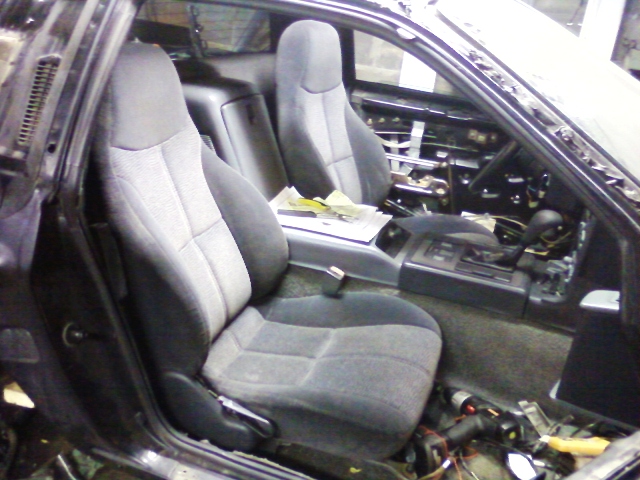
I decided to swap out the fiero seats with a pair of 6-way power seats out of a 1996 camaro. They are charcoal colored, which matches the shift surround and the dash perfectly.
Old seats (*in excellent shape BTW)
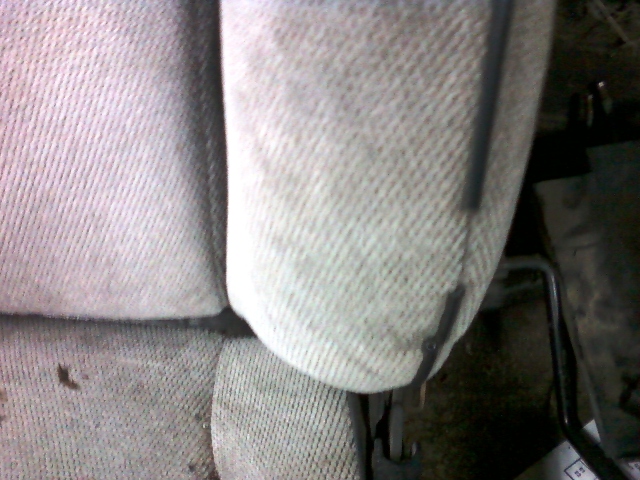
The only blemish on the old seats:
New power seats loaded up at the junkyard:
When I installed the new Firebird seats in the Fiero, the passenger seat was tilted forward too much. If felt like I was going to slide out of it, and my legs were straight out in front of me. I found out that the Firebird has a hump in the floor for the catalytic converter. So I bought some M8x1.25 x 1 1/2" long coupler nuts. I threaded the nuts onto the floor studs, put the seat on top, and used bolts to hold it down. Works like a charm: INSTALLED!
*****BODY/PAINT*****
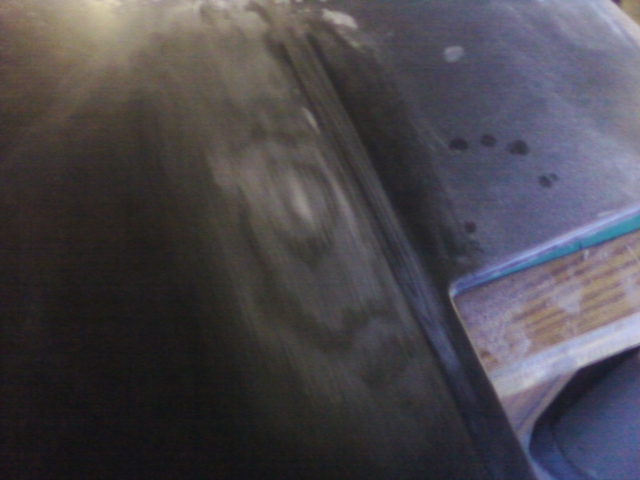
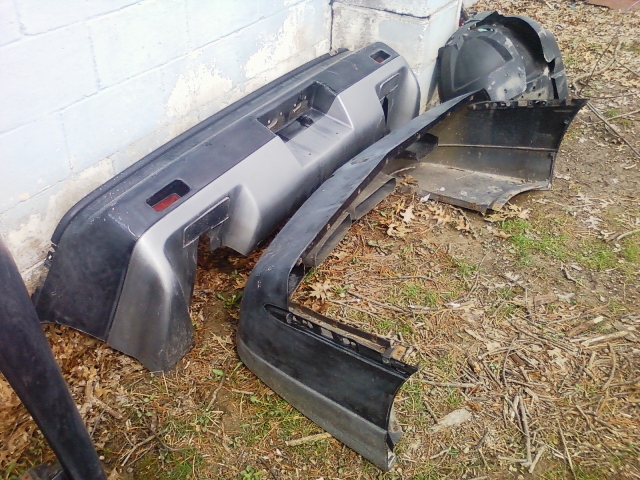
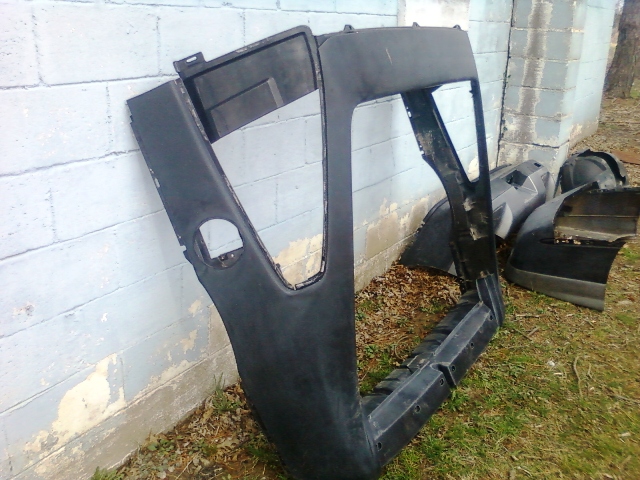
Now, the only thing I have left to do to get the car on the road is a new coat of paint!! Body panels prepped and ready for paint:


 I set the package down on cardboard on an old shop cart. I started taking the motor apart in order to get it up on the engine stand. I removed the exhaust, both belts, alternator, axles (Tranny fluid went everywhere) P/S pump(wont need it), A/C compressor, TB.
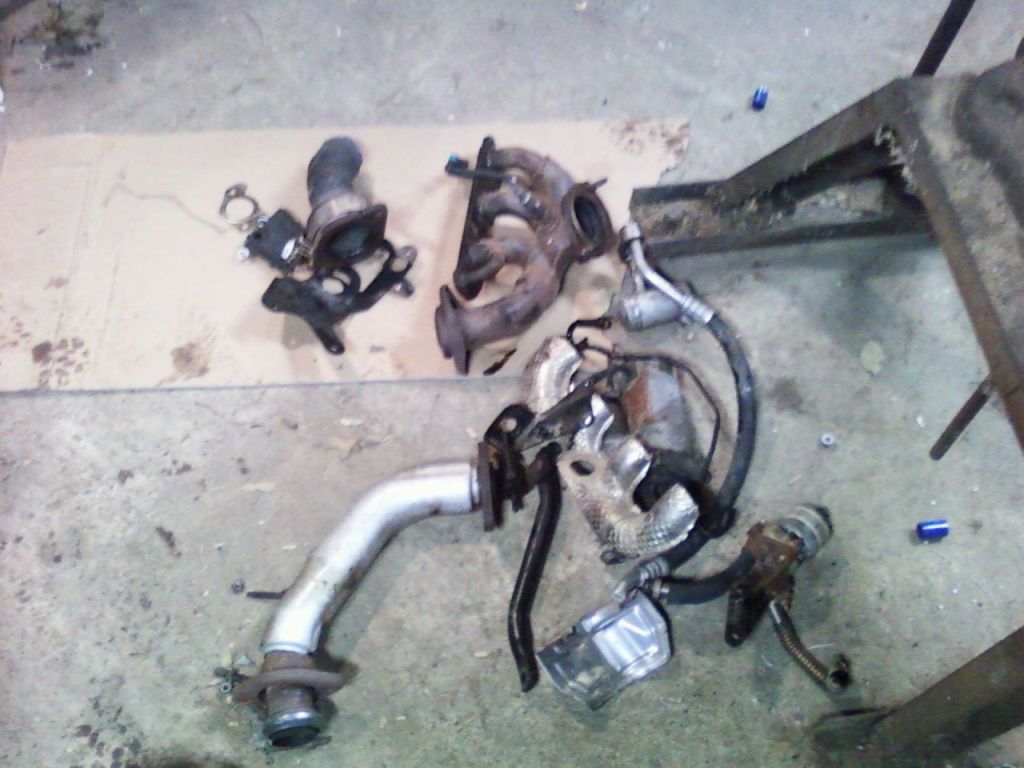

 Time for a new tranny.

 I was surprised at the quality of the harness also. GM Harnesses are big and bulky, but this harness was very thin, without all the extra tubing and tape. It was completely shrinkwrapped, and had all new wire from connector to conector. (No Splices) All wire and connectors are brand new. Overall best harness I have seen. Well worth 650$ I think. (I highly recommend Injection Technology for all your Fiero Swap needs.)


 Three coats each.
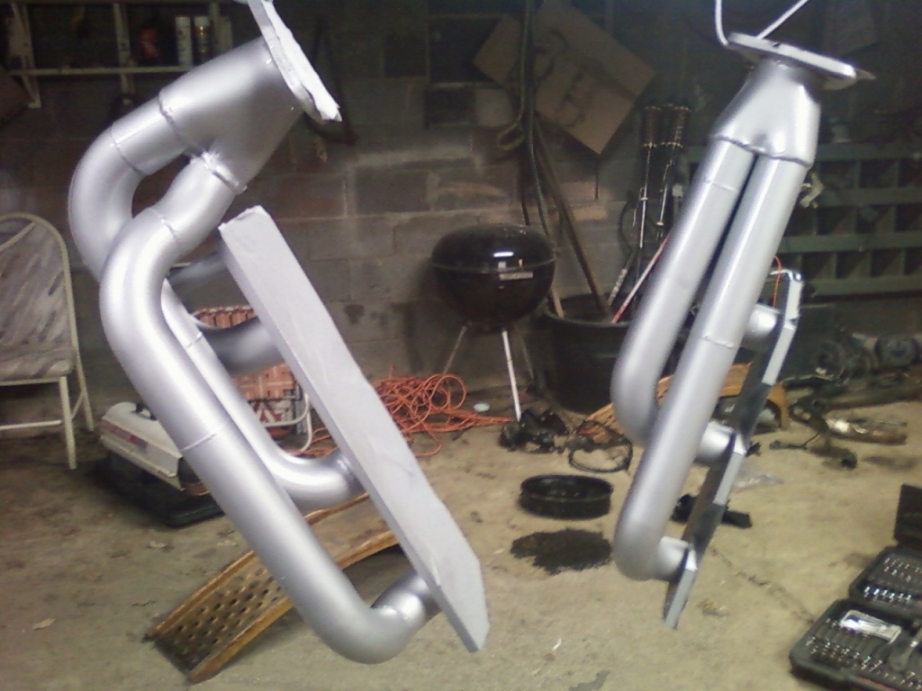


 I dont know if congress will pass the extension or not, so my first priority is saving as much money as possible. So, the engine is going to sit for awhile. All the work to the engine is done, so it is just a matter of putting it ito the Fiero. I am doing 15 credit hours at school, and with my UC running out, I wont have any money to work on the engine until probably summertime, so I guess I will post when I start working on the car again. Funny how things come up at precisely the wrong time...