Pennock's Fiero Forum Technical Discussion & Questions - Archive
Engine Removed from my 87GT today, prepping to install my 4.9 V8 5spd. Lots of Pics. (Page 3)
T H I S I S A N A R C H I V E D T O P I C
Engine Removed from my 87GT today, prepping to install my 4.9 V8 5spd. Lots of Pics.
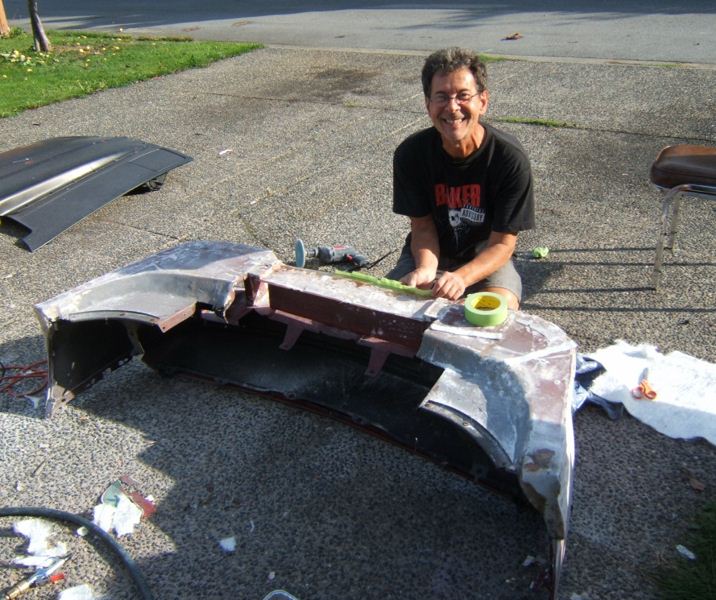
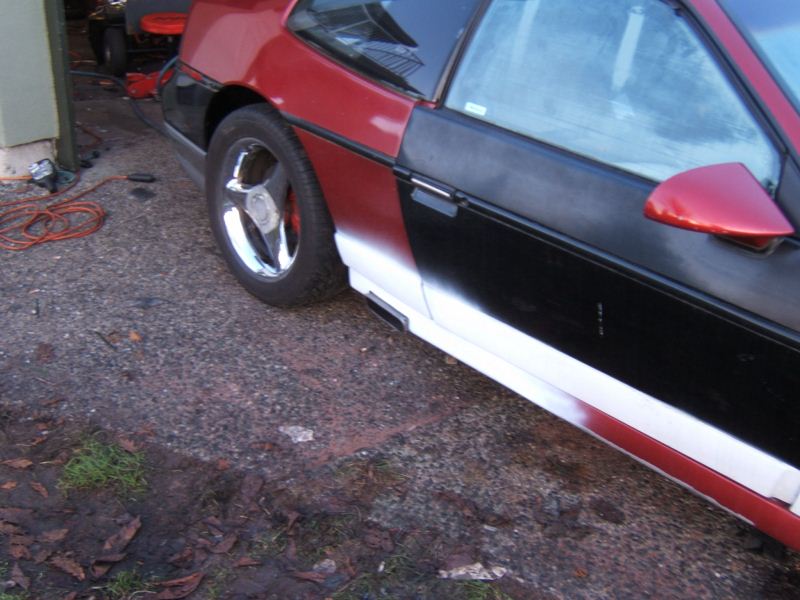
I've never seen that nose before, but I love it! Where can I get one? Was it moulded into an '87-'88 nose, or does it replace all noses? Urethane or fiberglass? Thanks!
IP: Logged
08:28 AM
Capt Fiero Member
Posts: 7658 From: British Columbia, Canada Registered: Feb 2000
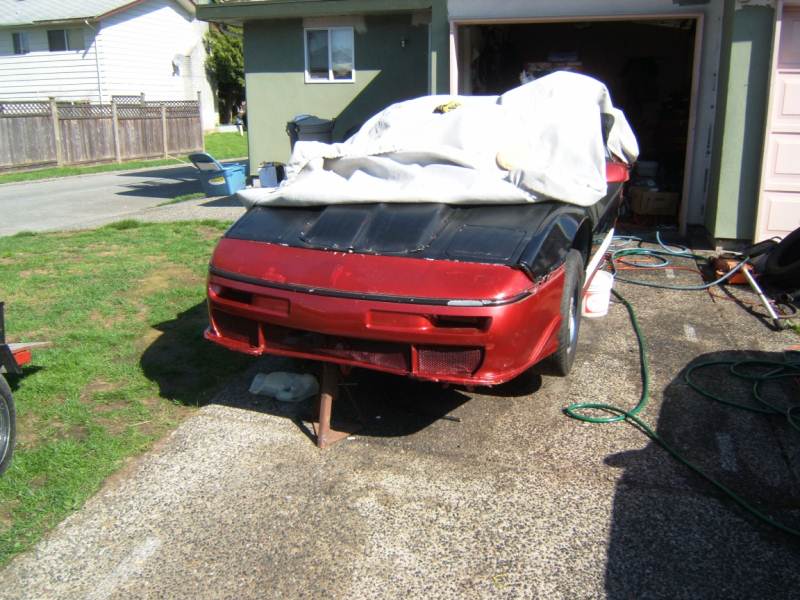
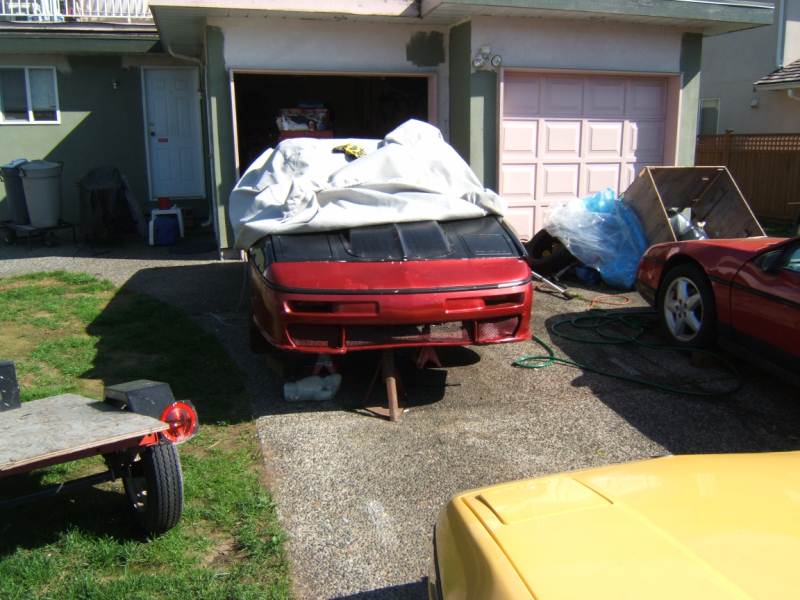
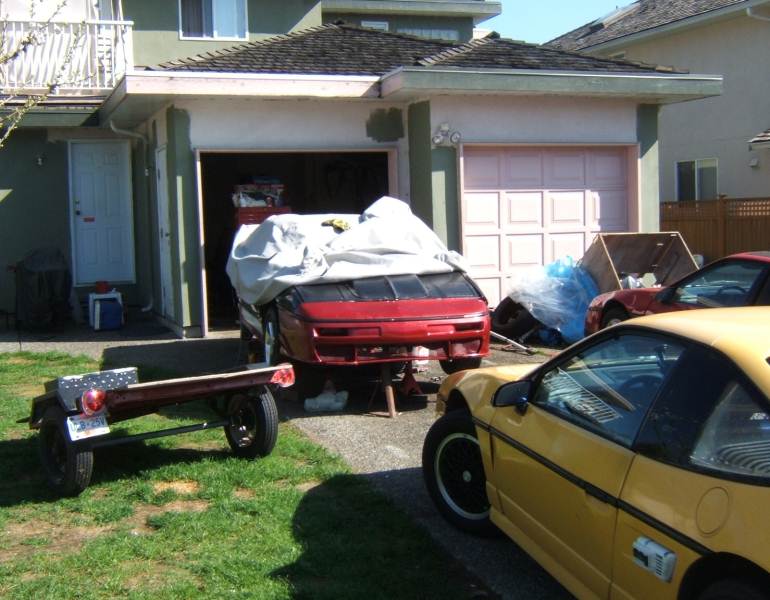
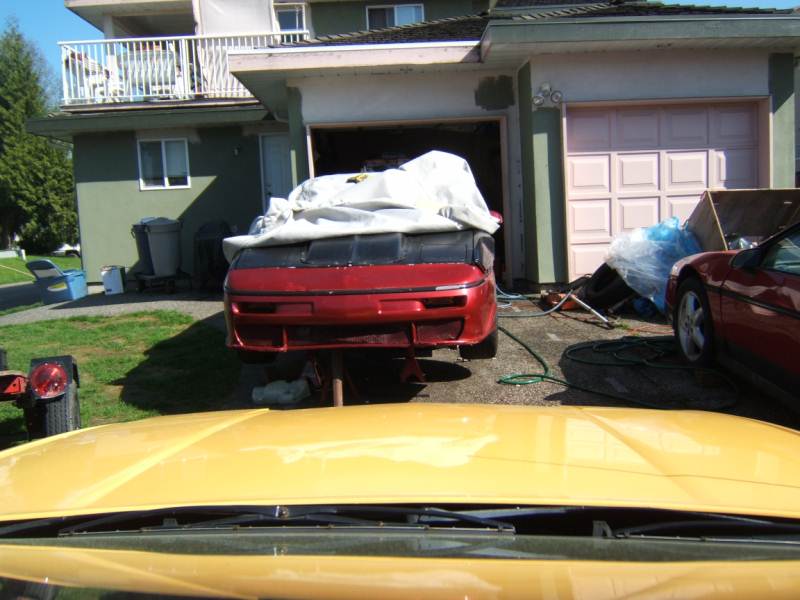
Its a one off, custom nose. Its built on an 87 Coupe nose. The add on area, is a mix of some type of foam with fiberglass over it. Its my understanding it was 2 owners previous to me getting the car that made the nose. I am still in Oregon on vacation, but when I get back, I'll be doing a lot of work to the nose to get it in shape for painting. I can't wait to start playing with my new paint guns.
------------------ 85GT Soon to be 87GT,93 Eldorado 4.9, 5spd Dual O2 Custom Chip, Custom Exhaust. MSD Everything Capt Fiero --- My Over View Cadero Pics Yellow 88GT 5spd Full Poly Suspension, Lowered 1/2" in front, Corner Carver.
IP: Logged
09:35 AM
Mar 27th, 2009
Capt Fiero Member
Posts: 7658 From: British Columbia, Canada Registered: Feb 2000
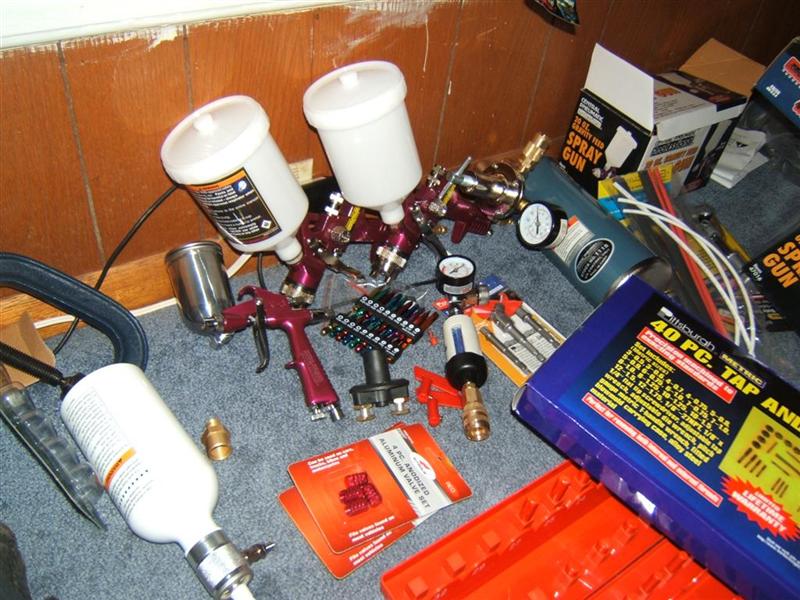
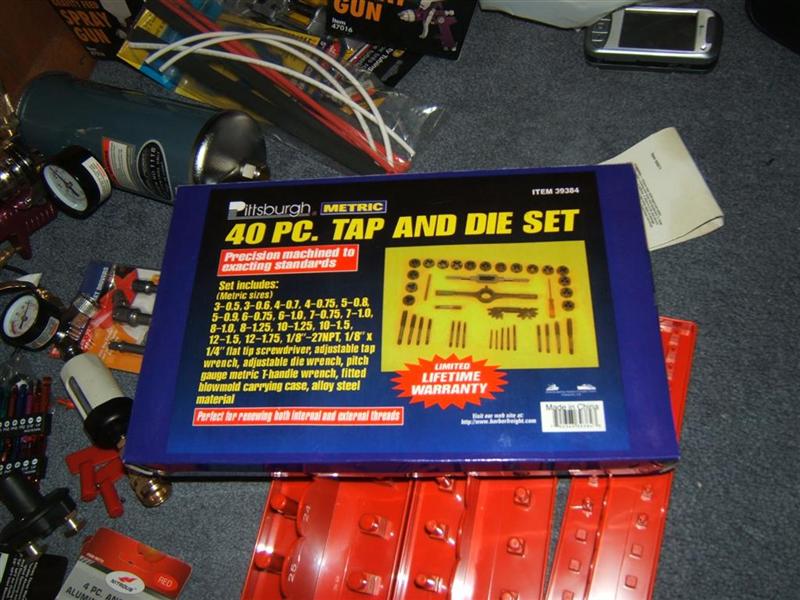
Well we made our 4th or 5th run to Harbour Freight today. Got a big bench vice, a full set of Metric Tap and Dies and smaller "Touch Up" paint gun. I am going to visit a Fiero owner in Astoria on Friday and hopefully pick up some tips on painting a Fiero. I'll be back in BC around April 5th, and will be able to get back to work on the Project 87GT V8. I can't believe how inexpensive some tools are down here.
IP: Logged
12:33 AM
Tony Kania Member
Posts: 20794 From: The Inland Northwest Registered: Dec 2008
Harbor Freight rocks! I too love that store. I can go in there just to walk around. I went yesterday myself. Spent only $11.38, but probably because I have already bought everything of value already. Did you get the magnetic vice guards? They are great for not maring up materials. They come with a pink eraser like material on the gripper side. I bet that you didn't. Now you will have to make a 7th trip there. He, he, he.
IP: Logged
10:26 AM
Mar 29th, 2009
Capt Fiero Member
Posts: 7658 From: British Columbia, Canada Registered: Feb 2000
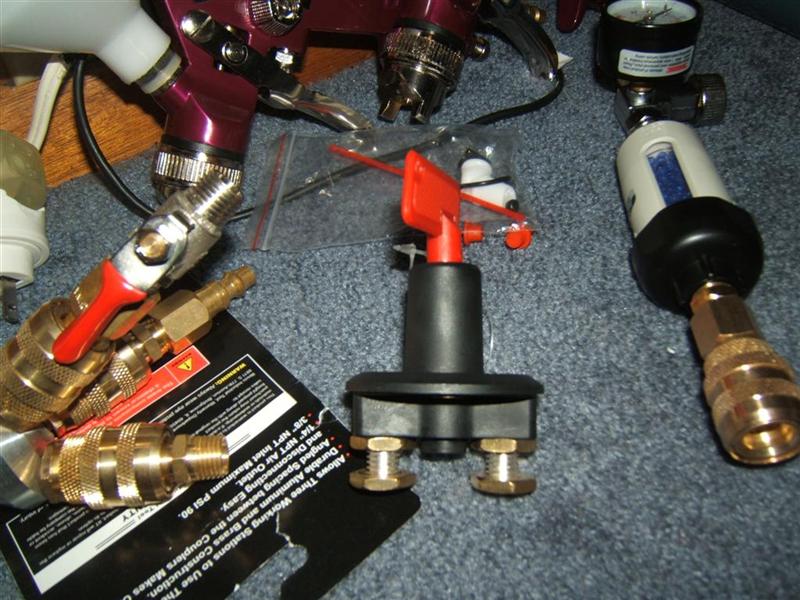
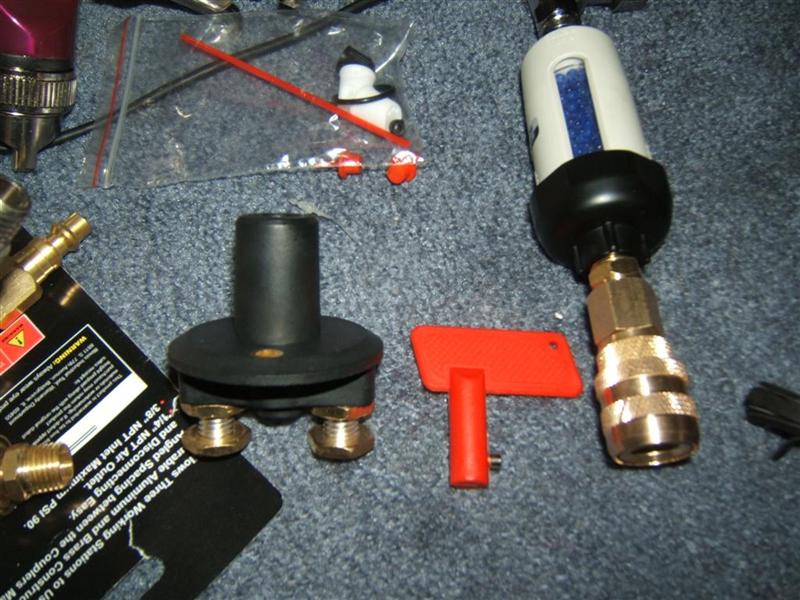
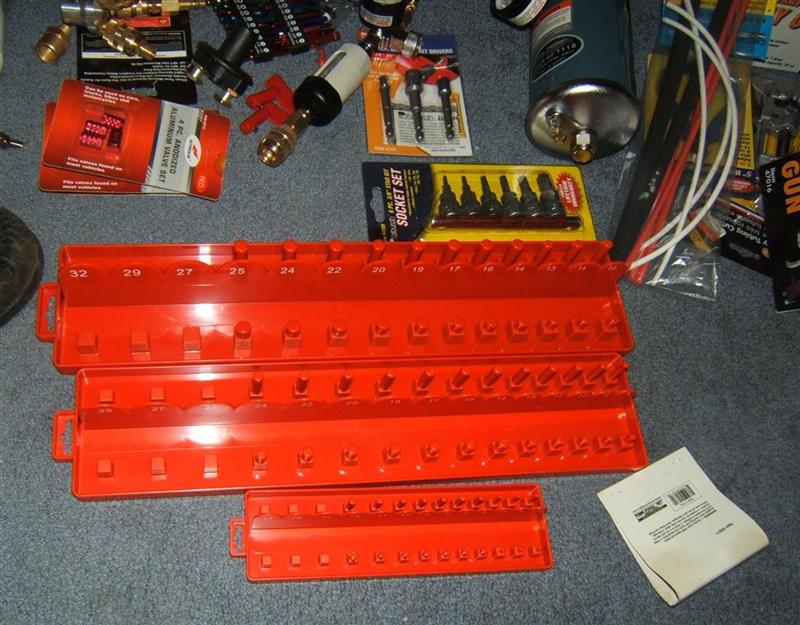
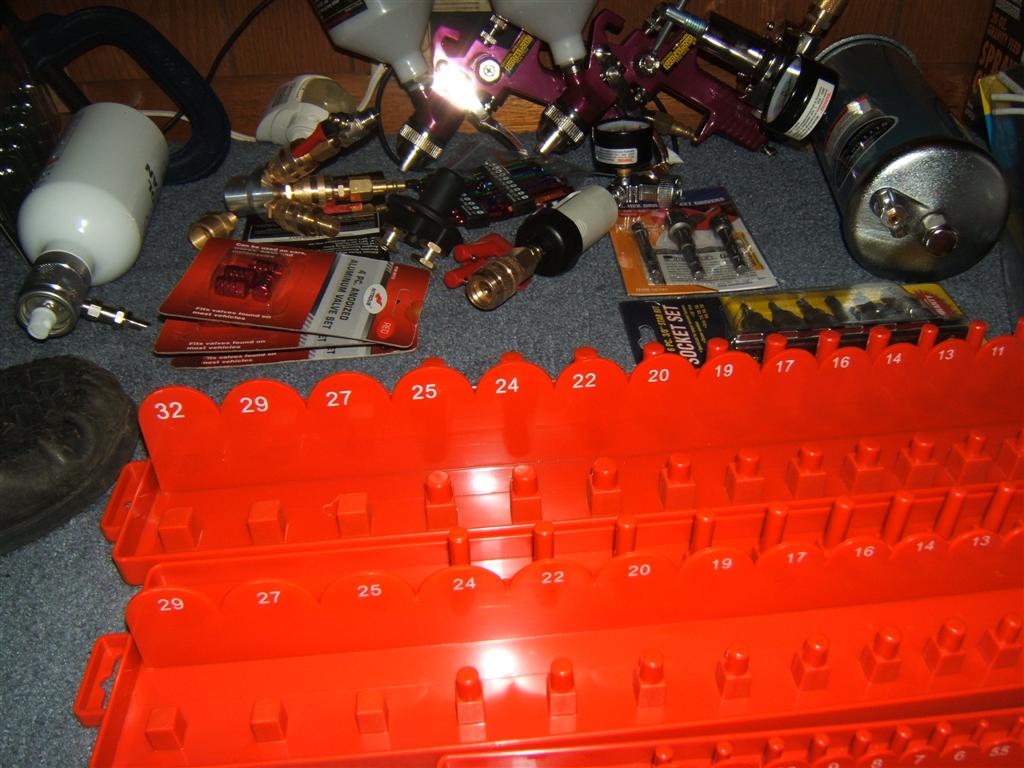
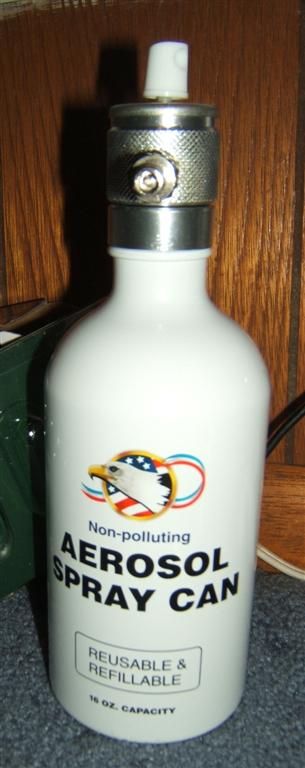
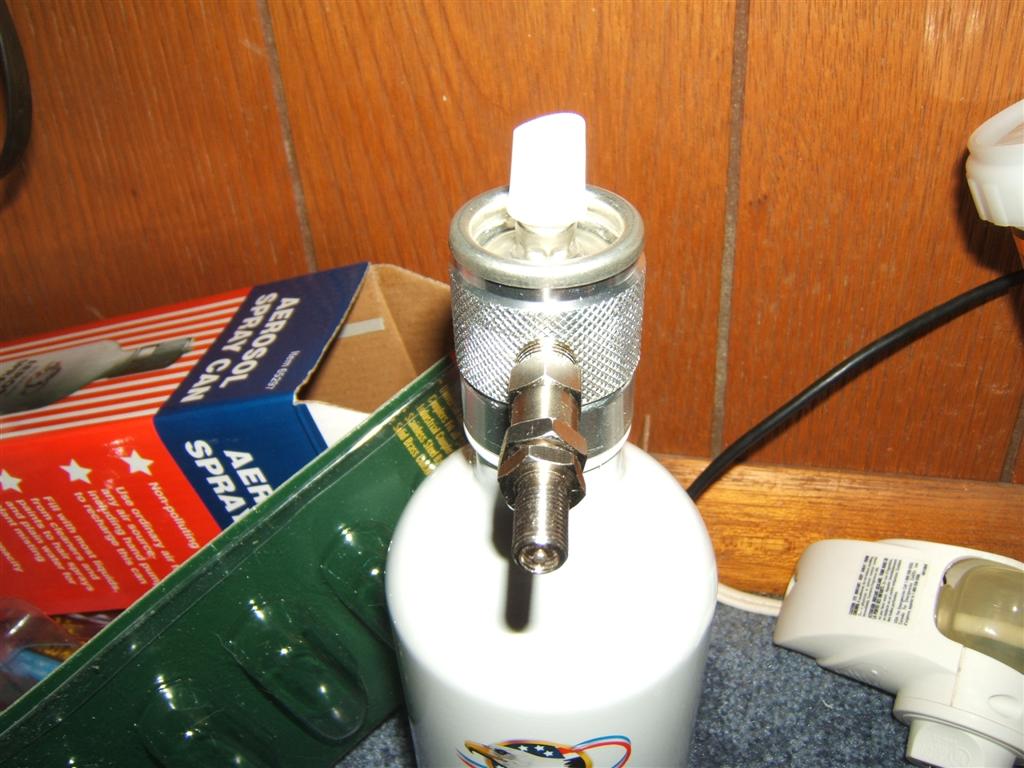
So we went back again today, and I tried to remember what the part was you mentioned. LOL. I had to go back to buy 4 Female 1/4 npt adapters with Male Quick Connectors on them, and found a really cool, battery cut off switch, that comes with removable keys, so you can turn off the battery then remove the red key and take it with you. An Aerosol can that comes apart to add liquid and then has a schrader valve that you can pressurize with a compressor and re-use over and over again. Another nicer C-Clamp for compressing brake calipers and another set of colour coated screw driver bits. I still have to go out to a different store to find some 1/2" NPT fittings for the larger dryer I bought. (all my fittings are 1/4 npt or 3/8 npt)
My father is also giving me a spare Waterloo Top and Bottom Box, so I'll be filling the tool box up, then strapping it to the trailer deck. I have already measured it all out, and with some tweaking, I should be able to turn the top box sideways and lay the bottom box on its back, and only end up with out 8" of overhang off the rear of the trailer deck. I'll have to make sure and load the hell out of the front storage box in order to keep the tongue weight as high as possible.
Between all the stuff Lisa and I have bought and or picked up down here, I did a rough guess on the weight of it all combined and there is over 1100lbs of tools and luggage that will be in the car or on the trailer.
------------------ 85GT Soon to be 87GT,93 Eldorado 4.9, 5spd Dual O2 Custom Chip, Custom Exhaust. MSD Everything Capt Fiero --- My Over View Cadero Pics Yellow 88GT 5spd Full Poly Suspension, Lowered 1/2" in front, Corner Carver.
IP: Logged
12:41 AM
Tony Kania Member
Posts: 20794 From: The Inland Northwest Registered: Dec 2008
You mean one of these? I put this in last week. I found this spot on the battery surround to be easy and accessable. The D clip goes on my key ring to disable the starter. There is still power to the accesories when wired up this way. If I plan on leaving my Fiero to go into a store or whatnot, I just pop the trunk and remove red key. Piece of mind is valuable when there are thieves on the prowl.
IP: Logged
11:25 AM
Mar 30th, 2009
Capt Fiero Member
Posts: 7658 From: British Columbia, Canada Registered: Feb 2000
LOL, yep I got the exact same one. It will be perfect to have it installed in the front compartment remote battery mount. Well is one of the piles of stuff I have picked up.
We did go back yesterday and looked around, I tried to go back today but ran late and they were already closed.
Battery Disconnect. Key in
Key Out
Paint Guns, 2 larger runs and 1 detail gun.
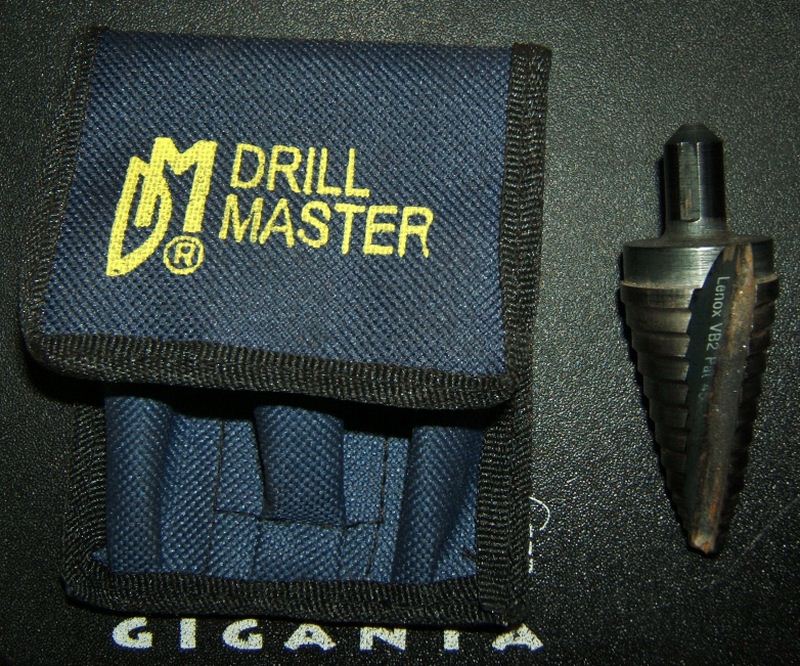
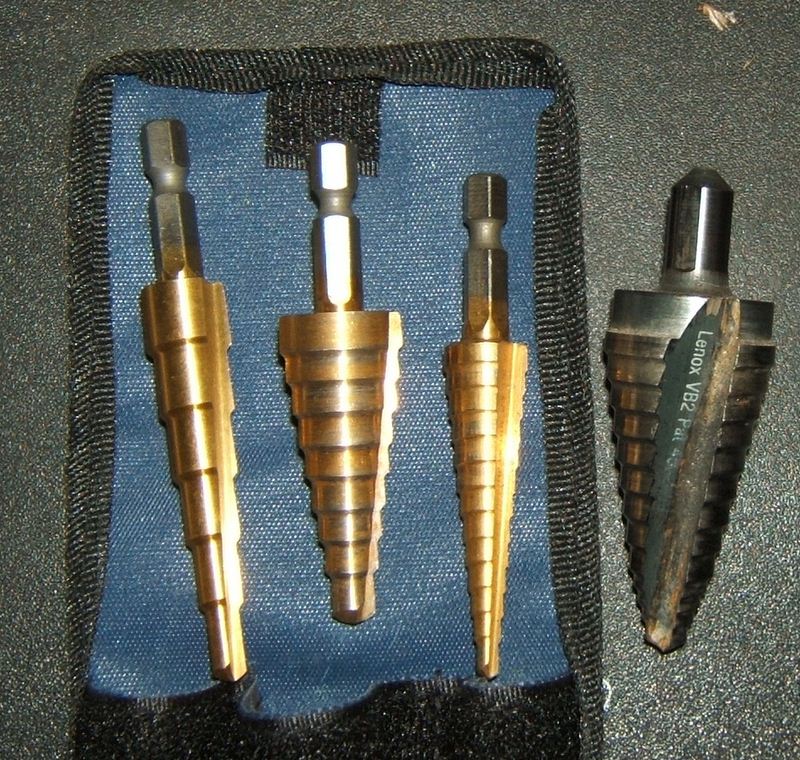
Finally a Tap and Die kit. Until know I have just taken a good bolt with grease on it and fired it in with my air impact gun and hope that the bolt is stronger than the threads I am trying to repair. So this will come in really handy.
Socket Trays
Re-usable Spray can. Fill it with anything charge it up to 90psi with an Air compressor and you are good to go.
------------------ 85GT Soon to be 87GT,93 Eldorado 4.9, 5spd Dual O2 Custom Chip, Custom Exhaust. MSD Everything Capt Fiero --- My Over View Cadero Pics Yellow 88GT 5spd Full Poly Suspension, Lowered 1/2" in front, Corner Carver.
IP: Logged
02:13 AM
Apr 8th, 2009
Capt Fiero Member
Posts: 7658 From: British Columbia, Canada Registered: Feb 2000
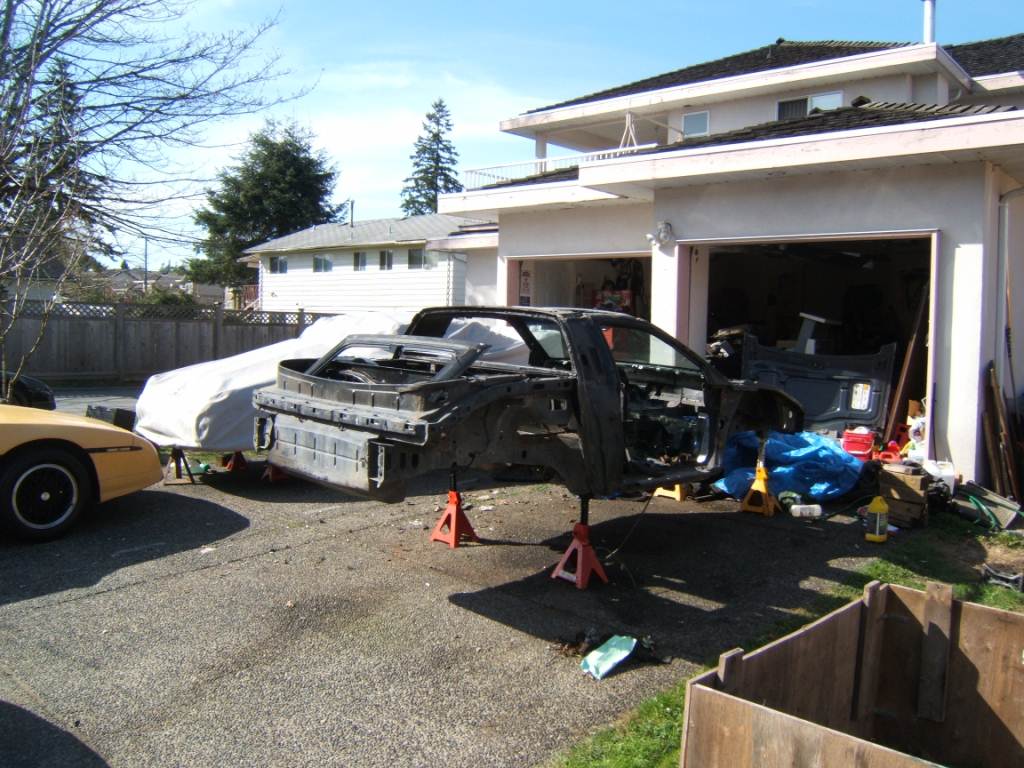
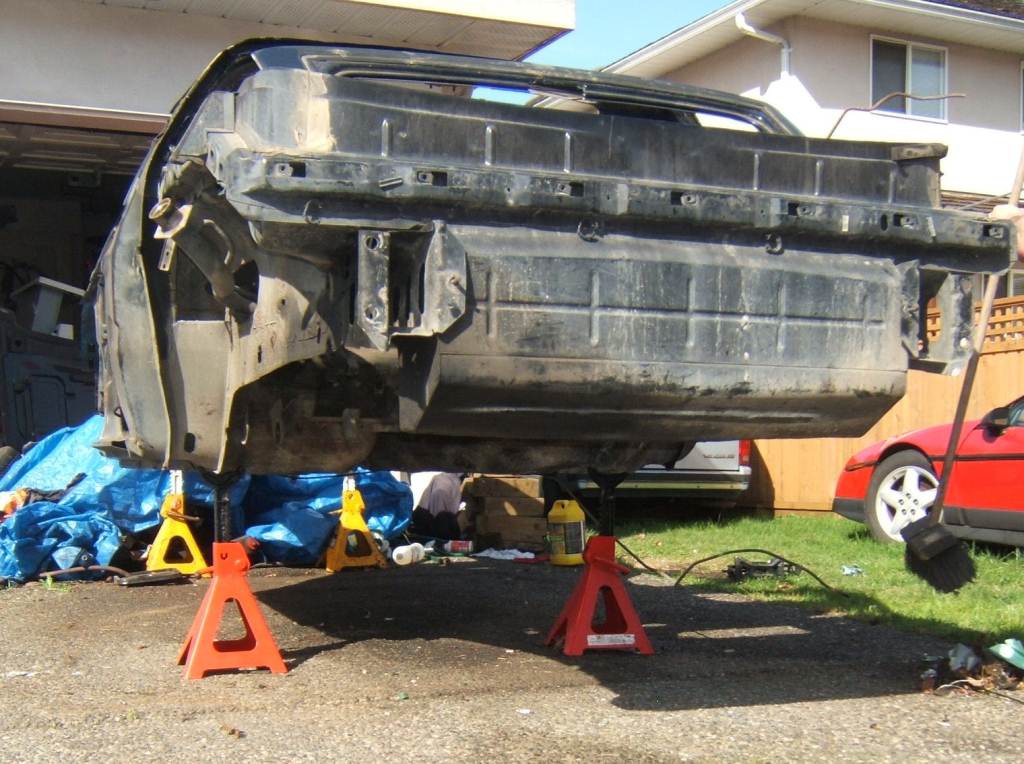
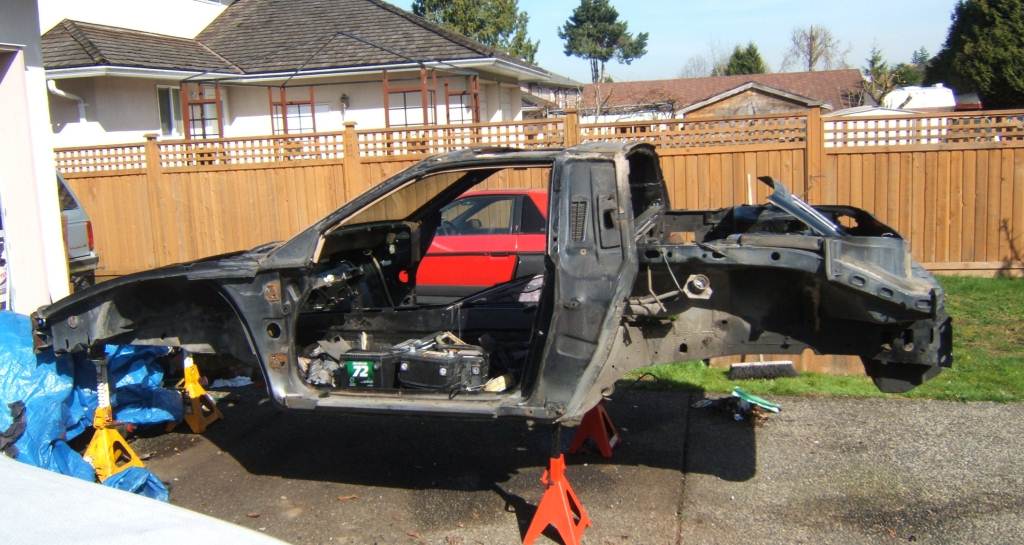
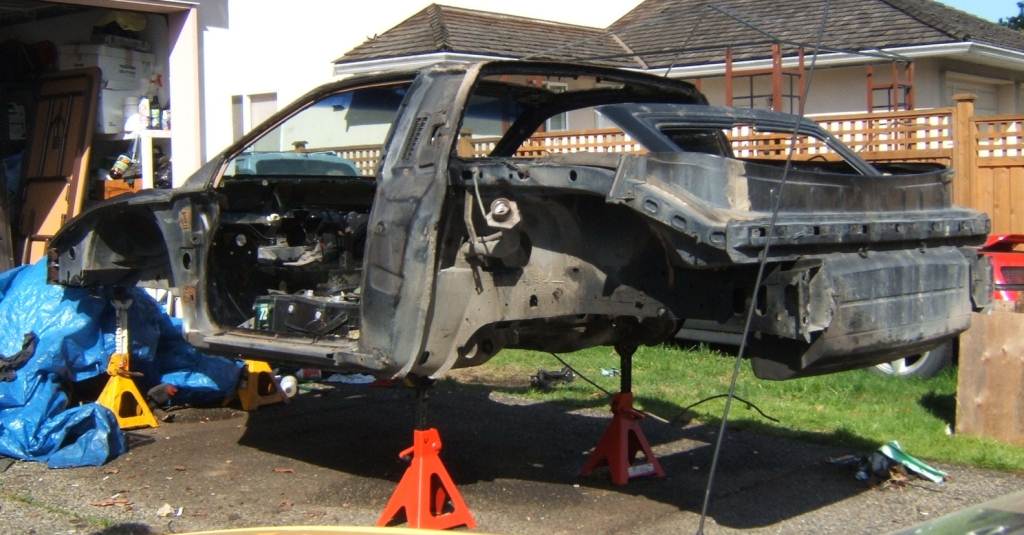
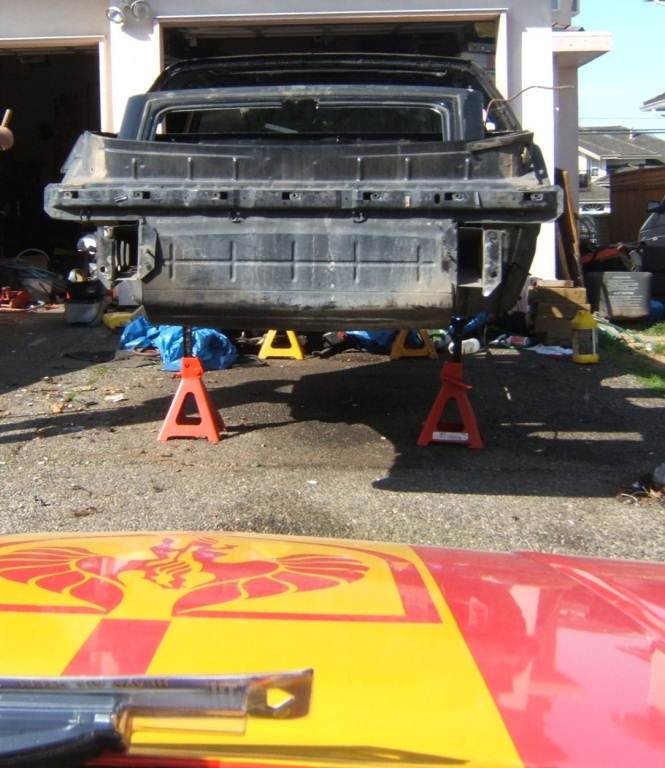
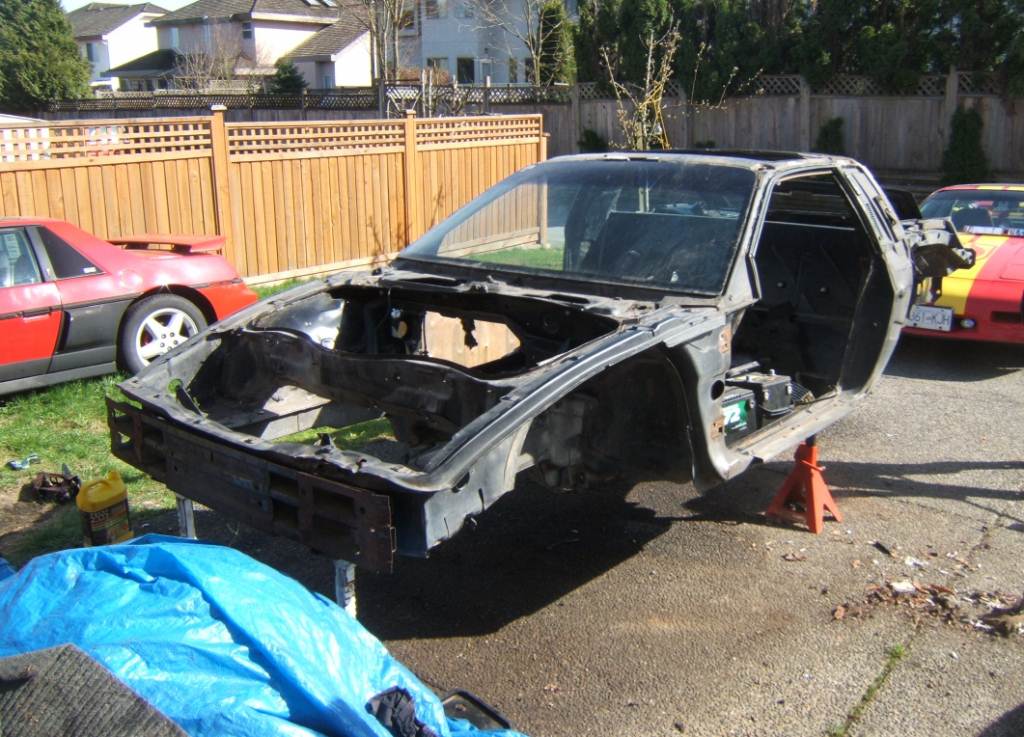
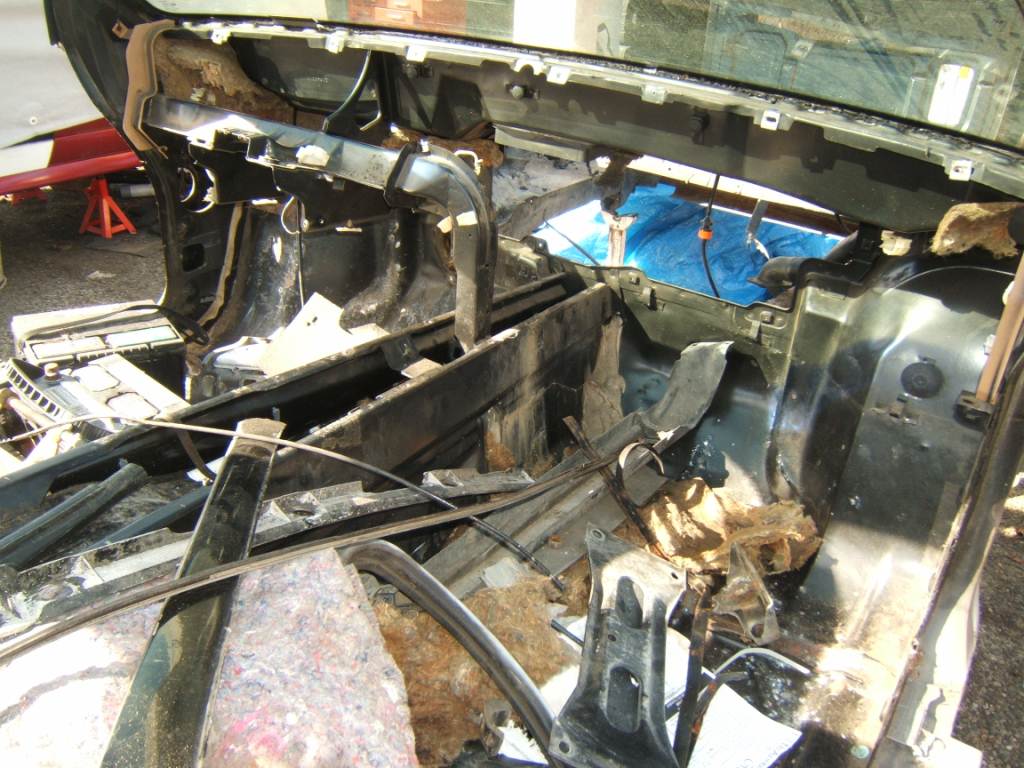
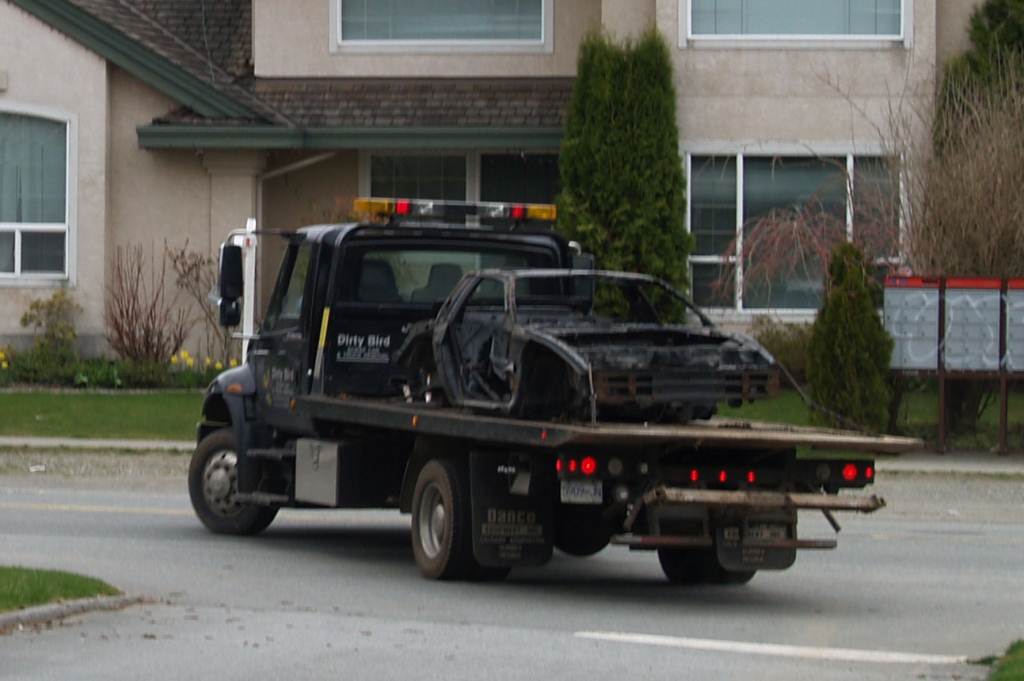
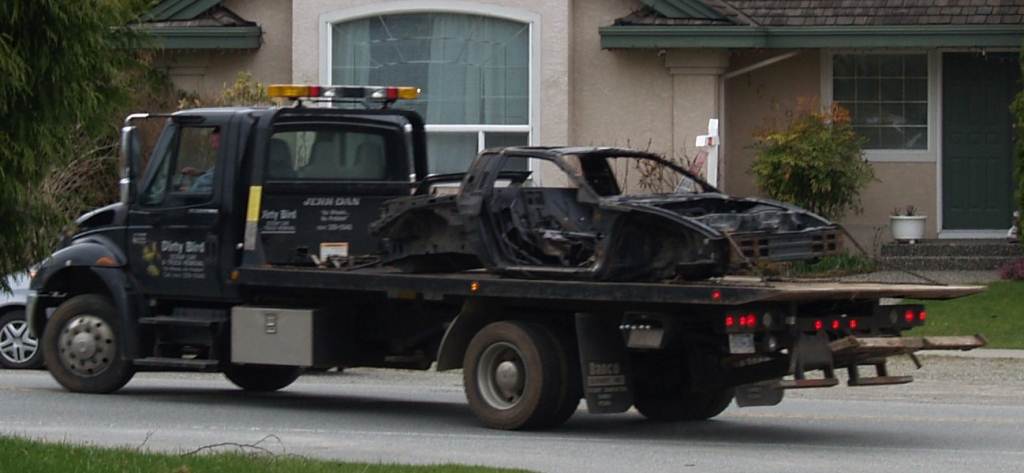
I am going to do a seperate thread later, but they took the last of my 85GT away today. I vowed to not let any Usable part remain on the car. The windshield was pulled out yesterday so it did not go either. Its an end of an Era.
------------------ 85GT Soon to be 87GT,93 Eldorado 4.9, 5spd Dual O2 Custom Chip, Custom Exhaust. MSD Everything Capt Fiero --- My Over View Cadero Pics Yellow 88GT 5spd Full Poly Suspension, Lowered 1/2" in front, Corner Carver.
IP: Logged
03:31 PM
Apr 23rd, 2009
Capt Fiero Member
Posts: 7658 From: British Columbia, Canada Registered: Feb 2000
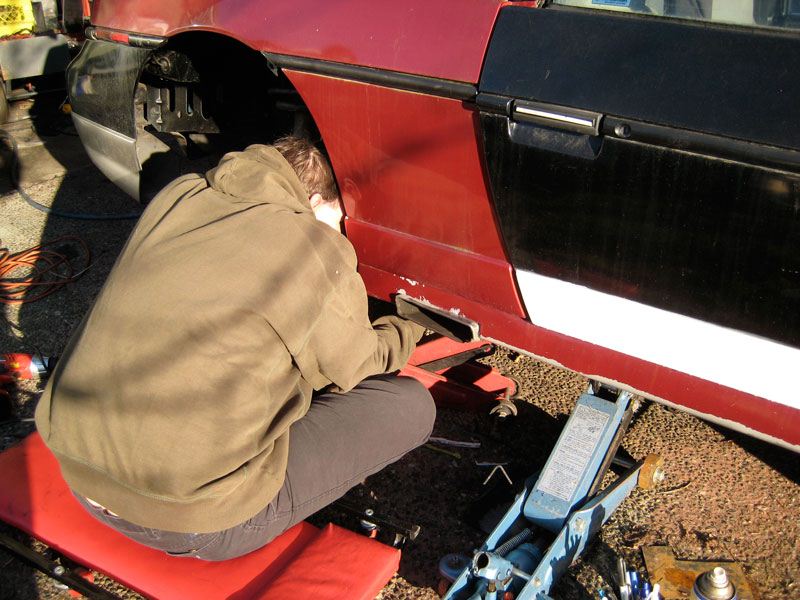
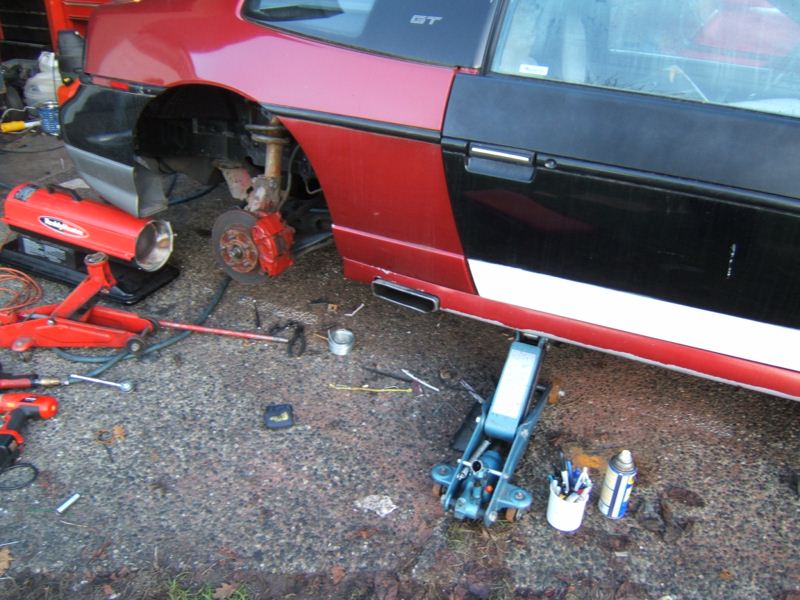
Ok I have spent the past week, cleaning the garage and have done very little to the project. I was at the point that I could spend 15 mins working on the car, then 45mins looking for the next part to go on the car. So I decided it was time to stop, clean up and gather the last of the needed parts. However in the bottom of one of my long forgotten boxes I found 2 cans of 87 Fiero Medium Metallic Red paint.. These were mixed a long time ago and are a direct match for the OEM Paint.
I know this is counter productive as I am going to have to sand and repaint the nose Black, but I was curious to see it would look like in one proper colour.
These are not photo shopped retouches. I am really pleased with how it is coming together.
IP: Logged
01:56 PM
May 24th, 2009
Capt Fiero Member
Posts: 7658 From: British Columbia, Canada Registered: Feb 2000
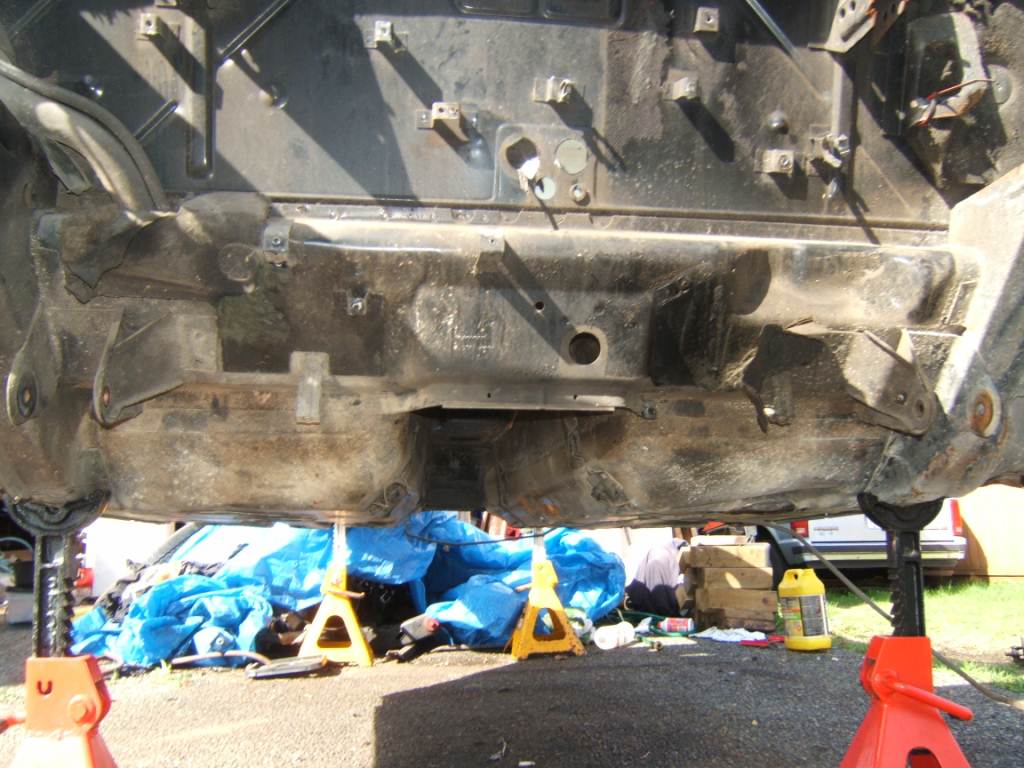
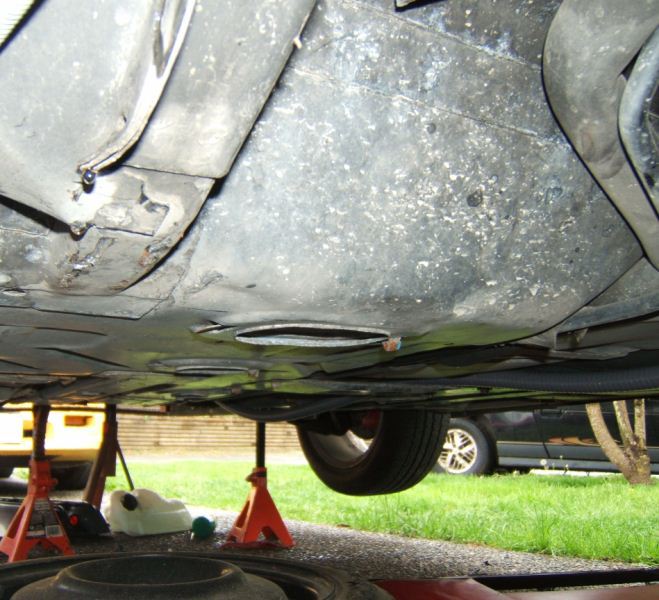
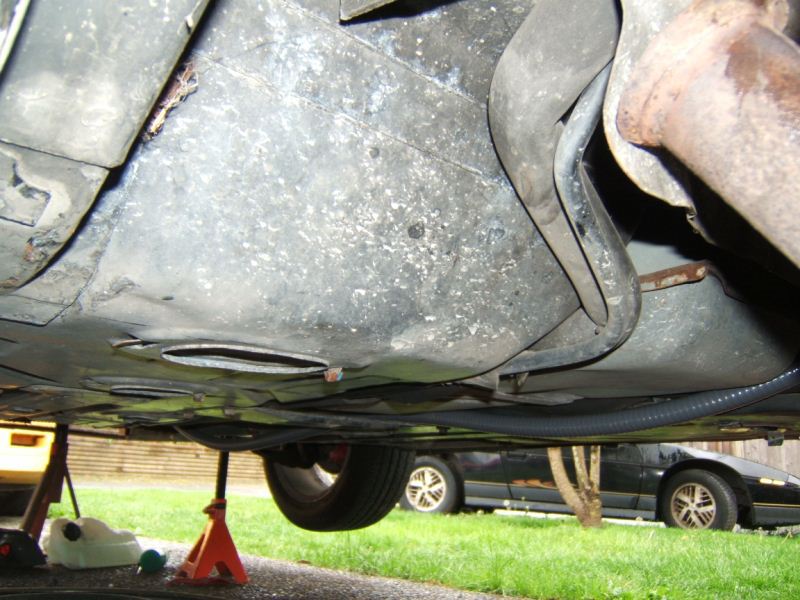
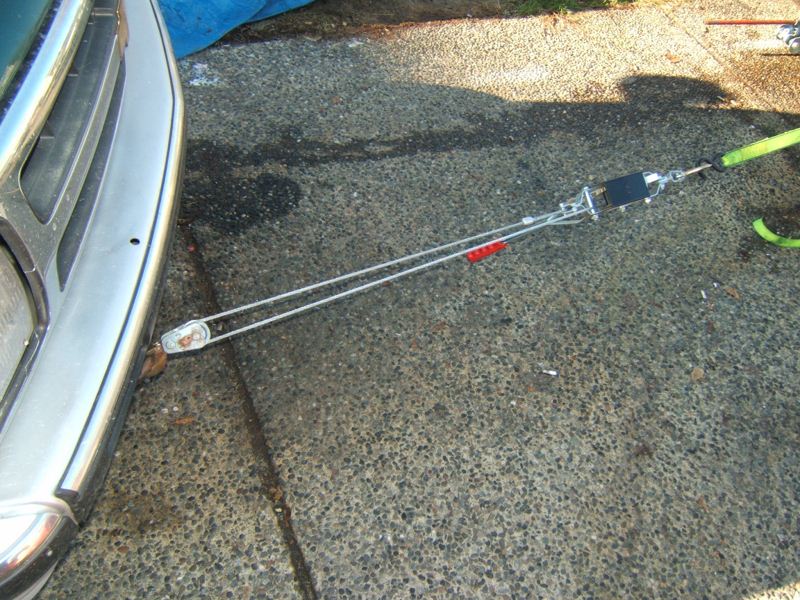
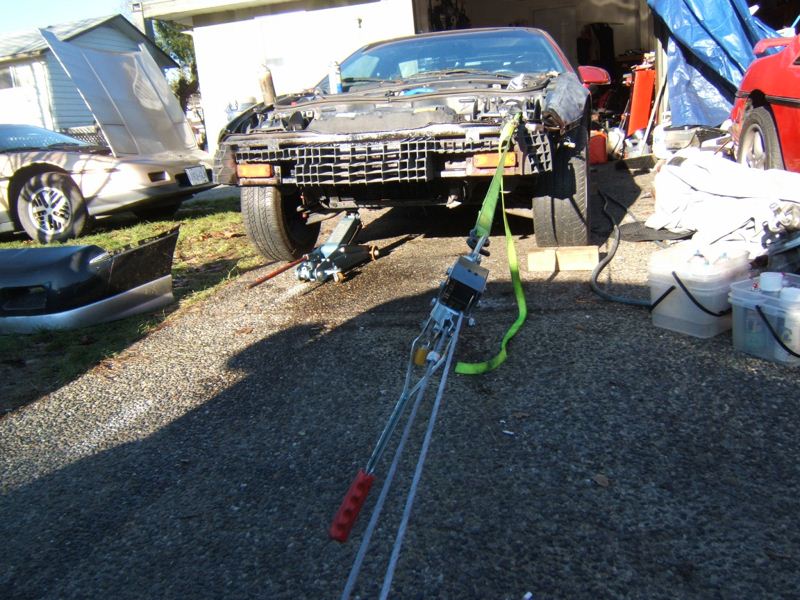
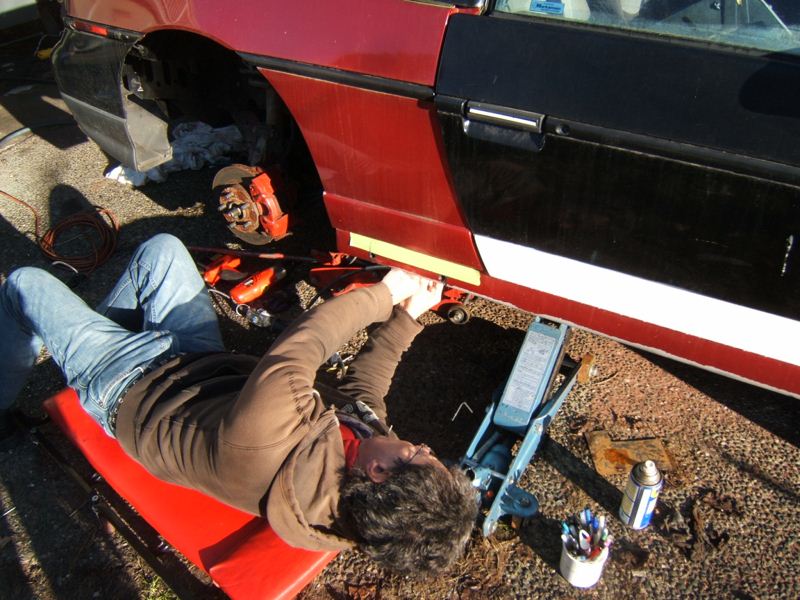
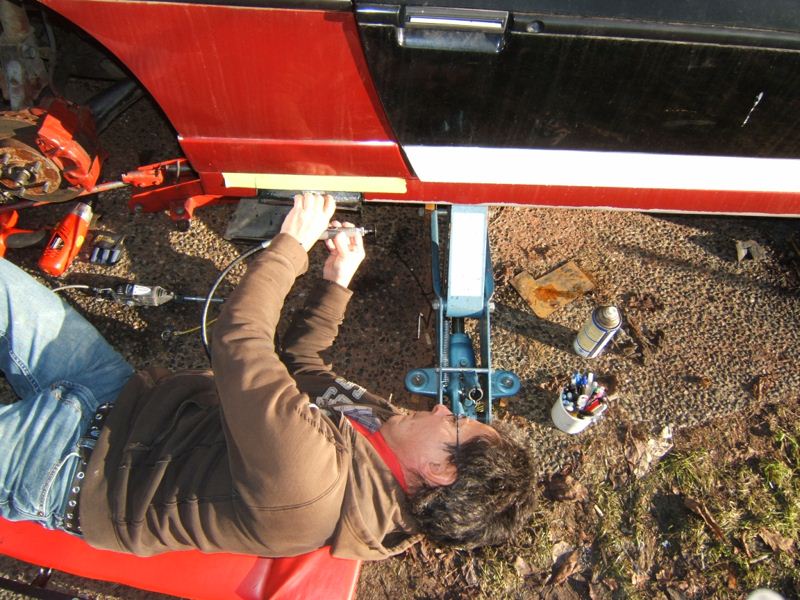
Ok so it’s been a few days since I updated this thread. Today was so suppose to be my big push to getting the car on the ground. Just one thing turned into another, then when I really through I had all the little things done and I could get working on the car, my compressor died. So I spent 2hrs trying to get that working, finally at 9:30 tonight I got it up and running. Well here are the pics from the last few days.
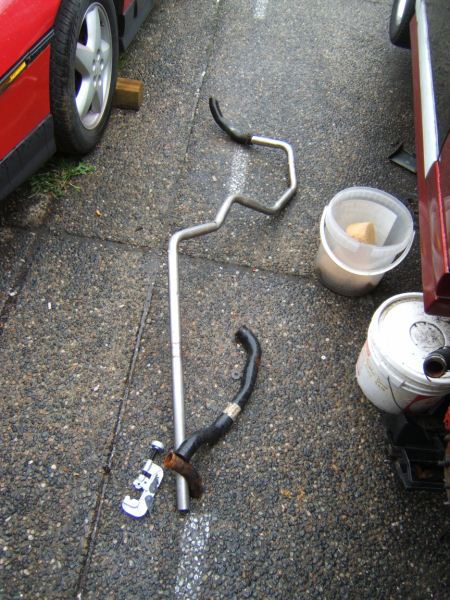
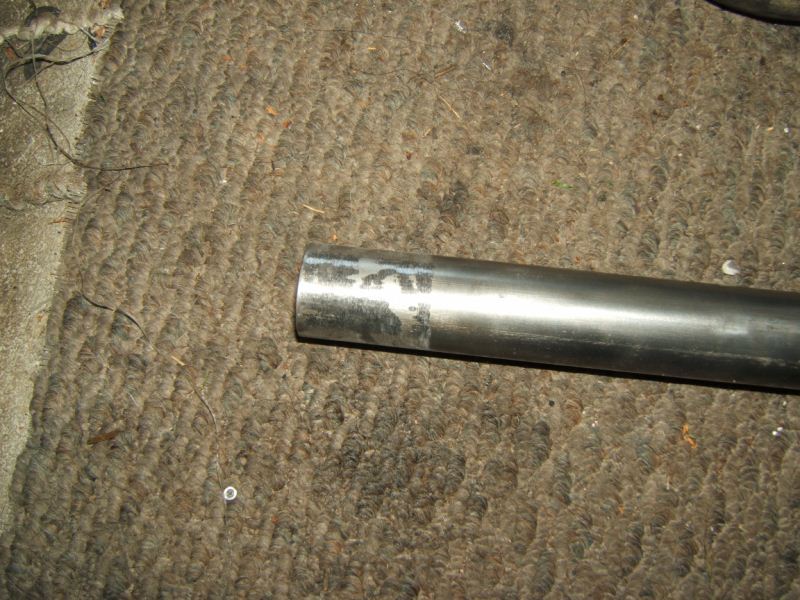
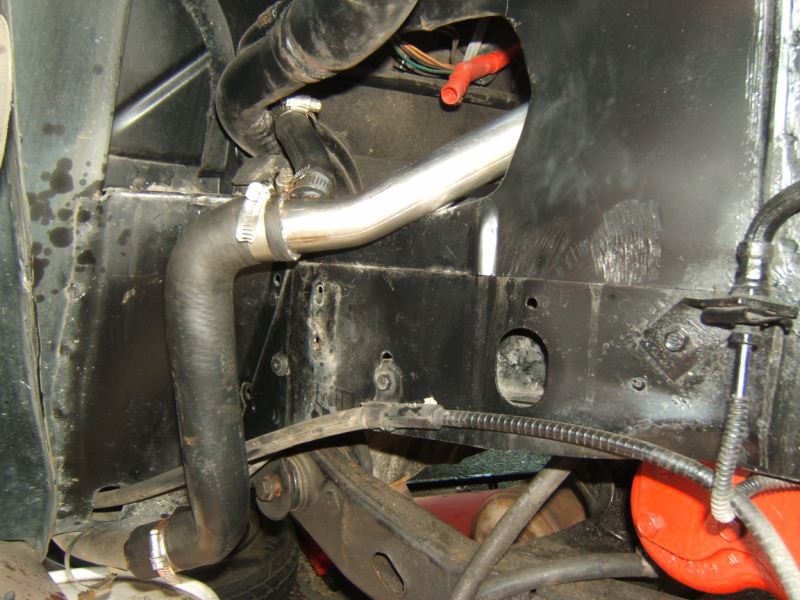
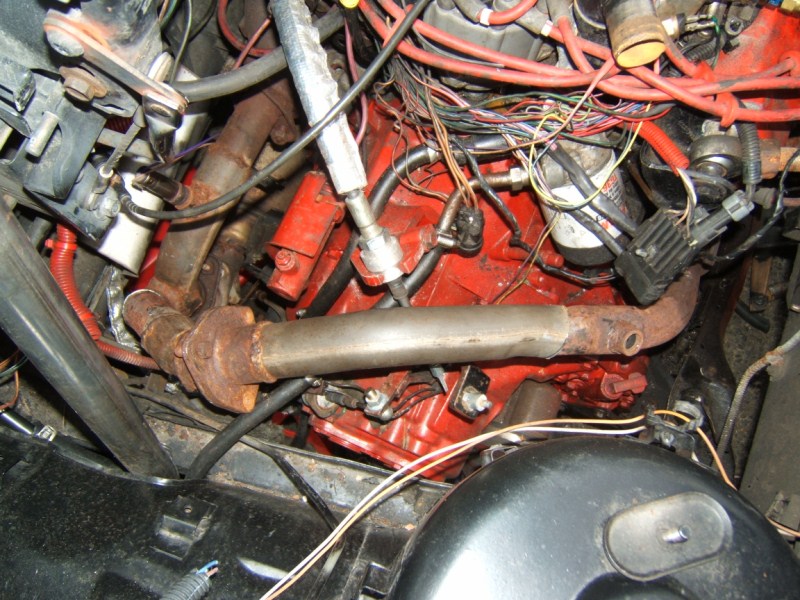
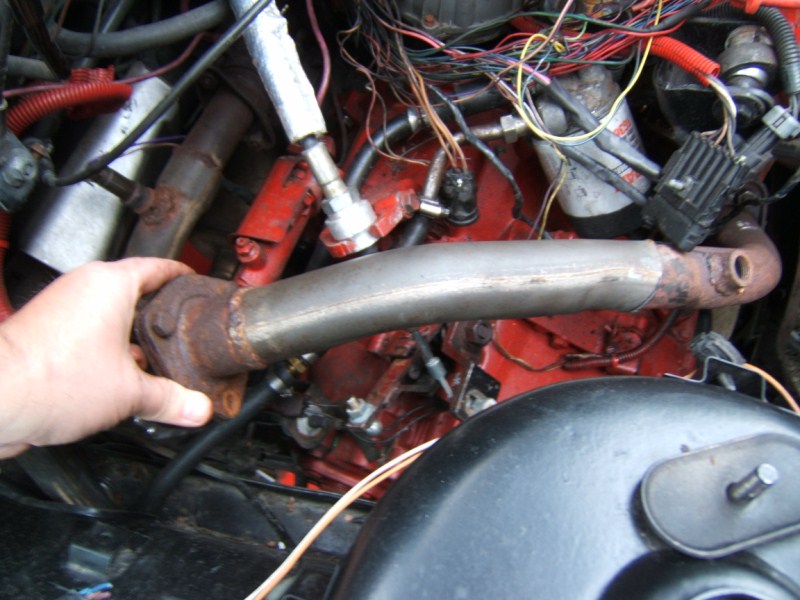
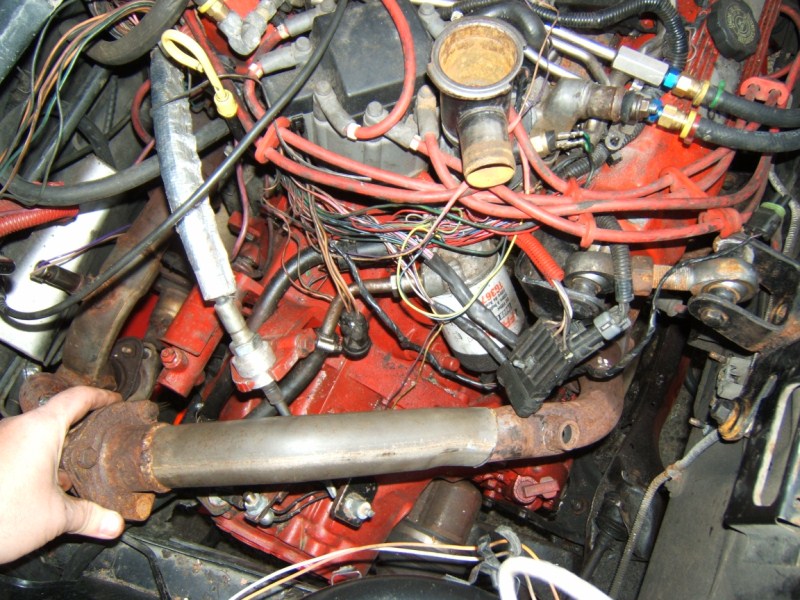
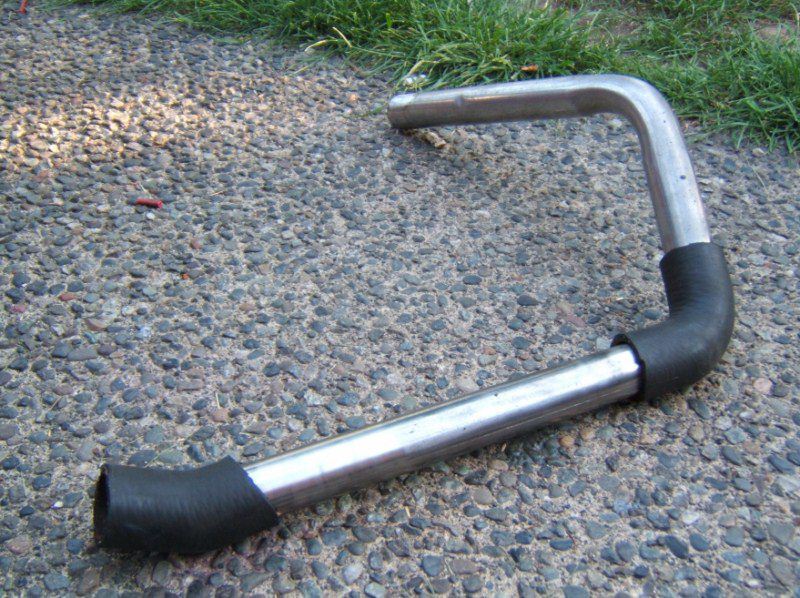
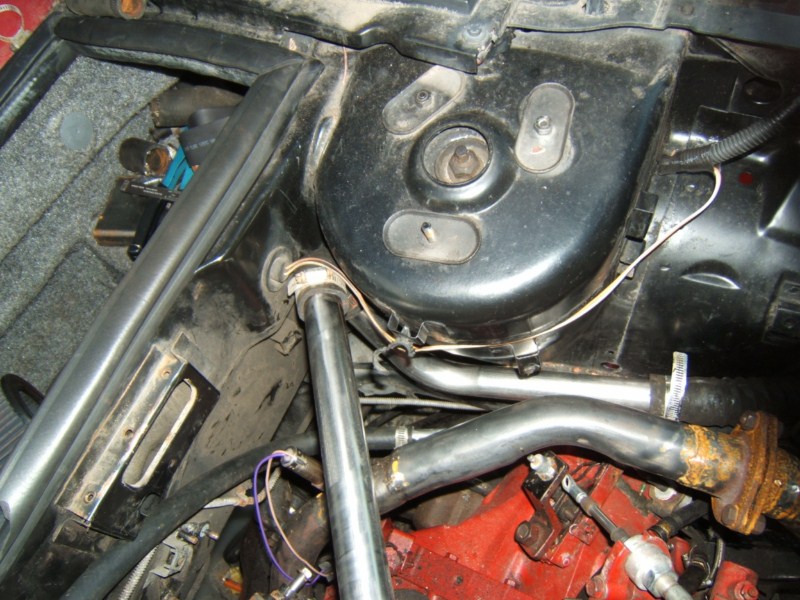
One of the big things that always bothered me was the crappy way I had the upper rad hose in my V8, it was darn near 3ft of rubber hose and joints and just looked bad. So I went to Dr.Fiero’s place and got an 87 or 88 coolant pipe, and started measuring and cutting. Here is the raw pipe.
Here is the start of getting my ideas. I was almost tempted to remove the filler neck, and get someone like Blair or Dr Fiero to chop it and rotate it. Which I may still at some point, but being as it was only a slight angle I made do.
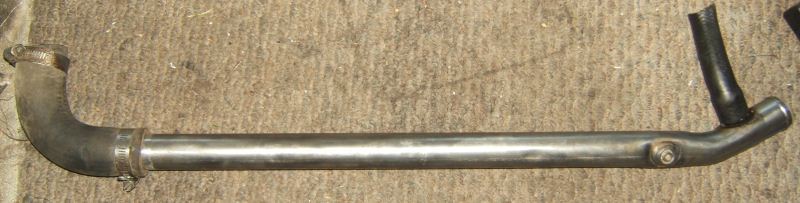
Here is a slightly longer view. Note the very IMPORTANT, heater fitting near the bottom.
Again showing down to the heater pipe.
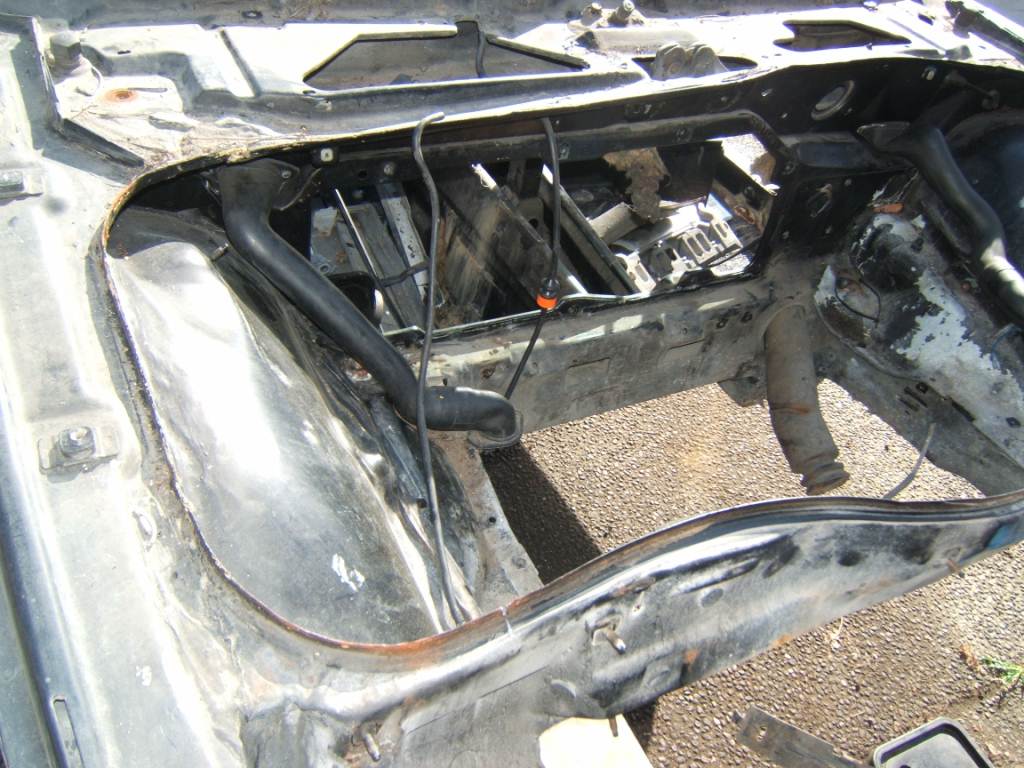
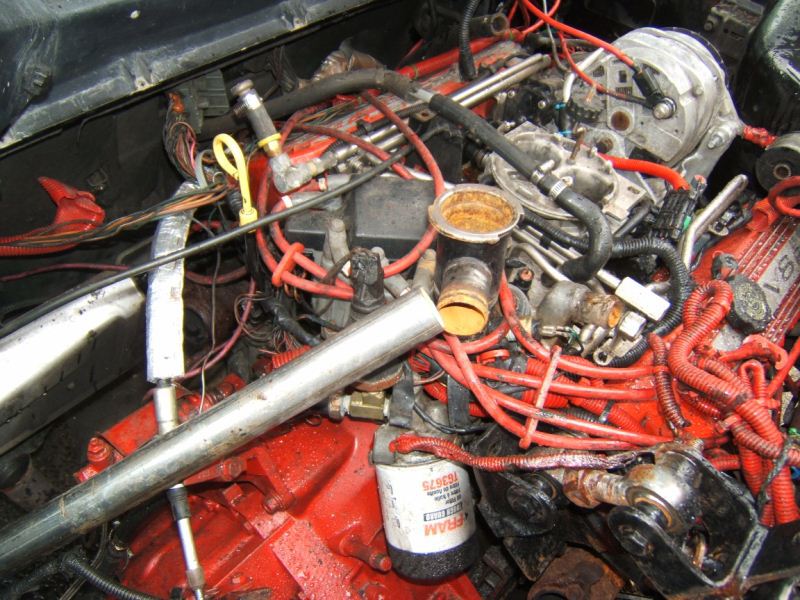
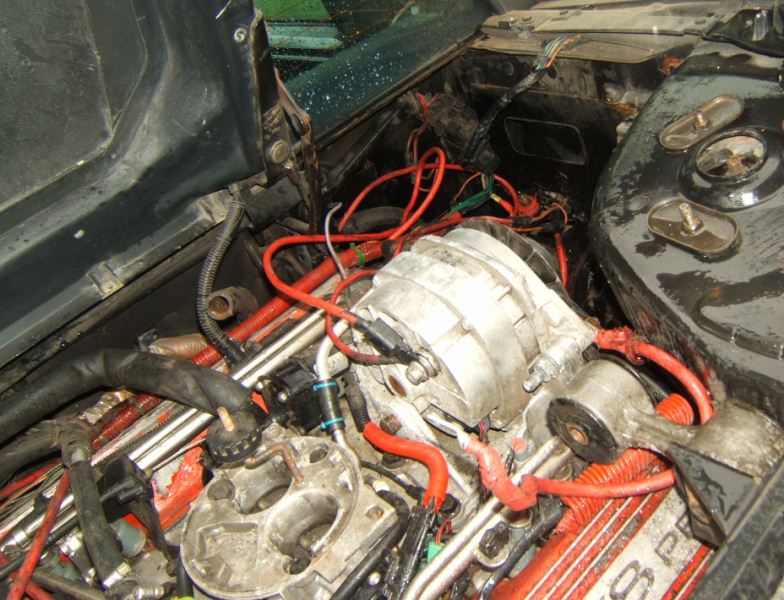
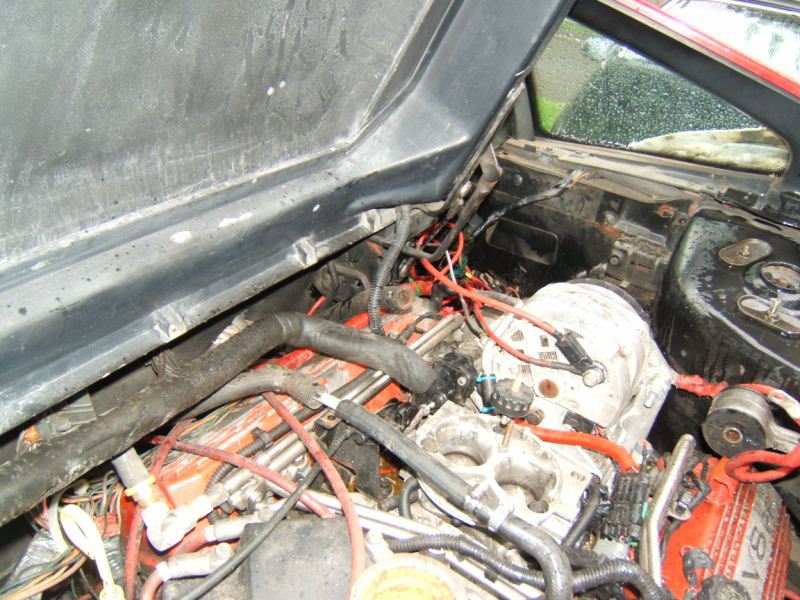
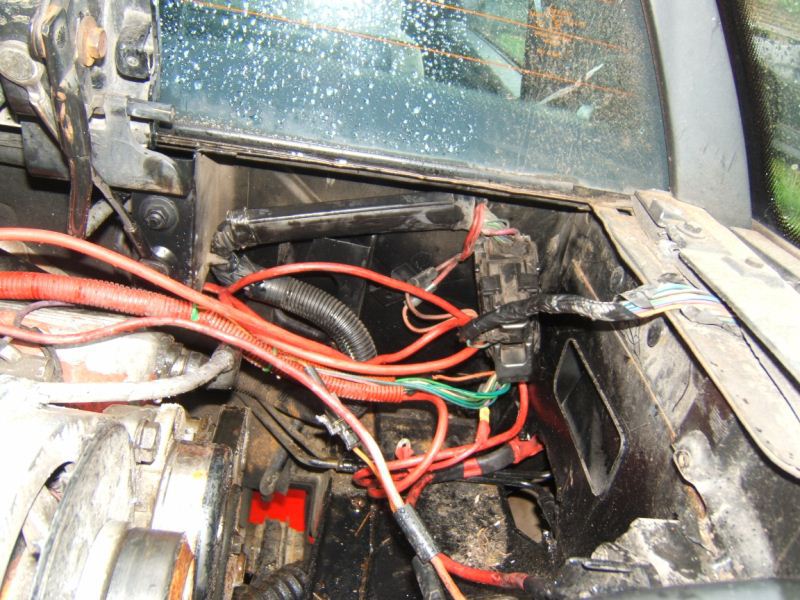
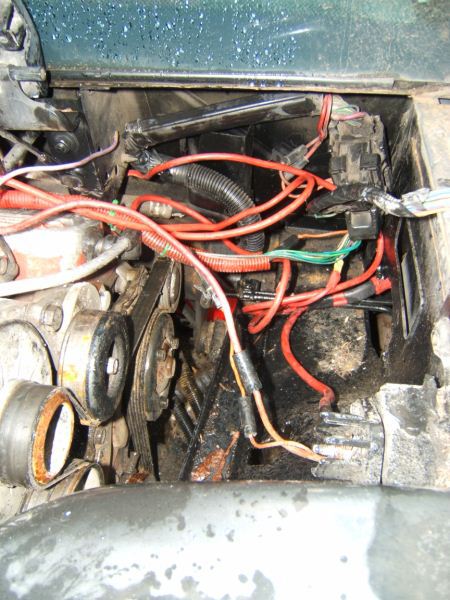
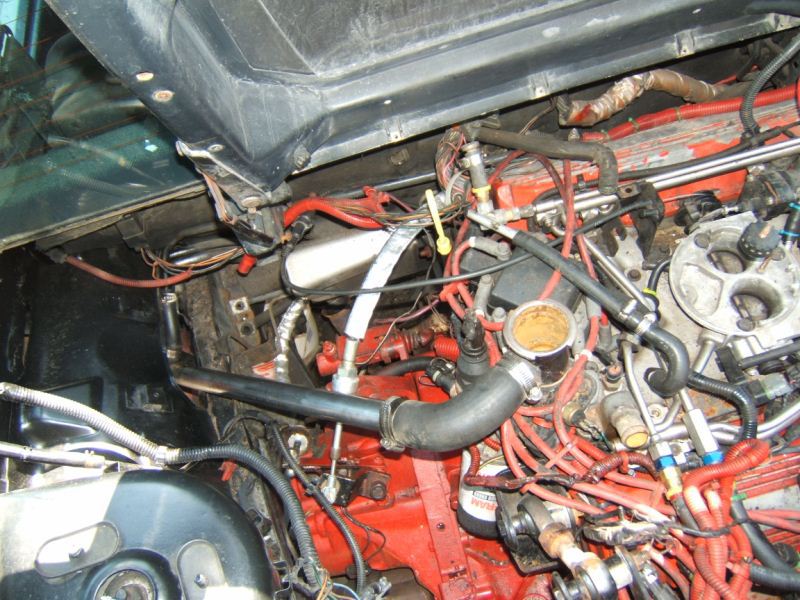
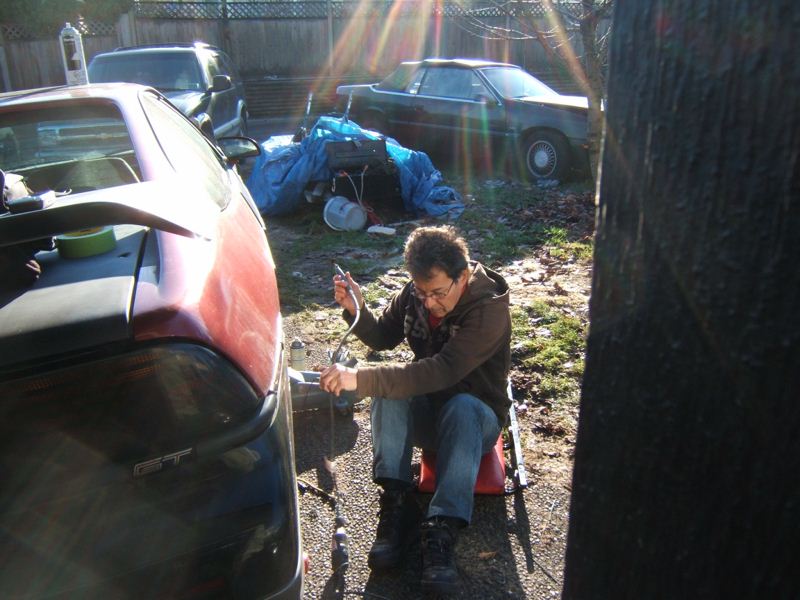
Ok jumping topic for a second, all the alternator wiring is now attached, one wire goes to the battery and the other goes to the junction block for the main car harness.
Still not sure how I am going to do this.
Thinking maybe pushing all of it back over to where the battery would normally sit then make a nice plastic cover over it all.
You can sorta see the battery cable housing dipping down, the grey wire. It’s all attached to the starter and ran into the correct location I just have to pull it up tight so it does not droop at all. The toughness of the housing, I did some tests with it. It’s unbelievable. I hit it with a hammer, a 5spd sledge, even put a chisel down and try to cut it with a chisel and a hammer. Just kinda like trying to cut through a steel pipe with a butter knife. I’d bet I could support the entire car dragging across a speed bump and not damage it.
Starter hook up.
A different angle towards the firewall exhaust.
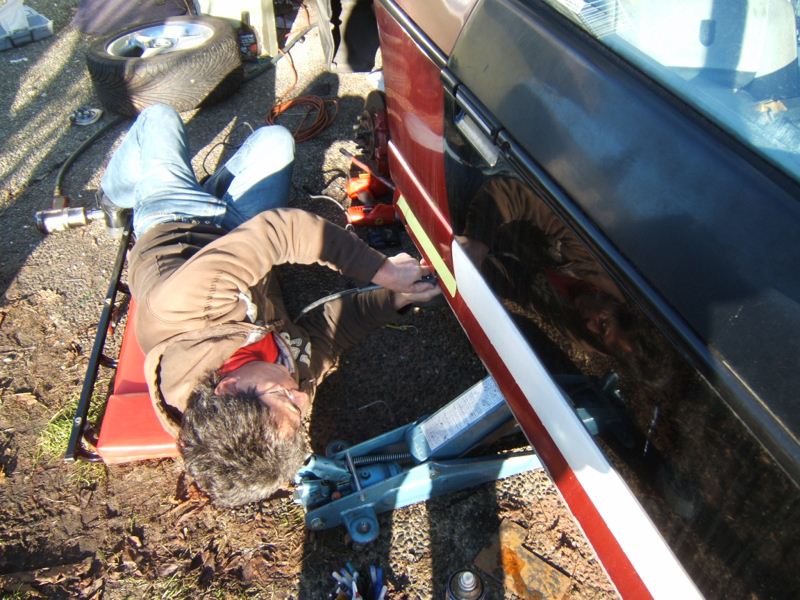
Ok Back to the Pipe stuff.
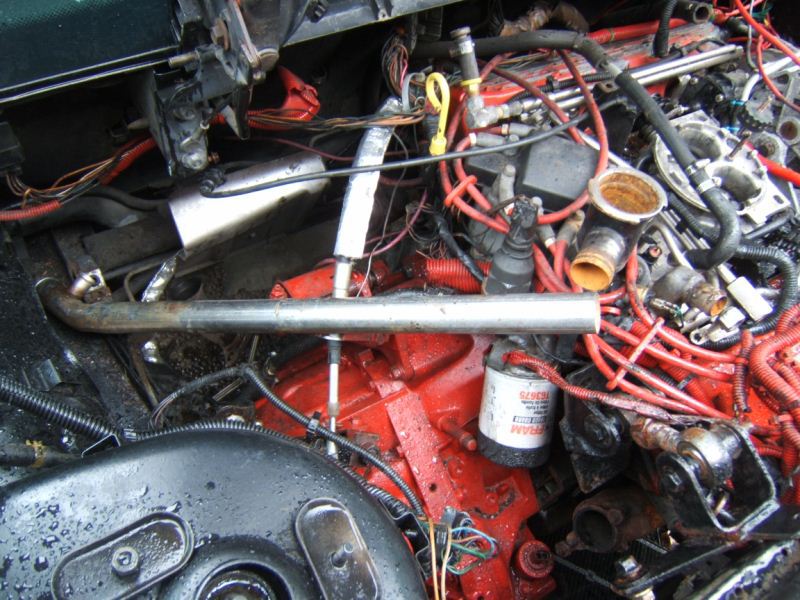
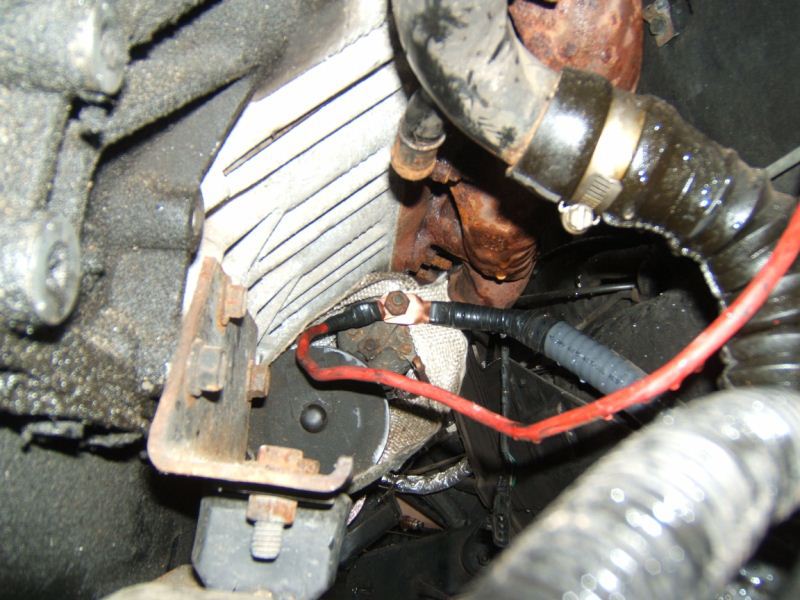
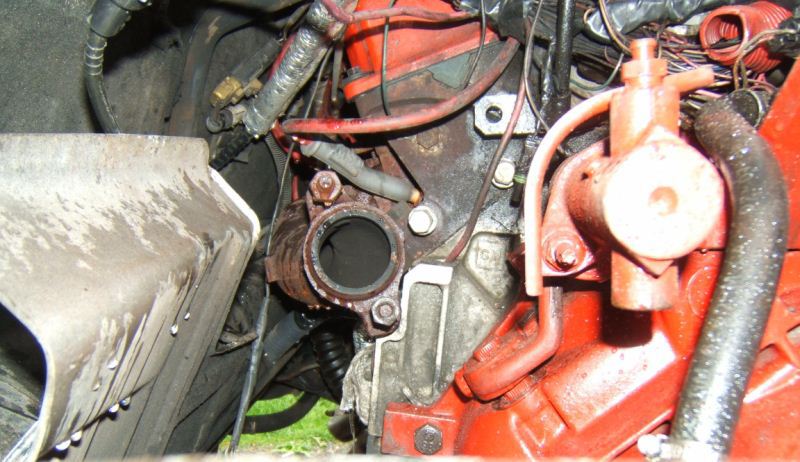
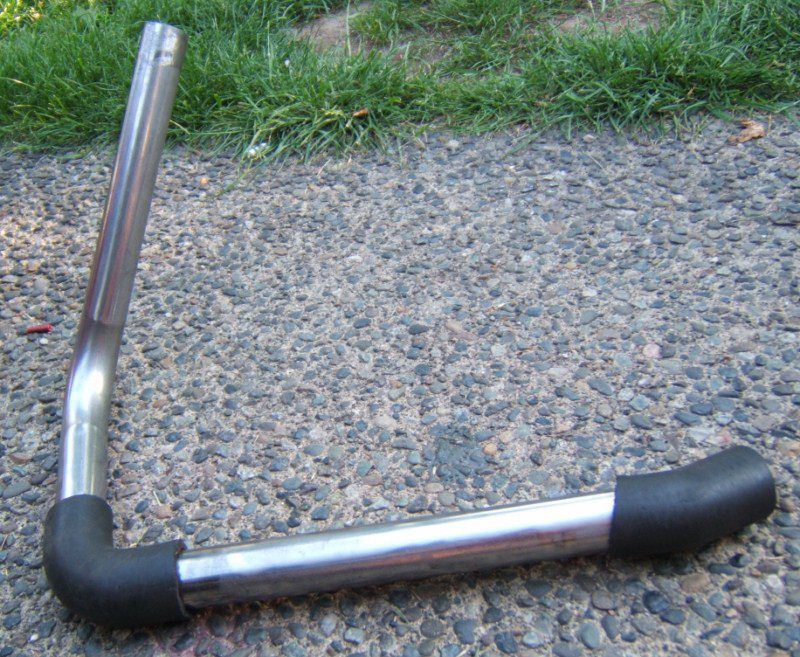
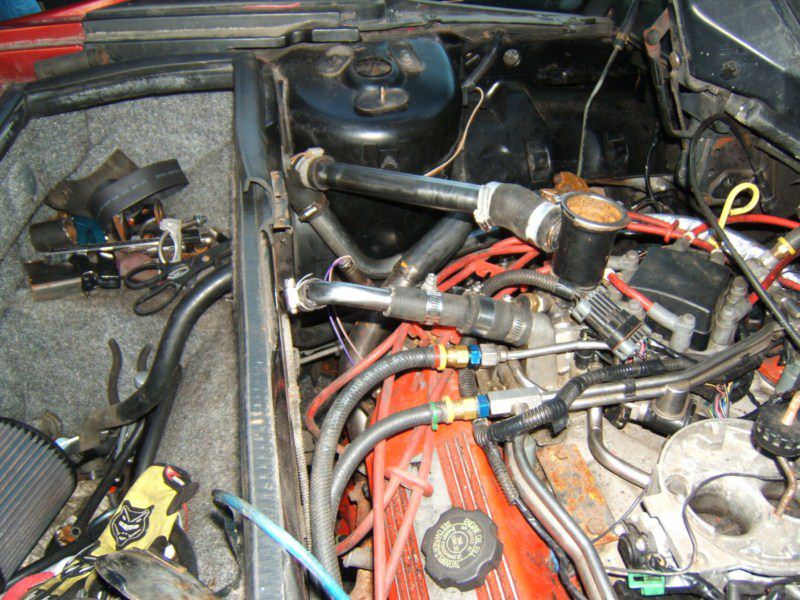
The caddy has a similar Heater Hose fitting on the coolant fill cap as the Fiero, only problem is that the coolant fill cap is on the driver’s side rather than the passenger side, so many people have a heater hose running all the way around the front of the engine, or over top of the motor to connect, that is the way I had it done as well. Then I started thinking seeing as I had to re-do most of my coolant hoses and get this to work on the new 87 car. I started looking at that pipe I got from the Doctor, and realized hey wait a min. I can run a small 1” steel pipe along the firewall, and have it hook to the driver’s side pipe and not need any upper heater host at all. I started with the pipe cutter, doing a light flair on the end, then scuffing up the pipe so the rubber hose could grab it nicely.
Scuffed Pipe
Pipe with angle hose on it.
Sorta installed in a test fit
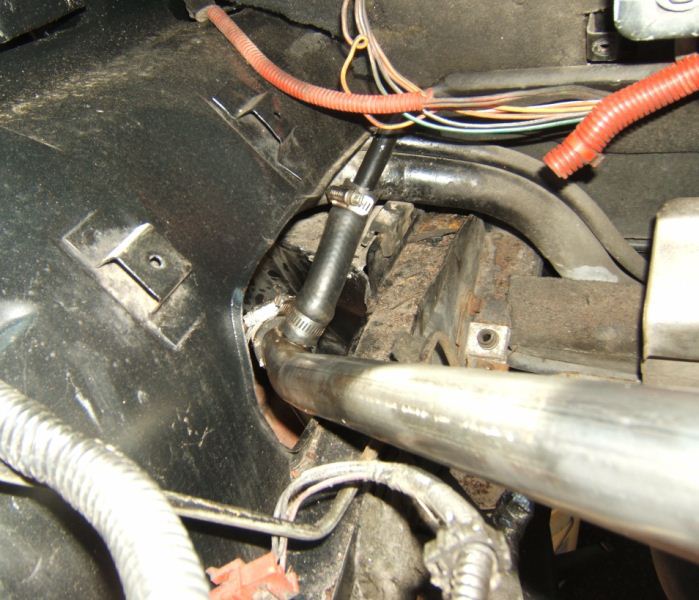
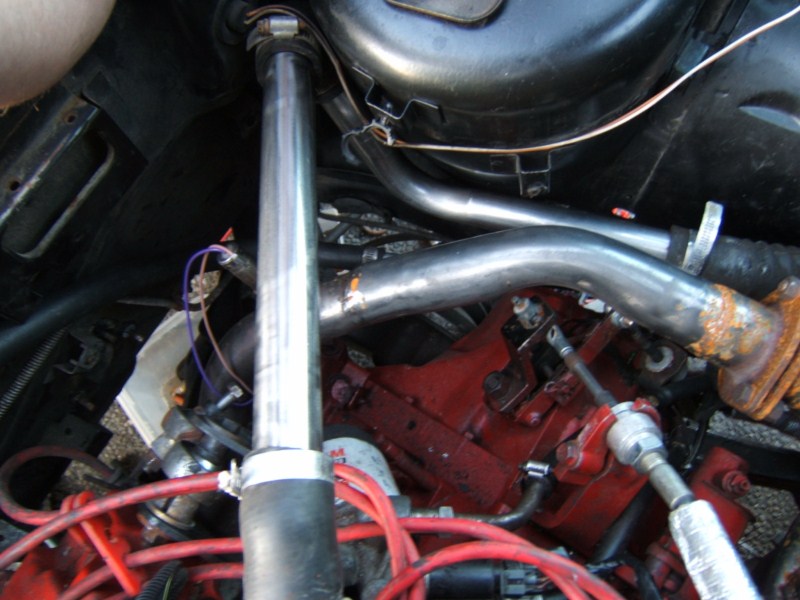
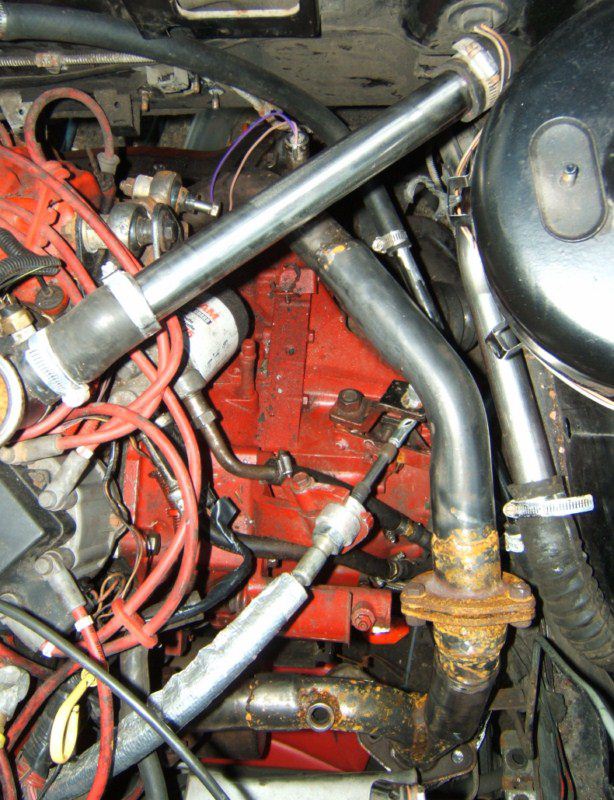
You can sorta see the metal heater line, it goes along the firewall to the factory 87 heater hose.
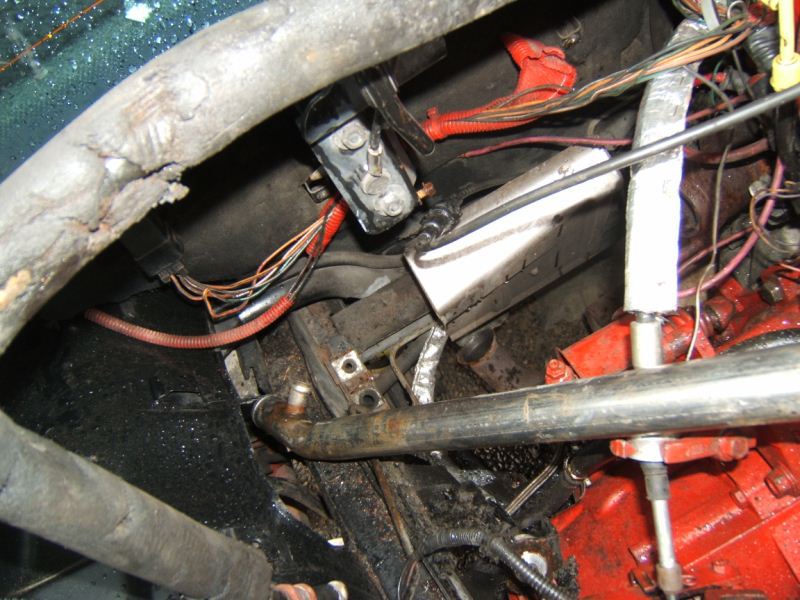
There is the area that it will be in the wheel well. I am really happy with the layout. I am trying to replace as many rubber areas as possible with stainless pipe, to reduce the chance of failure points. I am using the nice red high tack spray on sealant. (Think industrial grade hair spray, lets the hose slide on easy, and then dries into almost indestructible bonds. After it is dried, you can damn near remove the hose clamp and it will stay sealed. I found that out by accident when a hose clamp did fail at some point and during a routine check of things, realized there was no clamp. Don’t know how long I had been driving without it, but its great stuff.
Since these pics were taken I have removed a bunch of wiring, am slowly cutting and soldering different sets. Really trying to clean up the engine bay. Every hose or wire that I can remove or shorten is getting changed. I want this setup to be bullet proof, which is almost Capt proof.
------------------ 85GT Soon to be 87GT,93 Eldorado 4.9, 5spd Dual O2 Custom Chip, Custom Exhaust. MSD Everything Capt Fiero --- My Over View Cadero Pics Yellow 88GT 5spd Full Poly Suspension, Lowered 1/2" in front, Corner Carver.
IP: Logged
03:12 AM
jscott1 Member
Posts: 21676 From: Houston, TX , USA Registered: Dec 2001
I am going to do a seperate thread later, but they took the last of my 85GT away today. I vowed to not let any Usable part remain on the car. The windshield was pulled out yesterday so it did not go either. Its an end of an Era.
That looks like a perfectly good spaceframe...why didn't you cut off the rear frame rails and the rear trunk? Those parts are useful if someone has a rusty car that they want to keep for some reason.
IP: Logged
03:24 AM
PFF
System Bot
Capt Fiero Member
Posts: 7658 From: British Columbia, Canada Registered: Feb 2000
Where we are here in BC, we send cars that are completely rust free to the scrap, our insurance policy's are really harsh, if a car was in an accident and even if the body panels alone cost more than what they feel its worth, they write it off. Once a Fiero has a rebuilt decal on it, the value is dropped by 75% so a $2000 Fiero is now 500 bucks at best. I fought to keep that status off of my 85, but it still had 2 accidents on it, and building on the 87GT was going to be so much better. If the cost was not so insane to ship cars back east people could make a lot of money from it.
Where we are here in BC, we send cars that are completely rust free to the scrap, our insurance policy's are really harsh,
That kind of sucks... I forgot you guys have the heavily regulated Province sponsored insurance. It's almost like that here in Texas where they are doing everything they can to discourage people from driving old cars.
Nice build though...I'm adding this to my favorites!
IP: Logged
01:05 PM
May 25th, 2009
Capt Fiero Member
Posts: 7658 From: British Columbia, Canada Registered: Feb 2000
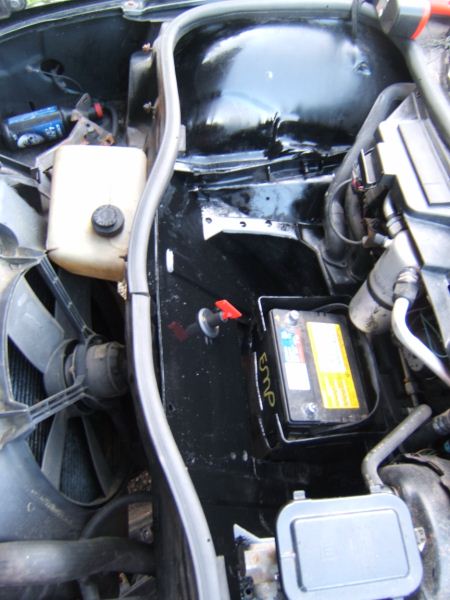
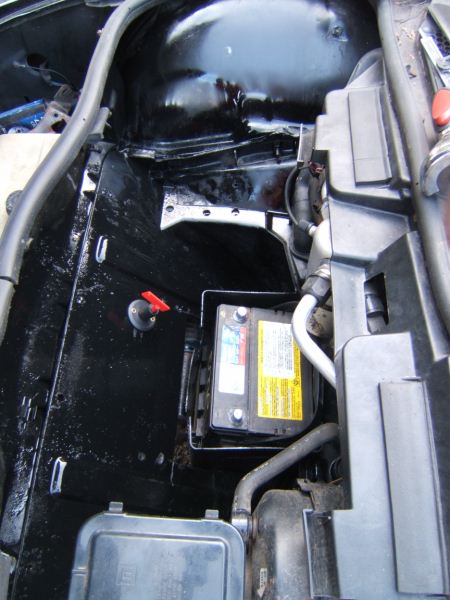
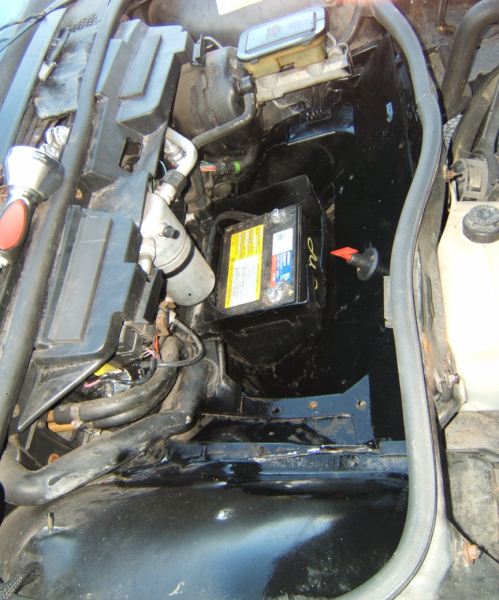
The pics don't really let you get the full perspective on where it is. If you have A/C go out to your car, and look where your A/C dryer is. Then realize that the top of the battery is 4" lower than the bottom of the dryer. I actually had to clearance the battery box for the rack and pinion. As the box sits lower than the rack, so if you remove the battery, you can actually see the top corner of the rack going through the bottom forward section of the battery box. Most of the kits mount the battery high and forward so you can still put your spare tire in the tub. Well that might be good for people that want the spare up there and don't mind having the battery that high. However I wanted that block of lead as far down as possible, and I wanted the battery box bolted solidly to the front cross member. With my driving style, and habit of trying to see just how much hang time I can get launching my car off of say railroad tracks, I wanted it solid. The big red switch is a direct battery cut off. So just case something goes drastically wrong, and the battery comes loose, or I catch the cable under the car, I can kill the power. I internally put it right smack out in the open, so that no matter what happened I would be able to reach it and turn it off. I'll admit after installing it and looking back at it, I kinda wish I had put it some place else, as it just sorta sticks out like a sore thumb. I may still move it before I finalize the wiring. Its a fine line between being easy to reach in a panic and hiding it in a corner. I also wanted it to be sorta hard to reach the backside of it. As it will be a minor security improvement, the key is removable. So if I go some place, I can pop the hood, turn the power off and pull the key. Don't worry, there will be a 5amp jumper to keep the ECM alive, but not enough to fire the engine.
------------------ 85GT Soon to be 87GT,93 Eldorado 4.9, 5spd Dual O2 Custom Chip, Custom Exhaust. MSD Everything Capt Fiero --- My Over View Cadero Pics Yellow 88GT 5spd Full Poly Suspension, Lowered 1/2" in front, Corner Carver.
IP: Logged
01:30 AM
May 26th, 2009
Capt Fiero Member
Posts: 7658 From: British Columbia, Canada Registered: Feb 2000
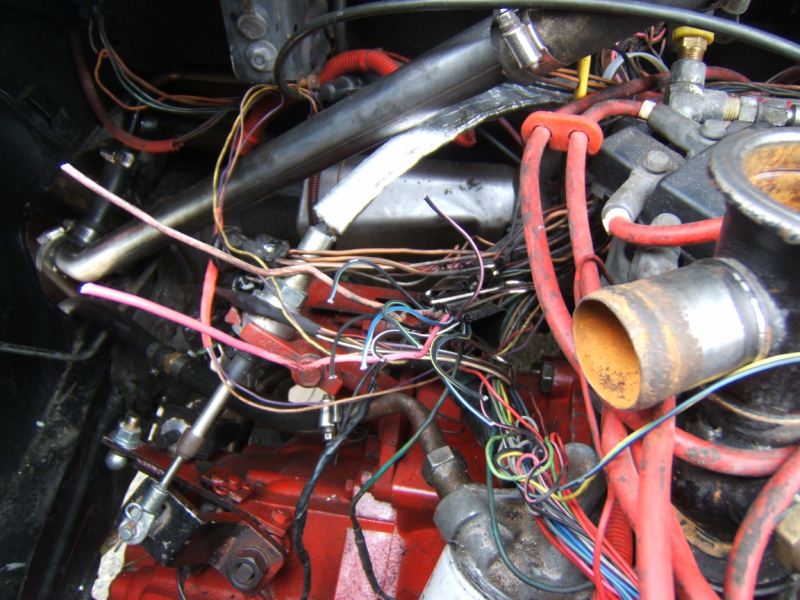
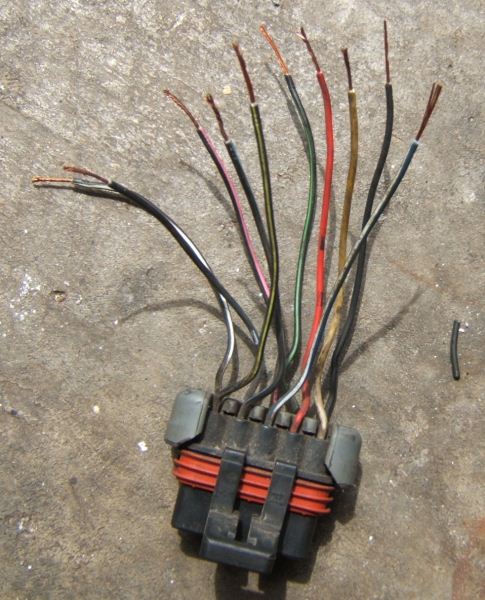
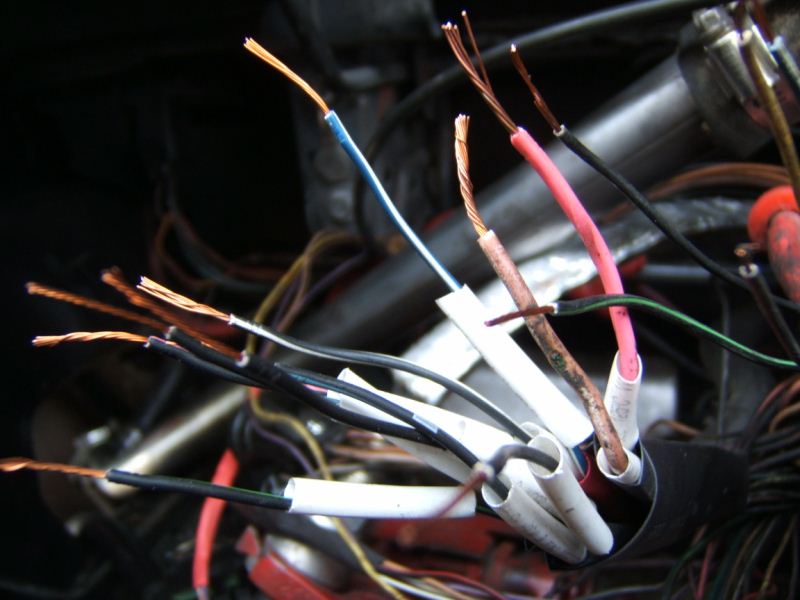
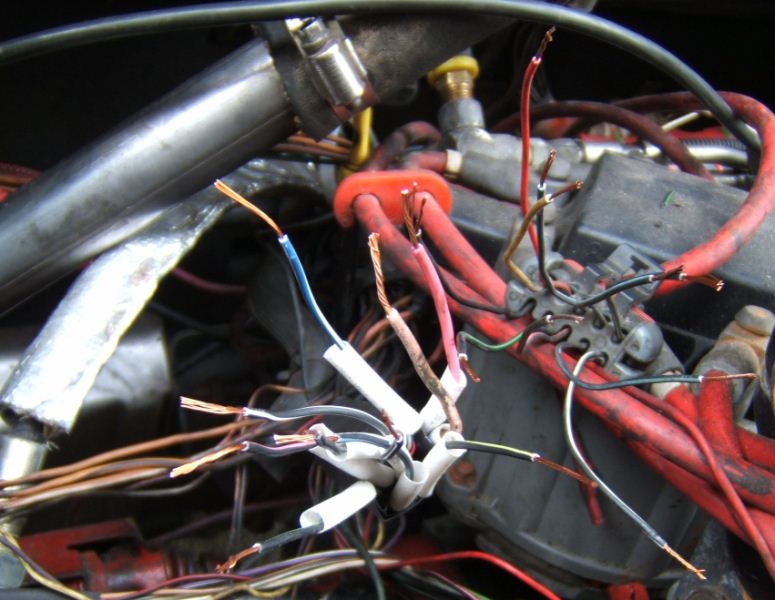
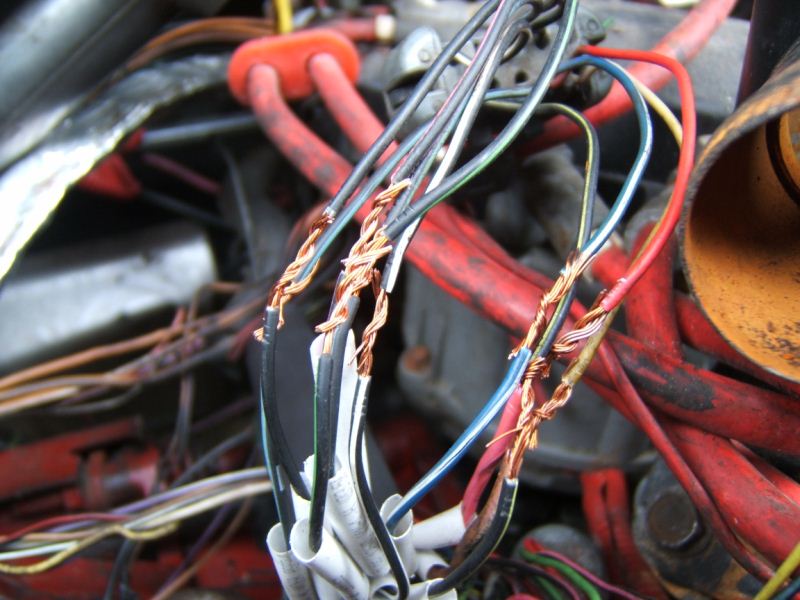
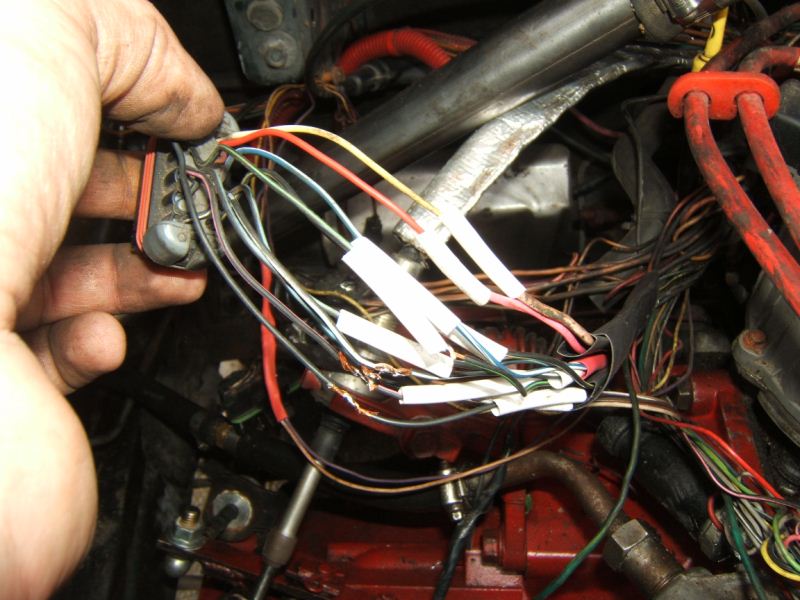
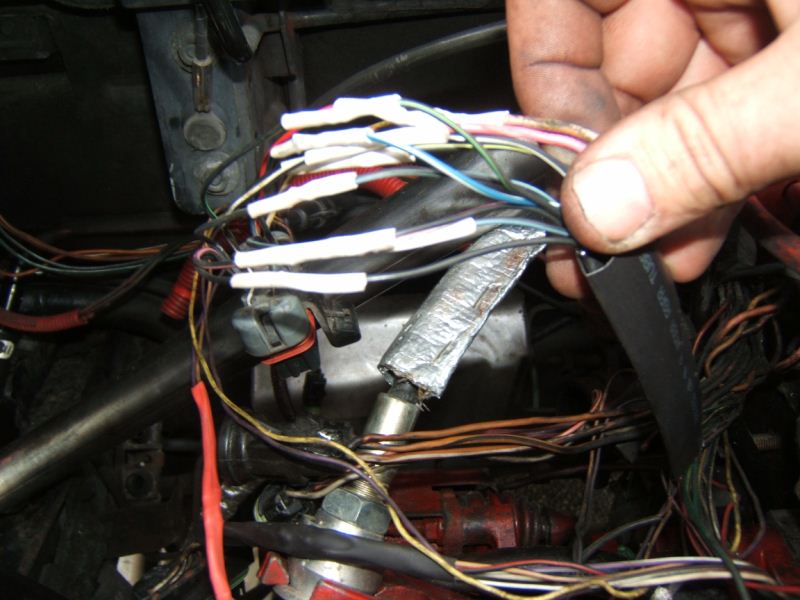
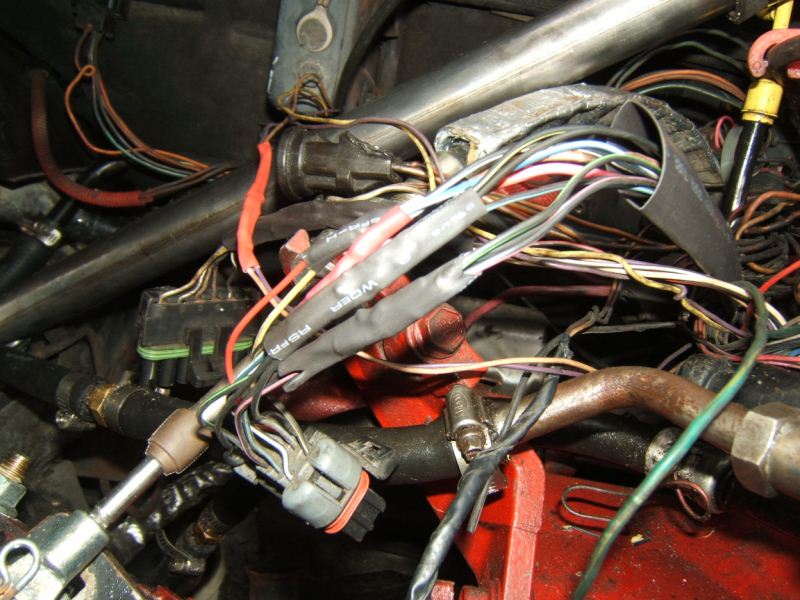
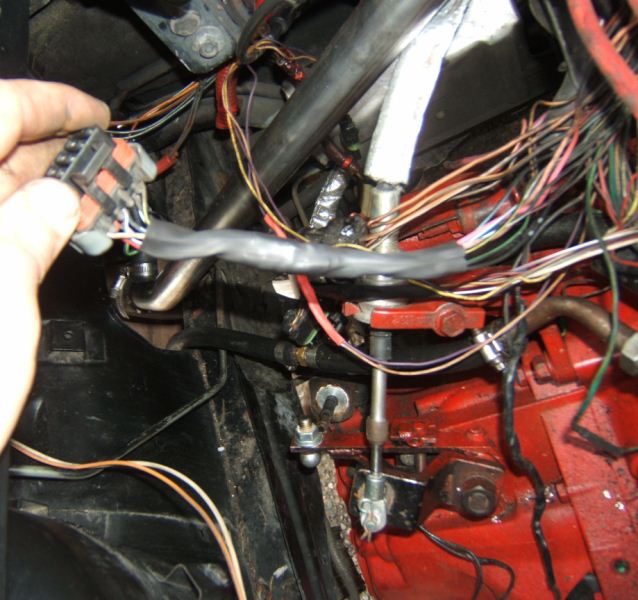
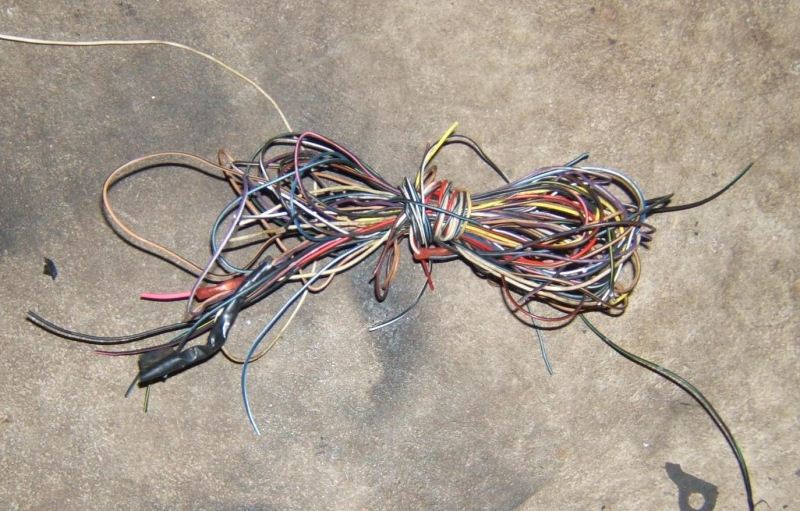
So today was another wiring day. WOW, and I am still not done. I removed an amazing (well amazing to me) 60ft yes Sixty Feet of wiring from the harness today. One by one, I cut, shortened then soldered, then shrink tube over each wire, then shrink tube each set of wires into a group. I had to cut out sections from the intake temp sensor, both the O2 sensors, and the injector harness. In the case of the larger connector below, each wire got a shrink tube over it, then into batches of 3 with the exception of the 2 larger wires that got there own group, then a really big shrink tube to cover them all into one solid harness.
I am going to have to read over the schematics a few more times to decide on how to re-wire the oil pressure sending unit. I have been running dual oil pressure sending units. (one for the Fiero gauge and one for the Caddy ECM) I just picked up an 88 oil pressure sending unit so I can eliminate the Caddy sender and just use the 88 Fiero sender to supply the signal to the Caddy ECM. I can't wait till I can fire this engine again, oh I so miss driving it. I know I could have taken a bunch of short cuts and been driving it by now, but I really want to do it right this time. I have a nearly bullet proof clutch and trans. Perfect suspension, and with the re-design on the mounts the motor should stay put. Only last things I have to install is the rear sway bar, to keep wheel hop to a minimum, and once its all together, sort out the exhaust changes. Its so close I can almost smell the burnt rubber and tire smoke bellows.
Well here are the pics.
After I unloomed a few of the harness bits
Main injector harness with 10 wires. I took out 48"s if wire from EACH wire.
All the harness side wires cut and stripped and all 3 levels shrink tube stuck over it all.
Twisted up, the pic did not show it very well, but yes they are all separate and nothing is touching
Soldered and first layer of shrink tube on.
Second layer of shrink tube.
Third and final layer on. Nice and neat tight harness that with any luck won't get any corrosion or water in it EVER!
The bundle of wires that I cut out.and I still have more to remove.
------------------ 85GT Soon to be 87GT,93 Eldorado 4.9, 5spd Dual O2 Custom Chip, Custom Exhaust. MSD Everything Capt Fiero --- My Over View Cadero Pics Yellow 88GT 5spd Full Poly Suspension, Lowered 1/2" in front, Corner Carver.
IP: Logged
01:56 AM
May 27th, 2009
Capt Fiero Member
Posts: 7658 From: British Columbia, Canada Registered: Feb 2000
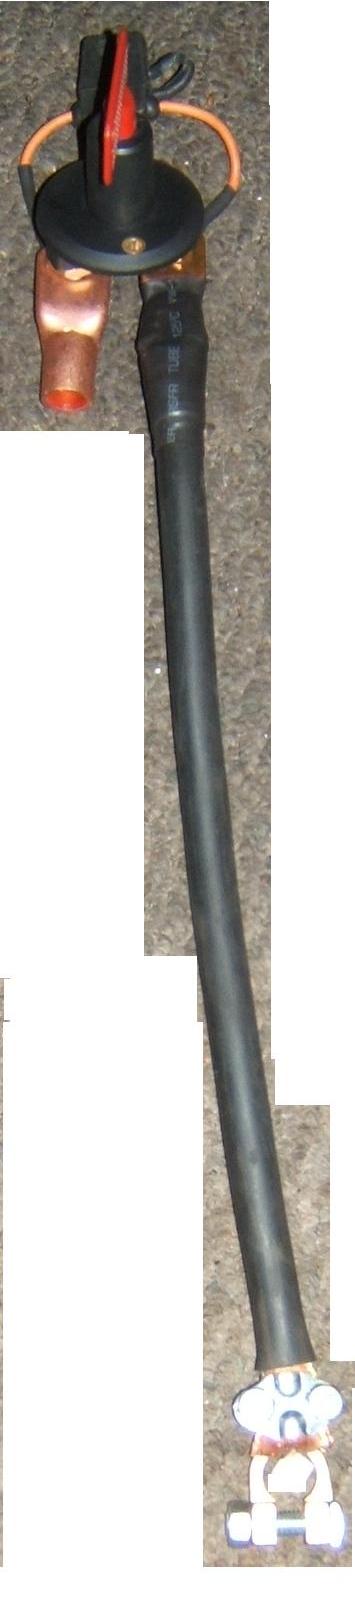
Ok not much time to work on the beast today, but I made my new main power cable.
You'll have to excuse the poor cropping in the first pic I was trying to reduce the data file size without shrinking it too much. Regardless some of the images are over 150kb, but I'll try to explain them before you need to click on them.
Ok Pic #1 of I 6
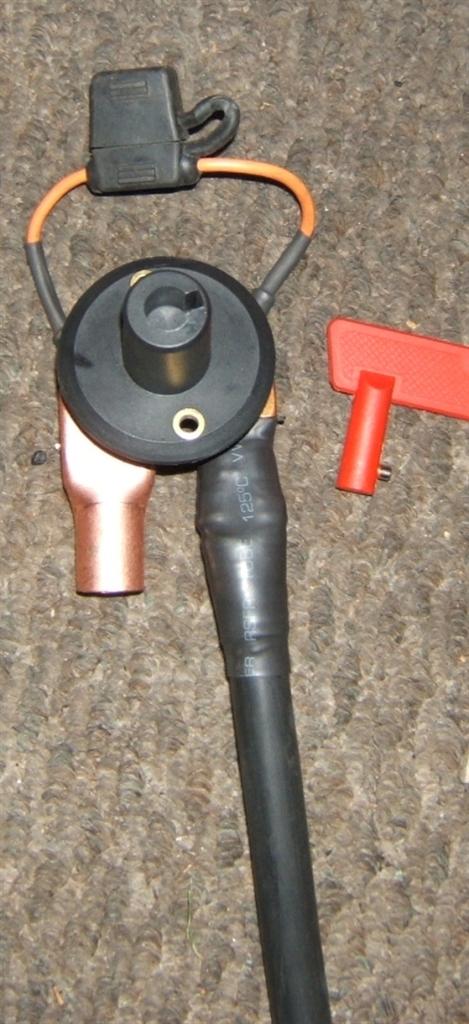
The cable as a whole
Close up with key installed.
Key removed so lets say I am out in a high theft area, where even alarms and clubs are a joke, I can pop the hood remove the key, and with any hope, I at least a 90% chance my car will be there when I get back. Might find a smashed window, busted ignition lock, but unless they bring a tow truck, or are smart enough to pop the hood, and try to find out how to turn the power on, or rip the power out and try to find a way to get the 2 lugs to stay together long enough to steel the car, they are SOL. (for the record, I use have friends on the wrong sides of the track when I was younger, if its not running and driving in 60 seconds or less or it won't start, they don't stick around to find out why and move on to a better target.
Backside showing fuse jumper. This is there so that when I shut the battery off, for either security or storage, it will keep the alarm alive, the stereo pre-sets alive and ecm alive. Will probably run a 30amp fuse, right now just a 15amp in there. Note pen for size reference, its 3 ought cable. Massive Overkill. But due to hassle of getting under the car to run it, and the cost of all the cable and large lugs, I didn't ever want to have to fuss with it ever again.
Brass Battery Terminal I love these guys, I have never had a corroded cable since I started using them
Backside of the Terminal box.
------------------ 85GT Soon to be 87GT,93 Eldorado 4.9, 5spd Dual O2 Custom Chip, Custom Exhaust. MSD Everything Capt Fiero --- My Over View Cadero Pics Yellow 88GT 5spd Full Poly Suspension, Lowered 1/2" in front, Corner Carver.
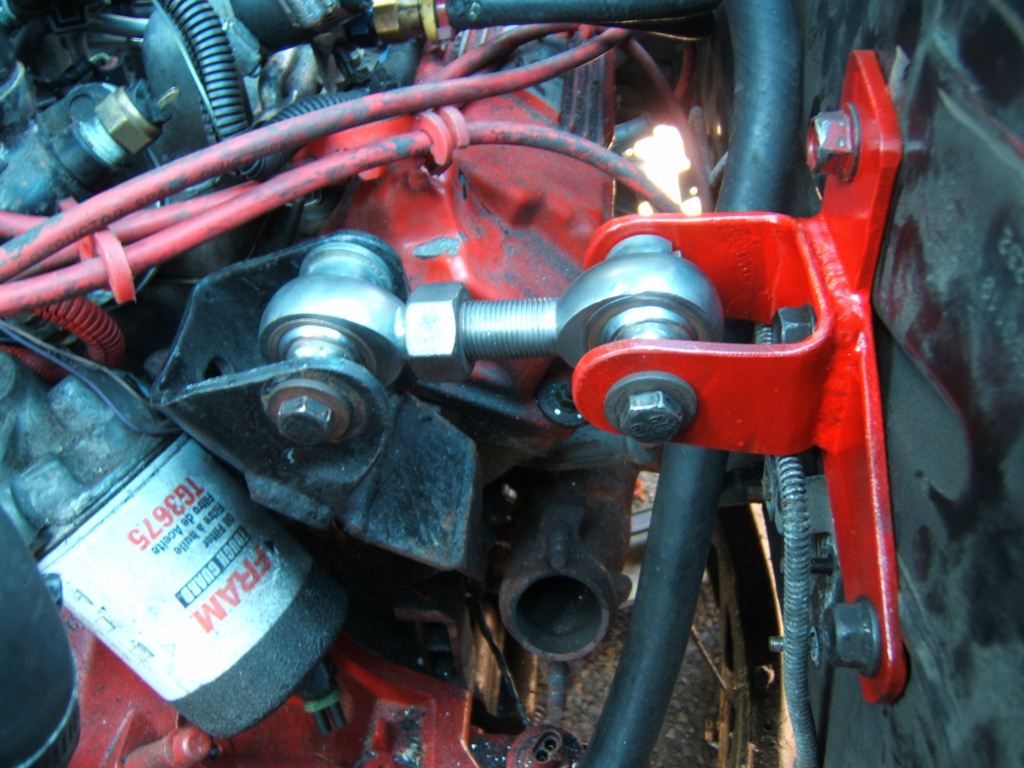
Sorry to disappoint, that mount does not get used, I just hadn't bothered to remove it yet in those pics.
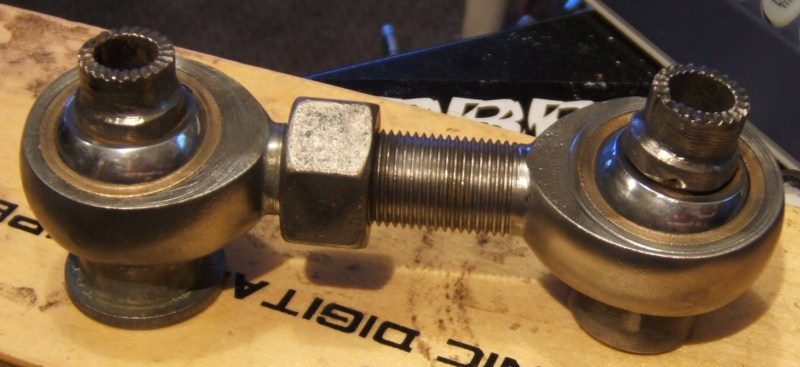
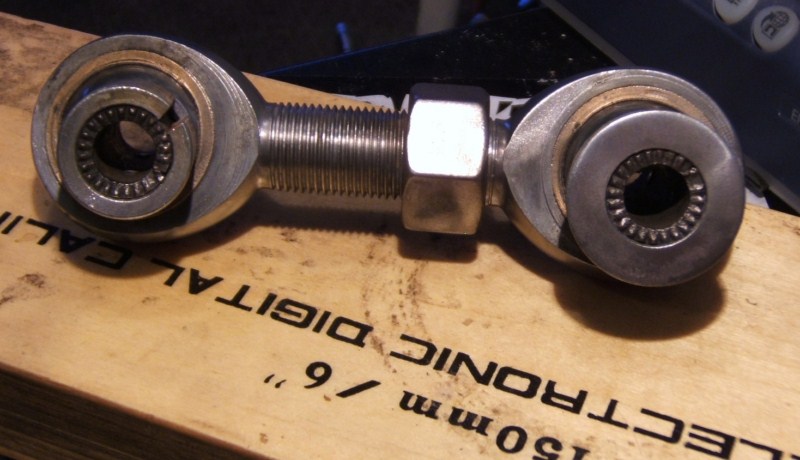
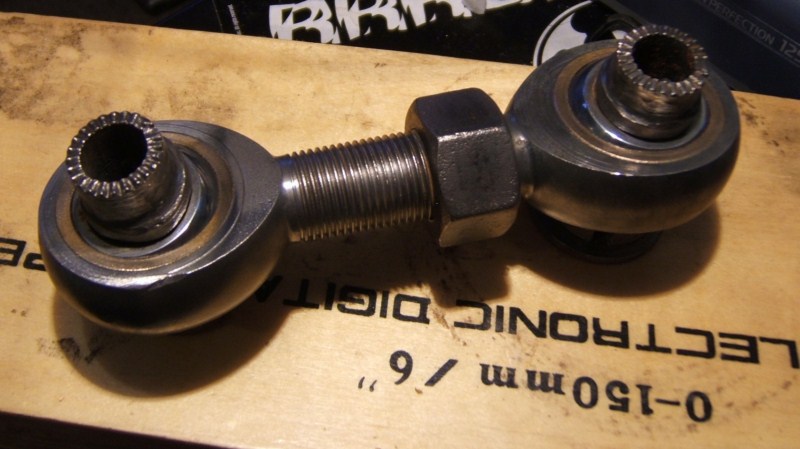
It is replaced with this one below. Its a solid heim joint that is bolted to the trunk wall via a 1/8 inch steel plate. The engine side is a mix between a Fiero dog bone bracket and the caddy dog bone bracket. Just bolts directly to the head. I am going to install a torque rod that goes from the passenger side head down to the cradle. I am really tempted to solid mount the damn motor. The vibration does not bother near as much as replacing the mounts every 6 months.
------------------ 85GT Soon to be 87GT,93 Eldorado 4.9, 5spd Dual O2 Custom Chip, Custom Exhaust. MSD Everything Capt Fiero --- My Over View Cadero Pics Yellow 88GT 5spd Full Poly Suspension, Lowered 1/2" in front, Corner Carver.
IP: Logged
11:14 AM
Jun 24th, 2009
Capt Fiero Member
Posts: 7658 From: British Columbia, Canada Registered: Feb 2000
Well its been a really long time since an update, so here goes.
I finally took the time to get started on the exhaust routing. My old crossover pipe would not work due to the Getrag cables being completely in the way. Clynt had dropped off a caddy crossover pipe to see if that would work and it would not work with the way I have things on my car. So I dug out the cut off disks, the air cutter, the air grinder, the the caliper for measuring and got started.
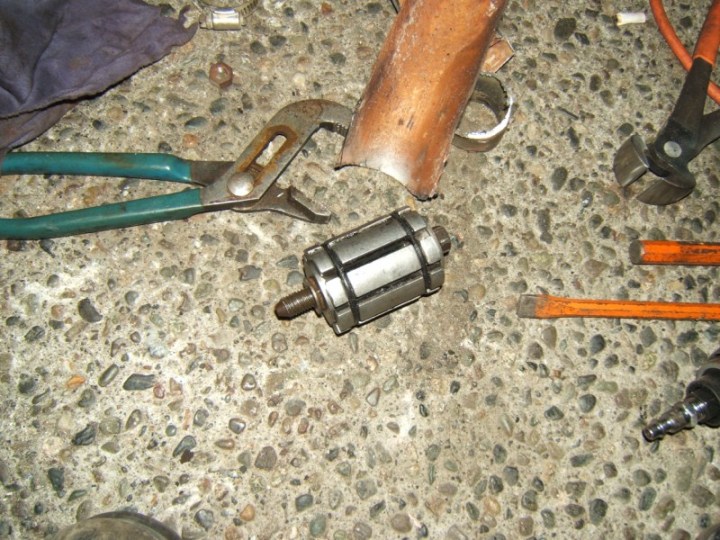
I took my old crossover pipe and cut out the entire center section, then added about 4"s to it, then rotated it around 180 degrees. So instead of going straight across the trans, it made a much larger arc around the cables. Then thanks to my Dad giving me a pipe expander on my last trip down to Oregon it made re-assembly worlds easier. I was able to treat it like Lego set, just stacking pieces on until I got the route I wanted. Pipe expander goes into an end of pipe, then using an impact gun, it expands out, stretches the end of the pipe so you can slide it over another pipe. Due to my in-experience I managed to kill the nice fancy bolt and nut that it came with, (didn't know you had to grease everything before use) I found that a cradle bolt was a near exact size.
Well here are the pics.
Layout
Me holding it more to show the clearance between the cable brackets
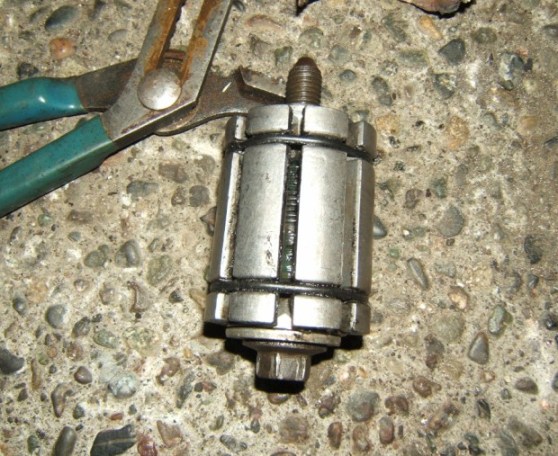
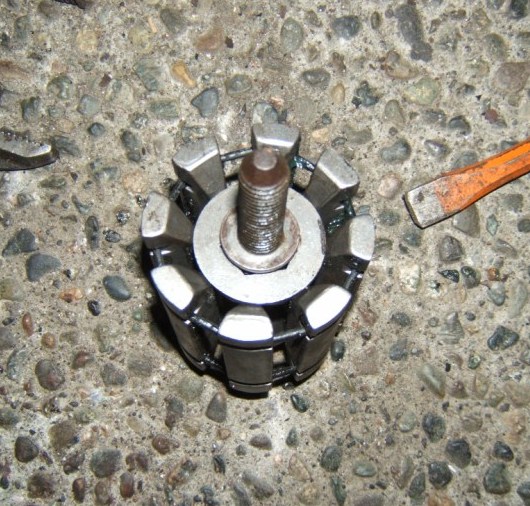
Pipe expander, at full compression its 1.5" at full expansion its 2.5"
You can't take a 1.5" pipe and make it 2.5" as metal only stretches so far before it tears, however you if you have 2 pieces that are the same size and you need to stretch one so it can fit over the other this is great, or if you have 2 pieces that you want to join and the joint is sloppy you can enlarge the smaller one to fit the larger pipe better. Its unbelievably handy. I wish I had this 5 years ago when I was working on exhaust bits, would have saved me hundreds of dollars in couplers trying to fab up my own parts.
------------------ 85GT Soon to be 87GT,93 Eldorado 4.9, 5spd Dual O2 Custom Chip, Custom Exhaust. MSD Everything Capt Fiero --- My Over View Cadero Pics Yellow 88GT 5spd Full Poly Suspension, Lowered 1/2" in front, Corner Carver.
IP: Logged
03:33 PM
Jun 26th, 2009
Capt Fiero Member
Posts: 7658 From: British Columbia, Canada Registered: Feb 2000
OK I am practically falling asleep at the keyboard so forgive me if this post makes very little sense.
I did not have a ton of time to work on the car tonight, but I am pleased with what I got done.
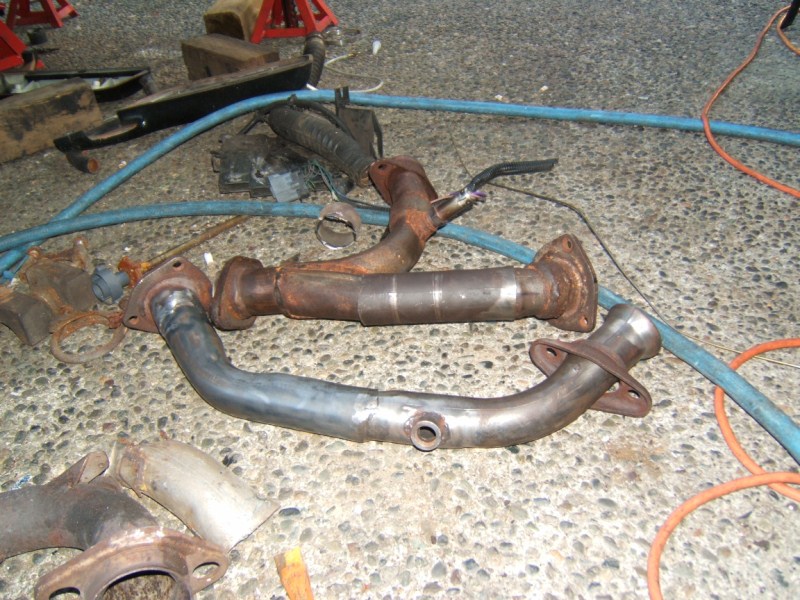
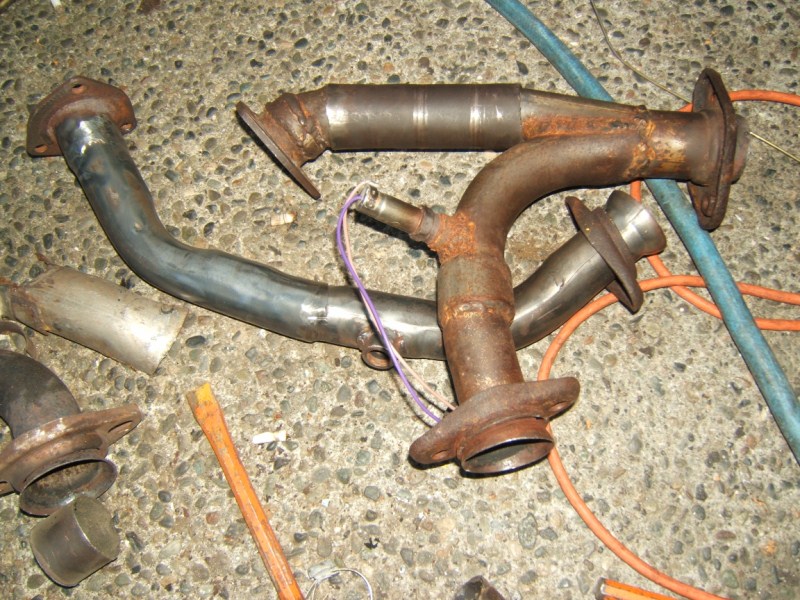
I did the rough setup with the exhaust the other knight, today I did the last of the prep for it to be welded.
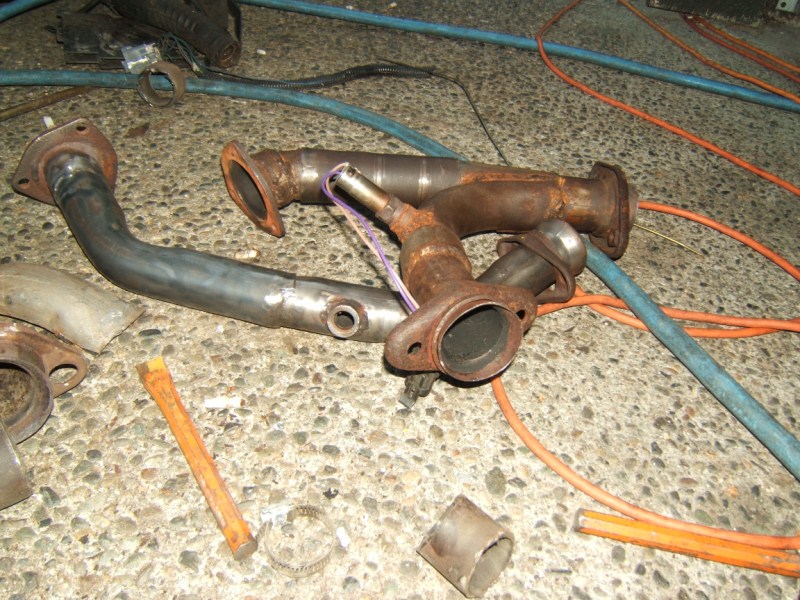
I didn't get any "before" shots on the main crossover pipe as frankly I did not think it was going to clean up nearly this much, it wasn't till I got the cross pipe done that I even decided to work on the Down/Y-pipe section.
I don't think I did too bad of a job considering its all put together from scrap bits of pipe cut and moved around. No welder, no sand blast cabinet or other cleaning tank. I chopped up the cross over pipe I had originally, sectioned it in a few places, used some scrap pipe I had, and some pipe that Clynt dropped off to me to play with. Used that funky flaring took, slipped the joints over, then using a grinder to heat the metal cherry hot, molded it, and shaped it to the size and shapes I needed. Then ground the seams together. It'll get properly welded, and then I'll do a final grind and polish to make it perfect.
OK pics.
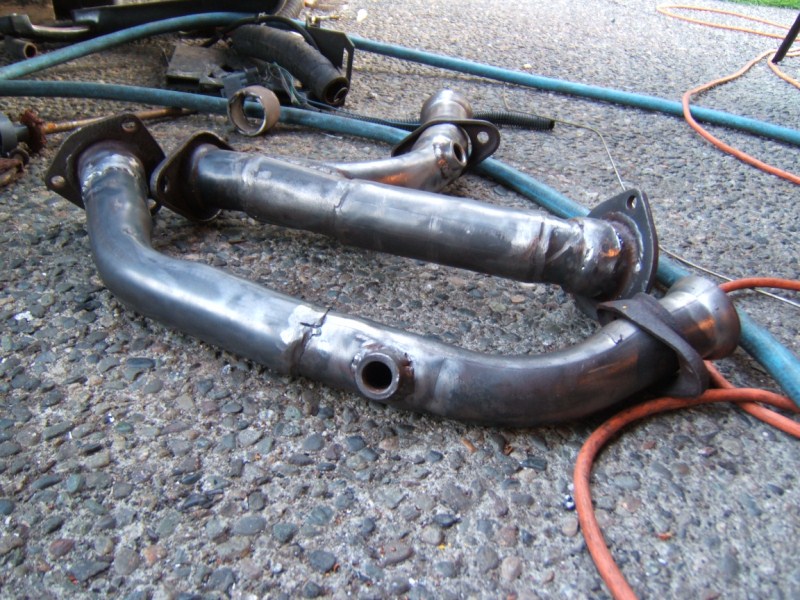
First pipe cleaned up
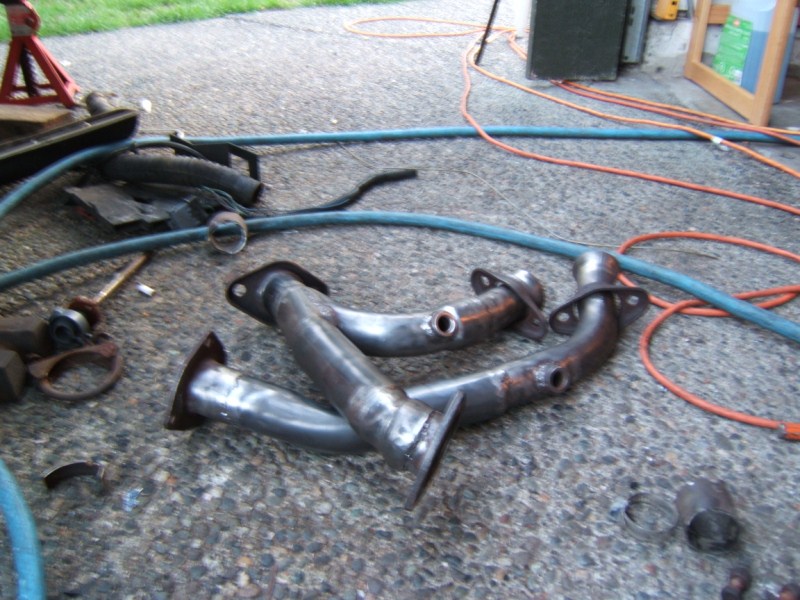
2nd pipe to show how nasty it is compared to the 1st pipe. They both looked that nasty to start with.
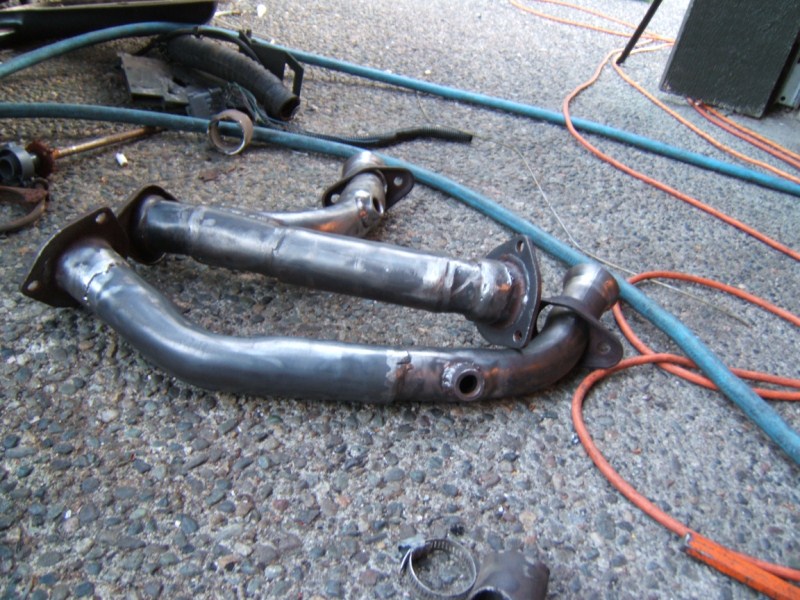
OK both cleaned up now.
I took the time to finally grind down any crappy welds that were left over from when the pipes were put together professionally by a shop back in 2005.
All in All I am really happy with the turnout on these 2 pipes. Once they get welded and final touches done. I just might get them ceramic coated so they stay nice. Then keep them until I am ready to get a new exhaust and sell them on E-Bay to someone that wants a 4.9 V8 Cross Over / Y pipe that will work with an otherwise completely stock V6 Fiero exhaust.
------------------ 85GT Soon to be 87GT,93 Eldorado 4.9, 5spd Dual O2 Custom Chip, Custom Exhaust. MSD Everything Capt Fiero --- My Over View Cadero Pics Yellow 88GT 5spd Full Poly Suspension, Lowered 1/2" in front, Corner Carver.
IP: Logged
02:35 AM
Jul 18th, 2009
Capt Fiero Member
Posts: 7658 From: British Columbia, Canada Registered: Feb 2000
Long Long past due for an update, Well as hot as it was today, I put up a tarp for shade and drug one of the big stand up fans outside and got to work. I really keep forgetting how hard something as simple as making a coolant pipe can be. Spent 8hrs just finding a way to get the main coolant pipe routed out of the way and finding a way to get the 3 different sizes of heater pipe to all play nicely together. My super simple original coolant pipe idea ended up not working with the re-design of the exhaust Y-Pipe. So everything had to be redone. I just kept sizing up the angles and cutting and bending the pipes till I had exactly what I wanted. My real goal is to have as little rubber hose as possible in the car. As the metal pipe won't fail, and if I do blow a rubber hose, I can just go to the parts store ask for "any" piece of XX size hose, then cut it up and replace my small broken piece rather than having to ask for a hose with XX size and 3 bends at such and such angle, then praying they gave me the right one.
Oh I am so close, I think I can actually smell the burnt rubber already. I pulled the exhaust off today and sent it out to get welded up. Tomorrow is just going to be affixing hoses to walls, finding good places for everything to get solid mounted to. Well enough chatter here are the pics.
Couple shots of the hose that I spent so much time sorting out all the bends and joints today.
In the end it was all worth it, it wraps around the strut tower, then feeds over to the air cleaner box area where it joins a wire coil filled flex line.
You can see it fairly well in this shot. Took a lot of work to get the angles just exactly the way I wanted.
Heater Pipe that got setup almost the same as the rad pipe, only I had no choice but to use a longer rubber line than I wanted.
What looks like a hose stuffed inside another hose, is actually going to be a proof of concept idea. Everyone has seen braided steel hoses before, well this is kinda the opposite. There is a steel tube inside the smaller rubber hose, friction fit, however the steel is actually 2 separate pieces. So you have a semi flex joint, with the strength of steel, can even hose clamp a larger hose over it and should seal tight and give me an almost indestructible burst strength.
I have a Trunk LOCK, Yaaa. Thanks to a friendly Mr. Duck, he took my spare 86GT trunk lock, re-keyed it so that I could use my original 85GT keys. I thought about using screws, but changed my mind and decided to use rivets to mount the lock barrel. They are fairly easy to drill out if needed and I have a thousand or so extra rivets.
Todays disaster mess, torch, pipe cutters, flaring tools, impact gun, bin of hose clamps, digital calipers and all sorts of stuff.
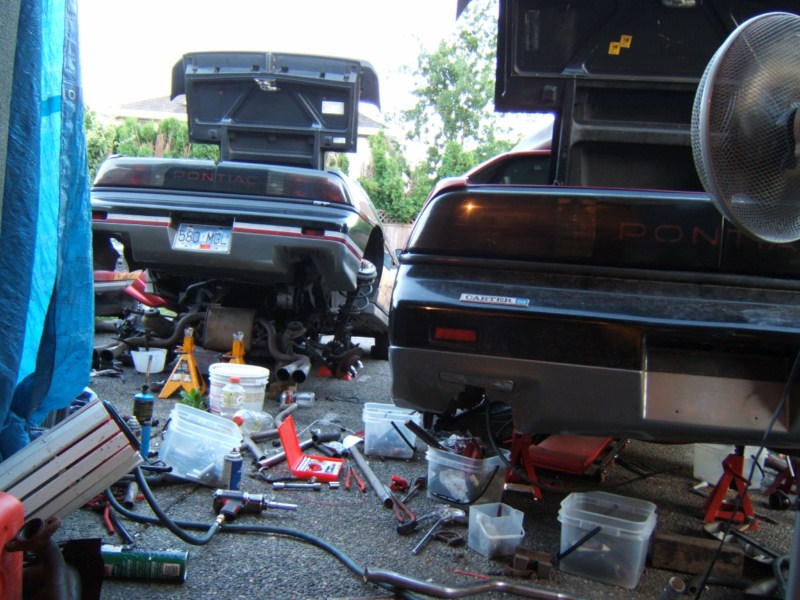
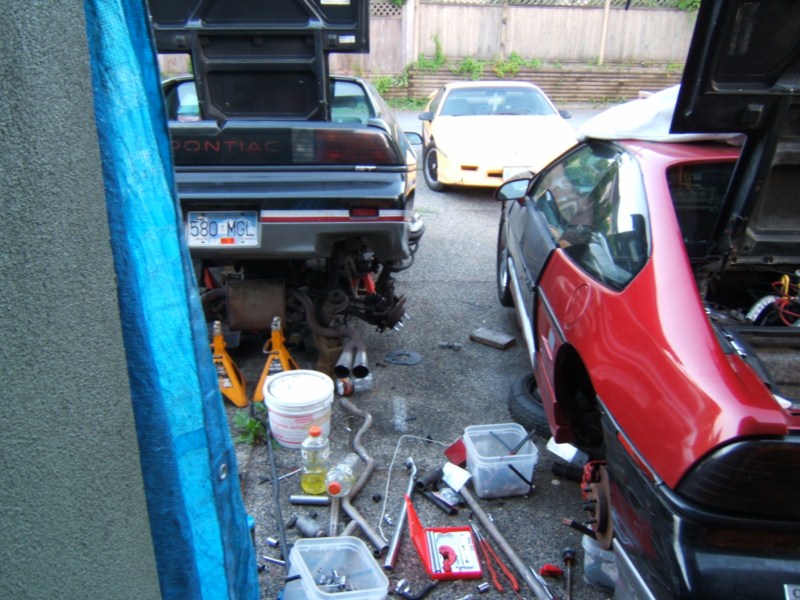
Hmm wonder if I work on Fiero's, 2 black fastbacks both torn apart at the same time. Kinda see my yellow 88 in the background.
Big Fan, Make Big Me, Big Cool.
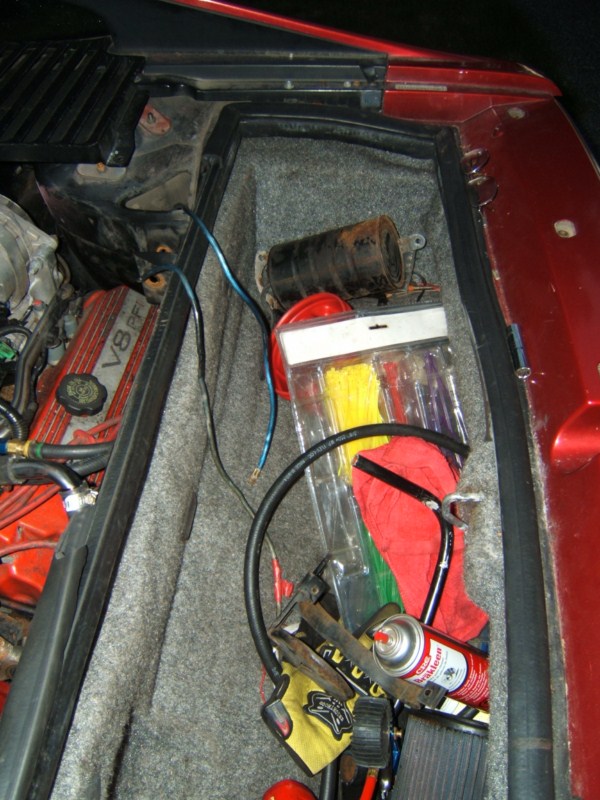
Does everyones trunk end up like this during a project?
Pack of Zip Ties are going to get put to good use Saturday,
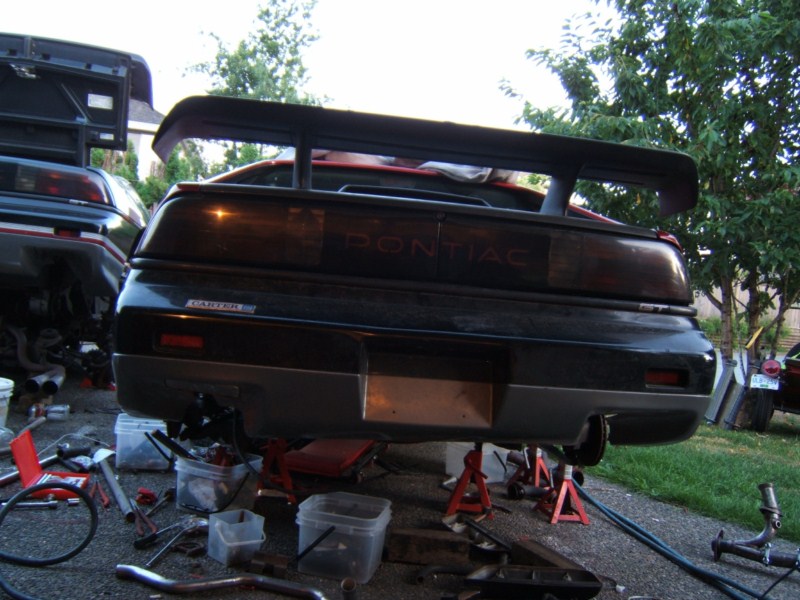
WooHoo, trunk actually does close and lock. From this angle you can really tell just how tall the spoiler is.
------------------ 85GT Soon to be 87GT,93 Eldorado 4.9, 5spd Dual O2 Custom Chip, Custom Exhaust. MSD Everything Capt Fiero --- My Over View Cadero Pics Yellow 88GT 5spd Full Poly Suspension, Lowered 1/2" in front, Corner Carver.
IP: Logged
03:24 AM
PFF
System Bot
Jul 19th, 2009
Capt Fiero Member
Posts: 7658 From: British Columbia, Canada Registered: Feb 2000
OK so the Miss's wanted to get out of the heat and go swimming today, jesh, doesn't she know I have a car to build, LOL,
So we went into Port Kells grabbed a burger at Wendy's, then went swimming for a couple hours, which was so nice, but it made us hungry again, so we went into Fort Langley, got some Italian Gilato, stopped off at Euphoria met with Blair and Angela, bumped into Brian and Kirsten in his 86GT. It was a nice afternoon.
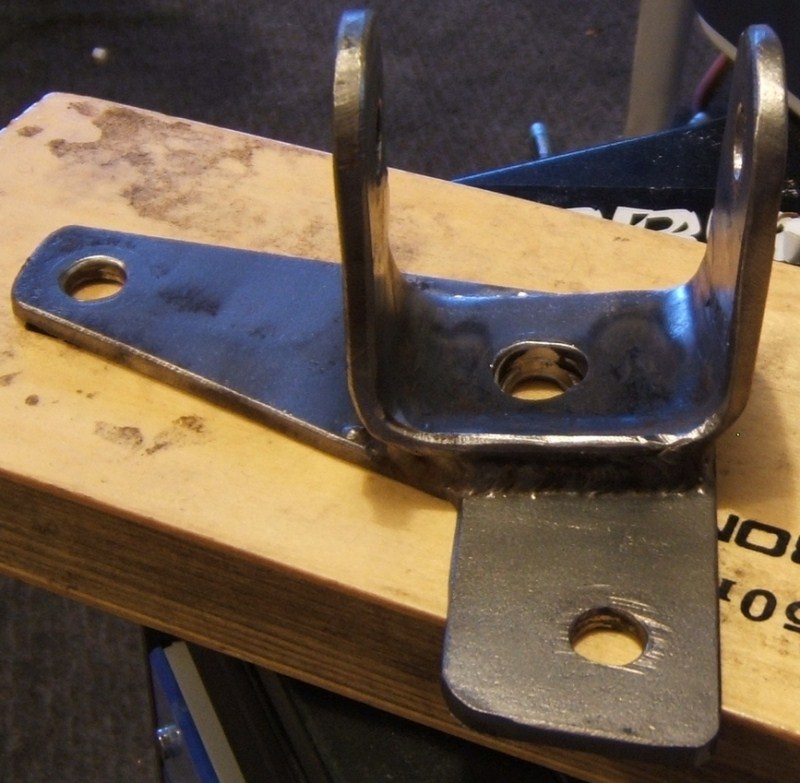
The nice bit was by the time we got home, the sun had moved far enough West that I was in a little bit of shade. I decided I should finally get the extreme dog bone installed in the 857GT. I did not get any pics of the holes, but I did clean up the dog bone and bracket. Not sure what I am going to paint the bracket with or what colour, but I am thinking a nice red colour that matches the other red parts on the engine. Blair built this for me, and it has taken all the abuse I have thrown at it, lasting longer than the race clutches, 3 different trans axles, 2 sets of rear wheel bears and a couple different CV shafts. So HUGE Kudos to Blair for designing building and helping me install it in my car. If anyone on here needs a bracket made up, and are willing to pay for it, HE IS THE MAN TO TALK TO. I have seen him take a complex bracket for the V8, look at it sideways, said that is a really crappy setup, took some cardboard, cut up the board into the shapes and angles, walked away with the bits, came back 30mins later and handed me a completely redesigned bracket done in plate steel, and perfect. His user name on here is Blair.
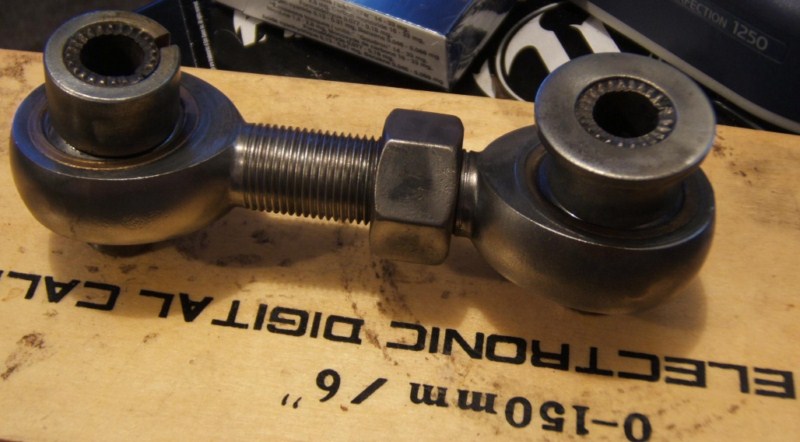
It was from what I understand made from a Trailing arm bits for a 60s era Firebird rear suspension 4 link setup. We always planned for me to get a longer joiner nut, however this, as it is, has held up for several years and not even flexed. You can't really see the size of this thing, but it is very heavy duty. It replaces the stock rubber style dog bone. However mounts in a different spot on the V8. Pics of the bracket will come lower down this post.
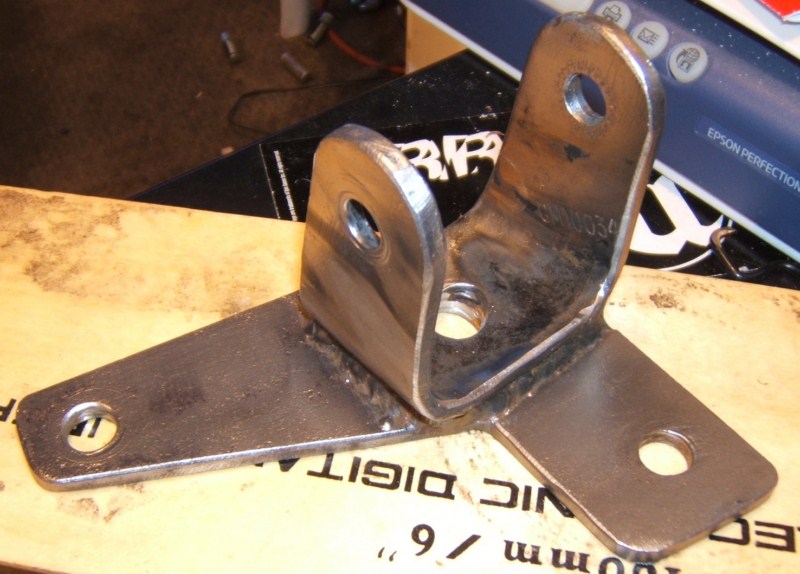
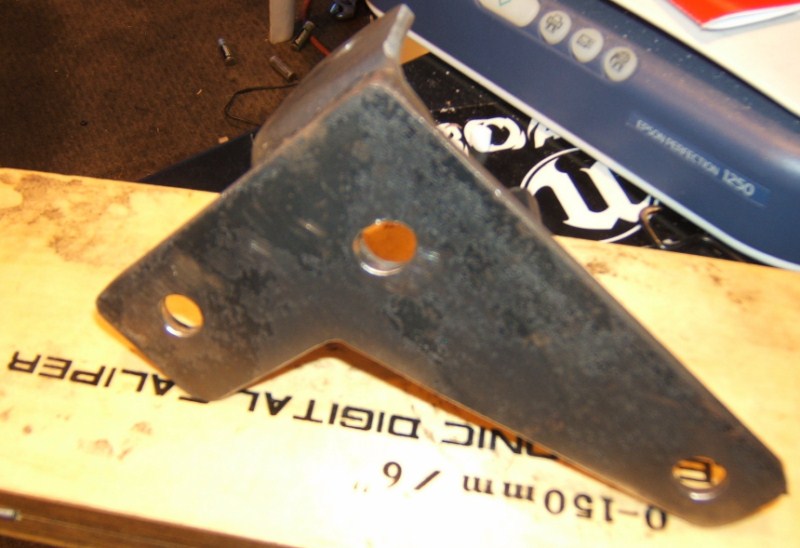
Here is the Bracket.
This has 3 large bolts that go into the truck wall with large washers to basically make it solid to the trunk wall same style as the stock dog bone, however this is mounted to the drivers side of the head. Blair designed this for me, as even with twice the amount of stock engine mounts the this motor was twisting the hell out of everything. The only option was to make a special dog bone for the left side of the head. It worked awesome. I drilled all the holes tonight, but didn't have time to paint and install it for pics of the install. The steel is really heavy plate steel.
It should be all painted and installed by tomorrow. I'll be here working on it most of the day so if anyone is looking for a reason to go for a cruise, pop on over. Will be fun. All I need to do is bleed the brakes, bleed the clutch, fill up the coolant, and she will be almost ready to go. Ryan should have my exhaust back to me by Tuesday. I can't believe I am getting this close to having my Baby back on the road, oh I miss it.
------------------ 85GT Soon to be 87GT,93 Eldorado 4.9, 5spd Dual O2 Custom Chip, Custom Exhaust. MSD Everything Capt Fiero --- My Over View Cadero Pics Yellow 88GT 5spd Full Poly Suspension, Lowered 1/2" in front, Corner Carver.
IP: Logged
02:37 AM
Jul 20th, 2009
Capt Fiero Member
Posts: 7658 From: British Columbia, Canada Registered: Feb 2000
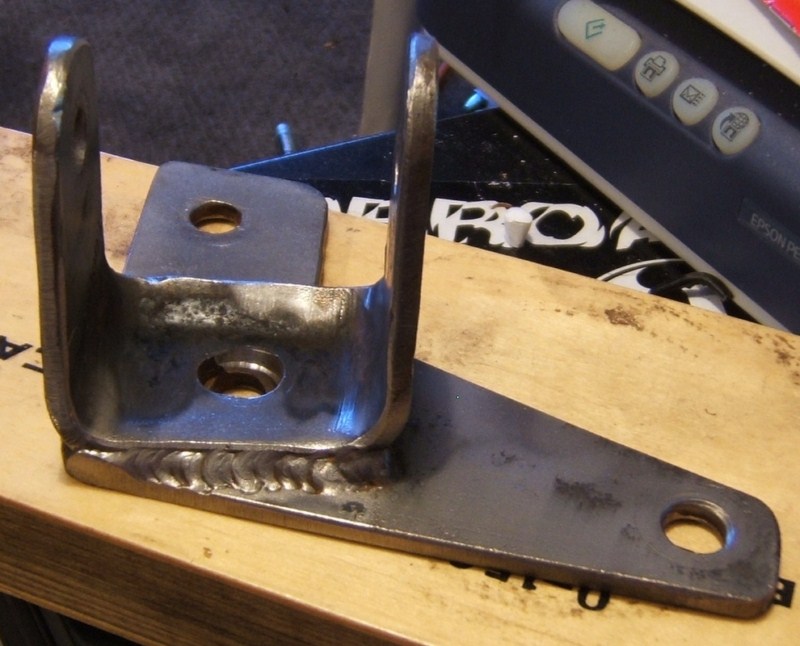
Tonights update is a little slow for 2 reasons, we finally sold the Minivan, ya.
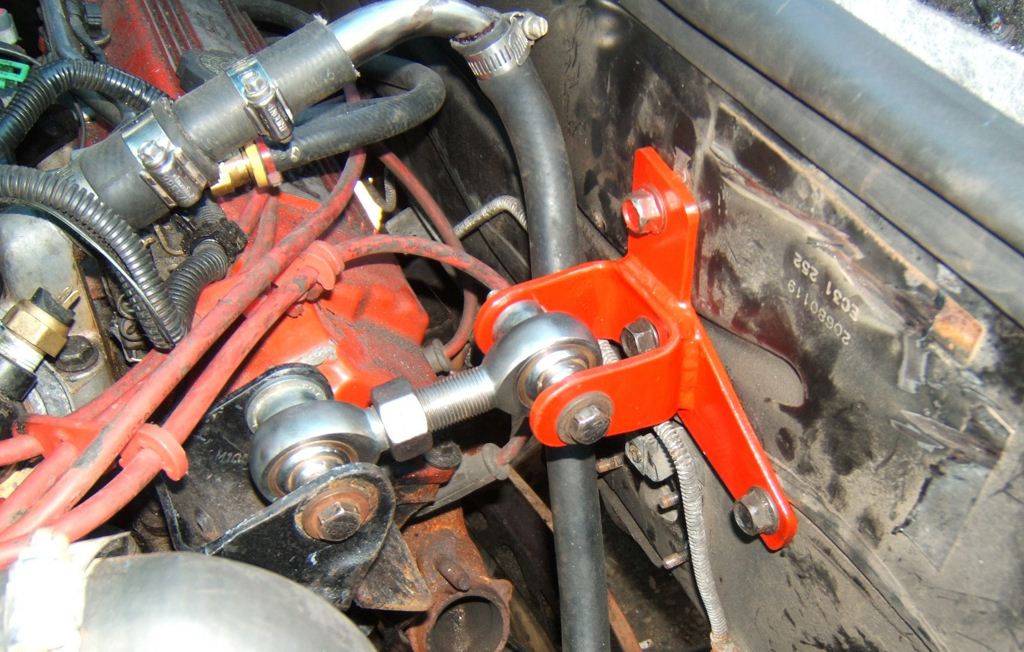
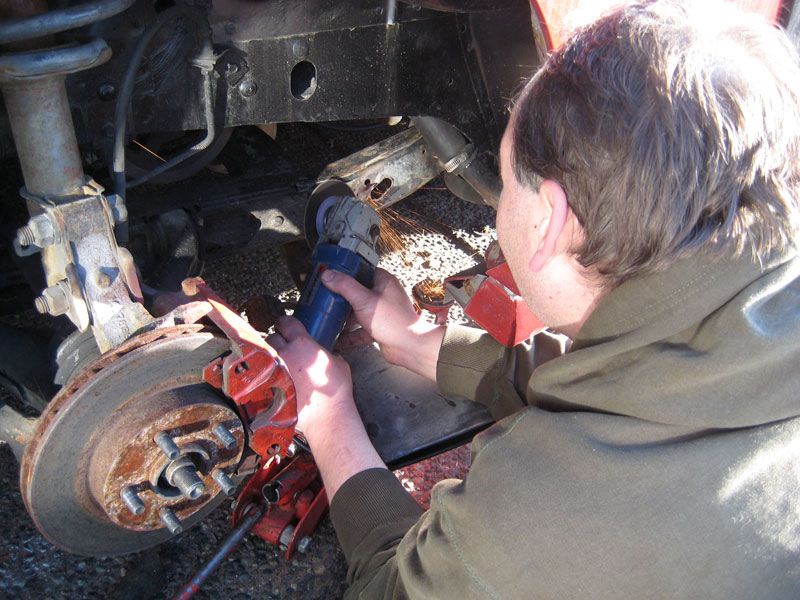
So first thing I did today was map out the holes for the bracket, The bolts to the wall don't have to b every heavy as they hold it in position. When accelerating the bracket is pushed against the trunk wall its only in reverse that it would pull away and frankly I am not into reverse drag racing. I also removed the old dog bone bracket and the cruise pod brackets just to clean it all up nicer. It really dawned on me today this is the first real mount that is V8 Specific that has been drilled to the car itself all the other mounts are into the trans. So its a kinda milestone. I decided Torch Red was a nice match for the rest of the engine. I think it turned out fairly well. The stepper drill bits made it so much faster. I'll try grab a photo of it tomorrow. I made special attention to one thing, all the bolts, nuts and even the dog bone bolts and nuts are ALL 15MM heads.
OK so todays bright red bracket. Painted red Looks good to be now for the mounting, If ws designend to withstand mu abuse and still replace a stock
I wish I could write more, but I to get some sleeop
[This message has been edited by Capt Fiero (edited 07-21-2009).]
IP: Logged
04:06 AM
Jul 21st, 2009
Capt Fiero Member
Posts: 7658 From: British Columbia, Canada Registered: Feb 2000
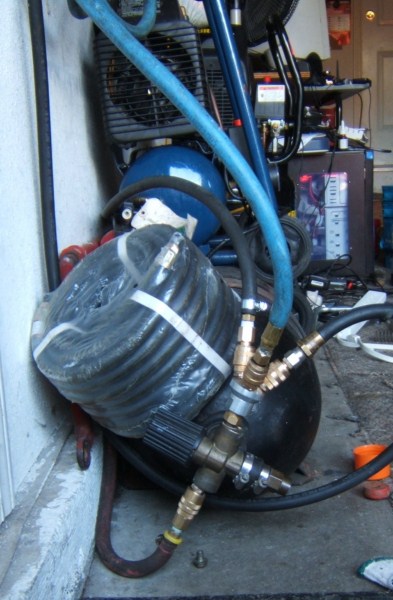
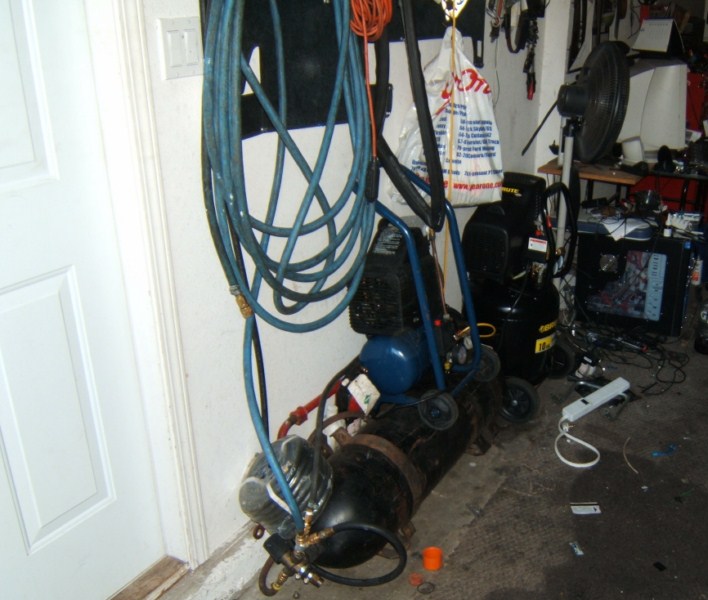
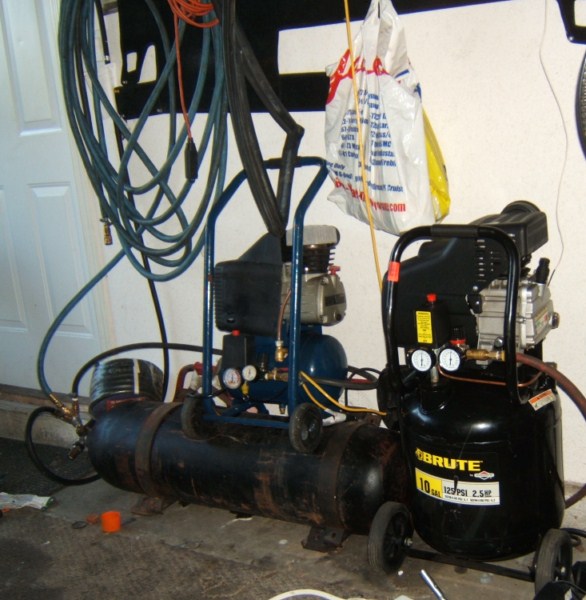
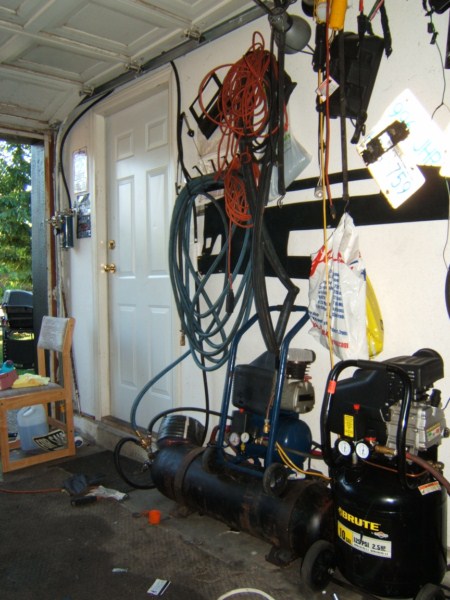
Well after having not 1, but 2 Air compressor fail on me, I re did the entire air system and now, running dual compressors, I had an issue that when they both fired up, 30 seconds later the breaker in the garage would pop. Ran a 50ft cord around the side of the house and plugged into a different circuit and all is fine, Hell its better than fine, I was able to cobble up a rig that actually works better than what I had before. I am using the 2 separate compressors feeding into a large central res tank. The big compressor gets all the res tanks up 100-120psi quickly then it shuts down, while the smaller compressor keeps running until the system gets to 140psi.
I'll quickly narrate
Main dryer and regulator, our local paint guy, said to get the drier line way up and over, to help keep moisture from killing the dryer.
triple hose manifold and primary bypass. The main large compressor, feeds the single line on the back of the steel LNG (ex liquefied natural gas) tank. When the black knob is turned one way, it passes the LNG tank and feeds direct to the tools and only maintains the single 10gallon tank. When I move the valve the other way, it opens up both lines into the long black tank, allowing me to double my reserve capacity when needed.
Now here is where took some thought, The Brute and the "Friend" compressor are both hooked to the main LNG tank. When everything is powered up and valves are open, the small Blue compressor will fire up at 90psi , and if I continue to pull air out faster than it can put it in, when the pressure drop to 80psi the large Brute fires up. Both will run constant until it gets to 120psi, at 120spi, the Brute shuts back down and only the blue one will continue to run until the entire system is up to 140psi.
I did some experimenting with it, and I can run my air die grinder steady on, and the 2 compressors are able to keep up with it. My new paint guns only need 5 cfm and the Brute alone will do more than that. So I don't foresee any major issues regardless. Oh just as a foot note. The blue hose can be unplugged from the tank and plugged into the dryer direct. I did it this way so I could remove the line from the dryer and not burn it up on day to day tasks. When I do start the painting, I will open up the new line that is sitting there onto of the LNG tank.
Note the black dryer line going over the doorway.
IP: Logged
04:37 PM
Sep 19th, 2009
Capt Fiero Member
Posts: 7658 From: British Columbia, Canada Registered: Feb 2000
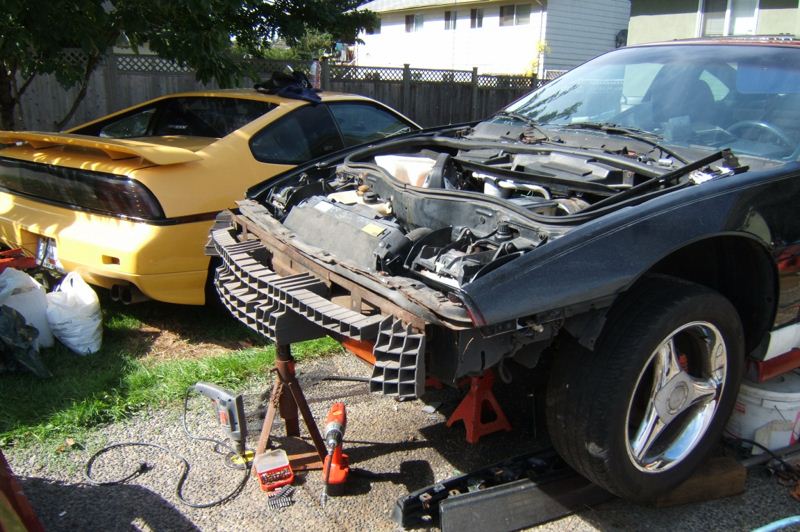
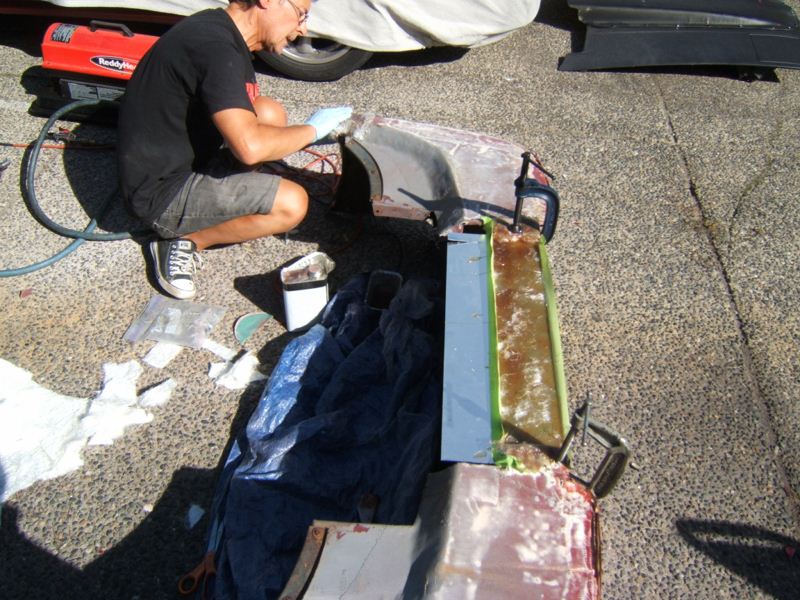
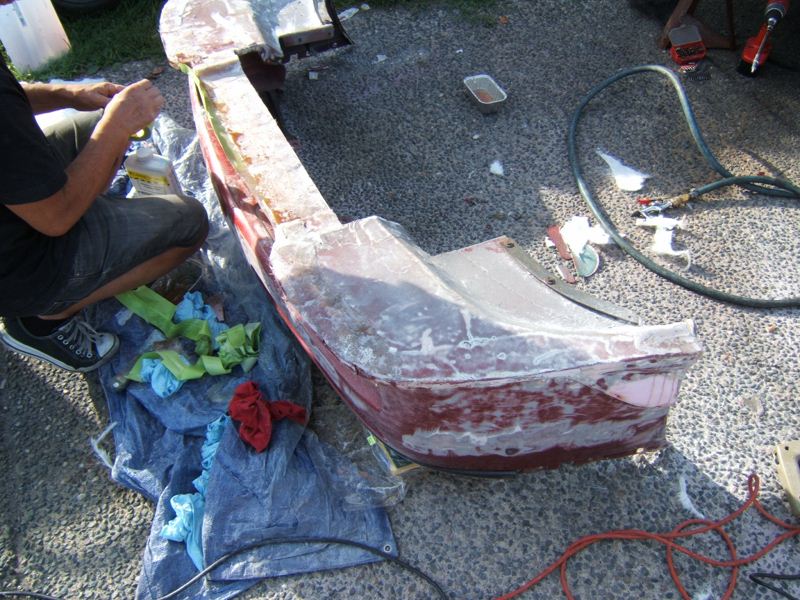
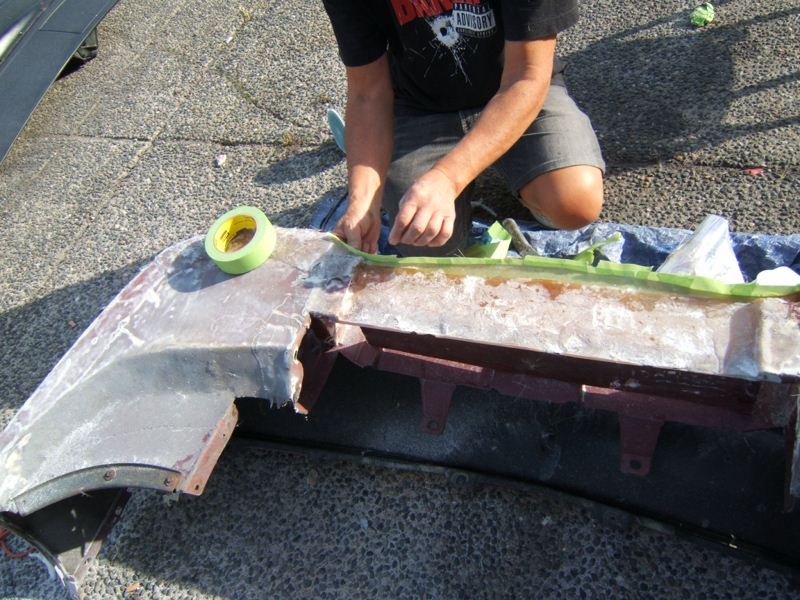
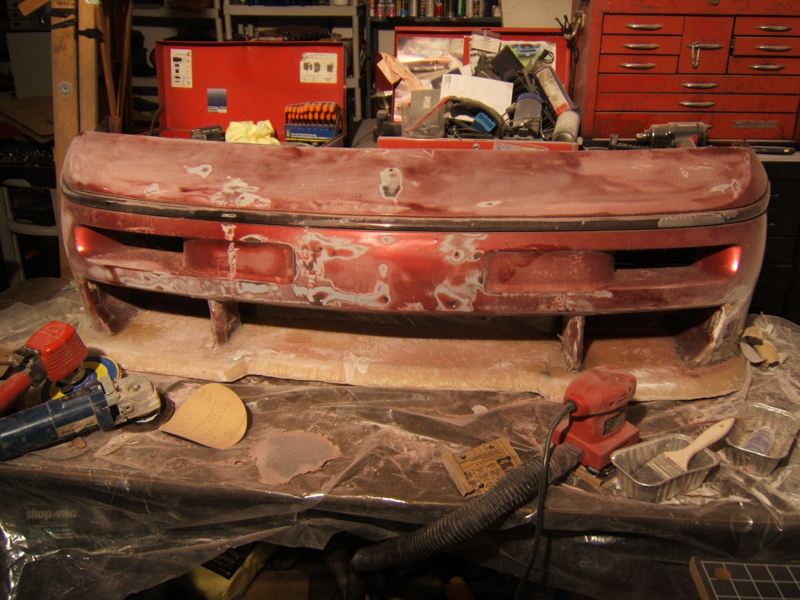
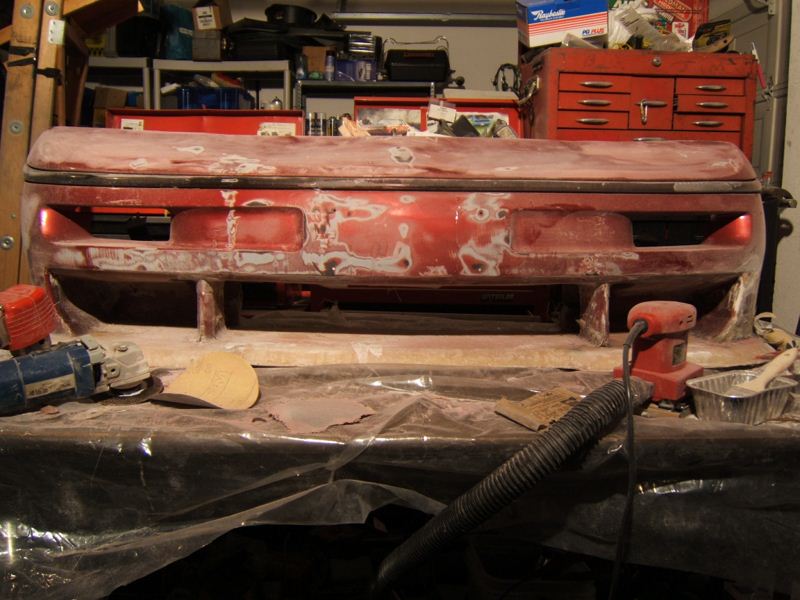
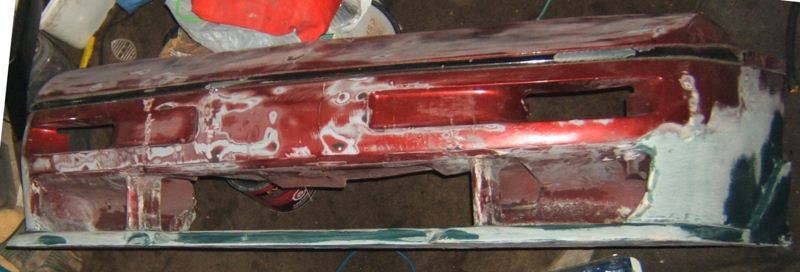
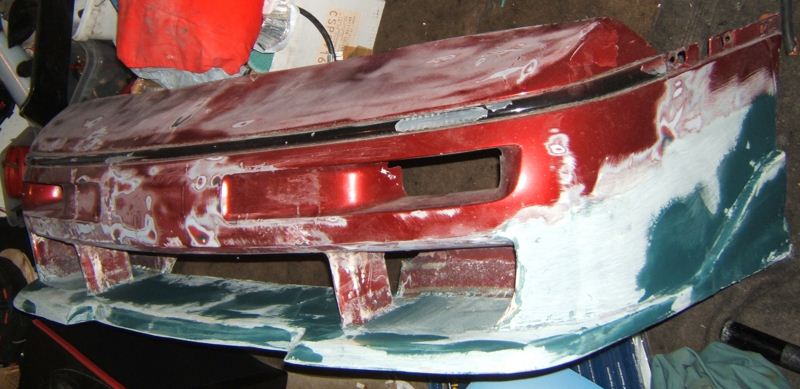
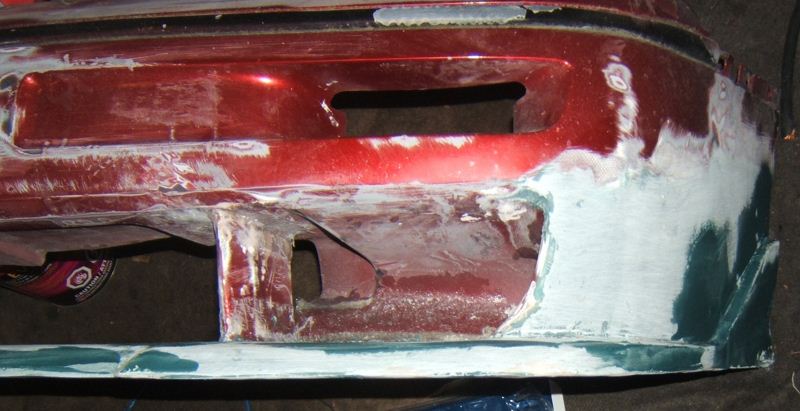
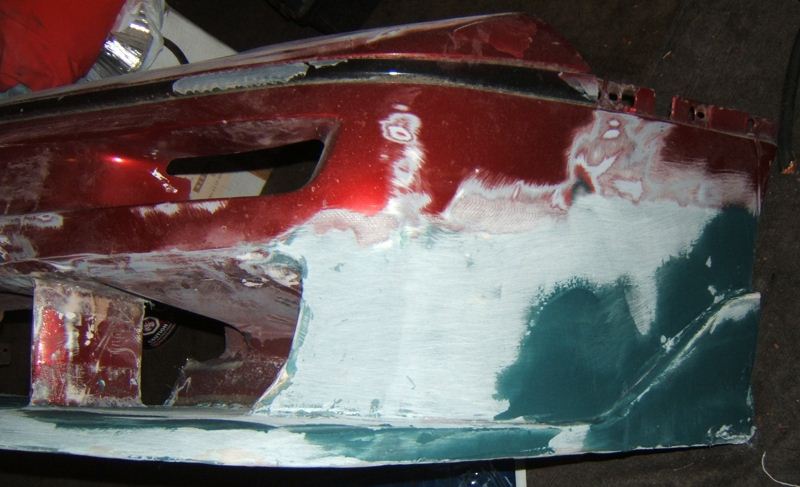
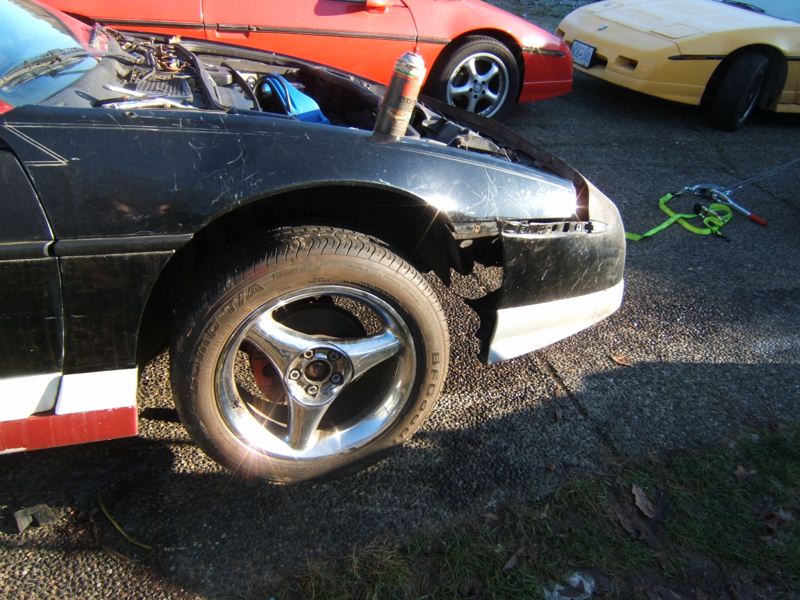
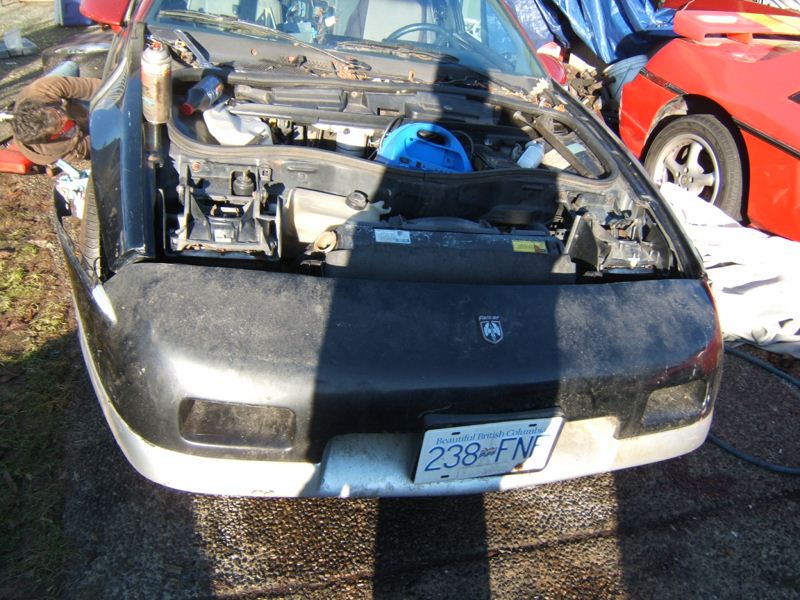
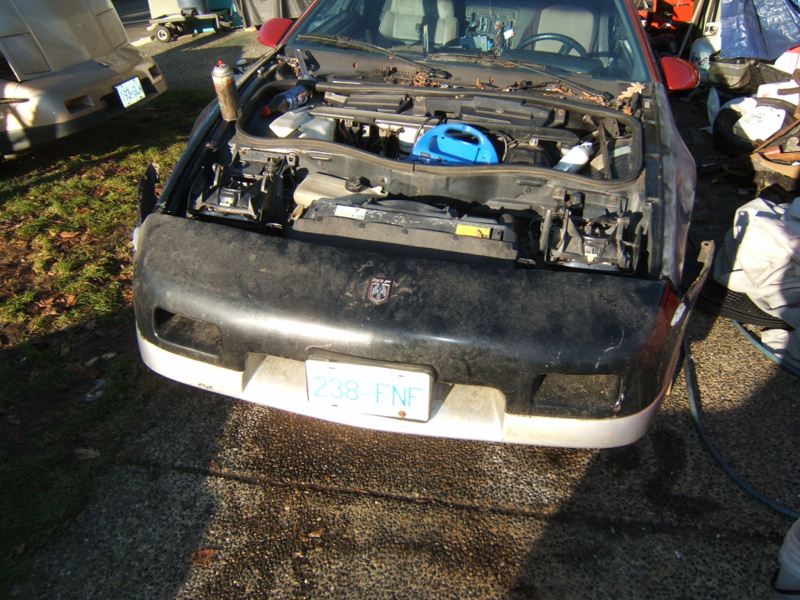
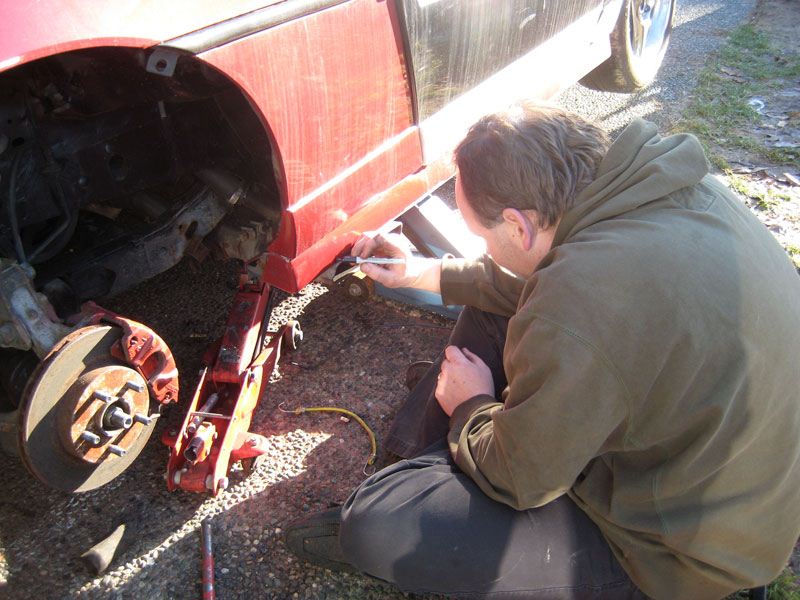
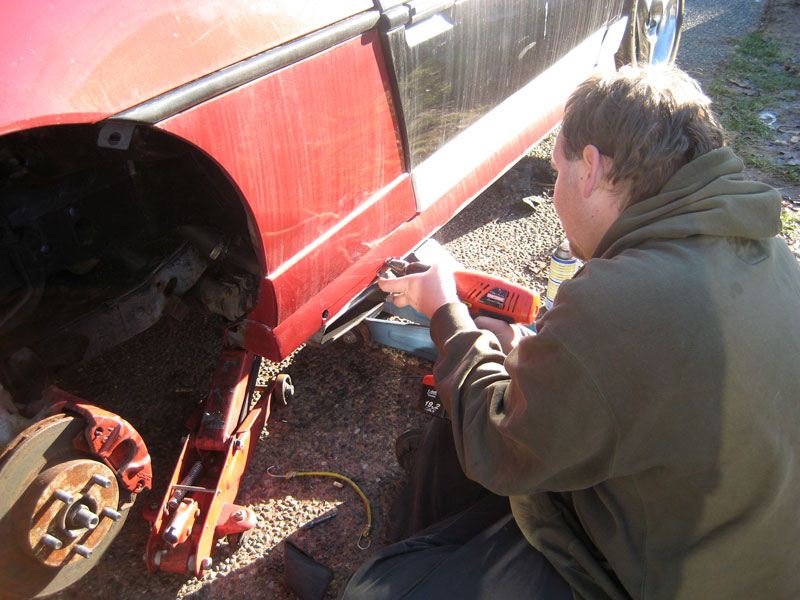
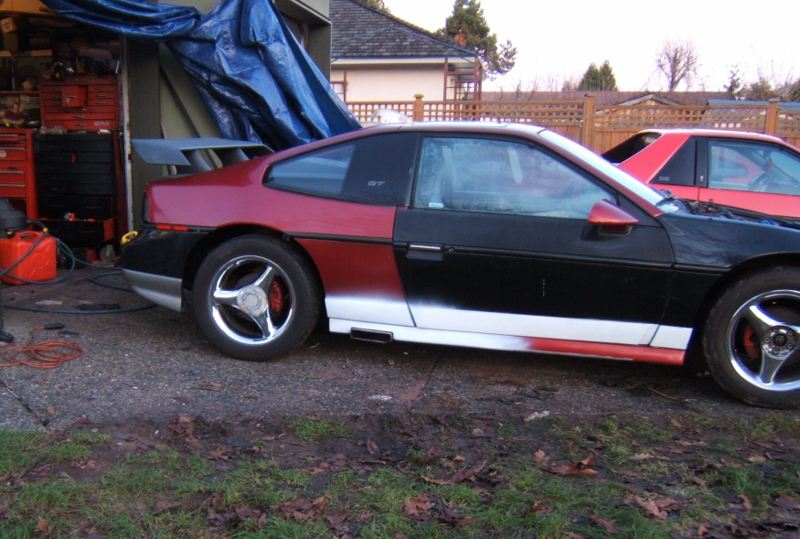
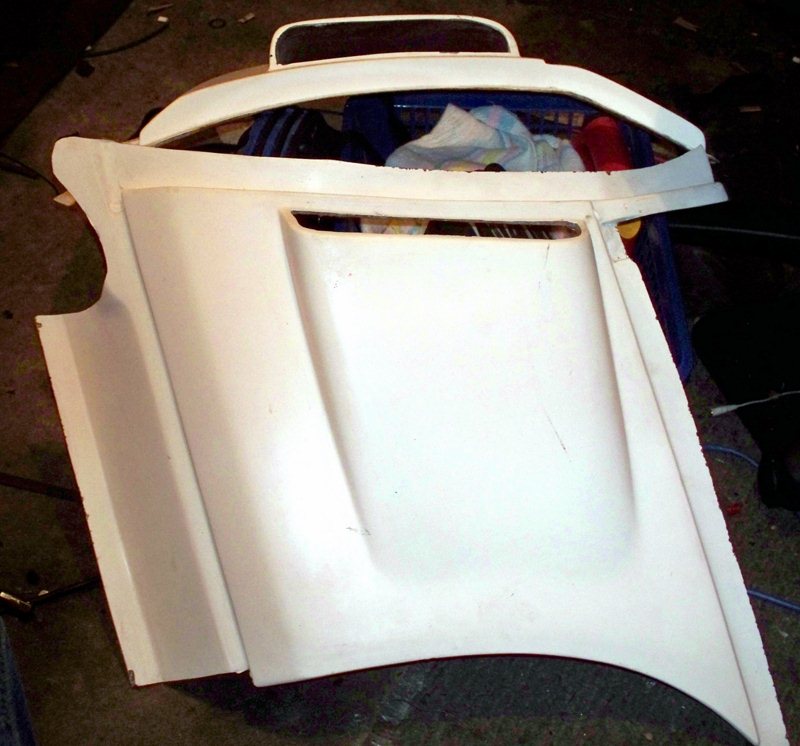
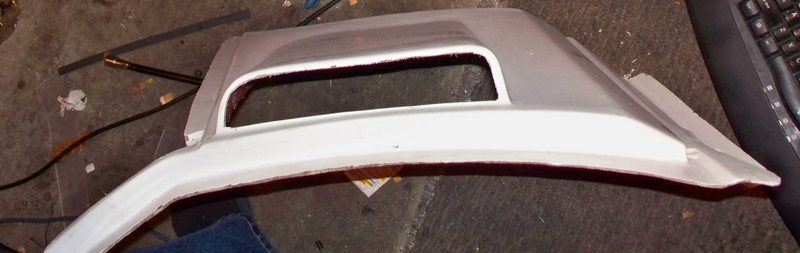
Well with a busted knee, wife that is 7 months pregnant, and both of us out of work due to injury's, things have gotten interesting, HOWEVER, there always seems to be that buddy that wants to come over and have some fun. I can't fiberglass at all, and Car-2-Lo offered at the last club meeting to come over and see what we could do with the custom nose on the 87GT. For reference, this is his 86GT Chop top Wide body, 3800SC car he built by hand himself,
I asked what I would need to have here for him to get started. His reply was "nothing" he would bring all the supplies and everything. I was like WOW, I actually hesitated the offer for him to help me, but at this point, I was so grateful, I couldn't turn it down. He needed a small thing changed on his car, just a clutch master, which for me is a 20 min no brainier job.
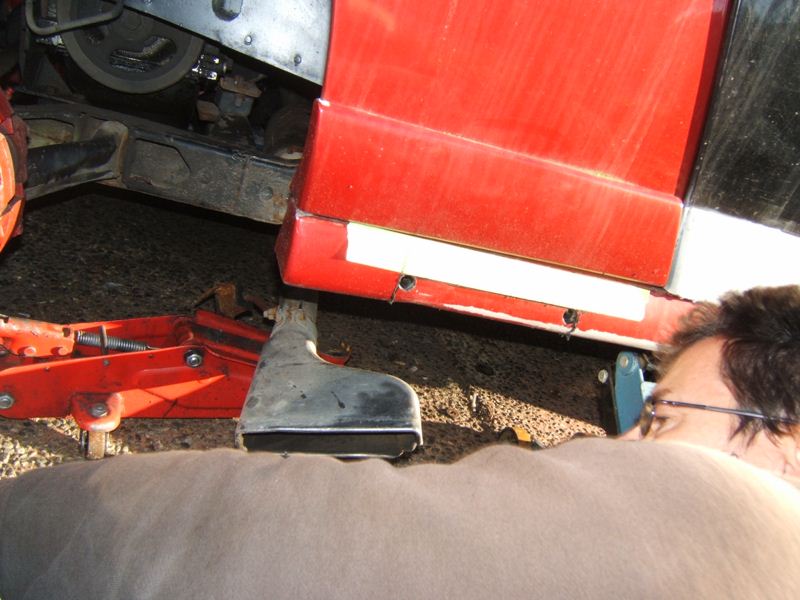
So the first order of business was drop the nose.
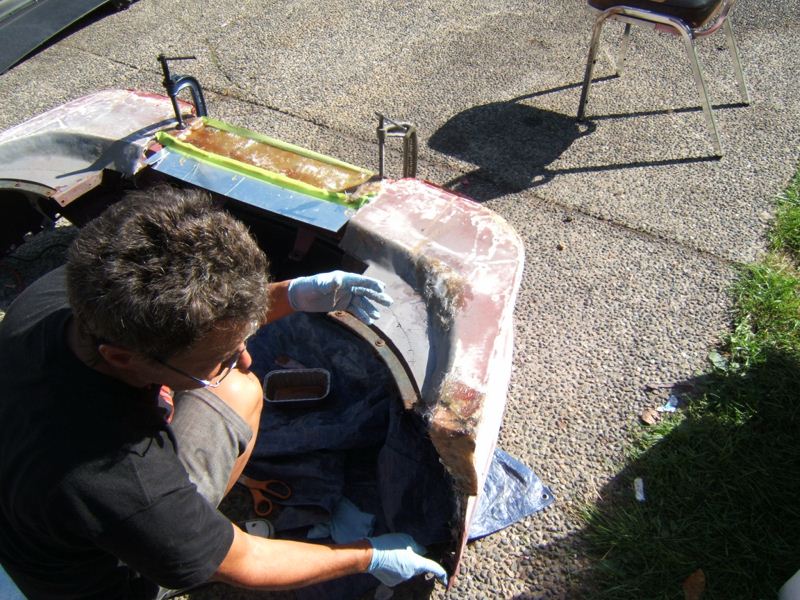
I was kinda surprised, it looks like it had a previous hit that was not reported to the insurance. It had been repaired but still concerning.
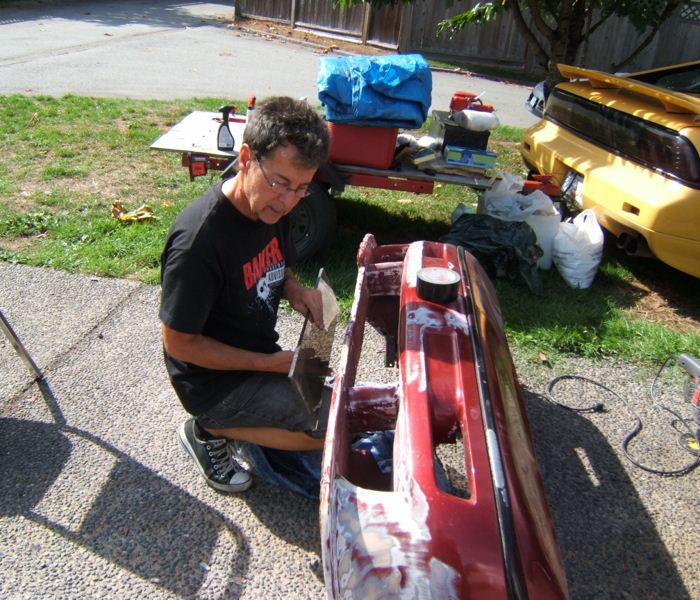
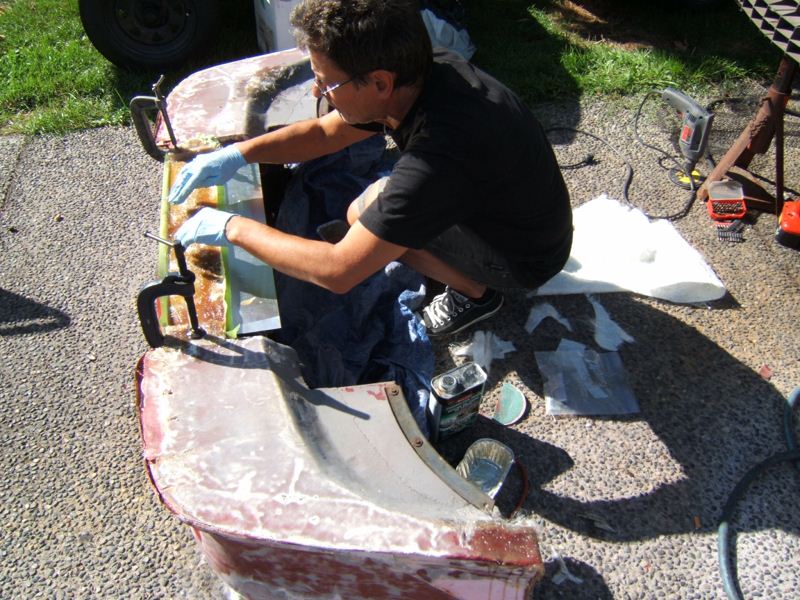
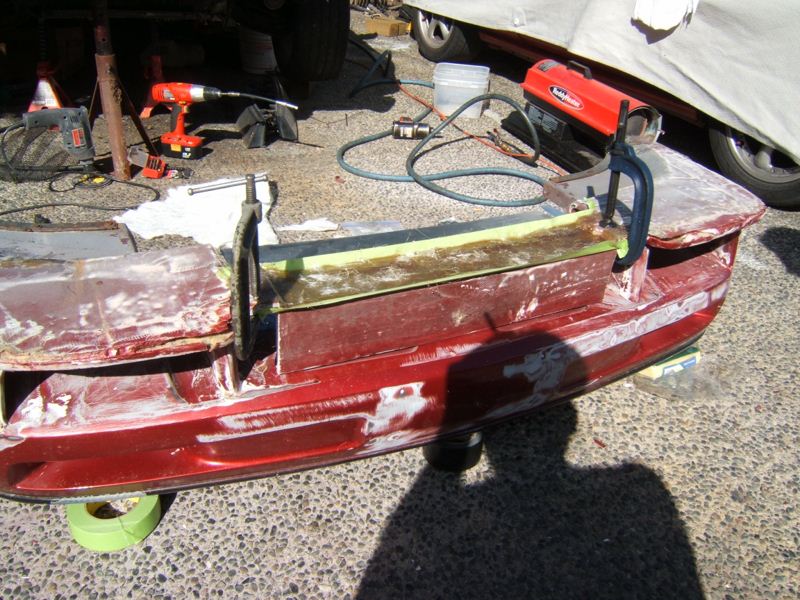
After some quick checking, he decided that at the very least the center section of the nose needed to be replaced and was not even sure if the entire lip would hold up. So he started looking at ways to rebuild it.
Finally deciding on using a separate piece of material clamped in place so it all held shape, then made a complete new center from fiberglass.
This was the partial start and glassing began.
The only good shot I got of the master all day.
The new center was now able to hold itself up.
However he was really concerned about the outside bits that are now showing the cracks, and he even started to bandage bits together.
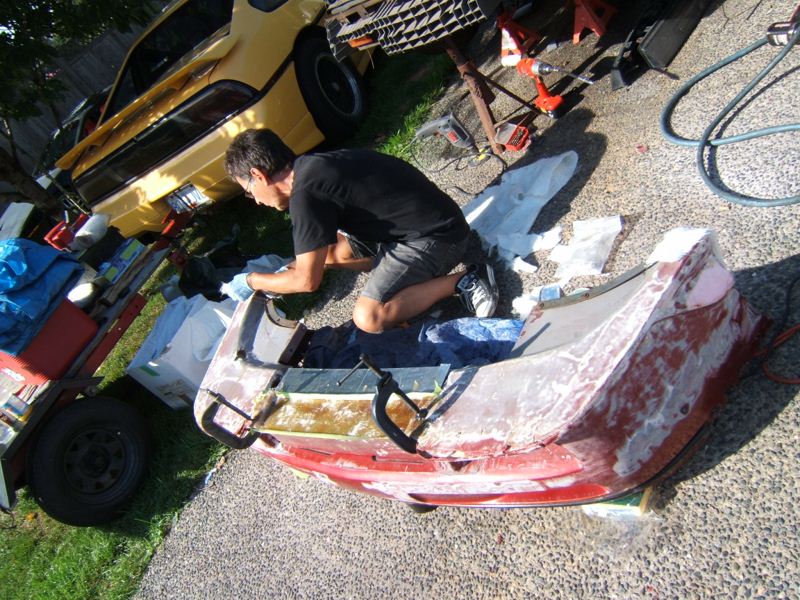
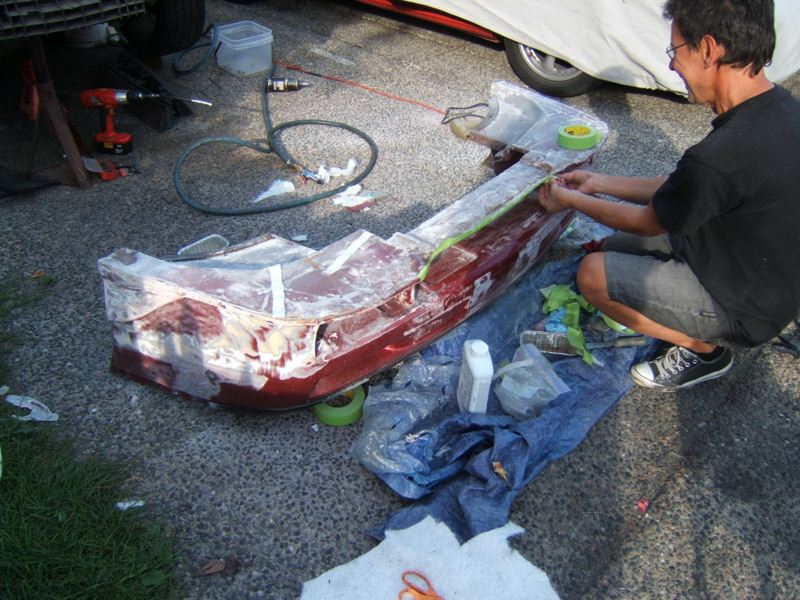
Then a test fit on the car, and we both stood back and I could see by the look in his face, it just wasn't going to work. He hated that it was not a smooth fit, as far as I was concerned aside from paint it was a ton better than what I had, but he hated it and would not leave it that way.
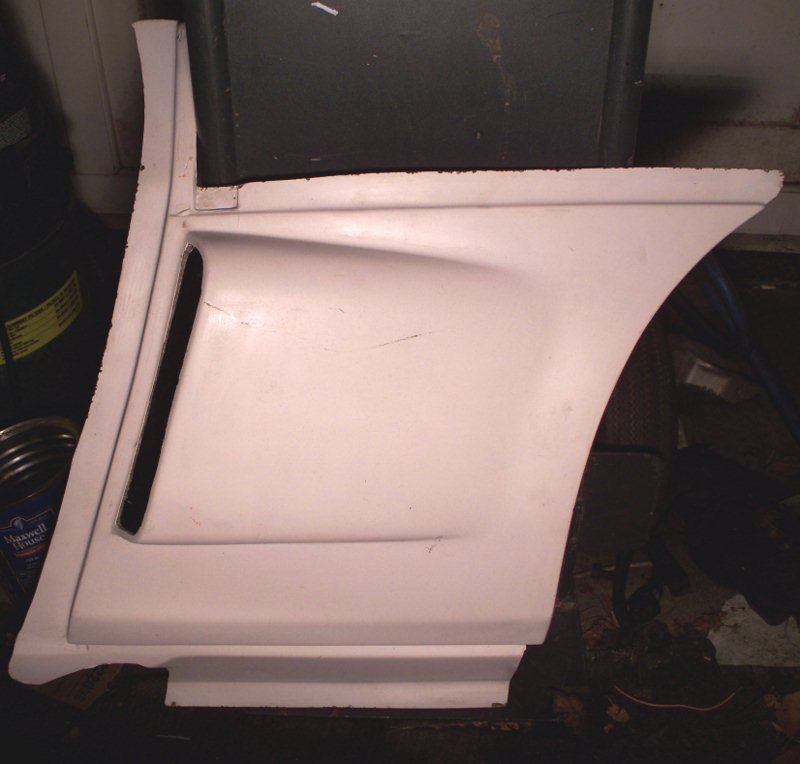
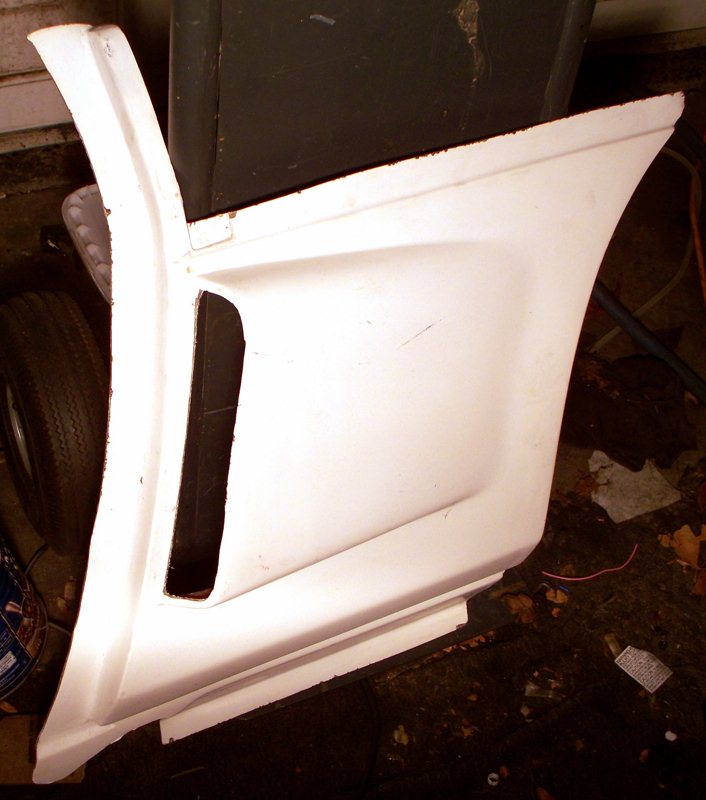
Although it looks like the outside vents are boxed in, they are not, the wall you can see, is actually the channel that directs air into the rad. So even though it looks like its the least functional part, it is actually more functional than 90% of the ones I have seen done.
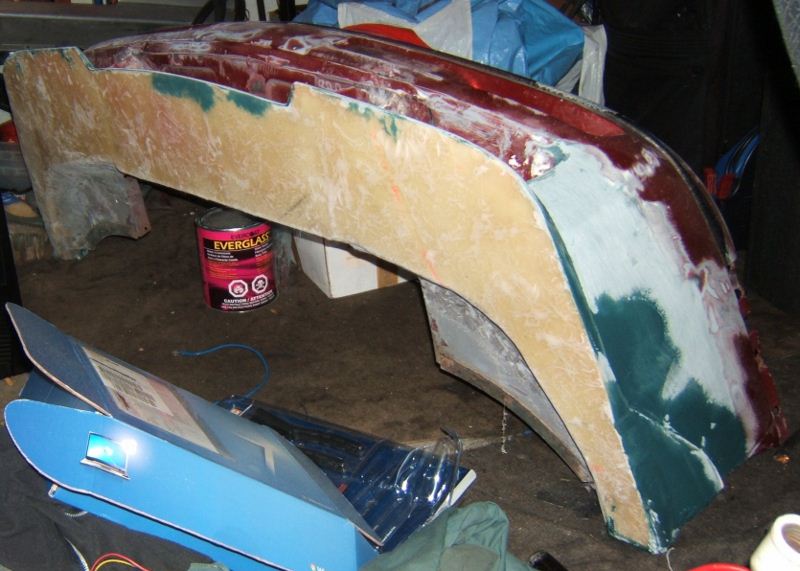
So the entire day, and all his glass, resin and such, in the end, we are going to take a saw and cut the entire lower lip off. I am going to get some Fibreform (fancy foam for making body kits), and he wants to trace the entire lower section onto a giant piece of fibrefoam and then glass an entire new lower section from scratch. He feels he can make it flow with the body lines so much better than trying to fix someone else's, 3rd rate work that was done previously.
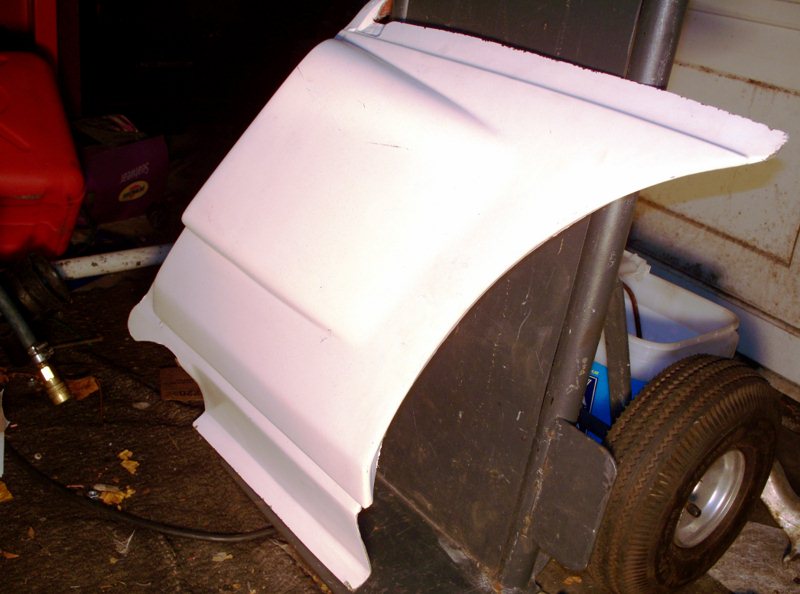
This is the hood that will be going on the car, the bolts will get removed, then the entire thing sanded down to bare fiberglass and the scoop will be glassed in, then painted to look like the rear scoop. The big cowl is going to work great at letting the hot air from the rad escape. So far I have found 3 different layers of paint on the hood. Which should make things very interesting, thankfully I do have an air orbital sander and a stack of 80 grit sand paper.
------------------ 85GT Soon to be 87GT,93 Eldorado 4.9, 5spd Dual O2 Custom Chip, Custom Exhaust. MSD Everything Capt Fiero --- My Over View Cadero Pics Yellow 88GT 5spd Full Poly Suspension, Lowered 1/2" in front, Corner Carver.
IP: Logged
03:46 AM
Sep 26th, 2009
Capt Fiero Member
Posts: 7658 From: British Columbia, Canada Registered: Feb 2000
Ok so I have 77 pics of the glassing and ripping and tearing and the home made fiberglass curing room. (manage 50C outside in my driveway) However because all the pics are of tearing apart and starting to build, there is nothing really "Cool" to see.
But it wasn't all glass work that we did, the 2nd chop top owner was also an expert on the wiring of the 4.9 V8 to Fiero and he came to the conclusion, I had not done anything wrong, it was all as it should be. So we started digging into "other" reasons why it would not start. Well I'll let the video explain.
Turned out to be so frickin stupid, something that I should have went back to basics and looked for rather than all the over the top OMG major things I was digging for. I had the fuel feed and return lines hooked up in reverse. As soon as we changed those, it fired right up. Man was I pissed, but also jumping happy, just beside myself that it is now running. Almost makes me want to shortcut the body work, just to get it on the road and driving it.
------------------ 85GT Soon to be 87GT,93 Eldorado 4.9, 5spd Dual O2 Custom Chip, Custom Exhaust. MSD Everything Capt Fiero --- My Over View Cadero Pics Yellow 88GT 5spd Full Poly Suspension, Lowered 1/2" in front, Corner Carver.
IP: Logged
06:24 PM
Sep 27th, 2009
IXSLR8 Member
Posts: 674 From: Post Falls, ID, USA Registered: Sep 2004
Great to see you moving forward again. Best of all, congratulations on the little one to be born to you both!
I'm still working out the bugs with my northstar swap. Got it through DEQ 3 weeks ago. Just got to get the tach working right and the speedo to read 200mph. I'm using a canadian face plate and a crystal from Riley's set-up, though discontinued. Some stalling issues after reaching operating temps. I just painted my side scoops this afternoon and didn't do the greatest job. Actually, its my first time painting a car body panel so I hope to get better soon!
Congrats from Portland, david.
--dave
IP: Logged
04:01 AM
Capt Fiero Member
Posts: 7658 From: British Columbia, Canada Registered: Feb 2000
I honestly thought you had finished that car and sold it. Really glad to know you still have it. If you want to add another one to your stable, one of our local guys has a Northstar, 6spd, Corvette Power Rack and tons of other goodies done to it, for sale on our local forum. www.westcoastfieros.com/forum then look in the for sale section complete cars.
There are no real "good" shots of the nose work as everything was tear down and re-assemble but if you pop to http://captfiero.com/85gtrebuildpics/092509 you can see all the mess we made ripping the nose apart. Its going to look freaking amazing when its done, but I can see it taking a while.
David B.
------------------ 85GT Soon to be 87GT,93 Eldorado 4.9, 5spd Dual O2 Custom Chip, Custom Exhaust. MSD Everything Capt Fiero --- My Over View Cadero Pics Yellow 88GT 5spd Full Poly Suspension, Lowered 1/2" in front, Corner Carver.
[This message has been edited by Capt Fiero (edited 09-27-2009).]
IP: Logged
02:27 PM
Capt Fiero Member
Posts: 7658 From: British Columbia, Canada Registered: Feb 2000
OK these first few I was going to delete but I thought they were kinda artsy so here is my interpretation of them.
OK the stage is set the spotlight is on, ACTION.
Or
It was a dark night with one bright street light on, keeping only small section visible, but it was the area's in the dark that were the important places.
Another one I was going to delete.
Hmm, there just seems to be something that is so true to all men, starting a project, then at some point, sitting down, putting there feet up in either satisfaction its done, frustration it isn't done, or just plan ah F-It, why did I start this in the first place.
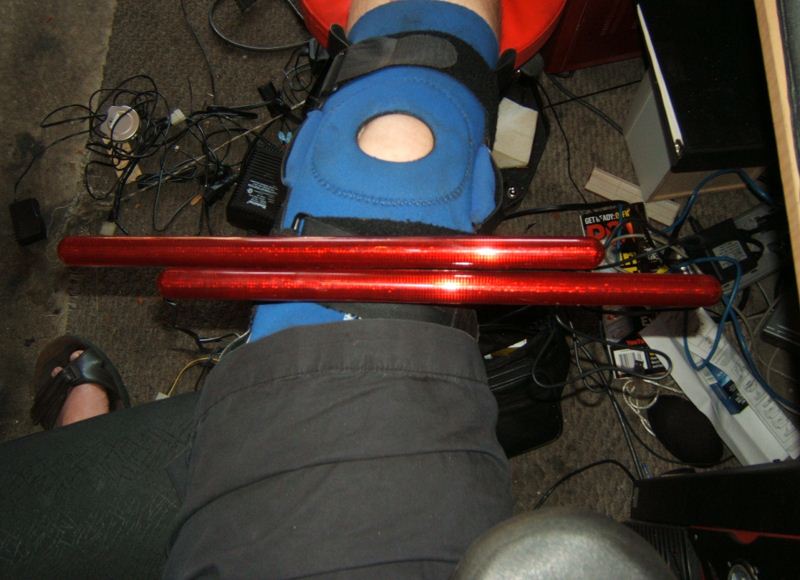
In my case, I needed to put my leg up, to get it to stop throbbing and relax my knee. It hurts like hell to work, but seeing it take shape, making progress I almost forget about the knee. I wonder if I can class this as physio therapy.
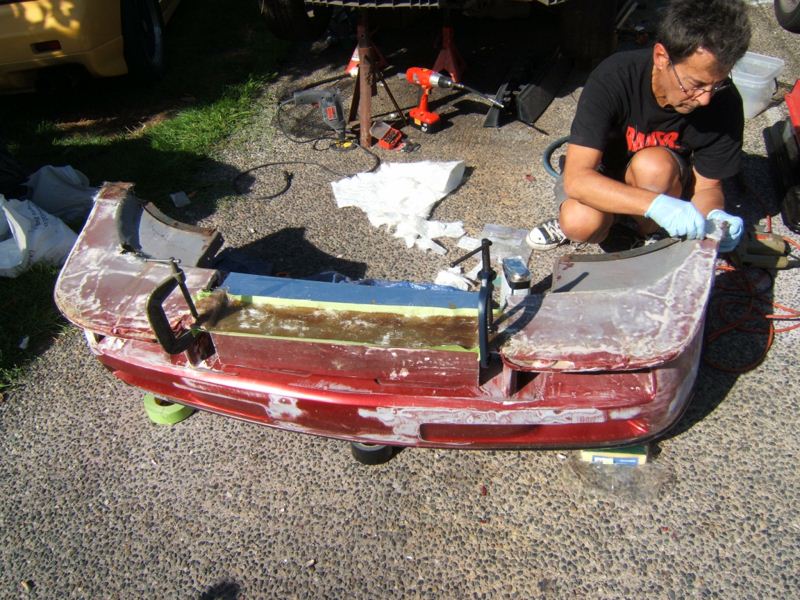
Now on to business, I sanded the entire bottom smooth, (sorry didn't get pics of that, so I started on the body of the nose. Removing any resin runs or drips, sanding all the heavily chipped paint areas smooth, cleaning and shaping the edges of the nose the way I wanted them.
I still have to work on the center area the way it is going to blend into the sides that are spaced forward. I really want that Angy Bull / Pit Viper look to it, and it has to blend with the hood scoop.
From this angle it almost looks like it has a smile. Almost Goofy ish. Will look good when the light bars are installed.
------------------ 85GT Soon to be 87GT,93 Eldorado 4.9, 5spd Dual O2 Custom Chip, Custom Exhaust. MSD Everything Capt Fiero --- My Over View Cadero Pics Yellow 88GT 5spd Full Poly Suspension, Lowered 1/2" in front, Corner Carver.
[This message has been edited by Capt Fiero (edited 09-29-2009).]
IP: Logged
11:20 PM
PFF
System Bot
Oct 12th, 2009
Capt Fiero Member
Posts: 7658 From: British Columbia, Canada Registered: Feb 2000
Ok finally the exhaust is all bolted up, with the exception of the last hanger at the exit, I left it down, so that I could blow all the collected water out of the muffler from the exhaust pipe sitting open for so long. Although the Mic started to crackle a bit the V8 sounded smooth as silk once it got to idle. However open it up a bit and it really woke up quick.
This was filmed during the 1st fire up to blow the water out, although it looked like it was smoking, a bit, it was just steam and maybe a little carbon.
The first video has better audio and the 2nd video has better picture.
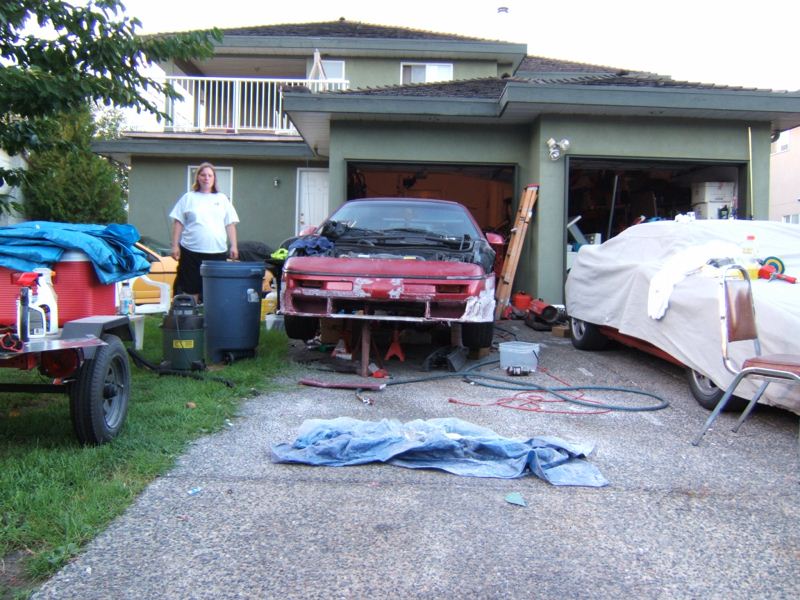
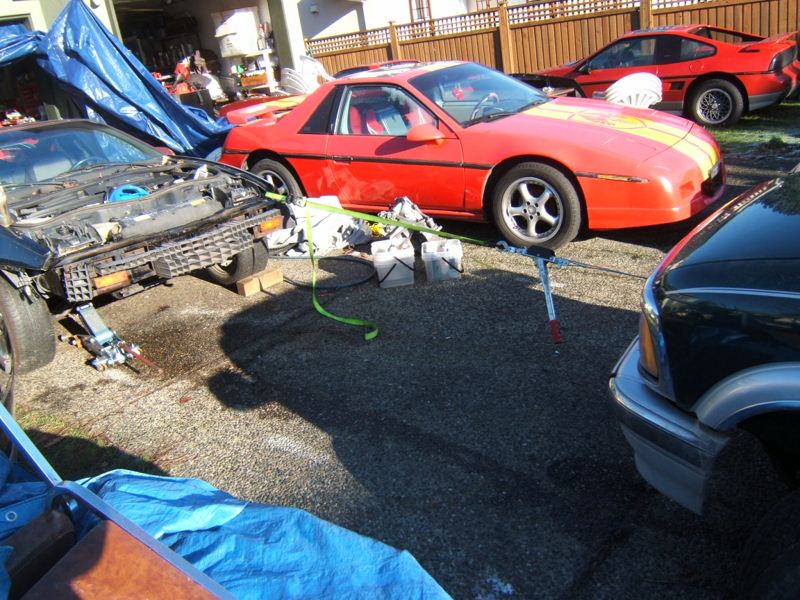
Well we had a little party at the house today, me and the guys were outside, so with the help of a few people, I got to work on getting the 857 on the ground.
A few commented that it looked like something from a Mad Max movie, which after reflection it totally does.
Now the idea was just to fire it and move it gently, as the struts are not torqued down, the hood is just lying there, only 1/2 the interior is put together. The front mount battery is just kinda laying in the front compartment. Nothing is really tested.
I didn't realize until after that I didn't have 1st or 2nd as the shift cables were not yet setup right, so the quick burnout was done in 3rd gear.
I am just so freaking happy that I was behind the wheel of my baby after nearly 2 years of tear down and rebuild, its finally coming back on the road, man how I missed it. So after a quick bit of wheel swapping, double checking electrical connections, hydraulics for the brakes and clutch. Everything checked out, so I hit the key........
Ok sorry I have not updated this thread in a bit, but I have an amazing excuse.
I AM A DAD!!!!! We spent 6 days in the hospital due to complications, but Oct 26th 2009 I became the father to Arianna Cassandra Bergquist, 6lbs 15oz.
OK, I am sure you don't want to hear about my daughter you are hear to read about my car. So lets get down to it.
Last I posted we were nose less and I had just test booted my car, oh it was a great feeling of a V8 under my foot.
Now to the nose. We did some work to it on the 20th and have since moved it inside. From the start of it, I decided if I was going to have a Rice type import combat nose I wanted it to be functional not just cosmetic. So
here we go.
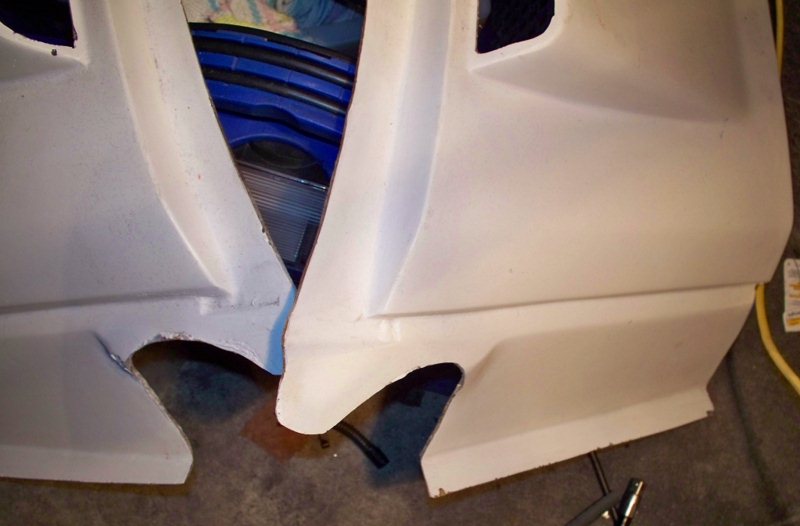
From the front it does not look too much changed.
You can kinda see the air duct here.
Below the turn signal the left and right air ducts are ported to force as much air as possible into the center and direct the air through the radiator.
We wanted to keep that side triangle in the mix as well as extend out the leading edge for better air flow. More on that in the next pic.
In keeping with the airflow and stability, I wanted the under side of this entire thing to be flat. Something similar to what you see on a race car.
I am setting this car up to be a real hell raiser on the open road. I want it to be stable at 250kph. Not just do 250, but be stable at the same time. Hence the reason for all the vents. All the air being pushed up through the nose will exit the massive cowl hood, all excess air will travel smoothly under the car, a portion of that air, will be drawn up into the engine bay and exit via the deck vents, the remainder will find its way to some sort of rear diffuser. (yet to be built)
Its not a high dollar exotic and I don't have the money for a wind tunnel, but I am at least trying to go with what should work, rather than what looks the craziest.
------------------ 85GT Soon to be 87GT,93 Eldorado 4.9, 5spd Dual O2 Custom Chip, Custom Exhaust. MSD Everything Capt Fiero --- My Over View Cadero Pics Yellow 88GT 5spd Full Poly Suspension, Lowered 1/2" in front, Corner Carver.
IP: Logged
03:00 AM
Dec 5th, 2009
Capt Fiero Member
Posts: 7658 From: British Columbia, Canada Registered: Feb 2000
I'm thinking about doing the same. I want to do the Northstar V8 swap. Is it necessary to change the transmission as well? I live down on Vancouver Island. Thanks.
I'm thinking about doing the same. I want to do the Northstar V8 swap. Is it necessary to change the transmission as well? I live down on Vancouver Island. Thanks.


 I too love that store. I can go in there just to walk around. I went yesterday myself. Spent only $11.38, but probably because I have already bought everything of value already. Did you get the magnetic vice guards? They are great for not maring up materials. They come with a pink eraser like material on the gripper side. I bet that you didn't.
  Now you will have to make a 7th trip there. He, he, he.
.JPG)
.JPG)