Following content is credited to forum member GS Jon:The standard disclaimer applies that I will not be held liable for any loss of life, property, misfortunes that befall you or black cats that cross your path if you follow this guide. Use at your own discretion. If you lack the ability to work on your car in a safe manner or are not comfortable with a wrench, please take your vehicle to a competent mechanic who can install the upgrade for you. Remember that it's not just your life on the line if this upgrade is not installed correctly, it's the lives of the people around you!READ THIS ENTIRE POST BEFORE STARTING WORK ON YOUR FIERO!Parts and supplies, required:(1 set) Conversion brackets (PM Forced_Firebird for a set)
(1 set) Calipers, '80-'85 Cadillac Seville, front and rear (NASTRA P/N 7412829 [fr], 7413839 [rr])
(4) Rear Rotors, '90-'94 LeBaron GTC, Bendix P/N 141533
(1) Master cylinder, '94 Blazer full-size
(10) Lug studs, P/N 610-323 (I wound up using 5 610-376 studs in the driver's side hub, and 5 610-323 studs in the passenger's side hub)
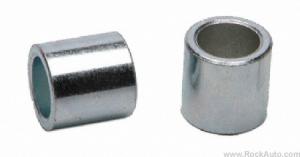
(4) Front bracket spacers - shaft collar, 1/2" ID, 1" OD, 7/16" width (I used McMaster-Carr P/N 9414T11)
(4) Rear bracket spacers - 1/2" ID washer
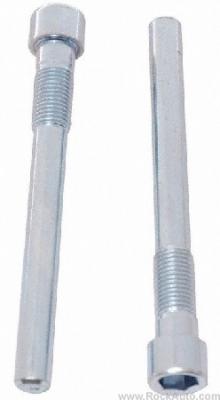
(4) 7/16"-20 bolts, 1" length (highest grade you can find)
Brake fluid (several large bottles, you should flush your old brake fluid out when you do this swap)
Brake parts cleaner (lots, I used around 6 cans, but I'm OCD)
Caliper lube
3-in-1 oil
(2) Cotter pins
Parts, optional:(2 packs) Speed bleeders, Fiero bleeders work (Motormite 12702)
(1 set) Stainless steel braided brake hoses, Fierostore.com P/N 56098
Tools that you might not have, but will need:7/16"-20 Tap
25/64" Drill bit
Angle grinder with .045" metal cutting discs, 80 grit sanding pads, metal grinding disc
MASTER CYLINDER:Follow the directions on how to swap the MC in any other thread. Be sure to bench bleed your MC before installation. Hopefully your MC came with some plugs for the ports in the left side, use them, fill up the reservior and then depress the back of the MC carefully but completely until you don’t see any more bubbles. Done. Install and double check your connections.
REAR BRAKES:Brake line at chassis, 12mm and 16mm
Banjo bolt, 7/16"
Bleeder (Stock), 10mm
Bleeder (Speed bleeder), 7/16"
Caliper bolt (Fiero), Torx T50
Caliper bolt (Seville), 3/8" Hex
1. Remove both rear tires after jacking up the rear of the car and support on jack stands.
2. Loosen brake line at chassis and caliper banjo bolt, bleeder
3. Remove brake line bracket from shock
4. Loosen caliper to bracket bolts
5. Remove e-brake cable and spring from actuator arm
6. Remove caliper from knuckle
7. Remove brake hose from caliper and chassis if upgrading, if not, clamp hose with vicegrips and leave brake line nut at chassis tight
8. If you had speed bleeders on the Fiero caliper, swap it to the Seville caliper at this time
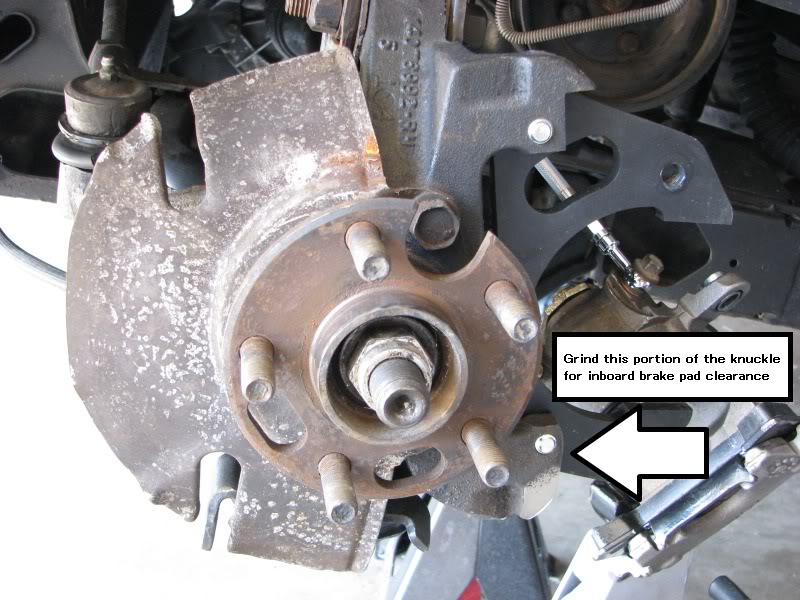 Fig.1
Fig.19. Grind or cut the lower knuckle ear to the same approximate shape as shown in the proceeding photo with an angle grinder (Fig.1, ignore the bracket)
10. Drill the caliper bolt holes in the knuckle ears with a 25/64” drill bit
11. Clean out the drilled holes and lube with 3-in-1 oil, then tap them with a 7/16”-20
12. Ensure your 1" long 7/16”-20 bolts thread cleanly in the new holes when inserted from the backside of the knuckle
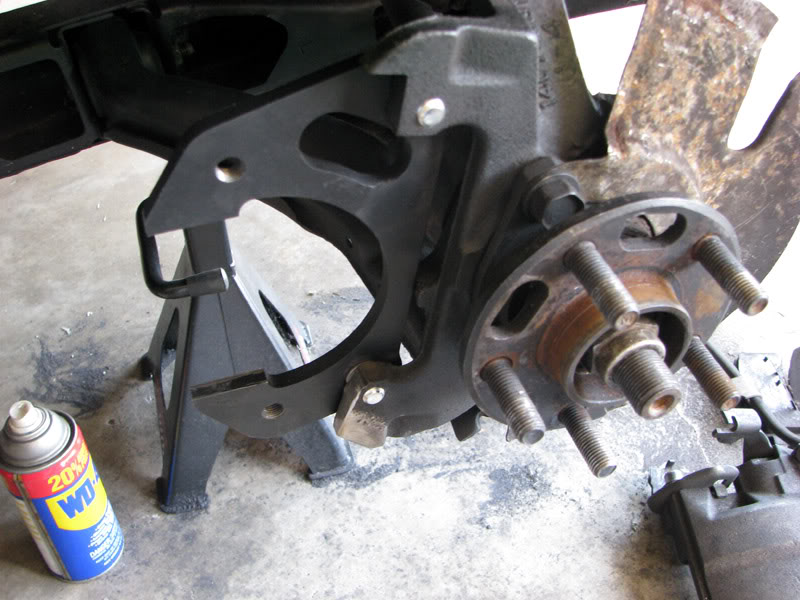 Fig.2
Fig.213. The conversion bracket is attached to the backside of the knuckle, with a 0.060” thick spacer between the knuckle and the bracket (Fig.2). A standard ½” ID washer works well in this application. Use a 1” long 7/16”-20 bolt in the top and bottom holes inserted from the back of the bracket.
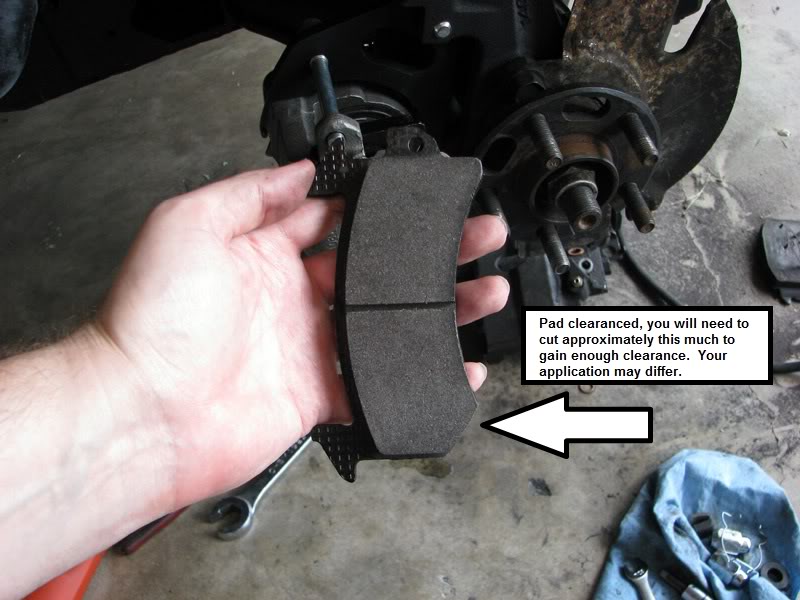 Fig.3
Fig.3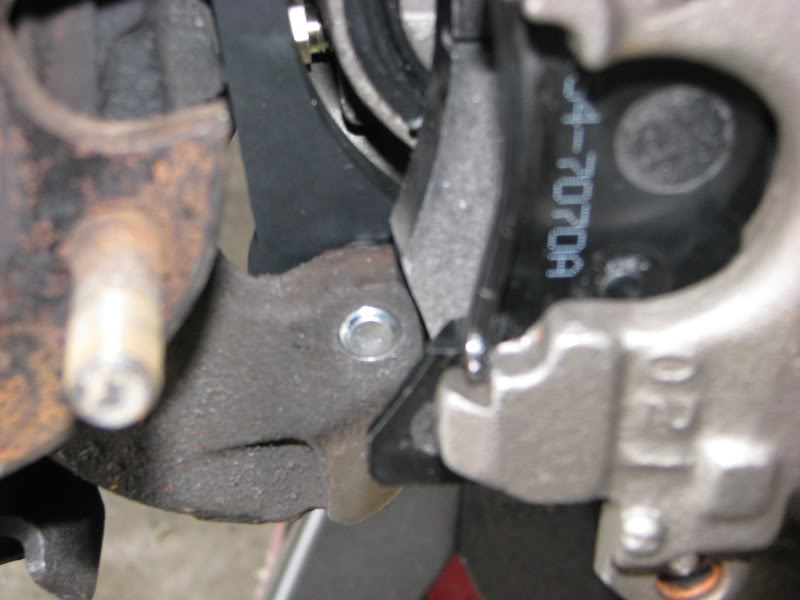 Fig.4
Fig.414. Grind or cut the inboard brake pad as shown (Fig.3). Getting an exact fit will require trial and error. The reason the lower knuckle ear and inboard pad are cut is because they interfere with one-another (Fig.4). Thus, only cut enough from each surface to accommodate the fitting of these two parts. This will take some time to get right.
 Fig.5
Fig.515. Bend the shield back, cut it, or remove it otherwise the shield will come into contact with the new rotors. I chose to remove it. If you want to do the same, there's only 3 18mm bolts between you and your goal (Fig.5). What are you waiting for?
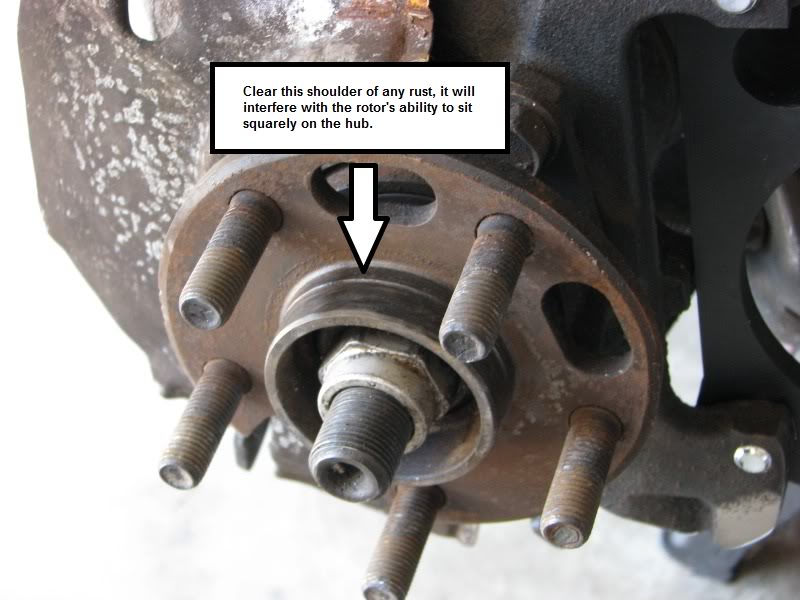 Fig.6
Fig.616. Use a rotary tool and a wire wheel to remove any rust on the hub. This rust will make it impossible for your rotors to sit squarely on the hub (Fig.6).
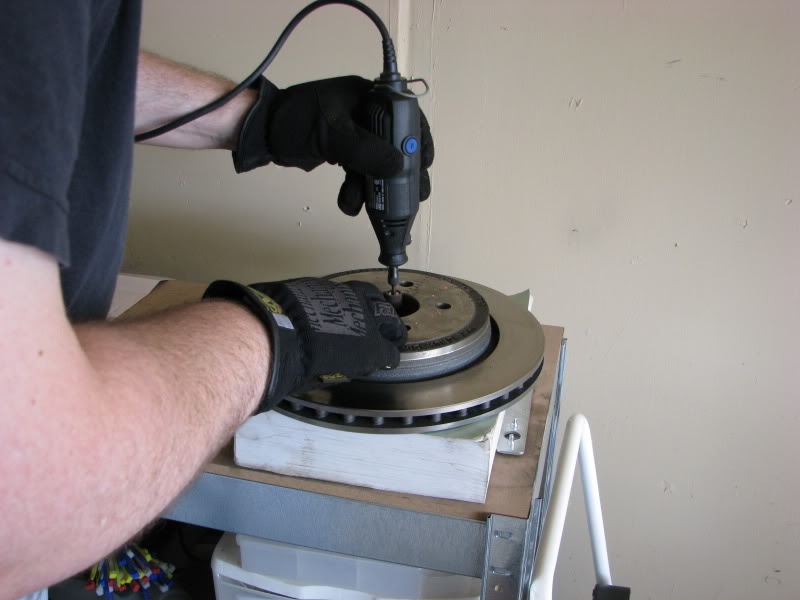 Fig.7
Fig.717. Open the center of the new rotor's pilot hole with a sanding disc on a rotary tool to allow it to clear the small shoulder on the hub (Fig.7). Proceed with caution - you cannot add material if you take off too much, so don't get impatient.
18. Place the LeBaron rotor onto the hub and use a lugnut or two to hold it flush to the hub.
19. Remove the caliper bolts from the Seville calipers and slide the calipers into the conversion bracket, checking the inboard pad to mounting ear clearance at the bottom of the knuckle. Continue making adjustments until you are sure the pad will not bind or rub on the ear. Replace and tighten the caliper bolts and check to ensure pads sit flat and true to the rotor surface.
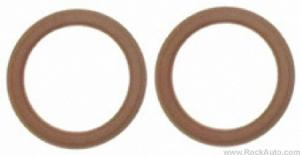
20. Install the new brake hose into the brackets on the chassis and shock, paying close attention to your routing. Remove the banjo bolt from the old Fiero caliper. Install the banjo bolt and new brake line in the Seville caliper, ensuring that you use two fresh copper washers - one on the top of the brake line fitting and another on the bottom. Tighten all brake hose fittings.
21. Block the pads from moving so you can bleed the caliper. Remember to position the bleeder as the highest point on the caliper so air can escape. If you do not block the piston from moving, you can count on a trip to the local auto store so you can rent the special tool you'll need to compress the piston back into the caliper bore. DO NOT FORGET TO BLOCK THE PISTON!
22. Reinstall the caliper into the bracket, then install the e-brake cable and spring.
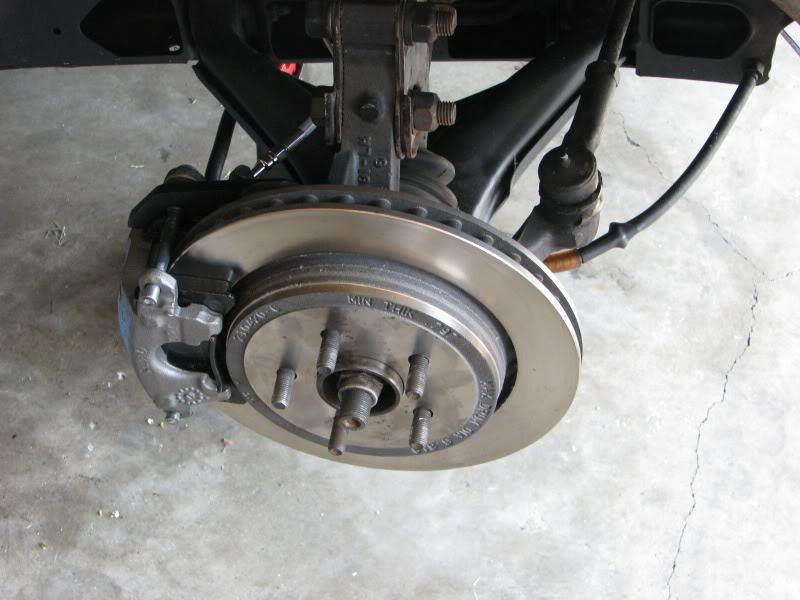 Fig.8
Fig.823. Double check all fittings and bolts. You're done with one side (Fig.8), get to work on the other side and make 'em match.
FRONT BRAKES:Bleeder (Stock), 10mm
Bleeder (Speed bleeder), 7/16"
Brake hose at chassis, 12mm and 16mm
Caliper bolt (Fiero), Torx T50
Caliper bolt (Seville), 3/8" Hex Bit
Caliper bracket bolt, 19mm
Splash shield bolts, 10mm
Front axle castle nut, 24mm
1. Jack up and support the front of the car, remove front wheels
2. Loosen and lightly snug the bleeder (if you have speed bleeders installed), Banjo bolt and brake hose at the hard line on the chassis, then remove the caliper bolts
3. Clamp off the brake hose with a pair of vice grips to avoid excess brake fluid loss
4. Remove the banjo bolt and place it aside, then remove the old caliper
5. Drill out the rivet holding the brake hose to the upper control arm if you're replacing the rubber hose with braided steel hoses, clear all shavings away from the work area. Skip this step if you're keeping your old brake hoses.
6. Pound the old lug studs out of the rotor using a hammer or press (press only after removing the rotor from the vehicle)
7. Remove the old rotor from the spindle by cutting off the old cotter pin, removing the 24mm castle nut and thrust washer, then sliding the rotor towards you
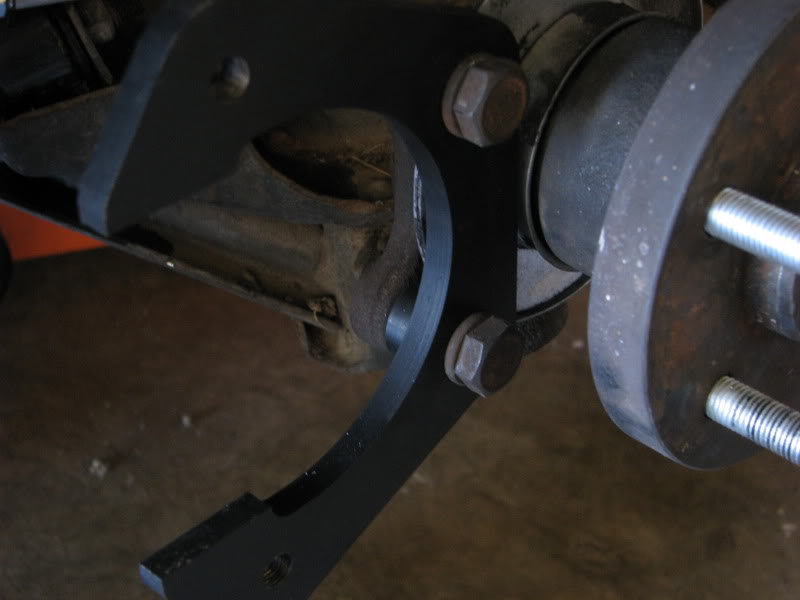 Fig.9
Fig.98. Take the front brackets (they look like a "C"), and install with the opening facing the rear of the car. The proper installation of the bracket and washer goes as follows: Bracket bolt, bracket, spacer, then place that entire assembly into the spindle (Fig.9)
9. It is highly recommended to service your wheel bearings if you haven't ever done so, or haven't done it recently. You'll need a new front wheel inner seal and some bearing grease if you do. If you choose not to service your bearings at this time, remove your outer bearing, carefully cover and protect your inner bearing and outer bearing race for the next step
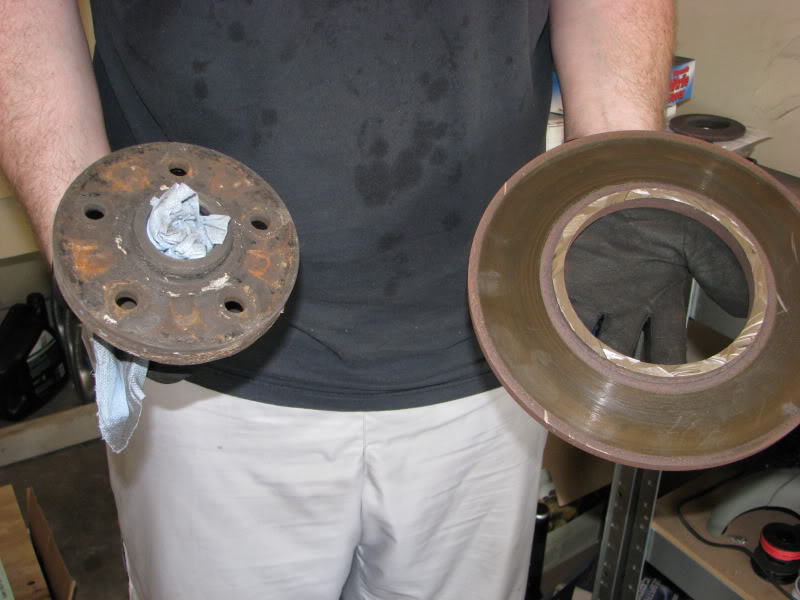 Fig.10
10. Use an angle grinder and a .045" metal/stainless cutting wheel (I used a DeWalt Type 27) to apart your hub from the rotor, it's as easy as it sounds (Fig.10). Make sure you keep an even amount of material around the entire hub. Take down the rough and high spots with a 80 grit sander on the angle grinder and make sure it's as balanced as possible. If you don't like this option, feel free to take your rotors to a machinist who will do it for you. Either way will work, just get it done and don't complain to me if you don't like my angle grinder method.
11. Press the 610-323 wheel studs into the hub
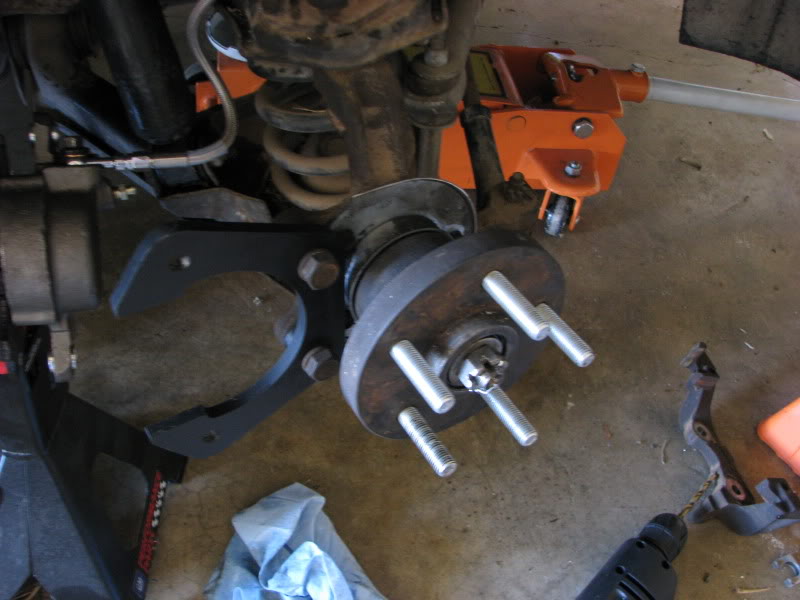 Fig.11
12. Remove the splash shield from the front spindle and cut off the section that will interfere with the new rotors, reinstall (Fig.11)
13. Reinstall the hub onto the spindle, take care to properly install the thrust washer, castle nut and cotter pin
14. Place the new rotor over the hub assembly, remove the caliper bolts and test fit the Seville front caliper on the bracket. Everything should line up perfectly, if so, bolt the caliper to the bracket
15. If installing braided lines, do so now and tighten all fittings, check clearance of the hose at full wheel lock left and right, adjust as necessary and zip tie the hose in place on the upper control arm, if not installing braided hoses install banjo bolt to brake hose and caliper, make sure to use two fresh copper washers on the mating surfaces (Bolt, washer, hose, washer, caliper)
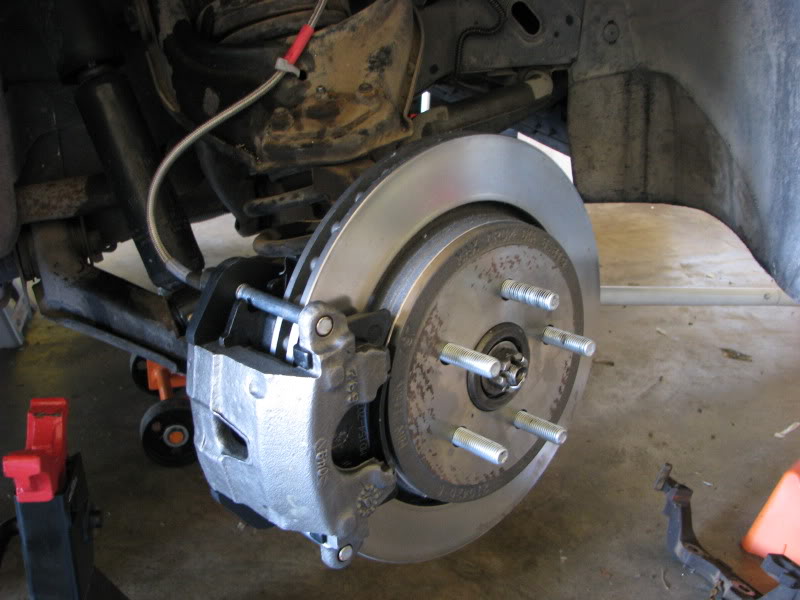 Fig.12
16. Doublecheck all bolts and make sure everything looks good (Fig.12)
17. Repeat on the other side
AFTER ALL 4 CORNERS ARE DONE:Bleed the brakes (yes, again! Seriously, if you don't know if your first bleed did the trick, do it again)
Adjust the e-brake
Check for firm pedal (no leakdown)
Check for external leaks at all connections, hoses, calipers
Check brake fluid level
Start car, pump up brakes, do a road check in the neighborhood (do try to avoid the interstate until you're sure your brakes work, please.)
Notes:I didn't do the blazer booster upgrade, and I don't know if I need it yet. If it is needed or you deem that you want to do it, make sure to do so at the same time you do your master cylinder, aka the very beginning of the swap. It should go without saying that bleeding the brakes on this swap is a pain in the butt since the rear calipers are "upside down" and the bleeders are on the bottom. This means that you'll have to undo the e-brake cable any time that you need to bleed the brakes as you won't be able to twist the rear caliper "right side up" to bleed them. Make sure you avoid any unneccessary bleeding!
If you notice a discrepancy, please let me know and I will correct it ASAP. The last thing I want is for this writeup to cause people confusion, headaches or wasted money! PM me or call me out (politely please) right here in this thread if you wish. Please remember that some people's cars will be different based on manufacturing defects or discrepancies in tolerances in parts, especially in aftermarket pieces. If something is not clear, please let me know and I will do what I can to clarify the instructions.
Those of you who have so patiently waited for me to make this writeup, I thank you.
UPDATE:pmbrunelle has found a source for front calipers with a 2 1/4" piston. The following is quoted from
THIS THREAD with permission from pmbrunelle.
| | | quote | Originally posted by pmbrunelle:
These calipers are made by "US Brake".
The US Brake part numbers are:
7241-9005 RH Metric Caliper 2-1/4"
7241-9006 LH Metric Caliper 2-1/4"
The left and right calipers are different, you really want a matching pair. In this case, I used the LH caliper on the passenger side, and vice versa, to keep stock hoses. This results in the bleeders on the bottom.
I got them from:
http://www.daymotorsports.c...ED-METRIC-GM-CALIPER
79.99 US Dollars per caliper + shipping
I haven't done much searching for rebuild kits, but I suggest frequent bleeding (at least once a year) as preventative maintenance to avoid the need for rebuild kits.
|
|
Also, the following information was added a day later:
| | | quote | Originally posted by pmbrunelle:
Note that these US Brake calipers are naked calipers.
You'll have to buy the hardware separately.
Get parts for:
85 Camaro front calipers |
|