Pennock's Fiero Forum
  Technical Discussion & Questions - Archive
  NEED HELP TO REMOVE REAR CLIP T-TOP NOTCHIE

T H I S   I S   A N   A R C H I V E D   T O P I C
  

Email This Page to Someone! | Printable Version


NEED HELP TO REMOVE REAR CLIP T-TOP NOTCHIE by bowrapennocks
Started on: 01-27-2010 09:26 AM
Replies: 8
Last post by: bowrapennocks on 01-28-2010 07:58 PM
bowrapennocks
Member
Posts: 872
From: Seattle WA
Registered: Jun 2008


Feedback score: N/A
Leave feedback

Rate this member

Report this Post01-27-2010 09:26 AM Click Here to See the Profile for bowrapennocksDirect Link to This Post
I replaced all the weatherseals on my 87 T-top coupe, and they do not leak. BUT I have a leak into the drivers side B pillar. I believe the water is leaking in the body seam that is under the rear clip, so now I have to remove the clip to seal it. I already had a problem on the right side, where there was a similar leak behind the quarter panel which I was able to fix. Since I do not want the inside of my car filling up with water, I must remove the clip. I searched on PFF and found how to remove a fastback clip. Any help would be appreciated.

Also, I seem to remember that is some sort of double back foam tape holding the clip in the front. If this is correct, any ideas where to buy it?
Thanks
Jim

------------------

87 T-top 2.8 5sp Camaro Dash Bonneville door panels; 86 355 body & interior kits 3.1 Auto; 85 SE 2.5 5sp, 86 SE 2.8 auto parts car

IP: Logged
PFF
System Bot
James Bond 007
Member
Posts: 8872
From: California.U.S.A.
Registered: Dec 2002


Feedback score: (1)
Leave feedback


Total ratings: 263
Rate this member

Report this Post01-27-2010 10:48 AM Click Here to See the Profile for James Bond 007Send a Private Message to James Bond 007Direct Link to This Post
Your better off trying to seal it from the outside,putting it back on is going to be a real pain.

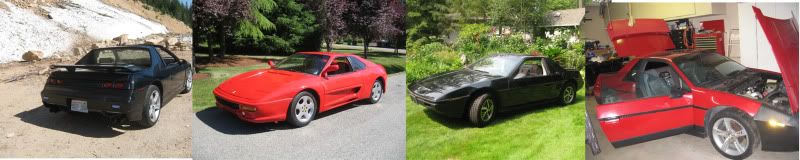
Rear Clip Removal (Fast Back,basicalley the same or simular procedure for a notch back)
When trying to remove my rear fastback clip I really couldn't find many resources on how to do it so I decided to write down all the steps I an think of. Feel free to add to this if you have any info.
1. Remove Taillights
2. Pop the clips that hold the taillight harness and bulbs to the clip. (they're back on each cubby of the taillight portion of the clip. Also unscrew every nut and bolt that you can see back there. the only thing left should be one rivet on each side that holds the clip pieces together.
3. Remove rear 1/4 panels if you have not done so already
4. Not sure whether rear bumper must be removed, but mine was.
5. pop out all the plastic fasteners in rear wheel wells that look like they might be attached. I think there's 3 on each side that are actually attached.
6. Unscrew all the screws and nuts from the gas housing. (4 nuts and 2 screws or so)
7. take off all the bolts and clips on the black plastic piece that runs along the side of trunk and around inside of 1/4 windows. You'll need to pop this out (The Black Quarter window frame,on the fast back Fiero) to get to the 3 (and one mini screw bolt) on each side that directly hold the clip on and are hidden under the The Black Quarter window frame.
8. unscrew those 3 bolts on each side. Look closely, the third one is hard to see.
9. pull back the cloth and you will find three nuts on the roof of the car in the rear. pull the plastic surrounding off of them and unscrew.
10. On each B Pillar (or the piece of frame that holds the seat belts and side speakers) there are two holes right next to each other, one larger ontop and one smaller on bottom. You will need a 3" extension and size 11mm deep socket to get this nut off. it's hard to get to but if you feel around for it *it's about 1/2" above the hole" you will get it off no problem. Don't lose your socket down the hole.If your Quarter Windowes are old remove (use Leather gloves) and the bolt heads can be easely ground off (this is an alternate way of bypassing the B piller bolts,and grinding the head off,each side)
11.It helps if you hold and lift udnerneath the and pull up while prying directly underneath the roof panel with a screwdriver at the top of the roof line because there are about plastic nubs that help hold the rear on. Good luck.

[This message has been edited by James Bond 007 (edited 01-28-2010).]

IP: Logged
Tony Kania
Member
Posts: 20794
From: The Inland Northwest
Registered: Dec 2008


Feedback score:    (7)
Leave feedback


Total ratings: 305
User Banned

Report this Post01-27-2010 01:27 PM Click Here to See the Profile for Tony KaniaSend a Private Message to Tony KaniaDirect Link to This Post
Excellent instructions James Bond 007! The only thing that I want to add, is to make sure the rubber butyle (sp) under the roof is warm. It is a lot easier on a hot summers day, than in the cold. The A pillars have a tendancy to snap at the roof line. A second, or even third set of hands is a must to get it off crack free. But, with a little help, and patience, you can have it off fairly quickly. Good luck.

Tony
IP: Logged
bowrapennocks
Member
Posts: 872
From: Seattle WA
Registered: Jun 2008


Feedback score: N/A
Leave feedback

Rate this member

Report this Post01-27-2010 03:04 PM Click Here to See the Profile for bowrapennocksDirect Link to This Post
Thanks to all. Luckily, I do not have to take the front of the roof off, because it is a T-top. On the other side, I had recently removed all the Butyl and recaulked it, but at least the $30.00 worth of fresh Butyl is fresh and soft.
Jim
IP: Logged
pontiackid86
Member
Posts: 19632
From: Kingwood Texas..... Yall
Registered: Sep 2008


Feedback score:    (12)
Leave feedback


Total ratings: 344
Rate this member

Report this Post01-27-2010 03:23 PM Click Here to See the Profile for pontiackid86Send a Private Message to pontiackid86Direct Link to This Post
Its the same thing as removing the fastback clip. took me all of 20MIN to do last night when removing the fastback off my parts car. There are 3 bolts under the headliner i think 5 bolts behind the taillights (4 bolts on either side by the vents if its the same deal as the fastback) and the wheel well screws. Its not hard to do just time consuming on your 1st try. I recomend having someone there to help you lift the clip off Its not heavy but very birttle.

[This message has been edited by pontiackid86 (edited 01-27-2010).]

IP: Logged
ltlfrari
Member
Posts: 5356
From: Wake Forest,NC,USA
Registered: Jan 2002


Feedback score: (4)
Leave feedback


Total ratings: 127
Rate this member

Report this Post01-27-2010 03:44 PM Click Here to See the Profile for ltlfrariClick Here to visit ltlfrari's HomePageSend a Private Message to ltlfrariDirect Link to This Post
I just did this. Three yeuky parts:

Sail panels.
Striping interior to get head liner out.
Lifting roof panel to get clear clip out.

See Sail Panels topic on my web site (link in sig below) for info on pulling the sail panels.

On mine (88) I found that the rear clip is secured below the front roof panel by a couple of small tabs that stick down into it from the fropnt panel. BUT, mine was also secured by three rather long bolts that go into the roof. I had to remove the interior roof panel to get at these bolts which means stripping the inside pretty much. These bolts are about 3/4 inch long so you need to raise the front panel by quite a bit in order to be able to lift the rear clip and these blts out of the holes.
Buddycraigg has a vid on youtube that I used to help me remove the headliner.

My car is a sunroof car so the front roof panel is also secured by the bolts that secure the weather seal tracks in the sun roof to the roof. These bolts are also behind the headliner! I ended up taking all the track bolts out, even from the front track so as to be able to lift the front panel as high as needed without cracking anything (it worked by the way).

Once I had all the front roof panel bolts out I carfefully lifted the rear of the front roof panel and wedged a socket extension under each side. That held the rear of the panel about a inch up without breaking anything!


I then got some strimmer plastic cord (thin electrical wire would work as well) and threaded it under the top of the rear clip, front to back. Then I got hold of each end and used it like a cable saw to cut the double sided sponge stuff under there. Had to remove and reinsert it to go around the bolts sticking down from the rear clip into the roof steel.

Once that was all done, lift the back and wiggle it out.


------------------
Dave

www.ltlfrari.com

[This message has been edited by ltlfrari (edited 01-27-2010).]

IP: Logged
Robs Fieros
Member
Posts: 723
From: Athens, Tennessee
Registered: Oct 2004


Feedback score: (4)
Leave feedback

Rate this member

Report this Post01-27-2010 08:29 PM Click Here to See the Profile for Robs FierosSend a Private Message to Robs FierosDirect Link to This Post
You said T-Top? That's a whole different ball game. Been there and done that and will never go there again. The trim piece behind the t-tops thats about 2" wide and is in two pieces is held in place by what looks to be a caulking gun tube of rubber silicon. You'll probably end up breaking those pieces to get them off. We used razor blades and sharp putty knives and still broke ours and had to buy new ones.
IP: Logged
bowrapennocks
Member
Posts: 872
From: Seattle WA
Registered: Jun 2008


Feedback score: N/A
Leave feedback

Rate this member

Report this Post01-27-2010 10:24 PM Click Here to See the Profile for bowrapennocksDirect Link to This Post
Luckily, I already took the trim pieces out without breaking them.

Jim
IP: Logged
bowrapennocks
Member
Posts: 872
From: Seattle WA
Registered: Jun 2008


Feedback score: N/A
Leave feedback

Rate this member

Report this Post01-28-2010 07:58 PM Click Here to See the Profile for bowrapennocksDirect Link to This Post
Done and back on. The wire trick was great. I used 16 gauge galv steel electric fence wire which is quite stiff and easy to push through to the other side.

Thanks to all
IP: Logged


All times are ET (US)

T H I S   I S   A N   A R C H I V E D   T O P I C
  

Contact Us | Back To Main Page

Advertizing on PFF | Fiero Parts Vendors
PFF Merchandise | Fiero Gallery
Real-Time Chat | Fiero Related Auctions on eBay


Copyright (c) 1999, C. Pennock