We painted new and used semi tractors and American LeFrance fire engines. Fire engines generally go their entire life on their original paint job. The bare aluminum got a coat of yellow zinc chromate, primered with red oxide laquer primer and either Imron or Acrylic Enamel with stripping done in laquer. All the two tone graphics were shot on the primer first, masked off and the remainder shot in the acrylic enamel.
Not to argue any point here, but why did they prime with Zinc chromate then with laquer? After all, it's been shown that zinc chromate alone works fine on airplanes which, as you said (correctly), take a lot more punishment. ~ Paul aka "Tha Driver"
If you choked a Smurff, what color would he turn?
IP: Logged
11:52 AM
Lambo nut Member
Posts: 4442 From: Centralia,Missouri. USA Registered: Sep 2003
Lambo, So what type of tape did you use for this, it could save some time when painting the two tone bumper covers on Fieros/ Sparx22
I used the 3M blue vinyl tape, in 1/8 inch and 1/4 inch to outline, then the green auto masking tape added to that, to build out the width, making it easier to tape the paper to. Make sence?
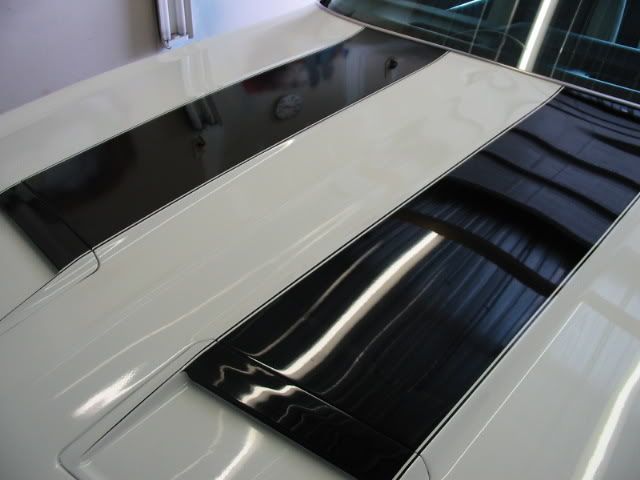
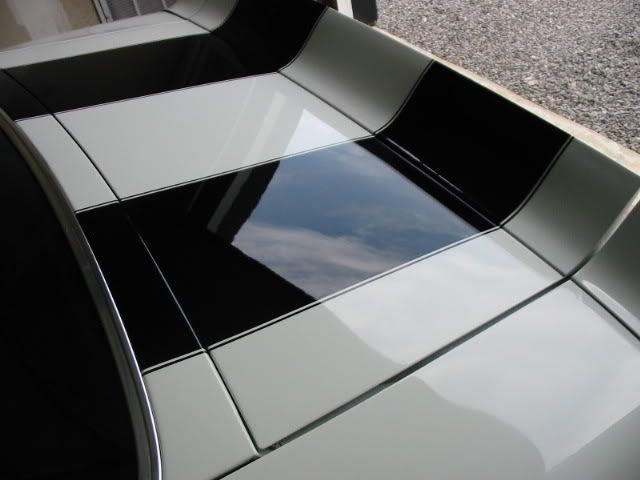
Here are a couple of pics of a 78 Firebird I did for a friend a few years back.
Kevin
IP: Logged
03:41 PM
fierosound Member
Posts: 15244 From: Calgary, Canada Registered: Nov 1999
I used the 3M blue vinyl tape, in 1/8 inch and 1/4 inch to outline, then the green auto masking tape added to that, to build out the width, making it easier to tape the paper to. Make sence?
Kevin
Sorry I forgot to respond to this question... But yeah; that's the right way to do it. The blue vinyl tape is called "Fine Line". It's best to use 1/4" for straight lines & wide curves, & 1/8" for sharper curves (& of course where you want a 1/8" stripe on a color). For a straight line (& consistent curves) keep it pulled tight with one hand while sticking it down with the other. Takes a little practice... You should always outline the layout with 3/4" masking tape, then mask with the paper. Then go back & check everything to make sure you didn't miss masking anywhere. ~ Paul aka "Tha Driver"
Success is the ability to go from one failure to another with no loss of enthusiasm. - Winston Churchill
[This message has been edited by Tha Driver (edited 06-11-2009).]
IP: Logged
05:05 PM
Jun 12th, 2009
rogergarrison Member
Posts: 49601 From: A Western Caribbean Island/ Columbus, Ohio Registered: Apr 99
Zinc Chromate is straight enamel and the yellow one has to be topcoated with primer or sealer. Its very thin almost like straight thinner and doesnt fill anything. You have to primer it to be able to sand it to get out anything, even 320 scratches or scribe lines, misshot rivets, etc. On a plane you put on one coat of non sander sealer then paint. You cant sand any airplane skin as it damages it and can cause surface cracks in mid air much the same as scribing a line on plastic allows it to break smoothly on that line. On a truck its not a problem to sand it, it isnt going to fall out of the sky. The roughest you can use on aircraft skin is a soft brass wire brush. The green zinc chromate does not have to be topcoated with anything, thats whats used on aircraft frames that dont get paint. Since both are enamels, you cant sand them without gumming up paper, so it is never sanded, just primed or sealed immediately.
You have to be carefull not to stretch the blue fineline tape very much on curves. It can pull itself up or curl when hit with wet paint. I use a lot of it in custom painting, like flames for example. For just straight lines, like 2 tones, I prefer the taupe colored fine line tape, leaves just as sharp of an edge and dont shrink up like the blue. It does not do curves very well though, likes to bunch up except on very gentle curves...plus....its way cheaper.
IP: Logged
10:41 AM
Jun 15th, 2009
fierosound Member
Posts: 15244 From: Calgary, Canada Registered: Nov 1999
Lol. I havnt painted it yet. There was a shipping problem and I got the paint today. My grandpa still has to bring the compressor over. So this weekend is looking good
IP: Logged
07:32 PM
fierosound Member
Posts: 15244 From: Calgary, Canada Registered: Nov 1999
Lol. I havnt painted it yet. There was a shipping problem and I got the paint today. My grandpa still has to bring the compressor over. So this weekend is looking good
But still - you've sanded, repaired and prep'd the body haven't you? It's a LOT to do even in 2 weekends.
I've been going a similar route to what you're doing, so I thought I'd share. If you'd like, here's a link to my build that was recently started. (I'm not sure where you are in the prep work yet.) https://www.fiero.nl/forum/Forum1/HTML/076267.html
I've been a member of a local car forum for years, and posted up my latest project when I got it. One of the guys from the club WAS a professional body-man at a Ford dealership, however the economy in this area is garbage and he was laid off. We made a deal that he will spray the car AND give me pointers throughout the prep process so that I can learn to do my own work on the cheap.
First rule I learned - DON'T sand into the plastic. EVERY spot that is down to the plastic will need to be sealed and feathered out. Sand just into the black. (Hopefully you don't have a black car.)
Wet sand using 400 grit. I'm wet sanding on the body initially, then removing ALL trim. Every edge needs to be scuffed down as well. You will be spending a LOT of time prepping. Do not skimp on your prep work.
Post pics of where you're at now and people will be able to give you pointers!
(posted the same reply on the other thread of yours) Did you wet sand with 600 grit to prepare for primer?
Also I read back on page 1 that it was suggested you wet sand the fresh clearcoat with 600 then 1000 etc. I would not start with 600, you can blow right thru the clear easily with 600. What I have read and done is to use 1000 and then 1500. Then buff after that with medium Meguiars compound, followed up with swirl remover. Brands are up to you of course.
sparx22
[This message has been edited by sparx22 (edited 06-16-2009).]
IP: Logged
12:21 PM
Bruce Member
Posts: 2189 From: Ventura, California, USA Registered: May 99
I'm going to have my car painted at 1 Day Paint and Body. I looked at their web site, in-person finished products, and prices; and I'm going to take a shot. Since my 86 GT is just for fun, and I don't drive it more than 1000 miles per year, I figured I could take a little bit of a gamble. I'll let you know how it goes. BB
(posted the same reply on the other thread of yours) Did you wet sand with 600 grit to prepare for primer?
sparx22
I'm posting in both to provide clarity. I'm block sanding with 400 grit wet. I had originally said 600 wet, but more research indicated 400 wet is the way to go. Sanding ONLY down into the primer, then scuffing everything else for adhesion. Some of the pictures in my thread are a bit deceiving because the car was still wet.
Hope this helps!
IP: Logged
02:38 PM
87antuzzi Member
Posts: 11151 From: Surrounded by corn. Registered: Feb 2009
I'm posting in both to provide clarity. I'm block sanding with 400 grit wet. I had originally said 600 wet, but more research indicated 400 wet is the way to go. Sanding ONLY down into the primer, then scuffing everything else for adhesion. Some of the pictures in my thread are a bit deceiving because the car was still wet.
Hope this helps!
Ok got it. 600 would make the surface too slick, best you went to only 400.
IP: Logged
03:27 PM
bulldog85043 Member
Posts: 403 From: Phoenix, AZ USA Registered: Jan 2009
I know this is going to just splash gas on the fire, but, what is the opinion of LIMCO paints and is it better to do a off-body paint job or just leave the panels on?
I know this is going to just splash gas on the fire, but, what is the opinion of LIMCO paints and is it better to do a off-body paint job or just leave the panels on?
I get a LOT of grief for saying this, but the only RIGHT way to do it is to take off the panels (I leave the roof panels on). But it seems that the vast majority of folks just want the outside to shine, & you can do that leaving the car together. Again, do a search there're lots of threads debating the subject. As for LIMCO: never used them, not sure I've even heard of them (although it does seem to ring a bell). Probably second rate at best. ~ Paul aka "Tha Driver"
The earth is in much more danger from human action, then from natural disastors. - Steven Hawking.
Ok got it. 600 would make the surface too slick, best you went to only 400.
Also, I'm ONLY taking it down to the primer. knocking down to the primer at 320 (wet 400) will allow the painter to use the factory primer on the car. ANY spots that show plastic will need to be sealed, primed, and feathered in. (This is according to my body man and a few conversations I've had with other people.)
Also, I'm ONLY taking it down to the primer. knocking down to the primer at 320 (wet 400) will allow the painter to use the factory primer on the car. ANY spots that show plastic will need to be sealed, primed, and feathered in. (This is according to my body man and a few conversations I've had with other people.)
If it was going to be primed, (which it apparently is) easier to hit it with a DA sander and 100 grit discs and use filler primer, then block it with 400 grit wet preparing it for bc. sparx22
IP: Logged
10:22 AM
30+mpg Member
Posts: 4061 From: Russellville, AR Registered: Feb 2002
Also, I'm ONLY taking it down to the primer. knocking down to the primer at 320 (wet 400) will allow the painter to use the factory primer on the car. ANY spots that show plastic will need to be sealed, primed, and feathered in. (This is according to my body man and a few conversations I've had with other people.)
Right - there's no reason (if it has the factory paint) to take off any more than the clear, as long as it's a smooth surface (no cracked paint left). However, I would seal the whole car with PPG epoxy primer just to give the new paint a uniform surface & to make everything stick better. ~ Paul aka "Tha Driver"
If it was going to be primed, (which it apparently is) easier to hit it with a DA sander and 100 grit discs and use filler primer, then block it with 400 grit wet preparing it for bc. sparx22
If you're going to seal it with PPG epoxy primer (& as you've noticed, I would), you can sand it with a DA using 180. You don't even have to sand the epoxy after that (but I do sand it with 400 wet, except on some of my own cars). ~ Paul aka "Tha Driver"
I'm not a complete idiot, some parts are missing.
IP: Logged
04:24 PM
Lee Phillips Member
Posts: 42 From: Ridgecrest, CA Registered: Nov 2008
I paint small airplanes, and supervise people who paint small airplanes. I have painted metal cars, and corvettes. None of us do quick jobs. We do jobs we're proud of.
I generally require combinations or permutations of zinc chromate and/or 2 part epoxy primer. Zinc Chromate serves its intended purpose over aluminum or steel, arguable better on aluminum. I NEVER allow anyone to put paint over bare metal. Sanding aluminum airplane skins is for people who hate airplanes, and/or want the occupants to die. Lacquer primer has no application with airplanes that I am aware of. Airplanes are chemically stripped, or stripped with an approved soda blast.
I strongly advise customers to buy GOOD airplane paint such as Jet-Glo or something, instead of Imron or a descendant. Most automotive used in the trade are adequate for autos. Some are better than others. You buy cheap, you get cheap, but IMHO, there ain't no cheap paint. If the price is low, it costs you in the long run. There is no substitute for good materials.
Regardless,
If you are going to paint, be careful of your health. Lacquer (acrylic lacquer) is not terribly unsafe to paint. Some of the paints with isocyanates (Imron or Acrylic Enamels), or zinc chromate can be deadly. Zinc Chromate has been implicated as causal in lung cancer. Others are implicated in causation of liver cancer. It behooves a person to be safe. Paint suits, breathing apparatus work in paint booths, but not very well outside. And, what about your neighbors? Do THEY want to breathe that stuff? Respirators are only part of the solution for the painter.
There are several books from HPO Books, Petersen Publishing, and others which could be very helpful. The preparation of any job is what your will see (on not see) after the paint is applied, assuming you are able to avoid runs, sags, curtains, fisheyes (which are generally not an issue for a CLEAN project).
10 pounds of preparation a few ounces of paint skill care dust avoidance all contribute to a good job. Don't even THINK about appying paint until you are SURE that the preparation is complete. Paint what you want to paint, and ONLY what you want to paint. It is a lot easier to apply than to remove.
Fiero Shop Manual says to use a flexative when painting Fiero Plastic panels. Probably worth listening to.
Lacquer weather checks, and crazes, and cracks if left out in the weather. Never allow anything with ammonia in it to contact acrylic "anything", unless you are after a "crazing" effect..
IP: Logged
06:08 PM
Lee Phillips Member
Posts: 42 From: Ridgecrest, CA Registered: Nov 2008