Pull the plug on cylinder 1. rotate the motor with a wrench with your finger over the plug hole. when you start to feel air coming out as your wide timing mark on the dampner reaches 0 stop. (if you don;t feel air, you will need to go around again.) Now plug 1 is tdc. replace the plug. remove the dist cap and see where the rotor is pointing. If you had it out, it could be at 4 instead of 1, but either way reset the dis so it is pointing at the #1 wire. reinstall the cap. remove the plate from the cig lighter area, jumper the a/b pins on the aldl connector. Start the car. Set cyl1 to 10 degrees. then check #4. set the timing so the 2 average out to 10 degrees. Lock down the dist. remove the jumper. Drive happily away.
IP: Logged
10:22 AM
hookdonspeed Member
Posts: 7980 From: baltimore, md Registered: May 2008
Pull the plug on cylinder 1. rotate the motor with a wrench with your finger over the plug hole. when you start to feel air coming out as your wide timing mark on the dampner reaches 0 stop. (if you don;t feel air, you will need to go around again.) Now plug 1 is tdc. replace the plug. remove the dist cap and see where the rotor is pointing. If you had it out, it could be at 4 instead of 1, but either way reset the dis so it is pointing at the #1 wire. reinstall the cap. remove the plate from the cig lighter area, jumper the a/b pins on the aldl connector. Start the car. Set cyl1 to 10 degrees. then check #4. set the timing so the 2 average out to 10 degrees. Lock down the dist. remove the jumper. Drive happily away.
sounds bout right. if your hand turning the engine, you can use a compression gauge to check for the "air coming out" as its hard to do and turn the engine at the same time.
Pull the plug on cylinder 1. rotate the motor with a wrench with your finger over the plug hole. when you start to feel air coming out as your wide timing mark on the dampner reaches 0 stop. (if you don;t feel air, you will need to go around again.)
Rotate the motor clockwise or counter-clockwise? I think I read something about you should only turn it over one direction. I would assume clockwise... Do you have a picture of the marks? I can't see them very well...
quote
Originally posted by hookdonspeed:
sounds bout right. if your hand turning the engine, you can use a compression gauge to check for the "air coming out" as its hard to do and turn the engine at the same time.
I think that I bought something that screwed onto the spark plug spot and it would whistle as the air came out... Probably doesn't work even if I could find it...
quote
Originally posted by tjm4fun:
Now plug 1 is tdc. replace the plug. remove the dist cap and see where the rotor is pointing. If you had it out, it could be at 4 instead of 1, but either way reset the dis so it is pointing at the #1 wire. reinstall the cap.
If I can't get it to point at the #1 wire then I need to move the distibutor... Ugh.
quote
Originally posted by tjm4fun:
remove the plate from the cig lighter area, jumper the a/b pins on the aldl connector.
I get to do this a little differently since I did the 7730 ECM upgrade... =)
quote
Originally posted by tjm4fun:
Set cyl1 to 10 degrees. then check #4. set the timing so the 2 average out to 10 degrees. Lock down the dist.
So I check #1 and #4 with the timing light. Good to know. I don't think the Haynes manual has that. Hell, I think the Haynes manual seems vague compared to anything out here...
Yes, rotate clockwise. on the pulley end. If it's off enough, you could rotate the wires one position either way to keep the dist plugs pointing where they should be, it;s really a matter of space in there, if you can get that adjustment without pulling the dist, then you should be ok.
I don;t have a pic of the dampner. if it is stock, then there should be 3 lines in it. one is about twice as deep and slightly wider than the rest. that is the mark you want. I usually put some chalk or white paint in it to make that one visible.
I don;t have a pic of the dampner. if it is stock, then there should be 3 lines in it. one is about twice as deep and slightly wider than the rest. that is the mark you want. I usually put some chalk or white paint in it to make that one visible.
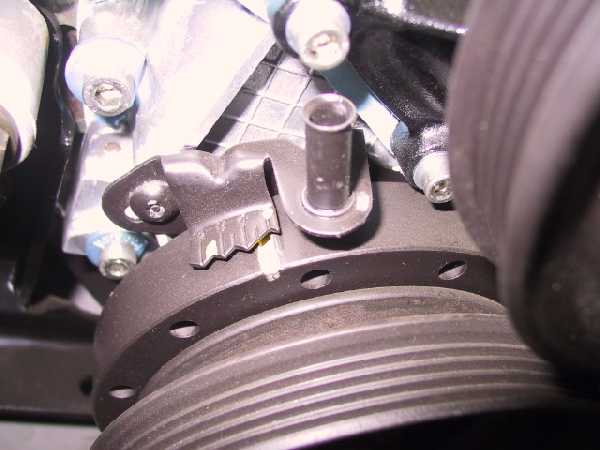
Oh, I didn't realize the pulley was called the dampner. My bad. I painted a white line on the widest mark while I was under the car. I was wanting a picture of the timing plate that has the degree marks on it. I can't remember if the larger marks are in 5 or 10 degree marks... I know that it looks something like this
O <=hole ==> is the first long hash zero degrees? => ==> => ==> => ==>
Originally posted by MulletproofMonk: Oh, I didn't realize the pulley was called the dampner.
It isn't. The crankshaft pulley and the damper are two separate pieces. And the timing mark is on the damper.
Here are a couple tricks I learned while working on the 2.8 V6, regarding the ignition timing. First, you can get the timing pretty close by turning the crankshaft to 10° BTDC instead of zero when setting the distributer. So when you start up the engine to fine-tune the timing, it will already be close to the mark. Second of all, you can attach your timing light probe to the coil wire instead of plug #1 or #4. That way, you get both at the same time, which makes timing adjustments quick and easy.