I recently noticed a small puddle of coolant directly under the radiator and upon further inspection, I discovered an 1½" long crack in the plastic end cap on the inlet side of the radiator.
My question is, were any of you to have this issue while in financial dire straits, would you first attempt to repair it using JB Weld? I've had a great amount of success with JB Weld and actually fixed the radiator on my wife's Ford Aerostar with it.
I don't see a problem with trying it at least. I mean, the worst I can do is screw up a broken radiator, right? And with the cooling system keeping things at a cozy 190° at all times, I don't foresee any problems with pressure.
If there is a radiator shop located close to you, it might be in your best interest to check with them and see how much they will charge to replace the plastic end cap. I have had it done (on a mustang, not Fiero) a couple years ago, and I remember it being VERY cheap to have done.
IP: Logged
10:53 PM
Feb 25th, 2009
Brocephus Member
Posts: 617 From: Franklin, NY, USA Registered: Mar 2006
If there is a radiator shop located close to you, it might be in your best interest to check with them and see how much they will charge to replace the plastic end cap. I have had it done (on a mustang, not Fiero) a couple years ago, and I remember it being VERY cheap to have done.
I may be forced to do that but for now I'm going to attempt a repair. If it'll at least get me to New York, then it will have done its job. The good thing about it is that it is very close to the top of the radiator and if it does fail, I'll only lose the top 2" of coolant. And in a 4.3L GMC Sonoma, that's nothing. (I guess I did fail to mention this was my pick-up, not my Fiero.)
TK, I think you're right. 16 psi doesn't seem like a whole lot, especially given the size of this crack. If it were a hole I was patching, I would be much more concerned, but the pressures this patch will be seeing are going to be much less than 16 lbs when you consider the area of the crack. I might have all of 1/64" of total area that will be exposed to the JB Weld and at 16 psi, that's equal to .25 lbs. of pressure spread over the entire length of the crack, lol.
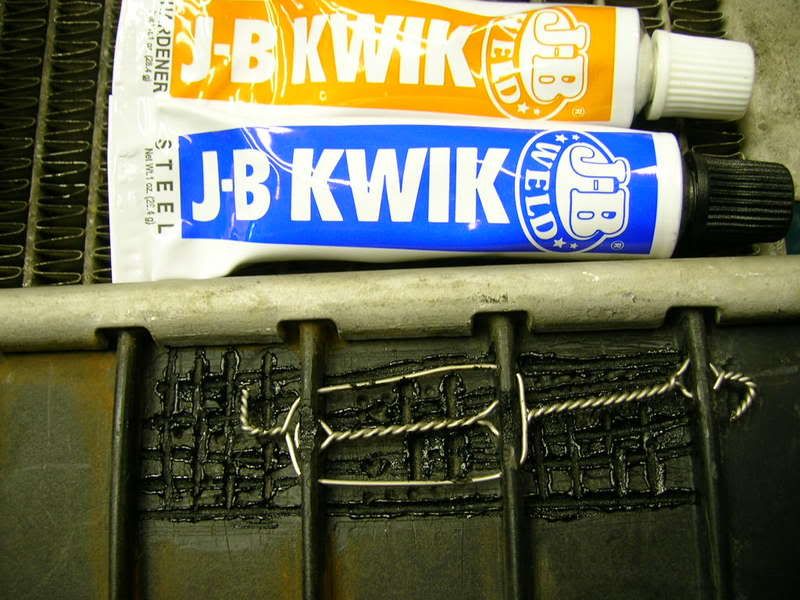
Dodgerunner, I agree that prepwork is key. I tried to sand the area with sandpaper, but all it managed to do was clean the surface somewhat. I broke out my Dremel with a reamer bit and shaved off some of the plastic. I then took a small drill bit and drilled through the plastic fins that protrude from the end cap. I also made some indentations in the plastic to help give the JB something to grab ahold of. I may have screwed up when I did that though because I made the indentations in a straight line and I fear that may have the same effect as nailing a bunch of nails into the same grain of a piece of wood - it may split. Time will tell. I'm also going to incorporate the aluminum "teeth" or clamps that hold the endcap onto the radiator as I feel this will further strengthen the repair by giving the JB something to grab onto. I don't have any fiberglass supplies so I'm going to just lay it on thick and let it set for a good 24 hours before attempting to fill it up.
A lower pressure cap might help- but you should also then put a lower temperature thermostat in. I say try the JB weld. If it develops a leak while on your way to NY, pull the thermostat and keep the system topped off. You should make it.
IP: Logged
09:15 AM
Brocephus Member
Posts: 617 From: Franklin, NY, USA Registered: Mar 2006
Ok fellas, here is my cracked radiator repair by the numbers.
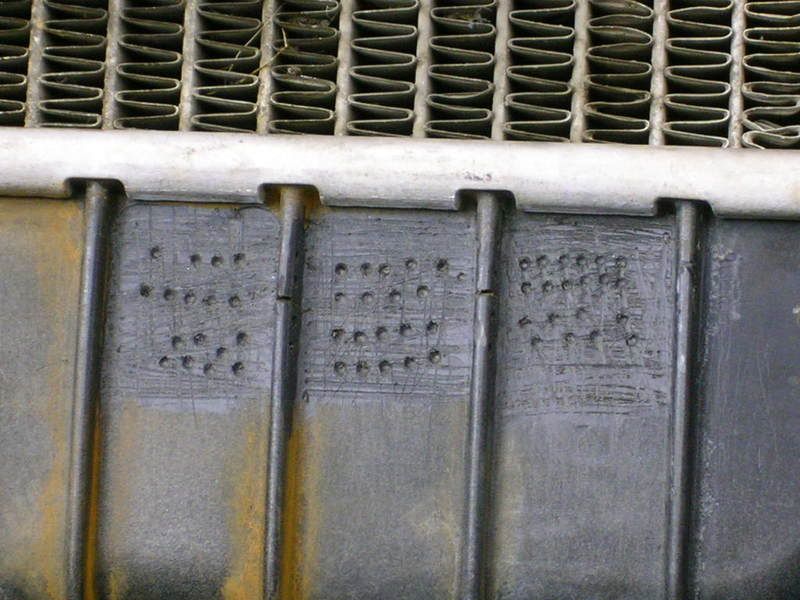
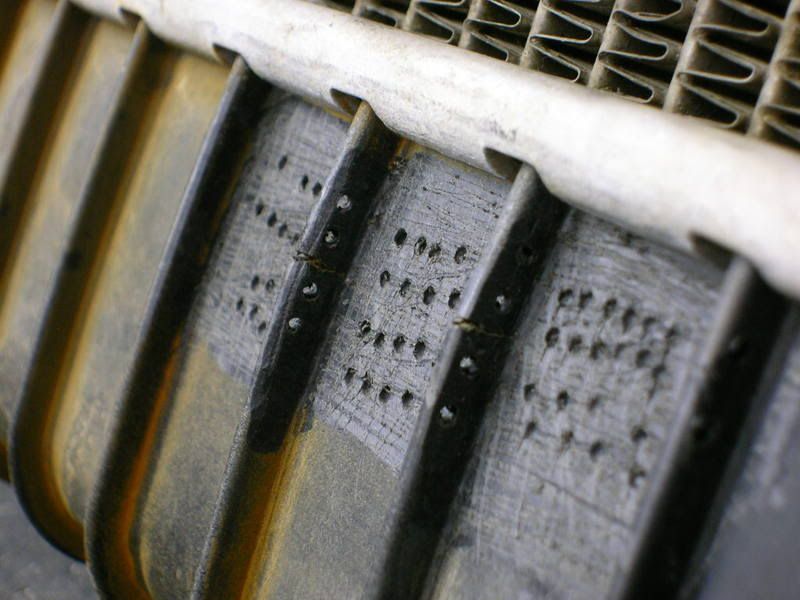
Here is the prep work I did last night. As stated earlier, I made several indentations in the plastic so as to give the JB something to bond to.
I also drilled some holes through the support ribs. My thought was to give the JB more to bond to.
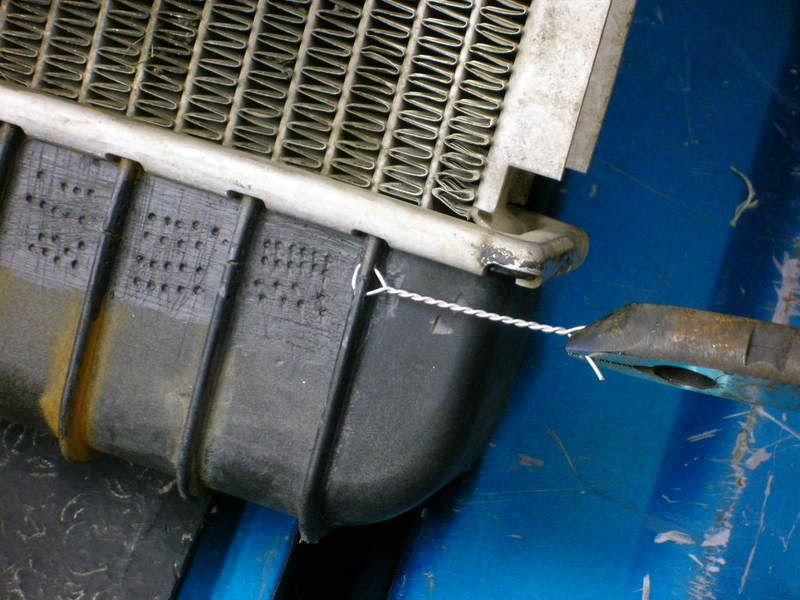
I had the lid off the JB and was about to start squeezing the tube when I had a brilliant idea. Some of you will know what these pliers are, other will not. These are wire twisting pliers and are common for use in high-vibration applications like aircraft and boats. If you've ever seen a bolt with a hole through the head of it, this is why. You run the wire through it and tie it to another bolt or something to keep it from loosening up.
I started to do it this way and then though it might be better to do it....
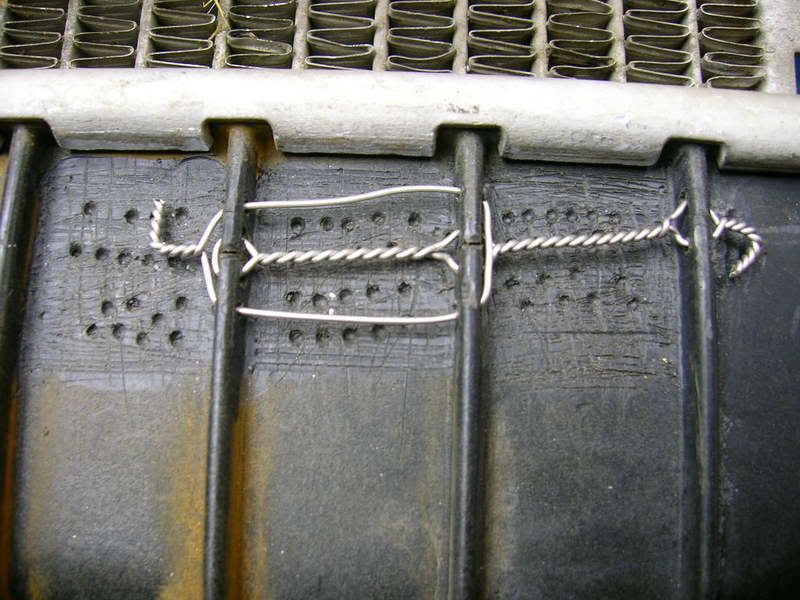
...this way. Doing this would give the JB more than enough grip.
I drilled four holes in the ribs, but only used two of them in the above pic. I used the other two in the finished product. I now have a steel reinforced radiator patch.
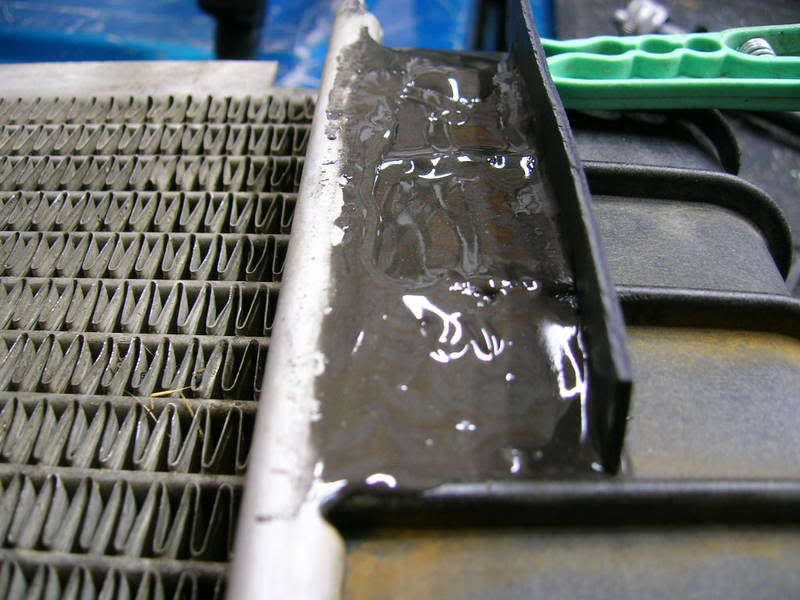
No, this isn't a shameless plug for JB Weld, hehe. I used a hairdryer to warm the area to be bonded and thought I'd warm the JB as well. I took a woodburning iron with a fairly broad tip and ran it over the length of the crack. Amazingly enough, I was able to seal the crack, but I wasn't about to trust it...the repair continued. I also used it to score the %#@! out of the bonding surface of the endcap.
I trimmed and clamped a small piece of plastic to the support rib to keep the JB from oozing everywhere and then poured the goose-poop to it. I had to work quick because the JB sets in 4 minutes.
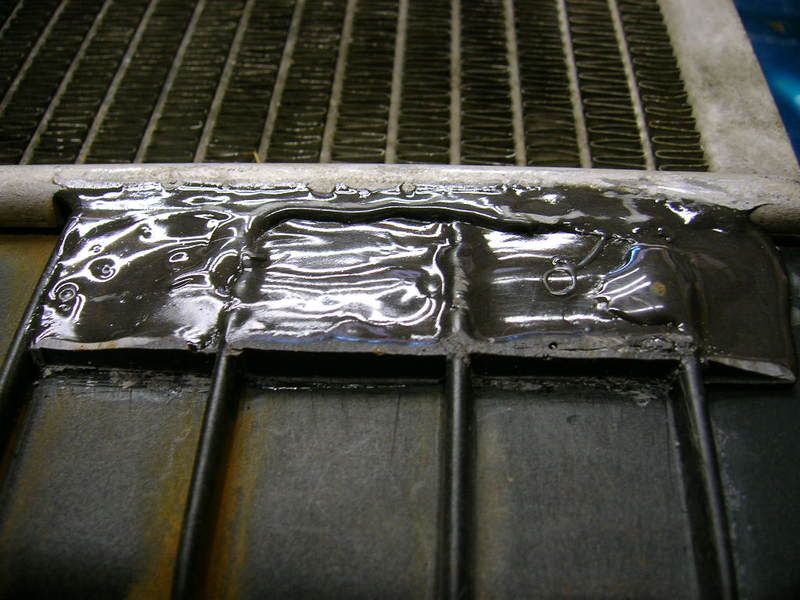
Finished product. Once the 24 hour curing time is passed, I can reinstall, refill and test. I'll letcha know how it goes.
[This message has been edited by Brocephus (edited 02-25-2009).]
IP: Logged
02:22 PM
Ken_86gt Member
Posts: 574 From: WILLIAMSBURG Registered: Jan 2004
That looks more like a leaking tank gasket. Was it really leaking at a crack in the tank?
If you look closely at the cracks in the support ribs on the tank itself, you'll notice a couple of cracks. Right between those two cracks and and an additional ½" beyond both ribs, there was a crack through which you see a faint amount of light if you had a flashlight poked in through the upper radiator hose nipple. It was definitely the source of my leak.
I had a moment of weakness and chucked the 24-hour cure time out the friggin' window. I kow, I know, but I couldn't stand it, lol. I'll know if I screwed up tomorrow.
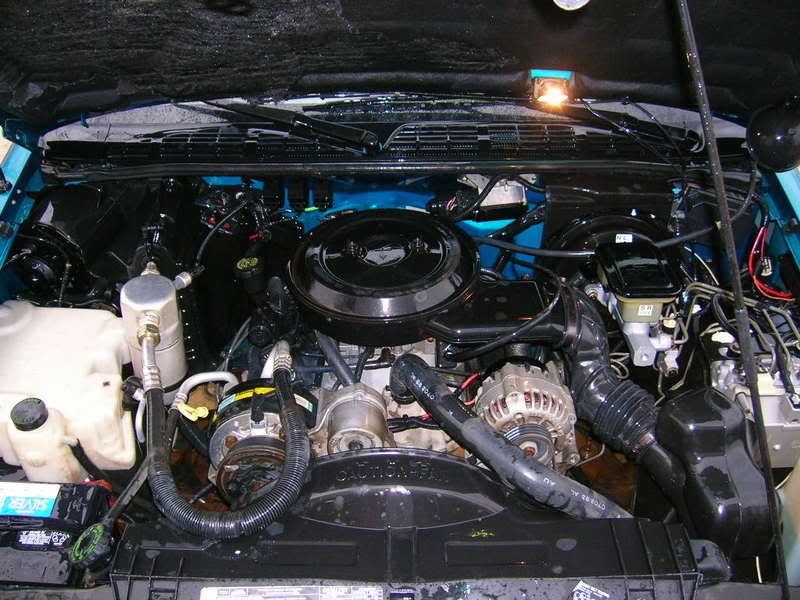
I filled and fired it up about six hours after I finished the repair. The JB was hard as hell and I figured the heat might help it cure faster anyway. (yeah right...) I let the truck idle for almost an hour in the garage, goosing it every few minutes to 2500 rpms and holding it steady for 20-30 seconds. I watched my patch like a hawk, scouring it with a flashlight, looking for any sign of seepage and saw nothing. I pulled it outside, hosed down the engine bay with a good degreaser and let it sit for a couple of minutes. I scrubbed a little and scraped a little and when I rinsed it off, this is what I saw...
A clean engine is a happy engine.
Gave the truck a well-deserved bath.
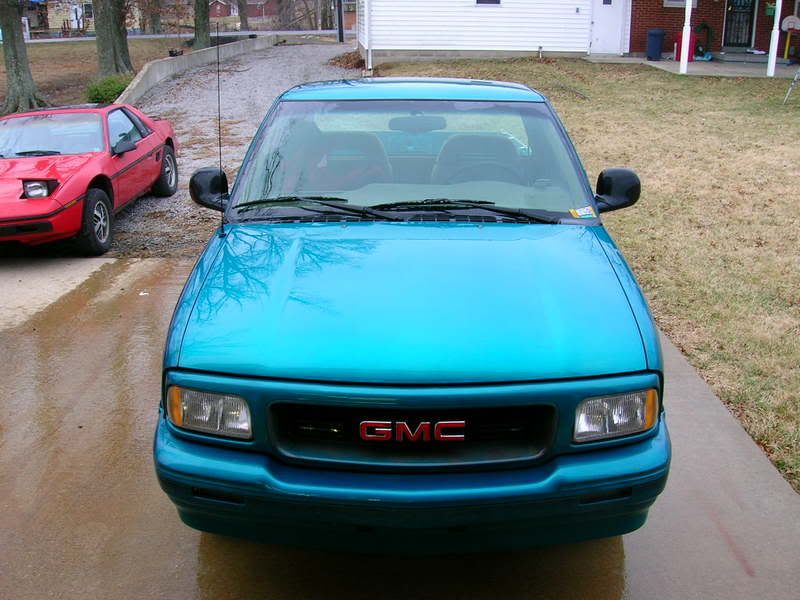
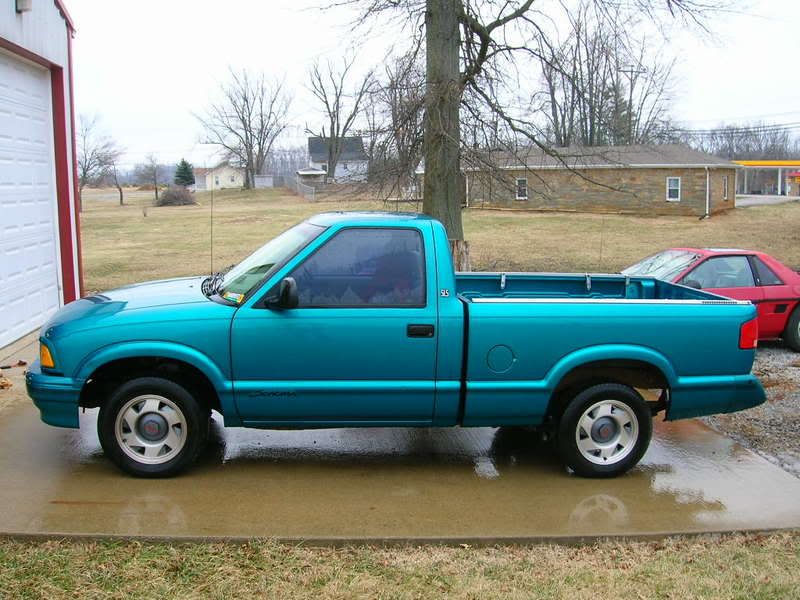
Hard to believe that truck is 15 years old. Still looks amazing from 10'.
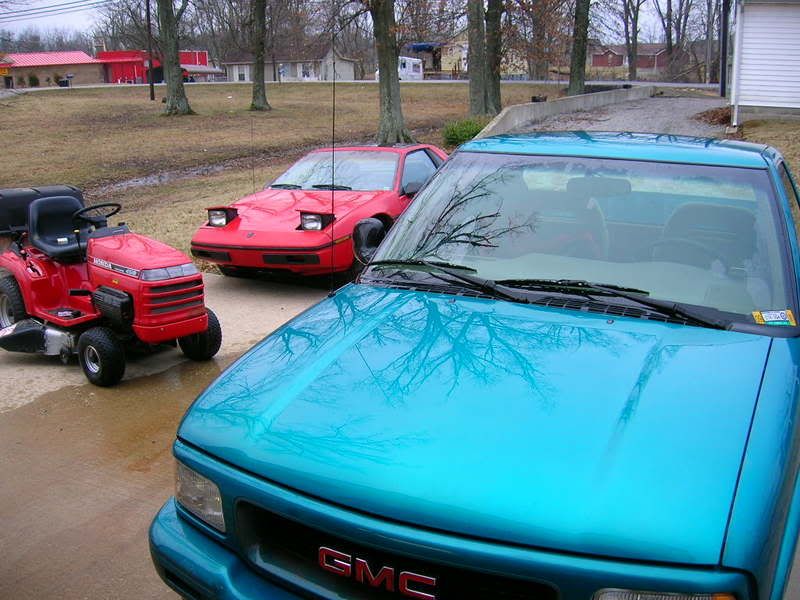
Here are my babies. The '94 GMC Sonoma, the '93 18 hp Honda lawn tractor, and the '84 Fiero SE.
This repair cost me nothing but time and anti-freeze. Had I decided to just buy a new radiator, the Chevy dealer wanted $269.73 for one. They also wanted to charge 1.2 hours of labor at $85/hr for a grand total of $371.73. Since I did it myself, I get to keep my money in my pocket and I have another excuse to post on my favorite forum, hehe. Thanks for lookin' and thanks again for the suggestions!
[This message has been edited by Brocephus (edited 02-26-2009).]
I find JB to work very well on the radiator repairs, but I never use the Quik Weld version. It's just not as good. Nothing required but a bit of patience.
IP: Logged
12:38 AM
Brocephus Member
Posts: 617 From: Franklin, NY, USA Registered: Mar 2006
Yeah WB, I probably should have used the other, but this was what I had on hand. On the bright side, if you never hear me speak of it failing, you'll at least know that the qwik weld will work for a radiator repair of this nature, hehe.