I had rebuilt/restored both my headlight motors on my 85GT and thought I was good for a couple years. Meanwhile I had picked up 88 Firebird headlight parts for the day I wanted to do a conversion. Well as things would go, the right side quit this week. The down limit switch decided it would break, so no better time to convert then now.
I didn't have a Fiero wire harness and really didn't care if I had one since I planned on just "doing it" so thought I might as well write it up if someone else wanted to do one.
So lets get started. Didn't take a lot of pictures so will try to explain while I go. I took my time and was able to do this in three hours with breaks. If you don't get done you can always install the buckets and manually run the lights in a pinch.
Here is what your starting with.
This is what we are shooting for when done.
****************Now the disclaimer: Once you start this there is no return unless you want to re-splice your cuts. I have documented this and believe it to be accurate. Proceed at your own risk. **********
I decided I was not going to put the module in the standard Fiero location but would keep in it the trunk. Nice spot seemed to be right in front of the brake master.
Here are the parts I started with. A left and right motor with plugs and fair amount of wire on each, and the module with plugs and some wire. I picked the parts up at a U-pull-it for $25. I bench tested all three parts before installing them.
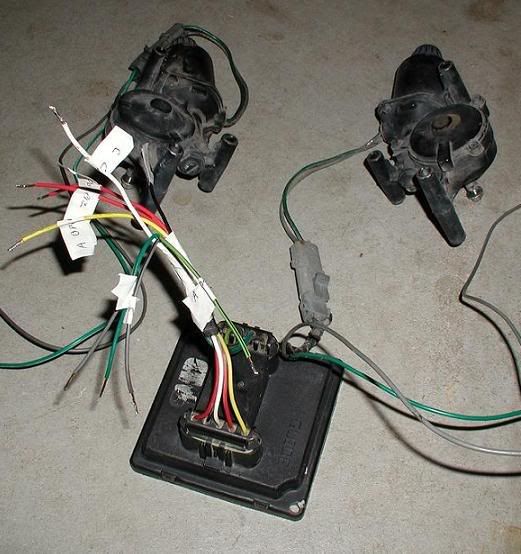
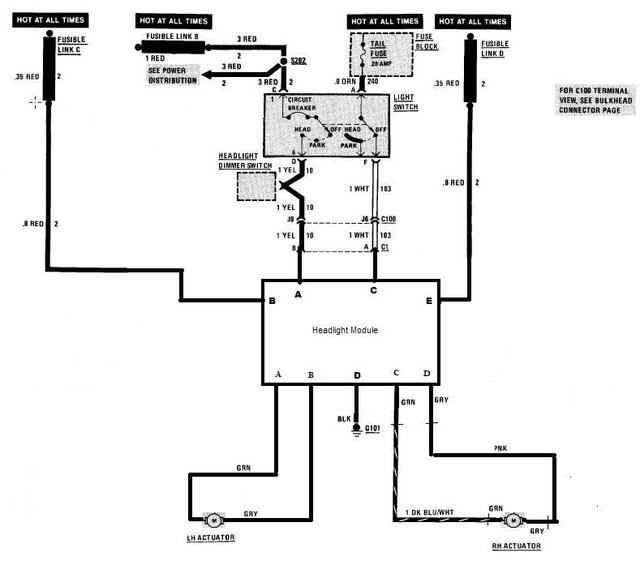
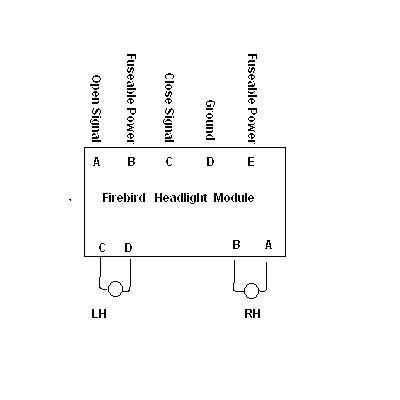
The module has a 5 pin plug (control and power) and a 4 pin plug (Motor connections). Both plugs are labled A-E and A-D.
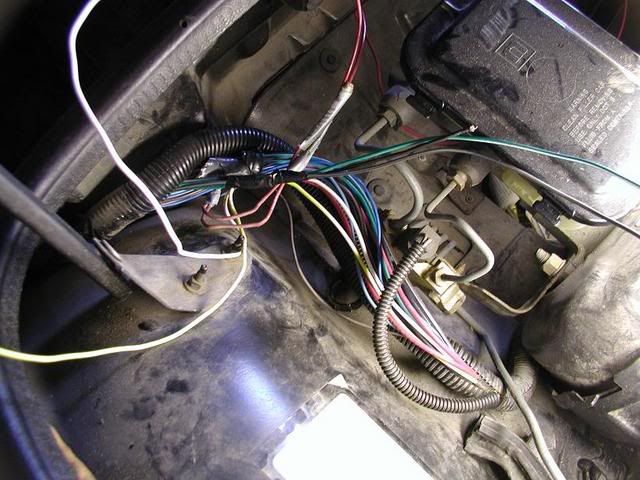
If you look at the 5 wire plug closest to you there are the following wires.
A- Yellow - Open power signal.
B- Red - Fuseable link power for motors.
C- White - Close power signal.
D- Black - Ground.
E- Red - Fuseable link power for motors.
As it just happend GM kept these five wire colors the same between the Firebird and the Fiero making these five fairly easy.
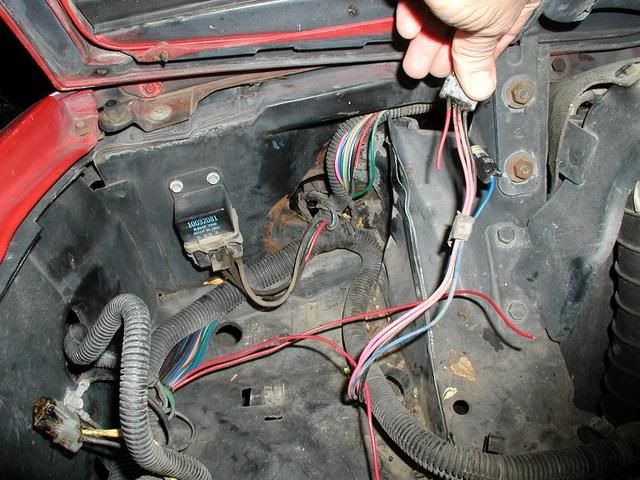
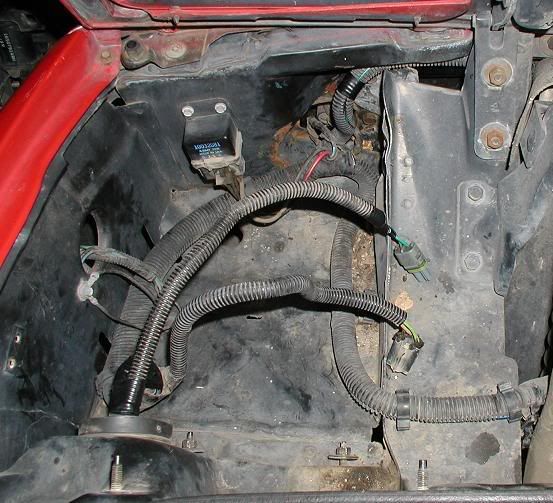
After pulling the headlight buckets this is what your left with.
Next I pulled the wires out of the loom so I could locate the wires needed. Here are the points I exposed the wires.
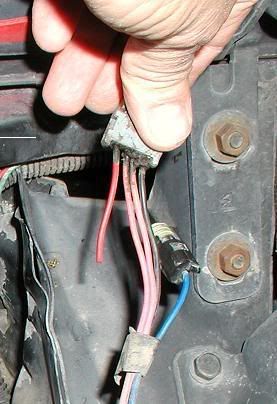
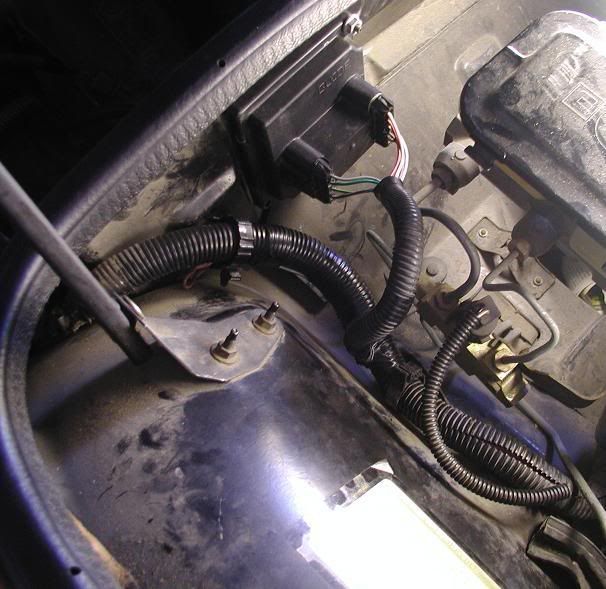
You will find the two fuseable links near the brake master.
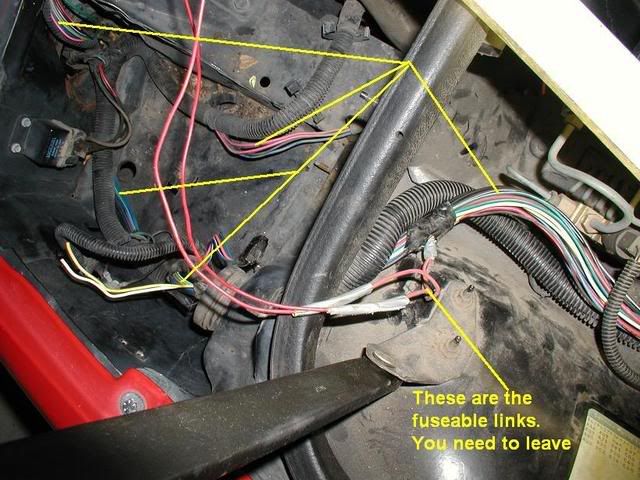
And another angle.
1. The first step is to disconnect the battery since you will be working with some wires with power on them.
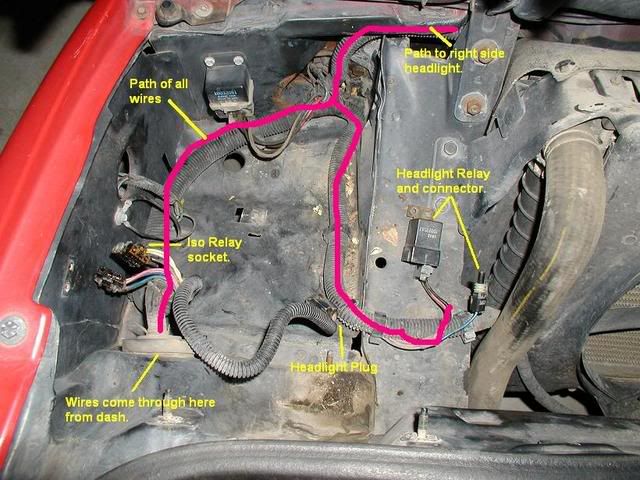
2. Locate the LH headlight relay socket plug with the red, two pink and black wires. Cut all four of these off the plug. You will endup using three. The red will be pulled back to the module, the two pink will be spiced together to get motor power the right hand motor.
3. Where the small loom goes up and over the radiator locate the one red (power) to the right hand motor and cut it at this location.
This will also be pulled back to where you mount your module.
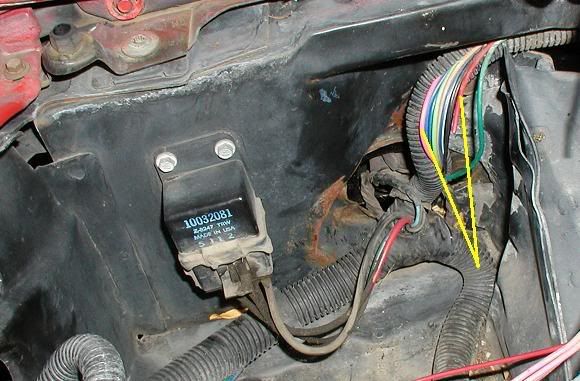
4. Pull the black wire (ground from the headlight relay) and both red wires out of the loom back to the place where the wires come from the trunk to the headlight area. (the area where the ISO relay wires are located.
5. The two pink wires you cut from the headlight relay will be used to run motor power to the RH motor. I spliced these two together so that I could pull the longer pink wire going to the RH motor side back to the Iso relay area using the pink wire that had connected to the Iso relay. The splice pulled back to this area and then I removed the short pink piece used to pull it. It is no longer needed.
6. Cut the plugs off that connected to the Iso relay.
7. Time to stop and check your wires. In the Iso Relay area you should have the following wires.
(2) Red wires. Fuseable link power.
(1) Dk Blue/wht RH motor power
(1 ) Pink RH motor power
(1) Yellow
(1) White
(1) Black - It's your choice here. This can be used as the ground for the module or you can just use a ground in the trunk area of your choice. I use one of the headlight ground wires.
8. Now your going to pulled the following wires into the trunk area or where ever you are going to locate your module. But read on before you pull them since you are going to use some of these wires to also pull others wires needed into the trunk.
(2) Red wires.
(1) Yellow
(1) White
(1) Black
The above listed wires when pulled into the truck area will also be used to pull four additional wires from the headlight area back to where the module will be. The four will use to get power to the new motors.
9. Where the wires go through the gromet into the trunk they are wrapped in tape. The gromet is full but you can pull the wires through since it stretches and you are removing a couple wires while adding others. I had no problem doing this.
10. To keep the motor wire colors matching on the module plug I use the wire from the new motor plugs since they also match and I had pulled enough out of the donor car. One motor plug has a green and gray wire pair, the other has a Green/blk and Gray/blk pair.
11. I picked one or the new plugs that had wires long enough to reach from the module to the LH motor location. I temporarily spliced and taped these onto the Red wires to be used to pulled them into the trunk area. Then remove the splices.
12. I now cut some wire off the other new motor plug leaving about 8 inches on the plug to be spliced onto the wires for the RH motor. Using the wire you just cut off permanently spliced them to the Dk Blue/Wht wire and Pink wire you pulled back in the Iso Relay area. Note which color you connect to which wire as you will need to know this later. I then temporarily spliced these two wires and the black ground wire to the Yellow and White wires using them to pull the two motor wires and a ground wire into the trunk area.
It starts to look like this. Looks like a mess but will work out.
13. Now in the trunk area you should have the follow group of wires.
(2) Red wires.
(1) Yellow
(1) White
(1) Black
Pair (1) Green and (1) Gray
Pair (1) Green/blk (1) Gray/blk
14. If you have used the above parts from a firebird all that should be left is to splice these wires to the corresponding module wires. I used the standard twist the wires and solder after slipping a piece of heat shrink tubing over each of the wires. After your done, dress the looms back up nice and neat.
15. All that is left to do is cut the plug off the RH motor relay and the single plug on the Drk blue/wht. You then can splice the remaining motor plug onto the pink wire and the Dk blue/wht wire matching them the same as noted in step 12. You did note that didn't you....?
That should do it... Install the the new motors in the headlight buckets and install them. Don't forget to shorten the one bolt on each motor so the arm does on hit it when it rotates.
 http://s20.photobucket.com/...urrent=headlight.flv
[This message has been edited by Dodgerunner (edited 04-26-2009).]


