Pennock's Fiero Forum
  Technical Discussion & Questions - Archive
  Let`s make a door panel

T H I S   I S   A N   A R C H I V E D   T O P I C
  

Email This Page to Someone! | Printable Version


Let`s make a door panel by TXGOOD
Started on: 05-02-2007 10:29 PM
Replies: 11
Last post by: TXGOOD on 05-03-2007 11:08 PM
TXGOOD
Member
Posts: 5410
From: Austin, Texas
Registered: Feb 2006


Feedback score:    (58)
Leave feedback


Total ratings: 87
Rate this member

Report this Post05-02-2007 10:29 PM Click Here to See the Profile for TXGOODClick Here to visit TXGOOD's HomePageSend a Private Message to TXGOODDirect Link to This Post
A couple of people on my dash build post wanted to know how I made my door panels so I`m going to post some pictures of the progress.

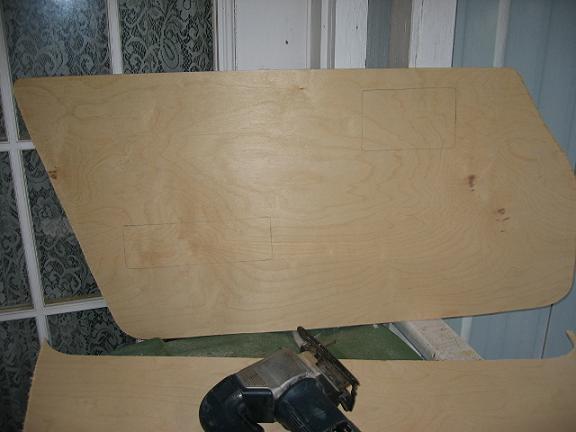
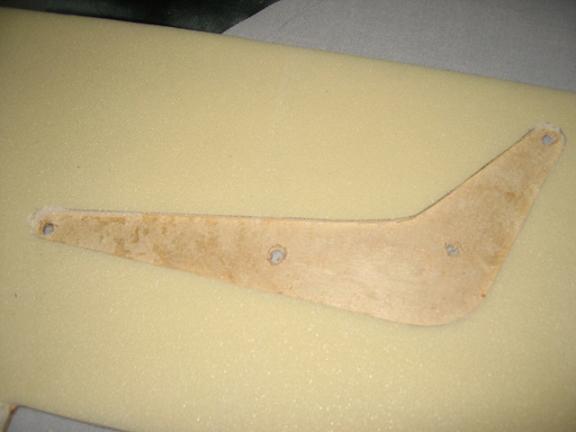
First I cut out the shape from a 1/4" piece of birch plywood.


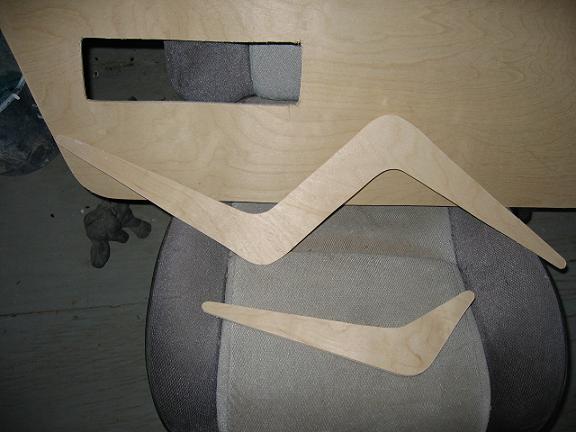
Then I cut out the holes for the lock lever and the grab handle and cut out my shapes for the insert


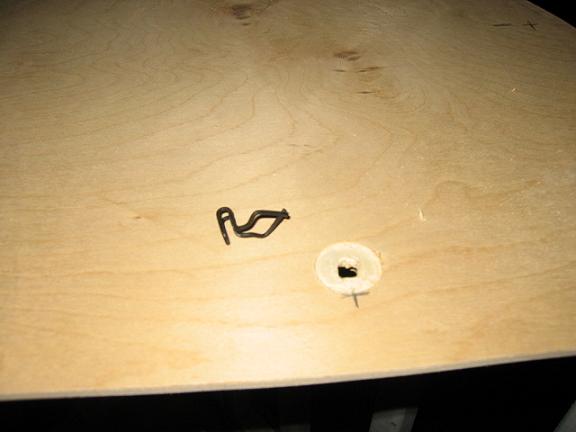
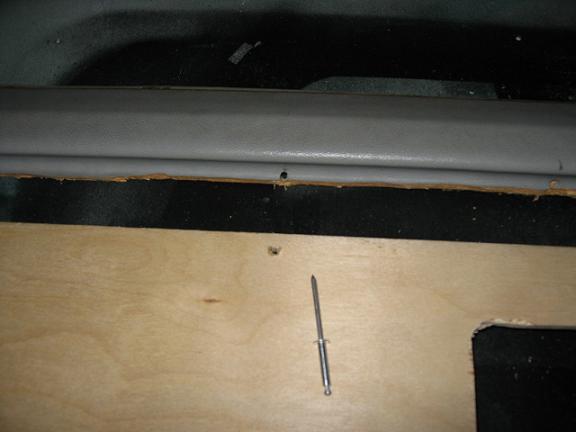
Next I drill a 1" hole about 1/2 way through to mount the clips. Notice I drill on the edge of my mark so the clips when installed will line up with the stock ones
IP: Logged
PFF
System Bot
TXGOOD
Member
Posts: 5410
From: Austin, Texas
Registered: Feb 2006


Feedback score:    (58)
Leave feedback


Total ratings: 87
Rate this member

Report this Post05-02-2007 10:34 PM Click Here to See the Profile for TXGOODClick Here to visit TXGOOD's HomePageSend a Private Message to TXGOODDirect Link to This Post
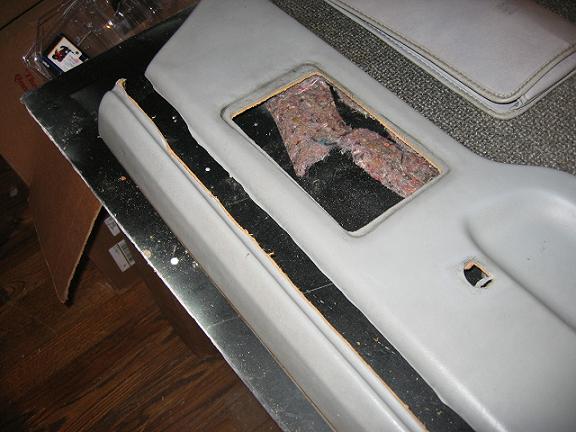
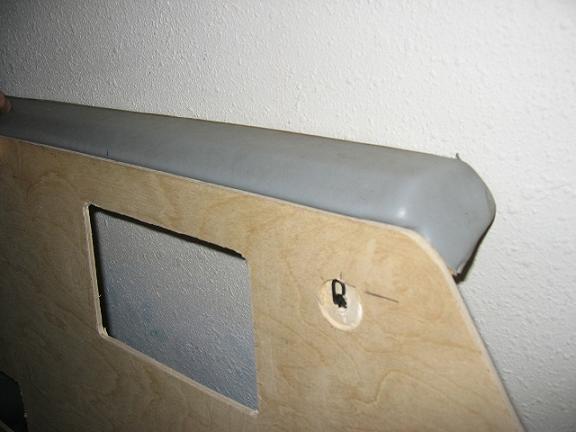
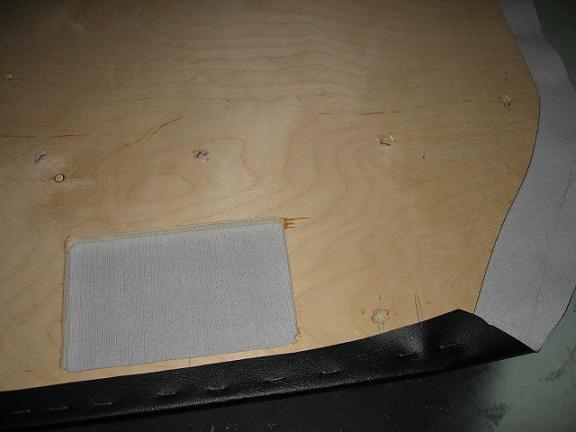
Next, I cut the stock panel right under the groove. Don`t mind my crooked cut, it won`t be seen.


It fits right on top of the plywood. I forgot to mention that you have to cut the plywood shorter by the piece that goes on top so the overall will be right.


Then I drill holes for rivets. I`m using 1/8" rivets 1/2" long and drilling 9/64" hole for them to go into.
IP: Logged
TXGOOD
Member
Posts: 5410
From: Austin, Texas
Registered: Feb 2006


Feedback score:    (58)
Leave feedback


Total ratings: 87
Rate this member

Report this Post05-02-2007 10:37 PM Click Here to See the Profile for TXGOODClick Here to visit TXGOOD's HomePageSend a Private Message to TXGOODDirect Link to This Post

TXGOOD

5410 posts
Member since Feb 2006
Next, I glue vinyl top padding 1/4" onto panel with spray contact adhesive and then take a razor and cut around the perimeter.


I will post more photos as I get further along.
Mike
IP: Logged
F-I-E-R-O
Member
Posts: 8410
From: Endwell, NY
Registered: Jan 2005


Feedback score:    (17)
Leave feedback


Total ratings: 294
Rate this member

Report this Post05-02-2007 11:13 PM Click Here to See the Profile for F-I-E-R-OSend a Private Message to F-I-E-R-ODirect Link to This Post
Cool! This will be a fun one to watch...
IP: Logged
ltlfrari
Member
Posts: 5356
From: Wake Forest,NC,USA
Registered: Jan 2002


Feedback score: (4)
Leave feedback


Total ratings: 127
Rate this member

Report this Post05-03-2007 07:05 AM Click Here to See the Profile for ltlfrariClick Here to visit ltlfrari's HomePageSend a Private Message to ltlfrariDirect Link to This Post
How did you measure/mark the holes for the clips?
IP: Logged
GODFATHER
Member
Posts: 1020
From: Summerville S.C
Registered: Jun 2003


Feedback score: (3)
Leave feedback

Rate this member

Report this Post05-03-2007 07:12 AM Click Here to See the Profile for GODFATHERSend a Private Message to GODFATHERDirect Link to This Post
I always wondered how you would make door panels due to all the bends and curves of the fieros.
Cool. More pics PLEASE.
Joe
IP: Logged
TXGOOD
Member
Posts: 5410
From: Austin, Texas
Registered: Feb 2006


Feedback score:    (58)
Leave feedback


Total ratings: 87
Rate this member

Report this Post05-03-2007 07:33 AM Click Here to See the Profile for TXGOODClick Here to visit TXGOOD's HomePageSend a Private Message to TXGOODDirect Link to This Post
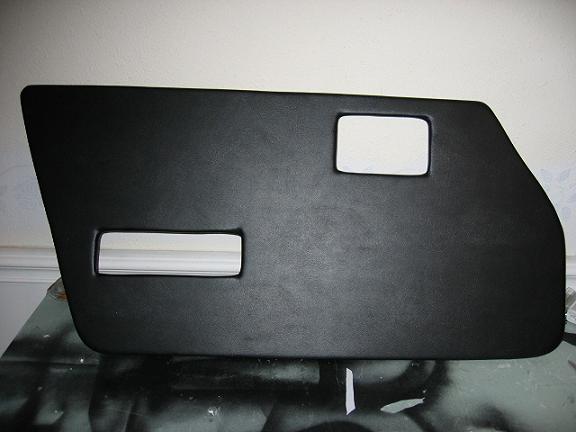
I just took the measurements from the edges of the stock doors panels to the middle of the existing plastic clips and transfered measurements from there. The new panel, because of the flatness of it and that it doesn`t have raised places where the clips go is that it actually is up against the door tighter. I still need to bend the lock rod because it kind of rubs against the back of the panel. To use these clips, which I like better than the plastic ones because they release easier, you have to drill the holes, where they go, out to 3/8". The only thing I might do different on this panel, that I didn`t do on the first one, is use small wire instead of rivets to hold the panel to the stock top part of the panel because unless you get the rivets away from the edge of the plywood enough it tends to flare out when you install the rivet.
IP: Logged
bonezjustice
Member
Posts: 150
From: Washington
Registered: Apr 2004


Feedback score: N/A
Leave feedback

Rate this member

Report this Post05-03-2007 10:29 AM Click Here to See the Profile for bonezjusticeSend a Private Message to bonezjusticeDirect Link to This Post
bump
IP: Logged
Jncomutt
Member
Posts: 8915
From: Charlotte, NC
Registered: Apr 2001


Feedback score: (3)
Leave feedback


Total ratings: 221
Rate this member

Report this Post05-03-2007 02:11 PM Click Here to See the Profile for JncomuttSend a Private Message to JncomuttDirect Link to This Post
Can you link to the dash build in your first post? I'm lazy and it would just make things easier... Thanks!
IP: Logged
TXGOOD
Member
Posts: 5410
From: Austin, Texas
Registered: Feb 2006


Feedback score:    (58)
Leave feedback


Total ratings: 87
Rate this member

Report this Post05-03-2007 02:16 PM Click Here to See the Profile for TXGOODClick Here to visit TXGOOD's HomePageSend a Private Message to TXGOODDirect Link to This Post
IP: Logged
TXGOOD
Member
Posts: 5410
From: Austin, Texas
Registered: Feb 2006


Feedback score:    (58)
Leave feedback


Total ratings: 87
Rate this member

Report this Post05-03-2007 11:01 PM Click Here to See the Profile for TXGOODClick Here to visit TXGOOD's HomePageSend a Private Message to TXGOODDirect Link to This Post

TXGOOD

5410 posts
Member since Feb 2006
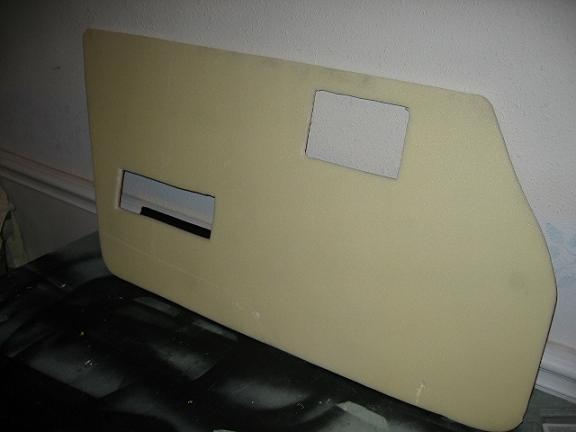
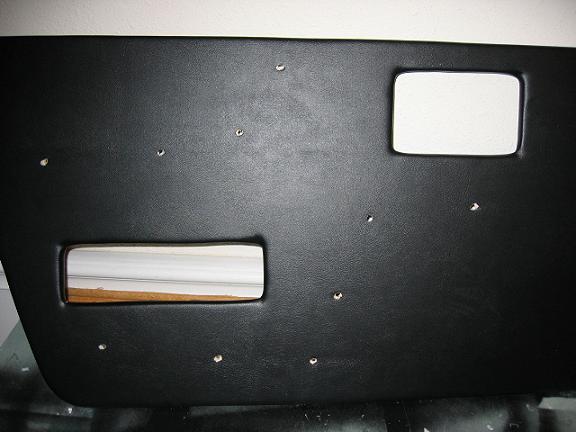
Trace the wood insert out on the foam making it about 1/8" bigger all of the way around.


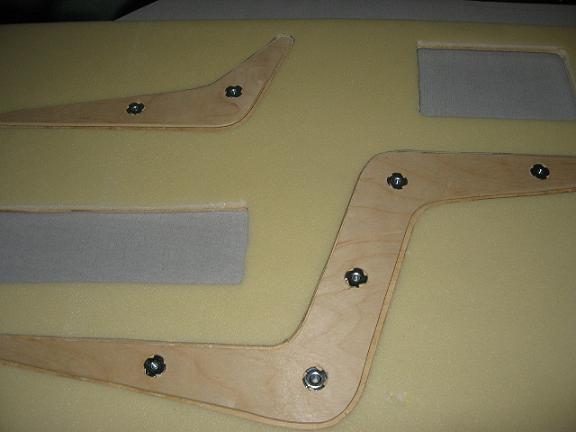
Then drill a number of 3/4" holes just deep enough for the 10-24 x 5/16 t-nuts to sit flush when driven into the plywood.


Next mark through the t-nuts and drill holes large enough for the t-nuts to fit through the panel.
Also drill a hole just at the ends of the inserts. Later you will pull the vinyl through that hole and staple it on the backside to secure
IP: Logged
PFF
System Bot
TXGOOD
Member
Posts: 5410
From: Austin, Texas
Registered: Feb 2006


Feedback score:    (58)
Leave feedback


Total ratings: 87
Rate this member

Report this Post05-03-2007 11:08 PM Click Here to See the Profile for TXGOODClick Here to visit TXGOOD's HomePageSend a Private Message to TXGOODDirect Link to This Post

TXGOOD

5410 posts
Member since Feb 2006
Lay panel on vinyl face side down and start stapling vinyl to back with 1/4" staples. Start from the middle and pull out slightly toward the ends along one edge until you get it stapled about 1" from the corners.


Then flip panel around and do the same from the opposite side pulling vinyl fairly tight until you finish that side. You can staple the corners now. If you start to staple around the corner and let it overlap as you go you can pull it tight enough that all of the wrinkles will be on the backside and hidden.


Then I stick the end of a pencil through the t-nut holes and cut around with a razor.

[This message has been edited by TXGOOD (edited 05-03-2007).]

IP: Logged


All times are ET (US)

T H I S   I S   A N   A R C H I V E D   T O P I C
  

Contact Us | Back To Main Page

Advertizing on PFF | Fiero Parts Vendors
PFF Merchandise | Fiero Gallery
Real-Time Chat | Fiero Related Auctions on eBay


Copyright (c) 1999, C. Pennock