Pennock's Fiero Forum
  Technical Discussion & Questions - Archive
  4.9 Water Pump Change Pics included

T H I S   I S   A N   A R C H I V E D   T O P I C
  

Email This Page to Someone! | Printable Version


4.9 Water Pump Change Pics included by Capt Fiero
Started on: 01-03-2007 08:17 PM
Replies: 11
Last post by: Mickey_Moose on 01-05-2007 10:55 AM
Capt Fiero
Member
Posts: 7658
From: British Columbia, Canada
Registered: Feb 2000


Feedback score: N/A
Leave feedback


Total ratings: 260
Rate this member

Report this Post01-03-2007 08:17 PM Click Here to See the Profile for Capt FieroClick Here to visit Capt Fiero's HomePageSend a Private Message to Capt FieroDirect Link to This Post
Well I was out driving the 85GT 4.9 last night. I am suppose to be the guy that blows nothing but Trans axles. Of all places I am leaving Wally Mart heading over to find some computer parts. The parking lot is nearly empty I get that funky feeling in my right foot. I crank the wheels over, punch it and drift the car sideways through the parking lot. I stop at the computer place and get out of the car to find a trail of water behind the car. CRAP CRAP CRAP. I pop the deck lid can see water streaming out from the engine bay. I get a light and shine down to the pump only to find water spraying out from the pump to housing seal. Looks like I popped the gasket.

I have a fellow Fiero nut with me (in another car) We get in there with tools and find 2 of the 15mm bolts (same place as the leak) were totally loose. Were not even finger tight. We torqued them down, and filled up the cooling system, left the thermostat out and I drove it about a mile and a half and the temp started to climb again. I stopped, topped it up again and drove another 2 miles. I did this start and stop thing all the way home about 5 miles down the highway. I never let it get over ¼ on the temp gauge. As soon as I saw the temp start to rise I pulled over and topped it up. I was not about to let it overheat and blow the engine.

So it looks like I am going to have to replace the gasket. The water pump was new a year ago as I installed a new pump when I installed the engine.

I called the parts store and ordered the new gasket. They said it would be at least 3-4 hrs to get it from the warehouse. So I decided to get the pump off the car. I wanted to take lots of pics for future reference for other 4.9 water pump changes for other people.

There are 5 main bolt types.

10mm nuts on studs in the housing
10mm bolts in the housing
15mm bolts in the housing
Torx bolts holding the housing to the pump under the pulley
13mm bolts holding the pulley to the pump

Once the belt is removed everything can be done from the top.

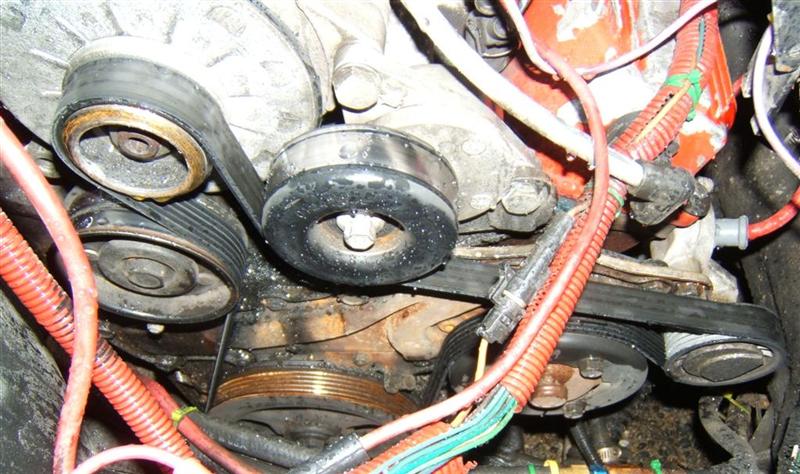
1st step is take a pic of your belt routing.
2nd step is remove belt by pulling tensioner back
3rd step is drain remaining coolant from engine
4th step is to remove 13mm pulley bolts
Then begin removing all the nuts, bolts, and torx bolts from the pump housing
Carefully peel the pump away.
Total dismantle should take 20-30mins if nothing goes wrong.

I got it all pulled apart and headed to the parts store and the gasket they brought in for me was damaged and they are going to deliver a new one to me in the morning.


So here are the pics from Todays dismantle.
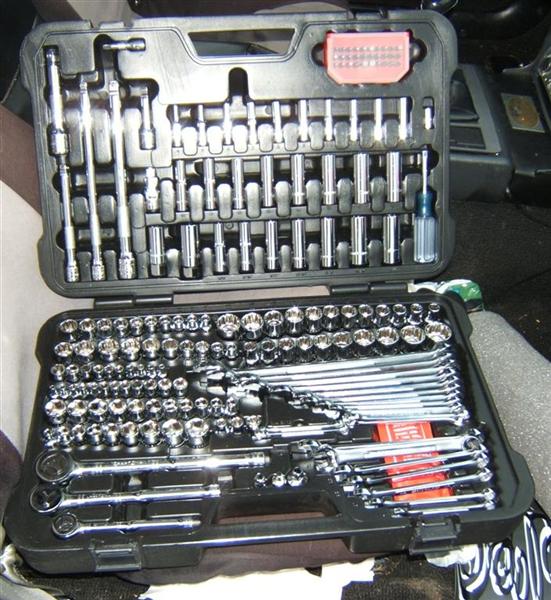
Socket Set


Gear Wrenches


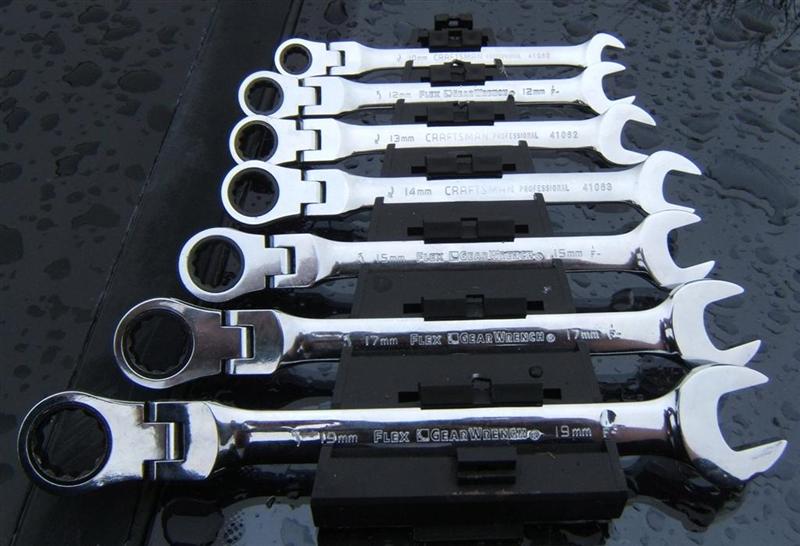
Speed Ratchet. When collapsed, all you do is twist the handle and it removes nuts and bolts. Great for tight spaces where you can't swing a wrench or ratchet


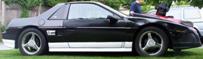
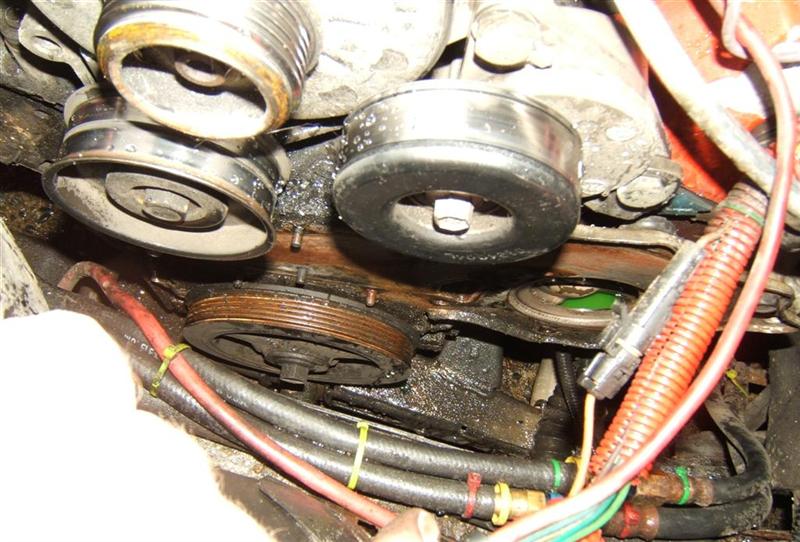
Belt Routing and pump installed


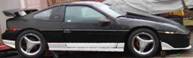
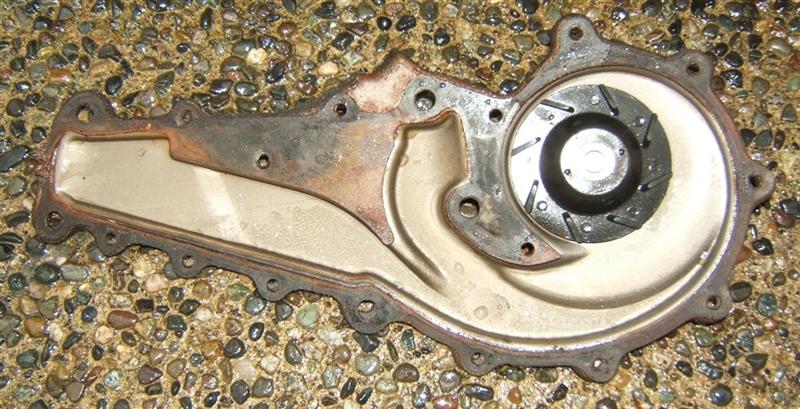
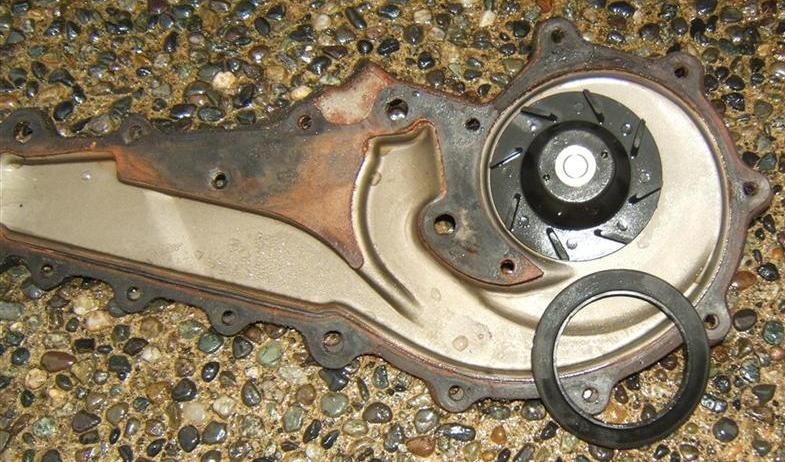
Pump Removed Sorry I really could not take pics of each individual bolt


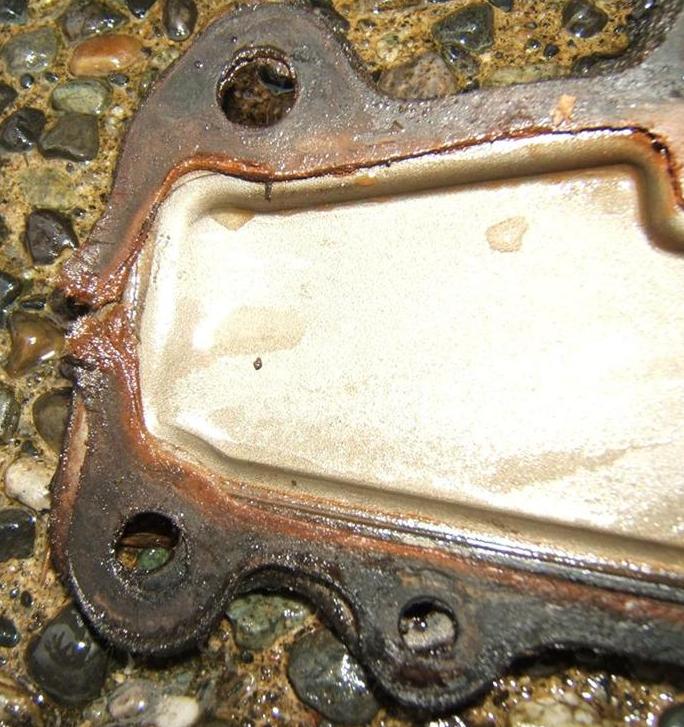
Blown gasket on back of pump


Pump impeller cap that came un-bonded. I have attempted a repair on it. Will post the results after driving on it for a week or two.


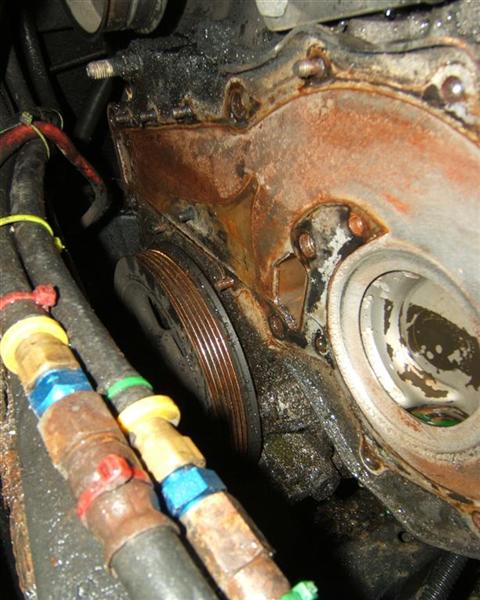
Pump housing with pump removed

[This message has been edited by Capt Fiero (edited 01-03-2007).]

IP: Logged
PFF
System Bot
Raydar
Member
Posts: 41385
From: Carrollton GA. Out in the... country.
Registered: Oct 1999


Feedback score:    (13)
Leave feedback


Total ratings: 461
Rate this member

Report this Post01-03-2007 09:19 PM Click Here to See the Profile for RaydarSend a Private Message to RaydarDirect Link to This Post
And I thought that my gear wrenches were the cat's azz, until I saw the ones you have, with the flex joint.


Great pics! You have a lot more room than I do. My frame rail (shock tower?) is only ~2" from the "tail" of the pump (where yours blew out),
possibly because the 88 shock towers encroach on the engine compartment a bit more. I did find that removing my idler and tensioner pullies provided a lot more room to maneuver.
Of course, my battery tray is still in the stock location, so that didn't help.

[This message has been edited by Raydar (edited 01-03-2007).]

IP: Logged
Archie
Member
Posts: 9436
From: Las Vegas, NV
Registered: Dec 1999


Feedback score:    (12)
Leave feedback


Total ratings: 547
Rate this member

Report this Post01-03-2007 09:35 PM Click Here to See the Profile for ArchieClick Here to visit Archie's HomePageSend a Private Message to ArchieDirect Link to This Post
You got some nice tools there.

I hate to interrupt but does anyone know the part number for that steel plate behind the W/P on the 4.9?

My Wife's Caddy is leaking for the 3rd time in the last 2 years & I want to replace that plate this time around.

Thanks

Archie
IP: Logged
Raydar
Member
Posts: 41385
From: Carrollton GA. Out in the... country.
Registered: Oct 1999


Feedback score:    (13)
Leave feedback


Total ratings: 461
Rate this member

Report this Post01-03-2007 09:45 PM Click Here to See the Profile for RaydarSend a Private Message to RaydarDirect Link to This Post
 
quote
Originally posted by Archie:
I hate to interrupt but does anyone know the part number for that steel plate behind the W/P on the 4.9?

My Wife's Caddy is leaking for the 3rd time in the last 2 years & I want to replace that plate this time around.


Shoulda given her a ZZ4 for Christmas.

Sorry. I can't help you with the part number.
Based upon how it's constructed, however, I'll bet that it's not an uncommon part to have to replace.
I wonder which brilliant bean counter came up with this piece of... cost-saving engineering.
IP: Logged
Capt Fiero
Member
Posts: 7658
From: British Columbia, Canada
Registered: Feb 2000


Feedback score: N/A
Leave feedback


Total ratings: 260
Rate this member

Report this Post01-03-2007 11:02 PM Click Here to See the Profile for Capt FieroClick Here to visit Capt Fiero's HomePageSend a Private Message to Capt FieroDirect Link to This Post
 
quote
Originally posted by Raydar:

And I thought that my gear wrenches were the cat's azz, until I saw the ones you have, with the flex joint.


Great pics! You have a lot more room than I do. My frame rail (shock tower?) is only ~2" from the "tail" of the pump (where yours blew out),
possibly because the 88 shock towers encroach on the engine compartment a bit more. I did find that removing my idler and tensioner pulleys provided a lot more room to maneuver.
Of course, my battery tray is still in the stock location, so that didn't help.


Thank You for the complement they were a gift from FieroChick. We picked up the gear wrenches and the large socket set at Sears. The twist/speed ratchet was a Canadian Tire tool. Having a fiancée that works on cars and knows what tools are good to buy as gifts also helps out tremendously.

 
quote
Originally posted by Archie:

You got some nice tools there.

I hate to interrupt but does anyone know the part number for that steel plate behind the W/P on the 4.9?

My Wife's Caddy is leaking for the 3rd time in the last 2 years & I want to replace that plate this time around.

Thanks

Archie


Thank You for the tools complement. Sorry I can't help you on the part number. This is the only 4.9 I own and as much as I love it, I am looking forward to owning a SBC Fiero here soon. I need all the nice tools due to the fact that we have a 5 Fiero household and maybe adding a 6th that has a SBC swap done to it. We all use Fiero's as our primary daily drivers. So lots of repairs get done on a semi-regular basis.


IP: Logged
Brian Lamberts
Member
Posts: 2691
From: TUCSON AZ USA
Registered: Feb 2003


Feedback score:    (7)
Leave feedback


Total ratings: 101
Rate this member

Report this Post01-04-2007 12:41 AM Click Here to See the Profile for Brian LambertsSend a Private Message to Brian LambertsDirect Link to This Post
 
quote
Originally posted by Raydar:

And I thought that my gear wrenches were the cat's azz, until I saw the ones you have, with the flex joint.


Great pics! You have a lot more room than I do. My frame rail (shock tower?) is only ~2" from the "tail" of the pump (where yours blew out),
possibly because the 88 shock towers encroach on the engine compartment a bit more. I did find that removing my idler and tensioner pullies provided a lot more room to maneuver.
Of course, my battery tray is still in the stock location, so that didn't help.


I got a set of those flex gear wrenches yesterday at Harbor Freight (I think Cap't larger wrenches are from there.) They are really nice. I think they were about $25--a 10% off coupon and a credit card is a very dangerous combination.
IP: Logged
Capt Fiero
Member
Posts: 7658
From: British Columbia, Canada
Registered: Feb 2000


Feedback score: N/A
Leave feedback


Total ratings: 260
Rate this member

Report this Post01-04-2007 01:01 AM Click Here to See the Profile for Capt FieroClick Here to visit Capt Fiero's HomePageSend a Private Message to Capt FieroDirect Link to This Post
I don't know if this link will work, but the ones I have are from Sears, USD $ 89.99 Canadian normal price is $109 or $99 they were on sale for $69 when we bought them.

Link should be here

I actually looked at Harbor Freight the last time I was down in Oregon for a set of real branded GearWrenchs with the flex heads and could not find any. Sounds like you got one hell of a deal. Are they real GearWrench brand?


------------------
85GT 5spd ,93 Eldorado 4.9 Dual O2 Custom Chip, Archie Clutch. Custom Exhaust. MSD Everything 245/50/16's Not Your Average 4.9 Capt Fiero Com --- My Over View Cadero Pics Yellow 88GT 5spd Stock.

[This message has been edited by Capt Fiero (edited 01-04-2007).]

IP: Logged
Mickey_Moose
Member
Posts: 7582
From: Edmonton, AB, Canada
Registered: May 2001


Feedback score: (3)
Leave feedback


Total ratings: 144
Rate this member

Report this Post01-04-2007 10:47 AM Click Here to See the Profile for Mickey_MooseSend a Private Message to Mickey_MooseDirect Link to This Post
...uh...

You should replace that water pump with one that has the metal impeller - you are only asking for future problems with that one (been there). The parts store should warrenty it.

Tim
IP: Logged
motoracer838
Member
Posts: 3751
From: Edgewater Co. USofA
Registered: Jan 2006


Feedback score: (2)
Leave feedback


Total ratings: 83
Rate this member

Report this Post01-04-2007 06:07 PM Click Here to See the Profile for motoracer838Send a Private Message to motoracer838Direct Link to This Post
While your at it...

You should replace the gasket on the inlet housing that is behind the water pump.

Ask me why I know that this is a good idea.

When things go wrong,
don't follow them
IP: Logged
Capt Fiero
Member
Posts: 7658
From: British Columbia, Canada
Registered: Feb 2000


Feedback score: N/A
Leave feedback


Total ratings: 260
Rate this member

Report this Post01-04-2007 07:30 PM Click Here to See the Profile for Capt FieroClick Here to visit Capt Fiero's HomePageSend a Private Message to Capt FieroDirect Link to This Post
I went ahead and put it all back together. I re-bonded the outer ring on the water pump. I am not going to say what I used to re-bond the cap on the water pump impeller until I know for sure it worked. But so far so good. The pump as far as I know only had a 1 year warranty and it is now about 14 months old. The parts store said it was the only style they carried and would not be able to get me a new one for a couple days.

I had the gasket in hand, a tube of blue silicone in the other and a 3rd tube of black silicone and gave it some serious thought. I have never in the 10-15 water pumps I have done on various Fiero’s ever had a failure using Permatex High Tack Spray Gasket with a Felpro Blue Gasket. So I went ahead and did it like I always do. I sprayed the back of the gasket, then laid it on the pump and sprayed the front of the gasket. The stuff comes out in a red spray with the consistency of hair spray.

I moved the pump into place, threaded in the 2 15mm large bolts and the 2 torx bolts then started installing all the 10mm bolts and nuts. I think the hardest part of the job was trying to find all the dang holes. Once I got all the bolts in finger tight I went back around 3 times snugging each one down and making sure that I did not miss any nut bolt or other fastener. I let it sit and dry for about an hour and then added the water and put the belt back on. Thankfully I did take pics of the belt routing as sure as **** I had the belt going the wrong way and it would not go back on. Once I looked at my pic I realized when I had done fixed it and fired her up.

Burped the system and took her for a spin. Temp got up to where it was suppose to be and engine ran perfectly. I took it for a spin into town in city traffic and it never got hot. I pulled over, checked under the car and not single drop of water. In any case car is back on the road and running great.

The spray stuff I used is

The website is http://www.permatex.com/products/automotive/aut...

It has never failed me when using a Felpro blue gasket.

As for the possibility of the outlet gasket leaking. If it does start to leak I will replace it when I drop the cradle. I am going to be dropping it in a month or so to swap to a new trans.

[This message has been edited by Capt Fiero (edited 01-04-2007).]

IP: Logged
Jeff Smith
Member
Posts: 359
From: Ledyard, CT
Registered: Dec 2001


Feedback score: N/A
Leave feedback

Rate this member

Report this Post01-04-2007 08:15 PM Click Here to See the Profile for Jeff SmithSend a Private Message to Jeff SmithDirect Link to This Post
I guess I am a little late to chime in here, but, the best thing that I have found to help aid in gasket sealing is Hylomar HPF, it is available from several different companies and it works great - it never sets up so if at a later date you have another part failure and need to replace you don't have the heavy duty scraping like you do with RTV or silicone products.

I have replaced water pumps and thermostats on several cars now and have never had any leaks. I am also using it as an additional sealer along with the o-rings on the jugs in my 4.9.
IP: Logged
PFF
System Bot
Mickey_Moose
Member
Posts: 7582
From: Edmonton, AB, Canada
Registered: May 2001


Feedback score: (3)
Leave feedback


Total ratings: 144
Rate this member

Report this Post01-05-2007 10:55 AM Click Here to See the Profile for Mickey_MooseSend a Private Message to Mickey_MooseDirect Link to This Post
 
quote
Originally posted by Capt Fiero:

I went ahead and put it all back together. I re-bonded the outer ring on the water pump. I am not going to say what I used to re-bond the cap on the water pump impeller until I know for sure it worked. But so far so good. The pump as far as I know only had a 1 year warranty and it is now about 14 months old. The parts store said it was the only style they carried and would not be able to get me a new one for a couple days.


Yea, the water pump seems to be a crap shoot, had the parts store call their supplier to check the shelf - some were plastic and some were metal - have them send one of the metal ones over. Now that seems really odd...
IP: Logged


All times are ET (US)

T H I S   I S   A N   A R C H I V E D   T O P I C
  

Contact Us | Back To Main Page

Advertizing on PFF | Fiero Parts Vendors
PFF Merchandise | Fiero Gallery
Real-Time Chat | Fiero Related Auctions on eBay


Copyright (c) 1999, C. Pennock