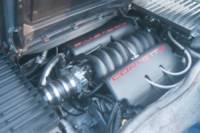
I got another 88 Coupe Jan 3rd 2005. It had a knocking 2.5/5 speed and I have an 86 2.8 from a parts car that runs good. Formula clone here I come!!!
Wouldn't you know it, the rear cradle bolts decided to be difficult and the backing nuts were spinning on both sides.....grrrrr
One way to get the bolts and the rotating nuts out is to cut a hole in the side of the frame rail, cut the bolt and then start all over. Well I am kinda finicky about cutting on my 88's unless it is absolutely required, so I chose to do it without cutting.
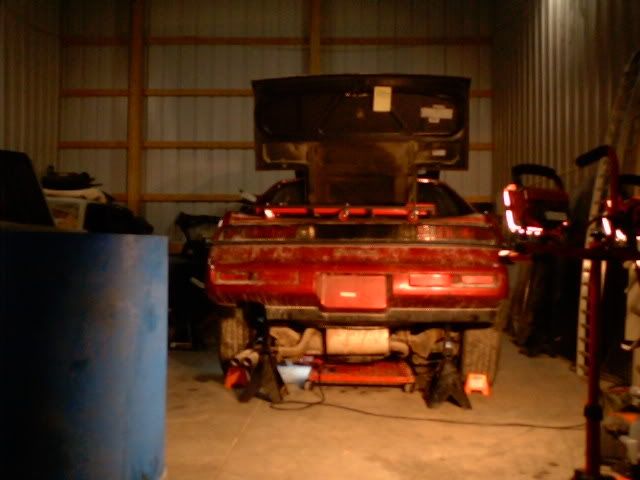
Remove the rear fascia and steel bumper and you can see the culprit
I used a long pry bar to remove the retaining sheet metal that was originally designed to keep these nuts from spinning (one side it was already off - go figure!). Then with a sharpened edge on the pry bar (or 1x1 square tube) chisel away at the spot welds to get them as smooth as possible.
Now we have to keep these nuts from spinning any more. These nuts are funny shaped and have two corners that stick out longer than the other two. Spin the nut (via the bolt head) to make the most room between the nut and the frame rail). A 6" long piece of 1 1/2" x 1/4" steel bar slides right between the base of the nut and the side of the frame. The base of the nut is also 1/4" thick. Here is the piece of steel in the frame next to the nut:
Now the steel will keep the nut from spinning as long as it stays flat and the nut doesn't try to go over or under the steel. So several scrap sections of steel (wood may work too) are used to "fill in" the frame right above the nut and 1 1/4" steel to wedge then both to the bottom of the frame rail. Make sure the first piece of shim covers the nut/1 1/4' steel interface (I used 1x1 again).
Once the frame is filled in, the nut is much more resistant to move and now it is time to get serious with the bolts. I use an 18mm impact socket (88) and a 1/2" breaker bar and 5 feet of 1x1 (breaker bar fits in it like a glove). Use muscle power to break them loose and remove them. An impact is not such a good idea since the pounding of the nut to the steel may round off the corners. You don't really have to take the bolts completely out, just loosen them enough to allow a saws all blade to get between the cradle and frame to cut the bolt - but I took mine all the way out to reuse the bolts.
Victory is mine!!!
The next step (which will be in a day or two) is to make new nut assemblies. I will use a "P" shaped piece of 1/4" plate. The leg of the P is to give me something to grab on to and to ensure the nut will never spin in the frame again without coming out of the frame to do so. Drill the bolt hole and weld a new nut on the backside. Put some silicone or sealant on the bottom side, slide it back into place and fasten down the rear cradle bolts till set to ensure the new nut assembly stays in place when the bolts are removed.
[This message has been edited by fieroguru (edited 01-13-2005).]
IP: Logged
08:11 PM
PFF
System Bot
p8ntman442 Member
Posts: 1747 From: portsmouth RI Registered: Sep 2003
when ONE bolt spins, take out the other one completely. Begin to lift the car by the hoist (or jacks, whatever you use) but no on the cradle itself. The side where the bolt was remove will begin to fall from the chassis, putting a great deal of force on the opposing bolt. Hit that bolt with a impact gun, and it comes free, everytime.
To install, jack the cradle so it meets the chassis. Install bolt by hand until nut starts to spin. Release jack so that weight of entire cradle is on that one bolt. Use impact gun. Works every time.
IP: Logged
09:20 PM
Indyellowgt Member
Posts: 1950 From: Alfred,Maine,Fiero Country,USA Registered: Dec 2000
I just got done with doing a 88. I had the same problem with the nuts spinning. I tried the preasure method along with a pry bar to even add more preasure. It didn't work. I used the blue wrench to remove the cradle. I made up new ones with 1/4" plate and went with larger bolts grade 8. I welded the nuts to the plate. To do this the rear bumper cover and bumper has to be removed to have access to the frame rail. Worked out great and is stronger!!!
IP: Logged
10:20 PM
Jan 13th, 2005
fieroguru Member
Posts: 12508 From: Champaign, IL Registered: Aug 2003
I tried the whole pry down on the cradle method on both sides and neither kept the nuts from slipping. Once I locked the nuts in place, I was able to turn the bolts - but they turned very hard. It was harder than torquing down SBC heads, so it was way over 65lb-ft and the remains of the spot welds were not enough to keep the bolts from spinning.
I have slept on the whole "P" plate deal and I think now I will just weld the 1 1/2" x 1/4" plate I used to keep the nuts from spinning to the side of the nut.
I still can't upload pics from home, I will try them at work today...
IP: Logged
08:14 AM
ditch Member
Posts: 3780 From: Brookston, IN Registered: Mar 2003
I tried this approach when I did my swap but no luck. I also tried lowering the jacks under the cradle to create force on the nut. Again, no luck. After a bottle of PB blaster I got pissed. I will only do it one way from now on....saws all. I stuck it in there and cut that damn thing off level with the base of the nut (the thick metal piece). It all came apart then
when I did mine I had to use a hole saw and cut a whole big enough to fit a welding rod through and still see what I was doing.. welded the nut to the frame and never had a problem since..
I agree welding the nut in place is the best bet. If you just need to lower the cradle to a tranny/clutch job, or if you don't anticipate many cradle removals, the force thing has worked 4 times so far. Quick projects, the weight of the cradle always worked for me.
If your doing an engine swap, where you will need to install/remove over and over for trial fits, etc... I agree weld em up.
Edit, on a side note, be sure to antiseize the shaft of the horizontal bolts up front. They LOVE to get stuck to the bushing, and cutting them out sucks.
[This message has been edited by Jncomutt (edited 01-13-2005).]
IP: Logged
10:42 AM
fieroguru Member
Posts: 12508 From: Champaign, IL Registered: Aug 2003
I just had the same problem when trying to change the clutch, i spent about $2.75 on a new bolt, and about $5 on a 3x4x2.5 inch block of metal, then an additional $10 on getting the thread pattern tapped into the metal block, then 100 bucks to have a welder weld the block right above inside the frame rail, it works perfectly, now even if the blocks weld becomes weak and breaks its too wide to spin around. I was really mad when i took out the retaining mount and it was a piece of 2 mil. sheet metal (wtf) i thought gm was smarter then that lol but i was even more mad when i went to pontiac and they never manufactured that part for resale to consumers. hope this helps a little
IP: Logged
12:58 PM
PFF
System Bot
LS1swap Member
Posts: 1181 From: McHenry,IL.USA Registered: Jan 2001
You can also place the fiero jack between the frame and cradle and open it to apply pressure to the nuts so they wont spin. you just have to keep expanding the jack as the bolt comes out.
------------------ LS1 v8 T-Top 87 GT
http://www.acxunlimited.com/ls1swap.htm
IP: Logged
02:04 PM
fieroguru Member
Posts: 12508 From: Champaign, IL Registered: Aug 2003
I hung the wieght of the cradle on the one bolt. I didn't think it was going to work. The bolt was just spinning still, then I though " hey stupid, try acting like you know how to use an impact. " At first I was lust laying on the impact. That doesn't ever work. You have to stab at it. Short bursts work great. Once it was out �", the nut must have bound up with the new slack, and it came right out. Right now, I'm letting the front bolts sit over night with PB Blaster on them. The nuts are off. I just need to get the bolts out.
PS, wtg pontiac. Retards decided to use 18mm bolts which is a skipped size in most sets. I had to use a normal socket because my impact sockets don't have an 18mm.
[This message has been edited by HellYes (edited 07-04-2005).]
IP: Logged
04:34 AM
tesmith66 Member
Posts: 7355 From: Jerseyville, IL Registered: Sep 2001
I just cut access holes in the frame. The metal is super thin right there and not stressed. And before anyone freaks out because I cut the frame, It's been that way for almost 10 years with ZERO problems. Even with a V8 I've had no issues. I also replaced the bolts with grade 8 1/2-13 and use nylon insert lock nuts.
------------------ 1986 SE 350 V8
IP: Logged
08:48 AM
Back On Holiday Member
Posts: 6238 From: Downingtown, PA Registered: Jul 2001
I just cut access holes in the frame. The metal is super thin right there and not stressed. And before anyone freaks out because I cut the frame, It's been that way for almost 10 years with ZERO problems. Even with a V8 I've had no issues. I also replaced the bolts with grade 8 1/2-13 and use nylon insert lock nuts.
yeah, just sheet metal there basicly, done the same. becoming 2nd nature for me to cut holes in that =)