Pennock's Fiero Forum
  Technical Discussion & Questions - Archive
  * Pics * of rear ctrl arm poly install

T H I S   I S   A N   A R C H I V E D   T O P I C
  

Email This Page to Someone! | Printable Version


* Pics * of rear ctrl arm poly install by jeffndebrus
Started on: 05-14-2005 11:35 PM
Replies: 27
Last post by: jeffndebrus on 05-15-2005 12:42 PM
jeffndebrus
Member
Posts: 2772
From: Jacksonville, Fl- usa
Registered: Aug 2001


Feedback score: (1)
Leave feedback


Total ratings: 85
Rate this member

Report this Post05-14-2005 11:35 PM Click Here to See the Profile for jeffndebrusSend a Private Message to jeffndebrusDirect Link to This Post
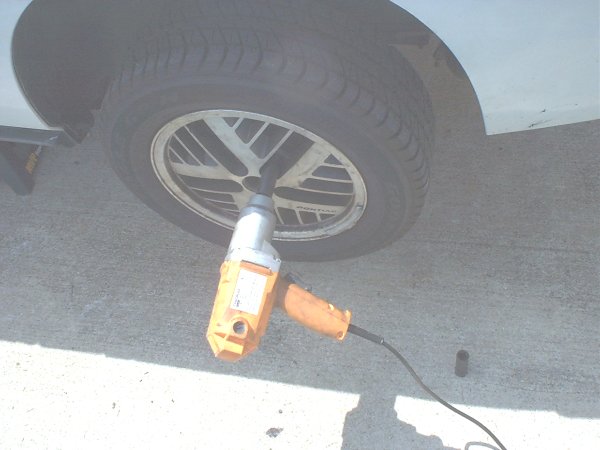
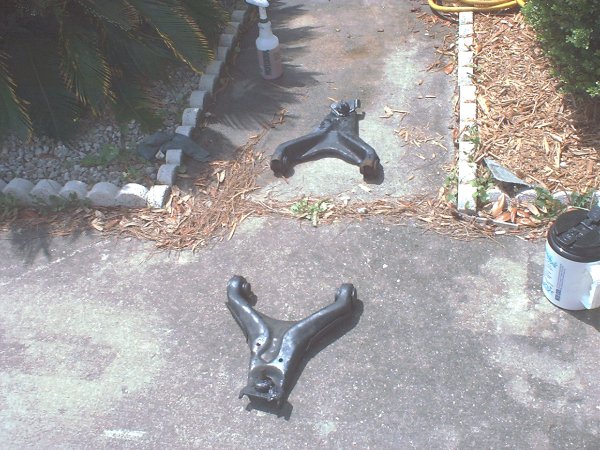
Replacing the rear control arm bushings is really easy and tightens up the handling nicely.
First step is safely jack and place your fiero on jackstands.
Then remove the wheels.

------------------
Proud Member of the North Florida Fiero club

4T60E Parks harness/ Rockcrawl chip-- more to come--

IP: Logged
PFF
System Bot
jeffndebrus
Member
Posts: 2772
From: Jacksonville, Fl- usa
Registered: Aug 2001


Feedback score: (1)
Leave feedback


Total ratings: 85
Rate this member

Report this Post05-14-2005 11:39 PM Click Here to See the Profile for jeffndebrusSend a Private Message to jeffndebrusDirect Link to This Post
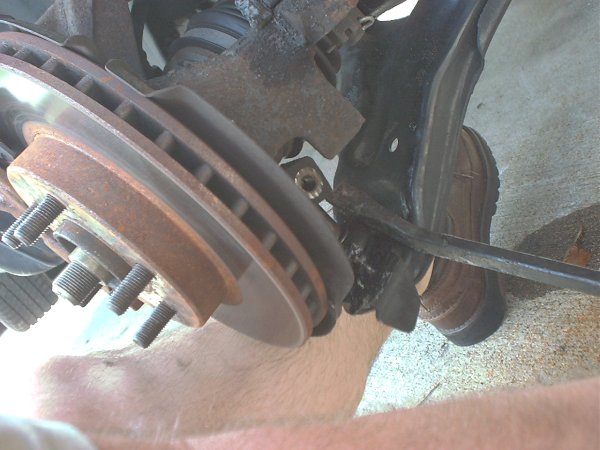
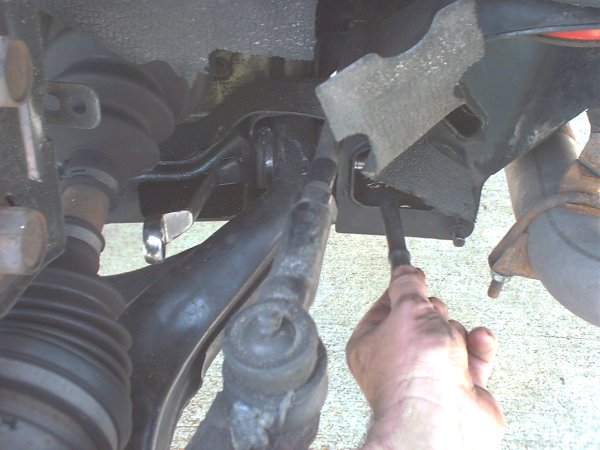
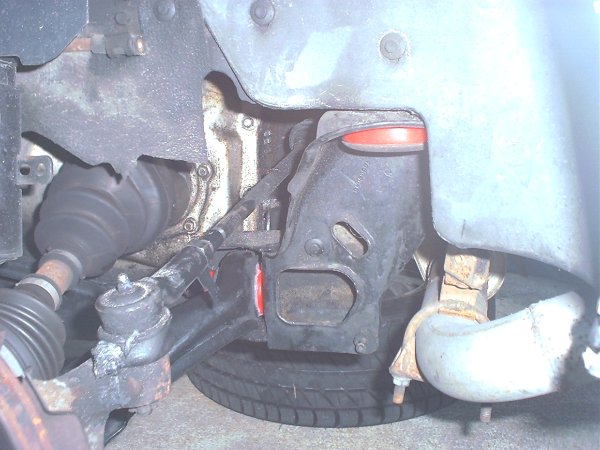
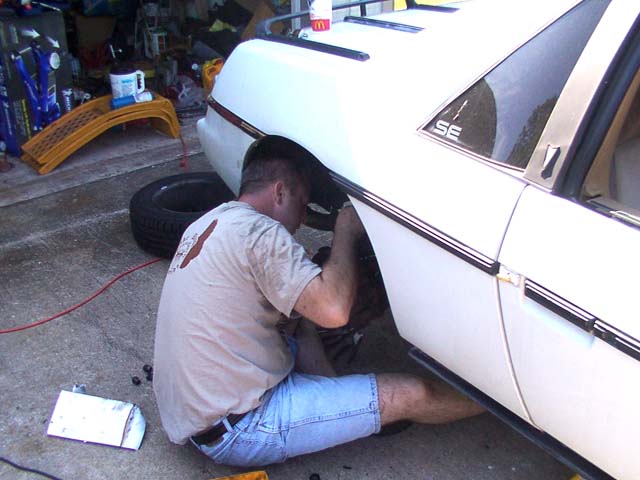
Look under here for the bolt-15mm which holds the lower ball joint to the spindle. remove the bolt--then squeeze the tip of a screwdriver blade into the crack of the pinch mechanism that holds the ball joint shaft---using a pry bar you can easily seperate the spindle from this ball joint shaft. The suspension is unloaded at this time so you do not have to worry about spring pressure.
IP: Logged
jeffndebrus
Member
Posts: 2772
From: Jacksonville, Fl- usa
Registered: Aug 2001


Feedback score: (1)
Leave feedback


Total ratings: 85
Rate this member

Report this Post05-14-2005 11:41 PM Click Here to See the Profile for jeffndebrusSend a Private Message to jeffndebrusDirect Link to This Post

jeffndebrus

2772 posts
Member since Aug 2001
IP: Logged
jeffndebrus
Member
Posts: 2772
From: Jacksonville, Fl- usa
Registered: Aug 2001


Feedback score: (1)
Leave feedback


Total ratings: 85
Rate this member

Report this Post05-14-2005 11:43 PM Click Here to See the Profile for jeffndebrusSend a Private Message to jeffndebrusDirect Link to This Post

jeffndebrus

2772 posts
Member since Aug 2001
Spray the control arm bolts with a penetrating lubricant and then using an 18mm wrench and socket you can remove the lower control arm bolts.
IP: Logged
jeffndebrus
Member
Posts: 2772
From: Jacksonville, Fl- usa
Registered: Aug 2001


Feedback score: (1)
Leave feedback


Total ratings: 85
Rate this member

Report this Post05-14-2005 11:45 PM Click Here to See the Profile for jeffndebrusSend a Private Message to jeffndebrusDirect Link to This Post

jeffndebrus

2772 posts
Member since Aug 2001
Now give it a good yank---
IP: Logged
jeffndebrus
Member
Posts: 2772
From: Jacksonville, Fl- usa
Registered: Aug 2001


Feedback score: (1)
Leave feedback


Total ratings: 85
Rate this member

Report this Post05-14-2005 11:47 PM Click Here to See the Profile for jeffndebrusSend a Private Message to jeffndebrusDirect Link to This Post

jeffndebrus

2772 posts
Member since Aug 2001
Now it is time to remove the old bushings

IP: Logged
jeffndebrus
Member
Posts: 2772
From: Jacksonville, Fl- usa
Registered: Aug 2001


Feedback score: (1)
Leave feedback


Total ratings: 85
Rate this member

Report this Post05-14-2005 11:49 PM Click Here to See the Profile for jeffndebrusSend a Private Message to jeffndebrusDirect Link to This Post

jeffndebrus

2772 posts
Member since Aug 2001
Next-move the control arms away from things which are flammable such as your Fiero, your wife, the dog, the gas can etc-
IP: Logged
Back On Holiday
Member
Posts: 6238
From: Downingtown, PA
Registered: Jul 2001


Feedback score:    (17)
Leave feedback


Total ratings: 153
Rate this member

Report this Post05-14-2005 11:52 PM Click Here to See the Profile for Back On HolidaySend a Private Message to Back On HolidayDirect Link to This Post
you know u can post like upto 6 pics per msg?
IP: Logged
jeffndebrus
Member
Posts: 2772
From: Jacksonville, Fl- usa
Registered: Aug 2001


Feedback score: (1)
Leave feedback


Total ratings: 85
Rate this member

Report this Post05-14-2005 11:52 PM Click Here to See the Profile for jeffndebrusSend a Private Message to jeffndebrusDirect Link to This Post
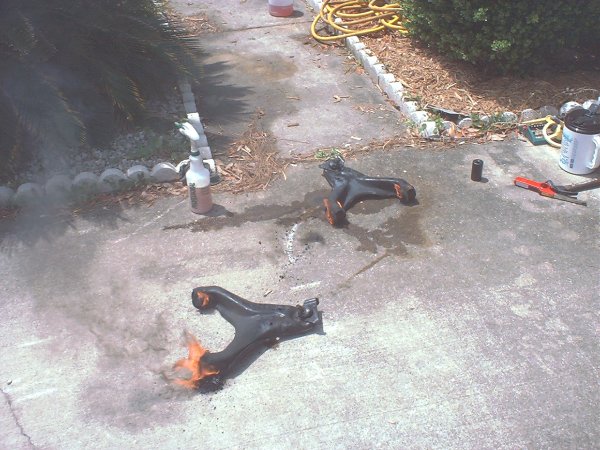
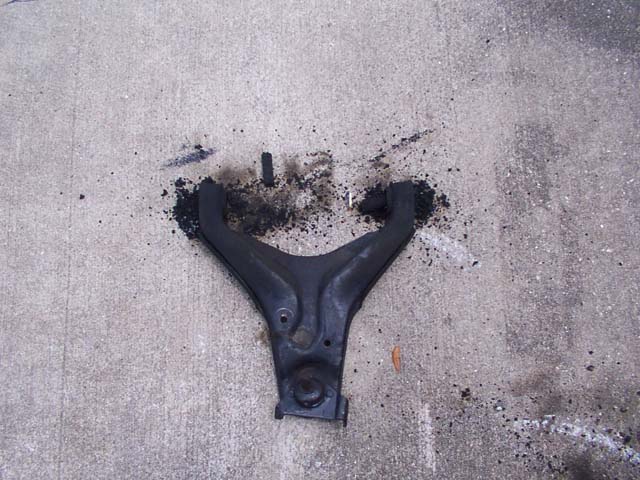
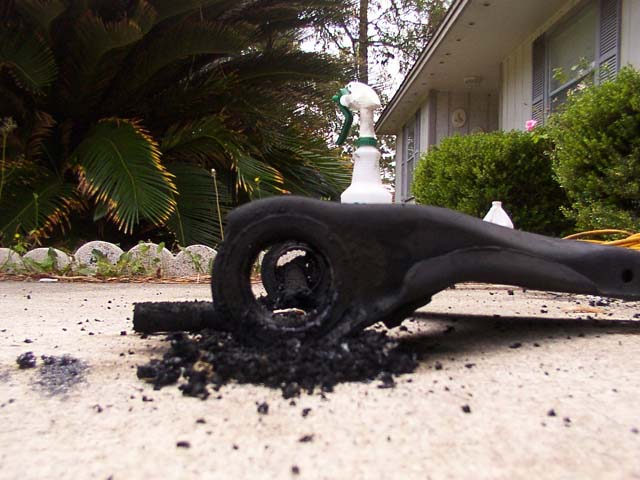
Now--following all the safety rules that you can think of-----
light the bushings on Fire with a propane torch and let them burn themselves out of the control arms.
IP: Logged
jeffndebrus
Member
Posts: 2772
From: Jacksonville, Fl- usa
Registered: Aug 2001


Feedback score: (1)
Leave feedback


Total ratings: 85
Rate this member

Report this Post05-14-2005 11:53 PM Click Here to See the Profile for jeffndebrusSend a Private Message to jeffndebrusDirect Link to This Post

jeffndebrus

2772 posts
Member since Aug 2001
 
quote
Originally posted by Back On Holiday:

you know u can post like upto 6 pics per msg?

Not with my old computer and dial up service--trust me

IP: Logged
jeffndebrus
Member
Posts: 2772
From: Jacksonville, Fl- usa
Registered: Aug 2001


Feedback score: (1)
Leave feedback


Total ratings: 85
Rate this member

Report this Post05-14-2005 11:57 PM Click Here to See the Profile for jeffndebrusSend a Private Message to jeffndebrusDirect Link to This Post

jeffndebrus

2772 posts
Member since Aug 2001
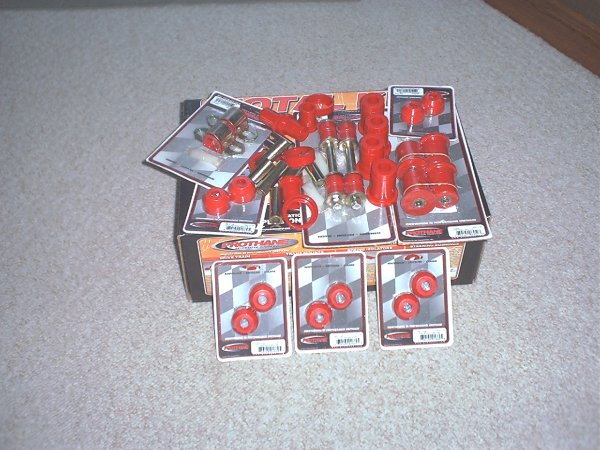
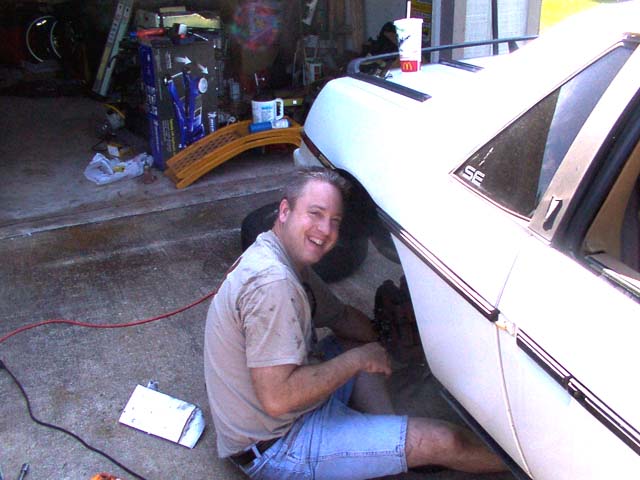
Now it didn't take a whole lot of cleaning---some degreaser and a red scotch pad and a few minutes with the dremel. Paulcal came over just in time for the goey rubber
Buy some new poly
IP: Logged
PFF
System Bot
jeffndebrus
Member
Posts: 2772
From: Jacksonville, Fl- usa
Registered: Aug 2001


Feedback score: (1)
Leave feedback


Total ratings: 85
Rate this member

Report this Post05-14-2005 11:59 PM Click Here to See the Profile for jeffndebrusSend a Private Message to jeffndebrusDirect Link to This Post

jeffndebrus

2772 posts
Member since Aug 2001
Here is a technique which Paulcal showed me to install poly bushings without a hammer.
IP: Logged
paulcal
Member
Posts: 2608
From: Jacksonville, Fl
Registered: Oct 2002


Feedback score: (1)
Leave feedback


Total ratings: 96
Rate this member

Report this Post05-15-2005 12:01 AM Click Here to See the Profile for paulcalSend a Private Message to paulcalDirect Link to This Post
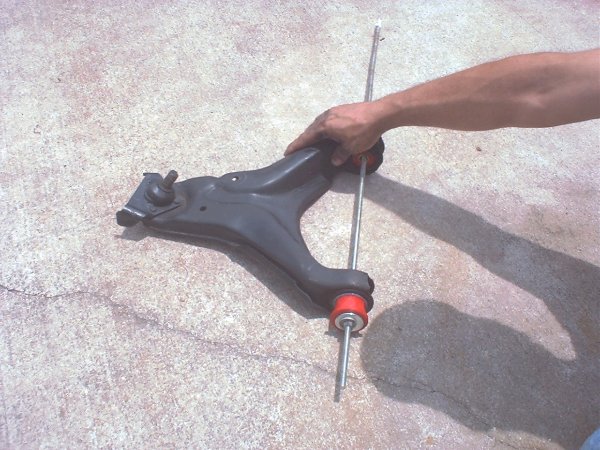
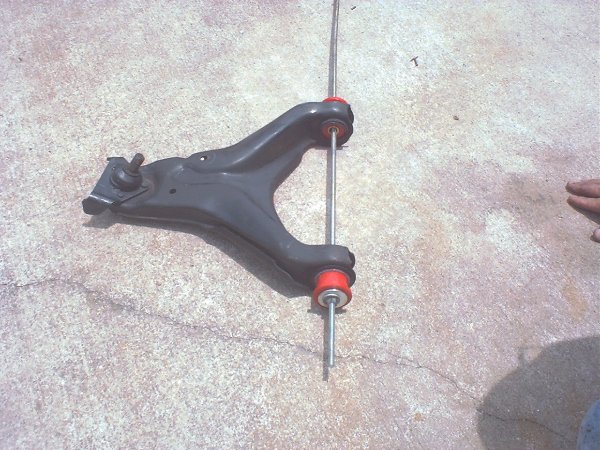
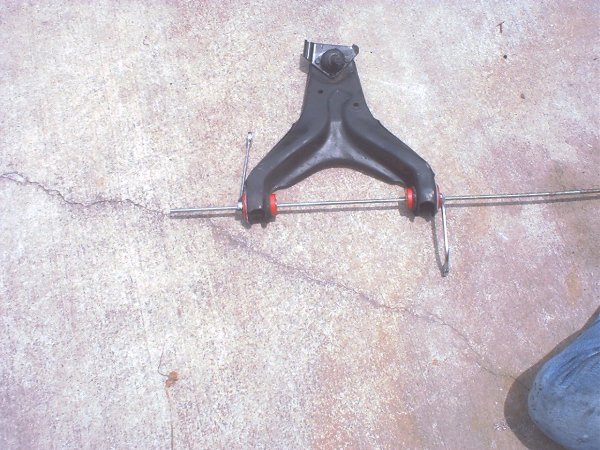
What we're using is a piece of all thread with 2 nuts on one end to lock it down and a pair of different sized washers on each end. Once you get it through both bushings all you have to do is tighten one nut and it pulls both bushings right into place, no muss, no fuss.

[This message has been edited by paulcal (edited 05-15-2005).]

IP: Logged
jeffndebrus
Member
Posts: 2772
From: Jacksonville, Fl- usa
Registered: Aug 2001


Feedback score: (1)
Leave feedback


Total ratings: 85
Rate this member

Report this Post05-15-2005 12:02 AM Click Here to See the Profile for jeffndebrusSend a Private Message to jeffndebrusDirect Link to This Post
Another angle of Paulcals engineering mind at work
IP: Logged
jeffndebrus
Member
Posts: 2772
From: Jacksonville, Fl- usa
Registered: Aug 2001


Feedback score: (1)
Leave feedback


Total ratings: 85
Rate this member

Report this Post05-15-2005 12:04 AM Click Here to See the Profile for jeffndebrusSend a Private Message to jeffndebrusDirect Link to This Post

jeffndebrus

2772 posts
Member since Aug 2001

these red poly bushings were seated home in less than a minute with no difficulty whatsoever.

IP: Logged
jeffndebrus
Member
Posts: 2772
From: Jacksonville, Fl- usa
Registered: Aug 2001


Feedback score: (1)
Leave feedback


Total ratings: 85
Rate this member

Report this Post05-15-2005 12:07 AM Click Here to See the Profile for jeffndebrusSend a Private Message to jeffndebrusDirect Link to This Post

jeffndebrus

2772 posts
Member since Aug 2001
And with not too much kicking and screaming the job is nearly completed.
IP: Logged
jeffndebrus
Member
Posts: 2772
From: Jacksonville, Fl- usa
Registered: Aug 2001


Feedback score: (1)
Leave feedback


Total ratings: 85
Rate this member

Report this Post05-15-2005 12:10 AM Click Here to See the Profile for jeffndebrusSend a Private Message to jeffndebrusDirect Link to This Post

jeffndebrus

2772 posts
Member since Aug 2001
Shameless plug for North Florida Fieros
http://www.northfloridafieros.homestead.com/

If you enjoyed my post, please remember to rate me.

IP: Logged
paulcal
Member
Posts: 2608
From: Jacksonville, Fl
Registered: Oct 2002


Feedback score: (1)
Leave feedback


Total ratings: 96
Rate this member

Report this Post05-15-2005 12:17 AM Click Here to See the Profile for paulcalSend a Private Message to paulcalDirect Link to This Post
I got there just in time to get the good job, cleaning this melted mess up.

Another angle:

Here's Jeff hard at work while I slough off:

Who says working on a Fiero isn't fun? Look at that smile....

IP: Logged
jstricker
Member
Posts: 12956
From: Russell, KS USA
Registered: Apr 2002


Feedback score:    (11)
Leave feedback


Total ratings: 370
Rate this member

Report this Post05-15-2005 12:28 AM Click Here to See the Profile for jstrickerSend a Private Message to jstrickerDirect Link to This Post
OK, a couple of things................

Before you push the poly into the cleaned up arms, take the center metal sleeve out of the poly bushing and they will push in with hand force, much quicker. You can then grease up the center metal sleeve and install it once the bushings are in the arms.

You also don't need to burn the bushings completely out, now I understand why people don't like that method. We made a little tool to do it, but you can also do it by hand with your all thread, but a nut on the all thread with a washer, pass it through a bushing, another washer as big as you can and still have it pass through the sleeve of the old bushing, then a nut, tighten them securely (finger tight is fine). Have someone pull on the all thread while you're heating up the sleeve of the bushing with the torch. Just a few seconds and it will pop right out.

Wear leather gloves and a long sleeved shirt in case some rubber gets on you and always be safe when doing it.

John Stricker

IP: Logged
$Rich$
Member
Posts: 14575
From: Sioux Falls SD
Registered: Dec 2002


Feedback score:    (20)
Leave feedback


Total ratings: 397
Rate this member

Report this Post05-15-2005 01:16 AM Click Here to See the Profile for $Rich$Send a Private Message to $Rich$Direct Link to This Post
 
quote
Originally posted by jstricker:

We made a little tool to do it, but you can also do it by hand with your all thread, but a nut on the all thread with a washer, pass it through a bushing, another washer as big as you can and still have it pass through the sleeve of the old bushing, then a nut, tighten them securely (finger tight is fine). Have someone pull on the all thread while you're heating up the sleeve of the bushing with the torch. Just a few seconds and it will pop right out.

Wear leather gloves and a long sleeved shirt in case some rubber gets on you and always be safe when doing it.

John Stricker

mighty fine idea!!!!
wish i woulda known that when i put my polly in

+ for you

IP: Logged
paulcal
Member
Posts: 2608
From: Jacksonville, Fl
Registered: Oct 2002


Feedback score: (1)
Leave feedback


Total ratings: 96
Rate this member

Report this Post05-15-2005 01:30 AM Click Here to See the Profile for paulcalSend a Private Message to paulcalDirect Link to This Post
LOL yeah NOW he tells us... great idea but after doing this twice, I think it's going to be awhile before I rebush control arms again. Oh wait, we still have his fronts to do. I guess we'll have a chance to try this out sooner than I thought.

Thanks J.S.

IP: Logged
PFF
System Bot
NorthFloridaFiero
Member
Posts: 918
From: Tallahassee Florida USA
Registered: Aug 2004


Feedback score: N/A
Leave feedback

Rate this member

Report this Post05-15-2005 02:12 AM Click Here to See the Profile for NorthFloridaFieroSend a Private Message to NorthFloridaFieroDirect Link to This Post
I will be next on this poly upgrade. I ordered mine tonight.
IP: Logged
paulcal
Member
Posts: 2608
From: Jacksonville, Fl
Registered: Oct 2002


Feedback score: (1)
Leave feedback


Total ratings: 96
Rate this member

Report this Post05-15-2005 04:23 AM Click Here to See the Profile for paulcalSend a Private Message to paulcalDirect Link to This Post
Jeff trying out the new poly, boy the 4.9 is fast

[This message has been edited by paulcal (edited 05-15-2005).]

IP: Logged
1MohrFiero
Member
Posts: 4363
From: Paducah, Ky
Registered: Apr 2003


Feedback score:    (37)
Leave feedback


Total ratings: 157
Rate this member

Report this Post05-15-2005 07:52 AM Click Here to See the Profile for 1MohrFieroSend a Private Message to 1MohrFieroDirect Link to This Post
 
quote
Originally posted by paulcal:

Jeff trying out the new poly, boy the 4.9 is fast

Nice pic! Great thread Jeff. + to you. Nice tips in here.

------------------

84 Sport Coupe (Sold)
87 GT 5 Spd (Will add to sig when finished painting)

IP: Logged
jeffndebrus
Member
Posts: 2772
From: Jacksonville, Fl- usa
Registered: Aug 2001


Feedback score: (1)
Leave feedback


Total ratings: 85
Rate this member

Report this Post05-15-2005 10:38 AM Click Here to See the Profile for jeffndebrusSend a Private Message to jeffndebrusDirect Link to This Post
---You know I have to say-----y'all may not like the fire method, but to me it was a very enjoyable part of my day. I got to sit back and rest and watch the little orange flames dancing around the control arms.
Maybe we will try try jstricker's idea on the front-----but I may have to light something on fire just to complete the experience--lol.

Thanks Jeff

IP: Logged
NotAFieroAnyLonger
Member
Posts: 4413
From: 75762/Texas/USA
Registered: Dec 2003


Feedback score: N/A
Leave feedback


Total ratings: 255
Rate this member

Report this Post05-15-2005 11:11 AM Click Here to See the Profile for NotAFieroAnyLongerSend a Private Message to NotAFieroAnyLongerDirect Link to This Post
Nice thread... It will be very helpful to some..

------------------

Choptytopped WideBody GT 1 of 1
4.9L-V8-Auto---almost finished

IP: Logged
Dennis LaGrua
Member
Posts: 15139
From: Hillsborough, NJ U.S.A.
Registered: May 2000


Feedback score:    (13)
Leave feedback


Total ratings: 328
Rate this member

Report this Post05-15-2005 12:35 PM Click Here to See the Profile for Dennis LaGruaSend a Private Message to Dennis LaGruaDirect Link to This Post
NIce thread. I would have two concerns with your method. First off burning out the bushings exposes the control arm to excessive heat and too much heat could destroy the temper and soften the metal. Second, the installation method using the threaded rod may very well push the bushings in square but I would also place a piece of pipe in between to prevent any inward pressure ( pushing the bushing in place) from bending the arm.

[This message has been edited by Dennis LaGrua (edited 05-15-2005).]

IP: Logged
jeffndebrus
Member
Posts: 2772
From: Jacksonville, Fl- usa
Registered: Aug 2001


Feedback score: (1)
Leave feedback


Total ratings: 85
Rate this member

Report this Post05-15-2005 12:42 PM Click Here to See the Profile for jeffndebrusSend a Private Message to jeffndebrusDirect Link to This Post
 
quote
Originally posted by Dennis LaGrua:

NIce thread. I would have two concerns with your method. First off burning out the bushings exposes the control arm to excessive heat and too much heat could destroy the temper and soften the metal. Second, the installation method using the threaded rod may very well push the bushings in square but I would also place a piece of pipe in between to prevent any inward pressure ( pushing the bushing in place) from bending the arm.


I didn't say I was "the bushing guru"---Y'all listen to the experts---I listened to the people who I have been reading on here for the past four years who all said-burn them out.
Thanks Dennis, I assure you, it didn't take that much pressure with the all thread to install those bushings. Not nearly enough to ever bend them.
Thanks again, Jeff

IP: Logged


All times are ET (US)

T H I S   I S   A N   A R C H I V E D   T O P I C
  

Contact Us | Back To Main Page

Advertizing on PFF | Fiero Parts Vendors
PFF Merchandise | Fiero Gallery | Ogre's Cave
Real-Time Chat | Fiero Related Auctions on eBay


Copyright (c) 1999, C. Pennock